
The sight and sound of water in the garden can bring life to its surroundings and a sense of calm that we all seem to need right now.
A water garden can be created in many forms with varying degrees of simplicity or complexity. A small water feature in a half-barrel-sized container on a patio. A small to medium one in a preformed fibreglass pool or pond in the ground. An old stock tank or bathtub. A pool liner laid over a hole dug into the ground. A natural pond fed by springs. A fountain, stream or waterfall for moving water. Planning is key, but there are endless options! Just be sure to check any local zoning restrictions before you build.

Whatever the pond form, water can immediately attract nature even in the middle of an urban space. Dragonflies, birds, and frogs will show up to sip, dip and enjoy!
Water gardens also provide a space to garden with plants that bring unexpected beauty and intrigue. It’s a whole new world of native and tropical, annual and perennial plants that exist in the water or on the edge of a pond.
Three Categories of Water Garden Plants
1. Underwater or Submerged Plants

Deep-water plants with floating leaves and flowers, like water lilies and lotus, are included in this group. Often the showy main feature of a water garden, water lilies come in various sizes and colours and produce blooms from late Spring to early Fall. Hardy lilies thrive year after year with very little effort. Full sun and water 18 to 36 inches deep will give a water lily the conditions it needs.
Oxygenating plants are not showy but are also found underwater, and they are essential. Anyone who owns an aquarium knows the importance of good oxygenators to improve water quality. They compete with algae for nutrients and win the battle each time. Elodia canadensis looks a little bit like seaweed, but it’s a hardy and vigorous water perennial here in southern Ontario, which makes it a very popular choice.
2. Floating
Duckweed and Water hyacinth are examples of plants that float freely on water. No soil is required! While Water hyacinth is a problematic invasive perennial in southern U.S. climates, here in Ontario, it’s a carefree annual and probably one of the most beneficial plants for a garden pond. Water hyacinths provide much-needed shade (algae requires sunlight to thrive), and the roots absorb excess nutrients, helping control algae and purify the water. If that’s not enough, its shiny green leaves can stand up to 4 inches out of the water, and they surround a spike of lovely blueish-purple flowers. It also provides shelter for fish.

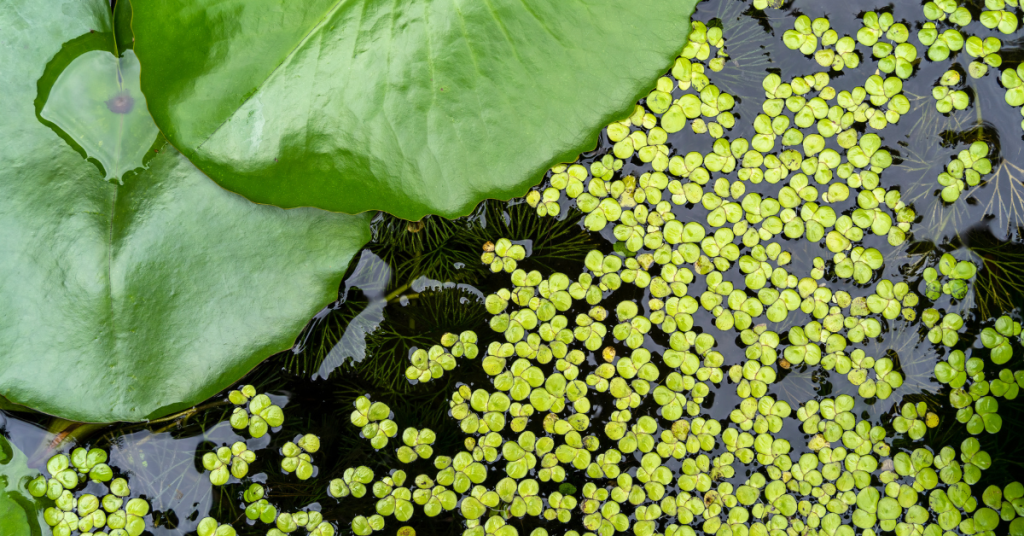
3. Shallow water or Marginal Plants
This is the bog folks! The plants grown here are also known as marginal plants. While the term bog doesn’t conjure dreamy Monet water lily paintings, the plants in this area of a pond or wetland can be beautiful, interesting and beneficial. Marginal plants and moisture-loving perennials, grow in the soil just below the water's surface or in consistently wet soil. They are beneficial because they keep water clear by keeping algae at bay. However, as previously mentioned there are many beautiful and interesting plants that grow on the pond's edge.
Here are just a few:
- Cattail - Hardy
- Water Iris - Hardy
- Variegated Sweet Flag - Hardy
- Corkscrew Rush - Hardy
- Pickerel Rush - Hardy
- Dwarf Papyrus - Tropical
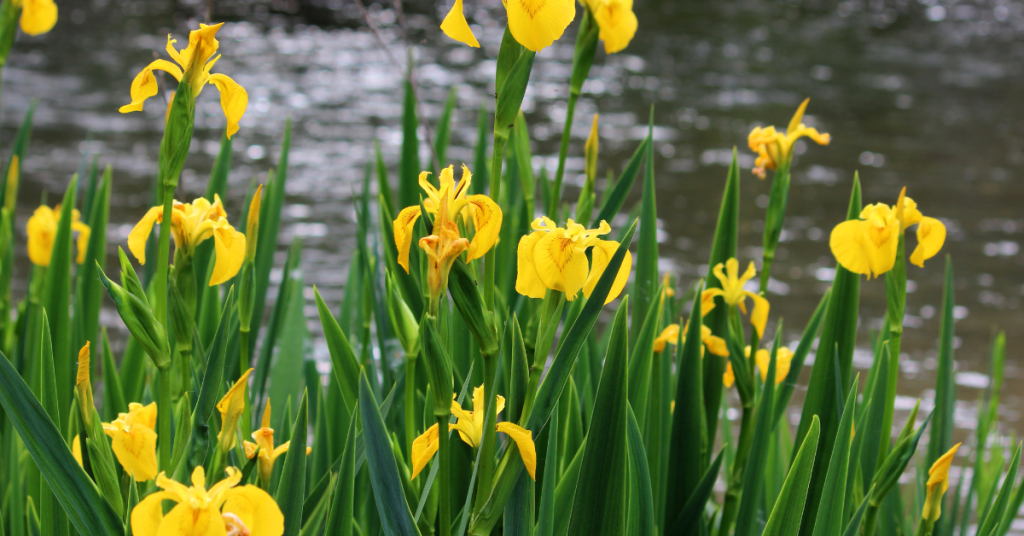

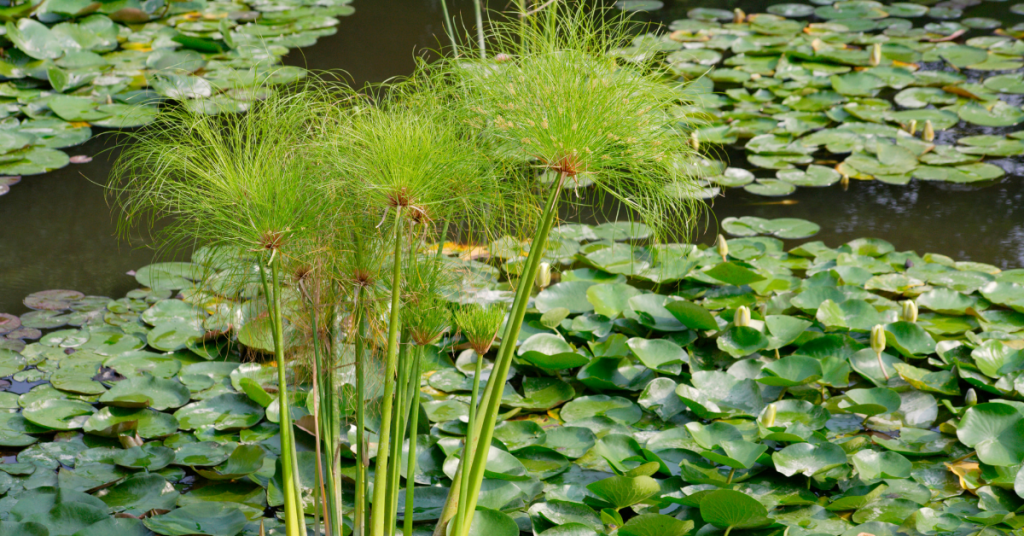
Growing plants in and around a water garden can be a very satisfying project. Curious guests will love to chat about it and ask questions making it a great conversation starter. It also provides a peaceful spot in your backyard to relax and watch the dragonflies whiz by!
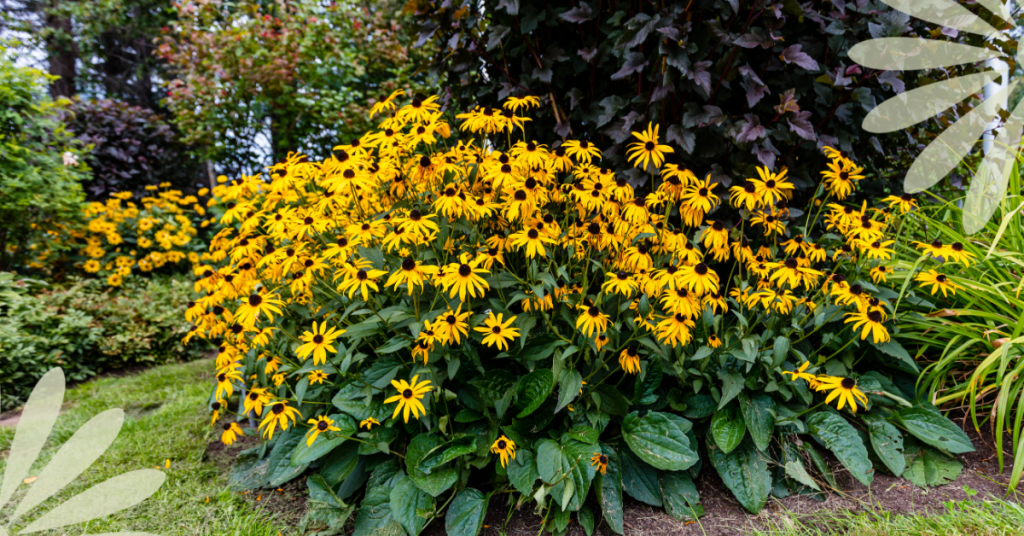
During the dog days of summer, having a resilient, dependable, and beautiful perennial flower in your garden is terrific. Meet the Black-Eyed Susan. They are quick to establish and mature, and perfect for a perennial border, cutting garden, or naturalized garden. Depending on the variety, they will grow 1-3 feet tall and spread about 2 feet wide, making them a show-stopping spectacle!
If that and the cheerful, dark-centred, golden-yellow, daisy-shaped flowers aren’t enough to draw you in, here are more reasons we love these plants!
Long Blooming
Black-Eyed Susan (Latin name: Rudbeckia) is a prolific bloomer whose flowers can last from July to October. At a time in the season when many other flowers can look weary, Rudbeckia is a shining star. Its flowers grow on sturdy stems, which adds to their resilience.

Easy to Grow
Rudbeckia are robust! They are drought—and heat-tolerant and generally do well in hard-to-grow locations. Once established, they do not require frequent watering. Rudbeckia hirta is an Ontario native plant, and exceptionally hardy.
Plant Black-Eyed Susan in full sun to partial shade and almost any type of soil. They are adaptable, generally trouble-free and do not require any extra care.
Pollinator-friendly
We aren’t the only ones who love Rudbeckia; butterflies, birds and bees do, too. This makes Black-Eyed Susan a perfect partner for other pollinator-friendly plants like Monarda (aka Wild Bergamot and Bee Balm), Gaillardia (Blanket flower), Yarrow and Echinacea (aka Coneflower).
Who doesn’t love Black-Eyed Susans? Because of the course hairs on the stems, this is a plant that rabbits and deer don’t care for.
Black-Eyed Susan is perfect to grow in a border, bed, planter, or in a field as a mass planting. It’s resilient, attractive, low maintenance and a beneficial addition to any garden!
The much-loved boxwood hedge has been a classic for centuries and is widely used in gardens worldwide. Neatly trimmed and manicured boxwood becomes the framework for containing everything from roses to riots of perennial blooms. From extensive estate gardens to small and modest yards, boxwood is a versatile shrub that earned its place by being easy to care for and prune.
Unfortunately, this staple shrub has trouble brewing, which impacts its leafy lifespan.
Since its first appearance in Ontario in 2014, the Boxwood Blight has become a significant concern for gardeners. However, the University of Guelph is not sitting idly by. They are actively researching this issue and working hard to find solutions to protect beloved boxwood shrubs.
Sometimes, being popular isn’t all it’s cracked up to be. Because Boxwood is a widely planted favourite, a new pest attracted to it, the Boxwood Moth (from Asia), has easily spread and is infecting shrubs.
Beautiful Boxwood Alternatives
Boxwood Blight and Boxwood Moth do pose severe threats to Boxwood shrubs, but here's the good news—many shrubs make great alternatives! Using a similar shrub is one of the simplest solutions to Boxwood's issues. You have lots of options to protect and diversify your garden.
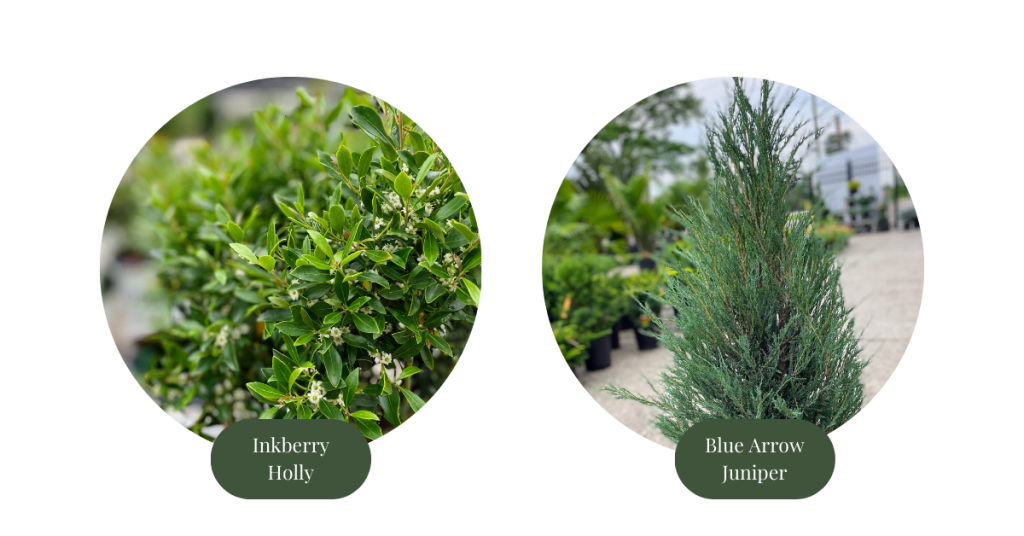
Inkberry Holly
The closest Boxwood lookalike is the Inkberry holly. It naturally grows in a rounded evergreen mound, can be trimmed like a traditional boxwood hedge, and has other enticing bonuses! Not only is it native to North America, but unlike boxwood, it blooms. In the spring, Inkberry holly is covered in showy white flowers, making it a standout alternative to boxwood. Here at Eising Greenhouses, look for Gem Box Inkberry Holly.
Upright Junipers
Blue Arrow and Moffat Blue Junipers make beautiful hedges and stand-alone accent trees. Both have an elegant upright form, striking blue evergreen foliage, and silvery blue berries from late spring to late fall. If that isn’t enticing enough, add drought tolerance to the list of features!
Showy Shapes and Standards
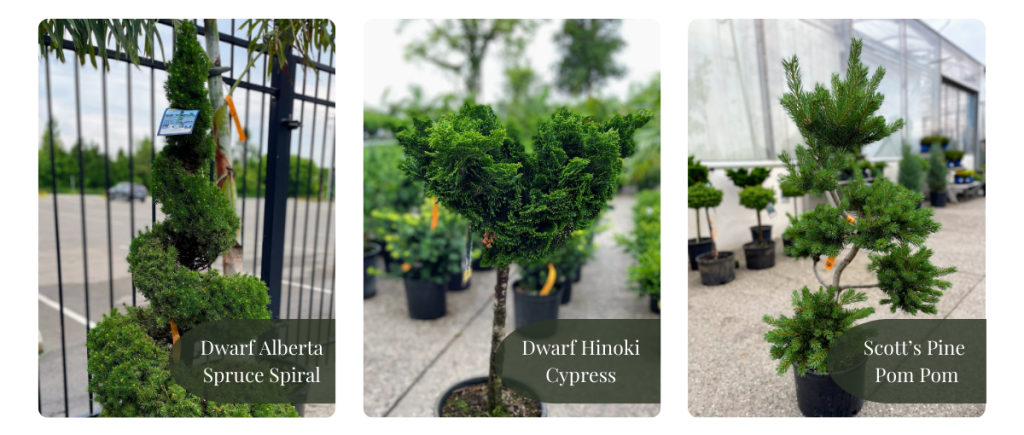
Consider a standard evergreen or a dwarf variety that has been pruned and sculpted to become a piece of art if you want to add something even more unusual. What’s a standard? It’s usually a single trunk with a plant at the top, like a compact evergreen shrub.
Standards and shaped dwarf evergreens can make a bold statement or add wonderful whimsy to your garden. We have lots to choose from, but here are a few examples to get your imagination going!
When it comes to replacing boxwood, there are many creative solutions and beautiful plants to choose from!
For more information:
Landscape Ontario - Boxwood Blight and Boxwood Moth
Toronto Master Gardeners - Rethinking Boxwood
Canada.ca - Box tree Moth
Fall is the time to plant garlic if you want to harvest them next summer. Why grow your own garlic? Like any vegetable, fresh garlic just tastes great. It’s also very satisfying to plant one little clove and get a whole head of garlic from it. Think of it as a garlic bank: put in a little effort in the Fall, and next summer you will profit from that small investment in spades!
If you’ve never planted garlic, it’s quite an easy crop to grow. Just follow these seasonal steps to help you get started. Hint: Mid-October to early November is when the majority of the work takes place.
FALL
Choose a location that is in the sunniest area of the garden. Lots of sun will produce large heads of garlic.
Prepare the soil in late summer, or as early in the Fall as possible. Or prepare the day before you plant if you can’t get to it sooner! Amending the soil is an often missed step but it will provide valuable nutrients for your garlic throughout the seasons.
Add organic compost like mushroom or sea compost, composted green waste, aged or composted manure, or a mix of any of these. Variety is best and all are great options. If you’re starting a new, raised bed, mix a ratio of 75% compost with 25% vermiculite to create a nice, light soil for your plants. This mix can also be added on top of the soil of an existing bed, making harvesting easier next summer!
Choose a garlic variety based on the flavour and size you like. There is softneck or hardneck garlic, but hardneck is recommended for growing in Canada. Also, hardneck varieties produce scapes which are a bonus crop - you can read more about that below. Red Russian, Music and Chesnock are just a few of the popular varieties grown in Ontario.
Separate the garlic cloves, or teeth, from the heads. As you’re breaking down the heads of garlic, it’s important to choose the largest cloves to plant. Starting with large cloves will increase your chances of growing large heads of garlic. Set aside any small cloves to cook with.

Planting! Sometime between early October to mid-November is a good range to get your garlic in the ground in Norfolk County. Basically, 4 to 6 weeks before the ground is frozen.
Here’s how to get your garlic in the ground!
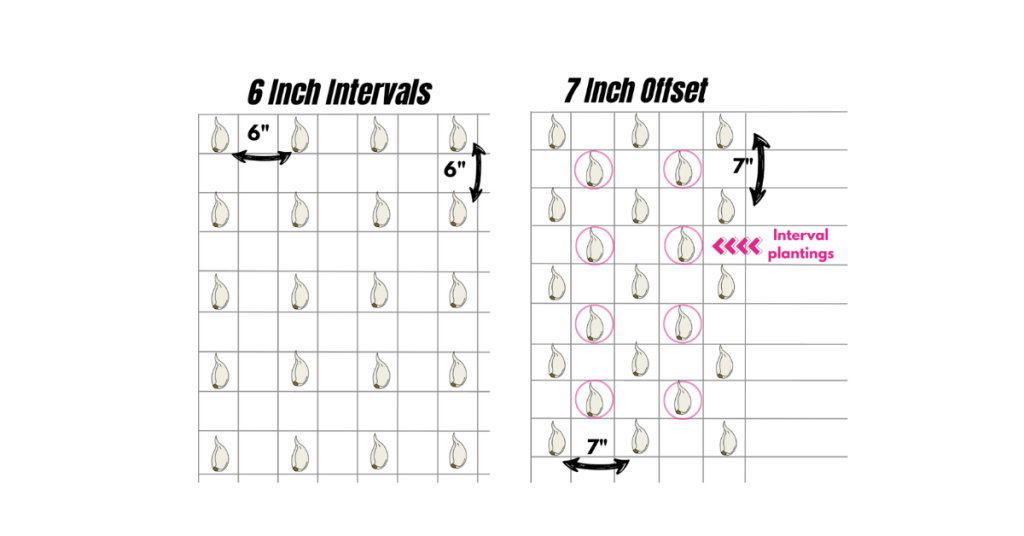
- When it comes to spacing, there are two options.
Using a dibber or a hand trowel, create 3 to 4” deep holes in one of the following patterns:
a) Make holes that are approximately 6” apart and in rows that are 6” apart.
b) Make holes that are approximately 7” apart and in rows that are 7” apart. Then, go halfway between each row and make an offset row. This method is best if you don’t have a lot of space and will not impact the growth of the garlic.
2. Place a handful of worm castings or organic 4:4:4 fertilizer in each hole and mix into the soil a bit.
3. Place ONE clove in each hole, with the pointy end facing up and the flat end down.
4. Backfill with surrounding soil so that each clove is covered 2-3”. This acts as protection during the cold winter months.
5. Top with leaf mulch, leaves, or straw, and water in your garlic if there is no rain in the forecast for several days.
SPRING
This is the time to check on your garlic and give it a little more nutrition.
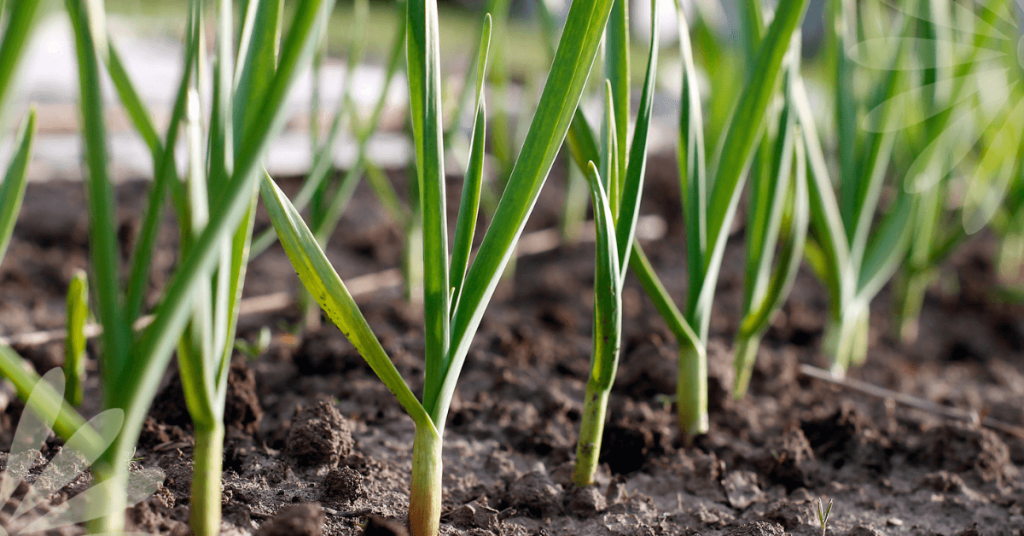
Look for signs of first growth in February or March, depending on how warm the weather is. When you see 3”- 4” of growth, remove the mulch from around each plant, or from the bed, and add it to the compost pile.
Add nutrients by amending the soil with 1 tablespoon of 4:4:4 organic fertilizer per square foot of the garden, or add a 1”- 2” layer of fresh compost.
Water deeply from now on when the soil dries out. And that’s it! Your garlic is well set up to go into a BIG growth cycle.

SUMMER
Remove the scapes! Around mid-June look for the top of the stem of each plant to curl around forming what’s referred to as a “scape”. These curls, or scapes NEED to be removed so that the energy from the plant goes into growing the bulb, not into growing the seed head that is part of the curly scape. One full loop is a good time to cut or snap off the scape just above the top foliage.
All of the growth in the bulb happens once you remove the scape!
Here’s the bonus - garlic scapes are delicious! Chop them up and add them to soups, stews or anything you’re grilling. They also make excellent pesto!
Water and check your garlic for any pests throughout the growing season, just as you would with any other plants.
Harvest! Sometime in July, you will start to notice that the bottom leaves of your plant are dying. Don’t worry! The leaves on the plant correspond with the protective layers forming around the outside of your bulb, and they’re getting ready for harvest.
Around mid-July, 4 or 5 of the bottom leaves will be dead and this is your sign that it’s time to harvest your bulbs.
- Stop watering your garlic 4 to 5 days before harvesting.
- Use a pitchfork or shovel to loosen the soil, keeping well away from each plant so that you don’t slice through the garlic heads.
- Gently pull up each bulb and shake off any soil hanging on to the roots. Resist the urge to wash the bulbs as moisture at this stage will promote mould or rot!
Cure your garlic harvest by hanging it in a cool, dry place that’s out of the sun and has good airflow for 2 to 3 weeks. You may need to use a fan for this step.
Once cured, trim off the stems leaving 1-2” and the roots, and store in a dark, cool and dry spot in the house. Well-cured and stored garlic can last until sometime between December and February… unless you’re cooking, canning, and freezing with it and use most of it up! But don’t forget to save the biggest cloves to plant again in the Fall!
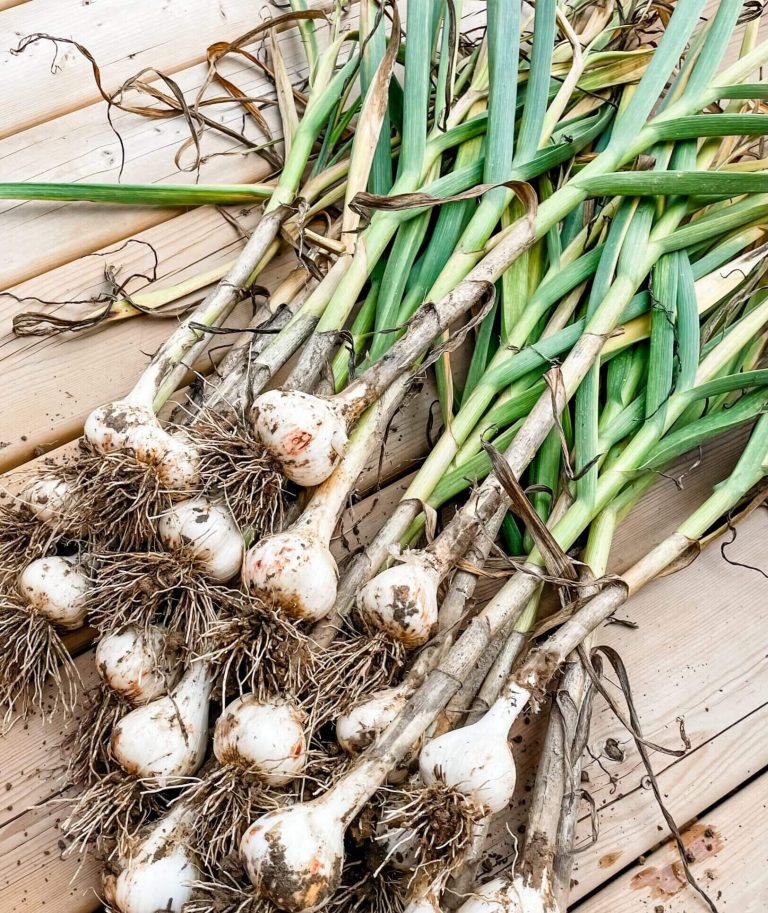
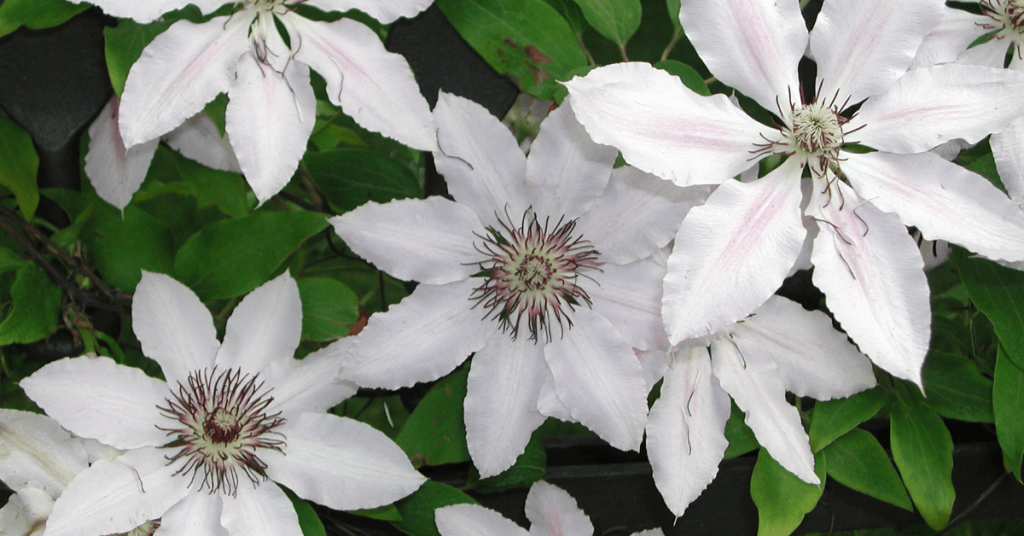
Clematis, the climbing plant that looks far too elegant and exotic to be growing in Ontario! Not only beautiful, Clematis gets along well with climbing roses (this is a gorgeous combination), trees, shrubs, and perennials. Different varieties of Clematis can also be grown together and provide a succession of blooms!
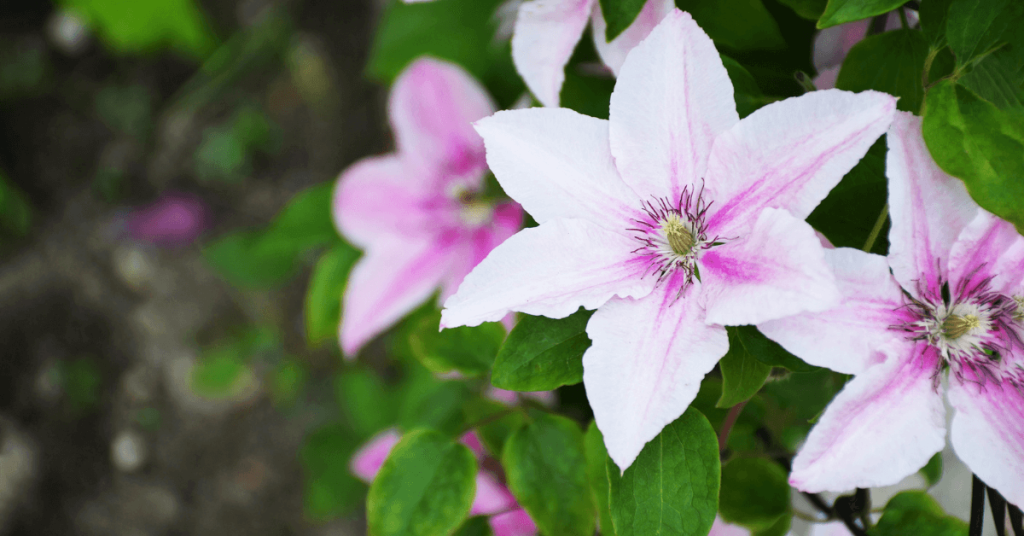
The variety of shapes, sizes, and colours available make Clematis a very desirable plant. Ranging from delicate, white, bell-shaped blossoms to dreamy, pastel rosettes, or sumptuous, deep purple double-flowers, and everything in between.
A stroll through the garden centre is a must to peruse Clematis labels and choose the ones that are most appealing to you. The varieties that we have will all suit our southern Ontario climate.
While the blooms vary widely, planting Clematis is straightforward. A few simple considerations when planting will help avoid root stress or Clematis Wilt, which are common problems when the location is wrong and the soil isn’t enriched. Here are some simple steps to ensure success!
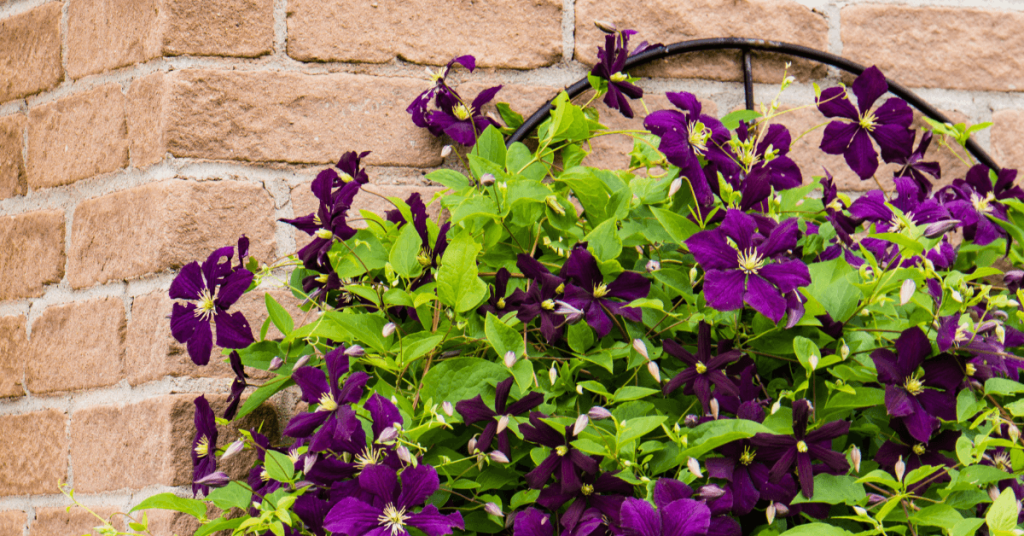
Location, location, location!
Clematis like at least 6 hours of sunlight a day, but not an excessively hot location. Some shade in the late afternoon will extend the length of time that a bloom looks good.
Provide Support
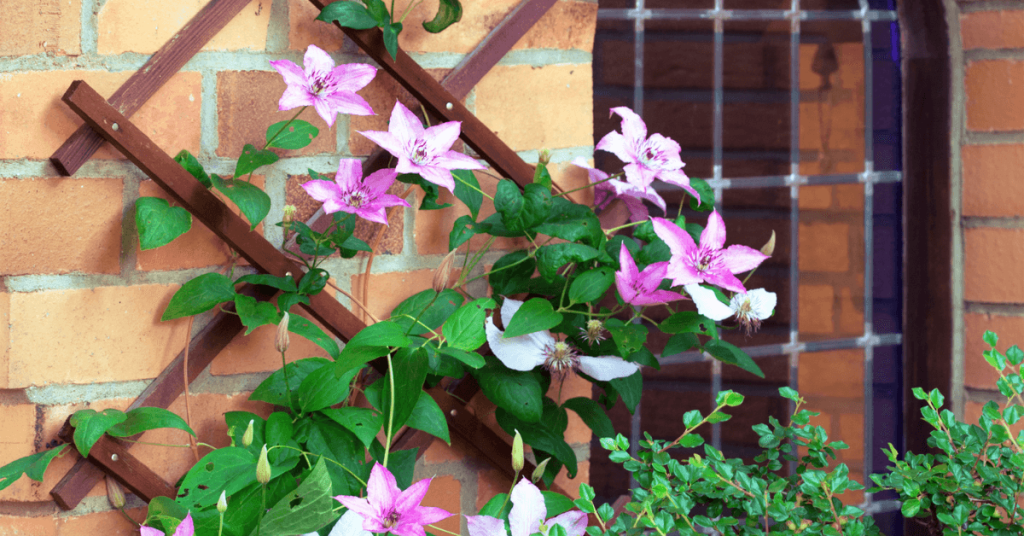
A trellis, archway, arbor, or even a shrub or tree, all make excellent supports for your clematis. Install a well-secured support system first, to avoid damaging your clematis roots.
Soil is the Key
Fertile, well-drained soil is essential to successfully growing Clematis. These vines are heavy feeders and require nutrients to produce their show-stopping flowers. Prepare your soil by mixing in plenty of compost or well-rotted manure.
Prepare the Planting Site
Dig a hole that’s as deep as it is wide. Use the plant as your guide and dig approximately 13 cm or 5 inches deeper than the root ball. Add some of the soil that’s been amended with compost, then check to see that your plant is sitting at the right height - the top of the root ball should be even with the soil around it. Once the root ball is sitting at the right height, backfill the rest of the hole with more amended soil and gently firm the soil around the plant with your hands.
Watering
Water deeply after planting, and keep the soil and root ball moist, not water-logged, throughout the season. Be sure to water at soil level, not with an overhead sprinkler which can scorch leaves and flowers.
Mulch
Mulch the soil around your plant to help suppress weeds and maintain moisture. Compost, organic shredded bark, or straw works well.
Fertilizer
Fertilize regularly throughout the season, or apply a slow-release fertilizer at the beginning of the season to maximize the blooming potential of your Clematis. For more information about fertilizer, see this article about caring for annuals and perennials.
Pruning
Pruning instructions are often included on your plant label as requirements vary from variety to variety. If in doubt, there are many growers who recommend pruning early blooming Clematis a little, after they bloom, to maintain the desired shape of the plant. For later blooming types, cut the vines right back to 45-60 cm in early spring.
Following these steps will provide a healthy environment for your Clematis to thrive. But be careful, Clematis are like potato chips - bet you can’t have just one!
If you have some space in your flower or vegetable garden, growing herbs is definitely worth it! Many are drought tolerant, do well in containers, require very little care, and can provide a bountiful harvest all summer long.
Buying herbs at the grocery store is often pricey. Growing them at home, using the tips below, helps to ensure a steady supply for a fraction of the price.
If you’re not accustomed to adding herbs to meals at home, buying a plant is a great way to experiment and see which ones you like. If you try Cilantro, for example, and don’t like it, place it in a nice pot and take it as a hostess gift the next time someone invites you to a barbeque. Especially if you’re coming over to our house, we love it!
Herb Growing Tips
- Like many other plants, there are perennial and annual herbs (annuals don’t survive an Ontario winter and need to be planted each year). Perennial or annual may determine where you plant your herbs in the garden.
- Most herbs are drought tolerant and enjoy full sun. The amount of water and sun can vary slightly, so it’s good to note watering and light needs for the herbs you’re growing.
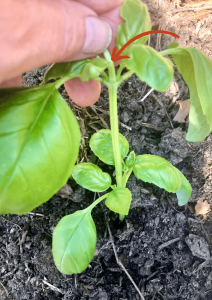
- The more you trim herbs, or “give them a haircut”, the more your plant will thrive. Start trimming them early - when they’re about 4 inches tall, and do it often! This will make your plants more sturdy and bushy.
- Regular pruning ensures that your herbs don’t flower! While this is the goal with many other plants, it’s not what you want with herbs. A plant will focus on producing flowers and seeds, and stop producing the leaves that you want to harvest for herbs!
Here’s a list of our favourite herbs to grow in Southern Ontario, and how to care for them.
Basil - Annual
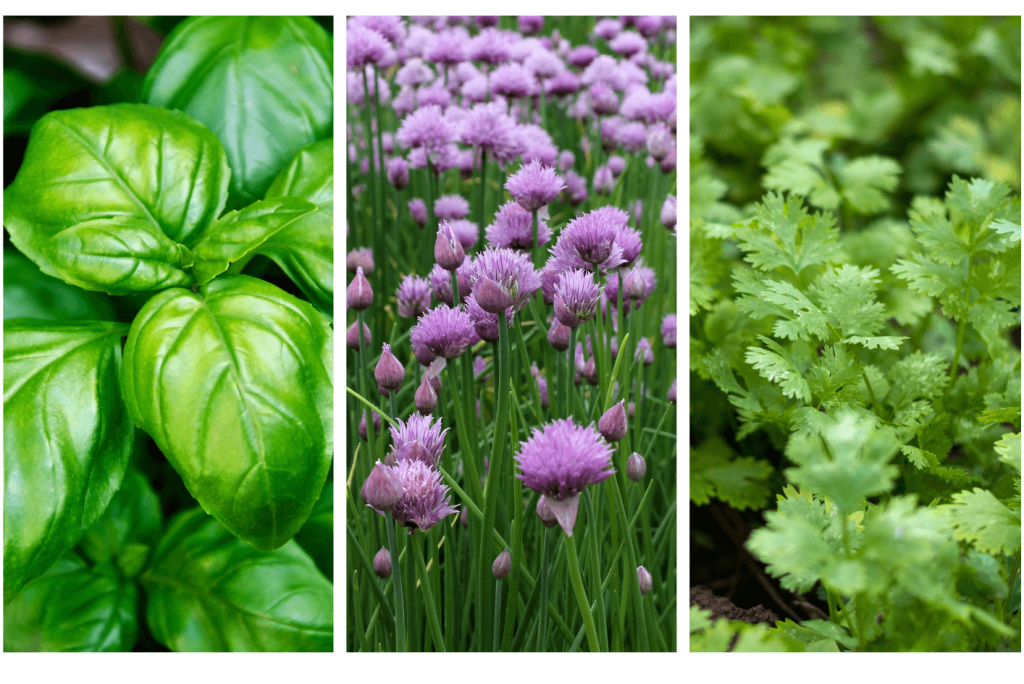
If you’ve planted tomatoes, it just makes sense to add a few basil plants! The tomatoes will love them, and so will you on your toasted tomato sandwiches. Basil loves full sun, and evenly moist soil.
Chives - Perennial
Chives are one herb that you may want to allow to flower. Its blossoms are great for flavouring vinegar, and the plant will still produce mildly onion-flavoured stems. Chives like full sun but will still grow in partial shade, and once established they only need watering during dry spells.
Cilantro - Annual
To some people with a very specific gene Cilantro tastes like soap! For everyone else, it’s one of the most delicious herbs and a taco wouldn’t be the same without it. Cilantro prefers part shade, but will tolerate full sun. It can be allowed to dry out, but it may flower prematurely if it gets too dry.
Dill - Annual
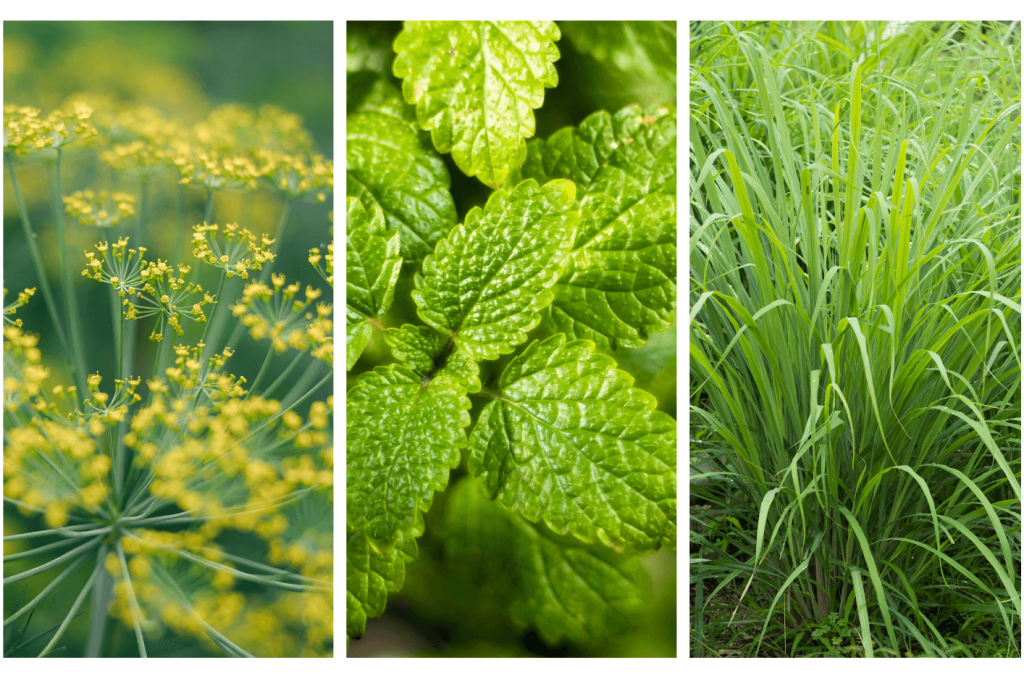
While Dill is considered an annual, many people in Ontario find that if you allow it to eventually go to seed, it will reseed and grow again the following season. No guarantees. But worth a try, right? Dill plants love full sun, and their roots just slightly moist.
Lemon Balm - Perennial
Fresh leaves can be used to make tea all summer long, or can be dried for winter use. But this versatile herb can be used for many things from pesto to cookies! Grow Lemon Balm in full sun to partial shade, and keep the soil moist for optimal growth.
Lemongrass - Annual
A staple in Thai cooking, Lemongrass is a great addition if you love to cook. Full sun and moist soil will keep this herb happy and producing lots of lemony stalks. You might want to try bringing it indoors for the winter as well.
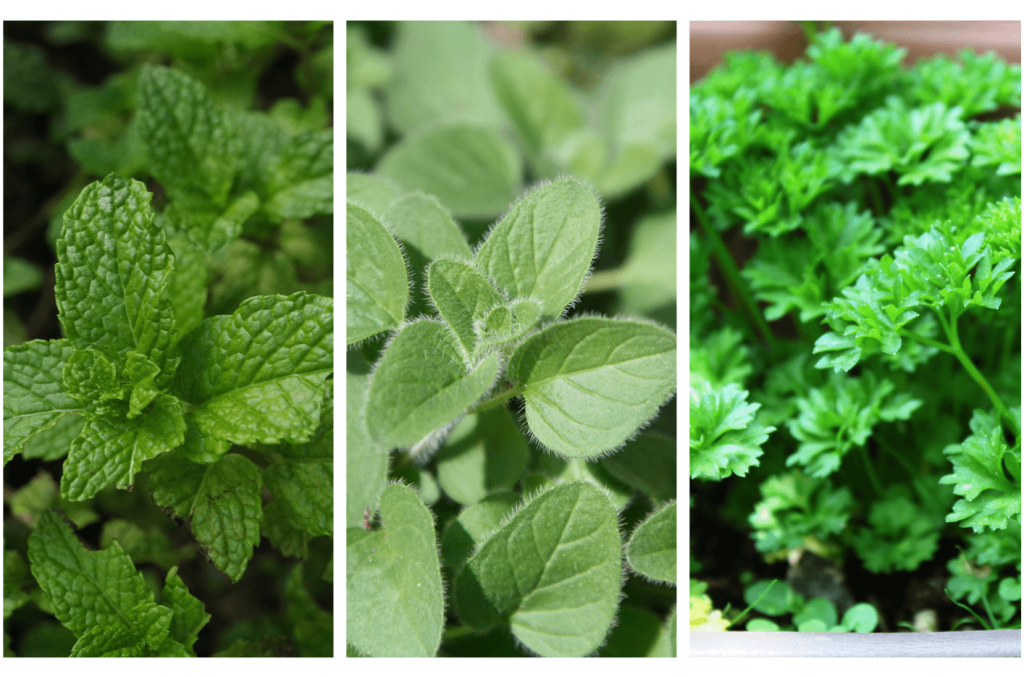
Mint - Perennial
This herb comes in so many variations that are just simply delicious - spearmint, peppermint, apple mint, chocolate mint, and more! But this is one plant you’ll want to keep in a pot, well away from garden soil. It’s also one to trim before it sets seeds or you will have a garden that’s full of mint! It can be invasive. It will thrive in full sun but will stand some shade, and it likes moist soil.
Oregano - Perennial
For obvious reasons, (tomato sauce) Oregano is a great addition to the garden. It will spread and reseed throughout the garden if you let it go to seed, but some people like this feature and use it as a groundcover or border for a perennial bed. Oregano likes full sun to partial shade and once it’s established it is very drought tolerant.
Parsley (flat and curly) - Annual
There was a time when every restaurant meal was adorned with a sprig of Parsley. It’s pretty. But it’s also an underrated culinary herb and can add wonderful flavour to soups and stews as well as other savoury dishes. Keep this plant moist and in full sun to part shade.

Rosemary - Annual
Is anyone else addicted to bread with olive oil, salt and Rosemary? It can’t just be us! This is another garden staple that loves full sun and slightly moist soil. It can also be brought indoors for the winter, but be sure to keep the soil from drying out completely.
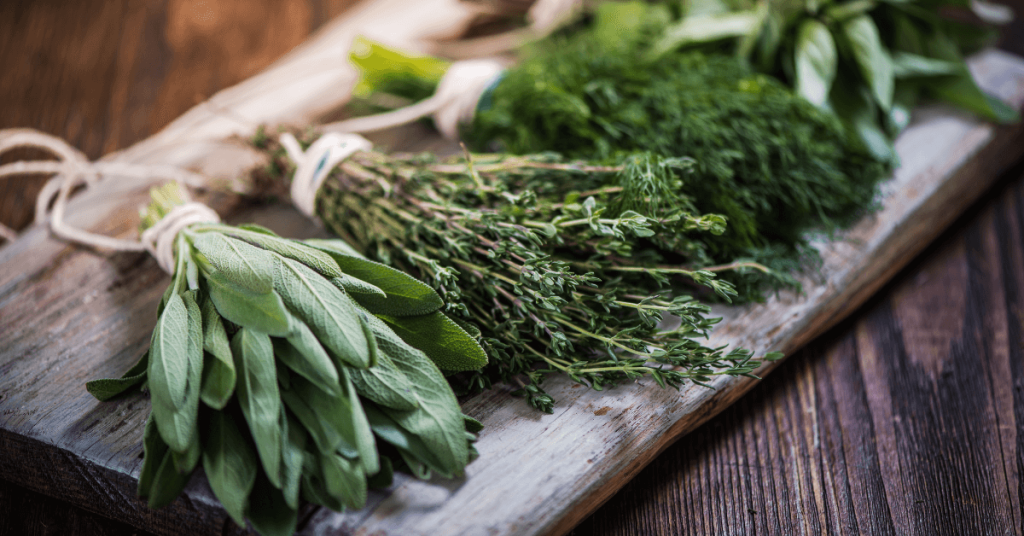
Sage - Perennial
Perennial, with a caveat. In Ontario, it’s best to provide some winter protection for this plant if you want it to survive the winter. I’ve had reasonable success with bringing it indoors for the winter, or it can be treated as an annual. Sage likes full sun and moist soil but don’t overwater this one! It does love the heat of summer and will produce a nice big plant once temperatures heat up.
Thyme - Perennial
Thyme is just so good in so many things - vegetables, meats, soups, and of course stuffing! It’s easy to grow if it has well-drained soil and full sun. Once it’s established it is moderately drought tolerant and can be harvested from early Spring until Winter.
Like all herbs - don’t forget to give it frequent haircuts!
At Eising Garden Centre you’ll also find many more herbs to grow and enjoy. Do stop by and give them a try!
You’ve selected your annual and perennial plants, chosen their location in the garden, amended the soil and everything is planted. Or close to it! Now what? How can you take care of them to maximize their potential? A bit of simple and easy maintenance will keep your plants healthy and blooming.
Once they start blooming, most annuals will flower all season long, until cold temperatures or frost put an end to their display. Many perennials will bloom for several weeks. We listed some of our favourites in this article if you missed it.
Here are some simple tips to keep your plants looking great!
Water
Newly planted annuals and perennials, even drought tolerant plants need to be watered at planting time.
Perennials will need water every week for the first two weeks and during periods without rain. Most perennials do well with a minimum of one inch of water per week.
Water is absorbed through the roots, so water the soil and not the foliage. Low (pressure) and slow (volume) allows water to adequately soak into the soil instead of running all over the place! It’s also best to water in the morning rather than at night because foliage that stays wet all night is susceptible to rot and foliar diseases.
Annuals planted in containers will need to be watered more frequently than annuals in a flower bed. Hanging baskets and planters will most likely need water daily, and in the heat of summer twice a day. For hanging baskets, the water should run out of the bottom.
In planters or the garden, use your finger in the soil to test it out - if it feels dry, your plant needs water.

Mulch
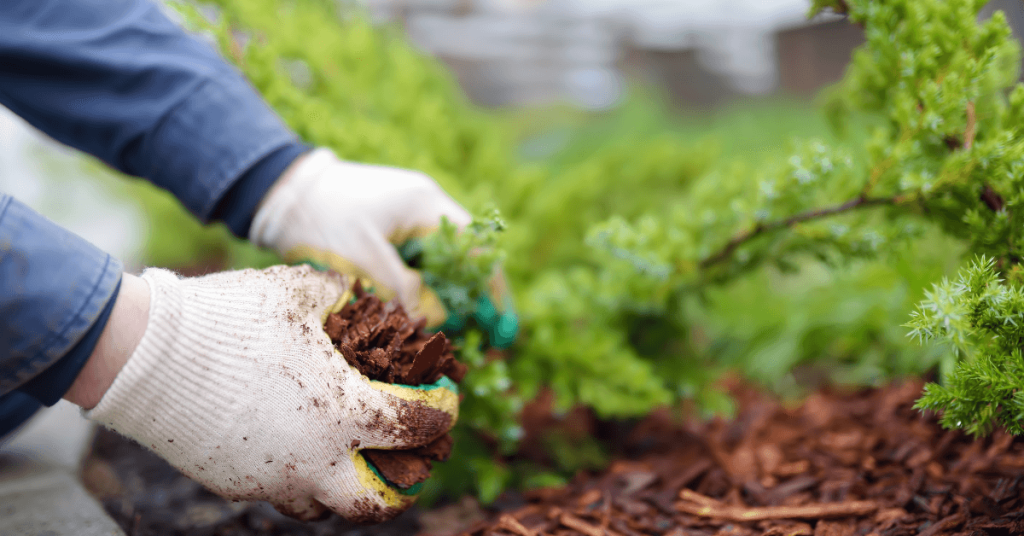
Mulch is always a very good idea to maintain soil health in the garden no matter what you’re planting!
An organic mulch will help enrich your soil, and keep it moist. A layer of at least 2 inches of mulch will also suppress weeds. Who doesn’t love that? The only caveat: don’t allow the mulch to touch your plants.
Deadhead
Deadheading or removing flowers that have finished blooming is important for many plants. Doing this allows the energy from the plant to be sent to producing new blossoms in annuals, and some perennials.
How do you do it? Take sharp, clean scissors or pruners, and cut off any dead flowers just below the base of the flower or above the first leaf. With some plants you can simply break off the spent flowers.
Bonus: your plants will look much better without dead flowers on them!
Note: some annuals don’t need deadheading. For example, Verbena, Lantana, Lobelia, Impatiens, Petunias, and Begonia.
Fertilizer
Let’s face it, fertilizer packaging can be confusing. They often feature three letters and three numbers. What does it all mean? What is N-P-K? This Eising article explains all you need to know about fertilizing and is worth the read.
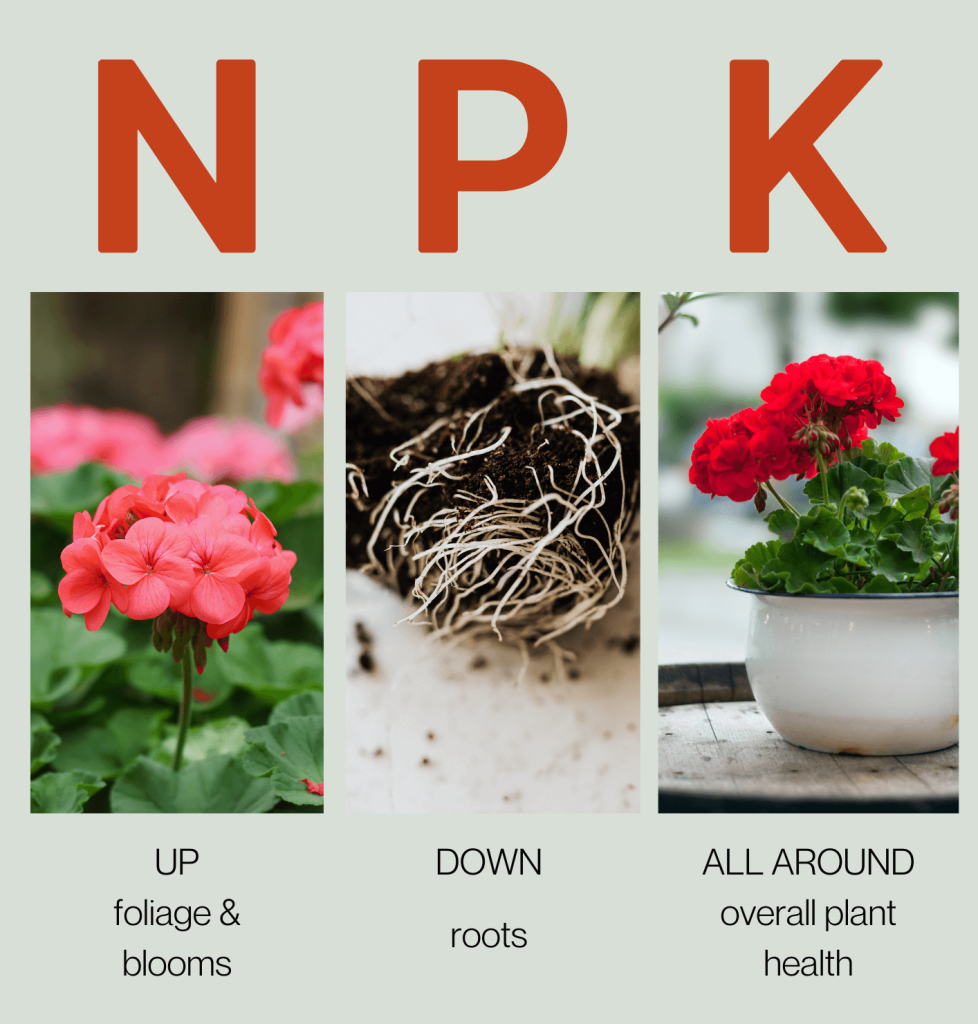
However, in a nutshell, this is a really easy way to remember the function of N (nitrogen), P (phosphorous and K (potassium) when it comes to fertilizing. The numbers are the percentage of each of those nutrients that the fertilizer package contains.
N = UP - foliage and blooms
P = DOWN - roots
K = ALL AROUND - overall plant health
If you used an organic, slow-release fertilizer when you planted your annuals or perennials in the ground, you shouldn’t have to fertilize again during the season.
Most potting soil in planters or hanging baskets contains the nutrients needed to help your plants get started. An easy way to maintain nutrients throughout the season is sprinkling Shake n’ Feed Ultra Bloom 10-18-9 slow release fertilizer on top of the soil. It will slowly feed your plants for three months. For heavy feeders like petunias or plants that are hungry, looking light, and in need of an instant boost, use a water-soluble fertilizer with an NPK ratio of approximately 20-20-20 every two weeks to keep them blooming.
For perennials, trees and shrubs that need more nutrients during the year, Shake n’ Feed slow release 18-6-12 fertilizer can be applied in the spring and it will feed your plants for three months during the growing season. The same fertilizer can be used for trees, shrubs and perennials in subsequent seasons.
As a rule of thumb, it’s better to under-fertilize and watch how your plants respond. Over-fertilizing can lead to sick plants that have yellow or brown leaves. In your garden, the only way to know what your plants need is to test the soil. Otherwise you’re guessing! To test your soil in Ontario, samples can be sent to The University of Guelph.
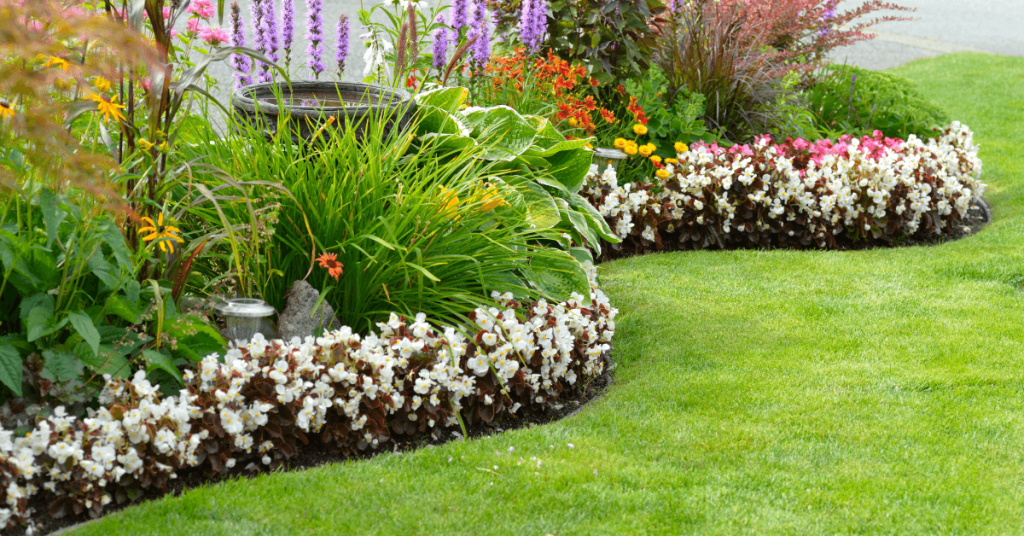
Just because they’re indoors doesn’t mean nothing changes for your houseplants when the seasons change. Even though they’re inside, the shorter days in fall and winter and the indoor climate change when the heating comes on affects your houseplants.
Almost all houseplants slow down their growth in the fall and winter, and some even have a period of dormancy. When they’re growing more slowly and getting less light than they did in summer, their care needs change as well.
Here are nine ways to keep your houseplants happy through the fall and winter in Simcoe.

1) Adjust your watering schedule. Because your plants are growing slower, they won’t be consuming as much water. If you usually water on a set schedule, do a quick check of the soil next time you water. Either test the soil with your finger to see if it feels damp, or use a moisture meter before watering your plants. Some of them probably won’t need it yet. If you have plants in terra cotta pots or small pots, you may need to water them more frequently than usual.
2) Increase the humidity for your plants by clustering them together in groups. Our heating systems tend to dry out the air in our homes, which is hard on plants. If your indoor air is really dry, you can add water trays under your plants, or use a humidifier nearby or keep a humidifier running nearby.
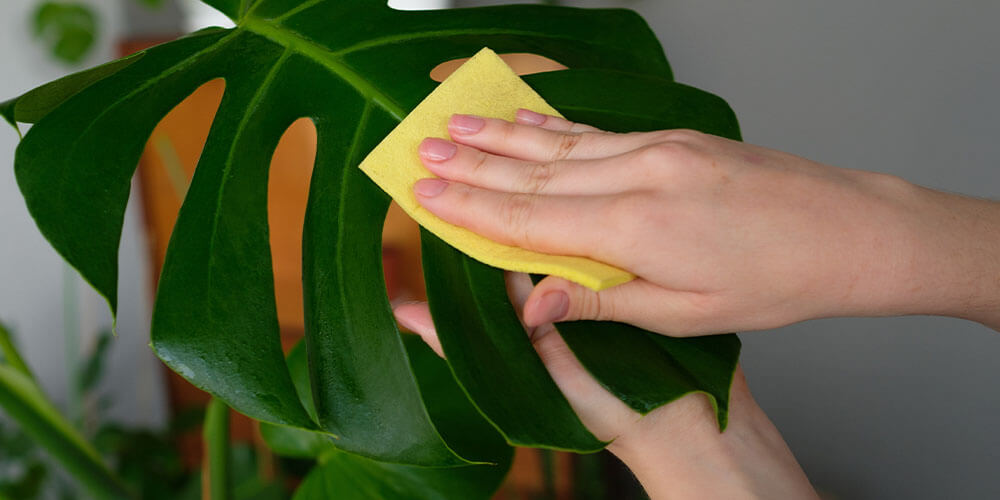
3) Clean the leaves of your plants. Another side effect of the furnaces turning on is extra dust in the air, which often settles on the leaves of your plants. Dust can impair their ability to photosynthesize, so wiping it off will help them stay healthier through the winter.
4) While you’re cleaning leaves, check for pests. Plants are more susceptible to pests in the winter because they’re not growing as quickly and the air is drier. If you find evidence of pests, immediately quarantine your houseplant and start a treatment plan.
5) With shorter days and the lower angle of the sun, your plants may need more light. You may need to move some of your plants closer to windows or further away from windows if they’re prone to sunburn. You may also want to add some grow lights to supplement the short days.
6) Stop fertilizing your plants in the fall and don’t start again until spring. Because your plants are growing slower right, or not at all right now, they don’t need extra nutrients and minerals. Start fertilizing again once they’ve started to show signs of new growth in the spring.
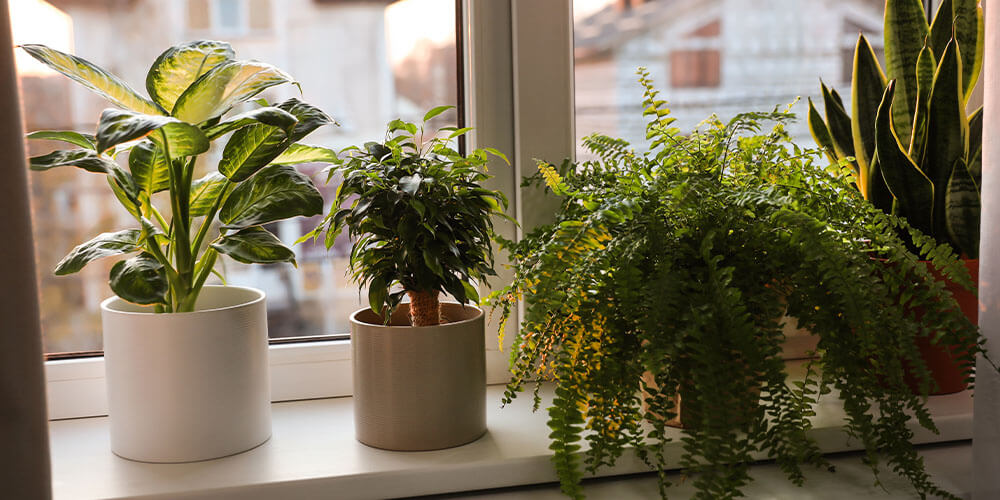
7) Plants that aren’t getting enough light may lean towards the windows in the winter. Every time you water, rotate any leaning plants a quarter turn so they start to straighten out.
8) Houseplants don’t love drafts, whether from the furnace or from windows and doors, and they also don’t love large temperature fluctuations. If your plants are getting lots of drafty air, move them around to places where the temperature and air movement is more consistent.
9) Let your plants rest through the winter. Avoid fussing with them too much, and don’t do any pruning or repotting, unless absolutely necessary, for the next few months.
It’s time to get festive! Making your own festive decor is a fun and rewarding way to pass the time at home—it feels good to create beautiful ornaments and decorations for the season! A craft night can be relaxing, too, since you have only one thing to focus on: making your home merry and bright. These simple DIY holiday decorating ideas are fun for the whole family. You can even schedule a video chat with friends or family and have a crafting night together.
Incorporate Evergreen Cuttings Everywhere and Anywhere
A sprig of an evergreen here and there will bring the sights and smells of the season into your home. Put small cuttings around candles, tuck greenery into your chandelier, and dress up a bookshelf with boughs of holly.
 Book Tree
If you’re tight on space and don’t have room for a Christmas tree, work with what you have to create a simple “book tree.”
Gather up all your books with green covers. On three shelves, one stacked above the other, place the books vertically. Put about 7 to 10 on the bottom shelf, 5 or 6 on the middle, and three or four on the top. Space the spines of the books apart a bit to create a tree shape—when you take a step back and look at the shelves, you should see a triangle of green books.
Centre an ornament, like a star, above the top shelf. You can also add small cuttings of evergreen, red berries, and pinecones to your shelves to add more of a holiday theme.

Citrus Garland
We love the pop of colour this garland of orange slices adds to your holiday décor. Plus, the scent is heavenly!
Preheat your oven to 250˚F, then cut some navel oranges into 1/4 inch slices (use as many oranges as you need for the length of garland you want!). Line a couple of cookie sheets with parchment paper. Pat the orange slices dry, then put them on the cookie sheets. Bake for about an hour and a half, flip the slices so the other side faces up, then bake for another hour and a half. You can check on your slices periodically starting around hour two. Remove any pieces that are beginning to brown, then bake the rest until they are dry.
Once the oranges are done and you have removed them from the oven, let the slices cool. Then, using a large needle and twine, sew through the flesh of the oranges to string them together. Space them apart however you like—some people like a few inches between each slice while others like the slices to overlap.
Hang your dried orange garland on your tree, along shelves, or on top of an evergreen garland.

Rustic Twig Ornaments
Twig ornaments look great on your tree, a garland, or hanging anywhere else in your home! To make your own, start by collecting some thin branches. Using a glue gun, glue the branches together into different shapes, like a star, snowflake, or Christmas tree. Tie twine around the branches for extra decoration and a bit of added support to the ornaments. Add things like buttons, sprigs of evergreen, or anything else festive to the ornament. To finish it off, add a loop of twine so you can hang your work of art.
Pinecone Ornaments
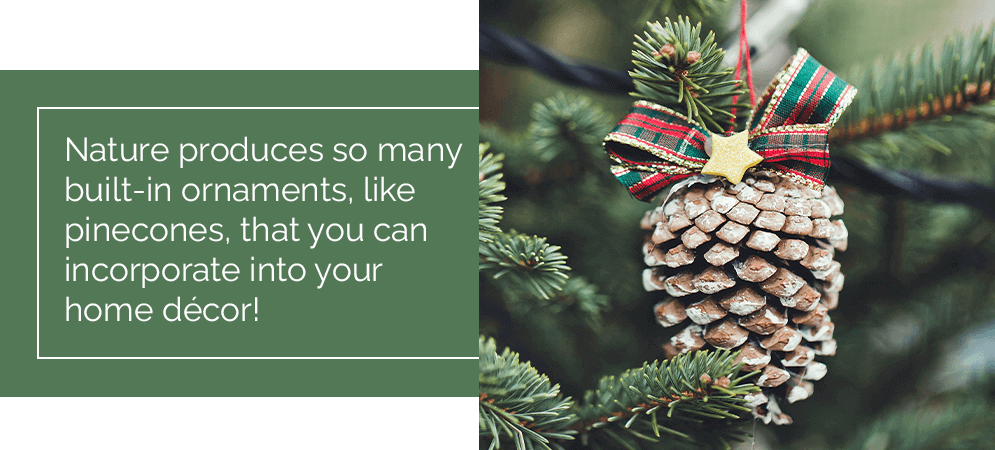
Nature produces so many built-in ornaments, like pinecones, that you can incorporate into your home décor!
Collect pinecones from your yard or purchase some at our garden centre. Spray paint them white—you can use any colour, but we love how the white stands out against a Christmas tree’s dark green needles. For added sparkle, sprinkle glitter on the pinecones while the paint is still wet. Once the paint has dried, make a loop with ribbon or twine to add to the top of the pinecone. Or, if you don’t want to hang them, you can instead place the painted pinecones in a decorative bowl to display as a centrepiece.

Vintage Ornament Shadow Box
Do you have vintage ornaments passed down from family members or a collection of your own favourite childhood ornaments? Consider displaying these special heirlooms in a shadow box!
Line the backing of the shadow box with fabric or even wrapping paper. Then, stick the bulbs onto the backing using double-sided adhesive pads. We get it—sometimes you run out of space on your tree and have to be selective with your ornaments, so this holiday decorating idea is one solution for displaying them!

Hanging Branch Centrepiece
Save table space by thinking vertically! To create a hanging branch centrepiece, find a long branch that has multiple twigs. Decorate the branch with fairy lights, then hang it using fishing line attached to ceiling hooks. Make sure there’s enough room between your table and the branch for you to add some hanging ornaments. Once the branch is secured, add a few ornaments to it.
Crafting your own ornaments is a great way to get in the holiday spirit! DIY holiday decorations make great gifts, too, so be sure to make a few extra to give away this season.
Fresh evergreen decor has the amazing double impact of visual beauty and nostalgic aroma, bringing back old holiday memories each time you walk past and catch a whiff of its invigorating pine scent. For those with a knack for crafts and creative designs, making your own DIY decor is such a fun way to add a personal touch to your winter holiday decor. You can pick a theme or a colour scheme and then customize all your decorations accordingly, for a picture-perfect look that would put Chip and Joanna Gaines to shame.
Here are some creative ideas and tips for using evergreen cuttings in your DIY holiday decor projects. Let’s get ready to deck some halls!

The Best Greenery for Wreaths
Wreaths are pretty much the quintessential winter decor piece for indoors and outdoors, with endless ways to customize the look and add beautiful accents. But, depending on the kind of look you want to achieve and where you’re planning on hanging the wreath, you’ll need to choose the right type of greenery, or else you could end up with a brown wreath that drops needles faster than ‘90s pop stars drop their Christmas albums.
We recommend using either cedar or Fraser fir cuttings for indoor wreaths, as they are very heat-tolerant and won’t turn brown if placed near a warm vent. Cedar has an exceptionally potent citrus-like scent that we can’t get enough of! We also love the look of fresh or dried eucalyptus for more modern, minimalist wreaths—especially if you want to keep them up well past December.

Outdoor wreaths require cold-hardy cuttings like juniper, pine, or spruce. Juniper is quite distinctive, as it has little blue berries all over it, but you’ll want to take care when handling it, as its needles are pretty pointy. Spruce is similarly sharp, so some protective gloves are a good idea! Pine is a bit more on the delicate side, so it isn’t as great for holding heavy ornaments, but its long needles and wispy, shaggy appearance is very in style.
If you prefer the look of a leafy wreath instead of one that’s covered in little green needles, try making a boxwood wreath! The little loonie-shaped leaves of this adorable evergreen can even be preserved in glycerin if you’d like to keep it for longer than a few weeks.
How to Decorate Outdoor Pots for Christmas
Outdoor Christmas potted arrangements are the perfect way to boost winter curb appeal and make your home’s entrance look warm and welcoming. When curating arrangements for your Christmas pots, use the same kind of design formula as you would with a live container arrangement: use tall, upright branches and cuttings for the center or back of the pot for the best visibility, add shaggier, trailing cuttings around the edges to spill out down the sides. Then, fill up the gaps in the middle with more mounded plants or cute holiday accents!
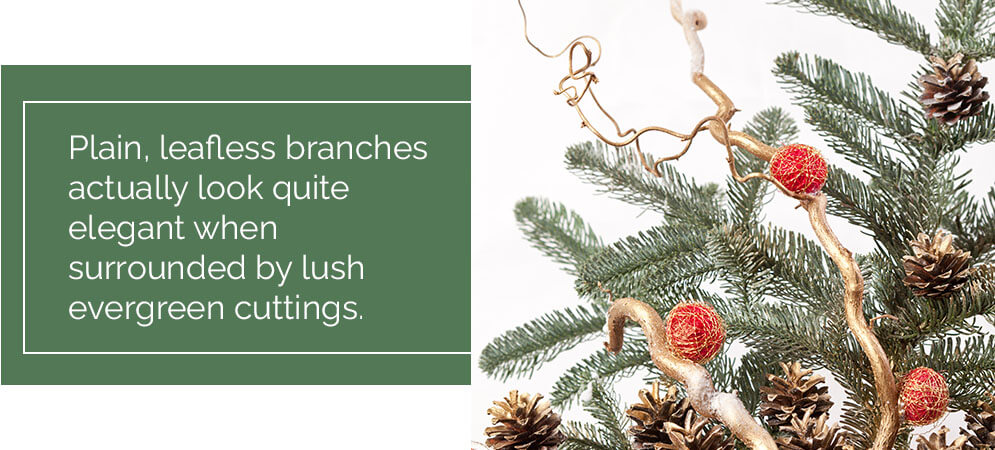
Plain, leafless branches actually look quite elegant when surrounded by lush evergreen cuttings, and they add a cool architectural effect. Bright red dogwood branches add a festive pop of colour, and thicker birch branches have more of a rustic vibe.
You can get extra creative when it comes to choosing decorative add-ons and accents! Shiny ribbons and glassy ornaments bring that classic opulent holiday spirit, whereas natural accents like lotus seed pods, berries and pinecones look more woodsy and lush. We’ve got it all at Eising, so come browse our full selection of decorations to get some inspiration!
4 Creative Ideas for Evergreen Decor
Looking for something a little different than the classic wreaths and garlands? Try out some of these cute DIY decorations for the winter season.
Fresh Evergreen Swags
Big, dramatic door swags are such a fun alternative to wreaths, and you don’t have to be as careful about making sure everything is perfectly in place. The more shaggy and voluminous, the better! Swags look best when there’s a large, decorative accent as the main focal point at the top, with long tails of evergreen cuttings hanging down from under it. Ribbons and pinecones are the most common topper for door swags, but lately we’ve really been loving the look of silk flowers instead, for an elegant, feminine touch.

Kissing Balls
These adorable hanging balls or meant to be dangled from door frames in lieu of the traditional cutting of mistletoe. First, start with a potato! Attach a loop of twine to a screw and twist it into the potato to anchor it in. Then, stick in a bunch of boxwood sprigs all over so the spud is completely covered, and then trim it so it’s a perfect sphere. Add little accents like berries or ribbons. Finally, hook the loop over your doorway to hang the decoration. The moisture from the potato will help keep the leaves alive longer!
Gift Tags
For a lovely special touch to top off each of the presents under the tree, attach little cuttings onto the gift tags with a piece of twine or ribbon. It’s the easiest way to take a wrapped gift from simple to sensational!

Mini Wreath Mobiles
Instead of one large wreath, make several small wreaths that vary slightly in size, and suspend them from a large branch or piece of driftwood. Hang it on the wall for a cute, boho decor piece that’s sure to garner many compliments!
Eager to blast some holiday tunes and start decorating? Eising has all sorts of cuttings and winter plants available now for your DIY evergreen decor projects, so visit the shop soon to snatch some up while supplies last!