
Starting seeds is a strangely exciting and rewarding hobby—and one of the few hobbies that actually saves you money instead of costing you more! A packet of fifty seeds can cost the same as one single starter plant. If you’re happy to tend to your seedlings for a couple of months longer than the rest of your garden, then it’s well worth the effort. And, you’ve got to admit, plants are kinda cute when they’re little.
If you want to learn how to start seeds, you might be a bit unsure whether to start them indoors or outdoors. Both seem like viable options, right? Well, the truth is that they can both be effective, but only if done correctly. A few missteps, and you might end up with an unsuccessful batch of seedlings.
To put you on the right track, we put together this list of common FAQs for starting vegetable garden seeds.
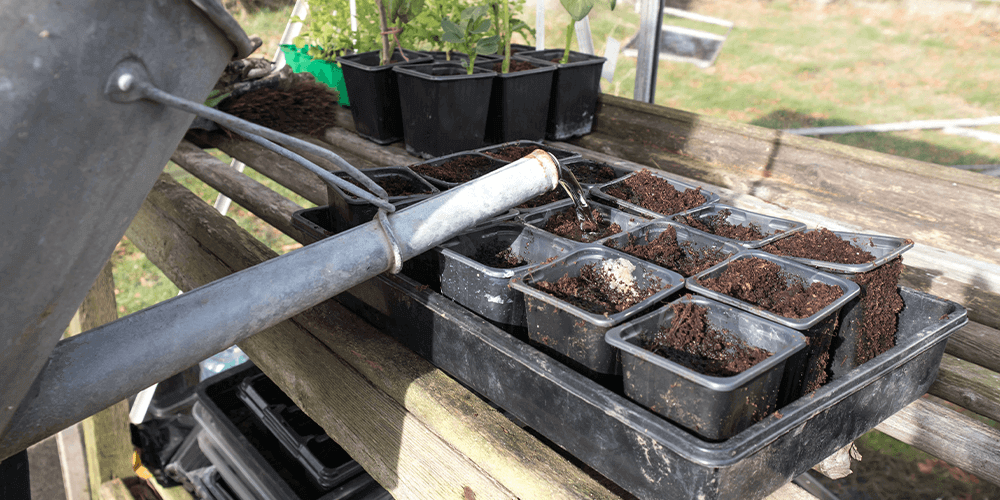
Is It Better to Start Seeds Indoors or Outdoors?
It depends on the plant. Some take a long time to mature, so if you want to enjoy them sooner in the season, it’s worth starting your seeds indoors. This way, you don’t have to wait for the weather to warm up to start growing. However, some plants don’t adjust well to being transplanted, so starting the seeds outdoors is necessary. When in doubt, do a Google search to see if your plant is better suited to starting outdoors or indoors.
What Supplies Do You Need to Start Seeds Indoors?
Maintaining consistent temperature, light, and humidity for your seedlings can be tricky indoors, but there are lots of supplies you can use to help you pull it off. It might seem like a lot at first, but it’s a one-time purchase that will help you start seeds indoors for years to come. We recommend trying some of these products to help you with seed starting:
- Plastic domes to trap humidity
- Seed starting mix
- An LED grow light with a timer setting
- Biodegradable seedling cups
- A mini-greenhouse, which comes with the humidity dome and grow light all built-in.
Remember, you need a lot of space to accommodate all the little seedlings you’re starting. If you don’t have enough space by a sunny window, a grow light or two will help you a lot!

How Many Seeds Do I Plant in Each Pot?
It’s recommended that you put 2–3 seeds in each pot or seed starting cell. Some seeds just won’t germinate—that’s just the luck of the draw. But if you have a couple of seeds in each cup, the chances of success are higher! If more than one seed sprouts in a cup, you’ll need to thin out the smaller, weaker ones and leave the strongest one. They won’t be able to grow properly when they’re so close together.
How Do You Acclimate Seedlings to the Outdoors?
Planting a seedling directly outdoors after it’s been inside for several weeks won’t end well. The shock of the temperature change will likely kill them. To ease them into the transition, it’s a good idea to put your seedlings outside for a little bit longer each day in a process called “hardening off.” Follow this schedule to harden off your seeds:
- Day 1–2: Full shade for two hours
- Day 3–4: Dappled shade for three hours
- Days 5–6: Full sun for two hours.
- Days 7–9: Full sun for three to four hours.
- Days 10–14: Full sun for five to six hours.
- Days 14–21: Full sun for 8 hours per day. Leave them out overnight if the temperature isn’t expected to dip below 10°C.
This is a three-week process, so follow the schedule carefully! Mark these times down on your calendar so you can follow them.

When Should I Start Planting Seeds Outside?
Seeds are safe to plant outside once the danger of frost has passed. Here in Simcoe, our typical last frost date is usually in the last week in April. If you plan to plant your seeds in the first week of May, you should be in the clear!
Can You Plant Tomato Seeds Outside?
Tomato seedlings are a bit too delicate to grow outside, so we recommend starting those seeds indoors. Tomato seedlings are susceptible to a bacterial disease called “damping off,” which can quickly kill them in their early growth stages. The temperature-controlled environment and better pest protection indoors will make it easier for your tomatoes to grow strong enough for smooth transplanting.
What Are The Best Seeds to Start Indoors?
Starting seeds indoors always gets us so excited for spring! Try starting some of these vegetables indoors in early April, so they’re ready to plant in May:
- Tomatoes
- Broccoli
- Cabbage
- Eggplant
- Onion
- Kale
- Lettuce
- Cabbage
- Peppers

Some seeds can be started indoors but need to be very carefully transplanted because they have delicate roots. Starting these seeds outdoors or indoors is possible as long as the temperature is comfortable. These plants include:
- Cucumber
- Melon
- Peas
- Squash
- Pumpkin
- Zucchini
- Celery
- Amaranth
What Are the Best Seeds to Plant Outdoors?
Some plants are best suited to planting outdoors—especially root vegetables! Some are also just suited to sprouting in colder spring soil. Here are some plants you can start seeding outside at home this spring:
- Carrots
- Radishes
- Beets
- Potatoes
- Turnips
- Radicchio
- Spinach
- Corn
If you need any seed starting supplies in Simcoe, Eising Garden Centre has got you covered! We’ve got plenty of high-quality equipment that will last for years and years, plus plenty of exciting new seeds for 2021. Visit us soon, and we’ll be happy to help you get started!
Having fresh flowers in the house is an instant pick-me-up! A bouquet of colourful blooms makes desk work so much lovelier, but it’s kind of a bummer when your freshly-cut bouquet ends up wilting within a week. That’s why we’re all about indoor flowering plants! The bloom time on these gorgeous houseplants lasts several months, bringing vibrant garden colour to your indoor space.
Many gardeners are quick to assume that indoor sunlight levels aren’t enough to keep a flowering plant happy. But luckily, some of our favourite flowering plants are totally suited to growing indoors. Direct sunlight can actually scorch their leaves and petals, so if your room is softly lit by a window, it will be a much more comfortable environment.
Brighten Your Homespace With Fabulous Flowering Plants
These low-light indoor flowering plants thrive best next to a window covered by a sheer curtain. With proper care, you’ll get to enjoy their prolific blooms again and again!
Phalaenopsis Orchid
Who can resist the exotic elegance of a colourful orchid with blooms all along its sleek, slender stem? The Phalaenopsis orchid is by far the most chilled-out, low-maintenance orchid available. It’s great for beginners, and while its care needs are a little different than your typical houseplant, they’re certainly not hard to manage. Since they have aerial roots and don’t grow in the soil, the indoor flowering plants are typically grown in a mound of peat moss or bark. Thoroughly soaking this potting medium every week and allowing it to drain out into the sink will keep it sufficiently hydrated.

Anthurium
This distinctive flowering houseplant really makes a statement! Its single-petalled flowers are so glossy, they almost look like they’re made of vinyl. Most varieties come in a vivid shade of candy-apple red or bubblegum pink, with a bright golden stamen. Anthuriums like their soil to be slightly moist but not soggy. To avoid overwatering, we recommend that you plant your anthurium in a pot with drainage holes in a mixture of one-half potting soil and one-half orchid potting mix.
African Violet
The adorable African violet is one of the best flowering plants for low light. It’s quite easy to take care of—the only time it’s fussy is when it’s being repotted, so be gentle with its delicate roots. African violets have a decidedly regal, luxurious appearance, with their plush, velvety emerald leaves and jewel-toned blossoms. Fill larger pots with three different African violets in assorted shades of magenta, lavender and deep purple for an especially opulent display!

Bromeliad
Technically the wild, vibrant display on top of bromeliads aren’t actually flowers; they’re modified leaves called ‘bracts.’ However, they still have all the visual impact of a bright bloom! A bromeliad’s tall, curved leaves and bracts work kind of like eavestroughs, collecting rain and delivering it straight to the centre of the plant. They come in a whole assortment of Crayola-bright colours, so if you want to liven up your living room decor, an electric yellow or hot pink bromeliad will do just the trick!
Peace Lily
One of the most effective air-purifying plants around, the peace lily sure seems calm and collected for a total powerhouse. Its simple ivory petals have been captured in countless works of art, bringing a sense of subtle elegance and femininity. The peace lily isn’t an especially needy plant and can thrive in low light, but if it isn’t getting quite enough sun or water, it might tell you by dramatically flopping over. Don’t worry—if you give it some water and more light, it should perk back up quickly!

Kalanchoe
Kalanchoes thrive in low light for half the year and like a bit more sunshine during their active blooming season. This helps it rest and recover between bloom cycles, so its flowers are more plentiful when they emerge. This indoor plant is actually a type of succulent, with cute scalloped leaves that bring attractive colour and texture to your decor, even when it isn’t in bloom. They also look great in mixed arrangements with other colourful plants like the fittonia, also known as “nerve plant.”
Cyclamen
From fall until spring, this dainty flowering plant produces lovely blooms in shades of pink, purple, white, or red. It does best in low light conditions with just a bit of indirect sun coming in from the window. Bright sun may prompt it to go into its summer dormancy! But even when it isn’t actively blooming, cyclamen have absolutely stunning leaves. Their cool, deep jade colour is highlighted by silvery veins that catch the light beautifully.

Christmas Cactus
Another winter bloomer that prefers low light, this funky cactus isn’t just a holiday houseplant; it’s a total stunner all year round! Its segmented foliage splays out like a fountain, producing bright blossoms on each end. Now, despite its “cactus” moniker, don’t go assuming this plant is a desert dweller that prefers dry soil! The Christmas cactus actually hails from the shady rainforests and thrives in high humidity, so it needs more water than your typical cactus.
For more indoor plants to bring a burst of colour and vibrant energy into your home or office, visit Eising Garden Centre in Simcoe to see what’s new for 2021! There are so many fascinating new houseplants now available to add to your growing collection. For more care tips for indoor plants, check out our blog archives for simple instructions and other valuable insights.
Figuring out when to prune all the different flowering shrubs on your property can be tricky, especially if they’re flowering at different times. Some shrubs bloom on old wood from the year before and some bloom on their fresh spring growth. Poorly-timed pruning can result in a flowerless shrub, so you’ve got to be careful. To save you the guesswork and Googling, we compiled a list of the most common flowering shrubs and exactly when you should prune them.
When to Prune
- Bluebeard: We love the late season colour this sapphire-tinted shrub brings to the landscape. Since it doesn’t flower until around August or September, you can prune it now in March or April, right at the first sign of new growth.
- Butterfly Bush: Technically, you can prune this flowering shrub any time of year, but it’s recommended that you do it in late winter while the plant is dormant. This will ensure the healthiest growth and the most flowers. However, if you give it a little bit of a trim while it’s in its active growing phase, it should fill out with new growth and blooms within a matter of weeks.
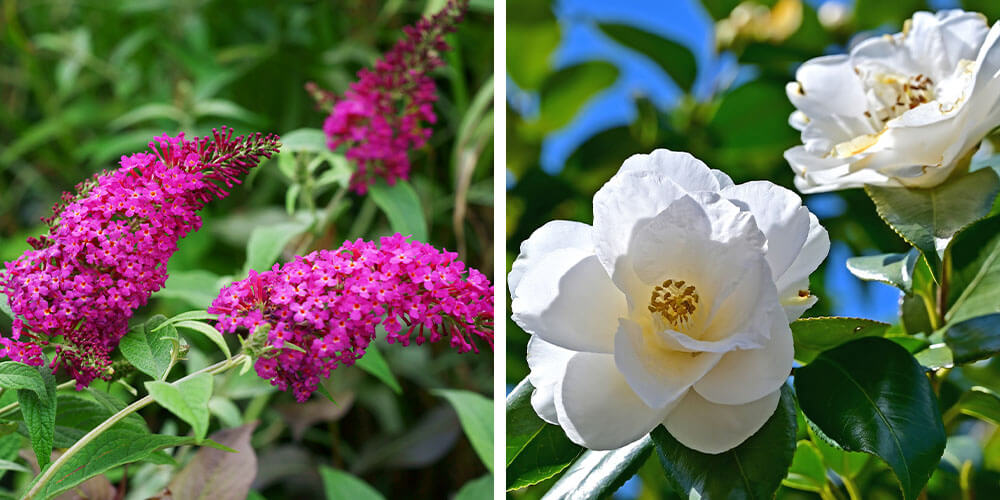
- Daphne: Generally, you don’t need to prune daphne very often because it grows quite slowly. If it’s starting to grow into another plant, you can prune it to avoid any complications from rubbing, tangled branches. Prune them in summer after the blooms fade but only if necessary.
- Dogwood: Never prune dogwood in the spring or summer! This can make it vulnerable to disease. Instead, the best time to prune is late fall or winter, when the temperature is cooler, and your plant has gone dormant. This way, it won’t leak out any of its sap, which increases the risk of infection.
- Forsythia: This spring-blooming shrub should not be pruned in spring, or else you’ll end up cutting off all the flower buds. Wait until summer once it has finished flowering.

- Honeysuckle: Honeysuckle shrubs (not to be confused with honeysuckle vines) are best pruned in winter when they’re dormant. They can handle a lot of pruning, and it makes a big difference in the volume of your plant.
- Hydrangeas: Summer-blooming hydrangea varieties like Hydrangea paniculata need to be pruned in March. Prune spring bloomers like Hydrangea macrophylla in the summer after their blooms fade; they develop their flower buds on old wood.
- Lilacs: These fragrant shrubs are some of the first to start flowering in spring, so they might be ready for you to prune by the end of spring around early June. Otherwise, you can wait until summer to prune, as they bloom on old wood.
- Magnolia: Midsummer or fall is typically when magnolia flowers start to disappear. Prune them once they’ve finished blooming, and avoid pruning in winter or early spring.
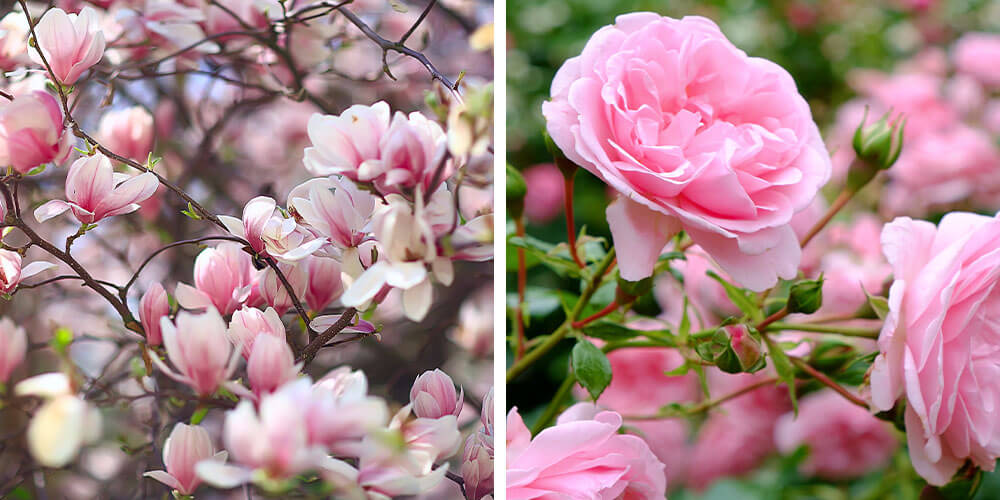
- Rose Bushes: Prune your roses in March or April before they start blooming. In summer, while they’re actively in bloom, you can trim off the dead flowers to encourage more flowers.
- Rose of Sharon: This hardy flowering shrub isn’t too picky about when it should be pruned. You can prune it in late summer after its blooms fade, in fall or winter when it’s dormant, or in very early spring before new growth appears.
- Smoke Tree: Sometimes, you can prune your smokebush in early spring if there are no signs of new buds yet. However, it’s typically best to prune it in winter, just to be on the safe side.
- Spirea: You’ll want to prune your spirea shrubs twice a year for the best results. Do one major pruning in winter to keep the shape compact and encourage fuller growth. Then, do a little tidy-up after it has finished blooming. Spirea responds pretty well to pruning, so don’t be afraid to get in there with the shears!
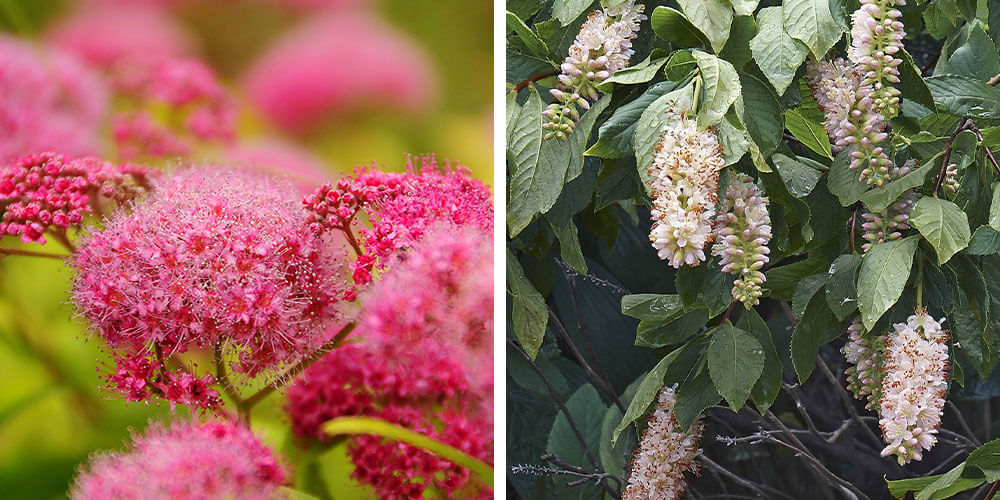
- Summersweet: Winter or very early spring is the best time to prune summersweet because you want to do it before new growth appears.
- Weigela: These early bloomers will be ready for a cleanup at the end of spring, right after their blooms fade. Don’t do it at the start of the season, or you’ll lose out on its gorgeous flowers!
Do you have any other flowering shrubs that aren’t on this list, and you’re unsure of when to prune them? Feel free to contact us at our greenhouse and we’ll be happy to find the answer for you!
Just because they’re indoors doesn’t mean nothing changes for your houseplants when the seasons change. Even though they’re inside, the shorter days in fall and winter and the indoor climate change when the heating comes on affects your houseplants.
Almost all houseplants slow down their growth in the fall and winter, and some even have a period of dormancy. When they’re growing more slowly and getting less light than they did in summer, their care needs change as well.
Here are nine ways to keep your houseplants happy through the fall and winter in Simcoe.

1) Adjust your watering schedule. Because your plants are growing slower, they won’t be consuming as much water. If you usually water on a set schedule, do a quick check of the soil next time you water. Either test the soil with your finger to see if it feels damp, or use a moisture meter before watering your plants. Some of them probably won’t need it yet. If you have plants in terra cotta pots or small pots, you may need to water them more frequently than usual.
2) Increase the humidity for your plants by clustering them together in groups. Our heating systems tend to dry out the air in our homes, which is hard on plants. If your indoor air is really dry, you can add water trays under your plants, or use a humidifier nearby or keep a humidifier running nearby.
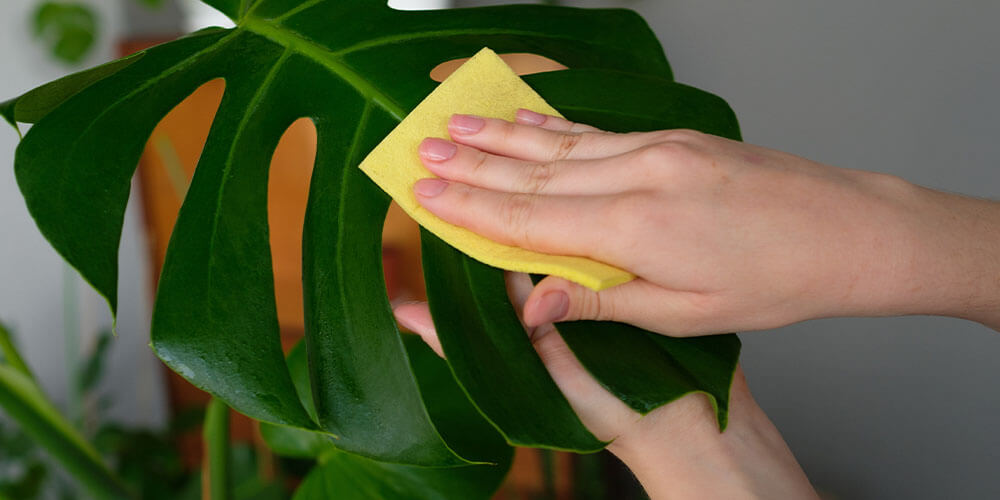
3) Clean the leaves of your plants. Another side effect of the furnaces turning on is extra dust in the air, which often settles on the leaves of your plants. Dust can impair their ability to photosynthesize, so wiping it off will help them stay healthier through the winter.
4) While you’re cleaning leaves, check for pests. Plants are more susceptible to pests in the winter because they’re not growing as quickly and the air is drier. If you find evidence of pests, immediately quarantine your houseplant and start a treatment plan.
5) With shorter days and the lower angle of the sun, your plants may need more light. You may need to move some of your plants closer to windows or further away from windows if they’re prone to sunburn. You may also want to add some grow lights to supplement the short days.
6) Stop fertilizing your plants in the fall and don’t start again until spring. Because your plants are growing slower right, or not at all right now, they don’t need extra nutrients and minerals. Start fertilizing again once they’ve started to show signs of new growth in the spring.
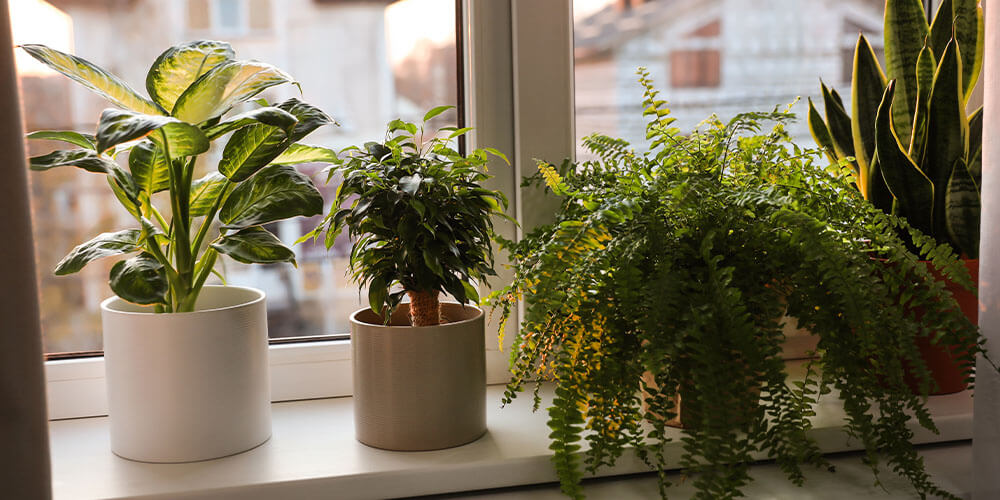
7) Plants that aren’t getting enough light may lean towards the windows in the winter. Every time you water, rotate any leaning plants a quarter turn so they start to straighten out.
8) Houseplants don’t love drafts, whether from the furnace or from windows and doors, and they also don’t love large temperature fluctuations. If your plants are getting lots of drafty air, move them around to places where the temperature and air movement is more consistent.
9) Let your plants rest through the winter. Avoid fussing with them too much, and don’t do any pruning or repotting, unless absolutely necessary, for the next few months.
It’s time to get festive! Making your own festive decor is a fun and rewarding way to pass the time at home—it feels good to create beautiful ornaments and decorations for the season! A craft night can be relaxing, too, since you have only one thing to focus on: making your home merry and bright. These simple DIY holiday decorating ideas are fun for the whole family. You can even schedule a video chat with friends or family and have a crafting night together.
Incorporate Evergreen Cuttings Everywhere and Anywhere
A sprig of an evergreen here and there will bring the sights and smells of the season into your home. Put small cuttings around candles, tuck greenery into your chandelier, and dress up a bookshelf with boughs of holly.
 Book Tree
If you’re tight on space and don’t have room for a Christmas tree, work with what you have to create a simple “book tree.”
Gather up all your books with green covers. On three shelves, one stacked above the other, place the books vertically. Put about 7 to 10 on the bottom shelf, 5 or 6 on the middle, and three or four on the top. Space the spines of the books apart a bit to create a tree shape—when you take a step back and look at the shelves, you should see a triangle of green books.
Centre an ornament, like a star, above the top shelf. You can also add small cuttings of evergreen, red berries, and pinecones to your shelves to add more of a holiday theme.

Citrus Garland
We love the pop of colour this garland of orange slices adds to your holiday décor. Plus, the scent is heavenly!
Preheat your oven to 250˚F, then cut some navel oranges into 1/4 inch slices (use as many oranges as you need for the length of garland you want!). Line a couple of cookie sheets with parchment paper. Pat the orange slices dry, then put them on the cookie sheets. Bake for about an hour and a half, flip the slices so the other side faces up, then bake for another hour and a half. You can check on your slices periodically starting around hour two. Remove any pieces that are beginning to brown, then bake the rest until they are dry.
Once the oranges are done and you have removed them from the oven, let the slices cool. Then, using a large needle and twine, sew through the flesh of the oranges to string them together. Space them apart however you like—some people like a few inches between each slice while others like the slices to overlap.
Hang your dried orange garland on your tree, along shelves, or on top of an evergreen garland.
Rustic Twig Ornaments
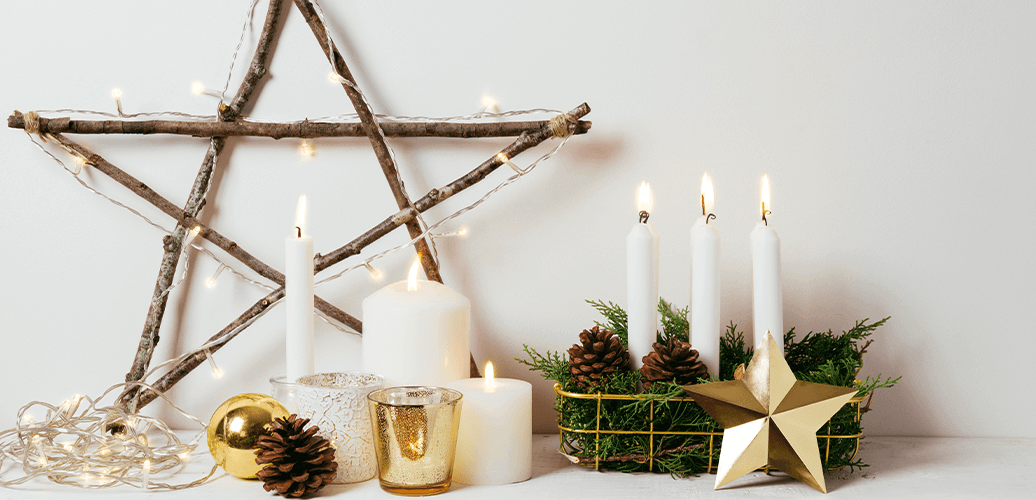
Twig ornaments look great on your tree, a garland, or hanging anywhere else in your home! To make your own, start by collecting some thin branches. Using a glue gun, glue the branches together into different shapes, like a star, snowflake, or Christmas tree. Tie twine around the branches for extra decoration and a bit of added support to the ornaments. Add things like buttons, sprigs of evergreen, or anything else festive to the ornament. To finish it off, add a loop of twine so you can hang your work of art.
Pinecone Ornaments
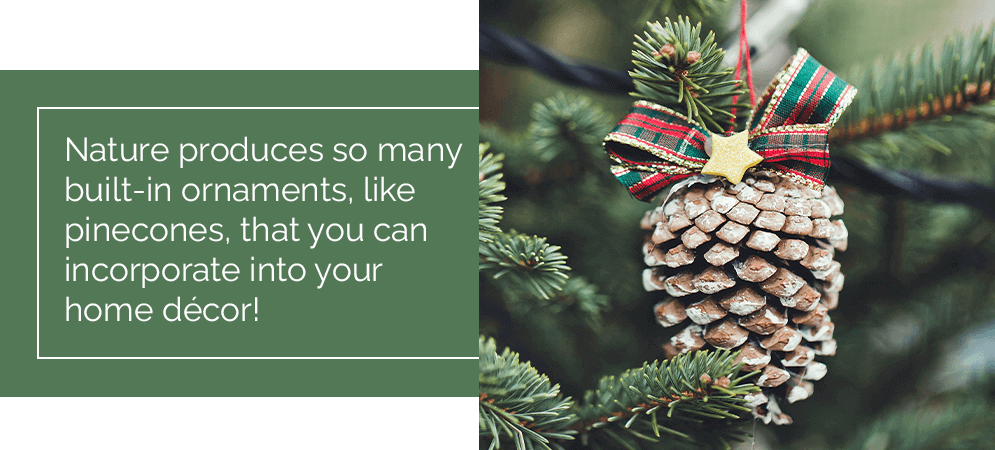
Nature produces so many built-in ornaments, like pinecones, that you can incorporate into your home décor!
Collect pinecones from your yard or purchase some at our garden centre. Spray paint them white—you can use any colour, but we love how the white stands out against a Christmas tree’s dark green needles. For added sparkle, sprinkle glitter on the pinecones while the paint is still wet. Once the paint has dried, make a loop with ribbon or twine to add to the top of the pinecone. Or, if you don’t want to hang them, you can instead place the painted pinecones in a decorative bowl to display as a centrepiece.
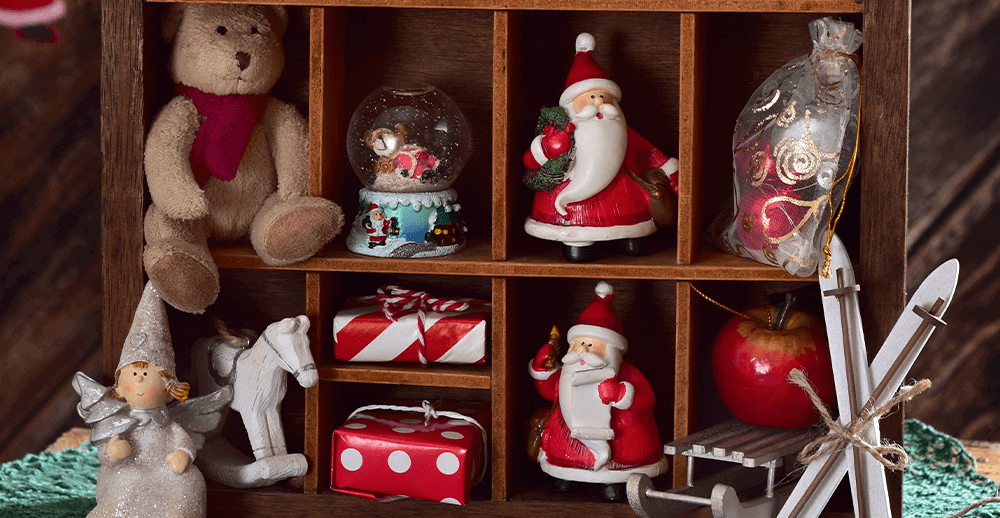
Vintage Ornament Shadow Box
Do you have vintage ornaments passed down from family members or a collection of your own favourite childhood ornaments? Consider displaying these special heirlooms in a shadow box!
Line the backing of the shadow box with fabric or even wrapping paper. Then, stick the bulbs onto the backing using double-sided adhesive pads. We get it—sometimes you run out of space on your tree and have to be selective with your ornaments, so this holiday decorating idea is one solution for displaying them!

Hanging Branch Centrepiece
Save table space by thinking vertically! To create a hanging branch centrepiece, find a long branch that has multiple twigs. Decorate the branch with fairy lights, then hang it using fishing line attached to ceiling hooks. Make sure there’s enough room between your table and the branch for you to add some hanging ornaments. Once the branch is secured, add a few ornaments to it.
Crafting your own ornaments is a great way to get in the holiday spirit! DIY holiday decorations make great gifts, too, so be sure to make a few extra to give away this season.
Fresh evergreen decor has the amazing double impact of visual beauty and nostalgic aroma, bringing back old holiday memories each time you walk past and catch a whiff of its invigorating pine scent. For those with a knack for crafts and creative designs, making your own DIY decor is such a fun way to add a personal touch to your winter holiday decor. You can pick a theme or a colour scheme and then customize all your decorations accordingly, for a picture-perfect look that would put Chip and Joanna Gaines to shame.
Here are some creative ideas and tips for using evergreen cuttings in your DIY holiday decor projects. Let’s get ready to deck some halls!

The Best Greenery for Wreaths
Wreaths are pretty much the quintessential winter decor piece for indoors and outdoors, with endless ways to customize the look and add beautiful accents. But, depending on the kind of look you want to achieve and where you’re planning on hanging the wreath, you’ll need to choose the right type of greenery, or else you could end up with a brown wreath that drops needles faster than ‘90s pop stars drop their Christmas albums.
We recommend using either cedar or Fraser fir cuttings for indoor wreaths, as they are very heat-tolerant and won’t turn brown if placed near a warm vent. Cedar has an exceptionally potent citrus-like scent that we can’t get enough of! We also love the look of fresh or dried eucalyptus for more modern, minimalist wreaths—especially if you want to keep them up well past December.

Outdoor wreaths require cold-hardy cuttings like juniper, pine, or spruce. Juniper is quite distinctive, as it has little blue berries all over it, but you’ll want to take care when handling it, as its needles are pretty pointy. Spruce is similarly sharp, so some protective gloves are a good idea! Pine is a bit more on the delicate side, so it isn’t as great for holding heavy ornaments, but its long needles and wispy, shaggy appearance is very in style.
If you prefer the look of a leafy wreath instead of one that’s covered in little green needles, try making a boxwood wreath! The little loonie-shaped leaves of this adorable evergreen can even be preserved in glycerin if you’d like to keep it for longer than a few weeks.
How to Decorate Outdoor Pots for Christmas
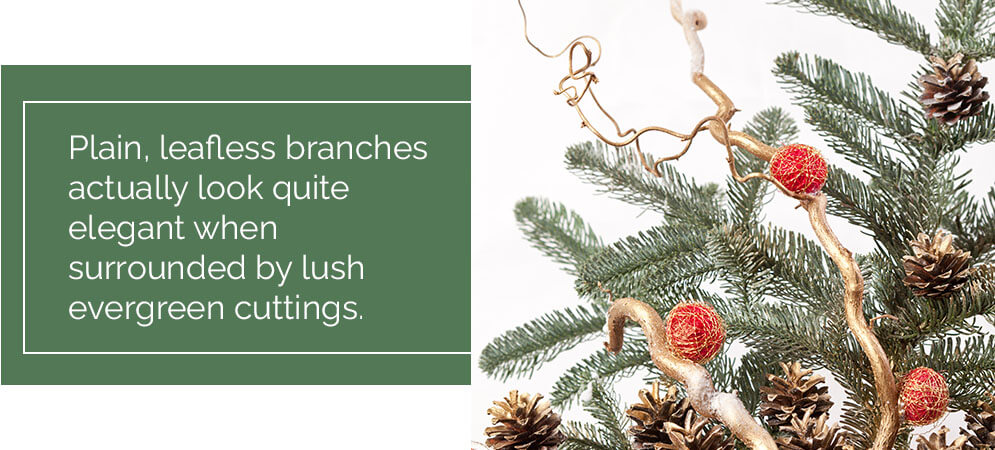
Outdoor Christmas potted arrangements are the perfect way to boost winter curb appeal and make your home’s entrance look warm and welcoming. When curating arrangements for your Christmas pots, use the same kind of design formula as you would with a live container arrangement: use tall, upright branches and cuttings for the center or back of the pot for the best visibility, add shaggier, trailing cuttings around the edges to spill out down the sides. Then, fill up the gaps in the middle with more mounded plants or cute holiday accents!
Plain, leafless branches actually look quite elegant when surrounded by lush evergreen cuttings, and they add a cool architectural effect. Bright red dogwood branches add a festive pop of colour, and thicker birch branches have more of a rustic vibe.
You can get extra creative when it comes to choosing decorative add-ons and accents! Shiny ribbons and glassy ornaments bring that classic opulent holiday spirit, whereas natural accents like lotus seed pods, berries and pinecones look more woodsy and lush. We’ve got it all at Eising, so come browse our full selection of decorations to get some inspiration!
4 Creative Ideas for Evergreen Decor
Looking for something a little different than the classic wreaths and garlands? Try out some of these cute DIY decorations for the winter season.
Fresh Evergreen Swags
Big, dramatic door swags are such a fun alternative to wreaths, and you don’t have to be as careful about making sure everything is perfectly in place. The more shaggy and voluminous, the better! Swags look best when there’s a large, decorative accent as the main focal point at the top, with long tails of evergreen cuttings hanging down from under it. Ribbons and pinecones are the most common topper for door swags, but lately we’ve really been loving the look of silk flowers instead, for an elegant, feminine touch.

Kissing Balls
These adorable hanging balls or meant to be dangled from door frames in lieu of the traditional cutting of mistletoe. First, start with a potato! Attach a loop of twine to a screw and twist it into the potato to anchor it in. Then, stick in a bunch of boxwood sprigs all over so the spud is completely covered, and then trim it so it’s a perfect sphere. Add little accents like berries or ribbons. Finally, hook the loop over your doorway to hang the decoration. The moisture from the potato will help keep the leaves alive longer!
Gift Tags
For a lovely special touch to top off each of the presents under the tree, attach little cuttings onto the gift tags with a piece of twine or ribbon. It’s the easiest way to take a wrapped gift from simple to sensational!

Mini Wreath Mobiles
Instead of one large wreath, make several small wreaths that vary slightly in size, and suspend them from a large branch or piece of driftwood. Hang it on the wall for a cute, boho decor piece that’s sure to garner many compliments!
Eager to blast some holiday tunes and start decorating? Eising has all sorts of cuttings and winter plants available now for your DIY evergreen decor projects, so visit the shop soon to snatch some up while supplies last!
If you’ve got a newly planted tree, or perhaps some more delicate trees and shrubs that are sensitive to frost and winter burn, it’s a good idea to provide them with some protection from the elements during the coldest months. Cold damage can lead to some pretty unsightly results, and it can potentially limit growth the following spring. Here’s everything you need to know about protecting trees and shrubs from the harshest conditions we often face during a cold January in Ontario.
Why Is It Important to Provide Protection for Trees and Shrubs?
Cold temperatures paired with harsh winds aren’t fun to experience without a warm jacket, so you can imagine how it must feel for those poor trees on the coldest days of the year! Evergreen trees and shrubs can get “burnt” from cold winds combined with direct sun, resulting in browned needles and foliage. This is because they’re still releasing moisture from their leaves, but they aren’t getting much moisture back in return since the ground is frozen, so they’re quite susceptible to drying up. So, if you want the evergreens to stay evergreen, you’re gonna need to call in some backup!

Here in Southern Ontario, we love our fruit trees, but these cultivars can be especially sensitive to the cold. Fluctuations between cold and warm can also confuse the tree and cause it to fall out of sync with its natural acclimatization, which can weaken its defences against cold.
If you have any evergreen trees or shrubs that are close to the road, it’s especially important to wrap them up to protect them from salt spray.
Cold damage on trees, such as cracking bark, root injury, or trunk splitting, often isn’t apparent until temperatures rise again, so you may not even realize your trees are injured until it’s well into the growing season. Projections show that we’re in for a pretty cold January this year, so if we want to ensure good fruit production for 2021, it’s a good idea to take the time to protect your fruit trees.
How to Protect Trees from Cold Weather
The simplest way to protect trees and shrubs from the cold is through wrapping. Simple burlap secured with twine is a common solution, but you can also purchase special thermal tree wraps that are made to hold up all through the season, through rain, snow, and blustery winds. Putting up a windbreak can also help to ease the harshness of the wind, especially if you have a sprawling property with no fence or few trees.
Young trees are also at risk for having their bark gnawed off by hungry mice and rabbits from December onward, when available food sources are scarce. Purchase tree guards to wrap around the trunks, as this will help to protect the bark and provide a little extra insulation. Opt for a solid wrap, not a netted one, as small rodents can pass through the holes easily. Wrapping shrubs with fabric or “shrub jackets” can also help to prevent hungry deer from chowing down.

Applying a layer of mulch across the soil surface around the bases of your trees and shrubs will help to further insulate the roots and regulate temperature, which is especially helpful when the weather is fluctuating between warm and cold. We recommend using a natural mulch, like shredded pine bark that’s free from artificial dyes. Be sure you don’t pile the mulch up in a mound around the base of the plant, as this can encourage bacterial growth. Just spread an even layer of a few inches, and you’ll be good to go.
If you have any evergreen trees or shrubs that are close to the road, it’s especially important to wrap them up to protect them from salt spray. Salt is often sprinkled across the road to help melt snow and improve traction, but it can severely burn our plants.
When Should I Wrap My Trees for Winter?
While cold tolerance tends to vary quite a bit between plant species, generally, it’s a good idea to start bringing in some protective measures once temperatures are hovering around 0–4°C. Wrap your trees up before they get covered in ice and snow, and apply some mulch before the ground freezes up.
For your trees that aren’t wrapped and remain exposed, you don’t necessarily have to remove the piled up snow from their branches, unless it’s a huge amount of snow or the branches are newer and more delicate. Don’t try to remove frozen ice from branches, as this can often lead to more harm than good.
If you have any questions or concerns about protecting newly planted trees and shrubs, or if you have landscape plants that have endured previous cold damage, don’t hesitate to get in touch with our experts here at Eising! We’re always happy to help.
As always, we have home delivery and curbside pickup options available for any tools, supplies, or new plants you may need over the holidays, so feel free to pick up the phone and place an order!
So many of the best small shrubs for autumn colour in Southern Ontario are available here at Eising! Folks are quick to assume that spring is the ideal time for planting, but autumn conditions are great for new landscape transplants because the soil is warm, the sunshine is mild, and the rainfall is steady. Savour those last few months of outdoor entertaining, and plant some fall bushes to add spectacular colour to the landscape! Bundling up with an extra sweater is so worth it when you get to enjoy scenery this beautiful.
7 Fall Shrubs to Plant Now
There are fewer sights lovelier than a yard full of gold, orange and red bushes in fall. Toss in some blue and purple berries that attract local wild birds, and even a few late-season blooms to draw in butterflies and bees, and you’ve got a perfectly picturesque landscape to end off the year. Plant these bushes in the fall for an instant pop of bold landscape colour, followed by some gorgeous flowers in spring or summer!
"The clusters of berries that it produces in fall are such a bright shade of purple, they almost don’t even look real!"
Oakleaf Hydrangea
This hardy hydrangea has lobed leaves just like an oak tree, and in October, their jade-green leaves turn fiery shades of orange, red, gold, and purple. Their blossoms, which grow in panicles similar to lilacs, actually appear in late summer, and in early fall, they begin to turn pink, so this hydrangea really doubles down on the fall colour! Plant them in full sun to partial shade, and keep their soil consistently moist but not soggy.

Spirea
There are many different spirea varieties—some are spring-blooming, while others are summer-blooming—but they always have incredible foliage in fall. Depending on your chosen cultivar, the leaves may turn bright gold or ruby red, and sometimes mid-transition, when some of the leaves have still kept their green, it looks like a rainbow tie-dye explosion! Full sun or partial shade is ideal, and well-draining soil is a must.
Viburnum
While they’re known for their sweet and spicy fragrance and voluminous clusters of blossoms, viburnums put on an incredible show in fall! Their leaves change colour and produce bright clusters of berries in contrasting colours that make for quite the spectacle. Some have burgundy leaves and electric blue berries; others have golden orange leaves and bright red berries. Full sun is best, but some viburnums may tolerate partial shade.

Beautyberry
It’s no surprise why this colourful bush got its name. The clusters of berries that it produces in fall are such a bright shade of purple, they almost don’t even look real! You’d think only Crayola could produce a colour like that, but Mother Nature is pretty amazing. Full sun and partial shade both suit this shrub fine, and moist, rich soil full of compost or organic matter will help it grow. Applying a layer of bark mulch will help to conserve soil moisture.
Chokecherry
Chokecherries can either be grown as shrubs or small trees, with leaves that transition into one of many fall colours, like yellow, orange, red, or a particularly stunning dark purple. Their berries shift in tones from orange to red, purple, and nearly black, attracting plenty of hungry birds preparing for winter. The berries are edible to us, as well—however, you must take care to remove the stems and seeds without crushing them, as they contain toxic compounds. The fleshy fruit is safe to eat and is commonly used for tasty fall jams and homemade wine.

Highbush Blueberry
Blueberries are some of the healthiest foods in existence, as they’re jam-packed with antioxidants, polyphenols, and vitamins to keep us looking and feeling our best. Though, we gotta say, the highbush blueberry looks the best in fall, with some of the most vibrant leaves you could ever imagine! This extremely cold-hardy plant does best in full sun and partial shade and requires a moderate amount of water.
Fragrant Sumac
Not to be confused with poison sumac, this ornamental (and completely safe) autumn shrubbery begins the season with bright yellow-green leaves, which transition to blazing tones of orange and red. When you crush their leaves, they give off a really lovely citrus scent. Rub it on the inside of your wrists for a little natural perfume! It can handle pretty much any sunlight level, from full sun to full shade. In springtime, it will greet you with cute yellow flowers.
Ready to give your yard an autumn makeover? Visit Eising to see the fabulous fall plants that are ready to go home. We’ve got curbside pickup and home delivery options available if needed, so feel free to give us a call at the store to make special arrangements. If you need any help transplanting your new plants into the ground, contact our landscaping services department. We’re happy to help!
We love choosing what bulbs to plant in autumn—there’s something exciting about designing your spring garden and waiting for all those colourful flowers to emerge at the first signs of warmer weather. But have you ever wondered why bulbs need to be planted so many months in advance?
Planting flower bulbs at the wrong time can stunt their growth or inhibit blooming altogether, so understanding the science behind it can help to ensure your spring garden is successful. Here’s a breakdown of why spring-flowering bulbs need to stay in the ground over the winter, and how to get the best results from planting.

When Should I Plant Spring-Blooming Bulbs?
Flower bulbs that bloom in spring are naturally accustomed to staying in the ground over the winter. This cold period is essential to kickstarting their bloom cycle—the cold is like a period of hibernation, and once the temperature begins to rise, this signals to the bulb that it’s time to start growing! Without the transition from cold to warm, your flower bulbs will get confused and won’t develop properly.
While the bulb is hanging out in the soil for several months, this also gives them an opportunity to soak up tons of nutrients from the soil, so they’re ready to spring into action as soon as it’s warm out. This is why it’s always a good idea to mix in lots of compost and remove any weeds from the soil, so your bulbs take in all that extra good stuff, and the weeds won’t end up hogging all the resources.
Ideally, you’ll want to plant your bulbs about 6 weeks before the ground is about to freeze up. Since our weather can be a bit unpredictable in autumn, wait until the temperatures consistently hover around 5-10°C. These are comfortable conditions for your flower bulbs to go in the ground.

Tips for Planting Flower Bulbs
There’s a bit more to planting flower bulbs than simply digging a hole and tossing them in, so follow these basic guidelines to make sure they’re planted properly:
- Choose a spot that gets at least 6 hours of direct sunlight every day. This will help your flowers bloom brightly.
- Plant them with the pointy side facing upward.
- Check the directions on the packaging to see the correct planting depth. Planting them too deeply can result in lots of leaves, but no flowers. Smaller bulbs usually only need to be planted about 4 inches deep, but larger bulbs like daffodils may need closer to 6–8 inches.
- Consider applying a layer of mulch to help block out weeds and regulate the soil temperature.
- Don’t add any fertilizer to the soil until spring, when you see the first signs of sprouting. Fertilizer just confuses plants in the fall and winter while they’re supposed to be resting, so hold off on using any and just stick with compost for building up soil nutrients.

What Bulbs are Planted in Fall?
For instant spring colour as soon as the snow melts and the temperature rises, grab some of these spring-blooming bulbs to plant in fall in Ontario that we carry here at Eising:
- Tulip
- Daffodil
- Crocus
- Iris
- Allium
- Hyacinth
- Snowdrops
- Garlic
Ready to start designing your spring garden? We’d love to help! Visit Eising, and we’ll show you our incredible collection of the best spring bulbs to plant now, in every beautiful colour imaginable!