
With all the extra time we've been spending indoors, now is a good time to start collecting air-cleaning houseplants. Many of us are craving some fresh spring air, but these natural air purifiers are the next best thing. We often underestimate just how powerful our plants can be — after all, they look like they're just sitting there. In fact, they're constantly in a cycle of soaking up carbon dioxide, airborne pollutants, and toxic compounds like carbon monoxide and turning it into fresh oxygen for us to breathe.
If all this time inside is making you feel a bit groggy or stuffed up, you'll definitely want to check out these five ultra-efficient air-cleaning houseplants—and we carry them all at our garden centre in Simcoe!
5 Air Cleaning Houseplants For A Healthier Home
Houseplants aren't just lovely to look at; they're like full-time cleaning staff who work in exchange for a little water and sunlight. NASA actually relies on air-cleaning houseplants for maintaining the air quality on their space shuttles! If the air in your home has been smelling less-than-fresh, snag some of these specimens for your home:
Spider Plant: This stringy, stripey plant is always a favourite — after all, it's pretty cool when your houseplant keeps sprouting new baby plants over and over again! By keeping your spider plant in a smaller container, it will be compelled to reproduce, resulting in tiny little plants. You can pluck and transplant these seedlings into bigger pots where they will grow into whole plants. Before you know it, you'll have tons of miniature spider plants to place all around the house for maximum purification power!
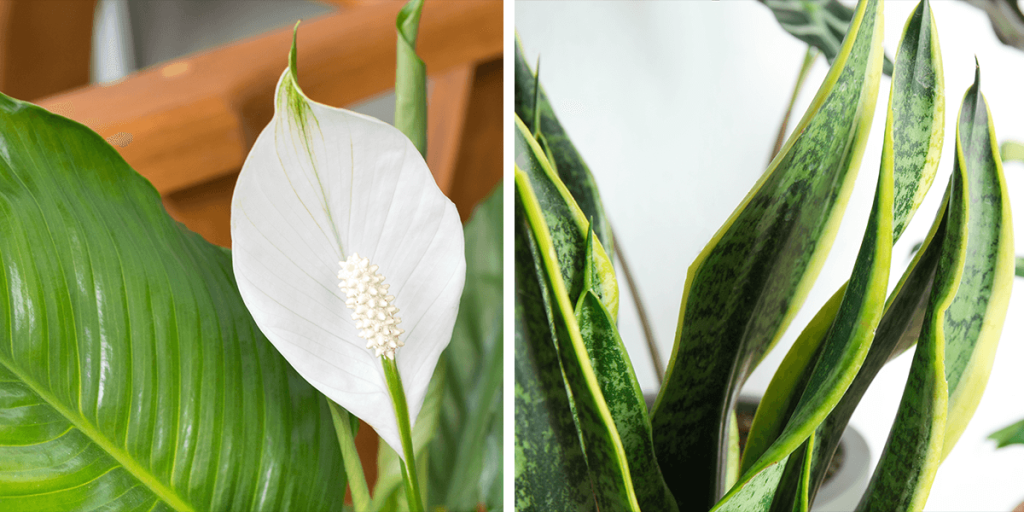
Peace Lily: There's something so elegant and pure about this houseplant, with its clean, white, single-petalled blooms. It looks like it jumped right off the canvas of a Georgia O'Keefe painting! The Peace Lily is also a wizard at making toxins disappear, filtering out harmful chemicals like formaldehyde and benzene. It also doesn't need very much sunlight, so if you don't have too many windows in your house, you can still easily grow this lovely flower indoors.
Snake Plant: This distinctive houseplant has recently seen a massive surge in popularity. Snake Plants, or Sansevieria, are some of the easiest plants to care for, and it's a total powerhouse when it comes to filtering the air. You can find some impressively large snake plants, but their flat, wavy leaves grow perfectly upright, so they don't take up too much room. You also won't need to water it very often— it doesn't enjoy soggy soil, and it really won't mind if you neglect it a bit.
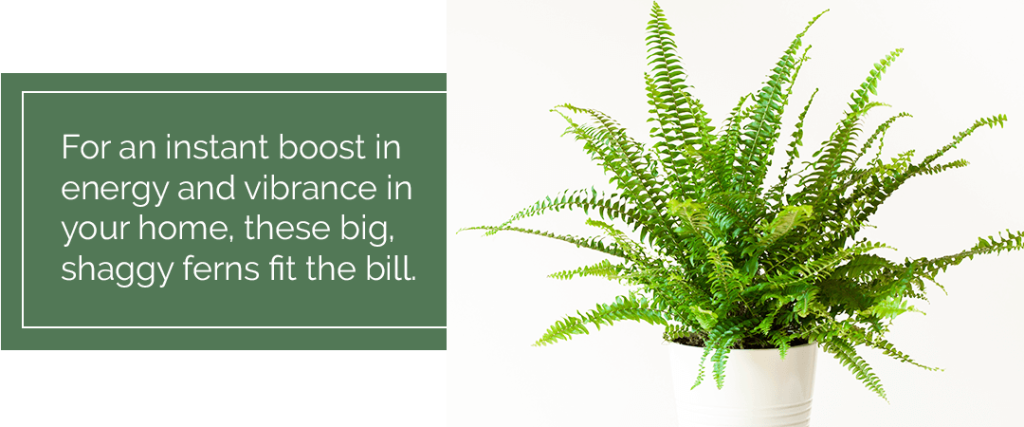
Boston Fern: For an instant boost in energy and vibrance in your home, these big, shaggy ferns fit the bill. They look fabulous in hanging baskets, but they're also great on pedestals and floating shelves, so their long leaves can trail elegantly downward. The sheer number of leaves on this colossal fern makes it one of the most effective air cleaning houseplants around, so it's sure to breathe new life into your home's interior. They do prefer a bit of humidity, so if the air is a bit dry in your home, it will help to mist the plant daily or plug in a humidifier.
Chinese Evergreen: There are so many different varieties of this wide-leafed houseplant — some have emerald green leaves with speckles of silver, some have cream coloured stripes, and others have vibrant red accents. Also known as the aglaonema, this much-loved houseplant will keep the air feeling clear and funk-free. Water it generously every week or two, making sure that the soil is loose and fast-draining, and the container has adequate drainage holes.

You'll be amazed at the difference these air-cleaning houseplants make within your four walls! Something about fresh oxygen and lush, green houseplants wakes up the brain and gives your mood an instant boost. Looking to pick up some more houseplants to go along with these air-purifying powerhouses? Give us a call at our garden centre! We're happy to process your order over the phone and arrange for contact-free curbside pickup.
Christmas in Simcoe wouldn't be the same without fresh greenery and beautiful holiday plants, and the Christmas cactus is undoubtedly one of the most iconic. They make gorgeous additions to your home decor, brightening things up throughout the rest of those cold winter months. They also make fantastic gifts that are very unlikely to get returned to the store—after all, who doesn't love new houseplants? Here's a rundown of how to care for your favourite Christmas flowers and plants, for a winter season that's extra merry and bright!
The Christmas Cactus And Other Holiday Plants
These colourful cacti remain popular picks year after year, not only because of their fabulous floral displays but because they're quite hardy. With proper care, they can last for many years. The most common variety has bright red flowers, but you can also find purple, pink, white, and even gold flowering cacti!
To keep their flowers lush and bright, keep your cactus near a sunny window and water it whenever the soil gets dry, about once per week. Don't worry if the windowsill is a bit chilly—these cacti may actually drop their blooms if it gets too warm. If you'd like it to bloom for a second year, fertilize it once a month from April until October, and put it outside for a few weeks at the end of the summer. They prefer to be cozy in their pot, so you won't have to worry about repotting them for several years.
Our Other Favourite Christmas Plants
Poinsettia: These quintessential winter flowers never fail to add an extra dose of holiday cheer to your home decor. You can find poinsettias in stunning shades of cardinal red, creamy white, and soft pink. When it comes time to pick one out, always make sure they've got tiny little yellow flowers in their centre. These are called cyathia, and if they've dropped from your poinsettia, that means it's well past its prime. When you take it home, make sure you cover it to protect it from the cold. Overwatering can cause poinsettias to wilt, so it helps to poke some holes in the bottom if it's in a pot wrapped in decorative foil.

Amaryllis: These fast-growing bulbs are so much fun to watch as they grow and develop. Their bulbs make great stocking stuffers, maturing within 4 to 6 weeks after planting. Keep them near a sunny window, because if they don't get enough light, they'll start to wilt. Give the pot a 90 degree turn each time you water it, so your amaryllis grows nice and evenly. Contrary to popular belief, you can keep your amaryllis for another year with proper care. Once the blossoms fade, you can snip off the stalk, keeping the leaves intact, then wait until spring to plant your amaryllis outside. By summer, you can bring it inside with no light or sunshine from June until the end of October. Start watering it again in November, and get ready for round 2 of beautiful blooms!
Christmas Rose: Also known as the black hellebore, this lovely evergreen flower looks quite similar to the buttercup, only white. They're incredibly low-maintenance and last quite a long time if you cut them and add them into mixed arrangements. Indirect sunlight and a bit of water should keep your hellebores happy. They usually bloom in December, but they may surprise you with blossoms from any time between November and February. Be careful when removing any dead leaves, because the sap will irritate your skin.
White Chrysanthemums: Often considered a fall flower, the snow-white variety of these bushy blossoms are perfectly suited to the winter season. Chrysanthemums look fabulous on their own in a pot or added into a festive container arrangement. They need at least 5 hours of direct sun every day and weekly watering. They're generally quite easy to care for, but if you happen to notice any spider mites pop up on the underside of their leaves, give them a spritz with some insecticidal soap, and your mum should recover just fine.

Cyclamen: These vibrant blossoms can last as long as eight weeks during the chilly winter months. They like indirect sunlight — not too bright — and they need to be watered from the base, unlike most houseplants. It should come in a pot with several holes in the bottom, which you can place in a saucer of water for 20 minutes at a time to soak up the moisture. Try not to get any water on the leaves, keep it away from warm drafts or space heaters, and when the flowers start to wilt, pluck them off from the base of their stems.
Rosemary: These fragrant herbs actually make great holiday plants! Not only are the delicious rosemary sprigs perfect for flavouring traditional dishes like roast beef and turkey, but the plants can be shaped like topiaries or mini trees with some artful pruning. Rosemary, like many other culinary herbs, is more cold tolerant than many houseplants, so they're perfect for adding a little greenery to your home and an extra pop of flavour to your recipes.
For all your Christmas plants and winter evergreen decor, visit Eising's, and we'll help you put together a grand display for your home. We've also got plenty of DIY workshops going on this season to help you create some gorgeous arrangements of your own. Call our store to reserve your spot!
There might not be a better flavour of summer than the perfectly ripe garden tomato. Picked straight from the garden, a fresh tomato lets you taste summer’s sunshine with each bite.
Tomatoes are incredibly popular garden plants, thanks in part to the staggering difference between homegrown and supermarket varieties. As much as the flavour and nutritional content of garden-grown produce have a clear advantage, we also think that the sheer variety of options is part of the tomato’s success. With so many choices, there’s something to fit everyone’s lifestyle, taste, and garden style, and with such a simple growing formula it’s easy to come out with a great harvest. Here are our tips on how to take your homegrown tomatoes to the next level.
Planting Tomatoes Made Simple
Tomatoes are easy-to-grow plants, but a bit of knowledge makes the difference between a mediocre harvest and an amazing one. The first task in planting your tomatoes is to choose your type. Tomatoes are normally categorized as determinate (bushy types that don’t require much pruning, stalking, or maintenance) and indeterminate (unruly plants that require a little more care but produce more fruit). You also have choices in size from small and sweet snacking cherry tomatoes to large, beefy tomatoes for slicing onto sandwiches and burgers.
Choose plants that are robust and stocky, not ones that have grown lanky. This is true whether you grow your own from seed or buy from the store; you’ll want to start your garden with only the best plants.
Choose a spot in the garden with full sun exposure. Tomatoes thrive on heat and will give you tastier fruits the warmer they are all season, so full exposure to sunlight (without too much exposure to winds) is perfect. Plant in well-draining soil to prevent root rot, but consider layering some mulch on top once you plant to lock moisture and heat in.
When you plant, you can plant part of the stem in the ground to grow roots, too. This is a great way to save any plants that might have stretched and gotten lanky while you waited to plant. Any part of the stem planted underground will grow roots, so take off the leaves and plant about a third of the stem in the ground.

Some Garden Classics
Choosing a type from all of the different and new tomato varieties can be daunting, but we’ve narrowed it down with a few of our favourites to grow in our own gardens.
For great determinate varieties that taste great with little intervention from you. We love the Tumbler and Roma varieties. These produce great flavour and lots of harvest without too much intervention from you, making them an ideal low-stress option.
If you like to put a bit more of a personal touch and love and care into your garden, though, indeterminates are a good choice. For most tomatoes, the flavour, quality, and quantity of tomatoes in indeterminate varieties can’t be matched. For those craving big, delicious, plump tomatoes, Beefmaster is a great choice. Early Girl offers the best of everything in a medium size, reaching maturity early in the season. For those looking for a sweet snacking tomato, though, look no further than Sweet Million.
Heirloom tomatoes are the choice for the traditionalist that wants something unique in their garden. There are many delicious and creatively-coloured tomatoes, like Green Zebra and Black Krim, that will have your dinner plate dressed up with natural beauty.
Growing top tomatoes in your garden isn’t difficult, and the rewards are so delicious that it’s hard to see why you wouldn’t want to grow your own. With so many tasty choices, there’s a tomato that’s suited for anyone and everyone’s space. The only challenge will be getting the tomatoes to the kitchen before eating them all off the vine!
Succulents are undoubtedly the must-have houseplant of 2019, and with good reason: they’re easy to look after and their vivid, spiralling foliage is seriously eye-catching. They have a distinctive appearance that adds some personality to your home décor without looking too garish or flashy, so they’ll complement whatever aesthetic you’re going for.
With hundreds of varieties to choose from, you may find it tricky to settle on just one (or three, or five…) so peruse through this list of popular succulent houseplants to find some that suit your style!
Our Favourite Small Succulents for Indoors
Placing potted succulents onto bookshelves, coffee tables, or work desks will instantly brighten up the energy in a room with little effort. These are our favourite picks for placing in indoor containers:
Burro’s Tail: This funky, little plant has long, spiralling ropes of foliage with plump, little leaves that kind of look like green grapes from afar. They start out small, but as they grow, they can actually get pretty long, spilling out from their container in a cascade of greenery.
Flaming Katy: This particular variety of succulent comes by its name honestly– its neon flowers are total showstoppers. It’s also one of the best plants for air purification, helping to filter out toxins like methane and formaldehyde.
Jade Plant: Practitioners of the Chinese art of Feng Shui will tell you that the jade plant is heralded for bringing forth good luck and prosperity. That’s how it earned its nickname, the money tree! The leaves are vivid emerald green, and sometimes in the autumn, they’ll surprise you with tiny pink star-shaped blossoms.
Roseum: As the name suggests, this succulent has overlapping petal-like leaves that resemble a rose. Some roseum succulents have a pretty, pink border along the edges of their lime green leaves, adding a sweet, feminine flair.
Snake Plant: This striped plant with its spiky vertical leaves might not look like a succulent at first glance, but it’s one of the most popular options for indoors because it requires very little light, making it great for small offices or bathrooms.
Great Options for an Outdoor Succulent Garden
Succulents make for great ground cover in large gardens with a variety of different plants, but a garden made entirely from succulents can be pretty spectacular too. Check out these succulents that thrive in outdoor conditions:
Dudleya: This grey-green succulent has a muted, chalky tone that adds some softness to your garden, and can live up to a century old if taken care of properly (which isn’t too hard to do, as they are famously low-maintenance).
Plush Plant: Also known as the Red Echeveria, this Mexico native features green leaves with a deep red border and fabulous orange-gold flowers that are wildly popular among hummingbirds and pollinators.
Sunburst: This absolute beauty produces simple, white blossoms in the summer, but its leaves really bring the wow-factor. Green, yellow, and white with a subtle red trim, they add a little burst of rainbow colour to your succulent garden.
Torch Plant: Many folks are quick to assume that succulents are typically small in size, but the torch plant is anything but petite. This behemoth of a succulent can reach up to 10 feet tall, with blazing orange summer blooms and spiny leaves that deepen in colour the sunnier it gets.
Hens-and-Chicks: These adorable, little succulents do pretty well both indoors and outdoors, but we particularly love the look of a mass of hens-and-chicks all clustered together in a garden. They tend to reproduce at a pretty speedy rate, so if you enjoy gifting baby plants to friends and family, you’ll get a kick out of this one.
Sedum: This über-trendy groundcover plant comes in so many different colour varieties with blossoms of all shapes and sizes. Also known as stonecrop, this fleshy-leafed plant is hardy and resilient, sometimes creeping its way up walls and stones. We particularly love the blue spruce sedum, with its blue-green leaves that surprise us with a hot pink stem that bursts forth every summer, producing a lemon-yellow blossom on top.
How to Care for Succulents
While these delightfully fuss-free plants don’t need much to keep them happy, there’s still a few things to keep in mind when caring for your succulents:
Most of them prefer lots of sunlight. While there’s the odd succulent here and there that won’t mind a bit of shade, as is the case with the snake plant, your typical succulent is going to want a decent amount of direct sunlight. Try to keep your indoor plants near a south-facing window, and your outdoor plants in a spot that isn’t too shaded.
Water the soil, not the leaves. Watering around the plant so it goes directly to the roots will help prevent rotting. Make sure to let that soil dry out between watering, too, because too much moisture is just as bad as too little.
When leaves start to dry up and wither, carefully pick them off with tweezers. Don’t be alarmed if you notice some leaves starting to get dry— this is just part of its natural growing process.
Succulents are fantastic houseplants for beginners and seasoned experts alike, so why not treat yourself to some succulents today? Keep in mind, collecting these adorable little waxy-leafed plants can become pretty addicting - don’t say we didn’t warn you!
After a winter like the one we had, we’re all ready and eagerly anticipating the spring, when our favorite blooms and a little greenery will finally take over from the dreary and dark winter days. There’s something special about the optimism of spring and all of the bright and clean colours that it brings with it - we can’t help but smile when we see the first buds and blooms poking their heads out to brave the spring weather. Here are some of our favourite seasonal blooms and how you can get them in your own yard:
Spring Flowers
These flowers, either planted as starters or grown from seed, are some of the traditional classics that we can’t get enough of. There’s a reason that these flowers have been endlessly popular and iconic for decades, and we’re not ones to knock a formula that’s working. Try one of these in a traditional look, or pick up a new variety that offers a fun and stylish spin on and old favourite:
Carnations are a frilly and delicate-looking flower that are simple to grow and offer endless choices with hundreds of varieties to choose from. Long lasting in vases, growing them outside and taking a little bit indoors to be appreciated is recommended in the spring when we are ready to absorb as much colour as we can! If protected against hard weather, you can enjoy your carnations well into the fall. They can be grown from seed, sown into well-draining soil, but also can be started from cuttings or propagated from mature plants. Tough, yet pretty, you can start growing these as soon as your last frost date is passed as they do best in the milder temperatures of spring.
Hydrangeas are best started from a starter plant or a cutting, but once they are established their old-fashioned charm is enough to keep you wanting more - thankfully, these perennials will be back to bloom again in the spring as long as you protect them during the cold winter months! These are the perfect bloom for gardeners that want a lot of style and punch for their effort because they are easy to grow and manage, while producing delightful bunches of blooms. While traditional colours focus on shades of pink and blue, there are now lots of options that include white, lavender, and purple. For the garden chemists out there, you can even experiment to change the colour of some types of hydrangeas from pink to blue with some soil pH tinkering. Tolerant of many conditions and often thriving the more you ignore them these flowers are a pretty statement in your garden, in a vase inside, or even dried. You’ll be excited for spring every year with these pretty blooms in your yard.

Snapdragons are a bold statement flower with towering spikes of blooms that add interest and sweet fragrance to your yard. These blooms are a late spring and early summer treat that are worth the anticipation all spring. These flowers offer a unique look to your garden, but with endless choices when it comes to colour and height they are a fully customizable look. We love them as accents or in borders, but we also love taking cuttings and bringing them inside to enjoy, too. Although your snapdragons will stop blooming during the hottest days of the summer, you’ll be thrilled to find them blooming again in the fall before they freeze. Start these pretty blooms from seed indoors now to have seedlings that are ready to move outside in the spring. Plant the hardened-off seedlings outdoors with lots of room (6 to 12 inches between plants) to grow, in an area with full sun and rich, well draining soil. Remove the flower spikes - we recommend cutting them for bouquets - to encourage your snapdragons to keep blooming as long as possible, giving your the benefit of a long-lasting and impressive show.
Spring Bulbs
Many of our classic garden favourites are actually bulbs! These are the ultimate plant-it-then-forget it blooms that you can plant in the fall, chill in the ground over the winter, and they will be ready to shine before the rest of your garden is even ready to plant. A lot of spring traditional favourites, these bulbs can be planted in the fall for an easy and simple show in the following spring. If you didn’t get to planting bulbs this past fall? You can always try again this year, or try planting bulbs that have been pre-chilled at the perfect temperature to mimic winter, ready to be planted in your thawed garden for a display of colour this season.

Tulips are arguably one of the most classic signs of spring, perhaps tied with the other classic bulb - the daffodil. Tulips have been a popular sensation for centuries and we have all of those years of growing to thank for their wide variety of colours and styles. Choose a sunny location with well-draining soil for the best and brightest tulips. These bulbs are like a painting in your backyard and make excellent cut flowers for a spring bouquet. Many tulip varieties will only give you triumphant cups of joy for a few years, so replant some fresh bulbs every fall to avoid disappointment in the spring.
Daffodils are like droplets of sunshine in your garden, just in time for when the weather is warm enough to actually get out and enjoy their cheerful yellow colour. That said, new innovations in daffodils have a whole roster of other non-yellow shades and unique shapes to choose from so that your daffodil garden is truly customizable to your tastes. These flowers are always sure to put us in a mood for spring. Plant them in partial to full sun to have them reach their full potential. These plants are tough and long lasting, so your investment in a single fall planting could last for up to multiple decades! That’s a lot of springtimes full of joy and colour.
Hyacinths are a great opportunity for a little bit of cooler-tone colour in your springtime garden, especially next to the bold and daring shades of daffodils and many tulips. These flowers offer clusters of blooms that smell just as fabulous as they look. We love to plant these in full-sun spots that have high traffic so that we get to enjoy the full sensory experience of them, not just their look. Just be sure to wear gloves when working with them as their sap can be an irritant.

Spring weather just makes us want to get outside and enjoy the milder temperatures and sunshine, but what better way to make our gardens incredibly enticing than a batch of fresh spring colour? Whether you want to plant something now to enjoy it for a season or plant something long lasting for years of seasonal blooms, spring is the perfect time to embrace life and colour right in our own homes.
After a tough winter like this one, there’s nothing that lifts the spirits and brings a smile to your face like bright spring blooms poking out of your newly thawed landscape.
Spring bulbs are some of the first flowers to appear in the spring, making them great additions to your landscape and flower beds to bring you a bit of colour and cheer as soon as possible in the year. Straying from seeds might seem a little intimidating for some people, but planting actually doesn’t get much simpler than “plant-it-then-forget-it” bulbs.
Spring Bulbs
Spring bulbs bring us some of our favorite seasonal looks that simply can’t be replicated with any other flowers, and their head start in the soil at the beginning of the season gives them an early jump on spring and other blooms. When the weather just begins to warm up, we’re ready to get out in our gardens and enjoy our landscapes again, and bulbs are the perfect way to take advantage of that spring excitement.
When to Plant Bulbs
Getting to know the basics about your bulbs is the difference between a successful garden and a disappointing beginning to the season. When it comes to bulb types, it’s all about timing.
Spring Blooming Bulbs
Classics like tulips and daffodils actually need some planning ahead for best results, as they need to be planted in the fall. These blooms should be in the ground approximately six weeks before the first frost (planting in late August) so that they can get settled in nicely before the winter chill. They actually need the deep freeze in order to get their beauty sleep and emerge in the spring just as soon as the weather is warm again. Already planted and ready to go, these blooms are great in the spring as they are ready to spring into action before you can get out into the garden to work on planting anything else.

If you didn’t get to planting last fall, though, all hope for spring bulb colour isn’t gone - you can get pre-chilled blooms that were kept the right temperature for hibernation all winter and are ready to be planted in your garden. Don’t worry about the last frost; if you can move the soil you can plant these bulbs outside, and they’ll bloom when weather permits. If the ground is still frozen solid, you can even plant them in a container until the soil is warm enough to start planting.
If you’ve totally missed out on spring bulbs, you don’t have to be sad about missing all of the colour and convenience of these blooms that you plant and forget until later - there’s tons of time to plant summer blooming bulbs in your garden. Beautiful flowers like dahlias, allium, and begonias are perfect for brightening your yard later in the season. Wait for warm soil before you plant these heat lovers, as they aren’t fans of frost and are a bit more delicate.
The Best Bulbs to Choose for a Flower Garden
Not every bulb was created equal, and there are so many options that it can be overwhelming to choose. You’ll be focusing on when to plant and how to plant, but also looking for flowers that compliment each other and give you lasting colour all season. Here are some of our favourite bulbs to see in our own yards in the spring:
- Tulips: These bulbs are beauty in a cup and are beloved classics for a reason. A symbol of spring, they triumphantly announce the arrival of warmer weather with vibrant colours and their iconic shape. Tulips can be picky and have a reputation for being finicky, but if you provide soil with lots of drainage and only water sparingly, you’re likely to have success. Many varieties only last a few years, so you’ll have the chance to refresh your look often! Plant new tulips every fall to make sure that you always have something to enjoy in the spring.
- Hyacinths: For a little bit of a cooler tone in your garden in the spring when the days are still chilly, hyacinths are a perfect addition. These flowers grow in stunning clusters that look and smell fabulous. You’ll love their intoxicating fragrance, which will bring a smile to your face every day. Plant them near high-traffic areas of your garden, like a walkway or a patio, so you can enjoy their scent whenever you step outside. Plant them in full sun to partial sun, and give them well-draining soil for a successful spring bloom.
- Daffodils: With pointed petals and a trumpet shape, these are the stars of spring blooming in many gardens. Like sunshine encapsulated right in your garden, they’re sure to put you in a spring mood. Give them lots of sunlight (only partial shade or full sun) to help them reach their maximum brightness. These tough plants are easy to care for and can last for decades without any maintenance so you can truly plant them and forget about them!

Eising’s Tips for Planting Spring Bulbs
If you’ve only ever planted from seeds or starters, something new can be a little intimidating. There’s no need to worry, though - there are lots of ways to make planting spring bulbs easy!
Pick high-quality bulbs. Check your bulbs before you buy (and plant!) to make sure they’re in good condition to grow. Pick healthy bulbs that are firm and plump, with no visible discolouration or mould spots. Larger bulbs will give you bigger and/or more blooms than smaller ones.
Location, location, location: Choose a good spot for your bulbs to give them the leg up on growing healthy and vibrant. Most flowers like full or partial sun conditions with good drainage, but read their label to be sure you give your bulbs what they need to reach their full potential.
Start with a good foundation. Good soil makes a big difference. Bulbs don’t like wet or damp conditions and will want something that drains well. They’ll also love the boost of fertilization to give them that extra push in the spring. Without a little fuel, the flowers will suffer and not be as bold of a display when it comes time to bloom.
Plant them right. Starting with healthy bulbs and good conditions is a great start, but planting bulbs takes some new skills that gardeners used to seeds and transplants might not have. Plant these bulbs deep enough - typically a hole 3 times as tall as the bulb is - and plant with the pointed side pointing downward.
Caring For Your Spring Bulbs
Many bulbs are simply perennial plants with a slight twist, so they will return with beautiful blooms year after year! While this saves you from getting new plants to replace the ones you love, it does mean that the work isn’t done when the blooms fade. Maintaining your blooms will bring flowers for next year:
- After your spring bulbs are done flowering for the season, cut their stalks down to the ground, but leave the foliage up for a few months. The leaves will still be busy collecting energy and nutrients to fuel the blooms for next year, and you don’t want to create a disappointing spring next year by trimming them back prematurely. As a rule of thumb, wait about 2 months before you trim the leaves back.
- Many perennials need to be divided every three to five years to manage their successful growth. If your plant is producing fewer blooms than usual it’s time to divide. Wait until your plant is dormant and the foliage has dried and died before you divide.
Cold winter days are a little less awful when you know that spring colour is waiting for you on the other side of the season. All your bulbs need is a little bit of planning ahead, and in return, they will fill your garden with cheer all season.
Having a tropical plant in your home is like creating a tiny little oasis of lush greenery that’s with you no matter what life throws at you. Especially after a chilly winter like the one we’ve had, it’s easy to see the appeal of having a leafy green friend inside to help us mentally escape the frostbite-inducing temperatures outside. It’s no wonder how having these green acquaintances in our homes has become so popular - and with your own, you’ll have a little bit of homegrown happiness in your everyday life.
Tropical plants don’t have to be difficult to care for, even though they are so far away from their balmy and sunny homes! We have all the tips to make sure that your new tropical friend is happy, healthy, and ready to flourish in your home. Here’s how to have a tropical getaway inside, no matter how green your thumb is (or isn’t).
How To Take Care of Tropical Plants
The secret to keeping a plant healthy - and alive - is to picture their homeland, and do what you can to replicate those conditions. Your plants might have grown up in a greenhouse but their species has spent a long time adapting to their native territory. Giving them an environment that meets their needs will reduce the work and fussing you have to put in to keep your plant looking fabulous.

For example, while you might try to make sure that a cactus or succulent is kept dry and sunny, your tropicals are going to love some moisture and humidity. In the tropical landscapes most of them come from, water is not in short supply, and while they enjoy some sunlight, many times they’re used to sharing the sun with so many plants and in such high humidity that they prefer indirect or partial light. No plant likes soggy roots, but you’ll generally be watering tropicals regularly and trying to keep the humidity at a nice level - usually not much of a struggle in our neighbourhood of Southern Ontario.
Each tropical plant will have its own care requirements that are unique to that plant so checking the tag or doing a quick search is the best way to make sure that you care is specific to its needs. That said, there are a few rules of thumb that you can stick to:
Watering Tropical Plants
The right amount of moisture can be tricky when you can’t just ask your plant if it’s thirsty! Generally, waiting until your plant is wilting is stressful for your cute leafy friend and should be avoided, so you can test the soil to anticipate when they’ll need a drink. Nobody likes soggy soil and roots, but you won’t want to dry out - tropical plants are a little like Goldilocks in that respect. Too much water will stifle the roots and prevent them from getting crucial oxygen, but too little will leave them parched. There are two great ways to check the moisture of your plant to tell you when to water to keep that level just right:
- Poke your finger into the soil to feel the moisture. This method is so direct you can’t go wrong! Poke a finger into the soil and stop when you feel moisture. Water your plant when you poke the soil and it’s dry up to your first knuckle.
- Go by weight. Water weighs a lot, and your dry container will be a whole lot lighter than a well-watered one. Get used to how much your plant weighs when thirsty and quenched and use this as a guide, too. You can even use both methods at the same time for extra confidence.

More Watering Tips: Some tropicals are quite sensitive, and the salts and minerals dissolved in our tap water can burn their roots, even if they’re safe for us to drink. When you water, keep going until water pours out the drainage holes at the bottom of the container, flushing out any leftover salts from last time you watered. You can even choose to use distilled water to avoid build-up in the soil. When you’re watering use a dish under the plant to catch what flows from the bottom, or for even less mess, relocate your plant to the sink or bathtub to water them, let them drain for a few minutes, and put them back.
Light for Tropical Plants
Each plant from different areas of the world might have different requirements, so lighting isn’t a one-size-fits-all thing. Many tropicals love to soak up the sun, but aren’t used to getting too many direct rays and might be prone to getting sunburns. Check the tag on your plant to get an idea of its needs and find a spot in your home that suits them - while plants don’t like being moved around too much, you can always relocate if you need to.
Your beautiful tropical can’t talk to you, but if you pay attention you can see signs of what it needs. Look out for pale or yellowing leaves, or a “stretching” plant that seems lanky - these are signs your tropical is craving a little bit more sunlight. Brown spots on the leaves, though, could be a sign of burning from too much direct light.
Fertilizing Tropicals
We want our plants to grow big and strong, and giving them the right fuel is certainly a way to do that. Fertilizer is an option to give your plant a little boost - especially during the growing season - to grow more lush and healthy. Be careful, though, as your plant’s roots are already in cramped quarters in a container, so only use half concentration doses, and only once or twice a year. Just a little goes a long way! Choose a fertilizer with close to equal numbers, like a 20-20-20 for a healthy mix to meet your plant’s needs.

Growing Tropicals - Moving Up in Size
With a happy and healthy plant, you’re sure to eventually need to give your plant a bigger home to let it stretch out its roots! When the plant looks “rootbound” or that almost all of the soil and space in the container is roots, it’s time to size up. You might notice visible roots at the top of the container, growing out the bottom, or that you need to water your plant more because it has less soil to hold on to water.
Sizing up is as easy as getting a larger container and repotting. It’s simple, but it can get messy. Here are some of our tips for sizing up for a healthy, growing tropical:
- Choose a container only one or two sizes bigger. You might be tempted to go much larger but not only will the proportions of your chic living decoration be off, the excess soil will also hold too much moisture and might invite rot into your container.
- Choose a container with good drainage. No matter the size, you’ll always want a spot for water to drain out the bottom. If you fall in love with a decorative pot without drainage, never fear! You can DIY by drilling holes yourself or cheat by planting your beautiful tropical in a container with drainage, and simply hiding that well-draining container inside your decorative one.
- Buy potting soil suited to your tropical beauty. Buying tropical-focused soil will give you something with the drainage and nutrition your plant’s needs - and planting from a sterile bag instead of taking soil from outside can help to keep pests out of your home and away from your plant.

Tropicals are one of our favorite ways to embrace the trend of houseplants, and we can’t get enough of their rich green and glossy leaves. They’re perfectly suited to our cozy, temperature-controlled homes and can be easy to take care of when you know how to give them what they need and speak their language. Taking home a tropical is a great way to boost your mood at home with a chic and stylish living decoration that’s ready to impress for years to come.
There’s nothing better than garden-fresh vegetables on your plate. But as a working generation with families to take care of, we don’t always have time to shop around the farmer’s markets on Saturday afternoons. Usually, a one-stop shop at the local grocery store is all we have time for.
While growing your own vegetables does require a time investment, it’ll save you plenty of time (and money!) in the long run! Plus, vegetable gardens add just as much beauty and value to your property as any other garden element. A thriving vegetable garden starts from the seed, and the first step to healthy seeds is indoor seeding.
What to Seed Indoors
The first step to seeding indoors is knowing what you’ll be seeding so you can plan in advance. Here in Ontario, we have a shorter growing season than our friends to the south. Our last frost dates can sometimes extend into mid-May, which is often too late to seed many vegetables. Seeding indoors gives us a head start on the growing season, ensuring we have a successful harvest that we can enjoy sooner. Another advantage of an early start is that it negates the need for chemical fertilizers to speed things along.
Heat-loving plants, like tomatoes and peppers, should definitely be started indoors. While many other vegetables can benefit from a head start on the growing season, others are quite content being sown right into the ground. Root vegetables, like potatoes, carrots, and turnip can withstand a light freeze. Beans, peas, and salad greens also don’t mind a little chill and can be sown into the ground or started indoors a few weeks early.
When to Start Seeds Indoors in Ontario
One of the biggest challenges of starting seeds indoors is knowing when to start them. This is due to the many factors that influence timing. The recommended dates you might find on a seeding calendar take into account the different growing timelines of different vegetables, as well as the last expected frost date of your region. But it’s not an exact science. Keep in mind that, depending on the conditions you provide and the climate patterns of the year, the ‘perfect’ date is pretty unpredictable.
Here in Southern Ontario, our last expected frost date for the year is sometime during the first week of May. Tomatoes and peppers need the longest time to be cozied up indoors at 6-8 weeks. Now that we’re in early March, we suggest you get peppers started ASAP if you haven’t already, and give them lots of light. Start your tomatoes in another week or two, depending on the variety, sticking them near a bright window once they begin to sprout. Broccoli and cauliflower can be started as soon as March rolls over to April, while cucumber, zucchini, and salad greens can wait until the middle of the month. When April showers bring May flowers, you can direct seed other vegetables into the ground!
How to Seed Indoors and the Materials You Need
Now that we’ve got the timing all straightened out, the process of seeding indoors is actually pretty simple! But before you start sowing your peppers and tomatoes, there are some materials you’ll need first:
Containers: The most important aspect of picking out containers is making sure they have enough drainage - you don’t want to drown your seeds before they even get a chance at life! Seeding trays with many individual cells are great choices since they can hold plenty of seedlings at once and don’t take up much space. Wash them well with soapy water first, to make sure they’re sterile and safe for your young plants.
Soil: Soil requirements will vary between different vegetables, but generally most plants will flourish in a mix of peat moss, vermiculite, and perlite. Never use dirt from your backyard for planting seeds indoors, you’ll likely be bringing unwanted pests into your home.
Lights: Light requirements will depend on what your particular seed needs for germination. While some need bright and direct sunlight right away, others don’t want to see the sun until they poke through the soil in search of light. While light from the window is great, bright, artificial light is often used as a supplement.
Once you have these three materials (and your seeds, of course), you’re ready to start planting! Follow the instructions on the packaging carefully to provide your seeds with the proper conditions they need to germinate. Use a sterile potting mix to cover seeds that need complete darkness to grow. Cover the container with a clear plastic dome to trap moisture, creating the humid environment required for germination.
Once the seedlings begin to poke through, you can remove the cover and let the oxygen flow. Remove any weak plants, allowing the strong ones to grow even stronger. It’s better to have a few great plants than plenty of unproductive ones. Keep the soil moist, but not wet. We recommend misting instead of watering, to prevent disturbing the soil.
Starting Seeds Indoors Without Grow Lights
While grow lights are super effective and allow you to start seeds anywhere in your home, they aren’t always the first thing new gardeners want to invest in. Plus, keeping these lights on for hours on end every day can definitely drive up your light bill, and isn’t a necessary use of energy. The good news is that you don’t need fancy grow lights to germinate seeds indoors, especially if you have plenty of windows.
The trick to maximizing sunlight is to place your growing trays in front of large, south- or west-facing windows. Be mindful of hills or trees that might block the sun in these parts of your home. Usually, the upper level of your home is your best bet!
Moving Your Plants Outdoors
While it’s important to get the timing right when it comes to starting seeds indoors, it’s also important when moving them outdoors. The beauty of indoor seeding is that you don’t have to be in such a rush to bring them outdoors, you’ve already given yourself the time to wait until the risk of frost has passed.
That being said, you don’t want to wait too long, or else your veggies’ growth might taper. You’ll know when your seedlings are ready to graduate from their containers to the ground when they begin to grow leaves. Don’t be fooled by the first leaves of your baby sprouts, as these are nourished by the seed. The true leaves develop afterward, indicating that the plant’s roots are now established enough to sustain the plant itself. Once you reach this stage, congratulations! Your seedlings are now ready for your beautiful vegetable garden.
No one likes to be thrown into an unfamiliar environment or situation, and the same goes for our tender new plants. They’ve been safe and cozy inside our warm homes for weeks, and now they’re being introduced to the great outdoors. Just like we sometimes get a ‘base tan’ before we head down South to prevent burning to a crisp, our seedlings need to be introduced to the sunlight gradually. Bring them outside on a cloudy day for a few hours first, and increase by an hour each day for a week or so to ‘harden them off’ before planting them outside for good.
Whether you’re a seasoned gardener or you’re just beginning your gardening journey, these simple steps to indoor seeding are all you need to get started. Soon enough, your flourishing veggie garden will be the cornerstone of your recipes and the envy of your neighbours!