
Perennials are fantastic for bringing reliable garden colour that comes back every year, but if they only flower for a brief window in summer, it can be a bit of a bummer. Finding perennials that bloom all spring, summer and fall can be tricky. However, blooms aren't always necessary—plenty of perennials have colourful foliage and ornamental features that delight throughout the seasons!
Get Amazing Colour With All Our Favourite Perennials For Spring, Summer & Fall
For incredible blooms and bold, unexpected foliage colour that never fails to disappoint, plant these beauties now! Hurry before those summer temperatures get scorching hot!
Autumn Joy Stonecrop
When spring and summer flowers fade, this hardy perennial succulent continues to impress us with its dusty rose blooms. As they mature, the cloud-like flower clusters will take on a deeper bronze tint, perfectly complementing the surrounding autumn scenery. It grows best in full sun with sandy, well-draining soil—and can thrive in poor, rockier soils, so it doesn’t need a ton of fertilizer. A little bit of all-purpose fertilizer applied in spring can help give a boost, but too much fertilizer can cause this low-maintenance plant to get a bit leggy.
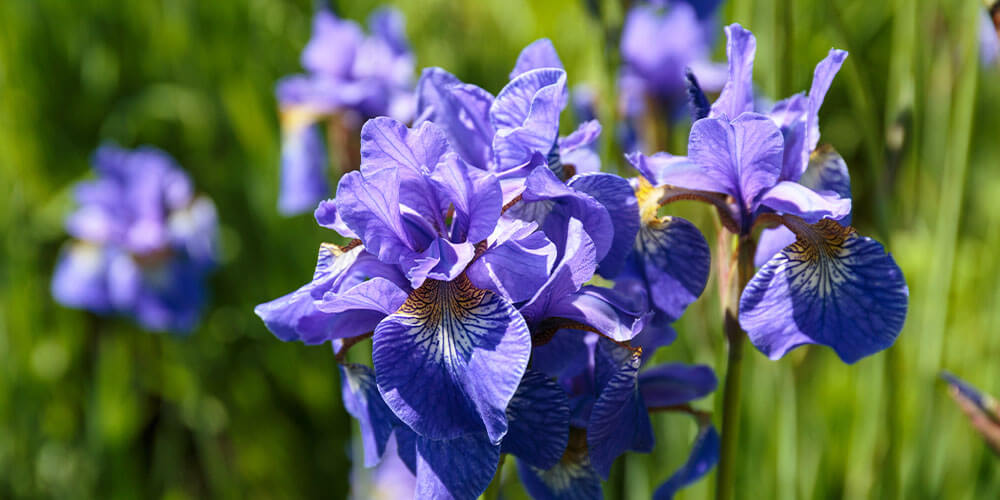
Siberian Iris
While the bearded iris has long been considered a spring favourite, its beardless cousin, the Siberian iris is worthy of a spot in your perennial garden! Its prolific blooms emerge in spring and continue into summer, with single plants sending up as many as 20 flower shoots. There are many different colours to choose from, like deep blue, burgundy or rich gold, and some have earlier or later bloom times than average. So, if you plant a colourful variety of Siberian irises with different flowering times, you’ll get quite a spectacular display!
Coral Bells
Also known as Heuchera, this ornamental foliage plant is famous for its ultra-vivid leaves, available in pretty much every colour in the rainbow. In fact, there are multicoloured rainbow varieties too! Even in a garden bursting with magnificent blooms, coral bells will still catch your eye with their distinctive, lobed foliage that looks almost like maple leaves. They do produce some cute, delicate flowers atop tall stalks in summer—usually pink or white—but it’s the glossy leaves that send our hearts aflutter!
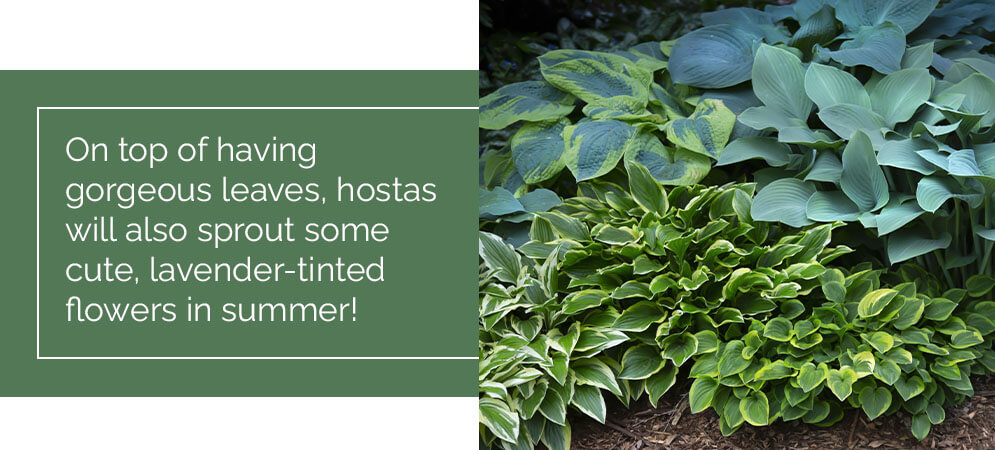
Hosta
The hosta is an absolute must-have for any shade garden. This perennial thrives in shaded areas, and it can get scorched from too much direct sun. The attractive leaves are quite large and slightly curved, forming a round, mounded shape that looks neat and tidy, making hosta great for border planting. We recommend planting a variegated variety with splashes of white or different shades of green to bring visual interest that lasts. On top of having gorgeous leaves, hostas will also sprout some cute, lavender-tinted flowers in summer, so you’ll have those to look forward to!
Autumn Brilliance Fern
Judging by the name, you might assume this fabulous fern transitions to orange in the autumn, but it’s the opposite! In spring, new fronds emerge a brilliant orange and mature into an emerald green shade. Don’t worry, you still get a little pop of autumn colour later in the season! Once September rolls around, bright red spores, or “sori,” appear on the undersides of the leaves. The frilled, wispy fronds add texture and movement to the landscape, and they do exceptionally well in shady areas covered by tree canopies. It likes the soil to be moist and well-draining, so mix in lots of compost when you plant, and water generously!
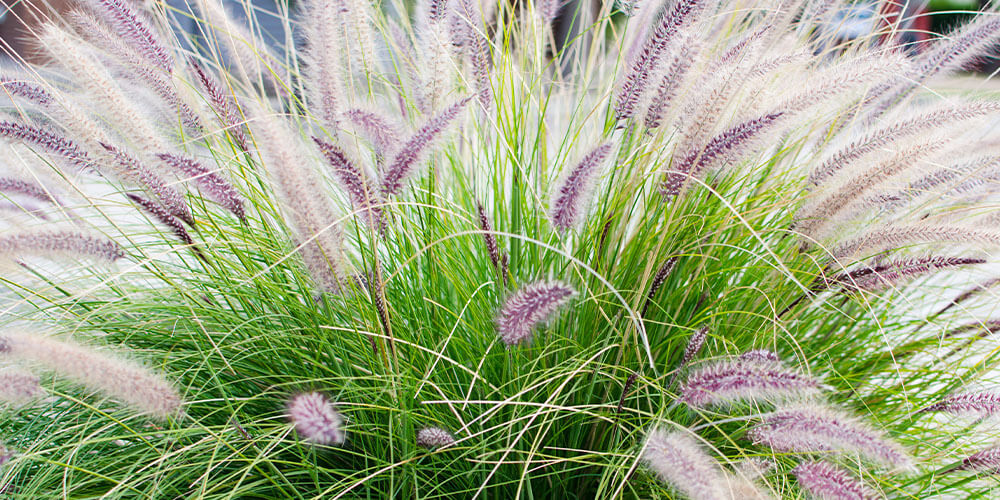
Pennisetum
Ornamental tufted grasses have such a dreamy, graceful quality to them. We love the way they dance in the breeze! The red and purple varieties are especially pretty if you’re looking for some long-lasting perennial colour, and their feathery plumes will stand out in any garden. Because of their height, Pennisetum plants look great as a “thriller” plant—something tall and flashy to act as a focal point in mixed arrangements in the garden or containers. Plant it near the back of your garden, so it doesn’t block any shorter plants from view.
On the hunt for perennials that will bloom all summer or offer stunning all-summer foliage? We’ve got an incredible collection in store for our Simcoe gardeners this year, and we’re so eager to show you what’s new and noteworthy! Visit us soon and one of our team members will be happy to help you find the perfect perennial assortment to make your garden look amazing all year.
Peat moss is probably a familiar term if you’ve ever browsed through a garden centre, but you might be unsure of how and why it’s used. Many potting soils actually come with a bit of peat moss already mixed in, but you can also buy it on its own. Mixing peat into your soil can offer major benefits, but there are some important things to keep in mind before you start adding fistfuls of peat into all your plant containers!
What is Peat Moss, and Why Are People Mixing It With Soil?
Peat moss is a material that grows on top of bogs, usually here in Canada. It’s used as a natural potting medium because its loose, spongy texture has amazing moisture retention for plants, as well as many other benefits. The thing is, it takes thousands of years for peat moss to develop, so it isn’t exactly an easily renewable resource. However, by using it sparingly as an additive to soils, we can still reap all the benefits without having to use that much.
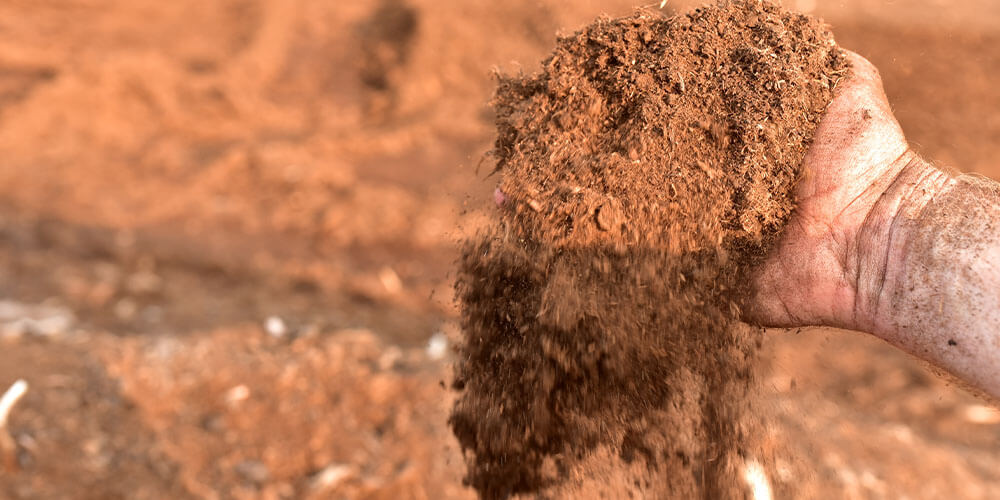
What Does Mixing in Peat Moss Do To Soil?
There are so many different kinds of soil. Some soils are heavy and full of clay; others are sandy and low in nutrients. Some are acidic, and some are more alkaline. The kind of soil you want usually depends on the type of plants you’re growing, but generally speaking, peat moss helps improve soils of all different kinds. You can add it into your soil to achieve any of the following results:
- Help drier, sandier soils retain moisture for longer
- Help heavy clay soils loosen up and have better drainage
- Increase the amount of organic material in the soil, which breaks down over time to provide nutrients
- Make standard potting mediums more suitable for epiphytic plants like orchids and staghorn ferns
- Reduce and slow down soil compaction and decomposition
- Reduce high alkalinity in soils
- Lower soil pH levels for plants like blueberries which prefer acidic soils
- Retain soil nutrients, so they don’t get flushed out from water
While compost is often used for improving drainage and balancing pH, one of the advantages of peat moss is that there’s no risk of any hidden weed seeds or pathogens. Compost can be a wonderful thing if you’ve got a good batch, but if your compost pile is contaminated, your garden plants could suffer.
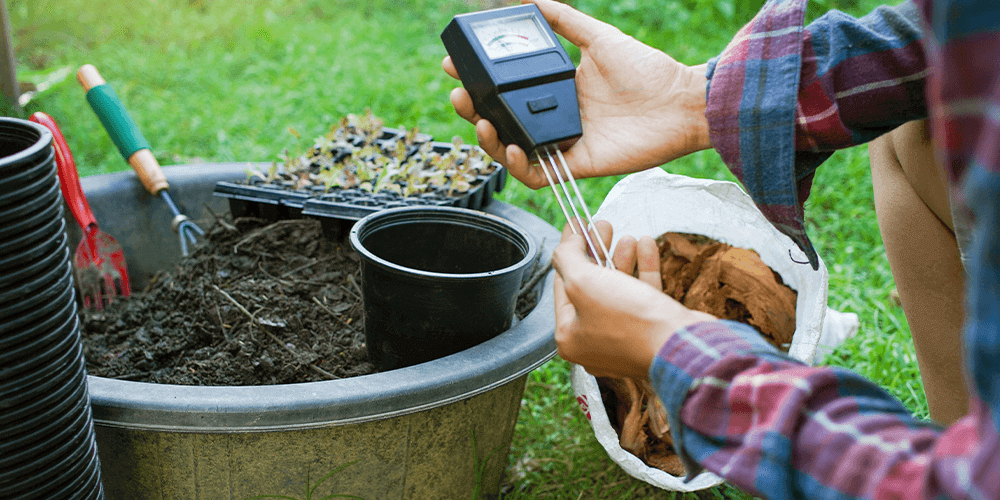
Peat Moss and Soil Acidity
Most plants thrive in soils with fairly balanced pH levels, but there are some that prefer slightly more acidic, or slightly more alkaline soils. Since peat moss is acidic, it has the effect of reducing pH levels in alkaline soils. If a soil test indicates that your soil is too alkaline, mixing in some peat moss will help bring it down. However, if you’ve already got acidic soil, consider adding some lime to counterbalance the acidity—lime the soil amendment, not lime the fruit!
Properly Mixing Peat Moss Into Soil
Before you add peat moss to soil, you should soak it in water for a few minutes first. Simply put some moss in a bin, fill it with water and let it sit. Remove the moist moss, give it a little squeeze to remove excess water, and then mix it into your soil at a 1:1 ratio. You can add more or less depending on what you’re trying to achieve with your soil composition. Hot tip: you can also add some liquid fertilizer into the water when soaking your peat moss, to fortify it with extra nutrients for your plants!
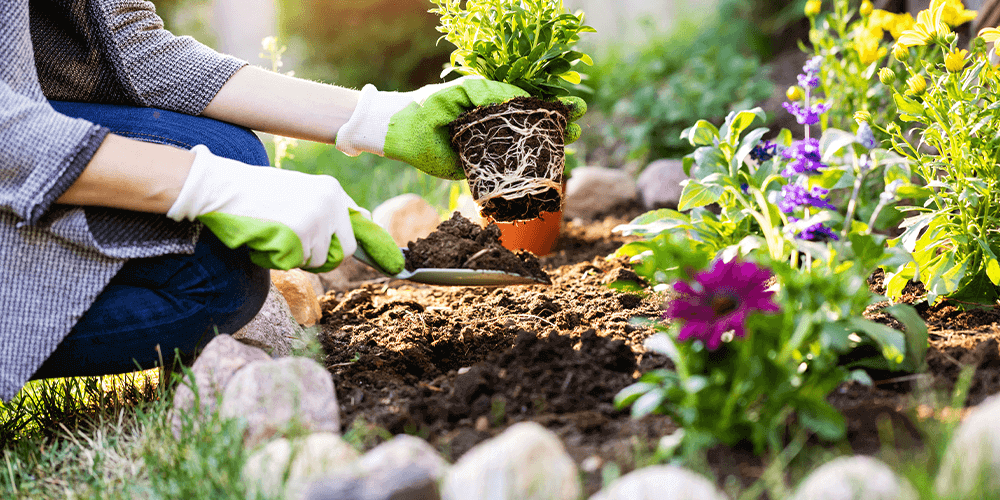
Impacting the Environment
As mentioned before, peat moss is a natural resource that takes thousands of years to develop. There are some environmental impacts to harvesting peat moss, so it’s good to be aware of the effects before you go out and buy bags and bags of the stuff. But don’t worry—a little bit of peat moss goes a very long way, so you really don’t need to use much at all!
Healthy plants help to remove a great deal of carbon dioxide from the atmosphere, so in a way, it all evens out by growing healthy plants, you’re still doing your part to make the world a greener place! Just remember to be conscious about your consumption and avoid wasting materials whenever possible.
Peonies are some of the most beautiful and sought-after spring blooms, and while their elegant appearance might suggest a high-maintenance temperament, learning how to care for peonies is actually quite easy! They're one of the last plants to bloom in spring, ushering in the summer with a showy display of luxurious petals. Follow our spring care guide to choose the best peonies for your garden.

How to Choose the Best Peonies in Spring
Before choosing your peonies, it's essential to understand the differences between the three different kinds: herbaceous peonies, tree peonies, and Itohs. Herbaceous peonies grow in a lush, mounded form but often require staking and support to keep their heavy flowers off the ground. Tree peonies are like small trees or shrubs, so their upright, sturdy build allows them to grow without requiring support. Itohs are a hybrid of the two—their shapes more like the herbaceous variety but with a sturdier structure that doesn't always require staking. Itoh's often last longer, sometimes blooming until the end of summer.
The price differences among peony varieties will likely factor into your decision quite a bit. Itohs have many qualities that make them especially popular, but that comes at a significant price markup! Herbaceous peonies tend to be more budget-friendly.
Choose a peony plant with healthy, perky leaves that show no signs of pest damage or diseases. You can successfully transplant a potted peony, but some people find they have more success with bare-root plants.

How to Plant Peonies
The best time to plant peonies is actually in fall, but they sell out fast, so many people put their orders in during spring! You can still plant your peonies in the spring once the ground has sufficiently warmed up. It’s crucial to choose a great spot to plant your peony that has lots of sun exposure and room for the plant to grow—peonies don’t take well to moving!
Use a transplant fertilizer for an easier transition into the ground. Remember to water your plant a little extra for those first two months after planting to help the roots establish.
Ensure the soil is loose, has good drainage, and mix in plenty of organic material like compost; this is such an essential part of peony care because if the soil isn't draining, your plants will suffer. Taking the time to ensure excellent soil quality will make peony care much easier in the long run!
How Much Sun Does a Peony Need?
Herbaceous and tree peonies need direct sun—at least 6 hours a day. Itoh's, on the other hand, prefer dappled sunlight and can tolerate partial shade. A spot underneath a leafy tree canopy would be a perfect spot for an Itoh, but for all other varieties, you'll see the best blooms if you plant in the sunniest spot in your garden.
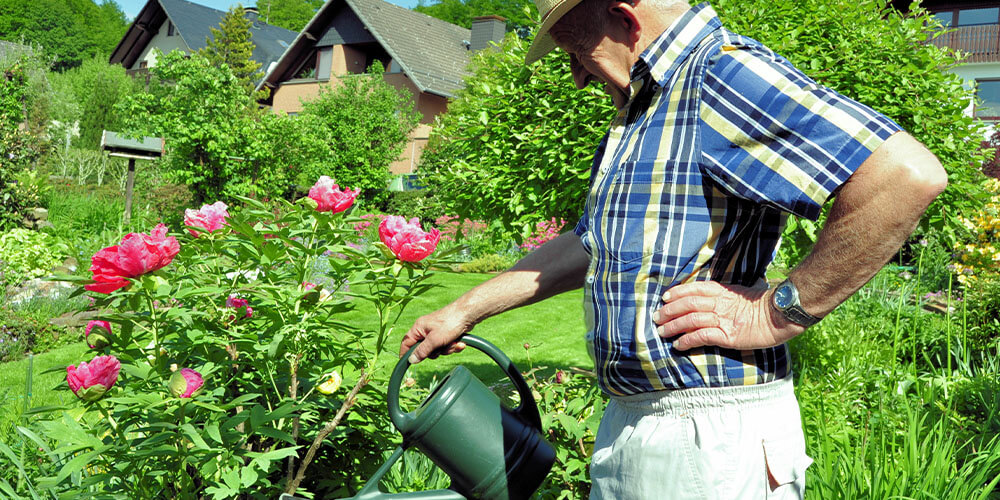
Watering Your Peonies
When you're learning the basics of caring for peonies, one of the first things you need to do is resist the urge to overwater. Peonies don't like sitting in soggy soil, and while having good drainage can help prevent root rot and other issues, overwatering can still do some damage. You only need to water your peonies every week or two—maybe a little more if it's been a sweltering, dry summer. Remember to water the soil directly instead of watering the plant overhead, which helps prevent mildew.
Do You Fertilize Peonies In Spring?
You might be surprised to hear this, but peonies are better off without all the extra bells and whistles like fancy fertilizer and mulch. The transplant fertilizer you'll use when planting should be more than sufficient to keep your plant fed. If a soil test indicates that your soil is depleted of nutrients, you can use an all-purpose fertilizer in late spring.
How Big Do Peonies Get?
Herbaceous peonies reach around 2–3 feet tall and 2–4 feet wide, with super fragrant, large blooms. You'll find that the large blooms start to flop over, so remember to use supports early on to keep the flowers upright and off the ground. We recommend grow-through rings, which support the stems in a much more natural manner than stakes and don’t need to be checked on and adjusted as often.
Tree peonies usually get to around 4–6 feet tall. Itoh peonies are generally wider than they are tall, so they only reach about 2.5 feet tall, but they have humongous flowers!

How to Care for Cut Peonies
Peonies are a go-to for romantic bouquets and wedding arrangements, so it's always tempting to snip a few peonies off your plant to make a cut arrangement. The key to long-lasting peony bouquets is to cut the flowers just before the buds open; this allows them to bloom indoors where you can enjoy the full lifetime of each flower!
The basics of how to care for peonies in a vase are pretty much the same as your typical flower arrangements—cut the flower stems at an angle, place them in a vase with room temperature water, and make sure there are no leaves submerged. Add some flower food to keep them nourished, change the water every three days, and keep them out of the direct sun or cold drafts.
Now that you've learned the ins and outs of how to care for peonies, you can bring some of these gorgeous spring beauties home! Visit Eising to see all our peonies for sale in Simcoe ON, and feel free to ask our staff for more helpful insights on how to look after a new peony plant.
Growing tomato plants is always a worthwhile gardening endeavour. If all goes according to plan, you end up with a huge harvest of delicious fruits to use in many tasty summer dishes. But, a few missteps can result in some not-so-delicious tomatoes with a bitter flavor, mushy texture, or splits in their skin. To help you start growing the tastiest tomatoes possible, we put together our list of secrets from the gardening experts at Eising.
Here Are The Secrets To Growing Delicious Tomatoes
Growing delicious tomatoes is easy if you know what your plants need to grow as big, bright, and juicy as possible. Whether you're growing mild, savoury beefsteak tomatoes, or sun sugar cherry tomatoes that are sweet as candy, these tomato growing secrets will help you achieve the ideal flavour.
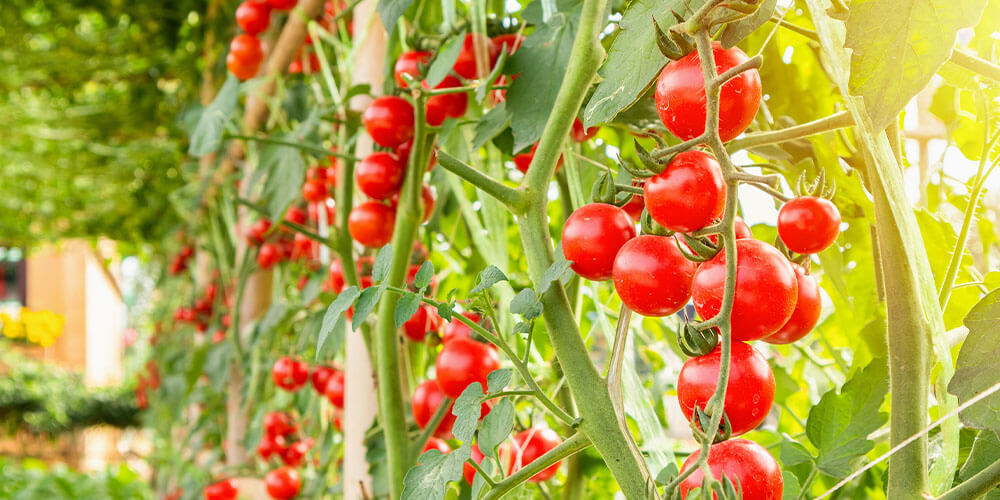
1. Aim For 7–8 Hours of Direct Sun
Tomato plants love the sun, so you'll get the best results by growing them somewhere with as much direct sunlight as possible. While tomato plants can survive on 6 hours of direct sun per day, they'll be happiest with 7–8 hours. Pick the brightest spot in your yard, and make sure it isn't shaded for half the day by any trees, fences, or buildings. Don't forget to use some stakes or tomato cages to keep your plants upright and facing the sun.
2. Test and Amend Your Soil
If you're growing tomatoes in containers, we assure you that your potting soil is healthy and balanced if you buy it new from Eising. However, if you're planting them in your garden bed, that soil might require some amendments after the long winter and last year's growing season. A soil test will help you determine if any nutrients are lacking or if the pH level is slightly off. Slightly acidic soil with a pH between 6.5–6.8 is ideal!
3. Add Quality Vegetable Fertilizer
When tomato plants are growing at such impressive speeds, it makes sense that they need a lot of fuel to keep them going! Use a water-soluble fertilizer that is specifically formulated for tomatoes for your best chance at success. If your soil test identified sub-par nutrient levels, you could buy a formula that's fortified with those necessary nutrients. Apply it once per week, and also consider using a transplant fertilizer to help ease the transition into the ground.

4. Water Tomatoes Generously and Consistently
If you want big, juicy tomatoes, your plants are going to need a lot of water! However, consistency is key to getting the best results. If you aren't consistent with the timing and the amount you're watering, the skins of your tomatoes will split or possibly develop blossom end rot. We suggest evening watering every other night, depending on the weather.
Drip irrigation systems or soaker hoses are ideal for delivering consistent moisture to your plants without overdoing it. Remember, always water your tomatoes at the soil level; this strengthens the root system and avoids foliage disease.
5. Use Mulch
Spread a layer of mulch across the soil surface to prevent soil moisture from evaporating under the sun too quickly. Use a natural mulch that's free from artificial dyes, like shredded bark or mulched leaves. Mulch will also help to block weeds from germinating, and weeds can end up stealing a lot of soil nutrients away from your growing veggie plants.
6. Prune The Tomato Suckers
Curious about the secret to get your tomatoes growing faster? The secret is pruning suckers! As your tomato plants grow, you'll see new little stems sprouting out from the spot where larger branches connect to the main stem. These "suckers" actually drain a lot of energy from your plant. Pinch them off with your thumb and forefinger, allowing your plant to devote more energy to growing amazing tomatoes––faster!

7. Plant Your Tomatoes Extra Deep
Here’s a tomato growing secret––did you know that if you plant your tomato deeply, roots will propagate from that main stem? This is helpful because often tomato plants can get a bit leggy and may flop over, even in their early stages. When you plant them, do it just deep enough that the bottom set of leaves is an inch or two above the soil surface. Some gardeners swear by the technique of planting their tomatoes on their sides, which “hooks” the plant into the ground, spreads the root system over a larger area, and strengthens the main stem as it straightens toward the sun.
8. Help Out With Pollination
Of course, the bees, beetles, butterflies, and other garden pollinators are happy to help out with pollination duties, but it doesn't hurt to chip in yourself! If you've got tomatoes growing in a greenhouse, then hand pollination is essential. All you need is a clean toothbrush or paintbrush. Gently tap each flower with your brush a couple of times as soon as you notice they've opened; this allows the upper male pollen to fall onto the lower female pistil. Gravity will do this on its own, but a little human help can produce even more fruit.
9. Remove Dead and Damaged Leaves
Leaving old, dead leaves on your plants can drain your plant of valuable energy. That damaged plant material is also susceptible to developing fungus, which can spread through your plant and weaken it. Clip the pieces off with sanitized shears and dispose of them in the garbage (or the compost bin, if there are no signs of disease or fungus).
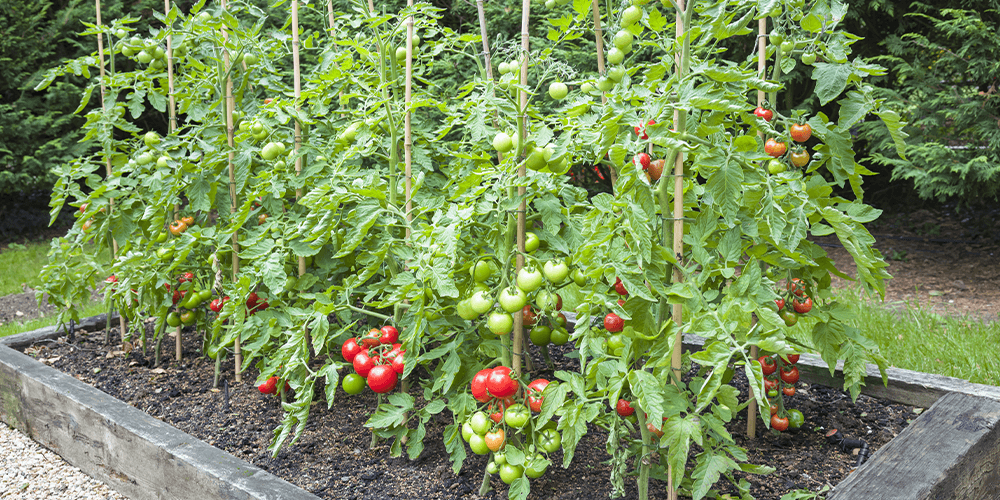
10. Consider Crop Rotation
One of the secrets to preventing pathogens and fungi from attacking your growing tomato plants is practicing crop rotation. Spores can hibernate over winter and bounce back spring, ready to mess with your plants all over again. Moving your tomatoes to a new garden spot will reduce the likelihood that the same pathogens will harm them as last year. And as you can probably guess, disease-free tomatoes are much tastier than the alternative!
Now is the time to start planting tomatoes outside! To cultivate your most fantastic vegetable garden yet, visit us soon to see all the new veggie varieties we have in store. There are so many incredible tomato plants for sale, from classic favourites to exciting new hybrids and exotic heirloom varieties. See them all, plus plenty of other fresh vegetable plants here at Eising.
Figuring out how to dress your body type makes shopping for women’s clothing much more fun and stress-free! The female physique clearly isn’t the same across all women; it’s unique and distinctive, with different proportions and shapes. That’s why some outfits look amazing on some gals and not-so-stellar on others. But don’t worry—no matter which shape you have, there are certain pieces that are bound to look absolutely amazing on you! You just need to know what to look for.

How Do I Dress For My Body Type?
The key to picking flattering women’s clothing is figuring out how to accentuate certain areas to keep things looking proportioned and occasionally minimizing the parts that draw attention. There’s nothing wrong with having a large bust, booty, or tummy, but a sense of visual balance can help you feel more confident.
When you learn how to dress for your body type, it makes such a difference in how you feel when you’re out on the town, posing for photographs, or meeting new people. At the end of the day, you should wear what makes you feel happy, but dressing stylishly can give your self-esteem a nice boost! Find your body type below so you can get started.
The 4 Women’s Body Types and How to Dress Them
The Straight Body Type
Description: Women with a straight shape tend to have similar hip, waist, and shoulder measurements. Weight is evenly distributed, and curves aren’t especially pronounced.
How To Dress: Straight figures look great in tops with sleeveless, racerback straps, halter tops, or slim-fitting sleeves. It flatters your arms, creating an athletic and toned look. Scoop necks and round necklines help to subtly emphasize the bust, and the curved lines really help to amp up the curviness!
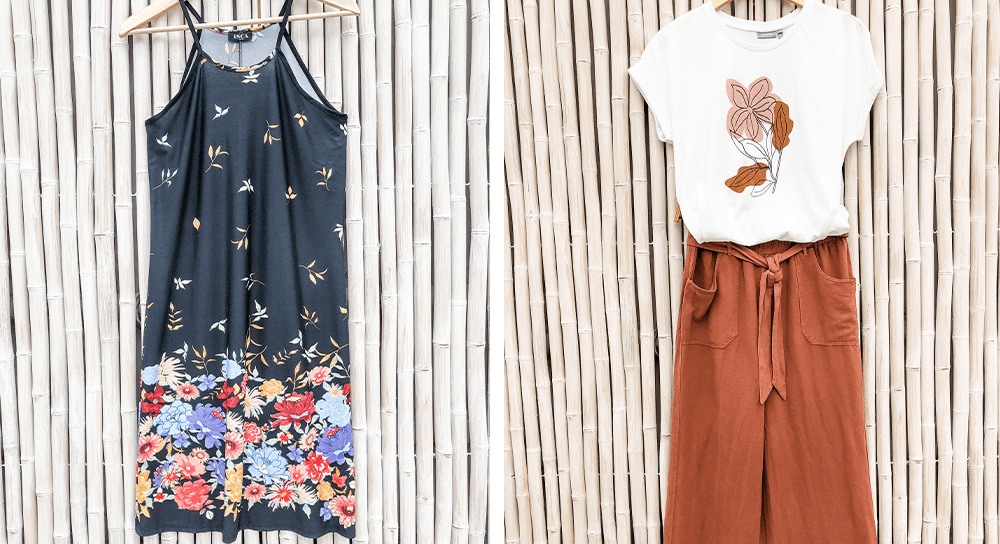
Mid-rise pants and women’s jeans with bootcut or flared legs can help add some curves as well, and lucky for you, they’re coming back in style in a big way! Our wide-leg cinnamon pants will cinch your waist and flatter the booty—add our white floral scoop neck tee and tuck it in, and you’re good to go!
Women with straight body types tend to not have much trouble figuring out how to pick the right dress for formal occasions. Pretty much all dress styles look great on straight bodies! However, dresses with a seam at the natural waist and a slight flare to the skirt can create the illusion of a more hourglass shape. Our breezy spaghetti strap dress has a tapered neckline and a floral skirt, effectively highlighting your top and bottom while minimizing the middle.

The Pear Body Type
Description: If you have a pear shape, you’ll be a bit fuller in the hips, rear, and thigh area and smaller in the bust and shoulders.
How To Dress: If you’ve got it, flaunt it! Pants and skirts that show off your bootylicious figure are fun to wear and look especially stellar if you pair them with the right pieces. Pencil skirts, high-waisted pants, and bootcut jeans will flatter your shape in all the right places. To balance out your shape, V-necks, dramatic necklines, and puff sleeve blouses bring more volume to the top. Try our dark wash denim pencil skirt paired with our coral V-neck tee—it’s comfy and casual while still looking tailored and feminine.
Playing with colours and patterns can flatter pear shapes as well. Light-coloured tops paired with darker jeans help to create a sense of visual balance. Horizontal striped tops can emphasize the bust, and pinstripe pants can minimize your bottom—though we don’t recommend pairing the two different stripes together! Our horizontal striped tee looks amazing with our coal-washed jeans. Throw on our cinch-waist vest overtop to add volume to the bust without drawing attention to your tummy.

Apple Body Type
Description: Your hips are narrow relative to your shoulders and bust, and you carry more of your body weight around your tummy rather than your hips, rear, and thighs.
How To Dress: Drawing attention to your more slender calves, and wearing loose, breezy tops will flatter your apple-shaped figure. Slim-cut jeans and skirts and trendy ankle-length pants will make those legs look long and lean! Try to avoid thin, clingy fabrics, and instead, try more structured materials like denim or linen. They’re natural and breathable, so you won’t feel uncomfortable on warm days. V-neck shirts are also great for elongating the torso—try our V-neck multicoloured blouse in an ultra-flattering print that’s super forgiving. Throw on our straight-leg jeans, and you’ll be runway ready!
When it comes time to dress up, you can never go wrong with an A-line little black dress. Every woman needs a good quality, versatile LBD in their closet. The A-line shape minimizes the tummy while emphasizing the shoulders and hips. We love the contrasting white tribal print on our new summer LBD—it adds a little more personality and attitude to this classic wardrobe staple.

Hourglass Body Type
Description: You’ve got hip and bust measurements that are nearly equal, but your waist measurement is several inches smaller, creating a va-va-voom silhouette that looks drop-dead gorgeous if you know how to highlight it properly.
How To Dress With An Hourglass Body Type:
When you’ve got a tinier waist and a bigger bust, you don’t want to wear boxy, loose styles, or you’ll be drowning in fabric! Cinch that middle with structured, fitted garments, belted waists, and high-waisted pants. For your top, you can either go with something light and flowy that tucks in or something more tailored and fitted. Flared and bootcut jeans and pretty much any leggings will look awesome on your curvy silhouette. Our leaf motif tank has a cute, asymmetrical, cinched waist, and it’s a perfect match for our navy blue leggings.
For dresses, hourglass figures look lovely in most styles, but it’s best to avoid straight-cut shift dresses, empire waistlines that sit right below the bust, or balloon skirts. Our blue floral dress is as comfy as can be, so it brings in the waist and flatters your curves without making you feel sucked in or stiff. The material is light yet loose, so it drapes beautifully without adding volume or squeezing too tight.
To see more of our trendy spring clothes for 2021, visit Sassyfras to browse all the latest women’s styles from our new collection. If you’re still learning the ins and outs of how to dress for your body type, the lovely ladies at Sassyfras will be more than happy to help you find something you feel spectacular in!
Arbor Day is one of the best days of the year to plant a tree in your yard! In Ontario, Arbor Day is the last Friday in April, so it’s the 30th of this month.
Whether you have a small backyard or plenty of space, there are bound to be some trees that will be best suited to your yard. Here are a particular few that we love.
American mountain ash (Sorbus americana)
Height: Up to 10 metres
Width: Up to 4 metres
Shape: Oval
Needs: These trees are best suited for consistently moist soils but are surprisingly drought-tolerant; they can take some shade and are adaptable to a variety of soils.
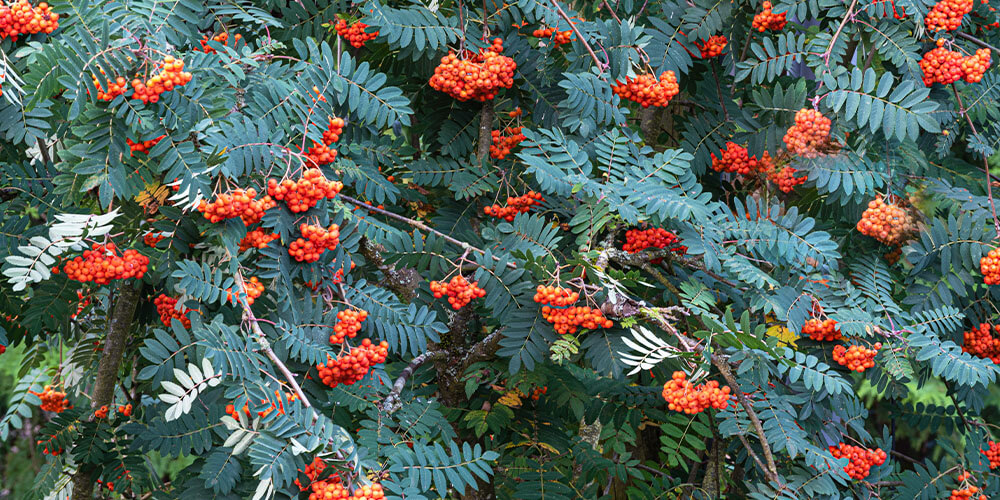
Colour: Green leaves, reddish-orange berries, yellow to red leaves in fall.
Pretty flowers followed by large clusters of bright orange-red berries. Leaves have 13-17 small leaflets with sawtooth edges. The berries persist into winter and are popular with birds. If grown in very rocky and dry ground, the tree won't get as large as it would in moister, richer soils. Mountain ash grows all across North America and does well in southern Ontario.
Blue Beech (Carpinus caroliniana)
Height: 8 metres
Width: 6 metres
Needs: These trees will do best in moist, rich, well-drained soil, but they can tolerate seasonal flooding. It will take full shade or full sun as long as it has enough moisture.
Colour: Blue-ish green leaves in summer, turn reddish-orange or yellow in fall.
They are also known as American hornbeam or musclewood. Blue beech is an excellent small shade tree, adaptable to a wide variety of situations and suitable for small backyards. Blue-ish grayish bark is smooth, and the trunk can be fluted or defined, like muscles. Blue beech is common around Lake Erie and Lake Ontario.
Eastern Flowering Dogwood (Cornus florida)
Height: 10 metres
Width: 3 metres
Needs: These trees prefer consistently moist sites and slightly acidic soil; they prefer light shade but can tolerate full sun if with plenty of moisture.
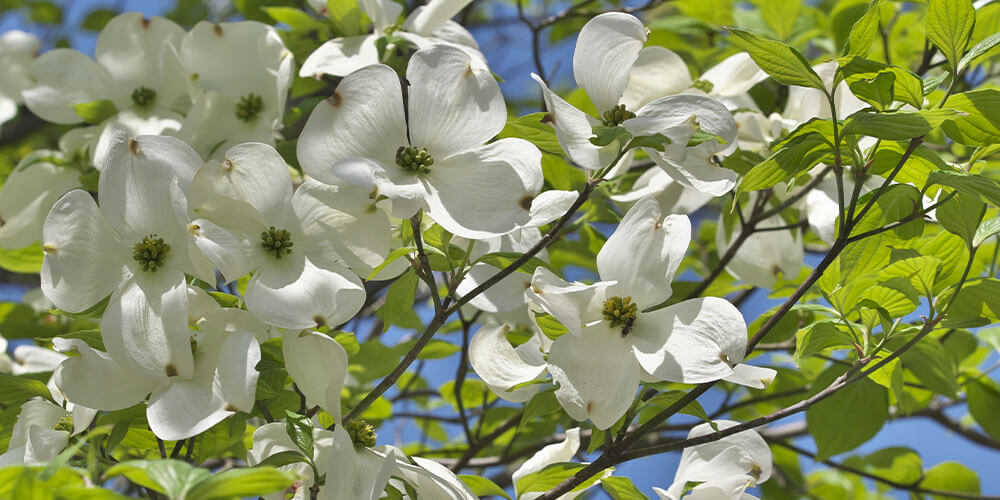
Colours: White flower-like bracts in spring, red leaves in fall, bright red fruit.
This gorgeous dogwood has large white flower-like bracts in the spring before the leaves expand. The bark is almost like alligator skin, very ornamental and beautiful. This native tree to Canada is endangered in Ontario and nationally. Contact the local Ministry of Natural Resources Species-at-risk Biologist if you want to plant this tree as part of the recovery strategy.
Jack Pine (Pinus banksiana)
Height: 24 metres
Width: 6 metres
Needs: These are pretty tolerant trees but prefer dryer soil, grow best in coarse soils and full sun.
Colours: Light green needles grow in bundles that are slightly curved and twisted, cones are yellowish-brown.
Jack pine is the most widely distributed tree in Canada. It grows almost anywhere, from permafrost to shallow soil on mountains. They grow into unique gnarled and sometimes lopsided shapes in very rocky soil, most famously seen in Tom Thomson paintings.
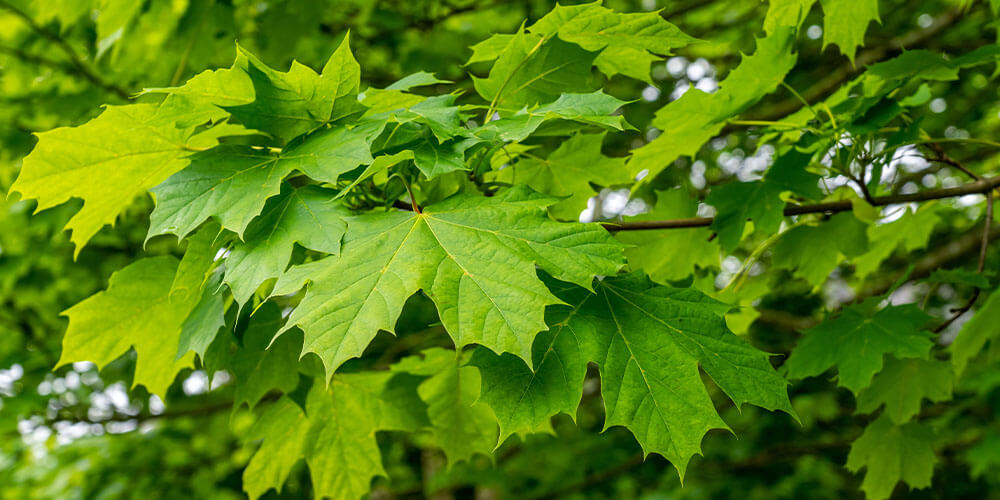
Sugar Maple (Acer saccharum)
Height: 35 metres
Width: 12 metres
Needs: These trees prefer deep, rich, moist soil. Full sun is best, but can tolerate some shade.
Colours: Yellowish-green leaves in summer, yellow, bright orange, or red in fall. Gray bark, brown seed pods.
By far the most patriotic tree on this list, sugar maples offer some of the best fall colour around—plus, you can tap some genuine Canadian maple syrup in your own yard!
These maples can live for more than 200 years and are the national tree of Canada. You'll need about 40 litres of sap to make 1 litre of maple syrup. A mature tree can produce 30-50 litres of sap, but generally, you shouldn’t tap them until they're 30-40 years old. Sugar maples grow well across central and southern Ontario.
Tamarack (Larix laricina)
Height: 20 metres
Width: 9 metres
Needs: These trees are very tolerant of soil and moisture levels but will do best in full sun.
Colours: Grayish-brown bark, bluish-green needles in spring/summer, turn yellow in the fall.
Tamaracks are a deciduous conifer–they drop their needles in the fall and put out new ones in spring. These gorgeous Canadian natives are popular with photographers because they light up coniferous forests with vibrant yellow tones in the fall. It has an excellent balanced conical shape.
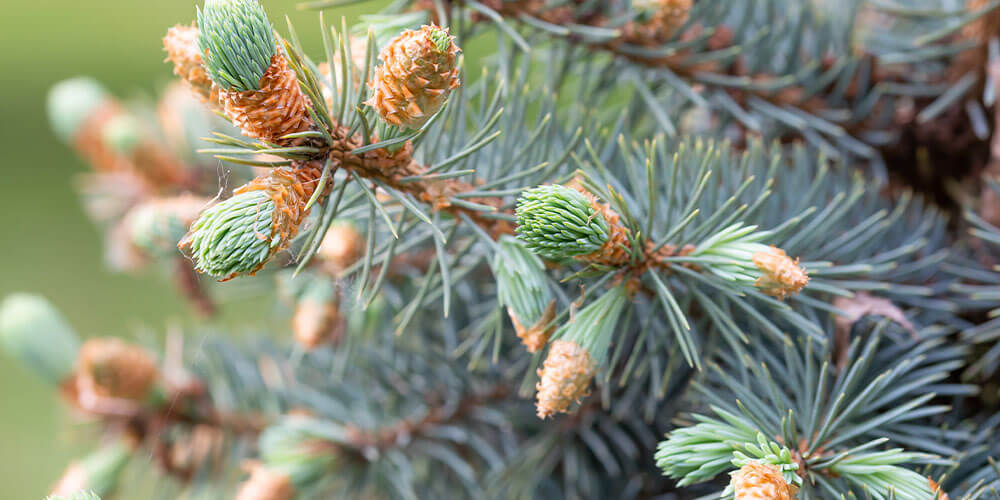
White Spruce (Picea glauca)
Height: 24 metres
Width: 3 metres
Needs: These trees are tolerant of almost any soil, wide range of moisture levels, and will do best with full sun, though they can tolerate some shade.
Colours: Blueish green needles with a way layer on top, light brown cones
White spruce is one of the best evergreens to use as a Christmas tree, and they thrive in our Southern Ontario climate. While they’re certainly not small trees, planting one in your front or backyard guarantees four-season interest, including a built-in holiday feature that looks incredible in winter when covered in string lights. When young, these trees may be susceptible to frost damage, and deer find them tasty, so they should be protected until well established.
Still hunting for the perfect tree to plant this Arbor Day? Visit our plant nursery in Simcoe soon to browse our full selection!
Spring has indeed sprung here in Ontario, and it’s looking beautiful. After a long winter, it can seem like there’s a lot of work to do in your yard and garden. It’s easy to get carried away with spring cleanup. While there’s plenty to do, there are also some don’ts—things that you should wait on for a while longer, or even leave until the fall.
Here’s our list of do’s and don’ts for how to get your landscaping ready for spring in southern Ontario.

Spring Landscaping Do’s
1. Start treating dead lawn patches. If you’ve got a dog, you’re probably starting to see evidence of dead spots on your lawn. You can get a jumpstart on these now. Rake up the dead grass on them and loosen up the top layer of soil a bit with a hand rake. If the whole area has been growing sparsely, aerate by hand with a garden fork. Then spread grass seed across the patch, blending a bit into the surrounding grass. Lay a thin layer of soil over the top and tamp it down gently to help the seeds contact the soil. Then make a very light application of fertilizer and gently water the area. Remember to water daily if it doesn’t rain until the new grass is well established.
2. Are you adding trees and shrubs to your yard? Spring is an excellent time to get them into your landscape so they can establish a strong root system and settle into their new home. Make sure to water them consistently and give them a good layer of mulch over the roots to regulate moisture and soil temperature.
3. Spring is a great time to plant pollinator-friendly perennials, like:
- Coneflower
- Coreopsis
- Gentian
- Joe Pye weed
- Marsh marigold
- Milkweed
- Monkshood
- Obedient plant
- Red trillium
- Wild sweet William
- Aster
- Baneberry
- Black-eyed Susan
- Blanket flower
- Blazing star
- Butterfly weed
- Canada goldenrod
- Canadian white violet
- Columbine
- Wild bergamot
4. Now is the time to get out and start dividing your perennials, so new splits have time to establish well in new locations.
5. Last but not least, start taking photos of your landscape, your plants and your garden. Capture the moments now, and when you look back later in the year or years in the future, you’ll be able to relive many great memories and appreciate how far your yard has come.
Sometimes it seems like there is endless work to be done in the yard, but don’t forget to pause and enjoy what you’ve created!
Spring Landscaping Don’ts
1. Don’t start pruning spring-blooming shrubs and trees in your landscaping. Many things need pruning in spring, but early flowering plants, like lilac, forsythia, viburnum, and quince, shouldn’t be pruned until they finish flowering. It won’t hurt them to prune now, but it will remove some of the buds, so you’ll have fewer flowers.
2. Don’t prune your elm trees. Because of such a high risk of Dutch elm disease, you should not prune elm trees anymore this spring. To keep risk as low as possible, you should try to prune elm between the end of October and the end of March.
3. Don’t work on soil that is too frozen or wet. Walking on, or working in soil that is saturated with water, or just starting to thaw can cause compaction, so let your garden and beds dry a bit before you get into them. If you really need to get into a bed to do some landscaping cleanup, lay down a plank of wood where you need to walk since this distributes weight more evenly, preventing excessive compaction.
4. Don’t plant your favourite annuals or tender perennials before the last frost unless you’re prepared to cover them every night until the frost is gone for good. You can start hardening off seedling plants during the day, though.
5. Don’t cut your lawn too short. It can be tempting to get the lawnmower out and cut the lawn really short to get rid of all the dry and dead bits, but it’s still too early. Give your lawn a chance to get growing before you cut it. Ideally, wait until it’s about 3 inches tall before you start cutting, and don’t scalp it right away, mow it at about 2.5-3 inches for now.
6. Don’t forget to enjoy your landscaping and the lovely weather days this spring. It seems like there is endless work to be done in the yard, but don’t forget to pause and enjoy what you’ve created. Relish the first perennial blooms, the leaves bursting and watching the bees buzz around early flowers. Pat yourself on the back; you should be proud of what you’ve created!
Whatever you need to get your spring yard chores done, or if you need inspiration for landscaping design or planters, stop by the garden centre. We’re following provincial health protocols and are limiting the number of customers allowed in at a time, so you can feel safe and still make sure your yard looks great this spring.
Pulling weeds isn’t exactly the most thrilling part of gardening, so knowing how to keep weeds out of the garden is a valuable skill. Now, weeds can sprout up any time during the growing season, so it’s important to stay on top of weeding and use a combined approach to tackle the problem. Proper prevention and early removal will save you so much effort and time spent yanking out those stubborn weeds!
Chemical herbicides can be quite harsh on your lawn and soil, and they can be harmful for local wildlife. This has resulted in many gardeners wanting to learn how to keep weeds out of the garden naturally. We’ve put together a list of natural methods of weed prevention and removal, for a more beautiful and healthy garden.
Start the Season With Pre-Emergent Herbicide
A pre-emergent herbicide made from corn gluten will help stop weed seeds from sprouting in the first place. Using it at the beginning of the season will help prevent that first crop of weeds from appearing, and follow-up applications will prevent late-season weeds. Keep in mind, this formula will prevent all seeds from germinating, so you won’t want to use it if you’re reseeding your lawn or direct seeding your plants.
Apply Mulch
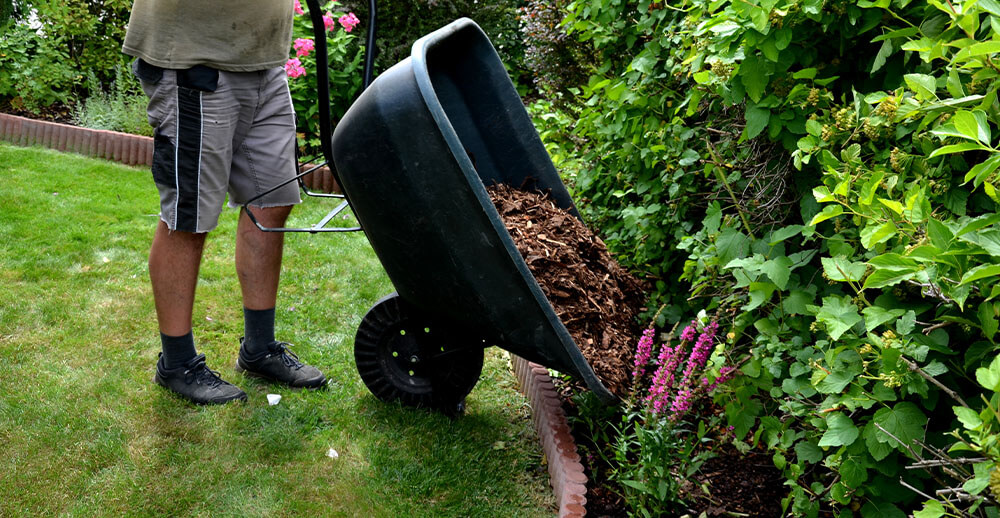
Mulch has so many benefits for your garden soil, but it’s also an amazing way to keep weeds out of the garden. Because it blocks the soil surface from the sun, weed seeds won’t germinate because they won’t receive enough light. Use a natural mulch, such as shredded bark, that’s free of chemical dyes, to help maintain great soil health.
Use Groundcovers, Filler Plants, and Cover Crops
If there’s no available real estate for weeds to take hold, you’ll have less weeds, plain and simple! Fill up gaps in between your plants with filler plants that grow low but spread out. Fragrant culinary herbs are a popular option, and they can help keep pests out of the garden as well. Using cover crops in the winter will help to keep out weeds as well, while also feeding your soil so it’s healthy and ready for planting in spring.

Pull Weeds After Heavy Rain, Use The Hoe On Dry Days
Weeds can put up quite a fight if they’ve got well developed roots, so you can make it easier for yourself by working on them in the correct conditions. Weeds are much easier to manually pull from the soil after a heavy rain, but pulling up large weeds with a hoe is easier when the soil is dry and crumbly.
Off With Their Heads
One of the most important ways to keep weeds out of the garden long-term is by reducing the risk of existing weeds reseeding. The tops of weeds are typically where their seed heads will develop, so if you don’t have time to immediately pull all the weeds from your yard, you can cut off the heads and dispose of them. It’s still a good idea to pull the roots out later, but cutting the heads offers a quick solution for preventing spread.
Keep Weeds Out Of The Compost Bin
If weed seeds end up in your compost pile, if you use that compost later, you’re going to end up reintroducing a whole new crop of weeds into the garden. If you’re absolutely certain your weeds are free of seeds, they can go in the compost bin, but it’s better to err on the side of caution and throw them all out in the garbage. Dried leaves, grass clippings, and other plant parts that are free of disease are fine to go in the bin.
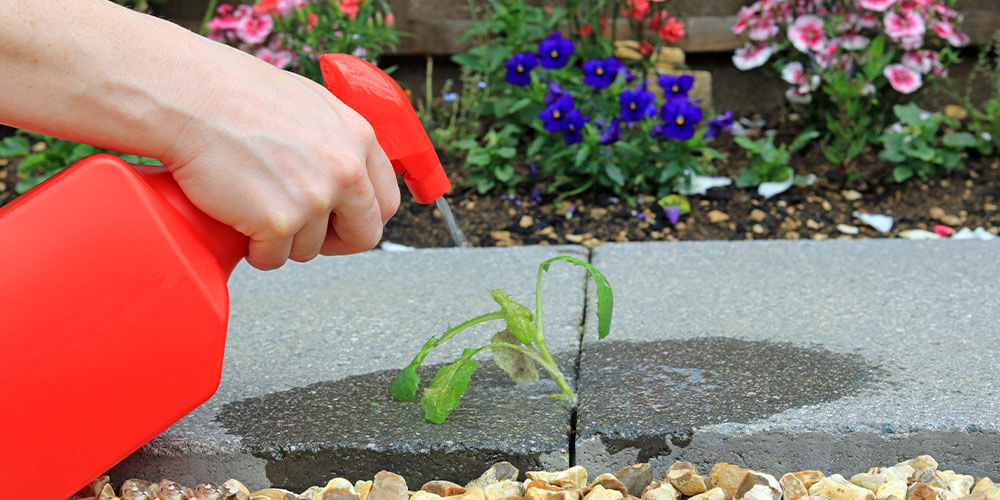
Use Spot Killers Sparingly
While there are many DIY weed killers with varying rates of success, they can often damage your soil or surrounding plants, so they should only be used when absolutely necessary. Vinegar solutions work well without doing as much soil damage as salt-based solutions. To prevent the spray from hitting your other plants, cut the bottom off of a 2L pop bottle, place it over the weed you want to kill, insert the spray nozzle into the top of the bottle, and spray away.
Torch ‘Em
A handheld torch made for burning up weeds can help kill the especially aggressive ones. Be very careful when using it—you don’t want to end up accidentally burning your other plants or injuring yourself. Weed torches typically have an adjustable flame size and a well directed flame for easily targeting the correct weeds. Use it on a day that isn’t windy to prevent accidents.
If you’re in need of any supplies or products to keep weeds out of the garden naturally, visit Eising and we’ll help get you all set up! We also have chemical formulas available if needed—just be sure to use them safely and responsibly to minimize risk to yourself or the environment. If you have any questions on how to keep weeds out of the garden, feel free to ask one of our experts!
As much as we love our cozy knits and festive soft sweaters for fall and winter, we are so excited to ditch the layers and embrace the latest spring fashion trends for 2021. After curating our gorgeous collection for the new season, we’ve combed through all the up-and-coming statement styles to create a solid fashion trend forecast for 2021 and into 2022!
What Are The New Fashion Trends For 2021?
So much has changed in the world this year, and it makes sense for the fashion trend forecasts to shift as well! However, these emerging trends show no signs of slowing down by 2022. The Sassyfras boutique is full of timeless-yet-modern pieces that feel fresh and current, so you can breeze through spring in style.

Dressed-Up Joggers
Joggers are the new sweat pants of 2021—just as comfy as classic loungewear, but way cuter and not at all frumpy. The high rise, breezy materials, and elasticized waistband create a surprisingly flattering shape that makes everyone’s booty look its best. Tuck in a cute camisole and layer a light spring jacket overtop or do a French tuck with a fun graphic tee for weekend hangouts.
Tie-Dye Textiles
While this retro textile might bring to mind scenes from Woodstock or that Jamaican cruise you went on back in 1998, tie-dye can look totally sophisticated and high-fashion when it’s done right! Instead of the tropical neons you’d normally see, opt for colour combos like ivory and sapphire for a more neutral palette that easily pairs with your go-to fashion essentials. Layer our tie-dye kimono over a plain tank top and jeans for a casual “date night” look.
 Modern Raincoats
The forecast will inevitably call for rain in the spring, so instead of dreading it, stay prepared by having an adorable raincoat you’re eager to flaunt! Our popular raincoats from Tribal have cute contrasting nautical stripes in the hood and a trendy cut that’s reminiscent of the utility shirts that have been dominating fashion runways. Instead of begrudgingly covering your cute spring top with your puffer jacket from winter 2021, wear one of these on-trend jackets available in lemon yellow, navy, and black.
Tribal Prints
Many of us are itching to get away on an exotic vacation, but that might not be in the cards for a while yet. So, we’re scratching the itch by rocking tropical vibes in Ontario fashion! Ornate, mandala-style motifs and kaleidoscope colours are popping up all over jackets, spring dresses, cardigans, and even classic tees. You might think a detailed, multi-coloured print would be hard to match, but it’s actually quite easy! Just pair it with solid coloured pieces in one of the shades present in the textile. So, if you’ve got a tribal printed cardigan with lime, turquoise, sapphire, and ivory, you can pair it with a pant or tank top in any of those shades!

Fashion Trend Colour Forecast for 2021–2022
It’s amazing how certain colours can explode in popularity as we go from one year to the next. Remember when blush pink achieved total fashion trend domination a few years back? From now until next spring 2022, we’re anticipating some seriously stellar shades that will triumph throughout fashion trend forecasts worldwide. Refresh your wardrobe with some spring pieces in these sensational colours:
Limoncello
Electric lemon-lime tones never fail to bring a jolt of energy and excitement into your wardrobe. We’re feeling pretty optimistic about the year ahead, so a cheerful colour like limoncello is perfect for 2021. If you’re unsure of how to mix and match with a colour this vibrant, stick to subtle or neutral shades like deep blues and ivory white.
Sapphire
This ultra-saturated true blue shade has all the versatility of a neutral tone, but with all the personality and visual impact of a rich jewel tone. Keep it cool by pairing it with icy white shades, or add some contrast with warm gold accessories. For a modern glam look, complement your sapphire outfit by drawing a thin line of deep blue eyeliner across your top lid, or rock a sapphire-hued mani/pedi!
Fuchsia
This candy pink shade is a true power colour, with bold femininity that’s both sweet and daring. Whether you do an all-fuschia look with a flirty spring dress or just add little accents of hot pink with your accessories or lipstick, you’ll look confident and ready to conquer 2021. Barbie has it all, and she can rock a fuschia dress like nobody’s business, so that’s the kind of energy we want to carry with us into 2022.
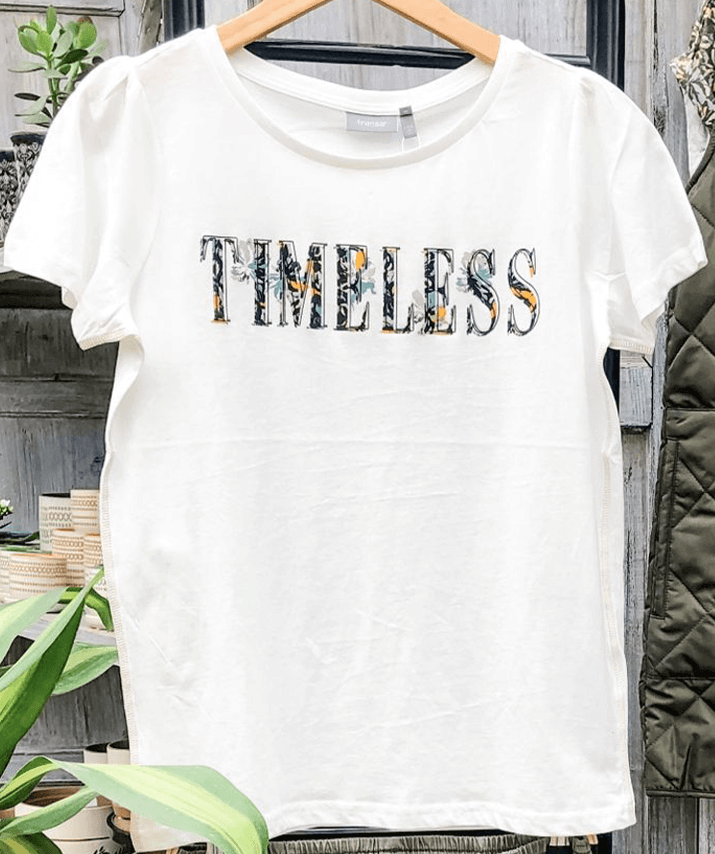 Ivory
Ivory
A softer, creamier alternative to true icy white, ivory is a stunning neutral shade that’s so flattering for every complexion. It’s less harsh and severe than true white—in fact, ivory tends to look more white in photographs, whereas true white tends to look a bit blue. Ivory linen pieces, collared shirts and cardigans are so easy to match with virtually any colour for a look that’s soft and serene but never boring.
For more fashion trend updates and sneak peeks at our latest stock, check out the Eising Facebook page. We regularly post video tours to show off the newest pieces in our collection, so you can browse at home from the comfort of your couch! We’ve got more styles trickling in as the weather forecast gets warmer, so visit soon to give your wardrobe a much-deserved update with on-trend new fashions for 2021.
Starting seeds is a strangely exciting and rewarding hobby—and one of the few hobbies that actually saves you money instead of costing you more! A packet of fifty seeds can cost the same as one single starter plant. If you’re happy to tend to your seedlings for a couple of months longer than the rest of your garden, then it’s well worth the effort. And, you’ve got to admit, plants are kinda cute when they’re little.
If you want to learn how to start seeds, you might be a bit unsure whether to start them indoors or outdoors. Both seem like viable options, right? Well, the truth is that they can both be effective, but only if done correctly. A few missteps, and you might end up with an unsuccessful batch of seedlings.
To put you on the right track, we put together this list of common FAQs for starting vegetable garden seeds.
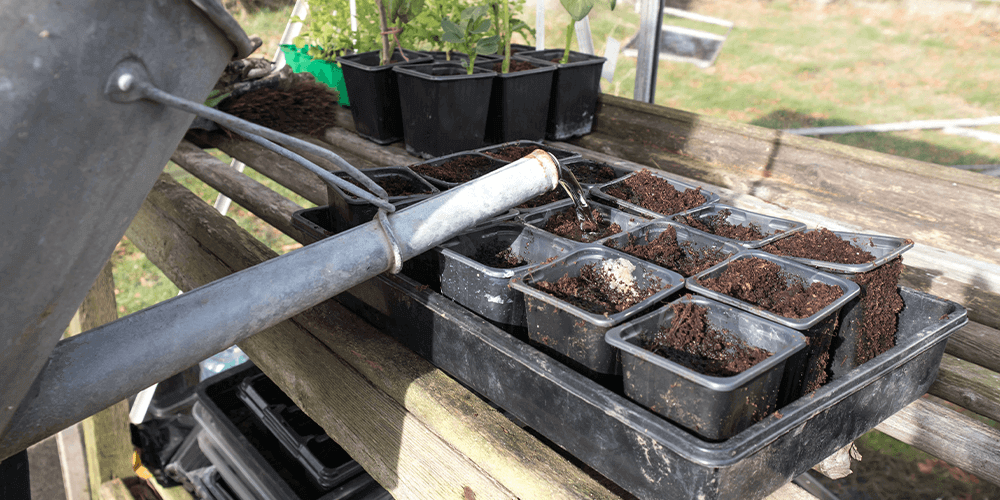
Is It Better to Start Seeds Indoors or Outdoors?
It depends on the plant. Some take a long time to mature, so if you want to enjoy them sooner in the season, it’s worth starting your seeds indoors. This way, you don’t have to wait for the weather to warm up to start growing. However, some plants don’t adjust well to being transplanted, so starting the seeds outdoors is necessary. When in doubt, do a Google search to see if your plant is better suited to starting outdoors or indoors.
What Supplies Do You Need to Start Seeds Indoors?
Maintaining consistent temperature, light, and humidity for your seedlings can be tricky indoors, but there are lots of supplies you can use to help you pull it off. It might seem like a lot at first, but it’s a one-time purchase that will help you start seeds indoors for years to come. We recommend trying some of these products to help you with seed starting:
- Plastic domes to trap humidity
- Seed starting mix
- An LED grow light with a timer setting
- Biodegradable seedling cups
- A mini-greenhouse, which comes with the humidity dome and grow light all built-in.
Remember, you need a lot of space to accommodate all the little seedlings you’re starting. If you don’t have enough space by a sunny window, a grow light or two will help you a lot!

How Many Seeds Do I Plant in Each Pot?
It’s recommended that you put 2–3 seeds in each pot or seed starting cell. Some seeds just won’t germinate—that’s just the luck of the draw. But if you have a couple of seeds in each cup, the chances of success are higher! If more than one seed sprouts in a cup, you’ll need to thin out the smaller, weaker ones and leave the strongest one. They won’t be able to grow properly when they’re so close together.
How Do You Acclimate Seedlings to the Outdoors?
Planting a seedling directly outdoors after it’s been inside for several weeks won’t end well. The shock of the temperature change will likely kill them. To ease them into the transition, it’s a good idea to put your seedlings outside for a little bit longer each day in a process called “hardening off.” Follow this schedule to harden off your seeds:
- Day 1–2: Full shade for two hours
- Day 3–4: Dappled shade for three hours
- Days 5–6: Full sun for two hours.
- Days 7–9: Full sun for three to four hours.
- Days 10–14: Full sun for five to six hours.
- Days 14–21: Full sun for 8 hours per day. Leave them out overnight if the temperature isn’t expected to dip below 10°C.
This is a three-week process, so follow the schedule carefully! Mark these times down on your calendar so you can follow them.
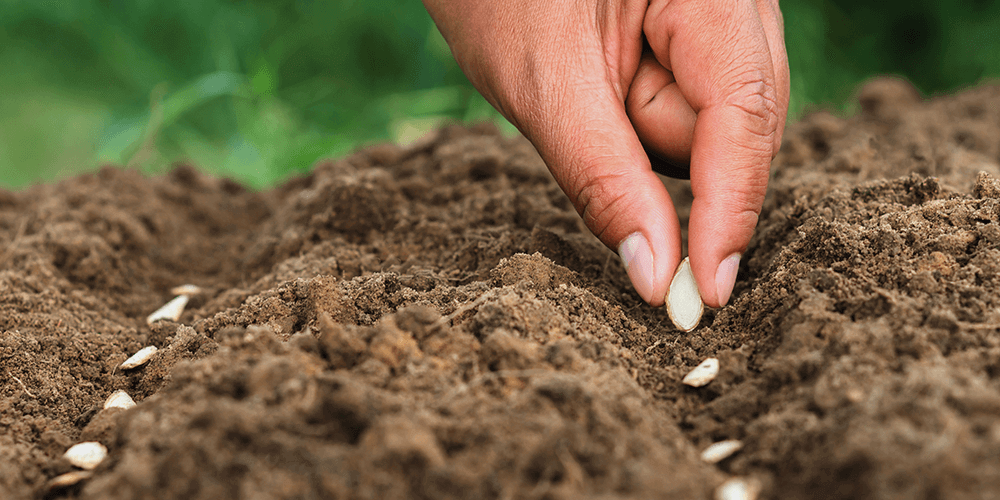
When Should I Start Planting Seeds Outside?
Seeds are safe to plant outside once the danger of frost has passed. Here in Simcoe, our typical last frost date is usually in the last week in April. If you plan to plant your seeds in the first week of May, you should be in the clear!
Can You Plant Tomato Seeds Outside?
Tomato seedlings are a bit too delicate to grow outside, so we recommend starting those seeds indoors. Tomato seedlings are susceptible to a bacterial disease called “damping off,” which can quickly kill them in their early growth stages. The temperature-controlled environment and better pest protection indoors will make it easier for your tomatoes to grow strong enough for smooth transplanting.
What Are The Best Seeds to Start Indoors?
Starting seeds indoors always gets us so excited for spring! Try starting some of these vegetables indoors in early April, so they’re ready to plant in May:
- Tomatoes
- Broccoli
- Cabbage
- Eggplant
- Onion
- Kale
- Lettuce
- Cabbage
- Peppers
Some seeds can be started indoors but need to be very carefully transplanted because they have delicate roots. Starting these seeds outdoors or indoors is possible as long as the temperature is comfortable. These plants include:
- Cucumber
- Melon
- Peas
- Squash
- Pumpkin
- Zucchini
- Celery
- Amaranth
What Are the Best Seeds to Plant Outdoors?
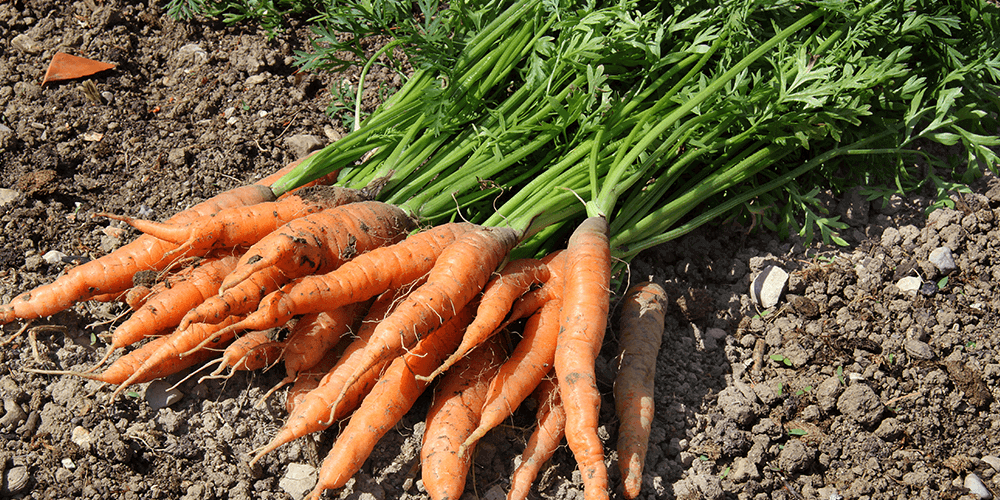
Some plants are best suited to planting outdoors—especially root vegetables! Some are also just suited to sprouting in colder spring soil. Here are some plants you can start seeding outside at home this spring:
- Carrots
- Radishes
- Beets
- Potatoes
- Turnips
- Radicchio
- Spinach
- Corn
If you need any seed starting supplies in Simcoe, Eising Garden Centre has got you covered! We’ve got plenty of high-quality equipment that will last for years and years, plus plenty of exciting new seeds for 2021. Visit us soon, and we’ll be happy to help you get started!