
Before we deck the halls with boughs of holly, it’s time to carve the turkey and decorate for the Thanksgiving season. Create these fabulous fall centrepieces with our Thanksgiving design guide!
Thanksgiving Succulent Centrepieces
Succulents are not just a summer trend! Celebrate the season with adorable succulents in your Thanksgiving centrepiece.
Pumpkin and Succulent Centrepiece
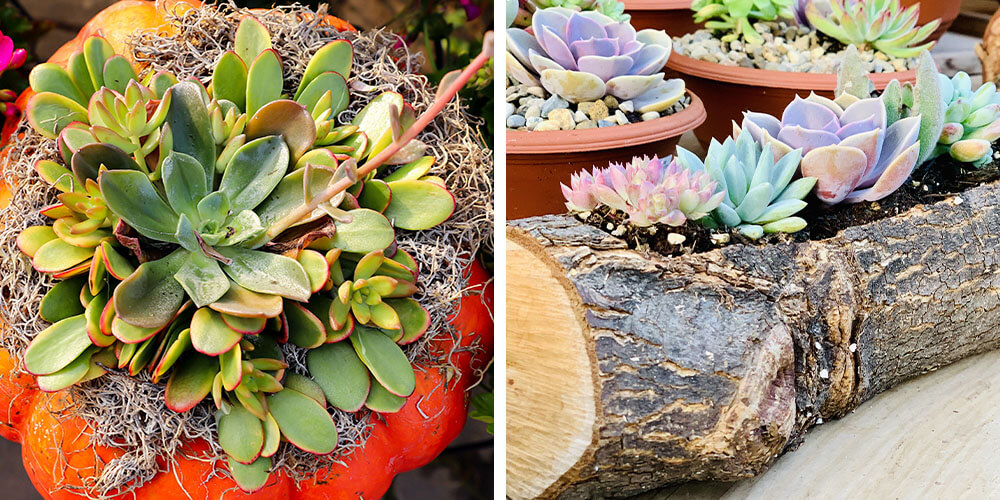
This is a no-carve and mess-free decorating tip that will have the guests at your Thanksgiving dinner in awe. Take an heirloom pumpkin and remove the stem only. Gather some succulents and mosses to use. Before diving into this DIY, you’ll need to let your cut succulents callus. Callusing your succulents means, if they are a fresh cutting, you need to let them heal over for 4-5 days. Once that’s done, you can use spray adhesive to secure about ½ inch of moss all over the top of the pumpkin. Then, with a bit of hot glue, attach the succulents to the moss. Yes, they will put down roots and grow right there on the pumpkin! Just mist the moss regularly.
Rustic Forest Succulent Centrepiece
If you’d rather skip the pumpkin, you can take a wood round or even a log and turn it into something spectacular. Make sure the wood is free of pests, then plot out where you’d like to add moss, succulents, and other fall festive plants. Secure the moss and succulents in the same way as the pumpkin centrepiece.
Bold and Beautiful Thanksgiving Centrepieces
Go bold for Thanksgiving with flowers and plants saturated in your favourite autumnal hues.
Crotons are famous for their dappling of yellow, red, and orange on their leaves. Even on their own, they make a great Thanksgiving centrepiece. If you want to get a bit more creative, add them amongst a harvest vegetable cornucopia.
Bromeliads have gorgeous towering flowers in our favourite autumn shades. Try red, orange, or yellow bromeliads for your Thanksgiving centrepieces. Not to mention, bromeliads grow “pups” when they get older, so you can split the plant and share it with your friends.
Anthuriums are known for their bright red waxy flowers. For your Thanksgiving centrepieces, pair anthuriums with “spiller” or “filler” plants like snake or spider plants so they can really stand out and steal the show.
Prairie Inspired Thanksgiving Centrepieces
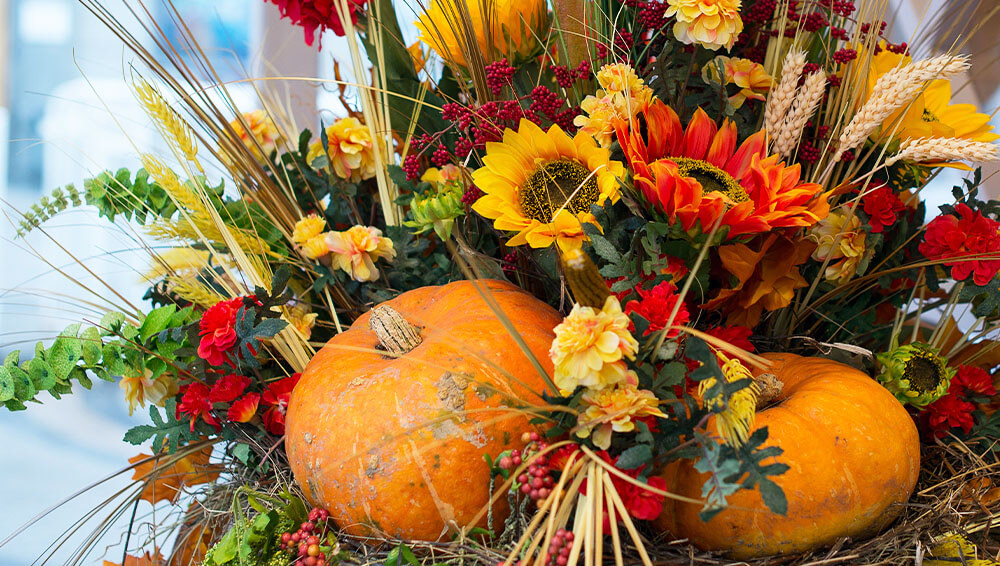
Prairie style and Thanksgiving go hand-in-hand. Create a prairie-themed cornucopia as the centrepiece of your Thanksgiving dinner table. Get inspired by wheat, root veggies and squash, and natural prairie wildflowers like yarrow, sage, prairie clover, coneflower, asters, and sunflowers. Gather these into a bouquet and use twine or other natural materials for that rustic vibe.
How to Make a Wheat Bundle
Another way to incorporate prairie style into your Thanksgiving centrepieces is through a wheat bundle. Grab two wheat bundles from your local garden centre or craft store, some twine, shears, a cone-shaped floral foam, and hot glue. Align the stems along the outside of the cone, with the bushel part of the wheat stick a few inches out from the narrow top of the cone. Glue down the stems all along the outside of the cone until you cannot see the green foam anymore (you’ll probably have to do two layers.) Trim the bottom of the wheat so it’s uniform in appearance. Finally, wrap a layer of twine or fabric around the middle of the fabric to look like it’s bound together.
Creativity with Tablescaping
Tablescaping, like landscaping, has a few basic rules to follow, but then you can get as creative as you’d like.
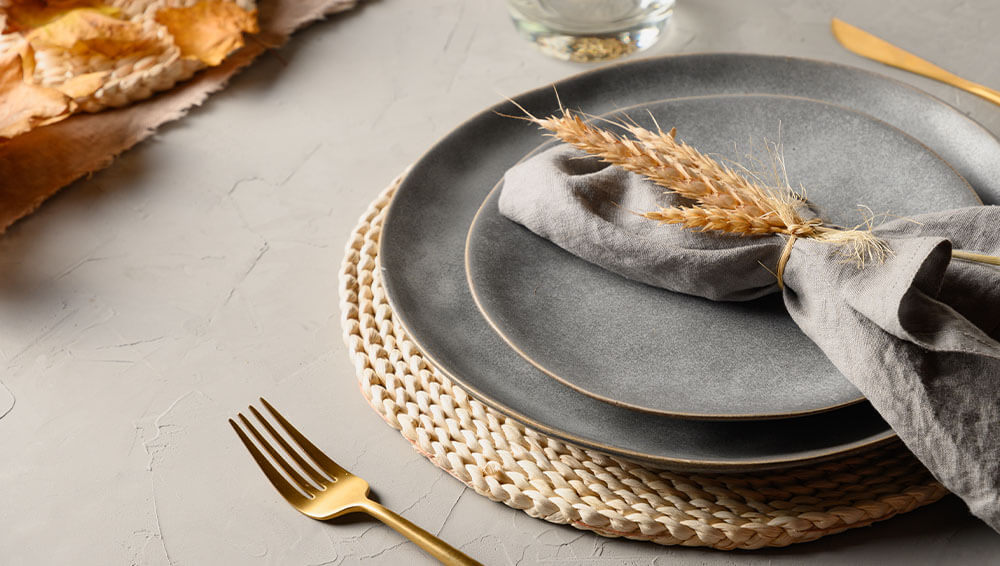
Play with Texture: Choose fabrics, plants, and florals with different textures that create visual interest. Think of the coziness of a soft table runner paired with the rugged texture of wheat, along with the bumpy skin of an heirloom pumpkin.
Mix and Match Patterns: You can keep your Thanksgiving tablescapes and centrepieces all within one theme (plaid, rustic, classic, etc.) but don’t be afraid to change up patterns within those themes.
Don’t Spare the Details: Keep in mind the small things that may add up. Thanksgiving tablescapes include not only pumpkins and succulents, but also things like lighting, serving dishes, and ambiance. This is your chance to add your personal style to the dinner table.
Whether you opt for succulent, prairie, or pumpkin centrepieces this Thanksgiving, we’d love to hear from you. If you need help choosing Thanksgiving decorations in Simcoe, come visit us!
As we transition our closets from summer to fall, it can be tricky putting trendy, cozy, and warm outfits together. Never fear, the Sassyfras Boutique is here! Here are some must-have items and trends to fill your closet with great fall outfits this season.
Botanical Prints
While fall may not be a time where we get to grow our favourite plants, we can incorporate them into cute fall outfits instead! Bring nature into your wardrobe with bold floral patterns or something more minimalist. You can think beyond the florals, too. Botanical prints can include green foliage, mushrooms, acorns, and herbs. Go big and colourful with prints, or find a comfy sweater with delicate botanical embroidery. You can customize your favourite fall plant outfits just like your own garden!

Natural Fabrics
Nothing says “fall” more than natural fabrics like linen and cotton. Warm, cozy, and eco-friendly, natural fabrics in earth-tone shades never go out of style. Incorporate natural fabrics into cute fall outfits by choosing a linen or cotton dress, linen trousers, or a simple, soft, cozy cotton tee. Natural fabric dyeing is also very trendy right now, which can be a super fun fall DIY project. There are tons of DIY videos online to help you beautifully dye your own natural fabric clothing.
Rhubarb and Peach
Some of the best colour trends this fall are also some of the tastiest garden treats! Peach and rhubarb, and every shade in between, are the must-have fall colours. Incorporate these fall colours into your outfits to create a cute and monochromatic look. If you’re hoping for a more subtle feel, you can use these colours in unexpected ways to refresh fall outfits. Try finding brooches, scarves, or collars decorated with peach and rhubarb accents.

See my Vest
We love to see the vests! While they went into hibernation for a time, they are back and better than ever. Vests can be so comfortable and perfect for layering. With a surge in the “academia” style, adding a vest to many outfits brings a layer of cuteness, intelligence, and mystery this fall. You can choose a puffy vest for your outdoor adventures, a knitted one in your fav fall colour, or add a denim one to your ‘casual Friday’ office outfits for a little autumnal chic.
Go Daring in Denim
It’s never been a better time to be Canadian! Pull out your vintage Canadian tuxedo and pile on the denim. While you may not want to go full denim (although we have no doubts you could pull it off!), you can start small with a classic denim jacket, jeans in any wash you want, or some adorable overalls.

Yellows, Golds, and Green
As the weather cools, try adding some fall-friendly tones to your cute outfits. A shade of yellow was awarded Pantone’s colour of the year for 2021, so we know there will be no shortage of yellow options for your fall wardrobe. Mustard, gold, and emerald green add rich colour and complement the fall backdrop perfectly. Try pairing a mustard cardigan, gold jewellery, and a green velvet skirt for a chic fall outfit. Or, mix and match just a few pieces for a subtle look.
Don’t Forget the Layers!
No matter what cute fall trends you put together for your go-to autumn outfits, it’s always a good idea to layer up. While layering is a trend in itself, it’s also just a smart way to handle the Canadian weather. Long-sleeved tops, vests, cardigans, and tights are a few key items to transform your closet into tons of comfy, warm, fall-friendly outfits.
Visit our Sassyfras boutique to shop around and fill your closet with simple, fall outfits. If you have any questions about fall basics in Simcoe, come visit us at Eising Garden Centre. We’d love to help you with fashion, plant care, and landscaping!
Hot summer temperatures are harsh on young trees and their delicate roots, so fall is a much better time to get planting! The soil has cooled, and the sun doesn’t beat down quite as brightly. This makes the transition into a new environment far less stressful for your new tree.
How Late Can You Plant Trees In The Fall?
As long as the ground isn’t frozen or coated with frost, you should be able to safely transplant a new tree! For best results, try to plant sometime between early September until the end of October here in Southern Ontario.
Planting Your Fall Tree
If you’d like to start planting some new trees on your property this fall, it’s easy to do yourself! In five easy steps, you can get your tree all settled in its new home, so its roots can spread out and develop.
Fill the Hole and Eliminate Air Pockets
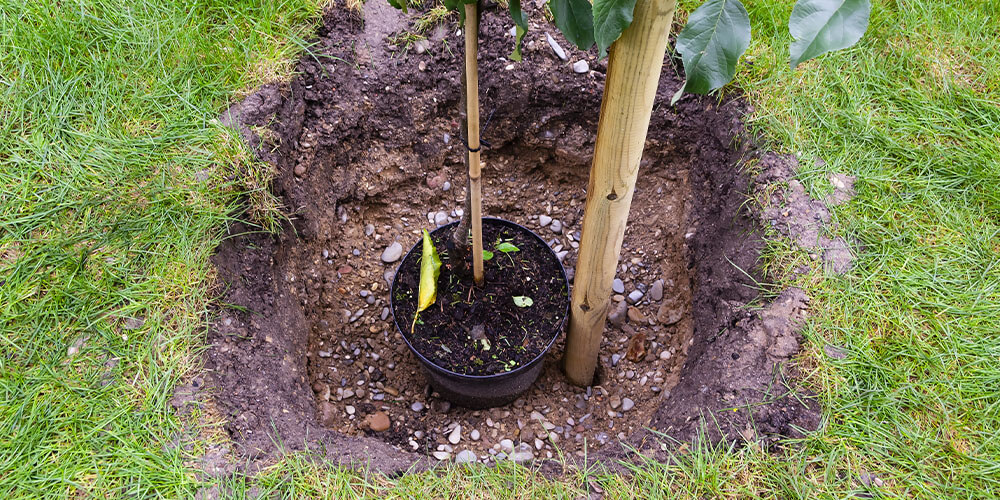
Hold your tree upright by the base of the trunk and make sure the top of the root ball, or the flare of the trunk is at ground level. Place your shovel handle across the top of the hole while your tree is in place; if there’s a gap between your shovel and the top of the root ball, that will give you a good reference point of how much more soil you should add in.
Pile the soil up in a cone shape and place the root ball on top to help the soil penetrate the roots and eliminate air pockets. As you continue filling the hole, tamp down the soil with your shovel to get those air bubbles out. Watering midway through planting can also help eliminate air bubbles.
Spread Mulch Across the Soil
An all-natural mulch free of chemical dyes will help protect your new tree from the elements. It slows the evaporation of soil moisture that occurs on hot, sunny days, and it helps insulate the roots during cold periods. It also helps to prevent weeds from sprouting up around the base of the tree and hogging all the nutrients from the soil.
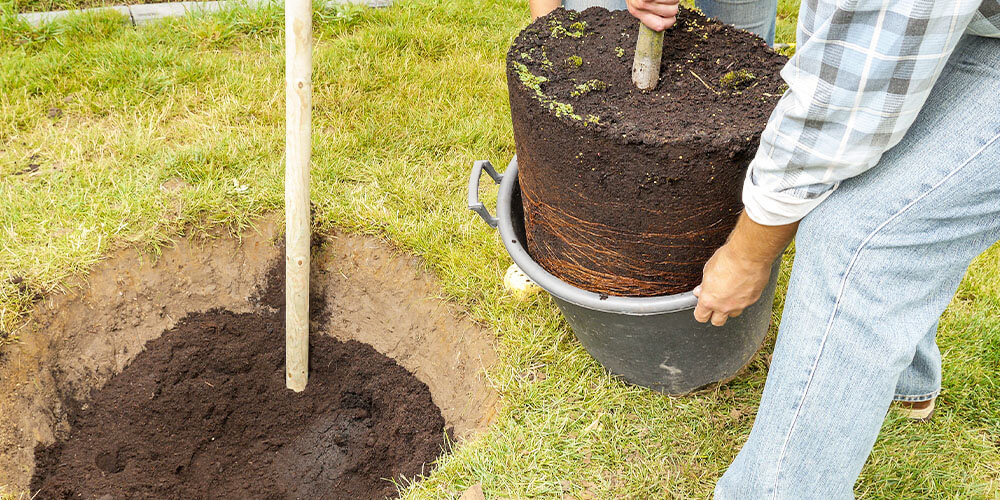
Fill the Hole and Eliminate Air Pockets
Hold your tree upright by the base of the trunk and make sure the top of the root ball, or the flare of the trunk is at ground level. Place your shovel handle across the top of the hole while your tree is in place; if there’s a gap between your shovel and the top of the root ball, that will give you a good reference point of how much more soil you should add in.
Pile the soil up in a cone shape and place the root ball on top to help the soil penetrate the roots and eliminate air pockets. As you continue filling the hole, tamp down the soil with your shovel to get those air bubbles out. Watering midway through planting can also help eliminate air bubbles.
Spread Mulch Across the Soil
Mulch is a must-have; it will help protect your new tree from the elements. It slows the evaporation of soil moisture that occurs on hot, sunny days, and it helps insulate the roots during cold periods. It also helps to prevent weeds from sprouting up around the base of the tree and hogging all the nutrients from the soil.
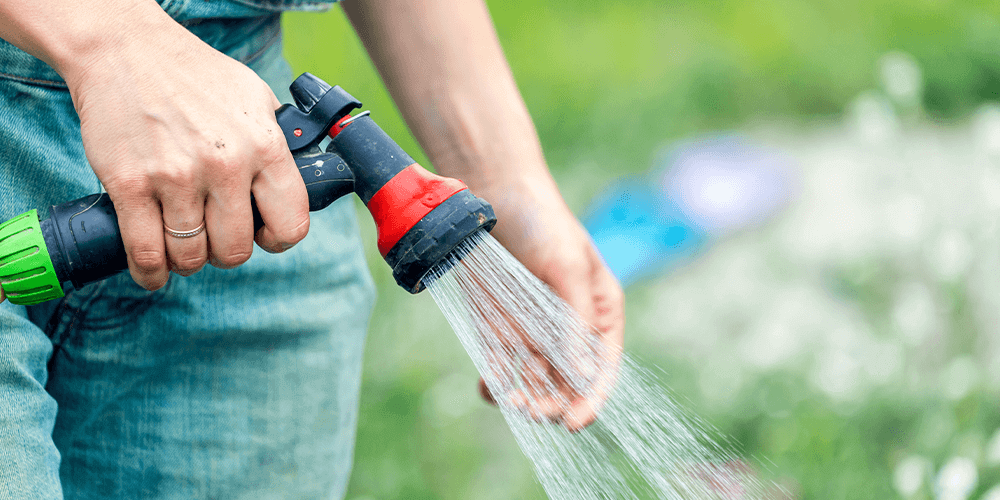
Don’t Forget to Water!
Watering your tree generously after planting is essential to help it get established through fall. We don’t get nearly as much rain in fall as we do in spring, and we had a pretty dry year to begin with, so we have to help our new trees out a bit! Follow this guide for watering your new tree:
- Weeks 1–4: Water deeply 3-4 times per week (depending on weather). A slow trickle of water for 20-30 minutes is ideal to allow for deep watering.
- Week 5–Frost: Taper down the watering to every other week, and give a big drink before the last frost.
- Next Spring—Summer: Water deeply once per week during hot/dry spells. As the tree becomes more established throughout the summer, a deep monthly or biweekly watering can be fine.
Once the ground has frozen, you can hold off on watering until spring.
We have trees, fertilizer and all your planting needs in our garden centre in Simcoe.Fall trees are always a gorgeous sight to behold, so we’re especially motivated to get planting this time of year! If you need any help along the way, our experts at Eising Garden Centre will be happy to share their tips for successful fall tree planting.
If there is one thing that we can all agree on when it comes to our backyard—it’s that privacy is pretty important. Whether you have a massive yard, or a tiny one, creating a barrier between your personal space and the outside world is ideal. The best way to create privacy in your yard is by installing wood fencing or planting hedges or shrubs—and we are rather partial to cedar in both forms. In addition to being great for blocking noise pollution, cedar shrubs will also give you the visual privacy and greenery we all love to experience in our yards.
These are some of our favourite, easy-to-grow cedar shrubs to plant for privacy hedges which will make hanging out in your backyard feel like a vacation every day of the year.

Emerald Cedar
Emerald cedar shrubs have a conical shape featuring bright green foliage and, when planted together, will form a row of tall privacy hedges in your yard. Emerald cedar shrubs (also commonly referred to as arborvitae) should be planted in an area where they get a relatively large amount of sun and should be watered well, particularly when they are young. These privacy shrubs will grow to approximately 15 feet tall and roughly three to four feet wide at maturity. Emerald’s, along with the rest of the cedar shrubs on this list will benefit from winter protection like a layer of burlap, which will help to keep delicate branches from snapping under the weight of heavy snowfall.
Degroot’s Spire Cedar
When planting for a privacy hedge, you will need a little bit of patience when it comes to Degroot’s Spire as they are one of the more slow-growing shrubs, but they are well worth the wait. They are hardy cedar shrubs that grow up to 20 feet in height and three to four feet wide at maturity and make for a great privacy screen. The tall, narrow Degroot’s shrub tolerates a wide variety of well-draining soils. While they are hardy, they will benefit from periodic deep watering during periods of drought, particularly while they are young.
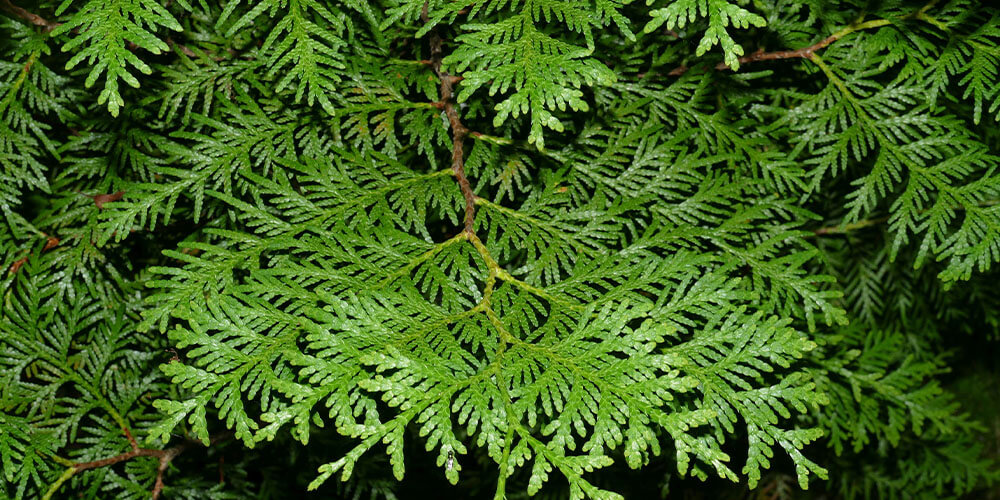
White Cedar ‘Brabant’
This coniferous shrub’s compact growth habit makes it an ideal cedar for privacy fencing. If colour is what you’re after, you’ll love Brabant. Their sprays of scale-like leaves grow in a vibrant yellow-green hue that will brighten up your yard in an instant. These cedar shrubs have an average annual growth rate of a staggering 20 to 30 centimetres a year, making them a popular choice for those looking to create privacy fencing fast. It is relatively low-maintenance when it comes to pruning and will quickly create that dense, natural privacy wall you’re looking for.
Yellow Ribbon Cedar
Yellow Ribbon Cedar is a dense evergreen shrub that is native to both central and eastern Canada, making it a relatively easy-to-grow option for privacy fencing. They produce new growth in a golden hue that eventually matures to green, offering year-round interest and colour. They usually grow to a mature height of anywhere from eight to 10 feet tall, making them an ideal shrub to use for privacy fencing, but their slow growth rate also makes them easy to maintain whatever shape or size you desire.

Alternative Cedar Fencing Options
If shrubs are not your preferred method of creating privacy, we do also recommend cedar as an ideal alternative for wood fencing. It’s a perfect material for wood fencing as it is naturally rot-resistant and does not require pressure treatment. It doesn’t warp or shrink, and it will generally stand the test of time.
If you want to create a unique look, horizontal cedar fencing has recently seen a surge in popularity, and it’s easy to see why. Horizontal cedar fencing can make your yard look more spacious and really just elevate the appearance of your backyard overall.
We hope this deep dive into some of our favourite cedar shrubs to plant for privacy has been helpful! If you’re looking for cedar shrubs for sale in Simcoe, be sure to stop by to see what we have in stock. Our in-house experts would be more than happy to select the best variety for your yard and answer any burning privacy fencing questions you might have!
Butterfly bush, also known as summer lilacs, is a fast-growing flowering shrub perfect for pops of colour in your garden—and for attracting oodles of butterflies to your yard! With deceivingly delicate flowers, it is surprisingly hardy from zones 5 through 9. Sometimes, you may run into a few issues with them. If you’re asking yourself: why is my butterfly bush not blooming? Read our tips for caring for your butterfly bush in Ontario.
Best Butterfly Bush Varieties
There are plenty of varieties to choose from, depending on your needs. These different options boast various bloom colours, all of which pollinators adore. A few we would recommend are:
Pugster Butterfly Bush: The Pugster variety comes in many gorgeous hues including pink, white and blue. This dwarf version is perfect for smaller garden beds or creating some low-level visual interest in any landscape.
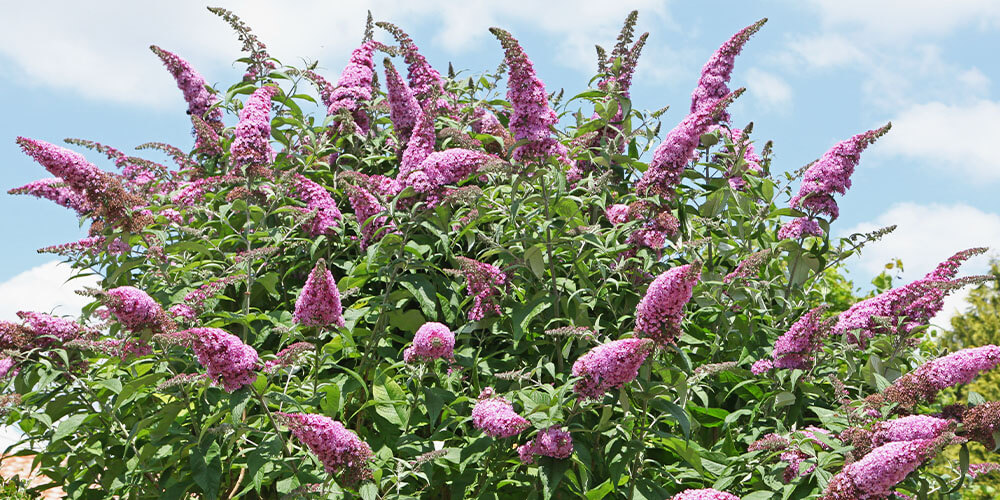
Prince Charming Butterfly Bush: Get swept off your feet by planting this dashing variety. The Prince Charming has boastful, tall, bright pink clusters of honey-scented flowers: a fan favourite of many pollinators (and people).
Royal Red Butterfly Bush: This incredible magenta-red option can grow up to 6-8 feet tall, a real eye-catcher! A variety that loves full-sun, and with proper care, it’s perfect for using as fresh-cut flowers in your summer bouquets.
Planting Butterfly Bushes
When it comes to planting your own butterfly bush, it’s best to do your planting in either spring or fall before your first frost. If you’re planting more than one shrub, make sure you space them 5-10 feet apart so they have plenty of space to grow and won’t be fighting for nutrients and sun. Choose a location that gets ample sunlight, and plant them in well-draining, nutrient-rich soil.
Caring for Butterfly Bushes
Butterfly bushes will do well in full or part-sun. The key to caring for butterfly bushes is to make sure it’s not getting over-watered. Overwatering will cause soggy, rotten roots. If you plant yours in nutrient-rich soil, you won’t need to do much fertilizing. In fact, too much fertilizing can cause the plant to direct energy into growing foliage and not the flowers.

How to Keep Your Butterfly Bush Blooming
If you are asking yourself “why is my butterfly bush not blooming?” there could be a few culprits. Consider these tips for getting your butterfly bush blooming, or reblooming.
You need to prune it back: The butterfly bushes’ blooms will only grow on new wood. An occasional, thorough haircut in early spring will entice it to grow back to its full glory. Many owners of deciduous shrubs are hesitant to prune back too much, but the butterfly bush loves it! New blooms will not grow on the branches of last year’s growth, so an early spring or late winter trim will allow you to shape the bush and promote new growth.
You need to deadhead it: Deadheading works very well when it comes to enticing new blooms on the butterfly bush. Once the blooms start to look dry and slightly withered, it starts to look a bit sad, and you can give the shrub a chance to push out another round of blooms with some thorough deadheading. Simply pinch just below the dried bloom, being careful not to pinch off new buds.
Check the growing conditions: Finally, be sure that your shrub is getting everything it needs from the sun, soil, and water. If your butterfly bush is not blooming, it could be under stress because of the growing conditions, or it could be overly fertilized with a nitrogen-rich fertilizer. Check to make sure the soil is moist but not soggy, and check the nursery tags to make sure that it’s getting the prescribed amount of sun.

Put the “Butterfly” back into “Butterfly Bush.”
Although butterfly bushes attract adult butterflies, they don’t always have what it takes to nurture the caterpillars that turn into our beautiful pollinating friends. If you want your garden to become a real haven for butterflies, you can plant milkweed, dill, and aster. Then, you’ll have a paradise for the entire lifecycle of a butterfly. Bonus: planting species that caterpillars love will distract any from potentially munching on your butterfly bush!
If you’re just as excited as we are about this incredible shrub, come visit us to find out more about getting your own butterfly bush in Simcoe.
Hydrangeas are absolute showstoppers when it comes to the world of flowering shrubs. These colourful beauties are the backdrop in many selfies and the envy of any neighbourhood. Caring for hydrangeas takes a bit of knowledge, so read on for ways to troubleshoot any problems that may come your way while you grow these glorious blooms.
Old Wood Versus New Wood
Get familiar with the terms ‘old wood’ and ‘new wood.’ These terms are a key differentiator between types of hydrangeas and will help guide how you care for them. Some types will bloom on old wood, as in, the buds will only form on wood that was grown the previous year. New wood hydrangeas will bloom on the new woody stems that grow during that season. Knowing the differences between old wood and new wood will help you find out how much sun, water, and pruning your hydrangea needs and tackle any problems.

Watering Your Hydrangeas
Hydrangeas love moist, well-drained soil—but avoid oversaturating the soil. If their roots sit in water for too long, you’ll have unhappy plants with rotting roots. Another common problem with hydrangea care is underwatering. Their root systems are quite shallow and dry out quickly. Remember that the word hydra is even in the name! Frequent waterings without being soggy is the way to go.
Sunlight for Hydrangeas
The amount of sunlight will depend on the variety. Before planting your hydrangeas, evaluate your yard for sunlight and shade throughout an entire day. You’ll find many varieties of hydrangeas that enjoy a full-sun area. Little Quickfire, Little Lime, and Firelight are three types that will love basking in the sun. If you have a shadier spot, explore partial shade-loving types like Incrediball, Annabelle, and Invincibelle. Be sure to select varieties that you love, and that love the space you choose for them. Planting hydrangeas in improper lighting can lead to problems with health, blossoms, and growth.
Common Hydrangea Problems
Drooping Plant: If you’re having a problem with your hydrangea being dramatic and drooping, it’s likely that it’s just under-watered. Give your plant a thorough watering and within just a few hours, you’ll see a big difference.
Hydrangea Leaves Turning Yellow: If leaves are turning yellow, it is also likely a watering issue. Too much or too little water can cause the discolouration of hydrangea leaves. If you have let your plant become too dry, you should gradually water it, but not all at once! Too much water at once can shock the plant and further damage it.
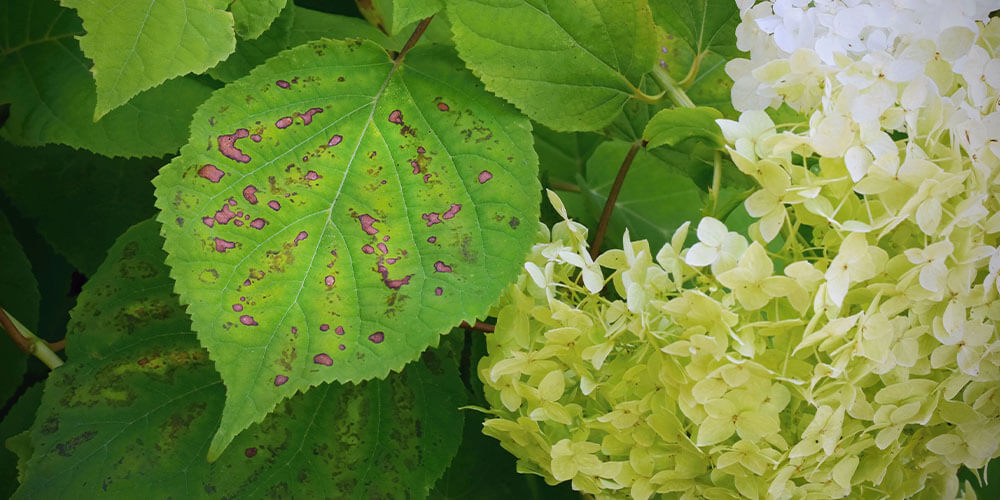
Unsightly Spots on Leaves: If you notice some not-so-stunning spots on your hydrangea leaves, it’s likely one of two issues. Those spots are usually either a fungal or bacterial infection on the plant. To deal with this problem, first, identify which one it is. Fungal spots are usually brown or tan, whereas bacterial spots may be red or purple. In either case, you can begin by applying a fungicide or removing a few branches of the flowering shrub to improve air circulation.
Hydrangea Leaves Turning Brown: Browning on the leaves may be a sign of fertilizer damage or it could be hydrangea rust. If you suspect the problem is a result of fertilizer, you can thoroughly flush the surrounding soil with water and then let it dry out for a few days. Treat leaf rust by avoiding getting water on the leaves of the plant, removing infected leaves, and possibly treating with a fungicide.
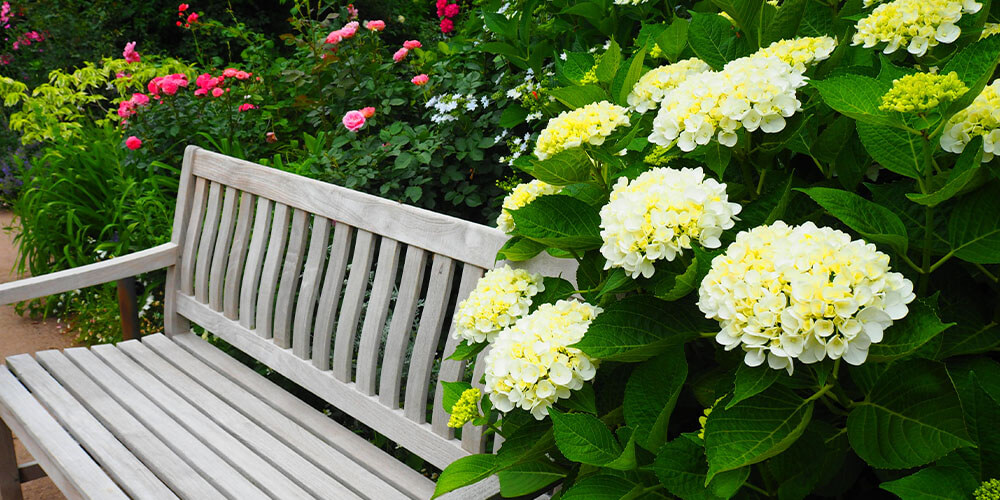
While there are a few things to keep in mind when applying some tender-loving care to your hydrangeas, it’s absolutely worth the effort! Learning more about common hydrangea problems will help you become an expert on this beautiful blooming shrub. If you’re looking for a hydrangea bush in Simcoe, or need any advice, come visit us!
If your home decor is feeling a little uninspired lately, adding one large indoor plant in a pretty container can make a world of difference! With vibrant, fresh colour, big glossy leaves, and powerful air-purifying properties, you’ll love the way your room feels with the addition of an extra-big houseplant.
Big Houseplants = Maximum Style Impact
These beautiful behemoths grow to impressive heights, instantly becoming the focal point of any room. With all the beauty and style of a tall, elegant art sculpture, but with a much more modest price tag, there are so many reasons to love these large indoor plants.
Majesty Palm
A breezy palm plant never fails to bring that carefree “California coast” vibe to your indoor scenery. They grow up to 10 feet tall, so if you want your majesty palm to get as large as possible, fertilize it from spring to fall and repot it in a slightly larger container every two years. This tropical beauty is also non-toxic and pet-friendly, so you can safely add it to your home decor if you’ve got cats, dogs, or curious kids.
Snake Plant
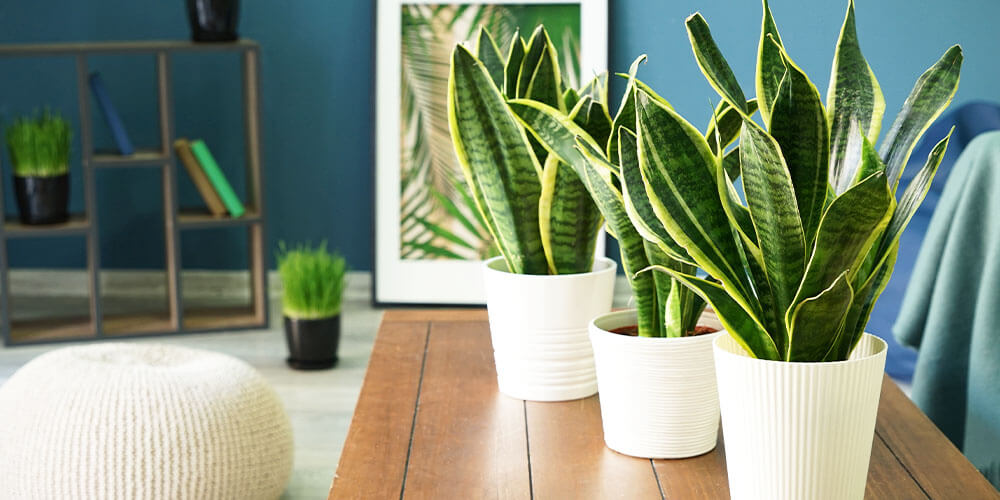
The snake plant, or sansevieria, is one of the easiest large indoor plants to grow. It thrives in low light, only needs to be watered 1–2 times per month, and it has the most incredible foliage! Its tall leaves grow upward like swords but with a slight ripple and beautiful colour variegation. They’re an excellent large plant for small indoor spaces because they don’t spread outwards and can be easily tucked into tight corners.
Philodendron Hope Selloum
The ruffled texture of this rainforest beauty adds an exciting, exotic edge to your decor. Like many other large-sized philodendrons, this plant produces aerial roots that help it cling to surfaces so it can grow even taller. A moss pole or stake can provide some extra support so the climbing stems can remain supported. However, if you accidentally break one off, don’t fret! The cut stems can live in a vase of water for several months, so they make a cool decor accent for your coffee tables and shelves.

Monstera Deliciosa
This super stylish indoor plant is large and in charge! Its distinctive hole-filled leaves have the most gorgeous, satiny sheen. Resist the urge to put them in direct sun—it will scorch that fabulous foliage! Instead, find a spot with bright, filtered light. After all, this plant is accustomed to living under a rainforest canopy of tree leaves, so it prefers a little protection.
Money Tree
What makes the money tree so special? On top of having large leaves that fan out like big green stars, it has multiple flexible trunks that are often braided early in its development. The result is an absolutely gorgeous, sturdy trunk that looks like woven rattan furniture. Find bright, indirect light for your money tree, and turn the pot 90 degrees each time you water it. This way, the leaves will get equal exposure to the sun, and you won’t end up with a lopsided plant.
Fiddle Leaf Fig
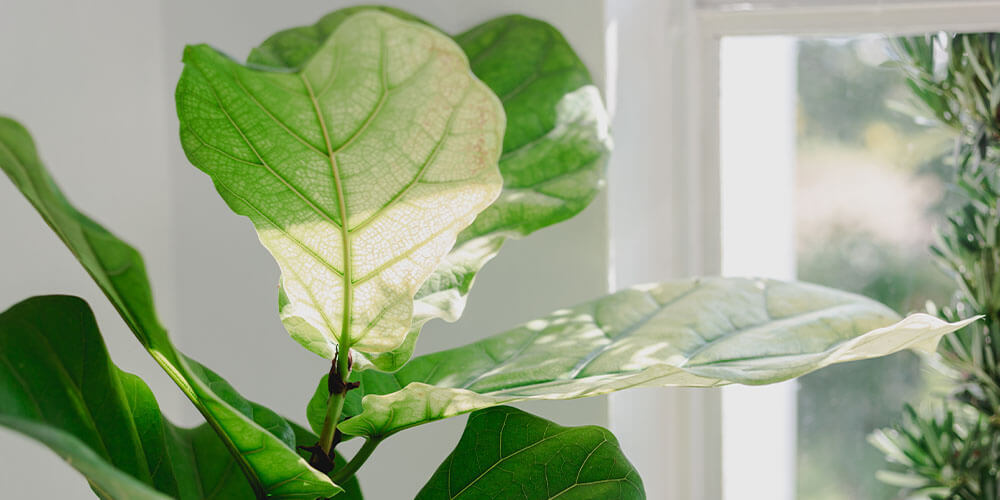
If you’re on the hunt for large indoor trees that won’t completely take over your whole room, the fiddle leaf fig is an absolute must. Its stunning foliage has us absolutely swooning! However, it is a bit more finicky than your typical houseplant. It likes humid air, is very sensitive to cold drafts, and prefers bright, indirect or filtered light. Once you find the perfect spot in the room for your fiddle leaf fig and nail down a consistent watering routine, it should remain glossy and gorgeous.
Looking to buy large indoor plants in Simcoe? Visit Eising Greenhouse and Garden Centre—we’ve got an incredible collection for summer 2021 that you’ll absolutely adore!
Fertilizing plants can be a bit overwhelming to new gardeners, but it can be an incredible tool to boost your blooms, create lusher leaves and tastier fruits and vegetables. Learning a few basic rules about plant food can help you feel more confident as you shop around on your next trip to a garden centre. At Eising, we want you to get excited about your plants and feel capable as you navigate the exciting world of gardening. Get your green thumbs out and read more about fertilizer.
Why Do We Need Fertilizer?
In their natural habitat, plants don’t have someone mixing their soil in with fertilizers. However, most of the plants we nurture in our gardens aren’t growing in their native regions or environment, so sometimes they need a little help. Adding fertilizers to your garden can help it grow healthy and strong and even provide better fruits, vegetables, and flowers. Soil health is key to great gardens, so learn how and when to apply fertilizer to your plants for the best outcomes.
The Letters on Fertilizer Packaging
Fertilizer has an array of different nutrients that are crucial to plant growth. The main chemicals are Nitrogen(N), Phosphorus (P), and Potassium (K). On most labels, you’ll see the letters NPK clearly displayed.
Depending on the soil conditions and region you live in, many of your garden plants will need a bit of a boost. Each nutrient generally promotes certain types of growth: For healthy foliage, nitrogen will do the trick. For root growth and better blooms, you can count on phosphorus. To help overall health, potassium is the way to go.

The Fertilizer Numbers
Seeing all those numbers is intimidating, but we will try to make it simple. You don’t need to have aced your biology and chemistry exams to use fertilizers effectively. Use the numbers as a guide to give your plants the best boost.
These numbers, known as NPK numbers, represent the amount of each element you’ll find in the package. For example, a fertilizer that has equal numbers across the board, 10-10-10, is considered a balanced fertilizer. Nitrogen, phosphorus, and potassium are present in equal parts.
One with varying numbers, such as 10-20-10, shows a higher ratio of Phosphorous (P) in this particular mix. The packaging will always follow the N-P-K order, which will help with any confusion.
Some brands list “micronutrients.” Fertilizers with micronutrients will have small amounts of naturally occurring elements such as manganese and copper, for example. Micronutrients are great additions to keep plants strong, thriving, and resistant to issues like diseases.
Remember that if you’re wondering about the best fertilizers in Simcoe, you can contact us. We’ll help you find the right match for your plant’s needs.

Tips for Using Fertilizer
You can never go wrong if you follow the instructions on the packaging. Make sure you thoroughly read the instructions before getting started. The makeup of fertilizer can be as unique as your plants are; they all have different nutrient ratios, and many factors require additional steps and precautions. Using the wrong type of fertilizer or using it the wrong way can spell disaster!
While it can be a bit tricky, the more you know, the better! That's why we are here—feel free to contact us anytime with any gardening questions. We’re always happy to help!
Using thrillers, spillers, and fillers in your garden pots is incredibly fun and a great way to express your creativity. All you need is some sun, soil, and plants that get along well together. The possibilities are endless when it comes to container garden design. Use this guide to make the best choices for your planters this season.
Container Garden Design Layouts
We all want breathtakingly beautiful gardens! When it comes to designing your garden pots with thrillers, spillers, and fillers, there are some guidelines you can follow to create cohesive and gorgeous container gardens. Keep this guide in mind so you can avoid some amateur mistakes—but remember, gardening is about experimentation and creativity! You will find out through trial and error what works and doesn’t work for you. Designing your garden should always be about making your life easier and more enjoyable. Here’s a breakdown of the elements of beautiful container gardens.
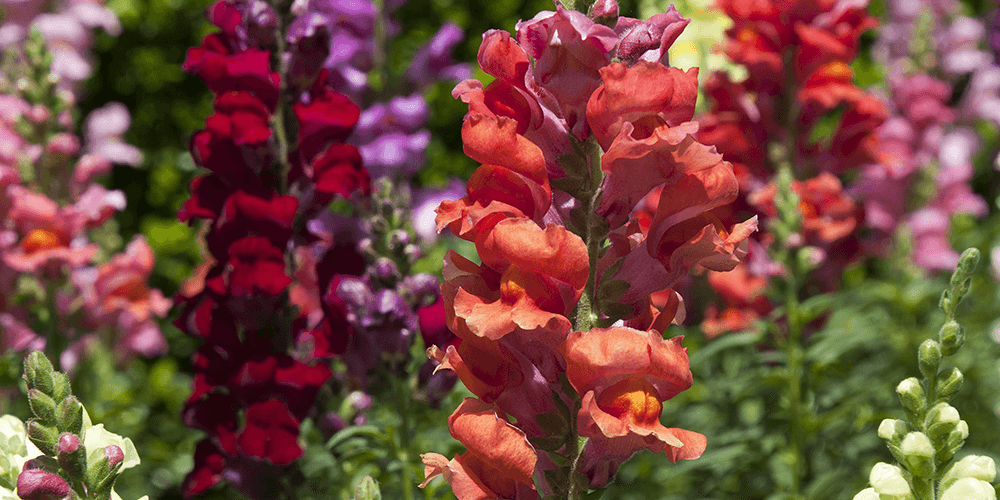
Thrillers
Think of these as the focal point of your container garden. Thrillers are the tallest plants and should go in the centre or back of your garden pots. Opt to plant them at the back of your containers if you’re placing them along a fence or wall. Some spectacular and tall plants to use for thrillers are:
- Snapdragons
- Snake plants
- Cordyline
- Lilies
- Ornamental grass
- Amaranth
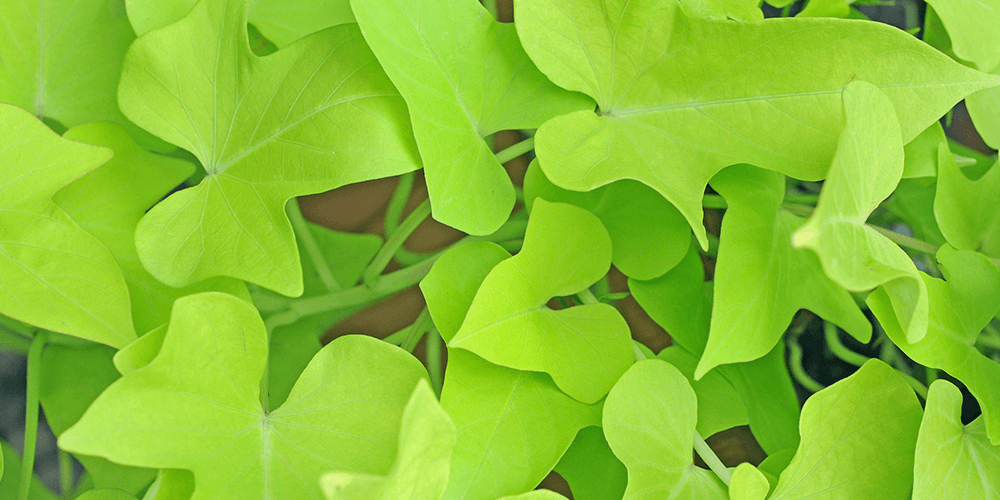
Spillers
Spillers are aptly named because they trail or “spill” down the sides of your garden pots. You’ll want to plant these romantic beauties along the perimeter of your garden containers so they can quickly and easily drape over the edges. Some favourite spiller plants include:
- Sweet potato vine
- Creeping Jenny
- Petunias
- Myrtle
- Creeping Phlox
- Lobelia
- Silver Falls
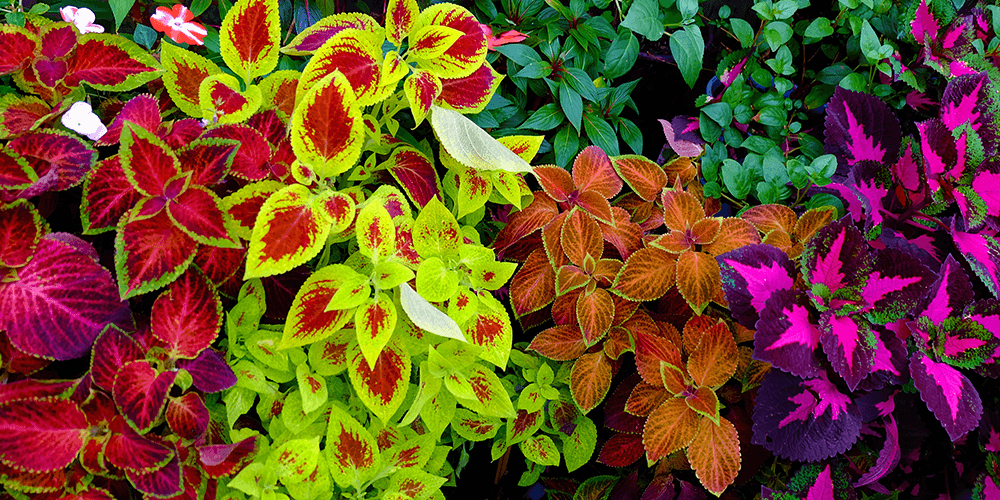
Fillers
You can probably guess what filler plants are; they fill the space between the thrillers and spillers. These are generally plants that don’t get too unruly and won’t compete with other plants. Some great examples are:
- Coleus
- Ornamental cabbage
- Caladiums
- Impatiens
- Geraniums
- Coral bells
- Silver ragwort
Now you know the difference between thrillers, spillers, and fillers, you can get creative with varieties and colours.
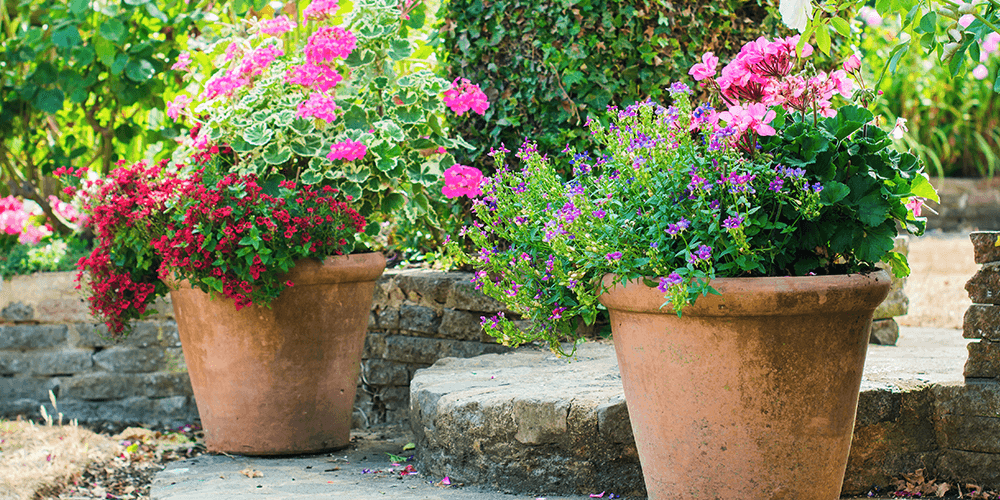
Container Gardening Strategy
Get strategic as you plan your container garden. As you choose which plants to place together, you’ll need to know what each needs in order to thrive. Choosing thrillers, fillers, and spillers that won’t compete with each other is key to beautiful and thriving garden pots.
Light: Measure the light for the location you hope to place your containers. Choose plants that can thrive under those light conditions. Keep in mind that your “fillers” or any low-growing plants may get shaded out by your tall-growing thrillers.
Water: You’ll need to find plants that have complementary water needs. When you are planting thrillers, spillers, and thrillers in one location, they will be sharing the same soil and if you are watering one, you’ll be watering them all. Choose plants that have similar watering needs and consider the rain conditions in the area you live in. If you are expecting a dry season or need plants that can withstand some neglect, select as many drought-resistant plants as possible.
Pest Control: If you really want to step up your garden game, find out what pests and diseases your plants are susceptible to. Knowing the ins and outs of all the thrillers, spillers, and fillers that share a space in your garden pots will help you troubleshoot and prevent infestations of pests and disease.
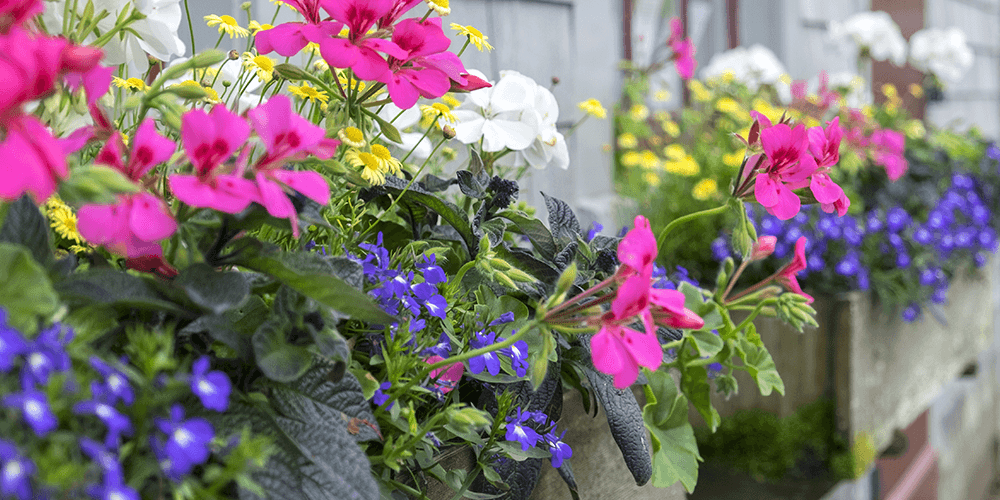
Playing with Colour
Playing with colour is one of the best parts of planting thrillers, spillers, and fillers into your garden pots. You may already have a clear vision of what colour schemes you want to incorporate into your garden, but if you need some guidance and inspiration, try some of these ideas.
- Go monochromatic. Keep things simple by sticking to one colour. For example, yellow is one of 2021’s hottest colours. You can plant thrillers, spillers, and thrillers of every shade of yellow and gold. Whichever colour you choose, you’ll likely be able to find many different plants that create visual interest with different textures, heights, and growth patterns.
- Choose a warm or cool palette. If you want to branch out from the monochromatic look, you can stick to either a warm or cool palette. Warm palettes have orange, gold, yellow, red-purple, bright green, and fire engine red. Cool-toned gardens would have hues like indigo, lavender, emerald green, silver and blue.
- Study the colour wheel. The colour wheel is a tried and true method of choosing plants for your garden pots. It can show you complementary, analogous, and triadic colours that will look stunning together.
We hope this guide can help you get excited and inspired about the plants to use in your garden pots this year. We’d love to hear about your design choices! If you’re looking for thrillers, spillers, and fillers for sale in Ontario, come visit our garden centre!
Think outside the garden box! We have an easy garden makeover secret to share—if your garden needs a little more colour, texture, and beauty, try these climbing plants for your wooden fences, trellises, and more.
Kiwi Vine
Kiwi vine is one of the best climbing plants for beautifying wooden fences. Think of the kiwi vine as the kiwi fruit's Canadian cousin. Hardy kiwi vine can withstand Ontario winters and can still bear fruit, albeit a bit different than warm-weather kiwi. The grape-sized fruit is sweet and can be eaten whole. Its heart-shaped leaves add a sweet charm to any fence, pergola, or trellis.
When it comes to caring for kiwi vine, scout out a nice sunny location for prime colour and beautiful leaf variegation. If you're planting in the hopes of tasting its delicious fruit, you will need both a male and female variety or choose a self-pollinating variety. You may also need to wait a few years: it can take up to 9 years before it starts producing fruit. However, some types only need 3-5 years. Be sure not to let your kiwi vine overcome trees or choke out any shrubs around it.

Honeysuckle Vine
Crowned the Queen of Flowering Vines honeysuckle will fill your garden with sweet scents and long-lasting flowers. Honeysuckle vines are the perfect climbing plants to grow along wooden fences to create a beautiful privacy screen. Their clusters of tubular flowers come in many hues to match your garden aesthetic. The strong scent of these flowers are the perfect attraction for hummingbirds, butterflies, and other pollinators.
Clematis
In recent years, clematis has become known as one of the best climbing plants for wooden fences and other structures. When choosing a clematis for your garden, consider what mature height, colour, and flower form would work best for your space. Some clematis varieties can easily take over 10-20 feet of space, while others come in a compact version for smaller areas. Their romantic bell-shaped flowers can be found in gorgeous shades of wine red, lavender, dark purple, white, and yellow. To keep care simple, prune back dead vines after mid-spring.

Climbing Roses
While technically shrubs, climbing roses can accomplish the same thing as a vining plant. Roses are one of the best climbing plants to turn wooden fences into an enchanting photo backdrop or secret garden-style gate. There is plenty of variety, so choose the bloom style and colour that sparks joy. In order to get the perfect lush rose garden feel, you'll need to train these climbers. Without training, you'll still have a few beautiful roses bloom, but they may look a bit long, gangly, and sparse. In order to train your roses, you can tie the stems to a trellis to guide their growth. Your roses will need ample fertilization, so be sure to keep track of their feedings. If you're looking for climbing roses near you in Ontario, visit our garden centre, we'll help you find your best rose match.
Virginia Creeper
Virginia creeper is a low-maintenance vine that is one of the best plants for carefree climbing of fences, wooden, or otherwise. They are sometimes confused with grapevines, but beware, Virginia creeper berries are toxic to humans. You can remove the berries for the safety of your children, but birds will happily devour them. Virginia creeper won't ask much of you: just watch out for scale, beetles, and leafhoppers. Prune off any branches that have been broken, and you can prune back any areas that are becoming too thick for your liking.

Blue Moon Wisteria
Turn your wooden fences into a magical fantasy world by planting blue moon wisteria: your best bet for climbing plants with style. Blue moon wisteria has lavender or powdery-blue pea-shaped flowers. Even the leaves have a unique beauty: they emerge as a coppery-bronze shade in spring and transform into a vivid green. They are a gorgeous addition to any structure. It loves to climb and drape romantically over edges of trellises, pergolas, and fences. In addition to their whimsical appearance, they'll also attract beautiful hummingbirds. Prune blue moon wisteria only after it's done blooming for the season.
Get your wooden fences looking their best with these ideas for the most beautiful climbing plants. If you are looking for supplies or support to have an amazing garden, don't hesitate to contact us. We look forward to helping you!