
5 Easy Steps To Get Started
By Ava Green
There’s a common myth that you need a lot of space to grow vegetables, but whether you have a few containers, a small sunny corner, or a larger garden bed, there’s lots you can grow! Here in Norfolk County, which is Zone 6 in Southern Ontario, some vegetables can go in the ground as early as the beginning of May, while many others are usually safe to plant around the May 24th weekend, once the risk of frost has passed. Here are five simple steps to get you growing your own food this season if you’re new to vegetable gardening.
Step 1: Decide What You’d Love To Grow
Start with a list of the vegetables you actually want to eat. Coming into Eising Garden Centre with a list in hand makes choosing plants so much easier! When building your list, consider:
- Vegetables you love
- High-value vegetables, the ones that are expensive at the grocery store but easy and economical to grow yourself
- Anything that tastes better when it’s freshly picked, like tomatoes, cucumbers, and fresh herbs

Step 2: Make a Simple Plan
You don’t need an elaborate design; a rough sketch on a scrap of paper is just fine. The goal is simply to get a sense of your space and where things will go before you start digging. We recommend starting a garden notebook or journal to track what you plant each year and how it performs. It will be especially helpful next spring!! A few planning tips to keep in mind:
- Most heat-loving vegetables, such as tomatoes, peppers, zucchini, eggplant and beans, need at least six hours of sun per day
- Cool-weather and shade-tolerant crops like lettuce, chard, kale, radishes, and beets do well with just three to four hours of sun
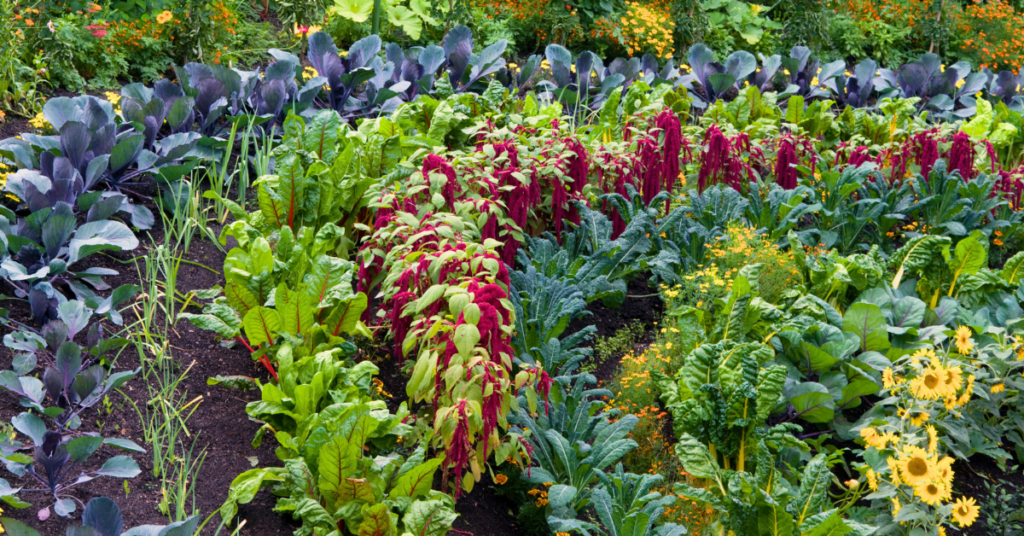
- Spacing in a vegetable garden can be much tighter than in other types of gardens. Less empty space means fewer weeds and bigger harvests. Square foot gardening is an excellent method to explore
- Layer your garden beds with plants that are great companions. For example, basil and marigolds planted beside tomatoes are said to improve flavour and repel pests. Carrot and beet seeds tucked in beside and between your lettuce plants (which are a cool-weather crop) are a smart pairing; as your lettuce finishes in the summer heat, your carrots and beets will be sprouting up to take their place. This is referred to as succession planting and optimizes the space in your garden
- Make use of vertical space with poles or trellises for peas, pole beans and cucumbers
- Tuck herbs into any gaps between your vegetables; they’re useful, beautiful, and most pollinators love them
Step 3: Prepare Your Space
Once you’ve chosen a spot with enough light, it’s time to get the soil ready:
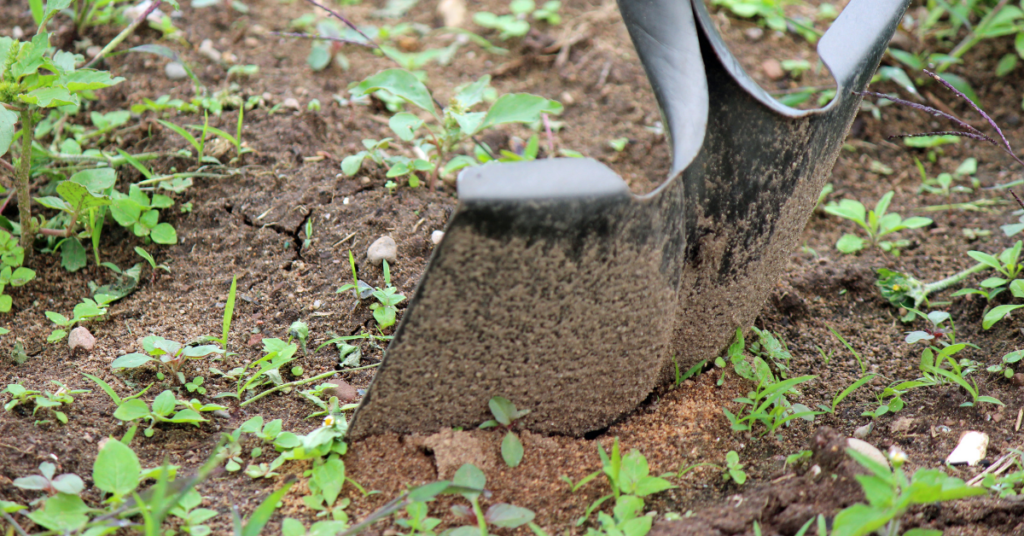
- Remove any sod or weeds before planting. If you’d rather not dig, the No Dig gardening method uses a layer of cardboard as the base for the new bed. This suppresses weeds naturally and breaks down into the soil over time
- Add a good-quality compost to your soil by either spreading a layer across the top of the garden bed or scooping some into each plant hole
- For container gardening, almost any container works, just make sure it’s deep and wide enough for the mature size of your plants. Also, drainage holes are a must! Fill containers with a soilless mix containing compost, peat moss or a peat alternative, and one of the following: sand, vermiculite, or perlite. Avoid using garden soil, triple mix, or topsoil in containers, as they compact easily and will restrict root growth. Learn more about soil mixes, amendments, and fertilizers here
Step 4: Water and Feed Consistently
Consistent watering and feeding are the foundation of a productive vegetable garden:
- Vegetables need regular, reliable watering. Inconsistent moisture leads to stressed plants and poor yields
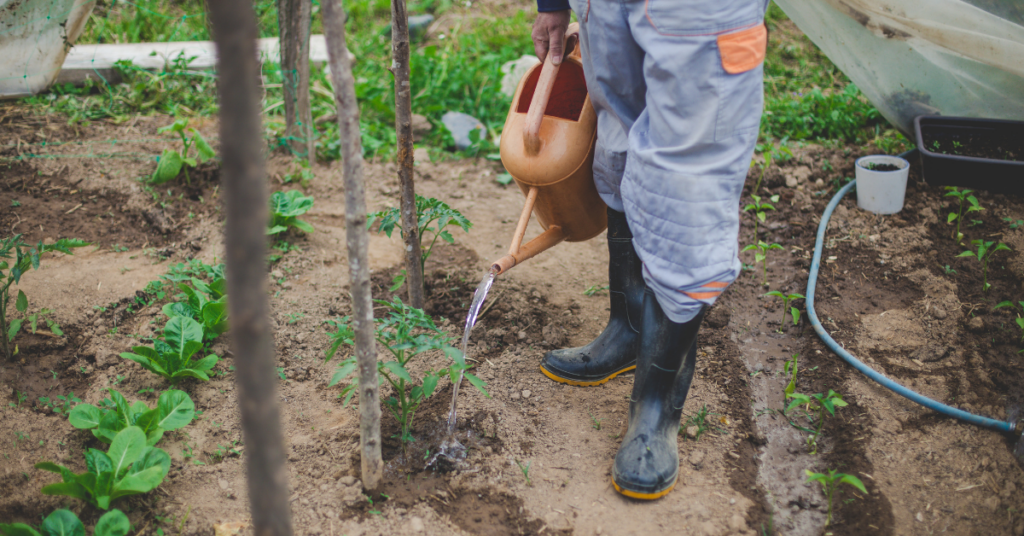
- Always water the soil, not the leaves. Plant roots take in water, and wet foliage can invite disease. Water deeply so moisture reaches the roots. Use your fingers to check how far down the water has penetrated into the soil
- Containers dry out faster than garden beds and will need more frequent attention
- Morning is the best time to water. If your plants are struggling on a particularly hot afternoon, a second watering is fine. Just be sure to aim at the base of the plant and avoid the foliage, which can scorch in direct sun
- Feed with organic fertilizers throughout the season to keep your plants healthy and productive. Follow the package instructions for the product you choose
Step 5: Plant Flowers for Your Pollinators
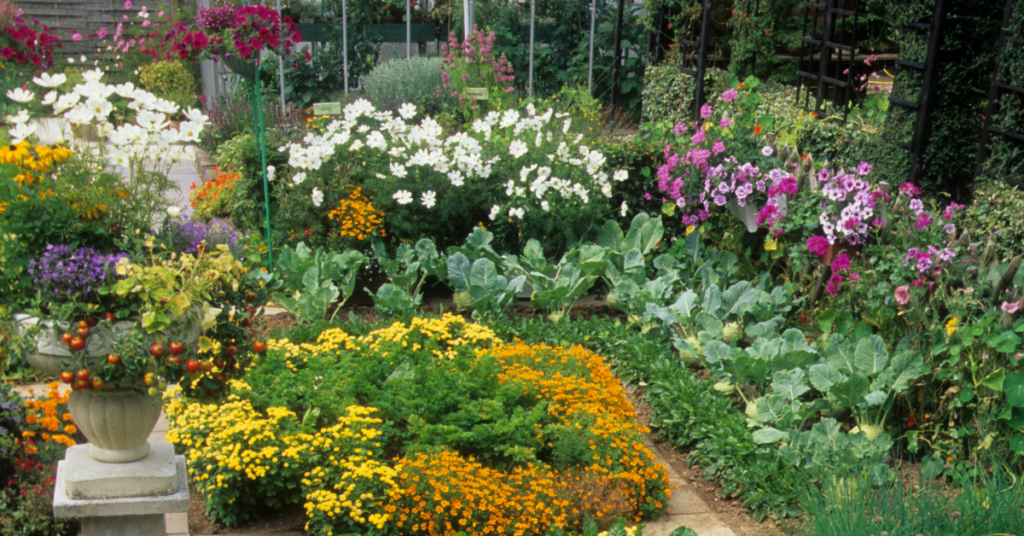
A vegetable garden without pollinators is a garden that won’t reach its full potential. Attracting bees, butterflies and other beneficial insects to your garden is one of the best things you can do for your harvest. Some of our favourite pollinator-friendly flowers for the vegetable garden include marigold, calendula, nasturtium, borage, sunflowers and culinary lavender. As a bonus, most of these are edible, so they earn their space twice over.
It’s Time
Starting a vegetable garden is one of the most rewarding things you can do with an outdoor space. There’s a quiet satisfaction in growing something from seed or a seedling and bringing it to your own table.
Start simple, grow what you love and don’t be afraid to learn as you go.
The team at Eising Garden Centre is always happy to help you choose the right plants for your space and answer any questions along the way. This could be the season that changes the way you think about your garden!
Resources:
Why Use a Garden Journal?: https://eising.ca/why-use-a-garden-journal/
Square Foot Gardening: https://www.almanac.com/planning-square-foot-garden-grow-more-less-space
Fertilizers & Soil Amendments: https://eising.ca/fertilizers-soil-amendments/
Companion Planting: https://eising.ca/companion-planting-with-herbs/ and https://eising.ca/incorporating-vegetables-into-your-garden/
Optimizing the Gardening Season: https://eising.ca/optimizing-the-gardening-season/
No Dig Gardening Method: https://charlesdowding.co.uk/blogs/no-dig-resources/beginners-guide
Reading Plant Tags: https://eising.ca/full-sun-part-shade-what-do-plant-tags-actually-mean/
Growing Vegetables in Pots: https://eising.ca/planters-are-for-more-than-flowers/
By Ava Green ☀️
One of the most common reasons plants struggle comes down to light. Specifically, whether the spot you’ve chosen gives your plant the light conditions it actually needs.
The good news? Once you understand what the terms on a plant tag really mean, matching the right plant to the right spot becomes second nature. And when a plant is happy in its environment, it grows stronger, looks better, and is far less vulnerable to pests and disease because it simply isn’t under stress.
Before You Plant Anything, Do This First
Light conditions in a garden can be surprisingly tricky to read unless you’re paying attention. A garden that feels sunny might not actually deliver the hours of direct light that certain plants require. A shady corner might get more sun than you think.
So here’s your homework assignment, and it’s a very nice one.
Go outside and sit for a while. Find the spot where you would like to plant and observe it for a few days in the summer. Track how many hours of direct sunlight that area receives, hour by hour. Jot it down on a piece of paper. Average it out over a few days for a reliable picture.
Fair warning: this assignment may require a chaise lounge, a good book, and something cold to drink.
Once you have this data, you’re ready to move forward!

Decoding Light Terms
No more guessing at the garden centre! Here’s exactly what each term means.

Full Sun
At least 6 hours of direct sunlight each day. Plants in this category are sun-lovers: most vegetables, lavender, roses and many annuals and perennials.

Part Sun
4 to 6 hours of sun including some afternoon sun. The hours don’t need to be consecutive; a few hours in the morning and a couple more in the afternoon. Not all of it needs to be intense, direct light.

Part Shade
Also 4 to 6 hours of sun, but with a preference for morning light rather than the stronger afternoon sun. These plants appreciate some protection from the harshest part of the day.

Full Shade
Fewer than 4 hours of direct sun per day. If direct sun hits these plants, morning sun is ideal. Plants that appreciate these conditions are woodland plants, hostas and ferns.
Why Getting This Right Saves You Time and Money
A little observation before you plant is genuinely one of the most valuable things you can do as a gardener. It takes the guesswork out of every purchase and saves you from replacing plants that were never suited to that spot. Most importantly, it gives you a garden full of plants that actually thrive there.
The best gardens aren’t built on luck. They’re built on knowing your conditions and planting accordingly. Now that you’ve cracked the code on light, you’re already ahead of the game.
Bonus - Signage at Eising Greenhouses and Garden Centre!
You'll notice our signage has icons to help you best decide which plants are right for you and your situation!

- If you see a little paw print on our signs or pots, this means we're proud to say this plant is pet friendly! We love your little critters too!

- The number of raindrops on our signs indicates how much water this plant will need

- Signs with these icons indicate the plant naturally deters pests like deer and rabbits
By Dave Zeldon and Ely Schweyer
Got cabin fever? Perhaps you’re going a little stir crazy looking out the window and seeing the drab, limited pallete in your seemingly lifeless outdoor space. It’s important to embrace this time of year as the composting and cleansing part of Earth’s cycle before spring’s renewal – but that doesn’t mean we should be trapped inside forever. Here’s a winter/early spring list of activities, divided by indoor (Part 1) and outdoor (Part 2), for the gardener and yard keeper.
☝️ First, let’s quickly note the important activity happening under the snow – and how your actions now will affect the summer garden!
What's Going on Outside When We Aren't Paying Attention?
Before heading out to attend to these jobs have a look at the ground beneath you.
If it is frozen hard you are good to go but avoid treading on the crowns of perennials.
If it has been warm and sunny and the soil is warm and dry, consider laying down a few planks to walk on.
If the soil is soggy then postpone those tasks until it has dried. What we are trying to protect is not your shoes but the soil itself.
Ideally, soil is comprised of 50% solid materials such as minerals and organic matter in various stages of decomposition, and 50% open air space. Water from rain or melting snow enters the soil, displacing the air. Wet soil is easier to squish down and that process is called compaction.
While walking on wet soil would not seem to have much effect, it occurs within the depth where annuals, perennials and lawn grasses have their roots. Compaction makes it harder for roots to grow through the soil. Roots can grow stronger to push aside the soil particles, but tougher roots are less effective at drawing in nutrients and moisture. Removing air spaces makes it more difficult for water to percolate down so compacted soils remain wetter. Plants don’t grow as well and are more prone to insect damage.
The freeze/thaw cycles of fall, spring, and winter heave the soil relieving compaction and aerating the soil; a good way to start the growing season. Preventing further damage to the soil is relatively simple. Stay off it when it’s wet. Later, consider using pavers or pathways in heavily travelled areas of the lawn. Aerate the lawn with a machine that removes small plugs of soil and redistributes them over the surface. In beds and borders, add compost and use a thick mulch layer to absorb some of the pressure.
And stay off it when it’s wet.
With this in mind, we can appreciate Earth’s renewal capabilities, as well as prevent destroying our yards and gardens!

Part 1: Activities for When it’s too Cold and the Soil isn’t Ready Yet
Yup, it’s bleak out there. It’s time we make that herbal tea and turn our attention to creating a lively, green indoor environment, even if just to get us through the winter. Here’s a to-do list for trapped gardeners and plant enthusiasts to make the most of our wintry sentence.
Indoors: Get Inspired!
- Expand your knowledge: There’s an endless plethora of botanical media at our fingertips, use this down time to learn more!
- Sustainable winter crafts: Why buy décor and gifts when you can make them from materials found outside? Perhaps you dried flowers or found some interesting seed pods – time to display them, and perhaps, eventually compost them.
- Visit botanical gardens: Ely’s boyfriend took her to the Royal Botanical Gardens as a birthday gift last year! Botanical gardens are a great way to experience interesting plants being preserved in a welcoming environment that differ from the dreary winter outside.
- Get floral: Try buying flowers and displaying your own arrangements! Colour is something we sometimes lack in the wintry months, and this is a good way to introduce it impermanently.

Indoors: Thinking Ahead!
- Use this winter down time to plan the next garden season - find more here on garden planning.
- Use a garden journal to assist your garden planning - see here inspo for garden journaling.
- Consider planning companion plants - see more here on companion planting.
- Go pot shopping – your local greenhouses and ceramic shops would love your support in the winter.

Indoors: New Beginnings!
- Bulb forcing and small science experiments: Flowering bulbs like amaryllis (more on amaryllis here) aren’t just a holiday splendor! Now is also the time to create cuttings to share with friends.
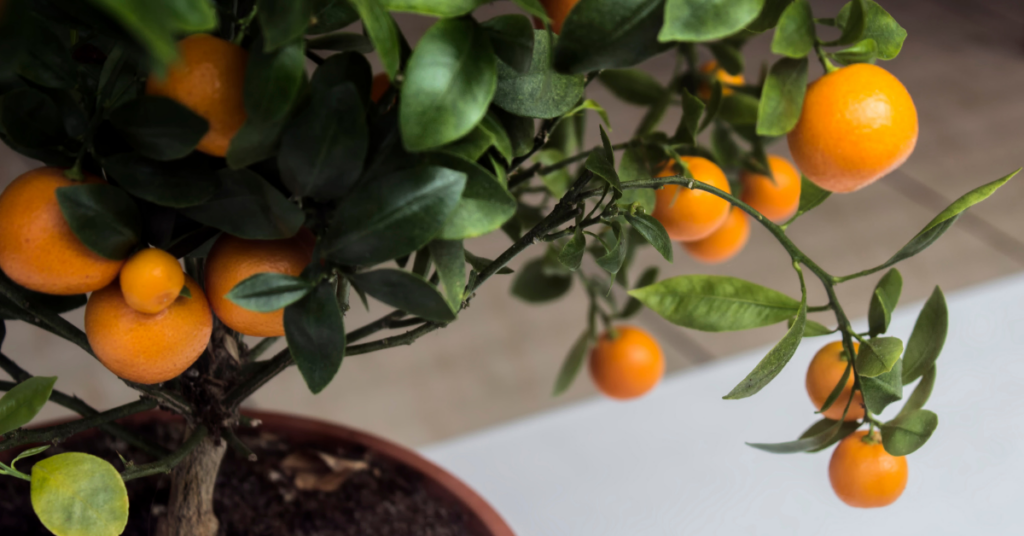
- Invest in winter fruiting botanicals like indoor fruit trees. Small, potted citrus by the window don’t only liven up the place but offer nutritious treats in the winter. Consider a calamondin!
- Microgreens - see our blog about it! When it’s too early to start seedlings that will go in the ground, you can still garden right on your kitchen counter.
- In late winter, start seedlings: but make sure you don't do so too early! Untimely seedlings can be too leggy before it's time to plant them outside - learn about hardening off seedlings here.
Part 2: When the Soil IS Ready!
Suit up!
Outdoors: Don’t Fall Behind!
- Appropriate seasonal décor: It goes without saying stringing lights and ornaments everywhere is good for the spirits in these dreary months… however 😬… come February, they seem to lose their vigor. Taking the décor down in preparation for new exciting things to come is also good for the soul! Remember to recycle your Christmas tree (see how here)!
- Turn your compost! Perhaps you’ve faithfully continued to add to your compost all year – your garden thanks you! On a warm day, remember to turn it and aerate it so it’s ready for spring.
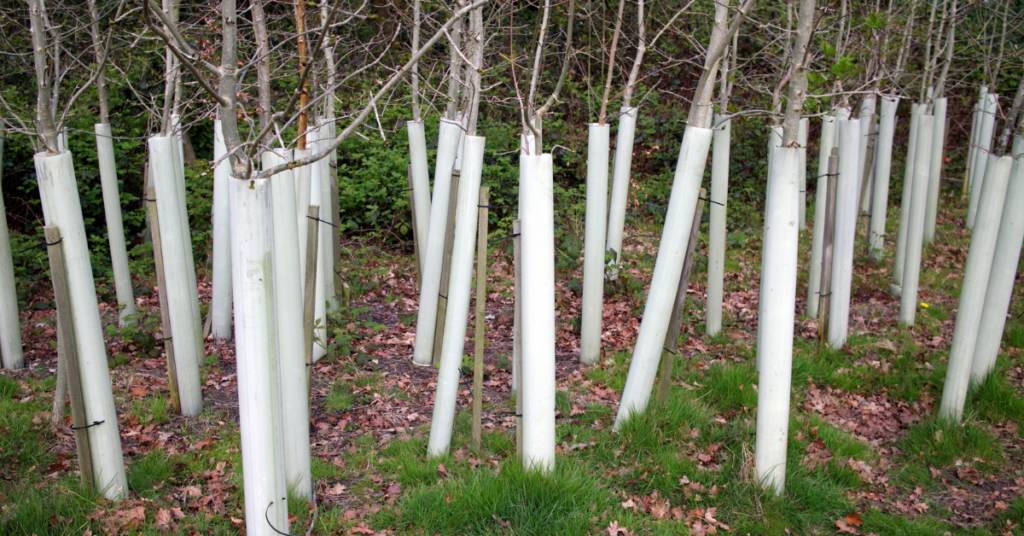
- Cover all your bases: Make sure to prevent rodents from damaging your tree bases by wrapping them well above the anticipated snow level – so rodents can’t chew your unprotected trees with the helpful elevation of snow!
Outdoors: Get Inspired!
- Go for nature walks: if you can safely go for a walk, hit the trails or stroll around your neighbourhood! A slow-paced change of scenery will help to fight your cabin fever, keep you active, and help you gather inspiration from the natural world.
- Visit your local maple syrup producers for tours.
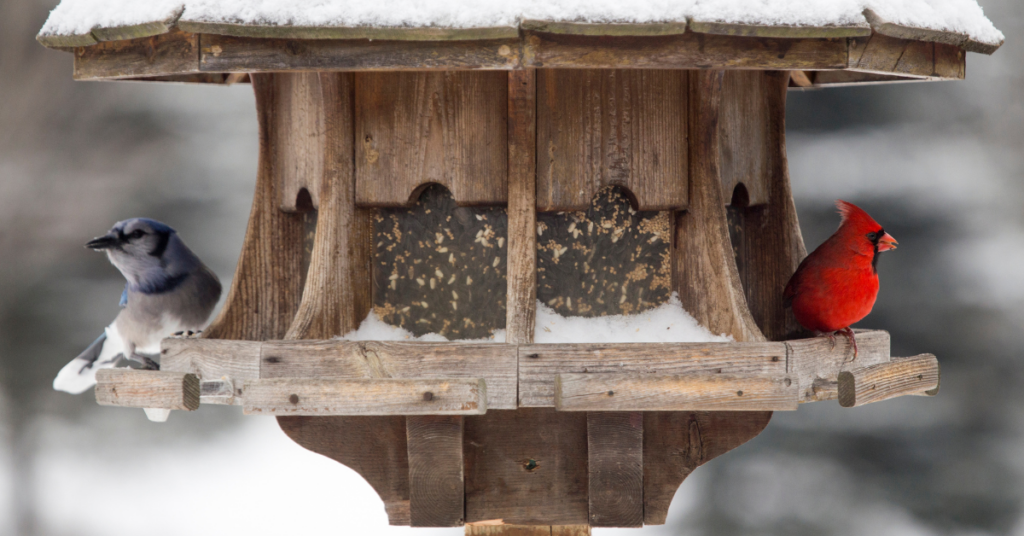
- Don’t forget our critters: Provide winter homage and appropriate food for our nonmigratory friends (i.e., hutches and feeders) outside windows where pets can observe nature too!
Outdoors: Thinking Ahead!
- Winter weeding: Some tough varieties of plants have evolved to use other plants’ winter dormancy to their advantage, tugging them out now will ensure that you and all the wanted plants in your garden have a fair start this spring.
- Manage snow piling: Heaped snow piling can kill plants including lawn, as well as introduce gravel and debris to areas where gravel is not wanted. Make sure your snow piles aren’t suppressing anything you’d like to live this summer.
- Early spring: Perhaps ice storms and plows have done a number on your trees and shrubs - prune broken branches to prevent pests and disease from entering your plants.
- Litter control: pick up the debris revealed by melting snow so it doesn’t venture farther into natural habitats or tempt wild animals to hurt themselves.

Outdoors: Start Something New!
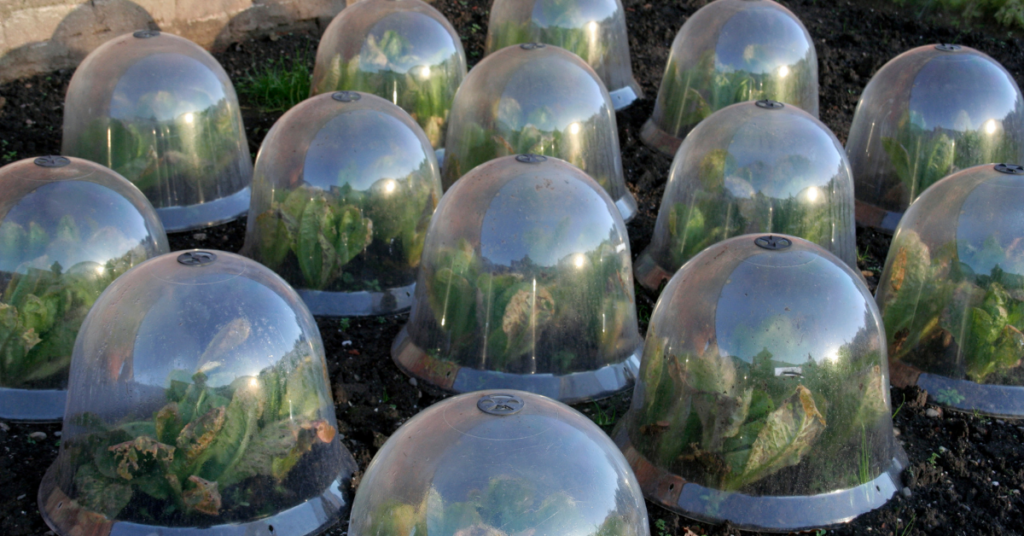
- Cold hardy crops in cold frames: Cold frames are doable! Use recycled materials - Victory gardens often used car windshields and old windows – to construct in-ground beds facing the sun (southwards) for passive solar heating.
- Winter sowing: Find more on winter sowing here.
We hope these suggestions help you stay green this spring and winter! For more gardening activities, see our other blogs here. We hope to see you this spring (March 5th, 2026) at Eising Greenhouses and Garden Centre! 🌱❄️
By: Ava Green
As temperatures begin to cool down, autumn colours set in and surround us with the beauty that is fall in southern Ontario. Suddenly summer is gone and it’s time to think about creating a cozy atmosphere inside and outside that is inspired by the world around us.
Autumn Outside
Whether you gather items from the garden or from the garden centre for a display, there are lots of natural materials all around us to draw from. Take some plumes from ornamental grasses and put them in decorative buckets. Add branches with colourful leaves or dried seed pods, and pumpkins or mums for a pop of colour. A bland background becomes the perfect backdrop.
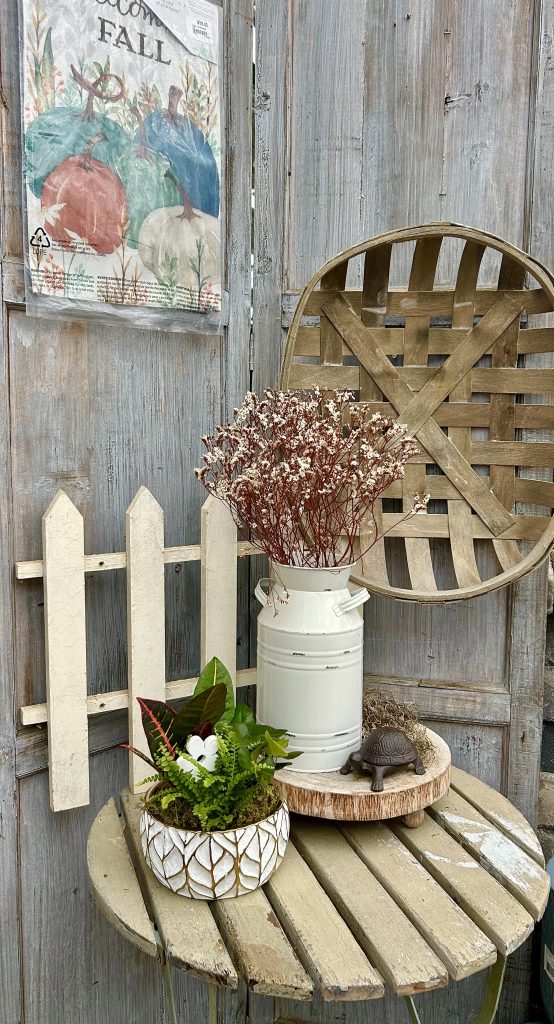
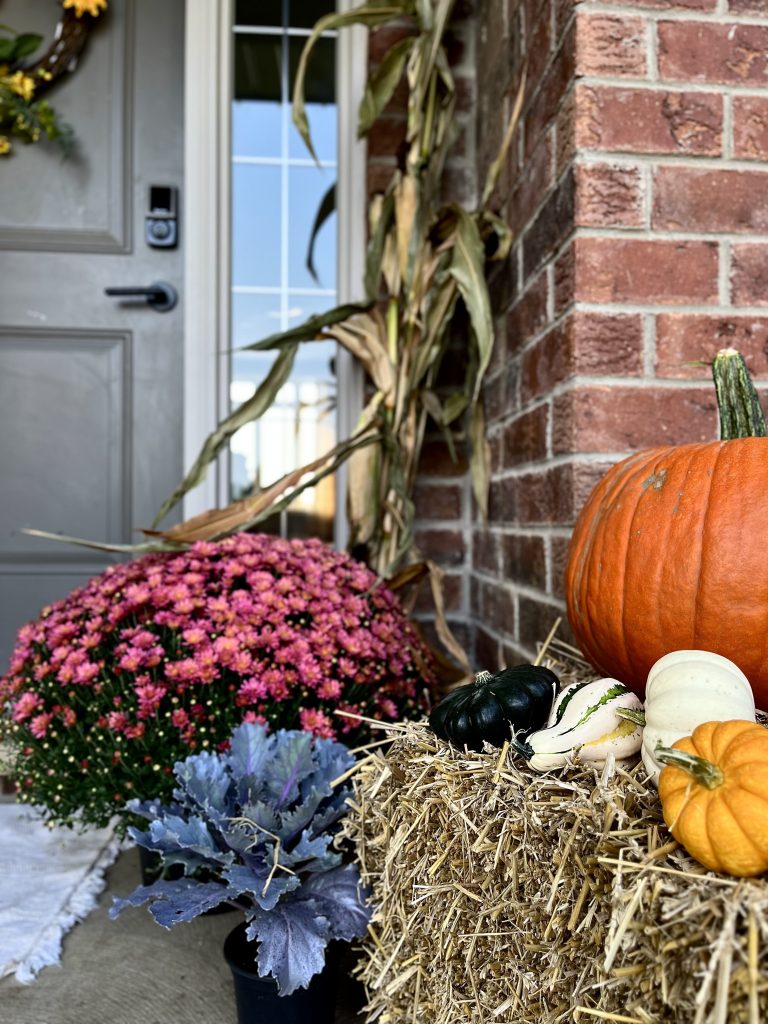
Looking for something to grow? Create fall planters with sunflowers, ornamental kale, ornamental peppers, live grasses, and, of course, fall mums.
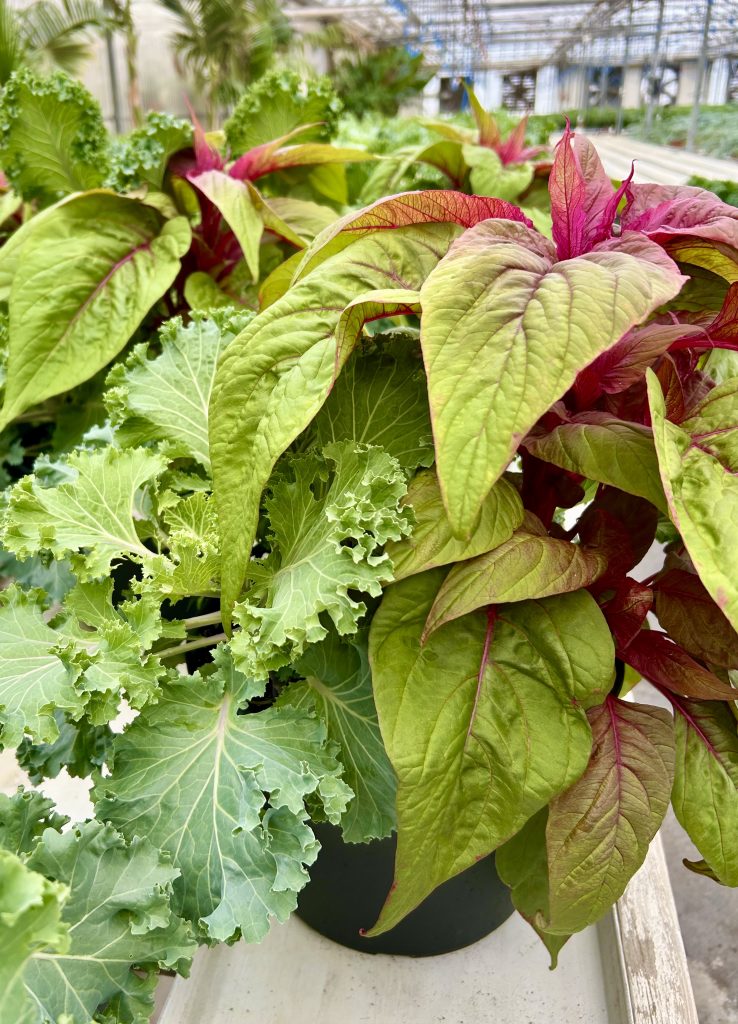
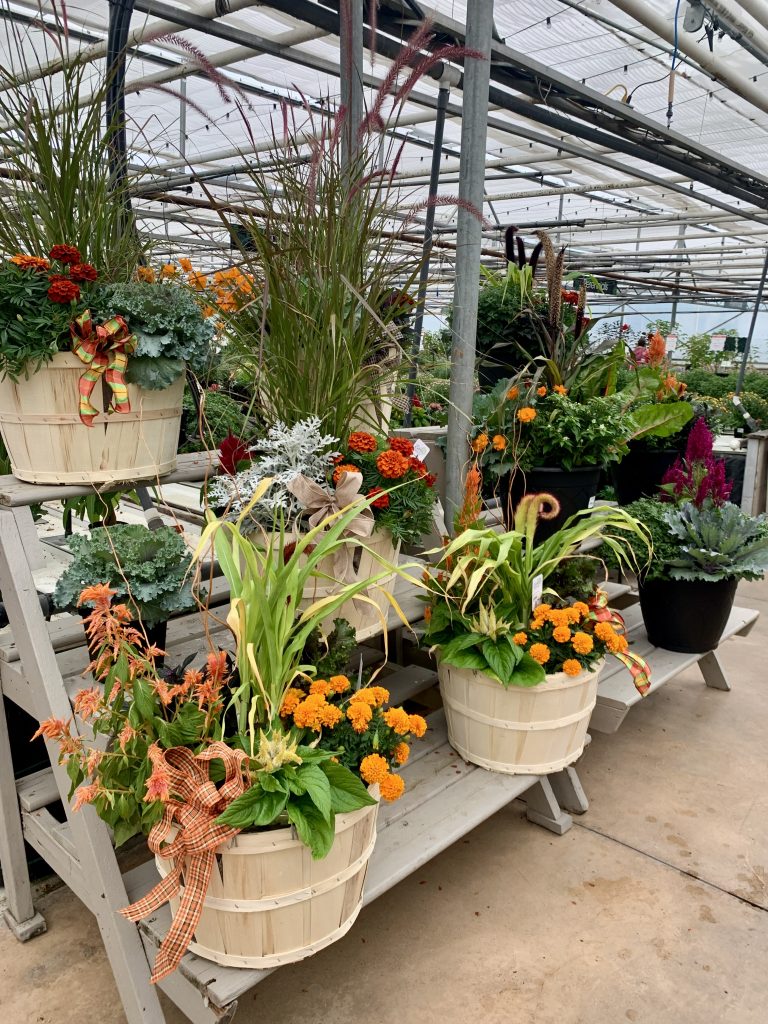
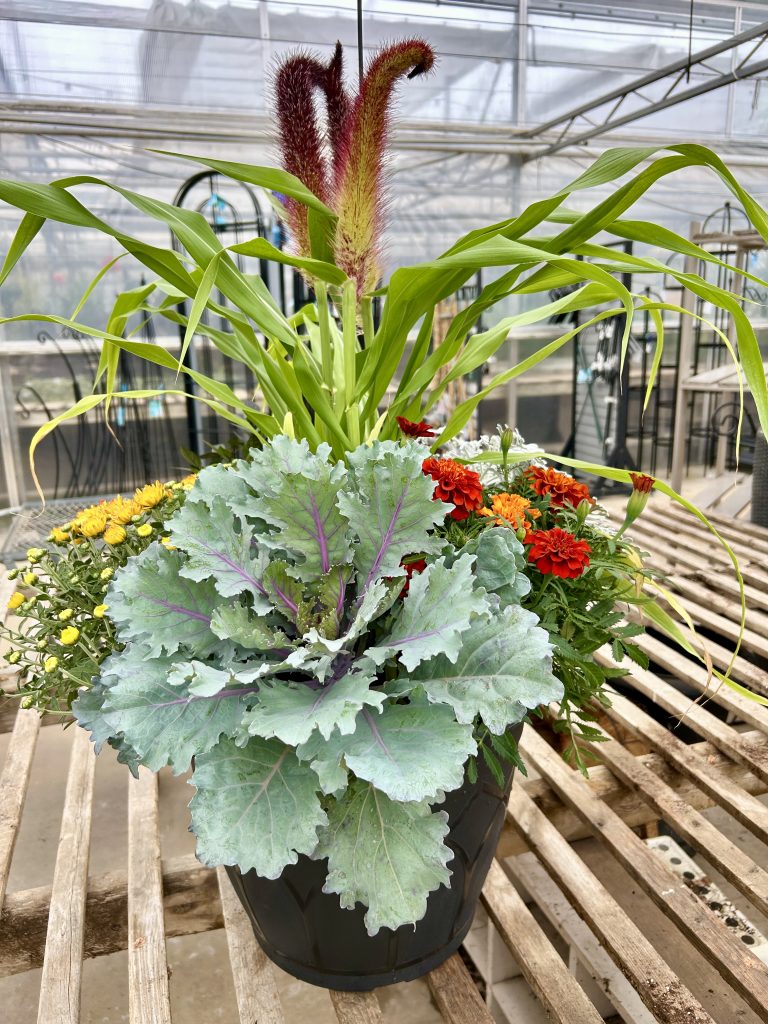
We offer beautifully festive arrangements with a variety of ornamental fall plants, as well as individual plants to decorate an outdoor table, or as a planter creating a warm welcome on your front porch (watch here: Jeanine create a fall planter on our IG).
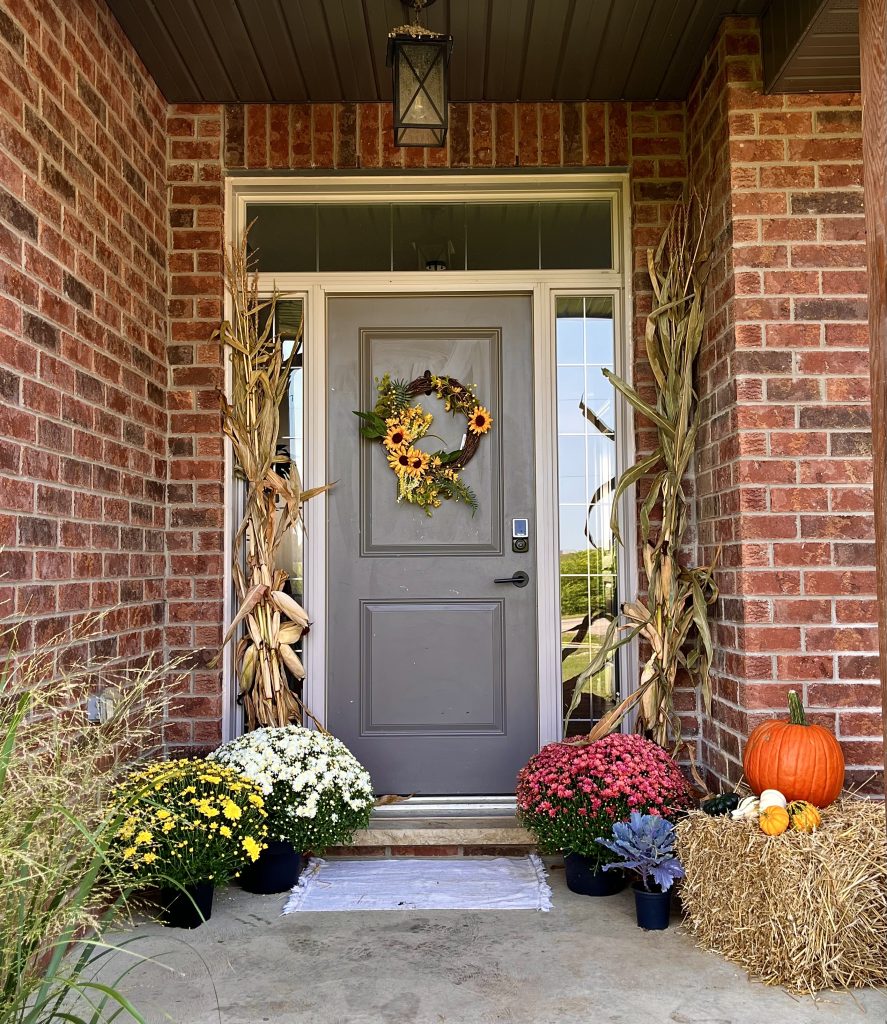
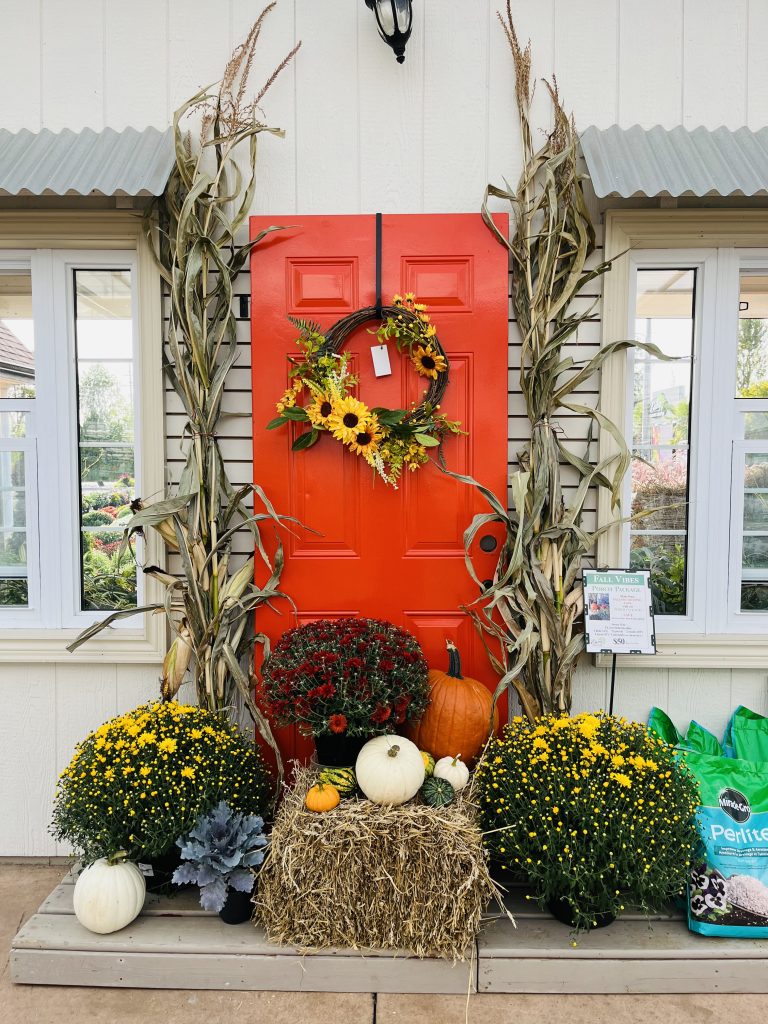
Eising’s popular Porch Packages make it easy to decorate the entryway to your home. But don’t wait, they sell out quickly!
Autumn Inside
When there are fall colours outside, autumn displays inside create continuity that will carry your indoor decorating right into the holiday season in December.
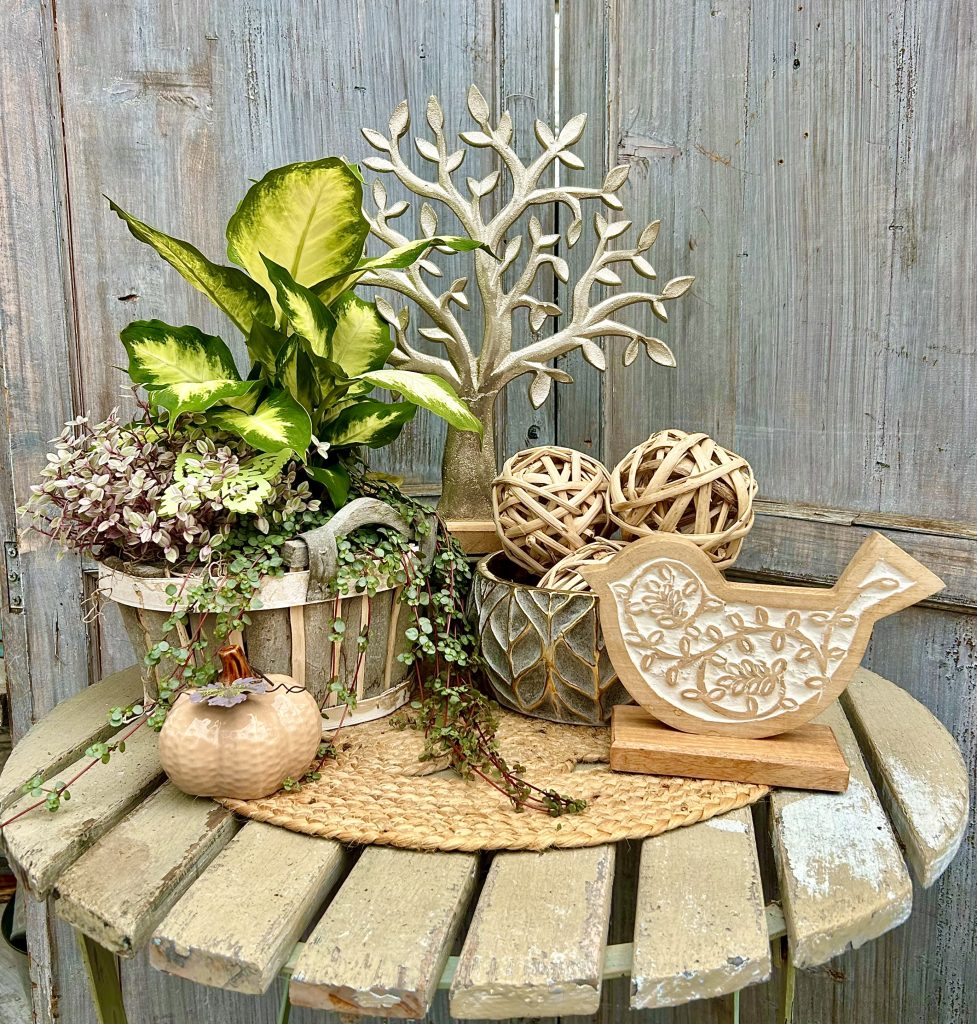
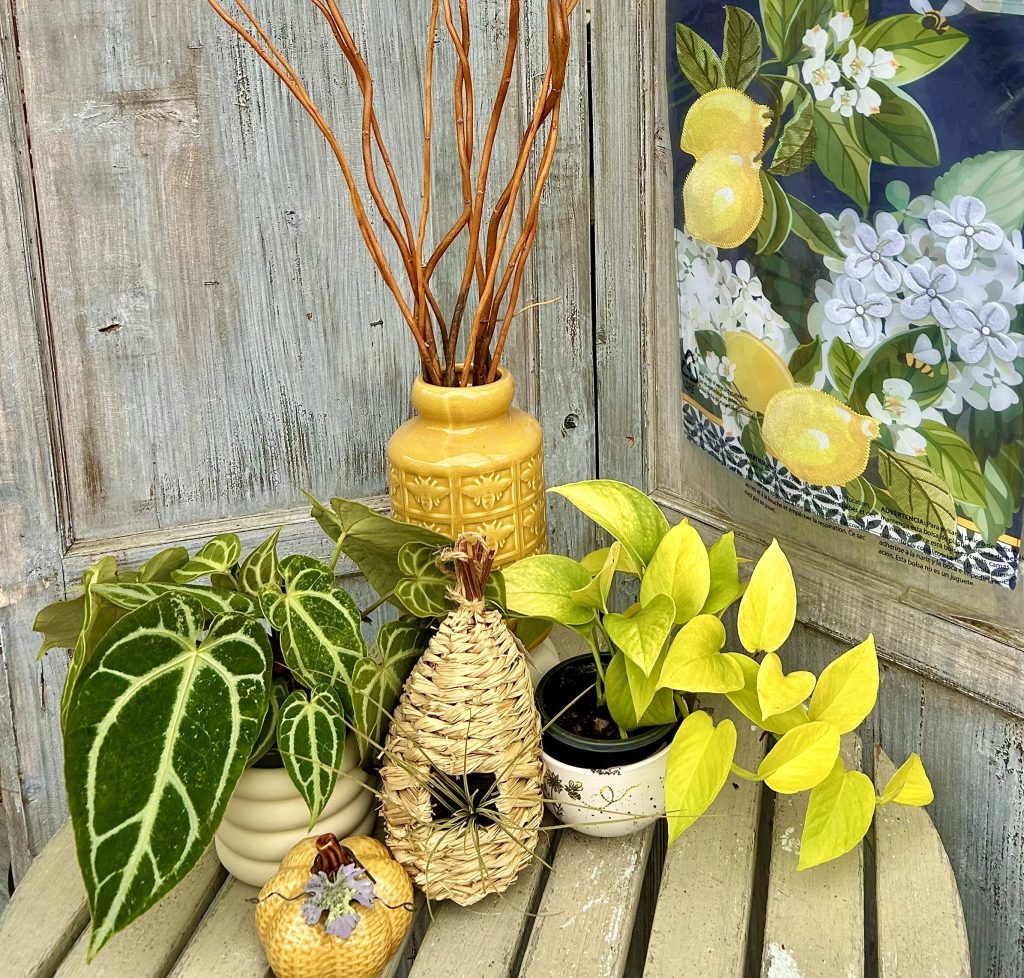
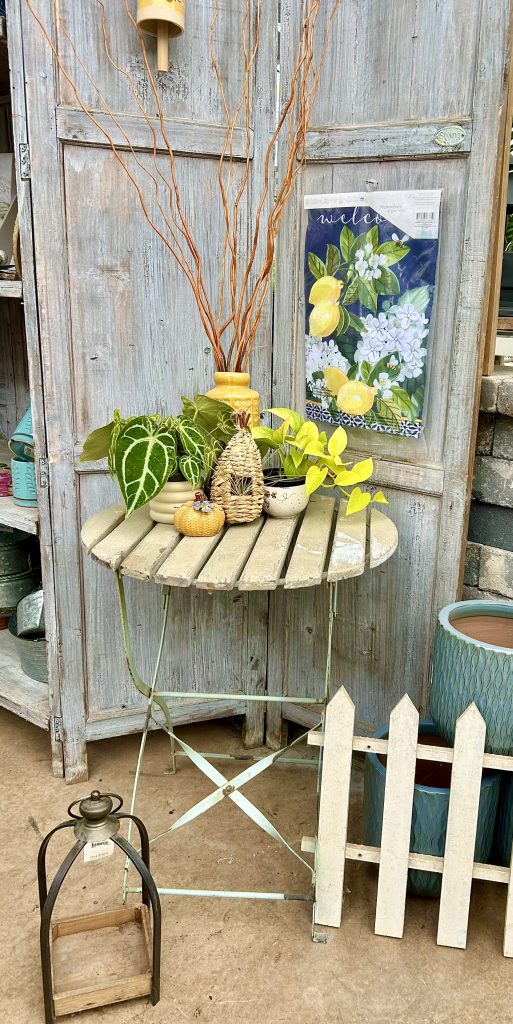
Displays that are vibrant, warm, rustic or whimsical are fun and easy to make. Here are some basic design principles that will help you get started, along with examples we’ve created using items in the Eisng shop.
The Rule of Odds
Using an odd number of items (3, 5 or 7) is always more appealing. Why? For some reason, odd numbers are just more harmonious for us to take in. Designers and photographers call it the rule of odds.
Pick a Theme
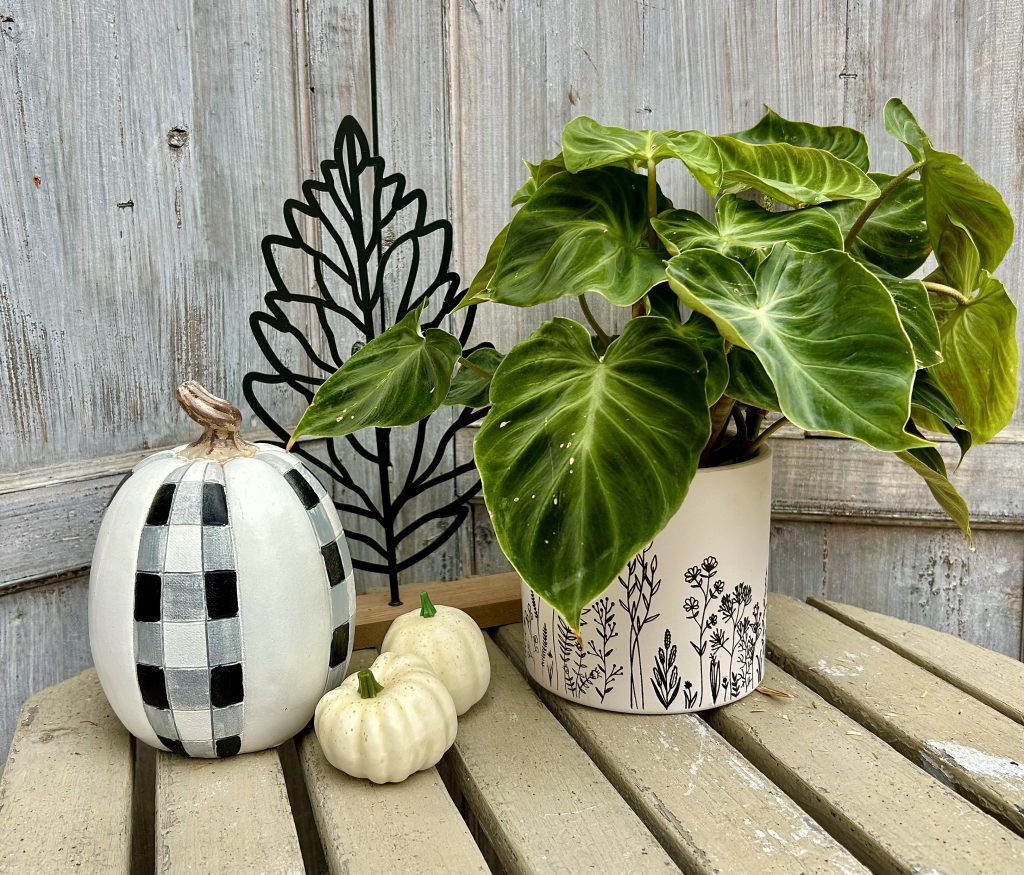
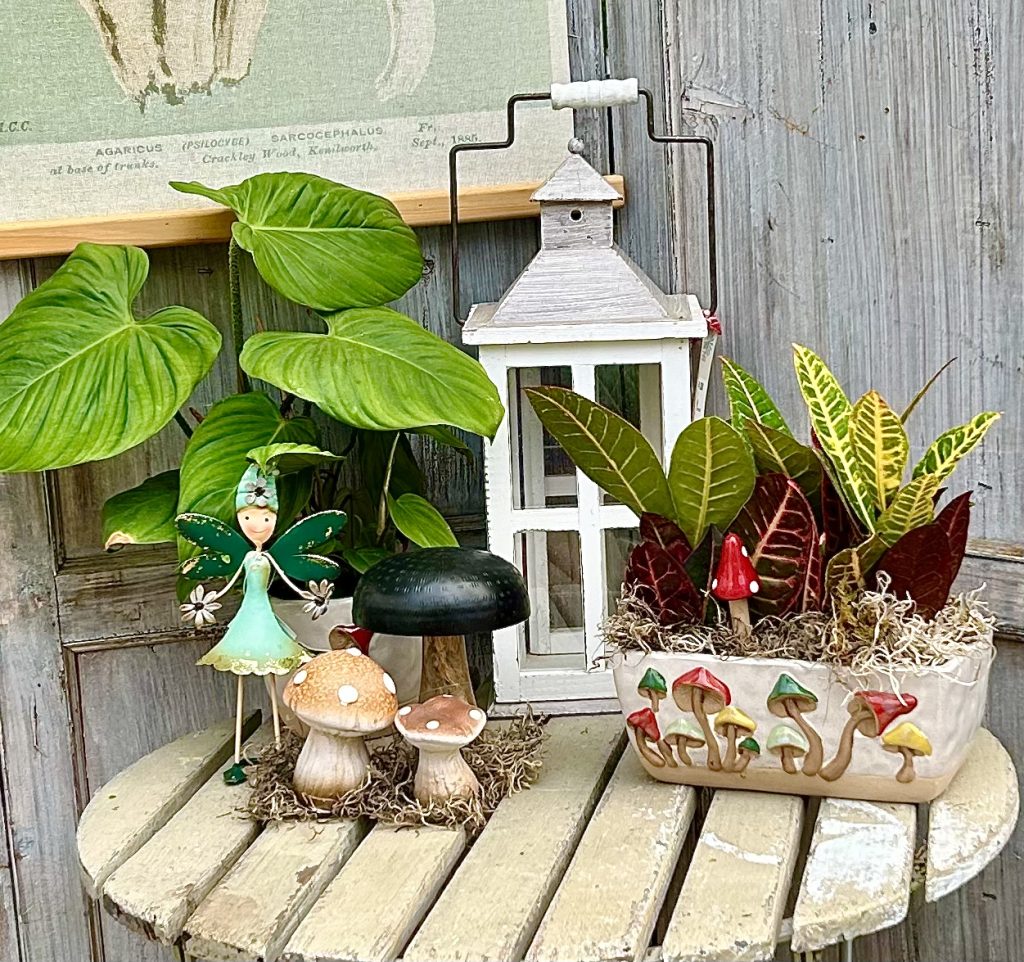
Pick a theme like a common colour, a shape, a design or motif. Look for containers or items you can include that fit in with your theme.
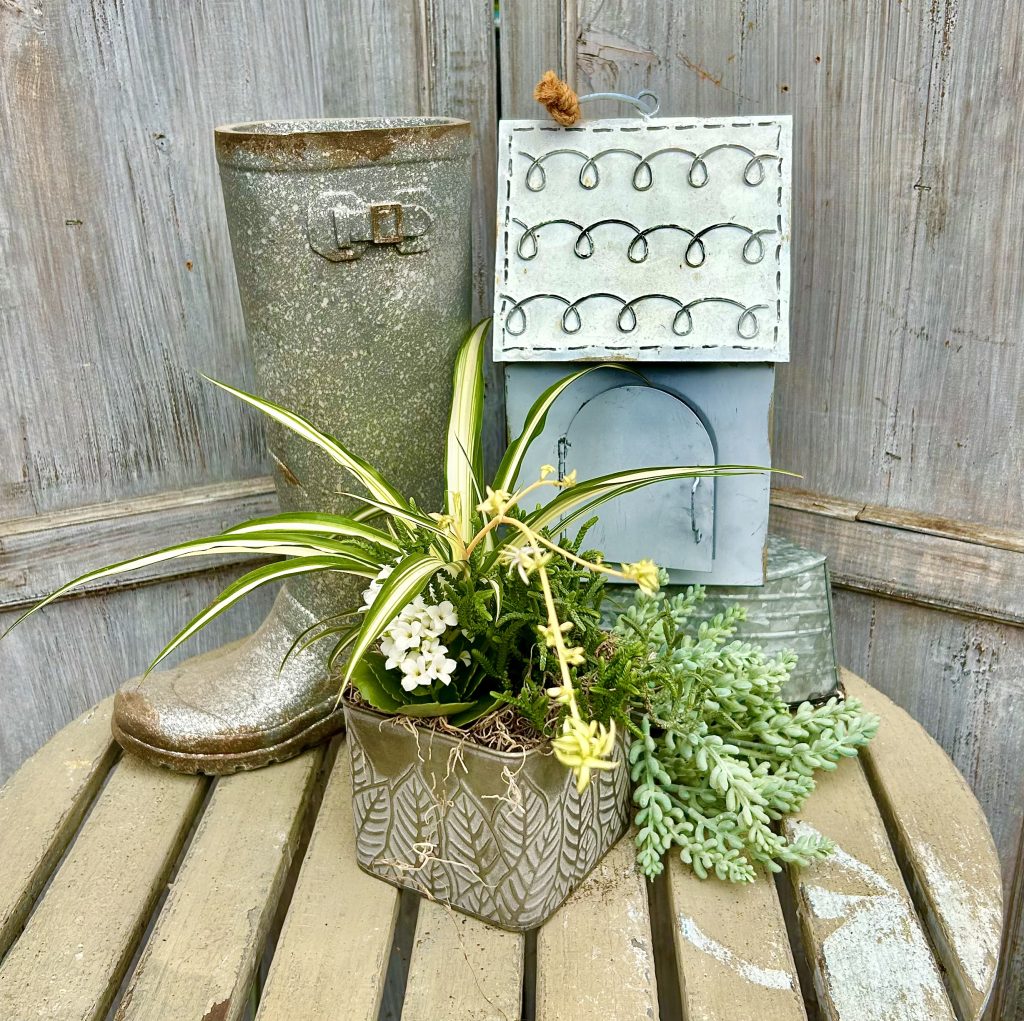
Like the arrangements we offer at Eising Garden Centre, include the following in your designs:
- a thriller like a beautiful vase or container, a tropical plant, or fresh or dried flowers
- a spiller like a plant, dried or silk leaves or moss around the base of containers
- and a filler like foliage plants, fruit, candy, mini pumpkins and gourds, or moss
Size and Scale
Scale is important! Keep the display short if it’s for the centre of a dining table so that guests can see each other across the table! Create taller displays if you’re decorating a corner table or a mantlepiece.
Light it Up
Adding light, including flameless candles or fairy lights, instantly brings warmth to any display.
Aromatics
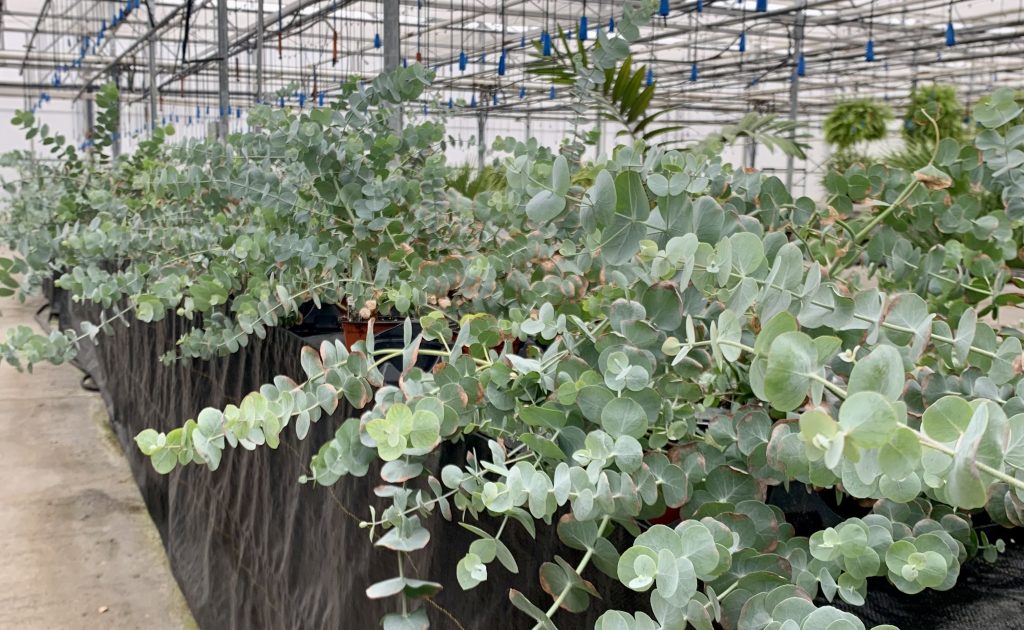
Include scent: using plants like eucalyptus, or fruit like apples or oranges, and spices like whole cloves and cinnamon sticks all add a homey touch.
We would love to see what you create and hope this has sparked your creativity. Don’t forget to tag @Eising Greenhouses & Garden Centre on your Instagram and Facebook posts when you share your decorations online - we would love to see them!
By: Dave Zeldon and Ely Schweyer
Most experts agree that we shouldn't bother bringing in our favourite summer potted plants for the winter and that we should buy new again the next season. But this seems to go against our sensibilities after paying good money earlier in the season. Why not try to save that bay tree, those Rosemary, and French Tarragon containers, as well as expensive Phormium, Mandeville, Passionflower, and Jasmine plants?
The secret to indoor survival for summer plants is to slow down their growth during the winter, so they’re ready to be put outside again once all the danger of frost has passed. How? A few weeks before fall frosts are expected, gradually introduce plants to life indoors by moving them inside (to a quarantined spot*) for half a day, working up to a full day over a week or so. Don't wait until nighttime temperatures are only slightly above freezing as the plants may go into shock and drop leaves!
How to Keep These Guys Comfy During the Winter Months?
- It is suggested that you should prune back excessive growth and re-pot with new lighter growing media.
- Place them in the sunniest location you have and then water sparingly but regularly over the Winter.
- Raising humidity by using a humidifier helps too.
- Resist the urge to fertilize these plants until just before you reintroduce them to outdoor living.
- Perhaps just for fun, you could repot them into the appropriate seasonal pots and planters!
It Seems They Brought Others in With Them - And They're Not Nice House Guests
*Before long, you may notice some unwanted guests, such as thrips and spider mites, on and around your precious plants as their natural predators are no longer present to keep their populations at bay. In many cases, it may be too late, and your plants may have to be discarded before the Holidays, but that’s not always the case!
Common problems that make themselves apparent indoors would be the brown soft scale insect, whiteflies, mealybugs, aphids, spider mites and most often, fungus gnats (those pesky little black flies).
Fungus gnats are considered to be the most common nuisance in houseplants. Sometimes their sheer numbers just hovering around an attractive plant take away from its appeal.
Basic Fungus Gnat Control Measures:
The fastest and easiest method of control is to catch the flying adults with yellow sticky cards. The large cards can be cut into little strips and mounted onto little wooden splints (popsicle sticks) then placed around the base of the plant out of the line of sight.
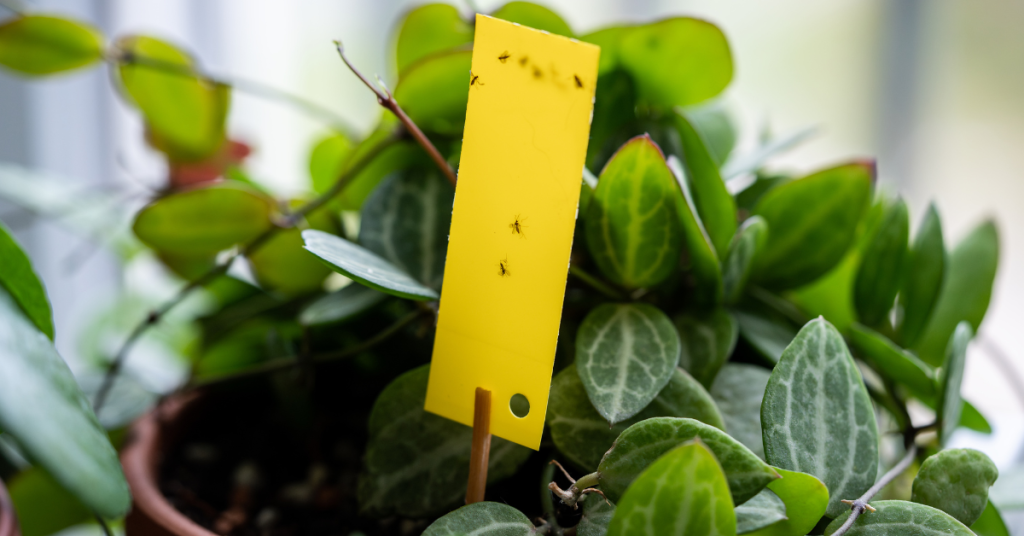
The chances are that the adults have already deposited eggs in the growing media (soil) of the plant as it is rich in organic matter, so we can disrupt its life cycle by:
- Subirrigation - water your potted plant from the bottom by adding water to the saucer it is sitting in. This will dry out the soil surface making it uninhabitable for the hatching larvae.
- Trapping larvae - If the surface soil it already very wet, try placing a few potato discs or slices on the surface of the soil. This will attract the larvae as they migrate to the potato to feed. Simply replace the discs every five days or so with fresh slices to eliminate the next generation of adults.
- Inoculating the soil with beneficial nematodes. Most garden centres will carry the Guardian line of beneficial nematode products.
We hope this helps your plants enjoy your winter abode as much as you do this season, for more information - and plants – visit Eising Greenhouse and Garden Centre!
Growing Vegetables in Pots!
A few years ago, I was walking through town with a friend as we discussed planting vegetables in our tiny front gardens. It seemed like an unusual idea until we spotted not one but two front gardens with pumpkin vines rambling amongst the shrubbery. What a novel way to cover the ground without mulch and have the bonus of showy, bright blossoms and bold foliage! Of course, this is eventually followed by the standout feature of brightly coloured pumpkins. It’s built-in fall decorating!
Right now, everyone is looking for ways to reduce grocery bills, and growing a few vegetables amongst the flowers and shrubs can make a big difference. If your garden is on a patio or balcony, there are lots of ways to add edible plants to maximize your space and beautify it at the same time. Who says vegetables can’t be ornamental and beautiful?!

Gaps and Small Spaces
If you have a new shrub and flower garden that has gaps or there’s a space in your garden where you’re not sure what to plant, consider tucking in a potted vegetable. In a cool, shady space, try some luscious lettuce bowls. Shade allows lettuce to grow more slowly in the heat of the summer. Keeping lettuce in a cool, shady spot will prevent it from bolting and becoming bitter.
If you have a small garden, a patio or a balcony, pots with compact varieties and hanging baskets are a terrific alternative for growing vegetables, herbs, and some fruits. These are some of the options we offer at Eising Garden Centre (based on availability) that can be purchased fully planted, or you can grow your own from seed if you have time, space and lights.
Trellised Planters and Patio Pots
For patios, balconies, or even a gap in the garden, there are lots of vegetables that can be grown in a trellised planter.
Tomatoes, peppers, cucumbers and eggplant all love warm soil and growing in pots provides the heat to help them thrive. Eising trellis pots are planted with specific varieties that are smaller but pack a flavourful punch.
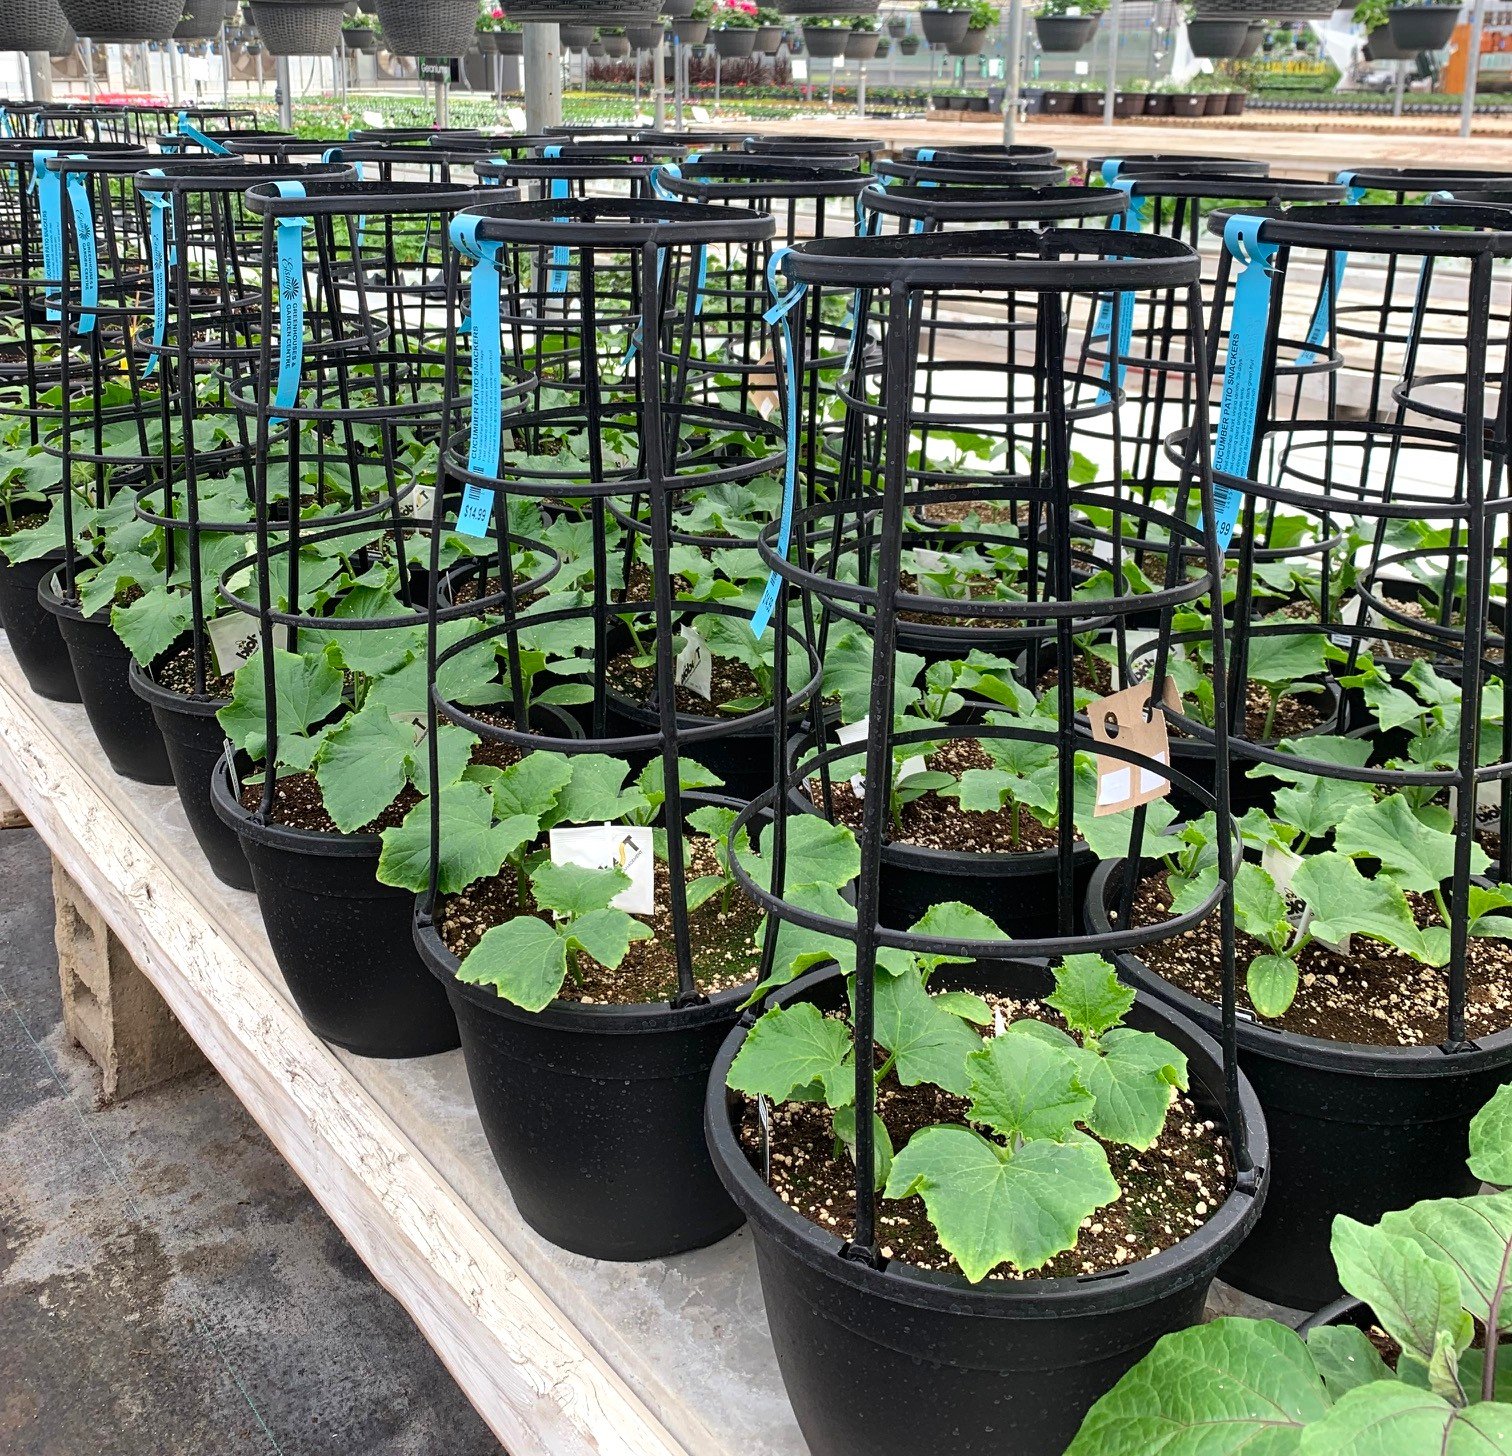
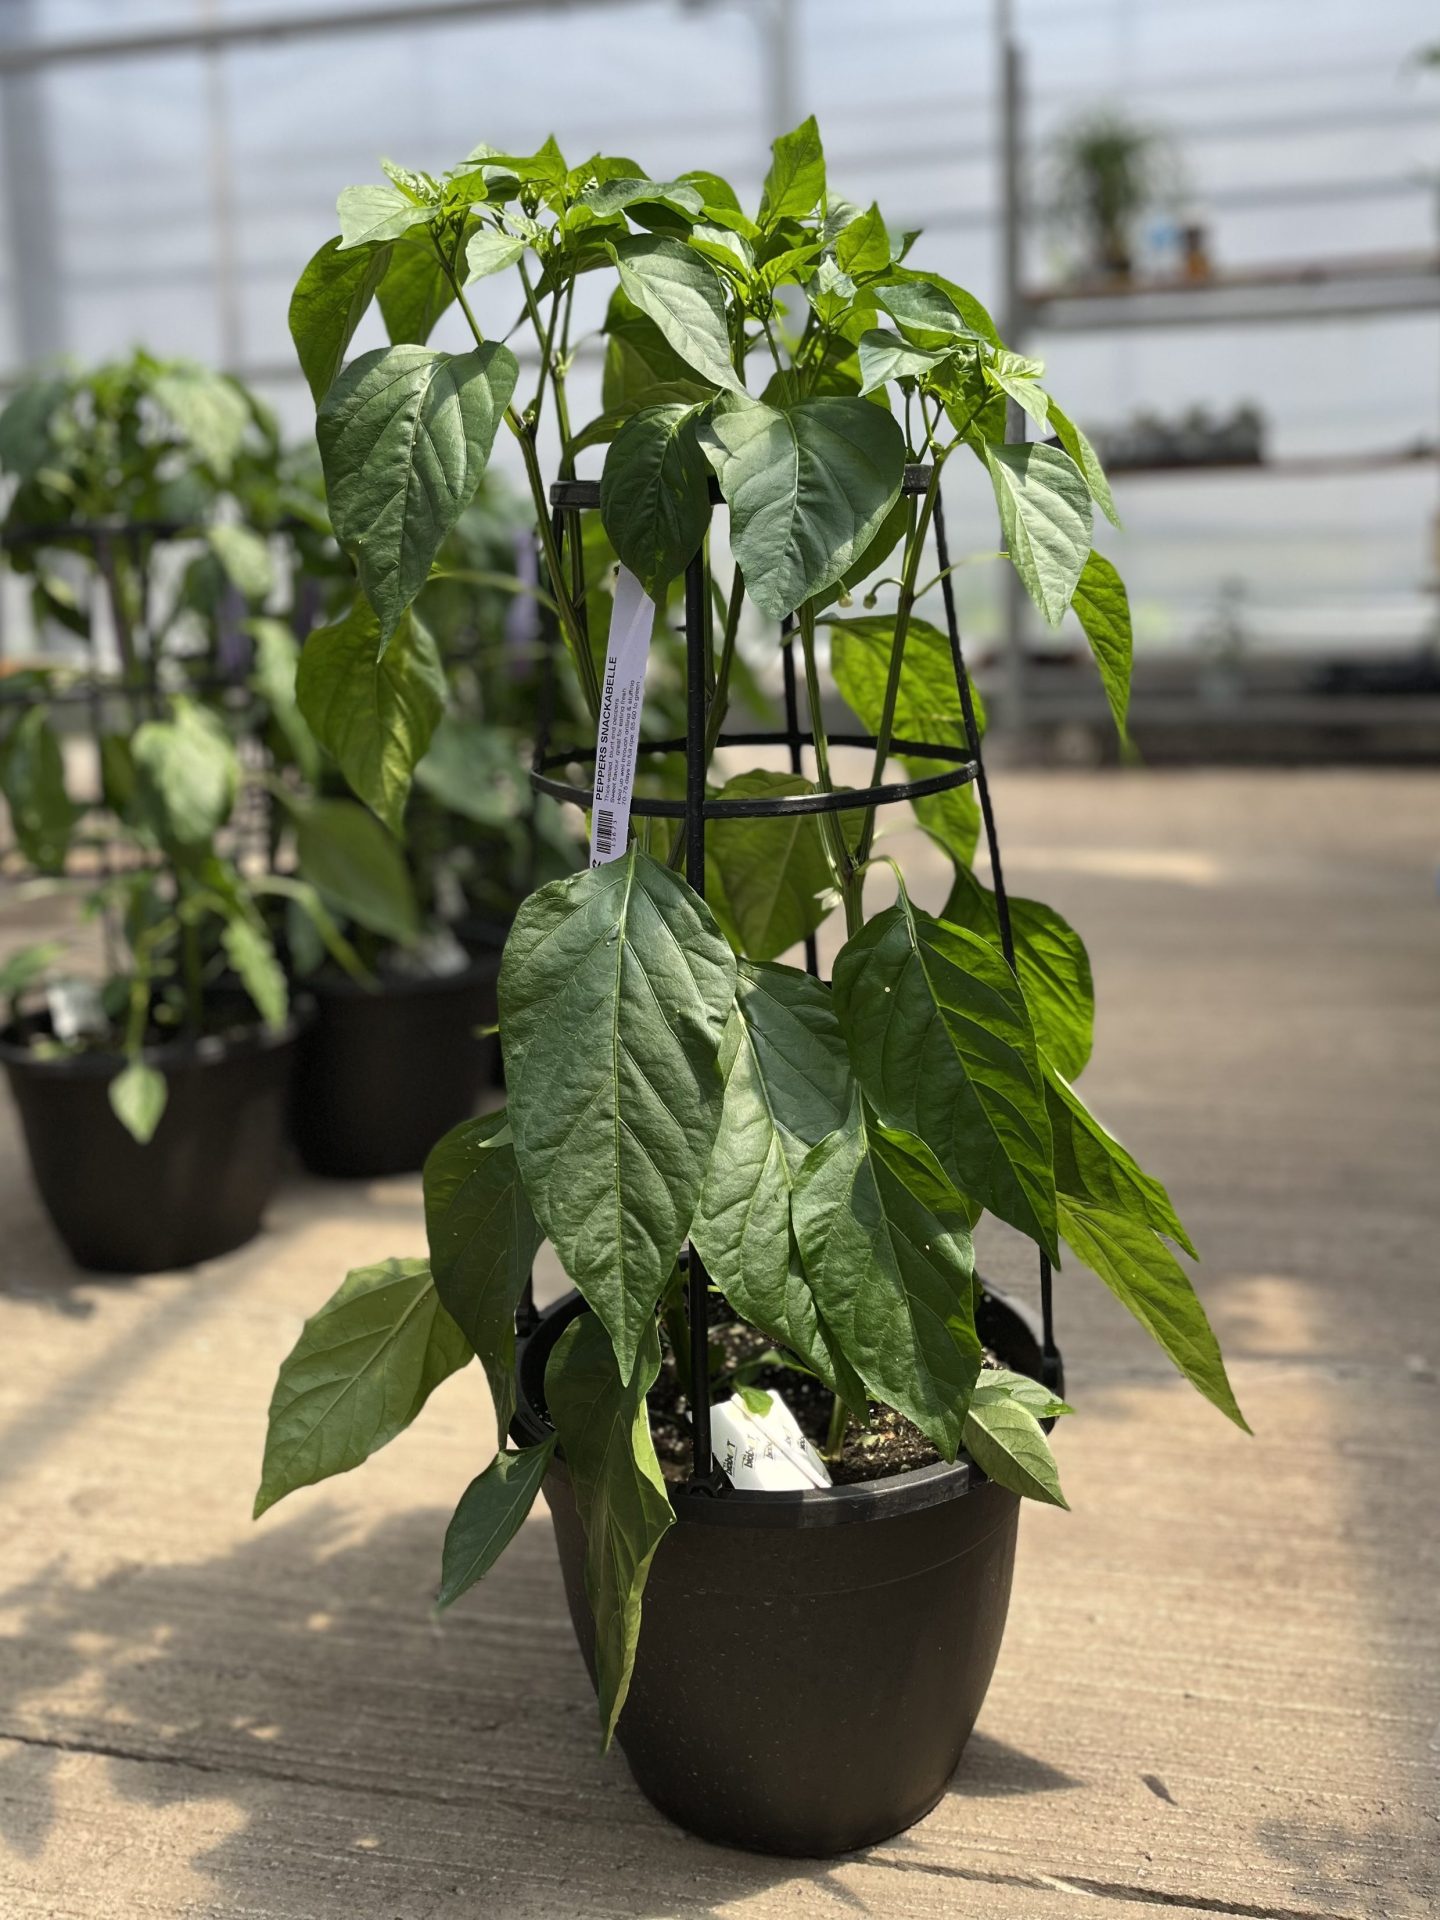
Sweet Snackabelle, Candycane Chocolate Cherry or Red, Mocha Swirl and Fresh Bites peppers.
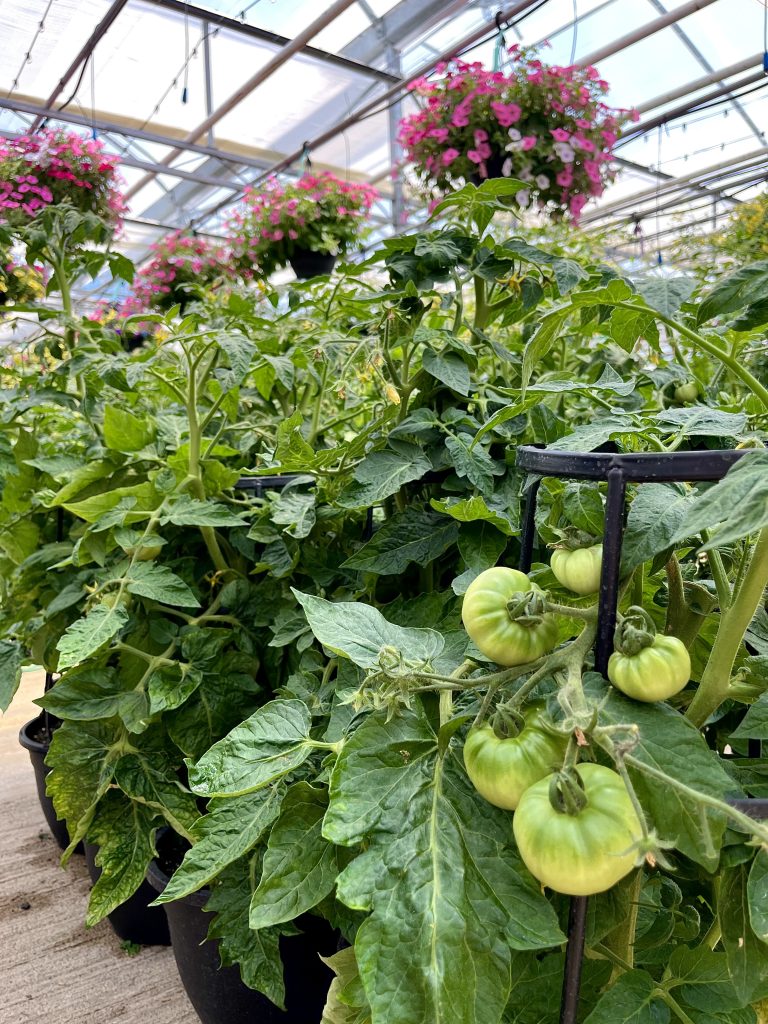
Little Sicily, Patio Hybrid, Candyland Red, Rapunzel and Tidy Treats tomatoes.
Eising Greenhouse also carries eggplants in trellised pots - a patio pot with Patio Baby eggplants is a perfect choice if ratatouille is on the menu!
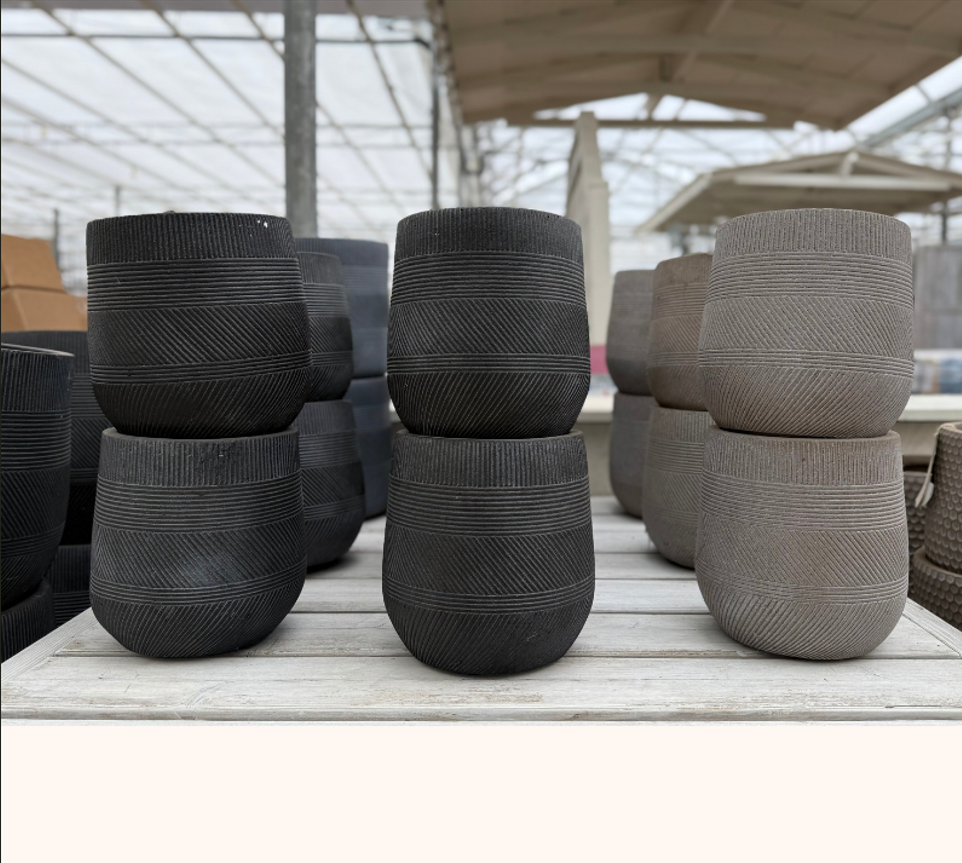
All of Eising's trellised planters would look lovely plopped into one of our decorative outdoor cover pots!
Herb Planters
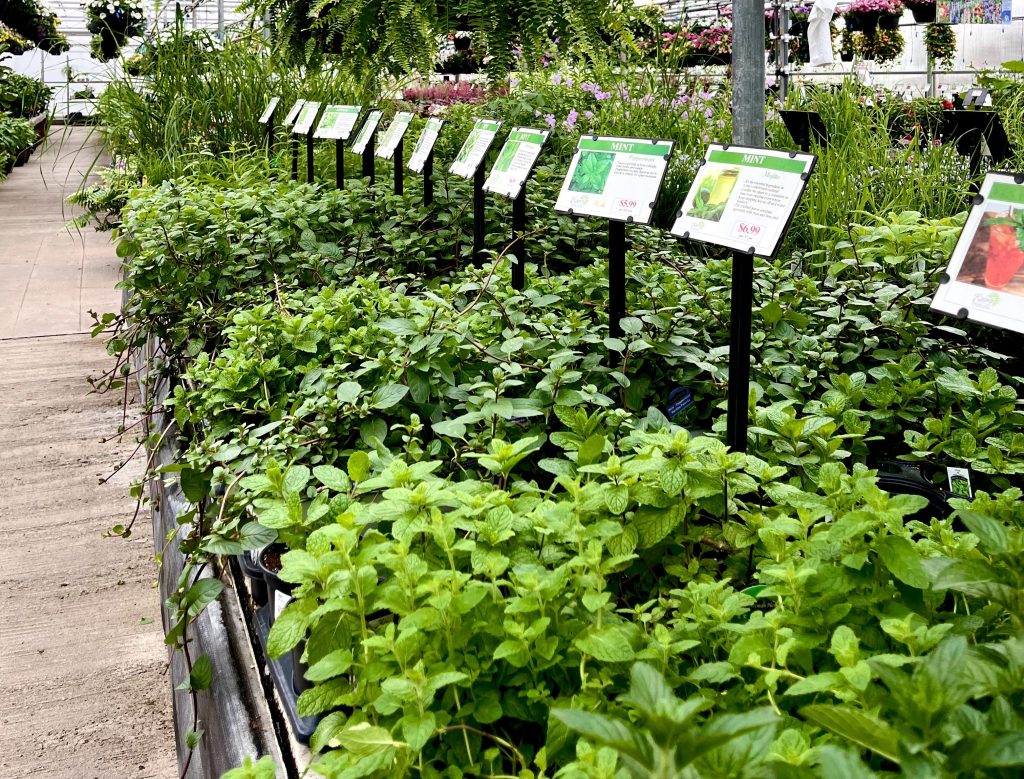
Many herbs thrive in a sunny and warm spot with well-drained soil, making a pot the perfect container for them. Herbs also make great companion plants with other vegetables and can be tucked into other pots. Most herbs also love to be harvested frequently, especially when they’re given these ideal conditions.
Lettuce Bowls
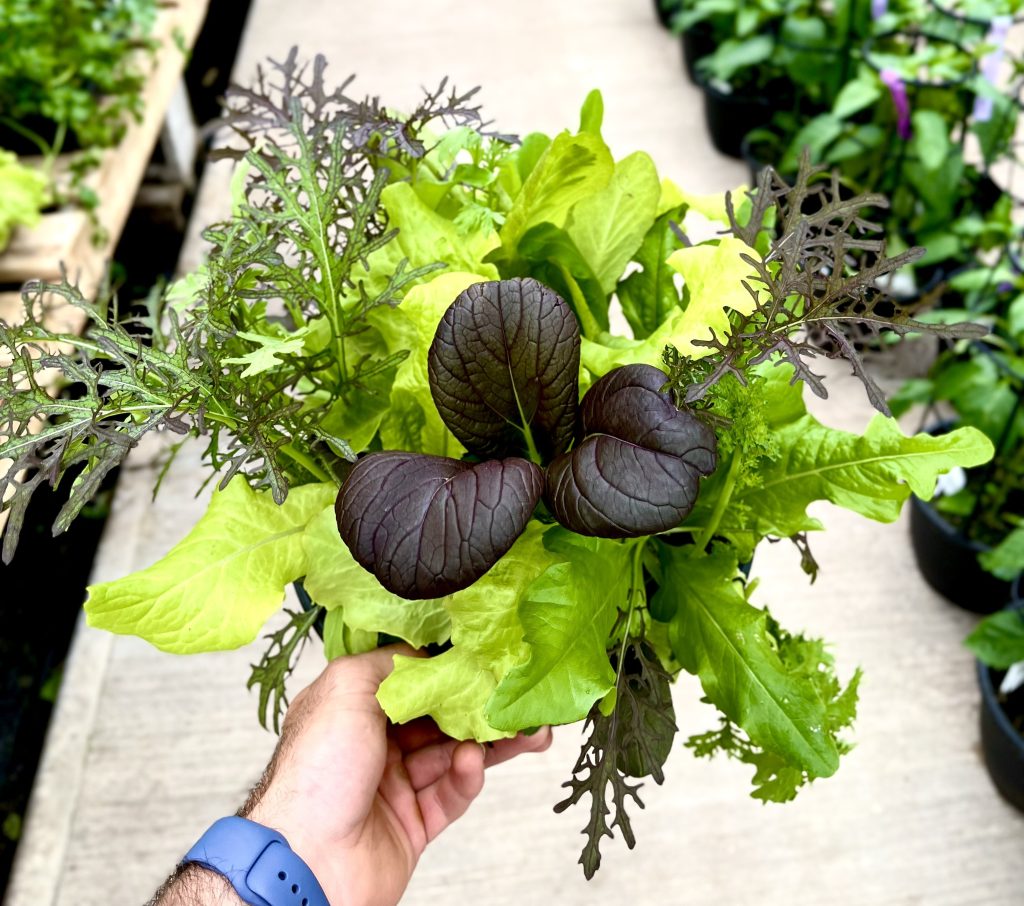
Lettuce bowls are a great way to grow greens in small spaces. Our 10” bowls are chock full of a variety of lettuces and are never boring!
👍Tip: Try the “cut and come again” method for harvesting lettuce, which prolongs the plant’s life. Simply pinch off the outer, mature leaves each time you pick the lettuce and leave the centre of the plant to keep growing.
Hanging Baskets
If there’s a spot to hang a basket or place a shepherd’s hook, you will want to grow one of the edible options we offer.

Topsy Tom tomatoes.
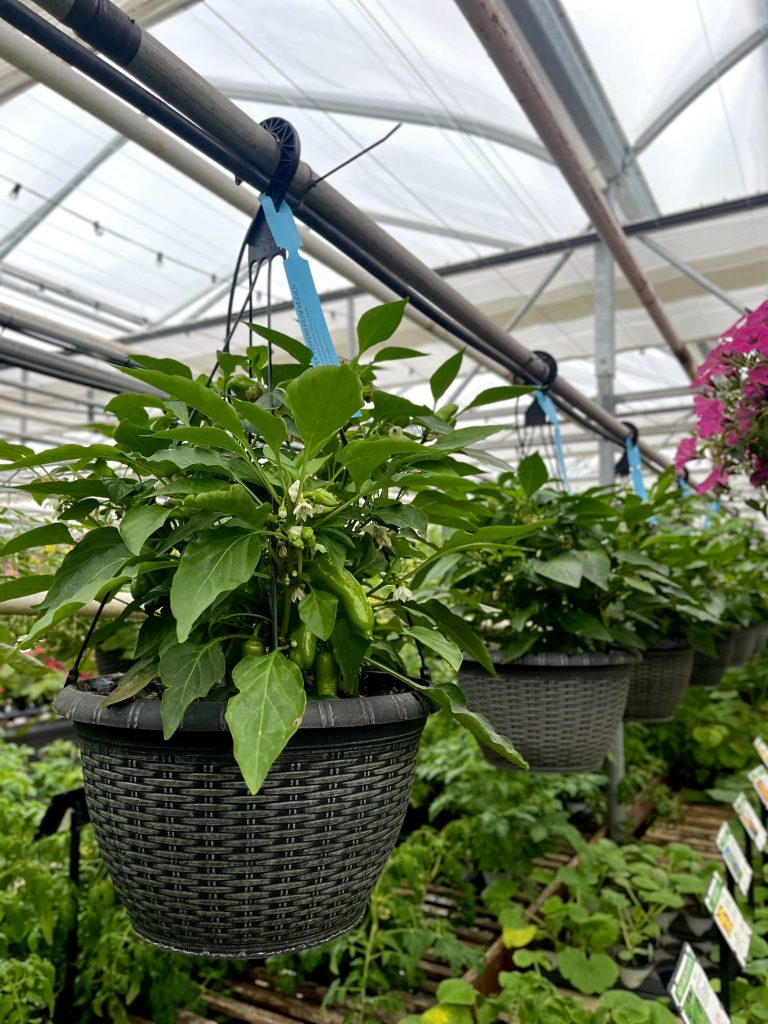
Pot-a-Peno and Peppers From Heaven peppers.
Tomatoes, peppers, and strawberries are all available in hanging baskets. Our deliciously sweet everbearing strawberries are also available in 4.5" pots and bareroot, which are great options for window boxes.
👍Tip: Pick strawberries as they ripen to encourage your plants to produce more. Also, remove runners as they grow to allow your plants to send energy into growing fruit instead of bigger plants. Painting rocks to look like strawberries is said to deter birds from feasting on ripe berries.
Citrus and Figs
Consider growing a beautiful and fragrant lemon, orange, fig or grapefruit tree in a patio pot. Just keep in mind that it will need to come indoors in the fall.
Container Plant Care


Whether you’re growing edible plants in the garden, a pot or a hanging basket, don’t forget to give them the care they need to maximize productivity:
- Water regularly, deeply and in the heat of the summer, frequently. Watering early in the morning is ideal. Pour water on the soil, not the foliage to prevent diseases like powdery mildew.
- Feed your vegetables and fruits throughout the growing season with fertilizer or compost.
- Remove dead foliage and prune plants as needed. Especially herbs.
Once you start foodscaping by including vegetables with your flowers and ornamental plants we’re sure you’ll want to keep looking for innovative ways to grow your own food! Who knows, maybe even pumpkins by the front porch!
November. It’s not quite winter, but pumpkin season is officially over. After you’ve put away the Fall decorations and cooked your pumpkin, it’s time to head outdoors to green up your decor again!
This is the perfect time to drop by Eisings to gather fresh greenery and decorations that are weather-resistant and hardy for your outdoor urns. Perfect because it’s that in-between time of year when autumn’s splendour starts to fade and temperatures begin to drop.
You can purchase urns that are already artistically filled with beautiful greenery and decorations, or you can find the supplies you need to fill an urn or pot you already have. Whether embellishing a premade urn or creating your own, here are some handy tips to help create a dramatic display.

“Planting” Medium
If you have had annuals or perennials in outdoor planters, don’t empty the soil - reuse it for your winter greenery! You may need a bag of soil to top it up, or ideally, you can use blocks of floral foam which can be purchased from our shop. These foam blocks can be nestled into the top of the soil and secured by crisscrossing a few pieces of tape across the top of the pot. If you’re starting with a fresh urn, find a pot that fits inside it and fill it with your planting medium. Soil and floral foam retain moisture for your fresh greens, and they also hold the plant material in place.
A Little Inspiration
Find some pictures online, or draw inspiration from the decorated planters at Eisings. Having a picture to work from will help you determine the supplies that you’ll need and how to arrange the items in your urn.
Gather Greens
Evergreen boughs will keep your planter looking fresh and green. Spruce, fir, pine and cedar branches will hold up well and retain their shape and colour throughout the holiday season.
Focal Points and Accents
Birch branches, curly willow, grapevine decorations, and dogwood branches all provide upright focal points with height in your planter.
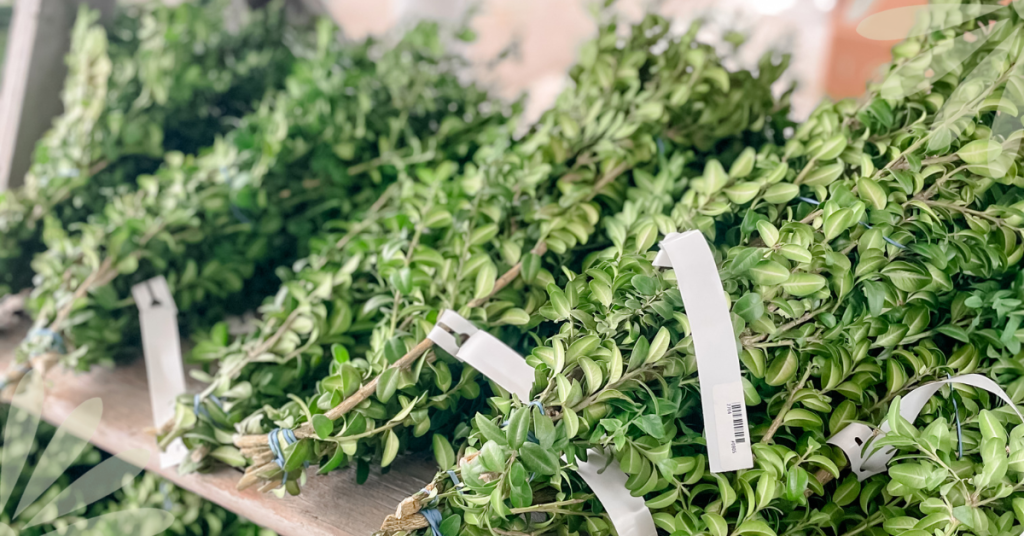
Magnolia leaves, boxwood, inkberry and holly branches add texture and interest. Use pine cones, rose hips, faux berries, moss balls, seed pods, ornaments, and bows for some great final touches.
Adding lights will make the planter stand out and give it an ambiance that’s warm and inviting.
Build It!
1. Start by placing the item that you’ve chosen as the focal point in the middle of the planter. Pick a side that will become the front of the planter, and add everything else while you’re facing that side.
This is a good time to add battery-operated LED lights to upright posts and branches or insert a solar lantern.
2. Surround your focal point with evergreens by layering different boughs like cedar and pine, which are soft and hang down with more firm fir and spruce on top. This becomes the base or background for everything else in your planter.

3. Add accent pieces like dogwood, willow, holly and inkberry branches.
4. Embellish with decorations. This is a great way to fill in any blank spaces and draw your eyes in to focus on the details.

Begin by decorating with a cluster of pine cones, a bow or any decoration grouping in a lower section of the planter, then space out other decorations around the planter. Later, as the holidays draw near, you may want to add some Christmas decorations as well.

Helpful Tips:
- Find a good sturdy “poker” (a screwdriver or a strong bamboo stake) to make holes in the soil or foam blocks, allowing you to insert smaller branches and delicate seed pods or ornaments easily. You may need to secure smaller items onto sticks or some of the stronger branches in the planter by wrapping wire around them.
- Don’t forget to water your arrangement to help your greens stay fresh longer!
In winter, the blanket of snow and grey winter skies can create a somewhat monotonous landscape. That’s when greenery urns make a big difference. Blending evergreen boughs with rustic and seasonal accents and some lights creates a welcoming outdoor display for November and beyond. Just be sure to use materials that can hold up to the frost, wind and snow that will be coming!
Other Resources
https://eising.ca/how-to-decorate-with-fresh-greenery-for-christmas/
https://eising.ca/holiday-home-decor-ideas-you-can-make-yourself/
https://eising.ca/holiday-decorating-tips/
Ah, the smell of fresh greenery! There’s something extra special about decorating for Christmas with fresh evergreen branches.
The holidays are the best time to bring the outdoors in. After all, what better time is there than when we’re longing for some green in a winter world that’s predominantly brown, or snowy white? Or, you may simply be searching for the nostalgic smell and sight of fresh holiday decorations.
In southern Ontario, evergreens last the longest outdoors during our winters. But how do you keep your pine, cedar, fir and spruce branches looking fresh and lovely all season long? Give these tips a try.
Start Fresh
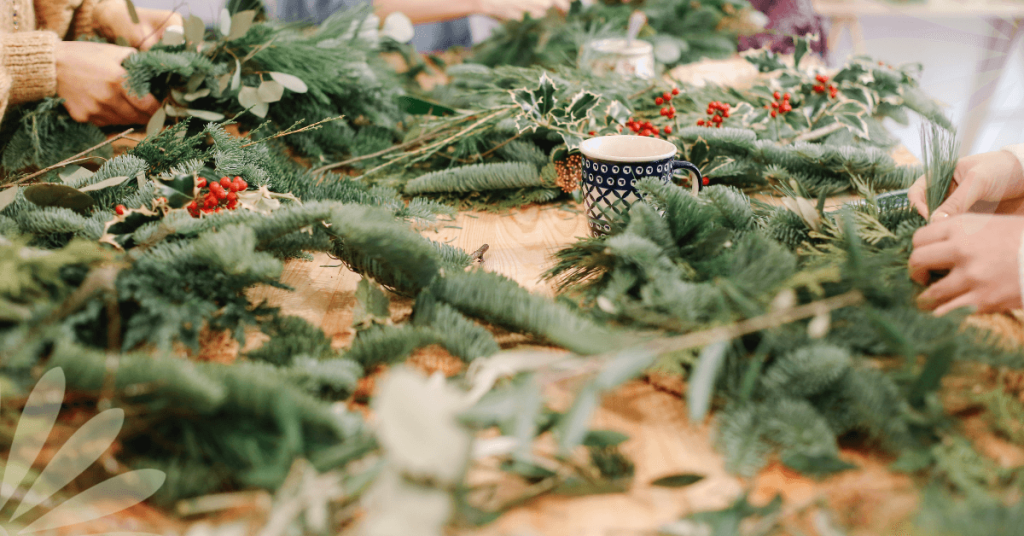
Whether you are making decorations, or buying them, start with freshly harvested branches.
Cut each stem on an angle to increase the water absorption rate, and place the stems in a bucket of water for several hours before using them. As you’re cutting each branch, be sure to check for any pests first.
At this point, your greens are ready to arrange into wreaths, swags, garlands, containers or whatever you’re making.
For indoor arrangements, oasis or floral foam that has been soaked in water, and secured in your container creates a solid base to work with. Fill outdoor urns or containers with moist soil, or a combination of oasis and damp soil to insert the branches into and hold them in place. Both methods will help to keep your plant material hydrated.
Prevent Dehydration
Before adding decorative elements, lightly mist your evergreen arrangements, wreaths, swags and garlands with an anti-dessicant spray. Doing this provides a protective barrier and reduces moisture loss.
Placement and Care
Keep outdoor arrangements sheltered from direct sunlight and strong winds if possible. Likewise, keep indoor arrangements away from sunlight, and heat sources like vents and radiators.
Evergreens can dry out very quickly. Keep arrangements watered (for outdoor arrangements, water when the soil is not frozen), and mist garlands, swags, and wreaths with water frequently. Avoid overwatering though! It’s a good idea to water or mist in the morning so that any excess moisture evaporates or can be drained if not absorbed after about an hour.

Following these steps should keep your decorations looking fresh through the holiday season and beyond!
If you would like more help with homemade decorating ideas, check out our DIY Fresh Evergreen Decor guide and our Holiday Home Decor Ideas.
Or, stop by and see us at Eising Greenhouses and Garden Centre in Simcoe for inspiration and choose from our selection of:
- fresh greenery branches
- undecorated arrangements
- decorated arrangements
- Poinsettias
- Christmas Cactus
- Kalanchoe
- Amaryllis
- Paperwhites and more!
If you’re heading to a holiday party, we have lots to choose from as gifts, or items to add to your arrangements, or to fill a spot in your home that needs a little extra holiday cheer!

As we all start to settle into our new routines and get the hang of homeschooling (common core math, anyone?), we're quickly realizing how important it is to have some variety in our lives. Too much monotony can make us pretty squirrelly—kids especially—so breaking up long stretches of time indoors with fresh air and exercise really helps the cause. After all, that's why schools have recess.
Time spent working is more productive and valuable when you get the chance to get some sunshine, so it's good to try and squeak in a couple of 20 - 60 minute activity breaks outdoors. It isn't always easy to think of activities to keep kids occupied when you're juggling all the other duties at home, but these six ideas for outdoor games should go over well with the little ones.
5 Creative Outdoor Games For Kids
Soak up some sun and enjoy some playtime with your kids; it's amazing how quickly it can lift the spirits and give you a second wind to tackle your next project. These fun activities will require you to help with setup and supervision, but you'll still be able to get a chance to kick back and enjoy a cold drink in a lawn chair while the young ones run around. A little exercise and a little relaxation—the best of both worlds!

Make a Chalk Obstacle Course
A set of rainbow chalk and a little imagination is all you need to create a wacky obstacle course all the way down your sidewalk. You can help them with the colouring, and then sit back and watch while they run through it over and over. Of course, there are the classics like hopscotch, but you and your kids can probably come up with some more creative ideas.
For example, you can colour a long stretch of bright orange and red lava, then add a few "stepping stones" to hop on. Draw a big, long, slithering anaconda and walk on it like a tightrope! Add in some squares with different actions like "Hop on one foot ten times," or "Spin around five times." Use the stopwatch on your phone to time their runs through the course and challenge them to try and get the fastest time they can!
Paint Some Rocks
Rock art can be a fun, inexpensive outdoor art project that kids of all ages can enjoy. The little ones can go the abstract route, covering rocks with fun splashes of colour (these actually look really pretty lined up on a windowsill or placed throughout the garden!). Older kids with more developed motor skills can try painting scenes on rocks or transforming them into their favourite characters. To avoid getting paint on the grass or cement, put an old bedsheet or some sheets of newspaper down. Make sure to provide plenty of paper towels along with a basin full of water!

Melt Old Crayons Into New Ones
If you've got cookie cutters, tin foil, old crayons, a cookie sheet, and a sunny afternoon, then you can pull off this super fun outdoor activity that gives new life to old, broken crayons. Cover the cookie sheet in tin foil and arrange the cookie cutters on top. Peel off any labels remaining on the crayons, snap the bigger ones in half, and put a mix of assorted coloured crayon bits in each cookie cutter. After you've got them all set up in the sunshine to start melting, you can go back inside for another activity, and then come back out to retrieve them once they've melted. Place the cookie sheet on the counter to cool off, and then once they're solid, pop out your new crayons and get colouring!
Let Them Power Wash The Windows
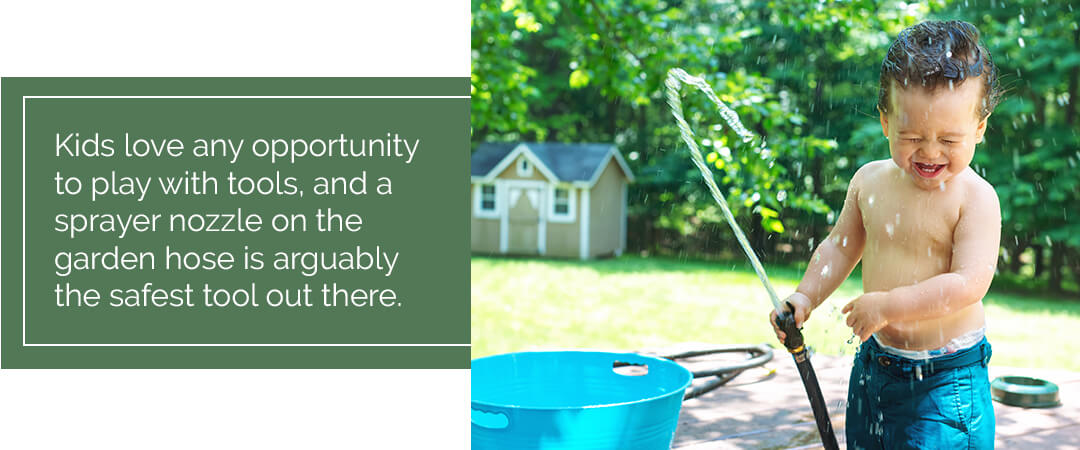
Okay, hear us out—kids love any opportunity to play with tools, and a sprayer nozzle on the garden hose is arguably the safest tool out there. If your windows are looking a bit mucky now that the snow has cleared, let your kids blast off all the dirt! You'll be amazed at how eager they are to help you clean. "Power washing" with the hose is definitely one of the most fun chores around. If they can't get enough, ask them to give the patio furniture or the family car a good rinse!
Plant A Kid-Friendly Garden
Of course, we're a little biased, but we think gardening with kids is one of the best outdoor activities imaginable. It's like a long-term, hands-on science lesson that results in some pretty spectacular end results. Sprout some seeds on the windowsill, or pick up some small starter plants. Grab them some child-sized garden tools and gloves so they can dig up some holes and get all their flowers and vegetable plants in place.
Encourage them to make some little signs to stick in the garden so they can keep track of which plant is which. It's a great way to expand on their vocabulary and work on their printing skills! Make a plant journal for them, and take note of exciting new developments or growth spurts in the garden. They'll love the sense of ownership they feel for their personal gardening project, and at the end of the summer, you'll have a cool memento to hold onto and look back on.
Spending time out in nature and getting some exercise is so important, whether you're 8 years old or 80. Check out our new web store to see all the brand new stuff we've got in for gardening and outdoor activities! Remember, we have curbside pickup service available to make your spring plant purchasing as fuss-free as possible!
Every day our understanding and awareness of the products and chemicals in our lives grows. From lotion to moisturize your skin, to chemicals to clean our homes, and to the fertilizers and pesticides applied to our lawns, chemicals are starting to be less and less invisible in our daily lives. There seem to be hidden chemicals and risks everywhere around us, and learning more about them can be important to living a healthy life and taking care of our vulnerable pets. Collectively, we’re starting to want to really understand the products we use and just how risky they actually are.
Pesticides, Herbicides, and Fertilizers
If you’ve ever had your lawn treated for weeds or have fertilized in hopes of a golf-green carpet of grass, you know just how unpleasant some of the chemicals that we use in our garden can be. Some of them have foul smells, others require precautions to keep us safe from touching them… it’s no mystery that what we use in our gardens and yards can be potent. On the other hand, most of us don’t want to have a struggling and ragged lawn and garden while our neighbours’ flourish.
There’s a middle ground between taking care of your lawn and garden to help it thrive and using harsh and scary chemicals that might be questionably unsafe for your family. There are tons of organic solutions for a thriving lawn that simply take a little work and some patience, but you can rest easy knowing you’re keeping your home safe to enjoy. Here’s how to get started:

Dethatch
This is as simple as dragging a hard rake across your lawn to clear out some of the dead old growth. These accumulated old layers can stifle your lawn and get in the way of new spring sprouts. A little elbow grease to rake the lawn will show you just how much old growth is in the way and will be the perfect way to get your lawn ready for spring.
Aerate
Your grass is a living thing and has basic needs for survival! Aerating is a great way to boost how much air, space, water, and nutrients can make their way through compacted soil to their roots.
Dethatching and aerating go hand in hand as a once-a-year chore to rejuvenate your lawn in the late fall or early spring. Your lawn might look rough after you dethatch and aerate, but it’s all a necessary to have a natural, thriving lawn when it fills in.
Seed With Good Seed
If you try to start your lawn off with poor seed, you’re setting a poor foundation for your lawn. Choose something that meets your needs, like something that is drought-resistant or perfectly suited for the conditions of your lawn. Even if your lawn was originally seeded with grass seed that is a poor match to your lawn needs, you can always interseed or overseed after you’ve thatched and aerated to re-establish your turf.
Watch Your Watering
Many lawns these days are totally dependent on regular watering to look lush. For many people, their fresh sod needs some extra pampering, and then it’s never weaned off. Ultimately, if you can try to wean your lawn off of constant watering it’ll be encouraged to develop deeper roots that will make it hardier and better able to tolerate dry conditions. A bit of thought into your watering schedule can make the difference between a nice lawn, and a gorgeous one that has the depth to be tough, too.
Working By Hand to Treat Weeds
The dream of a beautiful lawn that is thriving is always compromised by weeds. Thankfully, the healthier your turf is, the more it’ll take up room that opportunistic weeds might have sprouted in the past. All of this work to make a gorgeous lawn isn’t just about getting your greens greener, but about getting rid of opportunities for weeds to take over.

Of course, weeds are stubborn enough that even the healthiest lawns are bound to have a few. If you’re trying to stay away from chemical solutions so your space is always safe for everyone to use, a bit of elbow grease is the solution. Grab a trowel and some gloves and pick away at whatever weeds make it through your defences. It’s actually therapeutic once you aren’t fighting overwhelming numbers of them. The more consistent you are with your weeding, the easier it gets.
Saying goodbye to chemicals in your yard doesn’t mean that you have to say goodbye to a beautiful lawn! A little bit of strategically timed work is exactly what you need to encourage your grass to thrive while keeping your landscape accessible to everyone — you, your kids, your pets, your guests, and your local beneficial critters — to enjoy.