
The flavour of homegrown tomatoes is like nothing else, and tomatoes are pretty easy to grow in Southern Ontario. With all that classic, juicy flavour, it's so satisfying to serve your family beautiful and tasty tomatoes that you grew yourself. Some of the more unique varieties are surprisingly beautiful plants as well—especially when they're loaded with brightly-coloured fruit!
Here are some of our favourite tomato varieties for 2020!
Little Sicily is the perfect patio tomato, delivering lots of tomatoes with excellent flavour on a plant that stays under 2 feet tall!
Candyland Red is a currant tomato—slightly smaller than the cherry size. The sweet flavour of these dark red fruits can be enjoyed all season long.
Glamour is an early producing tomato, with large crack-resistant fruits. These are a delicious all-around tomato, great for sandwiches, salads, slicing, and canning.
Great White is a large, yellow-white tomato with a delicate tropical flavour and low acidity. These are the best when eaten immediately after harvesting! Great White is pleasant and mild, and perfect for folks who are sensitive to acidic foods.

Green Zebra is a green and yellow striped tomato with a tart and rich flavour. It's a little smaller than your average grocery store tomato. Let them ripen fully on the vine before picking to enjoy their full, balanced flavour.
Pineapple is a sizeable bright-yellow tomato known for its refreshing citrusy flavour. These are super sweet with lower acid levels than other yellow tomatoes. Pineapple tomatoes can weigh up to 1 pound each and are perfect for sandwiches!
Better Boy is the perfect classic red tomato. Its the perfect balance of tart and sweet, and it produces an amazing amount of fruit in one season. This excellent slicing tomato grows well almost anywhere.
Bush Beefsteak is the perfect beefsteak variety for patios. It delivers large and flavourful fruit early in the season, maturing in just 62 days. The plant stays much more compact than other beefsteak varieties.
Whatever variety of tomatoes you choose to grow, you can be sure they'll taste amazing. You'll be able to show off your delicious homegrown fruit in all sorts of meals—from salads to kebabs, soups to sauces, and burgers to sandwiches. All of these varieties are disease resistant and will grow well in Simcoe!

Tomatoes are pretty simple to care for, but there are a few basics to keep in mind. These garden favourites are heavy feeders, and they're also very thirsty. Because they grow so fast, they use up nutrients in the soil fast. Fertilize your tomatoes once a week to ensure they have the nutrients they need to produce the best possible flavour. During the summer, you may need to water your tomatoes daily, especially if they are in pots. Growing as fast and as large as they do, tomatoes use up water very quickly. Make sure they're watered consistently, without getting too dry in between, to prevent blossom end rot.
Ready to start growing tomatoes for your summer BBQs, picnics, and block parties? Stop by our Garden Centre; we've got many more delicious and beautiful varieties to choose from!
If you haven’t gotten started on your summer vegetable garden yet, don’t worry—there are still plenty of veggies you can plant now for a late-season harvest! That means more fresh produce to enjoy through the fall, and with the help of our trusty freezers, many can be enjoyed well through winter and spring. You can find all kinds of seeds and starters for vegetables and fruits on our brand new webstore, so feel free to browse online and place an order for curbside pickup or citywide delivery.
What Are The Best Vegetables To Plant In Summer?
Generally speaking, vegetables that can be planted in summer are either fast-growing and love the sun, or slow-growing and tolerant of the cooler temperatures in the fall. Many garden edibles can get scorched from the hot sun if planted too early, so it’s best to delay so that they’re ready to go once the temperature is less extreme.

Late Summer Vegetables You Can Direct Seed
Many folks assume that spring is the best time for planting vegetable seeds, but every plant is different! So, if you want to start planting seeds in summer, there are more than a few good options for you to choose from. Here are the best late summer vegetables to plant in Simcoe through direct seeding:
Beans: Perhaps one of the easiest and most kid-friendly veggies to grow, beans are always a favourite. Plus, they deposit nitrogen into the soil, which helps improve soil quality.
Beets: These hearty root vegetables make excellent comfort food, and their ultra-vibrant colour indicates super-high levels of vitamins, nutrients and antioxidants. Your beets will be ready for harvest around September or October.
Broccoli: Even the pickiest of eaters aren’t likely to turn down a delicious bowl of broccoli cheese soup, or a Chinese beef and broccoli stir fry. Sow broccoli seeds in June for a harvest that’s ready right at the start of back-to-school season.
Carrots: Before you sow your carrot seeds, make sure your soil is super loose and free of rocks and compacted areas. If it’s all clumped together, the roots won’t grow long and pointy, so you’ll be left with stumpy, misshapen carrots.

Leafy Greens: Lettuce, kale and spinach can all be sown directly into the soil in June. They don’t take too long to develop, and they thrive in cooler temperatures, so you can even get away with planting a second round in early autumn!
Parsnips: Slow-growing parsnips need around four months to mature, but there’s no need to rush! Parsnips taste best if you harvest them after the weather has turned chilly. If we get hit with a few frosty nights in autumn, this will actually help them! Just make sure you pull them up before the ground freezes.
Potatoes: While not technically seeds, you can put potato tubers in the soil in June to enjoy an autumn harvest. Wait for the plants to mature, turn brown, and wither, then leave them in the soil for another three weeks before pulling them up! Store them in a cool, dry spot, and don’t wash them before storing—this will cause them to rot.
The Best Starter Plants For Late Summer Crops
The waiting game can get a little long when you directly seed certain plants, so sometimes it’s better to get a starter plant to transplant into containers or your garden bed. Here are some excellent starters to pick up later in the season:

Zucchini: “Zoodles,” or spiralized zucchini noodles, are quickly gaining popularity as a delicious alternative to carb-heavy spaghetti. If (like many of us) you’ve been kinda overdoing it on the pasta lately, you’ll definitely enjoy having this tasty squash in your garden.
Celery: This ultra-healthy, crunchy veggie adds some great crunch to tuna salad, chilli, and stews, but it takes a pretty long time to develop from seed, so you may as well skip ahead and opt for a starter.
Cucumbers: Technically, you can either transplant or direct seed cucumbers in June, but getting a starter will ensure you get to enjoy your harvest earlier in the season!
Peppers: With their thin, delicate skins, peppers aren’t too tolerant of chilly temperatures and will taste much better if they get lots of sunlight. Planting a starter in June will ensure these sun-loving veggies get peak sunshine in July and August, right when it counts.
Tomatoes: We especially love growing small tomatoes in hanging baskets! The little fruits look like strings of colourful porch lights changing from green, to yellow, to red!
Fresh garden produce can be enjoyed well into autumn, and even early winter, if you pick the right crops and time them just right. If you have any questions about late-season planting, feel free to give us a call at the shop, and we’ll be happy to help!
By now, if you've been caring diligently for your seedlings, they're likely bursting out of your starter trays or pots! You've watched them grow up, and now it's time for them to graduate into the garden. But you may be wondering how to take the next steps. How do I transplant, and when? Answering these questions is key to success at this pivotal moment.
Transplanting Overview
Transplant timing hinges upon our last frost date, which is May 19 in Simcoe. Frost-hardy veggies can be transplanted before then, but tender plants should wait a little longer. Sometimes seedlings can outgrow their trays before their graduation time. Don't worry, that means they're growing well! The solution is simply to move them into a bigger pot.
How to Repot
Your young ones are ready for a larger home when their roots have filled their containers and their leaves are crowding out their neighbours. The new pot should be twice as large as the old one.
Begin by watering the seedlings. The damp soil will adhere to the roots and keep them from drying out. Don't tug on the stems. Instead, use a butter knife to carefully lift them from the container or squeeze them out from the base. If a few are intertwined, gently tease them apart. With a pencil or your finger, dig a hole into their new pot or plug tray. Place the seedling, firm the soil around it, and water them all once you finish. The roomier pot will give them a chance to stretch their legs before their big move.
When to Transplant into the Garden
Historic weather averages tell us when to take the next step. Often, we need to adapt to unusual weather or unique conditions each year, but here is a general guide for our climate.
April 15 - 25
Frost hardy: asparagus, broccoli, Brussels sprouts, cabbage, lettuce, onions, radishes, peas, spinach, parsnips, early potatoes.
April 25 - May 10
Semi-frost hardy: beets, carrots, cauliflower, celery, late potatoes, early sweet corn.
May 15 - 25
Semi-frost tender: snap beans, sweet corn, tomatoes.
May 25 - June 5
Frost tender: cucumbers, eggplant, melons, peppers, pumpkins, squash.
Hardening Off
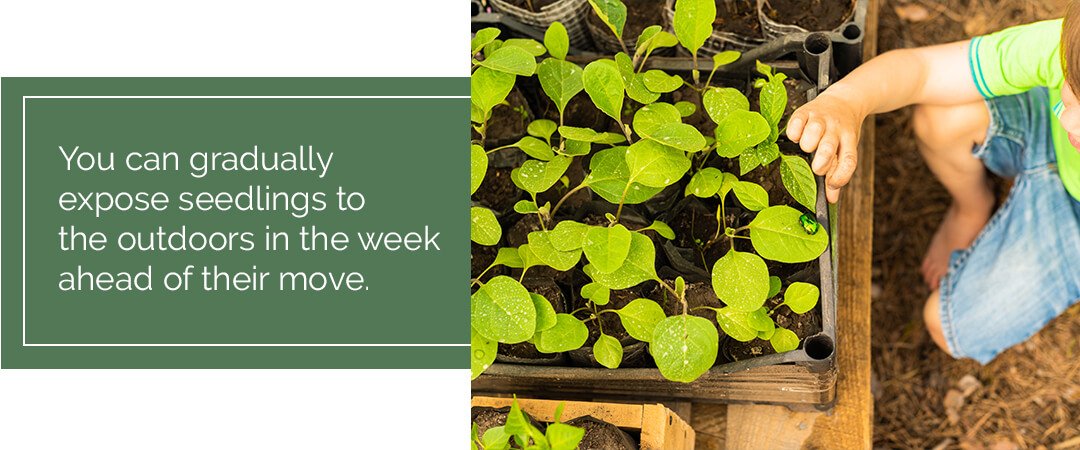
You can gradually expose seedlings to the outdoors in the week ahead of their move. While not absolutely necessary, your veggies, especially the tender crops like tomatoes, will be strengthened by the gradual transition.
Begin by setting them in a shady spot away from the wind for a few hours each day. Slowly increase their exposure to sunlight and breeze until they spend a whole day and night outside. Make sure to keep them well-watered, as their small pots can quickly desiccate. When the time comes to graduate, they'll be ready to brave the elements.
How to Transplant into the Garden
Follow these steps for transplanting success:
- First, make sure you've loosened and enriched the soil with compost or another organic fertilizer.
- Choose a warm overcast day and plant in the morning or evening.
- Water the seedlings to hydrate their roots.
- Determine the correct garden spacing in advance.
- Gently squeeze the tray around each plug to remove them. Only remove each seedling just before moving to minimize the roots' exposure to air.
- Using a trowel or your fingers, make a hole and drop the seedling into it, firming up the soil around it as you plant. Leggier seedlings can be planted a little deeper as long as you don't bury the first leaves.
- Water the newly planted area immediately after finishing.
- They will likely need to be watered daily for a few weeks afterwards. Check the soil moisture and water as needed to prevent them from drying out.

There are a few more tricks for particular plants like tomatoes and cucumbers. But in general, these are the basics for transitioning your veggies into the ground. If you haven't started your seedlings, check out our selection of starter plants in our online catalogue. If you need more advice, our garden centre would be happy to share more tips for success!
We’re fortunate here in Simcoe—our weather is mild enough that we can grow a pretty impressive variety of delicious fruit trees. There are loads of benefits to growing fruit trees, the most obvious one being the large amount of fruit you can harvest every year. On top of that, they’re seriously beautiful, especially when they’re in bloom, and they can help increase your property value significantly! Want to try and grow your own? Here are the best fruit tree varieties for our neck of the woods.
5 Fruit Trees For Southern Ontario Gardens
Having your own backyard orchard is totally possible, so long as you pick the right kinds of fruit trees to grow. There are many different varieties of each kind of fruit tree, and it’s important to keep in mind that some are self-pollinating, while some others aren’t. The ones that don’t self-pollinate will need to be grown in groups of two or more, so check with one of the experts at our garden centre to make sure you’ve got everything you’ll need to successfully grow fruit.
There’s nothing quite like freshly picked fruit right off the tree, and it’s definitely a nice bonus to get it for free instead of shelling out money for imported fruits from the supermarket. Here are some of our favourites fruit trees for Southern Ontario:

Cherry: The gorgeous blossoms of the cherry tree are truly in a league of their own—the colour and the fragrance are so breathtaking! And, of course, all that tasty fruit definitely sweetens the deal. When choosing your cherry tree variety, always check to see if it’s a sour cherry or sweet cherry tree. The sour fruits are usually used for baking or cooking, but you can snack on the sweet ones with no problem. Black cherry trees are the most popular, and their fruits are usually ripe by late June or early July. Harvest them by nipping them off with pruning shears, because the branches are a little too delicate for you to pull them.
Peach: Fuzzy golden peaches are so tangy and perfect—having your own peach tree is really quite the luxury! Luckily, they’re pretty easy to maintain. Peach trees are technically self-pollinating, but as with all fruit trees, you’ll get the best yields if you keep two peach trees of different varieties on the same property. Make sure you plant your tree, or trees, in a spot that gets plenty of sunshine, with healthy soil that drains well. Plant them in the spring when the weather is mild, and once they’re mature, you can harvest your peaches in July or August. Regularly pruning your peach tree will help to increase your crop yield, but that little extra effort will definitely be worth the payoff of buckets full of fresh, juicy peaches.

Pear: These are definitely one of the most low-maintenance fruit trees to grow, but none of them are self-pollinating, so you’ll definitely want to plant at least two of different varieties. Thankfully, they aren’t very large, so you shouldn’t have too much trouble making space for them. Plant them in the spring, in an area with full sun and plenty of air circulation, which will help to prevent the buildup of mildew or other fungi. Depending on your chosen variety, it can take anywhere from three to 10 years for your pear trees to start bearing fruit, so you’ll need to be patient, but we think it’s definitely worth the wait! Pears usually begin to ripen by the end of the summer through until October, so you can enjoy a nice late-season harvest.

Plum: Few things are as refreshing on a hot day than a frosty, cold plum straight out of the cooler. If you’re a fan of these juicy purple fruits, then you absolutely should grow your own plum trees because the amount of fruit they produce is incredible! Some trees will continue producing fruit from May all the way until October, so there will be plenty to go around. Plums are the perfect fruit tree for beginners because they’re super hardy and low-maintenance. One thorough pruning in the spring will help a lot, though, because thinning out the weaker branches will prevent major breakage later on when the fruits grow and get all plumped up.
Apple: Ah yes, the classic apple tree, how could we ever forget? This much-loved fruit tree has so many different delicious varieties, and the fruits are so versatile. Dinner guests will be fawning over your pies and dessert crumbles made with garden grown, organic apples from your own backyard! Apple trees can be planted in the spring or fall, and they like lots of water for those first few months after planting. You won’t have to prune them much, but you may notice they’re a bit more prone to pests, so you’ll want to regularly inspect your tree and spray with natural pesticides when needed.
Need any guidance on how to plant your own trees successfully? We’d be happy to help walk you through the process! Don’t hesitate to contact us at Eising; we’ll help you on your way to creating your very own home orchard. Don’t forget, we just launched our online store, and we have curbside pickup and delivery options available, so getting your garden plants and supplies is now easier than ever!
As we all start to settle into our new routines and get the hang of homeschooling (common core math, anyone?), we're quickly realizing how important it is to have some variety in our lives. Too much monotony can make us pretty squirrelly—kids especially—so breaking up long stretches of time indoors with fresh air and exercise really helps the cause. After all, that's why schools have recess.
Time spent working is more productive and valuable when you get the chance to get some sunshine, so it's good to try and squeak in a couple of 20 - 60 minute activity breaks outdoors. It isn't always easy to think of activities to keep kids occupied when you're juggling all the other duties at home, but these six ideas for outdoor games should go over well with the little ones.
5 Creative Outdoor Games For Kids
Soak up some sun and enjoy some playtime with your kids; it's amazing how quickly it can lift the spirits and give you a second wind to tackle your next project. These fun activities will require you to help with setup and supervision, but you'll still be able to get a chance to kick back and enjoy a cold drink in a lawn chair while the young ones run around. A little exercise and a little relaxation—the best of both worlds!

Make a Chalk Obstacle Course
A set of rainbow chalk and a little imagination is all you need to create a wacky obstacle course all the way down your sidewalk. You can help them with the colouring, and then sit back and watch while they run through it over and over. Of course, there are the classics like hopscotch, but you and your kids can probably come up with some more creative ideas.
For example, you can colour a long stretch of bright orange and red lava, then add a few "stepping stones" to hop on. Draw a big, long, slithering anaconda and walk on it like a tightrope! Add in some squares with different actions like "Hop on one foot ten times," or "Spin around five times." Use the stopwatch on your phone to time their runs through the course and challenge them to try and get the fastest time they can!
Paint Some Rocks
Rock art can be a fun, inexpensive outdoor art project that kids of all ages can enjoy. The little ones can go the abstract route, covering rocks with fun splashes of colour (these actually look really pretty lined up on a windowsill or placed throughout the garden!). Older kids with more developed motor skills can try painting scenes on rocks or transforming them into their favourite characters. To avoid getting paint on the grass or cement, put an old bedsheet or some sheets of newspaper down. Make sure to provide plenty of paper towels along with a basin full of water!

Melt Old Crayons Into New Ones
If you've got cookie cutters, tin foil, old crayons, a cookie sheet, and a sunny afternoon, then you can pull off this super fun outdoor activity that gives new life to old, broken crayons. Cover the cookie sheet in tin foil and arrange the cookie cutters on top. Peel off any labels remaining on the crayons, snap the bigger ones in half, and put a mix of assorted coloured crayon bits in each cookie cutter. After you've got them all set up in the sunshine to start melting, you can go back inside for another activity, and then come back out to retrieve them once they've melted. Place the cookie sheet on the counter to cool off, and then once they're solid, pop out your new crayons and get colouring!
Let Them Power Wash The Windows
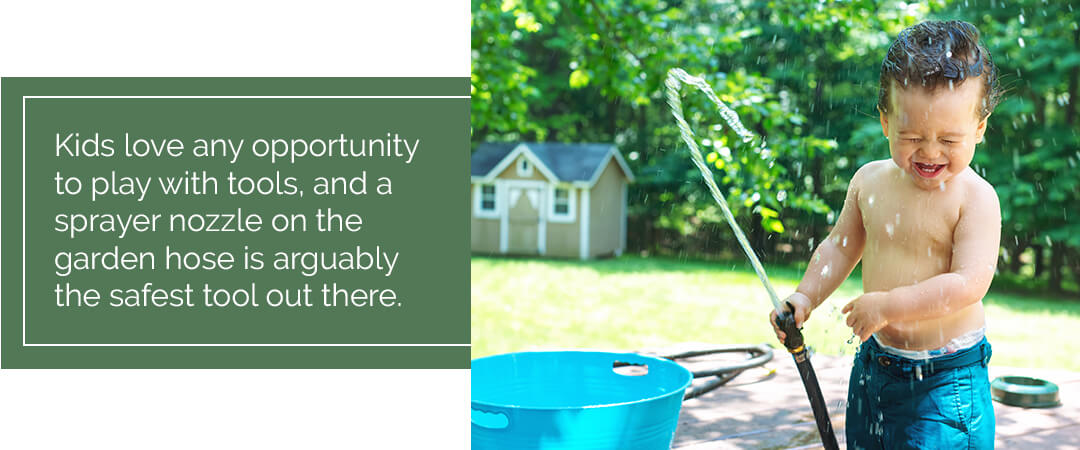
Okay, hear us out—kids love any opportunity to play with tools, and a sprayer nozzle on the garden hose is arguably the safest tool out there. If your windows are looking a bit mucky now that the snow has cleared, let your kids blast off all the dirt! You'll be amazed at how eager they are to help you clean. "Power washing" with the hose is definitely one of the most fun chores around. If they can't get enough, ask them to give the patio furniture or the family car a good rinse!
Plant A Kid-Friendly Garden
Of course, we're a little biased, but we think gardening with kids is one of the best outdoor activities imaginable. It's like a long-term, hands-on science lesson that results in some pretty spectacular end results. Sprout some seeds on the windowsill, or pick up some small starter plants. Grab them some child-sized garden tools and gloves so they can dig up some holes and get all their flowers and vegetable plants in place.
Encourage them to make some little signs to stick in the garden so they can keep track of which plant is which. It's a great way to expand on their vocabulary and work on their printing skills! Make a plant journal for them, and take note of exciting new developments or growth spurts in the garden. They'll love the sense of ownership they feel for their personal gardening project, and at the end of the summer, you'll have a cool memento to hold onto and look back on.
Spending time out in nature and getting some exercise is so important, whether you're 8 years old or 80. Check out our new web store to see all the brand new stuff we've got in for gardening and outdoor activities! Remember, we have curbside pickup service available to make your spring plant purchasing as fuss-free as possible!
Making your own compost is a great way to save money and reduce your carbon footprint—plus, it saves you a trip to the store! With summer coming up, our vegetable plants and fast-growing annuals will be hungry for soil nutrients, and having the perfect organic fertilizer on hand makes it that much easier to have a healthy, thriving garden. Plus, it can cut your total household waste in half, so it’s twice as good for the environment! Less trash in our landfills means less methane gas gets released, which Mother Nature will surely appreciate.
Want to start making your own compost at home using kitchen scraps that would otherwise end in the garbage? Once you get the hang of it, it’s really pretty simple, and the end product will be so worth it. Here are the basics of making compost, so your garden will be well-fed this year.
What Goes In A Compost Bin?
One of the things that people find the most confusing when beginning to compost is figuring out what goes in the bin, and what stays out. There are all sorts of different kitchen scraps that we can generate in a day, but some of them can contaminate the compost bin and introduce harmful bacteria instead of the good kind. Having a little cheat sheet posted on the fridge will make it easier for you to navigate the do’s and don’ts of composting, so we compiled this list for you to use as a reference.

Things You Can Always Compost
- Fruit and vegetable scraps
- Eggshells
- Dye-free cardboard
- Coffee grounds
- Grass clippings
- Leaves and stems (unless they show signs of disease)
- Straw
- Pine needles
- Untreated paper
- Cotton and wool
- Sawdust and untreated woodchips
Things You Can Compost In Smaller Amounts
- Citrus fruit peels
- Herbivore manure (ex: rabbits, birds, horses)
- Printed cardboard
- Teabags
- Black and white newspaper
- Hair and pet fur
Things That Shouldn’t Go In the Compost
- Dairy
- Meat
- Bones
- Metal
- Chemically-treated wood
- Diseased plants
- Plastic
- Weeds
- Oils and fats
- Diapers
- Carnivore animal droppings (no dog or cat waste!)
If there’s anything you want to toss in the bin but aren’t entirely sure about, go online and do a quick Google search as to whether or not the item is compostable.

The Different Types Of Compost Bins
There are three different types of compost bins you can use at home: aerobic, anaerobic, and vermicomposting bins. Each one breaks down waste a little differently, and there are a few pros and cons, so we’ve listed out the basics of each type so that you can choose accordingly.
Aerobic Compost Bins: These bins have a crank that helps to turn the inner contents, helping to aerate the waste so it breaks down faster. While they’re a little more expensive, they’re neater and more compact than other composters, so you can place them pretty much anywhere in the yard.
Anaerobic Compost Bins: A cheaper, more basic alternative to the aerobic bin, the anaerobic bin is pretty much just a lidded bin with no turn crank. You simply toss your scraps in and let it break down over time. It’s a slower, and somewhat stinkier process, but they’re pretty cost-effective, and you can even find online tutorials on how to build your own using materials you may already have at home. It’s a good idea to add an even ratio of dry leaves (save that fall leaf litter!) and household waste to keep odours to a minimum. Use a stick or shovel to mix up the decomposing matter every month or so, to speed up decomposition and prevent methane from building up in the container.
Vermicomposting Bins: Now, this one might seem a little weird if you’re squeamish around bugs, but hear us out: vermicomposting is a super effective way to turn trash into treasure. Vermicomposting bins are full of tiny worms that quickly break down the scraps and release them into a lower compartment in the bin, so you can retrieve your compost without having to touch the worms. The resulting compost is super nutrient-rich and easy to spread through the soil.
Composting is great for your garden, great for the environment, and great for your wallet too. Remember, if you need any supplies to help you get started, feel free to check out our brand new online store, and we can arrange curbside pickup for your order!
This is the year—the year you cross off all the tasks on your spring to-do list! A little bit of yard work now pays off in the long run. You'll feel more organized and have healthier plants, and you'll be better prepared for the following year.
Review Your Tools and Accessories
Before we get into the heart of the gardening season, now is the time to look over your storage shed to make sure you have everything you need for a successful season. To prevent the spread of disease between plants, clean pots and containers you may use, as well as any tools. You also may need to sharpen and oil some old standbys, like pruning shears, loppers, and trimmers. If, after doing your clean up, you realize you need any tools or accessories, we're now offering curbside pickup at our garden centre.
Clean Up The Yard
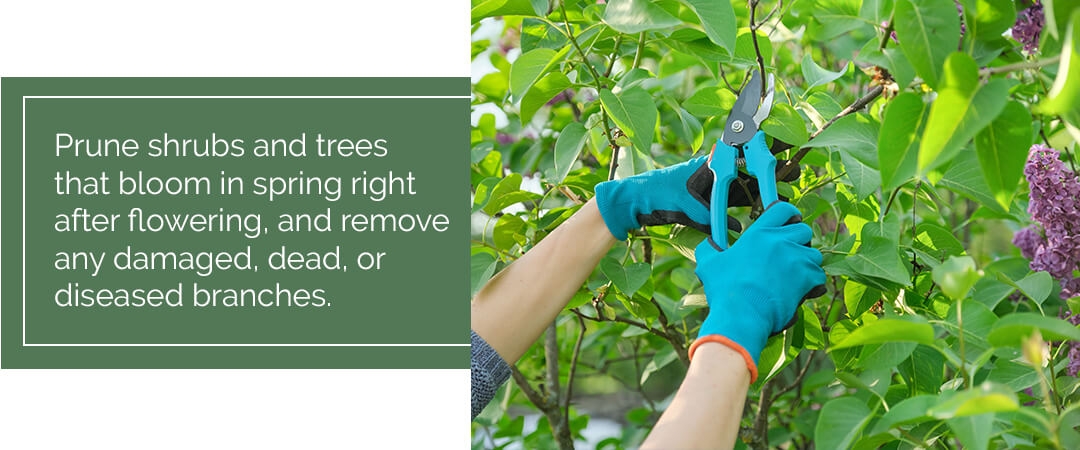
Removing any fallen branches is especially important to reduce any hazards now that the kids are spending more time playing outside. Prune shrubs and trees that bloom in spring, like lilacs, right after flowering, and remove any damaged, dead, or diseased branches.
Though perennials, like grasses and woody herbs, provide food and shelter for birds during the winter, they can make your yard look a little scruffy during the spring. Cut back these perennials to encourage fresh growth and remove last year's annuals to make room for new ones this year.
Work the Land
Pick up a handful of soil, shape into a ball, and squeeze it. If water comes out, the soil is too wet, and you should wait a bit longer. However, if the ball crumbles, then the soil is ready to be worked. Remove any fresh mulch or leaf litter, but leave whatever has composted to mix into the soil. Loosen up and mix the soil by turning it over, using a tiller or a spade. Depending on the soil in your garden, you may also have to add amendments, like fertilizer.
Take inventory of the groundcover in your yard. Mulch and rock seem to disappear every year — groundcover should be about two to three inches thick, so replenish accordingly.
Plan Ahead
Take note in a garden journal of what you've completed already, like all of the steps above, plus any seedlings you started or bulbs you planted. A garden journal is a great help, not only for this season but also for years to come, since you can keep track of what worked and what didn't each year. Write down what you'll plant, where you'll plant it, and when. The majority of garden vegetables can be planted through mid-May here in Simcoe, after any risk of frost has passed. Now is also the right time to take note of any open spots in your yard that you can fill in by dividing fall-blooming perennials, like hosta and purple coneflower. Dividing perennials helps keep the plants healthy, plus it gives you more plant material to work with!
Odds and Ends
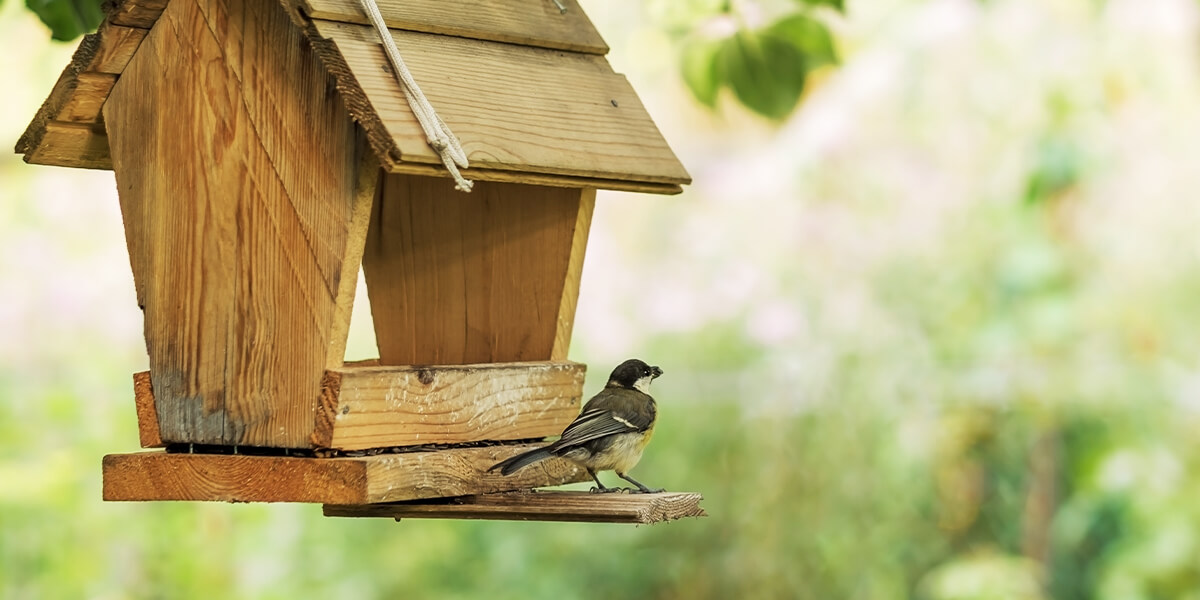
Clear out the gutters, turn over the compost, clean out bird feeders, and repair anything that needs it, like fences and lawnmowers. Locate and put up stakes and trellises for any plants that might need them, like tomatoes and peonies. Now is also a great time to tend to your decks and hardscapes so that you have a place to enjoy your garden from when it starts blooming!
Though you could make a day of prepping your garden this spring, to make it more manageable, break up your days at home by doing tasks between conference calls. Follow this checklist, and in no time, you'll be seeing the results of your hard work—evidenced by your thriving garden!
It's never too early to get your kids interested in gardening, so if you have some budding botanists at home who are curious to get involved in your hobbies, why not help them create a kid-friendly garden? Gardening is a fantastic learning experience, and you can ease them into it by building from their existing knowledge.
Families are spending a lot more time together at home lately, and we've been hearing lots of buzz about kicking off family gardening projects. However, not everyone is sure how to get their kids involved despite their interest. Our solution? Organizing your plants into rainbow colours! It not only creates a beautiful garden landscape, but it will also create some familiarity for your kids, so they aren't overloaded by all this new information. Plus, everything is more fun when it's loaded with colour!
On top of its visual beauty, a rainbow garden has some real benefits, especially if you're growing edible plants. Different coloured fruits and vegetables tend to have different levels of vitamins, so by having a diet that's full of colour, you can be sure that you're getting a broad variety of vital nutrients.
Preparing Your Kid-Friendly Rainbow Garden
You'll want to have a large garden bed with room for six sections of plants all in a row, which you'll organize by colour, starting with red and ending with purple. Make sure there's ample room to access each plant — kids can be a bit clumsy, so you want to make sure they can tend to their plants without totally trampling them.
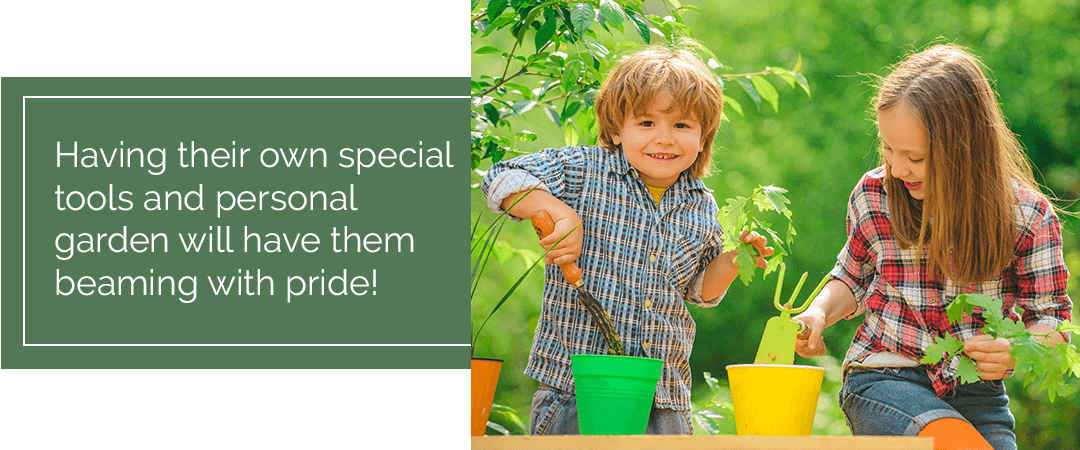
It also helps to pick up some kid-friendly gardening tools, so your little ones can contribute. Kids love having a sense of ownership over things, so by having their own special tools and personal garden, they'll be beaming with pride over their efforts. Plus, a lot of standard garden tools are heavy and pointy, so you want to make sure they're safe from injuring themselves.
Don't forget, Eising is open for curbside pickup, so you can feel free to call us during our store hours to place an order, or you can order online on our newly launched web store! We'll be happy to assemble your order and have it ready for you to pick up and take home.
Designing Your Rainbow Garden
Once you've got the sections of your garden all planned out, you can start planning which plants you'd like to include. Do you want a strictly decorative garden, or would you like to plant some fruits and veggies in there, too? If you're leaning more toward edible gardening, we still definitely recommend planting some flowers in the mix to help attract pollinators, which will promote better harvests.

Here are some suggestions for easy flowers that kids can grow, organized by colour:
Red Flowers: Cardinal flower, Petunias, Geraniums, Anthuriums.
Orange Flowers: Marigolds, Chrysanthemums, Nasturtiums, Gerbera daisies.
Yellow Flowers: Sunflowers, Yarrow, Black-eyed Susans, Tickseed.
Green Flowers: Daylilies, Sedum, Spider mums, Hydrangeas.
Blue Flowers: Phlox, Morning glories, Delphiniums, Irises.
Purple Flowers: Allium, Cape daisies, Pansies, Coneflowers, Hyacinths.
For some colourful fruits and vegetables for you and your kids to enjoy, try out some of these easy beginner veggies:
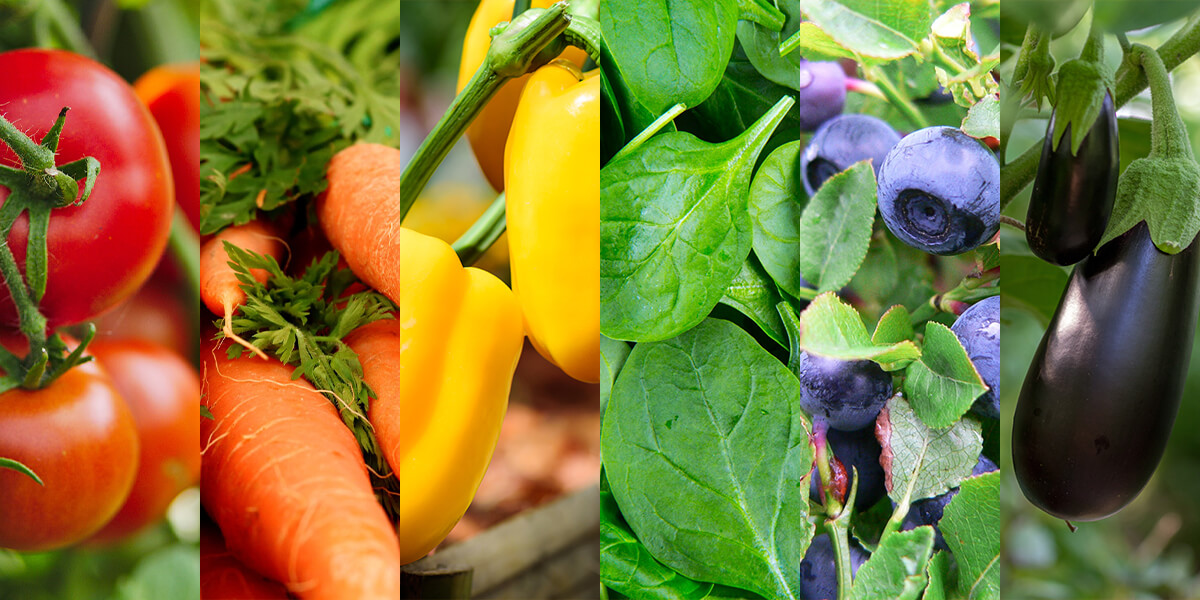
Red Edibles: Tomatoes, Strawberries, Bell peppers, Chili peppers.
Orange Edibles: Bell peppers, Pumpkins, Sweet potatoes, Carrots.
Yellow Edibles: Yellow zucchinis, Summer squash, Bell peppers, Yellow tomatoes.
Green Edibles: Lettuce greens, Spinach, Bush beans, Cucumbers.
Blue Edibles: Blueberries, Borage, Currants.
Purple Edibles: Cabbage, Eggplant, Purple carrots.
Ready to start planting your vibrant rainbow garden for the whole family to enjoy? Feel free to browse our web store, and sign up for our newsletter to receive more updates from Eisings!
With all the extra time we've been spending indoors, now is a good time to start collecting air-cleaning houseplants. Many of us are craving some fresh spring air, but these natural air purifiers are the next best thing. We often underestimate just how powerful our plants can be — after all, they look like they're just sitting there. In fact, they're constantly in a cycle of soaking up carbon dioxide, airborne pollutants, and toxic compounds like carbon monoxide and turning it into fresh oxygen for us to breathe.
If all this time inside is making you feel a bit groggy or stuffed up, you'll definitely want to check out these five ultra-efficient air-cleaning houseplants—and we carry them all at our garden centre in Simcoe!
5 Air Cleaning Houseplants For A Healthier Home
Houseplants aren't just lovely to look at; they're like full-time cleaning staff who work in exchange for a little water and sunlight. NASA actually relies on air-cleaning houseplants for maintaining the air quality on their space shuttles! If the air in your home has been smelling less-than-fresh, snag some of these specimens for your home:
Spider Plant: This stringy, stripey plant is always a favourite — after all, it's pretty cool when your houseplant keeps sprouting new baby plants over and over again! By keeping your spider plant in a smaller container, it will be compelled to reproduce, resulting in tiny little plants. You can pluck and transplant these seedlings into bigger pots where they will grow into whole plants. Before you know it, you'll have tons of miniature spider plants to place all around the house for maximum purification power!
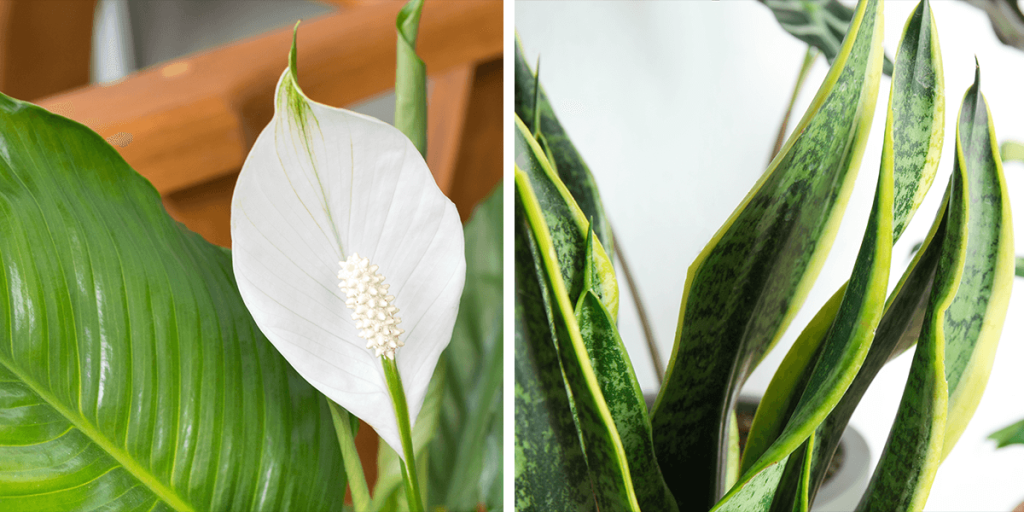
Peace Lily: There's something so elegant and pure about this houseplant, with its clean, white, single-petalled blooms. It looks like it jumped right off the canvas of a Georgia O'Keefe painting! The Peace Lily is also a wizard at making toxins disappear, filtering out harmful chemicals like formaldehyde and benzene. It also doesn't need very much sunlight, so if you don't have too many windows in your house, you can still easily grow this lovely flower indoors.
Snake Plant: This distinctive houseplant has recently seen a massive surge in popularity. Snake Plants, or Sansevieria, are some of the easiest plants to care for, and it's a total powerhouse when it comes to filtering the air. You can find some impressively large snake plants, but their flat, wavy leaves grow perfectly upright, so they don't take up too much room. You also won't need to water it very often— it doesn't enjoy soggy soil, and it really won't mind if you neglect it a bit.

Boston Fern: For an instant boost in energy and vibrance in your home, these big, shaggy ferns fit the bill. They look fabulous in hanging baskets, but they're also great on pedestals and floating shelves, so their long leaves can trail elegantly downward. The sheer number of leaves on this colossal fern makes it one of the most effective air cleaning houseplants around, so it's sure to breathe new life into your home's interior. They do prefer a bit of humidity, so if the air is a bit dry in your home, it will help to mist the plant daily or plug in a humidifier.
Chinese Evergreen: There are so many different varieties of this wide-leafed houseplant — some have emerald green leaves with speckles of silver, some have cream coloured stripes, and others have vibrant red accents. Also known as the aglaonema, this much-loved houseplant will keep the air feeling clear and funk-free. Water it generously every week or two, making sure that the soil is loose and fast-draining, and the container has adequate drainage holes.

You'll be amazed at the difference these air-cleaning houseplants make within your four walls! Something about fresh oxygen and lush, green houseplants wakes up the brain and gives your mood an instant boost. Looking to pick up some more houseplants to go along with these air-purifying powerhouses? Give us a call at our garden centre! We're happy to process your order over the phone and arrange for contact-free curbside pickup.
It’s always nice to take some time away during the holiday season, but it’s kind of a hassle to arrange for a house sitter simply to take care of your houseplants. So, we recommend doing some thorough holiday-proofing before you go. With the right tools and a little prep work before you head off, you should be able to leave your plants for several weeks without worrying about them drying up. Here are the basics of holiday-proofing, so you can rest assured that your precious plants will be safe and sound through your vacation.
Holiday-Proofing Your Houseplants
Is it about time to start holiday-proofing your houseplants in Simcoe? Follow these simple steps for getting them all holiday ready for while you’re away.
First, water them thoroughly. Make sure the soil is thoroughly saturated, but if your pot doesn’t have drainage holes, try not to overdo it. If your pot has drainage holes and is placed on a dish, make sure you’ve watered it enough that water begins to collect on the dish. Be sure to dump the water in the dish before you leave so it doesn’t end up getting funky.
Remove any dead plant material. When dried up plant parts remain on a plant, it will still end up directing its energy toward those limbs. Nipping off those pieces should help your plant to grow stronger and use up resources and nutrients more efficiently.
Move them away from cold drafts and direct sunlight. An icy breeze sneaking in through a frozen window could shock your plant, and a ton of sun will end up drying the soil out too quickly. To maintain a safe temperature and reduce sun exposure without depriving your plants of light, try moving them a few feet away from the window.
Turn the thermostat down a bit. Indoor plants don’t mind a cooler base temperature as opposed to being in warm air. This will also help prevent the soil moisture from evaporating too quickly.
Huddle your plants together. It’s all about retaining that moisture, and plants that are all huddled in a bunch will be much better at conserving water.

How To Water Indoor Plants While On Vacation
If you’re going to be away on a holiday for over a week, you’ll want to put together a plan to keep your plants watered while you’re gone. There are a few ways to keep your plants watered while you’re lounging on a beach on the other side of the world, so try some of these methods for self-watering.
Purchase a drip-irrigation system. These automatic watering systems slowly release water over an extended period. There are several different models and designs to choose from, ranging from high-end electronic drip systems, and more budget-friendly options like glass water globes or spikes. Evaluate the size and quantity of your plant collection and select your irrigation system accordingly.
Build a DIY irrigation system. If you’re a crafty type who enjoys saving money by going the DIY route, there are tons of tutorials online for creating your own irrigation system using everyday household materials like mason jars or wine bottles. Browse through Pinterest to see if you can find one that works for your plants.
Mimic a humid climate with a water tray. If you’ve got plants that prefer humid environments and need to be misted occasionally, this is a great way to increase the moisture in the air. Simply fill a tray with pebbles or river stones, then pour some water in. Place your potted plant on top of the tray so it can enjoy some humid tropical air while you’re out soaking in the tropical sun!

Houseplants For Frequent Flyers
If holiday travelling is common practice for you, it might be worth sticking to plants that are low-maintenance and more tolerant of dry spells. These are our favourite options for all you globetrotters out there:
- Snake plants
- ZZ plants
- Succulents
- Cacti
- Chinese evergreens
- Ponytail palms
There’s no need to go to the trouble of paying a house sitter to come by your home just to water your plants. These tricks should keep your plants well-watered while you’re away on vacation. If you need to purchase any irrigation systems for while you’re away, come visit Eising and we’ll help you pick out the right models for your plant collection. Enjoy your holiday!