
We love decorating for Canada Day, but lately we’ve been compelled to avoid buying disposable plastic decorations, and instead look for eco-friendly alternatives. We figured, what better way to show your Canadian pride than through your garden? A red and white décor colour palette is so timeless and beautiful, and it’s all the more festive once July 1st rolls around!
Want some intel on the best new annuals to plant in your Canada Day themed garden? Here are some of our favourites for summer 2020 here in Simcoe. Our online store is now up and running, so if you don’t feel like swinging by the garden centre, you can order these beauties for citywide delivery!
Red Annual Plants And Flowers For Canada Day
Red is such a powerful, vibrant colour that makes a strong impact, yet it’s so versatile and classic. Plant these fire ultra-red flowers and plants in your yard, for a gorgeous pop of colour that brings to mind that big, bright red maple leaf we all know and love.

Whopper Begonia: Bronze Red
This shade-tolerant flower never fails to brighten up the darker corners of our yards, bursting with red blossoms reaching up to 3 inches wide. The bronze leaves kind of have a warmer, reddish cast to them too, so they’ll really help to create a streamlined, consistent colour scheme. Grow them with ease in garden beds or containers, and they’ll treat you with blossoms from spring until fall.
Coleus: Red Wizard
This high-impact foliage plant is perfect for Canada Day—candy apple red with a skinny white trim! Ideally, some morning sun and dappled afternoon shade will help your coleus to grow lush and bright, and you’ll need to water them extra often if they’re in a container. Coleus are fun to grow, because you can propagate them by simply placing cuttings in a cup of water, so you can easily turn one plant into several to give away to friends and family.

Crimson Mandevilla
These romantic vining plants grow so rapidly, by the end of the summer their volume and size is colossal. They’re often grown in containers or hanging baskets, but if you want a really impressive display that boasts Canada’s colours, grow them on a tall, white trellis so they can climb right up. We recommend growing them in full sun, near a wall to give them some protection from the wind.
Red Impatiens
Shade-tolerant, low-maintenance, and self-cleaning—there’s just so many reasons why these annuals remain to be some of the most popular flowers year after year. Impatiens grown in containers will probably need daily watering, but if you have a shaded garden bed with a layer of mulch, you can get away with watering them about twice per week. For ultimate blooming action, add water soluble fertilizer every two weeks until the end of summer.
White Annual Plants And Flowers For Canada Day
White flowers and icy, frosted foliage are so incomparably elegant and lovely in the garden, and they always match your home’s outdoor colour palette, whether it’s cool or warm. Try some of these creamy white flowers and foliage plants in your Canada Day garden!

Helichrysum: Silver Spike
The silvery white, slender, spiky leaves of this plant look like a burst of fireworks—extra appropriate for this national holiday! They’re especially beautiful in mixed container arrangements, bringing contrasting colour and texture that really stands out among ruffly flowers in ultra-rich hues. Plant in full sun!
White Heliotrope
These clusters of little white blossoms look just like scoops of vanilla ice cream, and the best part is, they smell like it too! You can enjoy the flowers of this continuous bloomer all the way until the first frost of winter. It gets its name from the Greek words “helios” (sun) and “tropos” (turn) because the flower heads turn to face the sunlight!

Hypoestes: White Splash
Also known as the Polka Dot Plant, this variety of hypoestes is totally covered in white speckles and splotches. It likes full sun, lots of water, weekly fertilizer in the summer, and fast-draining soil. They look especially cute as potted plants, and since it’s rare for one plant to survive more than a year, we recommend propagating a cutting so you can enjoy it as a houseplant at the end of the growing season.
Nonstop Begonia: White/Bronze
The massive double flower heads on this gorgeous annual flower are just like big, fluffy clouds. Through summer until mid-autumn, you can enjoy these long lasting blooms that sit in a bed of dramatic, dark foliage—deep greenish-bronze with hints of red. Partial shade is totally comfortable for this variety, but try to avoid complete shade if possible.
Have a happy and safe Canada Day, from all of us at Eising Greenhouse and Garden Centre! If there are any tools or supplies you need in time for your backyard barbecue party, we’ve got you covered. Visit us in-store or shop online for all your backyard entertaining needs.
Father's Day is conveniently held right at the start of summer, so that gives you all sorts of options for a creative gift that he can enjoy right away. This year, treat Dad by giving him a chance to relax in a gorgeous yard—instead of toiling away at it himself!—by hiring our pro landscapers to do the work for him.
Our many different landscaping services are varied and customizable, so you can call up our team to help you find the best plan for backyard landscaping that Dad will absolutely love. Or, if Dad likes to have some creative control over projects, we can collaborate with him to develop a design plan that suits his ideal vision. This will certainly be a Father's Day to remember, with a gorgeous new yard that Papa Bear can enjoy for many years to come. Here are some of the services we can provide to make it all happen:
Trees and Shrubs
At Eising, our landscaping pros know a thing or two about planting new trees and shrubs. Instead of fumbling through planting them yourself, which might not guarantee the best results, hire our experts to do it for you!
There are so many awesome benefits to planting trees and shrubs in the yard—Dad will definitely be on board! Sure, they're beautiful to look at, and they provide some nice shade to lounge around in, but they also increase your home's value significantly! You could even opt for some trees or shrubs to grow Dad's favourite fruit, like peaches or raspberries, so he'll have a steady supply of summer snacks year after year. Plant two trees spaced eight feet apart, and in a few years, you can get him a Father's Day hammock! There, now you've got two Father's Day gift ideas covered!
Perennials and Grasses
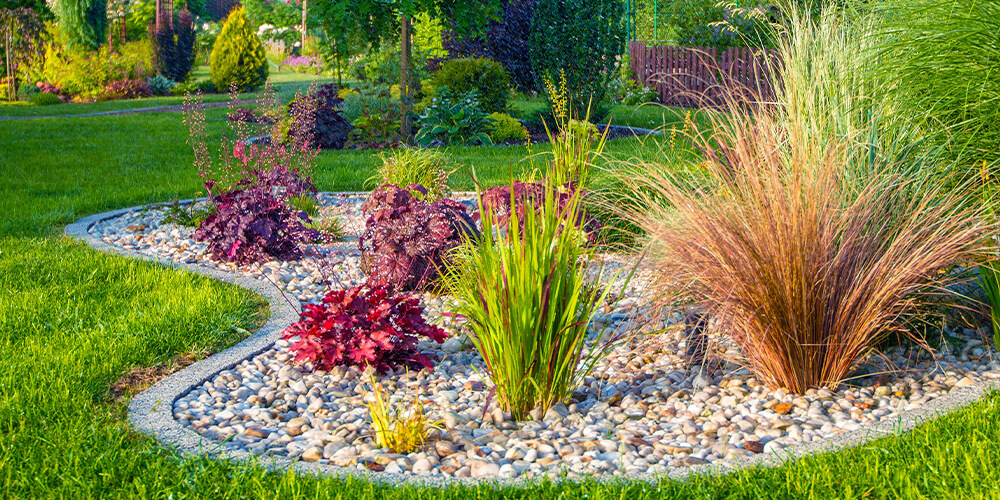
If you want some consistent, reliable plants and flowers to add some beauty to the yard, and you aren't too concerned with switching up the scenery every year, then consider planting some perennials and ornamental grasses. Talk to our experts, and we can help pick an assortment of spring, summer, and fall-blooming perennial plants, so there's never a shortage of colour throughout the season.
Ornamental grasses are such an underrated landscaping staple, adding height, texture and movement to the garden. Plus, Dad will appreciate having some grass in the yard that he doesn't have to cut! We can help you pick out the best varieties for your landscape style and colour palette, and help you find the best places to plant them to create a balanced, aesthetically-pleasing design.
Tropicals and Annuals
Spice things up with some exotic plants, vibrant colours, and tons of variety by opting for sun-loving tropicals and annual plants to enjoy for the summer. Dad will be totally floored when he sees that his old yard has been transformed into a lush, tropical oasis. Who needs a vacation when you've got the perfect getaway right at home?
Whether you think hanging baskets and container arrangements will do the trick, or you'd prefer a fully-loaded garden bed, we can help you choose stunning assortments of flowers that can thrive throughout our Southern Ontario summers. Even if your yard doesn't get much sunshine, we can still make some magic happen! Plenty of rainforest-dwelling tropical plants prefer the shade and will be right at home in your yard underneath a canopy of tree foliage.
Small Space Design
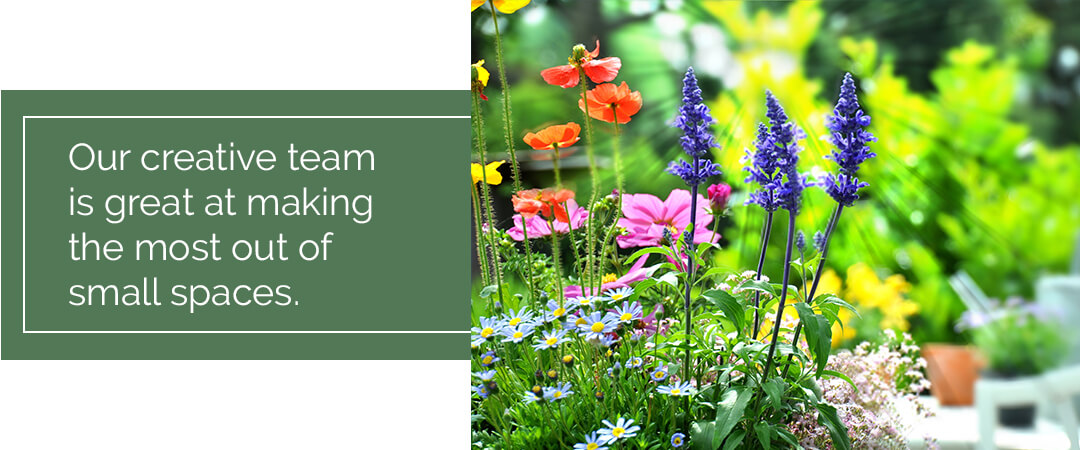
Don't have a ton of space? No problemo! Our creative team is great at making the most out of small spaces. We strategically place plants throughout the yard in a stylish and functional way, so Dad will have plenty of room to stretch out on his favourite lounger. A smaller space can feel much bigger with a layout that sections the yard into different living areas and draws the eye to unique focal points throughout the space. A small patio set is always inviting and will get plenty of use, so it's a pretty smart use for the space you have!
Develop Design Ideas With On-Site Consultation
If Dad's a take-charge guy who likes to take the lead, let him have some input on the landscape design by setting up an on-site consultation with our landscaping pros! We can work together to create the best possible design by combining Dad's big ideas and the most practical, cost-efficient ways to make them happen. That way, you'll be sure that he absolutely loves the final product.
The cost of a professional landscaping consultation with our team is $150 plus taxes, which we’re happy to apply to a gift card—perfect for surprising him on Father’s Day! To purchase a gift card or get more information about our landscaping services, give us a call and we'll be happy to help. Or, you can gift Dad some gorgeous new perennials with our brand new online store! We have delivery and curbside pick-up options available, so getting everything you need for the garden is easier than ever before.
If you haven’t gotten started on your summer vegetable garden yet, don’t worry—there are still plenty of veggies you can plant now for a late-season harvest! That means more fresh produce to enjoy through the fall, and with the help of our trusty freezers, many can be enjoyed well through winter and spring. You can find all kinds of seeds and starters for vegetables and fruits on our brand new webstore, so feel free to browse online and place an order for curbside pickup or citywide delivery.
What Are The Best Vegetables To Plant In Summer?
Generally speaking, vegetables that can be planted in summer are either fast-growing and love the sun, or slow-growing and tolerant of the cooler temperatures in the fall. Many garden edibles can get scorched from the hot sun if planted too early, so it’s best to delay so that they’re ready to go once the temperature is less extreme.

Late Summer Vegetables You Can Direct Seed
Many folks assume that spring is the best time for planting vegetable seeds, but every plant is different! So, if you want to start planting seeds in summer, there are more than a few good options for you to choose from. Here are the best late summer vegetables to plant in Simcoe through direct seeding:
Beans: Perhaps one of the easiest and most kid-friendly veggies to grow, beans are always a favourite. Plus, they deposit nitrogen into the soil, which helps improve soil quality.
Beets: These hearty root vegetables make excellent comfort food, and their ultra-vibrant colour indicates super-high levels of vitamins, nutrients and antioxidants. Your beets will be ready for harvest around September or October.
Broccoli: Even the pickiest of eaters aren’t likely to turn down a delicious bowl of broccoli cheese soup, or a Chinese beef and broccoli stir fry. Sow broccoli seeds in June for a harvest that’s ready right at the start of back-to-school season.
Carrots: Before you sow your carrot seeds, make sure your soil is super loose and free of rocks and compacted areas. If it’s all clumped together, the roots won’t grow long and pointy, so you’ll be left with stumpy, misshapen carrots.

Leafy Greens: Lettuce, kale and spinach can all be sown directly into the soil in June. They don’t take too long to develop, and they thrive in cooler temperatures, so you can even get away with planting a second round in early autumn!
Parsnips: Slow-growing parsnips need around four months to mature, but there’s no need to rush! Parsnips taste best if you harvest them after the weather has turned chilly. If we get hit with a few frosty nights in autumn, this will actually help them! Just make sure you pull them up before the ground freezes.
Potatoes: While not technically seeds, you can put potato tubers in the soil in June to enjoy an autumn harvest. Wait for the plants to mature, turn brown, and wither, then leave them in the soil for another three weeks before pulling them up! Store them in a cool, dry spot, and don’t wash them before storing—this will cause them to rot.
The Best Starter Plants For Late Summer Crops
The waiting game can get a little long when you directly seed certain plants, so sometimes it’s better to get a starter plant to transplant into containers or your garden bed. Here are some excellent starters to pick up later in the season:

Zucchini: “Zoodles,” or spiralized zucchini noodles, are quickly gaining popularity as a delicious alternative to carb-heavy spaghetti. If (like many of us) you’ve been kinda overdoing it on the pasta lately, you’ll definitely enjoy having this tasty squash in your garden.
Celery: This ultra-healthy, crunchy veggie adds some great crunch to tuna salad, chilli, and stews, but it takes a pretty long time to develop from seed, so you may as well skip ahead and opt for a starter.
Cucumbers: Technically, you can either transplant or direct seed cucumbers in June, but getting a starter will ensure you get to enjoy your harvest earlier in the season!
Peppers: With their thin, delicate skins, peppers aren’t too tolerant of chilly temperatures and will taste much better if they get lots of sunlight. Planting a starter in June will ensure these sun-loving veggies get peak sunshine in July and August, right when it counts.
Tomatoes: We especially love growing small tomatoes in hanging baskets! The little fruits look like strings of colourful porch lights changing from green, to yellow, to red!
Fresh garden produce can be enjoyed well into autumn, and even early winter, if you pick the right crops and time them just right. If you have any questions about late-season planting, feel free to give us a call at the shop, and we’ll be happy to help!
By now, if you've been caring diligently for your seedlings, they're likely bursting out of your starter trays or pots! You've watched them grow up, and now it's time for them to graduate into the garden. But you may be wondering how to take the next steps. How do I transplant, and when? Answering these questions is key to success at this pivotal moment.
Transplanting Overview
Transplant timing hinges upon our last frost date, which is May 19 in Simcoe. Frost-hardy veggies can be transplanted before then, but tender plants should wait a little longer. Sometimes seedlings can outgrow their trays before their graduation time. Don't worry, that means they're growing well! The solution is simply to move them into a bigger pot.
How to Repot
Your young ones are ready for a larger home when their roots have filled their containers and their leaves are crowding out their neighbours. The new pot should be twice as large as the old one.
Begin by watering the seedlings. The damp soil will adhere to the roots and keep them from drying out. Don't tug on the stems. Instead, use a butter knife to carefully lift them from the container or squeeze them out from the base. If a few are intertwined, gently tease them apart. With a pencil or your finger, dig a hole into their new pot or plug tray. Place the seedling, firm the soil around it, and water them all once you finish. The roomier pot will give them a chance to stretch their legs before their big move.
When to Transplant into the Garden
Historic weather averages tell us when to take the next step. Often, we need to adapt to unusual weather or unique conditions each year, but here is a general guide for our climate.
April 15 - 25
Frost hardy: asparagus, broccoli, Brussels sprouts, cabbage, lettuce, onions, radishes, peas, spinach, parsnips, early potatoes.
April 25 - May 10
Semi-frost hardy: beets, carrots, cauliflower, celery, late potatoes, early sweet corn.
May 15 - 25
Semi-frost tender: snap beans, sweet corn, tomatoes.
May 25 - June 5
Frost tender: cucumbers, eggplant, melons, peppers, pumpkins, squash.
Hardening Off
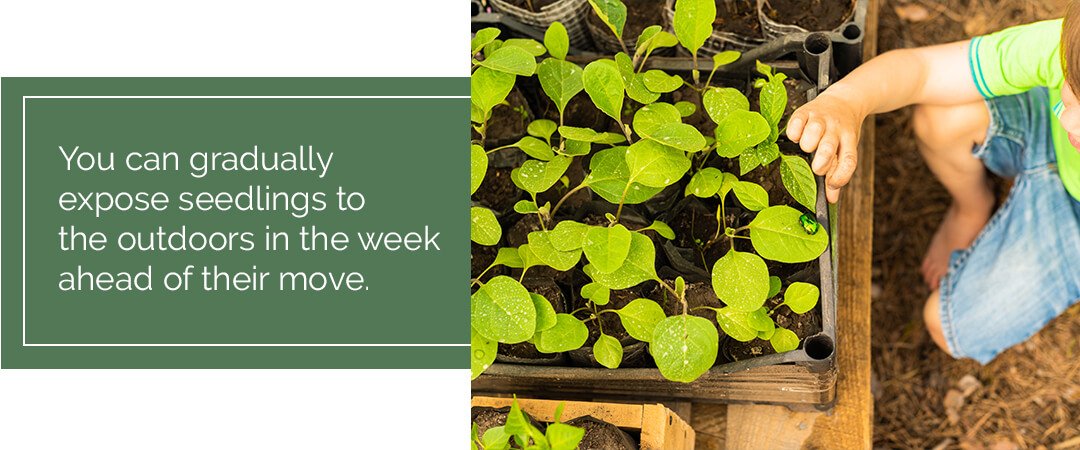
You can gradually expose seedlings to the outdoors in the week ahead of their move. While not absolutely necessary, your veggies, especially the tender crops like tomatoes, will be strengthened by the gradual transition.
Begin by setting them in a shady spot away from the wind for a few hours each day. Slowly increase their exposure to sunlight and breeze until they spend a whole day and night outside. Make sure to keep them well-watered, as their small pots can quickly desiccate. When the time comes to graduate, they'll be ready to brave the elements.
How to Transplant into the Garden
Follow these steps for transplanting success:
- First, make sure you've loosened and enriched the soil with compost or another organic fertilizer.
- Choose a warm overcast day and plant in the morning or evening.
- Water the seedlings to hydrate their roots.
- Determine the correct garden spacing in advance.
- Gently squeeze the tray around each plug to remove them. Only remove each seedling just before moving to minimize the roots' exposure to air.
- Using a trowel or your fingers, make a hole and drop the seedling into it, firming up the soil around it as you plant. Leggier seedlings can be planted a little deeper as long as you don't bury the first leaves.
- Water the newly planted area immediately after finishing.
- They will likely need to be watered daily for a few weeks afterwards. Check the soil moisture and water as needed to prevent them from drying out.

There are a few more tricks for particular plants like tomatoes and cucumbers. But in general, these are the basics for transitioning your veggies into the ground. If you haven't started your seedlings, check out our selection of starter plants in our online catalogue. If you need more advice, our garden centre would be happy to share more tips for success!
There might not be a better flavour of summer than the perfectly ripe garden tomato. Picked straight from the garden, a fresh tomato lets you taste summer’s sunshine with each bite.
Tomatoes are incredibly popular garden plants, thanks in part to the staggering difference between homegrown and supermarket varieties. As much as the flavour and nutritional content of garden-grown produce have a clear advantage, we also think that the sheer variety of options is part of the tomato’s success. With so many choices, there’s something to fit everyone’s lifestyle, taste, and garden style, and with such a simple growing formula it’s easy to come out with a great harvest. Here are our tips on how to take your homegrown tomatoes to the next level.
Planting Tomatoes Made Simple
Tomatoes are easy-to-grow plants, but a bit of knowledge makes the difference between a mediocre harvest and an amazing one. The first task in planting your tomatoes is to choose your type. Tomatoes are normally categorized as determinate (bushy types that don’t require much pruning, stalking, or maintenance) and indeterminate (unruly plants that require a little more care but produce more fruit). You also have choices in size from small and sweet snacking cherry tomatoes to large, beefy tomatoes for slicing onto sandwiches and burgers.
Choose plants that are robust and stocky, not ones that have grown lanky. This is true whether you grow your own from seed or buy from the store; you’ll want to start your garden with only the best plants.
Choose a spot in the garden with full sun exposure. Tomatoes thrive on heat and will give you tastier fruits the warmer they are all season, so full exposure to sunlight (without too much exposure to winds) is perfect. Plant in well-draining soil to prevent root rot, but consider layering some mulch on top once you plant to lock moisture and heat in.
When you plant, you can plant part of the stem in the ground to grow roots, too. This is a great way to save any plants that might have stretched and gotten lanky while you waited to plant. Any part of the stem planted underground will grow roots, so take off the leaves and plant about a third of the stem in the ground.

Some Garden Classics
Choosing a type from all of the different and new tomato varieties can be daunting, but we’ve narrowed it down with a few of our favourites to grow in our own gardens.
For great determinate varieties that taste great with little intervention from you. We love the Tumbler and Roma varieties. These produce great flavour and lots of harvest without too much intervention from you, making them an ideal low-stress option.
If you like to put a bit more of a personal touch and love and care into your garden, though, indeterminates are a good choice. For most tomatoes, the flavour, quality, and quantity of tomatoes in indeterminate varieties can’t be matched. For those craving big, delicious, plump tomatoes, Beefmaster is a great choice. Early Girl offers the best of everything in a medium size, reaching maturity early in the season. For those looking for a sweet snacking tomato, though, look no further than Sweet Million.
Heirloom tomatoes are the choice for the traditionalist that wants something unique in their garden. There are many delicious and creatively-coloured tomatoes, like Green Zebra and Black Krim, that will have your dinner plate dressed up with natural beauty.
Growing top tomatoes in your garden isn’t difficult, and the rewards are so delicious that it’s hard to see why you wouldn’t want to grow your own. With so many tasty choices, there’s a tomato that’s suited for anyone and everyone’s space. The only challenge will be getting the tomatoes to the kitchen before eating them all off the vine!
Starting an edible garden is like building your own private produce aisle right there in your yard. You’ll reap all of the benefits of healthier and fresher food just outside your door, and you’ll be able to grow the best of your favourite garden flavours; nothing beats fresh-picked taste.
The key to a great edible garden is having some variety. The mix of lots of fruits and vegetables gives you lots of options to experiment with in the kitchen so you’ll never get bored with the same flavours. We have lots of tips to make growing your own food easy and fun.
Our Tips for How To Grow Fruits and Vegetables
These simple tips are a huge help in making your fruit & veggie garden hassle-free:
Try using a raised garden bed. They’re easy to make and they help with better soil quality, better temperature control, with far fewer weeds to pull due to their controlled environment. If you’re growing straight from the ground, you’ll be at the mercy of your property’s soil quality—but in a raised bed, you’re in control! Fill the raised planter with bags of sterile soil and add in lots of organic matter to give your veggies a great start. The elevated container also makes the garden easier to work in, as you don’t have to bend over as much while tending your plants.

If space is a concern or you simply want to start small before you take the plunge, try container gardening. Most edible plants—except the biggest and most unruly specimens—grow well in containers, so you can make the most of a small space with as many containers as you like. Choose a location with a lot of sun and watch your miniature garden grow.
Try out companion planting and let your plants do some of the work for you. Some fruits and vegetables do so well together that we’d recommend planting them as buddies so they can give each other a boost. For example, green beans and corn work great together as the beans nurture the soil and the corn support the bean vines while they’re growing. We also love growing tomatoes and basil together. Not only do they often end up in dishes next to each other, but the basil improves tomato flavour and wards off pests.
Use natural weed and pest control methods. If you’re growing food with the intention to eat it, there’s a strong case for keeping chemicals off of them while they grow. There are lots of natural pest control methods to try for almost any type of pest while keeping your food safe.
The Best Fruits and Vegetables for Home Growing
Some garden edibles have reputations for being more picky and difficult to grow than others, while others give you impressive yields for much less effort! This is our list of foolproof garden options to start fuelling your kitchen from your yard:

- Raspberries: These fall-bearing fruit bushes are as low-maintenance as they come, only requiring a bit of pruning in the winter to make room for more fruit-bearing shoots. Starting in the late summer you’ll always have lots of raspberries to bring inside, even if half of your picking time is actually spent munching on them right off the branch. Enjoy these sweet treats all the way until the first frosts!
- Strawberries: There are lots of varieties to choose from that produce fruit in different quantities at different times of the year, so you can tailor your strawberry growth to what you want - whether that’s a steady harvest of some fruit all year, or a big bounty perfect for jams and pies all at once. You get to pick if you want spring, summer, or fall berries, and how many. We love how well these do in containers as well as in a garden bed.
- Tomatoes: We might think about them like vegetables but these plants are actually fruits! Savoury and versatile, this fruit is perfect for beginners. You might choose to grow little cherry tomatoes for the perfect summer salads or maybe beefier slicing tomatoes for burgers and sandwiches. With impressive yields, you’re likely to end up with enough tomatoes at the height of the season that you’ll be giving them away! Luckily they freeze well to be put into sauces later in the year.
- Currants: These bushes produce oodles of their tiny sweet fruits in shades of red, pink, white, and black. While white currants are certainly the sweetest, black ones are the easiest to take care of and require almost no care.
- Radishes: These root vegetables have a little spicy kick that is welcome in so many summer dishes. Low-maintenance and quick-growing, you can start them in the spring but even do a second crop in the late summer, too.
- Lettuce and Leafy Greens: These are the perfect vegetables for growing in containers or a bed! The greens sprout and grow at lightning speed, so you’ll enjoy harvests more often. Their shallow roots also make them the perfect versatile candidate for growing anywhere.
- Cucumbers: The trick to crisp and tasty cucumbers is to keep them well-watered. Generous helpings of moisture on a regular basis (as long as your soil has good drainage) will set your cukes apart from the rest.
- Carrots: This root vegetable is a classic for good reason. All they need is some loose and loamy soil to grow perfectly straight. Other than starting off with the right foundation, they mostly take care of themselves! You can plant them densely and munch on baby carrots as your thin them out through the growing season.
Your garden is all about you and which fresh flavours you want to eat more of during the summer. This is just a starting point, but your garden is yours to customize and perfect. Plant what you love to eat and you’ll get tastier food at a better price all summer.
There’s nothing better than garden-fresh vegetables on your plate. But as a working generation with families to take care of, we don’t always have time to shop around the farmer’s markets on Saturday afternoons. Usually, a one-stop shop at the local grocery store is all we have time for.
While growing your own vegetables does require a time investment, it’ll save you plenty of time (and money!) in the long run! Plus, vegetable gardens add just as much beauty and value to your property as any other garden element. A thriving vegetable garden starts from the seed, and the first step to healthy seeds is indoor seeding.
What to Seed Indoors
The first step to seeding indoors is knowing what you’ll be seeding so you can plan in advance. Here in Ontario, we have a shorter growing season than our friends to the south. Our last frost dates can sometimes extend into mid-May, which is often too late to seed many vegetables. Seeding indoors gives us a head start on the growing season, ensuring we have a successful harvest that we can enjoy sooner. Another advantage of an early start is that it negates the need for chemical fertilizers to speed things along.
Heat-loving plants, like tomatoes and peppers, should definitely be started indoors. While many other vegetables can benefit from a head start on the growing season, others are quite content being sown right into the ground. Root vegetables, like potatoes, carrots, and turnip can withstand a light freeze. Beans, peas, and salad greens also don’t mind a little chill and can be sown into the ground or started indoors a few weeks early.
When to Start Seeds Indoors in Ontario
One of the biggest challenges of starting seeds indoors is knowing when to start them. This is due to the many factors that influence timing. The recommended dates you might find on a seeding calendar take into account the different growing timelines of different vegetables, as well as the last expected frost date of your region. But it’s not an exact science. Keep in mind that, depending on the conditions you provide and the climate patterns of the year, the ‘perfect’ date is pretty unpredictable.
Here in Southern Ontario, our last expected frost date for the year is sometime during the first week of May. Tomatoes and peppers need the longest time to be cozied up indoors at 6-8 weeks. Now that we’re in early March, we suggest you get peppers started ASAP if you haven’t already, and give them lots of light. Start your tomatoes in another week or two, depending on the variety, sticking them near a bright window once they begin to sprout. Broccoli and cauliflower can be started as soon as March rolls over to April, while cucumber, zucchini, and salad greens can wait until the middle of the month. When April showers bring May flowers, you can direct seed other vegetables into the ground!
How to Seed Indoors and the Materials You Need
Now that we’ve got the timing all straightened out, the process of seeding indoors is actually pretty simple! But before you start sowing your peppers and tomatoes, there are some materials you’ll need first:
Containers: The most important aspect of picking out containers is making sure they have enough drainage - you don’t want to drown your seeds before they even get a chance at life! Seeding trays with many individual cells are great choices since they can hold plenty of seedlings at once and don’t take up much space. Wash them well with soapy water first, to make sure they’re sterile and safe for your young plants.
Soil: Soil requirements will vary between different vegetables, but generally most plants will flourish in a mix of peat moss, vermiculite, and perlite. Never use dirt from your backyard for planting seeds indoors, you’ll likely be bringing unwanted pests into your home.
Lights: Light requirements will depend on what your particular seed needs for germination. While some need bright and direct sunlight right away, others don’t want to see the sun until they poke through the soil in search of light. While light from the window is great, bright, artificial light is often used as a supplement.
Once you have these three materials (and your seeds, of course), you’re ready to start planting! Follow the instructions on the packaging carefully to provide your seeds with the proper conditions they need to germinate. Use a sterile potting mix to cover seeds that need complete darkness to grow. Cover the container with a clear plastic dome to trap moisture, creating the humid environment required for germination.
Once the seedlings begin to poke through, you can remove the cover and let the oxygen flow. Remove any weak plants, allowing the strong ones to grow even stronger. It’s better to have a few great plants than plenty of unproductive ones. Keep the soil moist, but not wet. We recommend misting instead of watering, to prevent disturbing the soil.
Starting Seeds Indoors Without Grow Lights
While grow lights are super effective and allow you to start seeds anywhere in your home, they aren’t always the first thing new gardeners want to invest in. Plus, keeping these lights on for hours on end every day can definitely drive up your light bill, and isn’t a necessary use of energy. The good news is that you don’t need fancy grow lights to germinate seeds indoors, especially if you have plenty of windows.
The trick to maximizing sunlight is to place your growing trays in front of large, south- or west-facing windows. Be mindful of hills or trees that might block the sun in these parts of your home. Usually, the upper level of your home is your best bet!
Moving Your Plants Outdoors
While it’s important to get the timing right when it comes to starting seeds indoors, it’s also important when moving them outdoors. The beauty of indoor seeding is that you don’t have to be in such a rush to bring them outdoors, you’ve already given yourself the time to wait until the risk of frost has passed.
That being said, you don’t want to wait too long, or else your veggies’ growth might taper. You’ll know when your seedlings are ready to graduate from their containers to the ground when they begin to grow leaves. Don’t be fooled by the first leaves of your baby sprouts, as these are nourished by the seed. The true leaves develop afterward, indicating that the plant’s roots are now established enough to sustain the plant itself. Once you reach this stage, congratulations! Your seedlings are now ready for your beautiful vegetable garden.
No one likes to be thrown into an unfamiliar environment or situation, and the same goes for our tender new plants. They’ve been safe and cozy inside our warm homes for weeks, and now they’re being introduced to the great outdoors. Just like we sometimes get a ‘base tan’ before we head down South to prevent burning to a crisp, our seedlings need to be introduced to the sunlight gradually. Bring them outside on a cloudy day for a few hours first, and increase by an hour each day for a week or so to ‘harden them off’ before planting them outside for good.
Whether you’re a seasoned gardener or you’re just beginning your gardening journey, these simple steps to indoor seeding are all you need to get started. Soon enough, your flourishing veggie garden will be the cornerstone of your recipes and the envy of your neighbours!