
Hydrangeas are some of the most beloved flowering shrubs around the world—you only need one look at their big, voluminous flowerheads to see why they’re so easy to love. There are hundreds of hydrangea varieties, each belonging to one of six main types. One type, in particular, known as mophead hydrangeas, is famous for a very peculiar and whimsical trait: the flowers can change colours!
The Colour-Changing Shrub
The flowers of the mophead hydrangea change as a reaction to their soil chemistry, resulting in flowers from bright pink to neon blue and every shade in between. However, the shift in shade doesn’t happen overnight—it requires some planning, and a fair bit of patience, to change your hydrangea’s colour.
The good news is that anyone can encourage their mopheads to change colours with the right supplies and a few tips! Here’s how to do it in your yard.
From Pink to Blue
When planted in alkaline soil, mophead flowers bloom in brilliant shades of pink. By increasing the acidity of the soil over time, the flowers will gradually shift to a lovely shade of lilac, and eventually, turn vivid blue with a low enough (more acidic) pH. It’s a true delight to behold this colour change taking place throughout the summer. Some crafty gardeners have even managed to create an “ombré” effect by keeping a row of soil more alkaline on one end and more acidic on the other!

There’s one caveat to the fun; however: while pink hydrangeas will readily fade to blue, it’s nearly impossible to reverse back to pink. Those who have attempted this tend to end up with a rosy purple, which is pretty enough, but never quite the same. With that said, blue mopheads are so gorgeous; there’s a good chance you’ll be happy to keep them around as-is!
How to Turn Your Hydrangeas Blue
Changing your soil pH requires the use of soil amendments, which can gradually alter the soil chemistry. If your hydrangeas are blooming pale pink to lilac, you can intensify the pink colour by adding garden lime to the soil. Follow the package directions to ensure you’re using the right amount at once, and over time, those hydrangeas will start blushing!
However, most mophead growers are in it for the blue blooms. Blue is a relatively uncommon colour in the gardening world, so those gorgeous blue blooms are highly coveted! Mopheads start blooming blue flowers once the soil pH reaches 5.5 or lower. The best way to increase the acidity of the soil is with the use of aluminum sulfate, a common soil amendment that we carry here at Eising. You’ll need to mix a quarter-ounce of aluminum sulfate into a gallon of water and soak the soil around your mopheads. You’ll get the best results by starting in spring, but you can start at any point during the season. However, once you start treating the soil, you’ll need to reapply the amendment every month until you reach the desired result, and then maintain it with an application every other month during the growing season.
To maintain the acidity of your soil, you can also fertilize with acidic compost like orange peels, coffee grounds, eggshells, or peat. While you won’t see results right away, these will help increase soil acidity in the long term, so that you eventually won’t have any need for the aluminum sulfate.

Considerations
Before you start modifying your soil acidity, keep your other plants in mind, as well. Each plant has a different tolerance to acidity—some love it, some can’t tolerate it. As your soil acidity changes, so will your soil’s suitability for your other favourite plants, so make sure to plan around that. Keep an eye on the nursery tag when you shop for plants to grow around your mopheads to ensure you’re leaving with a good fit. We recommend using soil tests regularly to monitor soil acidity throughout your garden. These tests are quick and easy to use, and lots of fun to do with kids!
A garden full of pink, purple, and blue hydrangeas is a truly magical place—and the pride of many Southern Ontario gardeners. Chat with us in-store for plant and product recommendations as you embark on this ultra-popular gardening project. Then, prepare to be spellbound by these enchanting shrubs!
Shrubs that flower in summer and fall make gorgeous accent plants for the landscape. We're so accustomed to seeing trees and shrubs blossom during spring, so it's a real treat to have all that vibrant colour and texture to enjoy throughout the later months of our growing season in Southern Ontario.
While many gardeners will insist that summer is too hot to plant shrubs, that simply isn't the case! It can still be done successfully if you follow the correct steps to prevent your plant from getting heat stress. If you wait until later in the evening on a cloudy day to transplant a shrub, then water it thoroughly after planting, it will have all night to adjust to its new habitat and will be hydrated—ready to soak up the summer sun the following morning.
Want to enhance the design and layout of your yard with some large, flowering shrubs? These late-season bloomers will bring a burst of colour and energy to the landscape, creating a fantastic setting for summer entertaining, hangouts on the patio, and picture-perfect photo ops.
Bluebeard
True blue is certainly the rarest colour to encounter in the plant world, so we can't help but get excited when we see flowering plants sporting this deep, cool hue. Our Beyond Midnight Bluebeard is totally on-trend—after all, Pantone named 'Classic Blue' as the 2020 Colour of the Year!
Bluebeard is a gorgeous flowering shrub that blooms from late summer to early fall, and its dark, glossy green foliage catches the sunlight beautifully. Plant it in full sun for best results, and prune it yearly in early spring, right at the first sign of new growth. Make sure its soil is well-draining because this shrub does not take kindly to soggy earth or stagnant water hanging around its roots.

Butterfly Bush
These pollinator-friendly shrubs have incredibly vivid flowers that attract butterflies, bees, and hummingbirds alike. Our Crown Jewels variety has some of the brightest purple petals we've ever seen, nestled in a mass of golden lime green foliage. Talk about a high-impact colour palette!
Butterfly bush is an incredibly hardy plant that's resistant to drought and tolerant of rocky soils. You'll have to water it regularly for the first few months after planting, but by year two, you'll be able to just leave it be, and the regular rainfall will be plenty enough to keep it hydrated.
Hydrangea Macrophylla
There's something so dreamy and beautiful about the lush clusters of flowers boasted by the hydrangea macrophylla—there's a reason why they're so popular for wedding bouquets! With so many different varieties and colours to choose from, you're bound to find a variety that suits your fancy.

We really love our Bloomstruck hydrangeas because their colour can shift from blue to pink, depending on the soil's pH levels. The blossoms last all summer long, but even after they fade, this shrub adds so much visual interest through the fall, because of its emerald green foliage transitions into a rich, warm burgundy colour.
Rose of Sharon
Rose of Sharon actually comes from the hibiscus family, and it grows in an upright form that can be trained into a tree shape. Like most hibiscus plants, Rose of Sharon's flowers are quite large and showy. Our Woodbridge variety has stunning blossoms in a rosy blush shade, with a ruby red centre. It loves the sun and can grow up to ten feet tall and six feet wide, so it makes an excellent option for privacy borders around the perimeter of your yard.

Smoke Tree
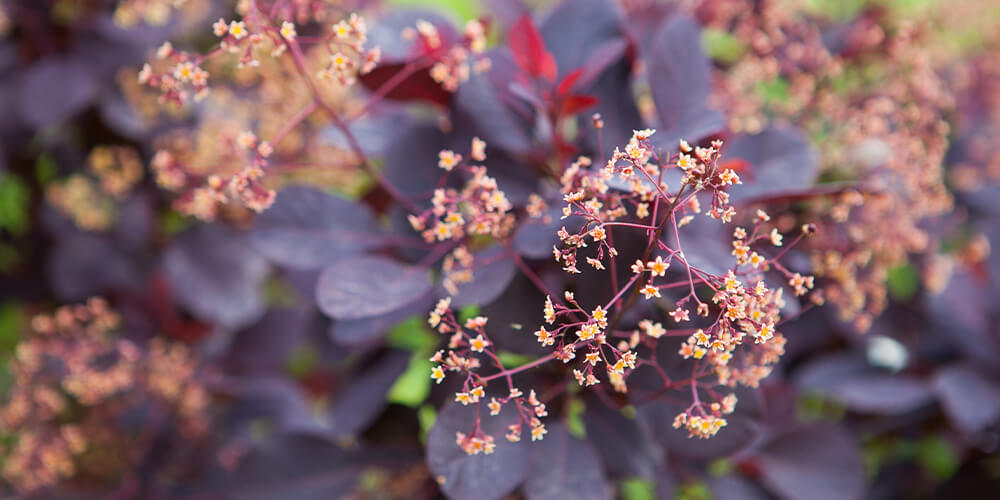
The smoke tree gets its name from it's wispy, fluffy blossoms that look like plumes of smoke. If you love rich purples and warm fall colour palettes, you'll go absolutely gaga over our Royal Purple smoke tree, which has reddish-purple blossoms and foliage to match! Once autumn rolls around, the leaves will actually turn a brighter cranberry red shade.
Make sure you leave plenty of space around your smoke tree when planting because they can reach up to 15 feet high and 12 feet wide! Regular pruning should help keep it a manageable size if you don't want it to get too large. Once it's established, it will appreciate it if you occasionally give it a thorough watering, especially in summer, during hot, dry spells.
Need some help getting your new shrubs in the ground? We're happy to offer planting services for those of you who are new to landscaping! To see more of our incredible selection of flowering shrubs you can grow here in Simcoe, take a look through our newly launched webstore, so you can order all the plants and supplies you need, right from the comfort of your own home.
Knowing how to stake plants properly is a valuable skill for any gardener, especially when you're growing vegetables. Some grow pretty tall and need a little extra help to stay off the ground so their fruits won't sit in a pile in the dirt and get funky. It can get pretty windy here as well, so providing some extra support will help prevent damage from heavy winds and rain.
Staking may look pretty straightforward, but there are some best practices you should follow to ensure good results. If you're planning on growing some tall, or vining garden plants, or if your mature plant keeps falling over, follow these tips on proper staking in the garden.
5 Tips For How To Stake Tomatoes And Other Garden Plants
Tomatoes, cucumbers, peppers, beans—there are so many garden greens that benefit from extra support. It keeps them from bunching up on the ground, allows full sunlight exposure, and prevents the wind and rain from totally pummeling them. Now that summer is approaching, many of your garden veggies are getting taller, and you'll need to step in before they flop right over. Here's how to do it correctly, so your vegetables grow big, bright, and delicious, according to plan.
Pick The Right Kind Of Stake
If you've got a plant with one stem, you can get away with using a simple wooden stick or pole. If there are multiple stems, then a cage might work a bit better, because you'll have more spots to tie on to. The cage must be at least one foot taller than the plant. If you're using a wood stake, make sure it's made with untreated wood so chemicals won't leach into the soil and contaminate your veggies. Bamboo stakes are also another great option. If you've got a vining plant, you may want to use a trellis. These can be quite beautiful with so many sizes and shapes to choose from; now, it's time to get out and find a creative way to integrate it into your backyard decor!
Drive The Stake Down 14 Inches And Facing North
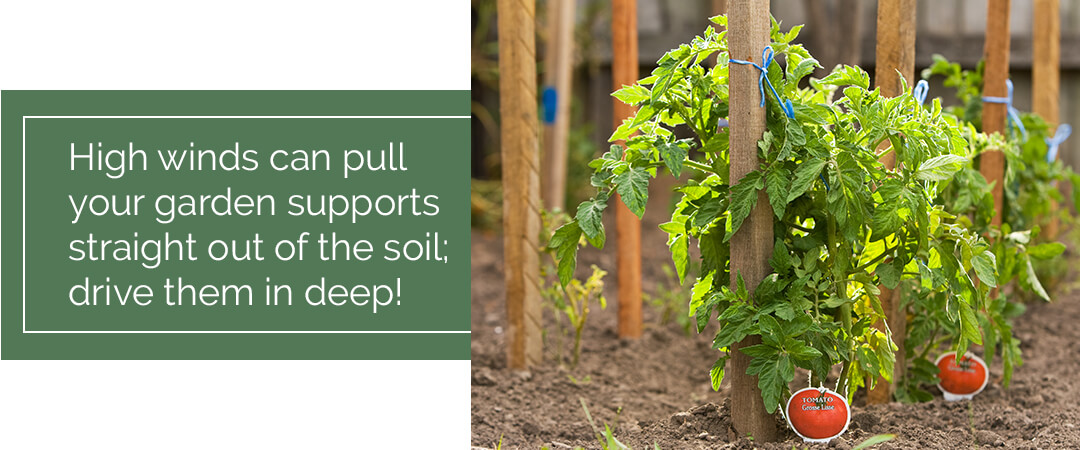
High winds can pull your garden supports straight out of the soil, and that can do some serious damage to your veggies. If you drive your stakes down into the dirt deeply, you won't have to worry about that happening. Making sure they're on the Northern side of the stem will be helpful too, especially if your supports are thicker, then they won't block any of the sunshine!
Tie Stems As They Grow Every 6 Inches
As your plants continue to grow, you need to keep securing them along the way so they don't flop. Monitor the development, and every time there's at least 6 inches of new growth, tie the stem to the support. Use material like gardeners tape, thick twine, velcro ties, or even strips of old pantyhose for securing.
Don't Tie Stems Too Tight
Leave a little bit of wiggle room—about one inch around the stem. If the ties are too tight, they could cut into the stems and hinder proper development. Try to avoid spots where leaf shoots are likely to emerge, so they don't get all bunched up. Instead, try to stick them a bit above the leaf shoots, so they'll stay in place and won't slide down the stem.

Replace Stakes When Needed
If your supports become too small, you need to replace them to accommodate for more growth. Some fast-growing plants may need to be re-staked every couple of months, or even sooner. Drive your new supports into the same hole as before, to avoid disturbing the roots. It helps if you use a mallet to drive it in deeply.
Are you in need of some supports and equipment to help your veggie garden along? Visit Eising, or place an order over the phone for curbside pickup or delivery. If you have any questions, don't hesitate to ask—we love to help our fellow gardeners!
If you haven’t gotten started on your summer vegetable garden yet, don’t worry—there are still plenty of veggies you can plant now for a late-season harvest! That means more fresh produce to enjoy through the fall, and with the help of our trusty freezers, many can be enjoyed well through winter and spring. You can find all kinds of seeds and starters for vegetables and fruits on our brand new webstore, so feel free to browse online and place an order for curbside pickup or citywide delivery.
What Are The Best Vegetables To Plant In Summer?
Generally speaking, vegetables that can be planted in summer are either fast-growing and love the sun, or slow-growing and tolerant of the cooler temperatures in the fall. Many garden edibles can get scorched from the hot sun if planted too early, so it’s best to delay so that they’re ready to go once the temperature is less extreme.

Late Summer Vegetables You Can Direct Seed
Many folks assume that spring is the best time for planting vegetable seeds, but every plant is different! So, if you want to start planting seeds in summer, there are more than a few good options for you to choose from. Here are the best late summer vegetables to plant in Simcoe through direct seeding:
Beans: Perhaps one of the easiest and most kid-friendly veggies to grow, beans are always a favourite. Plus, they deposit nitrogen into the soil, which helps improve soil quality.
Beets: These hearty root vegetables make excellent comfort food, and their ultra-vibrant colour indicates super-high levels of vitamins, nutrients and antioxidants. Your beets will be ready for harvest around September or October.
Broccoli: Even the pickiest of eaters aren’t likely to turn down a delicious bowl of broccoli cheese soup, or a Chinese beef and broccoli stir fry. Sow broccoli seeds in June for a harvest that’s ready right at the start of back-to-school season.
Carrots: Before you sow your carrot seeds, make sure your soil is super loose and free of rocks and compacted areas. If it’s all clumped together, the roots won’t grow long and pointy, so you’ll be left with stumpy, misshapen carrots.

Leafy Greens: Lettuce, kale and spinach can all be sown directly into the soil in June. They don’t take too long to develop, and they thrive in cooler temperatures, so you can even get away with planting a second round in early autumn!
Parsnips: Slow-growing parsnips need around four months to mature, but there’s no need to rush! Parsnips taste best if you harvest them after the weather has turned chilly. If we get hit with a few frosty nights in autumn, this will actually help them! Just make sure you pull them up before the ground freezes.
Potatoes: While not technically seeds, you can put potato tubers in the soil in June to enjoy an autumn harvest. Wait for the plants to mature, turn brown, and wither, then leave them in the soil for another three weeks before pulling them up! Store them in a cool, dry spot, and don’t wash them before storing—this will cause them to rot.
The Best Starter Plants For Late Summer Crops
The waiting game can get a little long when you directly seed certain plants, so sometimes it’s better to get a starter plant to transplant into containers or your garden bed. Here are some excellent starters to pick up later in the season:

Zucchini: “Zoodles,” or spiralized zucchini noodles, are quickly gaining popularity as a delicious alternative to carb-heavy spaghetti. If (like many of us) you’ve been kinda overdoing it on the pasta lately, you’ll definitely enjoy having this tasty squash in your garden.
Celery: This ultra-healthy, crunchy veggie adds some great crunch to tuna salad, chilli, and stews, but it takes a pretty long time to develop from seed, so you may as well skip ahead and opt for a starter.
Cucumbers: Technically, you can either transplant or direct seed cucumbers in June, but getting a starter will ensure you get to enjoy your harvest earlier in the season!
Peppers: With their thin, delicate skins, peppers aren’t too tolerant of chilly temperatures and will taste much better if they get lots of sunlight. Planting a starter in June will ensure these sun-loving veggies get peak sunshine in July and August, right when it counts.
Tomatoes: We especially love growing small tomatoes in hanging baskets! The little fruits look like strings of colourful porch lights changing from green, to yellow, to red!
Fresh garden produce can be enjoyed well into autumn, and even early winter, if you pick the right crops and time them just right. If you have any questions about late-season planting, feel free to give us a call at the shop, and we’ll be happy to help!
By now, if you've been caring diligently for your seedlings, they're likely bursting out of your starter trays or pots! You've watched them grow up, and now it's time for them to graduate into the garden. But you may be wondering how to take the next steps. How do I transplant, and when? Answering these questions is key to success at this pivotal moment.
Transplanting Overview
Transplant timing hinges upon our last frost date, which is May 19 in Simcoe. Frost-hardy veggies can be transplanted before then, but tender plants should wait a little longer. Sometimes seedlings can outgrow their trays before their graduation time. Don't worry, that means they're growing well! The solution is simply to move them into a bigger pot.
How to Repot
Your young ones are ready for a larger home when their roots have filled their containers and their leaves are crowding out their neighbours. The new pot should be twice as large as the old one.
Begin by watering the seedlings. The damp soil will adhere to the roots and keep them from drying out. Don't tug on the stems. Instead, use a butter knife to carefully lift them from the container or squeeze them out from the base. If a few are intertwined, gently tease them apart. With a pencil or your finger, dig a hole into their new pot or plug tray. Place the seedling, firm the soil around it, and water them all once you finish. The roomier pot will give them a chance to stretch their legs before their big move.
When to Transplant into the Garden
Historic weather averages tell us when to take the next step. Often, we need to adapt to unusual weather or unique conditions each year, but here is a general guide for our climate.
April 15 - 25
Frost hardy: asparagus, broccoli, Brussels sprouts, cabbage, lettuce, onions, radishes, peas, spinach, parsnips, early potatoes.
April 25 - May 10
Semi-frost hardy: beets, carrots, cauliflower, celery, late potatoes, early sweet corn.
May 15 - 25
Semi-frost tender: snap beans, sweet corn, tomatoes.
May 25 - June 5
Frost tender: cucumbers, eggplant, melons, peppers, pumpkins, squash.
Hardening Off
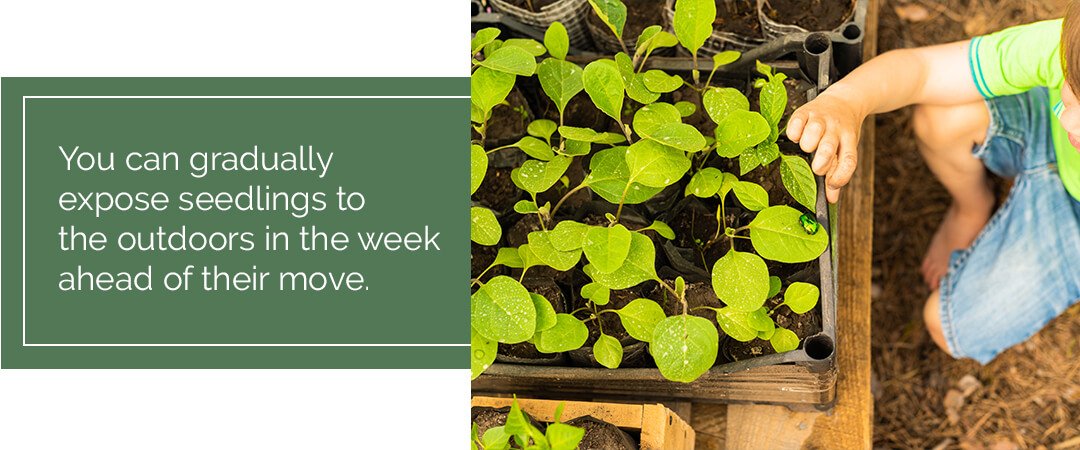
You can gradually expose seedlings to the outdoors in the week ahead of their move. While not absolutely necessary, your veggies, especially the tender crops like tomatoes, will be strengthened by the gradual transition.
Begin by setting them in a shady spot away from the wind for a few hours each day. Slowly increase their exposure to sunlight and breeze until they spend a whole day and night outside. Make sure to keep them well-watered, as their small pots can quickly desiccate. When the time comes to graduate, they'll be ready to brave the elements.
How to Transplant into the Garden
Follow these steps for transplanting success:
- First, make sure you've loosened and enriched the soil with compost or another organic fertilizer.
- Choose a warm overcast day and plant in the morning or evening.
- Water the seedlings to hydrate their roots.
- Determine the correct garden spacing in advance.
- Gently squeeze the tray around each plug to remove them. Only remove each seedling just before moving to minimize the roots' exposure to air.
- Using a trowel or your fingers, make a hole and drop the seedling into it, firming up the soil around it as you plant. Leggier seedlings can be planted a little deeper as long as you don't bury the first leaves.
- Water the newly planted area immediately after finishing.
- They will likely need to be watered daily for a few weeks afterwards. Check the soil moisture and water as needed to prevent them from drying out.

There are a few more tricks for particular plants like tomatoes and cucumbers. But in general, these are the basics for transitioning your veggies into the ground. If you haven't started your seedlings, check out our selection of starter plants in our online catalogue. If you need more advice, our garden centre would be happy to share more tips for success!
As we all start to settle into our new routines and get the hang of homeschooling (common core math, anyone?), we're quickly realizing how important it is to have some variety in our lives. Too much monotony can make us pretty squirrelly—kids especially—so breaking up long stretches of time indoors with fresh air and exercise really helps the cause. After all, that's why schools have recess.
Time spent working is more productive and valuable when you get the chance to get some sunshine, so it's good to try and squeak in a couple of 20 - 60 minute activity breaks outdoors. It isn't always easy to think of activities to keep kids occupied when you're juggling all the other duties at home, but these six ideas for outdoor games should go over well with the little ones.
5 Creative Outdoor Games For Kids
Soak up some sun and enjoy some playtime with your kids; it's amazing how quickly it can lift the spirits and give you a second wind to tackle your next project. These fun activities will require you to help with setup and supervision, but you'll still be able to get a chance to kick back and enjoy a cold drink in a lawn chair while the young ones run around. A little exercise and a little relaxation—the best of both worlds!

Make a Chalk Obstacle Course
A set of rainbow chalk and a little imagination is all you need to create a wacky obstacle course all the way down your sidewalk. You can help them with the colouring, and then sit back and watch while they run through it over and over. Of course, there are the classics like hopscotch, but you and your kids can probably come up with some more creative ideas.
For example, you can colour a long stretch of bright orange and red lava, then add a few "stepping stones" to hop on. Draw a big, long, slithering anaconda and walk on it like a tightrope! Add in some squares with different actions like "Hop on one foot ten times," or "Spin around five times." Use the stopwatch on your phone to time their runs through the course and challenge them to try and get the fastest time they can!
Paint Some Rocks
Rock art can be a fun, inexpensive outdoor art project that kids of all ages can enjoy. The little ones can go the abstract route, covering rocks with fun splashes of colour (these actually look really pretty lined up on a windowsill or placed throughout the garden!). Older kids with more developed motor skills can try painting scenes on rocks or transforming them into their favourite characters. To avoid getting paint on the grass or cement, put an old bedsheet or some sheets of newspaper down. Make sure to provide plenty of paper towels along with a basin full of water!

Melt Old Crayons Into New Ones
If you've got cookie cutters, tin foil, old crayons, a cookie sheet, and a sunny afternoon, then you can pull off this super fun outdoor activity that gives new life to old, broken crayons. Cover the cookie sheet in tin foil and arrange the cookie cutters on top. Peel off any labels remaining on the crayons, snap the bigger ones in half, and put a mix of assorted coloured crayon bits in each cookie cutter. After you've got them all set up in the sunshine to start melting, you can go back inside for another activity, and then come back out to retrieve them once they've melted. Place the cookie sheet on the counter to cool off, and then once they're solid, pop out your new crayons and get colouring!
Let Them Power Wash The Windows
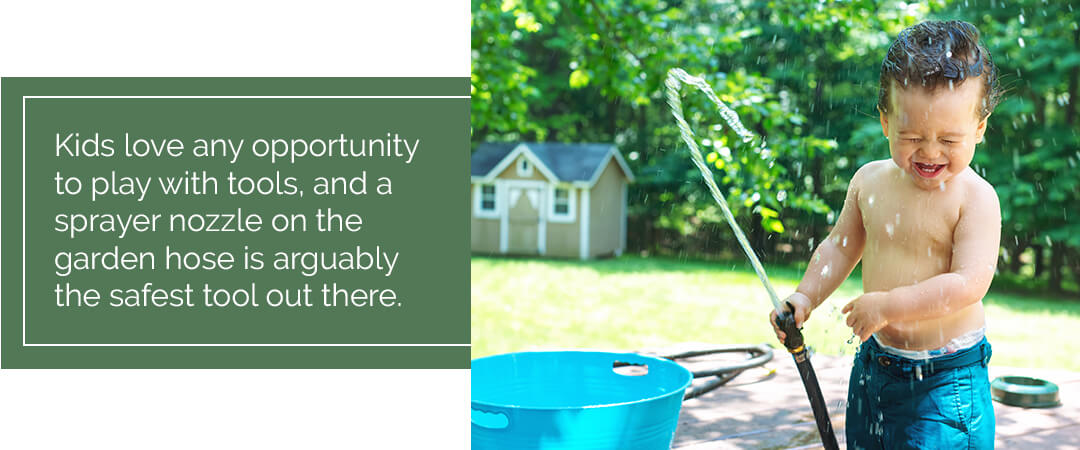
Okay, hear us out—kids love any opportunity to play with tools, and a sprayer nozzle on the garden hose is arguably the safest tool out there. If your windows are looking a bit mucky now that the snow has cleared, let your kids blast off all the dirt! You'll be amazed at how eager they are to help you clean. "Power washing" with the hose is definitely one of the most fun chores around. If they can't get enough, ask them to give the patio furniture or the family car a good rinse!
Plant A Kid-Friendly Garden
Of course, we're a little biased, but we think gardening with kids is one of the best outdoor activities imaginable. It's like a long-term, hands-on science lesson that results in some pretty spectacular end results. Sprout some seeds on the windowsill, or pick up some small starter plants. Grab them some child-sized garden tools and gloves so they can dig up some holes and get all their flowers and vegetable plants in place.
Encourage them to make some little signs to stick in the garden so they can keep track of which plant is which. It's a great way to expand on their vocabulary and work on their printing skills! Make a plant journal for them, and take note of exciting new developments or growth spurts in the garden. They'll love the sense of ownership they feel for their personal gardening project, and at the end of the summer, you'll have a cool memento to hold onto and look back on.
Spending time out in nature and getting some exercise is so important, whether you're 8 years old or 80. Check out our new web store to see all the brand new stuff we've got in for gardening and outdoor activities! Remember, we have curbside pickup service available to make your spring plant purchasing as fuss-free as possible!
This is the year—the year you cross off all the tasks on your spring to-do list! A little bit of yard work now pays off in the long run. You'll feel more organized and have healthier plants, and you'll be better prepared for the following year.
Review Your Tools and Accessories
Before we get into the heart of the gardening season, now is the time to look over your storage shed to make sure you have everything you need for a successful season. To prevent the spread of disease between plants, clean pots and containers you may use, as well as any tools. You also may need to sharpen and oil some old standbys, like pruning shears, loppers, and trimmers. If, after doing your clean up, you realize you need any tools or accessories, we're now offering curbside pickup at our garden centre.
Clean Up The Yard
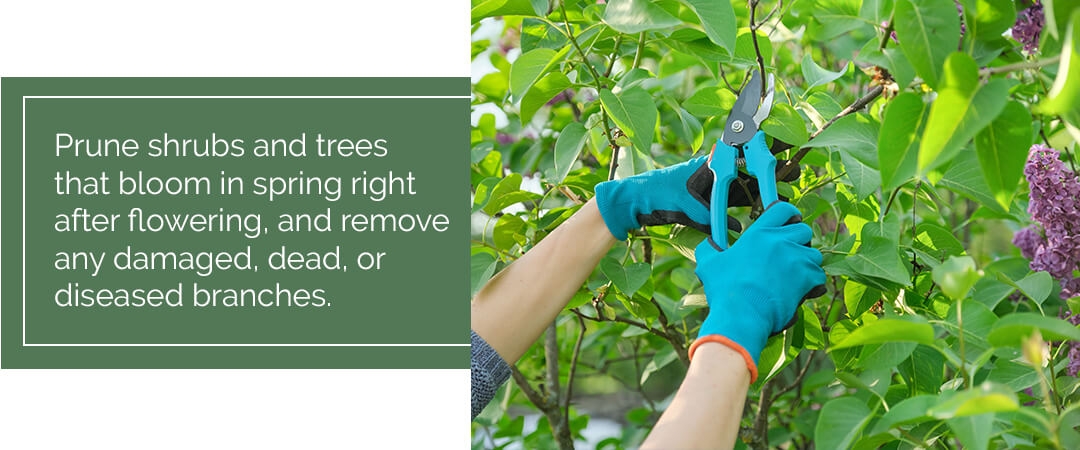
Removing any fallen branches is especially important to reduce any hazards now that the kids are spending more time playing outside. Prune shrubs and trees that bloom in spring, like lilacs, right after flowering, and remove any damaged, dead, or diseased branches.
Though perennials, like grasses and woody herbs, provide food and shelter for birds during the winter, they can make your yard look a little scruffy during the spring. Cut back these perennials to encourage fresh growth and remove last year's annuals to make room for new ones this year.
Work the Land
Pick up a handful of soil, shape into a ball, and squeeze it. If water comes out, the soil is too wet, and you should wait a bit longer. However, if the ball crumbles, then the soil is ready to be worked. Remove any fresh mulch or leaf litter, but leave whatever has composted to mix into the soil. Loosen up and mix the soil by turning it over, using a tiller or a spade. Depending on the soil in your garden, you may also have to add amendments, like fertilizer.
Take inventory of the groundcover in your yard. Mulch and rock seem to disappear every year — groundcover should be about two to three inches thick, so replenish accordingly.
Plan Ahead
Take note in a garden journal of what you've completed already, like all of the steps above, plus any seedlings you started or bulbs you planted. A garden journal is a great help, not only for this season but also for years to come, since you can keep track of what worked and what didn't each year. Write down what you'll plant, where you'll plant it, and when. The majority of garden vegetables can be planted through mid-May here in Simcoe, after any risk of frost has passed. Now is also the right time to take note of any open spots in your yard that you can fill in by dividing fall-blooming perennials, like hosta and purple coneflower. Dividing perennials helps keep the plants healthy, plus it gives you more plant material to work with!
Odds and Ends
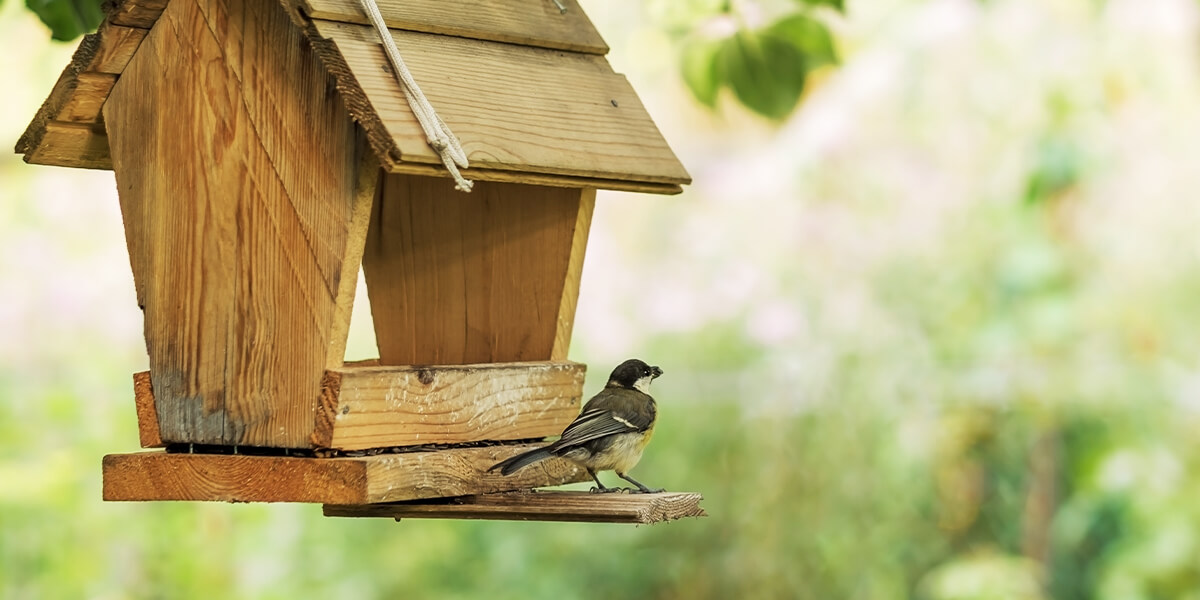
Clear out the gutters, turn over the compost, clean out bird feeders, and repair anything that needs it, like fences and lawnmowers. Locate and put up stakes and trellises for any plants that might need them, like tomatoes and peonies. Now is also a great time to tend to your decks and hardscapes so that you have a place to enjoy your garden from when it starts blooming!
Though you could make a day of prepping your garden this spring, to make it more manageable, break up your days at home by doing tasks between conference calls. Follow this checklist, and in no time, you'll be seeing the results of your hard work—evidenced by your thriving garden!
There might not be a better flavour of summer than the perfectly ripe garden tomato. Picked straight from the garden, a fresh tomato lets you taste summer’s sunshine with each bite.
Tomatoes are incredibly popular garden plants, thanks in part to the staggering difference between homegrown and supermarket varieties. As much as the flavour and nutritional content of garden-grown produce have a clear advantage, we also think that the sheer variety of options is part of the tomato’s success. With so many choices, there’s something to fit everyone’s lifestyle, taste, and garden style, and with such a simple growing formula it’s easy to come out with a great harvest. Here are our tips on how to take your homegrown tomatoes to the next level.
Planting Tomatoes Made Simple
Tomatoes are easy-to-grow plants, but a bit of knowledge makes the difference between a mediocre harvest and an amazing one. The first task in planting your tomatoes is to choose your type. Tomatoes are normally categorized as determinate (bushy types that don’t require much pruning, stalking, or maintenance) and indeterminate (unruly plants that require a little more care but produce more fruit). You also have choices in size from small and sweet snacking cherry tomatoes to large, beefy tomatoes for slicing onto sandwiches and burgers.
Choose plants that are robust and stocky, not ones that have grown lanky. This is true whether you grow your own from seed or buy from the store; you’ll want to start your garden with only the best plants.
Choose a spot in the garden with full sun exposure. Tomatoes thrive on heat and will give you tastier fruits the warmer they are all season, so full exposure to sunlight (without too much exposure to winds) is perfect. Plant in well-draining soil to prevent root rot, but consider layering some mulch on top once you plant to lock moisture and heat in.
When you plant, you can plant part of the stem in the ground to grow roots, too. This is a great way to save any plants that might have stretched and gotten lanky while you waited to plant. Any part of the stem planted underground will grow roots, so take off the leaves and plant about a third of the stem in the ground.

Some Garden Classics
Choosing a type from all of the different and new tomato varieties can be daunting, but we’ve narrowed it down with a few of our favourites to grow in our own gardens.
For great determinate varieties that taste great with little intervention from you. We love the Tumbler and Roma varieties. These produce great flavour and lots of harvest without too much intervention from you, making them an ideal low-stress option.
If you like to put a bit more of a personal touch and love and care into your garden, though, indeterminates are a good choice. For most tomatoes, the flavour, quality, and quantity of tomatoes in indeterminate varieties can’t be matched. For those craving big, delicious, plump tomatoes, Beefmaster is a great choice. Early Girl offers the best of everything in a medium size, reaching maturity early in the season. For those looking for a sweet snacking tomato, though, look no further than Sweet Million.
Heirloom tomatoes are the choice for the traditionalist that wants something unique in their garden. There are many delicious and creatively-coloured tomatoes, like Green Zebra and Black Krim, that will have your dinner plate dressed up with natural beauty.
Growing top tomatoes in your garden isn’t difficult, and the rewards are so delicious that it’s hard to see why you wouldn’t want to grow your own. With so many tasty choices, there’s a tomato that’s suited for anyone and everyone’s space. The only challenge will be getting the tomatoes to the kitchen before eating them all off the vine!
Every day our understanding and awareness of the products and chemicals in our lives grows. From lotion to moisturize your skin, to chemicals to clean our homes, and to the fertilizers and pesticides applied to our lawns, chemicals are starting to be less and less invisible in our daily lives. There seem to be hidden chemicals and risks everywhere around us, and learning more about them can be important to living a healthy life and taking care of our vulnerable pets. Collectively, we’re starting to want to really understand the products we use and just how risky they actually are.
Pesticides, Herbicides, and Fertilizers
If you’ve ever had your lawn treated for weeds or have fertilized in hopes of a golf-green carpet of grass, you know just how unpleasant some of the chemicals that we use in our garden can be. Some of them have foul smells, others require precautions to keep us safe from touching them… it’s no mystery that what we use in our gardens and yards can be potent. On the other hand, most of us don’t want to have a struggling and ragged lawn and garden while our neighbours’ flourish.
There’s a middle ground between taking care of your lawn and garden to help it thrive and using harsh and scary chemicals that might be questionably unsafe for your family. There are tons of organic solutions for a thriving lawn that simply take a little work and some patience, but you can rest easy knowing you’re keeping your home safe to enjoy. Here’s how to get started:

Dethatch
This is as simple as dragging a hard rake across your lawn to clear out some of the dead old growth. These accumulated old layers can stifle your lawn and get in the way of new spring sprouts. A little elbow grease to rake the lawn will show you just how much old growth is in the way and will be the perfect way to get your lawn ready for spring.
Aerate
Your grass is a living thing and has basic needs for survival! Aerating is a great way to boost how much air, space, water, and nutrients can make their way through compacted soil to their roots.
Dethatching and aerating go hand in hand as a once-a-year chore to rejuvenate your lawn in the late fall or early spring. Your lawn might look rough after you dethatch and aerate, but it’s all a necessary to have a natural, thriving lawn when it fills in.
Seed With Good Seed
If you try to start your lawn off with poor seed, you’re setting a poor foundation for your lawn. Choose something that meets your needs, like something that is drought-resistant or perfectly suited for the conditions of your lawn. Even if your lawn was originally seeded with grass seed that is a poor match to your lawn needs, you can always interseed or overseed after you’ve thatched and aerated to re-establish your turf.
Watch Your Watering
Many lawns these days are totally dependent on regular watering to look lush. For many people, their fresh sod needs some extra pampering, and then it’s never weaned off. Ultimately, if you can try to wean your lawn off of constant watering it’ll be encouraged to develop deeper roots that will make it hardier and better able to tolerate dry conditions. A bit of thought into your watering schedule can make the difference between a nice lawn, and a gorgeous one that has the depth to be tough, too.
Working By Hand to Treat Weeds
The dream of a beautiful lawn that is thriving is always compromised by weeds. Thankfully, the healthier your turf is, the more it’ll take up room that opportunistic weeds might have sprouted in the past. All of this work to make a gorgeous lawn isn’t just about getting your greens greener, but about getting rid of opportunities for weeds to take over.

Of course, weeds are stubborn enough that even the healthiest lawns are bound to have a few. If you’re trying to stay away from chemical solutions so your space is always safe for everyone to use, a bit of elbow grease is the solution. Grab a trowel and some gloves and pick away at whatever weeds make it through your defences. It’s actually therapeutic once you aren’t fighting overwhelming numbers of them. The more consistent you are with your weeding, the easier it gets.
Saying goodbye to chemicals in your yard doesn’t mean that you have to say goodbye to a beautiful lawn! A little bit of strategically timed work is exactly what you need to encourage your grass to thrive while keeping your landscape accessible to everyone — you, your kids, your pets, your guests, and your local beneficial critters — to enjoy.
Mulching is a common gardening technique that protects your plant and gives your garden a little more vibrancy with less work! Sprinkling a simple insulating layer of mulch material around your plants will help to maintain moisture levels, prevent weeds, insulate your plants, and clean up the appearance of your garden. The benefits are clear and there are lots of materials to choose from to meet your needs. Here’s how mulching can help your garden’s aesthetic and more:
The Importance of Mulching
Summers can get hot, leaving us with thirsty plants that need water seemingly constantly. Using hundreds of litres to keep our plants hydrated is not only a waste of resources and money, but of our time, too. Mulching will help to lock moisture in by cracking down on evaporation so that the water that you do give to your plants actually gets used at the roots rather than (literally) disappearing into thin air.
Mulching is also super effective in our wild temperature swings from summer to winter and back. For those perennials in your garden that are left out shivering through the coldest of our winter days, mulch can provide a much-needed insulative layer that blocks out the worst of the cold and freeze-thaw cycle, keeping our plants safe until temperatures are mild again. Mulching will give your plants a better success rate with surviving the winter, and you’ll have happier plants in the spring that are ready to thrive, instead of battling winter damage.
Finally, mulch does wonders to clean up the look of your garden. Mulch is a great buffer layer between our soil - where weed seeds lie in wait - and the sun that they need to thrive, effectively stifling most weed growth. You’ll save time and appreciate a cleaner looking garden where all of your soil’s resources can be spent on the plants that you want. Not only does mulch prevent unwanted weed growth, but it simply cleans up the aesthetic of your garden, providing an upgrade from the look of normally exposed dirt. There are lots of styles and materials to choose from so you can choose an effective mulch material for your home that also adds to the style and look of your landscape.

Mulching or Stone?
While some people might like the look of decorative stone to shade their soil, it simply doesn’t provide all of the benefits that most natural options offer. In addition to their lacklustre performance in all areas other than style, they can also end up being quite an expensive addition to your landscape. While stone might offer a clean look that provides a slight barrier to evaporation, biodegradable options do a better job of the health of your soil and plants while offering a similar look at a better price point.
Options for Mulching Your Garden
There are tons of materials and methods for mulching your garden, so the main questions that you should ask yourself are: What do I want to get out of my mulch? What kind of look am I going for in my garden? Do I want to use synthetic materials or natural materials?
Once you have an idea of what you want, consider these great mulch options:
Bark Mulch consists of shredded bark, creating a fantastic all-natural mulch material that will provide all of the moisture-locking and weed-blocking benefits of mulch, while also slowly boosting the health of your garden as the organic material decomposes. Bark mulches come in a variety of colours depending on the type of tree they are sourced from.
Wood Chips provide a look that is similar to bark chips, but a little more robust. Again, colours depend on the type of wood they are sourced from, but there is the additional option of treated chips that have a more uniform colour. These chips will also break down slowly to supplement your soil, so opting for an all-natural dye on the treated chips is a good idea to prevent chemicals leaching into the soil.
Straw is a good option for those that want cost-effective and all-natural mulch solutions, but are also okay with a more rustic look in the garden. We love the country aesthetic that it gives our flower beds! Keep in mind that some straw varieties might have weeds and seeds of their own that pop up when applied, so they may not be the ideal choice for those looking to cut down on weed pressure.
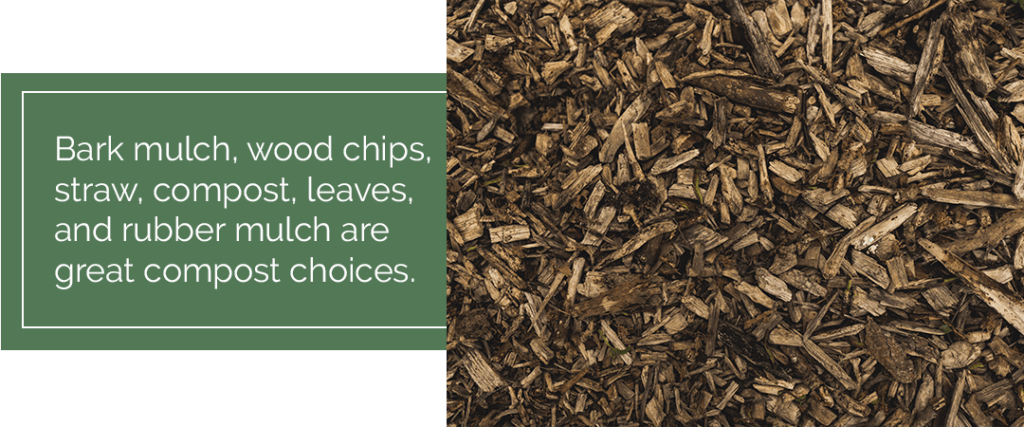
Compost or Manure, when applied in a thick layer will deliver a massive nutritional boost to your soil and plants, resulting in lush and beautiful growth that can’t be matched with synthetic fertilizers. If you’re looking to mulch with compost or manure, you’ll need to provide a generous coat of 2-4 inches of material to effectively insulate the soil.
Leaves and Grass Clippings are another great natural option that is very easy to source from your own yard! The clippings straight from your lawn mower bag and the leaves you collect in the fall are more welcome in your garden than the garbage. While this might not be the cleanest look in your mulching options, it’s incredibly effective and very straightforward - and the freshly clipped grass smells great.
Rubber Mulch is another option, though it is not natural and won’t contribute to the nutritional health of your soil as the other mulches do. However, it is still very effective at locking in moisture, choking out weeds, and keeping the soil insulated, all while looking clean and uniform. As it doesn’t break down like the other options, this is certainly a mulch choice that is more permanent - you won’t have to replace it, but moving it might become difficult.
Mulch is the secret weapon that goes unappreciated in many gardens, stepping up the performance and look of your landscape in one simple application. With so many options, there’s bound to be something that is the perfect fit for you and your garden’s goals.