
Come along on a little journey with me and imagine this… It’s Springtime. The sun shines, and the air finally feels warmer after a long, grey winter. You take a little trip to your favourite garden centre and find that special plant you’ve been reading about and hoping for. Of course, you buy the plant, take it home, and proudly place it on your sunny patio on this beautiful day. Two more sunny days go by, and the plant does not look good at all. It seems to be dying, so you give it lots of water, but that makes no difference. It is in fact dying. So disappointing! How could this be happening?
In our excitement to get outdoors and plant flowers, or add greenery, we forget that the plants we’ve been growing indoors or inside a greenhouse, aren’t used to the elements in the great outdoors. They’ve been sheltered indoors, out of the wind and direct sun, and watered and fertilized regularly with the utmost attention. They’ve been pampered in a plant spa and are quite literally hothouse flowers! Being plunked outside afterwards is the equivalent of us going outside in a bathing suit with no sunblock on for the first sunny, warm days of Spring, exposing our lily-white skin that’s been covered up by a parka all winter long!
Red, sunburned skin is not a great image, but hopefully, this comparison helps to explain the importance of transitioning or hardening off plants. Much like us, indoor plants need to be gradually exposed to the elements and given protection in the process.
The same will be true if you have planted seeds indoors or purchased greenhouse-grown seedlings. Seedlings grown in a greenhouse, a sunny window, or under grow lights in your home need up to 14 days to acclimate to being moved from their cozy indoor space to the great outdoors.
What is Hardening Off?
Hardening off ensures that you will not lose another plant or seedling! It’s a sensible process for all the plants you’re moving from indoors to outdoors. By helping plants or seedlings to gradually toughen to withstand the elements, you prevent transplant shock, which can cause your plants to be stunted or, worse, die.
To ensure success, the process of hardening off takes up to 14 days, so you will want to begin two weeks before transplanting plants and seedlings into your garden. Houseplants may only need 7 to 10 days, but tender, tiny seedlings need the full two weeks to strengthen and get used to their new environments.
When to Harden Off
Cold-weather plants like lettuce, kale, pansies, violas, dianthus, and potted or forced spring bulbs can be hardened off once daytime temperatures consistently reach 5 Celsius, usually in April in southern Ontario.
Perennial plants, tropical houseplants, and heat-loving seedlings like most annual flowers, tomatoes, peppers, and basil should wait until temperatures are around 7-10 Celsius to begin hardening off. For vegetables and annual flowers, start hardening off around May 10 here in Norfolk County if your target is planting seedlings around May 24th.
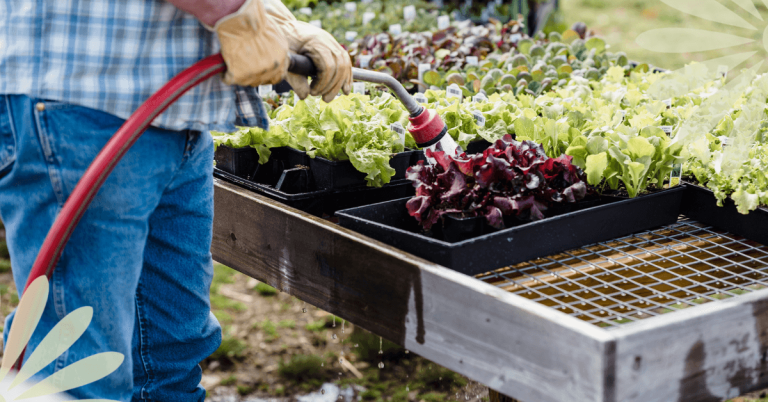
Successfully Hardening Off Your Seedlings and Plants
Days 1 and 2
Begin on a day that is optimally warm (At least 5 Celsius for cold-weather-tolerant plants, 7 Celsius for heat-loving plants, or 15 Celsius for tropical houseplants) and place your plants or seedlings outside in full shade and protected from the wind.
If you don't have a wind-sheltered area in the shade, putting your plants in an open cardboard box is a good way to protect them from the wind at this stage.
Leave them in this protected area for 1-2 hours before returning them indoors.
Days 3 to 5
Each day, gradually increase the length of time your plants are outside and begin to place them in an area where they will get dappled shade and some wind.
Pay close attention to watering while you’re hardening off your plants as they will require more frequent watering.
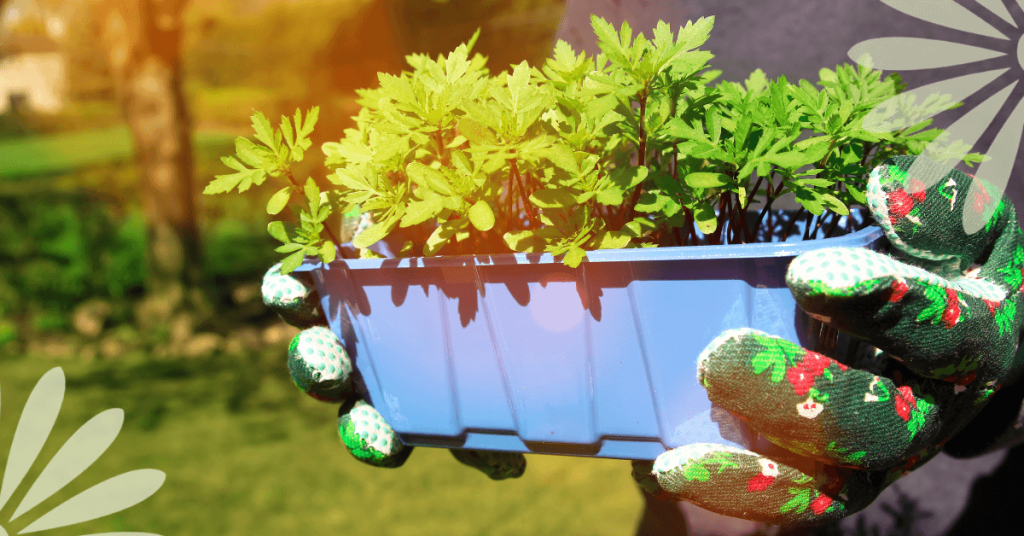
Days 6 to 10
On day 6, start to increase your plant’s exposure to direct sunlight by placing them in the morning sun, which is less intense than the afternoon sun.
Begin to leave them outside overnight from this point on unless the temperature is expected to drop below 7 Celcius.
Days 10 to 14
After 10 days of acclimation, it is safe to move houseplants that require more sun to a location that meets their needs.
After 14 days of acclimation, it’s safe to transplant seedlings to their place in the garden or to large pots if you’re growing in containers.
As soon as your plants are transplanted, be sure to water them well! This will help them transition and eliminate air pockets in the soil that can harm the roots.
If the temperature drops and a fluke, unexpected freeze is forecasted after you’ve planted everything, cover your plants with row cover, cloches (you can use plastic water jugs with the bottom cut out, just leave the screw cap off to act as a vent), or cardboard boxes to protect them.
To summarize, when Spring arrives, protect your skin with sunblock, and harden off your plants before you move them outdoors!

Fall is the time to plant garlic if you want to harvest them next summer. Why grow your own garlic? Like any vegetable, fresh garlic just tastes great. It’s also very satisfying to plant one little clove and get a whole head of garlic from it. Think of it as a garlic bank: put in a little effort in the Fall, and next summer you will profit from that small investment in spades!
If you’ve never planted garlic, it’s quite an easy crop to grow. Just follow these seasonal steps to help you get started. Hint: Mid-October to early November is when the majority of the work takes place.
FALL
Choose a location that is in the sunniest area of the garden. Lots of sun will produce large heads of garlic.
Prepare the soil in late summer, or as early in the Fall as possible. Or prepare the day before you plant if you can’t get to it sooner! Amending the soil is an often missed step but it will provide valuable nutrients for your garlic throughout the seasons.
Add organic compost like mushroom or sea compost, composted green waste, aged or composted manure, or a mix of any of these. Variety is best and all are great options. If you’re starting a new, raised bed, mix a ratio of 75% compost with 25% vermiculite to create a nice, light soil for your plants. This mix can also be added on top of the soil of an existing bed, making harvesting easier next summer!
Choose a garlic variety based on the flavour and size you like. There is softneck or hardneck garlic, but hardneck is recommended for growing in Canada. Also, hardneck varieties produce scapes which are a bonus crop - you can read more about that below. Red Russian, Music and Chesnock are just a few of the popular varieties grown in Ontario.
Separate the garlic cloves, or teeth, from the heads. As you’re breaking down the heads of garlic, it’s important to choose the largest cloves to plant. Starting with large cloves will increase your chances of growing large heads of garlic. Set aside any small cloves to cook with.

Planting! Sometime between early October to mid-November is a good range to get your garlic in the ground in Norfolk County. Basically, 4 to 6 weeks before the ground is frozen.
Here’s how to get your garlic in the ground!
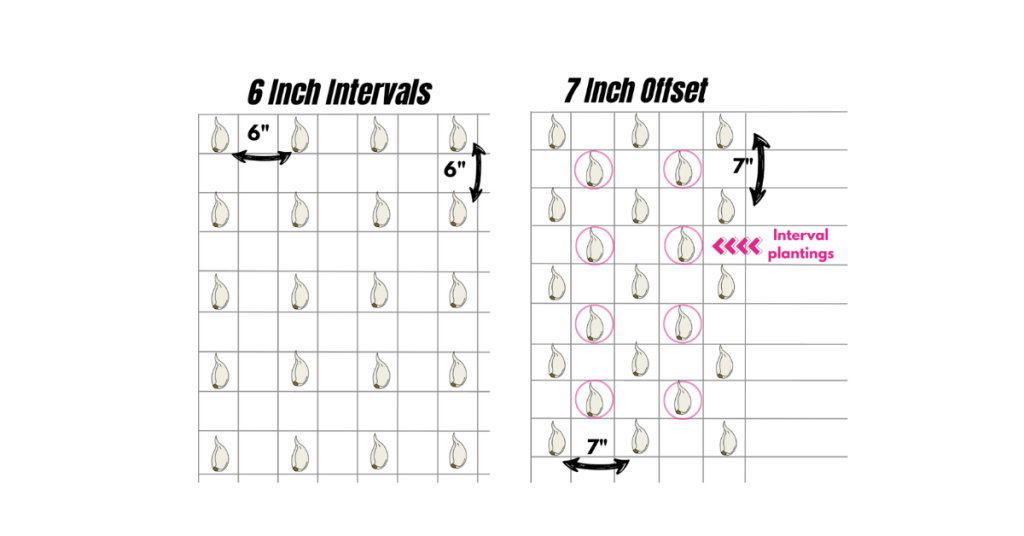
- When it comes to spacing, there are two options.
Using a dibber or a hand trowel, create 3 to 4” deep holes in one of the following patterns:
a) Make holes that are approximately 6” apart and in rows that are 6” apart.
b) Make holes that are approximately 7” apart and in rows that are 7” apart. Then, go halfway between each row and make an offset row. This method is best if you don’t have a lot of space and will not impact the growth of the garlic.
2. Place a handful of worm castings or organic 4:4:4 fertilizer in each hole and mix into the soil a bit.
3. Place ONE clove in each hole, with the pointy end facing up and the flat end down.
4. Backfill with surrounding soil so that each clove is covered 2-3”. This acts as protection during the cold winter months.
5. Top with leaf mulch, leaves, or straw, and water in your garlic if there is no rain in the forecast for several days.
SPRING
This is the time to check on your garlic and give it a little more nutrition.
Look for signs of first growth in February or March, depending on how warm the weather is. When you see 3”- 4” of growth, remove the mulch from around each plant, or from the bed, and add it to the compost pile.
Add nutrients by amending the soil with 1 tablespoon of 4:4:4 organic fertilizer per square foot of the garden, or add a 1”- 2” layer of fresh compost.
Water deeply from now on when the soil dries out. And that’s it! Your garlic is well set up to go into a BIG growth cycle.
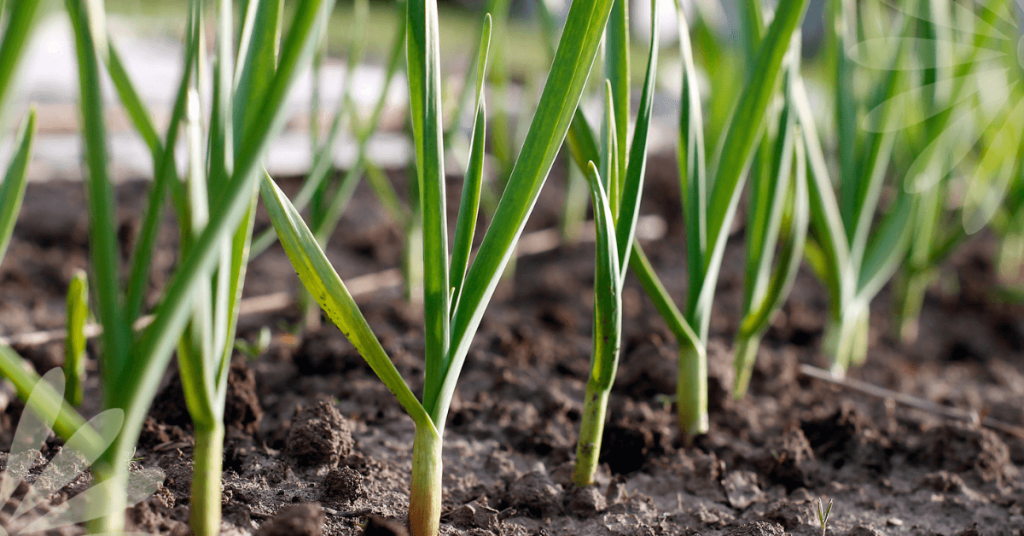

SUMMER
Remove the scapes! Around mid-June look for the top of the stem of each plant to curl around forming what’s referred to as a “scape”. These curls, or scapes NEED to be removed so that the energy from the plant goes into growing the bulb, not into growing the seed head that is part of the curly scape. One full loop is a good time to cut or snap off the scape just above the top foliage.
All of the growth in the bulb happens once you remove the scape!
Here’s the bonus - garlic scapes are delicious! Chop them up and add them to soups, stews or anything you’re grilling. They also make excellent pesto!
Water and check your garlic for any pests throughout the growing season, just as you would with any other plants.
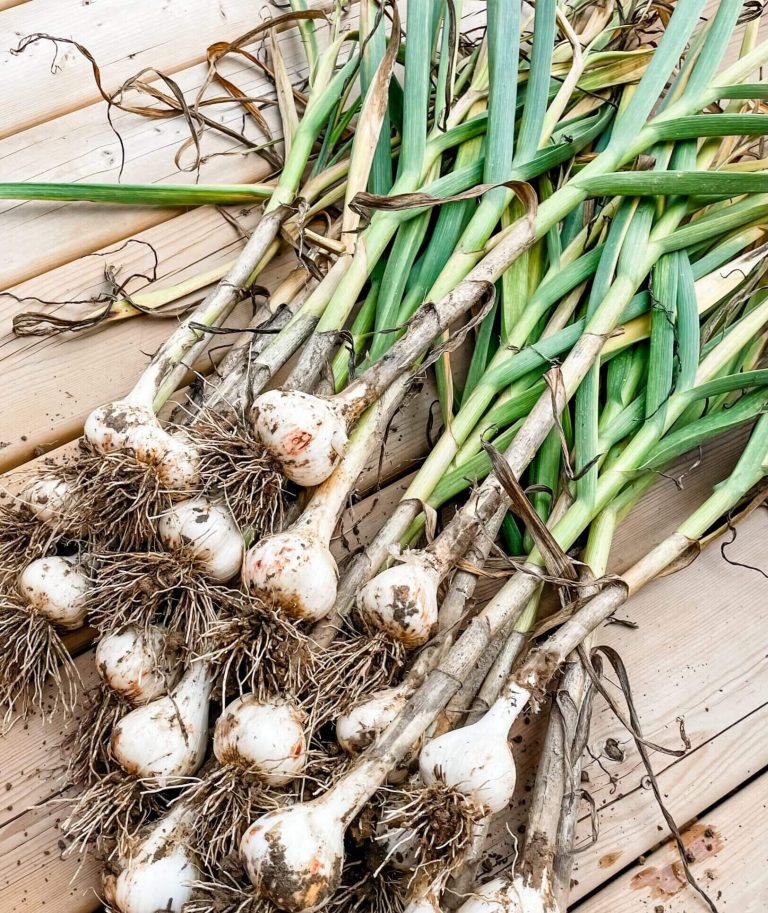
Harvest! Sometime in July, you will start to notice that the bottom leaves of your plant are dying. Don’t worry! The leaves on the plant correspond with the protective layers forming around the outside of your bulb, and they’re getting ready for harvest.
Around mid-July, 4 or 5 of the bottom leaves will be dead and this is your sign that it’s time to harvest your bulbs.
- Stop watering your garlic 4 to 5 days before harvesting.
- Use a pitchfork or shovel to loosen the soil, keeping well away from each plant so that you don’t slice through the garlic heads.
- Gently pull up each bulb and shake off any soil hanging on to the roots. Resist the urge to wash the bulbs as moisture at this stage will promote mould or rot!
Cure your garlic harvest by hanging it in a cool, dry place that’s out of the sun and has good airflow for 2 to 3 weeks. You may need to use a fan for this step.
Once cured, trim off the stems leaving 1-2” and the roots, and store in a dark, cool and dry spot in the house. Well-cured and stored garlic can last until sometime between December and February… unless you’re cooking, canning, and freezing with it and use most of it up! But don’t forget to save the biggest cloves to plant again in the Fall!
Spring is the season to refresh and renew our clothing as we begin to finally put away our winter wardrobe and get ready for Summer. Hooray!
While fashion trends are constantly evolving, at Sassyfras we’re committed to helping you find clothes that make you feel comfortable and confident. We have a great selection of women’s and men’s clothing all conveniently located inside Eising Garden Centre in Simcoe.
So, how does a private preview of what’s in store sound? Here’s a little look-see at some of the items you’ll find at Sassyfras (depending on availability) when you stop by this Spring.
A Wide Selection of Gifts
Jewelry, to handbags. Spa items, to the ever popular Sloggers for anyone who loves to spend time outdoors. You’re sure to find a gift that will be a hit for any occasion.


Spring Flowers
We’re so excited about all of the beautiful fabrics in the store right now! Inspired by nature, you’ll find the prettiest florals, patterns and colours in stock. Orientique is one of our popular brands, and we’re loving their dresses and tops that will brighten up any wardrobe.
Staples
We all need some great fitting pants or jeans to go with everything. You’ll find a great selection of colours and styles that will become the staples you’ll come back to every time.


Women's Golf Collection
If you’re heading out to the fairway soon, stop by our golfwear section. We’re loving these fresh colour combinations.
Menswear Too
If lightweight, moisture wicking, great looking shirts are something that sounds good to you, we’ve got you covered gentlemen. Some of our shirts are even reversible. Now that’s versatility.


Top it Off With a Hat
Complete your ensemble, keep your head cool, and protect your skin from harmful rays. A stylish hat can do it all!
When we say that we’ve got you covered, we really mean it. We hope to see you soon so that you can see for yourself.
Sassyfras in Eising Garden Centre is open 10 am to 5 pm, Monday to Saturday. You can find us at 814 Cockshutt Road, Simcoe, Ontario.
PS: If you’re having trouble organizing your closet, and figuring out what pieces to get to freshen up your wardrobe, now is a great time to follow our 6 Steps to a Revitalized Wardrobe. These simple steps don’t take long, and make it possible to quickly see what you need, and what you already have!
Every year, more and more people discover the beauty of the plentitude of showy blossoms on fruit trees around April and May. It’s a memorable display to be sure. Those blossoms of course set the fruit to be harvested later in the season - the absolute best time to have a fruit tree in your yard, and the reason we think that planting fruit trees is an investment that’s well worth your time.
Luckily, here in Norfolk County we are able to grow many types of fruit and at Eising you can find a wide variety (based on availability): Apples, Pears, Cherries, Peaches, Nectarines, and Plums. We also have lots of fruit bearing shrubs available too. Is your mouth watering yet?!


Spring is the recommended time of year to plant a fruit tree. Depending on the weather, it’s best to get your tree in the ground between early April and early May.
Want to give growing fruit trees a try? Here’s a list of what you’ll need and 6 steps to guide you through the process.
What you will need:
- Spade or shovel
- Compost or well rotted manure
- Fruit trees
- Bone Meal fertilizer
- Tree stakes
- Mulch
- Tree guards
- Pruners
Part One - Preparation
1 - Select a location in your yard that gets full sun and allows enough space for the mature width of the tree. There are more and more dwarf varieties available that make this task easier. If the location is sheltered that’s ideal, and good drainage is a must. Fruit trees do not like “wet feet”.
2 - Prepare the soil by digging it up well and incorporating compost or well rotted manure.
3 - Select the tree(s) for your site. For example Honeycrisp, if it’s apples you want, a variety that is great for cooking or eating fresh from the tree. It’s also important to keep in mind that with certain types of fruit trees you will need to plant at least two different varieties (not the same) in order for them to pollinate and produce fruit. It’s best to research which varieties to plant together as some fruit trees flower at different times that others. Flowering and pollination timing is essential for producing fruit! It’s a good idea to also check the tags on the trees for suggestions, or ask an Eising staff member if you have any questions about selecting your trees.
Part Two - Planting

1 - To plant your trees, start by digging a hole in your prepared soil that’s twice as big as the root ball of each tree and amend the soil with Bone Meal fertilizer. This will soften the surrounding soil, and provide space for backfill with nutrient dense soil for the roots.
Test the depth of the hole you’ve dug - the soil on the top of the root ball should end up being at the same height as the soil around the hole it’s going into.
Place the tree in the hole, and place a tree stake beside the root ball. Backfill the remainder of the hole with the amended soil. Firm the tree into the ground by gently tamping the soil around the roots with your feet, then water thoroughly.
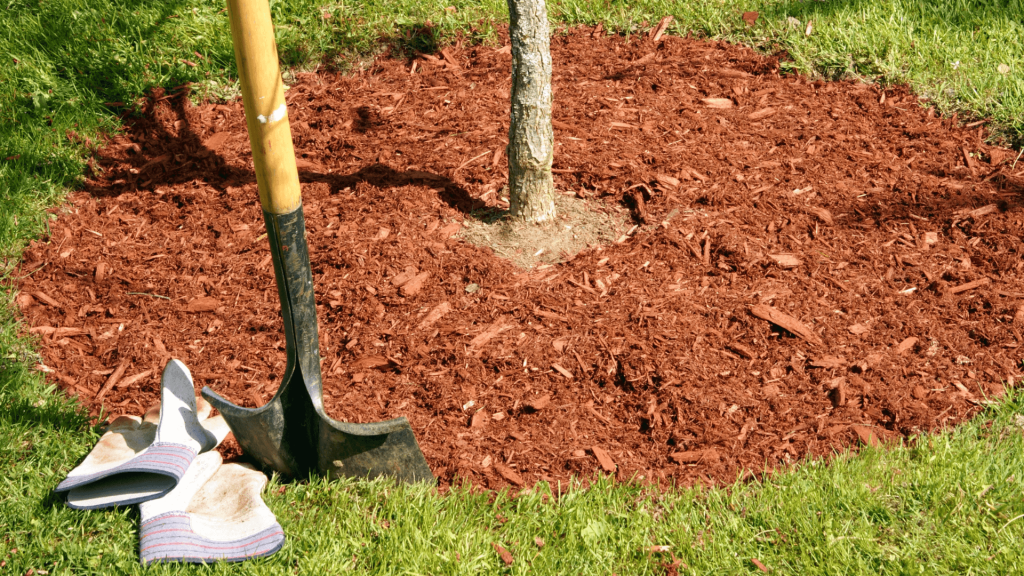
2 - Secure your tree to the stake and add a good, thick layer of mulch. Staking your trees during their first two years in the ground will provide important stability which allows the roots to become firmly established. Add a thick enough layer of mulch to suppress weeds and retain moisture - lawn clippings, wood chips, old straw or other organic matter will help to conserve moisture while the tree is getting established and will also act as a fertilizer as it breaks down into the soil.
Here’s a bonus tip: keep the mulch away from the trunk of the tree! As the organic matter in your mulch breaks down, you don’t want it also breaking down the bark on your tree. While we’re focussed on the trunk, it’s also a very good idea at this point to add a tree guard to the bottom of the tree to prevent rodent damage.
3 - Lastly, get out a nice sharp and clean pair of pruning shears. Prune your tree to remove any dead or broken branches, then trim anything that makes the tree look off balance. After this initial pruning, a good pruning each spring to remove any dead or crowded branches in the interior or top of the tree will help keep your tree healthy. If you’ve never pruned a tree before, consult this guide or enlist the help of a friend who has done it. Once someone shows you how easy it is, pruning will be a breeze.
When you follow these steps you will be setting yourself up for success. Fertilize regularly with bonemeal the first year to help your trees get established. After that, a slow release fertilizer can be added each year. Pruning your trees, fertilizing, and adding a layer of compost and mulch each spring can help ensure that they stay in good health, and produce a nice crop of fruit in the fall when you can enjoy the fruits of your labour!

If dull days have you feeling a little down, a fresh, green, tropical plant might just be the tonic to inject some life into your living space and brighten things up.
Go Green
Spring flowers are beautiful, but the hero of Spring is the abundance of green. As everything comes back to life, it’s the colour that begins to envelop us, and it just makes the world look so much better again.
Adding greenery to your home can have that same overall effect! If you’re new to houseplants, there’s really something for everyone. There are tropical plants that can be very easy to grow and require very little attention. Plant care (how often they need water) and conditions (how much light they need) are two main factors to think about when choosing the best indoor plants for you.
Here are four beautiful houseplants to consider:
Snake Plant
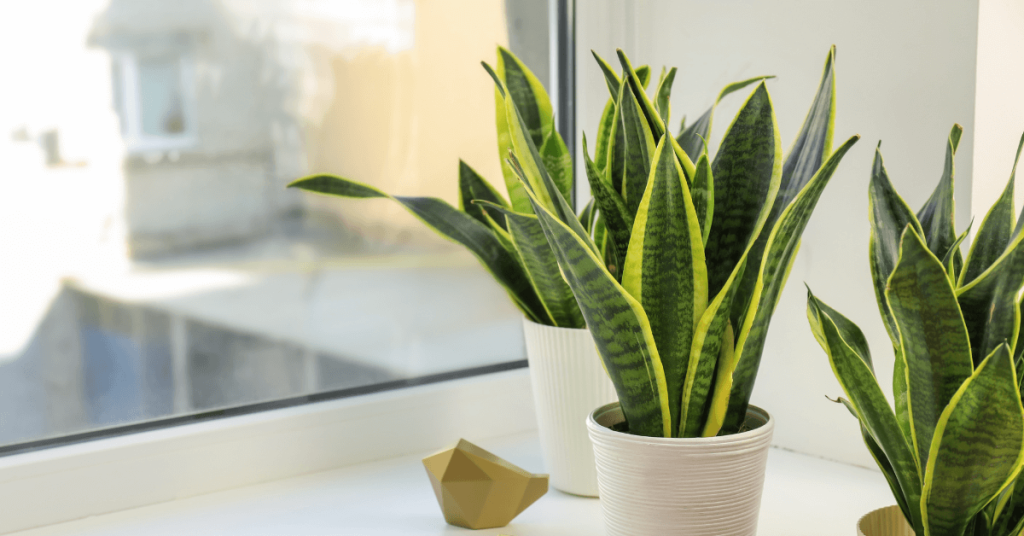
Dracaena trifasciata or Snake Plant is a very hardy indoor plant, some say nearly indestructible. It will grow in almost any amount of light - dark to bright, so it can be placed virtually anywhere in your home. These tough plants require very little water - only water them if the soil feels dry. Overwatering may lead to root rot, so save your love and attention for something else, your Snake Plant just needs a little sip now and then.
ZZ Plant
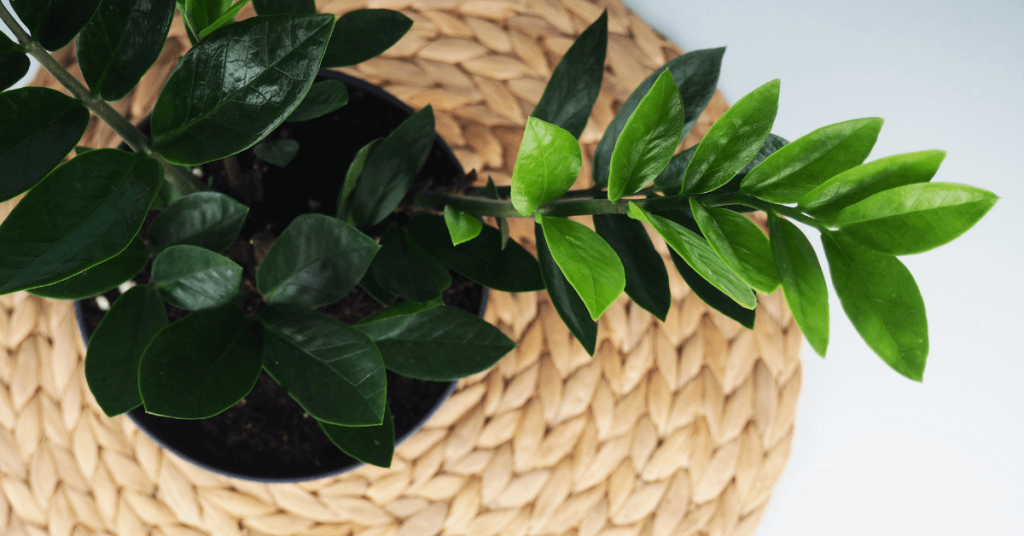
Wondering why the strange name? Technically its name is Zamioculcas zamiifolia…so let’s stick with ZZ! This is another easy to care for house plant. It likes bright, indirect light and some water every couple of weeks. Basically, a drink whenever the soil dries out. Not bad for a plant that looks like its shiny leaves have had a spa day.
Spider Plant
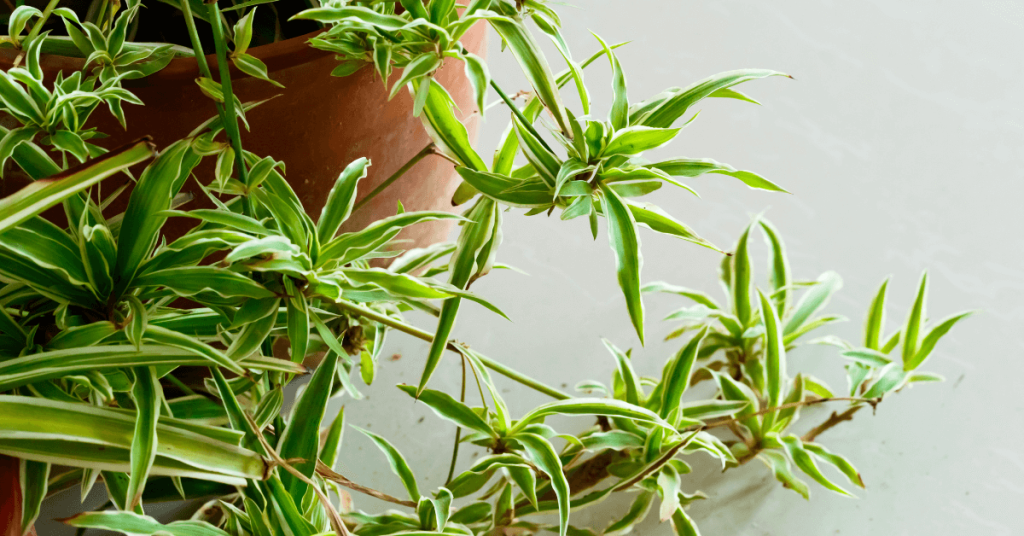
Spider Plants are predominantly known for their graceful arching foliage, but they do send out a stem of small, star-shaped flowers fairly regularly on mature plants adding to the beauty of this popular house plant. Bright indirect light is where it thrives, and it does enjoy regular watering. Humidity can also help the Spider Plant stay healthy which makes it a great candidate for a bathroom with a shower or tub in it.

String of Pearls
Tiny, pea shaped leaves that look like pearls on a string make this a very unique houseplant. Unique may be a code word for: this one needs a little more attention. It’s best grown in a plant hanger or on a shelf where its trailing lengths of pearls are undisturbed. Morning light is best, not full light in the heat of the afternoon. During its growing season in Spring and Summer, keep the soil moist. It can be watered less in the winter. This is a plant that you can talk to each day while you give it a little drink, and it may become a very loyal friend. String of Hearts or other succulent, trailing vines are also plants to consider when you come in to shop and you’re liking the sound of this one.
When you do come into the store to see us, we can help with any other questions that you may have, like whether or not fertilizer is recommended and when to repot. Or, read this article on Tropical Plant Care.
When you pick out your new tropicals, we also have a great selection of decorative pots to place your new plants in to enhance your decor.
Eising Exotics
If you’re looking for a really special feature plant, or maybe to make your garden or pool area feel like you’ve been transported to a southern paradise, it’s time to pre-order larger palms and tropical plants! Shopping for these tropicals will surely make you feel like warm Summer breezes are just around the corner. Visit the Eising Exotics page now to view what’s available and place your pre-order.

The promise of Spring signals the season of revitalization, even for your wardrobe. Wouldn’t it be great to open your closet and find clothes that go together and that fit? Also, why is it that just when you find the perfect pair of black pants, there is never anything in the closet that seems to go with them?
Reorganizing your closet so that you can find what you need and know what is missing is easier than you might think. Even if you are already organized and can effortlessly pull an outfit together, this is always a great exercise to freshen things up. A revitalized closet just makes life easier! And organizing each year can be a quick, simple task that is quite enjoyable. Especially when you know there’s a payoff at the end of the job - getting something new to add to the mix!
These simple steps will help you see what items you need to update your closet. Then, when you come in to shop, you will know whether you need something with a burst of colour to freshen things up, like a colour block tee, or one of the great graphic tees at Sassyfras. Or maybe you bought a men’s dryweave shirt from us last year, and one just isn’t enough to use for sports, supper out, and that vacation in Spain. Once you follow this plan, you will know, and it will probably save you money.
If you set an afternoon aside, and do this with a friend - in person or on a video chat - time will fly by. Or, just put on some good music now and let’s get started.

1 - Make a Pile
First take everything out of your closet. Empty out drawers and all the things on the shelves above and below, including those birthday presents you meant to give out last year. Put it all on the bed or the floor, depending on the amount of space needed.
2 - Sort
Grab five boxes, bags or bins and label them as: Keep, Donate, Sell, Other and Trash.
As you pick up each article of clothing from the pile, decide which of the five containers it should go into. It can be a tough thing to do if you hate to part with old favourites. This is when you need that friend to support you and ask questions like “How often do you wear this? Is it still useful to you?” If you’re going it alone, and you’re not sure, just put it in the Other bin for now, along with those birthday gifts from last year.

3 - Clean
Don’t let this one scare you! It’s an empty closet, so it will go quickly. Give the closet a good vacuum. Wipe down poles, shelves, drawers and the floor. Maybe even add a quick coat of paint. Just make sure that it’s dry before continuing to the next step!
4 - Organize
Drawing from the Keep pile, start to put these items back into the closet in an organized way - pants in one section, blouses in another, etc. Keep colour in mind as you go so that you can organize items by colour as well. For example, keep all the blue blouses together.
If anything on the shelves was disorganized when you emptied the closet (sweaters, t-shirts, shoes), find containers to gather each of these items into and label them clearly. Even if it’s cardboard boxes with labels written in magic marker for now - you can always find a clear bin later and swap them out if you like.
Once everything that you know you want to keep is back in the closet, take another look in the Other bin. Where those items go may be more clear to you now. If not, put that box into the closet, except those birthday gifts - for heaven’s sake give those away. Or, hang these items up with the hangers facing backwards. If the hangers are still facing backwards in a year, or the Other box still has items in it, it’s time for those things to go!

5 - Remove
Now you’re ready to post the items you’re selling, or put the box in the car to take to a consignment store, along with the box of items that you’re donating.
Take the trash bag out to the curb, pull your shoulders back, and brush your hands together because you’ve done some great work! Doesn’t it feel good?! The final step is your sweet reward.
6 - Revitalize
While a sparkling clean and organized closet does feel good… nothing feels better than a new piece of clothing. It’s time to think about what’s next.
Take a look inside your beautiful closet, and see what you need. It should be so much easier to make a list of items that will revitalise your wardrobe now.
Bring that list with you on your next shopping trip! Of course, Sassyfras is stocked up with lots of great clothing, and ready to help you when Eising Garden Centre reopens on Thursday, March 2 for the 2023 season.
If you would like updates with everything that’s happening at Eising Garden Centre, this is the link to sign up for our fabulous newsletter.
We look forward to seeing you soon!
Sassyfras Hours
Beginning March 2, 2023
Monday - Saturday 10am-5pm
Eising Garden Centre
Spring Hours - Beginning March 2, 2023
Monday - Saturday 9am-5pm
Believe it or not, winter is the absolute best time to ponder, dream, and plan your garden and landscape design. Why? Spring is the optimal season to plant and transplant, and with a design in hand, we can hit the ground running once warmer temperatures arrive. Can you plant and transplant throughout the garden season? There are some exceptions, but for the most part the answer is yes. But why not get a head start, and take advantage of having plants established at the start of the growing season? Sure, we have designers sitting by the phone right now on these long, cold winter days but don’t just feel sorry for them - take advantage of the fact that it’s a great time to contact them! Contact details for Eising Garden Centre Landscape Design* are at the end of this post.
You may be asking why you should bother having someone else design your garden? One reason that I have learned the hard way is that it pays off in the long run. I’m probably not the only one who has planted flowers before putting in a patio or walkway, only to rip everything up because of construction, then re-plant all over again.
Besides saving you money on costly mistakes, here are a couple more things to consider:



1. Curb appeal and property value
When most people think of those two concepts, they think about preparing a home for selling. I’m not referring to that. Every day, when you arrive home from work, or errands, wouldn’t it be great to love the way your home and garden looks when you pull into the driveway? That’s curb appeal and property value for your own benefit! However, if you are planning to sell, investing a bit of money in sprucing up the yard definitely impacts the selling price.
2. Design for living
Because we have a few precious months to enjoy our outdoor spaces, landscaping allows you to make better use of the space available. What do you use your space for? What do you need to incorporate into your plan to include those activities? Will you need to install a patio, or create a garden, and where should you put them on the property? Maybe you need to create privacy with an evergreen hedge? Landscape design makes sense of all of it.
Maybe you’re interested in an opportunity to make your garden more environmentally friendly. For example, adding native plants, a birdhouse and birdbath. Perhaps you want to add shade trees to shelter birds, and decrease the need for air conditioning your house in the summer.

3. Structure and a plan are sexier than you think
Lastly, I want to tell you a personal story about my experience hiring a landscape designer. I’m a plant lover and I never considered design. I studied plants, and spent several years joyously collecting all kinds of perennials, shrubs, water and bog plants, and trees.
My garden was chaotic! But I loved the wild looking patchwork quilt of rare and unusual plants scattered within the confines of borders around my property. I nurtured each individual plant, and when I looked at my garden that’s what I saw, individual plants. Then I hired a landscaper to build a bigger pond for my growing collection of water and bog plants.
When the time came to build the pond, he moved my plants to make way for all of the construction. Once that was complete, he placed my plant material back following his design. My plants, the same plants I had before the project, looked completely different. There was harmony in the arrangement.
The overall effect was such an incredible improvement that I could not believe my eyes. It was a whole new garden, and proved the value of good garden design. Hint: it doesn’t involve buying a new, spectacular plant and plunking it into an empty spot, or digging another bed in some random location that gets sunlight. That was my AHA! moment.
Someone who understands plants AND design can take the things on your wish list and make them all come together in a way that just works.


*Eising Garden Centre Landscape Design
Contact Roman Bodnar to set up an appointment: by email here or call 519-428-4607.
Consultation Fee: $175 consultation fee per space (2023 pricing) - for example, the front yard would be considered one space.
What your consultation includes:
1) A knowledgeable staff member will meet with you at the site of the project for up to 1 hour.
2) Any questions and concerns that the customer has will be reviewed and helpful suggestions will be made to ensure a successful project.
3) A simple 3D visual landscape design will be made, to enable the customer to see the potential of their space.
4) A detailed list will be provided to exhibit the needs, amounts and prices of the materials.
5) A 10% discount will be made available on all plant material in the design within 90 days of the consultation purchase.
Our specialty is soft-scaping: plants, soil and mulch. If the design we create warrants it, we will also utilize some armour stone and other natural stone features. We can’t wait to show you the potential of your property! Don’t delay your planning any longer…contact Eising Garden Centre today.
Perennials are fantastic for bringing reliable garden colour that comes back every year, but if they only flower for a brief window in summer, it can be a bit of a bummer. Finding perennials that bloom all spring, summer and fall can be tricky. However, blooms aren't always necessary—plenty of perennials have colourful foliage and ornamental features that delight throughout the seasons!
Get Amazing Colour With All Our Favourite Perennials For Spring, Summer & Fall
For incredible blooms and bold, unexpected foliage colour that never fails to disappoint, plant these beauties now! Hurry before those summer temperatures get scorching hot!
Autumn Joy Stonecrop
When spring and summer flowers fade, this hardy perennial succulent continues to impress us with its dusty rose blooms. As they mature, the cloud-like flower clusters will take on a deeper bronze tint, perfectly complementing the surrounding autumn scenery. It grows best in full sun with sandy, well-draining soil—and can thrive in poor, rockier soils, so it doesn’t need a ton of fertilizer. A little bit of all-purpose fertilizer applied in spring can help give a boost, but too much fertilizer can cause this low-maintenance plant to get a bit leggy.
Siberian Iris
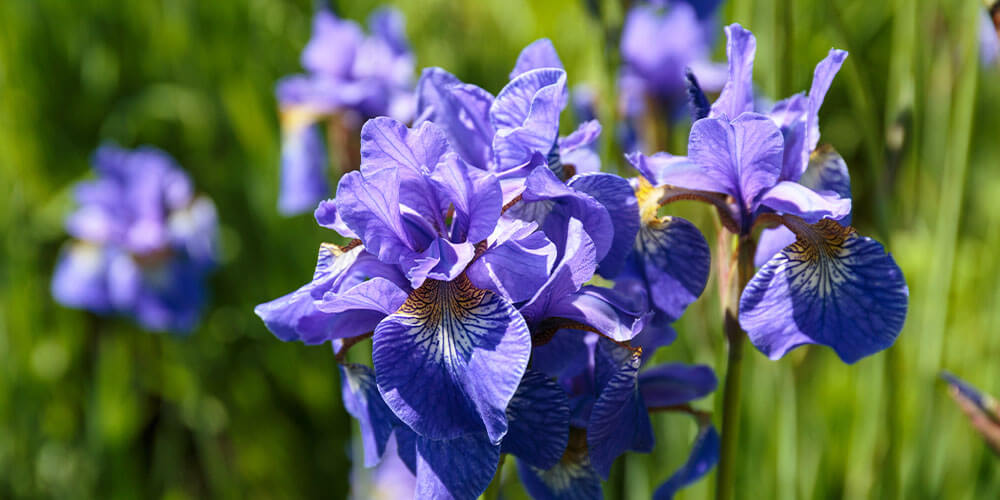
While the bearded iris has long been considered a spring favourite, its beardless cousin, the Siberian iris is worthy of a spot in your perennial garden! Its prolific blooms emerge in spring and continue into summer, with single plants sending up as many as 20 flower shoots. There are many different colours to choose from, like deep blue, burgundy or rich gold, and some have earlier or later bloom times than average. So, if you plant a colourful variety of Siberian irises with different flowering times, you’ll get quite a spectacular display!
Coral Bells
Also known as Heuchera, this ornamental foliage plant is famous for its ultra-vivid leaves, available in pretty much every colour in the rainbow. In fact, there are multicoloured rainbow varieties too! Even in a garden bursting with magnificent blooms, coral bells will still catch your eye with their distinctive, lobed foliage that looks almost like maple leaves. They do produce some cute, delicate flowers atop tall stalks in summer—usually pink or white—but it’s the glossy leaves that send our hearts aflutter!
Hosta
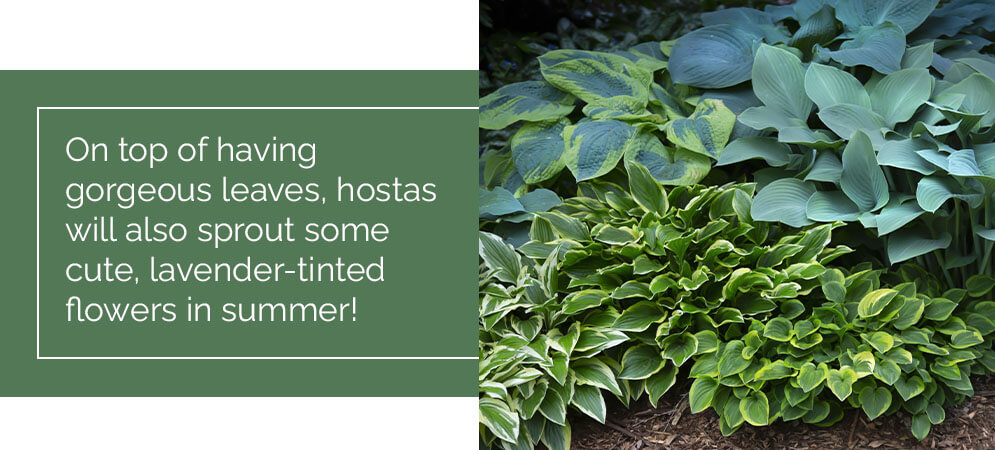
The hosta is an absolute must-have for any shade garden. This perennial thrives in shaded areas, and it can get scorched from too much direct sun. The attractive leaves are quite large and slightly curved, forming a round, mounded shape that looks neat and tidy, making hosta great for border planting. We recommend planting a variegated variety with splashes of white or different shades of green to bring visual interest that lasts. On top of having gorgeous leaves, hostas will also sprout some cute, lavender-tinted flowers in summer, so you’ll have those to look forward to!
Autumn Brilliance Fern
Judging by the name, you might assume this fabulous fern transitions to orange in the autumn, but it’s the opposite! In spring, new fronds emerge a brilliant orange and mature into an emerald green shade. Don’t worry, you still get a little pop of autumn colour later in the season! Once September rolls around, bright red spores, or “sori,” appear on the undersides of the leaves. The frilled, wispy fronds add texture and movement to the landscape, and they do exceptionally well in shady areas covered by tree canopies. It likes the soil to be moist and well-draining, so mix in lots of compost when you plant, and water generously!
Pennisetum
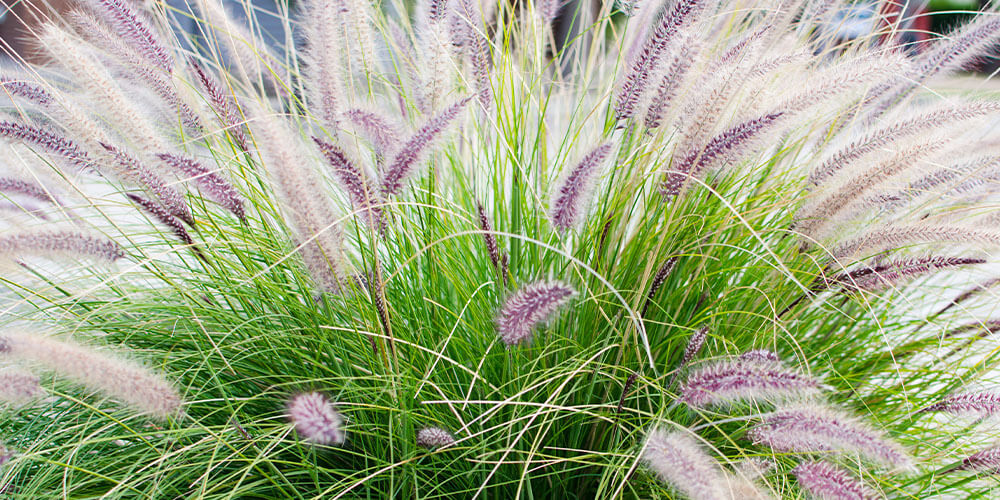
Ornamental tufted grasses have such a dreamy, graceful quality to them. We love the way they dance in the breeze! The red and purple varieties are especially pretty if you’re looking for some long-lasting perennial colour, and their feathery plumes will stand out in any garden. Because of their height, Pennisetum plants look great as a “thriller” plant—something tall and flashy to act as a focal point in mixed arrangements in the garden or containers. Plant it near the back of your garden, so it doesn’t block any shorter plants from view.
On the hunt for perennials that will bloom all summer or offer stunning all-summer foliage? We’ve got an incredible collection in store for our Simcoe gardeners this year, and we’re so eager to show you what’s new and noteworthy! Visit us soon and one of our team members will be happy to help you find the perfect perennial assortment to make your garden look amazing all year.
This is the year—the year you cross off all the tasks on your spring to-do list! A little bit of yard work now pays off in the long run. You'll feel more organized and have healthier plants, and you'll be better prepared for the following year.
Review Your Tools and Accessories
Before we get into the heart of the gardening season, now is the time to look over your storage shed to make sure you have everything you need for a successful season. To prevent the spread of disease between plants, clean pots and containers you may use, as well as any tools. You also may need to sharpen and oil some old standbys, like pruning shears, loppers, and trimmers. If, after doing your clean up, you realize you need any tools or accessories, we're now offering curbside pickup at our garden centre.
Clean Up The Yard
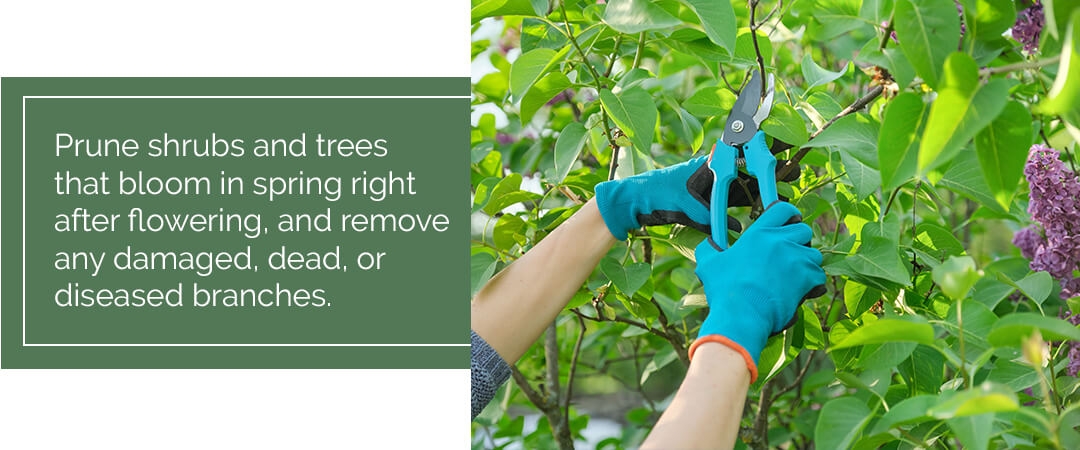
Removing any fallen branches is especially important to reduce any hazards now that the kids are spending more time playing outside. Prune shrubs and trees that bloom in spring, like lilacs, right after flowering, and remove any damaged, dead, or diseased branches.
Though perennials, like grasses and woody herbs, provide food and shelter for birds during the winter, they can make your yard look a little scruffy during the spring. Cut back these perennials to encourage fresh growth and remove last year's annuals to make room for new ones this year.
Work the Land
Pick up a handful of soil, shape into a ball, and squeeze it. If water comes out, the soil is too wet, and you should wait a bit longer. However, if the ball crumbles, then the soil is ready to be worked. Remove any fresh mulch or leaf litter, but leave whatever has composted to mix into the soil. Loosen up and mix the soil by turning it over, using a tiller or a spade. Depending on the soil in your garden, you may also have to add amendments, like fertilizer.
Take inventory of the groundcover in your yard. Mulch and rock seem to disappear every year — groundcover should be about two to three inches thick, so replenish accordingly.
Plan Ahead
Take note in a garden journal of what you've completed already, like all of the steps above, plus any seedlings you started or bulbs you planted. A garden journal is a great help, not only for this season but also for years to come, since you can keep track of what worked and what didn't each year. Write down what you'll plant, where you'll plant it, and when. The majority of garden vegetables can be planted through mid-May here in Simcoe, after any risk of frost has passed. Now is also the right time to take note of any open spots in your yard that you can fill in by dividing fall-blooming perennials, like hosta and purple coneflower. Dividing perennials helps keep the plants healthy, plus it gives you more plant material to work with!
Odds and Ends
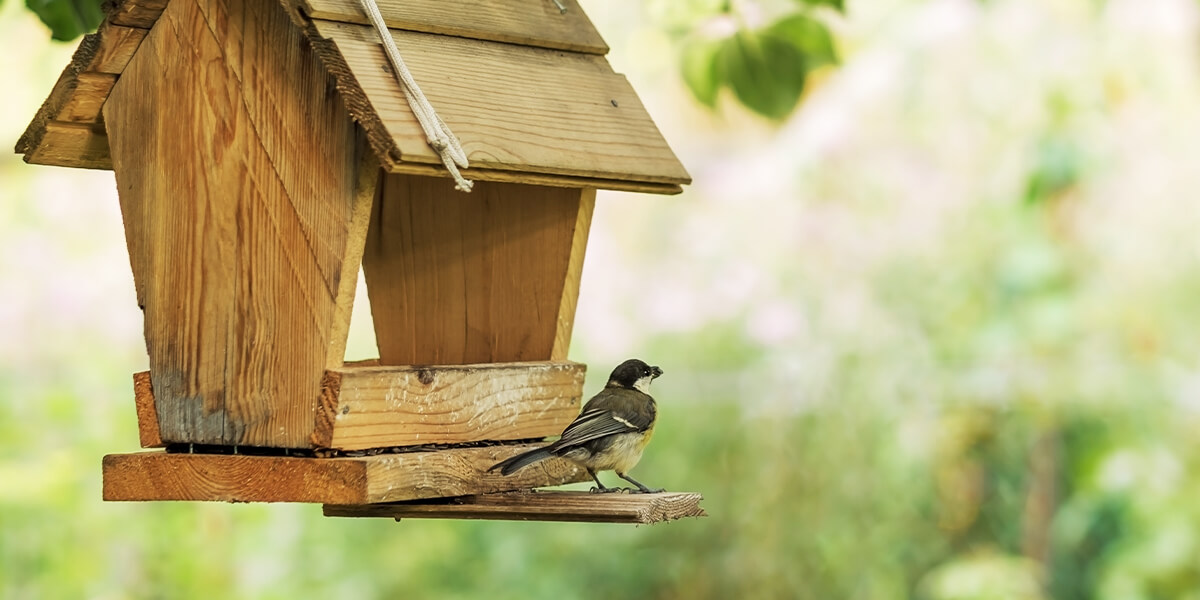
Clear out the gutters, turn over the compost, clean out bird feeders, and repair anything that needs it, like fences and lawnmowers. Locate and put up stakes and trellises for any plants that might need them, like tomatoes and peonies. Now is also a great time to tend to your decks and hardscapes so that you have a place to enjoy your garden from when it starts blooming!
Though you could make a day of prepping your garden this spring, to make it more manageable, break up your days at home by doing tasks between conference calls. Follow this checklist, and in no time, you'll be seeing the results of your hard work—evidenced by your thriving garden!