
Adding Year-Round Interest to Your Garden
By Ava Green
Spring brings excitement and the hope of fresh beginnings, but also the harsh reality that our gardens can look a little…well…blah, in between seasons. Even when you have evergreens, well shaped trees, shrubs or perennials with “good bones” (strong framework or structure) a garden can look bare off season. This is when garden features and ornaments can really make a dramatic difference!
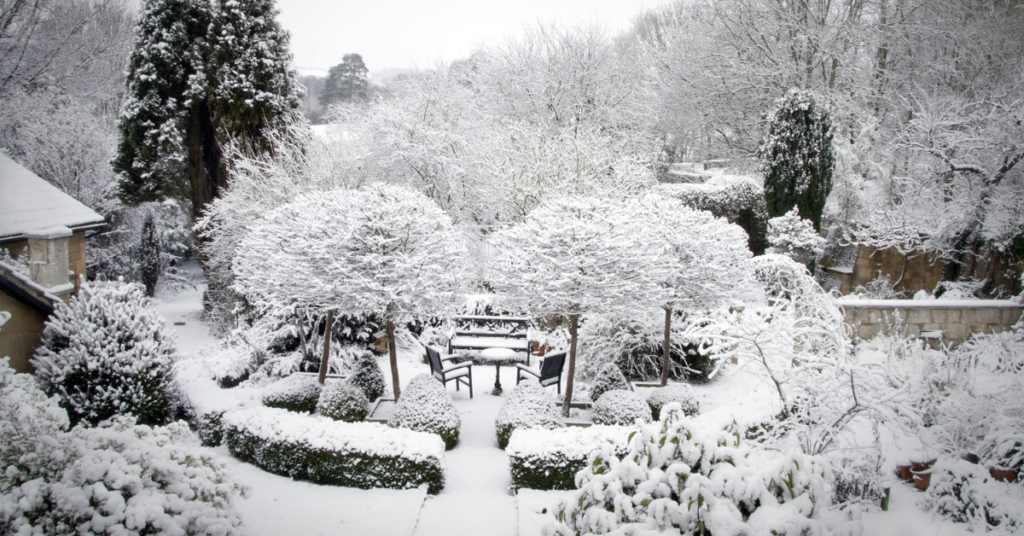
Create Year-Round Interest In Your Garden
Do you have a spot in the garden where plants struggle to grow? Or an area where you feel like your garden is missing something?
Items like benches, patios, ornamental urns, decorative fencing, statues, a pond, gazing balls, birdhouses and birdbaths add beauty and function in every season. In Southern Ontario’s long shoulder seasons (early spring, late fall, and the longest of all - winter) these permanent elements help to make your garden look inviting all year.

Why Every Garden Benefits from a Focal Point
A garden filled with colourful annuals and perennials can be stunning, but without a focal point, it can feel visually overwhelming. A garden focal point like a bench, statement urn, a piece of statuary, or a water feature draws your attention, and creates a sense of purpose.
Focal points guide movement through the garden and help tell a story, leading visitors toward a destination. While naturalized gardens and wildflower areas don’t always require structure, for gardeners who prefer a more organized look, incorporating a focal point can create a sense of order and transform your space.
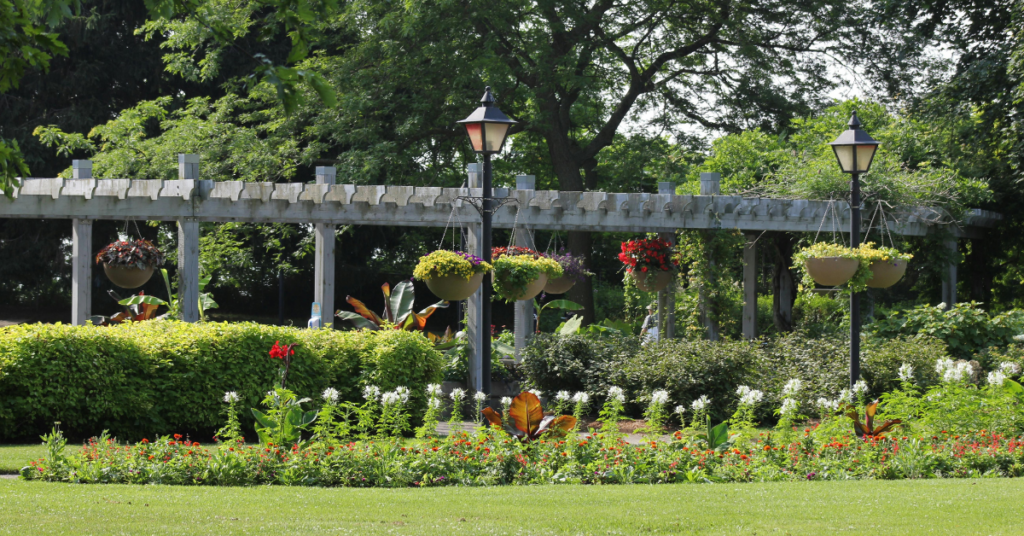
Add Contrast With Texture and Shape
Many gardeners naturally gravitate toward favourite plant forms. Tall, spiky perennials like coneflowers, salvia, and Black-eyed Susan are popular in Ontario gardens but they can feel repetitive when planted together.
Introducing contrast changes everything. A round birdbath nestled among upright perennials adds softness and contrast making it more visually interesting. In shady gardens dominated by hostas, a tall iron obelisk or trellis creates height and drama. Mixing plant textures with garden features like lighting instantly elevates beds and borders.

Express Your Personality!
Gardening is a creative process, and experimentation is part of the joy. Moving plants to find the right light or shelter often leads to surprising combinations and successes. Garden features allow you to express that creativity even further.
Statuary, ornaments, and structures, whether handcrafted or purchased, add personality and meaning. From whimsical accents to bold architectural elements, these features bring height, structure, and style to your garden in ways plants alone can’t.
More Than Just Flowers
Flowers bloom and fade with the seasons here in Southern Ontario. Garden features provide continuity, offering year-round interest, structure, and charm. With just a few additional elements, your garden can look beautiful in every season, not just when it’s in bloom.
Christmas Gift Buying Made Easy
By Ava Green
The Eising Holiday Gift Guide has become a popular tradition, and this year, I asked staff members to share their favourite gifts. We have some great picks to brighten anyone’s holidays: family, friends, teachers, hosts/hostesses, the cat sitter, the dog sitter - anyone you would like to wish a Merry Christmas to!
Everlasting Decorations

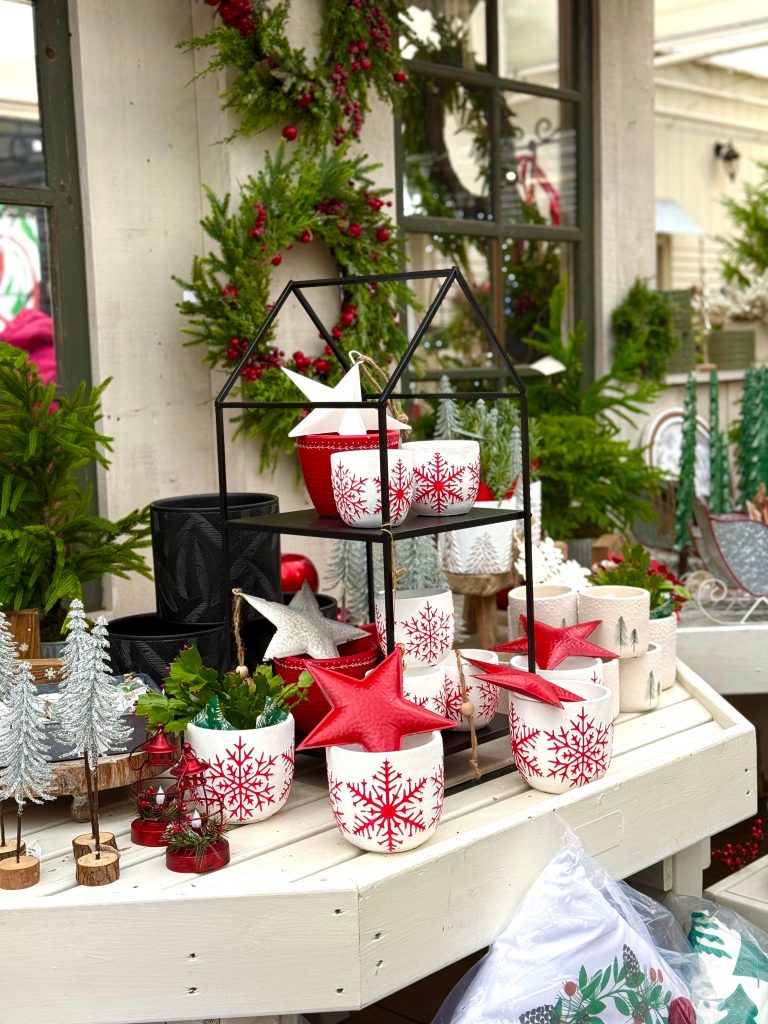

What looks good every year? Everlasting decorations! Kirsten’s favourites are natural wreaths with just a bit of an embellishment. Elegant, timeless and oh-so-festive!
An ornament from our Giving Tree is Arlene’s choice because she can gift the beautiful glass cardinal, and the proceeds go to the local toy drive. Now that’s a gift that keeps on giving!
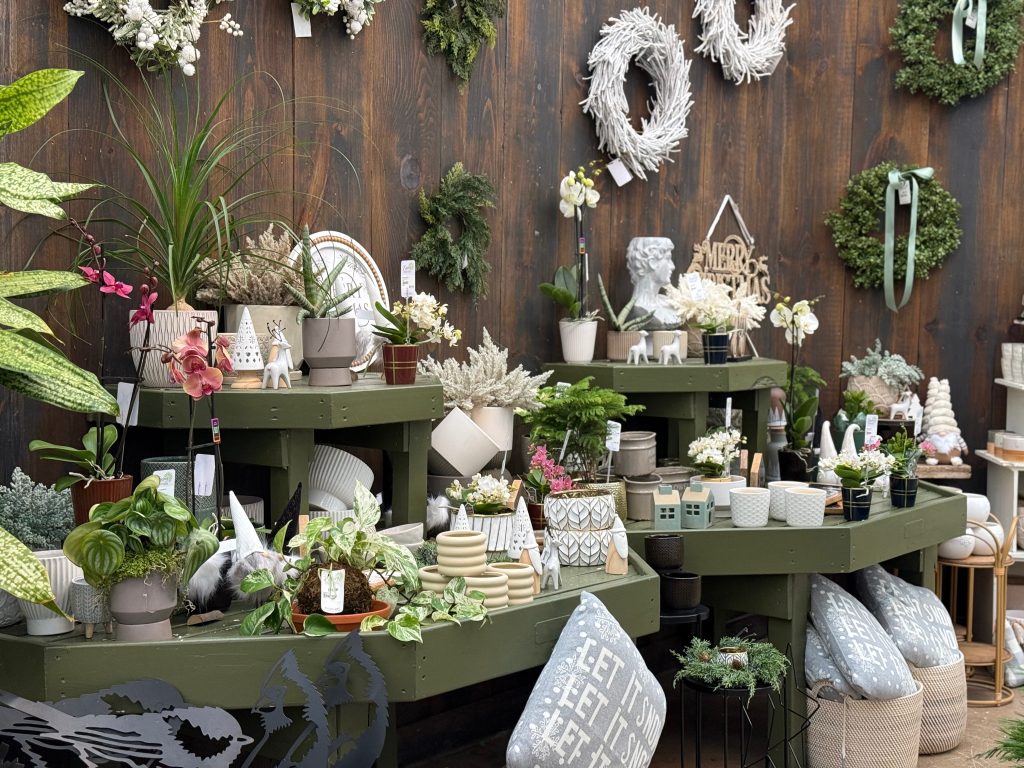
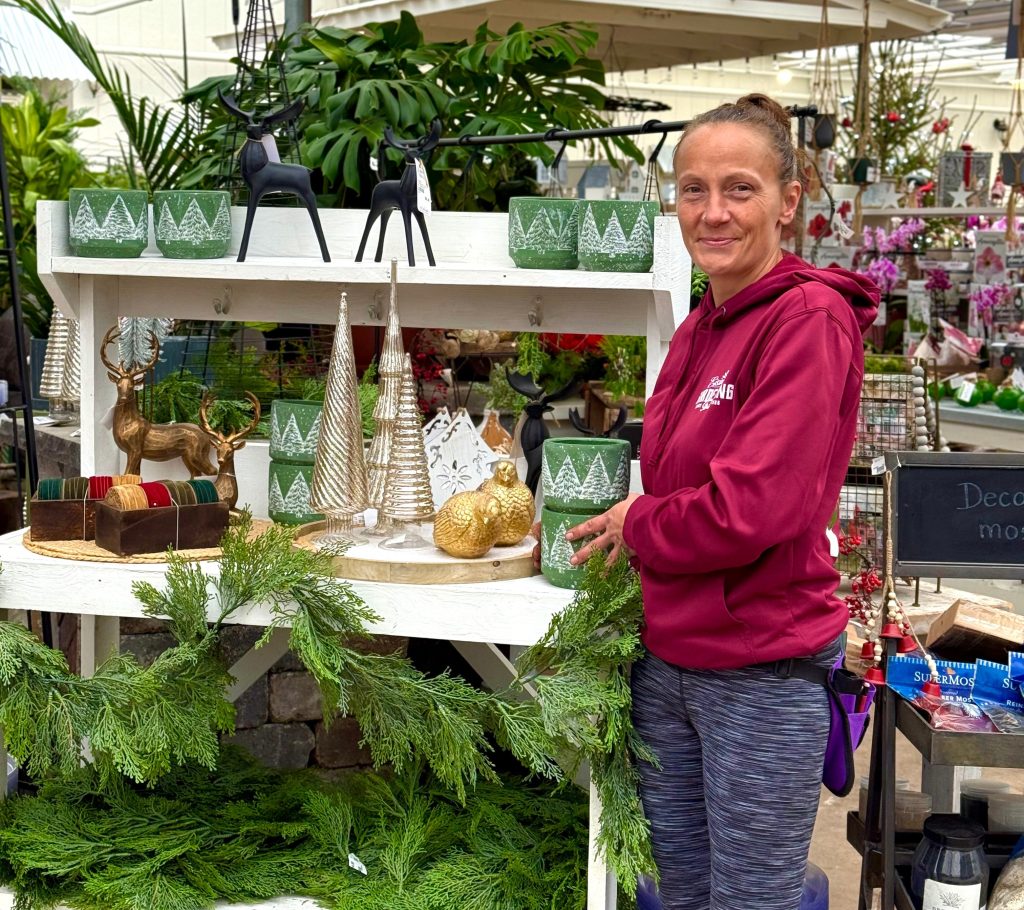
We also have lots of beautiful everlasting garlands, and Lindsey’s favourites: holiday-themed decorative containers to choose from. These festive plant pots transform any houseplant into a Christmasy gift or are perfect for holding other treasures if you’re creating a gift basket.
Fresh Greenery
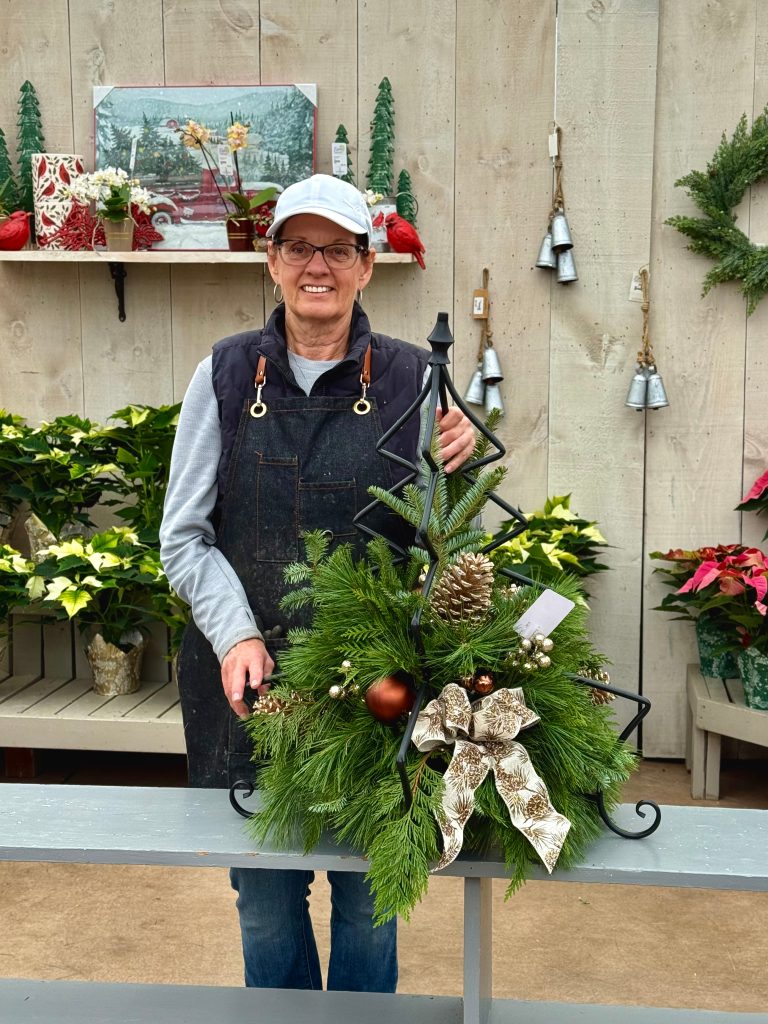
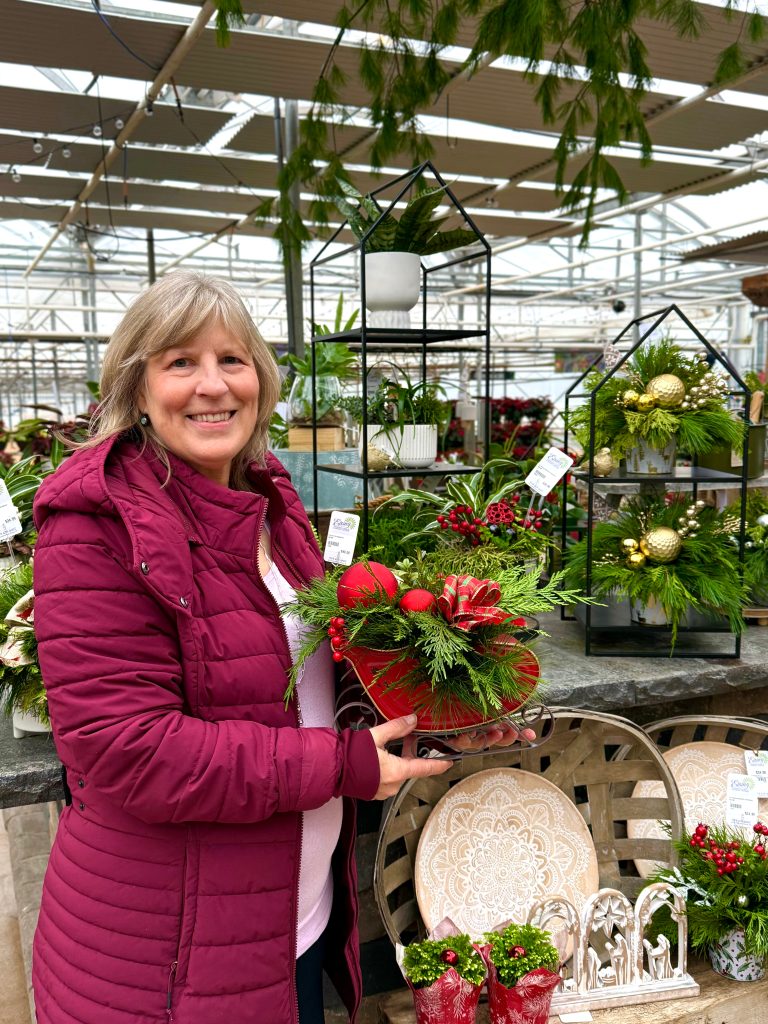
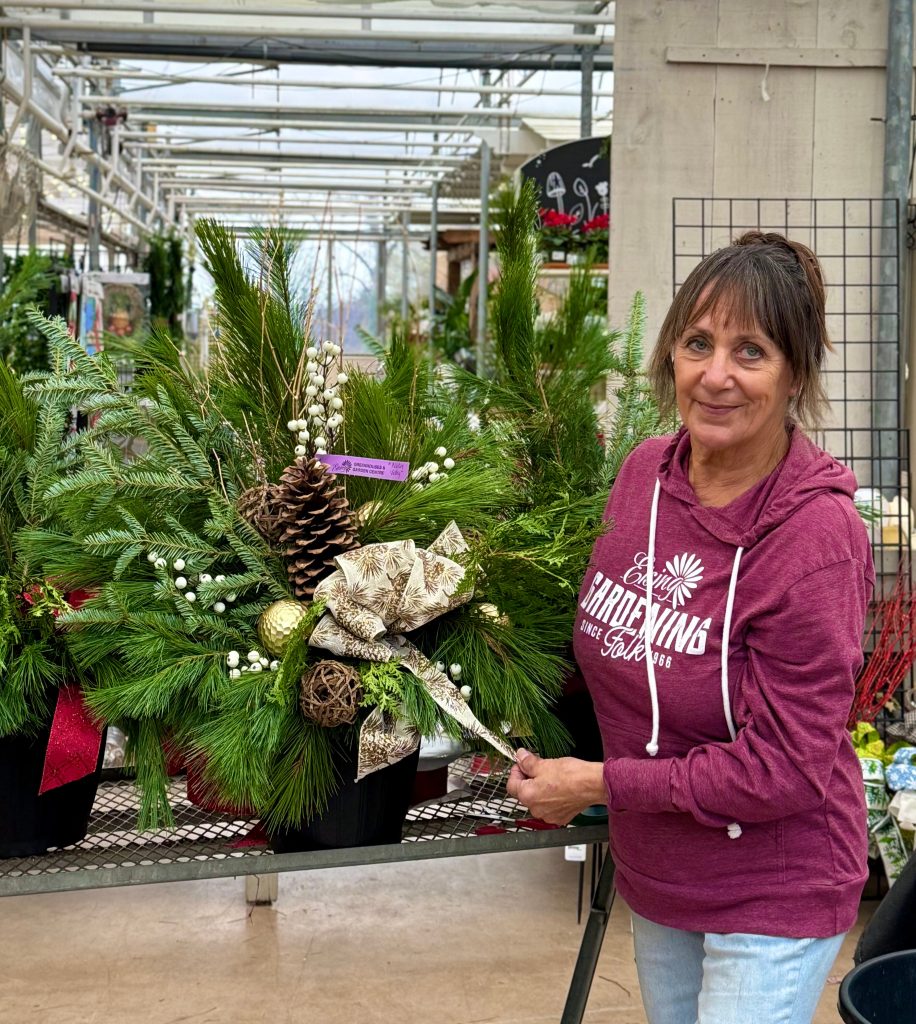
There’s an entire team of decorators, no…creators, no….elves, no…very talented staff members who spend the holiday season making the most beautiful urns, planters, and fresh greenery centrepieces. Donna and I are holding two of our favourites. Mary stopped making festive urns just long enough for this photo to be taken! She really pours her heart into it.
Tropicals, Holiday Plants, and Bulbs
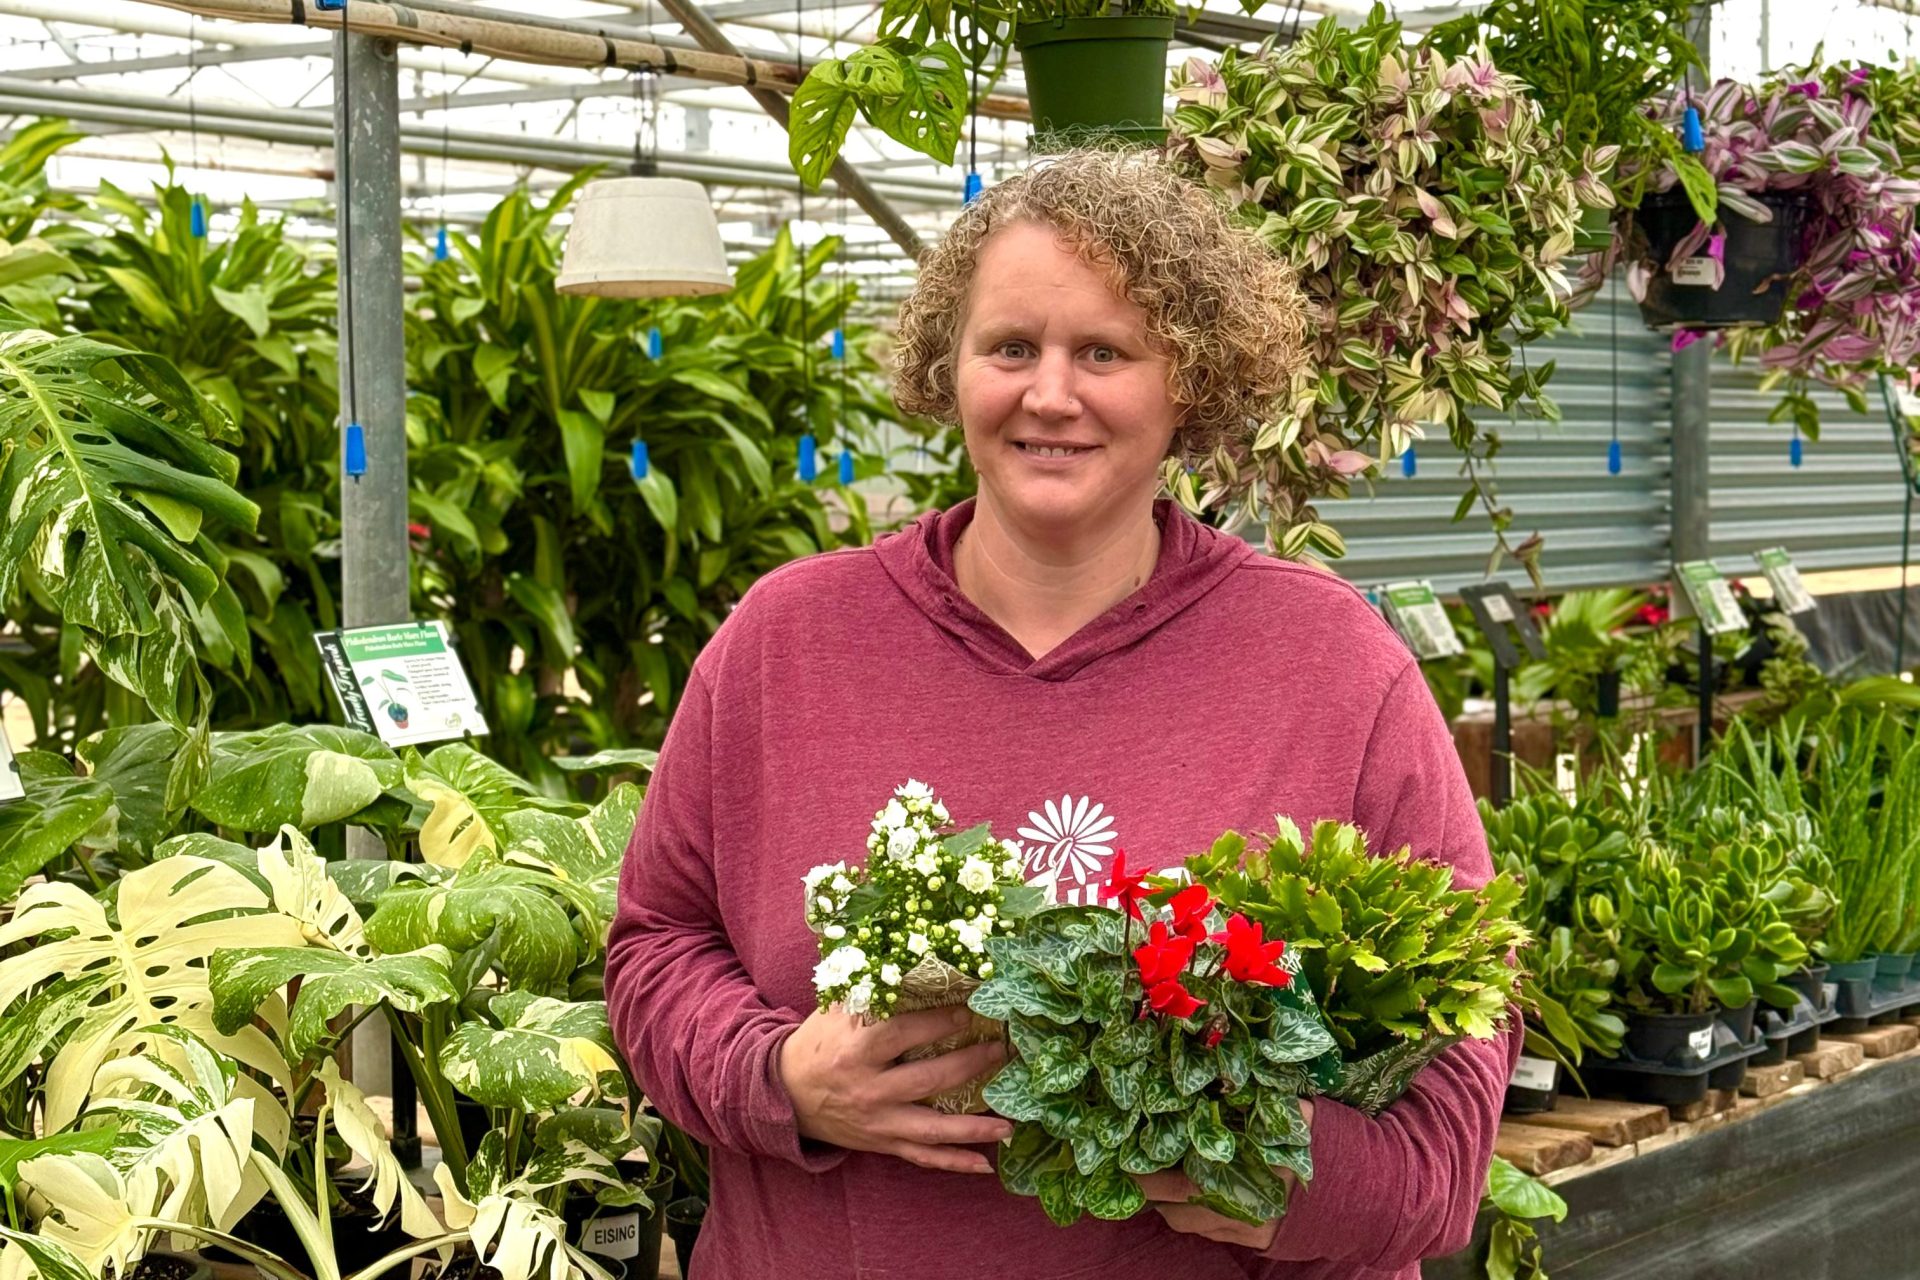
As always, Courtney has a phenomenal selection of tropical plants to choose from. Do not ask her which one is her favourite. Trust me. Too many to count.
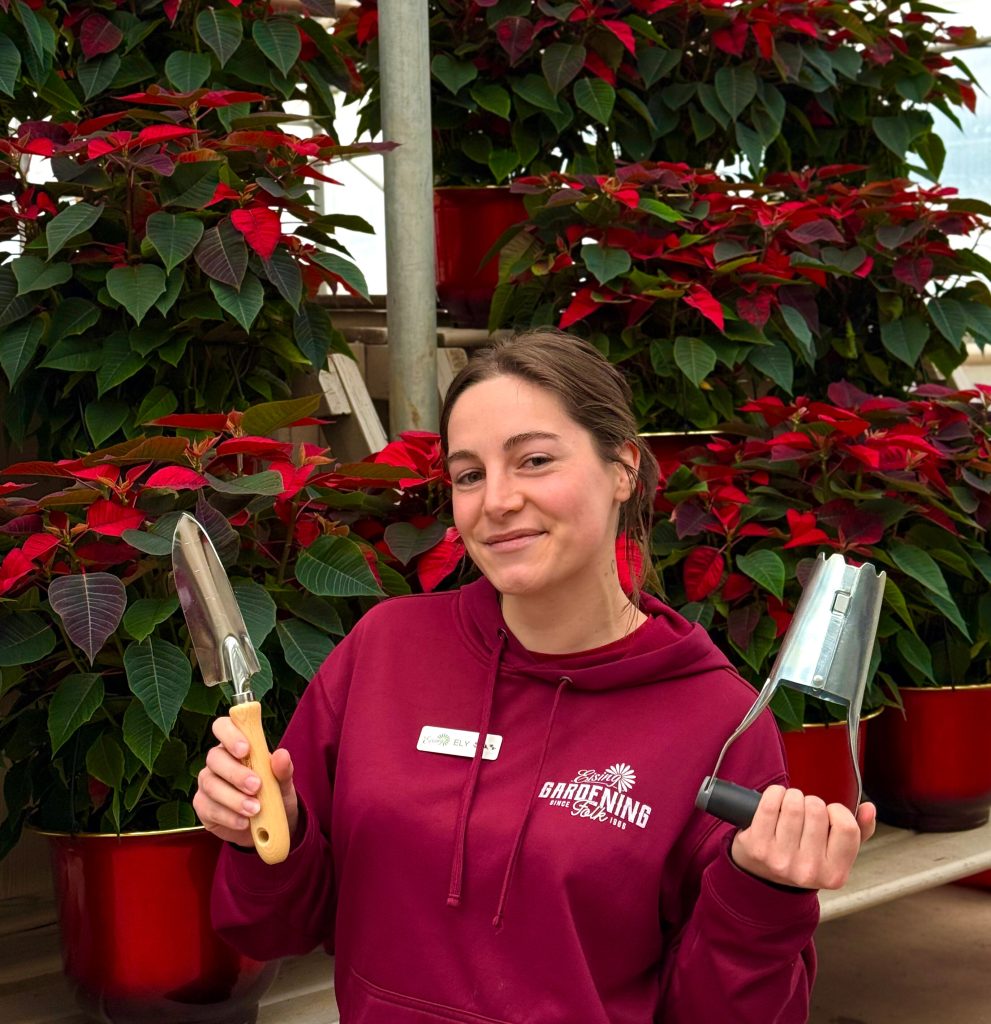
Ely is hoping for some gardening tools under the tree this year, and what gardener couldn’t use an array of trowels?!
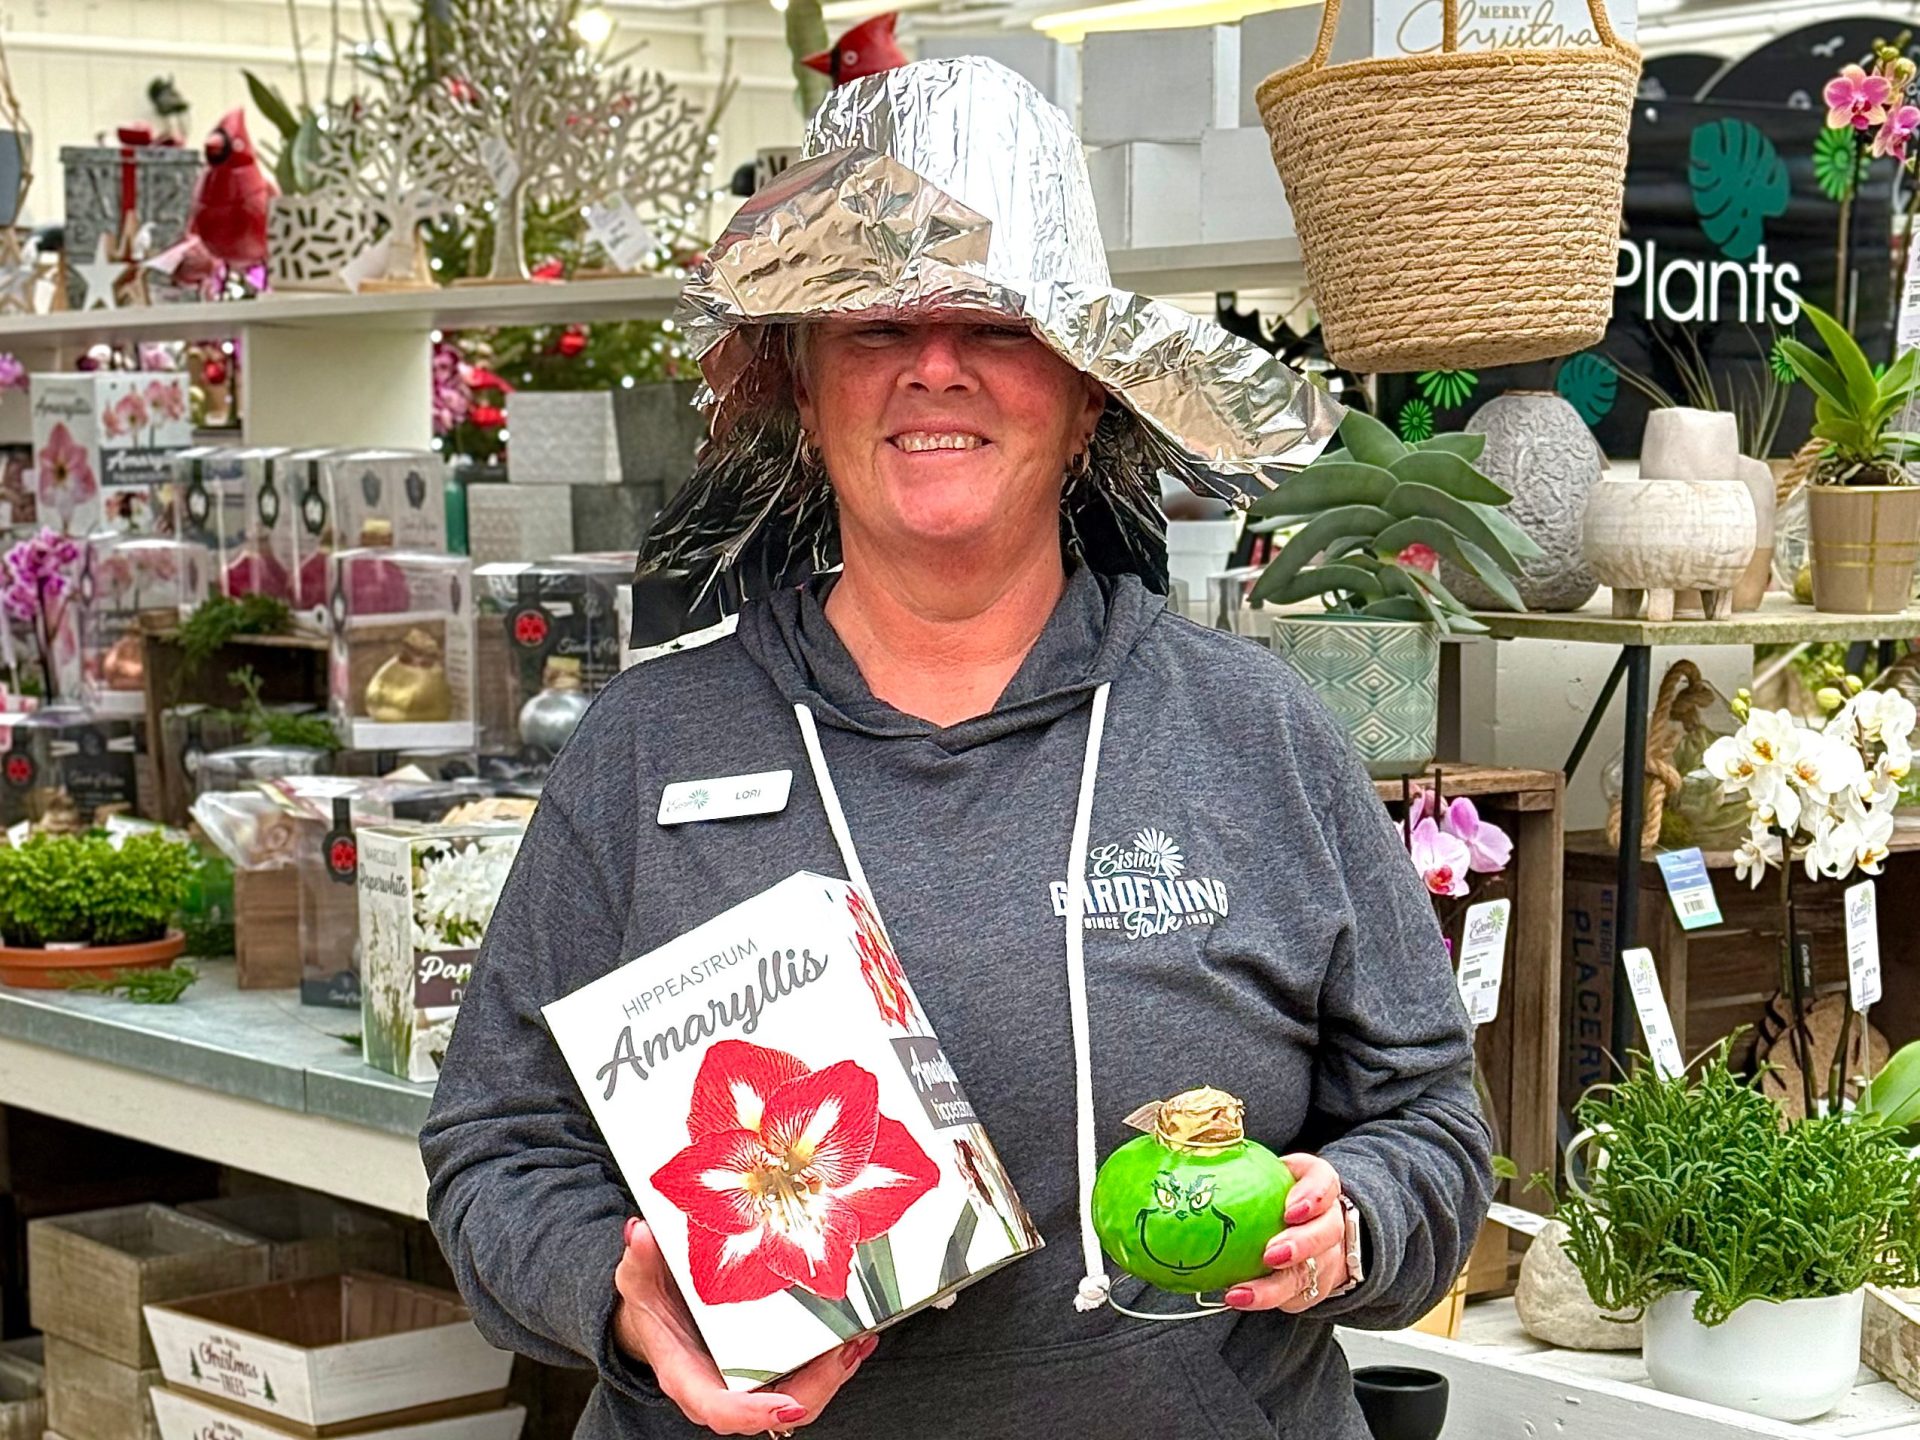
Lori is ready for a party with her favourite hostess gifts - Amaryllis bulbs. Apparently, the Grinch likes plants, too. Who knew? Cindy Lou Who, possibly, and Lori.
Sassy Fashion

Donna is wearing and holding some of her favourite clothes, jewelry, accessories, and products from Sassyfras Boutique inside Eising Greenhouse. Yes, she has many favourites. In her defence, who can pick just one thing from Sassyfras?! Not us.
For Your Favourite People!
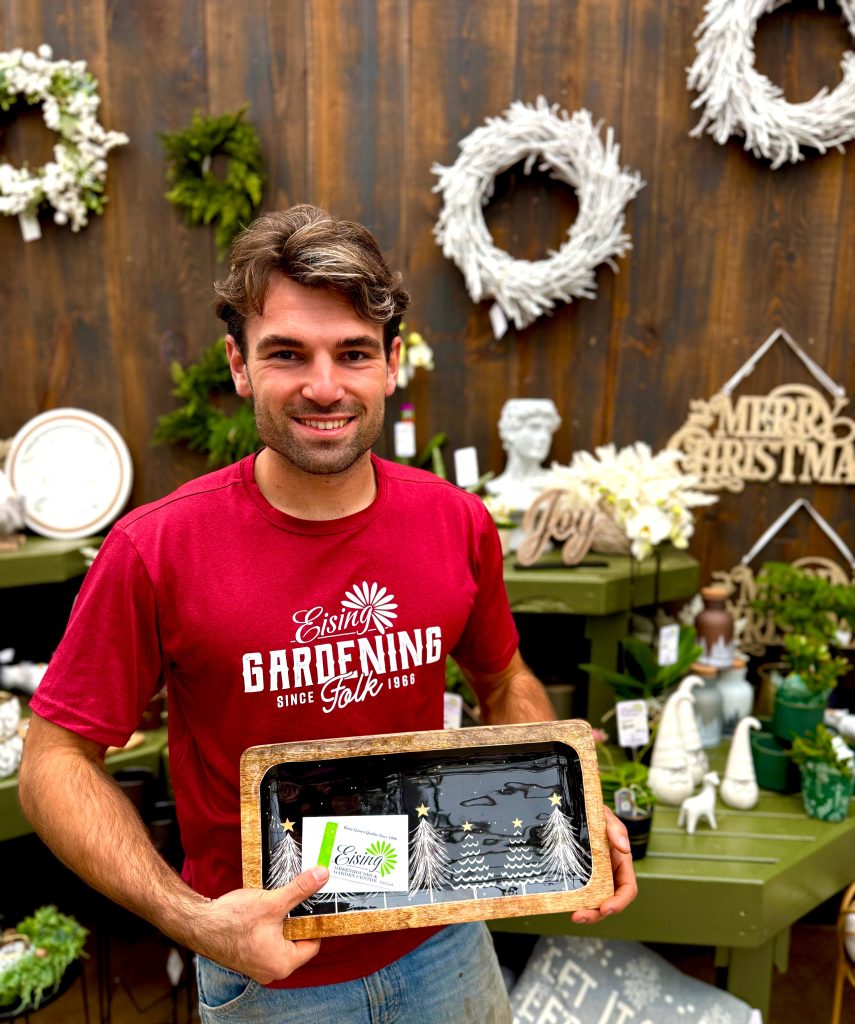
Finally, this is THE most flexible item in the guide, our Eisings gift card. It can also be the perfect solution for the person who has everything already and is hard to buy for. Why is this Lucas’s favourite? Eising gift cards can be used for plants, landscaping, trees, shrubs, perennials, annuals, seeds, tropicals, decor, pots, garden tools, and any other items sold in the greenhouse. And that’s not all! Gift cards can also be used for anything in Sassyfras Boutique. So many options!
Good Tidings To All!
During this season of abundance, Henry and all of us at Eisings hope you get all of your favourite things, but mostly we wish you a safe and happy holiday season! ✨
Pruning is an essential part of gardening. Essential, but a little intimidating at first because it’s a broad subject. That said, there are some basic rules that apply to most trees and shrubs that will get you started.
There are a number of reasons to prune; the most obvious is for safety, to keep a branch from doing damage or harm by falling or rubbing against something like a building or another tree. Other important reasons include:
- Removing dead, diseased or damaged wood
- Shaping to make a plant bushier, reduce the size and bulk, or slow down growth
- Thinning to increase light penetration and airflow and reduce the possibility of disease
- Rejuvenation to encourage growth, blooming and fruit
Correctly pruning trees and shrubs can help with everything listed above and, most importantly, help maintain the health of your plants. Proper techniques and timing ensure the best results.
The Right Tools
You may need fewer tools to prune than you think!
Secateurs or hand pruners work well on smaller branches.
Loppers or lopping shears have longer handles for more leverage and are ideal for medium-sized branches.
A pruning saw works best for larger branches.
Electric or manual hedge shears are best for cutting a tidy wall of foliage like hedges and shaped evergreens.
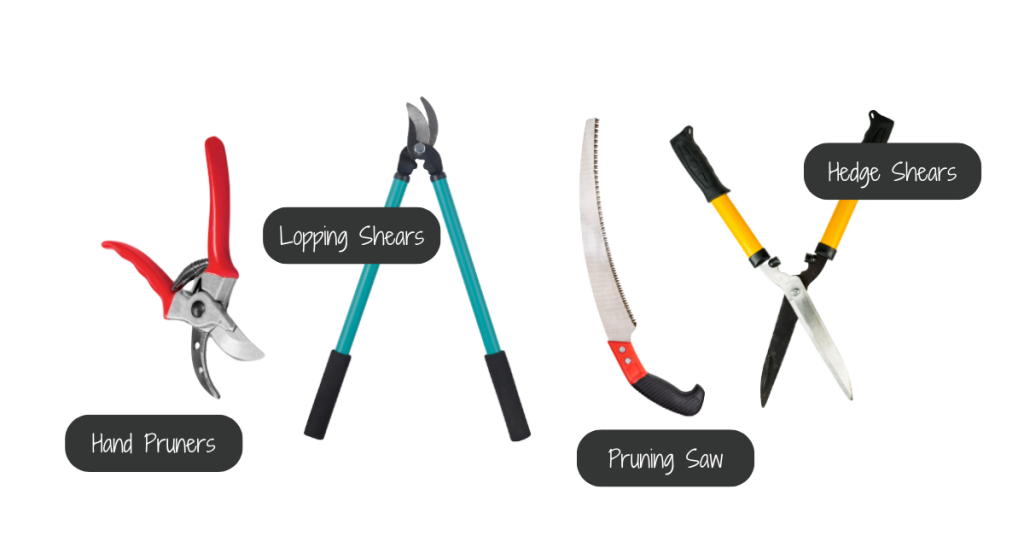
The key with garden tools is to make sure they’re sharp and sterile. This can prevent the spread of disease. Clean tool blades with rubbing alcohol after trimming each branch.
When to Prune
Pruning timing requires some research as it depends on the species of the plant and the result you’re aiming to achieve. For example, some trees may be best pruned in the winter while they’re dormant and buds have not yet appeared. To shape a tree, it’s easier to prune before the leaves have formed so that all of the branches can clearly be seen. Pruning early in the gardening season will invigorate the tree. Conversely, pruning after the tree has formed leaves in June will tend to slow down growth.
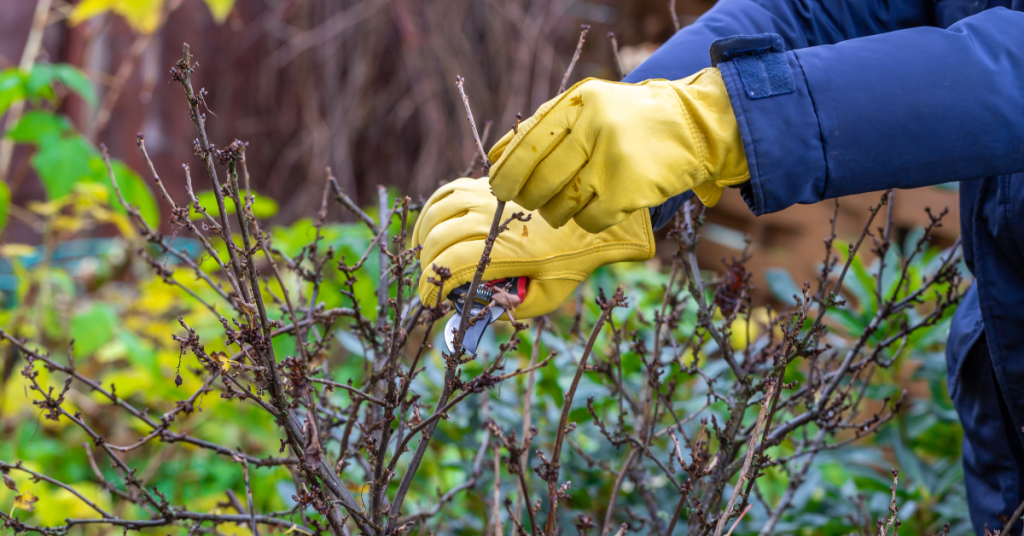
When pruning flowering trees and bushes, there are other timing considerations. Some ornamentals bloom on branches that grew the previous year. Pruning those branches too early will result in fewer or no blooms. For these plants, it’s best to wait until after they have bloomed.
If you’re unsure about pruning timing for your tree or shrub, this is a fairly comprehensive list to use as a guide. We have also linked other resources below this article.
In general, late fall or early winter is not the time to prune any plant as it encourages new growth, which may be damaged by colder weather.
Pruning Techniques
While some trees may require specific care (pines, for example), here are the basic techniques for pruning trees and shrubs. It’s a good idea to know these basics before you head out to begin cutting branches.
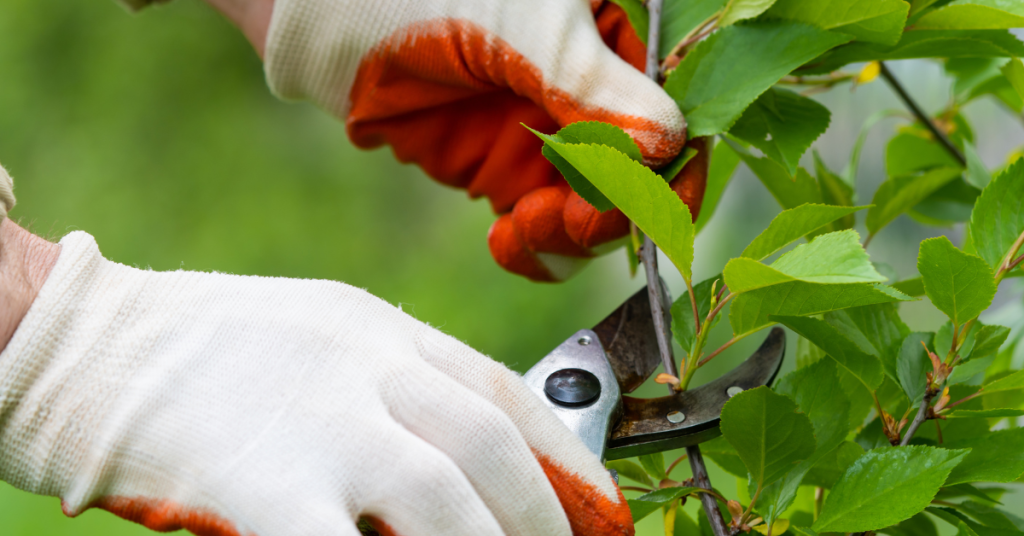
Examine the branch, buds and shoots before cutting. Cutting above a bud facing away from the trunk of the tree will have the branch continue to grow in that direction.

Cut on a 45° angle just above a bud whenever possible. Keep your cut above the lowest bud (the bud closest to the trunk), or the branch will die back.
Before removing a large branch, cut ⅔ off the end of the length to reduce the weight. Once the bulk of the branch has been removed, then cut the rest of the branch away from the trunk by cutting close to, but not into, the “collar” of the branch where it meets the trunk of the tree.

Now You’re Ready to Begin Cutting!
Now that you know the techniques for pruning, where do you begin? Here’s a logical set of steps to follow:
1 - Remove any dead or diseased wood
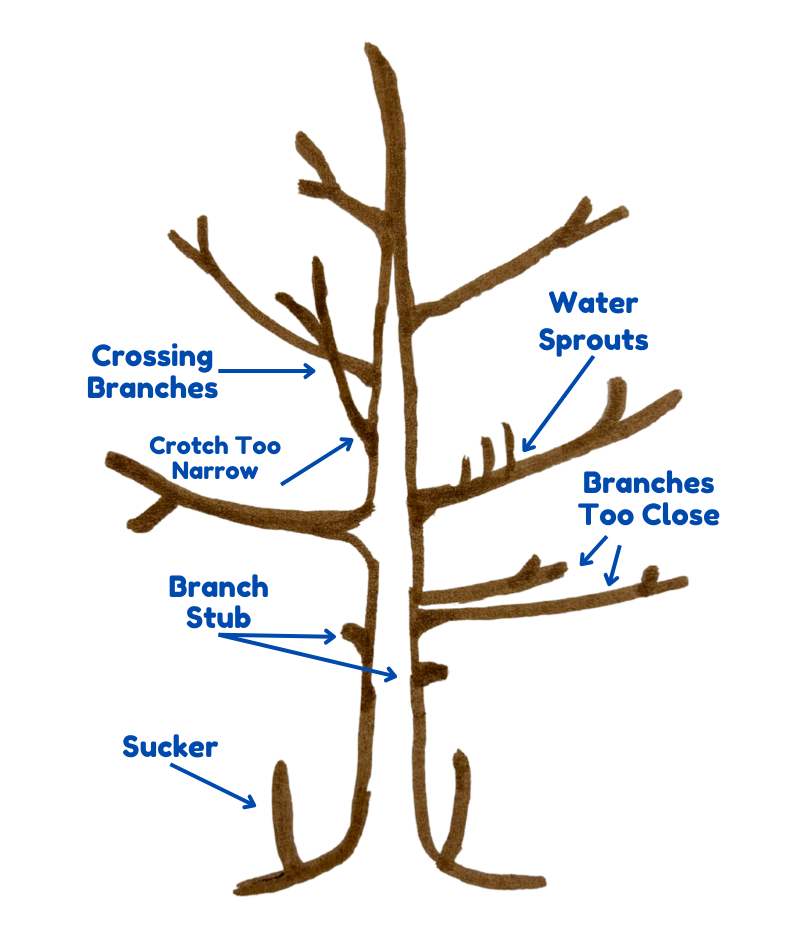
2 - Remove any branches that are crossing and rubbing together. For a shrub that’s too crowded, remove the thickest branches down to the ground first
3 - Remove water sprouts
4 - Stand back and observe the shape of the tree. If anything is not pleasing about the look (lopsided growth or branches growing too close together or at a sharp angle to the trunk, for example), begin removing or trimming back one unsightly branch at a time. Observing the shape between each cut
5 - Remove any suckers or stubs
Follow The ⅓ Rule!
Once you start, pruning can be fun, but be careful not to get too carried away. Trim up to ⅓ off of an established plant (not a newly transplanted tree or shrub) in one growing season - maximum. Cutting off too much can stress the plant and impact its overall health.
Lastly, know that you can always hire a certified arborist if the task is too much or the tree is simply too large!
Other Resources:
- City of Moose Jaw: Pruning Trees
- Landscape Ontario: Pruning Shrubs and Evergreens
- Ontario Government: Pruning Fruit Trees
- University of Georgia: Pruning Ornamental Plants
We tend to get a lot of questions about rose care, and while roses do require more maintenance than other common shrubs, they’re by no means difficult to look after. A little bit of regular upkeep leads to some pretty impressive results, so if you’re a gardening novice, it’s definitely a worthwhile project. Here’s how you can grow and care for roses in Simcoe, Ontario.
Planting Roses In Southern Ontario
Depending on the variety you choose, you can use roses for border plants, garden bed accents, climbing plants to train over arbours and patio lattice, or as container plants. Whatever location or growing medium you select, just ensure it’s suited to the size and growth habit of your chosen rose variety, since there are so many different kinds to choose from. That being said, almost all roses will need at least 6 hours of direct sun every day, so make sure your chosen location has plenty of light.

The best soil for roses has excellent drainage and high nutrients, to set your rose bushes off to a good start, you’ll want to loosen up the soil thoroughly. Ideally, you’ll want sandier, loamy soil with a lot of compost mixed in.
If you’ve purchased a rose bush with bare roots, you’ll want to soak the root ball in water for up to 24 hours before planting. If it’s a potted rose, you won’t have to worry about that step. Plant your roses about 1.5–2 feet deep to fit their large root system, then fill the hole back up with the soil, compost and bone meal mix. Mound it up slightly around the base of the plant.
How Often Should I Water Roses?
Generally, roses need about 1-3 inches of water per week. The thing is, roses are pretty susceptible to mildew and other fungal diseases if they get soggy and don’t receive much air circulation. That means you’ll want to avoid getting the leaves wet whenever possible and stick to watering the soil directly. The easiest way to do this is with a trickle hose set up near the base of the plant. Just turn it on and leave it for a while, so it thoroughly saturates the ground.
If we experience a lot of rain in a short period, you can skip on watering, and should check your roses regularly for any signs of bacteria or fungal growth. Remove any damaged pieces with sanitized shears, wiping the blades clean between every cut, and disposing of the damaged parts safely in the garbage, not the compost bin.
Rose Care: Mulch, Fertilizer, And More
Applying a layer of mulch on top of the soil around your roses will help to retain moisture and control weeds. Some gardeners insist that cocoa bean shells are the best mulch for roses, but we’ve found that classic bark mulch still works perfectly fine.

In spring, feed your roses with a fertilizer formulated specifically for roses. For best performance and blooms, apply the fertilizer every 2-3 weeks during the growing season. There are also special fertilizers made for transplanting, easing the transition when planting your rose. Be sure to water your rose before and after applying fertilizer as their roots are susceptible to being burnt.
Since there are so many types of roses, this means there are different times of the seasons and different styles of pruning. Use a pruning saw or hand pruners to remove any damaged branches or awkward pieces that jut out too far. If there are some densely packed areas with branches, it may help to thin them out a bit to help prevent fungal growth.
We have so many spectacular colours and varieties of roses to grow in Southern Ontario. Visit Eising to see our full collection, or check out our online store! We have citywide delivery and curbside pickup available all summer long.
Knowing how to stake plants properly is a valuable skill for any gardener, especially when you're growing vegetables. Some grow pretty tall and need a little extra help to stay off the ground so their fruits won't sit in a pile in the dirt and get funky. It can get pretty windy here as well, so providing some extra support will help prevent damage from heavy winds and rain.
Staking may look pretty straightforward, but there are some best practices you should follow to ensure good results. If you're planning on growing some tall, or vining garden plants, or if your mature plant keeps falling over, follow these tips on proper staking in the garden.
5 Tips For How To Stake Tomatoes And Other Garden Plants
Tomatoes, cucumbers, peppers, beans—there are so many garden greens that benefit from extra support. It keeps them from bunching up on the ground, allows full sunlight exposure, and prevents the wind and rain from totally pummeling them. Now that summer is approaching, many of your garden veggies are getting taller, and you'll need to step in before they flop right over. Here's how to do it correctly, so your vegetables grow big, bright, and delicious, according to plan.
Pick The Right Kind Of Stake
If you've got a plant with one stem, you can get away with using a simple wooden stick or pole. If there are multiple stems, then a cage might work a bit better, because you'll have more spots to tie on to. The cage must be at least one foot taller than the plant. If you're using a wood stake, make sure it's made with untreated wood so chemicals won't leach into the soil and contaminate your veggies. Bamboo stakes are also another great option. If you've got a vining plant, you may want to use a trellis. These can be quite beautiful with so many sizes and shapes to choose from; now, it's time to get out and find a creative way to integrate it into your backyard decor!
Drive The Stake Down 14 Inches And Facing North
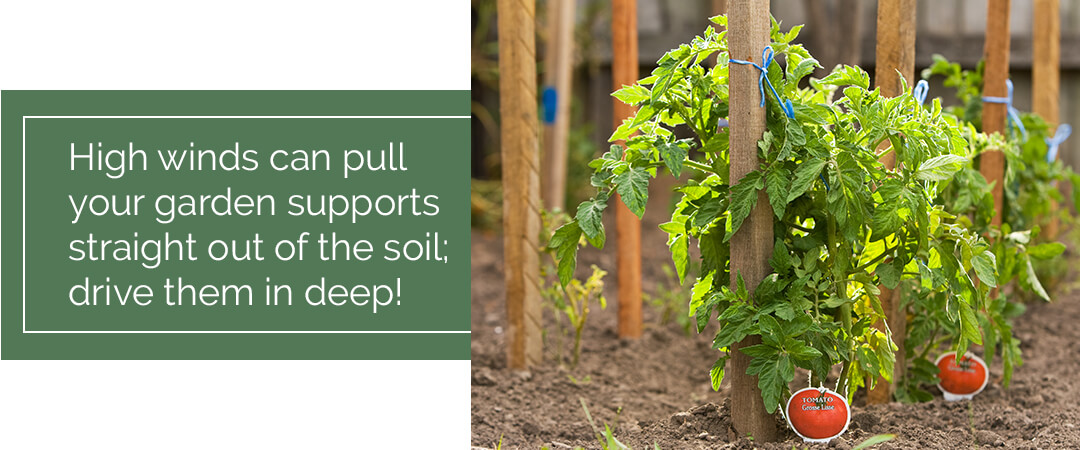
High winds can pull your garden supports straight out of the soil, and that can do some serious damage to your veggies. If you drive your stakes down into the dirt deeply, you won't have to worry about that happening. Making sure they're on the Northern side of the stem will be helpful too, especially if your supports are thicker, then they won't block any of the sunshine!
Tie Stems As They Grow Every 6 Inches
As your plants continue to grow, you need to keep securing them along the way so they don't flop. Monitor the development, and every time there's at least 6 inches of new growth, tie the stem to the support. Use material like gardeners tape, thick twine, velcro ties, or even strips of old pantyhose for securing.
Don't Tie Stems Too Tight
Leave a little bit of wiggle room—about one inch around the stem. If the ties are too tight, they could cut into the stems and hinder proper development. Try to avoid spots where leaf shoots are likely to emerge, so they don't get all bunched up. Instead, try to stick them a bit above the leaf shoots, so they'll stay in place and won't slide down the stem.

Replace Stakes When Needed
If your supports become too small, you need to replace them to accommodate for more growth. Some fast-growing plants may need to be re-staked every couple of months, or even sooner. Drive your new supports into the same hole as before, to avoid disturbing the roots. It helps if you use a mallet to drive it in deeply.
Are you in need of some supports and equipment to help your veggie garden along? Visit Eising, or place an order over the phone for curbside pickup or delivery. If you have any questions, don't hesitate to ask—we love to help our fellow gardeners!
It’s always nice to take some time away during the holiday season, but it’s kind of a hassle to arrange for a house sitter simply to take care of your houseplants. So, we recommend doing some thorough holiday-proofing before you go. With the right tools and a little prep work before you head off, you should be able to leave your plants for several weeks without worrying about them drying up. Here are the basics of holiday-proofing, so you can rest assured that your precious plants will be safe and sound through your vacation.
Holiday-Proofing Your Houseplants
Is it about time to start holiday-proofing your houseplants in Simcoe? Follow these simple steps for getting them all holiday ready for while you’re away.
First, water them thoroughly. Make sure the soil is thoroughly saturated, but if your pot doesn’t have drainage holes, try not to overdo it. If your pot has drainage holes and is placed on a dish, make sure you’ve watered it enough that water begins to collect on the dish. Be sure to dump the water in the dish before you leave so it doesn’t end up getting funky.
Remove any dead plant material. When dried up plant parts remain on a plant, it will still end up directing its energy toward those limbs. Nipping off those pieces should help your plant to grow stronger and use up resources and nutrients more efficiently.
Move them away from cold drafts and direct sunlight. An icy breeze sneaking in through a frozen window could shock your plant, and a ton of sun will end up drying the soil out too quickly. To maintain a safe temperature and reduce sun exposure without depriving your plants of light, try moving them a few feet away from the window.
Turn the thermostat down a bit. Indoor plants don’t mind a cooler base temperature as opposed to being in warm air. This will also help prevent the soil moisture from evaporating too quickly.
Huddle your plants together. It’s all about retaining that moisture, and plants that are all huddled in a bunch will be much better at conserving water.

How To Water Indoor Plants While On Vacation
If you’re going to be away on a holiday for over a week, you’ll want to put together a plan to keep your plants watered while you’re gone. There are a few ways to keep your plants watered while you’re lounging on a beach on the other side of the world, so try some of these methods for self-watering.
Purchase a drip-irrigation system. These automatic watering systems slowly release water over an extended period. There are several different models and designs to choose from, ranging from high-end electronic drip systems, and more budget-friendly options like glass water globes or spikes. Evaluate the size and quantity of your plant collection and select your irrigation system accordingly.
Build a DIY irrigation system. If you’re a crafty type who enjoys saving money by going the DIY route, there are tons of tutorials online for creating your own irrigation system using everyday household materials like mason jars or wine bottles. Browse through Pinterest to see if you can find one that works for your plants.
Mimic a humid climate with a water tray. If you’ve got plants that prefer humid environments and need to be misted occasionally, this is a great way to increase the moisture in the air. Simply fill a tray with pebbles or river stones, then pour some water in. Place your potted plant on top of the tray so it can enjoy some humid tropical air while you’re out soaking in the tropical sun!

Houseplants For Frequent Flyers
If holiday travelling is common practice for you, it might be worth sticking to plants that are low-maintenance and more tolerant of dry spells. These are our favourite options for all you globetrotters out there:
- Snake plants
- ZZ plants
- Succulents
- Cacti
- Chinese evergreens
- Ponytail palms
There’s no need to go to the trouble of paying a house sitter to come by your home just to water your plants. These tricks should keep your plants well-watered while you’re away on vacation. If you need to purchase any irrigation systems for while you’re away, come visit Eising and we’ll help you pick out the right models for your plant collection. Enjoy your holiday!
There might not be a better flavour of summer than the perfectly ripe garden tomato. Picked straight from the garden, a fresh tomato lets you taste summer’s sunshine with each bite.
Tomatoes are incredibly popular garden plants, thanks in part to the staggering difference between homegrown and supermarket varieties. As much as the flavour and nutritional content of garden-grown produce have a clear advantage, we also think that the sheer variety of options is part of the tomato’s success. With so many choices, there’s something to fit everyone’s lifestyle, taste, and garden style, and with such a simple growing formula it’s easy to come out with a great harvest. Here are our tips on how to take your homegrown tomatoes to the next level.
Planting Tomatoes Made Simple
Tomatoes are easy-to-grow plants, but a bit of knowledge makes the difference between a mediocre harvest and an amazing one. The first task in planting your tomatoes is to choose your type. Tomatoes are normally categorized as determinate (bushy types that don’t require much pruning, stalking, or maintenance) and indeterminate (unruly plants that require a little more care but produce more fruit). You also have choices in size from small and sweet snacking cherry tomatoes to large, beefy tomatoes for slicing onto sandwiches and burgers.
Choose plants that are robust and stocky, not ones that have grown lanky. This is true whether you grow your own from seed or buy from the store; you’ll want to start your garden with only the best plants.
Choose a spot in the garden with full sun exposure. Tomatoes thrive on heat and will give you tastier fruits the warmer they are all season, so full exposure to sunlight (without too much exposure to winds) is perfect. Plant in well-draining soil to prevent root rot, but consider layering some mulch on top once you plant to lock moisture and heat in.
When you plant, you can plant part of the stem in the ground to grow roots, too. This is a great way to save any plants that might have stretched and gotten lanky while you waited to plant. Any part of the stem planted underground will grow roots, so take off the leaves and plant about a third of the stem in the ground.

Some Garden Classics
Choosing a type from all of the different and new tomato varieties can be daunting, but we’ve narrowed it down with a few of our favourites to grow in our own gardens.
For great determinate varieties that taste great with little intervention from you. We love the Tumbler and Roma varieties. These produce great flavour and lots of harvest without too much intervention from you, making them an ideal low-stress option.
If you like to put a bit more of a personal touch and love and care into your garden, though, indeterminates are a good choice. For most tomatoes, the flavour, quality, and quantity of tomatoes in indeterminate varieties can’t be matched. For those craving big, delicious, plump tomatoes, Beefmaster is a great choice. Early Girl offers the best of everything in a medium size, reaching maturity early in the season. For those looking for a sweet snacking tomato, though, look no further than Sweet Million.
Heirloom tomatoes are the choice for the traditionalist that wants something unique in their garden. There are many delicious and creatively-coloured tomatoes, like Green Zebra and Black Krim, that will have your dinner plate dressed up with natural beauty.
Growing top tomatoes in your garden isn’t difficult, and the rewards are so delicious that it’s hard to see why you wouldn’t want to grow your own. With so many tasty choices, there’s a tomato that’s suited for anyone and everyone’s space. The only challenge will be getting the tomatoes to the kitchen before eating them all off the vine!
After a tough winter like this one, there’s nothing that lifts the spirits and brings a smile to your face like bright spring blooms poking out of your newly thawed landscape.
Spring bulbs are some of the first flowers to appear in the spring, making them great additions to your landscape and flower beds to bring you a bit of colour and cheer as soon as possible in the year. Straying from seeds might seem a little intimidating for some people, but planting actually doesn’t get much simpler than “plant-it-then-forget-it” bulbs.
Spring Bulbs
Spring bulbs bring us some of our favorite seasonal looks that simply can’t be replicated with any other flowers, and their head start in the soil at the beginning of the season gives them an early jump on spring and other blooms. When the weather just begins to warm up, we’re ready to get out in our gardens and enjoy our landscapes again, and bulbs are the perfect way to take advantage of that spring excitement.
When to Plant Bulbs
Getting to know the basics about your bulbs is the difference between a successful garden and a disappointing beginning to the season. When it comes to bulb types, it’s all about timing.
Spring Blooming Bulbs
Classics like tulips and daffodils actually need some planning ahead for best results, as they need to be planted in the fall. These blooms should be in the ground approximately six weeks before the first frost (planting in late August) so that they can get settled in nicely before the winter chill. They actually need the deep freeze in order to get their beauty sleep and emerge in the spring just as soon as the weather is warm again. Already planted and ready to go, these blooms are great in the spring as they are ready to spring into action before you can get out into the garden to work on planting anything else.

If you didn’t get to planting last fall, though, all hope for spring bulb colour isn’t gone - you can get pre-chilled blooms that were kept the right temperature for hibernation all winter and are ready to be planted in your garden. Don’t worry about the last frost; if you can move the soil you can plant these bulbs outside, and they’ll bloom when weather permits. If the ground is still frozen solid, you can even plant them in a container until the soil is warm enough to start planting.
If you’ve totally missed out on spring bulbs, you don’t have to be sad about missing all of the colour and convenience of these blooms that you plant and forget until later - there’s tons of time to plant summer blooming bulbs in your garden. Beautiful flowers like dahlias, allium, and begonias are perfect for brightening your yard later in the season. Wait for warm soil before you plant these heat lovers, as they aren’t fans of frost and are a bit more delicate.
The Best Bulbs to Choose for a Flower Garden
Not every bulb was created equal, and there are so many options that it can be overwhelming to choose. You’ll be focusing on when to plant and how to plant, but also looking for flowers that compliment each other and give you lasting colour all season. Here are some of our favourite bulbs to see in our own yards in the spring:
- Tulips: These bulbs are beauty in a cup and are beloved classics for a reason. A symbol of spring, they triumphantly announce the arrival of warmer weather with vibrant colours and their iconic shape. Tulips can be picky and have a reputation for being finicky, but if you provide soil with lots of drainage and only water sparingly, you’re likely to have success. Many varieties only last a few years, so you’ll have the chance to refresh your look often! Plant new tulips every fall to make sure that you always have something to enjoy in the spring.
- Hyacinths: For a little bit of a cooler tone in your garden in the spring when the days are still chilly, hyacinths are a perfect addition. These flowers grow in stunning clusters that look and smell fabulous. You’ll love their intoxicating fragrance, which will bring a smile to your face every day. Plant them near high-traffic areas of your garden, like a walkway or a patio, so you can enjoy their scent whenever you step outside. Plant them in full sun to partial sun, and give them well-draining soil for a successful spring bloom.
- Daffodils: With pointed petals and a trumpet shape, these are the stars of spring blooming in many gardens. Like sunshine encapsulated right in your garden, they’re sure to put you in a spring mood. Give them lots of sunlight (only partial shade or full sun) to help them reach their maximum brightness. These tough plants are easy to care for and can last for decades without any maintenance so you can truly plant them and forget about them!

Eising’s Tips for Planting Spring Bulbs
If you’ve only ever planted from seeds or starters, something new can be a little intimidating. There’s no need to worry, though - there are lots of ways to make planting spring bulbs easy!
Pick high-quality bulbs. Check your bulbs before you buy (and plant!) to make sure they’re in good condition to grow. Pick healthy bulbs that are firm and plump, with no visible discolouration or mould spots. Larger bulbs will give you bigger and/or more blooms than smaller ones.
Location, location, location: Choose a good spot for your bulbs to give them the leg up on growing healthy and vibrant. Most flowers like full or partial sun conditions with good drainage, but read their label to be sure you give your bulbs what they need to reach their full potential.
Start with a good foundation. Good soil makes a big difference. Bulbs don’t like wet or damp conditions and will want something that drains well. They’ll also love the boost of fertilization to give them that extra push in the spring. Without a little fuel, the flowers will suffer and not be as bold of a display when it comes time to bloom.
Plant them right. Starting with healthy bulbs and good conditions is a great start, but planting bulbs takes some new skills that gardeners used to seeds and transplants might not have. Plant these bulbs deep enough - typically a hole 3 times as tall as the bulb is - and plant with the pointed side pointing downward.
Caring For Your Spring Bulbs
Many bulbs are simply perennial plants with a slight twist, so they will return with beautiful blooms year after year! While this saves you from getting new plants to replace the ones you love, it does mean that the work isn’t done when the blooms fade. Maintaining your blooms will bring flowers for next year:
- After your spring bulbs are done flowering for the season, cut their stalks down to the ground, but leave the foliage up for a few months. The leaves will still be busy collecting energy and nutrients to fuel the blooms for next year, and you don’t want to create a disappointing spring next year by trimming them back prematurely. As a rule of thumb, wait about 2 months before you trim the leaves back.
- Many perennials need to be divided every three to five years to manage their successful growth. If your plant is producing fewer blooms than usual it’s time to divide. Wait until your plant is dormant and the foliage has dried and died before you divide.
Cold winter days are a little less awful when you know that spring colour is waiting for you on the other side of the season. All your bulbs need is a little bit of planning ahead, and in return, they will fill your garden with cheer all season.
Having a tropical plant in your home is like creating a tiny little oasis of lush greenery that’s with you no matter what life throws at you. Especially after a chilly winter like the one we’ve had, it’s easy to see the appeal of having a leafy green friend inside to help us mentally escape the frostbite-inducing temperatures outside. It’s no wonder how having these green acquaintances in our homes has become so popular - and with your own, you’ll have a little bit of homegrown happiness in your everyday life.
Tropical plants don’t have to be difficult to care for, even though they are so far away from their balmy and sunny homes! We have all the tips to make sure that your new tropical friend is happy, healthy, and ready to flourish in your home. Here’s how to have a tropical getaway inside, no matter how green your thumb is (or isn’t).
How To Take Care of Tropical Plants
The secret to keeping a plant healthy - and alive - is to picture their homeland, and do what you can to replicate those conditions. Your plants might have grown up in a greenhouse but their species has spent a long time adapting to their native territory. Giving them an environment that meets their needs will reduce the work and fussing you have to put in to keep your plant looking fabulous.

For example, while you might try to make sure that a cactus or succulent is kept dry and sunny, your tropicals are going to love some moisture and humidity. In the tropical landscapes most of them come from, water is not in short supply, and while they enjoy some sunlight, many times they’re used to sharing the sun with so many plants and in such high humidity that they prefer indirect or partial light. No plant likes soggy roots, but you’ll generally be watering tropicals regularly and trying to keep the humidity at a nice level - usually not much of a struggle in our neighbourhood of Southern Ontario.
Each tropical plant will have its own care requirements that are unique to that plant so checking the tag or doing a quick search is the best way to make sure that you care is specific to its needs. That said, there are a few rules of thumb that you can stick to:
Watering Tropical Plants
The right amount of moisture can be tricky when you can’t just ask your plant if it’s thirsty! Generally, waiting until your plant is wilting is stressful for your cute leafy friend and should be avoided, so you can test the soil to anticipate when they’ll need a drink. Nobody likes soggy soil and roots, but you won’t want to dry out - tropical plants are a little like Goldilocks in that respect. Too much water will stifle the roots and prevent them from getting crucial oxygen, but too little will leave them parched. There are two great ways to check the moisture of your plant to tell you when to water to keep that level just right:
- Poke your finger into the soil to feel the moisture. This method is so direct you can’t go wrong! Poke a finger into the soil and stop when you feel moisture. Water your plant when you poke the soil and it’s dry up to your first knuckle.
- Go by weight. Water weighs a lot, and your dry container will be a whole lot lighter than a well-watered one. Get used to how much your plant weighs when thirsty and quenched and use this as a guide, too. You can even use both methods at the same time for extra confidence.

More Watering Tips: Some tropicals are quite sensitive, and the salts and minerals dissolved in our tap water can burn their roots, even if they’re safe for us to drink. When you water, keep going until water pours out the drainage holes at the bottom of the container, flushing out any leftover salts from last time you watered. You can even choose to use distilled water to avoid build-up in the soil. When you’re watering use a dish under the plant to catch what flows from the bottom, or for even less mess, relocate your plant to the sink or bathtub to water them, let them drain for a few minutes, and put them back.
Light for Tropical Plants
Each plant from different areas of the world might have different requirements, so lighting isn’t a one-size-fits-all thing. Many tropicals love to soak up the sun, but aren’t used to getting too many direct rays and might be prone to getting sunburns. Check the tag on your plant to get an idea of its needs and find a spot in your home that suits them - while plants don’t like being moved around too much, you can always relocate if you need to.
Your beautiful tropical can’t talk to you, but if you pay attention you can see signs of what it needs. Look out for pale or yellowing leaves, or a “stretching” plant that seems lanky - these are signs your tropical is craving a little bit more sunlight. Brown spots on the leaves, though, could be a sign of burning from too much direct light.
Fertilizing Tropicals
We want our plants to grow big and strong, and giving them the right fuel is certainly a way to do that. Fertilizer is an option to give your plant a little boost - especially during the growing season - to grow more lush and healthy. Be careful, though, as your plant’s roots are already in cramped quarters in a container, so only use half concentration doses, and only once or twice a year. Just a little goes a long way! Choose a fertilizer with close to equal numbers, like a 20-20-20 for a healthy mix to meet your plant’s needs.

Growing Tropicals - Moving Up in Size
With a happy and healthy plant, you’re sure to eventually need to give your plant a bigger home to let it stretch out its roots! When the plant looks “rootbound” or that almost all of the soil and space in the container is roots, it’s time to size up. You might notice visible roots at the top of the container, growing out the bottom, or that you need to water your plant more because it has less soil to hold on to water.
Sizing up is as easy as getting a larger container and repotting. It’s simple, but it can get messy. Here are some of our tips for sizing up for a healthy, growing tropical:
- Choose a container only one or two sizes bigger. You might be tempted to go much larger but not only will the proportions of your chic living decoration be off, the excess soil will also hold too much moisture and might invite rot into your container.
- Choose a container with good drainage. No matter the size, you’ll always want a spot for water to drain out the bottom. If you fall in love with a decorative pot without drainage, never fear! You can DIY by drilling holes yourself or cheat by planting your beautiful tropical in a container with drainage, and simply hiding that well-draining container inside your decorative one.
- Buy potting soil suited to your tropical beauty. Buying tropical-focused soil will give you something with the drainage and nutrition your plant’s needs - and planting from a sterile bag instead of taking soil from outside can help to keep pests out of your home and away from your plant.

Tropicals are one of our favorite ways to embrace the trend of houseplants, and we can’t get enough of their rich green and glossy leaves. They’re perfectly suited to our cozy, temperature-controlled homes and can be easy to take care of when you know how to give them what they need and speak their language. Taking home a tropical is a great way to boost your mood at home with a chic and stylish living decoration that’s ready to impress for years to come.