
By Ava Green
Is there anything sweeter than the scent of Lilacs in the spring? These beloved shrubs are remarkably easy to grow and will reward you with weeks of fragrant blooms for little or no effort. But a bit of attention can make a big difference, especially if you’ve noticed your blooms getting smaller or fewer with each passing year.
To help your lilac put on its best show, keep these steps in mind:
- Plant in full sun, at least 6 hours of direct sunlight a day, in well-draining soil
- Water newer plants during prolonged periods of drought until established (the first 3 years)
- Feed your lilacs annually with a balanced fertilizer (10-10-10, for example)
- Follow spacing instructions and prune yearly. Pruning is a very important step, and it’s well worth it.
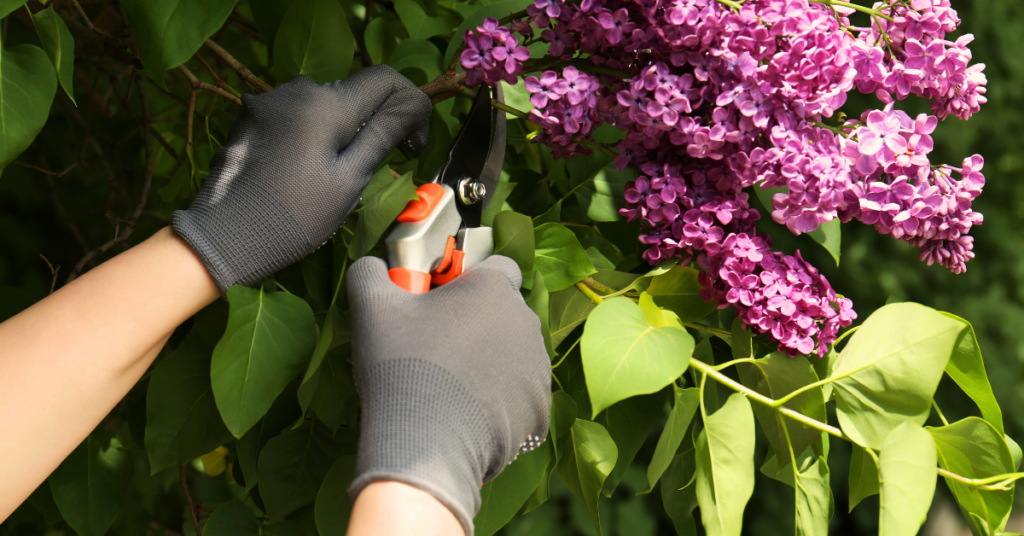
Knowing When to Prune is Key
Timing is everything when it comes to pruning your lilacs. After the blooms fade, you have a two-week window to prune before the shrub sets its buds for next year's flowers. Yes, they set buds this year that will bloom next year! Pruning lilacs in the fall or the early spring risks cutting off all of the flower buds for the following year. Mark your calendar and prune promptly after flowering.
It also helps to understand how lilacs grow: Younger, thinner lilac stems produce more flowers. Older, thicker stems are more prone to disease and pests. Keeping this in mind will help with pruning decisions.
How To Prune Young Lilacs
If your lilac has been in the ground for less than three years, leave it alone; it doesn’t need pruning yet. Many young lilacs won’t bloom during those first few years.
After three years, once your shrub is established, begin by removing just one of the thickest, oldest stems down to the ground every 2 years. This gentle approach prevents the shrub from becoming overgrown while encouraging newer, flower-producing growth.
How To Prune Older, Overgrown Lilacs
If your lilac has been neglected or grown out of control, you have two options:
Option 1: Gradual Rejuvenation
Begin by removing any damaged stems, as these invite pests that can harm the entire shrub. Next, remove only the largest, oldest stems by cutting them right down to the ground. The key is to remove no more than one-third of the living wood (dead stems don’t count toward that total). Leave the younger, thinner stems intact so your shrub can still bloom the following year. Repeat this process each spring for three years, and you’ll gradually restore the shrub to its full, flowering potential without sacrificing a single bloom season.
Option 2: Full Cutback
For a severely overgrown lilac that has been largely ignored, a complete cutback is often the most practical solution. Cut the entire shrub as close to the ground as possible, either in early spring or immediately after blooming. Yes, this breaks the general rule of never removing more than one-third of live wood, but lilacs are remarkably resilient and respond well to this kind of hard reset. By the end of summer, you will have healthy new stems of three to five feet tall. While the shrub won’t bloom for approximately three years after a full cutback, the long-term results are well worth the wait.

Deadheading Your Lilacs
Deadheading, or removing spent flower clusters after the blooms fade, is a simple task that’s separate from pruning, and can be done during that same two-week post-bloom window. When you trim off faded blooms, the plant redirects its energy from seed production toward building bigger, healthier buds for the next year. It takes only minutes and can make a meaningful difference in the size and abundance of next year’s flowers.
A Note on Lawns and Lilacs
If your lilac grows near a lawn, be mindful of how much fertilizer you’re applying to the surrounding grass. Lawn fertilizers are typically high in nitrogen, which encourages lush leaf growth, but too much nitrogen reaching your lilac’s roots will suppress flower production.
Worthy Rewards
Lilacs are remarkably long-lived, often outlasting the gardens and even the homes they were planted beside. So whether you’re nursing a young shrub through its first few years or breathing new life into an old, overgrown beauty, the effort you put in now is an investment that will keep rewarding you, and perhaps generations after you. Every single spring!
Coneflowers (Echinacea) have earned their place in perennial borders, pollinator gardens, and meadow-style landscapes—and for good reason. These hardy, vibrant perennials reliably return each spring in our Ontario Zone 6 climate, adding long-lasting colour and texture to any garden.
The classic Purple Coneflower (Echinacea purpurea) begins with soft, pink-tinged petals that deepen into rich purple hues as the season progresses. At its peak, the familiar domed centre cone emerges—an eye-catching structure that dries beautifully and provides winter interest in the garden.
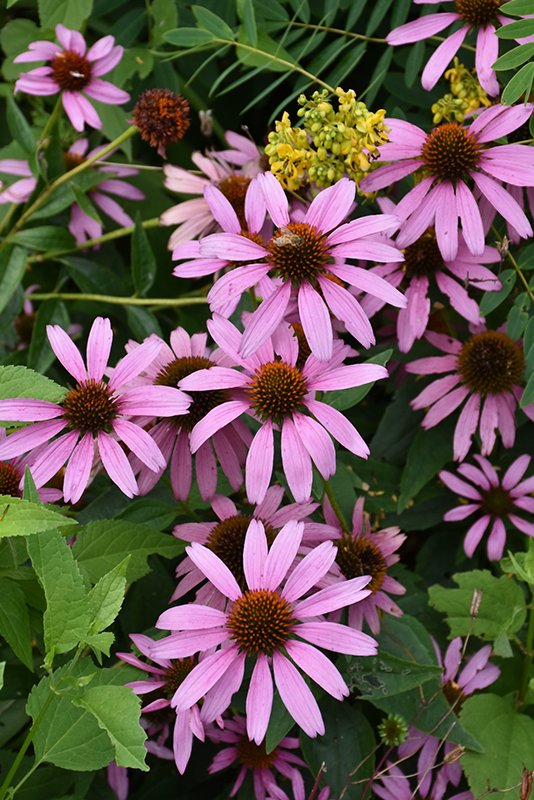
Purple Coneflower (Echinacea purpurea)
Choose From The Rainbow
While the purple coneflower is the most iconic, hybrids now come in nearly every colour of the rainbow. You'll find stunning varieties in pink, white, green, orange, and fiery reds.
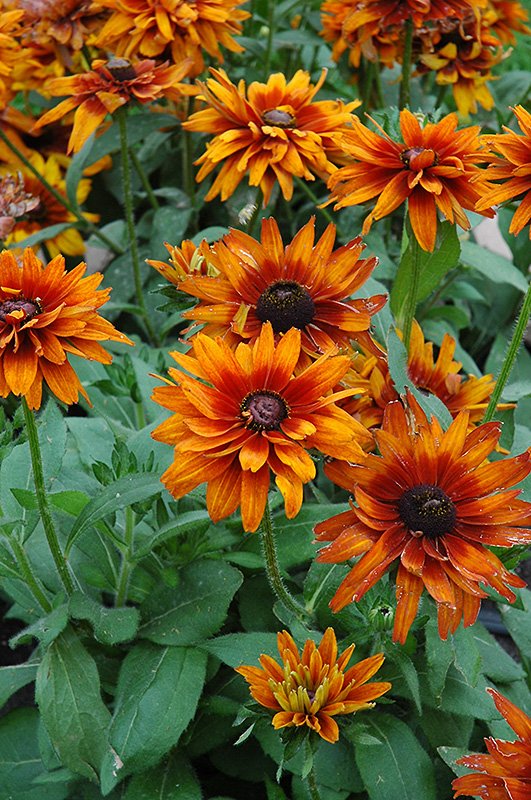
Rudbeckia hirta 'Cherokee Sunset'
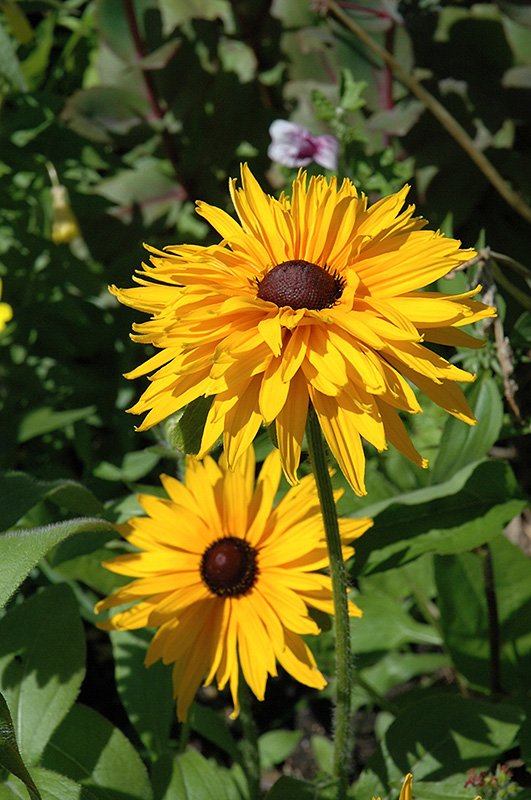
Rudbeckia hirta 'Double Gold'
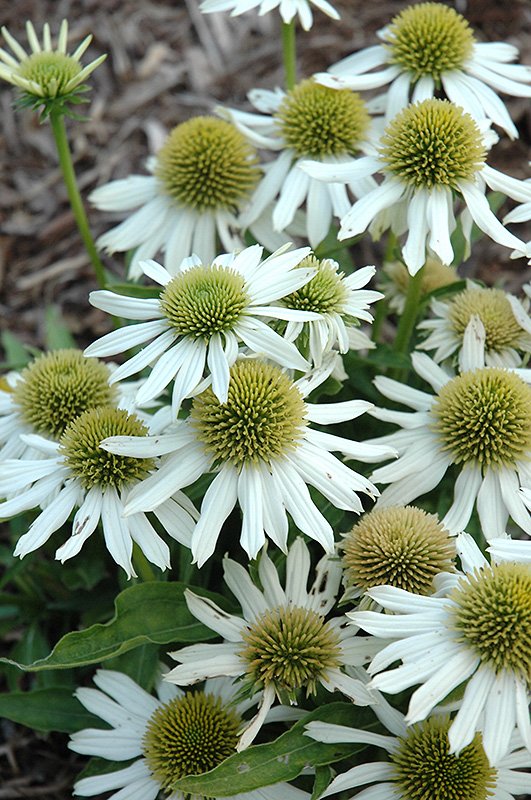
Echinacea 'Snow Cone'
No matter your garden’s colour scheme, there’s likely a coneflower to match. Even better, their bold blooms attract pollinators like bees and butterflies, while the seed heads feed songbirds in fall and winter.
Low Maintenance, Long-Blooming Beauty
Coneflowers are both showy and easy to care for—ideal for beginners and seasoned gardeners alike. Here’s what you need to know:
Growth habit:
- Height: 24–60 inches, depending on the variety
- Spread: 12–24 inches
- Bloom time: Mid-summer to fall
Growing conditions:
- Sun: Full sun is best, though light shade is tolerated
- Soil: Well-drained soil is key
- Water: Drought-tolerant once established, but thrives with consistent watering
- Fertilizer: Not necessary
Pro tips for success:
- Pinch back in early summer to encourage bushier, sturdier plants and decrease the chance of powdery mildew forming
- Deadhead spent blooms early in the season to prolong flowering
- Leave seed heads in late summer and fall for winter beauty and bird food
- Optional self-seeding: Let them go to seed for a naturalized look, or remove blooms to prevent self-seeding
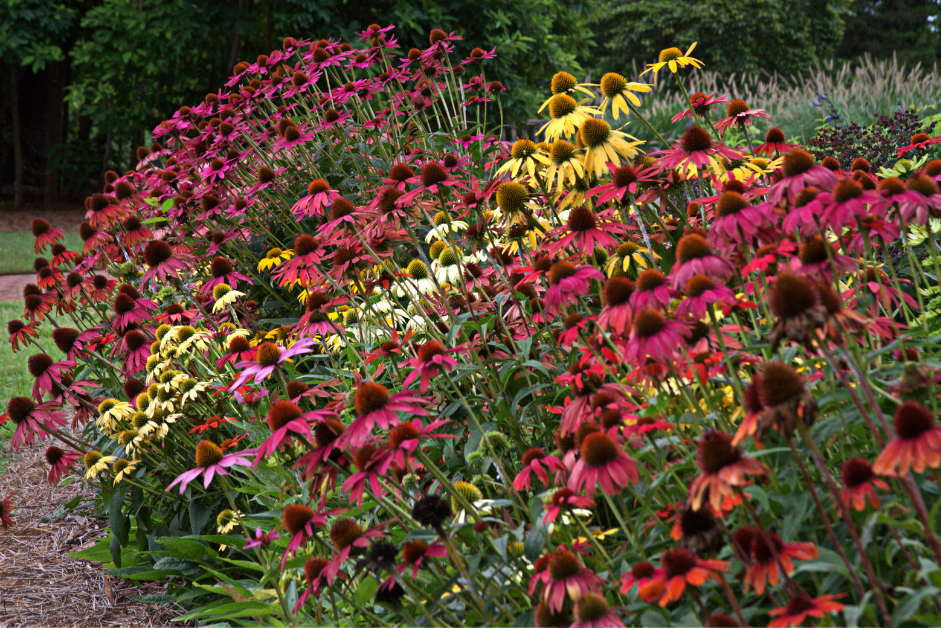
Coneflower Companions
Coneflowers mix beautifully with a variety of other perennials. For vibrant, complementary plantings, try pairing them with:
- Hyssop (Agastache)
- Catmint (Nepeta)
These companions share similar growing requirements and will enhance the colour and texture of your garden throughout the growing season.
Visit Us for More Ideas
Want help choosing the perfect Coneflower variety or finding the right garden companions? Stop by Eising Garden Centre and chat with our perennial expert, Mary. She’ll help you create stunning combinations that bloom beautifully from summer into fall.
Growing Vegetables in Pots!
A few years ago, I was walking through town with a friend as we discussed planting vegetables in our tiny front gardens. It seemed like an unusual idea until we spotted not one but two front gardens with pumpkin vines rambling amongst the shrubbery. What a novel way to cover the ground without mulch and have the bonus of showy, bright blossoms and bold foliage! Of course, this is eventually followed by the standout feature of brightly coloured pumpkins. It’s built-in fall decorating!
Right now, everyone is looking for ways to reduce grocery bills, and growing a few vegetables amongst the flowers and shrubs can make a big difference. If your garden is on a patio or balcony, there are lots of ways to add edible plants to maximize your space and beautify it at the same time. Who says vegetables can’t be ornamental and beautiful?!

Gaps and Small Spaces
If you have a new shrub and flower garden that has gaps or there’s a space in your garden where you’re not sure what to plant, consider tucking in a potted vegetable. In a cool, shady space, try some luscious lettuce bowls. Shade allows lettuce to grow more slowly in the heat of the summer. Keeping lettuce in a cool, shady spot will prevent it from bolting and becoming bitter.
If you have a small garden, a patio or a balcony, pots with compact varieties and hanging baskets are a terrific alternative for growing vegetables, herbs, and some fruits. These are some of the options we offer at Eising Garden Centre (based on availability) that can be purchased fully planted, or you can grow your own from seed if you have time, space and lights.
Trellised Planters and Patio Pots
For patios, balconies, or even a gap in the garden, there are lots of vegetables that can be grown in a trellised planter.
Tomatoes, peppers, cucumbers and eggplant all love warm soil and growing in pots provides the heat to help them thrive. Eising trellis pots are planted with specific varieties that are smaller but pack a flavourful punch.
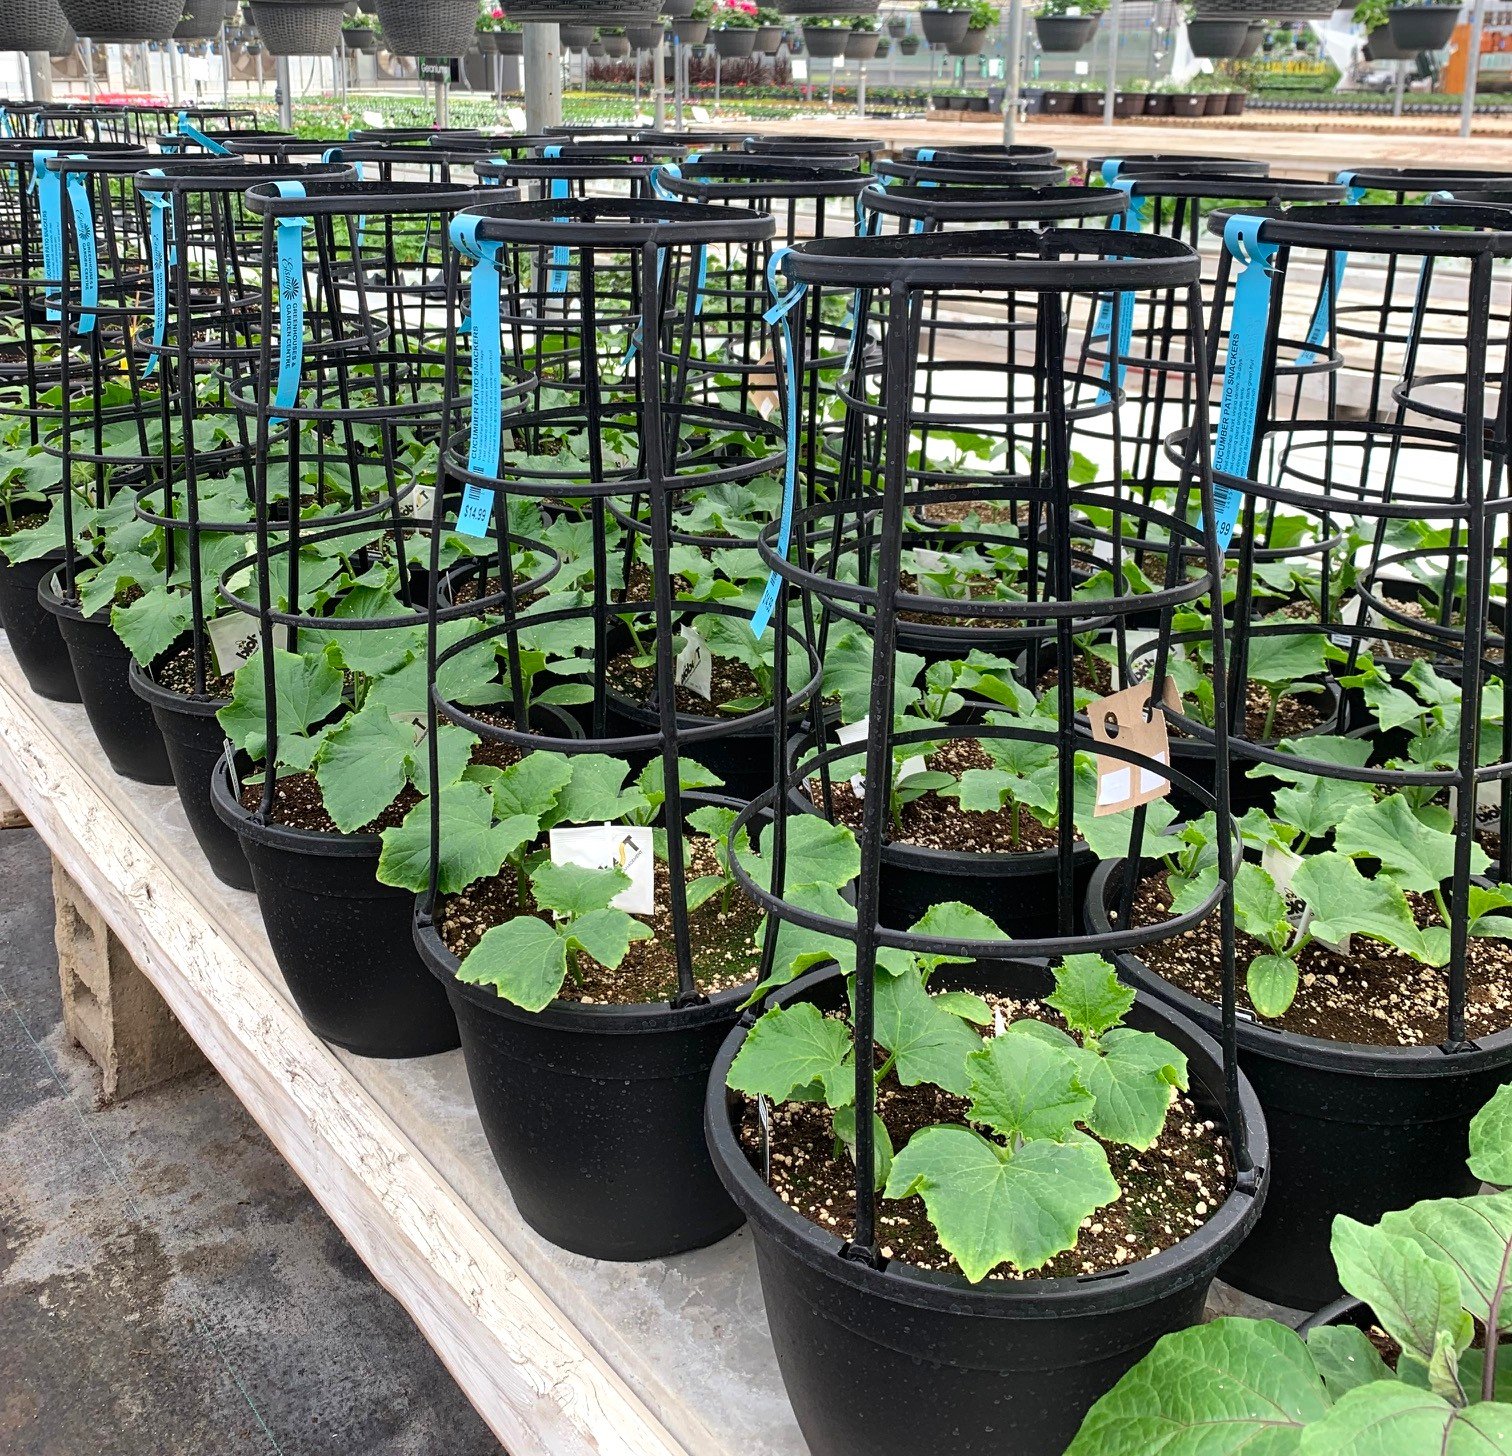
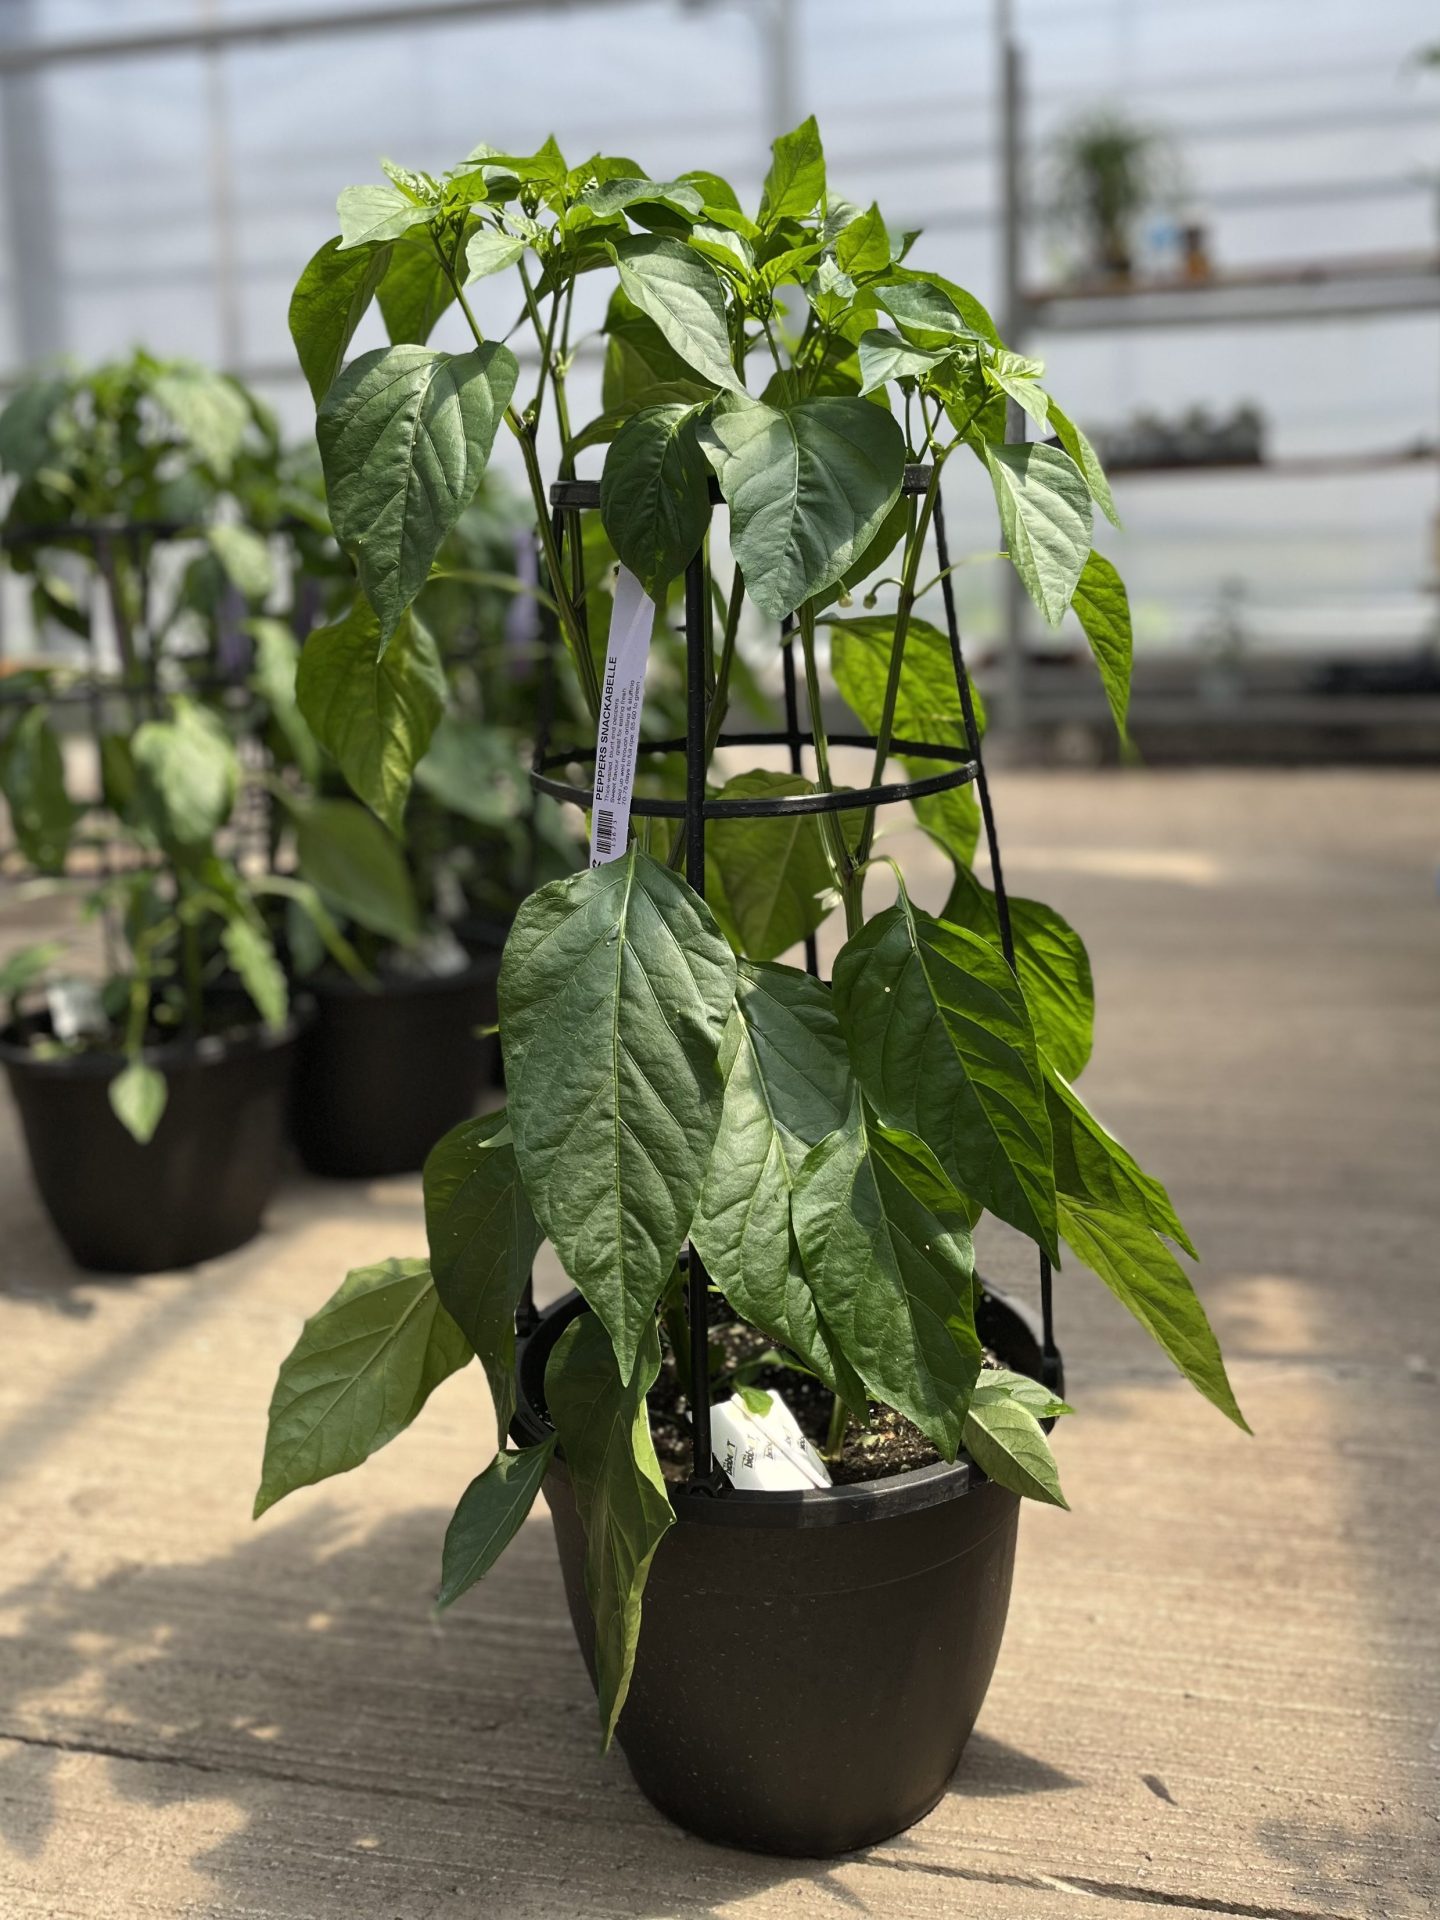
Sweet Snackabelle, Candycane Chocolate Cherry or Red, Mocha Swirl and Fresh Bites peppers.
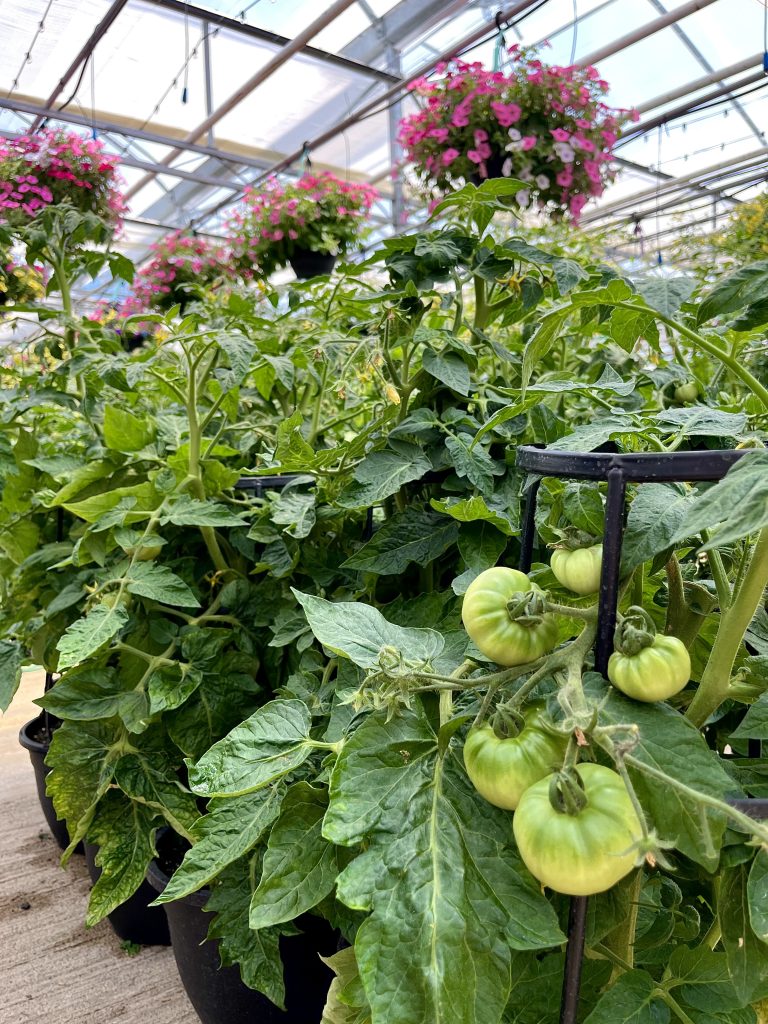
Little Sicily, Patio Hybrid, Candyland Red, Rapunzel and Tidy Treats tomatoes.
Eising Greenhouse also carries eggplants in trellised pots - a patio pot with Patio Baby eggplants is a perfect choice if ratatouille is on the menu!
All of Eising's trellised planters would look lovely plopped into one of our decorative outdoor cover pots!
Herb Planters
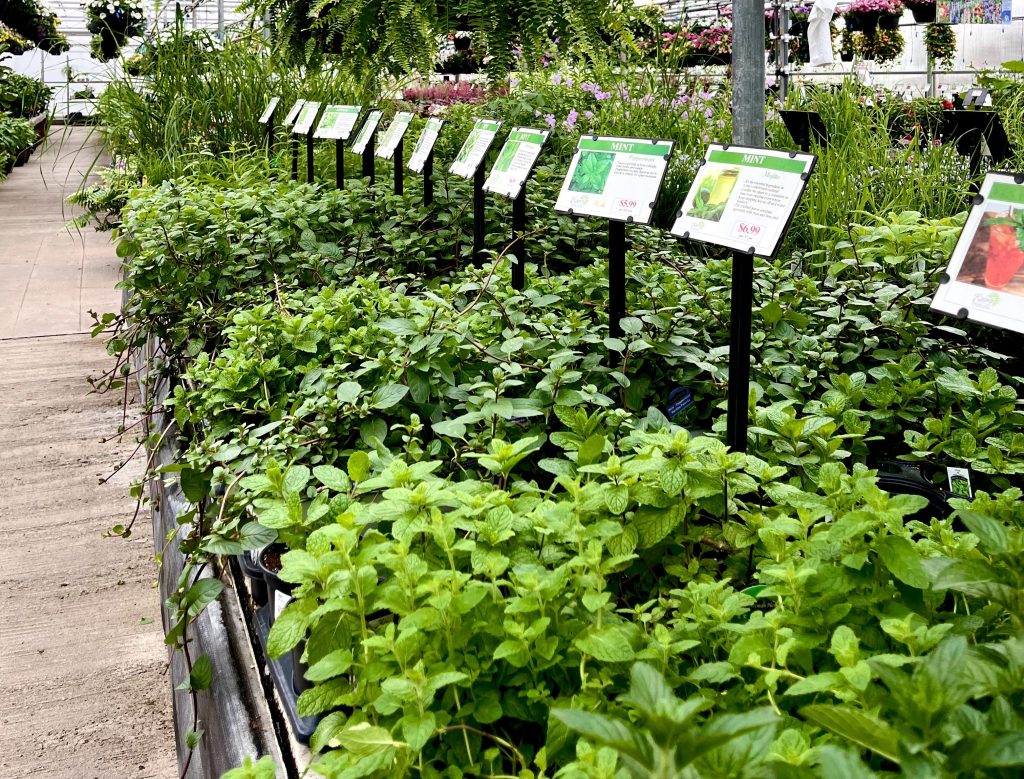
Many herbs thrive in a sunny and warm spot with well-drained soil, making a pot the perfect container for them. Herbs also make great companion plants with other vegetables and can be tucked into other pots. Most herbs also love to be harvested frequently, especially when they’re given these ideal conditions.
Lettuce Bowls
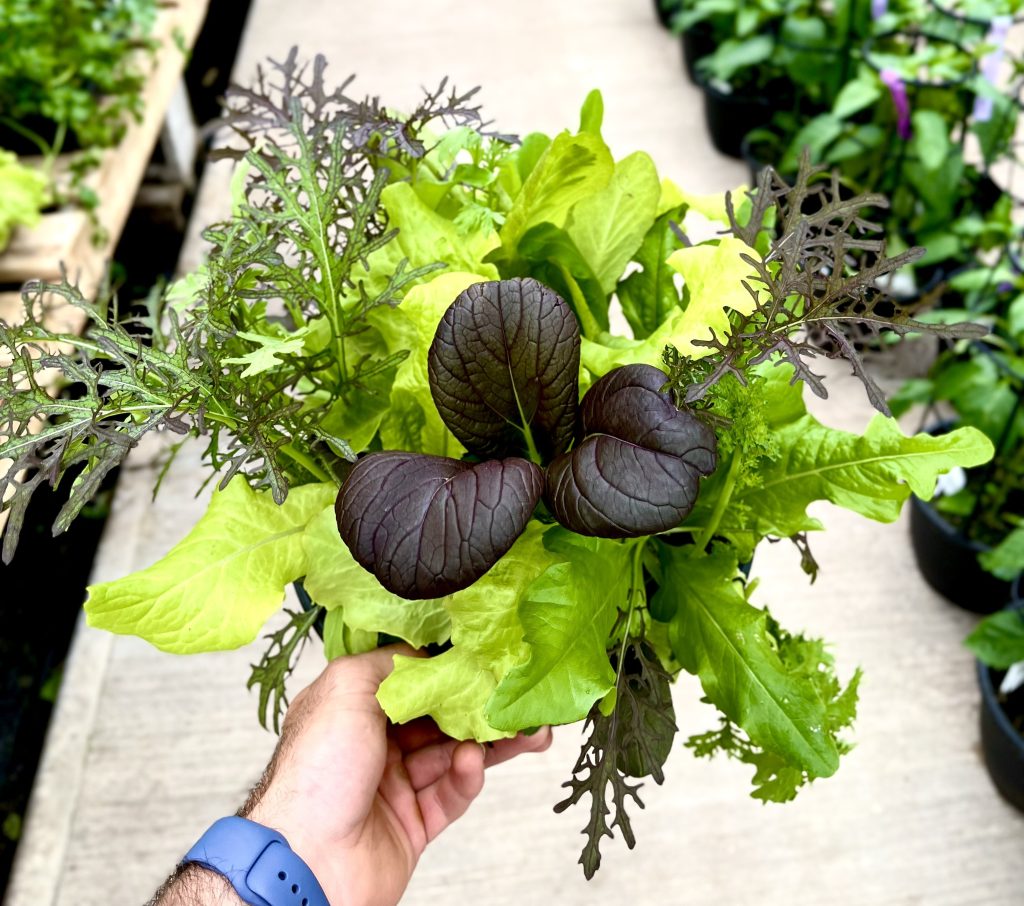
Lettuce bowls are a great way to grow greens in small spaces. Our 10” bowls are chock full of a variety of lettuces and are never boring!
👍Tip: Try the “cut and come again” method for harvesting lettuce, which prolongs the plant’s life. Simply pinch off the outer, mature leaves each time you pick the lettuce and leave the centre of the plant to keep growing.
Hanging Baskets
If there’s a spot to hang a basket or place a shepherd’s hook, you will want to grow one of the edible options we offer.

Topsy Tom tomatoes.
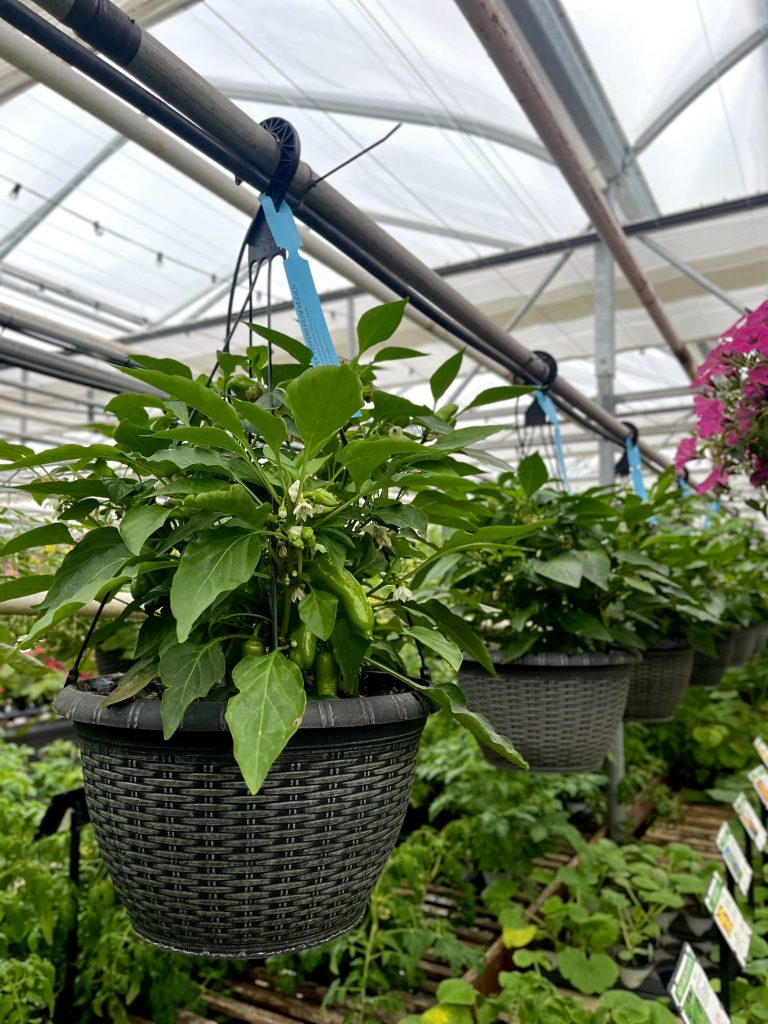
Pot-a-Peno and Peppers From Heaven peppers.
Tomatoes, peppers, and strawberries are all available in hanging baskets. Our deliciously sweet everbearing strawberries are also available in 4.5" pots and bareroot, which are great options for window boxes.
👍Tip: Pick strawberries as they ripen to encourage your plants to produce more. Also, remove runners as they grow to allow your plants to send energy into growing fruit instead of bigger plants. Painting rocks to look like strawberries is said to deter birds from feasting on ripe berries.
Citrus and Figs
Consider growing a beautiful and fragrant lemon, orange, fig or grapefruit tree in a patio pot. Just keep in mind that it will need to come indoors in the fall.
Container Plant Care

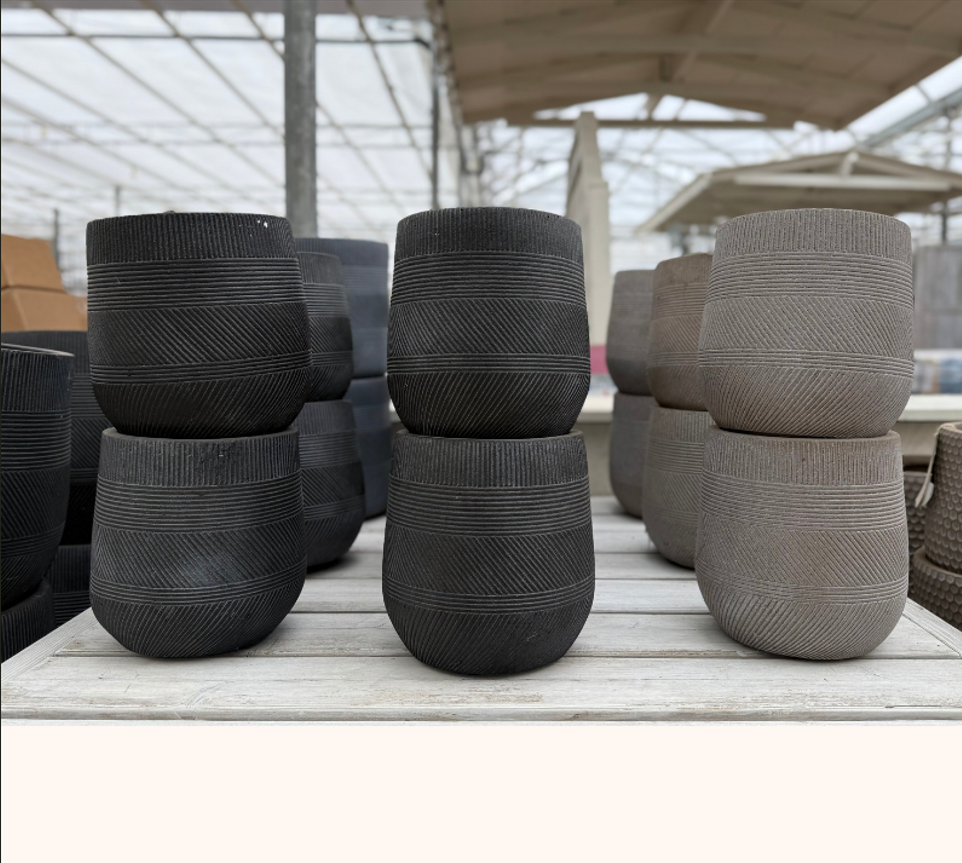

Whether you’re growing edible plants in the garden, a pot or a hanging basket, don’t forget to give them the care they need to maximize productivity:
- Water regularly, deeply and in the heat of the summer, frequently. Watering early in the morning is ideal. Pour water on the soil, not the foliage to prevent diseases like powdery mildew.
- Feed your vegetables and fruits throughout the growing season with fertilizer or compost.
- Remove dead foliage and prune plants as needed. Especially herbs.
Once you start foodscaping by including vegetables with your flowers and ornamental plants we’re sure you’ll want to keep looking for innovative ways to grow your own food! Who knows, maybe even pumpkins by the front porch!
You read that right. Easy houseplants exist, and there are some very cool varieties too. Easy does not mean boring!
Plenty of tropical plants are forgiving and require little fussing—you just need to know which ones and how to care for them.
These plants are generally resilient and forgiving of occasional neglect, making them perfect choices for new growers. When choosing any houseplant, consider your home's lighting conditions and the care you can provide.
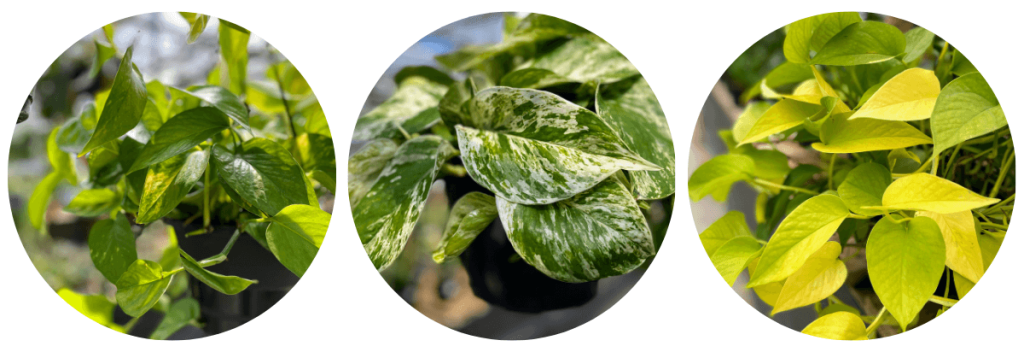
Pothos
Pothos vine is one of the easiest houseplants to grow and is perfect for beginners.
Bright and indirect light is what this plant loves, but it will also grow in low light - just not no light.
Allow the soil to dry out between waterings. Too much moisture will cause the roots to rot. The plant’s leaves will droop and let you know when it needs a drink!
Feed Pothos with a balanced fertilizer monthly in Spring and Summer only to keep it thriving.
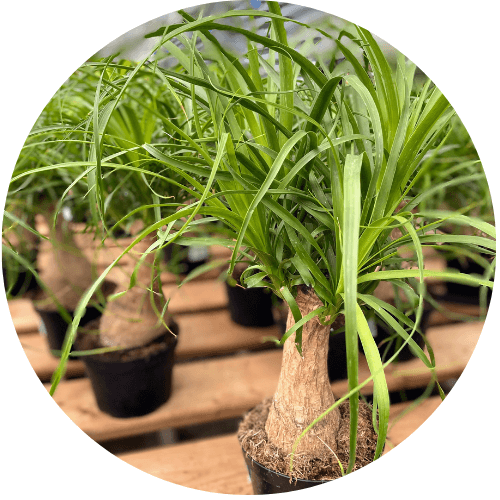
Ponytail Palm
Give this plant the brightest location in the house. It loves full sun or bright, indirect light. They will survive to 10 Celsius, but this plant loves warmer temperatures.
Be careful not to overwater Ponytail Palms. Because water is stored in the bulbous stem, they only need a drink every 7 to 10 days during the summer. In the winter, cut back to monthly watering.
Use a slow-release pellet fertilizer in the Spring for carefree maintenance.
Trimming the tips off damaged leaves will keep them healthy.
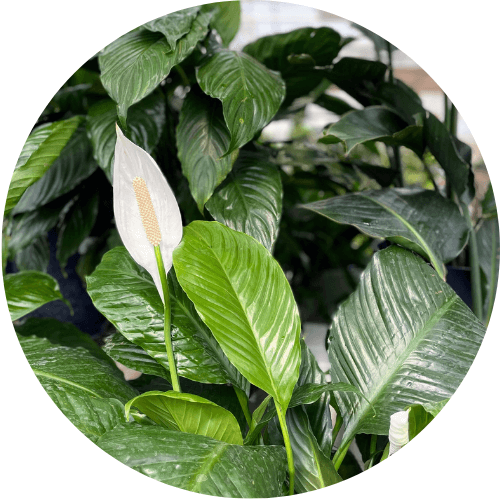
Peace Lily
This plant loves filtered or indirect sun (place it a few feet away from a sunny window or in an east-facing window) and moderately moist soil.
While Peace Lilies love moist and warm conditions, keeping them under-watered is best. Use your finger to check the soil’s moisture. Water this plant when the top inch of soil has dried out.
Use slow-release fertilizer pellets in the Spring or feed the soil weekly during the summer with liquid fertilizer. This plant enjoys frequent feeding during the growing season.
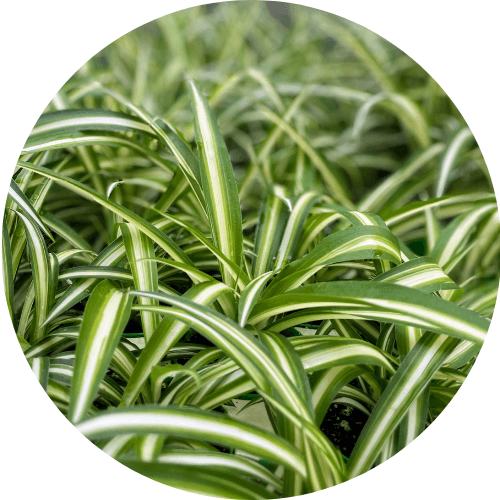
Spider Plant
Spider plants are straightforward to grow. They prefer an area with partial sun or semi-shade that is warm.
Keep the soil lightly moist, not soggy!
Use an all-purpose fertilizer during the summer months. Trim off any brown leaves as needed.
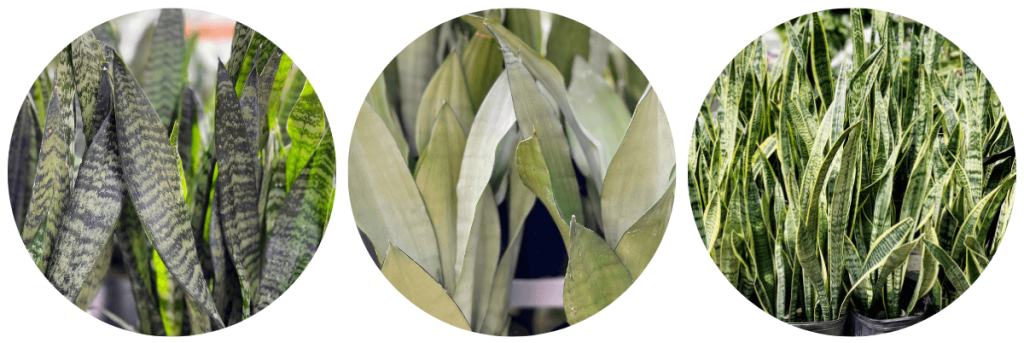
Snake Plant
Indirect sun (a few feet away from a sunny window) or a couple hours of early morning sun will keep this plant happy. These tropicals thrive in warm temperatures with no cold drafts.
Do not allow your Snake plant to sit in water! Water deeply, then let it drain only when the soil is dry.
A 10-10-10 balanced fertilizer at half strength once in the spring and again in mid-summer is all the plant food it needs!
One Final Tip
Most houseplants do not like chlorinated or treated tap water. If possible, water your plants with filtered, distilled, or rainwater. If you only have access to tap water, allow it to sit in an open container for several days until the chlorine evaporates.
Following these simple guidelines will keep your plants healthy, and in return, they will provide natural beauty to your home.
If you have some space in your flower or vegetable garden, growing herbs is definitely worth it! Many are drought tolerant, do well in containers, require very little care, and can provide a bountiful harvest all summer long.
Buying herbs at the grocery store is often pricey. Growing them at home, using the tips below, helps to ensure a steady supply for a fraction of the price.
If you’re not accustomed to adding herbs to meals at home, buying a plant is a great way to experiment and see which ones you like. If you try Cilantro, for example, and don’t like it, place it in a nice pot and take it as a hostess gift the next time someone invites you to a barbeque. Especially if you’re coming over to our house, we love it!
Herb Growing Tips
- Like many other plants, there are perennial and annual herbs (annuals don’t survive an Ontario winter and need to be planted each year). Perennial or annual may determine where you plant your herbs in the garden.
- Most herbs are drought tolerant and enjoy full sun. The amount of water and sun can vary slightly, so it’s good to note watering and light needs for the herbs you’re growing.
- The more you trim herbs, or “give them a haircut”, the more your plant will thrive. Start trimming them early - when they’re about 4 inches tall, and do it often! This will make your plants more sturdy and bushy.
- Regular pruning ensures that your herbs don’t flower! While this is the goal with many other plants, it’s not what you want with herbs. A plant will focus on producing flowers and seeds, and stop producing the leaves that you want to harvest for herbs!
Here’s a list of our favourite herbs to grow in Southern Ontario, and how to care for them.
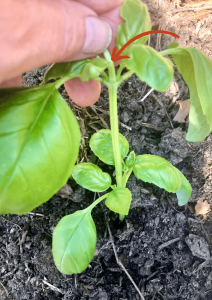
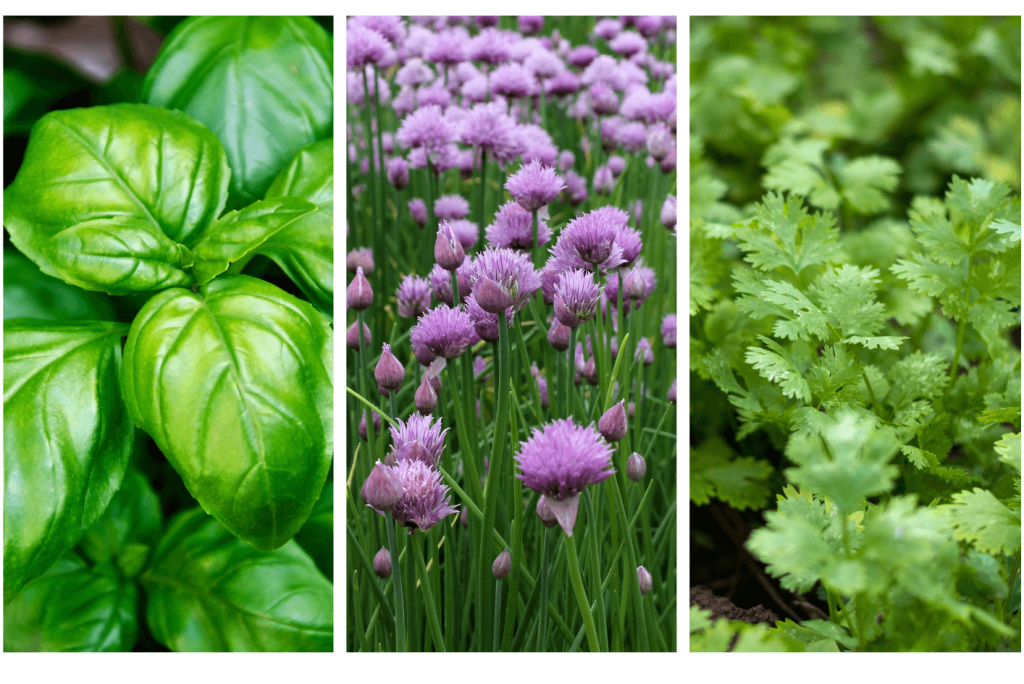
Basil - Annual
If you’ve planted tomatoes, it just makes sense to add a few basil plants! The tomatoes will love them, and so will you on your toasted tomato sandwiches. Basil loves full sun, and evenly moist soil.
Chives - Perennial
Chives are one herb that you may want to allow to flower. Its blossoms are great for flavouring vinegar, and the plant will still produce mildly onion-flavoured stems. Chives like full sun but will still grow in partial shade, and once established they only need watering during dry spells.
Cilantro - Annual
To some people with a very specific gene Cilantro tastes like soap! For everyone else, it’s one of the most delicious herbs and a taco wouldn’t be the same without it. Cilantro prefers part shade, but will tolerate full sun. It can be allowed to dry out, but it may flower prematurely if it gets too dry.
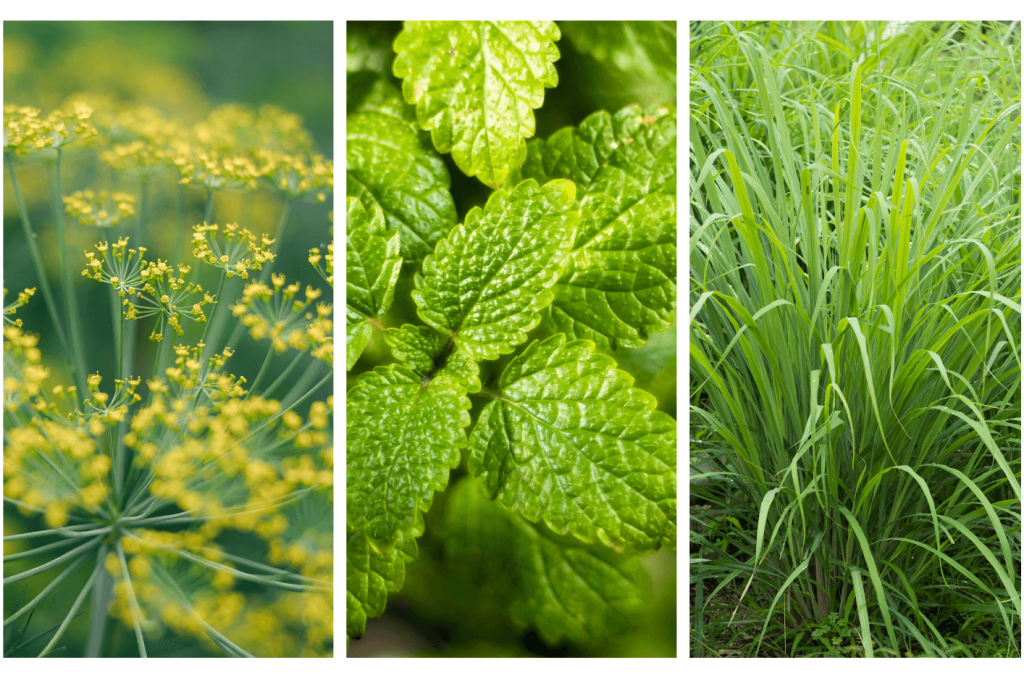
Dill - Annual
While Dill is considered an annual, many people in Ontario find that if you allow it to eventually go to seed, it will reseed and grow again the following season. No guarantees. But worth a try, right? Dill plants love full sun, and their roots just slightly moist.
Lemon Balm - Perennial
Fresh leaves can be used to make tea all summer long, or can be dried for winter use. But this versatile herb can be used for many things from pesto to cookies! Grow Lemon Balm in full sun to partial shade, and keep the soil moist for optimal growth.
Lemongrass - Annual
A staple in Thai cooking, Lemongrass is a great addition if you love to cook. Full sun and moist soil will keep this herb happy and producing lots of lemony stalks. You might want to try bringing it indoors for the winter as well.
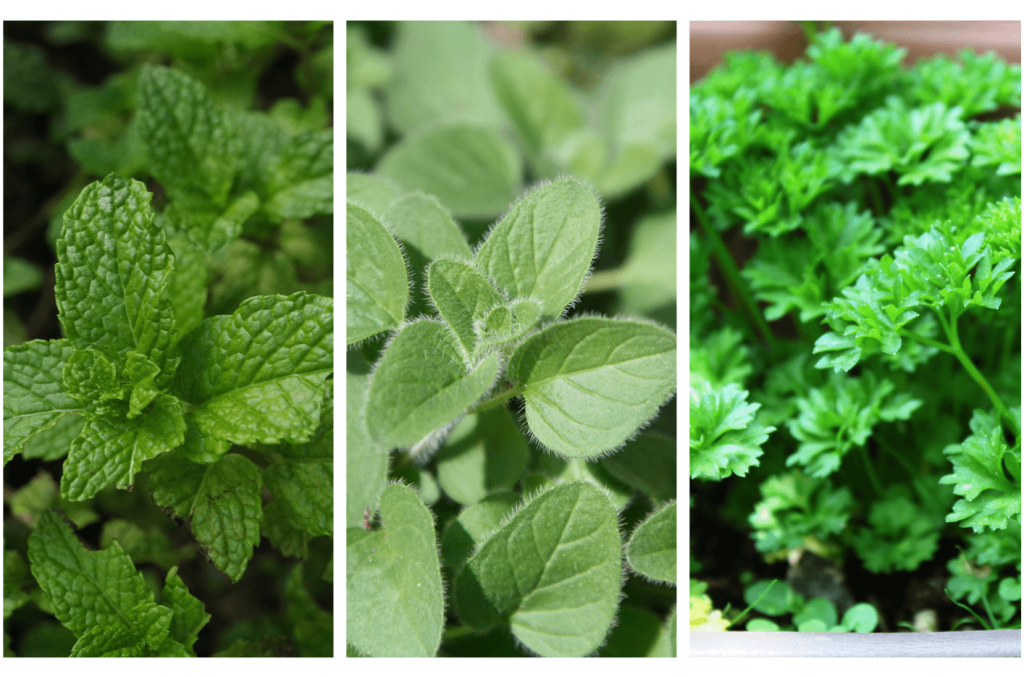
Mint - Perennial
This herb comes in so many variations that are just simply delicious - spearmint, peppermint, apple mint, chocolate mint, and more! But this is one plant you’ll want to keep in a pot, well away from garden soil. It’s also one to trim before it sets seeds or you will have a garden that’s full of mint! It can be invasive. It will thrive in full sun but will stand some shade, and it likes moist soil.
Oregano - Perennial
For obvious reasons, (tomato sauce) Oregano is a great addition to the garden. It will spread and reseed throughout the garden if you let it go to seed, but some people like this feature and use it as a groundcover or border for a perennial bed. Oregano likes full sun to partial shade and once it’s established it is very drought tolerant.
Parsley (flat and curly) - Annual
There was a time when every restaurant meal was adorned with a sprig of Parsley. It’s pretty. But it’s also an underrated culinary herb and can add wonderful flavour to soups and stews as well as other savoury dishes. Keep this plant moist and in full sun to part shade.

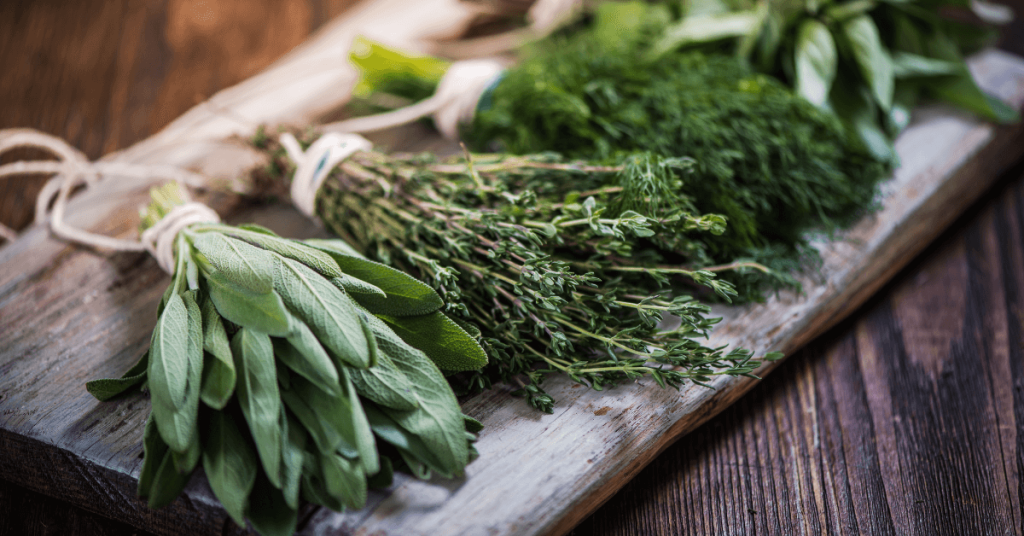
Rosemary - Annual
Is anyone else addicted to bread with olive oil, salt and Rosemary? It can’t just be us! This is another garden staple that loves full sun and slightly moist soil. It can also be brought indoors for the winter, but be sure to keep the soil from drying out completely.
Sage - Perennial
Perennial, with a caveat. In Ontario, it’s best to provide some winter protection for this plant if you want it to survive the winter. I’ve had reasonable success with bringing it indoors for the winter, or it can be treated as an annual. Sage likes full sun and moist soil but don’t overwater this one! It does love the heat of summer and will produce a nice big plant once temperatures heat up.
Thyme - Perennial
Thyme is just so good in so many things - vegetables, meats, soups, and of course stuffing! It’s easy to grow if it has well-drained soil and full sun. Once it’s established it is moderately drought tolerant and can be harvested from early Spring until Winter.
Like all herbs - don’t forget to give it frequent haircuts!
At Eising Garden Centre you’ll also find many more herbs to grow and enjoy. Do stop by and give them a try!
Now that everything in the garden has been put to bed for the winter, our thoughts are on the holidays - decorating, parties, and that seemingly never-ending list of gifts. At Eising Garden Centre we have solutions to help bring joy to your holiday season.
Your Gift Giving Problem Solver
We know that finding the perfect gift for someone can be a challenge. There’s always that one person that has everything and it’s impossible to buy for them! The good news is that we have plenty to offer at Eising Garden Centre so that you can cross even the most perplexing person off your list.
For Fashion Lovers
You’ve probably heard it before - accessorizing is the key to making any outfit sing. At the Sassyfras Boutique you’ll find beautiful, casual clothing as well as hats, mitts, winter scarves, plus socks for men and women. They also have jewelry and handbags that are sure to add flair to any ensemble.
For The Wanderer
If you have friends or family members that love to travel, new sunglasses, beach towels, a fashionable scarf, a roomy handbag, or new pajamas from Sassyfras are sure to be a hit.


Your Just Retired Husband Or Wife
If they no longer have to go into the office every day and don’t know what to do, give them a challenge!
Pick up some seed packets to get them started on planning and maybe even planting for Spring.
Growing indoor flower bulbs can be a fun project to brighten winter days too. You’ll be amazed by the dainty blooms of Paperwhites versus the massive blooms of an Amaryllis!
Or how about a Sprouting Kit to grow tasty, organic greens all winter long? Let’s face it, we all know that healthy eating will be on the New Year’s Resolutions list!
Deck The Halls, And More
When decorating your home or getting ready to host a holiday party, come see us first.
While supplies last, we have lots of fresh Christmas trees (call us to check availability (519) 428-4607), ornaments and Christmas decor, fresh greenery, garlands, urns, wreaths, hanging baskets, centrepieces, and live plants like Cyclamen, Frosty Ferns and of course, Poinsettias.
Did you know that we also create custom containers? Bring in your own vase or container for centrepieces and urns, and we’ll do the rest. We’ll create an arrangement that will make that vase that 'Aunt Martha' gave you, sparkle with fresh greenery and holiday flair.
Previous
Next
Holiday Parties and Hostess Gifts
Solve the “I have nothing to wear to a party” blues, with a wardrobe “pick me up” from Sassyfras.
While you’re there, check out the selection of lovely locally handmade soaps, and great houseware gift items like dish cloths, scrubbies, and wine or bottle openers. Perfect gifts for your party host.
There’s also a wide variety of potted plants in the garden centre, and beautiful decorations that any host or hostess would love to add to their holiday decor!
For Your Kid’s Teacher
Let your child’s teacher know that you recognize that they’re already looking forward to summer vacation by giving them an Eising gift card. Once May rolls around, they can pick up plants that will bring them joy all summer long!
Great Gifts We Recommend
Eising gift cards go a long way too since they can be used on anything in the shop, including Sassyfras. A gift card is a great way to help someone with their next landscaping project, or even Spring garden clean up. Now that’s something to look forward to!
Not into gift cards? We have a great selection of items you could bundle together into your own custom gift basket! Think of all the things that you would love to get and we think someone on your list will love them too!

Soak Up The Holiday Mood
We know that you love wandering through the greenhouses when they’re full of summer plants, but we also invite you to stop by to visit us in November and December to enjoy the winter paradise we’ve created for your gift giving and decorating inspiration.
Take the pressure off the holidays and join us for Starlight Shopping Night on Thursday, December 8th. On December 8th only, we’ll be open late - from 9am to 7pm! Enjoy the ambiance, the specials, the exciting draws, the extended shopping hours and get all of your gift buying done early!
You’ll find us at 814 Cockshutt Rd, Simcoe, ON Monday to Saturday, 9am to 5pm until December 23, and 9am to 2pm on December 24th.
After December 24th, we will be closed until Spring, but the greenhouse elves will be working to have everything ready for you in 2023.
Happy Holidays from all of us at Eising Greenhouses & Garden Centre!
There might not be a better flavour of summer than the perfectly ripe garden tomato. Picked straight from the garden, a fresh tomato lets you taste summer’s sunshine with each bite.
Tomatoes are incredibly popular garden plants, thanks in part to the staggering difference between homegrown and supermarket varieties. As much as the flavour and nutritional content of garden-grown produce have a clear advantage, we also think that the sheer variety of options is part of the tomato’s success. With so many choices, there’s something to fit everyone’s lifestyle, taste, and garden style, and with such a simple growing formula it’s easy to come out with a great harvest. Here are our tips on how to take your homegrown tomatoes to the next level.
Planting Tomatoes Made Simple
Tomatoes are easy-to-grow plants, but a bit of knowledge makes the difference between a mediocre harvest and an amazing one. The first task in planting your tomatoes is to choose your type. Tomatoes are normally categorized as determinate (bushy types that don’t require much pruning, stalking, or maintenance) and indeterminate (unruly plants that require a little more care but produce more fruit). You also have choices in size from small and sweet snacking cherry tomatoes to large, beefy tomatoes for slicing onto sandwiches and burgers.
Choose plants that are robust and stocky, not ones that have grown lanky. This is true whether you grow your own from seed or buy from the store; you’ll want to start your garden with only the best plants.
Choose a spot in the garden with full sun exposure. Tomatoes thrive on heat and will give you tastier fruits the warmer they are all season, so full exposure to sunlight (without too much exposure to winds) is perfect. Plant in well-draining soil to prevent root rot, but consider layering some mulch on top once you plant to lock moisture and heat in.
When you plant, you can plant part of the stem in the ground to grow roots, too. This is a great way to save any plants that might have stretched and gotten lanky while you waited to plant. Any part of the stem planted underground will grow roots, so take off the leaves and plant about a third of the stem in the ground.

Some Garden Classics
Choosing a type from all of the different and new tomato varieties can be daunting, but we’ve narrowed it down with a few of our favourites to grow in our own gardens.
For great determinate varieties that taste great with little intervention from you. We love the Tumbler and Roma varieties. These produce great flavour and lots of harvest without too much intervention from you, making them an ideal low-stress option.
If you like to put a bit more of a personal touch and love and care into your garden, though, indeterminates are a good choice. For most tomatoes, the flavour, quality, and quantity of tomatoes in indeterminate varieties can’t be matched. For those craving big, delicious, plump tomatoes, Beefmaster is a great choice. Early Girl offers the best of everything in a medium size, reaching maturity early in the season. For those looking for a sweet snacking tomato, though, look no further than Sweet Million.
Heirloom tomatoes are the choice for the traditionalist that wants something unique in their garden. There are many delicious and creatively-coloured tomatoes, like Green Zebra and Black Krim, that will have your dinner plate dressed up with natural beauty.
Growing top tomatoes in your garden isn’t difficult, and the rewards are so delicious that it’s hard to see why you wouldn’t want to grow your own. With so many tasty choices, there’s a tomato that’s suited for anyone and everyone’s space. The only challenge will be getting the tomatoes to the kitchen before eating them all off the vine!
Mulching is a common gardening technique that protects your plant and gives your garden a little more vibrancy with less work! Sprinkling a simple insulating layer of mulch material around your plants will help to maintain moisture levels, prevent weeds, insulate your plants, and clean up the appearance of your garden. The benefits are clear and there are lots of materials to choose from to meet your needs. Here’s how mulching can help your garden’s aesthetic and more:
The Importance of Mulching
Summers can get hot, leaving us with thirsty plants that need water seemingly constantly. Using hundreds of litres to keep our plants hydrated is not only a waste of resources and money, but of our time, too. Mulching will help to lock moisture in by cracking down on evaporation so that the water that you do give to your plants actually gets used at the roots rather than (literally) disappearing into thin air.
Mulching is also super effective in our wild temperature swings from summer to winter and back. For those perennials in your garden that are left out shivering through the coldest of our winter days, mulch can provide a much-needed insulative layer that blocks out the worst of the cold and freeze-thaw cycle, keeping our plants safe until temperatures are mild again. Mulching will give your plants a better success rate with surviving the winter, and you’ll have happier plants in the spring that are ready to thrive, instead of battling winter damage.
Finally, mulch does wonders to clean up the look of your garden. Mulch is a great buffer layer between our soil - where weed seeds lie in wait - and the sun that they need to thrive, effectively stifling most weed growth. You’ll save time and appreciate a cleaner looking garden where all of your soil’s resources can be spent on the plants that you want. Not only does mulch prevent unwanted weed growth, but it simply cleans up the aesthetic of your garden, providing an upgrade from the look of normally exposed dirt. There are lots of styles and materials to choose from so you can choose an effective mulch material for your home that also adds to the style and look of your landscape.

Mulching or Stone?
While some people might like the look of decorative stone to shade their soil, it simply doesn’t provide all of the benefits that most natural options offer. In addition to their lacklustre performance in all areas other than style, they can also end up being quite an expensive addition to your landscape. While stone might offer a clean look that provides a slight barrier to evaporation, biodegradable options do a better job of the health of your soil and plants while offering a similar look at a better price point.
Options for Mulching Your Garden
There are tons of materials and methods for mulching your garden, so the main questions that you should ask yourself are: What do I want to get out of my mulch? What kind of look am I going for in my garden? Do I want to use synthetic materials or natural materials?
Once you have an idea of what you want, consider these great mulch options:
Bark Mulch consists of shredded bark, creating a fantastic all-natural mulch material that will provide all of the moisture-locking and weed-blocking benefits of mulch, while also slowly boosting the health of your garden as the organic material decomposes. Bark mulches come in a variety of colours depending on the type of tree they are sourced from.
Wood Chips provide a look that is similar to bark chips, but a little more robust. Again, colours depend on the type of wood they are sourced from, but there is the additional option of treated chips that have a more uniform colour. These chips will also break down slowly to supplement your soil, so opting for an all-natural dye on the treated chips is a good idea to prevent chemicals leaching into the soil.
Straw is a good option for those that want cost-effective and all-natural mulch solutions, but are also okay with a more rustic look in the garden. We love the country aesthetic that it gives our flower beds! Keep in mind that some straw varieties might have weeds and seeds of their own that pop up when applied, so they may not be the ideal choice for those looking to cut down on weed pressure.
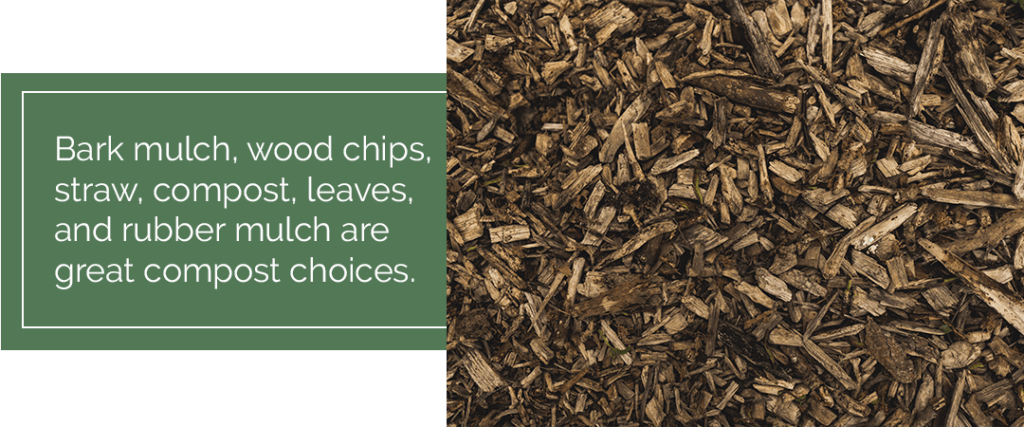
Compost or Manure, when applied in a thick layer will deliver a massive nutritional boost to your soil and plants, resulting in lush and beautiful growth that can’t be matched with synthetic fertilizers. If you’re looking to mulch with compost or manure, you’ll need to provide a generous coat of 2-4 inches of material to effectively insulate the soil.
Leaves and Grass Clippings are another great natural option that is very easy to source from your own yard! The clippings straight from your lawn mower bag and the leaves you collect in the fall are more welcome in your garden than the garbage. While this might not be the cleanest look in your mulching options, it’s incredibly effective and very straightforward - and the freshly clipped grass smells great.
Rubber Mulch is another option, though it is not natural and won’t contribute to the nutritional health of your soil as the other mulches do. However, it is still very effective at locking in moisture, choking out weeds, and keeping the soil insulated, all while looking clean and uniform. As it doesn’t break down like the other options, this is certainly a mulch choice that is more permanent - you won’t have to replace it, but moving it might become difficult.
Mulch is the secret weapon that goes unappreciated in many gardens, stepping up the performance and look of your landscape in one simple application. With so many options, there’s bound to be something that is the perfect fit for you and your garden’s goals.
After a tough winter like this one, there’s nothing that lifts the spirits and brings a smile to your face like bright spring blooms poking out of your newly thawed landscape.
Spring bulbs are some of the first flowers to appear in the spring, making them great additions to your landscape and flower beds to bring you a bit of colour and cheer as soon as possible in the year. Straying from seeds might seem a little intimidating for some people, but planting actually doesn’t get much simpler than “plant-it-then-forget-it” bulbs.
Spring Bulbs
Spring bulbs bring us some of our favorite seasonal looks that simply can’t be replicated with any other flowers, and their head start in the soil at the beginning of the season gives them an early jump on spring and other blooms. When the weather just begins to warm up, we’re ready to get out in our gardens and enjoy our landscapes again, and bulbs are the perfect way to take advantage of that spring excitement.
When to Plant Bulbs
Getting to know the basics about your bulbs is the difference between a successful garden and a disappointing beginning to the season. When it comes to bulb types, it’s all about timing.
Spring Blooming Bulbs
Classics like tulips and daffodils actually need some planning ahead for best results, as they need to be planted in the fall. These blooms should be in the ground approximately six weeks before the first frost (planting in late August) so that they can get settled in nicely before the winter chill. They actually need the deep freeze in order to get their beauty sleep and emerge in the spring just as soon as the weather is warm again. Already planted and ready to go, these blooms are great in the spring as they are ready to spring into action before you can get out into the garden to work on planting anything else.

If you didn’t get to planting last fall, though, all hope for spring bulb colour isn’t gone - you can get pre-chilled blooms that were kept the right temperature for hibernation all winter and are ready to be planted in your garden. Don’t worry about the last frost; if you can move the soil you can plant these bulbs outside, and they’ll bloom when weather permits. If the ground is still frozen solid, you can even plant them in a container until the soil is warm enough to start planting.
If you’ve totally missed out on spring bulbs, you don’t have to be sad about missing all of the colour and convenience of these blooms that you plant and forget until later - there’s tons of time to plant summer blooming bulbs in your garden. Beautiful flowers like dahlias, allium, and begonias are perfect for brightening your yard later in the season. Wait for warm soil before you plant these heat lovers, as they aren’t fans of frost and are a bit more delicate.
The Best Bulbs to Choose for a Flower Garden
Not every bulb was created equal, and there are so many options that it can be overwhelming to choose. You’ll be focusing on when to plant and how to plant, but also looking for flowers that compliment each other and give you lasting colour all season. Here are some of our favourite bulbs to see in our own yards in the spring:
- Tulips: These bulbs are beauty in a cup and are beloved classics for a reason. A symbol of spring, they triumphantly announce the arrival of warmer weather with vibrant colours and their iconic shape. Tulips can be picky and have a reputation for being finicky, but if you provide soil with lots of drainage and only water sparingly, you’re likely to have success. Many varieties only last a few years, so you’ll have the chance to refresh your look often! Plant new tulips every fall to make sure that you always have something to enjoy in the spring.
- Hyacinths: For a little bit of a cooler tone in your garden in the spring when the days are still chilly, hyacinths are a perfect addition. These flowers grow in stunning clusters that look and smell fabulous. You’ll love their intoxicating fragrance, which will bring a smile to your face every day. Plant them near high-traffic areas of your garden, like a walkway or a patio, so you can enjoy their scent whenever you step outside. Plant them in full sun to partial sun, and give them well-draining soil for a successful spring bloom.
- Daffodils: With pointed petals and a trumpet shape, these are the stars of spring blooming in many gardens. Like sunshine encapsulated right in your garden, they’re sure to put you in a spring mood. Give them lots of sunlight (only partial shade or full sun) to help them reach their maximum brightness. These tough plants are easy to care for and can last for decades without any maintenance so you can truly plant them and forget about them!

Eising’s Tips for Planting Spring Bulbs
If you’ve only ever planted from seeds or starters, something new can be a little intimidating. There’s no need to worry, though - there are lots of ways to make planting spring bulbs easy!
Pick high-quality bulbs. Check your bulbs before you buy (and plant!) to make sure they’re in good condition to grow. Pick healthy bulbs that are firm and plump, with no visible discolouration or mould spots. Larger bulbs will give you bigger and/or more blooms than smaller ones.
Location, location, location: Choose a good spot for your bulbs to give them the leg up on growing healthy and vibrant. Most flowers like full or partial sun conditions with good drainage, but read their label to be sure you give your bulbs what they need to reach their full potential.
Start with a good foundation. Good soil makes a big difference. Bulbs don’t like wet or damp conditions and will want something that drains well. They’ll also love the boost of fertilization to give them that extra push in the spring. Without a little fuel, the flowers will suffer and not be as bold of a display when it comes time to bloom.
Plant them right. Starting with healthy bulbs and good conditions is a great start, but planting bulbs takes some new skills that gardeners used to seeds and transplants might not have. Plant these bulbs deep enough - typically a hole 3 times as tall as the bulb is - and plant with the pointed side pointing downward.
Caring For Your Spring Bulbs
Many bulbs are simply perennial plants with a slight twist, so they will return with beautiful blooms year after year! While this saves you from getting new plants to replace the ones you love, it does mean that the work isn’t done when the blooms fade. Maintaining your blooms will bring flowers for next year:
- After your spring bulbs are done flowering for the season, cut their stalks down to the ground, but leave the foliage up for a few months. The leaves will still be busy collecting energy and nutrients to fuel the blooms for next year, and you don’t want to create a disappointing spring next year by trimming them back prematurely. As a rule of thumb, wait about 2 months before you trim the leaves back.
- Many perennials need to be divided every three to five years to manage their successful growth. If your plant is producing fewer blooms than usual it’s time to divide. Wait until your plant is dormant and the foliage has dried and died before you divide.
Cold winter days are a little less awful when you know that spring colour is waiting for you on the other side of the season. All your bulbs need is a little bit of planning ahead, and in return, they will fill your garden with cheer all season.
Having a tropical plant in your home is like creating a tiny little oasis of lush greenery that’s with you no matter what life throws at you. Especially after a chilly winter like the one we’ve had, it’s easy to see the appeal of having a leafy green friend inside to help us mentally escape the frostbite-inducing temperatures outside. It’s no wonder how having these green acquaintances in our homes has become so popular - and with your own, you’ll have a little bit of homegrown happiness in your everyday life.
Tropical plants don’t have to be difficult to care for, even though they are so far away from their balmy and sunny homes! We have all the tips to make sure that your new tropical friend is happy, healthy, and ready to flourish in your home. Here’s how to have a tropical getaway inside, no matter how green your thumb is (or isn’t).
How To Take Care of Tropical Plants
The secret to keeping a plant healthy - and alive - is to picture their homeland, and do what you can to replicate those conditions. Your plants might have grown up in a greenhouse but their species has spent a long time adapting to their native territory. Giving them an environment that meets their needs will reduce the work and fussing you have to put in to keep your plant looking fabulous.

For example, while you might try to make sure that a cactus or succulent is kept dry and sunny, your tropicals are going to love some moisture and humidity. In the tropical landscapes most of them come from, water is not in short supply, and while they enjoy some sunlight, many times they’re used to sharing the sun with so many plants and in such high humidity that they prefer indirect or partial light. No plant likes soggy roots, but you’ll generally be watering tropicals regularly and trying to keep the humidity at a nice level - usually not much of a struggle in our neighbourhood of Southern Ontario.
Each tropical plant will have its own care requirements that are unique to that plant so checking the tag or doing a quick search is the best way to make sure that you care is specific to its needs. That said, there are a few rules of thumb that you can stick to:
Watering Tropical Plants
The right amount of moisture can be tricky when you can’t just ask your plant if it’s thirsty! Generally, waiting until your plant is wilting is stressful for your cute leafy friend and should be avoided, so you can test the soil to anticipate when they’ll need a drink. Nobody likes soggy soil and roots, but you won’t want to dry out - tropical plants are a little like Goldilocks in that respect. Too much water will stifle the roots and prevent them from getting crucial oxygen, but too little will leave them parched. There are two great ways to check the moisture of your plant to tell you when to water to keep that level just right:
- Poke your finger into the soil to feel the moisture. This method is so direct you can’t go wrong! Poke a finger into the soil and stop when you feel moisture. Water your plant when you poke the soil and it’s dry up to your first knuckle.
- Go by weight. Water weighs a lot, and your dry container will be a whole lot lighter than a well-watered one. Get used to how much your plant weighs when thirsty and quenched and use this as a guide, too. You can even use both methods at the same time for extra confidence.

More Watering Tips: Some tropicals are quite sensitive, and the salts and minerals dissolved in our tap water can burn their roots, even if they’re safe for us to drink. When you water, keep going until water pours out the drainage holes at the bottom of the container, flushing out any leftover salts from last time you watered. You can even choose to use distilled water to avoid build-up in the soil. When you’re watering use a dish under the plant to catch what flows from the bottom, or for even less mess, relocate your plant to the sink or bathtub to water them, let them drain for a few minutes, and put them back.
Light for Tropical Plants
Each plant from different areas of the world might have different requirements, so lighting isn’t a one-size-fits-all thing. Many tropicals love to soak up the sun, but aren’t used to getting too many direct rays and might be prone to getting sunburns. Check the tag on your plant to get an idea of its needs and find a spot in your home that suits them - while plants don’t like being moved around too much, you can always relocate if you need to.
Your beautiful tropical can’t talk to you, but if you pay attention you can see signs of what it needs. Look out for pale or yellowing leaves, or a “stretching” plant that seems lanky - these are signs your tropical is craving a little bit more sunlight. Brown spots on the leaves, though, could be a sign of burning from too much direct light.
Fertilizing Tropicals
We want our plants to grow big and strong, and giving them the right fuel is certainly a way to do that. Fertilizer is an option to give your plant a little boost - especially during the growing season - to grow more lush and healthy. Be careful, though, as your plant’s roots are already in cramped quarters in a container, so only use half concentration doses, and only once or twice a year. Just a little goes a long way! Choose a fertilizer with close to equal numbers, like a 20-20-20 for a healthy mix to meet your plant’s needs.

Growing Tropicals - Moving Up in Size
With a happy and healthy plant, you’re sure to eventually need to give your plant a bigger home to let it stretch out its roots! When the plant looks “rootbound” or that almost all of the soil and space in the container is roots, it’s time to size up. You might notice visible roots at the top of the container, growing out the bottom, or that you need to water your plant more because it has less soil to hold on to water.
Sizing up is as easy as getting a larger container and repotting. It’s simple, but it can get messy. Here are some of our tips for sizing up for a healthy, growing tropical:
- Choose a container only one or two sizes bigger. You might be tempted to go much larger but not only will the proportions of your chic living decoration be off, the excess soil will also hold too much moisture and might invite rot into your container.
- Choose a container with good drainage. No matter the size, you’ll always want a spot for water to drain out the bottom. If you fall in love with a decorative pot without drainage, never fear! You can DIY by drilling holes yourself or cheat by planting your beautiful tropical in a container with drainage, and simply hiding that well-draining container inside your decorative one.
- Buy potting soil suited to your tropical beauty. Buying tropical-focused soil will give you something with the drainage and nutrition your plant’s needs - and planting from a sterile bag instead of taking soil from outside can help to keep pests out of your home and away from your plant.

Tropicals are one of our favorite ways to embrace the trend of houseplants, and we can’t get enough of their rich green and glossy leaves. They’re perfectly suited to our cozy, temperature-controlled homes and can be easy to take care of when you know how to give them what they need and speak their language. Taking home a tropical is a great way to boost your mood at home with a chic and stylish living decoration that’s ready to impress for years to come.