
5 Easy Steps To Get Started
By Ava Green
There’s a common myth that you need a lot of space to grow vegetables, but whether you have a few containers, a small sunny corner, or a larger garden bed, there’s lots you can grow! Here in Norfolk County, which is Zone 6 in Southern Ontario, some vegetables can go in the ground as early as the beginning of May, while many others are usually safe to plant around the May 24th weekend, once the risk of frost has passed. Here are five simple steps to get you growing your own food this season if you’re new to vegetable gardening.
Step 1: Decide What You’d Love To Grow
Start with a list of the vegetables you actually want to eat. Coming into Eising Garden Centre with a list in hand makes choosing plants so much easier! When building your list, consider:
- Vegetables you love
- High-value vegetables, the ones that are expensive at the grocery store but easy and economical to grow yourself
- Anything that tastes better when it’s freshly picked, like tomatoes, cucumbers, and fresh herbs

Step 2: Make a Simple Plan
You don’t need an elaborate design; a rough sketch on a scrap of paper is just fine. The goal is simply to get a sense of your space and where things will go before you start digging. We recommend starting a garden notebook or journal to track what you plant each year and how it performs. It will be especially helpful next spring!! A few planning tips to keep in mind:
- Most heat-loving vegetables, such as tomatoes, peppers, zucchini, eggplant and beans, need at least six hours of sun per day
- Cool-weather and shade-tolerant crops like lettuce, chard, kale, radishes, and beets do well with just three to four hours of sun
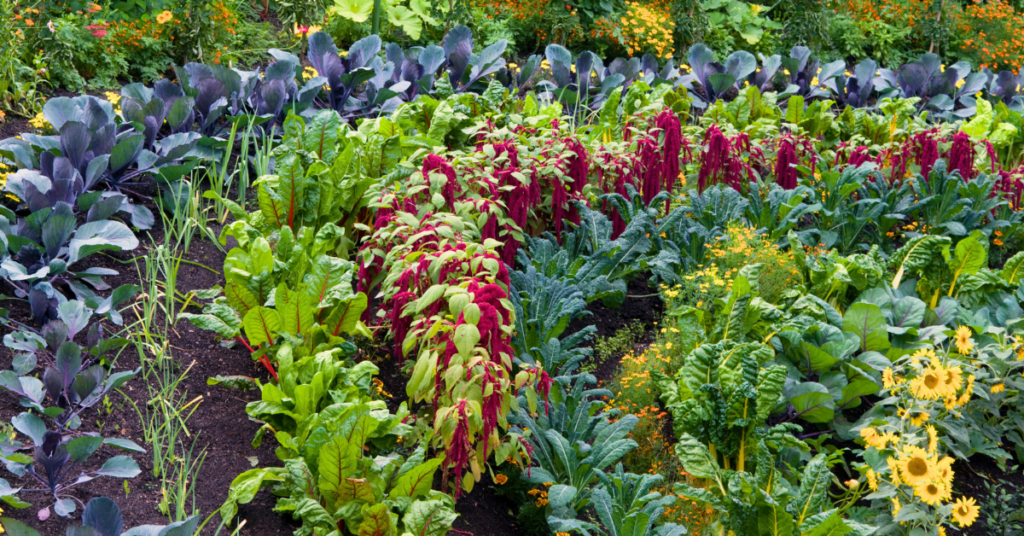
- Spacing in a vegetable garden can be much tighter than in other types of gardens. Less empty space means fewer weeds and bigger harvests. Square foot gardening is an excellent method to explore
- Layer your garden beds with plants that are great companions. For example, basil and marigolds planted beside tomatoes are said to improve flavour and repel pests. Carrot and beet seeds tucked in beside and between your lettuce plants (which are a cool-weather crop) are a smart pairing; as your lettuce finishes in the summer heat, your carrots and beets will be sprouting up to take their place. This is referred to as succession planting and optimizes the space in your garden
- Make use of vertical space with poles or trellises for peas, pole beans and cucumbers
- Tuck herbs into any gaps between your vegetables; they’re useful, beautiful, and most pollinators love them
Step 3: Prepare Your Space
Once you’ve chosen a spot with enough light, it’s time to get the soil ready:
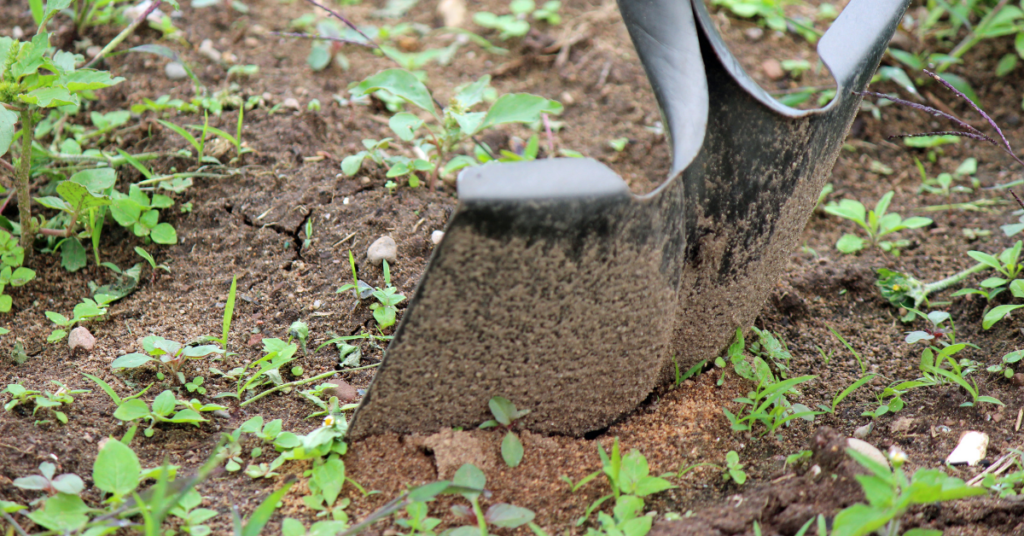
- Remove any sod or weeds before planting. If you’d rather not dig, the No Dig gardening method uses a layer of cardboard as the base for the new bed. This suppresses weeds naturally and breaks down into the soil over time
- Add a good-quality compost to your soil by either spreading a layer across the top of the garden bed or scooping some into each plant hole
- For container gardening, almost any container works, just make sure it’s deep and wide enough for the mature size of your plants. Also, drainage holes are a must! Fill containers with a soilless mix containing compost, peat moss or a peat alternative, and one of the following: sand, vermiculite, or perlite. Avoid using garden soil, triple mix, or topsoil in containers, as they compact easily and will restrict root growth. Learn more about soil mixes, amendments, and fertilizers here

Step 4: Water and Feed Consistently
Consistent watering and feeding are the foundation of a productive vegetable garden:
- Vegetables need regular, reliable watering. Inconsistent moisture leads to stressed plants and poor yields
- Always water the soil, not the leaves. Plant roots take in water, and wet foliage can invite disease. Water deeply so moisture reaches the roots. Use your fingers to check how far down the water has penetrated into the soil
- Containers dry out faster than garden beds and will need more frequent attention
- Morning is the best time to water. If your plants are struggling on a particularly hot afternoon, a second watering is fine. Just be sure to aim at the base of the plant and avoid the foliage, which can scorch in direct sun
- Feed with organic fertilizers throughout the season to keep your plants healthy and productive. Follow the package instructions for the product you choose
Step 5: Plant Flowers for Your Pollinators
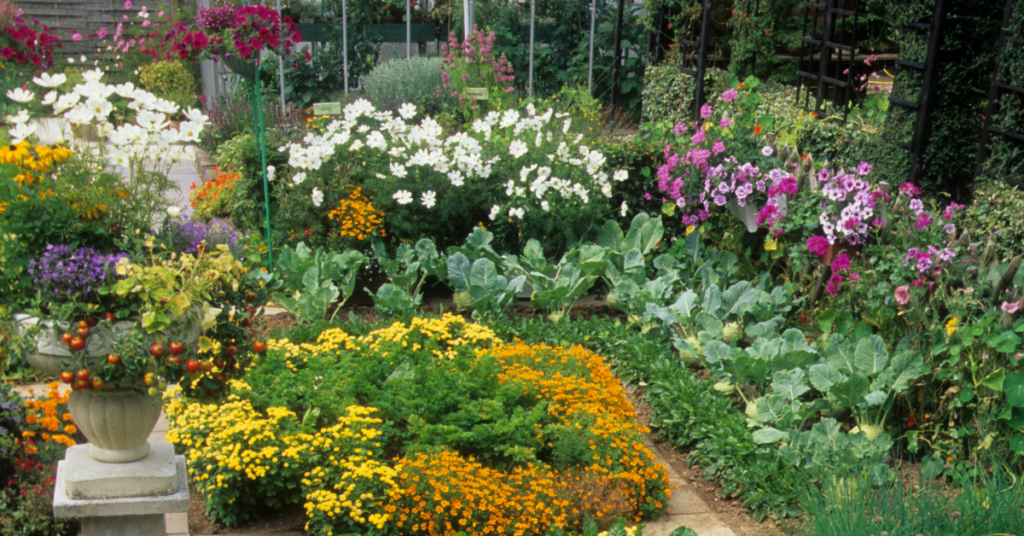
A vegetable garden without pollinators is a garden that won’t reach its full potential. Attracting bees, butterflies and other beneficial insects to your garden is one of the best things you can do for your harvest. Some of our favourite pollinator-friendly flowers for the vegetable garden include marigold, calendula, nasturtium, borage, sunflowers and culinary lavender. As a bonus, most of these are edible, so they earn their space twice over.
It’s Time
Starting a vegetable garden is one of the most rewarding things you can do with an outdoor space. There’s a quiet satisfaction in growing something from seed or a seedling and bringing it to your own table.
Start simple, grow what you love and don’t be afraid to learn as you go.
The team at Eising Garden Centre is always happy to help you choose the right plants for your space and answer any questions along the way. This could be the season that changes the way you think about your garden!
Resources:
Why Use a Garden Journal?: https://eising.ca/why-use-a-garden-journal/
Square Foot Gardening: https://www.almanac.com/planning-square-foot-garden-grow-more-less-space
Fertilizers & Soil Amendments: https://eising.ca/fertilizers-soil-amendments/
Companion Planting: https://eising.ca/companion-planting-with-herbs/ and https://eising.ca/incorporating-vegetables-into-your-garden/
Optimizing the Gardening Season: https://eising.ca/optimizing-the-gardening-season/
No Dig Gardening Method: https://charlesdowding.co.uk/blogs/no-dig-resources/beginners-guide
Reading Plant Tags: https://eising.ca/full-sun-part-shade-what-do-plant-tags-actually-mean/
Growing Vegetables in Pots: https://eising.ca/planters-are-for-more-than-flowers/
By Ava Green
As soon as warm weather and sunshine arrive in Southern Ontario, it’s time to head to the garden centre and pick up all the plants we’ve been dreaming about all winter long! May 24th is generally the date we look forward to — the unofficial marker when frosty mornings are behind us and the promise of summer is ahead.
By now, cool-weather plants like cabbage, Brussels sprouts, peas, and lettuce should be well established in the vegetable garden. And for everything else, it’s go time!
TIP: Before you start planting, this is the ideal time to amend your soil. Top up your garden beds with fresh topsoil or enrich them with compost to improve soil health, add nutrients, and promote vigorous plant growth. Don’t forget to refresh the soil in your containers as well, with potting mix or compost.
Warm Weather Vegetables
When soil temperatures are consistently 60°F (15°C) or higher, it’s safe to plant all the warm-weather vegetable crops we’ve been waiting for! Plants that thrive in warmer weather include tomatoes, peppers, eggplants, cucumbers, zucchini and corn.
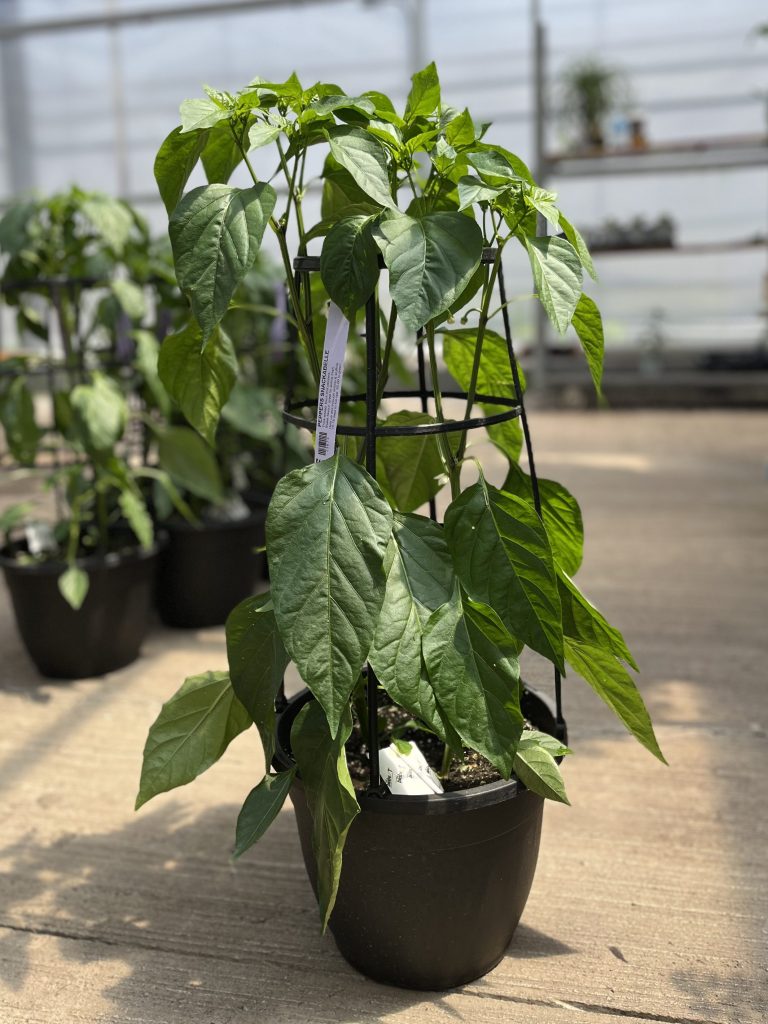
At Eising Garden Centre, you’ll find vegetables in 6-packs, 4” pots, trellised patio containers, patio bowls and hanging baskets - while supplies last, of course!
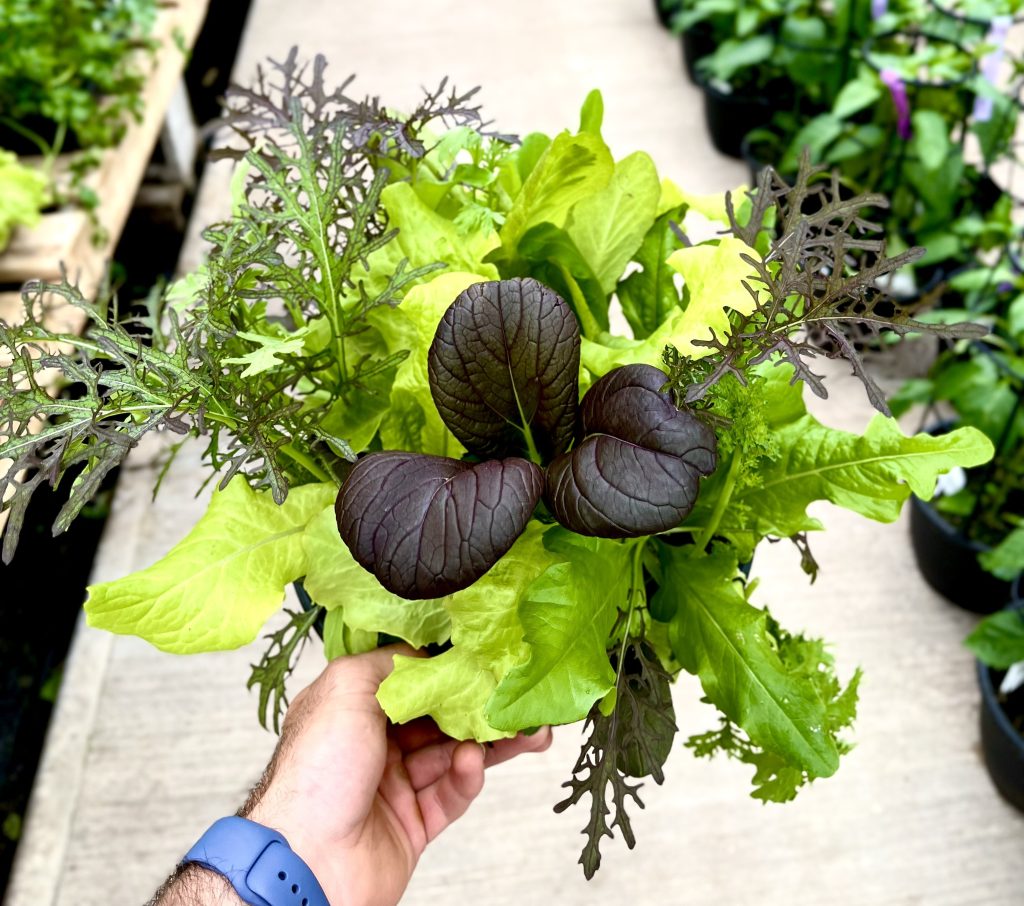

Herbs also love warm weather, and tender varieties like basil are safe to plant once all danger of frost has passed. Whether you plant herbs directly into the ground or create a potted herb garden near the kitchen door, they’ll add fresh flavour to your meals all season long. A container of herbs also makes a wonderful gift when visiting friends and family for a summer BBQ.
While you’re in the vegetable and herb aisle, keep an eye out for everbearing strawberries in planters and containers of tropical fruits like lemons, limes, and oranges.
Annual Flowers
Winter-weary flower beds can be revived almost instantly with a burst of colourful annuals! If you’re looking for an immediate impact and blooms that last all summer long, annual flowers are the answer.
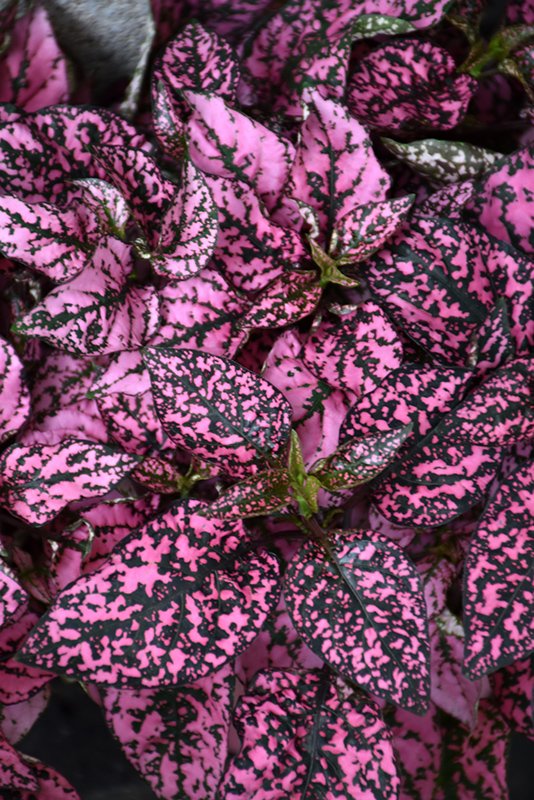
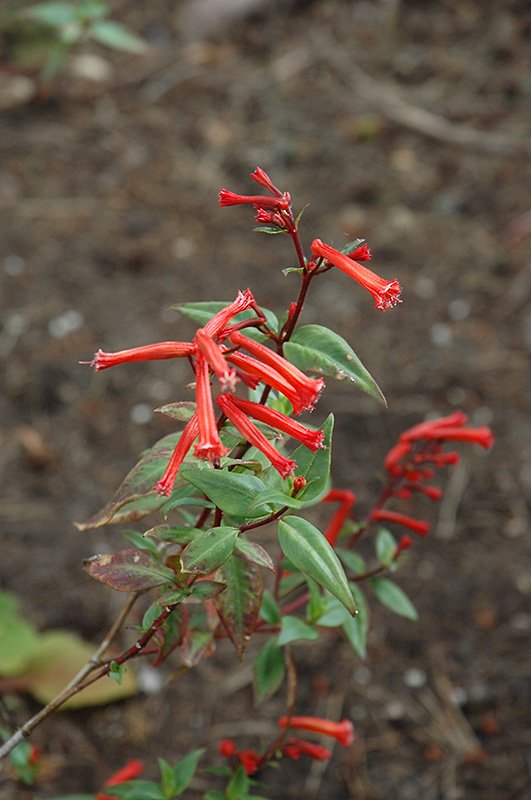
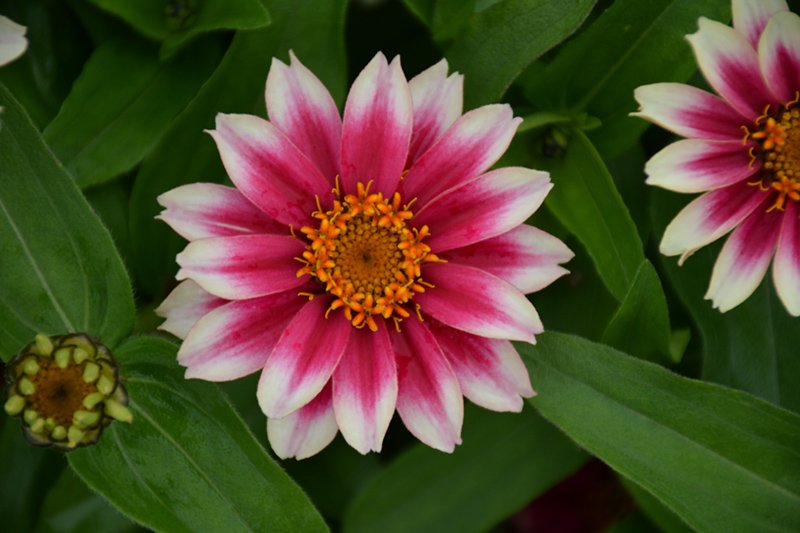
Whether you plant them in beds, containers, window boxes, or hanging baskets — or choose from one of our gorgeous pre-planted options — just add water and fertilizer, and you’ll be rewarded with a vibrant display that keeps on giving.
Perennials
While perennials may not bloom all summer, many offer extended bloom periods, and by combining different varieties, you can create a succession of flowers that lasts for months. Perennials also provide essential greenery to anchor your garden and enhance the look of your flowering plants.
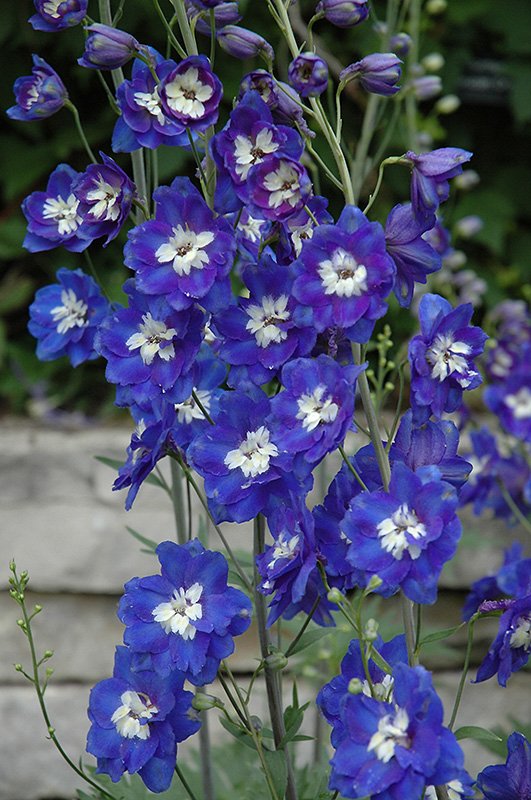
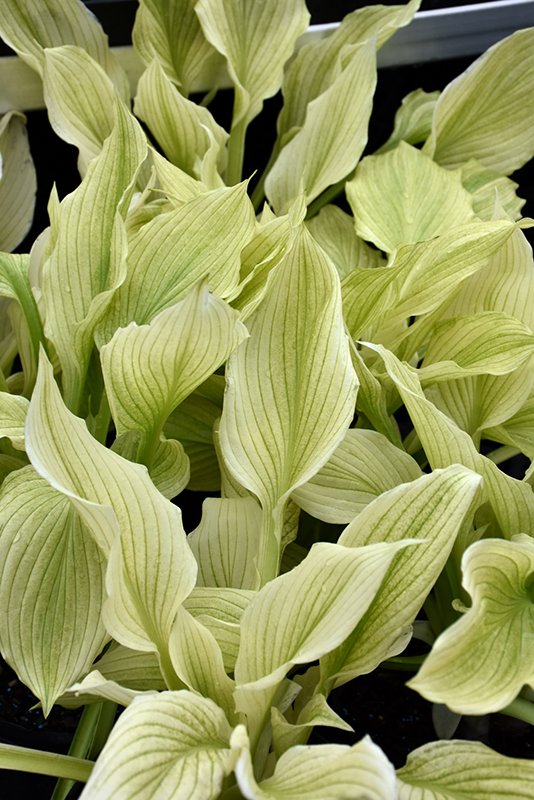
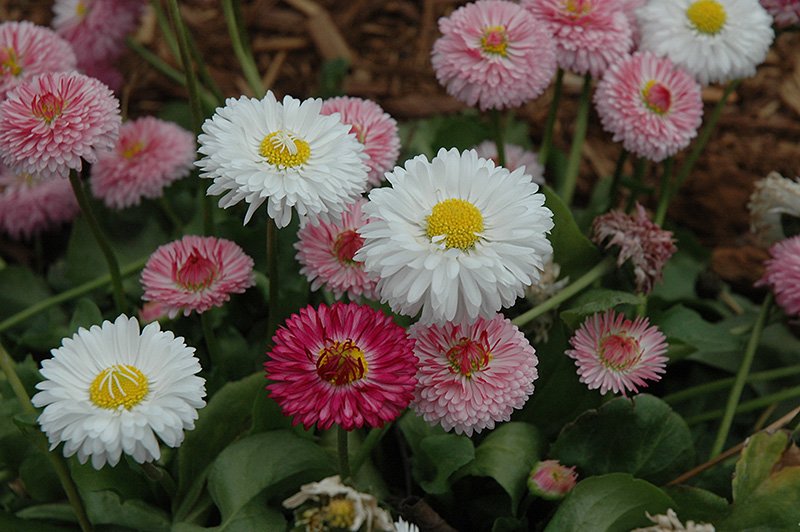
You can plant perennials from spring through fall, but getting them into the ground now gives them a strong start. From hostas and ornamental grasses to daisies and delphiniums, there’s a perennial for every style of garden — and the best part is, they’ll return each spring like dependable old friends.
Trees, Shrubs and Vines
Often called “the bones” of the garden, trees, shrubs, and climbing vines add essential structure, height, and seasonal interest. Planting them now allows you to design your garden layers thoughtfully, incorporating annuals and perennials around their base.
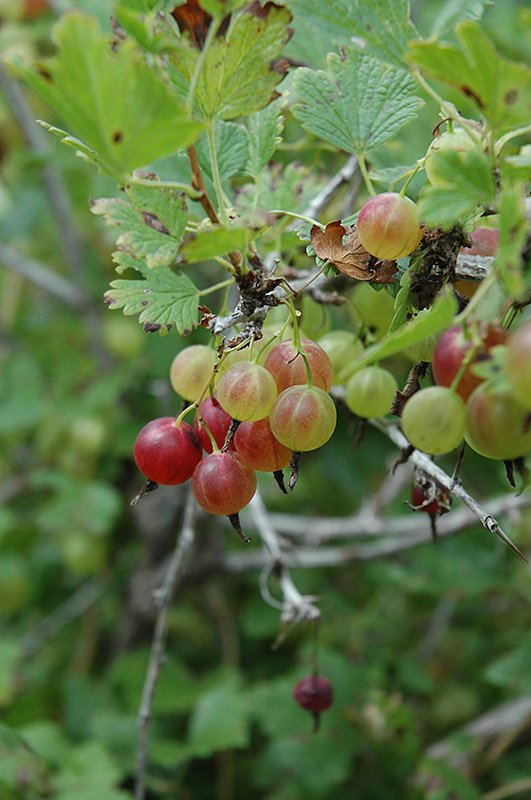
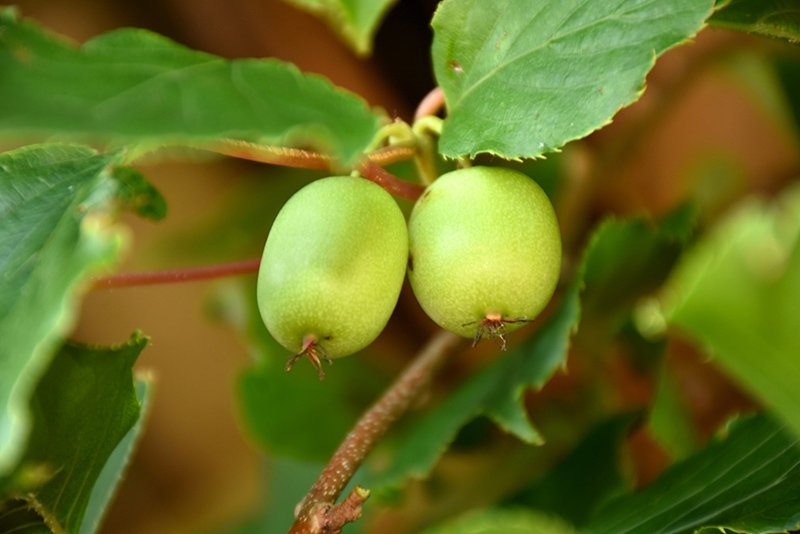

Spring is also the prime time to purchase and plant fruit trees and fruiting shrubs. At Eising, spring offers the best selection for starting your home orchard. Are you thinking of adding a few edible shrubs? Gooseberries, haskaps, hardy kiwi, rhubarb and raspberries are excellent choices.
Mulch
Okay, it’s not a plant, but this is a reminder to add mulch to your garden beds or containers. After planting, adding a layer of mulch to your garden beds or containers helps retain soil moisture, reduces transplant shock, and suppresses weeds. Even if a few weeds manage to sneak through, mulch makes them easier to pull.
Water Garden Plants
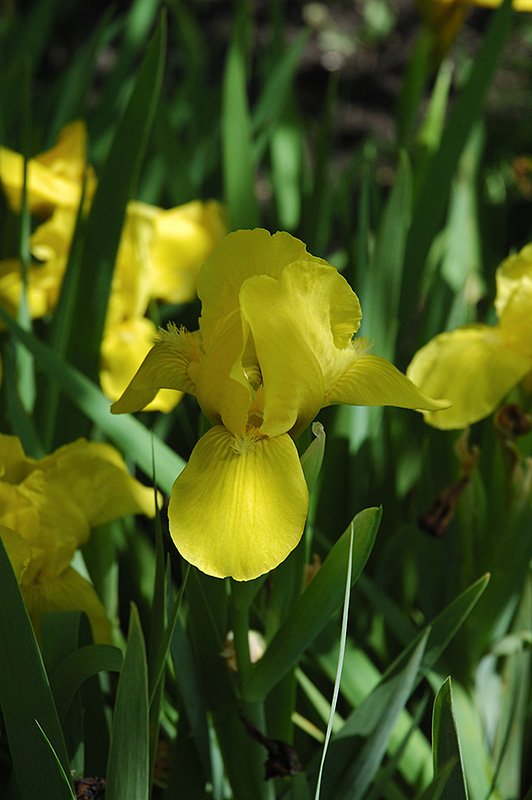
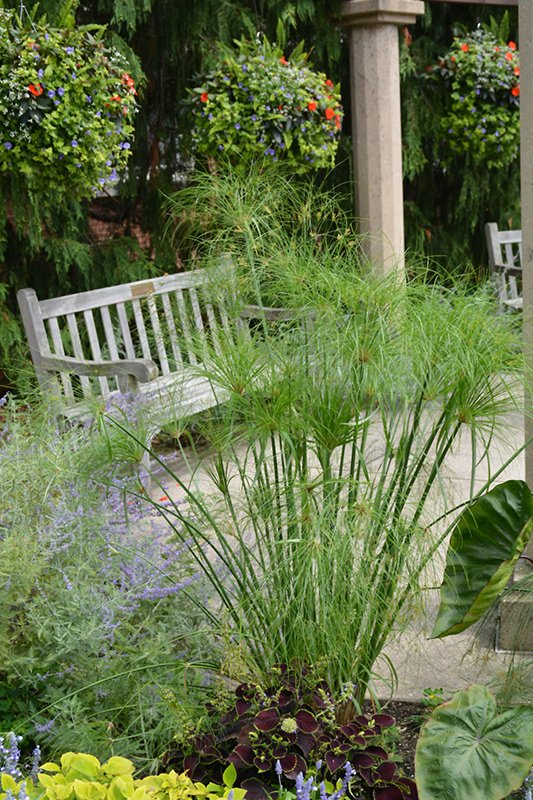
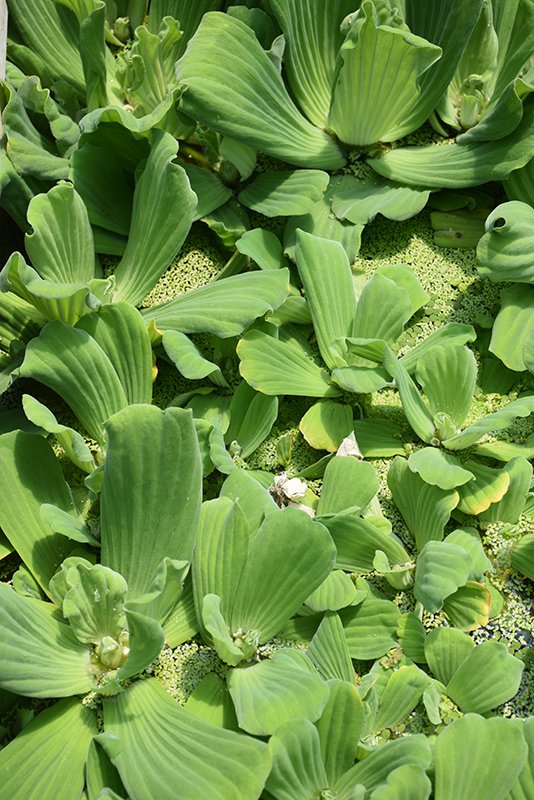
If you have a garden pond, spring is the perfect time to add water plants. Floating plants, such as water hyacinths and water lilies, help shade the pond’s surface, reducing algae blooms. Marginal or bog plants, such as water iris, papyrus, and cattails, also help keep the water healthy and clear by improving oxygen levels and providing habitats for beneficial wildlife.
Time to Grow!
May is one of the most anticipated and exciting months in the garden. Whether you’re dreaming of fresh vegetables, a lush landscape, or a colourful flower display, planting now sets the stage for a beautiful, bountiful season. Visit us at Eising Garden Centre to find everything you need — and let’s get growing!
By Dave Zeldon and Ely Schweyer
Starting the first week of January, seed packets of many vegetable garden delicacies began arriving at your local garden centres. It’s a great time to plan your gardens and purchase your seeds while the selection is good but don't sow your seeds too early!

If started too soon, your plants will be leggy and overgrown long before you can transplant them into the garden. The general rule of thumb (even if yours isn't green), is if the seed packet recommends sowing four to six weeks before the last frost date, it's better to pick the four - rather than the six-week date (to calculate the sowing date, count back from the third week of May).
In this blog post, we’ll discuss the proper timing of the beneficial companion planting practice, to ensure an organic triple-play of pesticide reduction, nutrient sharing, and the fruits of your labour actually tasting better!
What is Companion Planting?
The use of companion plants is an organic approach embracing plant diversity that involves growing certain different types of plants near each other. By mixing a variety of plants together you confuse harmful insects (i.e., the ‘Three Sisters,’ corn, beans, and squash). When you plant certain vegetables together or alongside flowers or herbs, you can often camouflage the scent of a given plant so that its potential enemies can't find it. For example, if you plant onions and carrots together, the Carrot Rust Fly can no longer detect the scent of its "prey," the carrot.
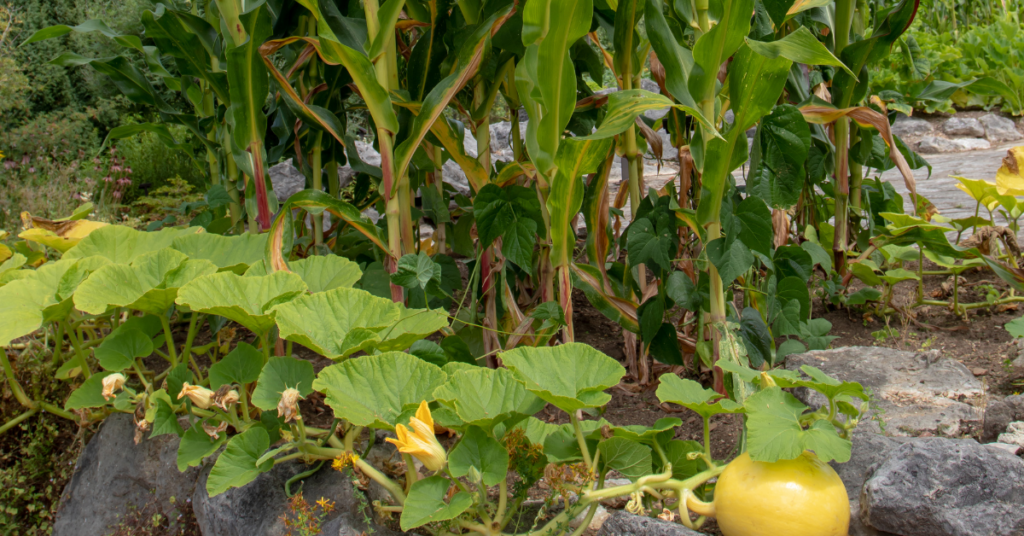
☝️ Plants also share nutrients and amend the soil below ground – in the instance of the Three Sisters, beans fix the nitrogen content of the soil for corn, who has long lost its ability to produce its own nitrogen.
What to Plant?
Herbs Make Excellent Companion Plants
Instead of grouping them all together in a corner, plant them in among your vegetables. Tarragon and marjoram give off a scent that repels most insects. Sage, rosemary, and thyme repel insects that feed on the different plants of the cabbage family. Plant these herbs near your cabbage, cauliflower, and brussels sprouts. Coriander attracts parasitic wasps that are very useful in controlling all sorts of pests.
🖱️ See more on companion planting with herbs here.

Why Not Try Flowers in the Vegetable Patch?
Nothing will make your vegetables happier! Plant borders of alyssum and cosmos; these attract beneficial insects and repel certain harmful ones. Marigolds protect tomatoes from threadworms, and nasturtiums and petunias attract aphids. If you plant them near your tomatoes, the aphids will choose the flowers instead of your tomatoes.
Meet My Plant Friends!
Plant friends are plants that can be grouped together because they mutually help each other grow. Basil stimulates the growth of Tomatoes and enhances the quality of the yield. Chamomile improves the growth and taste of cabbage and onions. It has been found that peas and beans enhance the growth of cucumbers and potatoes. Peas and beans also repel the Colorado Potato Beetle that commonly attacks potatoes and eggplant.
Once you’ve decided who is going where, it’s time to focus on when who is going where.
When To Plant?
It is important to know when the last spring frost date is for your area. Many plants need to be planted after the last frost, so that they don't freeze their little buds off! Follow this guide so that you can have healthy, sturdy little plants that will become good friends in your garden this summer.
| Ten Weeks Before Last Frost Sow indoors: broccoli, brussels sprouts, cabbage, cauliflower, eggplant, lettuce, peppers, and onion |
| Eight Weeks Before Last Frost Sow indoors: tomatoes Sow outdoors: spinach |
| Five Weeks Before Last Frost Sow indoors: marigolds (do not transplant until after last frost) Sow outdoors: peas Transplant: broccoli, cabbage, cauliflower, onion |
| Four Weeks Before Last Frost Sow indoors: cantaloupe, cucumbers, okra, pumpkins, squash, and watermelon |
| Three Weeks Before Last Frost Sow outdoors: carrots Transplant: brussels sprouts, hardened off frost-hardy herbs like chives and oregano |
| Week of Last Frost Sow outdoors: pole beans Transplant: cantaloupe, eggplant, lettuce, okra, peppers, pumpkins, squash, tomatoes, and watermelon |

BONUS: Tips on Ensuring Your Seeds Have the Best Start!
🌱 To ensure success it is always best to use fresh, sterile seed-starting mixture (available from garden centres). Moisten mixture about an hour before sowing; it shouldn't be soggy, just as damp as a wrung-out sponge.
🌱 Follow the information contained on seed packets in terms of timing, lighting requirements, sowing depth, and optimal germination and growing temperatures.
🌱 Lightly water freshly sown flats, then cover with plastic dome lid, or if reusing containers try placing them inside a plastic zip-lock bag. At the first signs of germination, uncover or remove from plastic bag.
🌱 As the seedlings develop, wait until the top of the soil looks dry, water carefully using a small watering can with a fine spray. Avoid over watering: soggy soil and poor air circulation can lead to damping off, a fungal disease that can kill seedlings.
🌱 Locate your seeding flat in a bright window but grow lights or cool fluorescent tubes are better. Keep seedlings about eight to 10 centimetres from light source to prevent plants from becoming too spindly. Plug lights into an automatic timer set for 16 hours on, eight hours off. Be careful if you’re using the windowsill method though, as extremes in temperature may occur from hot drying sunny days to frigid evenings.
🌱 When seedlings have two sets of true leaves (the first leaves are called cotyledons — or seed leaves — so wait for the true ones, start feeding once a week with a balanced (20-20-20), water-soluble fertilizer at half-strength, working up to full strength after a few weeks.
🌱 Finally, the plants which have been raised under sheltered conditions must now be hardened off (see more here) before planting out. Gradually lower the temperature and reduce the watering while exposing the plants to brighter light for seven days prior moving them out to a cold frame. Keep an eye on the weather as sudden changes, as it often happens in spring, could spell disaster to your young plants.
We hope your garden is biodiverse and fruitful this year! For more information – and companion plants – visit Eising Greenhouse and Garden Centre this spring! 🌿
By Dave Zeldon and Ely Schweyer
This is the time of year that most garden centres will have on display their wide variety of Amaryllis bulbs, including the evermore popular waxed dipped. These enormous bulbs that are appearing now will be ready to burst into bloom within 4-8 weeks after planting.
Non-Wax Dipped: Planting
All Amaryllis need is a bit of commercial potting soil that should not cover the shoulders of the bulb (try leaving about 1/3rd of the bulb showing above the soil line), with the nose (or narrow end) of the bulb peeping well over the top of the pot. Make sure that you use a well-drained container that is 3-4” bigger in diameter than the bulb itself.
☝️A heavy clay pot will prevent this top-heavy plant from toppling over. To achieve continuous bloom, plant at intervals of two weeks for stunning colour in your home.

Non-Wax Dipped: Care
Once leaves emerge, fertilize once a month with a 20-20-20 water soluble fertilizer for houseplants. Water sparingly and wait for the miracle in a warm sunny room. Sub-irrigation or watering from the bottom of the drip tray will keep the surface soil dry, thus keeping and bulb rot organisms and those pesky fungus gnats at bay.
Non-Wax Dipped: It's Not Done Yet!
When blooming is over, remove the scape (or flower stock) and place the plant in a sunny spot and continue to water. This is to allow the leaves to regenerate the bulb. In springtime, when all danger of frost has passed, bring the bulb outdoors and let it spend its holidays in a shady spot. In some varieties the leaves will die back in September to give the plant a rest for a couple months. Stop watering and store the bulb on its side in a cool place for about eight weeks, when the leaves will once again begin to emerge.
Amaryllis can go 3-4 years without repotting as they don’t mind a little crowding. Try growing a couple of bulbs in larger pots to see if you can get a clump of flowers from the offshoots or babies that will develop after a couple of years.
Or, Try One of These Wax Dipped Bulbs!
Now growing more popular are the care-free waxed-bulb Amaryllis!



Experienced growers and beginners alike love that these waxed bulbs do not need to be planted or watered! Each of these robust bulbs are carefully prepared in festive-coloured wax, allowing you the freedom to place them among your holiday decorations.
Simply keep the bulbs at an ambient room temperature of at least 16C (70F) for beautiful blooms in five to six weeks.
These novelty items are low commitment! Their only fault is their lack of longevity - gardeners don’t get to enjoy them after year as these waxed bulbs were designed to be a one-use throwaway item!
BUT with a little luck and perseverance you may be able to save the bulb for next season after blooming. All you have to do is to carefully remove the wax layer, remove the flower stalk and place the bulb and with its remaining leaves into a pot of good growing media, allowing the leaves to regenerate the food stores in the expired bulb.
If you’re looking for more information – or perhaps, Amaryllis – visit Eising Greenhouse and Garden Centre! Happy Holidays! ✨
By: Dave Zeldon and Ely Schweyer with tips from Mary K, Zach C, Sandy M, and Jeanine LT!
Now is the time to prep our outdoor landscapes for the coming cold weather and the ensuing spring! Perhaps your autumn is calmer than your spring, and this is the best time to clean up and begin new projects. The following are some simple but effective tips to get your yard winter-ready - so your spring will be a little more pleasant for you!
Planting
When warm weather still allows it, plant trees, shrubs, perennials, and bulbs to allow them to establish for budding and blooming next spring.
Pond Care
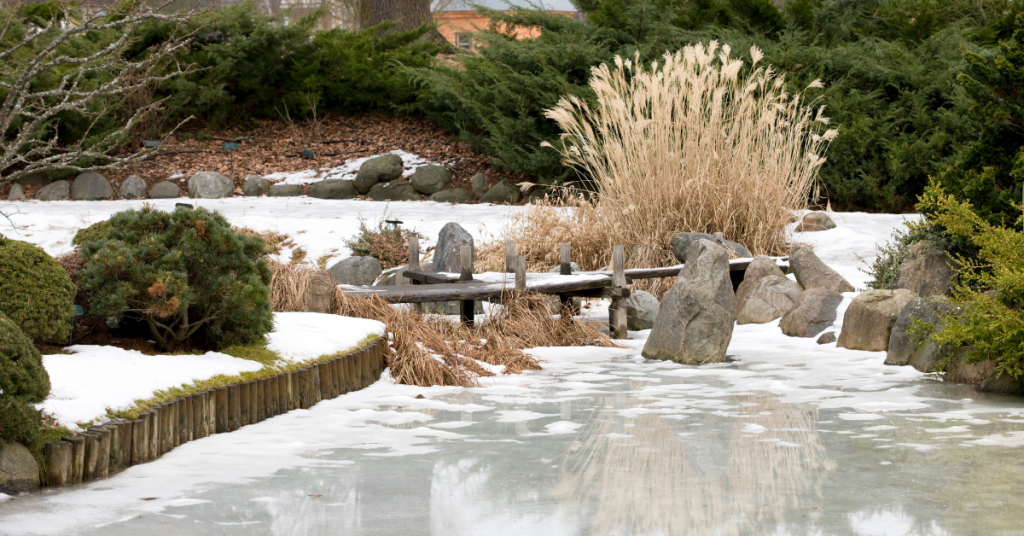
Mary, our perennials gal, suggests not removing any water from your pond but instead aerating it all winter. She skims out the leaves to maintain the balance of the nitrogen cycle in the water and suggests waiting to do a big pond clean out in the spring, as that’s when the water’s culture can bounce back easier.
Fertilizing
After top growth of your landscape plants ceases, reduce your annual fertilizer application by up to half of the requirement. Autumn is a major root growth period for woody and herbaceous perennials; roots will grow and absorb nutrients whenever soil temperatures remain above 5 °C but can be over fertilized quickly in these cooling temperatures.
Produce gardens could benefit at this time from a top layer of compost that will break down during the winter so it isn't too 'hot' for spring planting.
Leaf Litter
Here’s our pitch on the ‘leave it – don’t leave it’ debate: It DEPENDS.
Ideally, we should leave litter leaf on the ground for our pollinator friends and endangered species like fireflies to hide out in the winter. But, there are appropriate situations in which to remove leaf litter.
- When they’re covering your bulbs and tender perennials, remove SOME. Leaf litter acts as a ground insulant, which can amplify our temperamental zone 6b temperatures. This freezing and thawing can often confuse and kill early spring bulbs and tender perennials.
- Zach, our trees and shrubs guy, suggests that if a tree shedding leaves has been diagnosed with pests and fungi, remove the leaf matter to reduce the spread to other plants. Diseased matter should always be removed in a quarantined fashion and taken to a landfill or burned.
☝️Please note: Unless diseased, compost your leaves, they contain vital nutrients specific to the plants they came from!

Lawncare
With autumn mowing practices you have the opportunity for the addition of much needed organic matter for your lawn, which is also an excellent source of slow release nutrients. Keep mower blades sharp since leaves can be tougher than grass. Raise the mower height up and mow leaves when they are lightly wet (e.g., morning dew). This will keep the leaves from blowing all over and will prevent the mower from getting bogged down in wet leaves.
See more on general lawncare in Dave's Lawncare 101 post.
Clean Up
Now is a good time to wash your tools with soap and water to prevent diseases spreading from plant to plant.
☝️Mary's tip is to spray garden tools with PAM before use, so the dirt slides right off them!

Pruning Perennials
Mary, our perennials gal, suggests leaving things until frost to cut back. This way they're easier to compost. Make sure to leave seedheads (i.e., coneflowers and black-eyed Susans) for wildlife, and things like hydrangeas for winter interest.
☝️Make sure if things are cut back, to leave them sticking up enough you can still find them in the spring!
Dividing and Moving Perennials
Moving or dividing perennials in the autumn is a great way to reduce your work next spring. The cool, moist weather is an ideal time for perennial roots to become well established.
👍The rule of green thumb for moving perennials: If the plant blooms between early spring and late June, then early fall division/moving is ideal. If the plant blooms after late June, then early spring division is ideal (except for Peonies which should only moved or divided in the fall, Poppies in August, Irises in July & Lilies in the Fall).

Overwintering Trees
Zach and Sandy from trees and shrubs suggest a couple of things to help your favourite trees along this winter:
- To reduce winter injury in evergreens: Keep properly watered throughout the growing season and into the fall is another way to reduce winter injury. Decrease watering slightly in September to encourage hardening off, then water thoroughly in October until freeze-up.
- Cedars - Spray cedars with antidesiccant spray (available at Eising GC) or wrap in burlap (with stakes to create dead air space) so wind doesn't dry out and burn tips.
- Fruit trees - In late fall, spray fruit trees with sulfur-horticultural oil (available at Eising GC) for protection against fungi and pests overwintering in the bark.
- Ornamental trees - wrap the base of young trees to protect from chewing rodents.
- Pruning trees - trees that prefer winter pruning rather than spring pruning are maples, oaks, birches, and elms, as well as with fruiting trees such as apples and pears. This ensures blight and pests will not affect the tree's open wounds.
If you missed the frosty deadline for transplanting trees, Sandy suggests insulating unplanted potted trees to help them best survive the coming winter. Here are some methods:
- Double-pot your tree with an insulative barrier (i.e., burlap, straw, mulch, etc.) stuffed between the two pots and securely cover the top with tarp to deflect moisture.
- Bury your potted tree in the ground, level with the top of the pot (don’t forget to dig it back up!) and mulch the area.
- Huddle all of your unplanted trees and plants together when using the above methods.

Mulching
Mulching is one of the simplest and most beneficial practices you can do for your garden. Just by simply placing a protective layer of material over the bare soil will benefit the soil as it decomposes providing the much-needed organic matter which improves root growth, the infiltration of water and the nutrient-holding capacity of the soil while reducing soil erosion.
A good layer of mulch allows the soil to warm more slowly in the spring, so perennials aren't fooled into breaking dormancy too early, as you want the ground to stay cold until it really is spring!
☝️Make sure your mulch application won't stunt the growth of your plants come spring as discussed in our Transplant Troubleshooting blog post!
Japanese Beetle Prevention
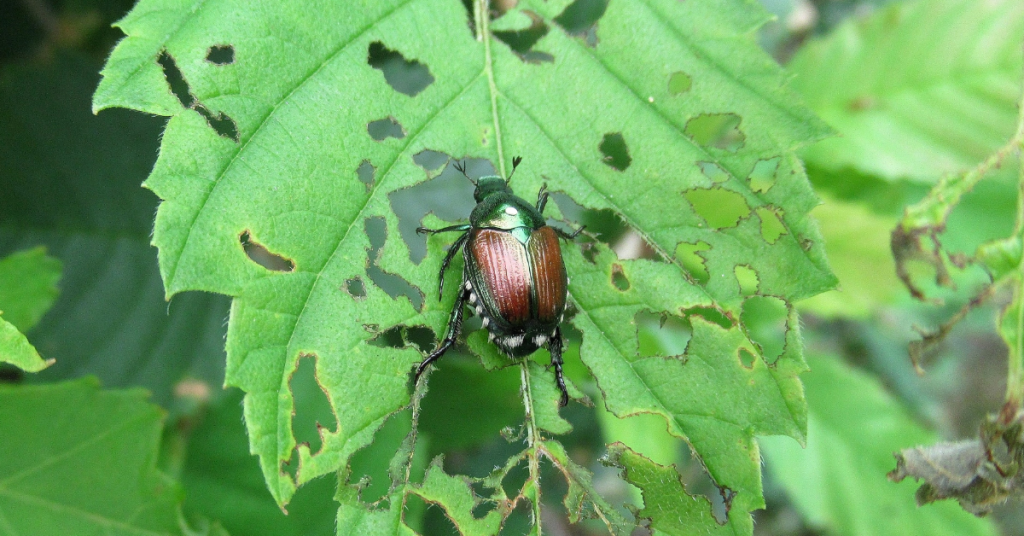
Nematodes are microscopic worms that should be applied to lawns that have been ravaged by grubs especially of the Japanese Beetle. Nematodes have a short shelf life and must be refrigerated until they are applied. Normally, they are sprayed onto the lawn from mid-May to mid-June and then again (for best practice) from mid-August to mid-September.
Pots
To prevent freezing and cracking, Mary suggests emptying and turning your pots upside down. You can disinfect at this time too.
Design Time!
Jeanine, from production, suggests writing down what worked best in your produce garden this year so you can implement it again in the spring.
With the trees and land being barren enough you can see its contour, now is a great time to plan ahead for spring landscaping! Don't forget Eising GC would love to offer help with your landscape designing!
We hope these tips help your landscape plants enjoy your winter abode as much as you do this season, for more information - and plants – visit Eising Greenhouse and Garden Centre! 🍁
By: Ava Green
Spring is the time of year known for new beginnings, and it’s also a very busy season in the garden as we hurry to get everything planted for the summer growing season here in Southern Ontario. But, did you know that fall is also an ideal time to get planting?
Similar to spring conditions, the cooler temperatures and more frequent rainfall make it easier for new plants to transition. This also decreases transplant stress. There’s time for roots to become established, and by springtime, you’ll be enjoying your plants instead of being busy planting them!
Don’t wait too long, though! At Eising Greenhouses, we recommend planting perennials, trees and shrubs before Thanksgiving weekend to give your new plants a little time to settle in before a hard frost arrives. A hard frost, or freeze, is when the temperature dips below zero for an extended period of time, killing tender plants.
What to Plant in Fall
Spring-Flowering Bulbs
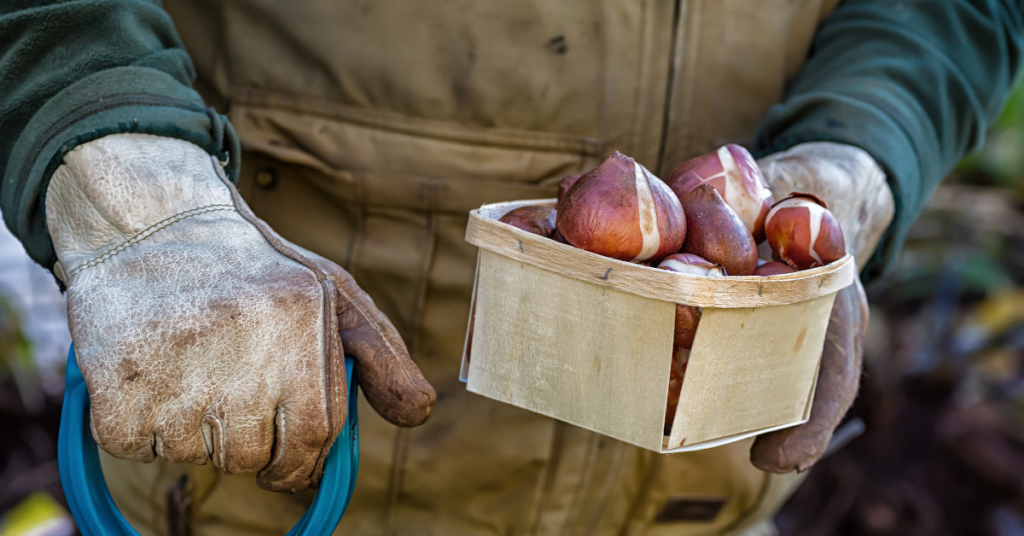
Tulips, Daffodils, Hyacinths, Crocus, Fritillaria and Alliums are just some of the bulbs that need to be planted in the fall in order to enjoy their flowers in the spring. Tulips especially appreciate being planted in cooler weather, but all of these bulbs require a cold period of about 12 weeks in order to grow in the spring. Many bulbs can be planted right up until the ground freezes. But why wait?!
👉 TIPS: While Tulips can be tasty and tempting for squirrels, rabbits and deer, many bulbs like Alliums, Frittilaria and Daffodils are not so delectable. Tamping down the soil after planting your bulbs makes it more difficult for critters to sniff them out. Laying some chicken wire over the area can also help deter from your bulbs becoming a meal for a critter.
Be sure to choose an area to plant your bulbs in that does not stay wet so the bulbs don’t rot.
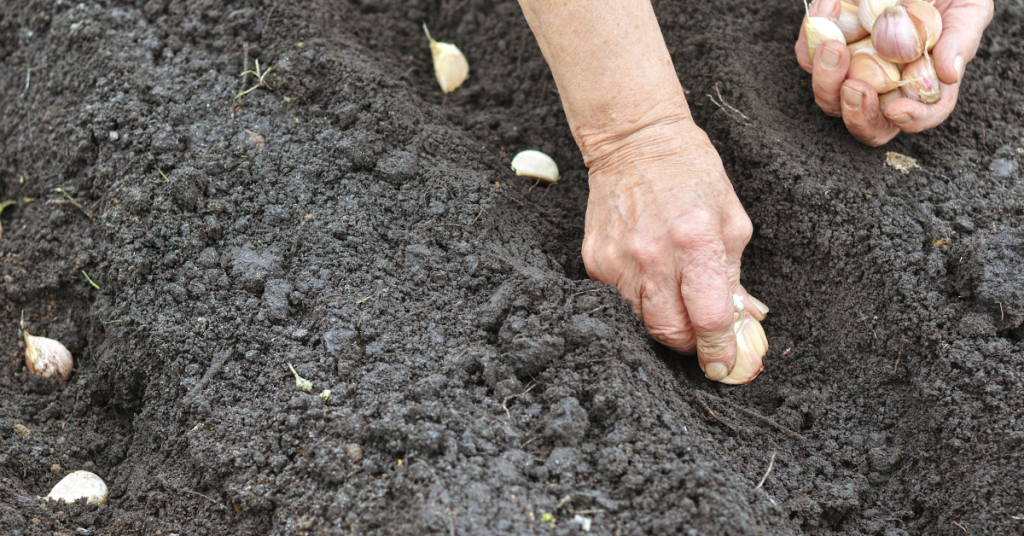
Garlic
While some folks choose to plant garlic in the early spring, many people choose to plant it in the fall. Why not get started now? When you plant your garlic in autumn, you will have a crop that’s ready for harvest next summer.
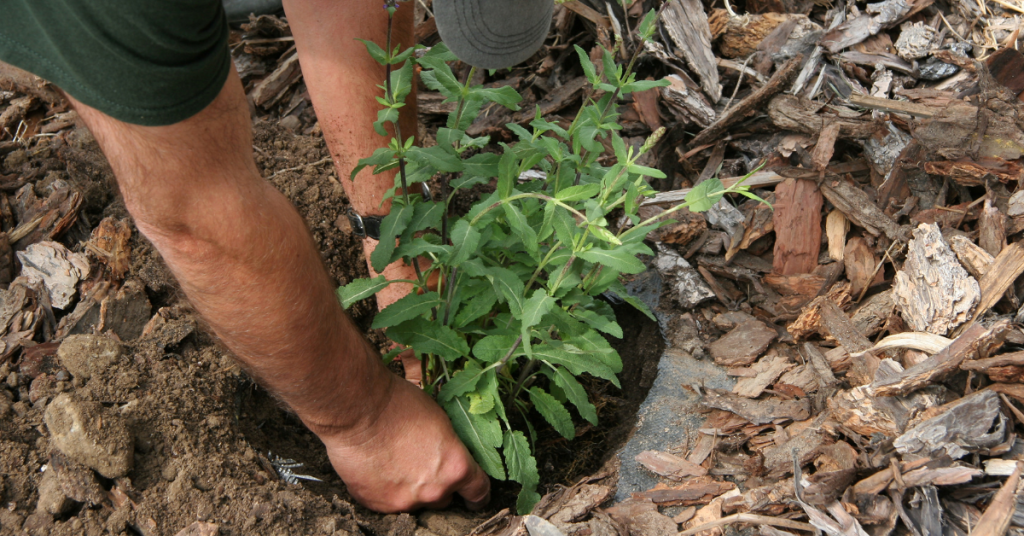
Plant, Divide, and Transplant Perennials
Yes, you can still plant perennial flowers in the fall! Whether you’re purchasing new plants or moving plants around, autumn is a great time of year to do it.
It’s also a great time to divide and transplant spring and summer blooming perennials. Why divide your plants? It’s a great way to revitalize the plant and also to create new plants.
Whether you’re planting, dividing or transplanting perennials, it’s best to do it 4-6 weeks before the first hard frost so that they have time to become established in the soil. Perennial plants will be available for sale at Eising Greenhouses until Thanksgiving weekend, so don’t delay too much!
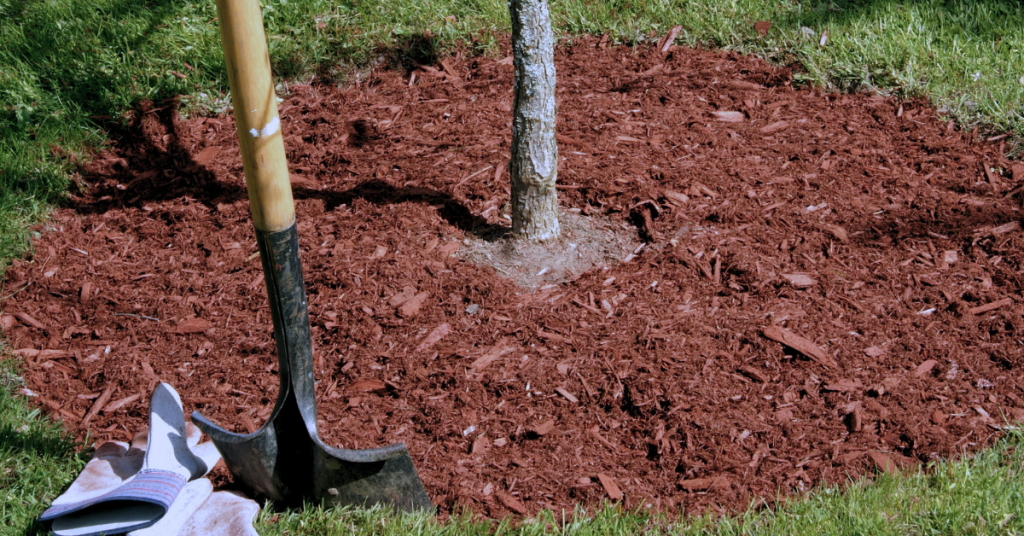
Trees and Shrubs
Container-grown or burlap-wrapped trees and shrubs can be planted as long as you can get a shovel in the ground! However, it’s a good idea to give them a few weeks in your garden before it freezes if you can.
It’s especially nice to see what a tree or shrub will look like in the fall before you plant it.

Peonies
Autumn is the best time to plant and establish roots so your peony is ready to bloom in spring! Planting them 4-6 weeks before the first hard frost will help your plant become established before cold weather descends.
👉 TIP: Be sure to add mulch to trees, shrubs and perennials after planting. But keep the mulch away from the trunks or stems. It’s never a good idea to put decaying plant material right up against a living plant!
Come in and take a look at what’s available, then enjoy the cool fall weather for planting!
Resources: If you’re new to dividing perennials, here’s a handy helper - A Guide to Dividing Perennials by the Toronto Master Gardeners
By: Dave Zeldon and Ely Schweyer
Most experts agree that we shouldn't bother bringing in our favourite summer potted plants for the winter and that we should buy new again the next season. But this seems to go against our sensibilities after paying good money earlier in the season. Why not try to save that bay tree, those Rosemary, and French Tarragon containers, as well as expensive Phormium, Mandeville, Passionflower, and Jasmine plants?
The secret to indoor survival for summer plants is to slow down their growth during the winter, so they’re ready to be put outside again once all the danger of frost has passed. How? A few weeks before fall frosts are expected, gradually introduce plants to life indoors by moving them inside (to a quarantined spot*) for half a day, working up to a full day over a week or so. Don't wait until nighttime temperatures are only slightly above freezing as the plants may go into shock and drop leaves!
How to Keep These Guys Comfy During the Winter Months?
- It is suggested that you should prune back excessive growth and re-pot with new lighter growing media.
- Place them in the sunniest location you have and then water sparingly but regularly over the Winter.
- Raising humidity by using a humidifier helps too.
- Resist the urge to fertilize these plants until just before you reintroduce them to outdoor living.
- Perhaps just for fun, you could repot them into the appropriate seasonal pots and planters!
It Seems They Brought Others in With Them - And They're Not Nice House Guests
*Before long, you may notice some unwanted guests, such as thrips and spider mites, on and around your precious plants as their natural predators are no longer present to keep their populations at bay. In many cases, it may be too late, and your plants may have to be discarded before the Holidays, but that’s not always the case!
Common problems that make themselves apparent indoors would be the brown soft scale insect, whiteflies, mealybugs, aphids, spider mites and most often, fungus gnats (those pesky little black flies).
Fungus gnats are considered to be the most common nuisance in houseplants. Sometimes their sheer numbers just hovering around an attractive plant take away from its appeal.
Basic Fungus Gnat Control Measures:
The fastest and easiest method of control is to catch the flying adults with yellow sticky cards. The large cards can be cut into little strips and mounted onto little wooden splints (popsicle sticks) then placed around the base of the plant out of the line of sight.
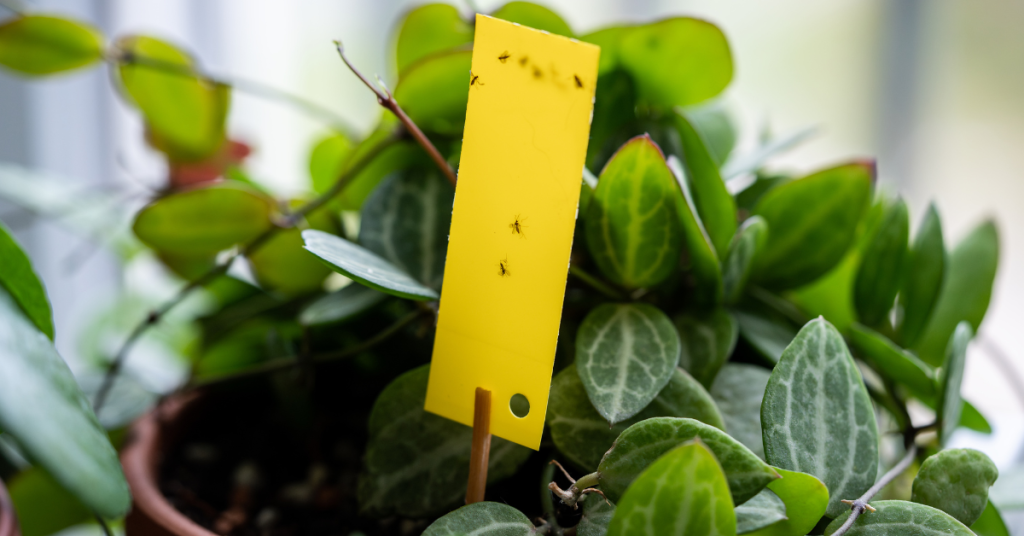
The chances are that the adults have already deposited eggs in the growing media (soil) of the plant as it is rich in organic matter, so we can disrupt its life cycle by:
- Subirrigation - water your potted plant from the bottom by adding water to the saucer it is sitting in. This will dry out the soil surface making it uninhabitable for the hatching larvae.
- Trapping larvae - If the surface soil it already very wet, try placing a few potato discs or slices on the surface of the soil. This will attract the larvae as they migrate to the potato to feed. Simply replace the discs every five days or so with fresh slices to eliminate the next generation of adults.
- Inoculating the soil with beneficial nematodes. Most garden centres will carry the Guardian line of beneficial nematode products.
We hope this helps your plants enjoy your winter abode as much as you do this season, for more information - and plants – visit Eising Greenhouse and Garden Centre!
By: Dave Zeldon and Ely Schweyer
The classic fall-blooming Chrysanthemum varieties of burnt amber, golden yellow, and deep burgundy blooms have been enormously popular for years, and as each new fall season rolls around, there always seems to be new varietal introductions – like multicoloured pinks with the hues of sunrises - to enhance your front porch display of pumpkins, corn stalks, and gourds.
These robust plants will produce blooms for weeks, even in the coolest of autumn weather. Their hardiness even offers versatility when it comes to their display; some gardeners prefer less labour-intensive groundskeeping and leave them in their original store pots, whereas others prefer to transplant these flowers into larger planters, window boxes, or into flowerbeds to add an easy seasonal flair.
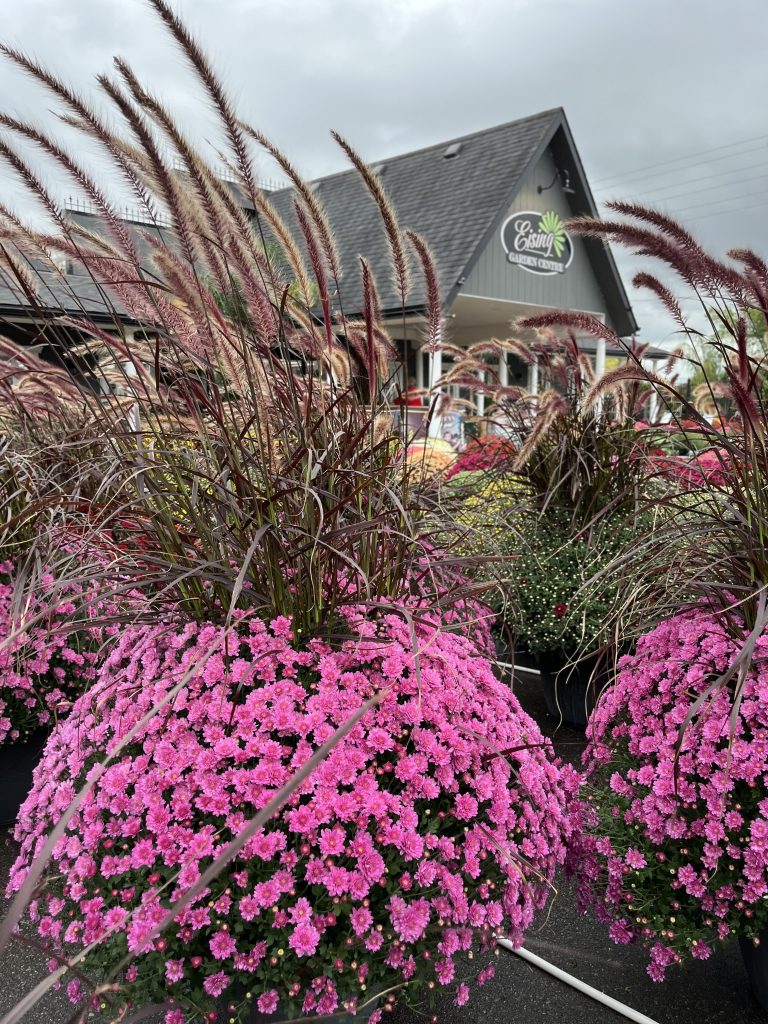
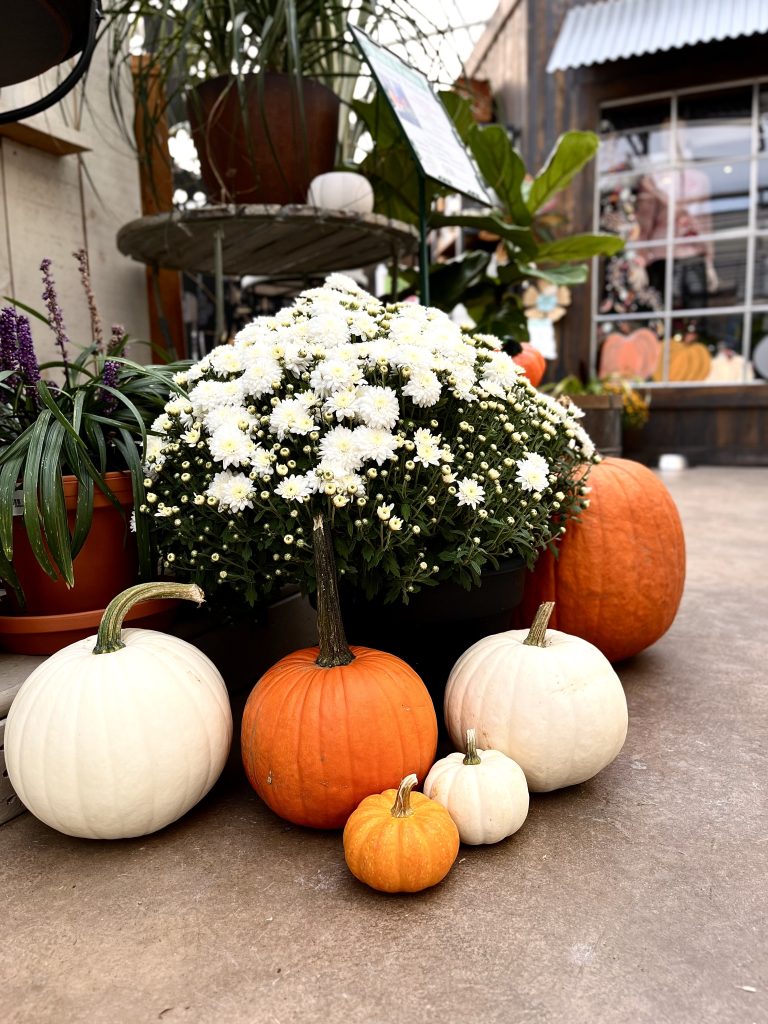

While resilient, these plants still need some TLC. Try these tips to keep your Mums looking fresh throughout the fall.
- Choose green plants with tightly closed buds. This way when your Mums do bloom, you will be able to keep those colourful displays for much longer.
- The Mums' foliage should have a deep green colour and lots of growth at the garden centre.
- Also, make sure the soil in the container is moist when purchasing your plant, as dried out Mums may have already suffered damage.
- You'll find out in short order that your potted Mums are very thirsty plants! Water them daily and make sure the soil remains moist. A shot of liquid fertilizer to the irrigation water once a week would be great as well.
Over-Wintering Mums
Modern Mum breeding is aimed primarily at creating plants that look good in their pots at their point of purchase, sacrificing the plant’s hardiness and performance for future years - meaning when home gardeners try to overwinter these big potted plants, they are not usually successful.

All Mum plants at garden centres are hardy, meaning that they are perennials in most climates. However, if these plants are put in the ground from August on, most won't make it through winter. The reason is that Mums planted late in the season are near, or at, the flowering stage, when their energy is focused into blooming, and they won't grow roots to sustain plants through the winter. This is why Mums should be planted in the spring if you want a perennial plant that has a spectacular autumn show!
If you really adore your fall purchase though, you can try to over-winter your Chrysanthemums in the basement or a dark, cold closet, after the first frost. Water well and place in an area where it is totally dark and 0°C to 10°C. The plants will hibernate for the winter if you keep their roots damp. Check the pots weekly.
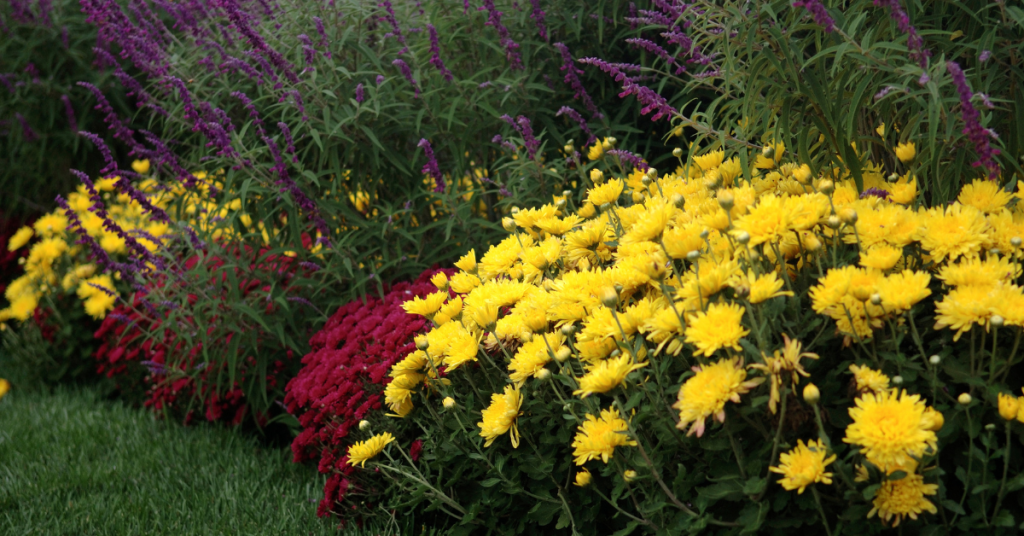
In the spring, gradually acclimate your Mum plants to light and plant them out in the garden after the last killing frost, remembering to pinch them twice prior to the first of August for a full, lush plant.
We hope this helps you to enjoy your Mums just a little bit longer! Use our Plant Finder to search for a sample of our Mum selection by your preferred colour. You can find many Mum varieties and more information at Eising Greenhouse and Garden Centre, please stop in for a visit this autumn!
By: Ava Green
One of the best things about living in southern Ontario is the beautiful show our deciduous trees and shrubs put on each fall.
Autumn is also the perfect time to plant trees, shrubs, and perennials. The sun is less intense, temperatures are slightly cooler, and with regular, deep watering, the plants are less prone to transplant shock, ensuring a successful planting.
As the leaves begin to change, they mark the arrival of autumn, a season full of colour and celebration. If fall is a special time of year for you, our staff have handpicked their favourite deciduous trees and shrubs with the most stunning seasonal displays. Here are their top recommendations.
Autumn Blaze Maple
Botanical Name: Acer x freemanii 'Jeffersred'
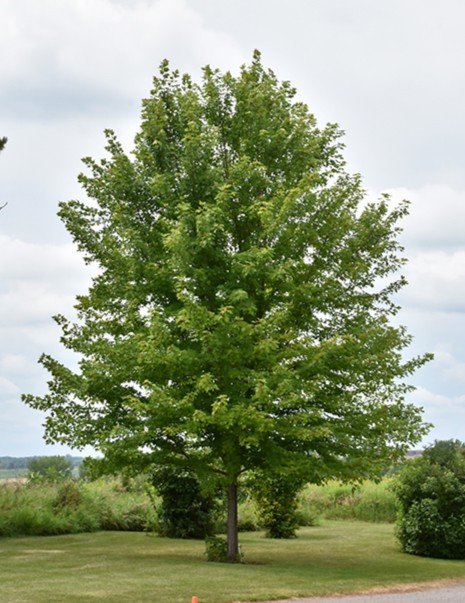
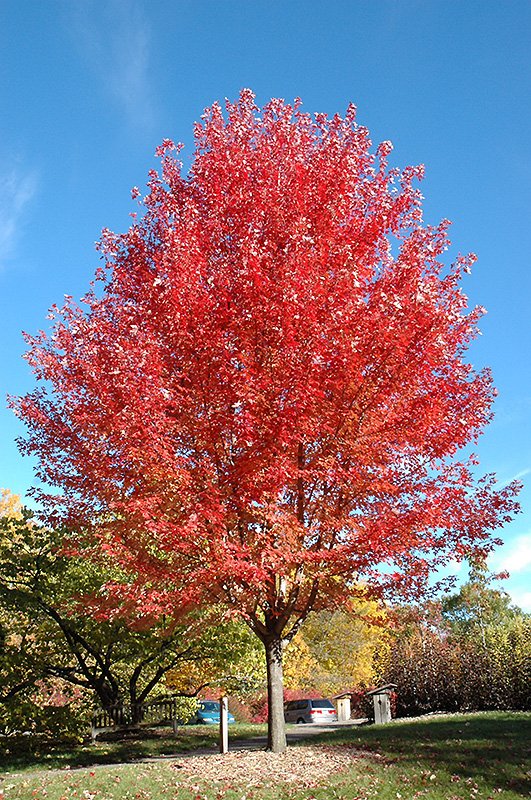
This tree is a cross between the fast-growing Silver Maple and the showy Red Maple - two very popular trees!
Autumn Blaze will provide a display of colour throughout autumn by starting earlier and lasting longer than most other trees. It’s large, with 5-inch leaves that begin by turning red at the top, then eventually shades of red and orange cascade down the length of the tree.
Even in the winter, this is a beautiful specimen because its shape is so symmetrical.
Seven-Son Flower
Botanical Name: Heptacodium miconioides
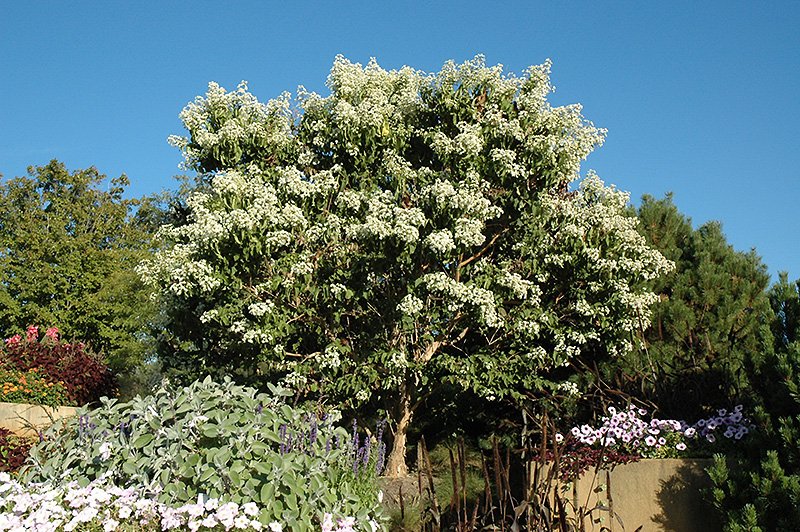
Considered a small tree or large shrub, Seven-Son Flower is popular for its year-round beauty!
Growing to a maximum of 6.1 metres (20 feet) tall and 3 metres (9.8 feet) wide, the leaves of this plant change from spring to summer, making it an interesting specimen plant in the garden.
The biggest attraction is the fragrant white blooms it produces late in summer, which are highly attractive to hummingbirds and other pollinators. As the blooms fall, they leave behind pink sepals, so it looks like it’s in bloom all over again!
Its unusual bark makes this tree beautiful year-round, but especially in the winter.
Washington Hawthorn
Botanical Name: Crataegus phaenopyrum
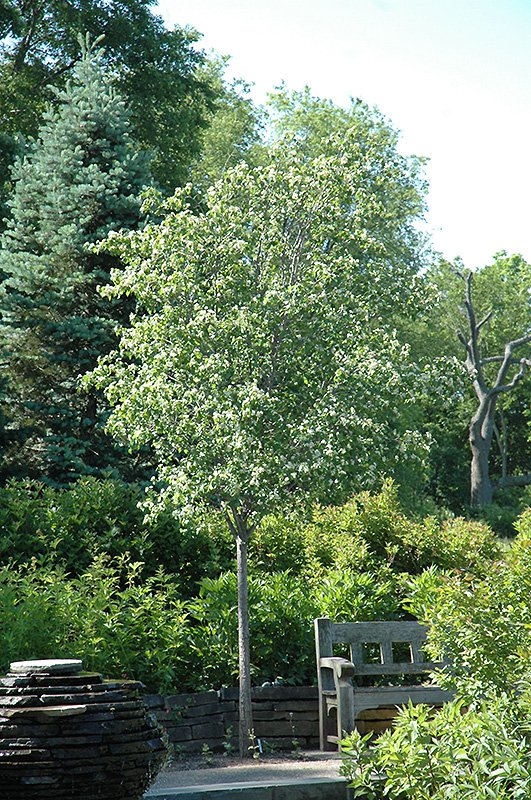

Leaves that turn vibrant shades of orange, purple or scarlet red in the fall are just part of the beauty of this small tree.
This is another specimen with year-round interest. In early spring, reddish-purple leaves emerge, which eventually turn dark green, followed by graceful white flowers. After its fall show, it produces bright red berries that last for most of the winter.
Maturing at 8 to 9 metres (25-30 feet) tall, Washington Hawthorn is also an important nectar plant for pollinators and provides food for birds in the winter.
Barberries
Botanical Name: Berberis thunbergii
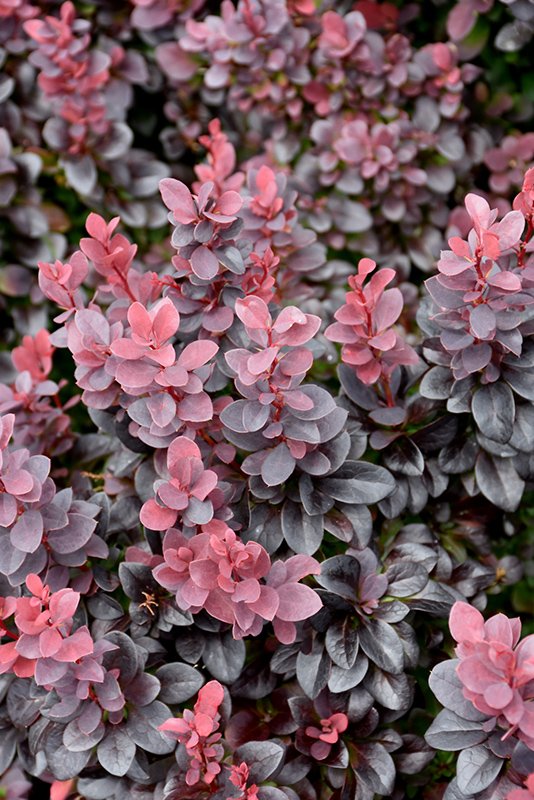
Concorde Japanese Barberry
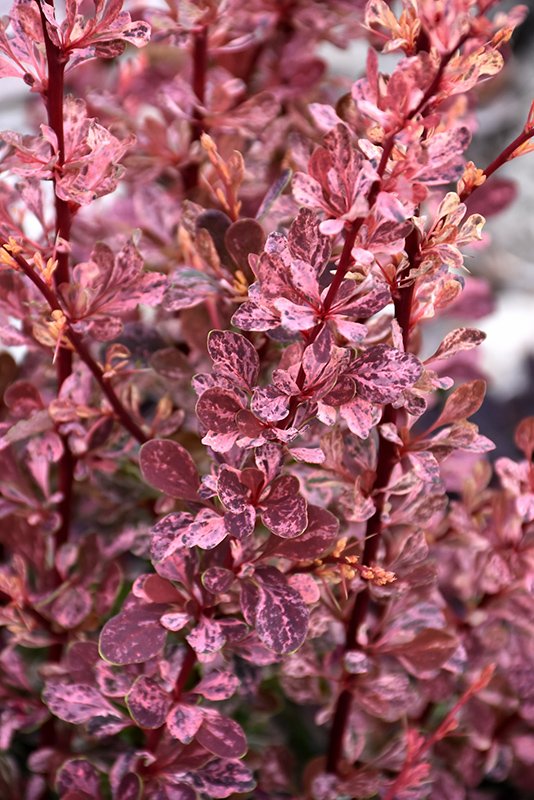
Rose Glow Japanese Barberry
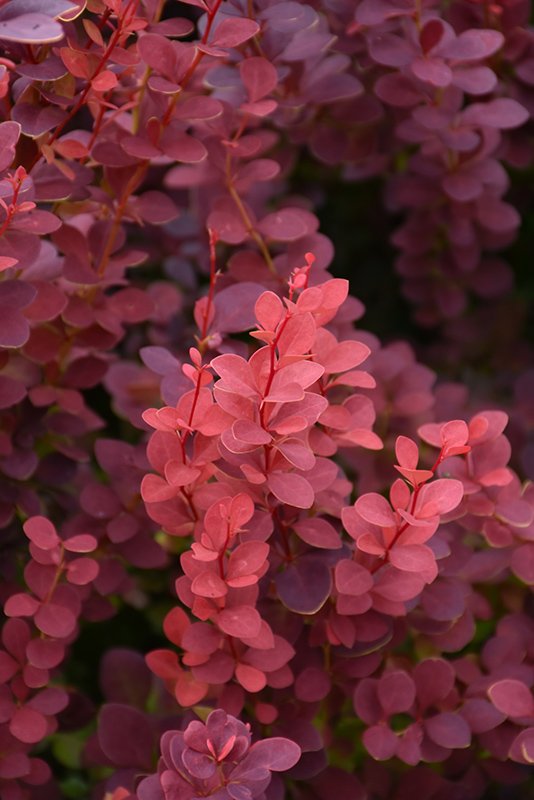
Ruby Carousel Japanese Barberry
Depending on the type of Barberry these deciduous shrubs can grow ½ to 3 metres (1-10 feet) tall and have varied shapes and features as well. For example:
- Barberry, Concorde (Berberis thunbergii 'Concorde')forms a nice globe when it's mature. Leaves start out red and gradually turn a deep, dark purple as they mature.
- Barberry, Ruby Carousel (Berberis thunbergii 'Bailone') is a compact variety with vibrant, ruby-red foliage.
- Barberry, Rose Glow (Berberis thunbergii 'Rose Glow') which matures to 1 to 1 ½ metres (3-5 feet) tall, starts out with a combination of green, white, and deep rose-red foliage in the spring. In the fall, it produces bright red berries that persist into winter.
Beautyberry, Pearl Glam
Botanical Name: Callicarpa 'NCCX2'
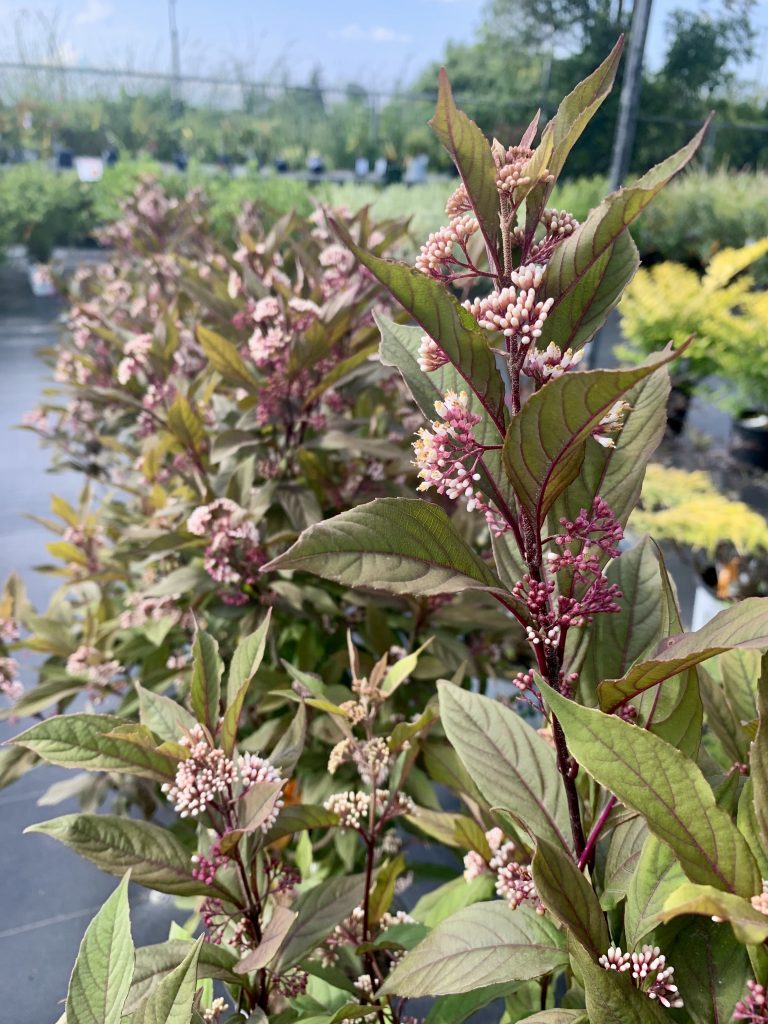
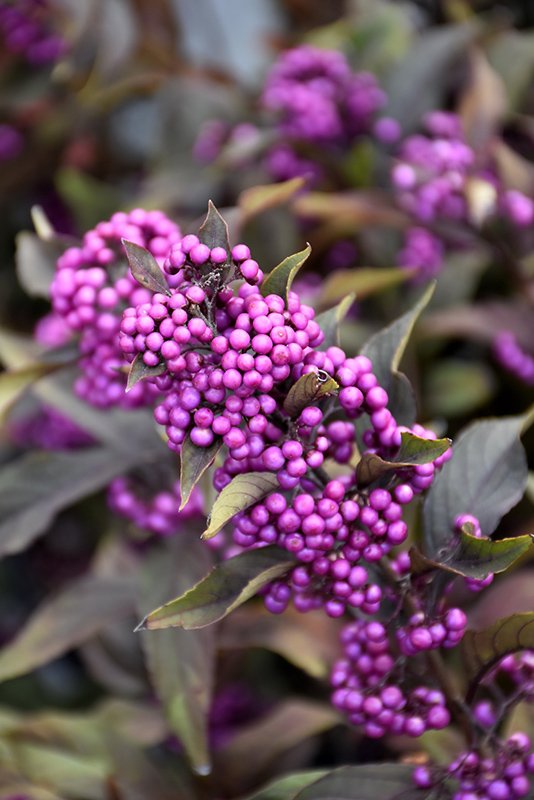
While many Beautyberry are showy in the fall, Pearl Glam is an upright, small shrub that has all-season interest. Its dark purple foliage emerges in the spring that lasts until frost.
In late summer it’s adorned with white flowers which attract butterflies and bees. After blooming it produces hundreds of beautiful violet-purple berries which last long after the leaves have fallen.
Crepe Myrtle, Cherry Mocha
Botanical Name: Lagerstroemia 'Cherry Mocha'
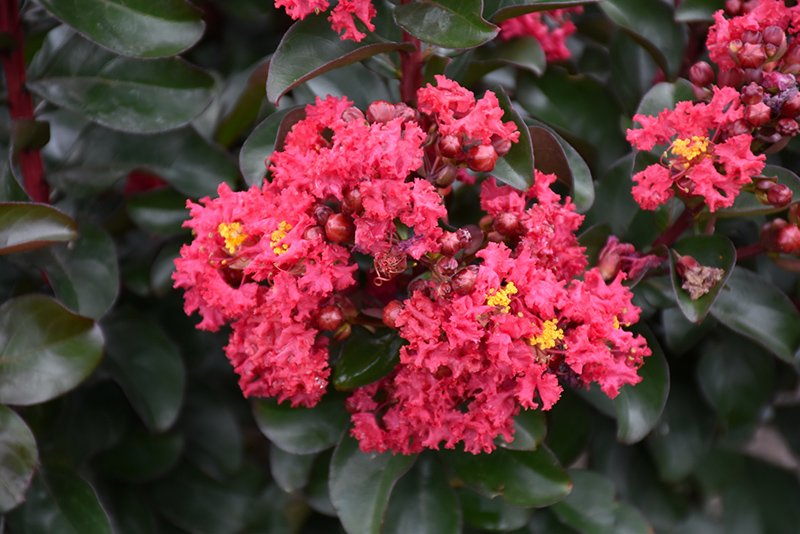

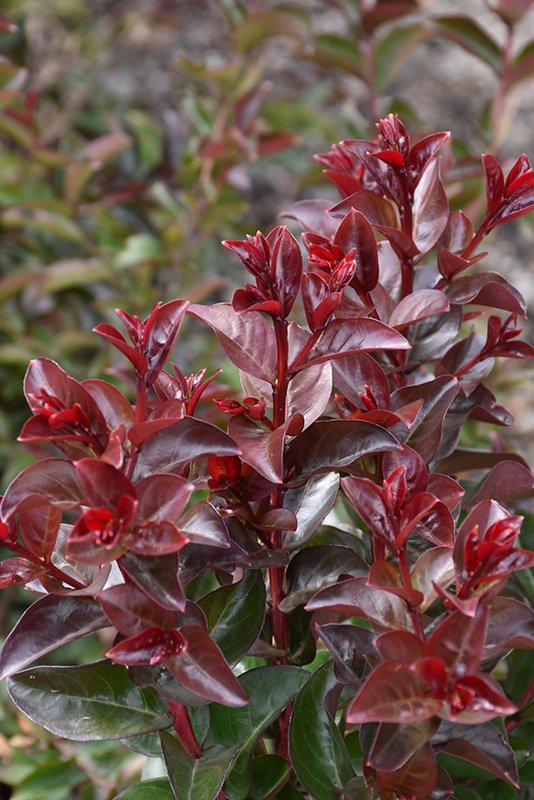
Another small ornamental deciduous shrub with an upright growing habit, Cherry Mocha Crepe Myrtle has decorative appeal in every season.
Burgundy coloured stems with semi-glossy burgundy leaves makes this plant stand out. To add to that, new growth at the tips starts out glossy, deep red. If that’s not enough, in late summer and early fall, the blooms on this cultivar are large, cherry-red flowers which stand out from the burgundy foliage. Its flowers late in the season provide important food for bees. After flowering, green seed pods provide extra interest.
Note: Have you ever wondered why leaves on trees and shrubs change each fall? Here’s a simple explanation. During the long, sunny days of summer, trees and shrubs produce plenty of chlorophyll - the food needed to keep the leaves green. In autumn, as the days grow shorter and temperatures are cooler, there is less chlorophyll produced and the plant breaks down residual chemicals on the surface of the leaves which produces shades of red, orange and yellow.
You’ll find more information in our handy Eisings online Plant Finder!
For tomato lovers, picking a warm, flavourful tomato right off the plant for a sandwich, burger, or salad is a sure sign of summer! I eagerly await the day the first fruit begins to turn red, knowing that I am a day or two away from the first of many toasted tomato sandwiches for the season!
By the end of June, your tomato plants should be in the ground or pot, staked, and well on their way to producing fruit. But how do you keep your plants healthy all summer so that you can maximize your investment? Here are a few tips to help keep your tomato sandwiches coming until frost!

Water
Water early in the morning and water deeply. For tomatoes, consistent moisture is best.
Keep the water on the ground, not on the foliage. This is important because damp foliage can lead to diseases like early blight, which can ultimately cause the entire plant to die. Mulching around the base of plants will reduce the amount of water that can splash up onto the leaves. A soaker hose or drip line is also a great way to ensure that water stays on the ground, rather than on the plant.
Pruning
Reducing the amount of foliage on a tomato plant is necessary for a couple of reasons: good air flow, which reduces the chance of powdery mildew forming, and less foliage means that the plant can send energy to growing fruit instead of lots of leaves.
Follow these easy steps when you prune your tomato plants:
- Before you begin, remember to follow the rule for pruning - no more than ⅓ of a plant should be removed at a time.
- Use clean scissors or pruning shears to cut the leaves off the bottom of the plant. Remove any leaves that are touching the ground. These are particularly susceptible to mildew formation.

When fruit starts forming, remove the leaves from the bottom of the plant up to the first or lowest fruit.
Remove suckers ongoingly. What are suckers? When you look at your tomato plant, you will see the main stem that comes up from the ground, and branches of leaves that come out of the main stem. As the plant grows, suckers begin to form in the “Y” between the main stem and a branch of leaves. Suckers won’t harm a plant; they just make it very unruly and reduce airflow.

If your tomatoes are indeterminate (growing into a tall vine), remove the top of the plant when frost is forecasted at the end of the season. Topping the plant allows energy to ripen the fruit that’s already set, rather than being used to continue growing the vine.

NOTE: Some gardeners like to leave suckers on determinate tomato plants as this can increase the yield.
TIP: Tomatoes ripen from the inside out. That means that by the time you see fruit beginning to flush on the outside, the inside is already ripe. If you have competition for tomatoes from pesky critters, or when there’s a chance of frost in the weather forecast, you can pick fruit that has just begun to turn colour and leave it on the kitchen counter to continue to ripen.
Fertilizer
Using organic material is one of the best ways to feed your crop. A good layer of compost, 1-2 inches, in the spring when you’re planting and again in the fall each year is one of the best ways to improve your soil structure in the garden, and it also adds lots of nutrition.
If you missed this step when planting your garden, you can always add a layer of compost around your plants or use other organic fertilizers, such as compost tea, seaweed, worm castings, or fish emulsion.
Alternatively, you can use a fertilizer that’s formulated especially for tomatoes - these usually have a ratio like 3-4-6 or 4-7-10. Follow label directions for amounts and err on the side of caution. Using less fertilizer is always better than using too much, as an excess can stress the plant and make it more prone to disease.
Following these simple steps for tomato care will help to ensure your plants stay healthy and producing fruit, but if you should have problems, here are some great resources to identify tomato issues:
- Ontario.ca: Bacterial diseases of tomato: bacterial spot, bacterial speck and bacterial canker
- Guelph.ca: Healthy Landscapes – Plant List Native and Drought-Tolerant Plants