5 Easy Steps To Get Started
By Ava Green
There’s a common myth that you need a lot of space to grow vegetables, but whether you have a few containers, a small sunny corner, or a larger garden bed, there’s lots you can grow! Here in Norfolk County, which is Zone 6 in Southern Ontario, some vegetables can go in the ground as early as the beginning of May, while many others are usually safe to plant around the May 24th weekend, once the risk of frost has passed. Here are five simple steps to get you growing your own food this season if you’re new to vegetable gardening.
Step 1: Decide What You’d Love To Grow
Start with a list of the vegetables you actually want to eat. Coming into Eising Garden Centre with a list in hand makes choosing plants so much easier! When building your list, consider:
- Vegetables you love
- High-value vegetables, the ones that are expensive at the grocery store but easy and economical to grow yourself
- Anything that tastes better when it’s freshly picked, like tomatoes, cucumbers, and fresh herbs

Step 2: Make a Simple Plan
You don’t need an elaborate design; a rough sketch on a scrap of paper is just fine. The goal is simply to get a sense of your space and where things will go before you start digging. We recommend starting a garden notebook or journal to track what you plant each year and how it performs. It will be especially helpful next spring!! A few planning tips to keep in mind:
- Most heat-loving vegetables, such as tomatoes, peppers, zucchini, eggplant and beans, need at least six hours of sun per day
- Cool-weather and shade-tolerant crops like lettuce, chard, kale, radishes, and beets do well with just three to four hours of sun
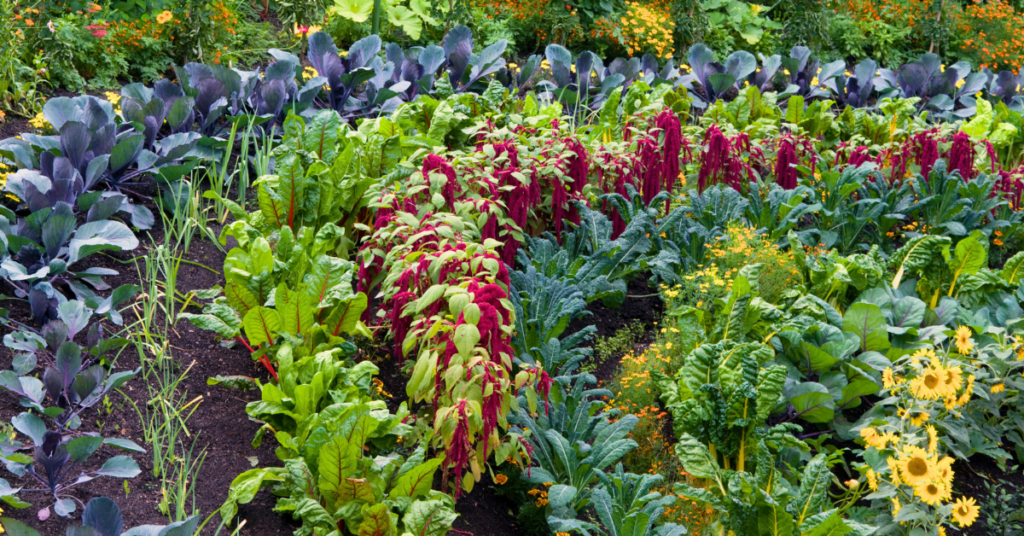
- Spacing in a vegetable garden can be much tighter than in other types of gardens. Less empty space means fewer weeds and bigger harvests. Square foot gardening is an excellent method to explore
- Layer your garden beds with plants that are great companions. For example, basil and marigolds planted beside tomatoes are said to improve flavour and repel pests. Carrot and beet seeds tucked in beside and between your lettuce plants (which are a cool-weather crop) are a smart pairing; as your lettuce finishes in the summer heat, your carrots and beets will be sprouting up to take their place. This is referred to as succession planting and optimizes the space in your garden
- Make use of vertical space with poles or trellises for peas, pole beans and cucumbers
- Tuck herbs into any gaps between your vegetables; they’re useful, beautiful, and most pollinators love them
Step 3: Prepare Your Space
Once you’ve chosen a spot with enough light, it’s time to get the soil ready:
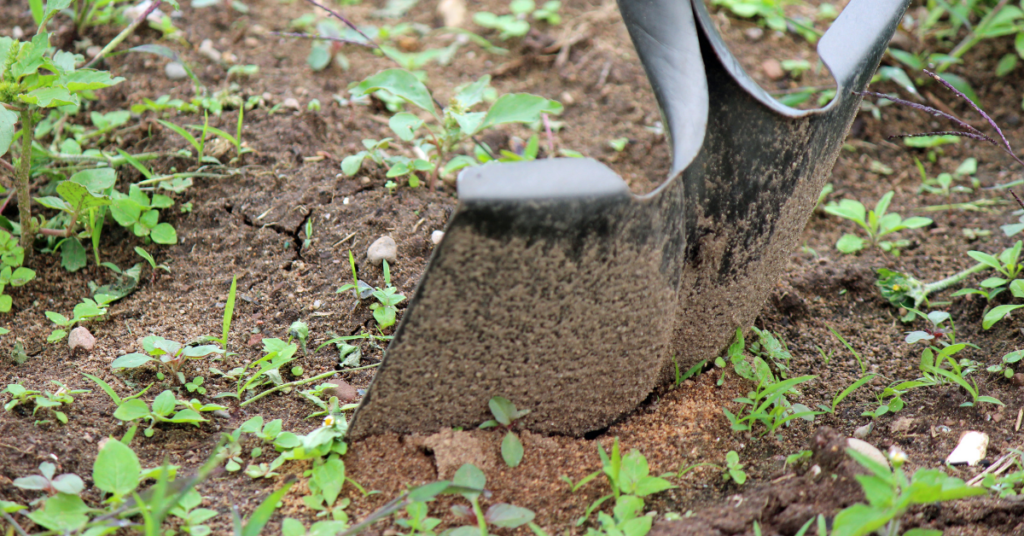
- Remove any sod or weeds before planting. If you’d rather not dig, the No Dig gardening method uses a layer of cardboard as the base for the new bed. This suppresses weeds naturally and breaks down into the soil over time
- Add a good-quality compost to your soil by either spreading a layer across the top of the garden bed or scooping some into each plant hole
- For container gardening, almost any container works, just make sure it’s deep and wide enough for the mature size of your plants. Also, drainage holes are a must! Fill containers with a soilless mix containing compost, peat moss or a peat alternative, and one of the following: sand, vermiculite, or perlite. Avoid using garden soil, triple mix, or topsoil in containers, as they compact easily and will restrict root growth. Learn more about soil mixes, amendments, and fertilizers here
Step 4: Water and Feed Consistently
Consistent watering and feeding are the foundation of a productive vegetable garden:
- Vegetables need regular, reliable watering. Inconsistent moisture leads to stressed plants and poor yields
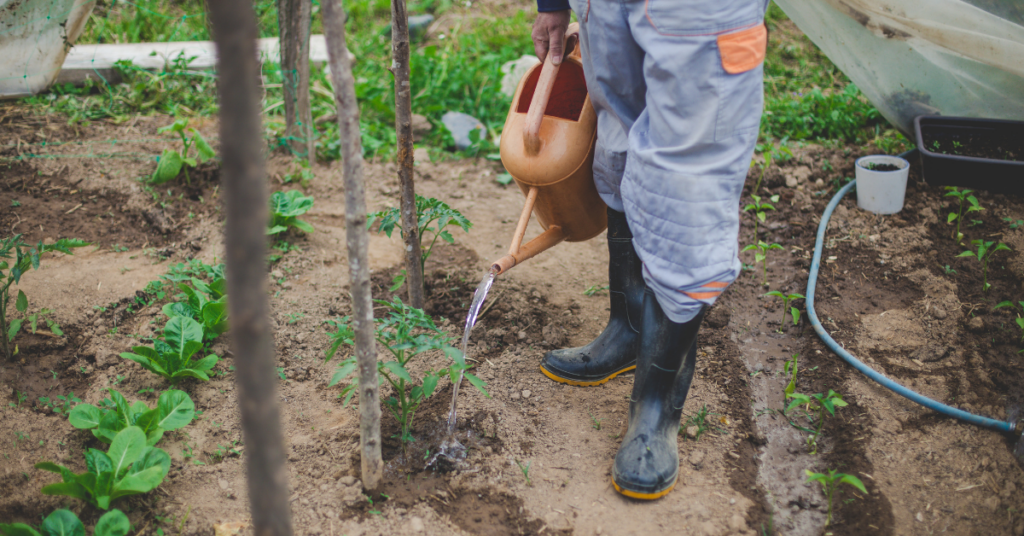
- Always water the soil, not the leaves. Plant roots take in water, and wet foliage can invite disease. Water deeply so moisture reaches the roots. Use your fingers to check how far down the water has penetrated into the soil
- Containers dry out faster than garden beds and will need more frequent attention
- Morning is the best time to water. If your plants are struggling on a particularly hot afternoon, a second watering is fine. Just be sure to aim at the base of the plant and avoid the foliage, which can scorch in direct sun
- Feed with organic fertilizers throughout the season to keep your plants healthy and productive. Follow the package instructions for the product you choose
Step 5: Plant Flowers for Your Pollinators
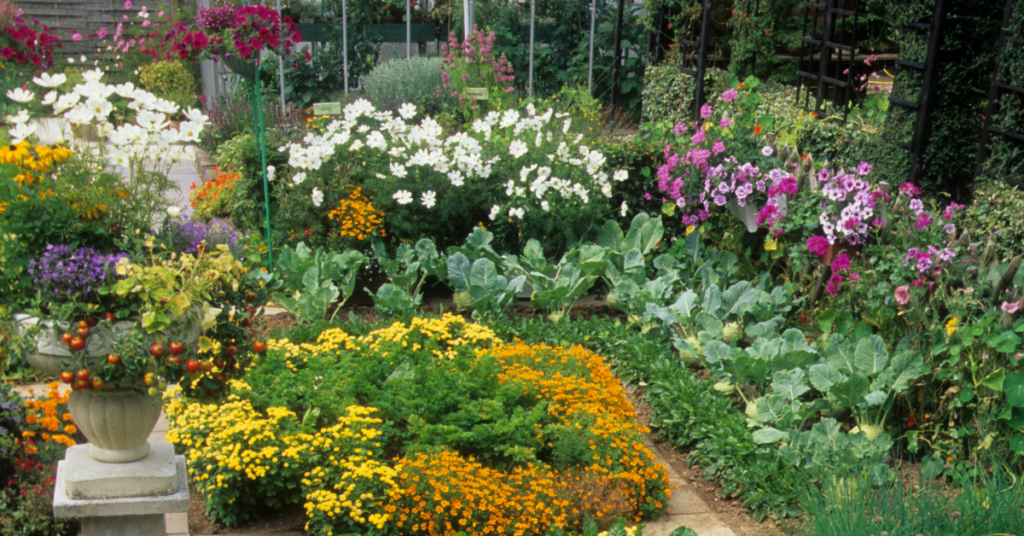
A vegetable garden without pollinators is a garden that won’t reach its full potential. Attracting bees, butterflies and other beneficial insects to your garden is one of the best things you can do for your harvest. Some of our favourite pollinator-friendly flowers for the vegetable garden include marigold, calendula, nasturtium, borage, sunflowers and culinary lavender. As a bonus, most of these are edible, so they earn their space twice over.
It’s Time
Starting a vegetable garden is one of the most rewarding things you can do with an outdoor space. There’s a quiet satisfaction in growing something from seed or a seedling and bringing it to your own table.
Start simple, grow what you love and don’t be afraid to learn as you go.
The team at Eising Garden Centre is always happy to help you choose the right plants for your space and answer any questions along the way. This could be the season that changes the way you think about your garden!
Resources:
Why Use a Garden Journal?: https://eising.ca/why-use-a-garden-journal/
Square Foot Gardening: https://www.almanac.com/planning-square-foot-garden-grow-more-less-space
Fertilizers & Soil Amendments: https://eising.ca/fertilizers-soil-amendments/
Companion Planting: https://eising.ca/companion-planting-with-herbs/ and https://eising.ca/incorporating-vegetables-into-your-garden/
Optimizing the Gardening Season: https://eising.ca/optimizing-the-gardening-season/
No Dig Gardening Method: https://charlesdowding.co.uk/blogs/no-dig-resources/beginners-guide
Reading Plant Tags: https://eising.ca/full-sun-part-shade-what-do-plant-tags-actually-mean/
Growing Vegetables in Pots: https://eising.ca/planters-are-for-more-than-flowers/
By Ava Green
As soon as warm weather and sunshine arrive in Southern Ontario, it’s time to head to the garden centre and pick up all the plants we’ve been dreaming about all winter long! May 24th is generally the date we look forward to — the unofficial marker when frosty mornings are behind us and the promise of summer is ahead.
By now, cool-weather plants like cabbage, Brussels sprouts, peas, and lettuce should be well established in the vegetable garden. And for everything else, it’s go time!
TIP: Before you start planting, this is the ideal time to amend your soil. Top up your garden beds with fresh topsoil or enrich them with compost to improve soil health, add nutrients, and promote vigorous plant growth. Don’t forget to refresh the soil in your containers as well, with potting mix or compost.
Warm Weather Vegetables
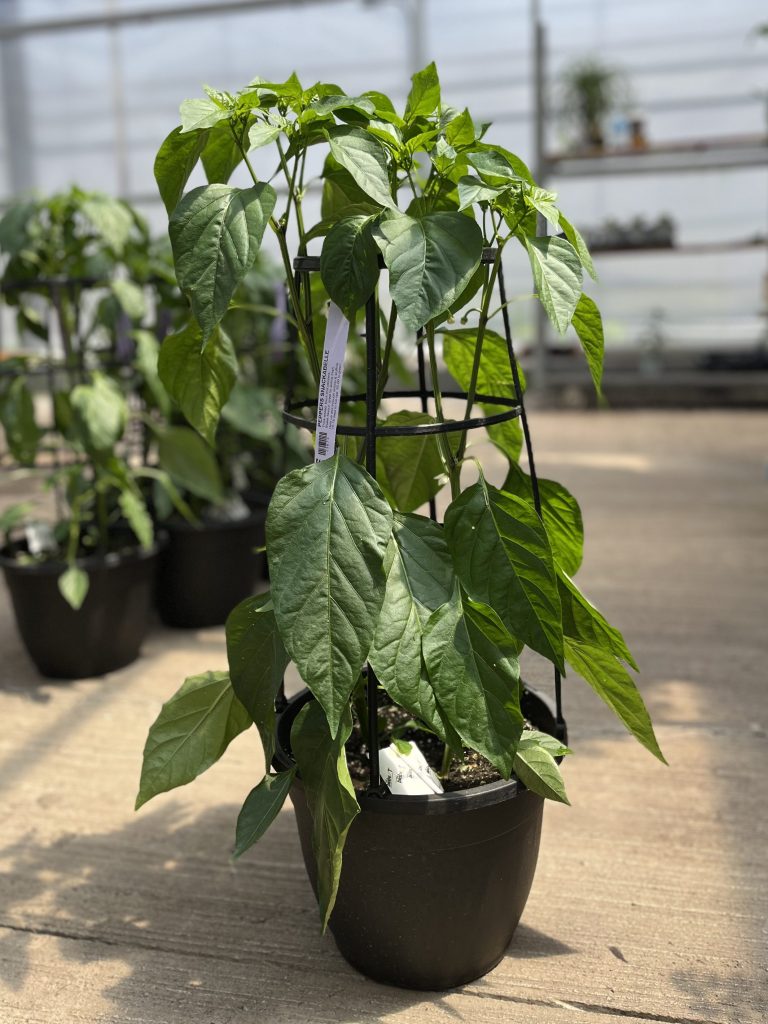
When soil temperatures are consistently 60°F (15°C) or higher, it’s safe to plant all the warm-weather vegetable crops we’ve been waiting for! Plants that thrive in warmer weather include tomatoes, peppers, eggplants, cucumbers, zucchini and corn.
At Eising Garden Centre, you’ll find vegetables in 6-packs, 4” pots, trellised patio containers, patio bowls and hanging baskets - while supplies last, of course!
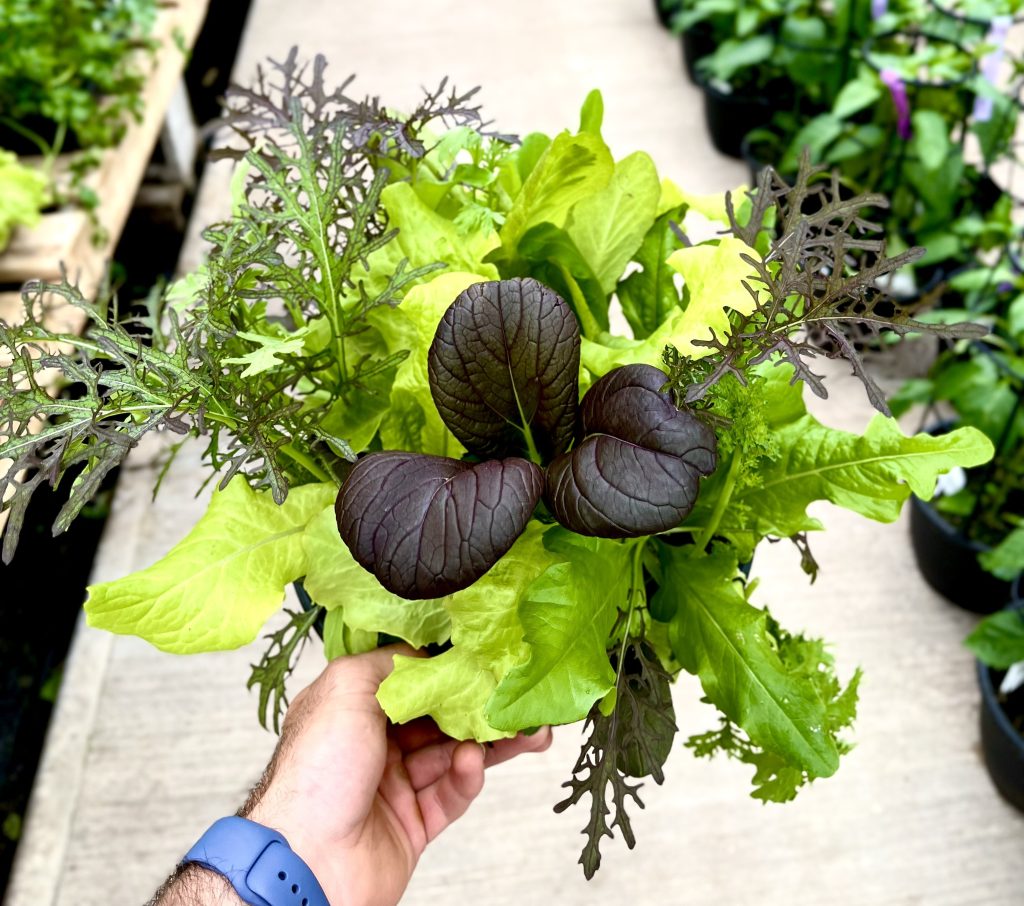

Herbs also love warm weather, and tender varieties like basil are safe to plant once all danger of frost has passed. Whether you plant herbs directly into the ground or create a potted herb garden near the kitchen door, they’ll add fresh flavour to your meals all season long. A container of herbs also makes a wonderful gift when visiting friends and family for a summer BBQ.
While you’re in the vegetable and herb aisle, keep an eye out for everbearing strawberries in planters and containers of tropical fruits like lemons, limes, and oranges.
Annual Flowers
Winter-weary flower beds can be revived almost instantly with a burst of colourful annuals! If you’re looking for an immediate impact and blooms that last all summer long, annual flowers are the answer.
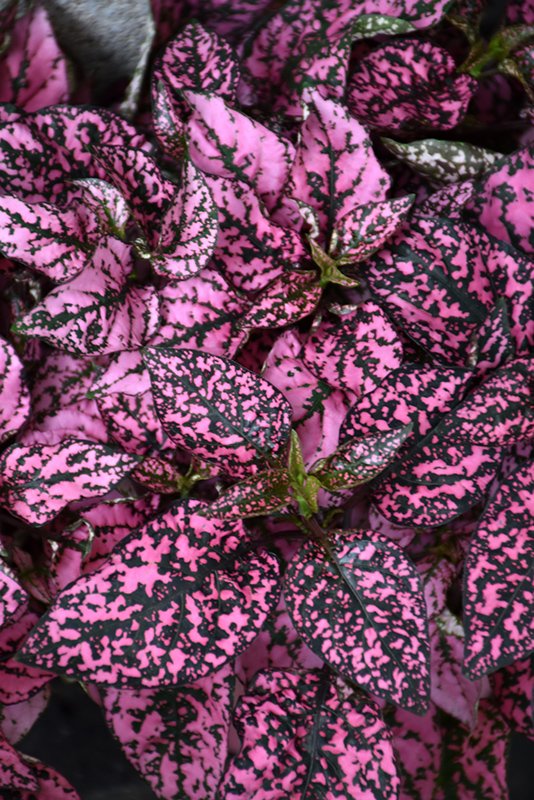
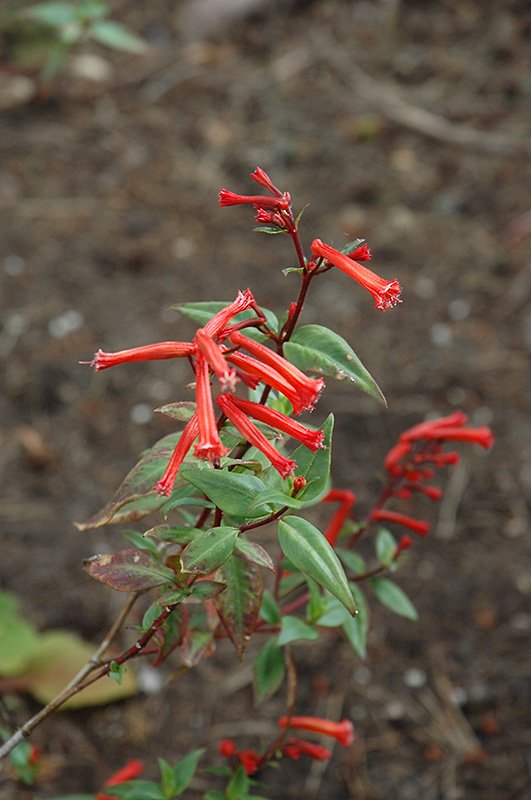
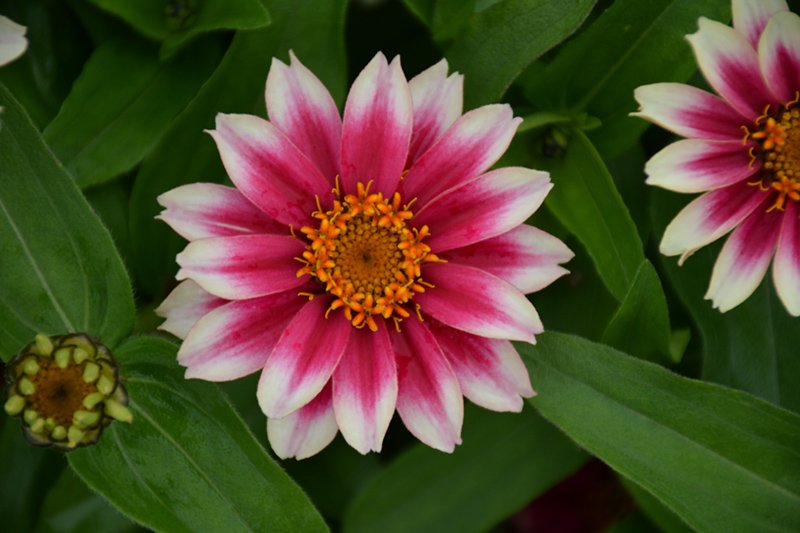
Whether you plant them in beds, containers, window boxes, or hanging baskets — or choose from one of our gorgeous pre-planted options — just add water and fertilizer, and you’ll be rewarded with a vibrant display that keeps on giving.
Perennials
While perennials may not bloom all summer, many offer extended bloom periods, and by combining different varieties, you can create a succession of flowers that lasts for months. Perennials also provide essential greenery to anchor your garden and enhance the look of your flowering plants.
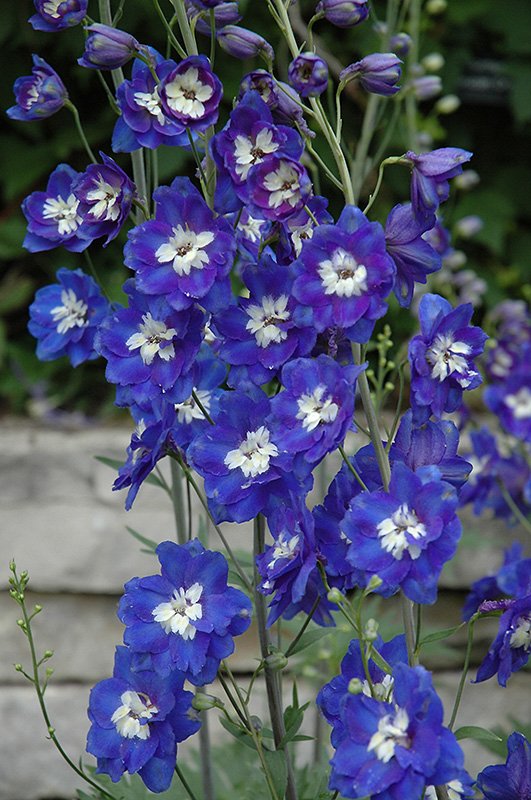
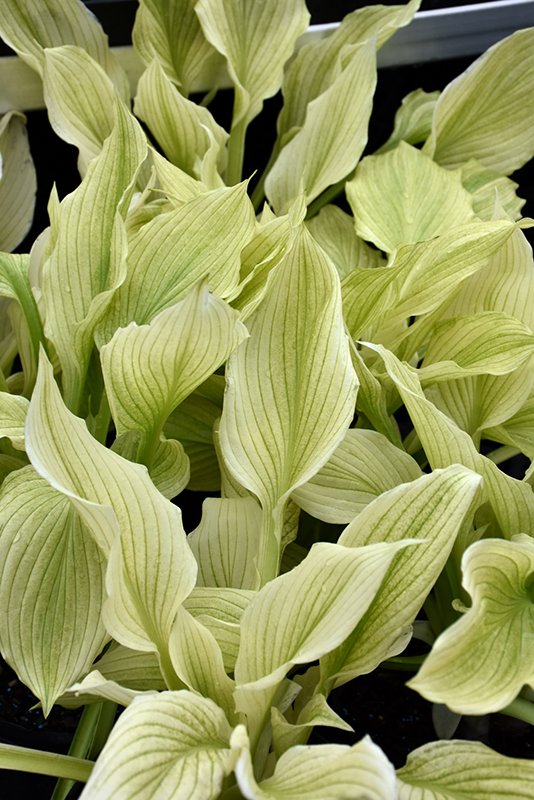
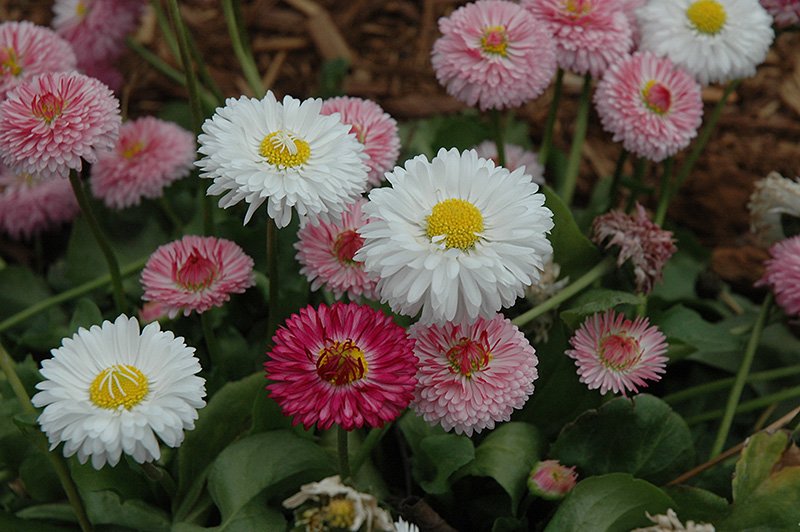
You can plant perennials from spring through fall, but getting them into the ground now gives them a strong start. From hostas and ornamental grasses to daisies and delphiniums, there’s a perennial for every style of garden — and the best part is, they’ll return each spring like dependable old friends.
Trees, Shrubs and Vines
Often called “the bones” of the garden, trees, shrubs, and climbing vines add essential structure, height, and seasonal interest. Planting them now allows you to design your garden layers thoughtfully, incorporating annuals and perennials around their base.
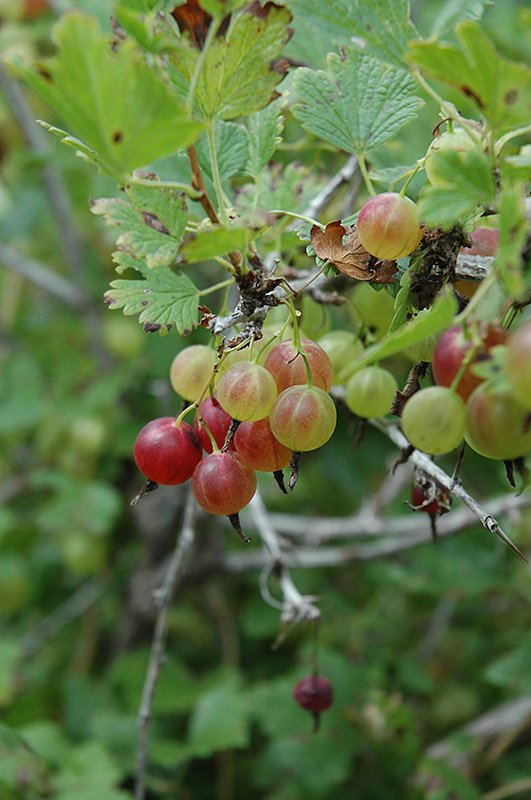
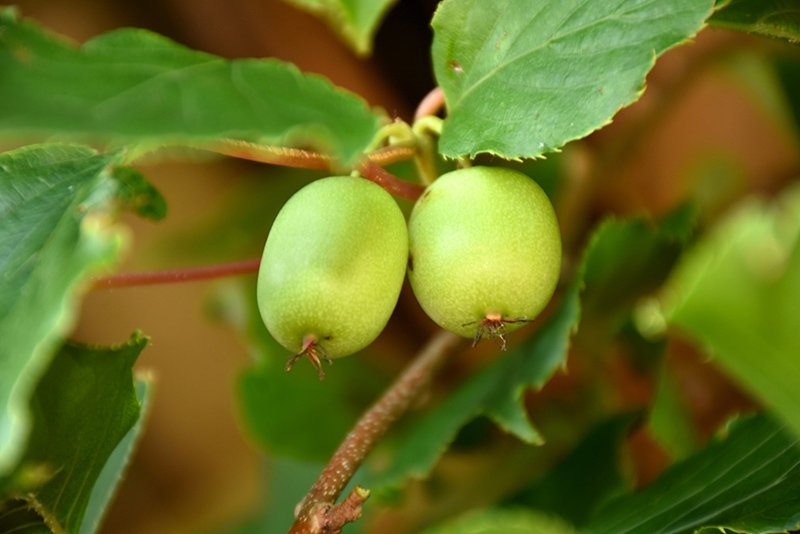
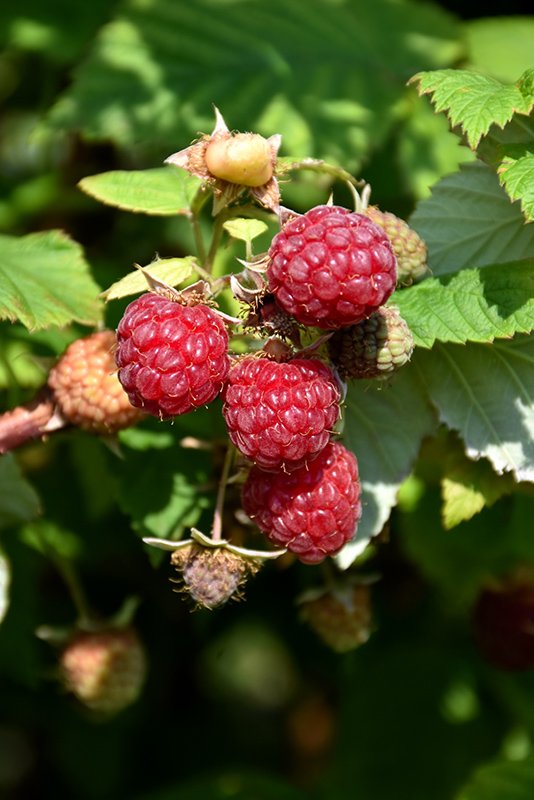
Spring is also the prime time to purchase and plant fruit trees and fruiting shrubs. At Eising, spring offers the best selection for starting your home orchard. Are you thinking of adding a few edible shrubs? Gooseberries, haskaps, hardy kiwi, rhubarb and raspberries are excellent choices.
Mulch
Okay, it’s not a plant, but this is a reminder to add mulch to your garden beds or containers. After planting, adding a layer of mulch to your garden beds or containers helps retain soil moisture, reduces transplant shock, and suppresses weeds. Even if a few weeds manage to sneak through, mulch makes them easier to pull.
Water Garden Plants
If you have a garden pond, spring is the perfect time to add water plants. Floating plants, such as water hyacinths and water lilies, help shade the pond’s surface, reducing algae blooms. Marginal or bog plants, such as water iris, papyrus, and cattails, also help keep the water healthy and clear by improving oxygen levels and providing habitats for beneficial wildlife.
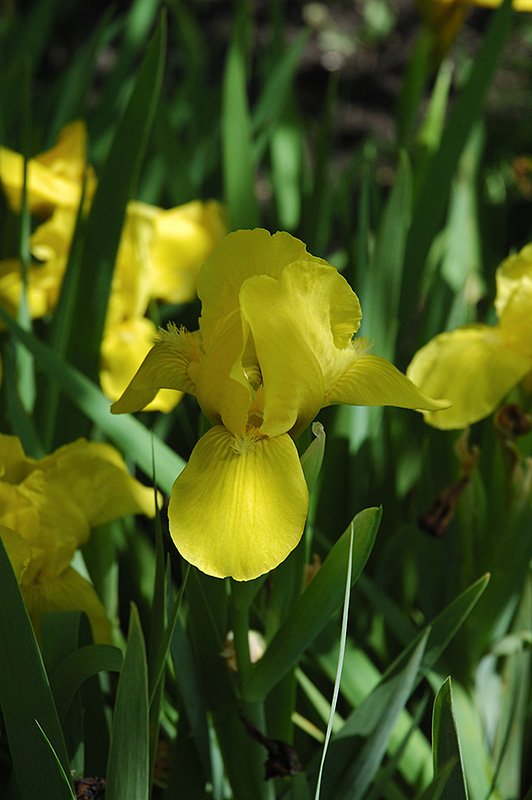
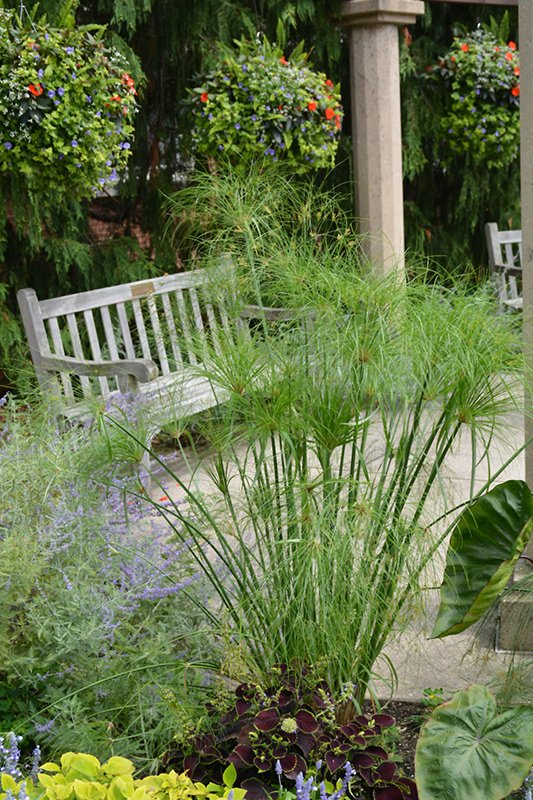
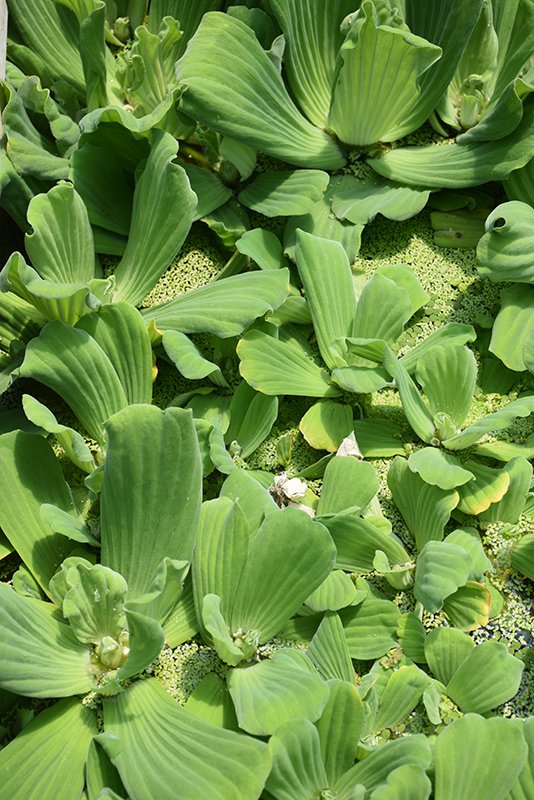
Time to Grow!
May is one of the most anticipated and exciting months in the garden. Whether you’re dreaming of fresh vegetables, a lush landscape, or a colourful flower display, planting now sets the stage for a beautiful, bountiful season. Visit us at Eising Garden Centre to find everything you need — and let’s get growing!
By Dave Zeldon and Ely Schweyer
As plant people, we’ve all experienced that moment when we realize the novelty phase of that plant we brought home from the garden centre has worn off. The plant isn’t standing quite as tall, the flowers aren’t as bold, and the leaves are unravelling smaller or not at all. What is this magic they perform in the greenhouse? Perhaps you’ve provided sufficient lighting and adequate watering; there’s just one thing that is often overlooked because dirt is dirt, isn’t it?
97% percent of plant tissue is made up of carbon, hydrogen, and oxygen pulled from the air and water, the remaining 3% is comprised of 16 other elements taken up from the soil. The quality of soil then is crucial to your plant’s health. Whether your plants are in pots or in ground, each soil type you could provide your plant offers something unique and may lack in another.
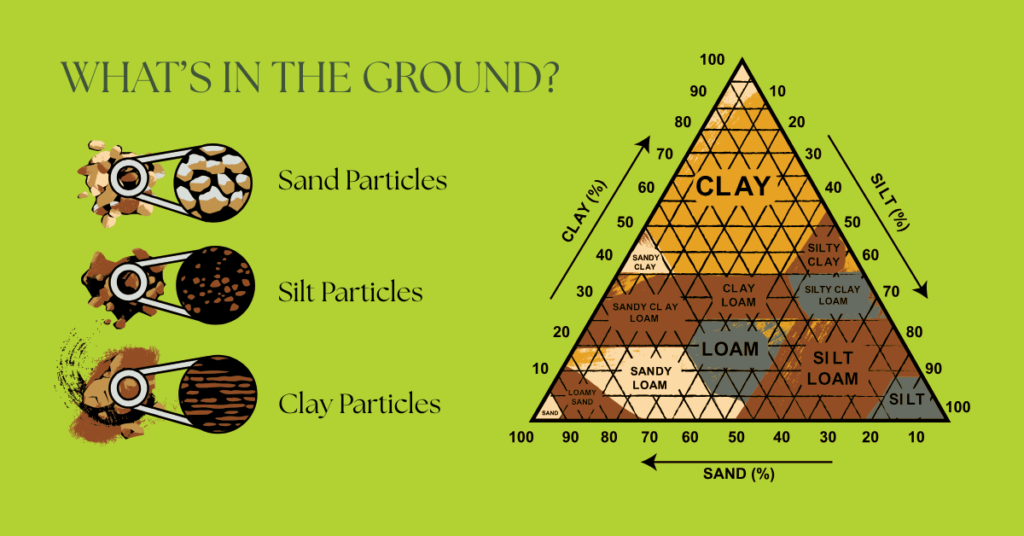
*Clay particles are even smaller than silt particles.
Resist the Urge to Slam Your Plant in Potting Soil
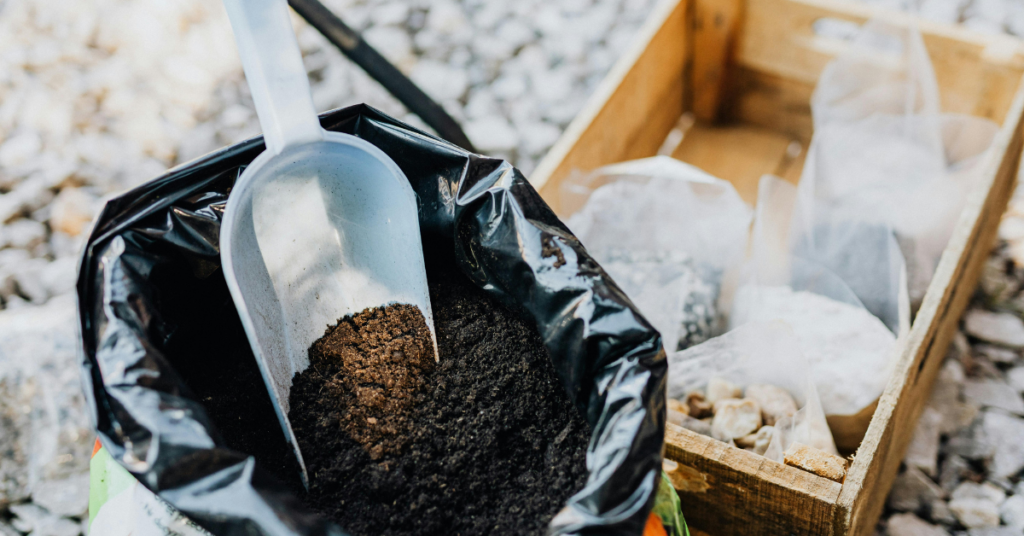
There’s bags and bags of rocks, sand, bark, manure, and moss on the shelves, yet the common buyer seems to always opt for potting mix. It’s fair; organic matter is usually great for plants and simple to use. However, most people don’t realize it’s merely an ingredient.
Strictly using potting mix is like attempting to make a loaf of bread out of only flour. All those bags of other materials on the shelves are also components for a successful plant diet!
Potting mix is a great base material, however, alone it presents risks of compacting, becoming waterlogged, can mold easily, and over time will become depleted of nutrients. Consider mixing the following ingredients into your pots, ground and raised beds to meet your plant’s required nutrients, pH level, and volume of moisture.
🖱️Use our Plant Finder to find some details on your plant! We try our best to keep this updated!
👍 Rule of Green Thumb: Plant roots can help you to determine the medium needed – thick, robust roots (i.e., yucca) typically enjoy chunkier materials, and smaller, delicate roots (i.e., begonias) enjoy finer materials.
Mulch and Bark Bites
- Mulch is the organic slow-release fertilizer, as it slowly decomposes, it lowers soil pH. However, may eventually compact soil once fully broken down.
- In the meantime, it creates shelves in the soil that create air pockets and prevent the soil from compacting. Mulch is a great short term medium for arid potted plants.
- If kept too wet, it can harbour fungus gnat larvae.
- Make sure when sourcing your mulch it doesn’t contain any black walnut.
🖱️ See more on mulching here.
Sphagnum Peat Moss
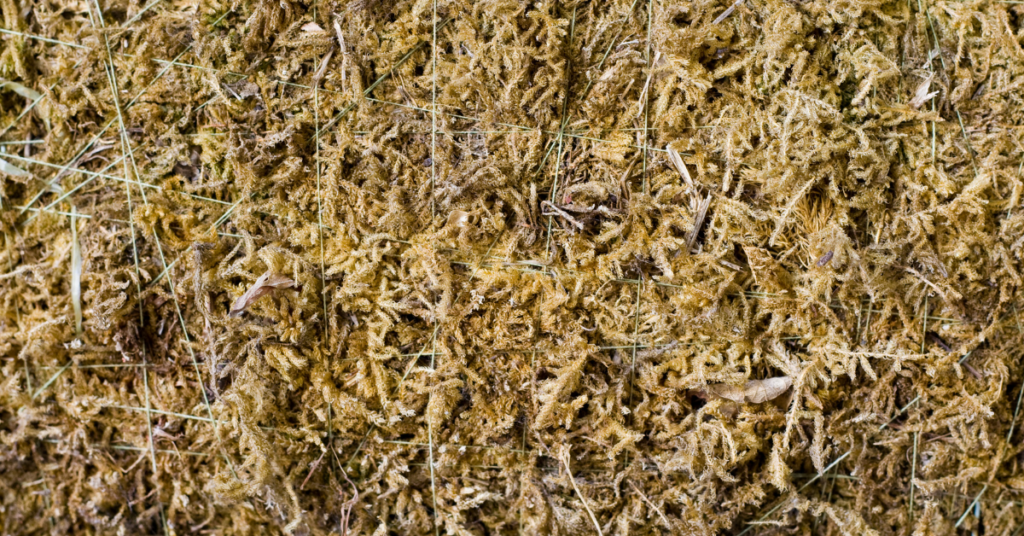
- Peat moss is used to help retain moisture and lower pH in the soil given it is harvested from bogs.
- Retains nutrients very well.
- It is difficult to rehydrate once it loses moisture.
Coconut Coir
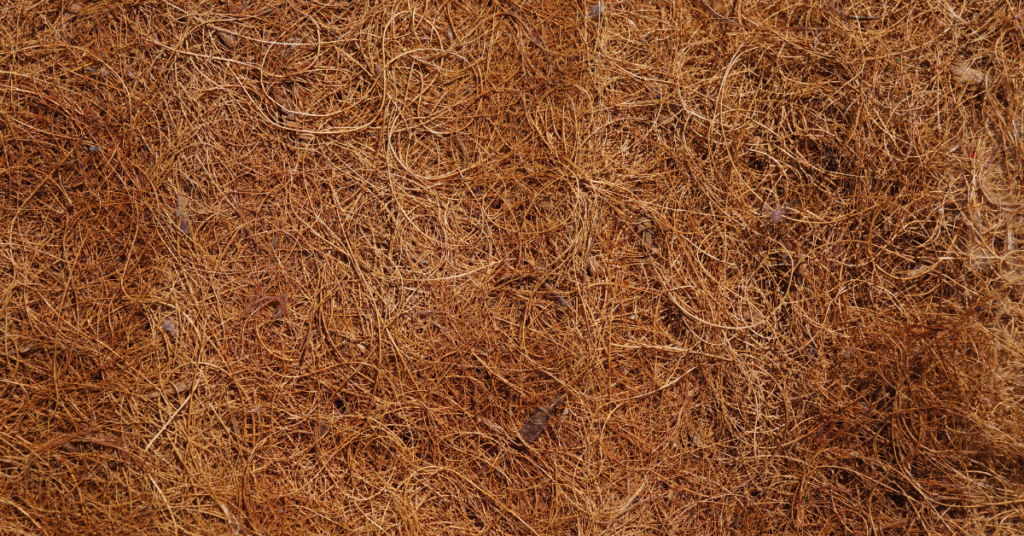
- Coco coir, much like peat moss is used to keep the soil moist and keep pH low, however it lasts longer and is possibly less invasive to harvest.
Sand
- Grains are relatively large and do not bind, allowing for excellent drainage depending on grade.
- Adds weight to top heavy plants.
- Has no ability to store minerals itself, however, pH can vary by its content of shells, minerals like silica, or fine organic matter.
Manure & Compost
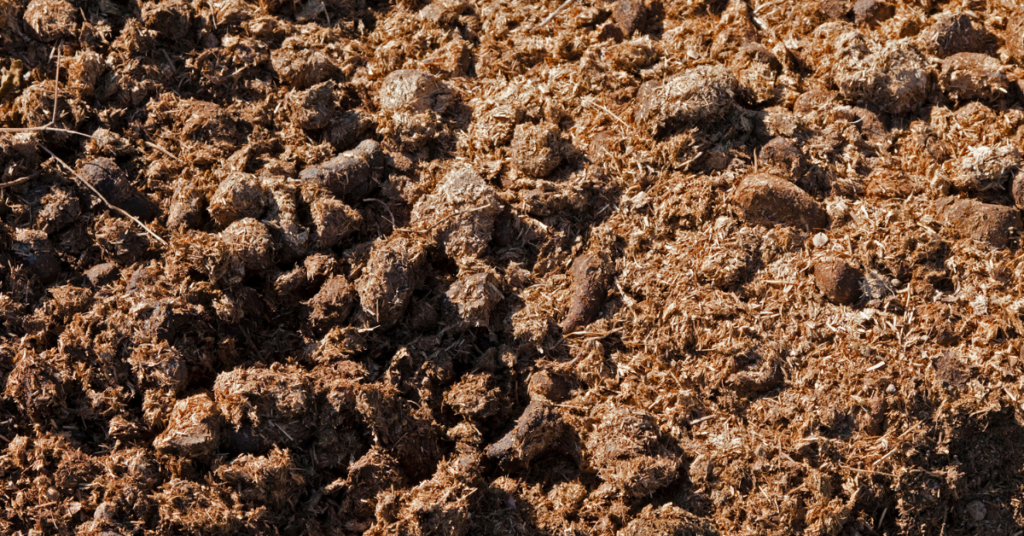
- Source these organic by products locally and ensure they’re not too hot. These additions can significantly lower pH.
- Sheep manure is usually near free of weed seeds as sheep digest seeds better than cattle and horses!
Perlite
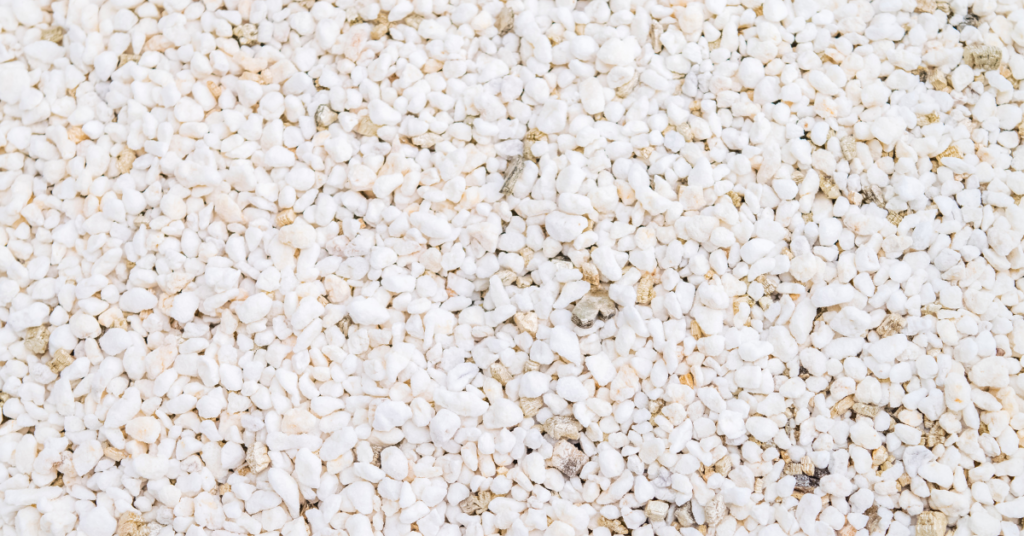
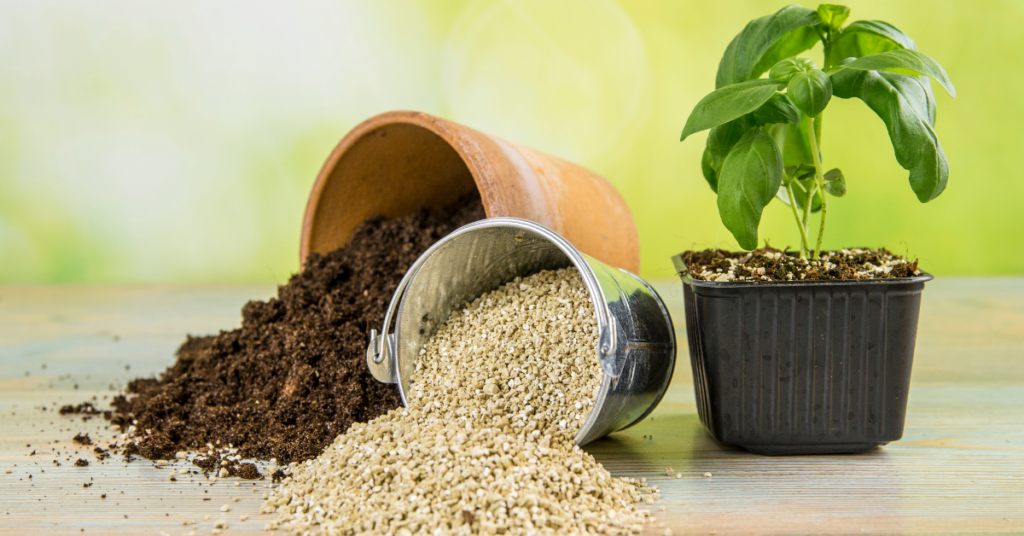
- Perlite is a volcanic byproduct (so it floats like pumice) that helps drainage in the soil and prevents compaction – vital in the case of starting seeds.
- If a rockier, well-draining medium is required for your plant, consider perlite.
- Perlite can expand holding trace amounts of water.
- Perlite has a neutral, slightly acidic pH.
- Make sure when sourcing perlite, that you are not being sold Styrofoam balls.
Vermiculite
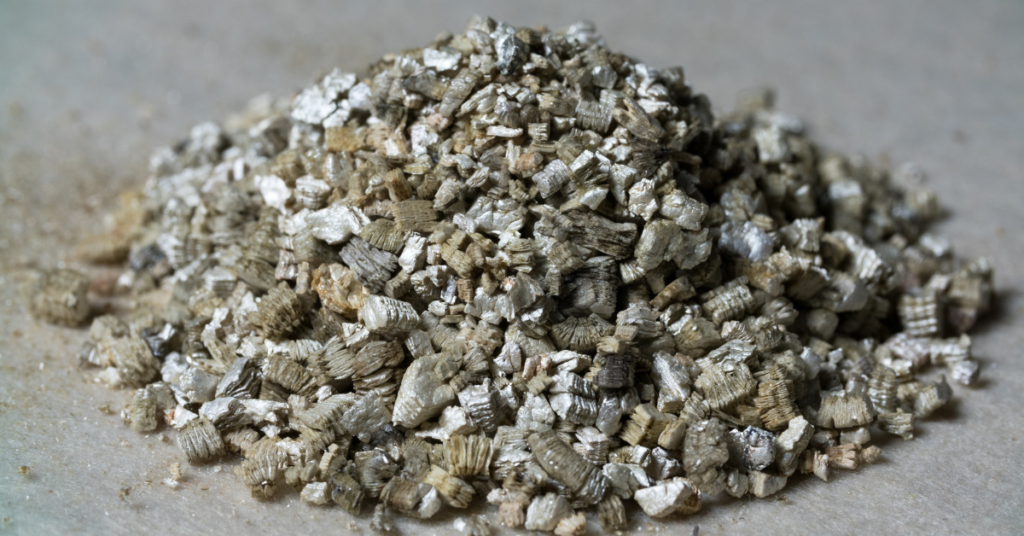
- Vermiculite is a recycled mineral used similarly to perlite, and too has a neutral, slightly acidic pH.
- Expands with water content.
- Can contain amounts of potassium and magnesium (as well as good cation exchange capacity).
- Runs the potential risk of introducing asbestos into your soil.
Calcined Clay Materials
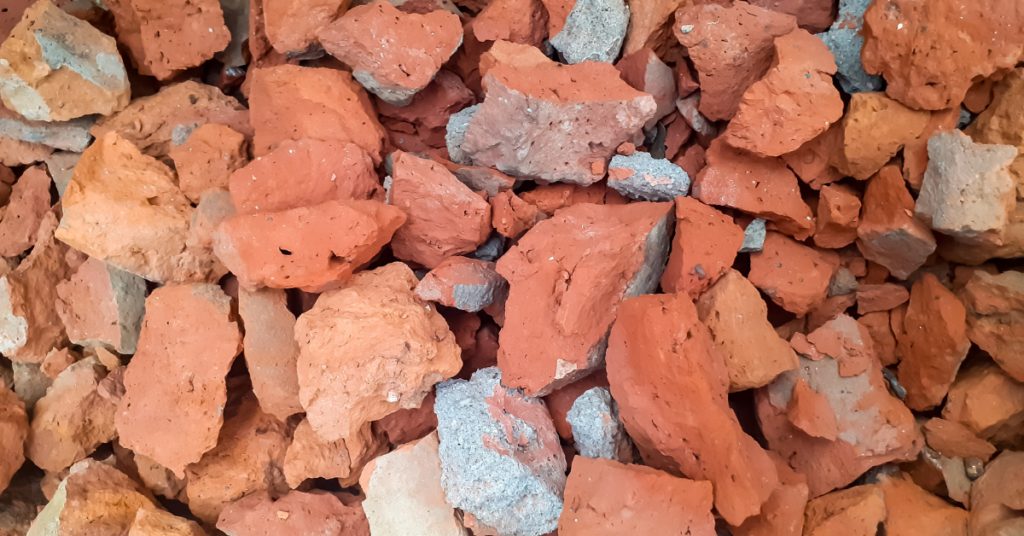
- Clay materials like recycled brick bits, pottery, or lecca are typically used for arid plants as it improves aeration and drainage.
- Can raise pH.
- Can retain some water.
- High cation exchange.
- Can also be used for starting robust cuttings when kept moist.
- Probably not ideal for inground amendments.
Maintaining Your Plant’s Dietary Needs
Perhaps we’ve crafted the perfect soil type for your plant – your plant thanks you – but over time, we will end up in the same staling predicament. Why? Because with each thorough watering, we leech the soil of the provided nutrients. Best we use the plant-specific required fertilizer for your plant to prevent nutrient loss.
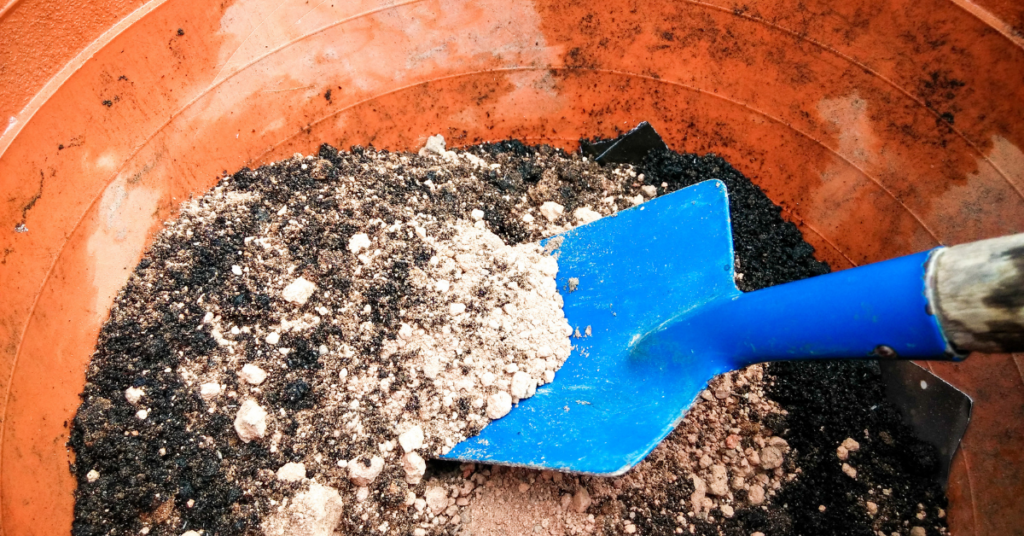
Organic sources of fertilizer such as bonemeal, composts, and manures, along with the application of lime, will improve the physical condition of the soil in terms of water and element holding ability. Unfortunately, in many cases though, manures and lime alone cannot be depended upon to provide enough available nutrients in soils with low essential element reserves.
Let’s talk about commercial fertilizers, which can help target your plant’s exact needs much like vitamins and supplements!
The Scoop on Fertilizers
Of the essential 16 elements your plant pulls from the soil, Nitrogen (N), Phosphorus (P), and Potassium (K) are the most critical for good plant growth. You’ll recognize the three numbers appearing on your commercial fertilizer labels known as the fertilizer analysis of the product, representing the percentage of each of the three "macronutrients" in the order of N, P & K.
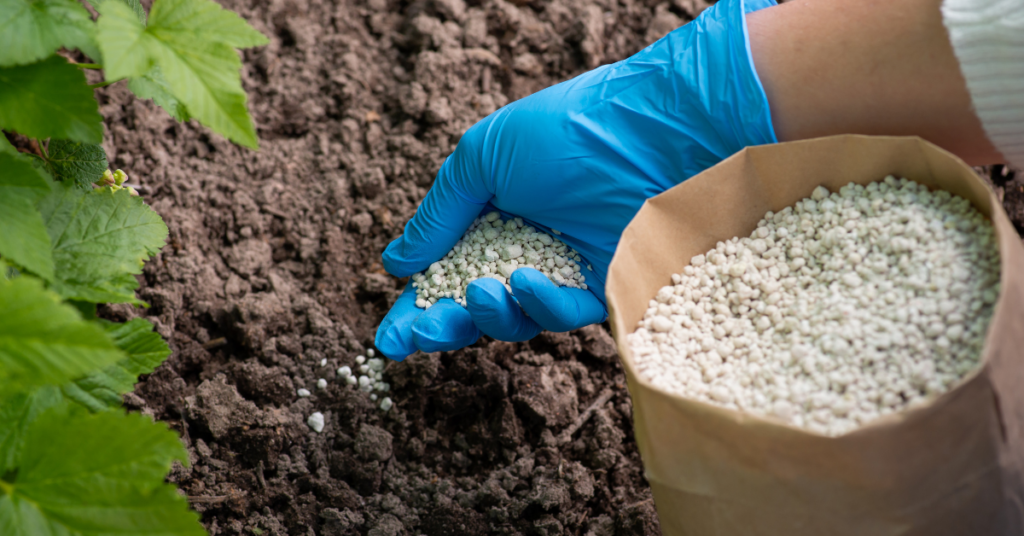
Nitrogen (N) is necessary for green leafy or vegetative growth which is important in crops like corn, cabbage, and potatoes.
☝️ It is important to remember that you should not use a fertilizer which is high in nitrogen late in the summer on your perennials, as it may cause a boost of growth which will only freeze as the cold weather sets in. Also, too much nitrogen in the analysis could cause too much lush, leafy growth thus inhibiting the desired flowering aspect of a plant species.
Phosphorus (P) promotes the development of flowers, fruit and roots. Crops like tomatoes, cauliflower and garden flowers.
Potassium (K) boosts plant hardiness, stem strength, resistance to disease and drought which is important to all crops, but especially in potatoes, celery and rhubarb.
👍 Rule of Green Thumb: For foliage plants, provide them with shade and lots of nitrogen, and for flowering and fruiting plants, provide them with lots of sun and lots of phosphorus!

Amending Clay
Hello Haldimand and Eastern Norfolk!
We’re presented with the challenge of compacted, often shallow and waterlogged clay, which proves difficult but not impossible.
Clay becomes compacted and waterlogged as it is the smallest soil particle – smaller than a grain of sand, and even smaller than silt – with rough edges that allow it to interlock and bind. In this instance, roots cannot penetrate further into the soil, are susceptible to root rot, and air pockets are slim to none.
This, however, can be fixed with the addition and renewal of the above materials.
Mindful that you don’t create a watery bowl in the ground (score the edges the area being worked), you can add organic matter (i.e., manure, compost, and potting soil) for nutrients, as well as mulch, sand and perlite for aeration and drainage. Annual soil particle aggregation in clay soils increases air porosity (air pockets) and is accomplished by the incorporation of organic matter that breaks down to form humus.
🖱️ See more here for planting trees in clay.
We hope this soil and fertilizer guide helps you provide all the vital nutrients to your beloved plants in ground and above ground! For more information - and soil – visit Eising Greenhouse and Garden Centre! 🌱
By: Dave Zeldon and Ely Schweyer with tips from Mary K, Zach C, Sandy M, and Jeanine LT!
Now is the time to prep our outdoor landscapes for the coming cold weather and the ensuing spring! Perhaps your autumn is calmer than your spring, and this is the best time to clean up and begin new projects. The following are some simple but effective tips to get your yard winter-ready - so your spring will be a little more pleasant for you!
Planting
When warm weather still allows it, plant trees, shrubs, perennials, and bulbs to allow them to establish for budding and blooming next spring.
Pond Care
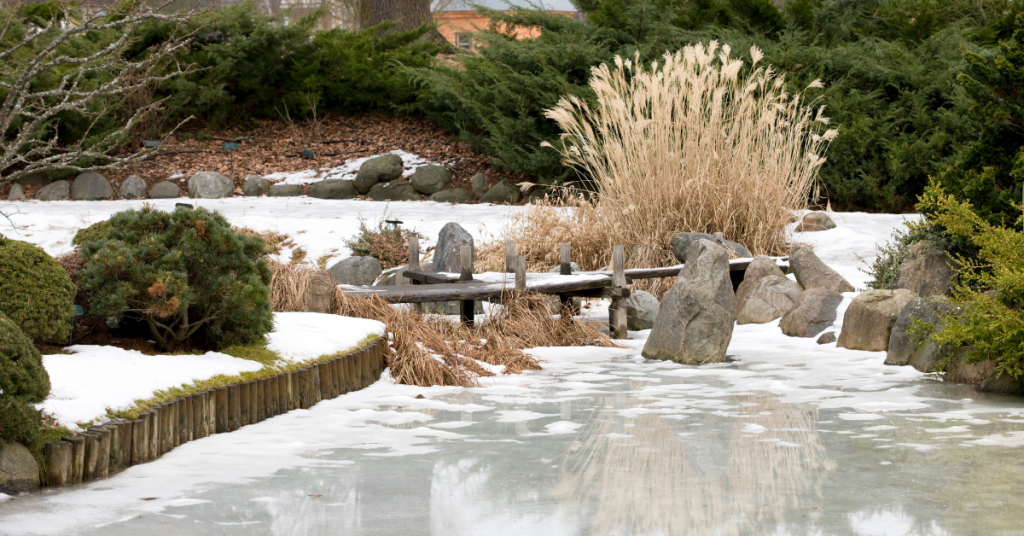
Mary, our perennials gal, suggests not removing any water from your pond but instead aerating it all winter. She skims out the leaves to maintain the balance of the nitrogen cycle in the water and suggests waiting to do a big pond clean out in the spring, as that’s when the water’s culture can bounce back easier.
Fertilizing
After top growth of your landscape plants ceases, reduce your annual fertilizer application by up to half of the requirement. Autumn is a major root growth period for woody and herbaceous perennials; roots will grow and absorb nutrients whenever soil temperatures remain above 5 °C but can be over fertilized quickly in these cooling temperatures.
Produce gardens could benefit at this time from a top layer of compost that will break down during the winter so it isn't too 'hot' for spring planting.
Leaf Litter
Here’s our pitch on the ‘leave it – don’t leave it’ debate: It DEPENDS.
Ideally, we should leave litter leaf on the ground for our pollinator friends and endangered species like fireflies to hide out in the winter. But, there are appropriate situations in which to remove leaf litter.
- When they’re covering your bulbs and tender perennials, remove SOME. Leaf litter acts as a ground insulant, which can amplify our temperamental zone 6b temperatures. This freezing and thawing can often confuse and kill early spring bulbs and tender perennials.
- Zach, our trees and shrubs guy, suggests that if a tree shedding leaves has been diagnosed with pests and fungi, remove the leaf matter to reduce the spread to other plants. Diseased matter should always be removed in a quarantined fashion and taken to a landfill or burned.
☝️Please note: Unless diseased, compost your leaves, they contain vital nutrients specific to the plants they came from!

Lawncare
With autumn mowing practices you have the opportunity for the addition of much needed organic matter for your lawn, which is also an excellent source of slow release nutrients. Keep mower blades sharp since leaves can be tougher than grass. Raise the mower height up and mow leaves when they are lightly wet (e.g., morning dew). This will keep the leaves from blowing all over and will prevent the mower from getting bogged down in wet leaves.
See more on general lawncare in Dave's Lawncare 101 post.
Clean Up
Now is a good time to wash your tools with soap and water to prevent diseases spreading from plant to plant.
☝️Mary's tip is to spray garden tools with PAM before use, so the dirt slides right off them!

Pruning Perennials
Mary, our perennials gal, suggests leaving things until frost to cut back. This way they're easier to compost. Make sure to leave seedheads (i.e., coneflowers and black-eyed Susans) for wildlife, and things like hydrangeas for winter interest.
☝️Make sure if things are cut back, to leave them sticking up enough you can still find them in the spring!
Dividing and Moving Perennials
Moving or dividing perennials in the autumn is a great way to reduce your work next spring. The cool, moist weather is an ideal time for perennial roots to become well established.
👍The rule of green thumb for moving perennials: If the plant blooms between early spring and late June, then early fall division/moving is ideal. If the plant blooms after late June, then early spring division is ideal (except for Peonies which should only moved or divided in the fall, Poppies in August, Irises in July & Lilies in the Fall).
Overwintering Trees
Zach and Sandy from trees and shrubs suggest a couple of things to help your favourite trees along this winter:
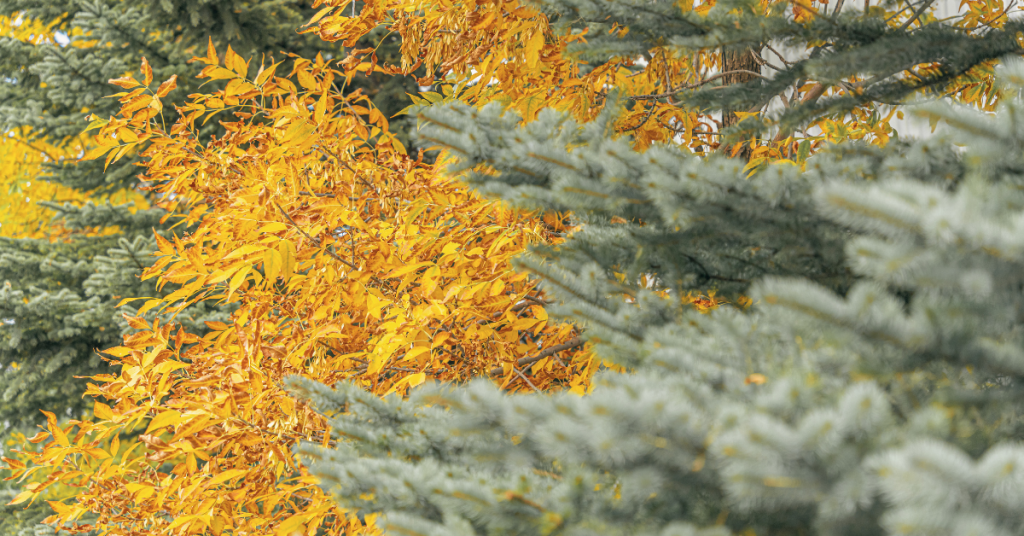
- To reduce winter injury in evergreens: Keep properly watered throughout the growing season and into the fall is another way to reduce winter injury. Decrease watering slightly in September to encourage hardening off, then water thoroughly in October until freeze-up.
- Cedars - Spray cedars with antidesiccant spray (available at Eising GC) or wrap in burlap (with stakes to create dead air space) so wind doesn't dry out and burn tips.
- Fruit trees - In late fall, spray fruit trees with sulfur-horticultural oil (available at Eising GC) for protection against fungi and pests overwintering in the bark.
- Ornamental trees - wrap the base of young trees to protect from chewing rodents.
- Pruning trees - trees that prefer winter pruning rather than spring pruning are maples, oaks, birches, and elms, as well as with fruiting trees such as apples and pears. This ensures blight and pests will not affect the tree's open wounds.
If you missed the frosty deadline for transplanting trees, Sandy suggests insulating unplanted potted trees to help them best survive the coming winter. Here are some methods:
- Double-pot your tree with an insulative barrier (i.e., burlap, straw, mulch, etc.) stuffed between the two pots and securely cover the top with tarp to deflect moisture.
- Bury your potted tree in the ground, level with the top of the pot (don’t forget to dig it back up!) and mulch the area.
- Huddle all of your unplanted trees and plants together when using the above methods.
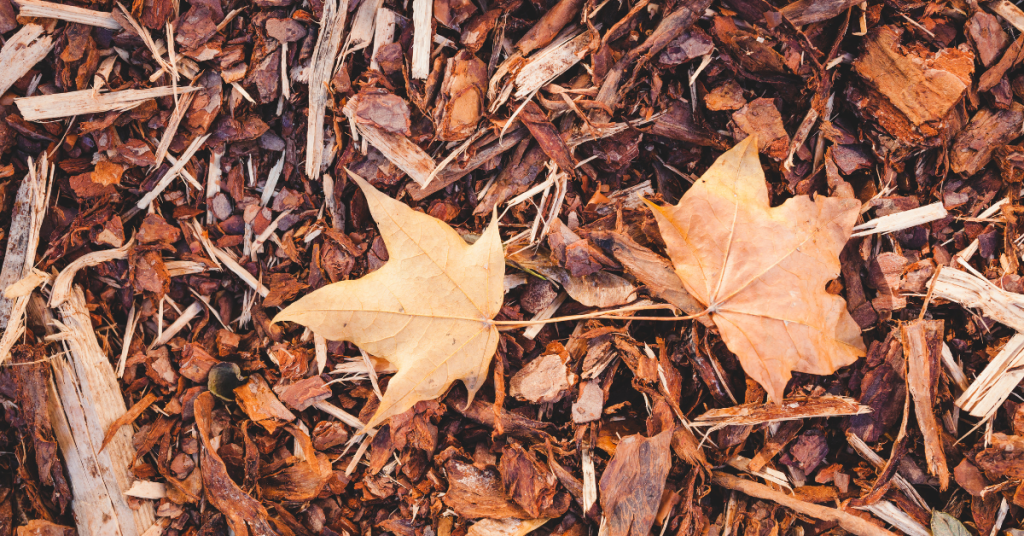
Mulching
Mulching is one of the simplest and most beneficial practices you can do for your garden. Just by simply placing a protective layer of material over the bare soil will benefit the soil as it decomposes providing the much-needed organic matter which improves root growth, the infiltration of water and the nutrient-holding capacity of the soil while reducing soil erosion.
A good layer of mulch allows the soil to warm more slowly in the spring, so perennials aren't fooled into breaking dormancy too early, as you want the ground to stay cold until it really is spring!
☝️Make sure your mulch application won't stunt the growth of your plants come spring as discussed in our Transplant Troubleshooting blog post!
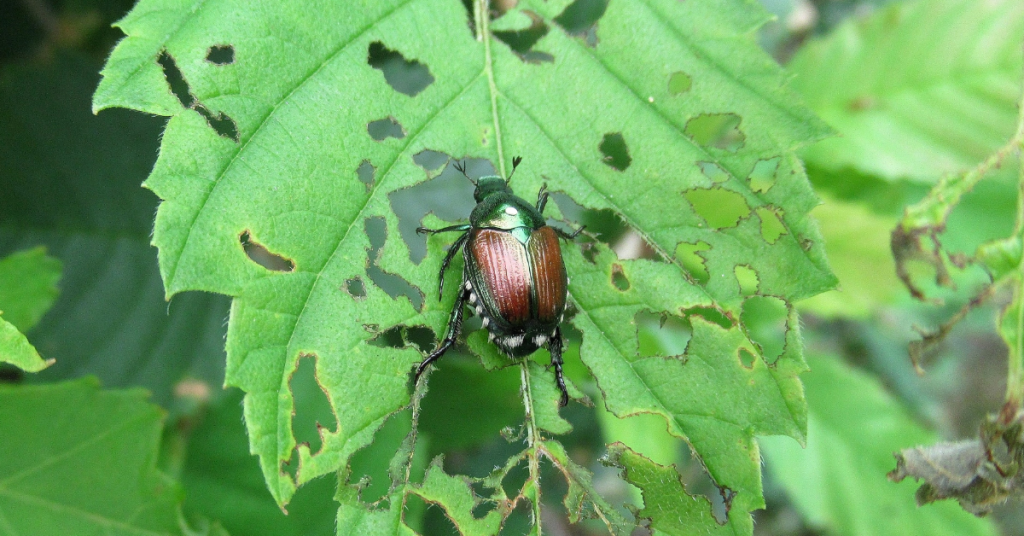
Japanese Beetle Prevention
Nematodes are microscopic worms that should be applied to lawns that have been ravaged by grubs especially of the Japanese Beetle. Nematodes have a short shelf life and must be refrigerated until they are applied. Normally, they are sprayed onto the lawn from mid-May to mid-June and then again (for best practice) from mid-August to mid-September.
Pots
To prevent freezing and cracking, Mary suggests emptying and turning your pots upside down. You can disinfect at this time too.
Design Time!
Jeanine, from production, suggests writing down what worked best in your produce garden this year so you can implement it again in the spring.
With the trees and land being barren enough you can see its contour, now is a great time to plan ahead for spring landscaping! Don't forget Eising GC would love to offer help with your landscape designing!
We hope these tips help your landscape plants enjoy your winter abode as much as you do this season, for more information - and plants – visit Eising Greenhouse and Garden Centre! 🍁
By: Dave Zeldon and Ely Schweyer
Spring and early fall are generally the best times for planting trees. It has been found that newly planted trees thrive when exposed to moderate temperatures and rainfall, as they need time to root and acclimatize before the onset of intense heat and dryness of summer or the freezing temperatures of winter.
Now whilst planting different types of trees differ in detail, all trees eventually end up in a hole. But remember not just any old hole will do.
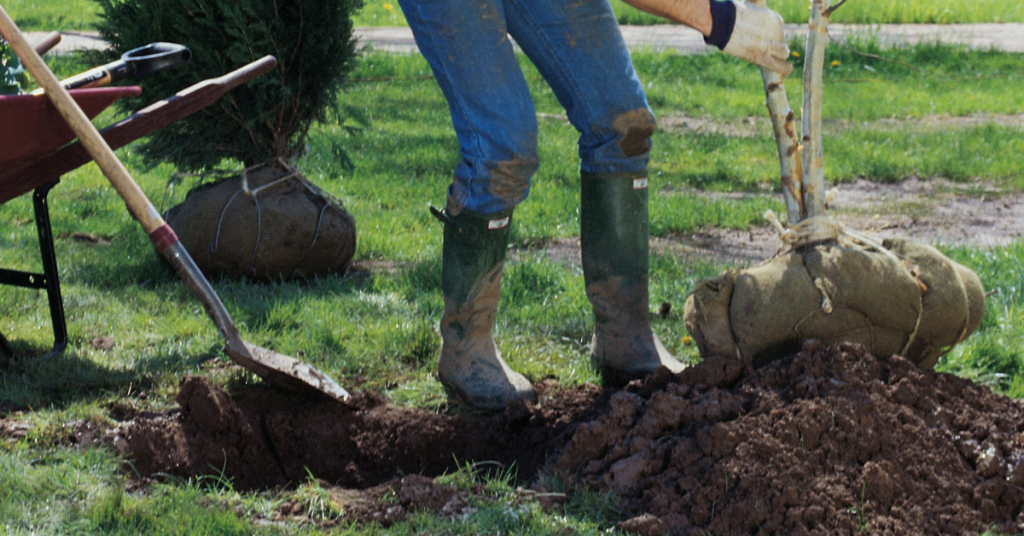
Let’s Get Digging!
1. Some trees are buried too deeply, causing the tree roots to decline in health and condition. We have a whole other article dedicated to transplanting depth if you wish to read more, but here’s the just of it: Poor tree health results in reduced growth rate, atypical leaf size and colour, increased disease susceptibility, and reduced cold hardiness. Always make sure that the root collar flare is visible after planting; if settling occurs, reset the tree to the proper depth.
👉 Note: Many times, homeowners build a raised bed garden around an existing tree in the yard (thus burying the root collar flare) only to find within a year or two their favourite tree now is in decline. Don’t bury that root collar flare!
2. As a general rule, trees should be transplanted no deeper than the soil in which they were originally grown. The width of the hole should be at least three times the diameter of the root ball or container or the spread of the roots in the case of bareroot trees. This will provide the tree with enough worked earth for its root structure to establish itself.
3. When digging in poorly drained clay soil, it is important to avoid 'glazing'. Glazing occurs when the sides and bottom of a hole become smoothed forming a barrier, through which water has difficulty passing. To break up the glaze, use a fork to work the bottom and drag the points along the sides of the completed hole. Also, raising the centre bottom of the hole slightly higher than the surrounding area. This allows water to disperse, reducing the possibility of water pooling in the planting zone.
4. The backfill soil should be a mixture of composted manure and topsoil. The mixture should then be placed in the hole surrounding the tree just to the height of the ball or slightly lower to allow for some settling. Be careful not to compress the backfill soil as this may prevent water from reaching the roots and the roots from expanding beyond the ball.
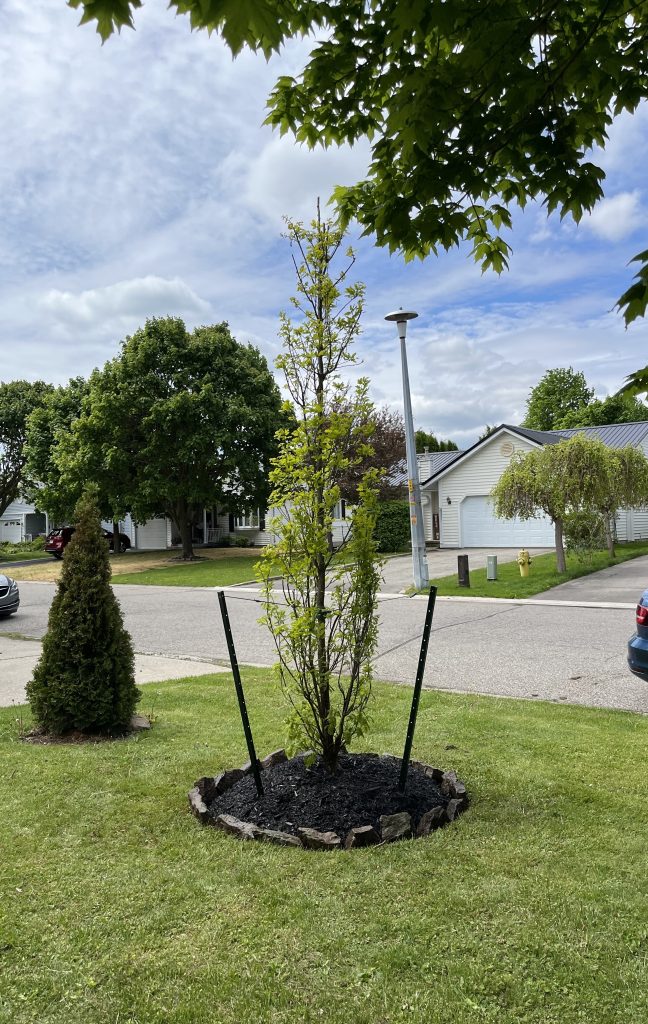

Jobs well done by the Eising landscaping team!
Standing On Its Own Roots
Young trees should be able to support their own weight when they are transplanted. If the tree is unable to do so, try thinning out the upper branches to reduce wind resistance. If that is not enough, you may have to stake a tree.
Watering Your New Tree
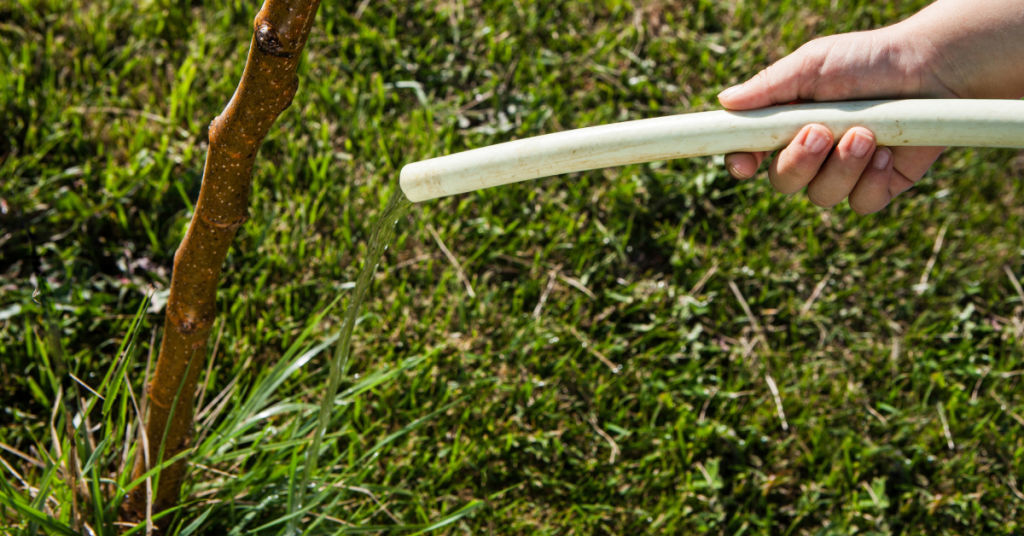
Newly planted trees should be watered at the time of planting. In addition, during the first growing season, they should be watered at least once a week in the absence of a good rain.
👉 Remember: Regular deep soakings are better than frequent light wettings.
We hope these tips can help you encourage the longevity of your new tree! For more information - and trees - visit our Trees & Shrubs section at Eising Greenhouse and Garden Centre. We hope to see you soon!
By: Dave Zeldon and Ely Schweyer
Let’s get in depth about planting trees too deeply!
Sometimes homeowners find that their newly planted trees start showing signs of stress and become unthrifty a little while after planting, and soon their investment is altogether lost when the plant just dies. Often when we’re asked to inspect a tree in poor health, we know what to suspect.
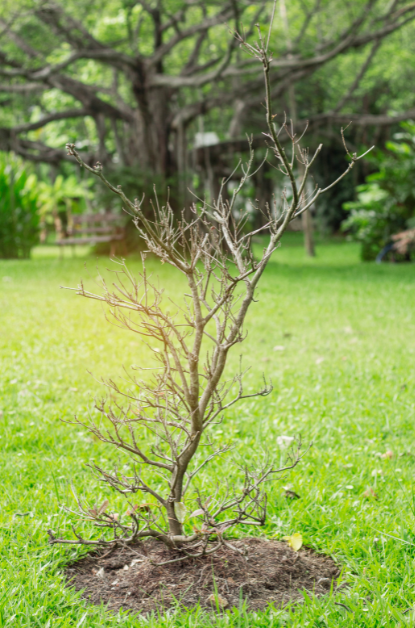
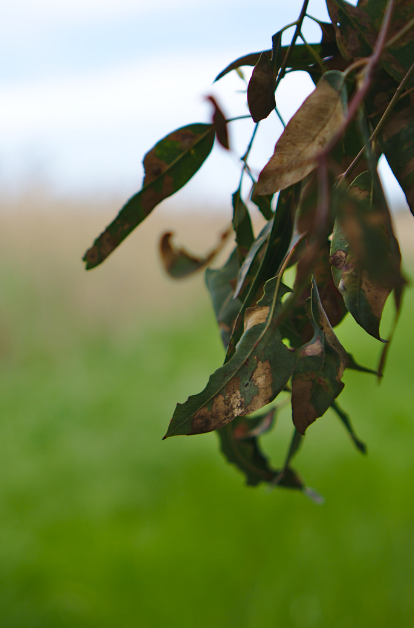
Although not readily apparent at the time of installation, the long-term effects of improperly placing the root system in the planting hole are substantial. The poor tree health that results manifests itself as reduced growth rate, atypical leaf size and colour, and increased disease susceptibility. Trees in really poor condition exhibit decay, cracks, and excessive deadwood. Sometimes trees show signs of stress within the first year of planting, but it usually takes several years for the problem to rear its ugly head.
The most common reason? Many trees are simply buried too deeply causing the tree roots to decline in health, as they cannot get the vital oxygen from the air that they require to live.
Putting Down Roots
The width of the hole your tree will call home should be at least two times the diameter of the root ball, container, or in the case of bare root trees, the spread of the roots. This will provide the tree with enough worked earth for its root structure to establish itself.
For tree roots to grow vigorously, they require water, oxygen, and warmth. An oxygen level of 25% of the soil volume is considered good for root development.
At a 5% oxygen level, growth stops, and at 2%, roots decline and die.
Since tree roots naturally grow quite shallowly in the soil profile, buried root systems are unable to obtain adequate soil oxygen and water. As a survival response, trees work to get roots closer to the soil surface where there is a more reliable source of both. The energy that a newly transplanted tree should use to overcome normal transplant stress is instead used just to survive.
The tree expends its energy either by forcing its roots to grow upward or by creating totally new roots from dormant buds on the buried trunk, wasting all its prior growth. Some plants can survive being buried too deeply and live normal lives after developing a functional root system, others begin a long, slow decline of health resulting in either premature death or sudden failure during wind or ice storms. Let’s not risk it!
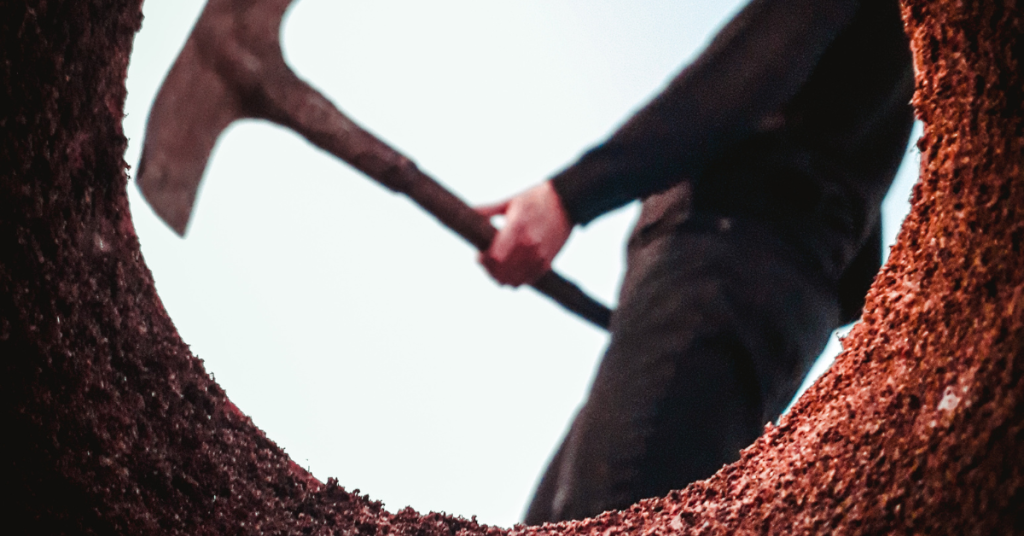
How Do I Know How Deep to Plant?
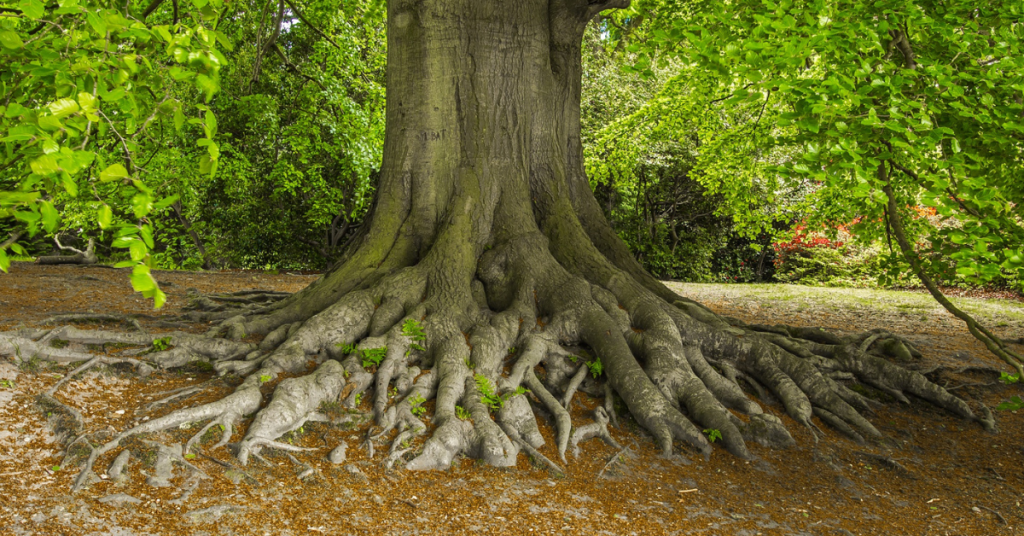
If you want your new tree to not only survive, but thrive, it needs the best start possible; it is very important that the root collar flare be visible after planting. The root collar is the part of a plant where the stem and root system meet, "flaring" where it transitions between the stem wood and the roots. Always make sure that the root collar flare is visible after planting. If settling occurs, reset the tree to the proper depth.
👉 Note: The backfilling soil should be a mixture of the original soil with composted manure or topsoil and bone meal.
But I Did Leave the Root Collar Visible… When I First Planted It
It has been observed that many times after a perfect tree planting, the homeowner then decides to build a raised-bed garden around the tree (thus burying the root collar flare – we’ve found root collar flares buried to 24 inches in mulch!) only to find that within a year or two, their young tree is dead or dying.

A common practice, often referred to as ‘volcano mulching,’ also contributes to this problem. In addition to subjecting trees to the problems associated with planting too deeply, heat from the composting mulch can literally cook a tree's trunk.
So, What is ‘Planting Proud’ Then?
The transplanting rules are amended if planting in the heavier clay soils where the practice of planting your new trees "proud" is advised. Planting proud essentially means that the root ball is left higher out of the ground level, producing a hilled effect. The soil that is normally used for back-filling is used to help to create a mound. Planting your trees this way in poorly draining clay soils prevents the ground water from collecting in an otherwise deep hole and drowning the roots of your new planting.
But, as a general rule, trees should be transplanted no deeper than the soil in which they were originally grown, and the soil level shouldn’t rise after planting. Two to three inches of wood chips is the optimum depth to mulch - and keep it an inch or two away from the trunk. If it is really desired to have the tree as a focal point in this newly built garden, then possibly a 3 foot well could be made around the tree to keep the root collar flare open to the air.
So, remember to give your tree a strong start and long life by not planting too deeply, but by leaving that root collar flare exposed! We hope these tips can help you encourage the longevity of your new tree. For more information - and trees - visit our Trees & Shrubs section at Eising Greenhouse and Garden Centre. We hope to see you soon!
Dealing with water restrictions or choosing to conserve water? You’re not alone. Many gardeners in Norfolk County are facing the challenge of keeping gardens thriving with less water. The good news? A lush, colourful garden is still within reach—thanks to drought-tolerant perennials.
When we think of drought-tolerant plants, cacti might be the first thing that comes to mind. But there’s a surprising variety of beautiful, hardy perennials that can handle our region’s dry spells—no desert landscape required.
While these plants do need regular watering when first planted, once established, they’re low-maintenance and well-suited to Southern Ontario’s climate, including periods of limited rainfall.
Full Sun Ground Cover
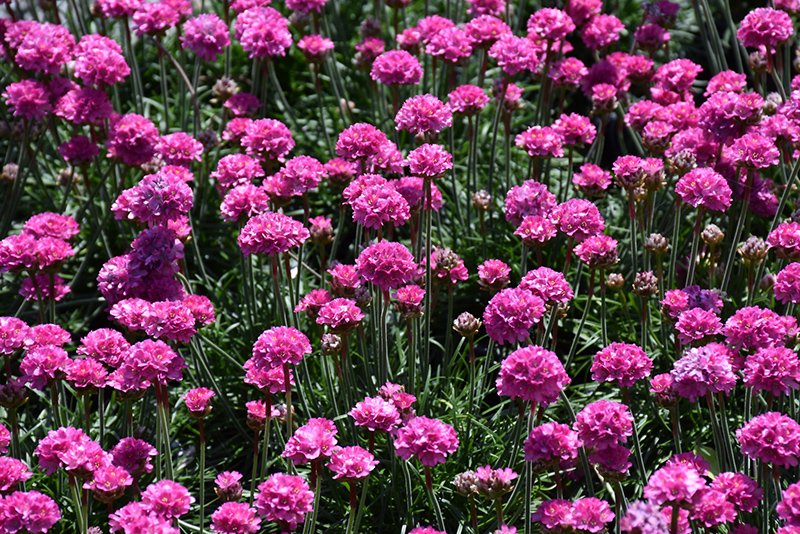
Botanical Name: Armeria maritima 'Dusseldorf Pride'
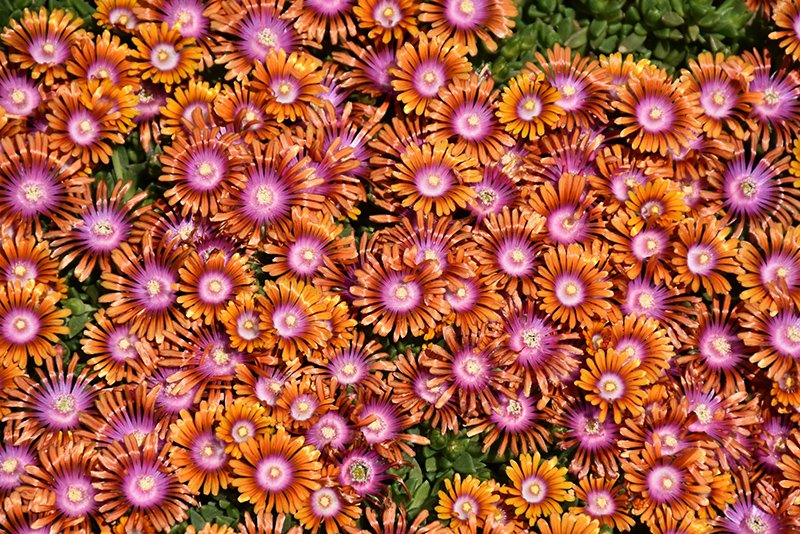
Botanical Name: Delosperma 'Fire Spinner'
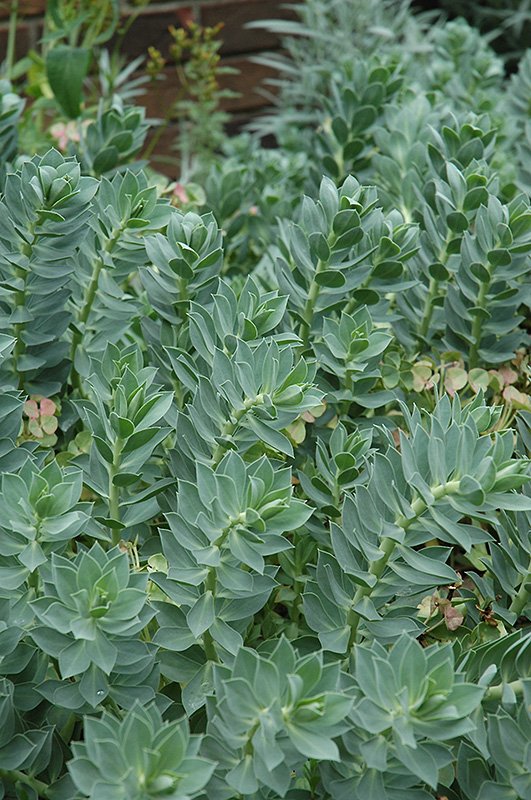
Botanical Name: Euphorbia myrsinites
- Candytuft (Iberis sempervirens)
- Catmint (Nepeta x faassenii)
- Hardy ice plant (Delosperma nubigenum)
- Hens and chicks (Sempervivum tectorum)
- Moss phlox, creeping phlox (Phlox subulata)
- Pincushion flower (Scabiosa japonica var. alpina) (S. ‘Butterfly Blue’)
- Pinks (Dianthus alpinus)
- Rock cress, wall cress (Arabis species)
- Rock rose, sun rose (Helianthemum hybrids)
- Spurge (Euphorbia myrsinites) (E. polychroma)
- Stonecrop (Sedum acre) - dwarf varieties
- Thrift, sea pink (Armeria maritima)
- Thyme (Thymus species)
Full Sun, Medium to Tall Plants
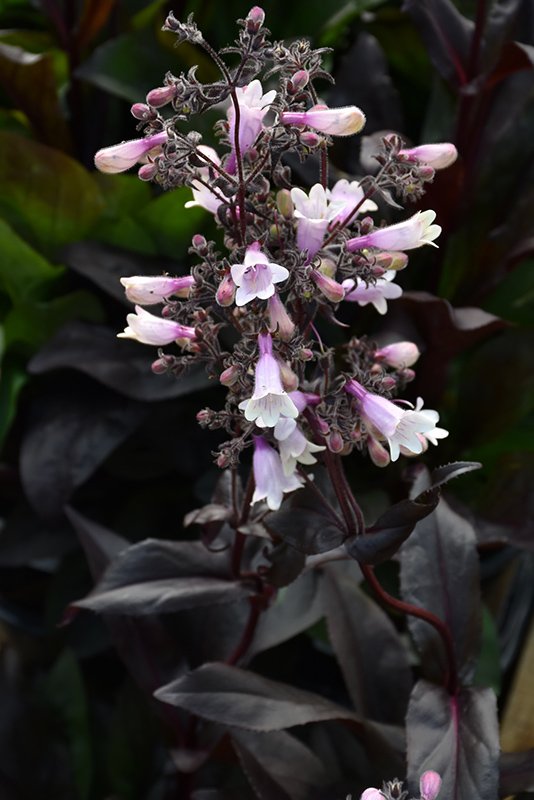
Botanical Name: Penstemon 'Dark Towers'
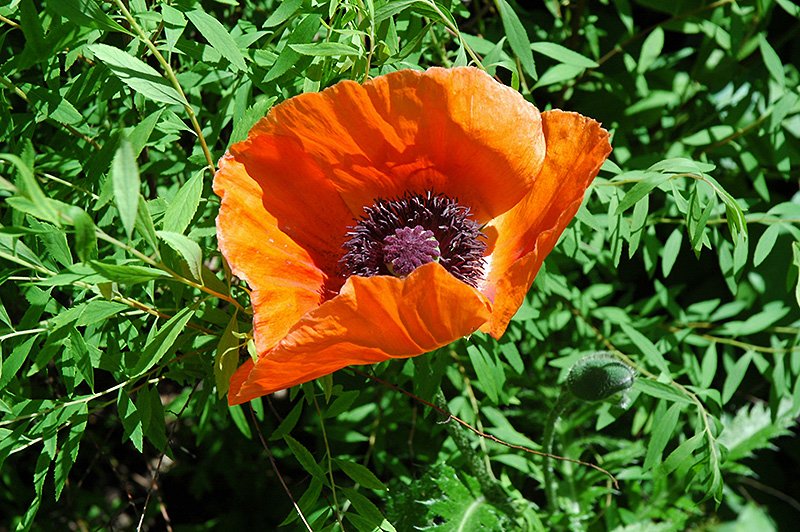
Botanical Name: Papaver orientale
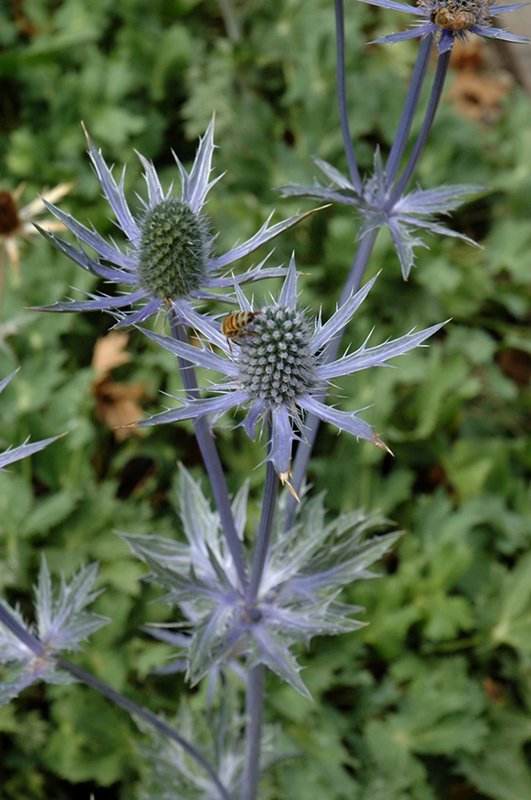
Botanical Name: Eryngium 'Big Blue'
- Beard-tongue (Penstemon digitalis) – Native
- Bergenia (Bergenia crassifolia)
- Black-eyed Susan (Rudbeckia hirta) – Native
- Blanket flower (Gaillardia x grandiflora)
- Butterflyweed (Asclepias tuberosa) – Native
- False indigo, wild indigo (Baptisia australis)
- Hairy penstemon (Penstemon hirsutus) – Native
- Lanceleaf coreopsis (Coreopsis lanceolata) – Native
- Lavender (Lavandula angustifolia)
- Orange coneflower (Rudbeckia fulgida ‘Goldsturm’)
- Perennial cornflower (Centaurea montana)
- Poppy (Papaver species)
- Purple coneflower (Echinacea purpurea)
- Prickly pear cactus (Opuntia compressa) – Native
- Russian sage (Perovskia atriplicifolia)
- Salvia (Salvia nemerosa hybrids)
- Sea Holly (Eryngium species)
- Silver sage, wormwood (Artemisia ludoviciana)
- Threadleaf coreopsis (Coreopsis verticillata) – Native
- Yarrow (Achillea millefolium)
Full Sun Grasses
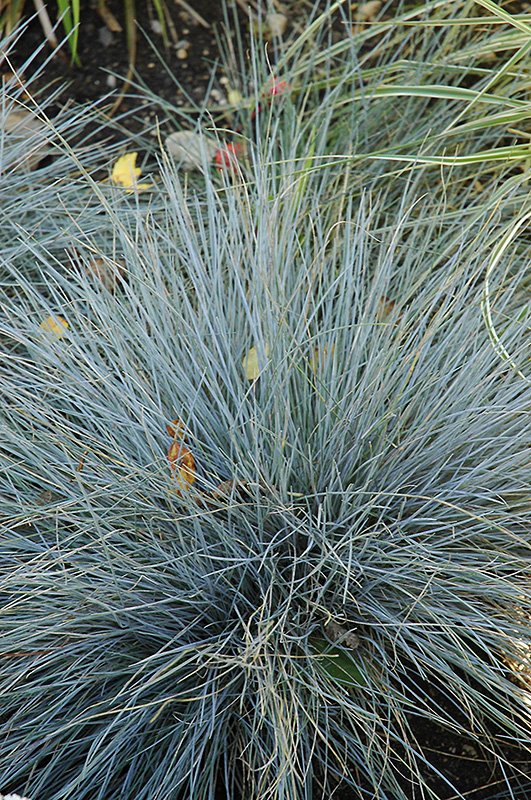
Botanical Name: Festuca glauca
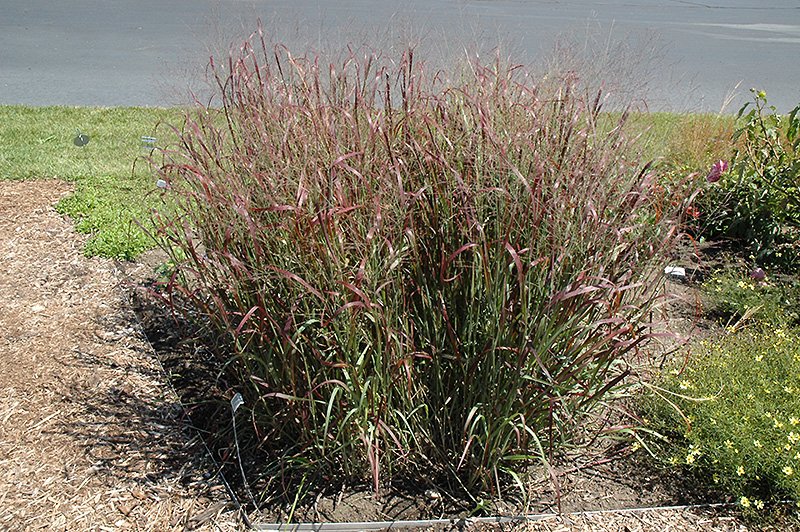
Botanical Name: Panicum virgatum 'Prairie Fire'
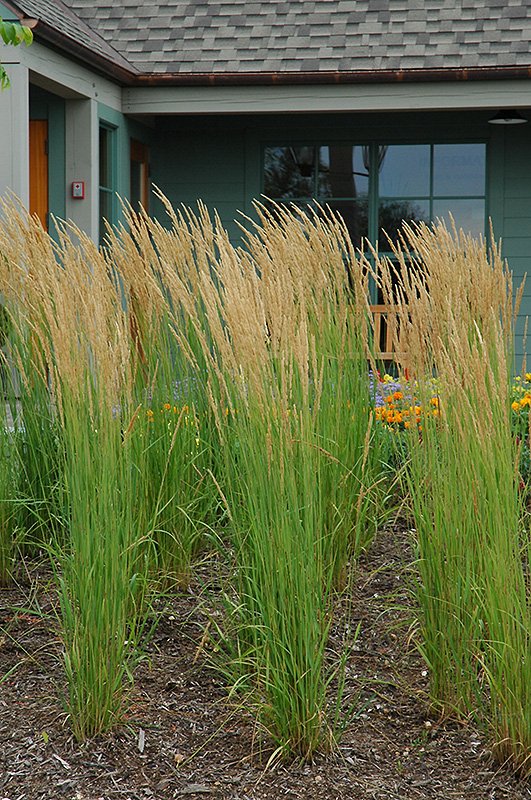
Botanical Name: Calamagrostis x acutiflora 'Karl Foerster'
- Big bluestem (Andropogon gerardii) – Native
- Blue fescue (Festuca glauca)
- Blue oat grass (Helictotrichon sempervirens)
- Feather reed grass (Calamagrostis x acutiflora ‘Karl Foerster’)
- Little blue stem (Schizachyrium scoparium) – Native
- Switch grass (Panicum virgatum) – Native
Groundcover for Shade
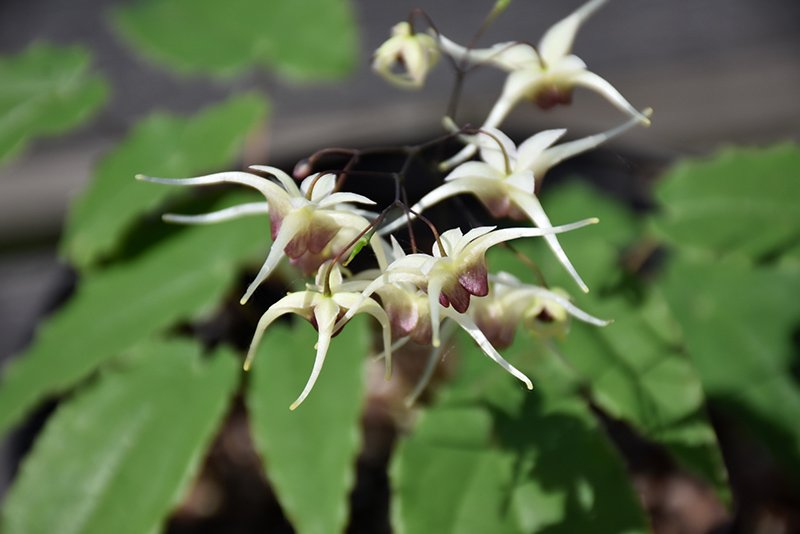
Botanical Name: Epimedium 'Domino'
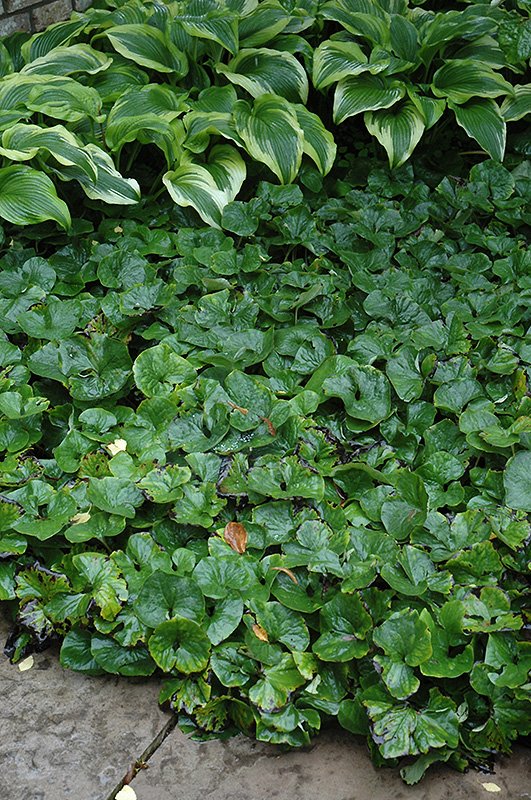
Botanical Name: Asarum canadense
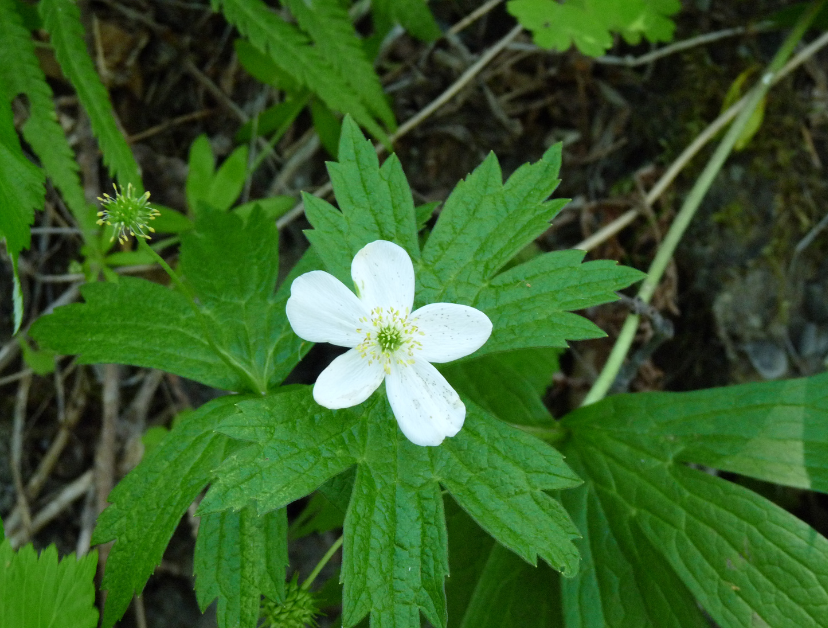
Botanical Name: Anemone canadensis
- Barrenwort (Epimedium hybrids)
- Bigroot geranium (Geranium macrorrhizum)
- Canada anemone (Anemone canadensis) – Native
- Creeping phlox (Phlox stolonifera)
- Sweet Woodruff (Galium odoratum)
- Wild ginger (Asarum canadense) – Native
- Woodland phlox (Phlox divaricata) – Native
Medium to Tall Plants for Shade
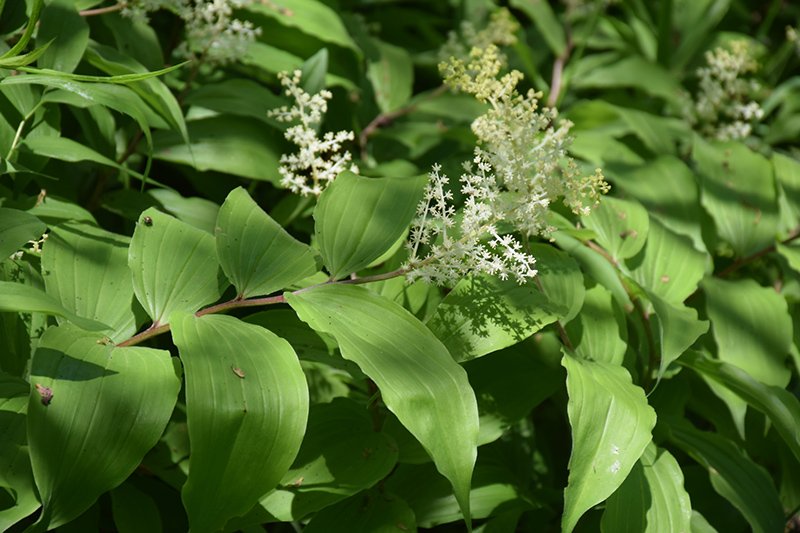
Botanical Name: Maianthemum racemosum
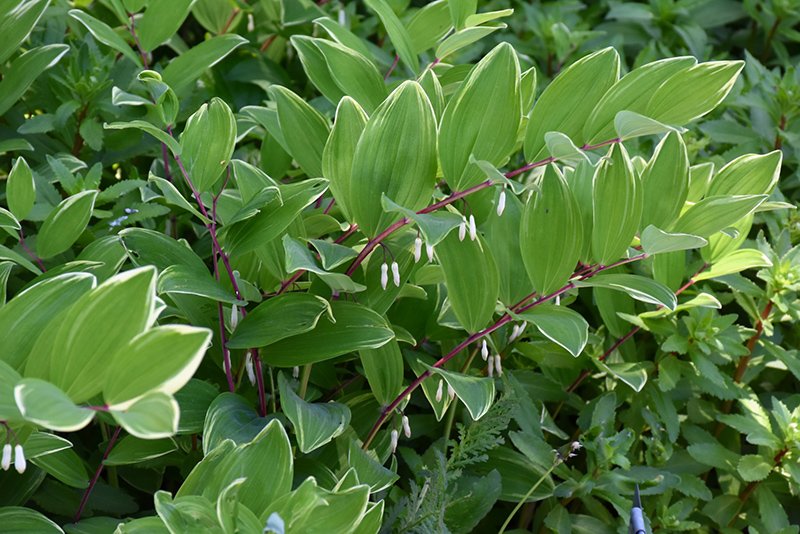
Botanical Name: Polygonatum odoratum 'Variegatum'
- False Solomon’s seal (Maianthemum racemosum) – Native
- Solomon’s seal (Polygonatum biflorum) – Native
Ferns for Dry Shade
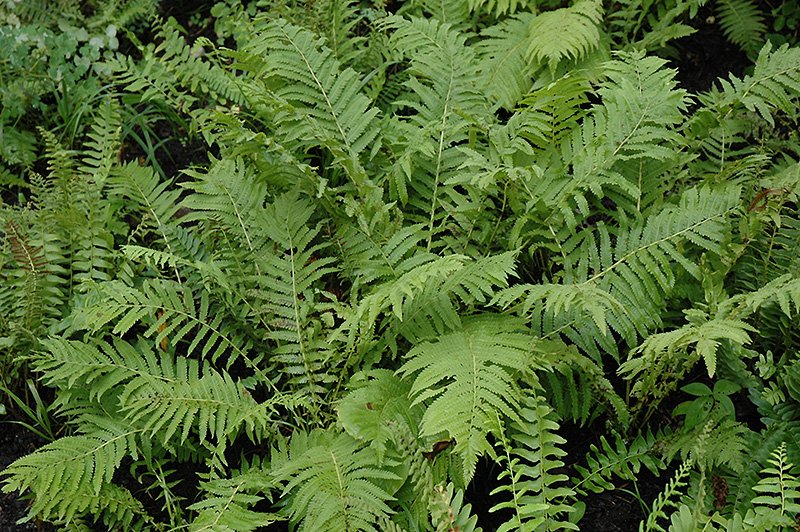
Botanical Name: Polystichum acrostichoides
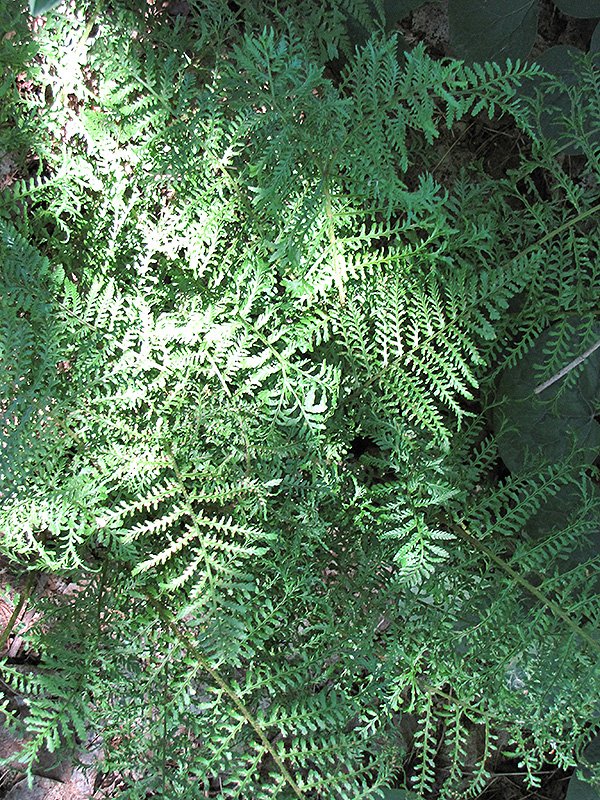
Botanical Name: Dryopteris filix-mas
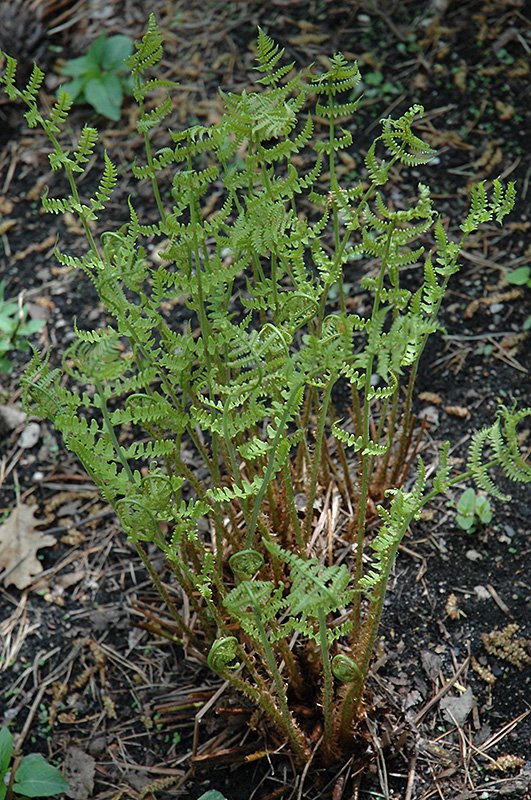
Botanical Name: Dryopteris marginalis
- Christmas fern (Polystichum acrostichoides) – Native
- Hay-scented fern (Dennstaedtia punctilobula) – Native
- Marginal wood fern (Dryopteris marginalis) – Native
- Male fern (Dryopteris filix-mas) – Native
- Rock fern (Polypodium virginianum) – Native
A Little TLC
It doesn’t take much to keep drought-tolerant plants thriving—just a little attention and some seasonal TLC. While they’re tough, even these hardy perennials appreciate an occasional deep watering during extended dry spells, especially in their first year.
For sun-loving perennials, skip the heavy fertilizers. Instead, an annual layer of compost is all they need to stay healthy and strong.
Shade-loving drought-tolerant plants, on the other hand, benefit from a layer of mulch. This helps retain moisture and reduces evaporation, especially in dry shade, which is one of the most challenging conditions for any plant to thrive in.
And don’t forget to deadhead regularly! Removing spent blooms encourages your plants to keep producing flowers instead of going to seed, meaning more colour, for longer.
With a few simple care tips, your drought-tolerant garden can remain beautiful and resilient throughout the entire season.
Other resources:
- Landscape Ontario: Eight Beautiful Drought Tolerant Plants
- Toronto Master Gardeners: Drought Tolerant Plants
- Guelph.ca: Drought Tolerant Native Plants
For tomato lovers, picking a warm, flavourful tomato right off the plant for a sandwich, burger, or salad is a sure sign of summer! I eagerly await the day the first fruit begins to turn red, knowing that I am a day or two away from the first of many toasted tomato sandwiches for the season!
By the end of June, your tomato plants should be in the ground or pot, staked, and well on their way to producing fruit. But how do you keep your plants healthy all summer so that you can maximize your investment? Here are a few tips to help keep your tomato sandwiches coming until frost!

Water
Water early in the morning and water deeply. For tomatoes, consistent moisture is best.
Keep the water on the ground, not on the foliage. This is important because damp foliage can lead to diseases like early blight, which can ultimately cause the entire plant to die. Mulching around the base of plants will reduce the amount of water that can splash up onto the leaves. A soaker hose or drip line is also a great way to ensure that water stays on the ground, rather than on the plant.
Pruning
Reducing the amount of foliage on a tomato plant is necessary for a couple of reasons: good air flow, which reduces the chance of powdery mildew forming, and less foliage means that the plant can send energy to growing fruit instead of lots of leaves.
Follow these easy steps when you prune your tomato plants:
- Before you begin, remember to follow the rule for pruning - no more than ⅓ of a plant should be removed at a time.
- Use clean scissors or pruning shears to cut the leaves off the bottom of the plant. Remove any leaves that are touching the ground. These are particularly susceptible to mildew formation.

When fruit starts forming, remove the leaves from the bottom of the plant up to the first or lowest fruit.
Remove suckers ongoingly. What are suckers? When you look at your tomato plant, you will see the main stem that comes up from the ground, and branches of leaves that come out of the main stem. As the plant grows, suckers begin to form in the “Y” between the main stem and a branch of leaves. Suckers won’t harm a plant; they just make it very unruly and reduce airflow.

If your tomatoes are indeterminate (growing into a tall vine), remove the top of the plant when frost is forecasted at the end of the season. Topping the plant allows energy to ripen the fruit that’s already set, rather than being used to continue growing the vine.

NOTE: Some gardeners like to leave suckers on determinate tomato plants as this can increase the yield.
TIP: Tomatoes ripen from the inside out. That means that by the time you see fruit beginning to flush on the outside, the inside is already ripe. If you have competition for tomatoes from pesky critters, or when there’s a chance of frost in the weather forecast, you can pick fruit that has just begun to turn colour and leave it on the kitchen counter to continue to ripen.
Fertilizer
Using organic material is one of the best ways to feed your crop. A good layer of compost, 1-2 inches, in the spring when you’re planting and again in the fall each year is one of the best ways to improve your soil structure in the garden, and it also adds lots of nutrition.
If you missed this step when planting your garden, you can always add a layer of compost around your plants or use other organic fertilizers, such as compost tea, seaweed, worm castings, or fish emulsion.
Alternatively, you can use a fertilizer that’s formulated especially for tomatoes - these usually have a ratio like 3-4-6 or 4-7-10. Follow label directions for amounts and err on the side of caution. Using less fertilizer is always better than using too much, as an excess can stress the plant and make it more prone to disease.
Following these simple steps for tomato care will help to ensure your plants stay healthy and producing fruit, but if you should have problems, here are some great resources to identify tomato issues:
- Ontario.ca: Bacterial diseases of tomato: bacterial spot, bacterial speck and bacterial canker
- Guelph.ca: Healthy Landscapes – Plant List Native and Drought-Tolerant Plants
Growing Vegetables in Pots!
A few years ago, I was walking through town with a friend as we discussed planting vegetables in our tiny front gardens. It seemed like an unusual idea until we spotted not one but two front gardens with pumpkin vines rambling amongst the shrubbery. What a novel way to cover the ground without mulch and have the bonus of showy, bright blossoms and bold foliage! Of course, this is eventually followed by the standout feature of brightly coloured pumpkins. It’s built-in fall decorating!
Right now, everyone is looking for ways to reduce grocery bills, and growing a few vegetables amongst the flowers and shrubs can make a big difference. If your garden is on a patio or balcony, there are lots of ways to add edible plants to maximize your space and beautify it at the same time. Who says vegetables can’t be ornamental and beautiful?!
Gaps and Small Spaces
If you have a new shrub and flower garden that has gaps or there’s a space in your garden where you’re not sure what to plant, consider tucking in a potted vegetable. In a cool, shady space, try some luscious lettuce bowls. Shade allows lettuce to grow more slowly in the heat of the summer. Keeping lettuce in a cool, shady spot will prevent it from bolting and becoming bitter.
If you have a small garden, a patio or a balcony, pots with compact varieties and hanging baskets are a terrific alternative for growing vegetables, herbs, and some fruits. These are some of the options we offer at Eising Garden Centre (based on availability) that can be purchased fully planted, or you can grow your own from seed if you have time, space and lights.
Trellised Planters and Patio Pots
For patios, balconies, or even a gap in the garden, there are lots of vegetables that can be grown in a trellised planter.
Tomatoes, peppers, cucumbers and eggplant all love warm soil and growing in pots provides the heat to help them thrive. Eising trellis pots are planted with specific varieties that are smaller but pack a flavourful punch.
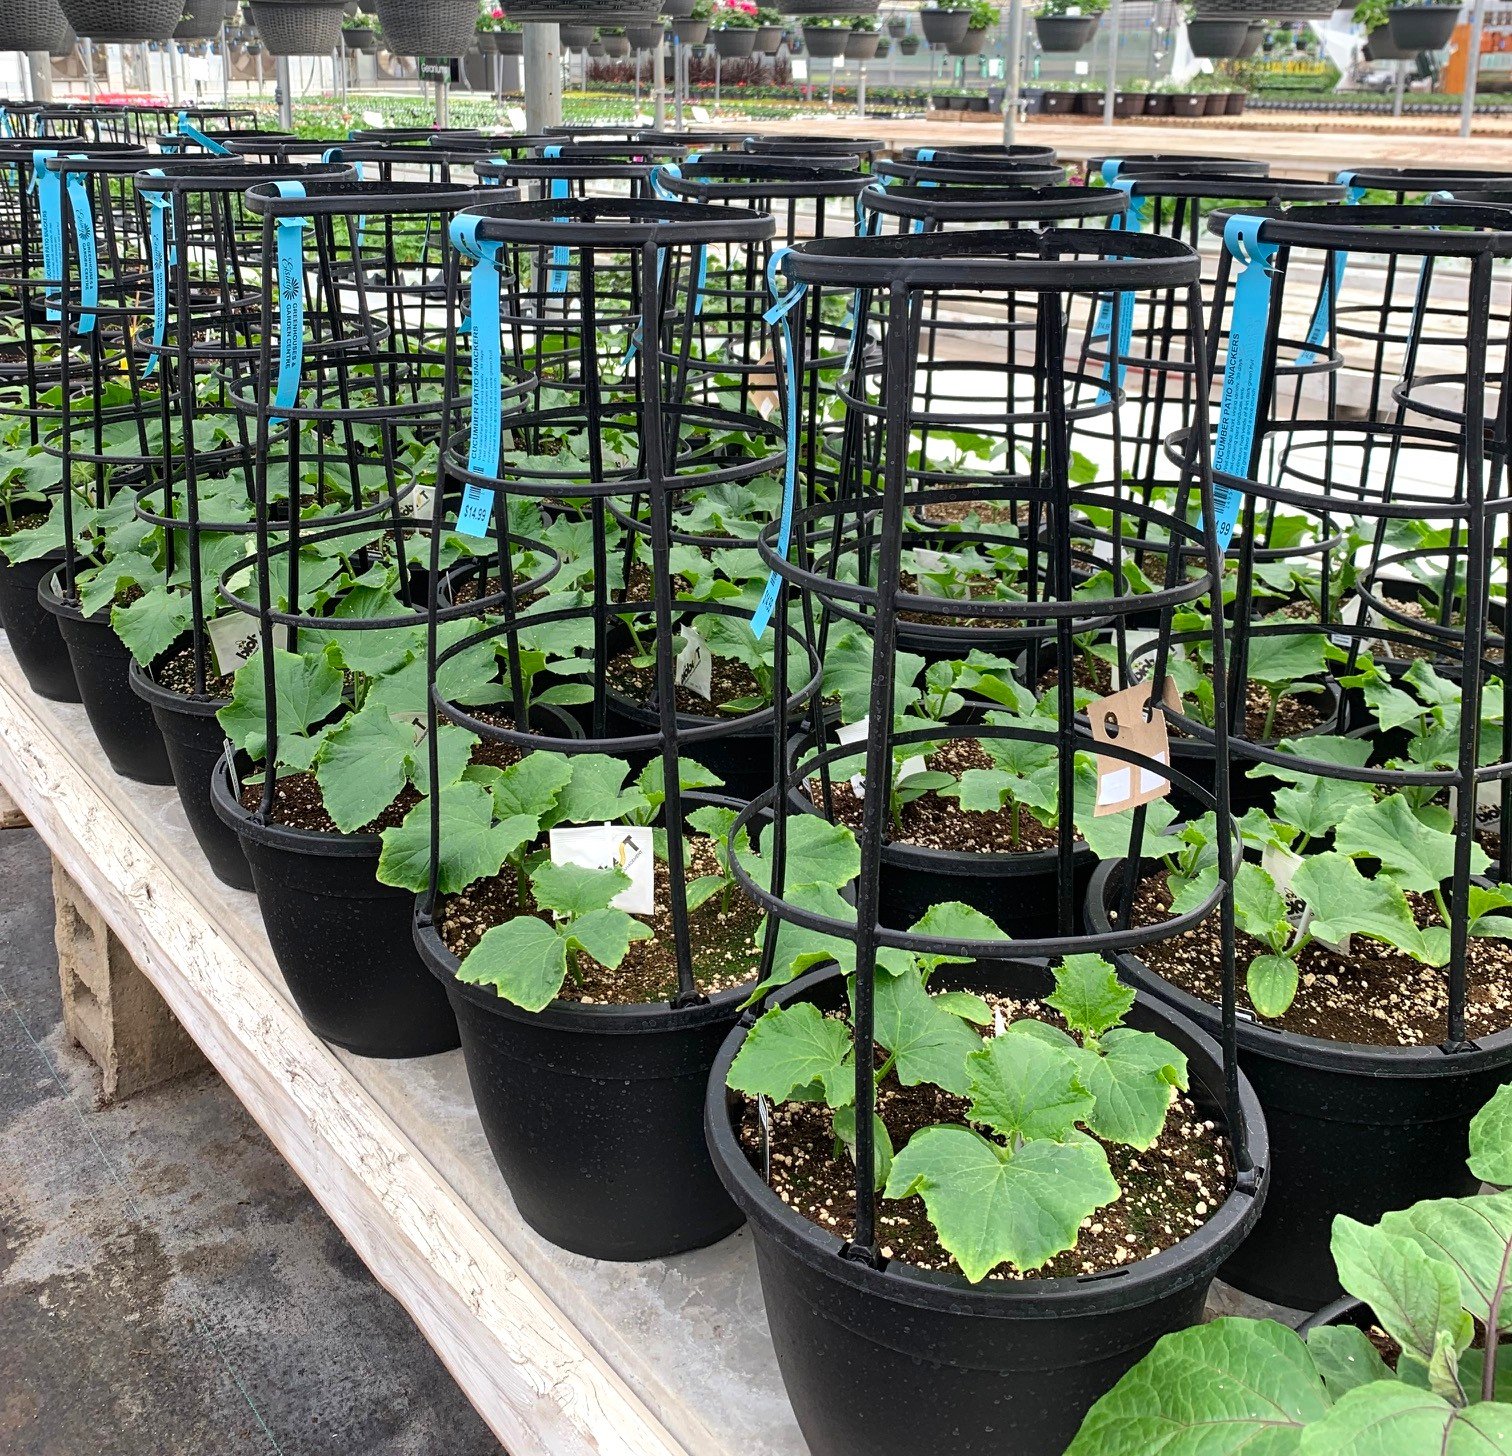
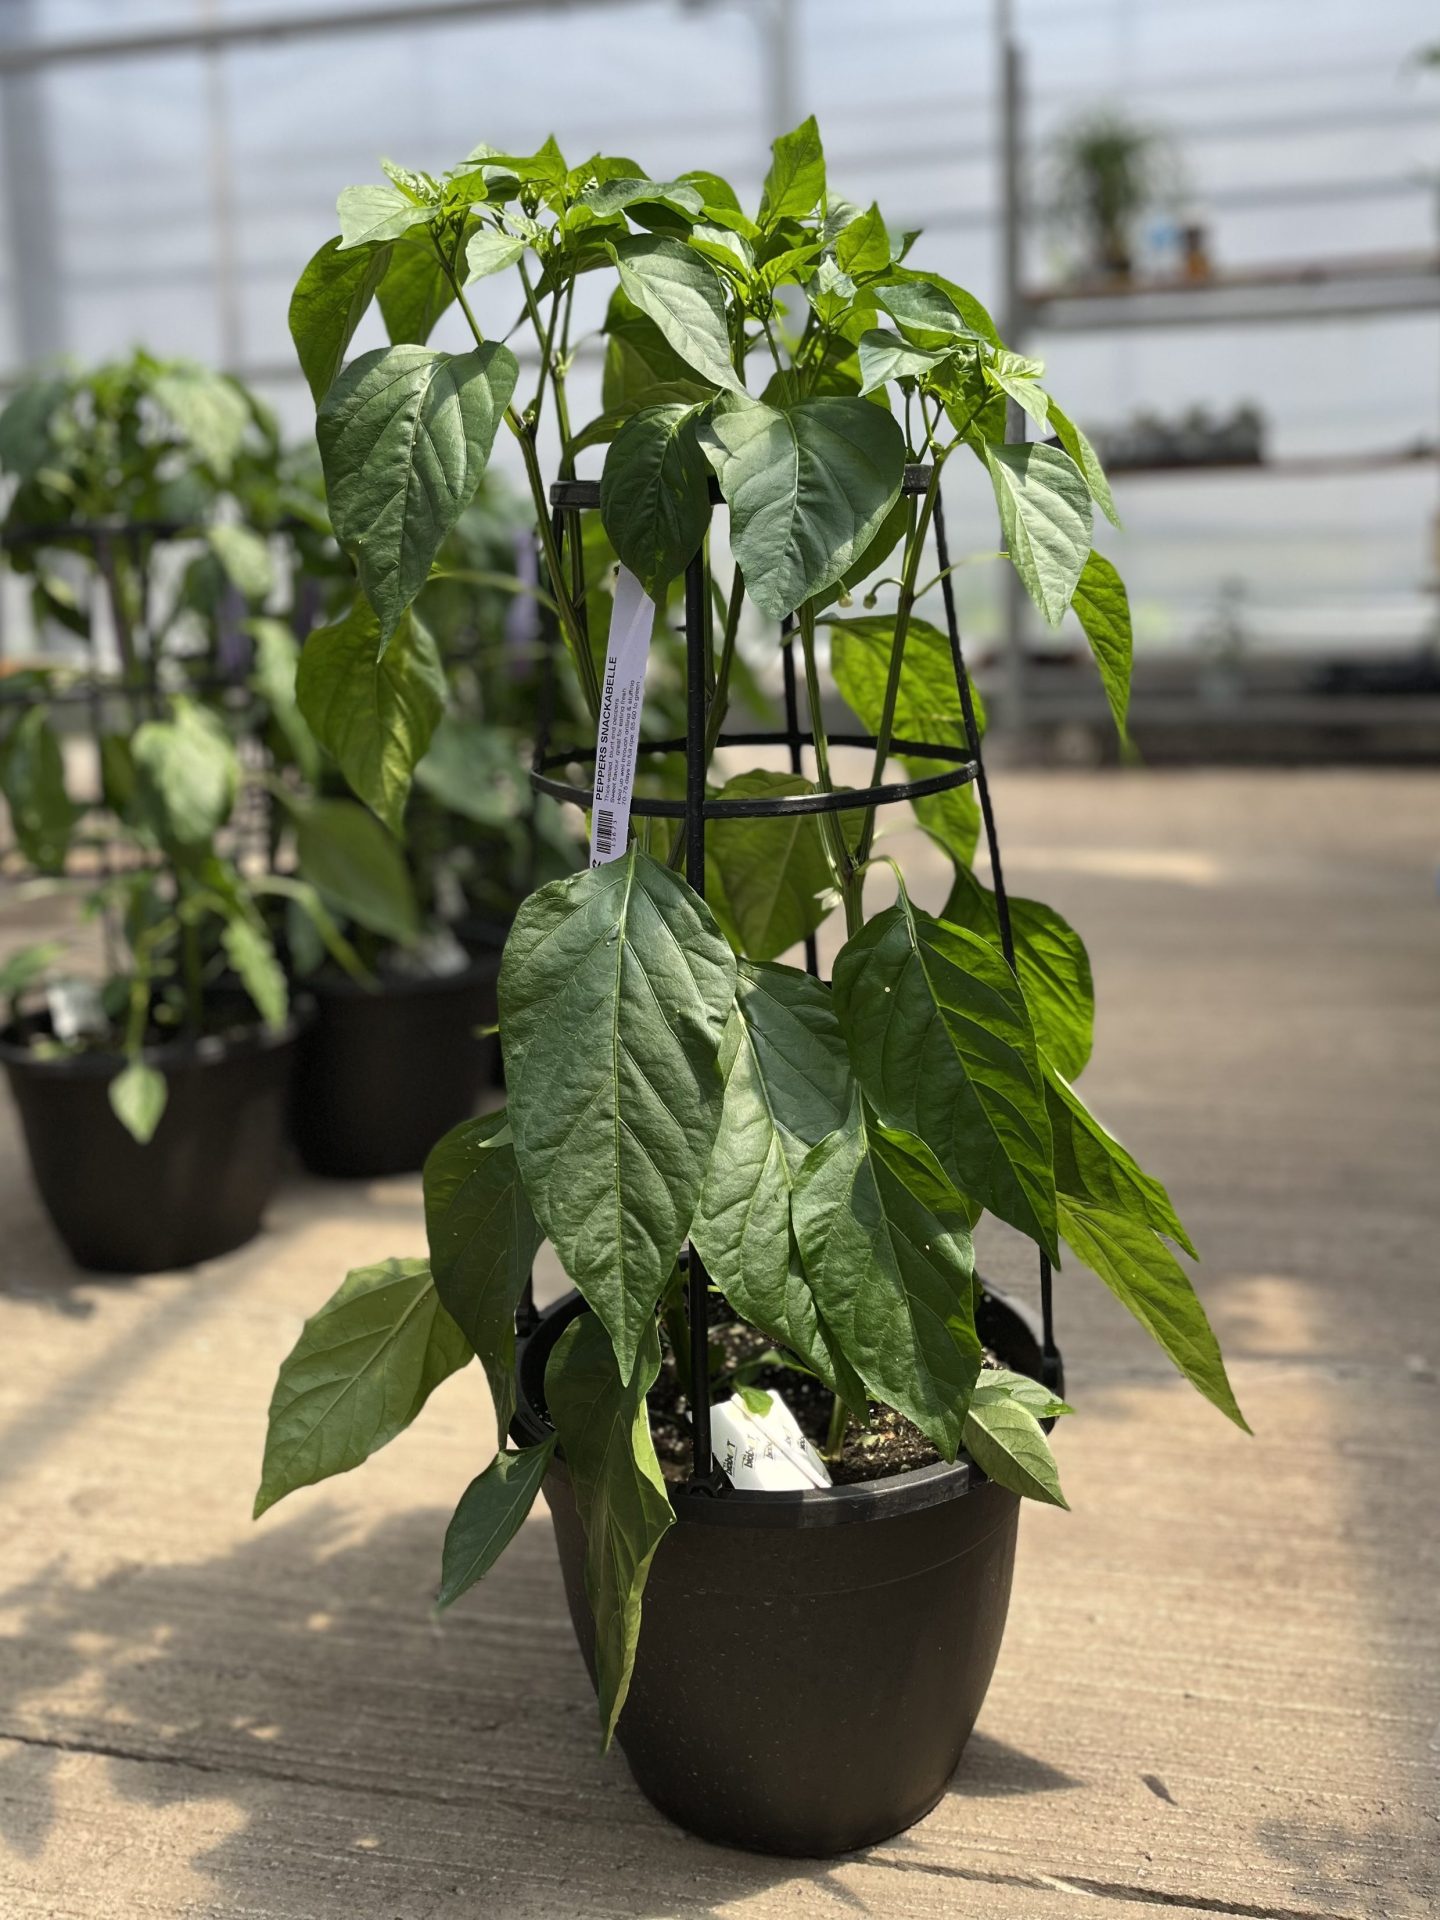
Sweet Snackabelle, Candycane Chocolate Cherry or Red, Mocha Swirl and Fresh Bites peppers.
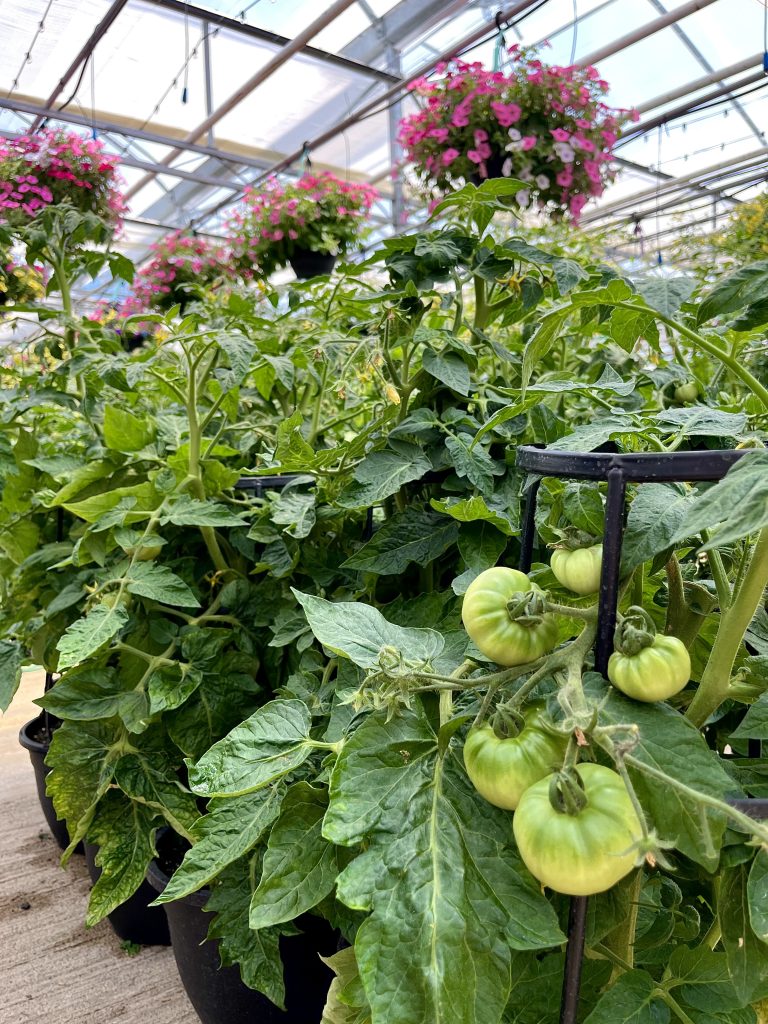
Little Sicily, Patio Hybrid, Candyland Red, Rapunzel and Tidy Treats tomatoes.
Eising Greenhouse also carries eggplants in trellised pots - a patio pot with Patio Baby eggplants is a perfect choice if ratatouille is on the menu!
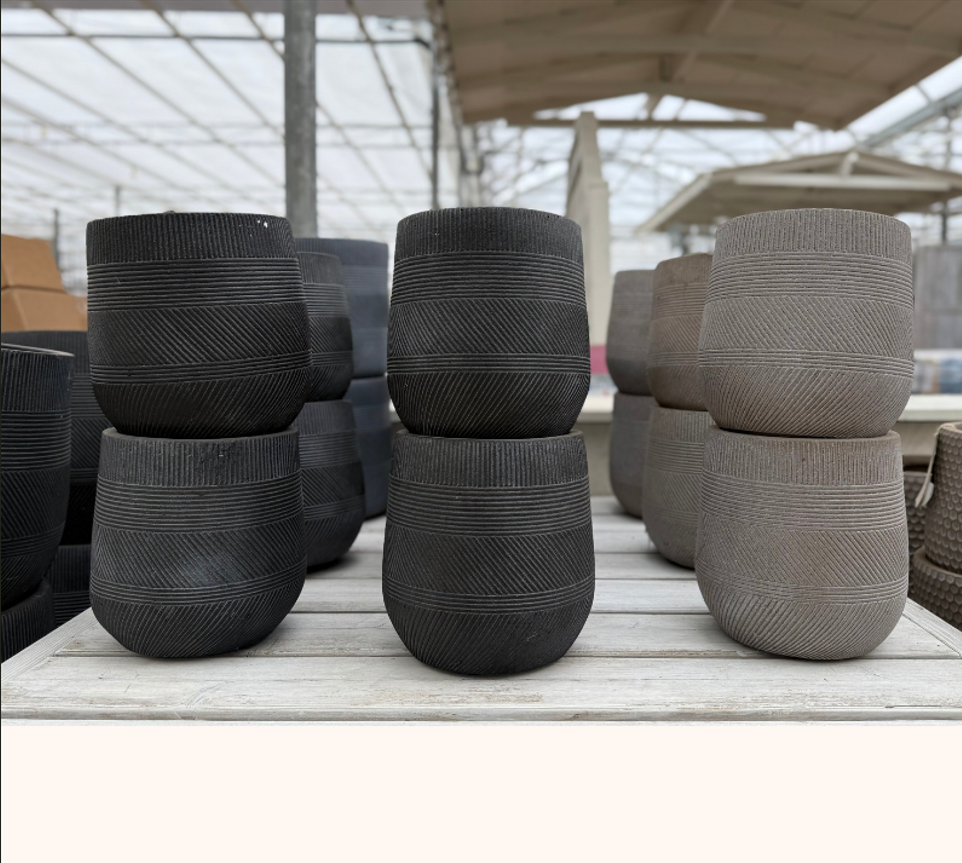
All of Eising's trellised planters would look lovely plopped into one of our decorative outdoor cover pots!
Herb Planters
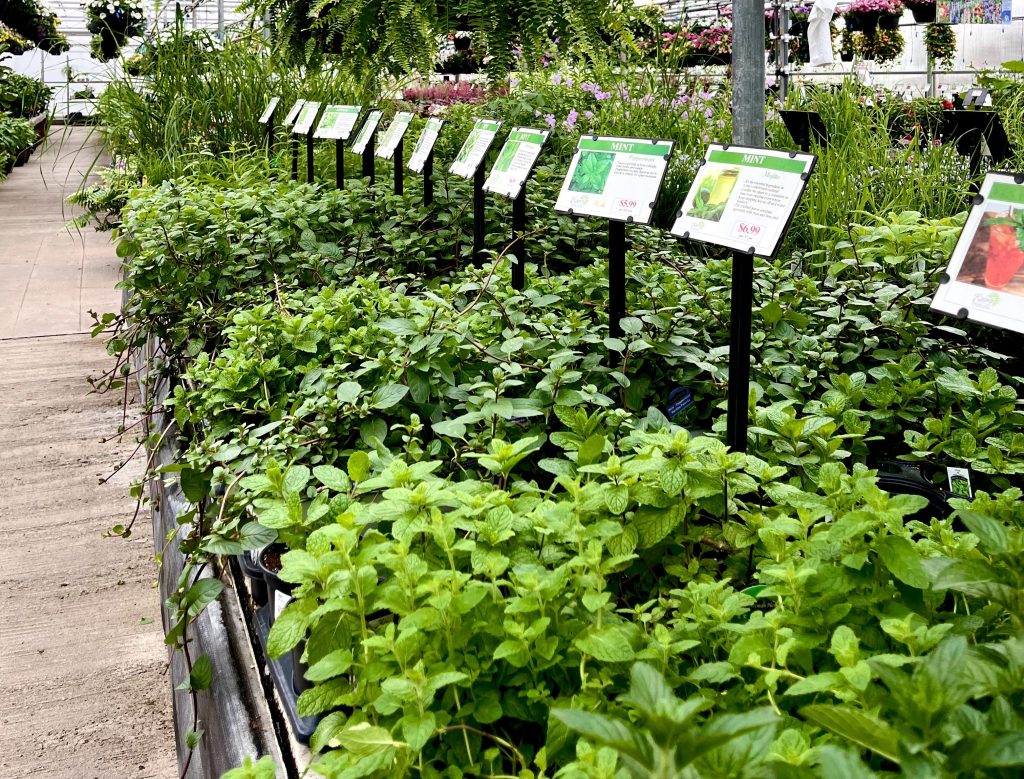
Many herbs thrive in a sunny and warm spot with well-drained soil, making a pot the perfect container for them. Herbs also make great companion plants with other vegetables and can be tucked into other pots. Most herbs also love to be harvested frequently, especially when they’re given these ideal conditions.
Lettuce Bowls
Lettuce bowls are a great way to grow greens in small spaces. Our 10” bowls are chock full of a variety of lettuces and are never boring!
👍Tip: Try the “cut and come again” method for harvesting lettuce, which prolongs the plant’s life. Simply pinch off the outer, mature leaves each time you pick the lettuce and leave the centre of the plant to keep growing.
Hanging Baskets
If there’s a spot to hang a basket or place a shepherd’s hook, you will want to grow one of the edible options we offer.
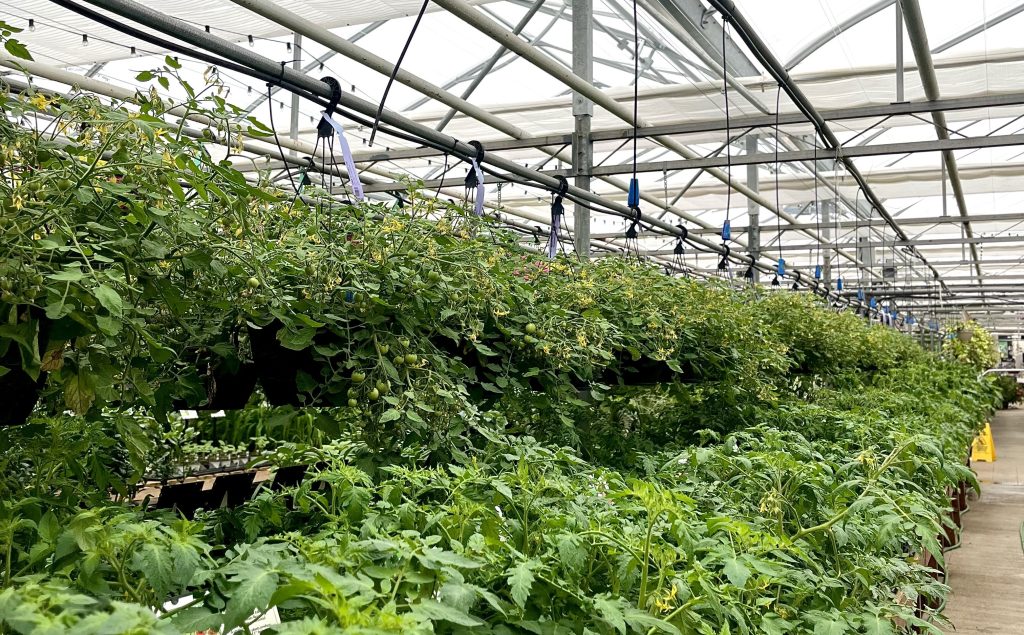
Topsy Tom tomatoes.
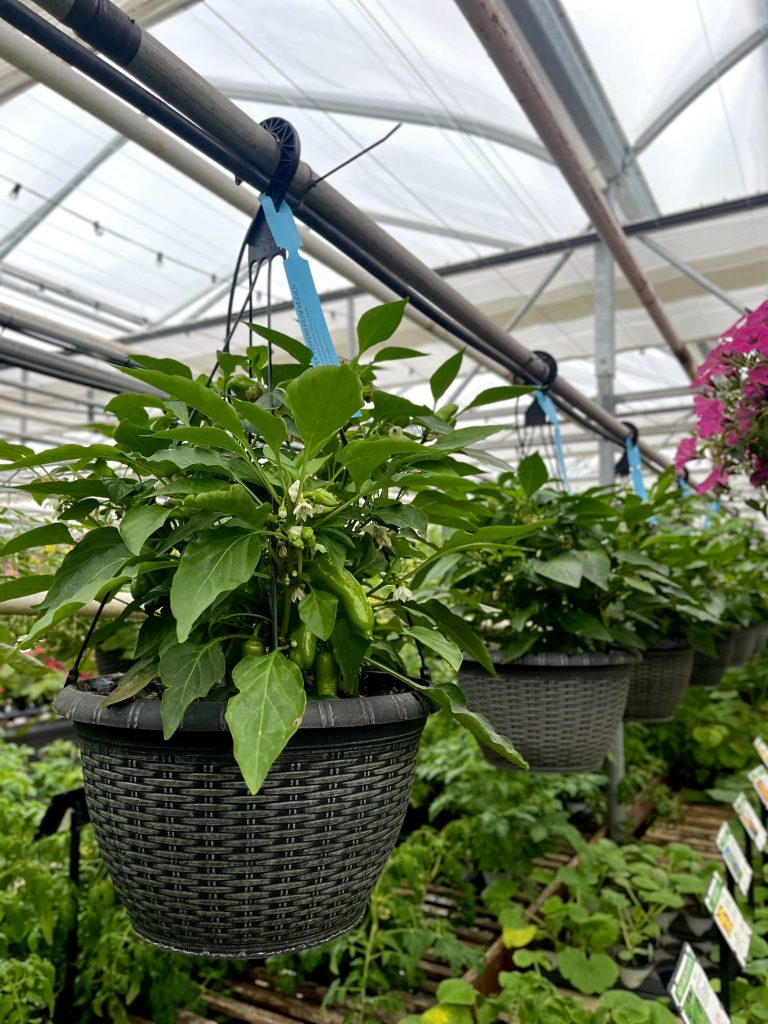
Pot-a-Peno and Peppers From Heaven peppers.
Tomatoes, peppers, and strawberries are all available in hanging baskets. Our deliciously sweet everbearing strawberries are also available in 4.5" pots and bareroot, which are great options for window boxes.
👍Tip: Pick strawberries as they ripen to encourage your plants to produce more. Also, remove runners as they grow to allow your plants to send energy into growing fruit instead of bigger plants. Painting rocks to look like strawberries is said to deter birds from feasting on ripe berries.
Citrus and Figs
Consider growing a beautiful and fragrant lemon, orange, fig or grapefruit tree in a patio pot. Just keep in mind that it will need to come indoors in the fall.
Container Plant Care


Whether you’re growing edible plants in the garden, a pot or a hanging basket, don’t forget to give them the care they need to maximize productivity:
- Water regularly, deeply and in the heat of the summer, frequently. Watering early in the morning is ideal. Pour water on the soil, not the foliage to prevent diseases like powdery mildew.
- Feed your vegetables and fruits throughout the growing season with fertilizer or compost.
- Remove dead foliage and prune plants as needed. Especially herbs.
Once you start foodscaping by including vegetables with your flowers and ornamental plants we’re sure you’ll want to keep looking for innovative ways to grow your own food! Who knows, maybe even pumpkins by the front porch!
If you’re looking for blooms that come back each Spring with a burst of colour, here are ten of our favourite flowering perennials and ground covers.
Plant These for a Spring Show!
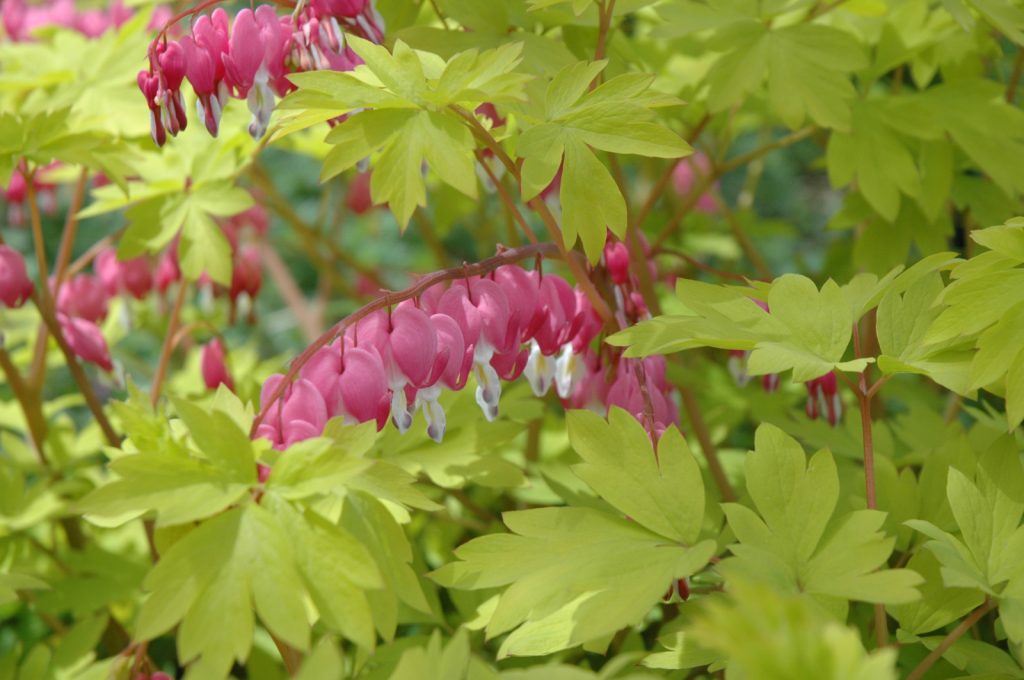
Bleeding Heart (Dicentra)
Height: 30-120 cm, Spread: 45-90 cm
Flower Colour: white, pink, red, purple
Blooms: spring, summer
Growing: While Bleeding Hearts will tolerate full sun or full shade, they prefer the protection of light shade. This perennial is fairly drought tolerant, but it will thrive in evenly moist soil, and blooms will last much longer if the soil is moist.
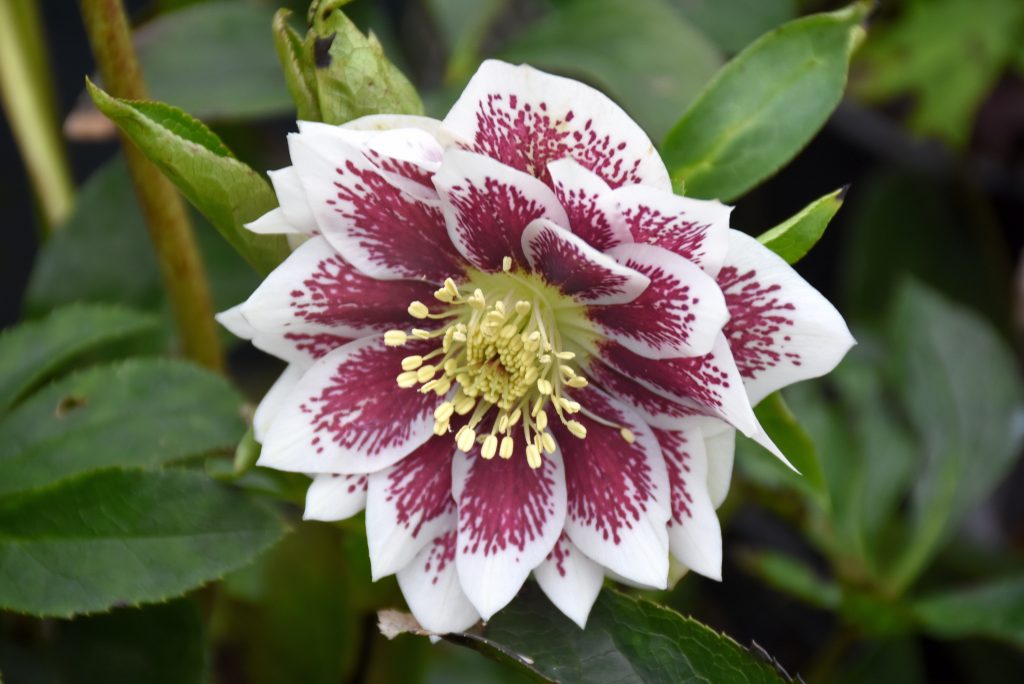
Hellebore Christmas Rose (Helleborus)
Height: 30-45 cm, Spread: 30-45 cm
Flower Colour: white, green, pink, purple, yellow
Blooms: late winter to mid-spring
Growing: Moist, humus-rich, well-drained soil in lightly dappled shade is where hellebores do best.
Primrose (Primula)
Height: 15-60 cm, Spread: 15-45 cm
Flower Colour: blue, red, orange, white, pink, purple, yellow
Blooms: spring, early summer
Growing: Full sun or partial shade and moist, well-drained, humus-rich soil.
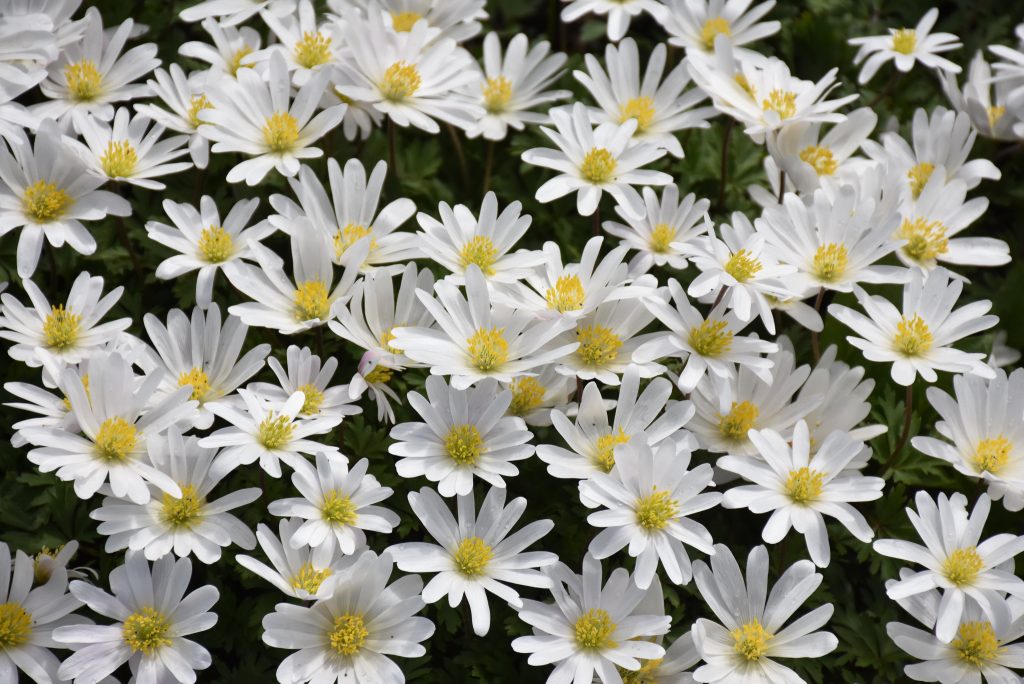
Anemone Windflower (Anemone)
Height: 8-150 cm, Spread: 15-60 cm
Flower Colour: white, yellow, pink, blue
Blooms: spring, summer or fall
Growing: Anemone does best in moist soil and partial or light shade, but they will tolerate full sun. While Anemone can take a while to become established, they’re worth the wait!
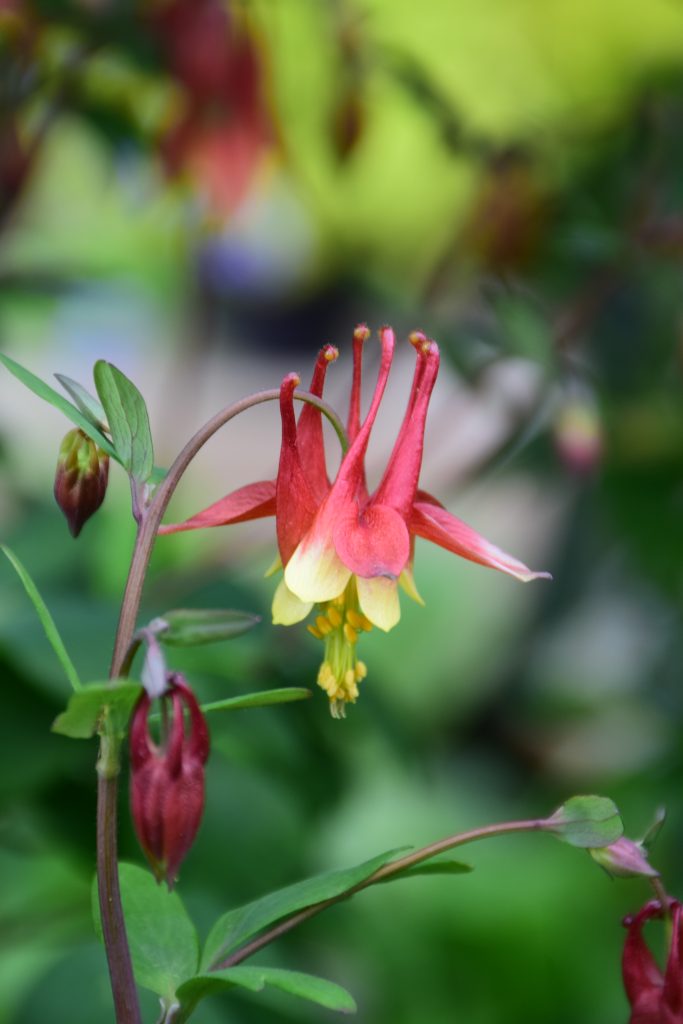
Columbine (Aquilegia canadensis)
Height: 45-90 cm, Spread: 30-60 cm
Flower Colour: white, red, yellow, pink, blue, purple (The colour of the spurs is often different than the petals)
Blooms: spring, summer
Growing: Columbines love full sun or part shade and moist, well-drained soil. This plant will self-seed and seedlings can be transplanted.
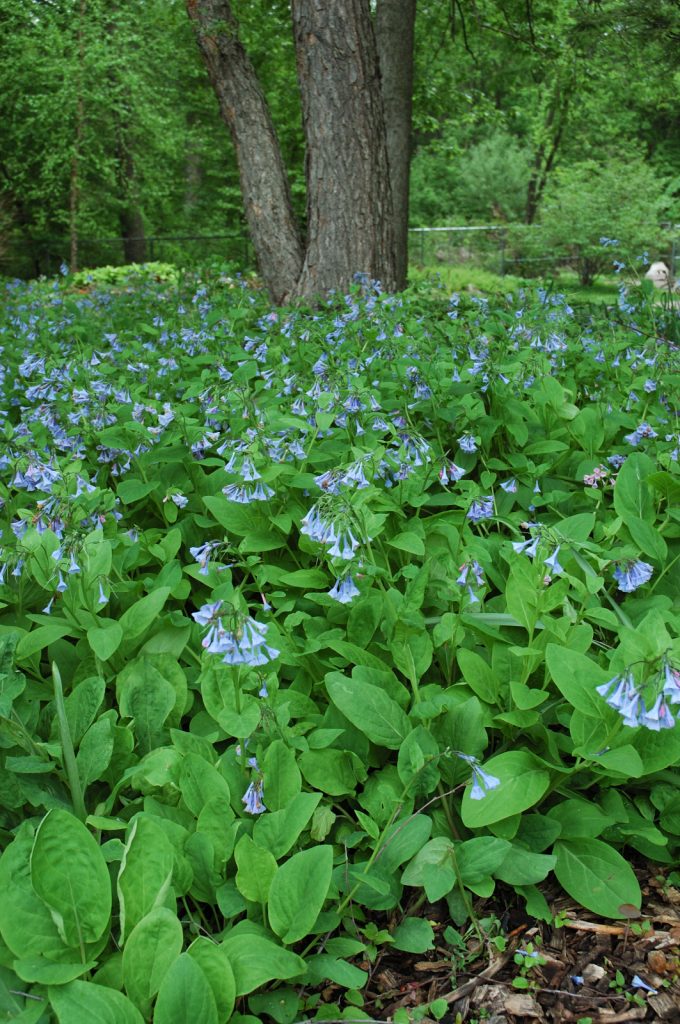
Virginia Bluebells (Mertensia virginica)
Height: 30-60 cm, Spread: forms groupings
Flower Colour: blue, pink, purple
Blooms: spring
Growing: Plant in partial to full shade with humus-rich, moist, well-drained soil. This woodland plant has blooms that are attractive to Hummingbirds and pollinators. Foliage dies back right after it blooms.
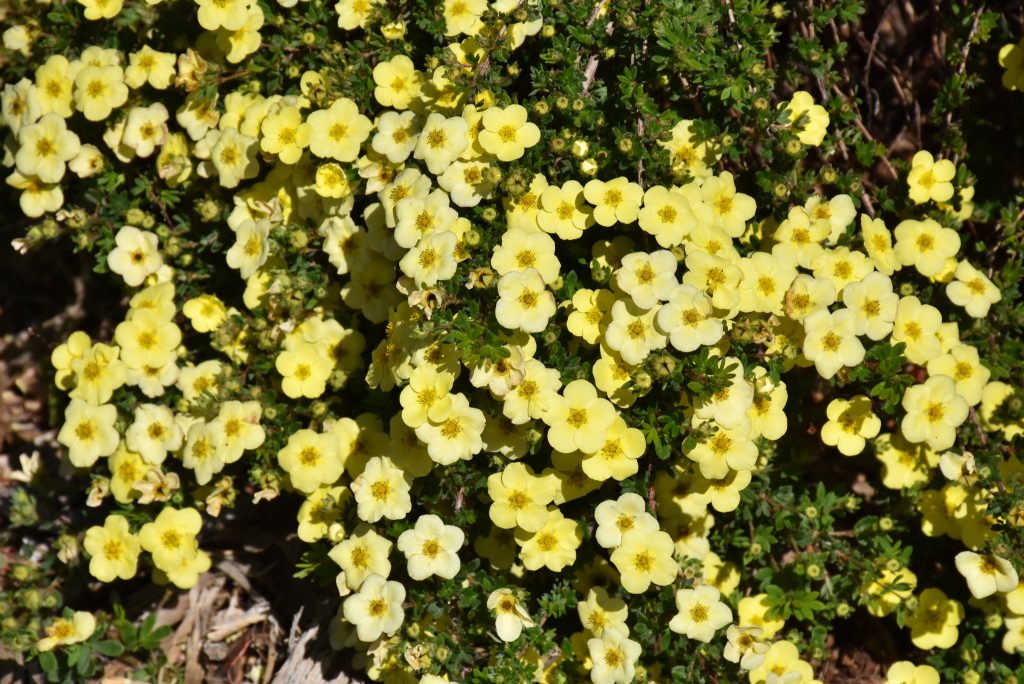
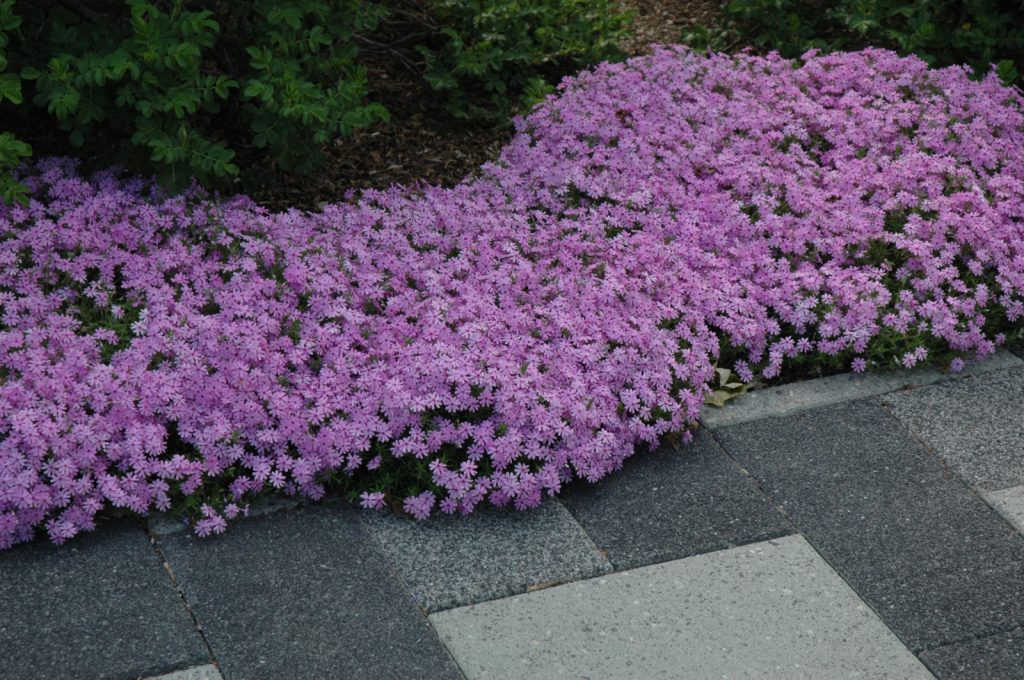
Moss Phlox or Creeping Phlox (Phlox subulata)
Height: 10-15 cm, Spread: 60 cm
Flower Colour: white, red, lavender, pink, bluish purple
Blooms: early spring
Growing: Plant in sun to partial shade with humus-rich, moist, well-drained soil. Spreads horizontally as it grows and creates new roots where the stems touch the ground. Do not prune in the fall as Spring’s flowers will already be forming on these plants.
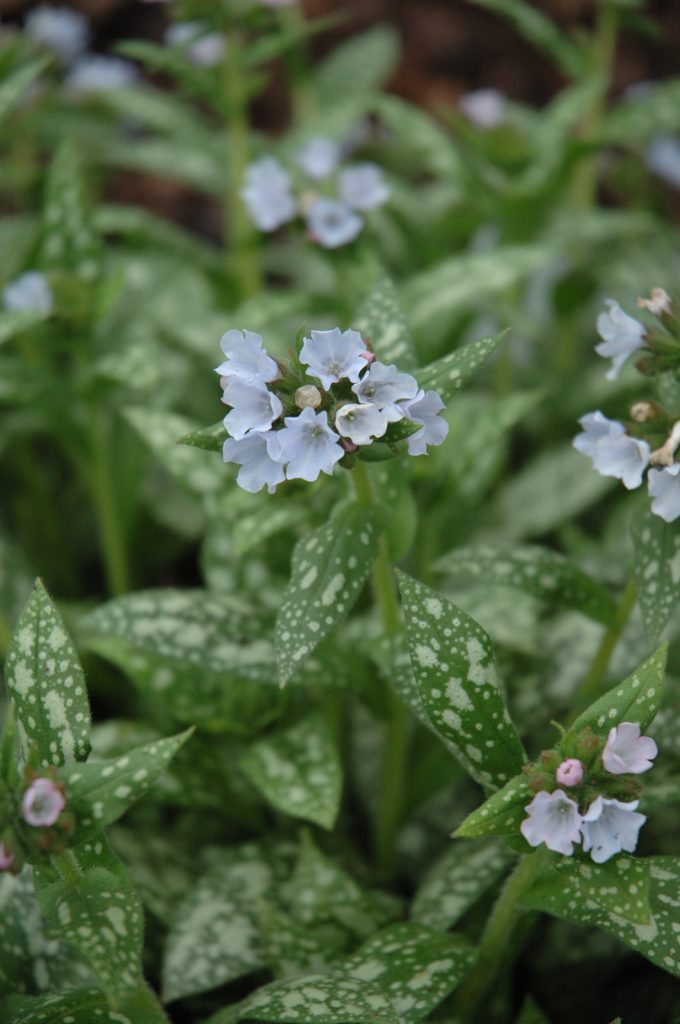
Lungwort (Pulmonaria)
Height: 20-60 cm, Spread: 20-90 cm
Flower Colour: white, red, pink, blue
Blooms: spring
Growing: To avoid root rot, grow Lungwort in moist, humus-rich soil that’s well drained. They prefer partial shade to full shade.
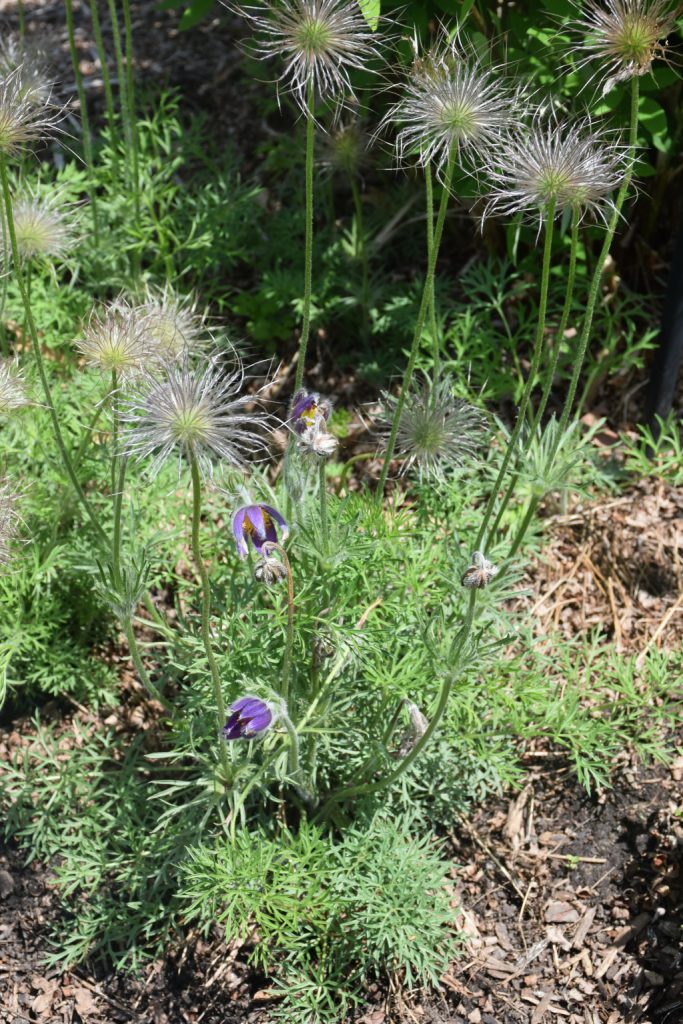
Pasque Flower (Pulsatilla)
Height: 10-30 cm, Spread: 20-30 cm
Flower Colour: white, red, purple, blue
Blooms: early to mid-spring
Growing: Very well drained soil is important for Pasque Flower, which does not like to sit in wet soil. It will grow well in full sun or partial shade.
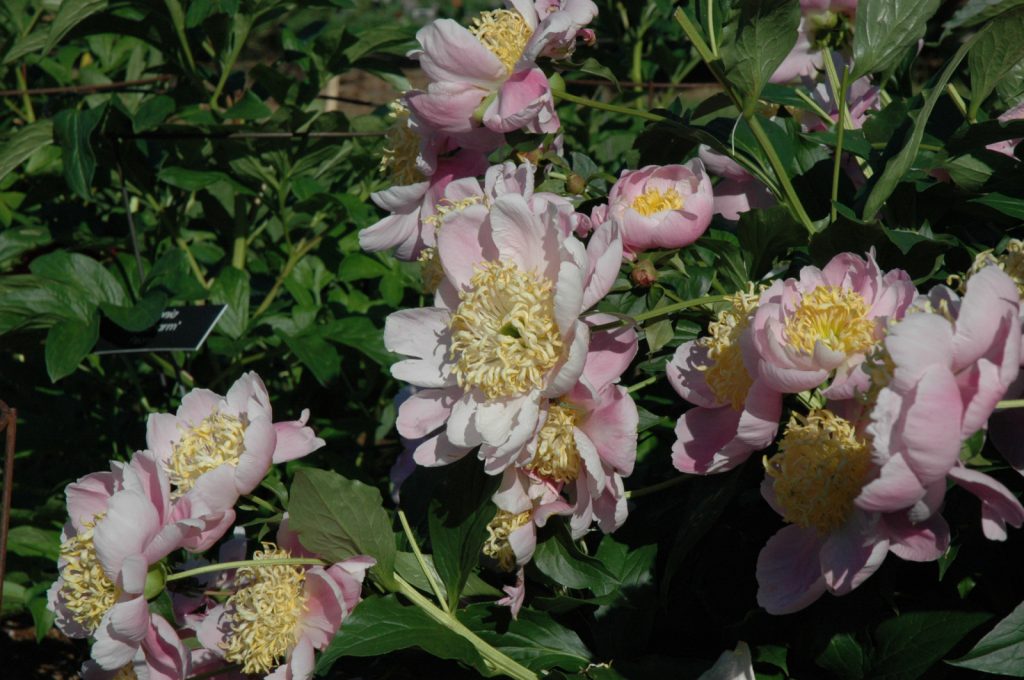
Peony (Paeonia)
Height: 60-80 cm, Spread: 60-80 cm
Flower Colour: yellow, pink, red, purple, and shades of white
Blooms: spring, early summer
Growing: Humus-rich, moist and well-drained soil in full sun or partial shade is where peonies do best. Adding lots of compost and planting at the proper depth is very important for peonies to bloom. Be sure to plant potted peonies at the same level as the soil around them, not higher.