
For Height, Drama, and Eye-Catching Interest
By Ava Green
Every well-designed garden needs an anchor, something tall and confident at the back that gives the whole planting a sense of structure and depth. While shrubs and trees often fill that role, perennials can also do the job beautifully. The back row perennials below are sturdy, reliable performers that thrive right here in Norfolk County. Plant them at the back of a border or the centre of an island bed as the backdrop that makes everything around them look better.
False Indigo, Baptisia australis
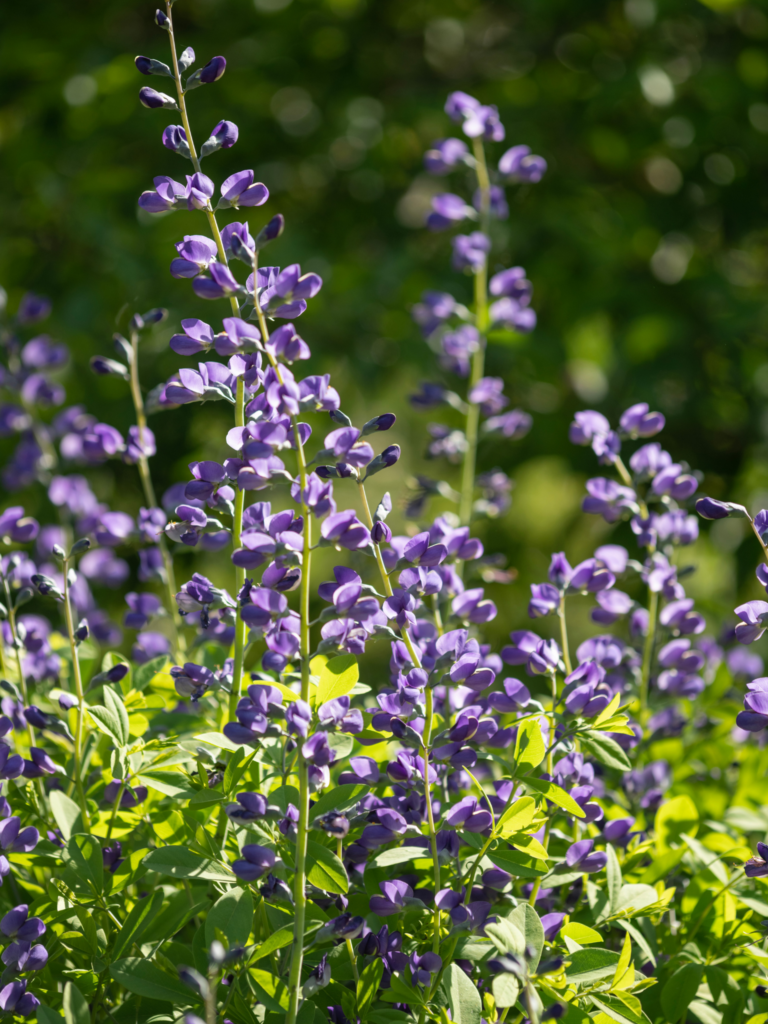
Baptisia is one of those perennials that gardeners discover and immediately wonder why they waited so long to plant it. In late spring, masses of stems are loaded with sweet pea-shaped flowers in shades of indigo blue, soft yellow, white or purple, and butterflies and bees absolutely love them. Once the blooms fade, the plant takes on a handsome, shrub-like form with blue-green foliage that holds its shape nicely for the rest of the season. While it’s slow to establish, it is extraordinarily long-lived, making it a plant you put in once and enjoy for decades.
Grows 3 ft tall and 3 ft wide | Full sun to partial shade | Blooms late spring to early summer
Hollyhocks, Alcea
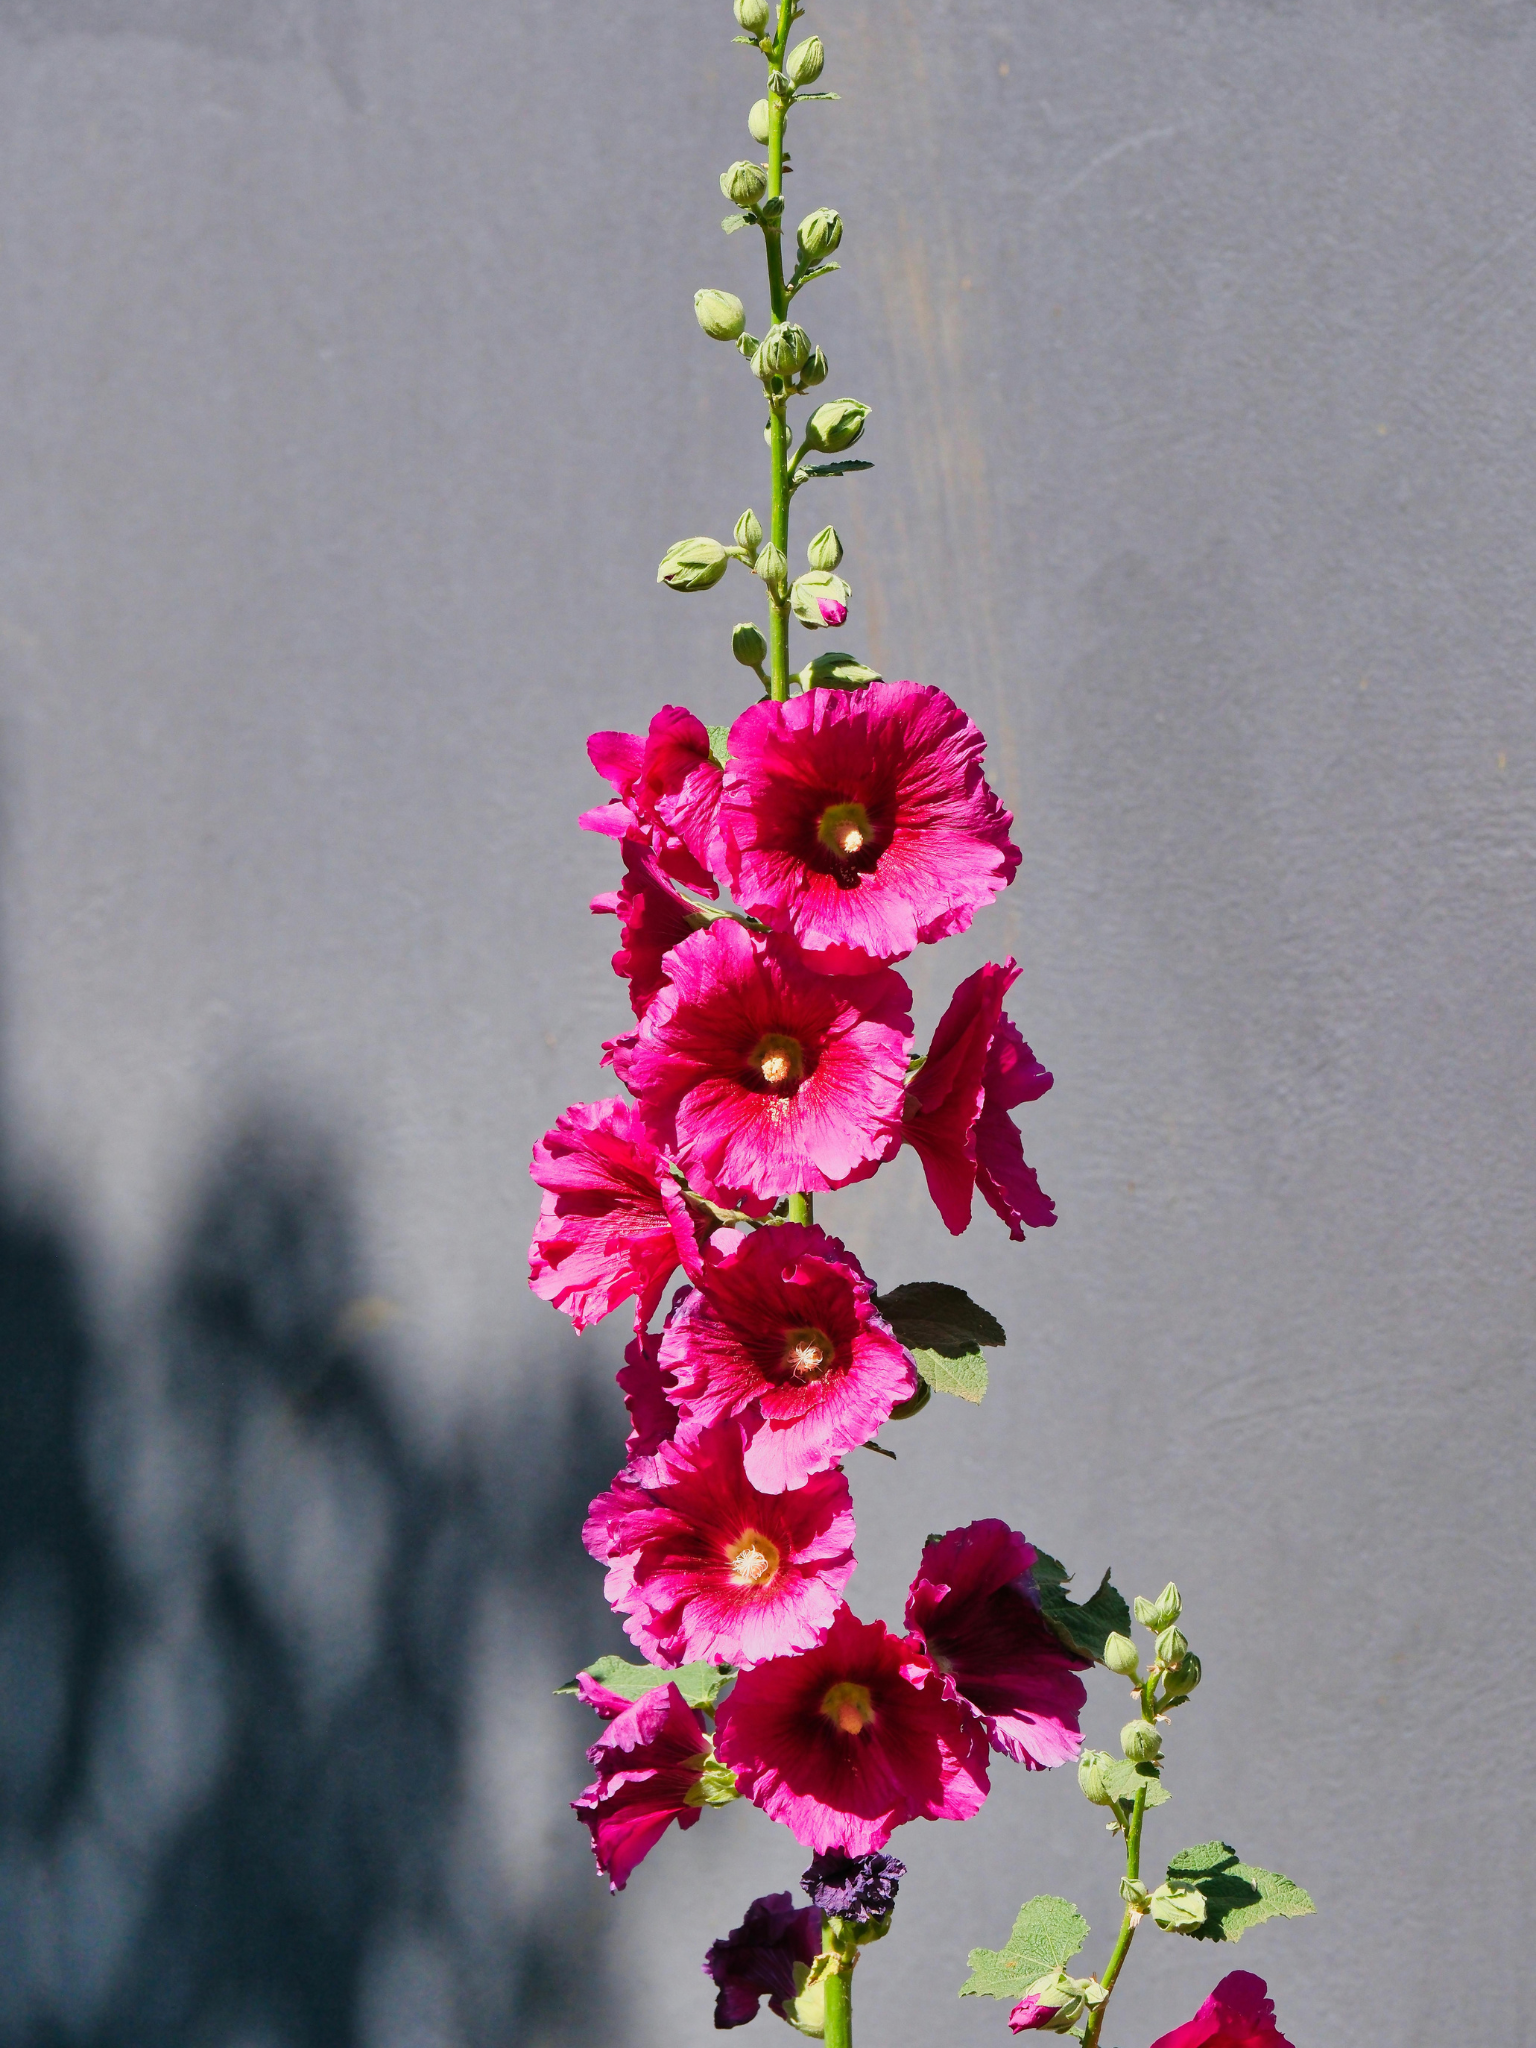
Few perennials carry the nostalgic, romantic charm of a Hollyhock in full bloom. Their tall, stately spires are covered in large, papery flowers and are available in an irresistible range of colours from soft pastels to rich burgundies and deep purples, to classic white. They have a way of making a garden feel established in their first season, making them a desirable back-row choice.
Grows 2-8 ft tall and 1-2 ft wide | Prefers full sun but will tolerate part shade | Blooms in summer
Joe Pye Weed, Eutrochium or Eupatorium
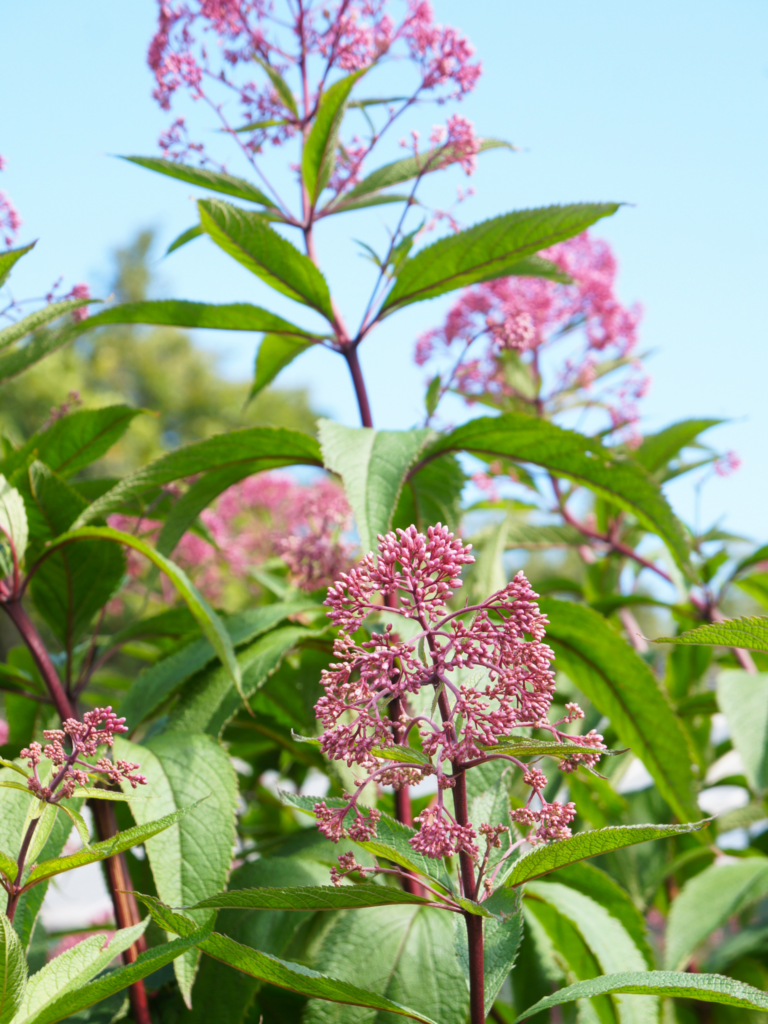
A native plant that is as ecologically valuable as it is beautiful. Its large, showy clusters of rosy-purple flowers are a magnet for butterflies and pollinators from mid-summer well into fall, long after many other perennials have finished their show. If you want a back-row plant that works hard for wildlife while adding bold colour to the garden, this is an excellent choice.
Grows 4-6 ft tall and 2-4 ft wide | Prefers part sun and moist soil | Blooms mid-summer to late fall
Russian Sage, Perovskia atriplicifolia or Salvia yangii
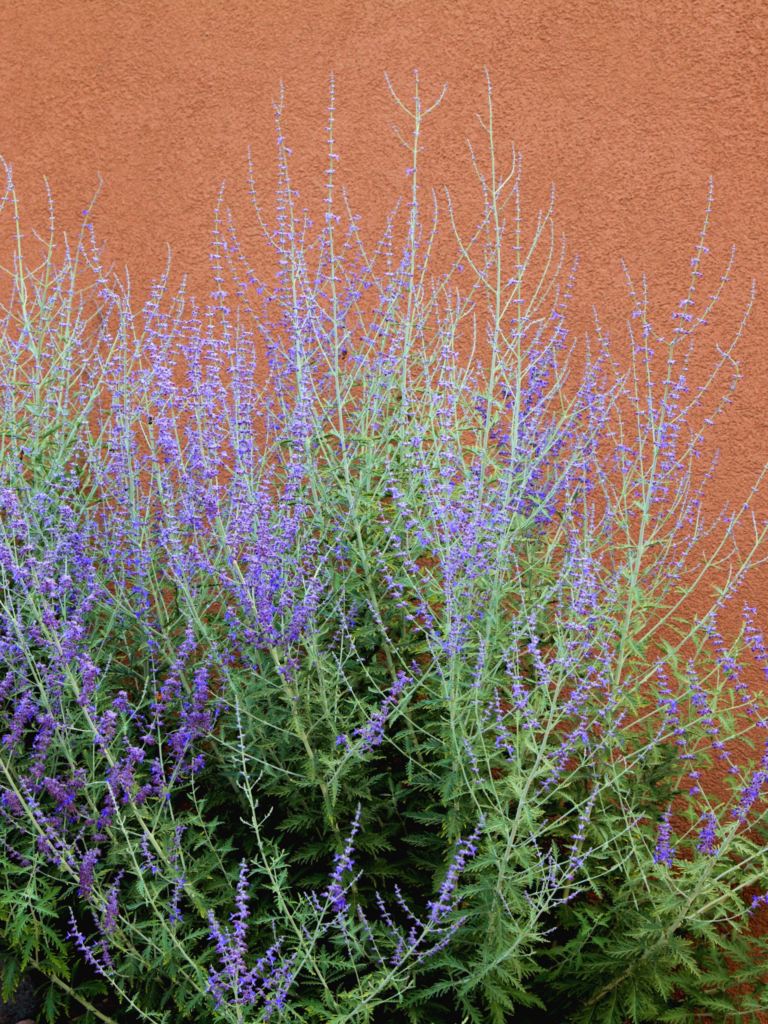
When the garden fills up with yellow and orange blooms in late summer, Russian Sage arrives with a billowy, airy cloud of lavender-blue flower spikes rising above silvery-grey foliage. It catches the light beautifully and adds a softness that few other plants can match. Drought-tolerant once established and virtually pest-free, it is one of the lowest-maintenance perennials you can grow. Compact varieties are also available if space is limited.
Grows 3-4 ft tall and 3-4 ft wide | Full sun | Blooms mid-summer to fall
Bear’s Breeches, Acanthus Mollis
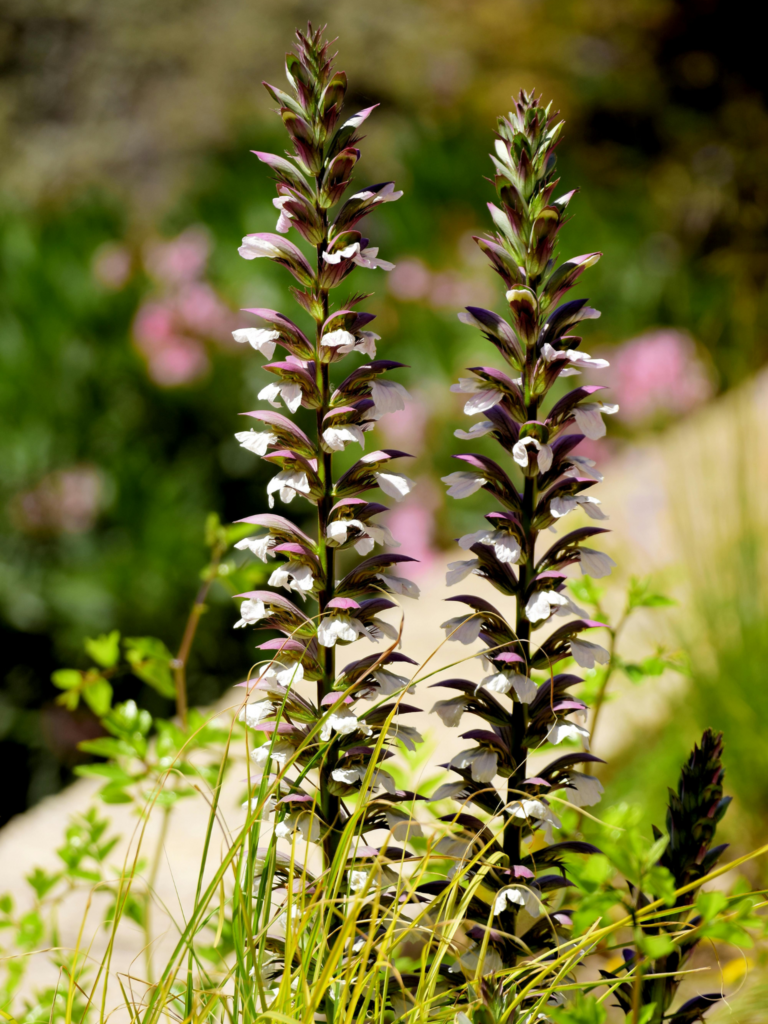
If you’re looking for a plant that makes a genuine architectural statement, Bear’s Breeches is in a category of its own. Its large, deeply lobed, glossy foliage forms an impressive mound, while dramatic flower spikes shoot three to five feet upward, bearing creamy white snapdragon-like blooms accented with striking reddish-purple bracts. It is bold, sculptural, and unlike almost anything else in the garden.
Grows 3-5 ft tall and 2-3 ft wide | Full sun to part shade | Blooms June to July
Foxglove, Digitalis
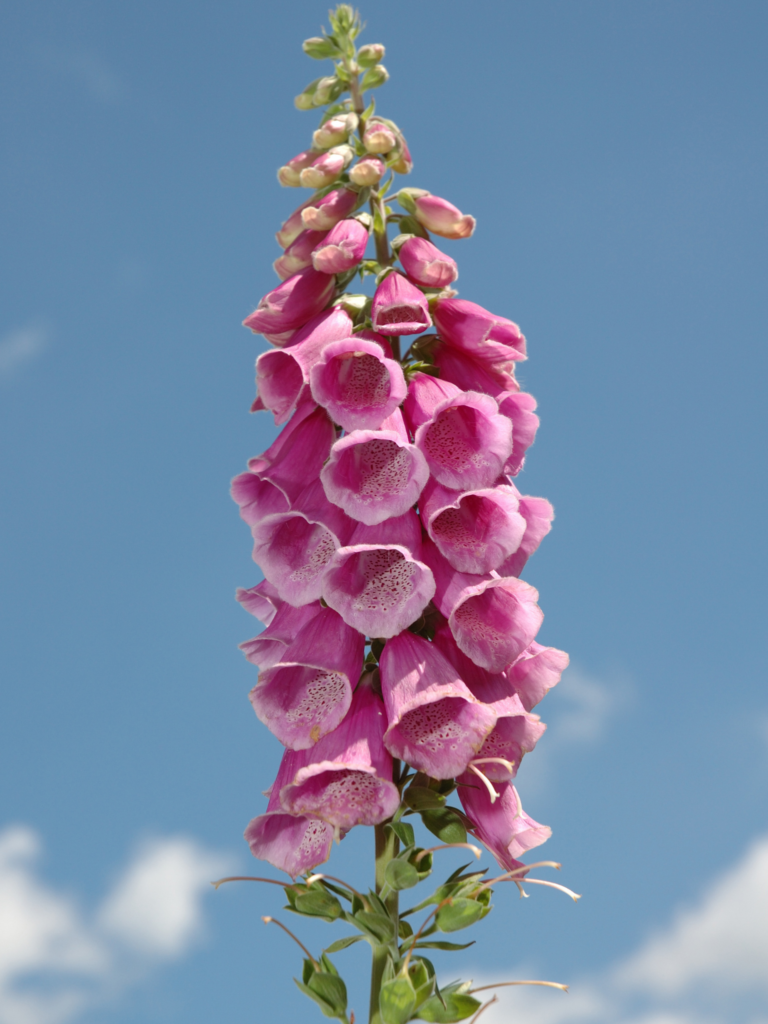
There is something undeniably enchanting and regal about Foxglove with its tall spires of tubular flowers freckled and spotted on the inside, nodding gently in the breeze. The colour range is also wonderful, from soft creamy whites and pale pinks to rich purples and deep rose. Many varieties self-seed freely, naturalizing happily in the garden over time. One important note: every part of the Foxglove plant is toxic to people and pets, so it is best planted away from areas where children or animals play. In the right spot, however, it is one of the most beautiful back-of-the-border plants available.
Grows 2-5 ft tall and 2 ft wide | Sun to part shade | Blooms in summer
Goat’s Beard, Aruncus diocus
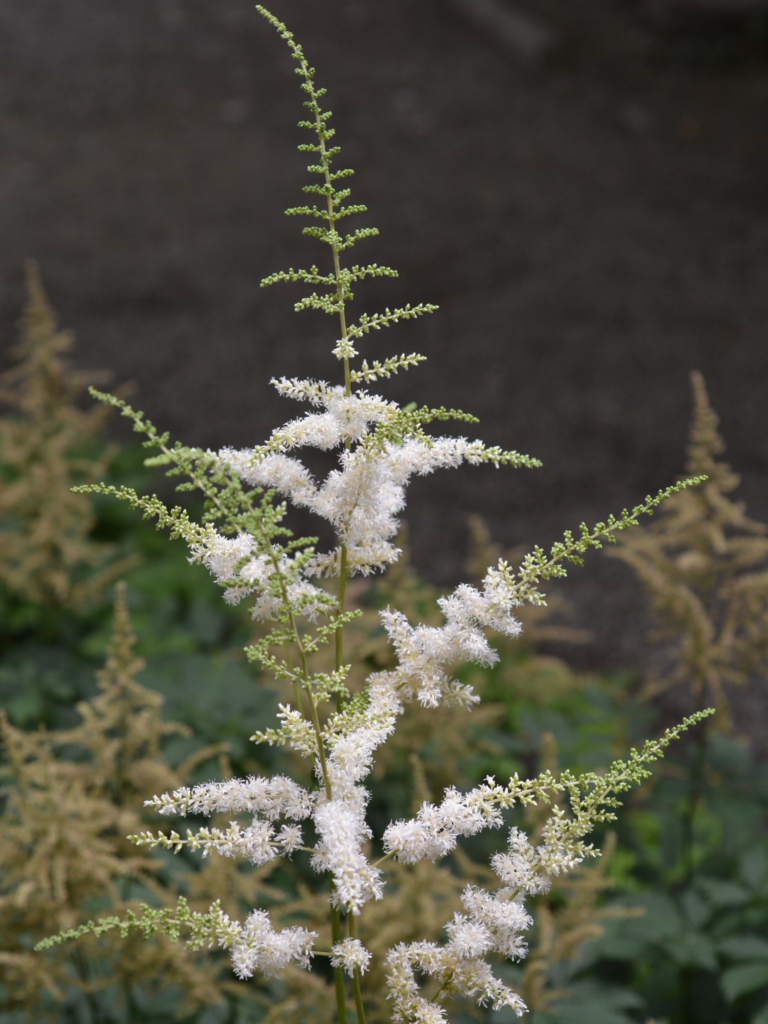
Despite its stature, this is one of the most graceful and softening plants you can add to a shady border. Large, feathery plumes of creamy white flowers rise above finely divided, elegant foliage, bringing lightness to even the darkest corners of the garden. It is especially effective at softening hard edges, filling bare spots under trees, and providing a lush, natural backdrop for smaller shade-loving plants. Dwarf varieties are available for smaller spaces.
Grows 6 inches (dwarf) to 6 ft tall and 2-4 ft wide | Partial to full shade | Blooms early to mid-summer
Gardener’s Tip:
Removing spent blooms before they go to seed, also known as deadheading, encourages many perennials to produce a second flush of flowers later in the season. It takes only a few minutes and can extend your bloom display by weeks.
Ready to Build Your Back Row?
The team at Eising Garden Centre is here to help you choose the right tall perennials for your space, your soil, and your sun conditions. Stop by and let us help you create a border that looks stunning from front to back, season after season.
Expert Picks You Can Plant Right Now
By Ava Green
Looking for a flowering shrub that delivers season after season? We asked our experts at Eising Garden Centre to share their top picks, the ones that customers and staff love most, and they delivered. Whether you’re looking for spring blooms, fall colour, wildlife and pollinator value, or a shrub to suit your space, there’s something on this list for every garden.
Fuji Cherry ‘Little Twist’, Prunus incisa ‘CarltonLT’
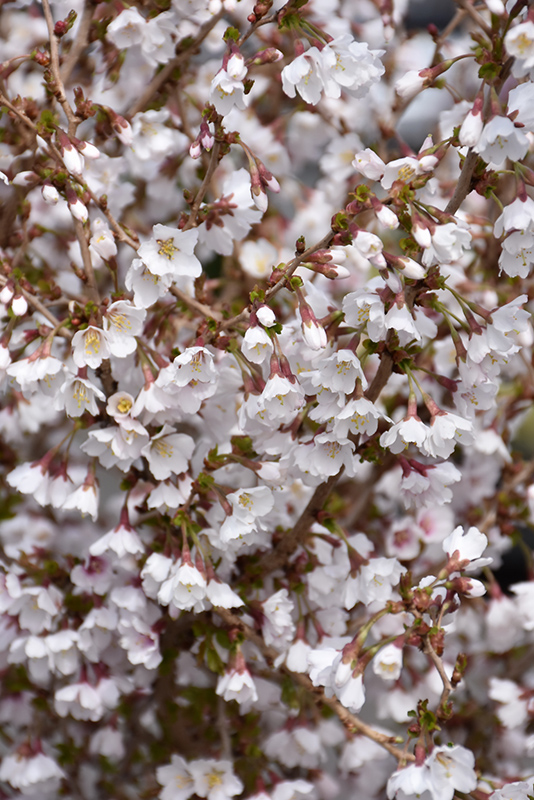
As an accent in a small garden, or planted in a grouping in a larger garden, this multi-stemmed shrub is a gem!
In early spring, crimson buds emerge before the leaves appear. Little Twist then produces clusters of lightly scented white, bell-shaped flowers with soft pink centres that grow along its stems, a stunning early-season display. It is a deciduous shrub, and leaves begin as green before shifting to coppery-bronze, then deepen to a rich burgundy in fall. Smooth, dark red bark adds interest in the winter once the leaves are gone.
This slow-growing, multi-stemmed shrub makes a striking feature in your garden.
Best for: Small gardens, accent planting, four-season interest. | Sun: Full sun | Mature size: 6 ft. tall × 6 ft. wide
Downy Serviceberry, Amelanchier canadensis
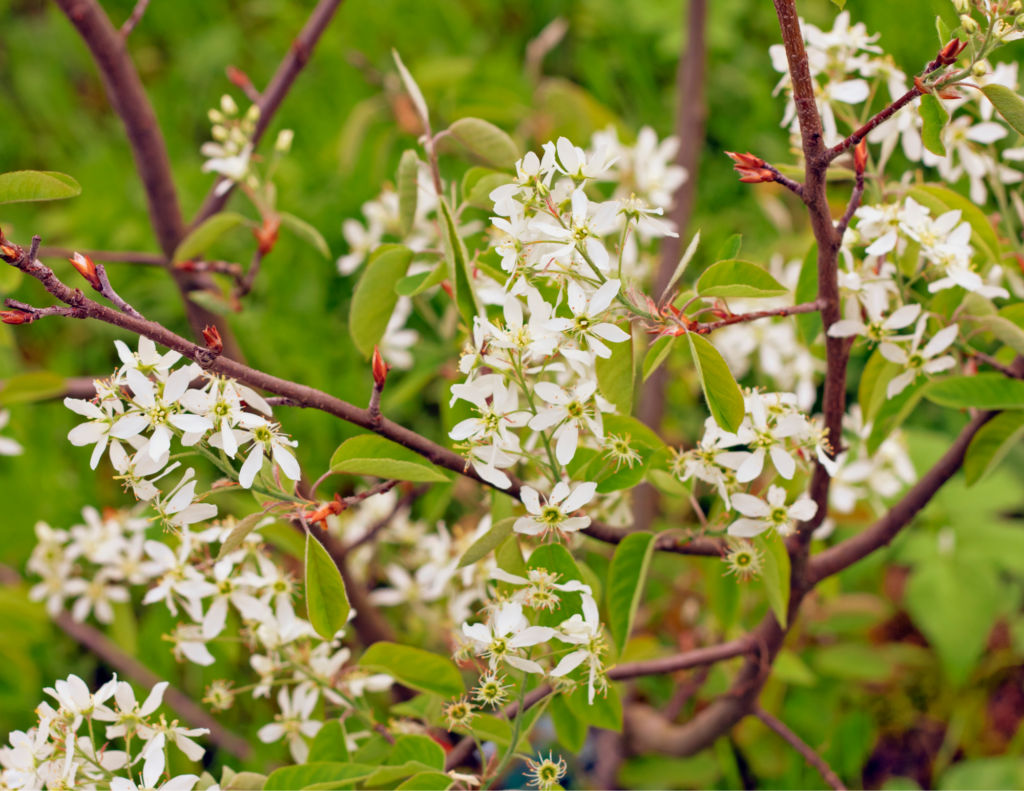
One of the most rewarding native shrubs you can plant, Downy Serviceberry earns its place in the garden from spring right through to fall. Showy clusters of fragrant white flowers in early spring, followed by small, sweet, edible purple-blue berries in early summer that are wonderful for making jam and an absolute favourite for birds. Come fall, the foliage puts on a spectacular show in shades of yellow, red, and orange.
As a bonus, choosing a native plant like Serviceberry supports local pollinators and wildlife, making it as ecologically valuable as it is beautiful. It works well as a specimen plant on it’s own, in a grouping or hedge, or naturalized in a larger landscape.
Best for: Wildlife gardens, naturalized areas, multi-season interest | Sun: Full sun to part shade | Mature size: 20 ft. tall × 10 ft. wide
Amur Privet, Ligustrum Amurense
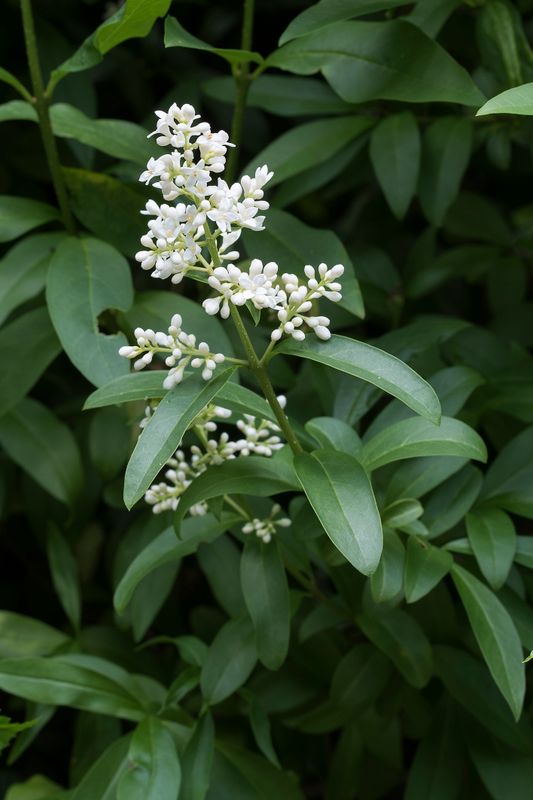

Amur Privet
When fast growth and privacy matter, Amur Privet is one of the best choices available. This dense, dark green shrub produces white flower panicles in late spring and small black berries in fall. It responds exceptionally well to pruning after it blooms, making it an ideal candidate for a formal or informal hedge. If you need to fill a space quickly and create structure in your garden, this is a reliable, low-maintenance option.
Best for: Hedging, screening, fast coverage | Sun: Full sun to part shade | Mature size: 12–15 ft. tall × 8–15 ft. wide
Viburnum ‘Fragrant Snowball’, Viburnum Opulus ‘Roseum’

Few shrubs stop people in their tracks quite like Fragrant Snowball Viburnum in full bloom. Large, rounded clusters of sweetly scented white flowers cover the plant in spring, creating a display that’s hard to match. While it doesn’t produce fruit, it earns its place again in the fall when the foliage transitions to rich shades of purple.
Pruning after it blooms will help to keep it a manageable size and encourage healthy new growth. It’s also available as a standard, or tree form, which matures to a more compact 6 to 8 feet tall.
Sun or part shade are best for this deciduous shrub, a beautiful, solitary accent plant for the garden growing 12 feet high and 10 feet wide. As a standard, it is smaller, maturing at 6 to 8 feet tall and 5 to 6 feet wide.
Best for: Specimen planting, cottage gardens, fragrance | Sun: Full sun to part shade | Mature size: 12 ft. tall × 10 ft. wide (shrub); 6–8 ft. tall (standard)
Snowbelle Mockorange, Philadelphus ‘Snowbelle’
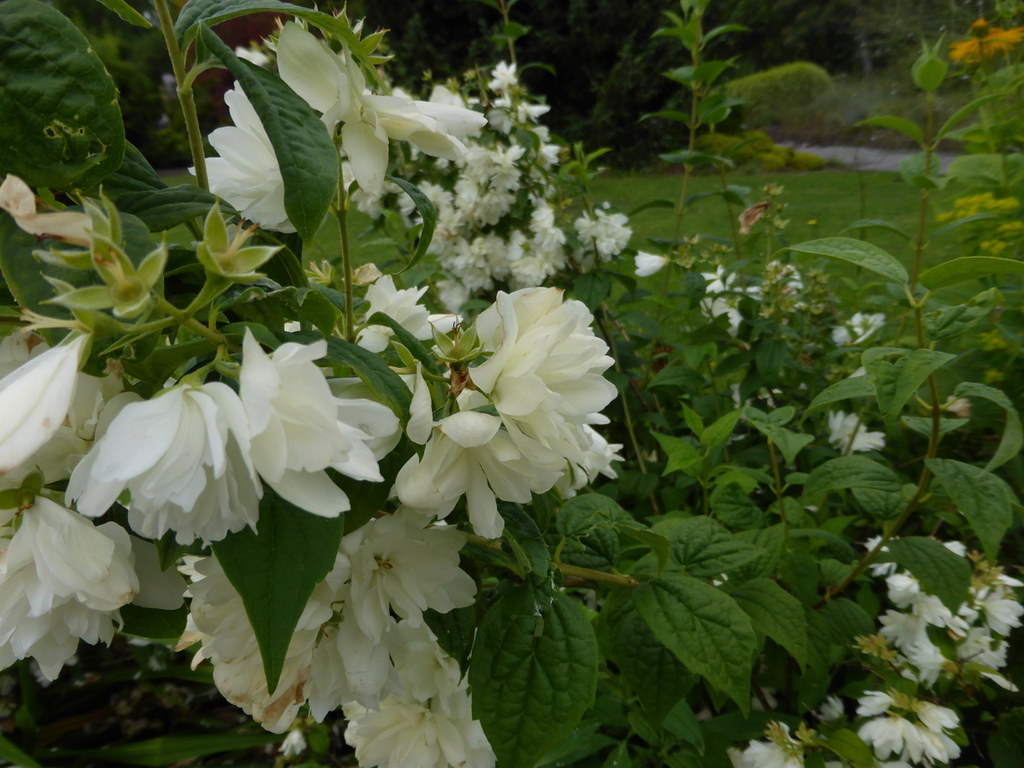
Don’t let its compact size fool you; when Snowbelle Mockorange blooms in early summer, it puts on a big show. This dense, mounded shrub is blanketed in sweetly fragrant double white blooms that are absolutely irresistible to bees and butterflies. Once the flowers fade, its rich, dark-green deciduous foliage makes it a lovely backdrop for other blooming plants in the border.
Growing just four feet tall and wide, it’s one of the best choices for smaller beds, borders and foundation plantings. It prefers full sun but handles part shade as well.
Best for: Small borders, foundation planting, fragrance | Sun: Full sun to part shade | Mature size: 4 ft. tall × 4 ft. wide
More Flowering Shrubs Worth Exploring
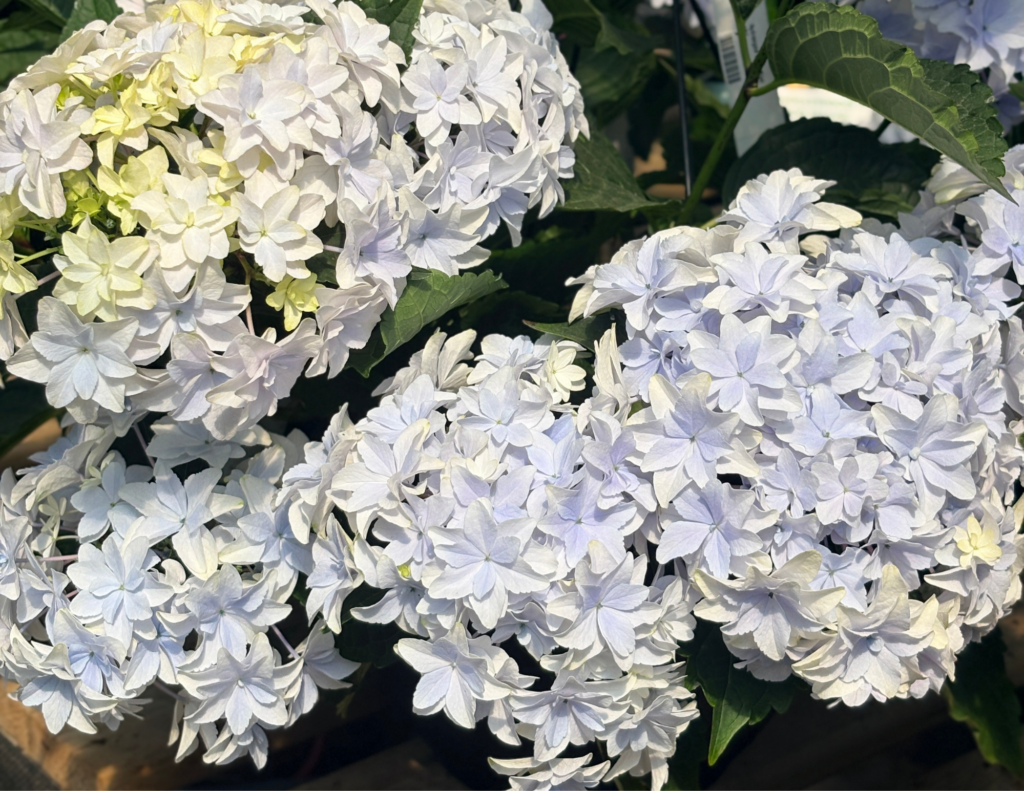
This is just the beginning! At Eising Garden Centre, we also carry a wonderful selection of Azalea, Eastern Redbud, Kwanzan Flowering Cherry, Hydrangea, Dogwood, Butterfly Bush, Beauty Bush, Lilac, Rose of Sharon, Forsythia, and Potentilla, to name a few.
The best way to find the right flowering shrub for your garden is to come in and see them in person, and right now is the perfect time to plant. Stop by and chat with Zach or Donna, who are always happy to help you find exactly what you’re looking for, based on your space, soil, and vision. We’re here to help you make the most of every corner of your garden!
By Ava Green
There’s a truth we all learn over time: good quality makes a big difference. Not buying more, buying smarter.
But how do you hold on to great pieces and make them look fresh and current? Start by getting yourself the perfect pair of jeans for the season. Great jeans work wonders to update your look. The right cut, the right wash, the right fit. It’s the closest thing to a style superpower you can own.
To show you what we mean, we picked a pair of white Lois jeans from Sassyfras, and created four completely different looks.
Crisp Black and White
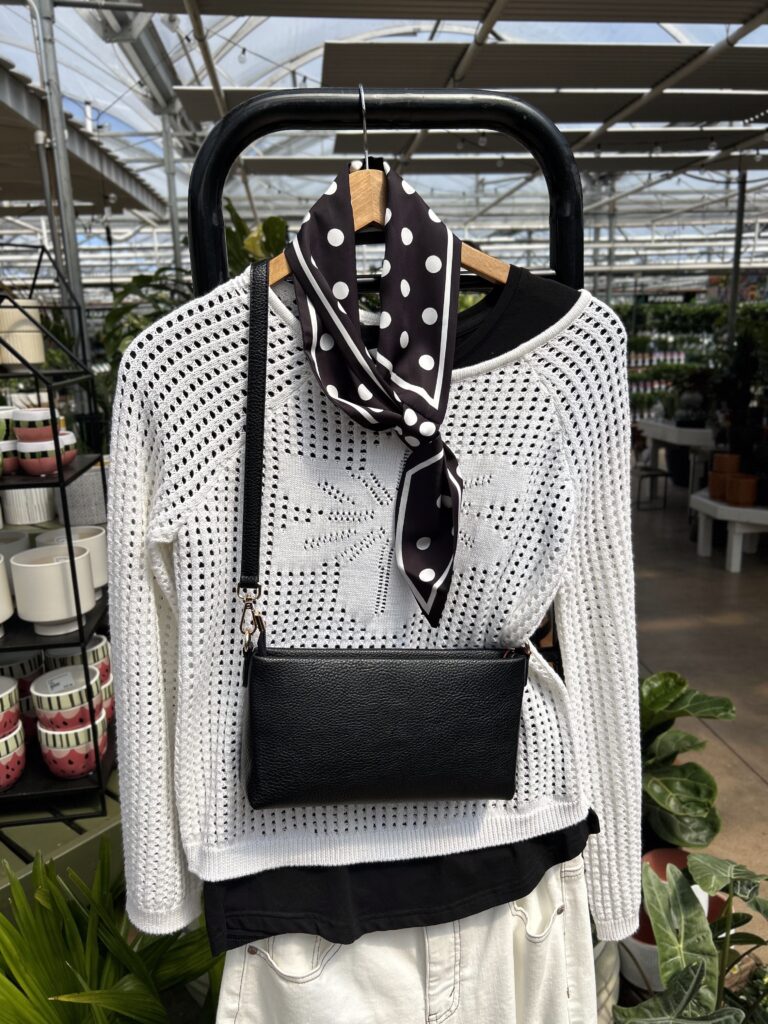
There is something timeless about a black-and-white outfit. Timeless made current with a new jean style. The printed scarf ties it all together and adds just enough personality to keep it from feeling too minimal.
Tie the scarf loosely around your neck, or loop it through the handle of your bag to pull the colours together. White-on-white (sweater and jeans) works beautifully, and varying the textures (knit vs. denim) keeps it interesting.
Sun-Kissed Orange
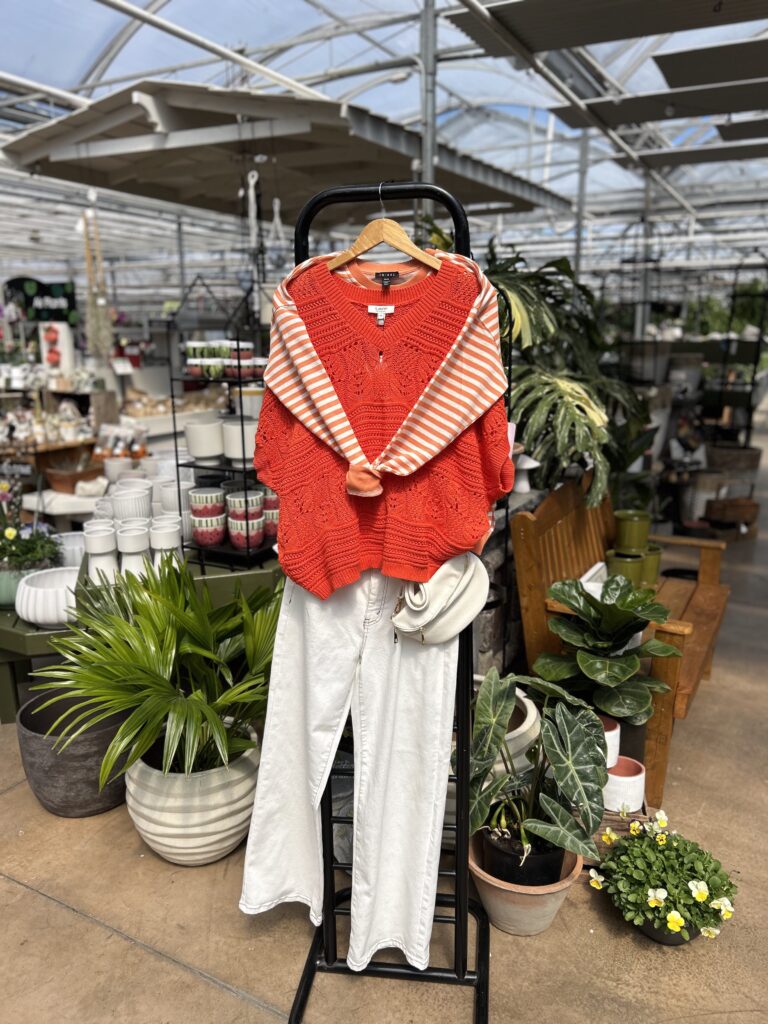
Orange and white is one of summer’s most joyful combinations. This outfit shows that beautifully. Playful, casual, and sunny. Tying a sweater around your waist or resting on your shoulders adds a relaxed, effortless layer that’s handy when you need a little extra warmth.
Classic Blue and White

This is the most polished of the four looks. A white blouse paired with a fine-striped blue jacket feels relaxed and also put together. This is the kind of outfit that works equally well for a casual lunch or an afternoon of errands. The multi-coloured scarf, which introduces a bit of pink and orange, pulls all the elements together beautifully and adds a little bit of playfulness. A blue bag grounds the colour palette.
The Colourful One
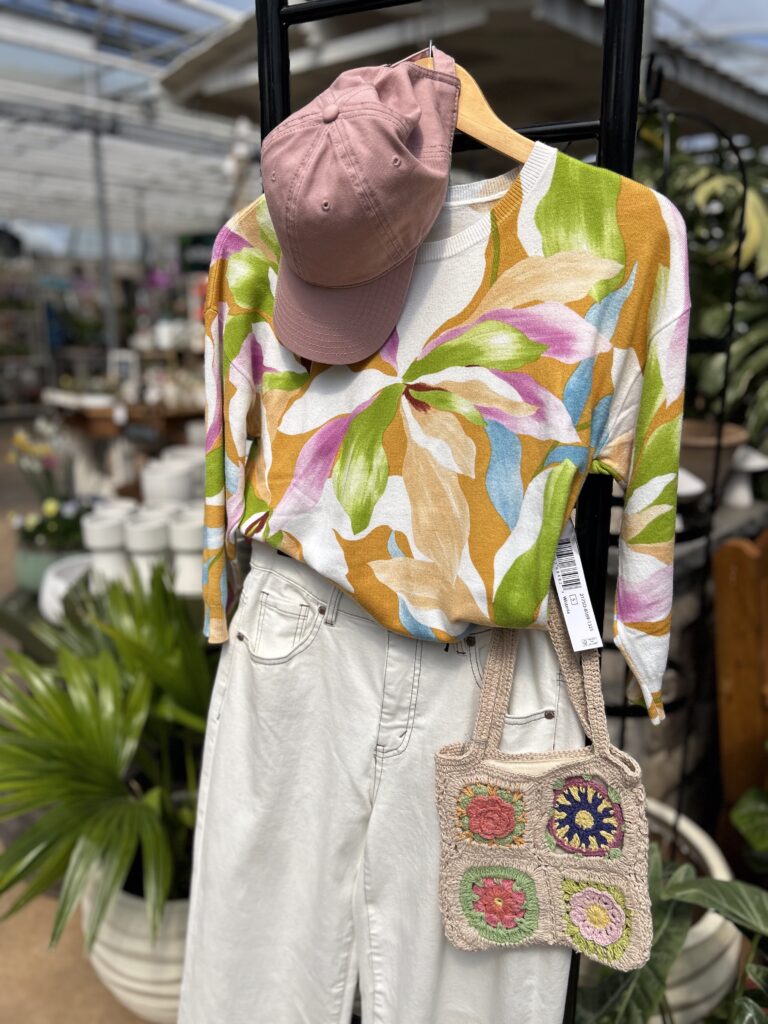
This look is so much fun. A multi-coloured sweater or blouse in bright, happy shades paired with white jeans is bold without trying too hard. White keeps it cohesive while the top gets to be the star. The woven macrame handbag adds texture and an artisan quality that feels intentional and individual. This outfit says: I’m having fun. The baseball cap is the punctuation mark! Vibrant, creative and completely at ease.
The Key to Making it Easy
Styled with intention and a little creativity, a single great piece, like our Lois jeans, can carry you through every mood and occasion. Wearing what brings you joy is always the right answer, and we have an inspiring selection at Sassyfras to make choosing easy. Stop by the boutique and see for yourself!
Sassyfras Boutique is located inside Eising Greenhouses and Garden Centre.
How to Keep Your Hanging Basket as Gorgeous as the Day You Brought it Home, All Summer Long!
By Dave Zeldon and Ely Schweyer
Remember your Mother's Day hanging basket with its variety of colours, textures, and plant combinations? Maybe there was Verbena cascading elegantly with their colourful star like blossoms, double Begonias for the porch in spectacular shades of reds, pinks, and burgundies, and of course the vigorously growing Petunias and Geraniums, to name just a few. But as the Summer goes on, they just don’t seem to have that same stamina.
To keep your hanging baskets in great shape and avoid the dry, wilted, bald spotted, leggy look that occurs to containers every August, one should follow these easy tips.
Watering
Plastic, fibre, and especially moss lined baskets dry out quickly. They should be checked twice daily and watered every day. Be sure to wet the moss sides as well.
Try to maintain uniform soil moisture. When watering, fill the top of the container with pooling water until it ‘pees,’ and allow it to drip out of the bottom of the basket every time you apply water. Frequent severe wilting will impact upon the quality of the basket.
At this time of year, one could take the basket down and soak it in a tub of water for 20 minutes to hydrate the entire root ball, once every week.

Deadheading
Remove spent flowers on a weekly basis (this is called deadheading) to prevent plants from going to seed. This will encourage more flower production. Part of the beauty of the mixed basket is its prolonged display, just like in your garden.
Check for Pests!
During your weekly deadheading, keep a watchful eye out for aphids, whiteflies, and caterpillars. If you see any, try a quick spray of insecticidal soap to keep them from becoming an infestation.
🖱️ If you're noticing fungus gnats in your hanging baskets, find more on eradicating them here!
Pruning
Not every plant in the basket will be at its peak all season.
Cutting plants back after a flush of bloom will tidy them up and prepare them for a fresh crop of flowers. Meanwhile, other varieties will begin putting on a show. This is especially true for Petunias.
A good cut back of long, lanky branches will reap benefits.
Fertilizing
Daily watering means nutrients can leach out of the soil before the plants can absorb them. The baskets should have both slow release granular added to the growing media and a weekly feeding of 15-30-15 soluble fertilizer. Use a solution containing micronutrients, as plants like Petunias need extra iron.
Sheltering
It has been suggested, if possible, that during stretches of extreme heat, give your baskets a break and move them to a cooler, shaded spot to de-stress for a couple of days. This is also suggested when heading on vacation. Your flowers will rebound to their former beautiful selves!
We hope this long term hanging basket care guide helps you enjoy your purchase all summer long! For more information - and beautiful plants – visit Eising Greenhouse and Garden Centre! 🌸
By Dave Zeldon and Ely Schweyer
This is the time of year that most garden centres will have on display their wide variety of Amaryllis bulbs, including the evermore popular waxed dipped. These enormous bulbs that are appearing now will be ready to burst into bloom within 4-8 weeks after planting.
Non-Wax Dipped: Planting
All Amaryllis need is a bit of commercial potting soil that should not cover the shoulders of the bulb (try leaving about 1/3rd of the bulb showing above the soil line), with the nose (or narrow end) of the bulb peeping well over the top of the pot. Make sure that you use a well-drained container that is 3-4” bigger in diameter than the bulb itself.
☝️A heavy clay pot will prevent this top-heavy plant from toppling over. To achieve continuous bloom, plant at intervals of two weeks for stunning colour in your home.

Non-Wax Dipped: Care
Once leaves emerge, fertilize once a month with a 20-20-20 water soluble fertilizer for houseplants. Water sparingly and wait for the miracle in a warm sunny room. Sub-irrigation or watering from the bottom of the drip tray will keep the surface soil dry, thus keeping and bulb rot organisms and those pesky fungus gnats at bay.
Non-Wax Dipped: It's Not Done Yet!
When blooming is over, remove the scape (or flower stock) and place the plant in a sunny spot and continue to water. This is to allow the leaves to regenerate the bulb. In springtime, when all danger of frost has passed, bring the bulb outdoors and let it spend its holidays in a shady spot. In some varieties the leaves will die back in September to give the plant a rest for a couple months. Stop watering and store the bulb on its side in a cool place for about eight weeks, when the leaves will once again begin to emerge.
Amaryllis can go 3-4 years without repotting as they don’t mind a little crowding. Try growing a couple of bulbs in larger pots to see if you can get a clump of flowers from the offshoots or babies that will develop after a couple of years.
Or, Try One of These Wax Dipped Bulbs!
Now growing more popular are the care-free waxed-bulb Amaryllis!



Experienced growers and beginners alike love that these waxed bulbs do not need to be planted or watered! Each of these robust bulbs are carefully prepared in festive-coloured wax, allowing you the freedom to place them among your holiday decorations.
Simply keep the bulbs at an ambient room temperature of at least 16C (70F) for beautiful blooms in five to six weeks.
These novelty items are low commitment! Their only fault is their lack of longevity - gardeners don’t get to enjoy them after year as these waxed bulbs were designed to be a one-use throwaway item!
BUT with a little luck and perseverance you may be able to save the bulb for next season after blooming. All you have to do is to carefully remove the wax layer, remove the flower stalk and place the bulb and with its remaining leaves into a pot of good growing media, allowing the leaves to regenerate the food stores in the expired bulb.
If you’re looking for more information – or perhaps, Amaryllis – visit Eising Greenhouse and Garden Centre! Happy Holidays! ✨
By: Dave Zeldon and Ely Schweyer
If you’ve ever wondered how the warm weather succulent came to be a seasonally regarded indoor plant, or how to keep one going, read on!
History and Cultural Significance
The Poinsettia was named after Joel Roberts Poinsett, the first U.S. Minister to Mexico. He introduced this native Mexican the United States in 1828. In the Mexican Christmas tradition, the star-shaped leaf pattern is said to symbolize the Star of Bethlehem, and the red colour represents the blood sacrifice through the crucifixion of Jesus.
Since the species is native to Mexico and found in the wild in deciduous tropical forest at moderate elevations, we then have a challenge to keep this plant alive and in a healthy form in our colder, northern climate.

It's Just A Rumour!
There is a common misconception that the poinsettia is highly toxic. This is not true.
Yes, it may be mildly irritating to the skin or the stomach if it is eaten, but otherwise, there have been no documented cases of poisoning. The origin of this myth could be found in the fact that most plants of the spurge genus (Euphorbia) are indeed toxic. Fortunately, this family member is a good one!

Here are Some Helpful Hints to Get the Most Longevity Out of Your Plant:
☝️Unsleeve the plant as soon as possible as the leaves may become droopy if left too long in the wrapper. Fortunately, the plant should recover in a few days if this does occur.
☝️If you want to try to keep your plant until next Christmas then fertilize after the blooming season with an all-purpose fertilizer, repot it later in the early Summer and then introduce it to 12 hours of uninterrupted darkness come September.
For more information on Poinsettia care (i.e., temperature, lighting, and watering), visit Ava's blog Caring for Poinsettias.
If you’re looking for more information – or perhaps a Poinsettia – visit Eising Greenhouse and Garden Centre! Happy Holidays! ✨
By: Dave Zeldon and Ely Schweyer
Spring and early fall are generally the best times for planting trees. It has been found that newly planted trees thrive when exposed to moderate temperatures and rainfall, as they need time to root and acclimatize before the onset of intense heat and dryness of summer or the freezing temperatures of winter.
Now whilst planting different types of trees differ in detail, all trees eventually end up in a hole. But remember not just any old hole will do.

Let’s Get Digging!
1. Some trees are buried too deeply, causing the tree roots to decline in health and condition. We have a whole other article dedicated to transplanting depth if you wish to read more, but here’s the just of it: Poor tree health results in reduced growth rate, atypical leaf size and colour, increased disease susceptibility, and reduced cold hardiness. Always make sure that the root collar flare is visible after planting; if settling occurs, reset the tree to the proper depth.
👉 Note: Many times, homeowners build a raised bed garden around an existing tree in the yard (thus burying the root collar flare) only to find within a year or two their favourite tree now is in decline. Don’t bury that root collar flare!
2. As a general rule, trees should be transplanted no deeper than the soil in which they were originally grown. The width of the hole should be at least three times the diameter of the root ball or container or the spread of the roots in the case of bareroot trees. This will provide the tree with enough worked earth for its root structure to establish itself.
3. When digging in poorly drained clay soil, it is important to avoid 'glazing'. Glazing occurs when the sides and bottom of a hole become smoothed forming a barrier, through which water has difficulty passing. To break up the glaze, use a fork to work the bottom and drag the points along the sides of the completed hole. Also, raising the centre bottom of the hole slightly higher than the surrounding area. This allows water to disperse, reducing the possibility of water pooling in the planting zone.
4. The backfill soil should be a mixture of composted manure and topsoil. The mixture should then be placed in the hole surrounding the tree just to the height of the ball or slightly lower to allow for some settling. Be careful not to compress the backfill soil as this may prevent water from reaching the roots and the roots from expanding beyond the ball.


Jobs well done by the Eising landscaping team!
Standing On Its Own Roots
Young trees should be able to support their own weight when they are transplanted. If the tree is unable to do so, try thinning out the upper branches to reduce wind resistance. If that is not enough, you may have to stake a tree.
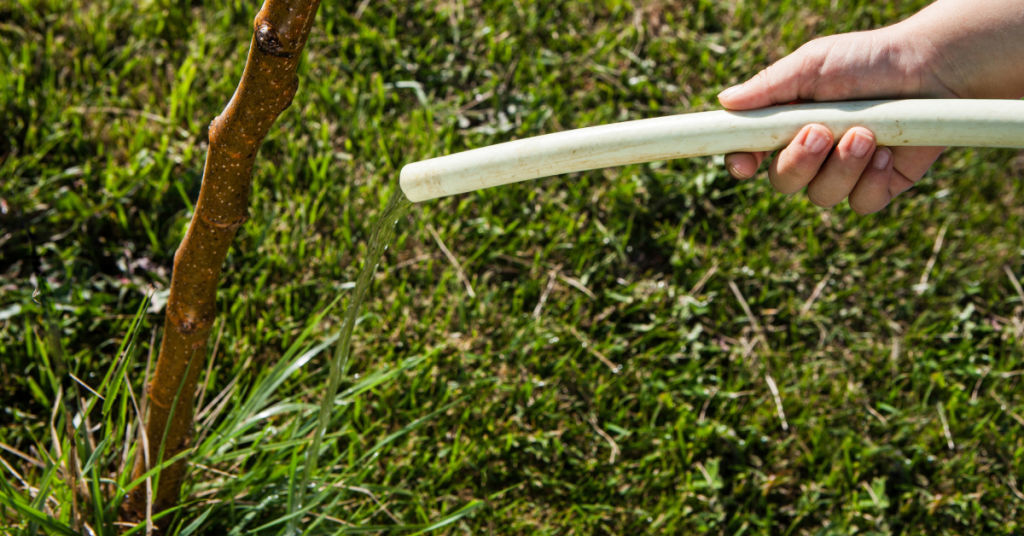
Watering Your New Tree
Newly planted trees should be watered at the time of planting. In addition, during the first growing season, they should be watered at least once a week in the absence of a good rain.
👉 Remember: Regular deep soakings are better than frequent light wettings.
We hope these tips can help you encourage the longevity of your new tree! For more information - and trees - visit our Trees & Shrubs section at Eising Greenhouse and Garden Centre. We hope to see you soon!
By: Dave Zeldon and Ely Schweyer
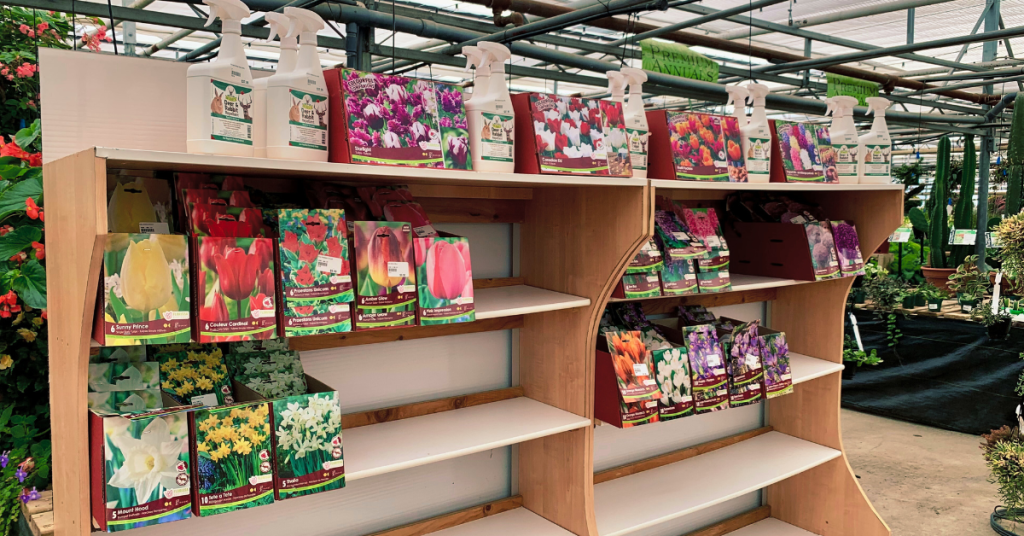
If you can’t wait for Mother Nature’s next great colour show, the time is now (mid September) to get rolling on those early spring flowering bulbs! Even though you can start planting in October or early November, buying bulbs now is advantageous as the selection at your local garden centre is at their best. Being the very first to bloom during the last dreary days of winter, bulbs announce that spring is returning once more, and as you think about the colourful show of tulips and daffodils next year, remember all spring’s groundwork begins now!
Your bulbs may be planted in your lawn, rock beds, at the foot of trees and bushes, in annual or perennial flower beds, or even in flower stands and pots. Combining the emerging fresh colors and textures of bulbs with the established foliage creates a harmonious relationship opportune for a complimenting or contrasting garden-scape. With a bit of planning and creative selection you can easily extend the joy of having spring flowering bulbs in your garden from a few weeks to several months, furthermore, planting bulbs amongst perennials offers that the new growth of the perennials will hide the fading foliage of the bulbs once they have finished flowering! Not long after the fading of the bulbs most perennials themselves will bloom, smoothly extending the sequence of flowering plants for you to enjoy.
Read on for all there is to know about planting bulbs!
Buying Your Bulbs:
When buying, look for nice, plump, firm, bulbs. Avoid those with scars or that feel spongy to the touch. The general rule is the larger the bulb the bigger the plant. If you're buying daffodils, look for bulbs that have two or more "noses" as you will get extra flowers for free!
To have a good display of colour in your garden, right from March to the end of June. Be sure to check the blooming times on the packages and get a variety of early, mid and late-blooming spring bulbs.
👉 Tip: To extend the season, plant some bulbs in places where the sun beats down in early spring and some in cooler, shady areas of the garden allowing them to emerge in later spring.
Planting Your Bulbs:
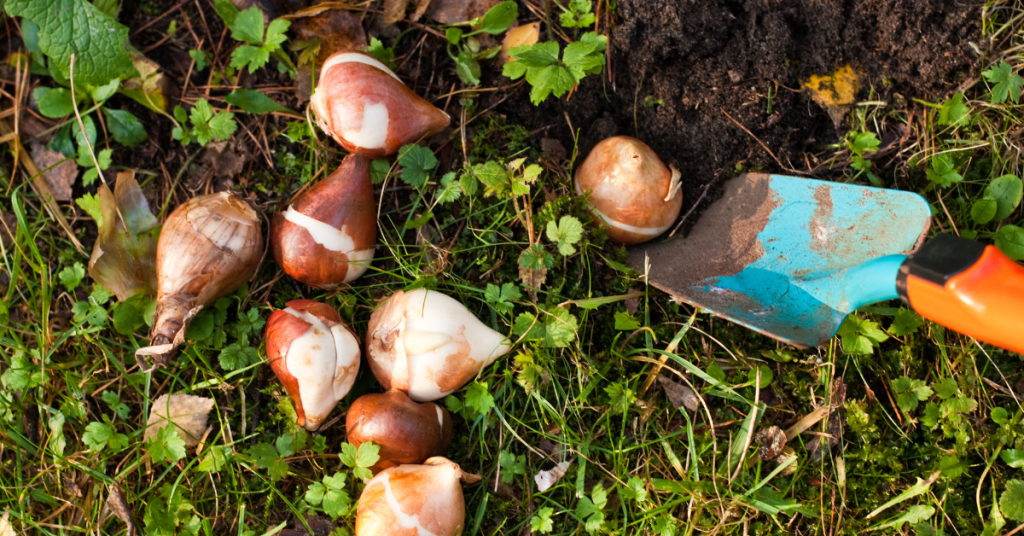
When planting, the soil must be warm enough under the surface to stimulate a little root growth prior to the winter freeze. Winter chilling is necessary to break the flower bud dormancy (vernalization) to have our bulbs produce blooms in the spring (see below how to force bulbs if you’re reading this in the spring).
Remember to plant your bulbs with the pointed end up! If it doesn't seem to have a pointed end, look for the flatter side and evidence of roots, which is the end that goes down. If you still can't be sure, plant the bulb on its side and it will figure out the proper direction by itself!
The rule of thumb is to plant the bulb two or three times as deep as the bulb is tall. The depth is to the base of the bulb, not the top. Typically, 8 inches (20 cm) for big bulbs such as daffodils, tulips and hyacinths and 5 inches (13 cm) for small bulbs like grape hyacinths and crocus. Plant in well-drained soil, cover up, water well and wait for spring.
In a wide hole, place bulbs - so they aren't touching - in threes, fives, or sevens per hole for the most natural look. You can throw a handful of bonemeal in the planting hole and mix it lightly with the soil, this will give your bulbs a good boost for the best bloom. Water to the depth of the hole.
Tulips, daffodils and other spring-flowering bulbs require a long period of cool temperatures to undergo the biochemical process that allows them to flower. So, in the fall, get them in the ground ideally six weeks before hard freezes to give them the time they need to develop strong roots.
Fertilizing Bulbs:
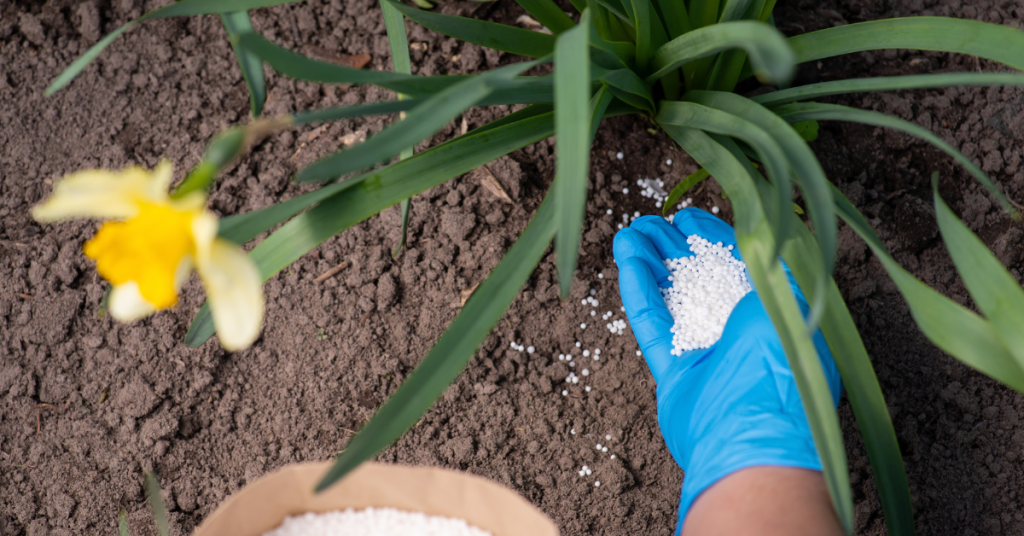
Bulbs contain the nutrients they need to bloom their first year, but a fertilizing program will keep plants healthy and ward off diseases and pests. Compost and manure are two good organic fertilizers that not only enrich the soil but ensure a good soil structure for bulbs. Additionally, organic supplements can be used to add nutritional balance. Compound mineral fertilizers can also be applied, however, check the label to see if fertilizing is appropriate for your bulbs and the best time of year to do so. Top-dressing with fertilizers like 9-9-6 slow release or either 8-8-8 or 10-10-10 soluble fertilizers are examples.
Once a bed of spring flowering bulbs are established, the process of naturalizing occurs which simply means that a bulb flowers again after the first year and starts producing more bulbs on their own. However, they will need your help to get the food they require to recharge and regenerate for the next season's bloom.
Some Helpful Tips:
- Squirrels enjoy the taste of tulip bulbs if they are easily accessible but not so with daffodil bulbs; interplanting the two together and/or mulching the garden will help protect them.
- Resist the urge to tidy up fading foliage or mow over it as the plants require about six weeks to build up reserves for the next season.
- Deadhead the tulips as the formation of seeds will sap the energy from the bulb. Daffodils & other bulbs do not require this action.
Forcing Bulbs:
Now if you can't wait for spring to smell the fragrant hyacinths, or you missed the fall planting, why not try your hand at bulb forcing?
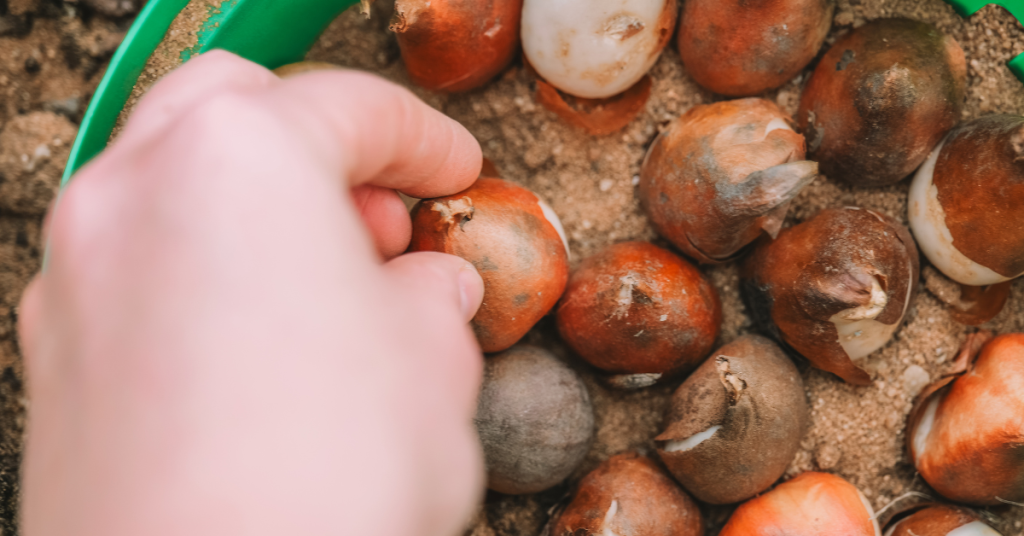
All you have to do is plant any extra bulbs in a pot with a drainage hole. Choose a pot that is at least twice as deep as the bulbs to allow for proper root growth. Fill the pot half full of soilless potting mix. Then place as many bulbs as possible in the pot, without letting them touch. For a thick show, layer more than one kind of bulb in the same pot; place larger bulbs on the bottom as they will grow around the smaller ones. A six inch-wide pot holds up to six tulips, three narcissus (daffodils), or 15 minor bulbs, such as crocuses or grape hyacinths.
Cover the bulbs with potting mix, leaving their tips showing. Water the bulbs thoroughly. Label with name and date; loosely cover pot with a paper bag. Place in cool (1-7 degrees Celsius or 35-45 degrees Fahrenheit), dark place for chilling such as an unheated attic, basement, or attached garage or in a 12 inch-deep trench covered in a tarp.
Check moisture in pot periodically keeping the soil damp but not wet. When chilling is complete, you'll see roots poking out of the bottom of the pot and green sprouts emerging at the bulb tips. It's time to move the potted bulbs into a warm room.
Chilling and Blooming Times:
- Daffodils: 12-15 weeks of chilling; 2-3 weeks to bloom after chilling.
- Tulips: 10-16 weeks of chilling; 2-3 weeks to bloom after chilling.
- Crocus: 8-15 weeks of chilling; 2-3 weeks to bloom after chilling.
- Grape hyacinth (Muscari): 8-15 weeks of chilling; 2-3 weeks to bloom after chilling.
- Iris reticulata: 13-15 weeks of chilling; 2-3 weeks to bloom after chilling.
- Snowdrop (Galanthus): 15 weeks of chilling; 2 weeks to bloom after chilling.
- Hyacinth: 12-15 weeks of chilling; 2-3 weeks to bloom after chilling.
We wish you all the best with your bulb planting this autumn! For more information - and bulbs - stop by Eising Greenhouse and Garden Centre this fall!
By: Ava Green
As temperatures begin to cool down, autumn colours set in and surround us with the beauty that is fall in southern Ontario. Suddenly summer is gone and it’s time to think about creating a cozy atmosphere inside and outside that is inspired by the world around us.
Autumn Outside
Whether you gather items from the garden or from the garden centre for a display, there are lots of natural materials all around us to draw from. Take some plumes from ornamental grasses and put them in decorative buckets. Add branches with colourful leaves or dried seed pods, and pumpkins or mums for a pop of colour. A bland background becomes the perfect backdrop.
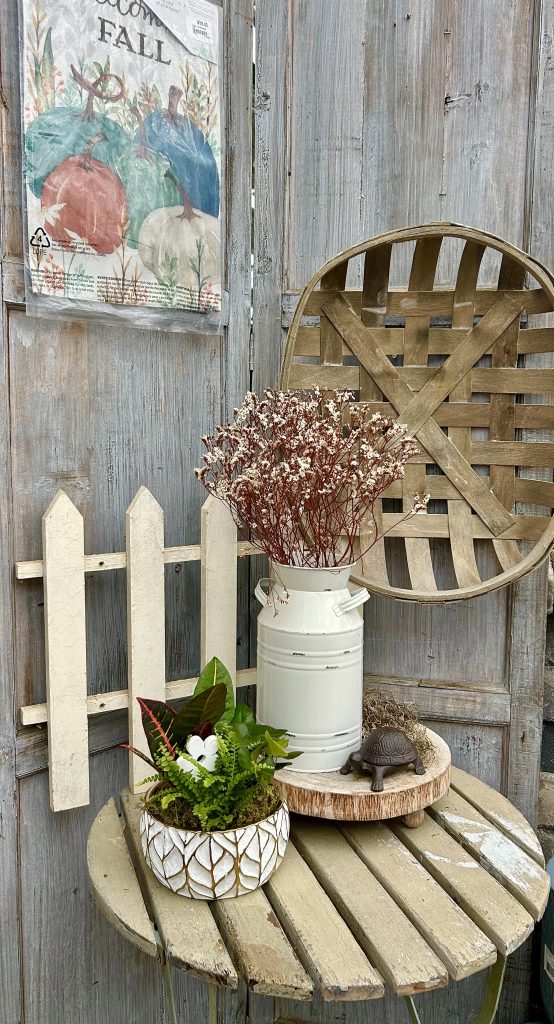

Looking for something to grow? Create fall planters with sunflowers, ornamental kale, ornamental peppers, live grasses, and, of course, fall mums.
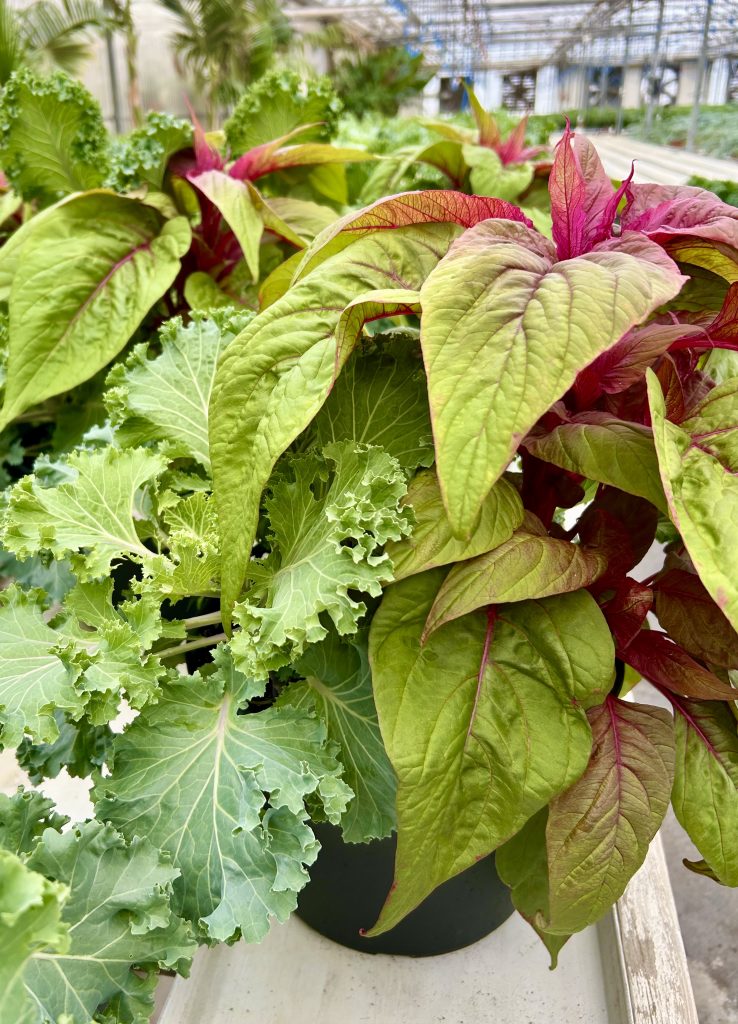
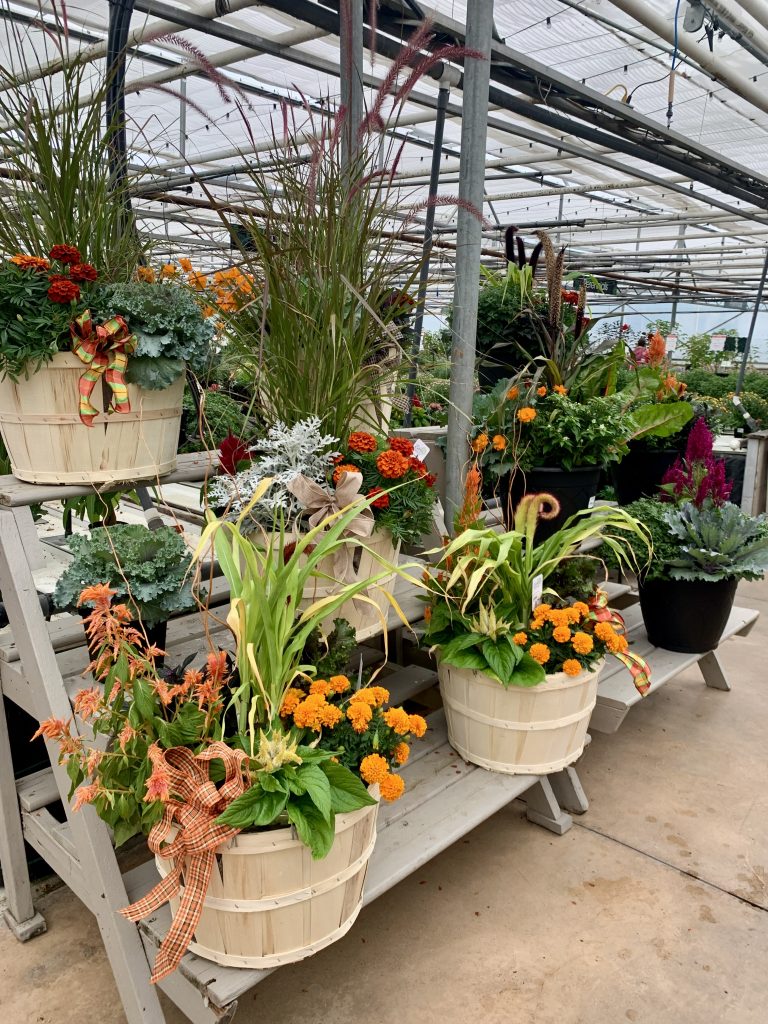
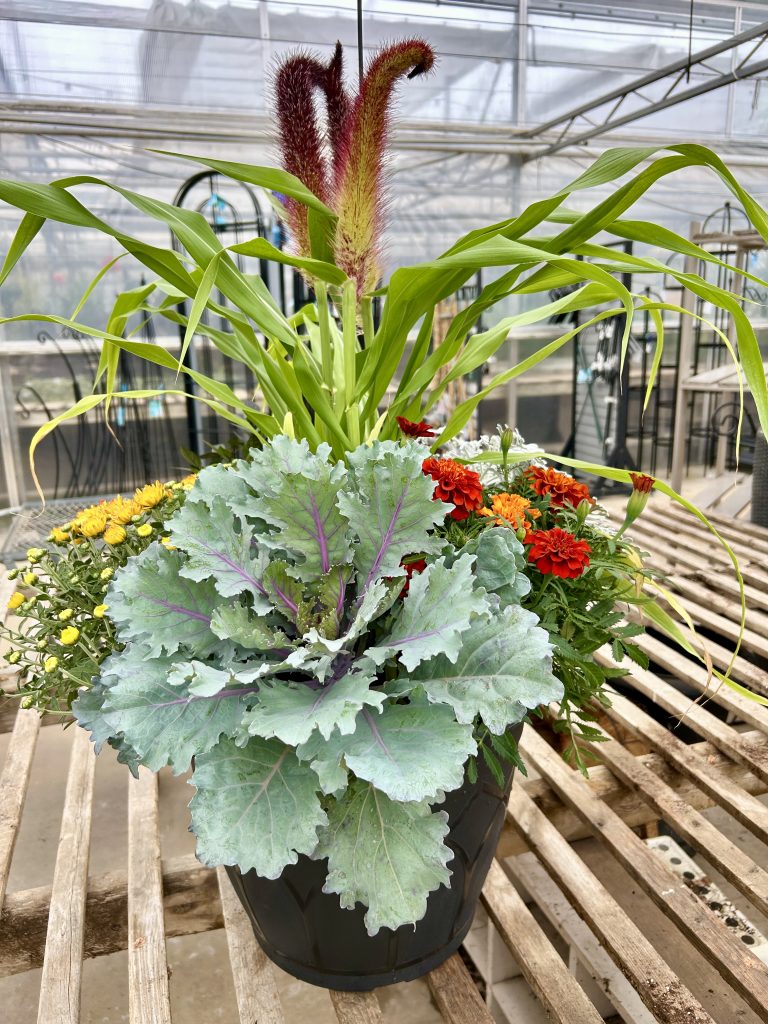
We offer beautifully festive arrangements with a variety of ornamental fall plants, as well as individual plants to decorate an outdoor table, or as a planter creating a warm welcome on your front porch (watch here: Jeanine create a fall planter on our IG).

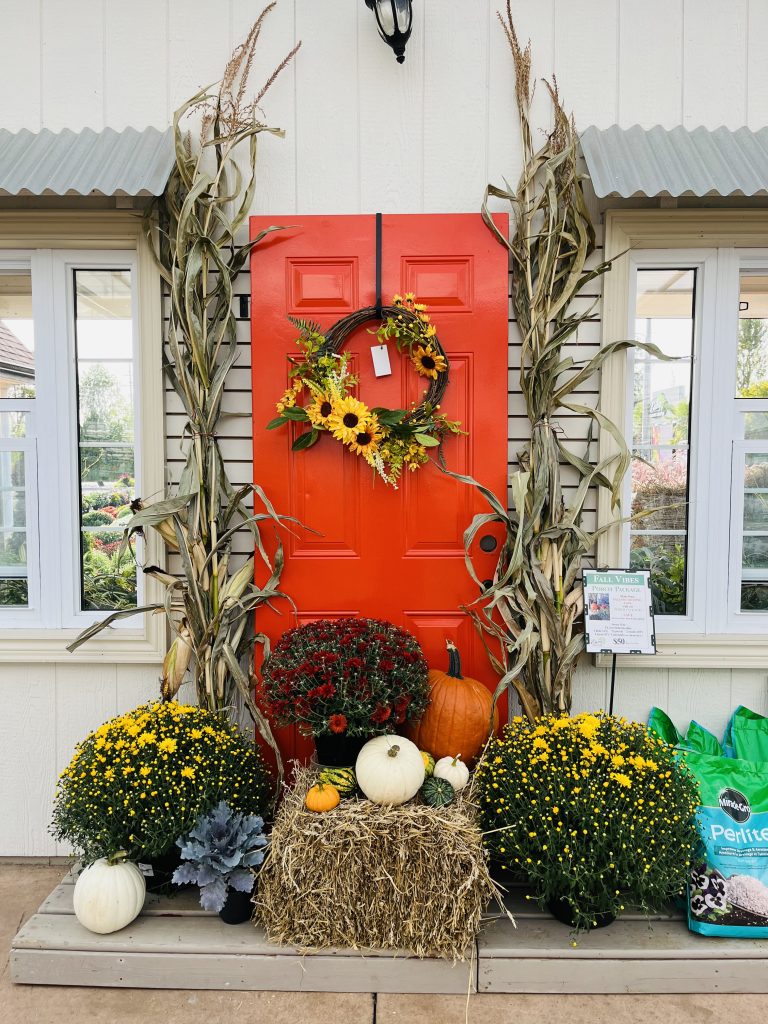
Eising’s popular Porch Packages make it easy to decorate the entryway to your home. But don’t wait, they sell out quickly!
Autumn Inside
When there are fall colours outside, autumn displays inside create continuity that will carry your indoor decorating right into the holiday season in December.
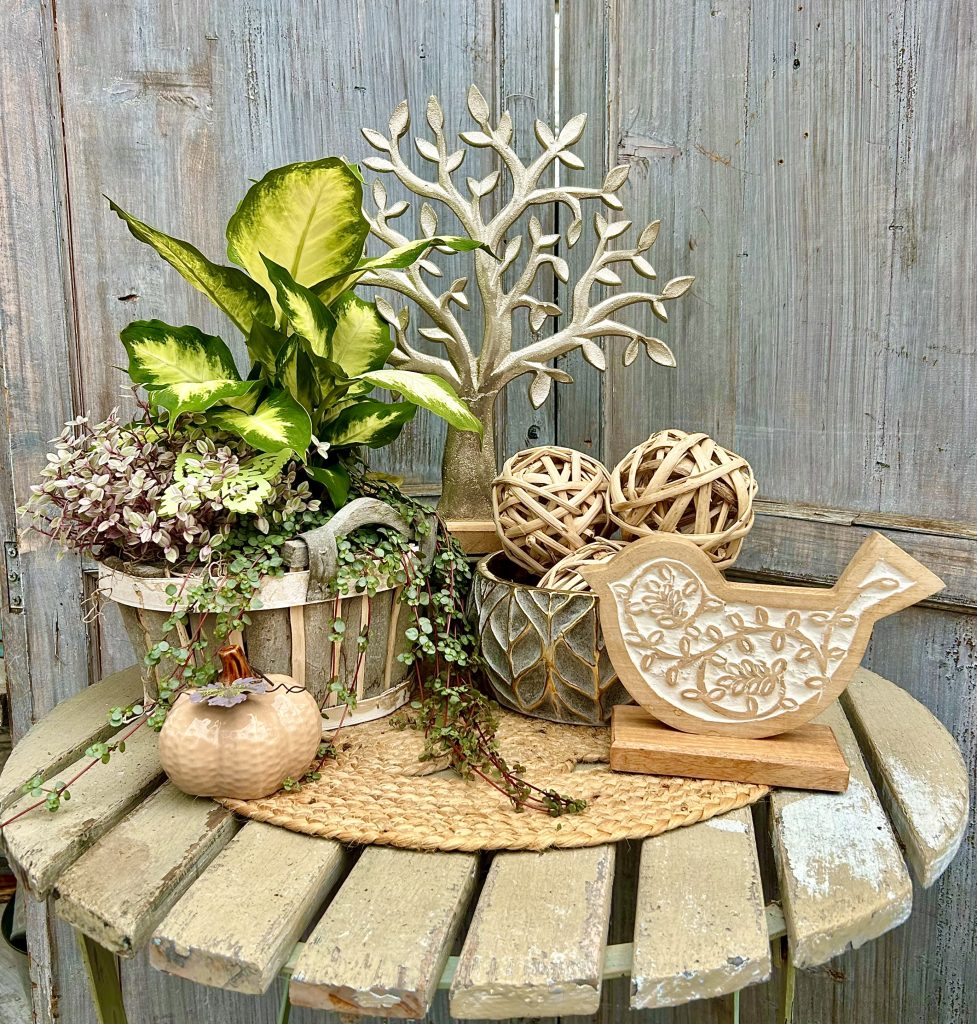
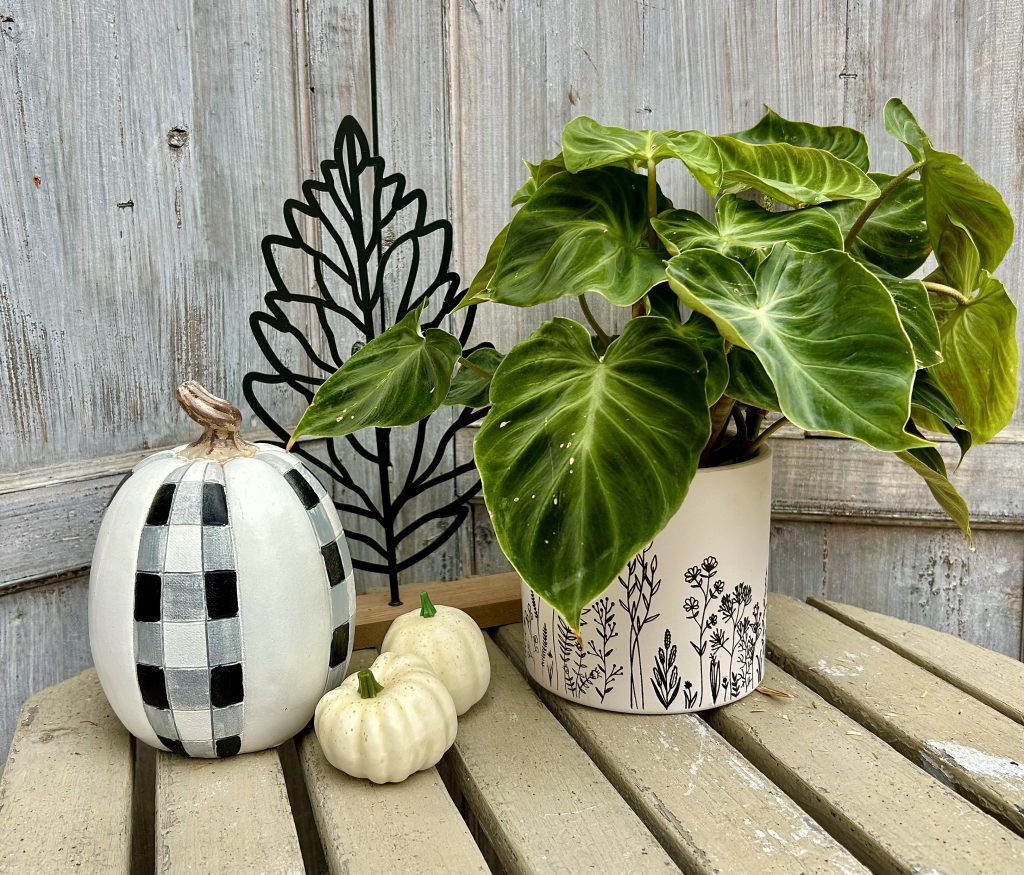
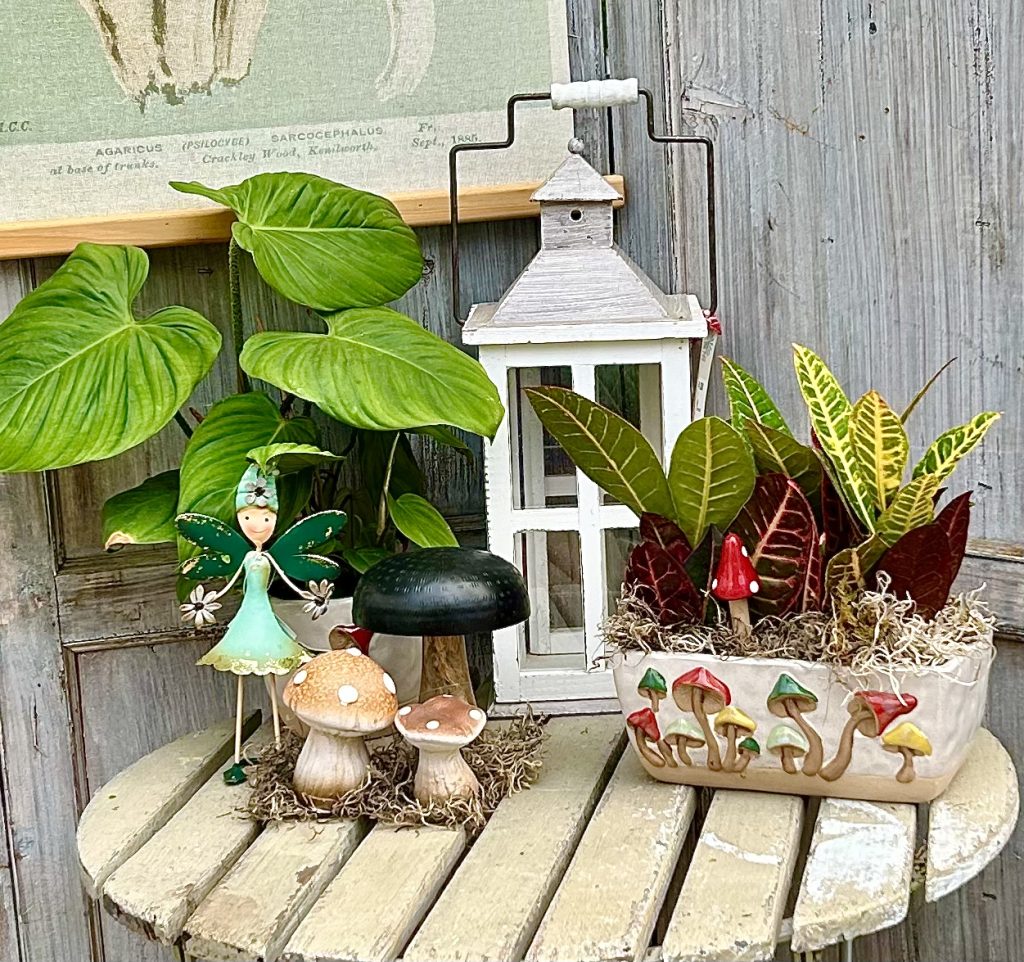
Displays that are vibrant, warm, rustic or whimsical are fun and easy to make. Here are some basic design principles that will help you get started, along with examples we’ve created using items in the Eisng shop.
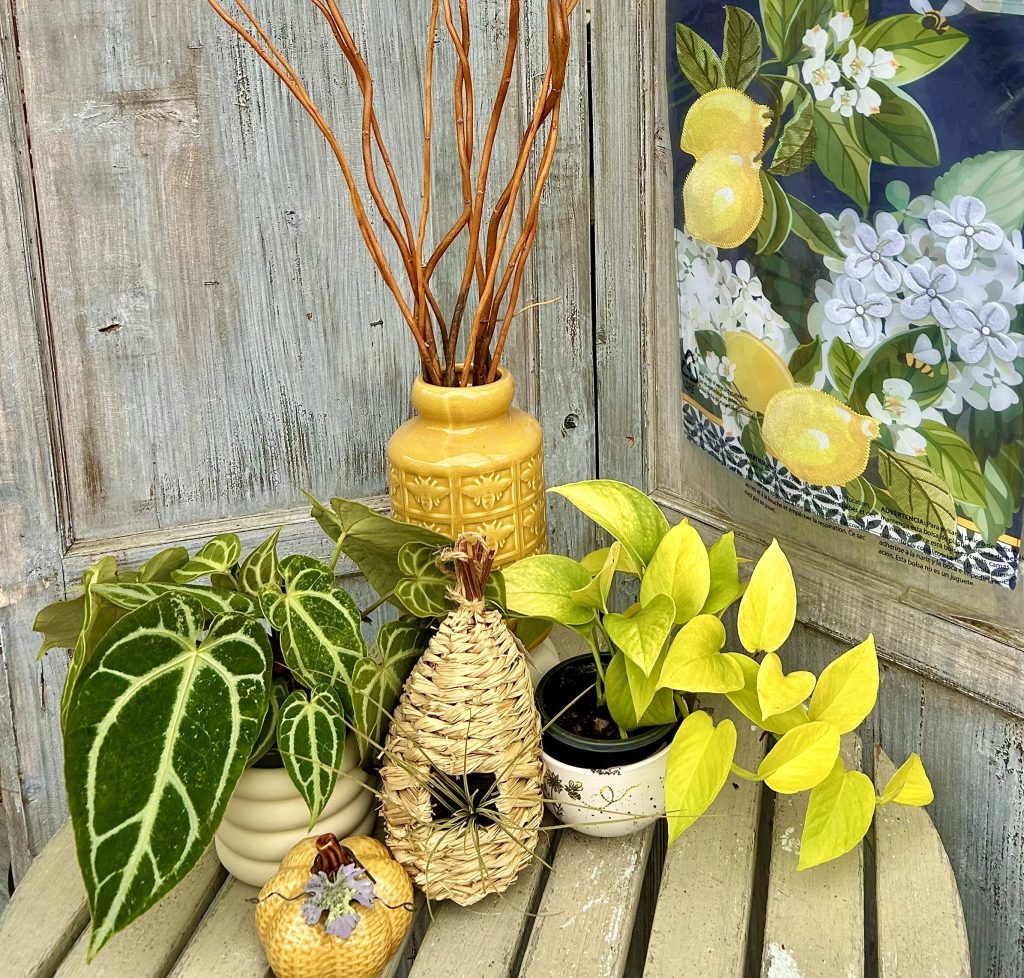
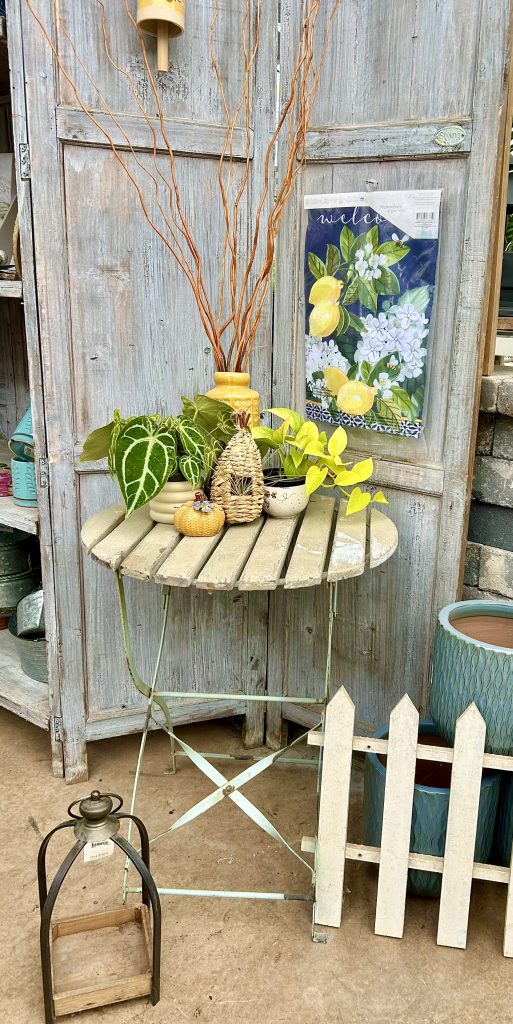
The Rule of Odds
Using an odd number of items (3, 5 or 7) is always more appealing. Why? For some reason, odd numbers are just more harmonious for us to take in. Designers and photographers call it the rule of odds.
Pick a Theme
Pick a theme like a common colour, a shape, a design or motif. Look for containers or items you can include that fit in with your theme.
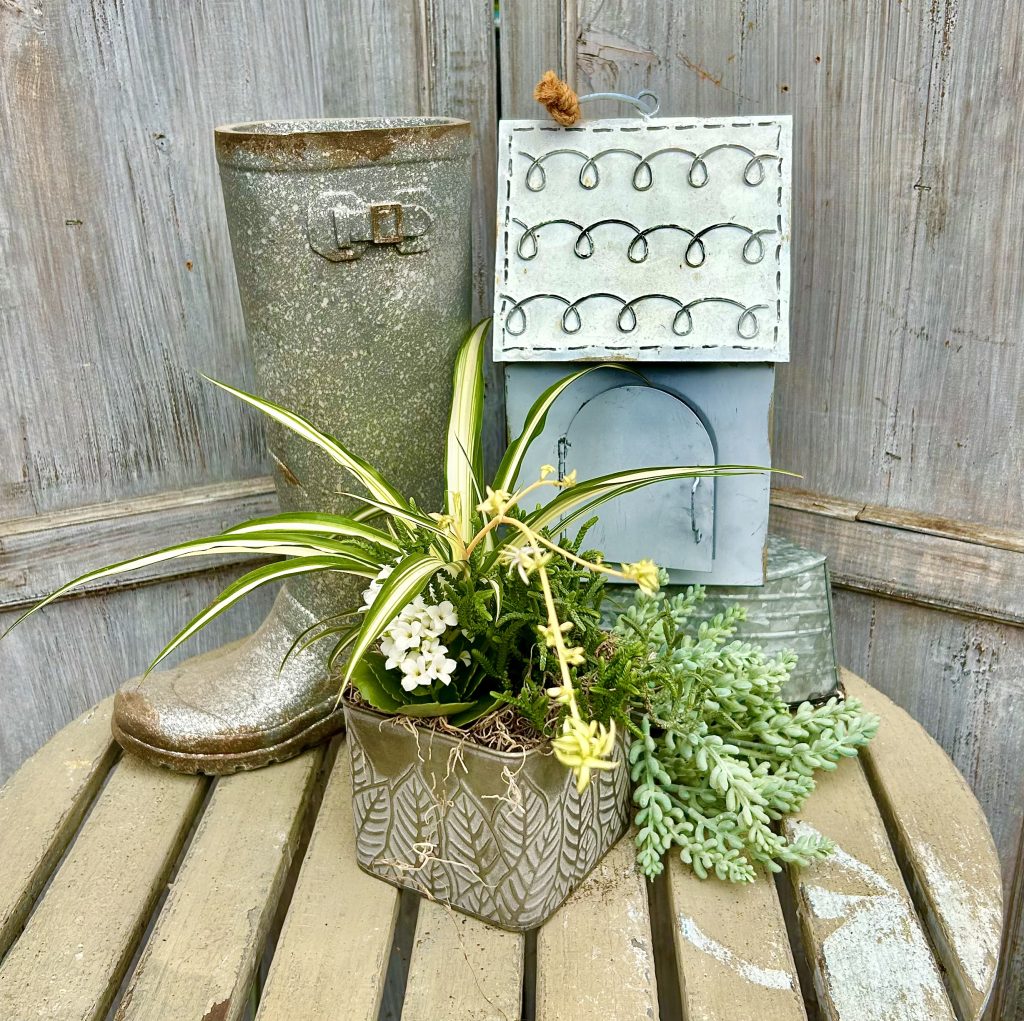
Like the arrangements we offer at Eising Garden Centre, include the following in your designs:
- a thriller like a beautiful vase or container, a tropical plant, or fresh or dried flowers
- a spiller like a plant, dried or silk leaves or moss around the base of containers
- and a filler like foliage plants, fruit, candy, mini pumpkins and gourds, or moss
Size and Scale
Scale is important! Keep the display short if it’s for the centre of a dining table so that guests can see each other across the table! Create taller displays if you’re decorating a corner table or a mantlepiece.
Light it Up
Adding light, including flameless candles or fairy lights, instantly brings warmth to any display.

Aromatics
Include scent: using plants like eucalyptus, or fruit like apples or oranges, and spices like whole cloves and cinnamon sticks all add a homey touch.
We would love to see what you create and hope this has sparked your creativity. Don’t forget to tag @Eising Greenhouses & Garden Centre on your Instagram and Facebook posts when you share your decorations online - we would love to see them!
By: Dave Zeldon and Ely Schweyer
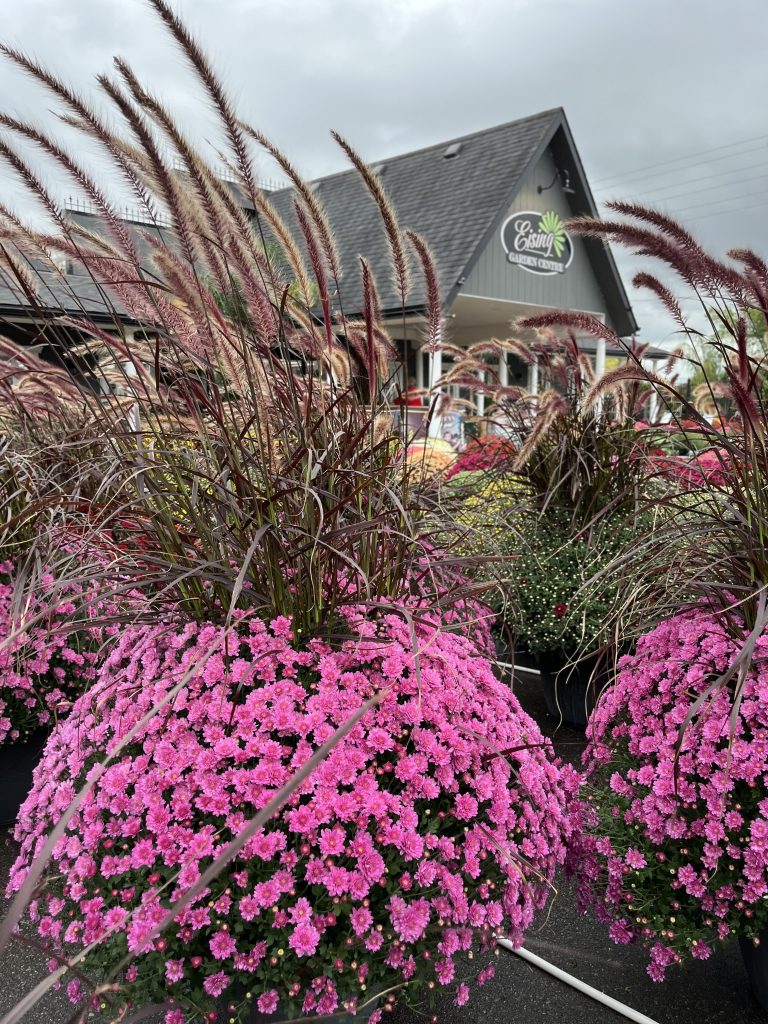
The classic fall-blooming Chrysanthemum varieties of burnt amber, golden yellow, and deep burgundy blooms have been enormously popular for years, and as each new fall season rolls around, there always seems to be new varietal introductions – like multicoloured pinks with the hues of sunrises - to enhance your front porch display of pumpkins, corn stalks, and gourds.
These robust plants will produce blooms for weeks, even in the coolest of autumn weather. Their hardiness even offers versatility when it comes to their display; some gardeners prefer less labour-intensive groundskeeping and leave them in their original store pots, whereas others prefer to transplant these flowers into larger planters, window boxes, or into flowerbeds to add an easy seasonal flair.
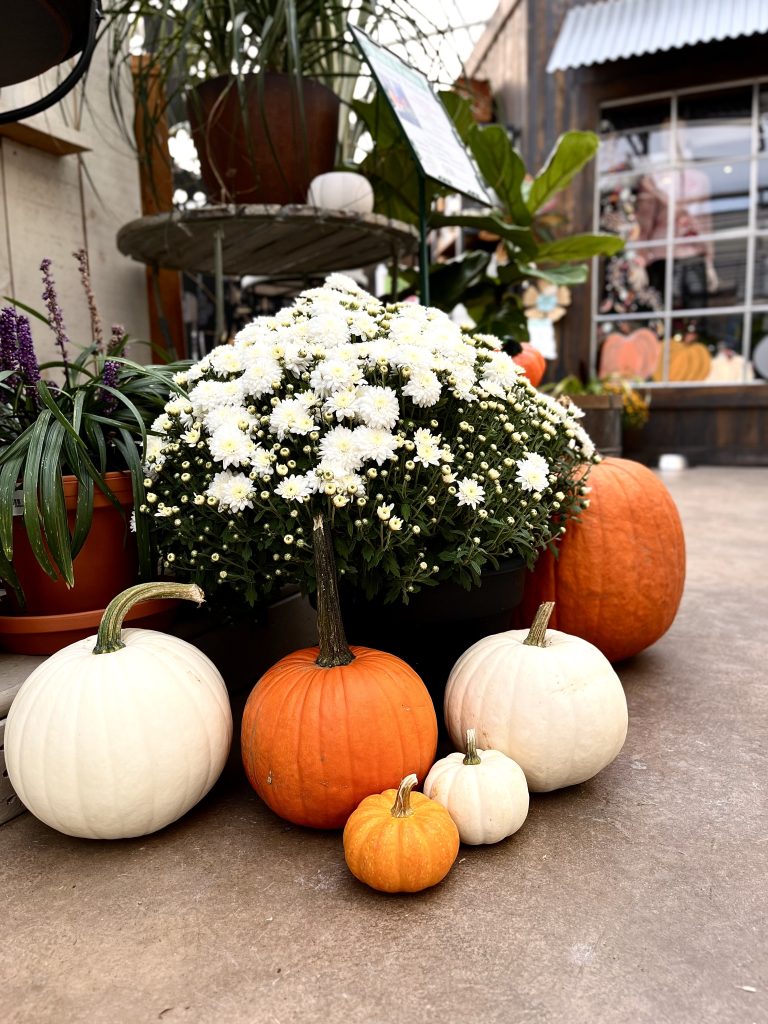

While resilient, these plants still need some TLC. Try these tips to keep your Mums looking fresh throughout the fall.
- Choose green plants with tightly closed buds. This way when your Mums do bloom, you will be able to keep those colourful displays for much longer.
- The Mums' foliage should have a deep green colour and lots of growth at the garden centre.
- Also, make sure the soil in the container is moist when purchasing your plant, as dried out Mums may have already suffered damage.
- You'll find out in short order that your potted Mums are very thirsty plants! Water them daily and make sure the soil remains moist. A shot of liquid fertilizer to the irrigation water once a week would be great as well.
Over-Wintering Mums
Modern Mum breeding is aimed primarily at creating plants that look good in their pots at their point of purchase, sacrificing the plant’s hardiness and performance for future years - meaning when home gardeners try to overwinter these big potted plants, they are not usually successful.

All Mum plants at garden centres are hardy, meaning that they are perennials in most climates. However, if these plants are put in the ground from August on, most won't make it through winter. The reason is that Mums planted late in the season are near, or at, the flowering stage, when their energy is focused into blooming, and they won't grow roots to sustain plants through the winter. This is why Mums should be planted in the spring if you want a perennial plant that has a spectacular autumn show!
If you really adore your fall purchase though, you can try to over-winter your Chrysanthemums in the basement or a dark, cold closet, after the first frost. Water well and place in an area where it is totally dark and 0°C to 10°C. The plants will hibernate for the winter if you keep their roots damp. Check the pots weekly.
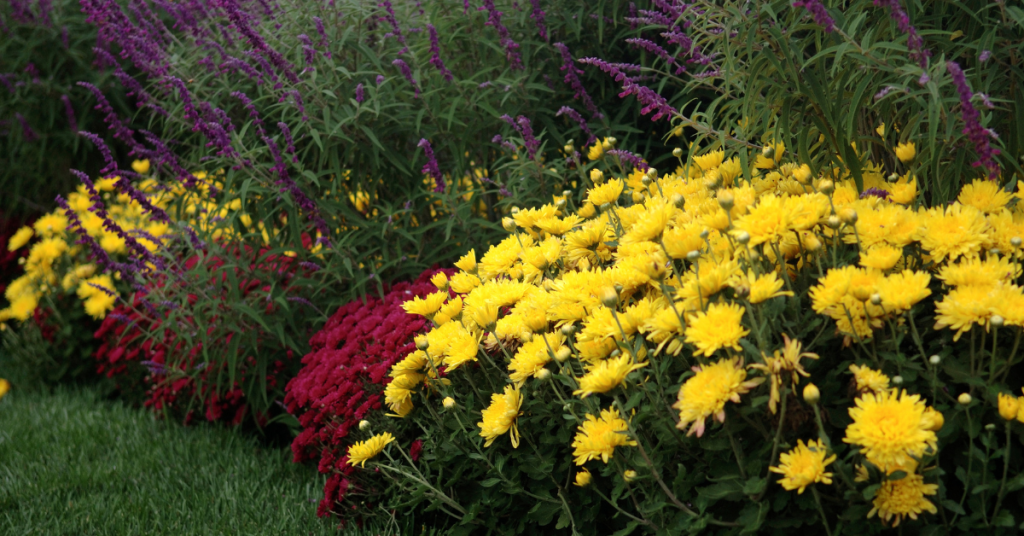
In the spring, gradually acclimate your Mum plants to light and plant them out in the garden after the last killing frost, remembering to pinch them twice prior to the first of August for a full, lush plant.
We hope this helps you to enjoy your Mums just a little bit longer! Use our Plant Finder to search for a sample of our Mum selection by your preferred colour. You can find many Mum varieties and more information at Eising Greenhouse and Garden Centre, please stop in for a visit this autumn!