By Dave Zeldon and Ely Schweyer
This is a question we hear daily during the spring, summer and, especially, the fall. Unfortunately, many homeowners do not see any adverse changes occurring in their trees until they look dead, or nearly so.
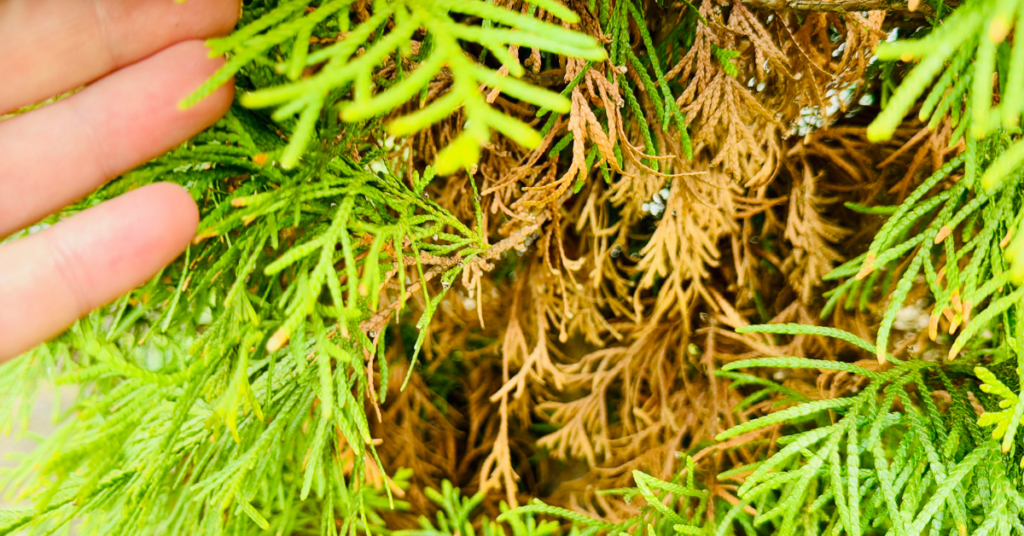
You Might Not Need to Panic Yet
The discolouration and dropping of evergreen needles are a natural phenomenon and the main cause of needle loss in the wild. Evergreen needles, as the name implies, survive for a lengthy period, and in fact usually have a life span of five to seven years on healthy trees, however, they must be shed. The needles first start to die in the central and lower part of the tree, and this change progresses upward over time. You will see spruce trees naturally lose needles as they get older.
Age is an important factor here in causing needle loss and branch death, however, in landscape plantings of coniferous evergreen trees, pests and disease are likely the major cause of needle loss and dying branches. If there is a sudden fall of a very large number of brown needles and leaves, this signals to us that there is something drastically wrong!
This can happen as early as a year or two after a tree is planted. This is especially true in Haldimand and Eastern Norfolk County where heavy clay soils predominate. Spruce trees, for example, do not grow well on clay soils.
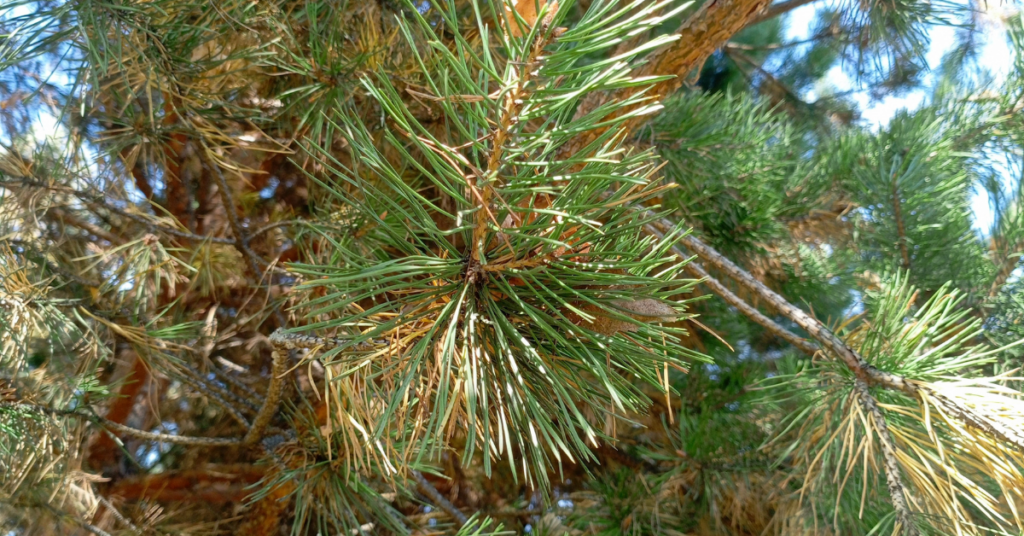
When You DO Need to Worry
Here are some of the more common problems, apart from natural aging that afflict spruce trees, the probable causes and ways of treating the problem.
☝️Unfortunately, these majestic trees, the most popular evergreen planted on our residential properties, incur many other pest and disease problems not dealt with here.
Symptom: Rusty brown needles that eventually fall.
Likely causes:
1. Internal fungus disease (called Cytospora or white blister canker). This creates cracks in the bark causing resin to drip and leave grey-white dripping streaks on the bark. The fungus also causes open wounds or blisters on tops of branches. These wounds can be greyish white or greyish blue in colour, eventually turning brown and black.
2. Feeding by spider mites which leave fine, poorly formed webs in the needles, especially near the ends of the twigs.
Best treatments:
1. Properly aerate and fertilize tree out to a distance of half its height in all directions, where possible.
2. Pressure wash thoroughly once a month with water only, all needles and branches as high as possible on the tree. Water pressure dislodges spider mites.
Symptom: Chewed up ends of twigs in June.
Likely cause:
Spruce bud worms which develop in the needle cluster that arises from a bud.
Best treatment:
Spray the biological pesticide, BTK (eg. Dipel), onto the entire tree when feeding is first noticed in early spring, to kill the young caterpillars.
Symptom: Black sooty mold covering twigs and needles.
Likely causes:
1. Spruce bud scales, ball-shaped insects, initially light brown in colour but eventually turning black. Often two to five scale balls cluster in one location on the twig; honey dew excretions from scales become infected with sooty mold.
2. An overhanging shade tree such as oak, maple or elm may have heavily infested leaves with aphids whose honey dew secretions become infected with sooty mold.
Best treatment:
1. Pressure wash tree using water only to dislodge young scales (called nymphs) in May and early June while they are in the crawling stage. Scale nymphs fall to the ground where they cease to be a threat to the tree.
2. Spray shade tree in early spring with insecticidal soap to control aphids. The problems of other coniferous evergreens such as pines, firs, cedars and junipers can usually be treated with correct diagnosis, though some diseases are lethal.
We hope these help you troubleshoot common issues often found in evergreen trees! For more information - and evergreens – visit Eising Greenhouse and Garden Centre! 🌲
By: Dave Zeldon and Ely Schweyer
Let’s get in depth about planting trees too deeply!
Sometimes homeowners find that their newly planted trees start showing signs of stress and become unthrifty a little while after planting, and soon their investment is altogether lost when the plant just dies. Often when we’re asked to inspect a tree in poor health, we know what to suspect.
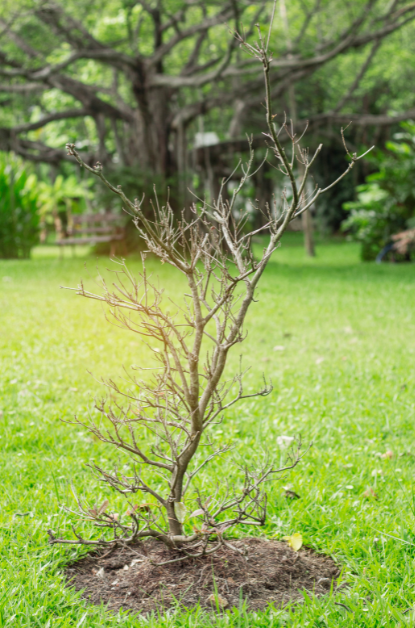
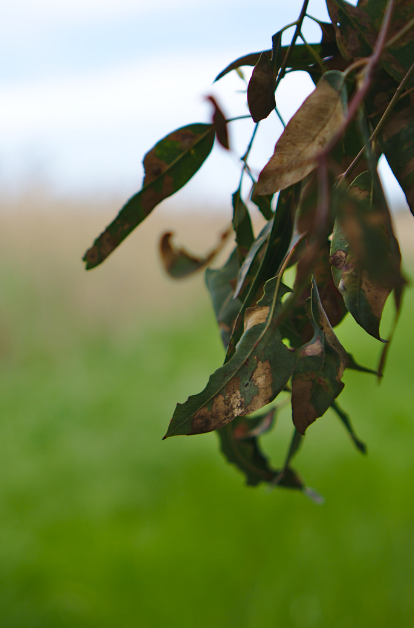
Although not readily apparent at the time of installation, the long-term effects of improperly placing the root system in the planting hole are substantial. The poor tree health that results manifests itself as reduced growth rate, atypical leaf size and colour, and increased disease susceptibility. Trees in really poor condition exhibit decay, cracks, and excessive deadwood. Sometimes trees show signs of stress within the first year of planting, but it usually takes several years for the problem to rear its ugly head.
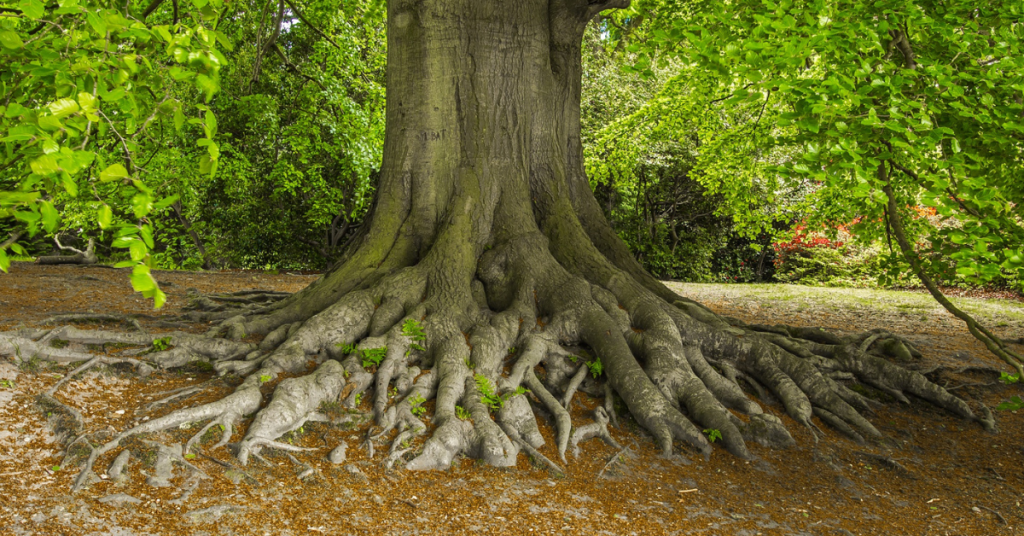
The most common reason? Many trees are simply buried too deeply causing the tree roots to decline in health, as they cannot get the vital oxygen from the air that they require to live.
Putting Down Roots
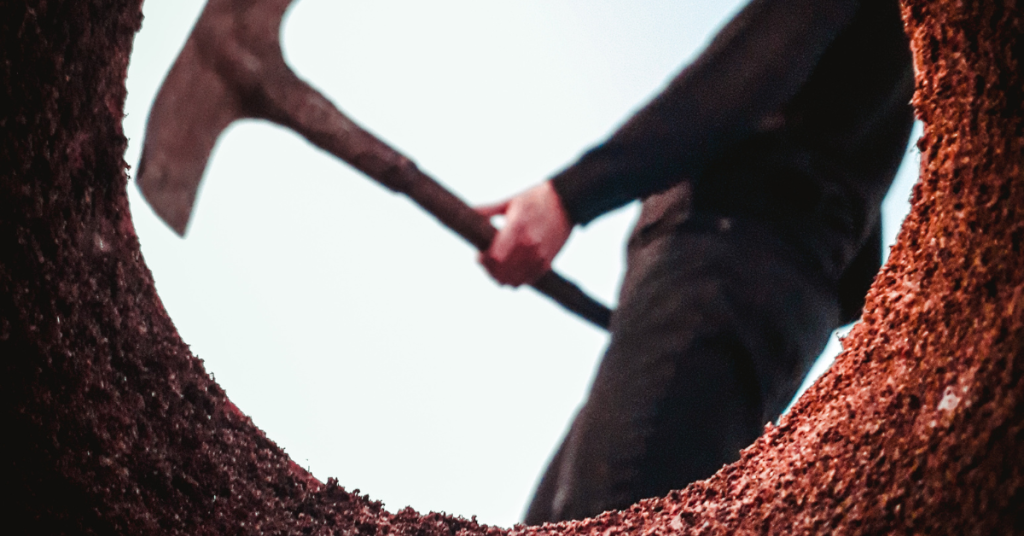
The width of the hole your tree will call home should be at least two times the diameter of the root ball, container, or in the case of bare root trees, the spread of the roots. This will provide the tree with enough worked earth for its root structure to establish itself.
For tree roots to grow vigorously, they require water, oxygen, and warmth. An oxygen level of 25% of the soil volume is considered good for root development.
At a 5% oxygen level, growth stops, and at 2%, roots decline and die.
Since tree roots naturally grow quite shallowly in the soil profile, buried root systems are unable to obtain adequate soil oxygen and water. As a survival response, trees work to get roots closer to the soil surface where there is a more reliable source of both. The energy that a newly transplanted tree should use to overcome normal transplant stress is instead used just to survive.
The tree expends its energy either by forcing its roots to grow upward or by creating totally new roots from dormant buds on the buried trunk, wasting all its prior growth. Some plants can survive being buried too deeply and live normal lives after developing a functional root system, others begin a long, slow decline of health resulting in either premature death or sudden failure during wind or ice storms. Let’s not risk it!
How Do I Know How Deep to Plant?
If you want your new tree to not only survive, but thrive, it needs the best start possible; it is very important that the root collar flare be visible after planting. The root collar is the part of a plant where the stem and root system meet, "flaring" where it transitions between the stem wood and the roots. Always make sure that the root collar flare is visible after planting. If settling occurs, reset the tree to the proper depth.
👉 Note: The backfilling soil should be a mixture of the original soil with composted manure or topsoil and bone meal.
But I Did Leave the Root Collar Visible… When I First Planted It
It has been observed that many times after a perfect tree planting, the homeowner then decides to build a raised-bed garden around the tree (thus burying the root collar flare – we’ve found root collar flares buried to 24 inches in mulch!) only to find that within a year or two, their young tree is dead or dying.

A common practice, often referred to as ‘volcano mulching,’ also contributes to this problem. In addition to subjecting trees to the problems associated with planting too deeply, heat from the composting mulch can literally cook a tree's trunk.
So, What is ‘Planting Proud’ Then?
The transplanting rules are amended if planting in the heavier clay soils where the practice of planting your new trees "proud" is advised. Planting proud essentially means that the root ball is left higher out of the ground level, producing a hilled effect. The soil that is normally used for back-filling is used to help to create a mound. Planting your trees this way in poorly draining clay soils prevents the ground water from collecting in an otherwise deep hole and drowning the roots of your new planting.
But, as a general rule, trees should be transplanted no deeper than the soil in which they were originally grown, and the soil level shouldn’t rise after planting. Two to three inches of wood chips is the optimum depth to mulch - and keep it an inch or two away from the trunk. If it is really desired to have the tree as a focal point in this newly built garden, then possibly a 3 foot well could be made around the tree to keep the root collar flare open to the air.
So, remember to give your tree a strong start and long life by not planting too deeply, but by leaving that root collar flare exposed! We hope these tips can help you encourage the longevity of your new tree. For more information - and trees - visit our Trees & Shrubs section at Eising Greenhouse and Garden Centre. We hope to see you soon!
For tomato lovers, picking a warm, flavourful tomato right off the plant for a sandwich, burger, or salad is a sure sign of summer! I eagerly await the day the first fruit begins to turn red, knowing that I am a day or two away from the first of many toasted tomato sandwiches for the season!
By the end of June, your tomato plants should be in the ground or pot, staked, and well on their way to producing fruit. But how do you keep your plants healthy all summer so that you can maximize your investment? Here are a few tips to help keep your tomato sandwiches coming until frost!

Water
Water early in the morning and water deeply. For tomatoes, consistent moisture is best.
Keep the water on the ground, not on the foliage. This is important because damp foliage can lead to diseases like early blight, which can ultimately cause the entire plant to die. Mulching around the base of plants will reduce the amount of water that can splash up onto the leaves. A soaker hose or drip line is also a great way to ensure that water stays on the ground, rather than on the plant.
Pruning
Reducing the amount of foliage on a tomato plant is necessary for a couple of reasons: good air flow, which reduces the chance of powdery mildew forming, and less foliage means that the plant can send energy to growing fruit instead of lots of leaves.
Follow these easy steps when you prune your tomato plants:
- Before you begin, remember to follow the rule for pruning - no more than ⅓ of a plant should be removed at a time.
- Use clean scissors or pruning shears to cut the leaves off the bottom of the plant. Remove any leaves that are touching the ground. These are particularly susceptible to mildew formation.

When fruit starts forming, remove the leaves from the bottom of the plant up to the first or lowest fruit.
Remove suckers ongoingly. What are suckers? When you look at your tomato plant, you will see the main stem that comes up from the ground, and branches of leaves that come out of the main stem. As the plant grows, suckers begin to form in the “Y” between the main stem and a branch of leaves. Suckers won’t harm a plant; they just make it very unruly and reduce airflow.

If your tomatoes are indeterminate (growing into a tall vine), remove the top of the plant when frost is forecasted at the end of the season. Topping the plant allows energy to ripen the fruit that’s already set, rather than being used to continue growing the vine.

NOTE: Some gardeners like to leave suckers on determinate tomato plants as this can increase the yield.
TIP: Tomatoes ripen from the inside out. That means that by the time you see fruit beginning to flush on the outside, the inside is already ripe. If you have competition for tomatoes from pesky critters, or when there’s a chance of frost in the weather forecast, you can pick fruit that has just begun to turn colour and leave it on the kitchen counter to continue to ripen.
Fertilizer
Using organic material is one of the best ways to feed your crop. A good layer of compost, 1-2 inches, in the spring when you’re planting and again in the fall each year is one of the best ways to improve your soil structure in the garden, and it also adds lots of nutrition.
If you missed this step when planting your garden, you can always add a layer of compost around your plants or use other organic fertilizers, such as compost tea, seaweed, worm castings, or fish emulsion.
Alternatively, you can use a fertilizer that’s formulated especially for tomatoes - these usually have a ratio like 3-4-6 or 4-7-10. Follow label directions for amounts and err on the side of caution. Using less fertilizer is always better than using too much, as an excess can stress the plant and make it more prone to disease.
Following these simple steps for tomato care will help to ensure your plants stay healthy and producing fruit, but if you should have problems, here are some great resources to identify tomato issues:
- Ontario.ca: Bacterial diseases of tomato: bacterial spot, bacterial speck and bacterial canker
- Guelph.ca: Healthy Landscapes – Plant List Native and Drought-Tolerant Plants
A well-chosen hedge can do a lot more than just look great—it can give you privacy, act as a windbreak, define garden spaces, reduce noise, or add year-round greenery. Whether you're looking to block out a view, frame your garden, or just create a lush backdrop, hedges are incredibly versatile.
One of the most underappreciated roles of a hedge? It makes everything in front of it—flowers, trees, garden art—look even better. Think of it as a green stage curtain that lets your garden stars shine.
Pretty much any shrub planted in a row can create a hedge, but the right plant depends on what you want it to do. Here are some of our top picks.
Evergreen Hedges - The Classic Green Wall
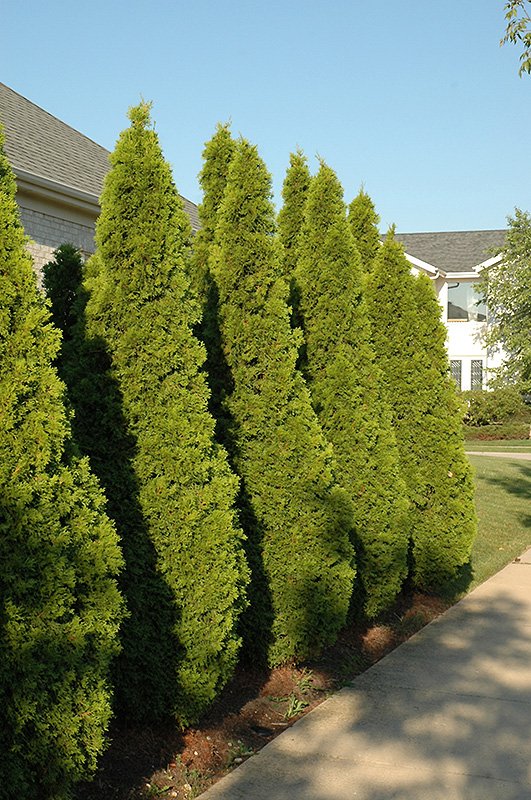
Botanical Name: Thuja occidentalis 'Smaragd'
Cedar is a favourite for a reason. With its dense, year-round green foliage and low-maintenance nature, it's ideal for privacy. Depending on the type, cedars can grow between 9–14 feet tall, forming a living wall that blocks wind, noise, and prying eyes. It also makes a lovely backdrop for all your other plants.
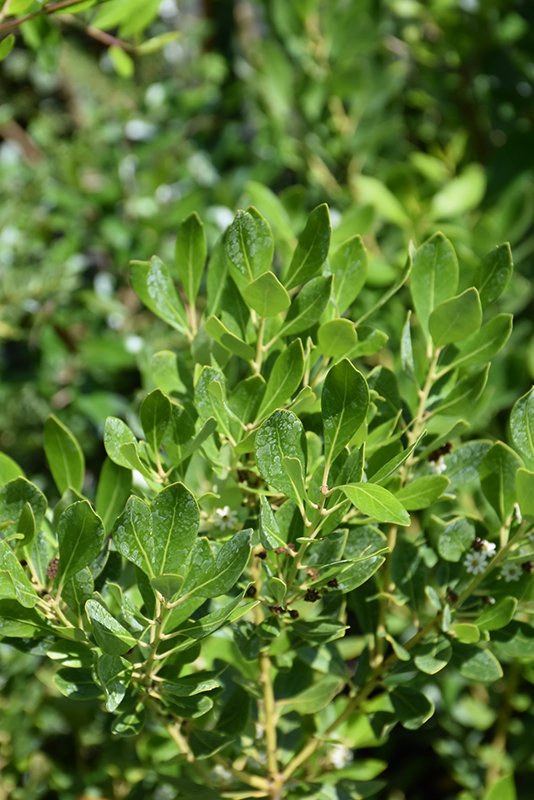
Botanical Name: Ilex glabra
Looking for a Boxwood alternative? Inkberry Holly is a great choice—especially if you're concerned about Boxwood Blight. This broadleaf evergreen keeps its dark, glossy green leaves all year and can grow up to 8 feet tall if left unpruned. It loves full sun, wet soil, and even acidic conditions. You can trim it to keep it neat or let it grow naturally—either way, it makes a fantastic border or garden divider.
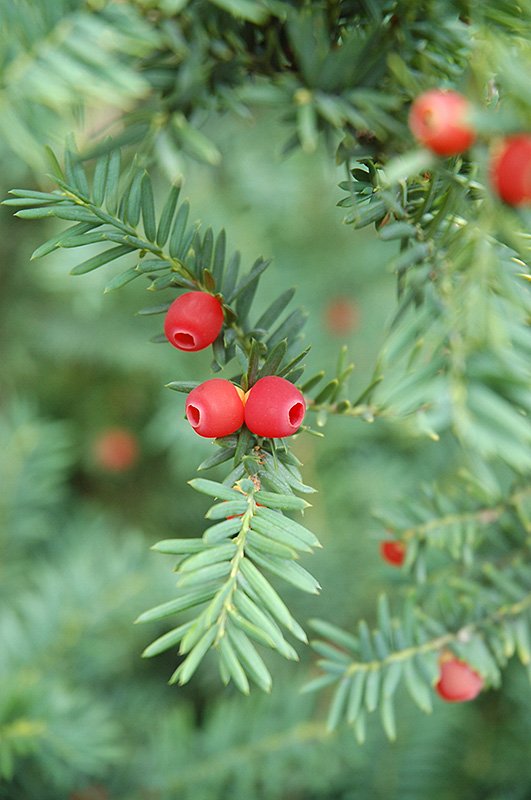
Botanical Name: Taxus cuspidata
With dense, dark green foliage that stays lush all year-round, Yews make excellent hedges for privacy, property lines, and garden backdrops. They’re incredibly versatile—leave them to grow naturally for a softer look or trim regularly for a crisp, formal shape. Yews respond beautifully to pruning, creating a smooth, tailored finish. Just be sure to wear gloves when handling them, and plant them away from children, pets and livestock, as all parts of this striking plant are toxic.
Deciduous Hedges with Drama and Colour
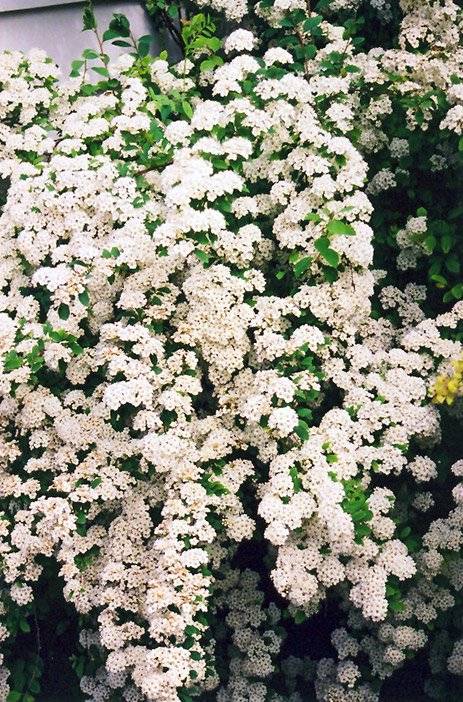
Botanical Name: Spiraea x vanhouttei
Graceful, arching branches that are completely covered in double-white blooms in the Spring make Bridalwreath Spirea a truly stunning hedge plant in the spring. After its spring show, small, glossy green leaves cover this plant until the fall, when its leaves take on beautiful autumn colours.
Bridalwreath Spirea grows to a mature height of 4-9 feet, can tolerate light shade as well as a variety of soil conditions and can be lightly pruned to shape. They are also deer-resistant.
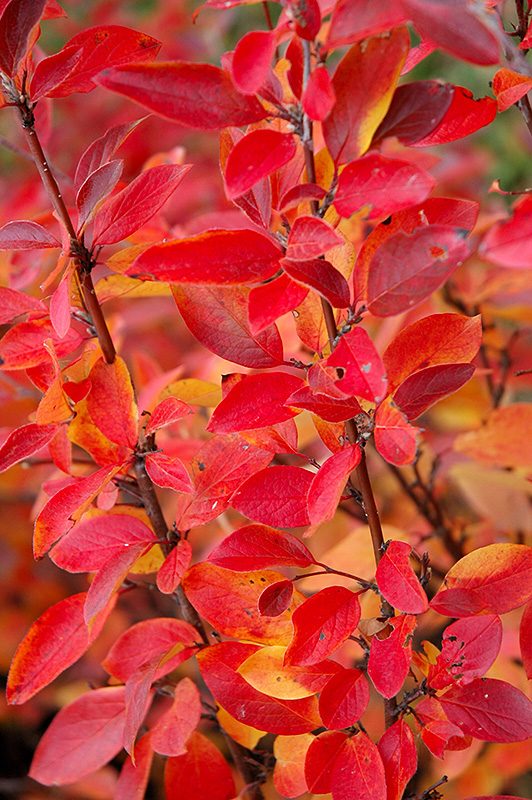
Botanical Name: Cotoneaster lucidus
Peking Cotoneaster may not be flashy, but there are lots of reasons to love this shrub. Its smooth, dark green leaves create a clean, structured look that works beautifully behind flowering plants or along fences. In fall, the leaves turn a fiery red, and black berries appear, which birds snack on through the winter. Growing 5–7 feet tall, this shrub is also a great choice for wind protection and bird habitat.
Still not sure which plants to choose for your hedge? Stop in to see us at Eising Garden Centre and talk to one of our tree and shrub specialists - Zach, Sandy and Donna, or contact one of our landscape design specialists, Emily or Lucas. We’re here to help!
Pruning is an essential part of gardening. Essential, but a little intimidating at first because it’s a broad subject. That said, there are some basic rules that apply to most trees and shrubs that will get you started.
There are a number of reasons to prune; the most obvious is for safety, to keep a branch from doing damage or harm by falling or rubbing against something like a building or another tree. Other important reasons include:
- Removing dead, diseased or damaged wood
- Shaping to make a plant bushier, reduce the size and bulk, or slow down growth
- Thinning to increase light penetration and airflow and reduce the possibility of disease
- Rejuvenation to encourage growth, blooming and fruit
Correctly pruning trees and shrubs can help with everything listed above and, most importantly, help maintain the health of your plants. Proper techniques and timing ensure the best results.
The Right Tools
You may need fewer tools to prune than you think!
Secateurs or hand pruners work well on smaller branches.
Loppers or lopping shears have longer handles for more leverage and are ideal for medium-sized branches.
A pruning saw works best for larger branches.
Electric or manual hedge shears are best for cutting a tidy wall of foliage like hedges and shaped evergreens.
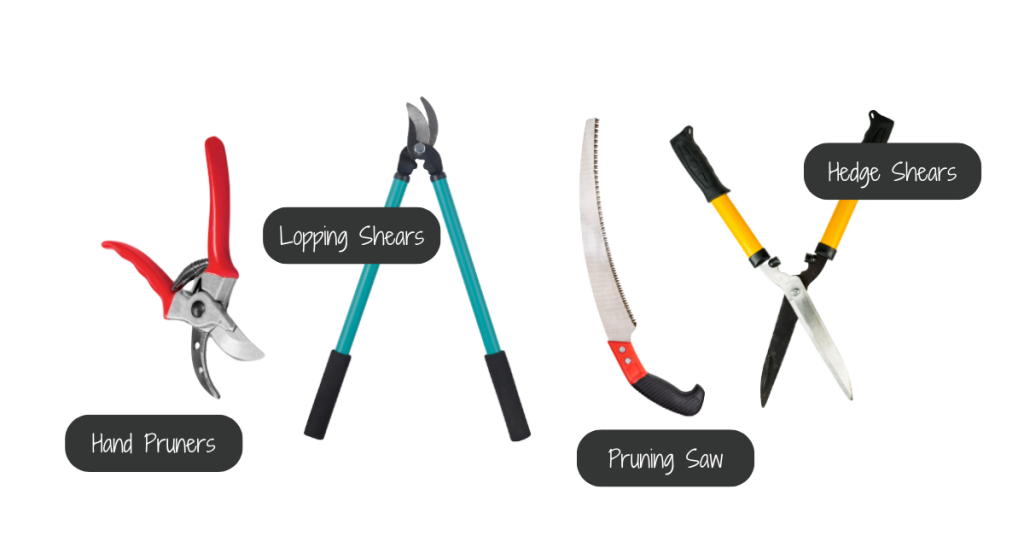
The key with garden tools is to make sure they’re sharp and sterile. This can prevent the spread of disease. Clean tool blades with rubbing alcohol after trimming each branch.
When to Prune
Pruning timing requires some research as it depends on the species of the plant and the result you’re aiming to achieve. For example, some trees may be best pruned in the winter while they’re dormant and buds have not yet appeared. To shape a tree, it’s easier to prune before the leaves have formed so that all of the branches can clearly be seen. Pruning early in the gardening season will invigorate the tree. Conversely, pruning after the tree has formed leaves in June will tend to slow down growth.
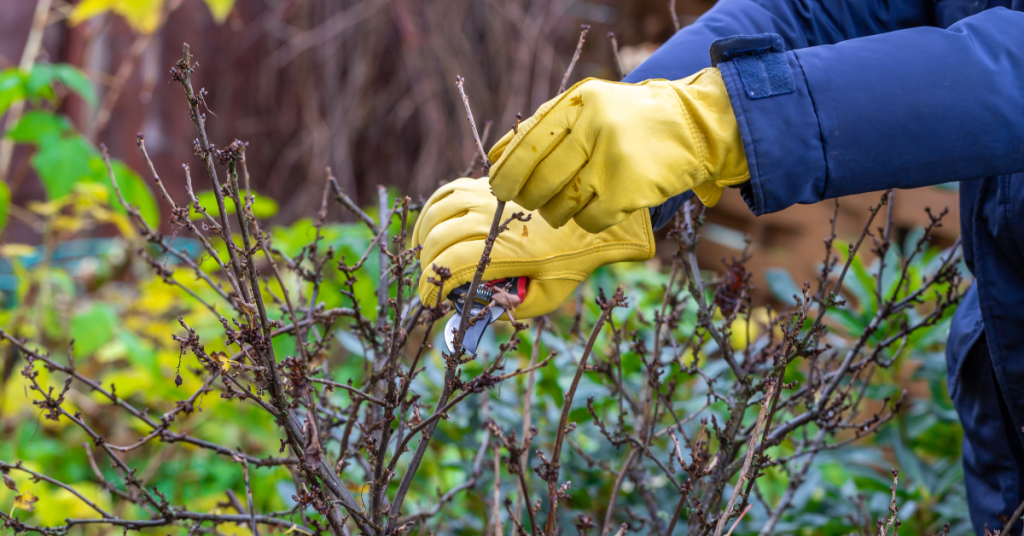
When pruning flowering trees and bushes, there are other timing considerations. Some ornamentals bloom on branches that grew the previous year. Pruning those branches too early will result in fewer or no blooms. For these plants, it’s best to wait until after they have bloomed.
If you’re unsure about pruning timing for your tree or shrub, this is a fairly comprehensive list to use as a guide. We have also linked other resources below this article.
In general, late fall or early winter is not the time to prune any plant as it encourages new growth, which may be damaged by colder weather.
Pruning Techniques
While some trees may require specific care (pines, for example), here are the basic techniques for pruning trees and shrubs. It’s a good idea to know these basics before you head out to begin cutting branches.
Examine the branch, buds and shoots before cutting. Cutting above a bud facing away from the trunk of the tree will have the branch continue to grow in that direction.

Cut on a 45° angle just above a bud whenever possible. Keep your cut above the lowest bud (the bud closest to the trunk), or the branch will die back.
Before removing a large branch, cut ⅔ off the end of the length to reduce the weight. Once the bulk of the branch has been removed, then cut the rest of the branch away from the trunk by cutting close to, but not into, the “collar” of the branch where it meets the trunk of the tree.

Now You’re Ready to Begin Cutting!
Now that you know the techniques for pruning, where do you begin? Here’s a logical set of steps to follow:
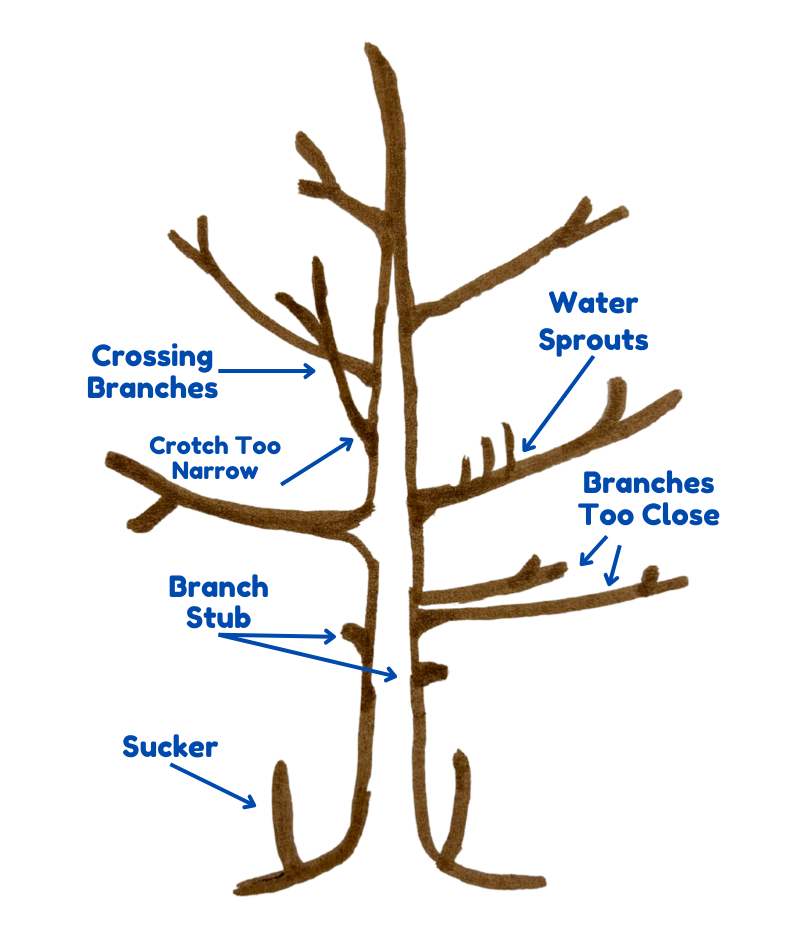
1 - Remove any dead or diseased wood
2 - Remove any branches that are crossing and rubbing together. For a shrub that’s too crowded, remove the thickest branches down to the ground first
3 - Remove water sprouts
4 - Stand back and observe the shape of the tree. If anything is not pleasing about the look (lopsided growth or branches growing too close together or at a sharp angle to the trunk, for example), begin removing or trimming back one unsightly branch at a time. Observing the shape between each cut
5 - Remove any suckers or stubs
Follow The ⅓ Rule!
Once you start, pruning can be fun, but be careful not to get too carried away. Trim up to ⅓ off of an established plant (not a newly transplanted tree or shrub) in one growing season - maximum. Cutting off too much can stress the plant and impact its overall health.
Lastly, know that you can always hire a certified arborist if the task is too much or the tree is simply too large!
Other Resources:
- City of Moose Jaw: Pruning Trees
- Landscape Ontario: Pruning Shrubs and Evergreens
- Ontario Government: Pruning Fruit Trees
- University of Georgia: Pruning Ornamental Plants
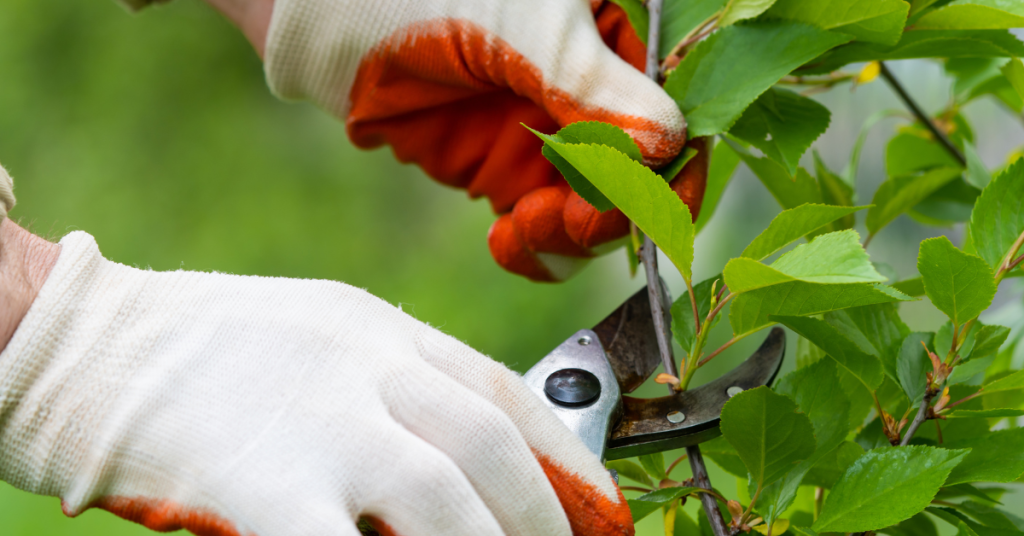
Ah, the smell of fresh greenery! There’s something extra special about decorating for Christmas with fresh evergreen branches.
The holidays are the best time to bring the outdoors in. After all, what better time is there than when we’re longing for some green in a winter world that’s predominantly brown, or snowy white? Or, you may simply be searching for the nostalgic smell and sight of fresh holiday decorations.
In southern Ontario, evergreens last the longest outdoors during our winters. But how do you keep your pine, cedar, fir and spruce branches looking fresh and lovely all season long? Give these tips a try.
Start Fresh
Whether you are making decorations, or buying them, start with freshly harvested branches.
Cut each stem on an angle to increase the water absorption rate, and place the stems in a bucket of water for several hours before using them. As you’re cutting each branch, be sure to check for any pests first.
At this point, your greens are ready to arrange into wreaths, swags, garlands, containers or whatever you’re making.
For indoor arrangements, oasis or floral foam that has been soaked in water, and secured in your container creates a solid base to work with. Fill outdoor urns or containers with moist soil, or a combination of oasis and damp soil to insert the branches into and hold them in place. Both methods will help to keep your plant material hydrated.
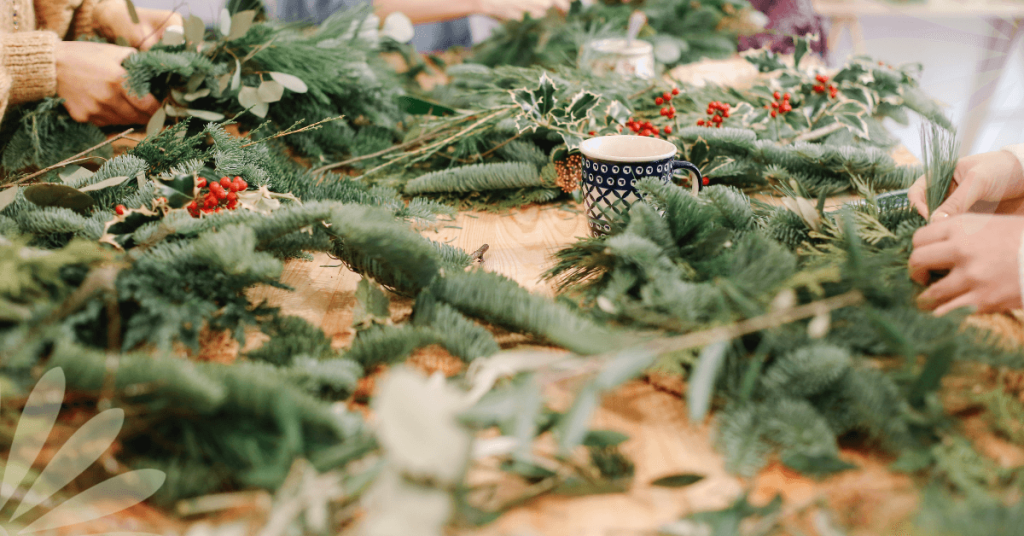
Prevent Dehydration
Before adding decorative elements, lightly mist your evergreen arrangements, wreaths, swags and garlands with an anti-dessicant spray. Doing this provides a protective barrier and reduces moisture loss.
Placement and Care
Keep outdoor arrangements sheltered from direct sunlight and strong winds if possible. Likewise, keep indoor arrangements away from sunlight, and heat sources like vents and radiators.
Evergreens can dry out very quickly. Keep arrangements watered (for outdoor arrangements, water when the soil is not frozen), and mist garlands, swags, and wreaths with water frequently. Avoid overwatering though! It’s a good idea to water or mist in the morning so that any excess moisture evaporates or can be drained if not absorbed after about an hour.

Following these steps should keep your decorations looking fresh through the holiday season and beyond!
If you would like more help with homemade decorating ideas, check out our DIY Fresh Evergreen Decor guide and our Holiday Home Decor Ideas.
Or, stop by and see us at Eising Greenhouses and Garden Centre in Simcoe for inspiration and choose from our selection of:
- fresh greenery branches
- undecorated arrangements
- decorated arrangements
- Poinsettias
- Christmas Cactus
- Kalanchoe
- Amaryllis
- Paperwhites and more!
If you’re heading to a holiday party, we have lots to choose from as gifts, or items to add to your arrangements, or to fill a spot in your home that needs a little extra holiday cheer!