
By: Dave Zeldon and Ely Schweyer
Most experts agree that we shouldn't bother bringing in our favourite summer potted plants for the winter and that we should buy new again the next season. But this seems to go against our sensibilities after paying good money earlier in the season. Why not try to save that bay tree, those Rosemary, and French Tarragon containers, as well as expensive Phormium, Mandeville, Passionflower, and Jasmine plants?
The secret to indoor survival for summer plants is to slow down their growth during the winter, so they’re ready to be put outside again once all the danger of frost has passed. How? A few weeks before fall frosts are expected, gradually introduce plants to life indoors by moving them inside (to a quarantined spot*) for half a day, working up to a full day over a week or so. Don't wait until nighttime temperatures are only slightly above freezing as the plants may go into shock and drop leaves!
How to Keep These Guys Comfy During the Winter Months?
- It is suggested that you should prune back excessive growth and re-pot with new lighter growing media.
- Place them in the sunniest location you have and then water sparingly but regularly over the Winter.
- Raising humidity by using a humidifier helps too.
- Resist the urge to fertilize these plants until just before you reintroduce them to outdoor living.
- Perhaps just for fun, you could repot them into the appropriate seasonal pots and planters!
It Seems They Brought Others in With Them - And They're Not Nice House Guests
*Before long, you may notice some unwanted guests, such as thrips and spider mites, on and around your precious plants as their natural predators are no longer present to keep their populations at bay. In many cases, it may be too late, and your plants may have to be discarded before the Holidays, but that’s not always the case!
Common problems that make themselves apparent indoors would be the brown soft scale insect, whiteflies, mealybugs, aphids, spider mites and most often, fungus gnats (those pesky little black flies).
Fungus gnats are considered to be the most common nuisance in houseplants. Sometimes their sheer numbers just hovering around an attractive plant take away from its appeal.
Basic Fungus Gnat Control Measures:
The fastest and easiest method of control is to catch the flying adults with yellow sticky cards. The large cards can be cut into little strips and mounted onto little wooden splints (popsicle sticks) then placed around the base of the plant out of the line of sight.
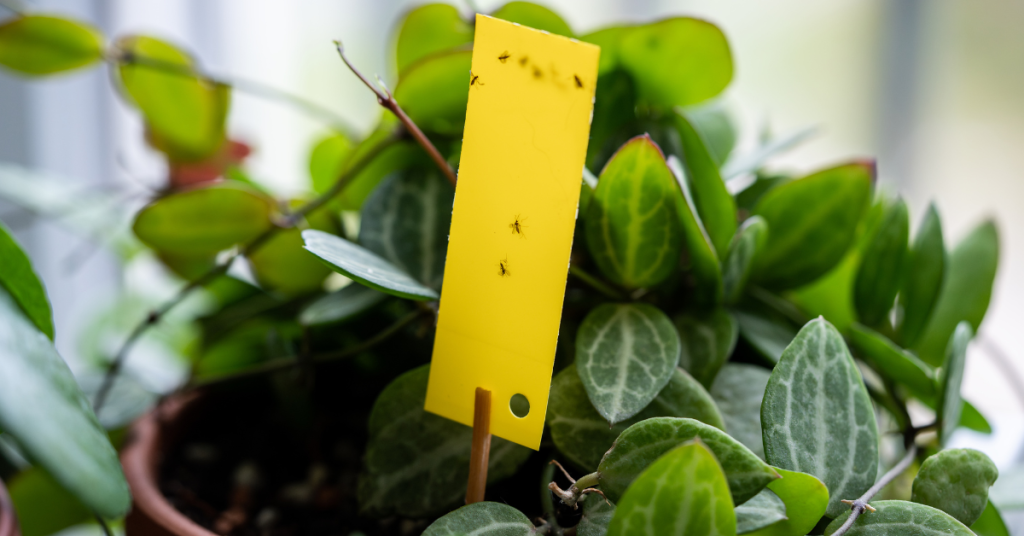
The chances are that the adults have already deposited eggs in the growing media (soil) of the plant as it is rich in organic matter, so we can disrupt its life cycle by:
- Subirrigation - water your potted plant from the bottom by adding water to the saucer it is sitting in. This will dry out the soil surface making it uninhabitable for the hatching larvae.
- Trapping larvae - If the surface soil it already very wet, try placing a few potato discs or slices on the surface of the soil. This will attract the larvae as they migrate to the potato to feed. Simply replace the discs every five days or so with fresh slices to eliminate the next generation of adults.
- Inoculating the soil with beneficial nematodes. Most garden centres will carry the Guardian line of beneficial nematode products.
We hope this helps your plants enjoy your winter abode as much as you do this season, for more information - and plants – visit Eising Greenhouse and Garden Centre!
Dealing with water restrictions or choosing to conserve water? You’re not alone. Many gardeners in Norfolk County are facing the challenge of keeping gardens thriving with less water. The good news? A lush, colourful garden is still within reach—thanks to drought-tolerant perennials.
When we think of drought-tolerant plants, cacti might be the first thing that comes to mind. But there’s a surprising variety of beautiful, hardy perennials that can handle our region’s dry spells—no desert landscape required.
While these plants do need regular watering when first planted, once established, they’re low-maintenance and well-suited to Southern Ontario’s climate, including periods of limited rainfall.
Full Sun Ground Cover
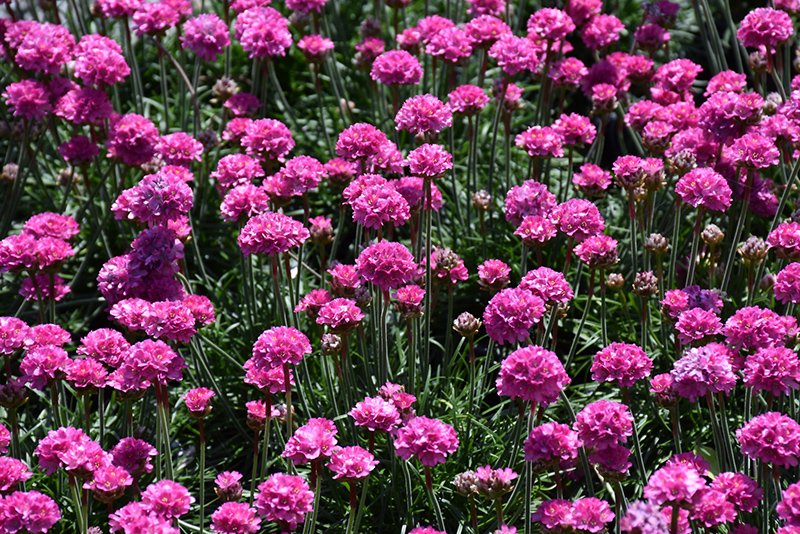
Botanical Name: Armeria maritima 'Dusseldorf Pride'
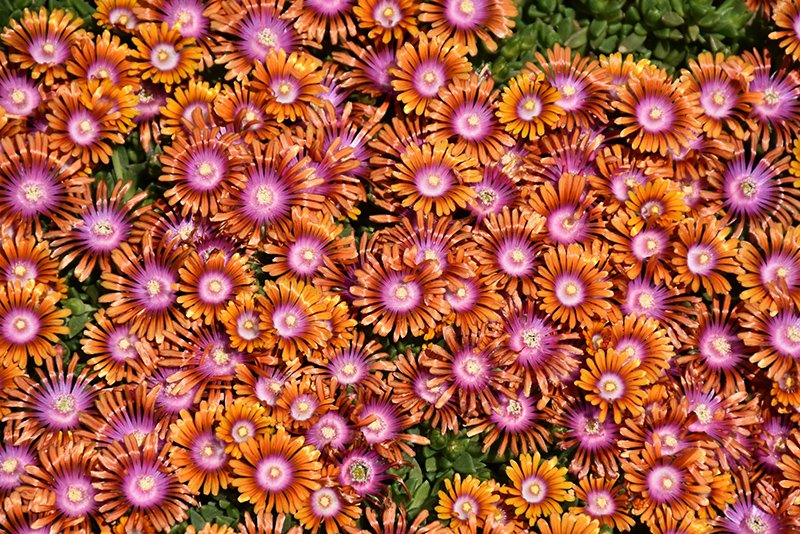
Botanical Name: Delosperma 'Fire Spinner'
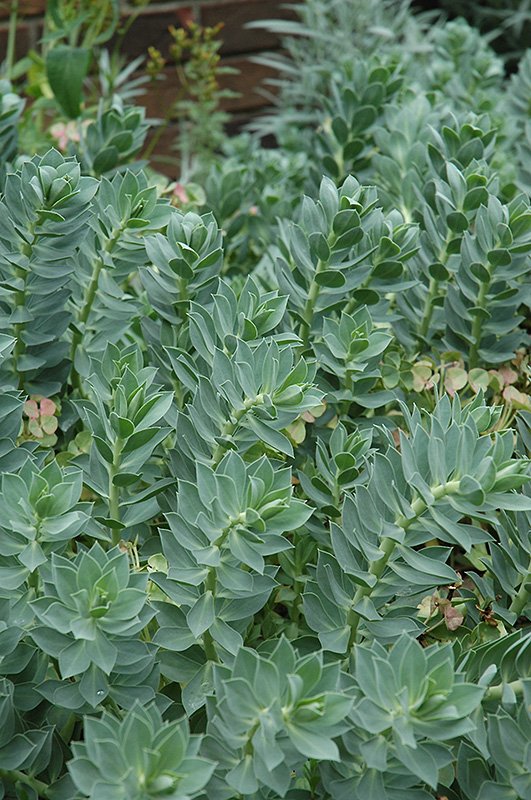
Botanical Name: Euphorbia myrsinites
- Candytuft (Iberis sempervirens)
- Catmint (Nepeta x faassenii)
- Hardy ice plant (Delosperma nubigenum)
- Hens and chicks (Sempervivum tectorum)
- Moss phlox, creeping phlox (Phlox subulata)
- Pincushion flower (Scabiosa japonica var. alpina) (S. ‘Butterfly Blue’)
- Pinks (Dianthus alpinus)
- Rock cress, wall cress (Arabis species)
- Rock rose, sun rose (Helianthemum hybrids)
- Spurge (Euphorbia myrsinites) (E. polychroma)
- Stonecrop (Sedum acre) - dwarf varieties
- Thrift, sea pink (Armeria maritima)
- Thyme (Thymus species)
Full Sun, Medium to Tall Plants
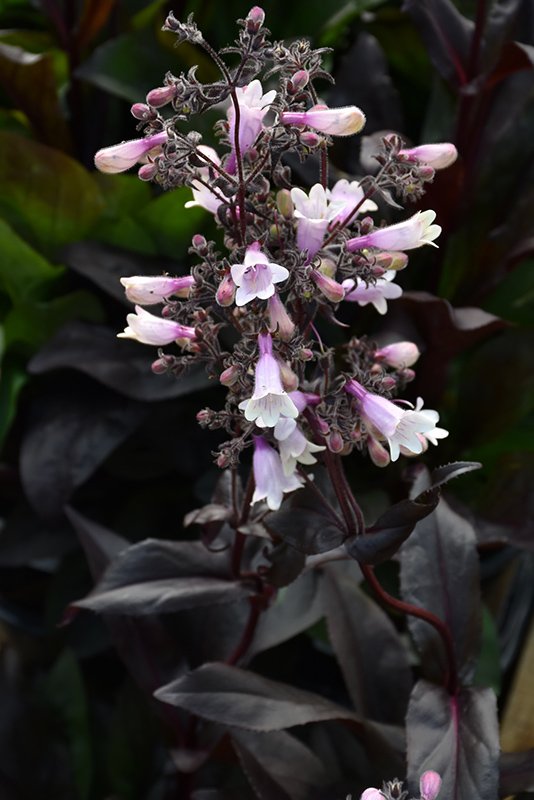
Botanical Name: Penstemon 'Dark Towers'
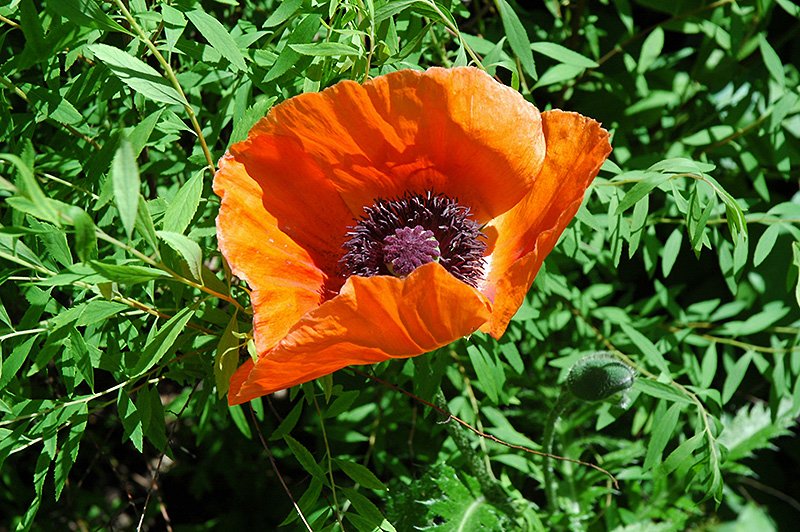
Botanical Name: Papaver orientale
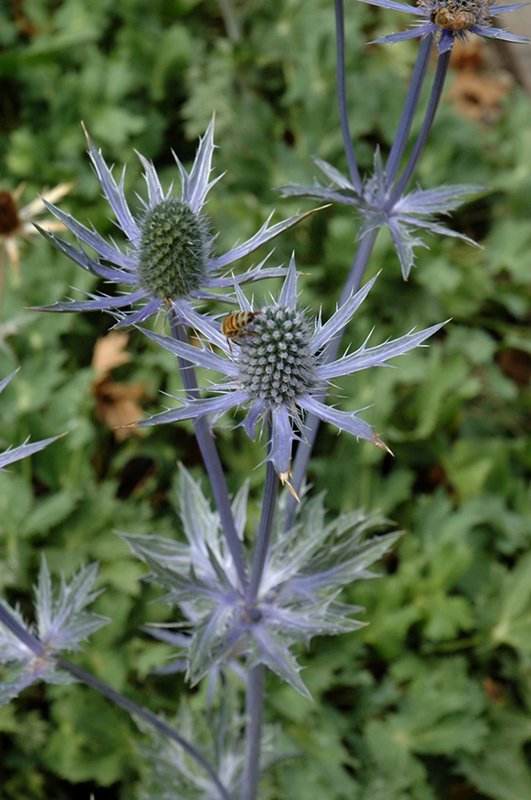
Botanical Name: Eryngium 'Big Blue'
- Beard-tongue (Penstemon digitalis) – Native
- Bergenia (Bergenia crassifolia)
- Black-eyed Susan (Rudbeckia hirta) – Native
- Blanket flower (Gaillardia x grandiflora)
- Butterflyweed (Asclepias tuberosa) – Native
- False indigo, wild indigo (Baptisia australis)
- Hairy penstemon (Penstemon hirsutus) – Native
- Lanceleaf coreopsis (Coreopsis lanceolata) – Native
- Lavender (Lavandula angustifolia)
- Orange coneflower (Rudbeckia fulgida ‘Goldsturm’)
- Perennial cornflower (Centaurea montana)
- Poppy (Papaver species)
- Purple coneflower (Echinacea purpurea)
- Prickly pear cactus (Opuntia compressa) – Native
- Russian sage (Perovskia atriplicifolia)
- Salvia (Salvia nemerosa hybrids)
- Sea Holly (Eryngium species)
- Silver sage, wormwood (Artemisia ludoviciana)
- Threadleaf coreopsis (Coreopsis verticillata) – Native
- Yarrow (Achillea millefolium)
Full Sun Grasses
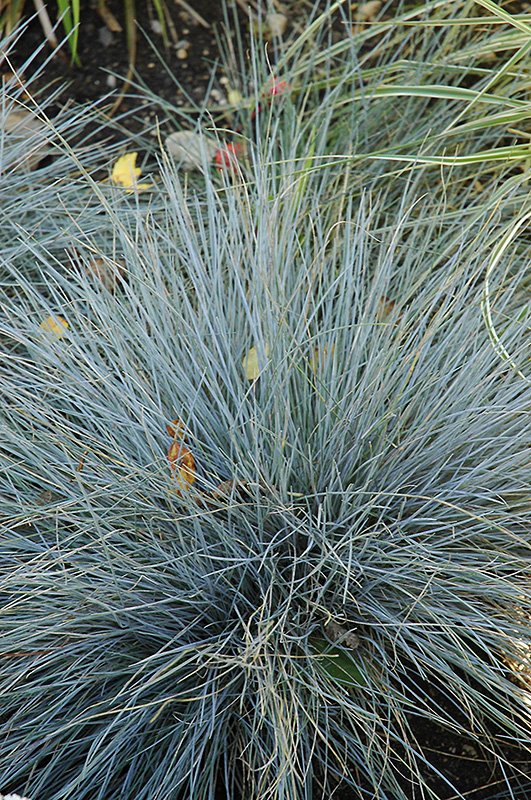
Botanical Name: Festuca glauca
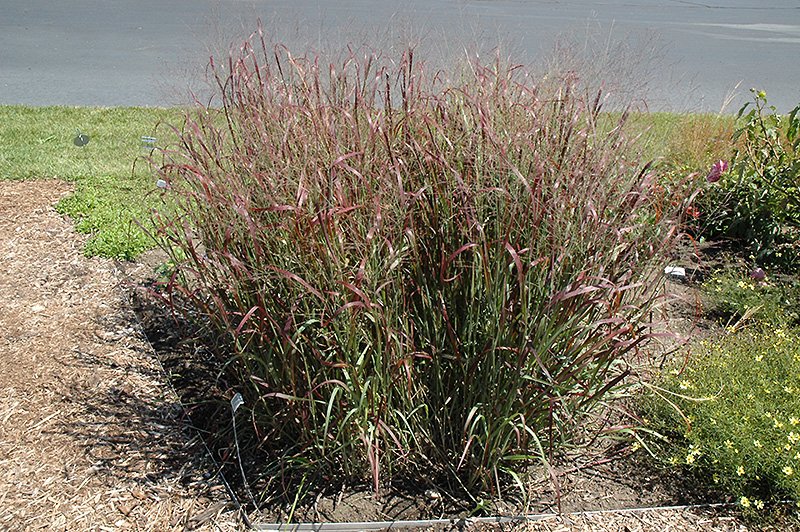
Botanical Name: Panicum virgatum 'Prairie Fire'
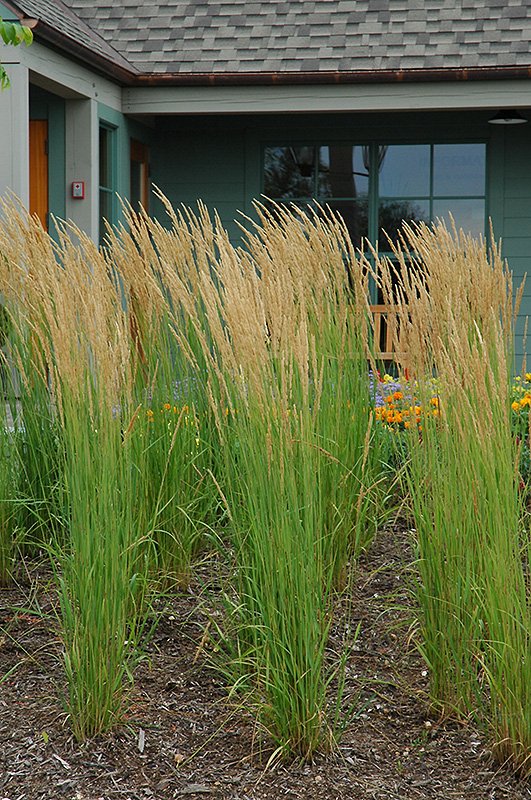
Botanical Name: Calamagrostis x acutiflora 'Karl Foerster'
- Big bluestem (Andropogon gerardii) – Native
- Blue fescue (Festuca glauca)
- Blue oat grass (Helictotrichon sempervirens)
- Feather reed grass (Calamagrostis x acutiflora ‘Karl Foerster’)
- Little blue stem (Schizachyrium scoparium) – Native
- Switch grass (Panicum virgatum) – Native
Groundcover for Shade
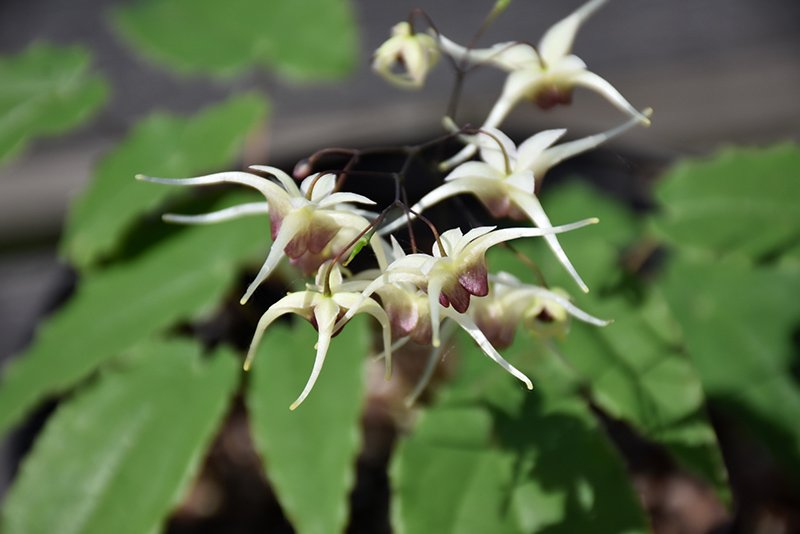
Botanical Name: Epimedium 'Domino'
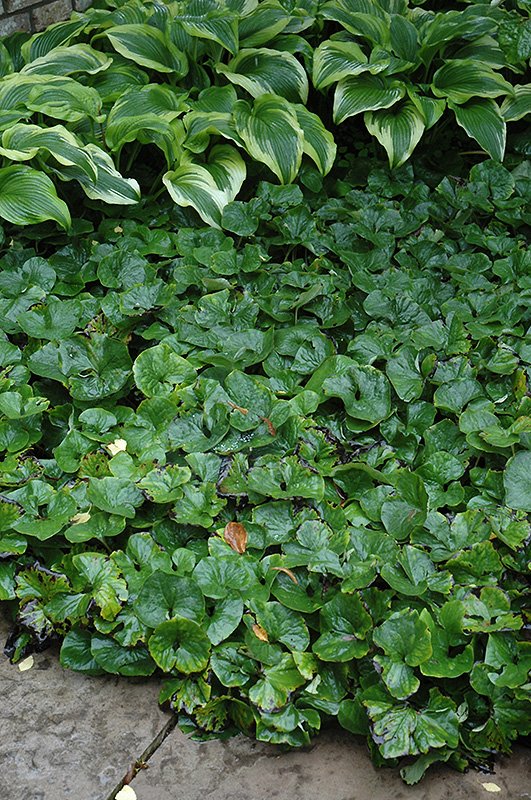
Botanical Name: Asarum canadense
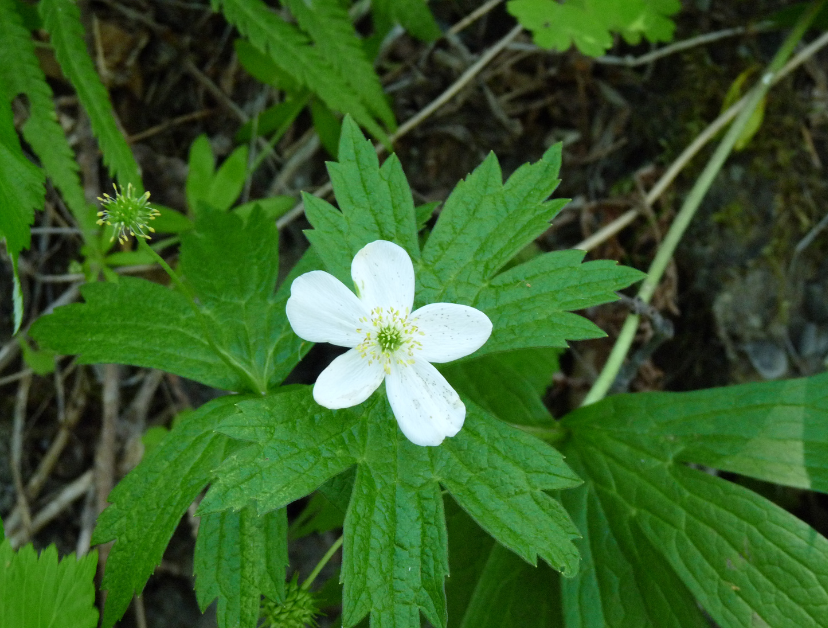
Botanical Name: Anemone canadensis
- Barrenwort (Epimedium hybrids)
- Bigroot geranium (Geranium macrorrhizum)
- Canada anemone (Anemone canadensis) – Native
- Creeping phlox (Phlox stolonifera)
- Sweet Woodruff (Galium odoratum)
- Wild ginger (Asarum canadense) – Native
- Woodland phlox (Phlox divaricata) – Native
Medium to Tall Plants for Shade
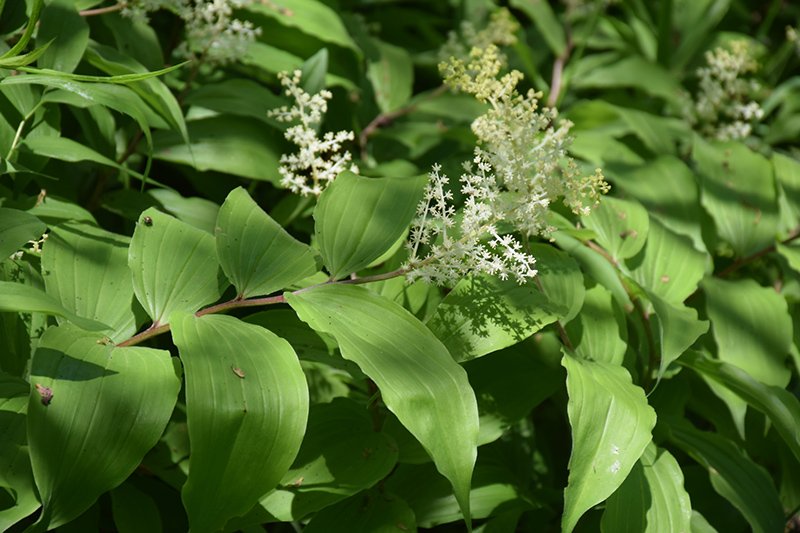
Botanical Name: Maianthemum racemosum
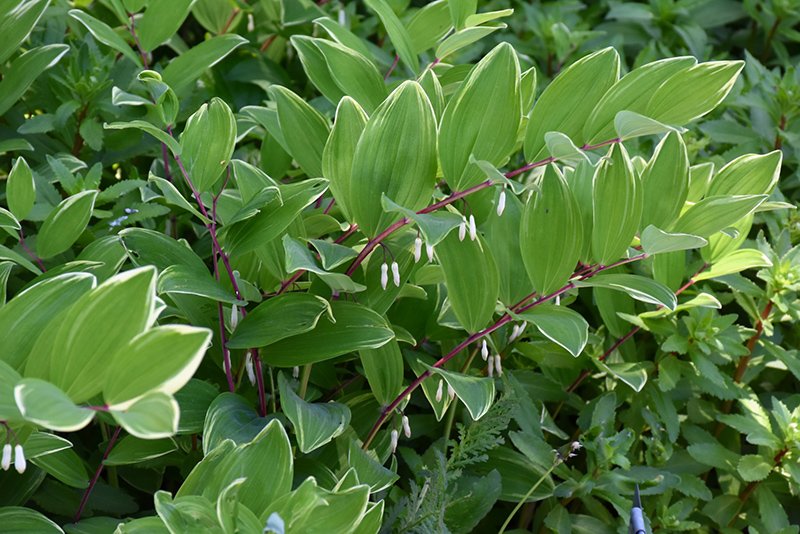
Botanical Name: Polygonatum odoratum 'Variegatum'
- False Solomon’s seal (Maianthemum racemosum) – Native
- Solomon’s seal (Polygonatum biflorum) – Native
Ferns for Dry Shade
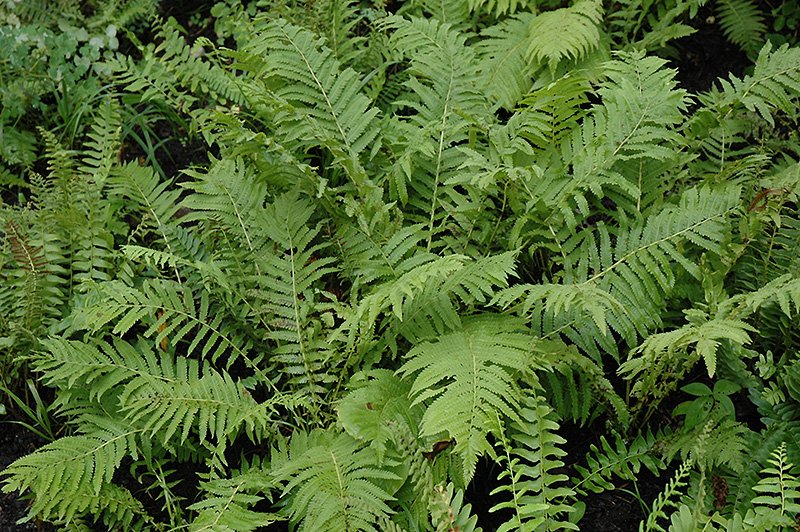
Botanical Name: Polystichum acrostichoides
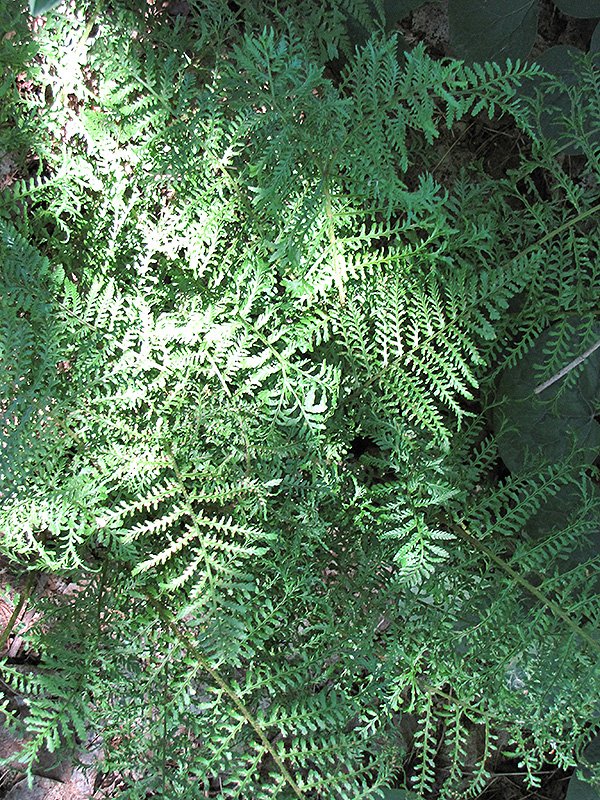
Botanical Name: Dryopteris filix-mas
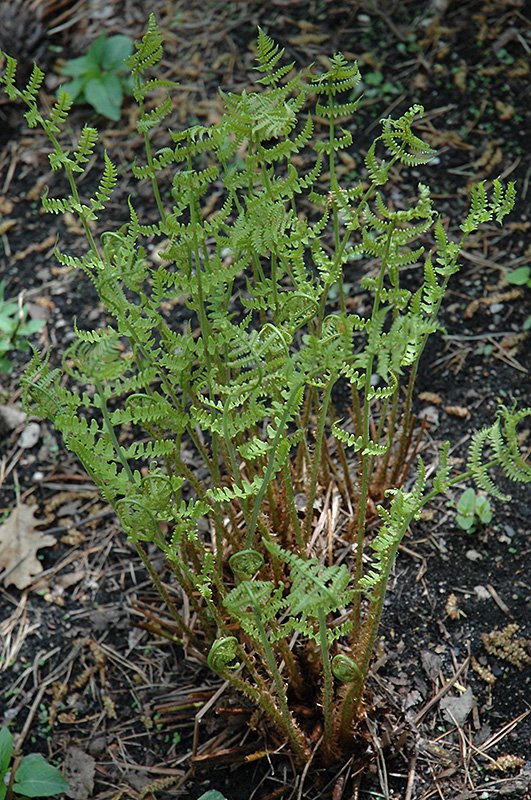
Botanical Name: Dryopteris marginalis
- Christmas fern (Polystichum acrostichoides) – Native
- Hay-scented fern (Dennstaedtia punctilobula) – Native
- Marginal wood fern (Dryopteris marginalis) – Native
- Male fern (Dryopteris filix-mas) – Native
- Rock fern (Polypodium virginianum) – Native
A Little TLC
It doesn’t take much to keep drought-tolerant plants thriving—just a little attention and some seasonal TLC. While they’re tough, even these hardy perennials appreciate an occasional deep watering during extended dry spells, especially in their first year.
For sun-loving perennials, skip the heavy fertilizers. Instead, an annual layer of compost is all they need to stay healthy and strong.
Shade-loving drought-tolerant plants, on the other hand, benefit from a layer of mulch. This helps retain moisture and reduces evaporation, especially in dry shade, which is one of the most challenging conditions for any plant to thrive in.
And don’t forget to deadhead regularly! Removing spent blooms encourages your plants to keep producing flowers instead of going to seed, meaning more colour, for longer.
With a few simple care tips, your drought-tolerant garden can remain beautiful and resilient throughout the entire season.
Other resources:
- Landscape Ontario: Eight Beautiful Drought Tolerant Plants
- Toronto Master Gardeners: Drought Tolerant Plants
- Guelph.ca: Drought Tolerant Native Plants
Coneflowers (Echinacea) have earned their place in perennial borders, pollinator gardens, and meadow-style landscapes—and for good reason. These hardy, vibrant perennials reliably return each spring in our Ontario Zone 6 climate, adding long-lasting colour and texture to any garden.
The classic Purple Coneflower (Echinacea purpurea) begins with soft, pink-tinged petals that deepen into rich purple hues as the season progresses. At its peak, the familiar domed centre cone emerges—an eye-catching structure that dries beautifully and provides winter interest in the garden.
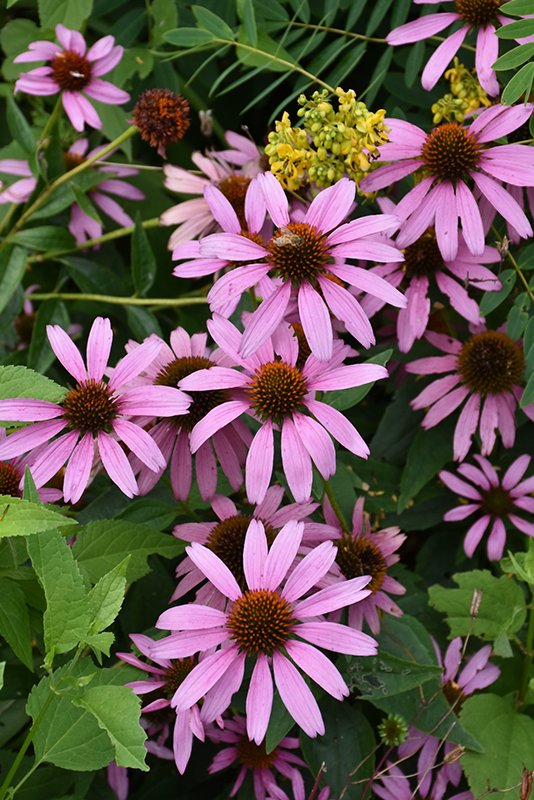
Purple Coneflower (Echinacea purpurea)
Choose From The Rainbow
While the purple coneflower is the most iconic, hybrids now come in nearly every colour of the rainbow. You'll find stunning varieties in pink, white, green, orange, and fiery reds.
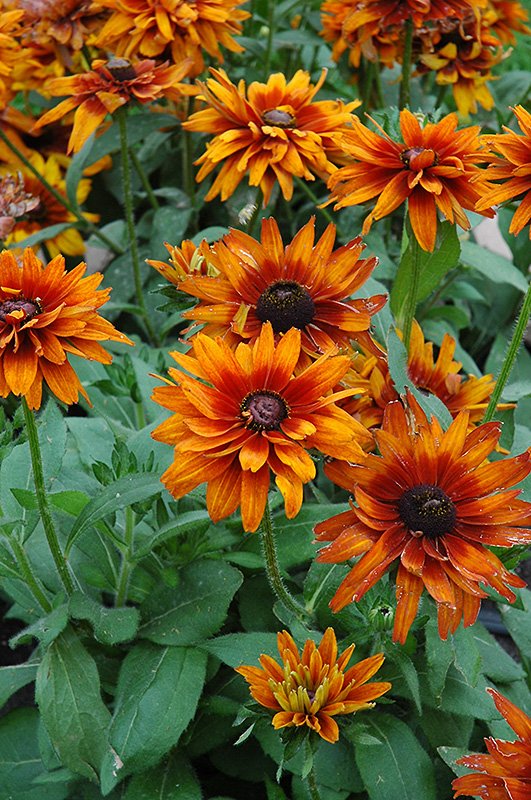
Rudbeckia hirta 'Cherokee Sunset'
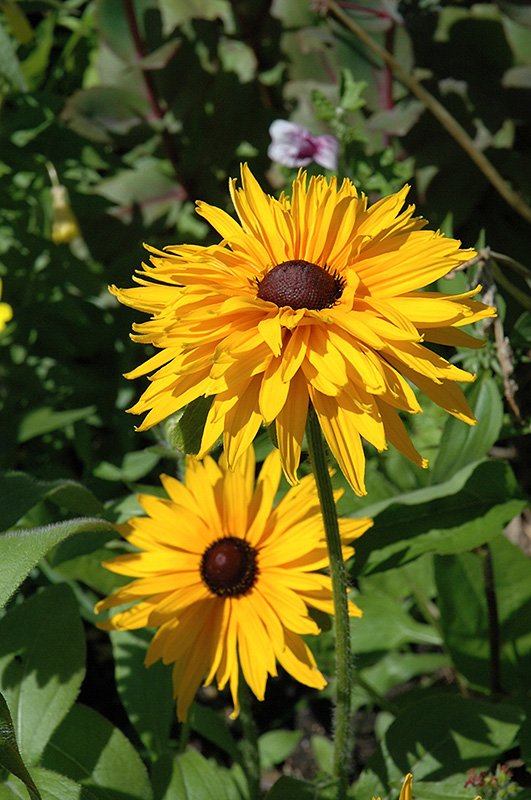
Rudbeckia hirta 'Double Gold'
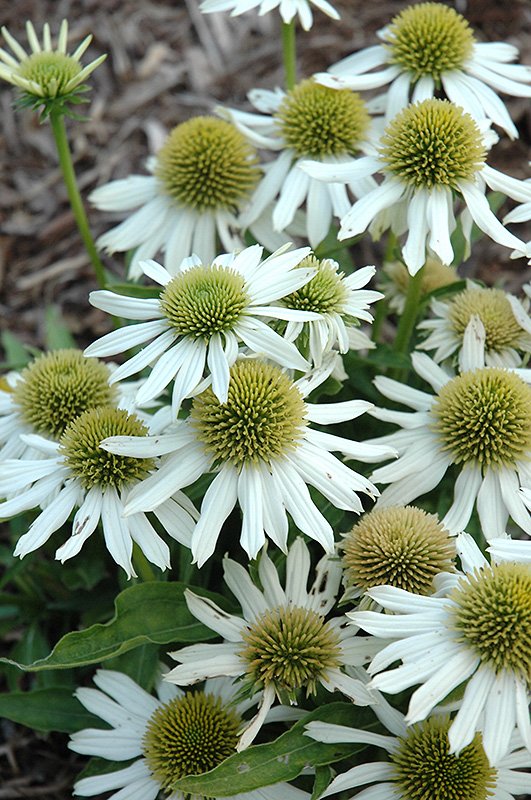
Echinacea 'Snow Cone'
No matter your garden’s colour scheme, there’s likely a coneflower to match. Even better, their bold blooms attract pollinators like bees and butterflies, while the seed heads feed songbirds in fall and winter.
Low Maintenance, Long-Blooming Beauty
Coneflowers are both showy and easy to care for—ideal for beginners and seasoned gardeners alike. Here’s what you need to know:
Growth habit:
- Height: 24–60 inches, depending on the variety
- Spread: 12–24 inches
- Bloom time: Mid-summer to fall
Growing conditions:
- Sun: Full sun is best, though light shade is tolerated
- Soil: Well-drained soil is key
- Water: Drought-tolerant once established, but thrives with consistent watering
- Fertilizer: Not necessary
Pro tips for success:
- Pinch back in early summer to encourage bushier, sturdier plants and decrease the chance of powdery mildew forming
- Deadhead spent blooms early in the season to prolong flowering
- Leave seed heads in late summer and fall for winter beauty and bird food
- Optional self-seeding: Let them go to seed for a naturalized look, or remove blooms to prevent self-seeding
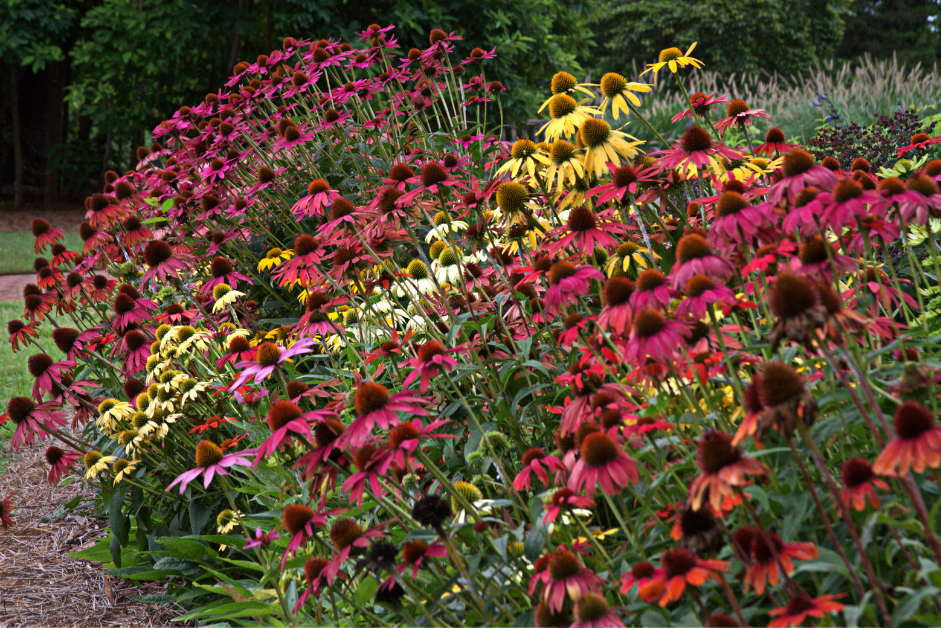
Coneflower Companions
Coneflowers mix beautifully with a variety of other perennials. For vibrant, complementary plantings, try pairing them with:
- Hyssop (Agastache)
- Catmint (Nepeta)
These companions share similar growing requirements and will enhance the colour and texture of your garden throughout the growing season.
Visit Us for More Ideas
Want help choosing the perfect Coneflower variety or finding the right garden companions? Stop by Eising Garden Centre and chat with our perennial expert, Mary. She’ll help you create stunning combinations that bloom beautifully from summer into fall.
Growing Vegetables in Pots!
A few years ago, I was walking through town with a friend as we discussed planting vegetables in our tiny front gardens. It seemed like an unusual idea until we spotted not one but two front gardens with pumpkin vines rambling amongst the shrubbery. What a novel way to cover the ground without mulch and have the bonus of showy, bright blossoms and bold foliage! Of course, this is eventually followed by the standout feature of brightly coloured pumpkins. It’s built-in fall decorating!
Right now, everyone is looking for ways to reduce grocery bills, and growing a few vegetables amongst the flowers and shrubs can make a big difference. If your garden is on a patio or balcony, there are lots of ways to add edible plants to maximize your space and beautify it at the same time. Who says vegetables can’t be ornamental and beautiful?!

Gaps and Small Spaces
If you have a new shrub and flower garden that has gaps or there’s a space in your garden where you’re not sure what to plant, consider tucking in a potted vegetable. In a cool, shady space, try some luscious lettuce bowls. Shade allows lettuce to grow more slowly in the heat of the summer. Keeping lettuce in a cool, shady spot will prevent it from bolting and becoming bitter.
If you have a small garden, a patio or a balcony, pots with compact varieties and hanging baskets are a terrific alternative for growing vegetables, herbs, and some fruits. These are some of the options we offer at Eising Garden Centre (based on availability) that can be purchased fully planted, or you can grow your own from seed if you have time, space and lights.
Trellised Planters and Patio Pots
For patios, balconies, or even a gap in the garden, there are lots of vegetables that can be grown in a trellised planter.
Tomatoes, peppers, cucumbers and eggplant all love warm soil and growing in pots provides the heat to help them thrive. Eising trellis pots are planted with specific varieties that are smaller but pack a flavourful punch.
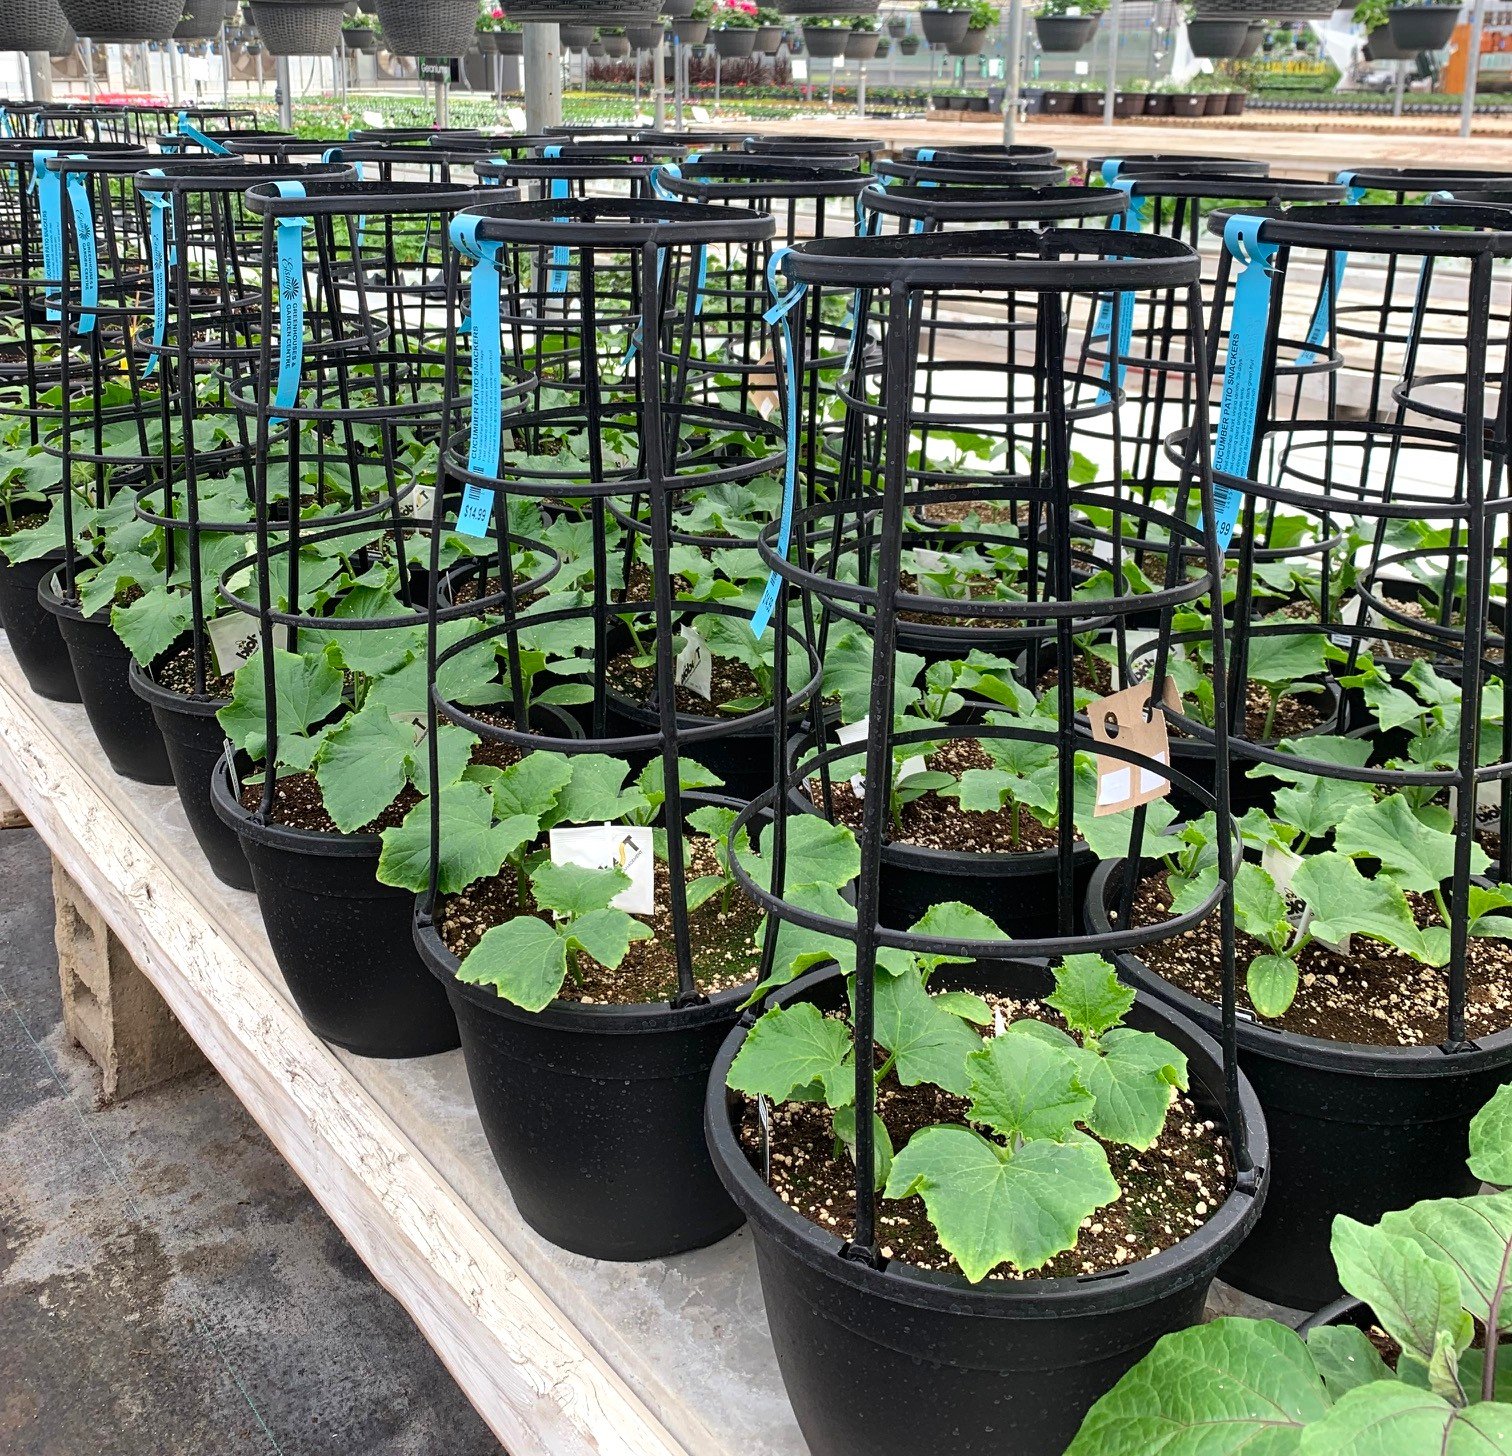
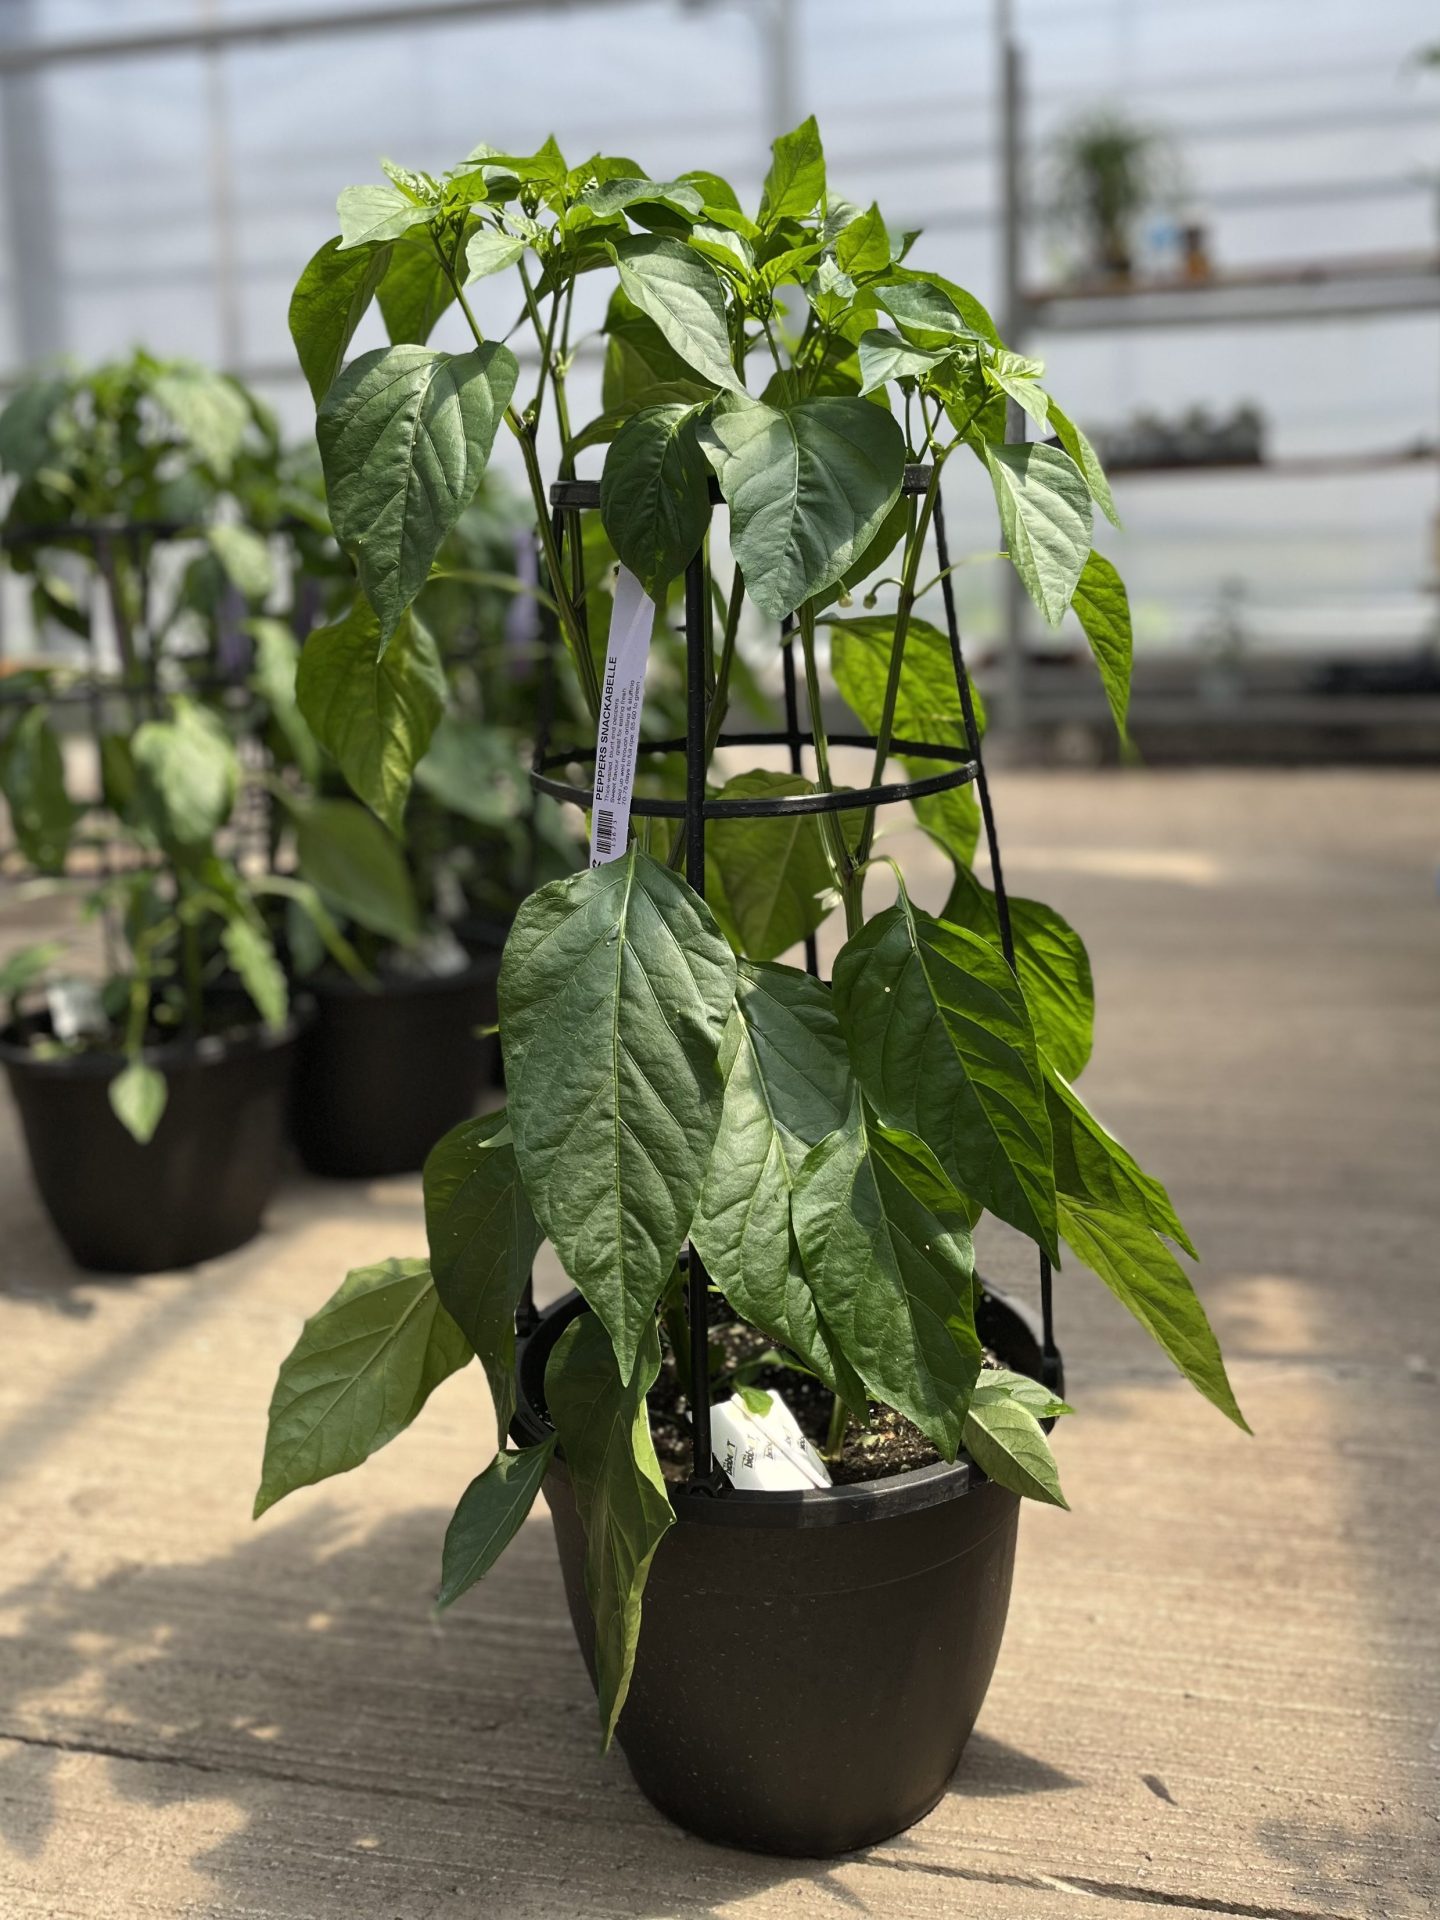
Sweet Snackabelle, Candycane Chocolate Cherry or Red, Mocha Swirl and Fresh Bites peppers.
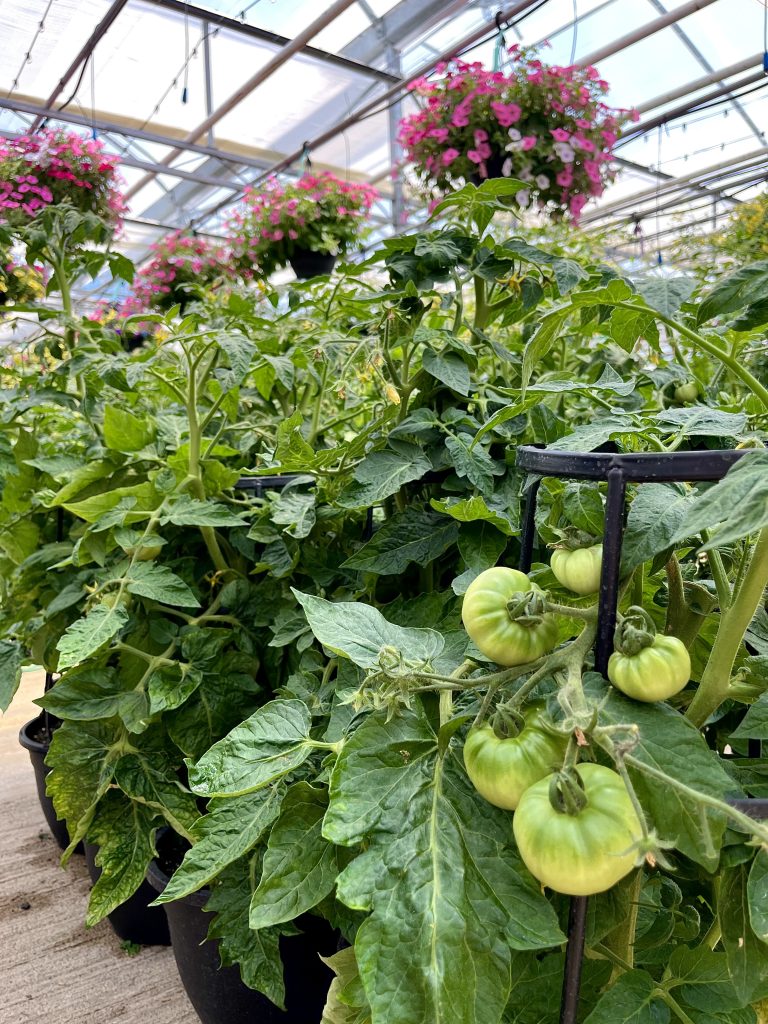
Little Sicily, Patio Hybrid, Candyland Red, Rapunzel and Tidy Treats tomatoes.
Eising Greenhouse also carries eggplants in trellised pots - a patio pot with Patio Baby eggplants is a perfect choice if ratatouille is on the menu!
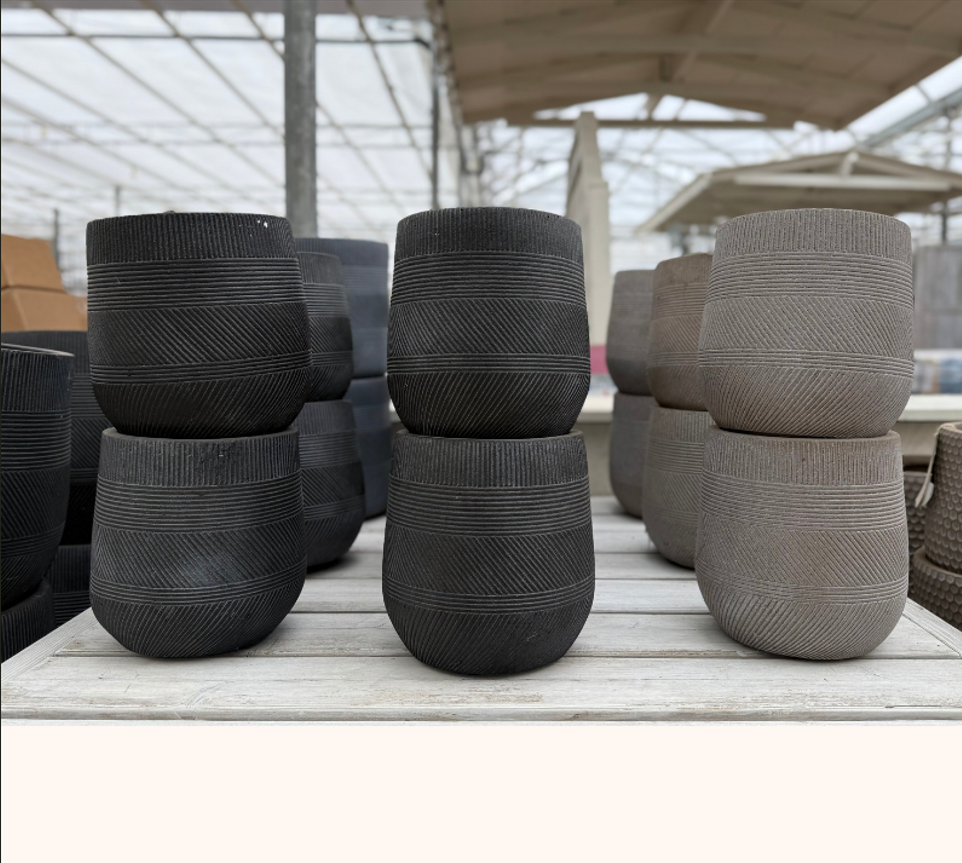
All of Eising's trellised planters would look lovely plopped into one of our decorative outdoor cover pots!
Herb Planters
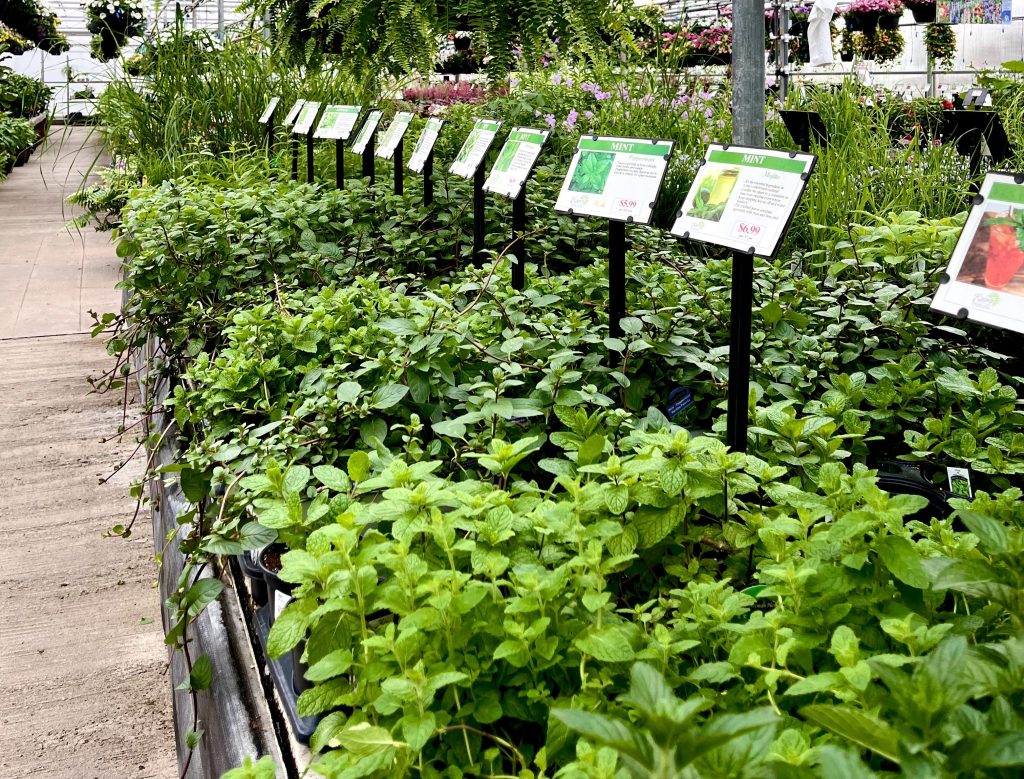
Many herbs thrive in a sunny and warm spot with well-drained soil, making a pot the perfect container for them. Herbs also make great companion plants with other vegetables and can be tucked into other pots. Most herbs also love to be harvested frequently, especially when they’re given these ideal conditions.
Lettuce Bowls
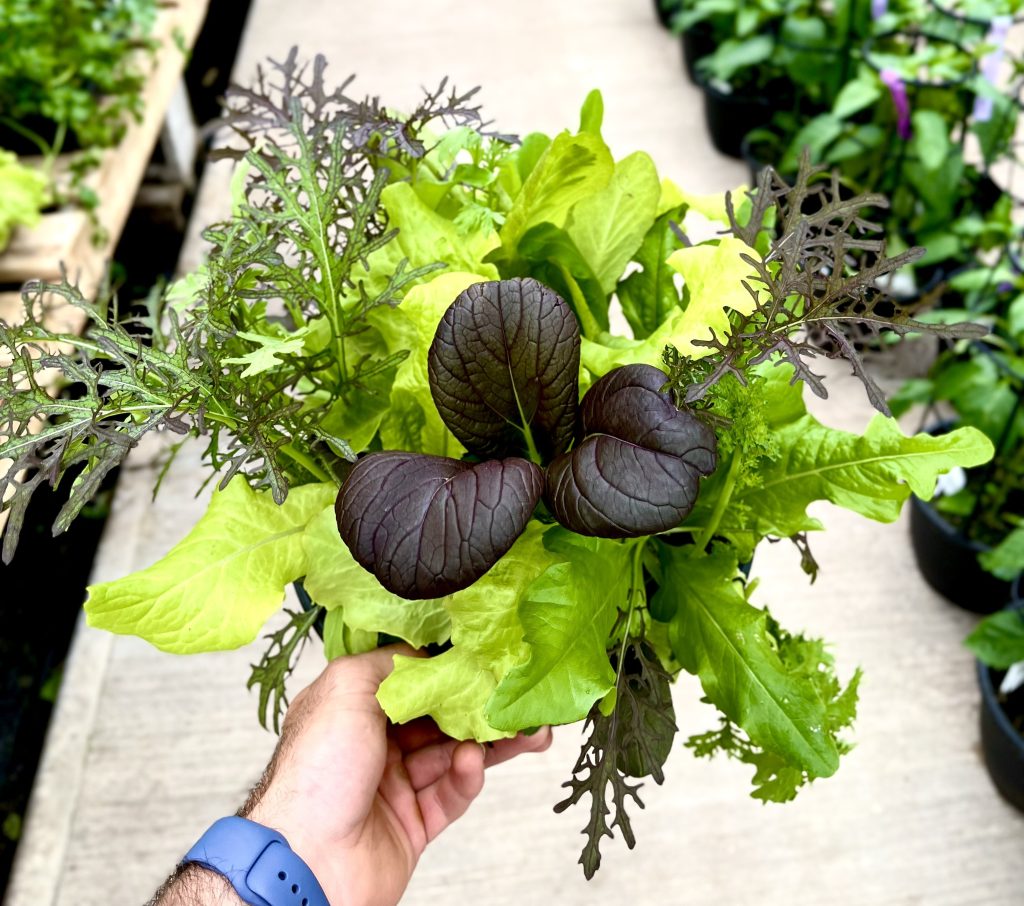
Lettuce bowls are a great way to grow greens in small spaces. Our 10” bowls are chock full of a variety of lettuces and are never boring!
👍Tip: Try the “cut and come again” method for harvesting lettuce, which prolongs the plant’s life. Simply pinch off the outer, mature leaves each time you pick the lettuce and leave the centre of the plant to keep growing.
Hanging Baskets
If there’s a spot to hang a basket or place a shepherd’s hook, you will want to grow one of the edible options we offer.

Topsy Tom tomatoes.
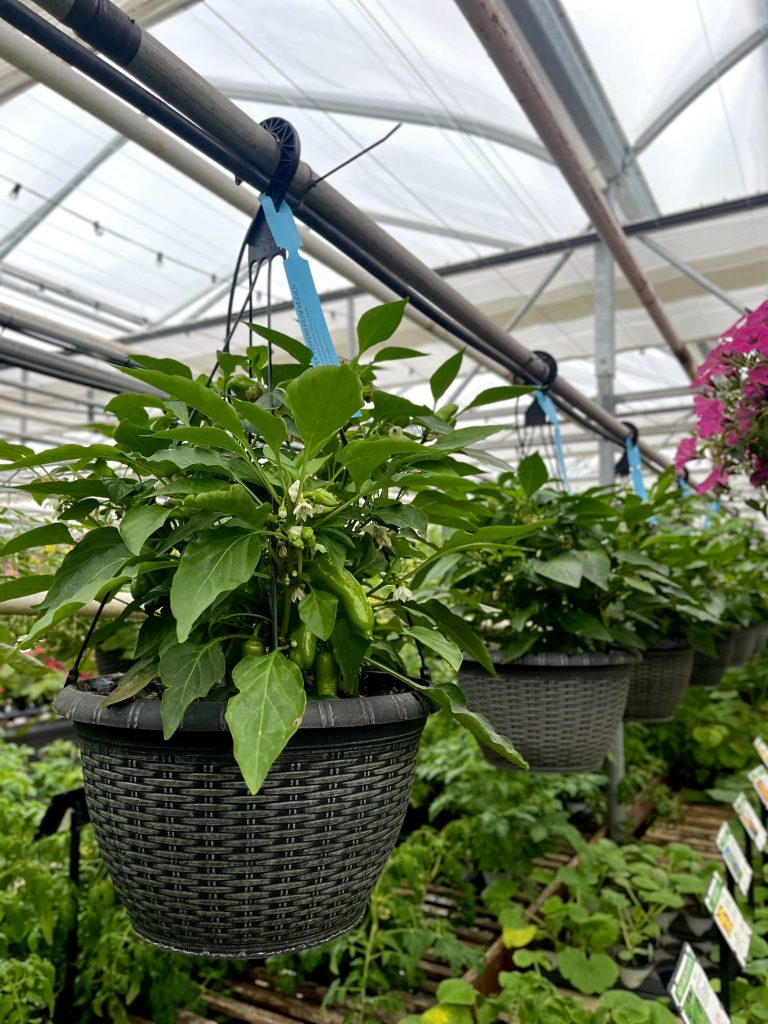
Pot-a-Peno and Peppers From Heaven peppers.
Tomatoes, peppers, and strawberries are all available in hanging baskets. Our deliciously sweet everbearing strawberries are also available in 4.5" pots and bareroot, which are great options for window boxes.
👍Tip: Pick strawberries as they ripen to encourage your plants to produce more. Also, remove runners as they grow to allow your plants to send energy into growing fruit instead of bigger plants. Painting rocks to look like strawberries is said to deter birds from feasting on ripe berries.
Citrus and Figs
Consider growing a beautiful and fragrant lemon, orange, fig or grapefruit tree in a patio pot. Just keep in mind that it will need to come indoors in the fall.
Container Plant Care


Whether you’re growing edible plants in the garden, a pot or a hanging basket, don’t forget to give them the care they need to maximize productivity:
- Water regularly, deeply and in the heat of the summer, frequently. Watering early in the morning is ideal. Pour water on the soil, not the foliage to prevent diseases like powdery mildew.
- Feed your vegetables and fruits throughout the growing season with fertilizer or compost.
- Remove dead foliage and prune plants as needed. Especially herbs.
Once you start foodscaping by including vegetables with your flowers and ornamental plants we’re sure you’ll want to keep looking for innovative ways to grow your own food! Who knows, maybe even pumpkins by the front porch!
The sight and sound of water in the garden can bring life to its surroundings and a sense of calm that we all seem to need right now.
A water garden can be created in many forms with varying degrees of simplicity or complexity. A small water feature in a half-barrel-sized container on a patio. A small to medium one in a preformed fibreglass pool or pond in the ground. An old stock tank or bathtub. A pool liner laid over a hole dug into the ground. A natural pond fed by springs. A fountain, stream or waterfall for moving water. Planning is key, but there are endless options! Just be sure to check any local zoning restrictions before you build.
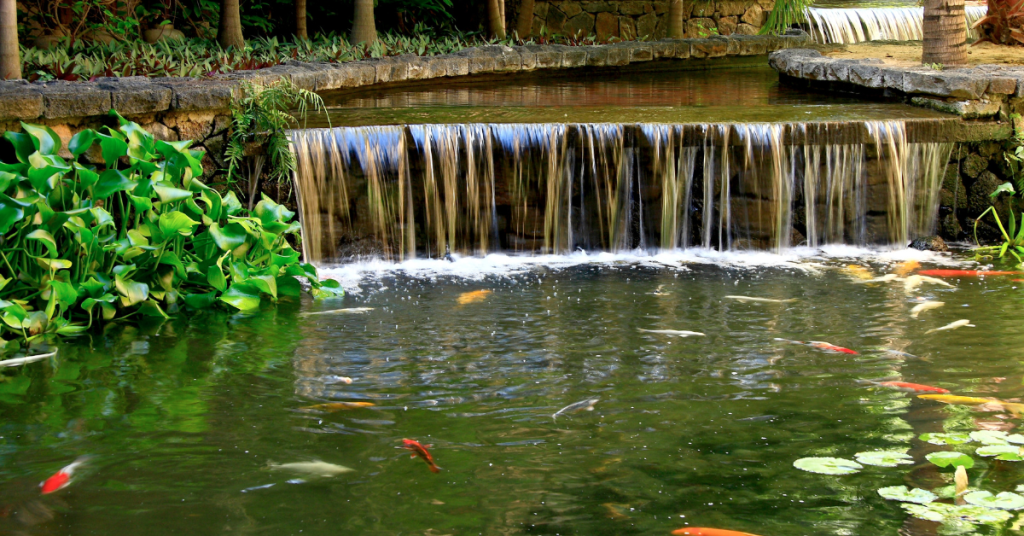
Whatever the pond form, water can immediately attract nature even in the middle of an urban space. Dragonflies, birds, and frogs will show up to sip, dip and enjoy!
Water gardens also provide a space to garden with plants that bring unexpected beauty and intrigue. It’s a whole new world of native and tropical, annual and perennial plants that exist in the water or on the edge of a pond.
Three Categories of Water Garden Plants
1. Underwater or Submerged Plants
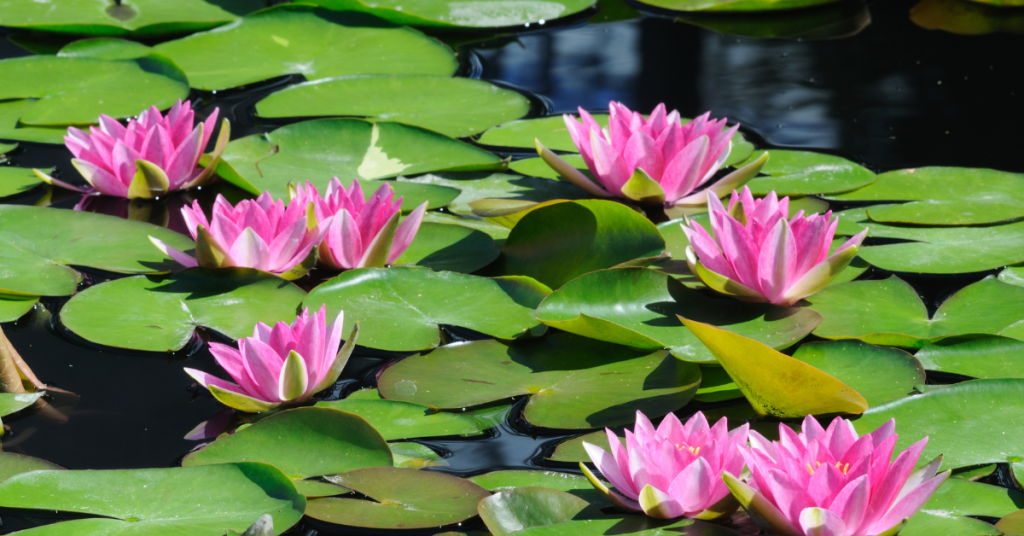
Deep-water plants with floating leaves and flowers, like water lilies and lotus, are included in this group. Often the showy main feature of a water garden, water lilies come in various sizes and colours and produce blooms from late Spring to early Fall. Hardy lilies thrive year after year with very little effort. Full sun and water 18 to 36 inches deep will give a water lily the conditions it needs.
Oxygenating plants are not showy but are also found underwater, and they are essential. Anyone who owns an aquarium knows the importance of good oxygenators to improve water quality. They compete with algae for nutrients and win the battle each time. Elodia canadensis looks a little bit like seaweed, but it’s a hardy and vigorous water perennial here in southern Ontario, which makes it a very popular choice.
2. Floating
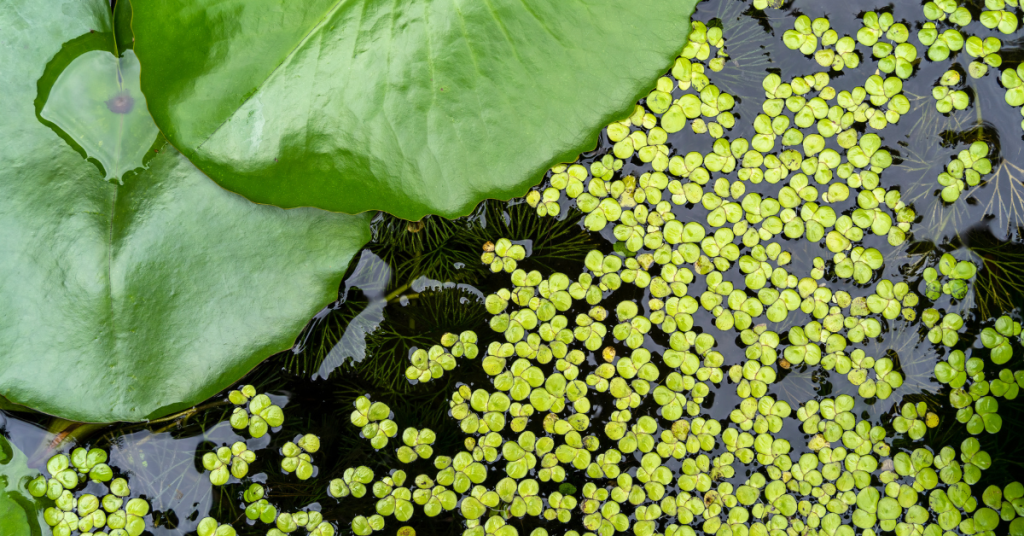
Duckweed and Water hyacinth are examples of plants that float freely on water. No soil is required! While Water hyacinth is a problematic invasive perennial in southern U.S. climates, here in Ontario, it’s a carefree annual and probably one of the most beneficial plants for a garden pond. Water hyacinths provide much-needed shade (algae requires sunlight to thrive), and the roots absorb excess nutrients, helping control algae and purify the water. If that’s not enough, its shiny green leaves can stand up to 4 inches out of the water, and they surround a spike of lovely blueish-purple flowers. It also provides shelter for fish.

3. Shallow water or Marginal Plants
This is the bog folks! The plants grown here are also known as marginal plants. While the term bog doesn’t conjure dreamy Monet water lily paintings, the plants in this area of a pond or wetland can be beautiful, interesting and beneficial. Marginal plants and moisture-loving perennials, grow in the soil just below the water's surface or in consistently wet soil. They are beneficial because they keep water clear by keeping algae at bay. However, as previously mentioned there are many beautiful and interesting plants that grow on the pond's edge.
Here are just a few:
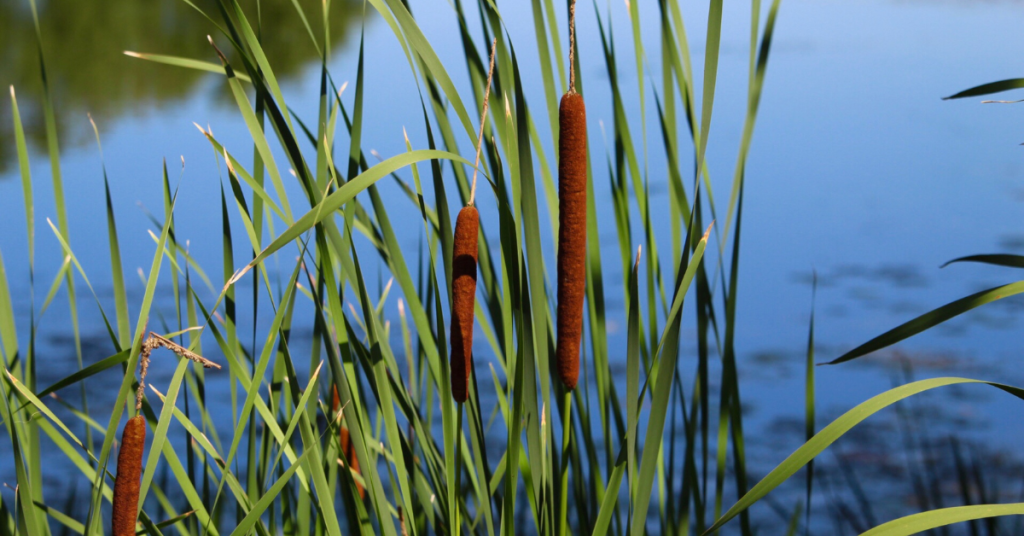
- Cattail - Hardy
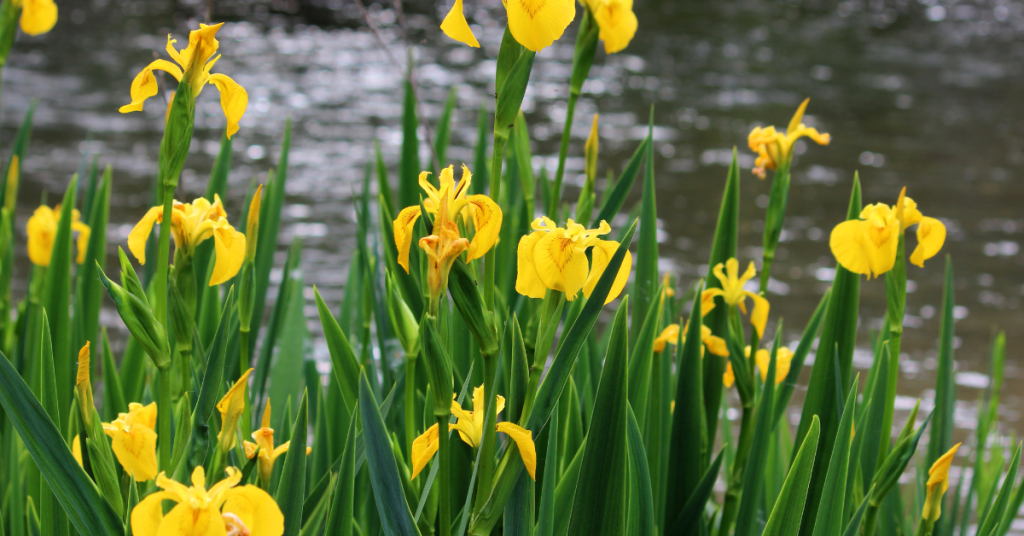
- Water Iris - Hardy
- Variegated Sweet Flag - Hardy
- Corkscrew Rush - Hardy
- Pickerel Rush - Hardy
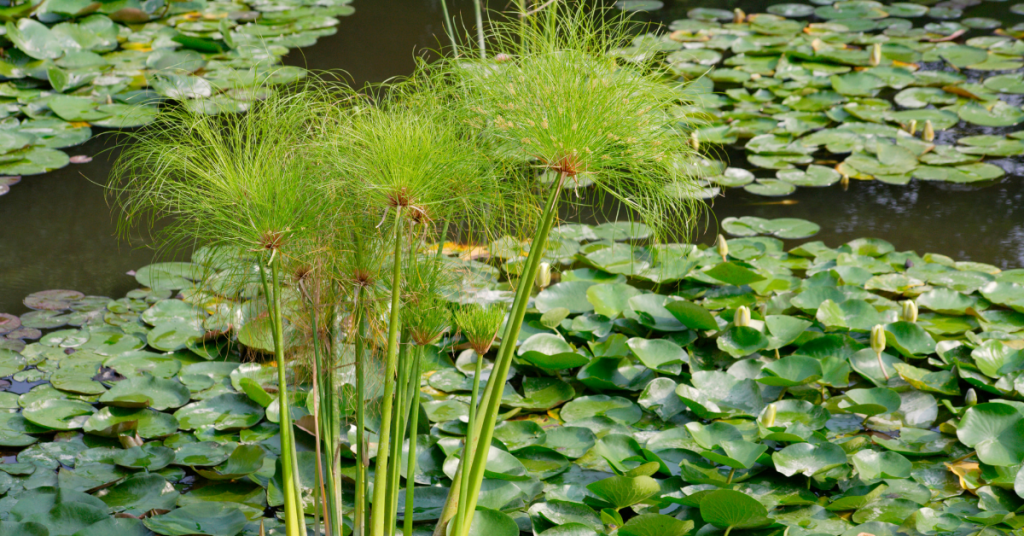
- Dwarf Papyrus - Tropical
Growing plants in and around a water garden can be a very satisfying project. Curious guests will love to chat about it and ask questions making it a great conversation starter. It also provides a peaceful spot in your backyard to relax and watch the dragonflies whiz by!
It’s the question we probably hear the most when it comes to flower gardens…”What can I buy that will flower all season long?” While some annuals bloom for a very long time, no plant will bloom from early Spring to late Fall, and no vegetable plant will produce for that duration either. The solution? Succession Planting! It’s a simple strategy that maximizes the time your garden is blooming or producing vegetables.
What is Succession Planting?
Plant early (earlier than you think) and plant things in succession that thrive in the current weather conditions - right up until there is a hard frost. Simply plan to plant another crop or flower once one is harvested or finished blooming. Many gardeners here in southern Ontario wait until the May 24th weekend to plant everything - all at once. Succession gardening staggers planting times so there is a continuous harvest of vegetables or an everchanging series of blooming flowers. While it takes a little more planning, the results are worth it.


A Succession of Blooms
The best way to ensure a parade of colour in your garden is to choose a variety of annuals, perennials, and biennials that bloom at different times. There is a notion that a garden can only have annual flowers or just perennials, but the best results come from a mix of both. You’re allowed to mix them together! Most annuals bloom during the heat of the summer, but perennial flowers can extend the season for you by blooming in early spring or in the fall. A list of perennial bloom times can be found in this Landscape Ontario article to help you choose your plants.
Some flowering plants, like pansies, love cooler weather and are easy to purchase in the spring. A little planning and planting in the fall will provide a flush of colour from Spring bulbs like Daffodils, Crocus, and Hyacinth. Spring bulbs look great alongside early-blooming shrubs or trees like Canada Serviceberry and Forsythia.
April or early May is also an excellent time to directly sow annual flowers like sunflowers, nasturtium, borage, and herbs like cilantro and dill to give them a head start.
Cool Weather Veggies
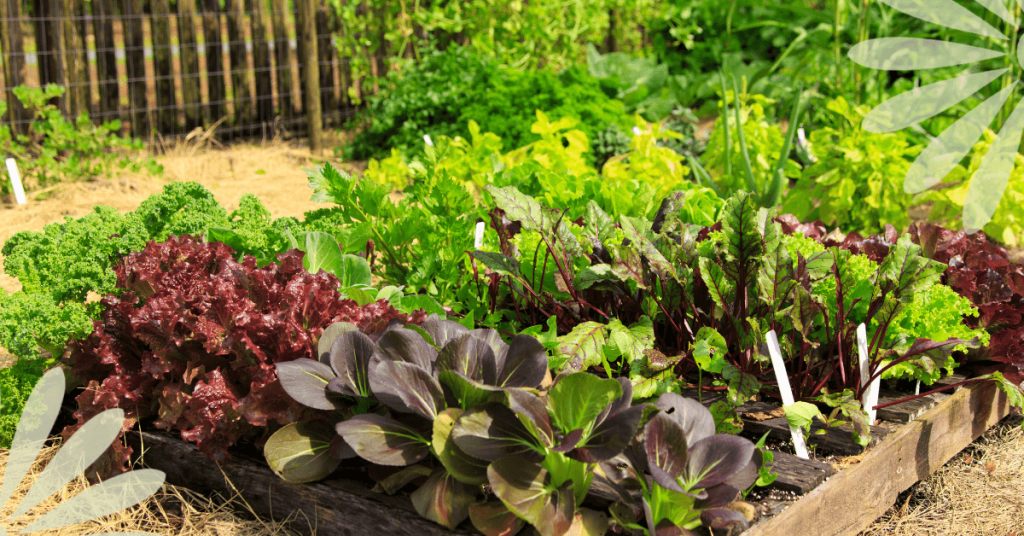
It’s surprising how many vegetables thrive in cool weather and withstand light frost. Keep tender plants indoors until the third week of April and slowly harden them off, but get outdoors any time in April and begin directly sowing fast-growing cool crops like leafy greens, root vegetables, and some herbs.
Lettuce planted in late spring will tend to “bolt” and taste bitter once hotter temperatures arrive. Lettuce loves cooler conditions. So you don’t have to wait until May 24th to sow lettuce and other vegetables. Which Vegetables? We have a list of examples for you in our article: Starting Seeds Indoors and Cold Weather Crops. Starting early means you can harvest a whole crop of vegetables before you plant heat-loving crops like peppers and tomatoes.
Sow All Season
If you’ve ever been overwhelmed by planting too much of one crop at once, you will love succession gardening. While you may be able to freeze a batch of 2,000 string beans from the entire packet of seeds you planted in one go, sometimes stretching out the harvest is nice. Plant smaller batches of beans, peas, and herbs like cilantro, dill, and basil every three weeks to ensure continuous summer harvests. This approach is also known as interval gardening.
Sow cool-weather crops like leaf lettuce, Swiss Chard, and Radishes in April or early May and again in September.
Continuous Harvest
Once your early Spring vegetables like lettuce, peas and radishes have been harvested, it’s time to sow your second crop of cool-weather veggies for harvesting in the Fall. Do you know veggies like parsnips, Brussels sprouts, peas, and kale have more flavour after a mild frost?! A mild winter this year meant we were still harvesting some Brussels sprouts in December.
Double Up
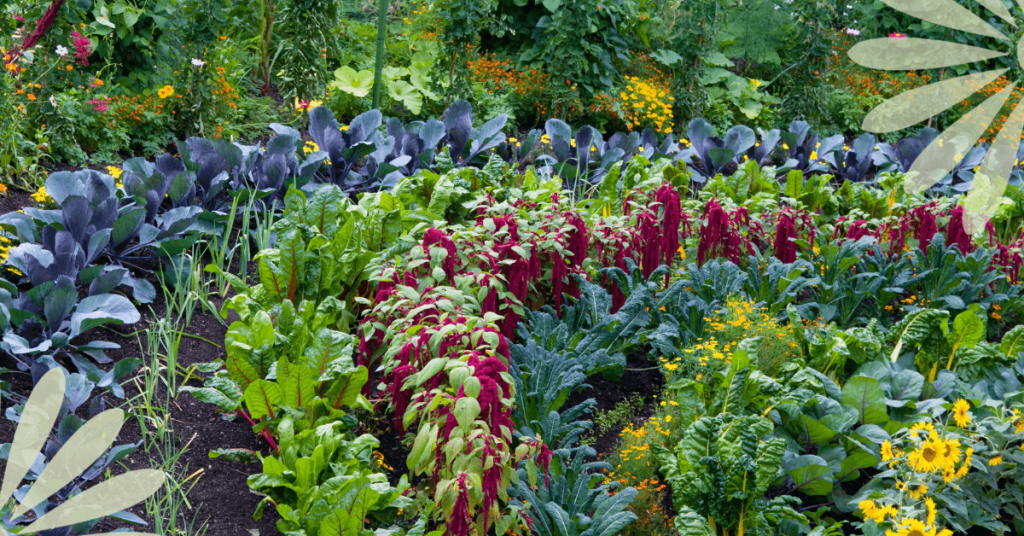
Another tip is to plant things that grow well together. For example, plant seeds for a root crop like carrots below your tomato plants, peas or bush beans in the vegetable garden. The carrot crop will be next after the tomatoes, peas or beans are done for the season. There are many combinations like this - tomatoes and basil, kale and dill, lettuce and beets, broccoli and borage, just to name a few. Doing this helps to increase the production of your plot of land and keeps the soil covered, which is always better for soil health.
One final strategy for flower succession planting is to use containers. Consider placing a well-positioned pot of annual blooms beside perennial plants resting after flowering.
Once you get started, researching companion plant combinations like these can be a fun game. These combinations will extend the time you can enjoy lots of colourful blooms and increase the amount of vegetables a garden can produce!
Come along on a little journey with me and imagine this… It’s Springtime. The sun shines, and the air finally feels warmer after a long, grey winter. You take a little trip to your favourite garden centre and find that special plant you’ve been reading about and hoping for. Of course, you buy the plant, take it home, and proudly place it on your sunny patio on this beautiful day. Two more sunny days go by, and the plant does not look good at all. It seems to be dying, so you give it lots of water, but that makes no difference. It is in fact dying. So disappointing! How could this be happening?
In our excitement to get outdoors and plant flowers, or add greenery, we forget that the plants we’ve been growing indoors or inside a greenhouse, aren’t used to the elements in the great outdoors. They’ve been sheltered indoors, out of the wind and direct sun, and watered and fertilized regularly with the utmost attention. They’ve been pampered in a plant spa and are quite literally hothouse flowers! Being plunked outside afterwards is the equivalent of us going outside in a bathing suit with no sunblock on for the first sunny, warm days of Spring, exposing our lily-white skin that’s been covered up by a parka all winter long!
Red, sunburned skin is not a great image, but hopefully, this comparison helps to explain the importance of transitioning or hardening off plants. Much like us, indoor plants need to be gradually exposed to the elements and given protection in the process.
The same will be true if you have planted seeds indoors or purchased greenhouse-grown seedlings. Seedlings grown in a greenhouse, a sunny window, or under grow lights in your home need up to 14 days to acclimate to being moved from their cozy indoor space to the great outdoors.
What is Hardening Off?
Hardening off ensures that you will not lose another plant or seedling! It’s a sensible process for all the plants you’re moving from indoors to outdoors. By helping plants or seedlings to gradually toughen to withstand the elements, you prevent transplant shock, which can cause your plants to be stunted or, worse, die.
To ensure success, the process of hardening off takes up to 14 days, so you will want to begin two weeks before transplanting plants and seedlings into your garden. Houseplants may only need 7 to 10 days, but tender, tiny seedlings need the full two weeks to strengthen and get used to their new environments.
When to Harden Off
Cold-weather plants like lettuce, kale, pansies, violas, dianthus, and potted or forced spring bulbs can be hardened off once daytime temperatures consistently reach 5 Celsius, usually in April in southern Ontario.
Perennial plants, tropical houseplants, and heat-loving seedlings like most annual flowers, tomatoes, peppers, and basil should wait until temperatures are around 7-10 Celsius to begin hardening off. For vegetables and annual flowers, start hardening off around May 10 here in Norfolk County if your target is planting seedlings around May 24th.
Successfully Hardening Off Your Seedlings and Plants
Days 1 and 2
Begin on a day that is optimally warm (At least 5 Celsius for cold-weather-tolerant plants, 7 Celsius for heat-loving plants, or 15 Celsius for tropical houseplants) and place your plants or seedlings outside in full shade and protected from the wind.
If you don't have a wind-sheltered area in the shade, putting your plants in an open cardboard box is a good way to protect them from the wind at this stage.
Leave them in this protected area for 1-2 hours before returning them indoors.
Days 3 to 5
Each day, gradually increase the length of time your plants are outside and begin to place them in an area where they will get dappled shade and some wind.
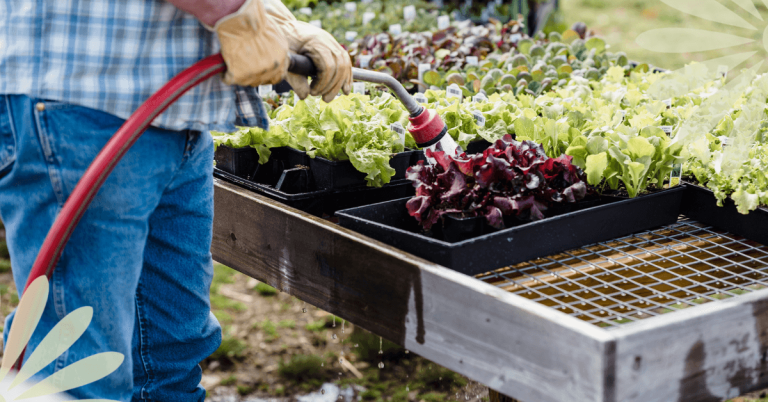
Pay close attention to watering while you’re hardening off your plants as they will require more frequent watering.
Days 6 to 10
On day 6, start to increase your plant’s exposure to direct sunlight by placing them in the morning sun, which is less intense than the afternoon sun.
Begin to leave them outside overnight from this point on unless the temperature is expected to drop below 7 Celcius.
Days 10 to 14
After 10 days of acclimation, it is safe to move houseplants that require more sun to a location that meets their needs.
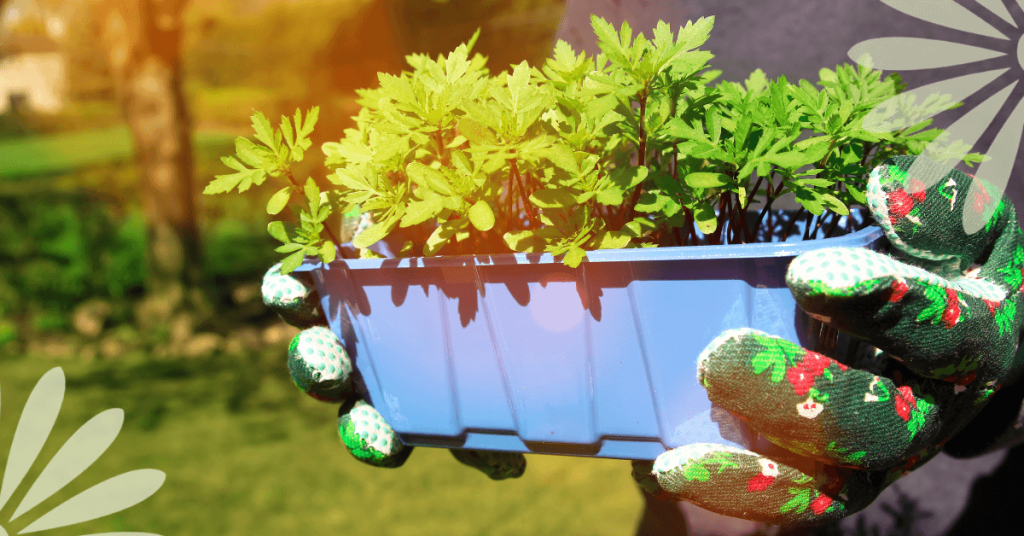
After 14 days of acclimation, it’s safe to transplant seedlings to their place in the garden or to large pots if you’re growing in containers.
As soon as your plants are transplanted, be sure to water them well! This will help them transition and eliminate air pockets in the soil that can harm the roots.
If the temperature drops and a fluke, unexpected freeze is forecasted after you’ve planted everything, cover your plants with row cover, cloches (you can use plastic water jugs with the bottom cut out, just leave the screw cap off to act as a vent), or cardboard boxes to protect them.
To summarize, when Spring arrives, protect your skin with sunblock, and harden off your plants before you move them outdoors!

You read that right. Easy houseplants exist, and there are some very cool varieties too. Easy does not mean boring!
Plenty of tropical plants are forgiving and require little fussing—you just need to know which ones and how to care for them.
These plants are generally resilient and forgiving of occasional neglect, making them perfect choices for new growers. When choosing any houseplant, consider your home's lighting conditions and the care you can provide.
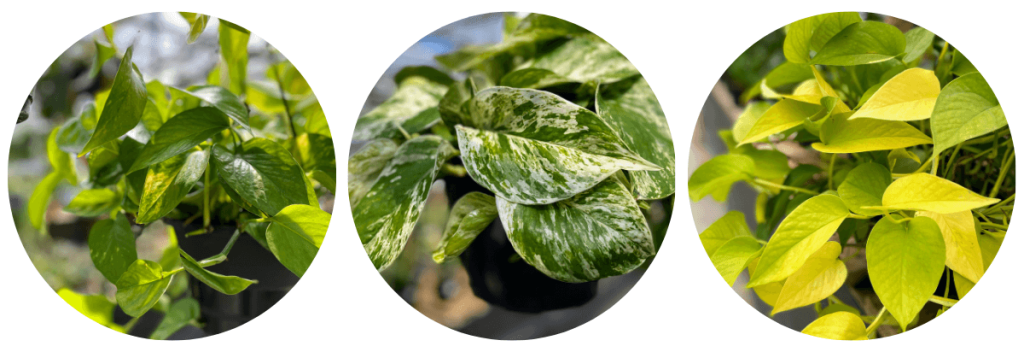
Pothos
Pothos vine is one of the easiest houseplants to grow and is perfect for beginners.
Bright and indirect light is what this plant loves, but it will also grow in low light - just not no light.
Allow the soil to dry out between waterings. Too much moisture will cause the roots to rot. The plant’s leaves will droop and let you know when it needs a drink!
Feed Pothos with a balanced fertilizer monthly in Spring and Summer only to keep it thriving.
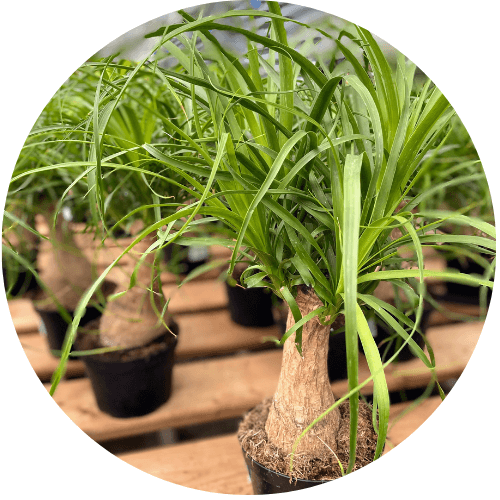
Ponytail Palm
Give this plant the brightest location in the house. It loves full sun or bright, indirect light. They will survive to 10 Celsius, but this plant loves warmer temperatures.
Be careful not to overwater Ponytail Palms. Because water is stored in the bulbous stem, they only need a drink every 7 to 10 days during the summer. In the winter, cut back to monthly watering.
Use a slow-release pellet fertilizer in the Spring for carefree maintenance.
Trimming the tips off damaged leaves will keep them healthy.
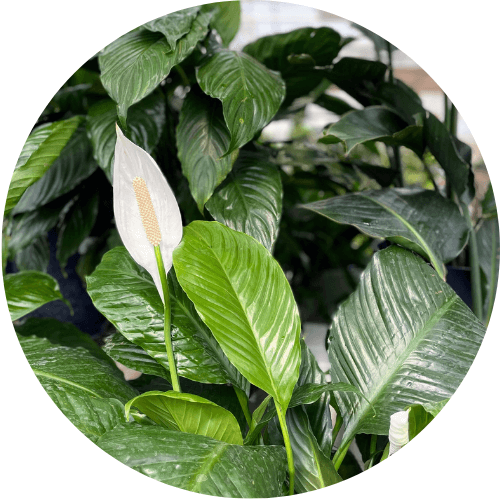
Peace Lily
This plant loves filtered or indirect sun (place it a few feet away from a sunny window or in an east-facing window) and moderately moist soil.
While Peace Lilies love moist and warm conditions, keeping them under-watered is best. Use your finger to check the soil’s moisture. Water this plant when the top inch of soil has dried out.
Use slow-release fertilizer pellets in the Spring or feed the soil weekly during the summer with liquid fertilizer. This plant enjoys frequent feeding during the growing season.
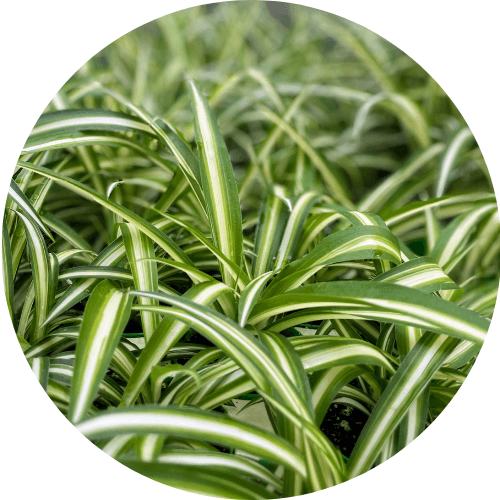
Spider Plant
Spider plants are straightforward to grow. They prefer an area with partial sun or semi-shade that is warm.
Keep the soil lightly moist, not soggy!
Use an all-purpose fertilizer during the summer months. Trim off any brown leaves as needed.
Snake Plant
Indirect sun (a few feet away from a sunny window) or a couple hours of early morning sun will keep this plant happy. These tropicals thrive in warm temperatures with no cold drafts.
Do not allow your Snake plant to sit in water! Water deeply, then let it drain only when the soil is dry.
A 10-10-10 balanced fertilizer at half strength once in the spring and again in mid-summer is all the plant food it needs!

One Final Tip
Most houseplants do not like chlorinated or treated tap water. If possible, water your plants with filtered, distilled, or rainwater. If you only have access to tap water, allow it to sit in an open container for several days until the chlorine evaporates.
Following these simple guidelines will keep your plants healthy, and in return, they will provide natural beauty to your home.
Ah, the smell of fresh greenery! There’s something extra special about decorating for Christmas with fresh evergreen branches.
The holidays are the best time to bring the outdoors in. After all, what better time is there than when we’re longing for some green in a winter world that’s predominantly brown, or snowy white? Or, you may simply be searching for the nostalgic smell and sight of fresh holiday decorations.
In southern Ontario, evergreens last the longest outdoors during our winters. But how do you keep your pine, cedar, fir and spruce branches looking fresh and lovely all season long? Give these tips a try.
Start Fresh
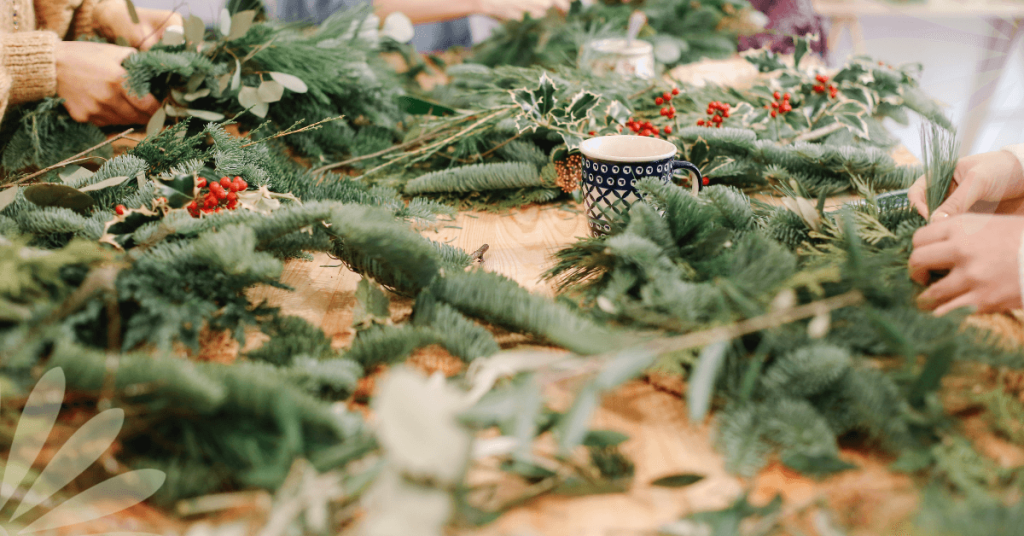
Whether you are making decorations, or buying them, start with freshly harvested branches.
Cut each stem on an angle to increase the water absorption rate, and place the stems in a bucket of water for several hours before using them. As you’re cutting each branch, be sure to check for any pests first.
At this point, your greens are ready to arrange into wreaths, swags, garlands, containers or whatever you’re making.
For indoor arrangements, oasis or floral foam that has been soaked in water, and secured in your container creates a solid base to work with. Fill outdoor urns or containers with moist soil, or a combination of oasis and damp soil to insert the branches into and hold them in place. Both methods will help to keep your plant material hydrated.
Prevent Dehydration
Before adding decorative elements, lightly mist your evergreen arrangements, wreaths, swags and garlands with an anti-dessicant spray. Doing this provides a protective barrier and reduces moisture loss.
Placement and Care
Keep outdoor arrangements sheltered from direct sunlight and strong winds if possible. Likewise, keep indoor arrangements away from sunlight, and heat sources like vents and radiators.
Evergreens can dry out very quickly. Keep arrangements watered (for outdoor arrangements, water when the soil is not frozen), and mist garlands, swags, and wreaths with water frequently. Avoid overwatering though! It’s a good idea to water or mist in the morning so that any excess moisture evaporates or can be drained if not absorbed after about an hour.

Following these steps should keep your decorations looking fresh through the holiday season and beyond!
If you would like more help with homemade decorating ideas, check out our DIY Fresh Evergreen Decor guide and our Holiday Home Decor Ideas.
Or, stop by and see us at Eising Greenhouses and Garden Centre in Simcoe for inspiration and choose from our selection of:
- fresh greenery branches
- undecorated arrangements
- decorated arrangements
- Poinsettias
- Christmas Cactus
- Kalanchoe
- Amaryllis
- Paperwhites and more!
If you’re heading to a holiday party, we have lots to choose from as gifts, or items to add to your arrangements, or to fill a spot in your home that needs a little extra holiday cheer!

We tend to get a lot of questions about rose care, and while roses do require more maintenance than other common shrubs, they’re by no means difficult to look after. A little bit of regular upkeep leads to some pretty impressive results, so if you’re a gardening novice, it’s definitely a worthwhile project. Here’s how you can grow and care for roses in Simcoe, Ontario.
Planting Roses In Southern Ontario
Depending on the variety you choose, you can use roses for border plants, garden bed accents, climbing plants to train over arbours and patio lattice, or as container plants. Whatever location or growing medium you select, just ensure it’s suited to the size and growth habit of your chosen rose variety, since there are so many different kinds to choose from. That being said, almost all roses will need at least 6 hours of direct sun every day, so make sure your chosen location has plenty of light.

The best soil for roses has excellent drainage and high nutrients, to set your rose bushes off to a good start, you’ll want to loosen up the soil thoroughly. Ideally, you’ll want sandier, loamy soil with a lot of compost mixed in.
If you’ve purchased a rose bush with bare roots, you’ll want to soak the root ball in water for up to 24 hours before planting. If it’s a potted rose, you won’t have to worry about that step. Plant your roses about 1.5–2 feet deep to fit their large root system, then fill the hole back up with the soil, compost and bone meal mix. Mound it up slightly around the base of the plant.
How Often Should I Water Roses?
Generally, roses need about 1-3 inches of water per week. The thing is, roses are pretty susceptible to mildew and other fungal diseases if they get soggy and don’t receive much air circulation. That means you’ll want to avoid getting the leaves wet whenever possible and stick to watering the soil directly. The easiest way to do this is with a trickle hose set up near the base of the plant. Just turn it on and leave it for a while, so it thoroughly saturates the ground.
If we experience a lot of rain in a short period, you can skip on watering, and should check your roses regularly for any signs of bacteria or fungal growth. Remove any damaged pieces with sanitized shears, wiping the blades clean between every cut, and disposing of the damaged parts safely in the garbage, not the compost bin.
Rose Care: Mulch, Fertilizer, And More
Applying a layer of mulch on top of the soil around your roses will help to retain moisture and control weeds. Some gardeners insist that cocoa bean shells are the best mulch for roses, but we’ve found that classic bark mulch still works perfectly fine.

In spring, feed your roses with a fertilizer formulated specifically for roses. For best performance and blooms, apply the fertilizer every 2-3 weeks during the growing season. There are also special fertilizers made for transplanting, easing the transition when planting your rose. Be sure to water your rose before and after applying fertilizer as their roots are susceptible to being burnt.
Since there are so many types of roses, this means there are different times of the seasons and different styles of pruning. Use a pruning saw or hand pruners to remove any damaged branches or awkward pieces that jut out too far. If there are some densely packed areas with branches, it may help to thin them out a bit to help prevent fungal growth.
We have so many spectacular colours and varieties of roses to grow in Southern Ontario. Visit Eising to see our full collection, or check out our online store! We have citywide delivery and curbside pickup available all summer long.