
By Dave Zeldon and Ely Schweyer
Starting the first week of January, seed packets of many vegetable garden delicacies began arriving at your local garden centres. It’s a great time to plan your gardens and purchase your seeds while the selection is good but don't sow your seeds too early!

If started too soon, your plants will be leggy and overgrown long before you can transplant them into the garden. The general rule of thumb (even if yours isn't green), is if the seed packet recommends sowing four to six weeks before the last frost date, it's better to pick the four - rather than the six-week date (to calculate the sowing date, count back from the third week of May).
In this blog post, we’ll discuss the proper timing of the beneficial companion planting practice, to ensure an organic triple-play of pesticide reduction, nutrient sharing, and the fruits of your labour actually tasting better!
What is Companion Planting?
The use of companion plants is an organic approach embracing plant diversity that involves growing certain different types of plants near each other. By mixing a variety of plants together you confuse harmful insects (i.e., the ‘Three Sisters,’ corn, beans, and squash). When you plant certain vegetables together or alongside flowers or herbs, you can often camouflage the scent of a given plant so that its potential enemies can't find it. For example, if you plant onions and carrots together, the Carrot Rust Fly can no longer detect the scent of its "prey," the carrot.
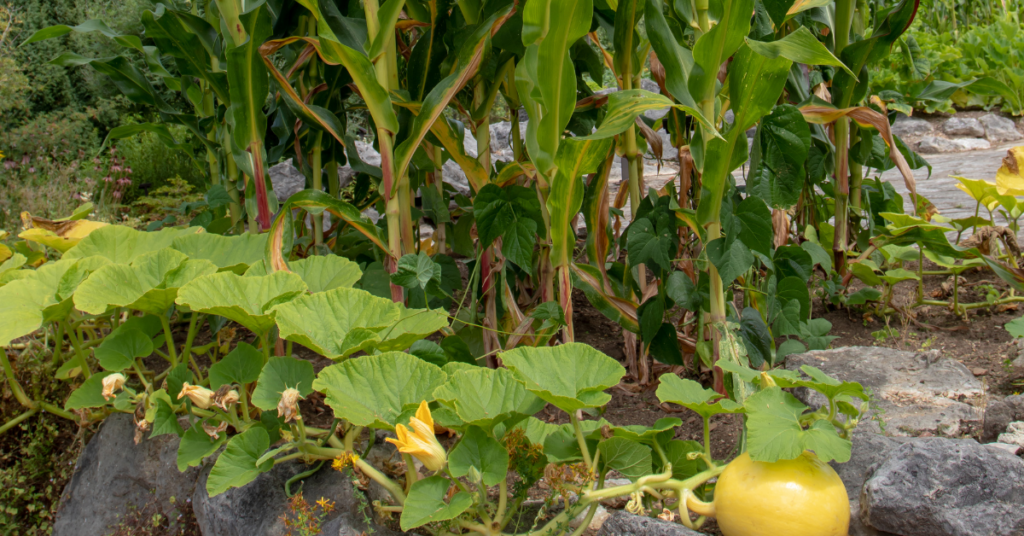
☝️ Plants also share nutrients and amend the soil below ground – in the instance of the Three Sisters, beans fix the nitrogen content of the soil for corn, who has long lost its ability to produce its own nitrogen.
What to Plant?
Herbs Make Excellent Companion Plants
Instead of grouping them all together in a corner, plant them in among your vegetables. Tarragon and marjoram give off a scent that repels most insects. Sage, rosemary, and thyme repel insects that feed on the different plants of the cabbage family. Plant these herbs near your cabbage, cauliflower, and brussels sprouts. Coriander attracts parasitic wasps that are very useful in controlling all sorts of pests.
🖱️ See more on companion planting with herbs here.
Why Not Try Flowers in the Vegetable Patch?
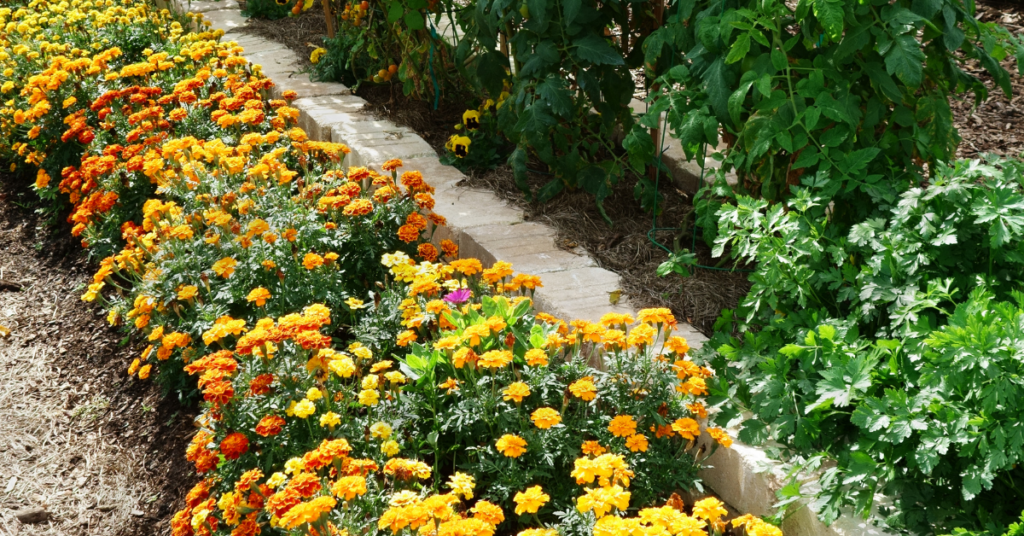
Nothing will make your vegetables happier! Plant borders of alyssum and cosmos; these attract beneficial insects and repel certain harmful ones. Marigolds protect tomatoes from threadworms, and nasturtiums and petunias attract aphids. If you plant them near your tomatoes, the aphids will choose the flowers instead of your tomatoes.
Meet My Plant Friends!
Plant friends are plants that can be grouped together because they mutually help each other grow. Basil stimulates the growth of Tomatoes and enhances the quality of the yield. Chamomile improves the growth and taste of cabbage and onions. It has been found that peas and beans enhance the growth of cucumbers and potatoes. Peas and beans also repel the Colorado Potato Beetle that commonly attacks potatoes and eggplant.
Once you’ve decided who is going where, it’s time to focus on when who is going where.
When To Plant?
It is important to know when the last spring frost date is for your area. Many plants need to be planted after the last frost, so that they don't freeze their little buds off! Follow this guide so that you can have healthy, sturdy little plants that will become good friends in your garden this summer.
| Ten Weeks Before Last Frost Sow indoors: broccoli, brussels sprouts, cabbage, cauliflower, eggplant, lettuce, peppers, and onion |
| Eight Weeks Before Last Frost Sow indoors: tomatoes Sow outdoors: spinach |
| Five Weeks Before Last Frost Sow indoors: marigolds (do not transplant until after last frost) Sow outdoors: peas Transplant: broccoli, cabbage, cauliflower, onion |
| Four Weeks Before Last Frost Sow indoors: cantaloupe, cucumbers, okra, pumpkins, squash, and watermelon |
| Three Weeks Before Last Frost Sow outdoors: carrots Transplant: brussels sprouts, hardened off frost-hardy herbs like chives and oregano |
| Week of Last Frost Sow outdoors: pole beans Transplant: cantaloupe, eggplant, lettuce, okra, peppers, pumpkins, squash, tomatoes, and watermelon |
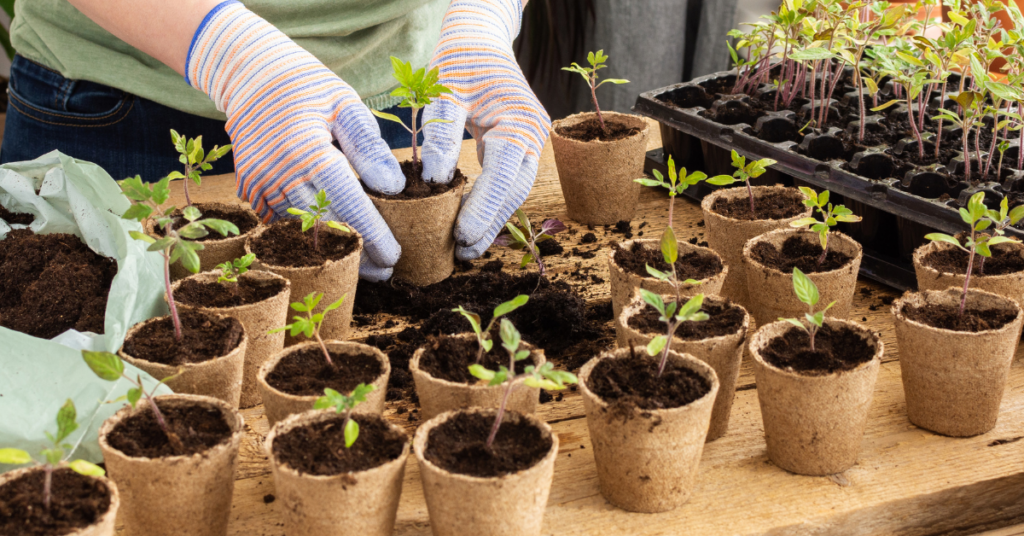
BONUS: Tips on Ensuring Your Seeds Have the Best Start!
🌱 To ensure success it is always best to use fresh, sterile seed-starting mixture (available from garden centres). Moisten mixture about an hour before sowing; it shouldn't be soggy, just as damp as a wrung-out sponge.
🌱 Follow the information contained on seed packets in terms of timing, lighting requirements, sowing depth, and optimal germination and growing temperatures.
🌱 Lightly water freshly sown flats, then cover with plastic dome lid, or if reusing containers try placing them inside a plastic zip-lock bag. At the first signs of germination, uncover or remove from plastic bag.
🌱 As the seedlings develop, wait until the top of the soil looks dry, water carefully using a small watering can with a fine spray. Avoid over watering: soggy soil and poor air circulation can lead to damping off, a fungal disease that can kill seedlings.
🌱 Locate your seeding flat in a bright window but grow lights or cool fluorescent tubes are better. Keep seedlings about eight to 10 centimetres from light source to prevent plants from becoming too spindly. Plug lights into an automatic timer set for 16 hours on, eight hours off. Be careful if you’re using the windowsill method though, as extremes in temperature may occur from hot drying sunny days to frigid evenings.
🌱 When seedlings have two sets of true leaves (the first leaves are called cotyledons — or seed leaves — so wait for the true ones, start feeding once a week with a balanced (20-20-20), water-soluble fertilizer at half-strength, working up to full strength after a few weeks.
🌱 Finally, the plants which have been raised under sheltered conditions must now be hardened off (see more here) before planting out. Gradually lower the temperature and reduce the watering while exposing the plants to brighter light for seven days prior moving them out to a cold frame. Keep an eye on the weather as sudden changes, as it often happens in spring, could spell disaster to your young plants.
We hope your garden is biodiverse and fruitful this year! For more information – and companion plants – visit Eising Greenhouse and Garden Centre this spring! 🌿
For tomato lovers, picking a warm, flavourful tomato right off the plant for a sandwich, burger, or salad is a sure sign of summer! I eagerly await the day the first fruit begins to turn red, knowing that I am a day or two away from the first of many toasted tomato sandwiches for the season!
By the end of June, your tomato plants should be in the ground or pot, staked, and well on their way to producing fruit. But how do you keep your plants healthy all summer so that you can maximize your investment? Here are a few tips to help keep your tomato sandwiches coming until frost!

Water
Water early in the morning and water deeply. For tomatoes, consistent moisture is best.
Keep the water on the ground, not on the foliage. This is important because damp foliage can lead to diseases like early blight, which can ultimately cause the entire plant to die. Mulching around the base of plants will reduce the amount of water that can splash up onto the leaves. A soaker hose or drip line is also a great way to ensure that water stays on the ground, rather than on the plant.
Pruning
Reducing the amount of foliage on a tomato plant is necessary for a couple of reasons: good air flow, which reduces the chance of powdery mildew forming, and less foliage means that the plant can send energy to growing fruit instead of lots of leaves.
Follow these easy steps when you prune your tomato plants:
- Before you begin, remember to follow the rule for pruning - no more than ⅓ of a plant should be removed at a time.
- Use clean scissors or pruning shears to cut the leaves off the bottom of the plant. Remove any leaves that are touching the ground. These are particularly susceptible to mildew formation.

When fruit starts forming, remove the leaves from the bottom of the plant up to the first or lowest fruit.
Remove suckers ongoingly. What are suckers? When you look at your tomato plant, you will see the main stem that comes up from the ground, and branches of leaves that come out of the main stem. As the plant grows, suckers begin to form in the “Y” between the main stem and a branch of leaves. Suckers won’t harm a plant; they just make it very unruly and reduce airflow.

If your tomatoes are indeterminate (growing into a tall vine), remove the top of the plant when frost is forecasted at the end of the season. Topping the plant allows energy to ripen the fruit that’s already set, rather than being used to continue growing the vine.

NOTE: Some gardeners like to leave suckers on determinate tomato plants as this can increase the yield.
TIP: Tomatoes ripen from the inside out. That means that by the time you see fruit beginning to flush on the outside, the inside is already ripe. If you have competition for tomatoes from pesky critters, or when there’s a chance of frost in the weather forecast, you can pick fruit that has just begun to turn colour and leave it on the kitchen counter to continue to ripen.
Fertilizer
Using organic material is one of the best ways to feed your crop. A good layer of compost, 1-2 inches, in the spring when you’re planting and again in the fall each year is one of the best ways to improve your soil structure in the garden, and it also adds lots of nutrition.
If you missed this step when planting your garden, you can always add a layer of compost around your plants or use other organic fertilizers, such as compost tea, seaweed, worm castings, or fish emulsion.
Alternatively, you can use a fertilizer that’s formulated especially for tomatoes - these usually have a ratio like 3-4-6 or 4-7-10. Follow label directions for amounts and err on the side of caution. Using less fertilizer is always better than using too much, as an excess can stress the plant and make it more prone to disease.
Following these simple steps for tomato care will help to ensure your plants stay healthy and producing fruit, but if you should have problems, here are some great resources to identify tomato issues:
- Ontario.ca: Bacterial diseases of tomato: bacterial spot, bacterial speck and bacterial canker
- Guelph.ca: Healthy Landscapes – Plant List Native and Drought-Tolerant Plants
Knowing how to stake plants properly is a valuable skill for any gardener, especially when you're growing vegetables. Some grow pretty tall and need a little extra help to stay off the ground so their fruits won't sit in a pile in the dirt and get funky. It can get pretty windy here as well, so providing some extra support will help prevent damage from heavy winds and rain.
Staking may look pretty straightforward, but there are some best practices you should follow to ensure good results. If you're planning on growing some tall, or vining garden plants, or if your mature plant keeps falling over, follow these tips on proper staking in the garden.
5 Tips For How To Stake Tomatoes And Other Garden Plants
Tomatoes, cucumbers, peppers, beans—there are so many garden greens that benefit from extra support. It keeps them from bunching up on the ground, allows full sunlight exposure, and prevents the wind and rain from totally pummeling them. Now that summer is approaching, many of your garden veggies are getting taller, and you'll need to step in before they flop right over. Here's how to do it correctly, so your vegetables grow big, bright, and delicious, according to plan.
Pick The Right Kind Of Stake
If you've got a plant with one stem, you can get away with using a simple wooden stick or pole. If there are multiple stems, then a cage might work a bit better, because you'll have more spots to tie on to. The cage must be at least one foot taller than the plant. If you're using a wood stake, make sure it's made with untreated wood so chemicals won't leach into the soil and contaminate your veggies. Bamboo stakes are also another great option. If you've got a vining plant, you may want to use a trellis. These can be quite beautiful with so many sizes and shapes to choose from; now, it's time to get out and find a creative way to integrate it into your backyard decor!
Drive The Stake Down 14 Inches And Facing North
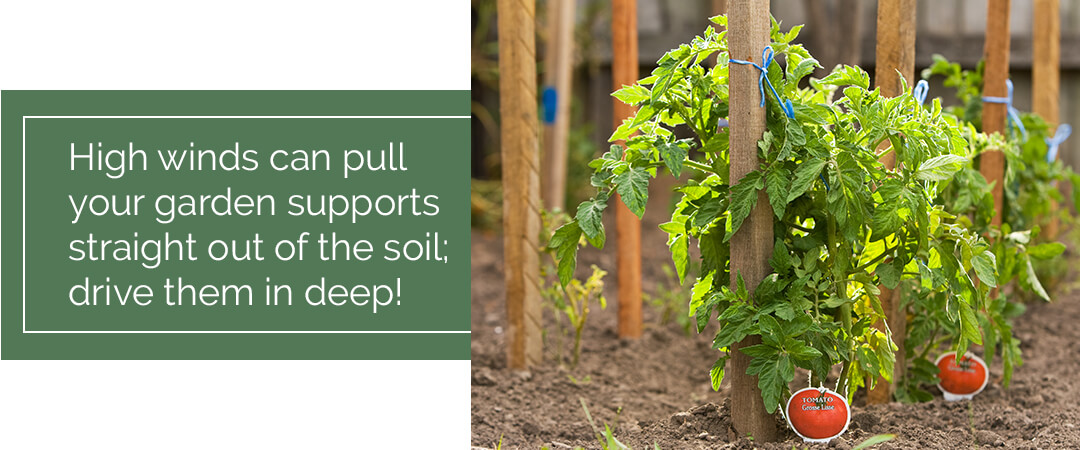
High winds can pull your garden supports straight out of the soil, and that can do some serious damage to your veggies. If you drive your stakes down into the dirt deeply, you won't have to worry about that happening. Making sure they're on the Northern side of the stem will be helpful too, especially if your supports are thicker, then they won't block any of the sunshine!
Tie Stems As They Grow Every 6 Inches
As your plants continue to grow, you need to keep securing them along the way so they don't flop. Monitor the development, and every time there's at least 6 inches of new growth, tie the stem to the support. Use material like gardeners tape, thick twine, velcro ties, or even strips of old pantyhose for securing.
Don't Tie Stems Too Tight
Leave a little bit of wiggle room—about one inch around the stem. If the ties are too tight, they could cut into the stems and hinder proper development. Try to avoid spots where leaf shoots are likely to emerge, so they don't get all bunched up. Instead, try to stick them a bit above the leaf shoots, so they'll stay in place and won't slide down the stem.

Replace Stakes When Needed
If your supports become too small, you need to replace them to accommodate for more growth. Some fast-growing plants may need to be re-staked every couple of months, or even sooner. Drive your new supports into the same hole as before, to avoid disturbing the roots. It helps if you use a mallet to drive it in deeply.
Are you in need of some supports and equipment to help your veggie garden along? Visit Eising, or place an order over the phone for curbside pickup or delivery. If you have any questions, don't hesitate to ask—we love to help our fellow gardeners!
If you haven’t gotten started on your summer vegetable garden yet, don’t worry—there are still plenty of veggies you can plant now for a late-season harvest! That means more fresh produce to enjoy through the fall, and with the help of our trusty freezers, many can be enjoyed well through winter and spring. You can find all kinds of seeds and starters for vegetables and fruits on our brand new webstore, so feel free to browse online and place an order for curbside pickup or citywide delivery.
What Are The Best Vegetables To Plant In Summer?
Generally speaking, vegetables that can be planted in summer are either fast-growing and love the sun, or slow-growing and tolerant of the cooler temperatures in the fall. Many garden edibles can get scorched from the hot sun if planted too early, so it’s best to delay so that they’re ready to go once the temperature is less extreme.

Late Summer Vegetables You Can Direct Seed
Many folks assume that spring is the best time for planting vegetable seeds, but every plant is different! So, if you want to start planting seeds in summer, there are more than a few good options for you to choose from. Here are the best late summer vegetables to plant in Simcoe through direct seeding:
Beans: Perhaps one of the easiest and most kid-friendly veggies to grow, beans are always a favourite. Plus, they deposit nitrogen into the soil, which helps improve soil quality.
Beets: These hearty root vegetables make excellent comfort food, and their ultra-vibrant colour indicates super-high levels of vitamins, nutrients and antioxidants. Your beets will be ready for harvest around September or October.
Broccoli: Even the pickiest of eaters aren’t likely to turn down a delicious bowl of broccoli cheese soup, or a Chinese beef and broccoli stir fry. Sow broccoli seeds in June for a harvest that’s ready right at the start of back-to-school season.
Carrots: Before you sow your carrot seeds, make sure your soil is super loose and free of rocks and compacted areas. If it’s all clumped together, the roots won’t grow long and pointy, so you’ll be left with stumpy, misshapen carrots.

Leafy Greens: Lettuce, kale and spinach can all be sown directly into the soil in June. They don’t take too long to develop, and they thrive in cooler temperatures, so you can even get away with planting a second round in early autumn!
Parsnips: Slow-growing parsnips need around four months to mature, but there’s no need to rush! Parsnips taste best if you harvest them after the weather has turned chilly. If we get hit with a few frosty nights in autumn, this will actually help them! Just make sure you pull them up before the ground freezes.
Potatoes: While not technically seeds, you can put potato tubers in the soil in June to enjoy an autumn harvest. Wait for the plants to mature, turn brown, and wither, then leave them in the soil for another three weeks before pulling them up! Store them in a cool, dry spot, and don’t wash them before storing—this will cause them to rot.
The Best Starter Plants For Late Summer Crops
The waiting game can get a little long when you directly seed certain plants, so sometimes it’s better to get a starter plant to transplant into containers or your garden bed. Here are some excellent starters to pick up later in the season:

Zucchini: “Zoodles,” or spiralized zucchini noodles, are quickly gaining popularity as a delicious alternative to carb-heavy spaghetti. If (like many of us) you’ve been kinda overdoing it on the pasta lately, you’ll definitely enjoy having this tasty squash in your garden.
Celery: This ultra-healthy, crunchy veggie adds some great crunch to tuna salad, chilli, and stews, but it takes a pretty long time to develop from seed, so you may as well skip ahead and opt for a starter.
Cucumbers: Technically, you can either transplant or direct seed cucumbers in June, but getting a starter will ensure you get to enjoy your harvest earlier in the season!
Peppers: With their thin, delicate skins, peppers aren’t too tolerant of chilly temperatures and will taste much better if they get lots of sunlight. Planting a starter in June will ensure these sun-loving veggies get peak sunshine in July and August, right when it counts.
Tomatoes: We especially love growing small tomatoes in hanging baskets! The little fruits look like strings of colourful porch lights changing from green, to yellow, to red!
Fresh garden produce can be enjoyed well into autumn, and even early winter, if you pick the right crops and time them just right. If you have any questions about late-season planting, feel free to give us a call at the shop, and we’ll be happy to help!