
By Ava Green
As soon as warm weather and sunshine arrive in Southern Ontario, it’s time to head to the garden centre and pick up all the plants we’ve been dreaming about all winter long! May 24th is generally the date we look forward to — the unofficial marker when frosty mornings are behind us and the promise of summer is ahead.
By now, cool-weather plants like cabbage, Brussels sprouts, peas, and lettuce should be well established in the vegetable garden. And for everything else, it’s go time!
TIP: Before you start planting, this is the ideal time to amend your soil. Top up your garden beds with fresh topsoil or enrich them with compost to improve soil health, add nutrients, and promote vigorous plant growth. Don’t forget to refresh the soil in your containers as well, with potting mix or compost.
Warm Weather Vegetables
When soil temperatures are consistently 60°F (15°C) or higher, it’s safe to plant all the warm-weather vegetable crops we’ve been waiting for! Plants that thrive in warmer weather include tomatoes, peppers, eggplants, cucumbers, zucchini and corn.
At Eising Garden Centre, you’ll find vegetables in 6-packs, 4” pots, trellised patio containers, patio bowls and hanging baskets - while supplies last, of course!
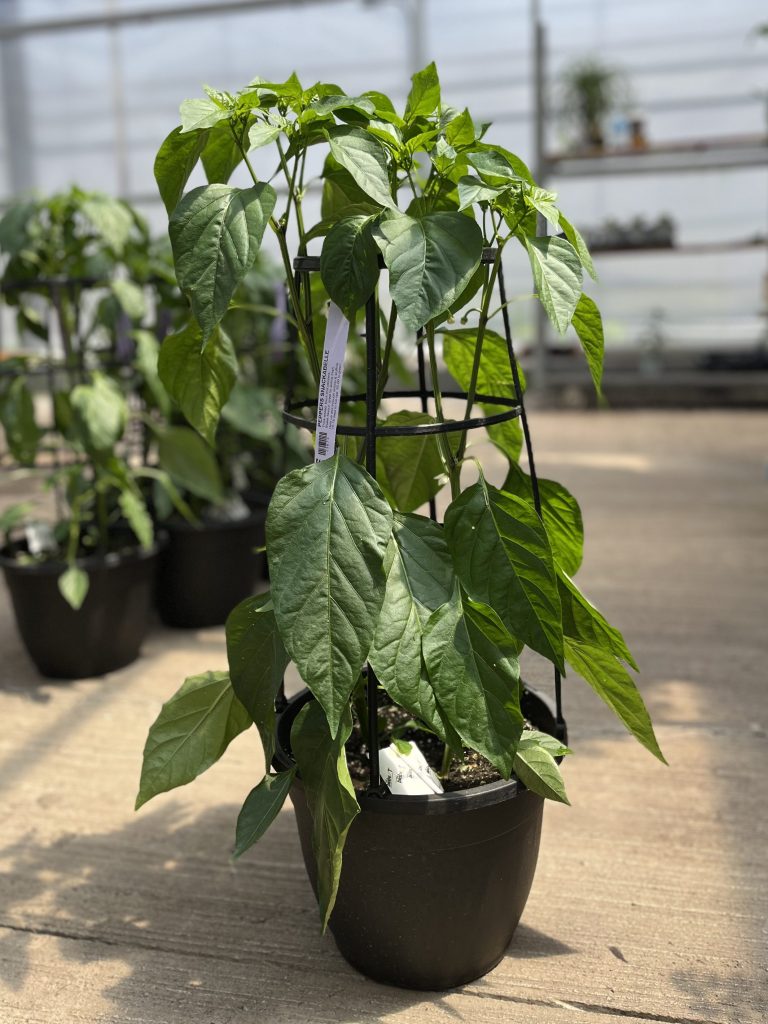
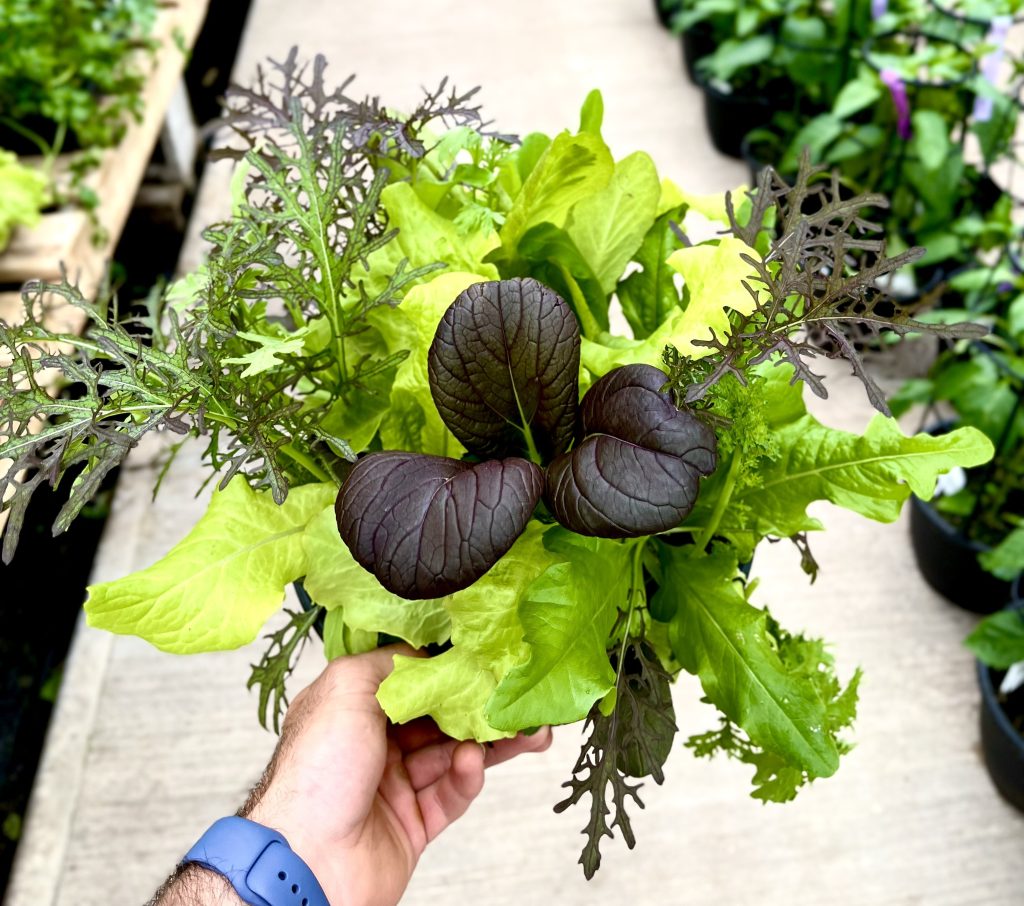

Herbs also love warm weather, and tender varieties like basil are safe to plant once all danger of frost has passed. Whether you plant herbs directly into the ground or create a potted herb garden near the kitchen door, they’ll add fresh flavour to your meals all season long. A container of herbs also makes a wonderful gift when visiting friends and family for a summer BBQ.
While you’re in the vegetable and herb aisle, keep an eye out for everbearing strawberries in planters and containers of tropical fruits like lemons, limes, and oranges.
Annual Flowers
Winter-weary flower beds can be revived almost instantly with a burst of colourful annuals! If you’re looking for an immediate impact and blooms that last all summer long, annual flowers are the answer.
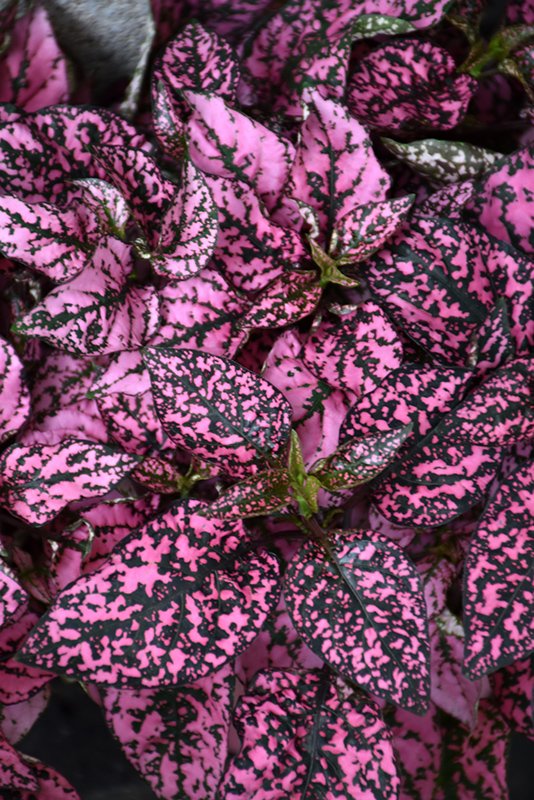
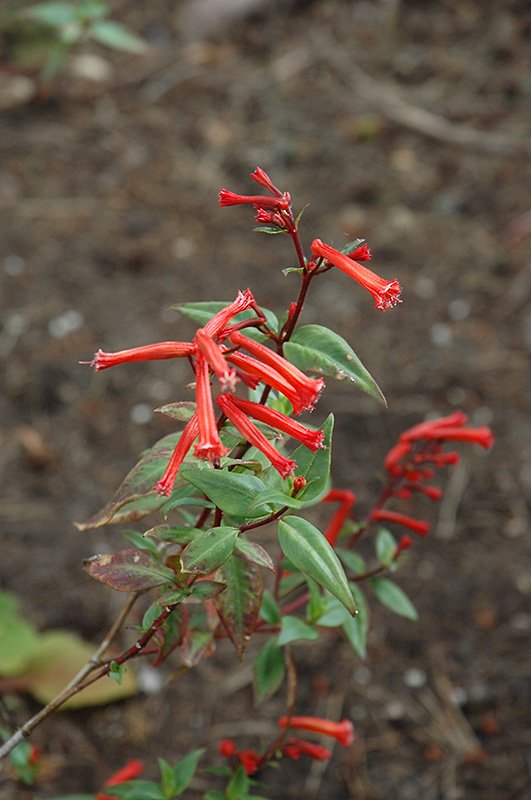
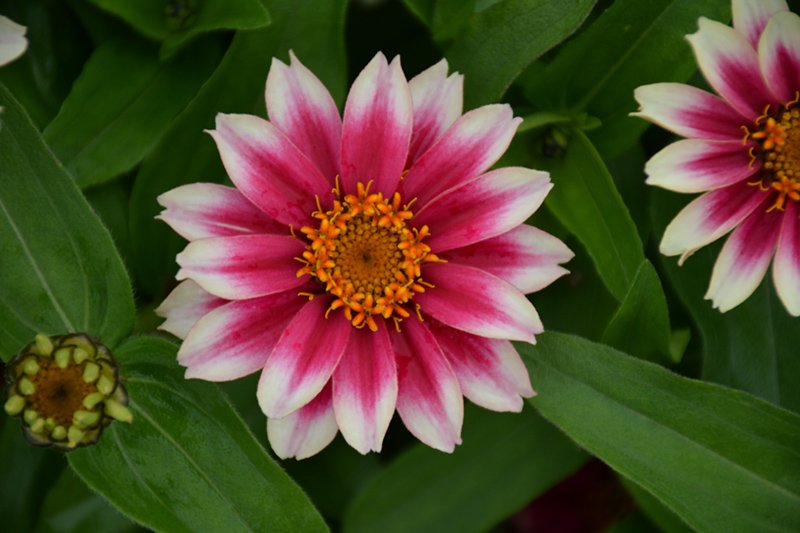
Whether you plant them in beds, containers, window boxes, or hanging baskets — or choose from one of our gorgeous pre-planted options — just add water and fertilizer, and you’ll be rewarded with a vibrant display that keeps on giving.
Perennials
While perennials may not bloom all summer, many offer extended bloom periods, and by combining different varieties, you can create a succession of flowers that lasts for months. Perennials also provide essential greenery to anchor your garden and enhance the look of your flowering plants.
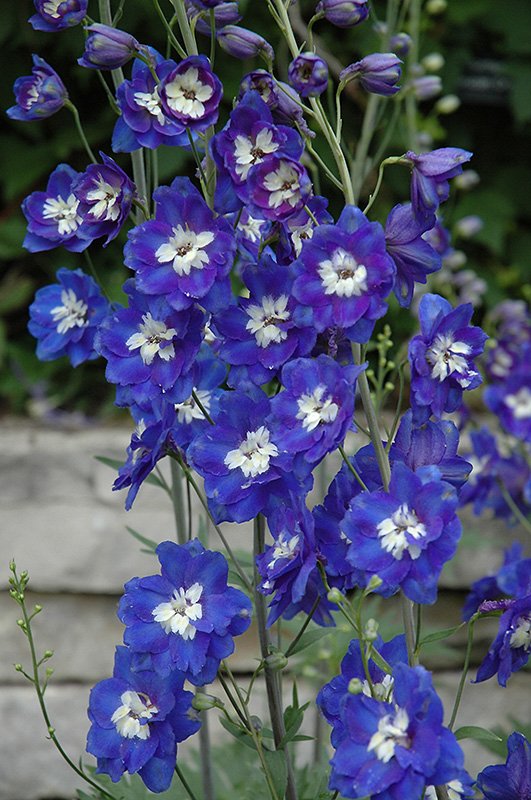
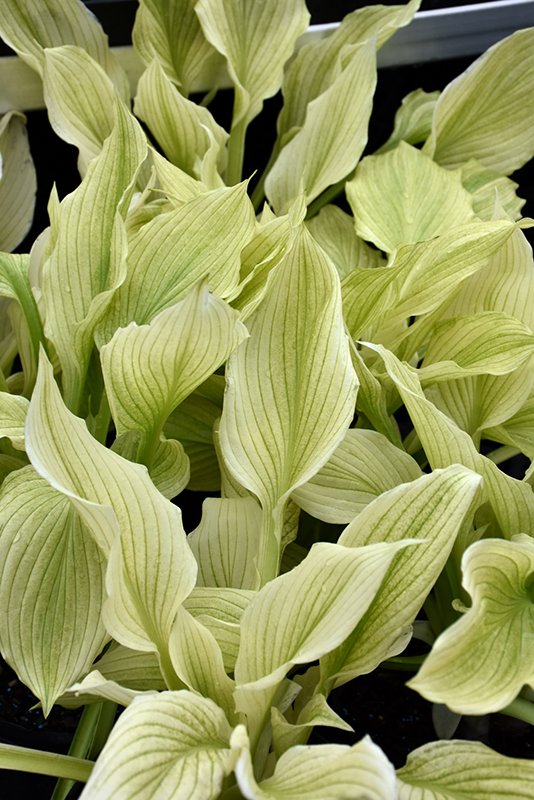
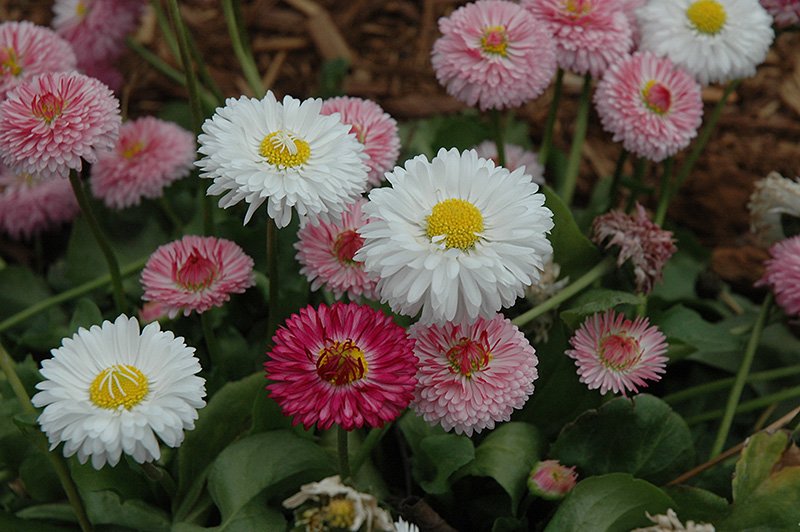
You can plant perennials from spring through fall, but getting them into the ground now gives them a strong start. From hostas and ornamental grasses to daisies and delphiniums, there’s a perennial for every style of garden — and the best part is, they’ll return each spring like dependable old friends.
Trees, Shrubs and Vines
Often called “the bones” of the garden, trees, shrubs, and climbing vines add essential structure, height, and seasonal interest. Planting them now allows you to design your garden layers thoughtfully, incorporating annuals and perennials around their base.
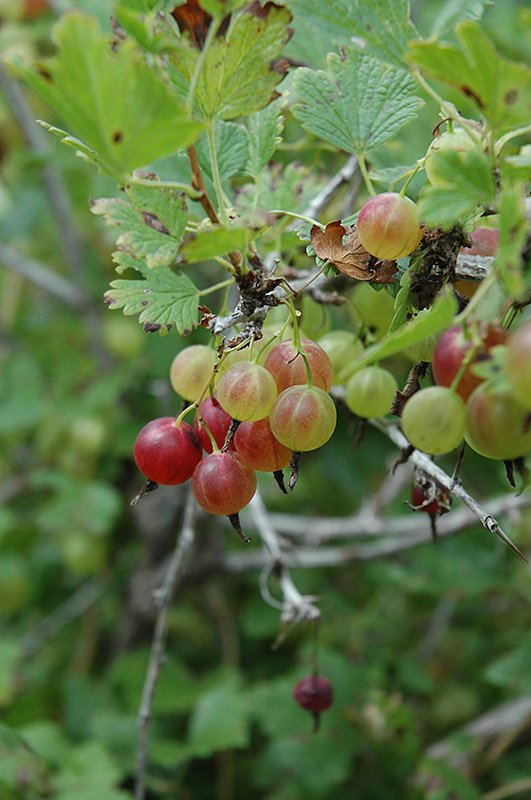
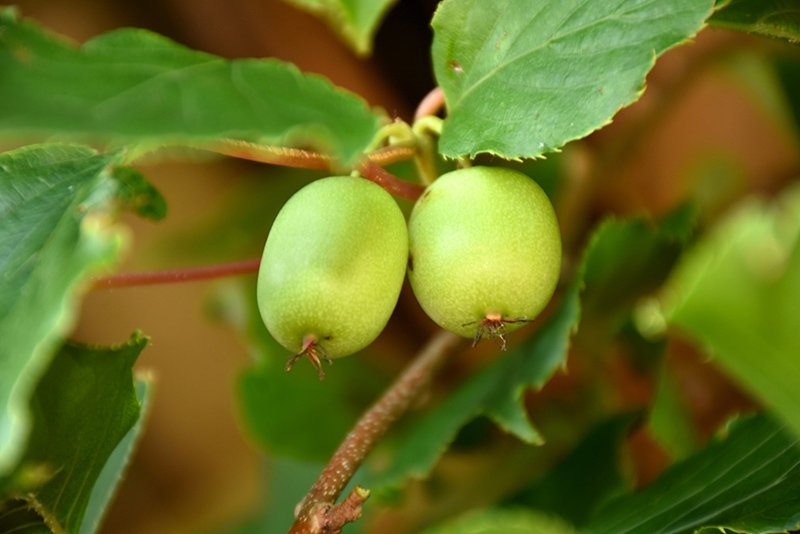

Spring is also the prime time to purchase and plant fruit trees and fruiting shrubs. At Eising, spring offers the best selection for starting your home orchard. Are you thinking of adding a few edible shrubs? Gooseberries, haskaps, hardy kiwi, rhubarb and raspberries are excellent choices.
Mulch
Okay, it’s not a plant, but this is a reminder to add mulch to your garden beds or containers. After planting, adding a layer of mulch to your garden beds or containers helps retain soil moisture, reduces transplant shock, and suppresses weeds. Even if a few weeds manage to sneak through, mulch makes them easier to pull.
Water Garden Plants
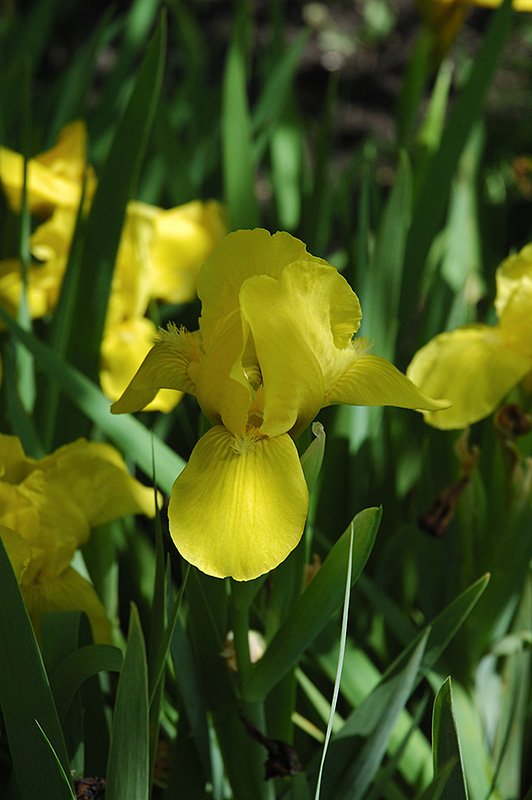
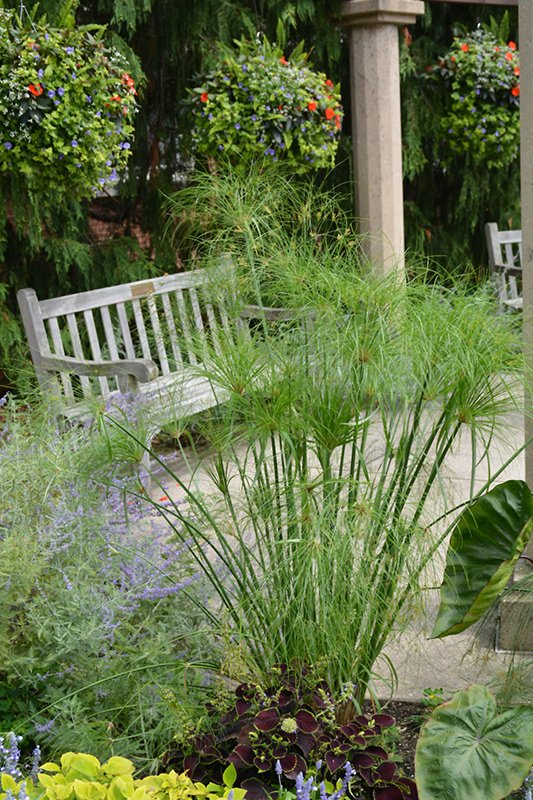
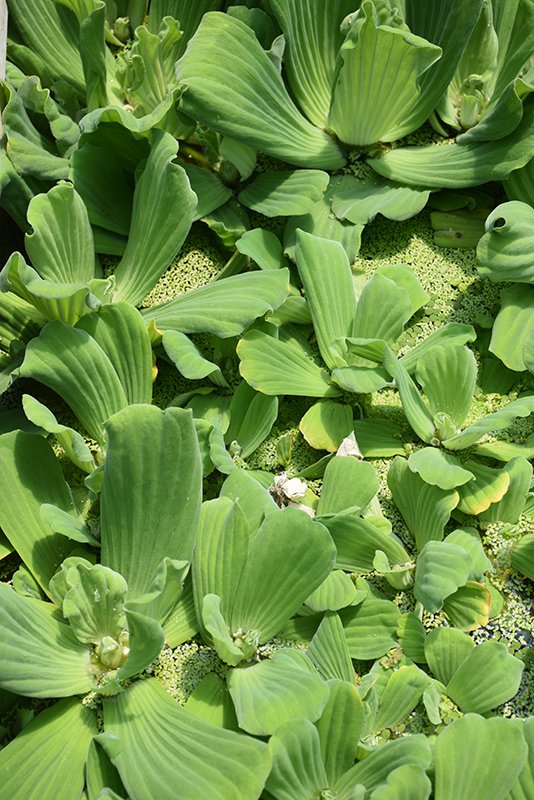
If you have a garden pond, spring is the perfect time to add water plants. Floating plants, such as water hyacinths and water lilies, help shade the pond’s surface, reducing algae blooms. Marginal or bog plants, such as water iris, papyrus, and cattails, also help keep the water healthy and clear by improving oxygen levels and providing habitats for beneficial wildlife.
Time to Grow!
May is one of the most anticipated and exciting months in the garden. Whether you’re dreaming of fresh vegetables, a lush landscape, or a colourful flower display, planting now sets the stage for a beautiful, bountiful season. Visit us at Eising Garden Centre to find everything you need — and let’s get growing!
By Dave Zeldon and Ely Schweyer
This is a question we hear daily during the spring, summer and, especially, the fall. Unfortunately, many homeowners do not see any adverse changes occurring in their trees until they look dead, or nearly so.
You Might Not Need to Panic Yet
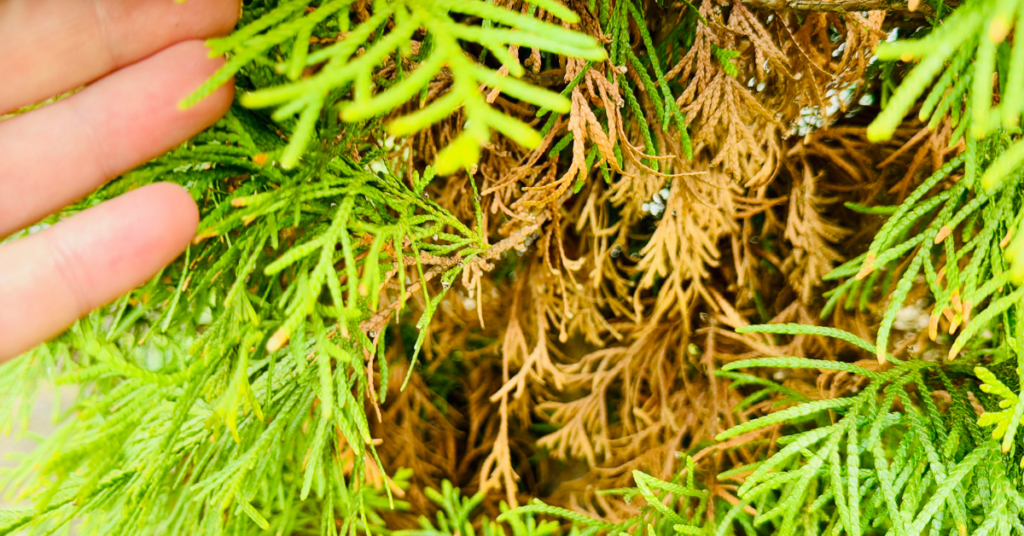
The discolouration and dropping of evergreen needles are a natural phenomenon and the main cause of needle loss in the wild. Evergreen needles, as the name implies, survive for a lengthy period, and in fact usually have a life span of five to seven years on healthy trees, however, they must be shed. The needles first start to die in the central and lower part of the tree, and this change progresses upward over time. You will see spruce trees naturally lose needles as they get older.
Age is an important factor here in causing needle loss and branch death, however, in landscape plantings of coniferous evergreen trees, pests and disease are likely the major cause of needle loss and dying branches. If there is a sudden fall of a very large number of brown needles and leaves, this signals to us that there is something drastically wrong!
This can happen as early as a year or two after a tree is planted. This is especially true in Haldimand and Eastern Norfolk County where heavy clay soils predominate. Spruce trees, for example, do not grow well on clay soils.
When You DO Need to Worry
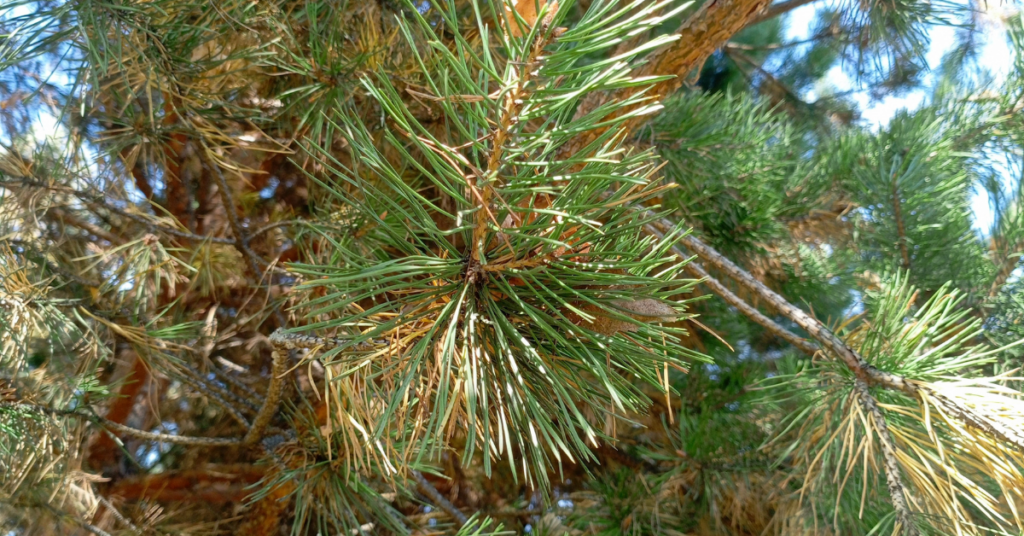
Here are some of the more common problems, apart from natural aging that afflict spruce trees, the probable causes and ways of treating the problem.
☝️Unfortunately, these majestic trees, the most popular evergreen planted on our residential properties, incur many other pest and disease problems not dealt with here.
Symptom: Rusty brown needles that eventually fall.
Likely causes:
1. Internal fungus disease (called Cytospora or white blister canker). This creates cracks in the bark causing resin to drip and leave grey-white dripping streaks on the bark. The fungus also causes open wounds or blisters on tops of branches. These wounds can be greyish white or greyish blue in colour, eventually turning brown and black.
2. Feeding by spider mites which leave fine, poorly formed webs in the needles, especially near the ends of the twigs.
Best treatments:
1. Properly aerate and fertilize tree out to a distance of half its height in all directions, where possible.
2. Pressure wash thoroughly once a month with water only, all needles and branches as high as possible on the tree. Water pressure dislodges spider mites.
Symptom: Chewed up ends of twigs in June.
Likely cause:
Spruce bud worms which develop in the needle cluster that arises from a bud.
Best treatment:
Spray the biological pesticide, BTK (eg. Dipel), onto the entire tree when feeding is first noticed in early spring, to kill the young caterpillars.
Symptom: Black sooty mold covering twigs and needles.
Likely causes:
1. Spruce bud scales, ball-shaped insects, initially light brown in colour but eventually turning black. Often two to five scale balls cluster in one location on the twig; honey dew excretions from scales become infected with sooty mold.
2. An overhanging shade tree such as oak, maple or elm may have heavily infested leaves with aphids whose honey dew secretions become infected with sooty mold.
Best treatment:
1. Pressure wash tree using water only to dislodge young scales (called nymphs) in May and early June while they are in the crawling stage. Scale nymphs fall to the ground where they cease to be a threat to the tree.
2. Spray shade tree in early spring with insecticidal soap to control aphids. The problems of other coniferous evergreens such as pines, firs, cedars and junipers can usually be treated with correct diagnosis, though some diseases are lethal.
We hope these help you troubleshoot common issues often found in evergreen trees! For more information - and evergreens – visit Eising Greenhouse and Garden Centre! 🌲
By Dave Zeldon and Ely Schweyer
Starting the first week of January, seed packets of many vegetable garden delicacies began arriving at your local garden centres. It’s a great time to plan your gardens and purchase your seeds while the selection is good but don't sow your seeds too early!

If started too soon, your plants will be leggy and overgrown long before you can transplant them into the garden. The general rule of thumb (even if yours isn't green), is if the seed packet recommends sowing four to six weeks before the last frost date, it's better to pick the four - rather than the six-week date (to calculate the sowing date, count back from the third week of May).
In this blog post, we’ll discuss the proper timing of the beneficial companion planting practice, to ensure an organic triple-play of pesticide reduction, nutrient sharing, and the fruits of your labour actually tasting better!
What is Companion Planting?
The use of companion plants is an organic approach embracing plant diversity that involves growing certain different types of plants near each other. By mixing a variety of plants together you confuse harmful insects (i.e., the ‘Three Sisters,’ corn, beans, and squash). When you plant certain vegetables together or alongside flowers or herbs, you can often camouflage the scent of a given plant so that its potential enemies can't find it. For example, if you plant onions and carrots together, the Carrot Rust Fly can no longer detect the scent of its "prey," the carrot.
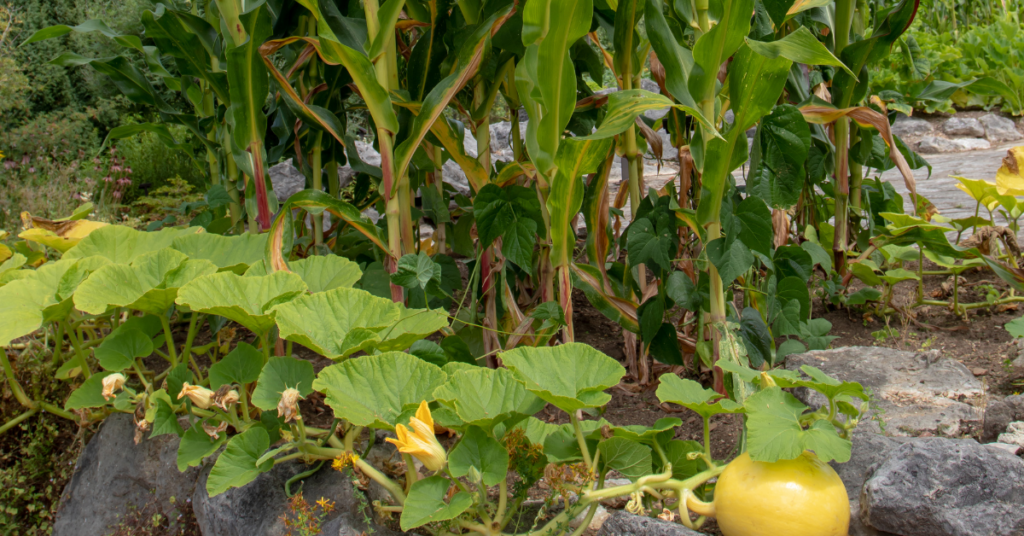
☝️ Plants also share nutrients and amend the soil below ground – in the instance of the Three Sisters, beans fix the nitrogen content of the soil for corn, who has long lost its ability to produce its own nitrogen.
What to Plant?
Herbs Make Excellent Companion Plants
Instead of grouping them all together in a corner, plant them in among your vegetables. Tarragon and marjoram give off a scent that repels most insects. Sage, rosemary, and thyme repel insects that feed on the different plants of the cabbage family. Plant these herbs near your cabbage, cauliflower, and brussels sprouts. Coriander attracts parasitic wasps that are very useful in controlling all sorts of pests.
🖱️ See more on companion planting with herbs here.

Why Not Try Flowers in the Vegetable Patch?
Nothing will make your vegetables happier! Plant borders of alyssum and cosmos; these attract beneficial insects and repel certain harmful ones. Marigolds protect tomatoes from threadworms, and nasturtiums and petunias attract aphids. If you plant them near your tomatoes, the aphids will choose the flowers instead of your tomatoes.
Meet My Plant Friends!
Plant friends are plants that can be grouped together because they mutually help each other grow. Basil stimulates the growth of Tomatoes and enhances the quality of the yield. Chamomile improves the growth and taste of cabbage and onions. It has been found that peas and beans enhance the growth of cucumbers and potatoes. Peas and beans also repel the Colorado Potato Beetle that commonly attacks potatoes and eggplant.
Once you’ve decided who is going where, it’s time to focus on when who is going where.
When To Plant?
It is important to know when the last spring frost date is for your area. Many plants need to be planted after the last frost, so that they don't freeze their little buds off! Follow this guide so that you can have healthy, sturdy little plants that will become good friends in your garden this summer.
| Ten Weeks Before Last Frost Sow indoors: broccoli, brussels sprouts, cabbage, cauliflower, eggplant, lettuce, peppers, and onion |
| Eight Weeks Before Last Frost Sow indoors: tomatoes Sow outdoors: spinach |
| Five Weeks Before Last Frost Sow indoors: marigolds (do not transplant until after last frost) Sow outdoors: peas Transplant: broccoli, cabbage, cauliflower, onion |
| Four Weeks Before Last Frost Sow indoors: cantaloupe, cucumbers, okra, pumpkins, squash, and watermelon |
| Three Weeks Before Last Frost Sow outdoors: carrots Transplant: brussels sprouts, hardened off frost-hardy herbs like chives and oregano |
| Week of Last Frost Sow outdoors: pole beans Transplant: cantaloupe, eggplant, lettuce, okra, peppers, pumpkins, squash, tomatoes, and watermelon |

BONUS: Tips on Ensuring Your Seeds Have the Best Start!
🌱 To ensure success it is always best to use fresh, sterile seed-starting mixture (available from garden centres). Moisten mixture about an hour before sowing; it shouldn't be soggy, just as damp as a wrung-out sponge.
🌱 Follow the information contained on seed packets in terms of timing, lighting requirements, sowing depth, and optimal germination and growing temperatures.
🌱 Lightly water freshly sown flats, then cover with plastic dome lid, or if reusing containers try placing them inside a plastic zip-lock bag. At the first signs of germination, uncover or remove from plastic bag.
🌱 As the seedlings develop, wait until the top of the soil looks dry, water carefully using a small watering can with a fine spray. Avoid over watering: soggy soil and poor air circulation can lead to damping off, a fungal disease that can kill seedlings.
🌱 Locate your seeding flat in a bright window but grow lights or cool fluorescent tubes are better. Keep seedlings about eight to 10 centimetres from light source to prevent plants from becoming too spindly. Plug lights into an automatic timer set for 16 hours on, eight hours off. Be careful if you’re using the windowsill method though, as extremes in temperature may occur from hot drying sunny days to frigid evenings.
🌱 When seedlings have two sets of true leaves (the first leaves are called cotyledons — or seed leaves — so wait for the true ones, start feeding once a week with a balanced (20-20-20), water-soluble fertilizer at half-strength, working up to full strength after a few weeks.
🌱 Finally, the plants which have been raised under sheltered conditions must now be hardened off (see more here) before planting out. Gradually lower the temperature and reduce the watering while exposing the plants to brighter light for seven days prior moving them out to a cold frame. Keep an eye on the weather as sudden changes, as it often happens in spring, could spell disaster to your young plants.
We hope your garden is biodiverse and fruitful this year! For more information – and companion plants – visit Eising Greenhouse and Garden Centre this spring! 🌿
By: Dave Zeldon and Ely Schweyer with tips from Mary K, Zach C, Sandy M, and Jeanine LT!
Now is the time to prep our outdoor landscapes for the coming cold weather and the ensuing spring! Perhaps your autumn is calmer than your spring, and this is the best time to clean up and begin new projects. The following are some simple but effective tips to get your yard winter-ready - so your spring will be a little more pleasant for you!
Planting
When warm weather still allows it, plant trees, shrubs, perennials, and bulbs to allow them to establish for budding and blooming next spring.
Pond Care
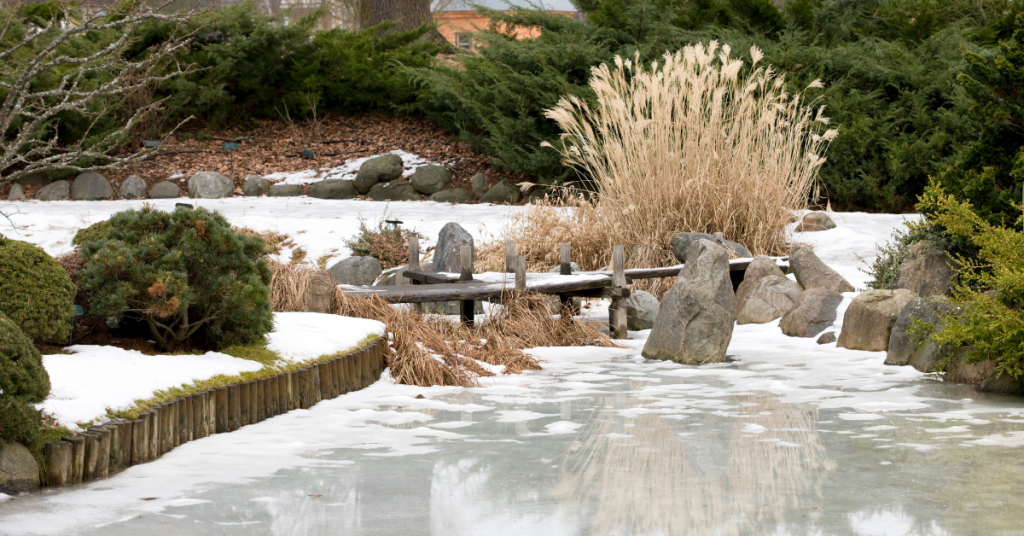
Mary, our perennials gal, suggests not removing any water from your pond but instead aerating it all winter. She skims out the leaves to maintain the balance of the nitrogen cycle in the water and suggests waiting to do a big pond clean out in the spring, as that’s when the water’s culture can bounce back easier.
Fertilizing
After top growth of your landscape plants ceases, reduce your annual fertilizer application by up to half of the requirement. Autumn is a major root growth period for woody and herbaceous perennials; roots will grow and absorb nutrients whenever soil temperatures remain above 5 °C but can be over fertilized quickly in these cooling temperatures.
Produce gardens could benefit at this time from a top layer of compost that will break down during the winter so it isn't too 'hot' for spring planting.
Leaf Litter
Here’s our pitch on the ‘leave it – don’t leave it’ debate: It DEPENDS.
Ideally, we should leave litter leaf on the ground for our pollinator friends and endangered species like fireflies to hide out in the winter. But, there are appropriate situations in which to remove leaf litter.
- When they’re covering your bulbs and tender perennials, remove SOME. Leaf litter acts as a ground insulant, which can amplify our temperamental zone 6b temperatures. This freezing and thawing can often confuse and kill early spring bulbs and tender perennials.
- Zach, our trees and shrubs guy, suggests that if a tree shedding leaves has been diagnosed with pests and fungi, remove the leaf matter to reduce the spread to other plants. Diseased matter should always be removed in a quarantined fashion and taken to a landfill or burned.
☝️Please note: Unless diseased, compost your leaves, they contain vital nutrients specific to the plants they came from!

Lawncare
With autumn mowing practices you have the opportunity for the addition of much needed organic matter for your lawn, which is also an excellent source of slow release nutrients. Keep mower blades sharp since leaves can be tougher than grass. Raise the mower height up and mow leaves when they are lightly wet (e.g., morning dew). This will keep the leaves from blowing all over and will prevent the mower from getting bogged down in wet leaves.
See more on general lawncare in Dave's Lawncare 101 post.
Clean Up
Now is a good time to wash your tools with soap and water to prevent diseases spreading from plant to plant.
☝️Mary's tip is to spray garden tools with PAM before use, so the dirt slides right off them!

Pruning Perennials
Mary, our perennials gal, suggests leaving things until frost to cut back. This way they're easier to compost. Make sure to leave seedheads (i.e., coneflowers and black-eyed Susans) for wildlife, and things like hydrangeas for winter interest.
☝️Make sure if things are cut back, to leave them sticking up enough you can still find them in the spring!
Dividing and Moving Perennials
Moving or dividing perennials in the autumn is a great way to reduce your work next spring. The cool, moist weather is an ideal time for perennial roots to become well established.
👍The rule of green thumb for moving perennials: If the plant blooms between early spring and late June, then early fall division/moving is ideal. If the plant blooms after late June, then early spring division is ideal (except for Peonies which should only moved or divided in the fall, Poppies in August, Irises in July & Lilies in the Fall).

Overwintering Trees
Zach and Sandy from trees and shrubs suggest a couple of things to help your favourite trees along this winter:
- To reduce winter injury in evergreens: Keep properly watered throughout the growing season and into the fall is another way to reduce winter injury. Decrease watering slightly in September to encourage hardening off, then water thoroughly in October until freeze-up.
- Cedars - Spray cedars with antidesiccant spray (available at Eising GC) or wrap in burlap (with stakes to create dead air space) so wind doesn't dry out and burn tips.
- Fruit trees - In late fall, spray fruit trees with sulfur-horticultural oil (available at Eising GC) for protection against fungi and pests overwintering in the bark.
- Ornamental trees - wrap the base of young trees to protect from chewing rodents.
- Pruning trees - trees that prefer winter pruning rather than spring pruning are maples, oaks, birches, and elms, as well as with fruiting trees such as apples and pears. This ensures blight and pests will not affect the tree's open wounds.
If you missed the frosty deadline for transplanting trees, Sandy suggests insulating unplanted potted trees to help them best survive the coming winter. Here are some methods:
- Double-pot your tree with an insulative barrier (i.e., burlap, straw, mulch, etc.) stuffed between the two pots and securely cover the top with tarp to deflect moisture.
- Bury your potted tree in the ground, level with the top of the pot (don’t forget to dig it back up!) and mulch the area.
- Huddle all of your unplanted trees and plants together when using the above methods.

Mulching
Mulching is one of the simplest and most beneficial practices you can do for your garden. Just by simply placing a protective layer of material over the bare soil will benefit the soil as it decomposes providing the much-needed organic matter which improves root growth, the infiltration of water and the nutrient-holding capacity of the soil while reducing soil erosion.
A good layer of mulch allows the soil to warm more slowly in the spring, so perennials aren't fooled into breaking dormancy too early, as you want the ground to stay cold until it really is spring!
☝️Make sure your mulch application won't stunt the growth of your plants come spring as discussed in our Transplant Troubleshooting blog post!
Japanese Beetle Prevention
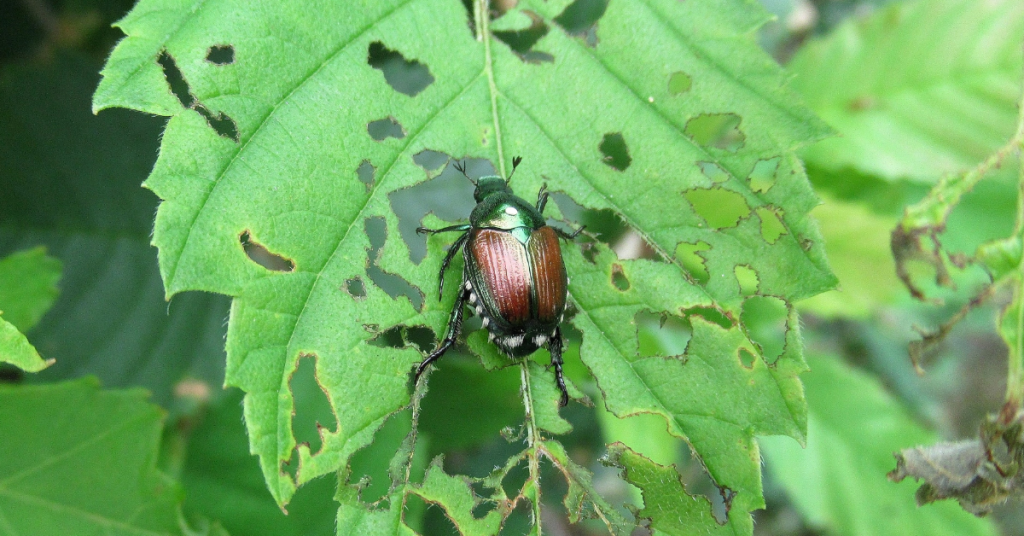
Nematodes are microscopic worms that should be applied to lawns that have been ravaged by grubs especially of the Japanese Beetle. Nematodes have a short shelf life and must be refrigerated until they are applied. Normally, they are sprayed onto the lawn from mid-May to mid-June and then again (for best practice) from mid-August to mid-September.
Pots
To prevent freezing and cracking, Mary suggests emptying and turning your pots upside down. You can disinfect at this time too.
Design Time!
Jeanine, from production, suggests writing down what worked best in your produce garden this year so you can implement it again in the spring.
With the trees and land being barren enough you can see its contour, now is a great time to plan ahead for spring landscaping! Don't forget Eising GC would love to offer help with your landscape designing!
We hope these tips help your landscape plants enjoy your winter abode as much as you do this season, for more information - and plants – visit Eising Greenhouse and Garden Centre! 🍁
By: Dave Zeldon and Ely Schweyer
Spring and early fall are generally the best times for planting trees. It has been found that newly planted trees thrive when exposed to moderate temperatures and rainfall, as they need time to root and acclimatize before the onset of intense heat and dryness of summer or the freezing temperatures of winter.
Now whilst planting different types of trees differ in detail, all trees eventually end up in a hole. But remember not just any old hole will do.
Let’s Get Digging!
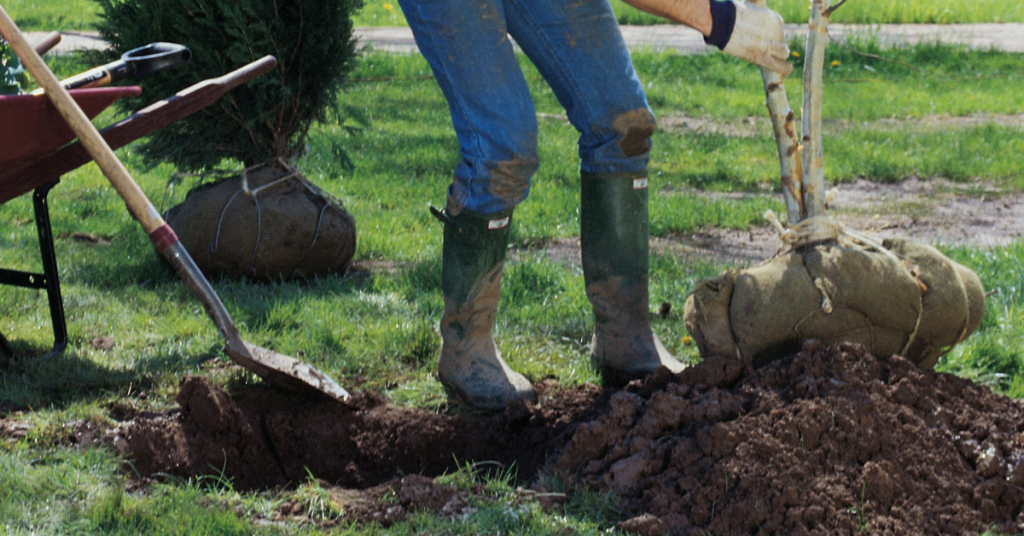
1. Some trees are buried too deeply, causing the tree roots to decline in health and condition. We have a whole other article dedicated to transplanting depth if you wish to read more, but here’s the just of it: Poor tree health results in reduced growth rate, atypical leaf size and colour, increased disease susceptibility, and reduced cold hardiness. Always make sure that the root collar flare is visible after planting; if settling occurs, reset the tree to the proper depth.
👉 Note: Many times, homeowners build a raised bed garden around an existing tree in the yard (thus burying the root collar flare) only to find within a year or two their favourite tree now is in decline. Don’t bury that root collar flare!
2. As a general rule, trees should be transplanted no deeper than the soil in which they were originally grown. The width of the hole should be at least three times the diameter of the root ball or container or the spread of the roots in the case of bareroot trees. This will provide the tree with enough worked earth for its root structure to establish itself.
3. When digging in poorly drained clay soil, it is important to avoid 'glazing'. Glazing occurs when the sides and bottom of a hole become smoothed forming a barrier, through which water has difficulty passing. To break up the glaze, use a fork to work the bottom and drag the points along the sides of the completed hole. Also, raising the centre bottom of the hole slightly higher than the surrounding area. This allows water to disperse, reducing the possibility of water pooling in the planting zone.
4. The backfill soil should be a mixture of composted manure and topsoil. The mixture should then be placed in the hole surrounding the tree just to the height of the ball or slightly lower to allow for some settling. Be careful not to compress the backfill soil as this may prevent water from reaching the roots and the roots from expanding beyond the ball.
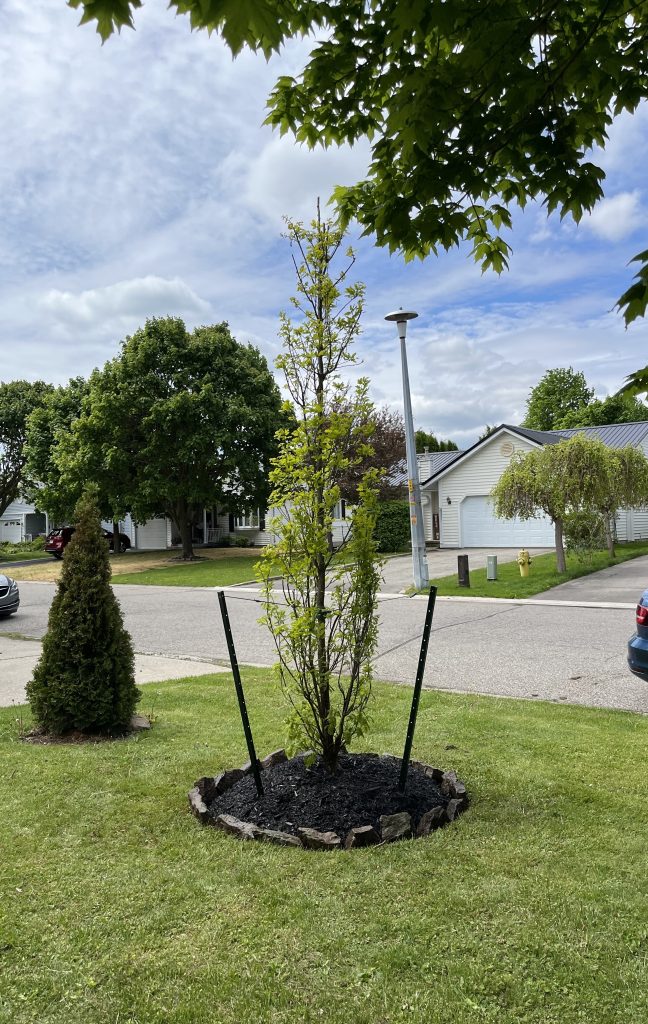

Jobs well done by the Eising landscaping team!
Standing On Its Own Roots
Young trees should be able to support their own weight when they are transplanted. If the tree is unable to do so, try thinning out the upper branches to reduce wind resistance. If that is not enough, you may have to stake a tree.
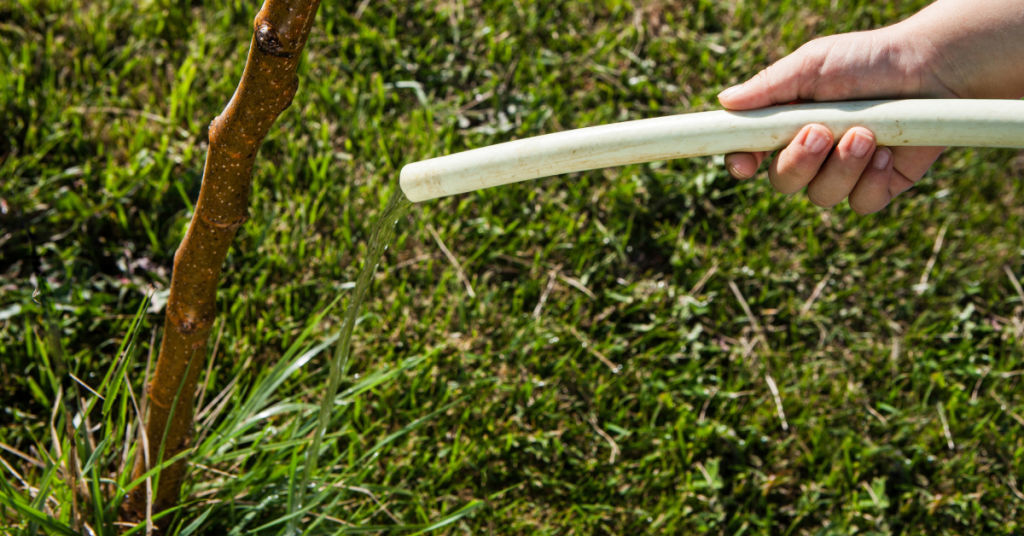
Watering Your New Tree
Newly planted trees should be watered at the time of planting. In addition, during the first growing season, they should be watered at least once a week in the absence of a good rain.
👉 Remember: Regular deep soakings are better than frequent light wettings.
We hope these tips can help you encourage the longevity of your new tree! For more information - and trees - visit our Trees & Shrubs section at Eising Greenhouse and Garden Centre. We hope to see you soon!
By: Dave Zeldon and Ely Schweyer
Let’s get in depth about planting trees too deeply!
Sometimes homeowners find that their newly planted trees start showing signs of stress and become unthrifty a little while after planting, and soon their investment is altogether lost when the plant just dies. Often when we’re asked to inspect a tree in poor health, we know what to suspect.
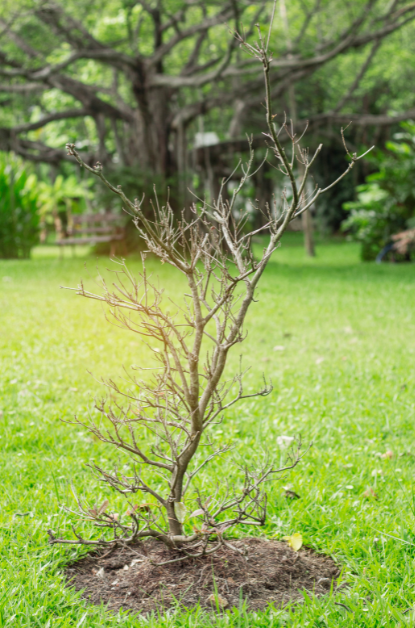

Although not readily apparent at the time of installation, the long-term effects of improperly placing the root system in the planting hole are substantial. The poor tree health that results manifests itself as reduced growth rate, atypical leaf size and colour, and increased disease susceptibility. Trees in really poor condition exhibit decay, cracks, and excessive deadwood. Sometimes trees show signs of stress within the first year of planting, but it usually takes several years for the problem to rear its ugly head.
The most common reason? Many trees are simply buried too deeply causing the tree roots to decline in health, as they cannot get the vital oxygen from the air that they require to live.
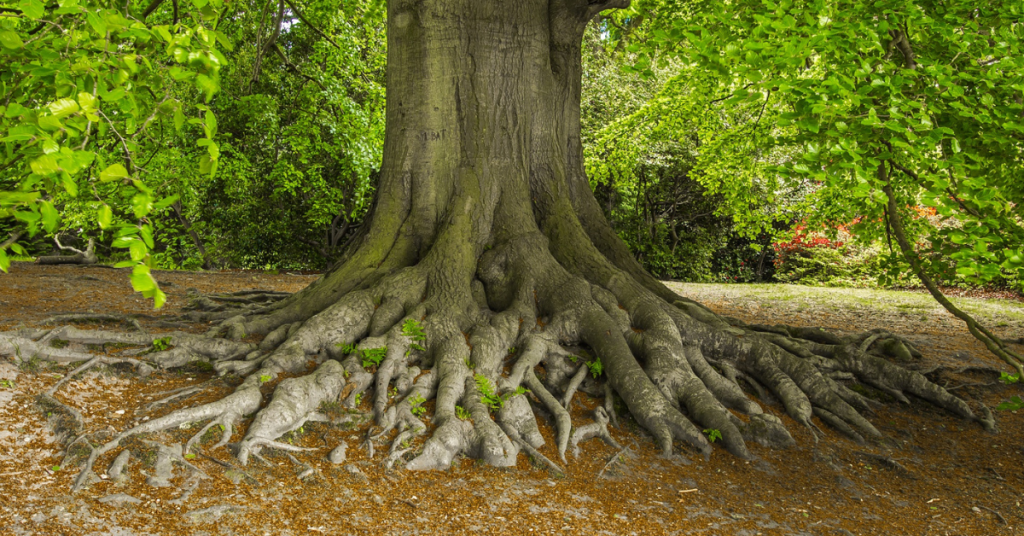
Putting Down Roots
The width of the hole your tree will call home should be at least two times the diameter of the root ball, container, or in the case of bare root trees, the spread of the roots. This will provide the tree with enough worked earth for its root structure to establish itself.
For tree roots to grow vigorously, they require water, oxygen, and warmth. An oxygen level of 25% of the soil volume is considered good for root development.
At a 5% oxygen level, growth stops, and at 2%, roots decline and die.
Since tree roots naturally grow quite shallowly in the soil profile, buried root systems are unable to obtain adequate soil oxygen and water. As a survival response, trees work to get roots closer to the soil surface where there is a more reliable source of both. The energy that a newly transplanted tree should use to overcome normal transplant stress is instead used just to survive.
The tree expends its energy either by forcing its roots to grow upward or by creating totally new roots from dormant buds on the buried trunk, wasting all its prior growth. Some plants can survive being buried too deeply and live normal lives after developing a functional root system, others begin a long, slow decline of health resulting in either premature death or sudden failure during wind or ice storms. Let’s not risk it!

How Do I Know How Deep to Plant?
If you want your new tree to not only survive, but thrive, it needs the best start possible; it is very important that the root collar flare be visible after planting. The root collar is the part of a plant where the stem and root system meet, "flaring" where it transitions between the stem wood and the roots. Always make sure that the root collar flare is visible after planting. If settling occurs, reset the tree to the proper depth.
👉 Note: The backfilling soil should be a mixture of the original soil with composted manure or topsoil and bone meal.
But I Did Leave the Root Collar Visible… When I First Planted It
It has been observed that many times after a perfect tree planting, the homeowner then decides to build a raised-bed garden around the tree (thus burying the root collar flare – we’ve found root collar flares buried to 24 inches in mulch!) only to find that within a year or two, their young tree is dead or dying.

A common practice, often referred to as ‘volcano mulching,’ also contributes to this problem. In addition to subjecting trees to the problems associated with planting too deeply, heat from the composting mulch can literally cook a tree's trunk.
So, What is ‘Planting Proud’ Then?
The transplanting rules are amended if planting in the heavier clay soils where the practice of planting your new trees "proud" is advised. Planting proud essentially means that the root ball is left higher out of the ground level, producing a hilled effect. The soil that is normally used for back-filling is used to help to create a mound. Planting your trees this way in poorly draining clay soils prevents the ground water from collecting in an otherwise deep hole and drowning the roots of your new planting.
But, as a general rule, trees should be transplanted no deeper than the soil in which they were originally grown, and the soil level shouldn’t rise after planting. Two to three inches of wood chips is the optimum depth to mulch - and keep it an inch or two away from the trunk. If it is really desired to have the tree as a focal point in this newly built garden, then possibly a 3 foot well could be made around the tree to keep the root collar flare open to the air.
So, remember to give your tree a strong start and long life by not planting too deeply, but by leaving that root collar flare exposed! We hope these tips can help you encourage the longevity of your new tree. For more information - and trees - visit our Trees & Shrubs section at Eising Greenhouse and Garden Centre. We hope to see you soon!
By: Ava Green
Spring is the time of year known for new beginnings, and it’s also a very busy season in the garden as we hurry to get everything planted for the summer growing season here in Southern Ontario. But, did you know that fall is also an ideal time to get planting?
Similar to spring conditions, the cooler temperatures and more frequent rainfall make it easier for new plants to transition. This also decreases transplant stress. There’s time for roots to become established, and by springtime, you’ll be enjoying your plants instead of being busy planting them!
Don’t wait too long, though! At Eising Greenhouses, we recommend planting perennials, trees and shrubs before Thanksgiving weekend to give your new plants a little time to settle in before a hard frost arrives. A hard frost, or freeze, is when the temperature dips below zero for an extended period of time, killing tender plants.
What to Plant in Fall
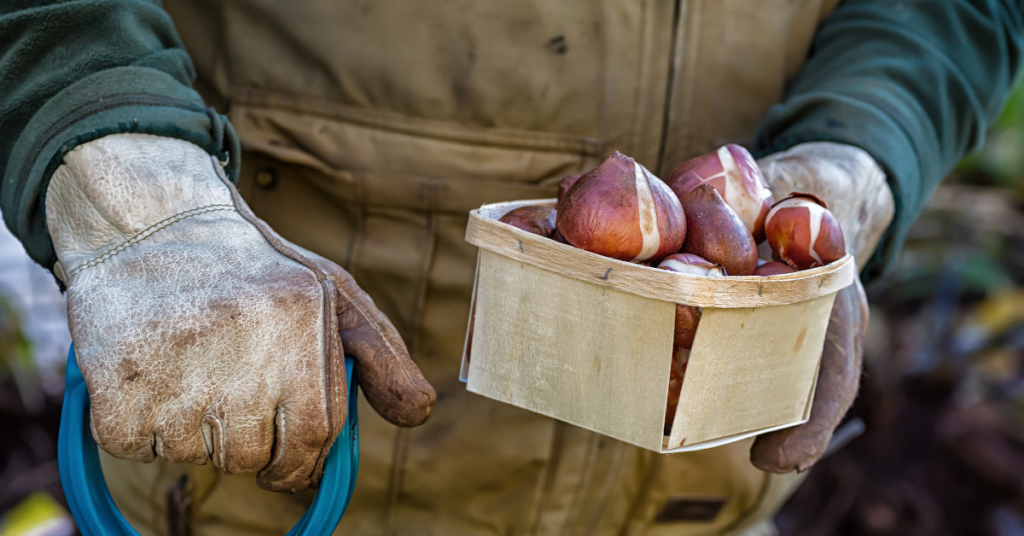
Spring-Flowering Bulbs
Tulips, Daffodils, Hyacinths, Crocus, Fritillaria and Alliums are just some of the bulbs that need to be planted in the fall in order to enjoy their flowers in the spring. Tulips especially appreciate being planted in cooler weather, but all of these bulbs require a cold period of about 12 weeks in order to grow in the spring. Many bulbs can be planted right up until the ground freezes. But why wait?!
👉 TIPS: While Tulips can be tasty and tempting for squirrels, rabbits and deer, many bulbs like Alliums, Frittilaria and Daffodils are not so delectable. Tamping down the soil after planting your bulbs makes it more difficult for critters to sniff them out. Laying some chicken wire over the area can also help deter from your bulbs becoming a meal for a critter.
Be sure to choose an area to plant your bulbs in that does not stay wet so the bulbs don’t rot.
Garlic
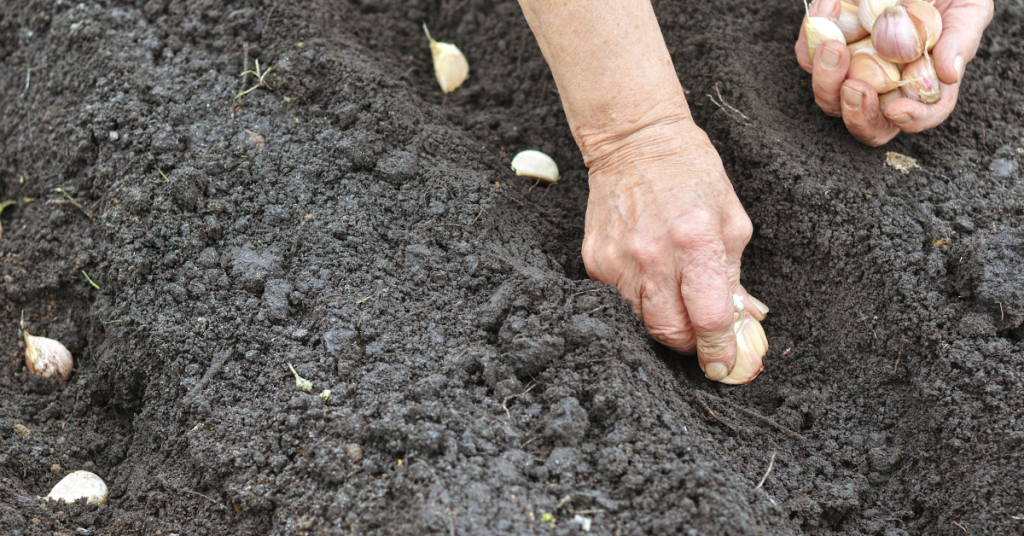
While some folks choose to plant garlic in the early spring, many people choose to plant it in the fall. Why not get started now? When you plant your garlic in autumn, you will have a crop that’s ready for harvest next summer.
Plant, Divide, and Transplant Perennials
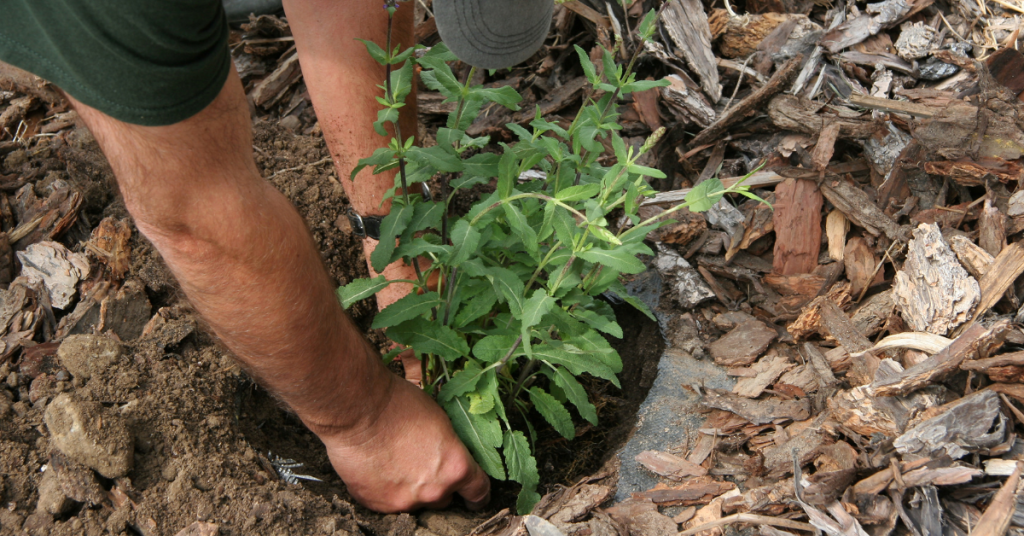
Yes, you can still plant perennial flowers in the fall! Whether you’re purchasing new plants or moving plants around, autumn is a great time of year to do it.
It’s also a great time to divide and transplant spring and summer blooming perennials. Why divide your plants? It’s a great way to revitalize the plant and also to create new plants.
Whether you’re planting, dividing or transplanting perennials, it’s best to do it 4-6 weeks before the first hard frost so that they have time to become established in the soil. Perennial plants will be available for sale at Eising Greenhouses until Thanksgiving weekend, so don’t delay too much!
Trees and Shrubs
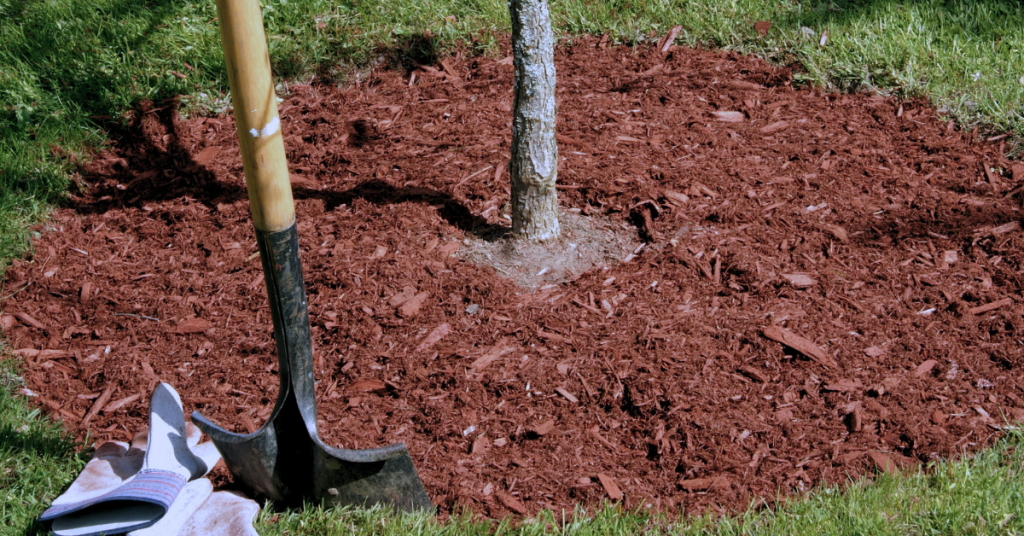
Container-grown or burlap-wrapped trees and shrubs can be planted as long as you can get a shovel in the ground! However, it’s a good idea to give them a few weeks in your garden before it freezes if you can.
It’s especially nice to see what a tree or shrub will look like in the fall before you plant it.

Peonies
Autumn is the best time to plant and establish roots so your peony is ready to bloom in spring! Planting them 4-6 weeks before the first hard frost will help your plant become established before cold weather descends.
👉 TIP: Be sure to add mulch to trees, shrubs and perennials after planting. But keep the mulch away from the trunks or stems. It’s never a good idea to put decaying plant material right up against a living plant!
Come in and take a look at what’s available, then enjoy the cool fall weather for planting!
Resources: If you’re new to dividing perennials, here’s a handy helper - A Guide to Dividing Perennials by the Toronto Master Gardeners
By: Ava Green
One of the best things about living in southern Ontario is the beautiful show our deciduous trees and shrubs put on each fall.
Autumn is also the perfect time to plant trees, shrubs, and perennials. The sun is less intense, temperatures are slightly cooler, and with regular, deep watering, the plants are less prone to transplant shock, ensuring a successful planting.
As the leaves begin to change, they mark the arrival of autumn, a season full of colour and celebration. If fall is a special time of year for you, our staff have handpicked their favourite deciduous trees and shrubs with the most stunning seasonal displays. Here are their top recommendations.
Autumn Blaze Maple
Botanical Name: Acer x freemanii 'Jeffersred'
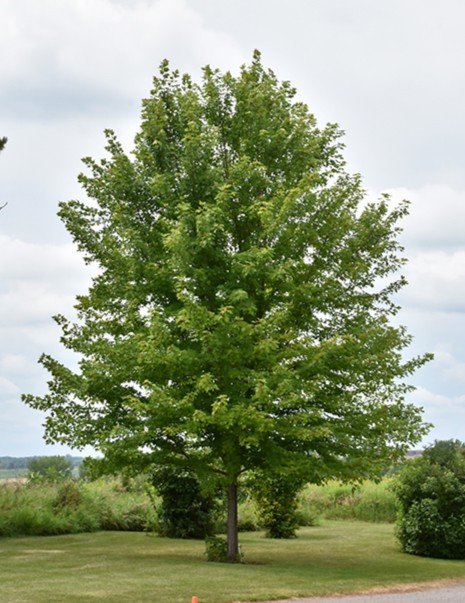
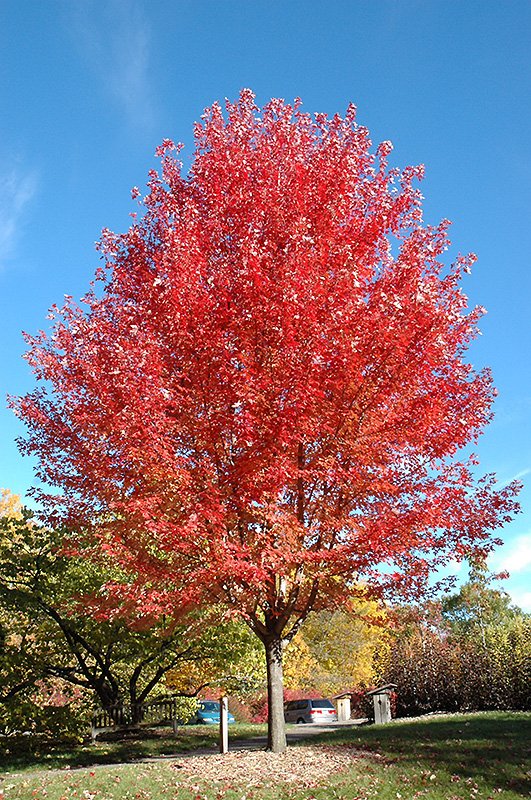
This tree is a cross between the fast-growing Silver Maple and the showy Red Maple - two very popular trees!
Autumn Blaze will provide a display of colour throughout autumn by starting earlier and lasting longer than most other trees. It’s large, with 5-inch leaves that begin by turning red at the top, then eventually shades of red and orange cascade down the length of the tree.
Even in the winter, this is a beautiful specimen because its shape is so symmetrical.
Seven-Son Flower
Botanical Name: Heptacodium miconioides
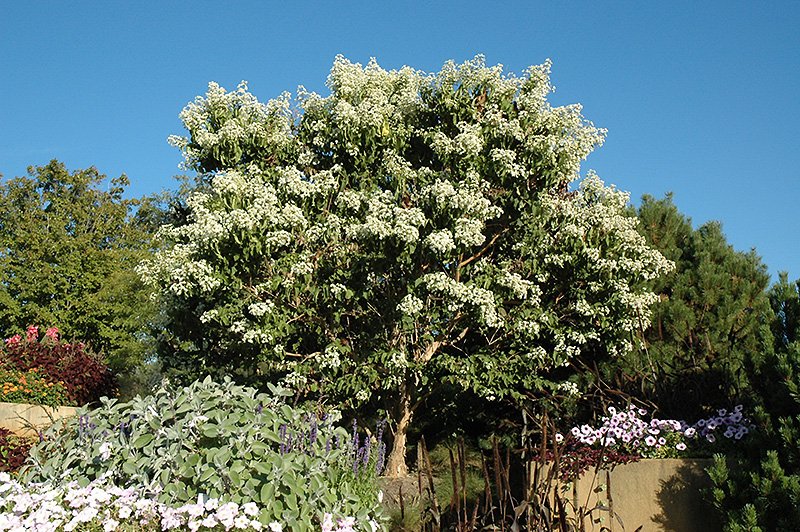
Considered a small tree or large shrub, Seven-Son Flower is popular for its year-round beauty!
Growing to a maximum of 6.1 metres (20 feet) tall and 3 metres (9.8 feet) wide, the leaves of this plant change from spring to summer, making it an interesting specimen plant in the garden.
The biggest attraction is the fragrant white blooms it produces late in summer, which are highly attractive to hummingbirds and other pollinators. As the blooms fall, they leave behind pink sepals, so it looks like it’s in bloom all over again!
Its unusual bark makes this tree beautiful year-round, but especially in the winter.
Washington Hawthorn
Botanical Name: Crataegus phaenopyrum
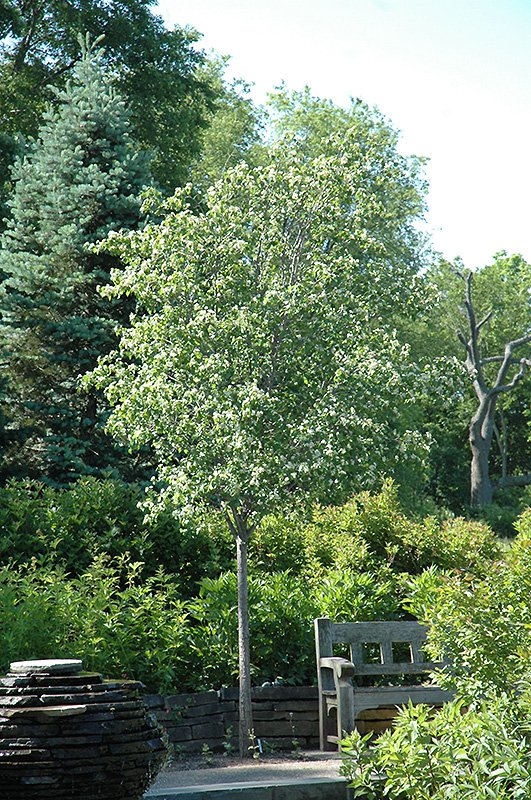
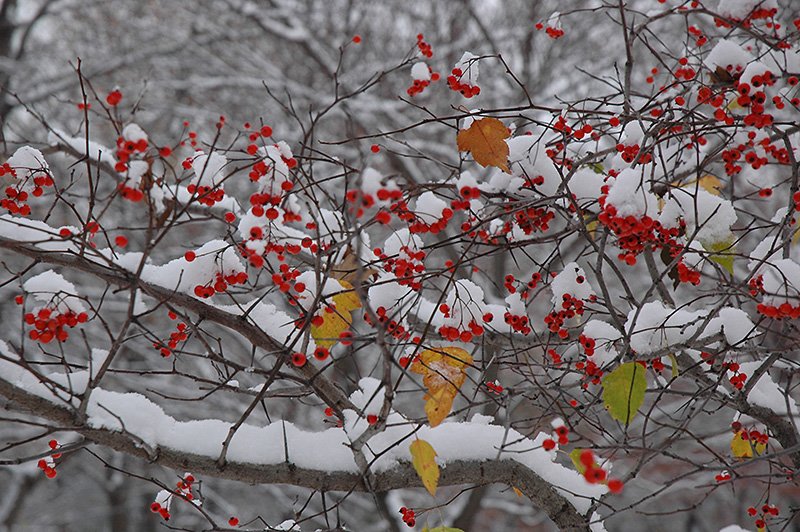
Leaves that turn vibrant shades of orange, purple or scarlet red in the fall are just part of the beauty of this small tree.
This is another specimen with year-round interest. In early spring, reddish-purple leaves emerge, which eventually turn dark green, followed by graceful white flowers. After its fall show, it produces bright red berries that last for most of the winter.
Maturing at 8 to 9 metres (25-30 feet) tall, Washington Hawthorn is also an important nectar plant for pollinators and provides food for birds in the winter.
Barberries
Botanical Name: Berberis thunbergii
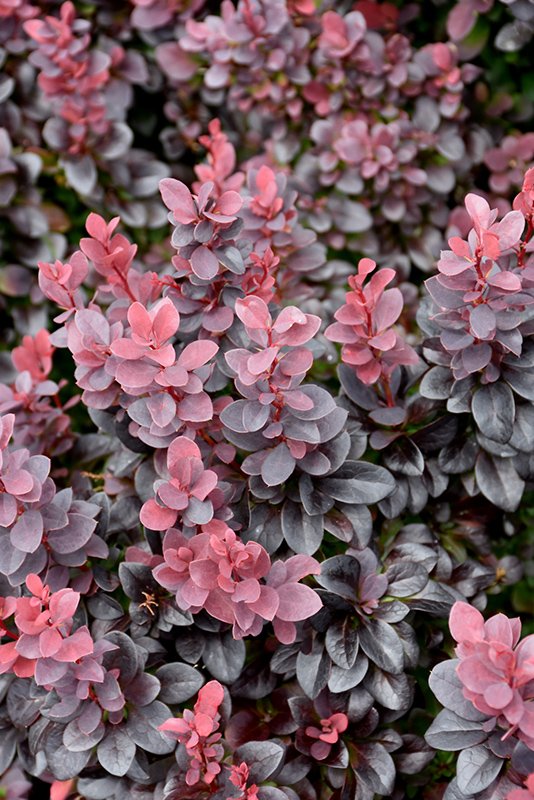
Concorde Japanese Barberry
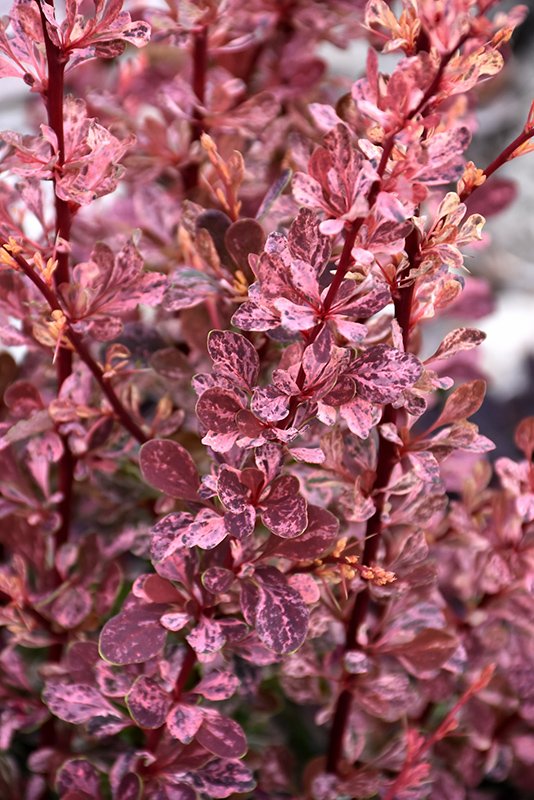
Rose Glow Japanese Barberry
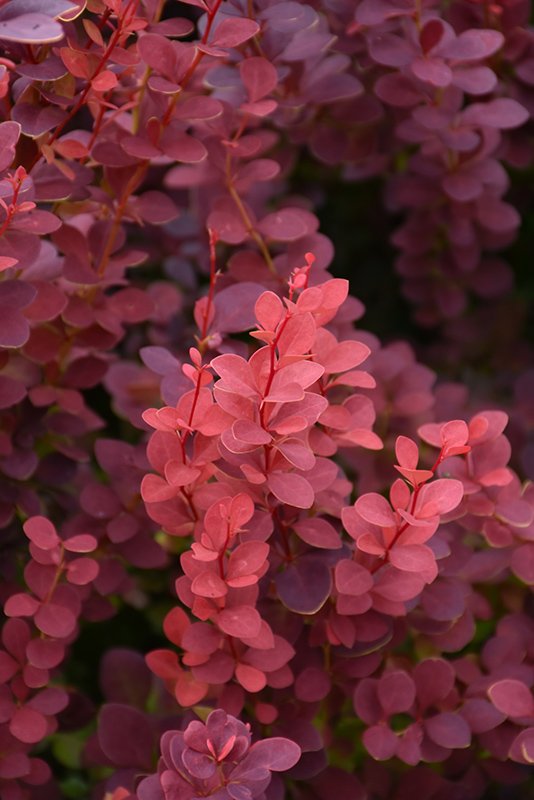
Ruby Carousel Japanese Barberry
Depending on the type of Barberry these deciduous shrubs can grow ½ to 3 metres (1-10 feet) tall and have varied shapes and features as well. For example:
- Barberry, Concorde (Berberis thunbergii 'Concorde')forms a nice globe when it's mature. Leaves start out red and gradually turn a deep, dark purple as they mature.
- Barberry, Ruby Carousel (Berberis thunbergii 'Bailone') is a compact variety with vibrant, ruby-red foliage.
- Barberry, Rose Glow (Berberis thunbergii 'Rose Glow') which matures to 1 to 1 ½ metres (3-5 feet) tall, starts out with a combination of green, white, and deep rose-red foliage in the spring. In the fall, it produces bright red berries that persist into winter.
Beautyberry, Pearl Glam
Botanical Name: Callicarpa 'NCCX2'
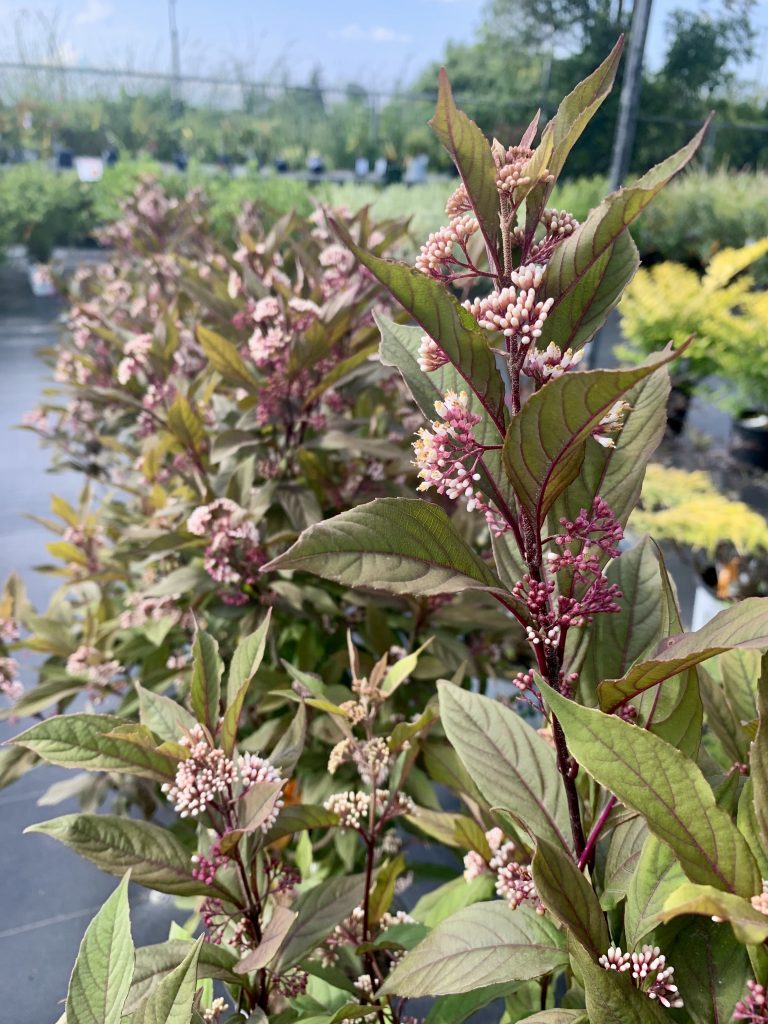
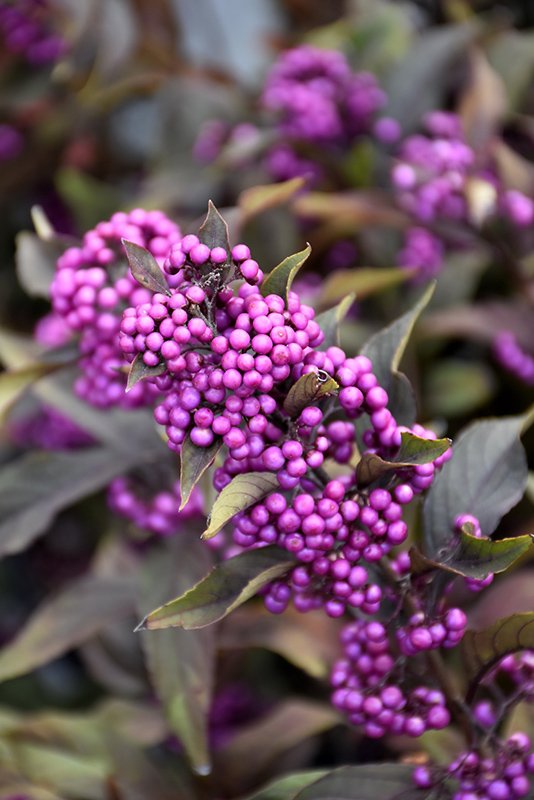
While many Beautyberry are showy in the fall, Pearl Glam is an upright, small shrub that has all-season interest. Its dark purple foliage emerges in the spring that lasts until frost.
In late summer it’s adorned with white flowers which attract butterflies and bees. After blooming it produces hundreds of beautiful violet-purple berries which last long after the leaves have fallen.
Crepe Myrtle, Cherry Mocha
Botanical Name: Lagerstroemia 'Cherry Mocha'
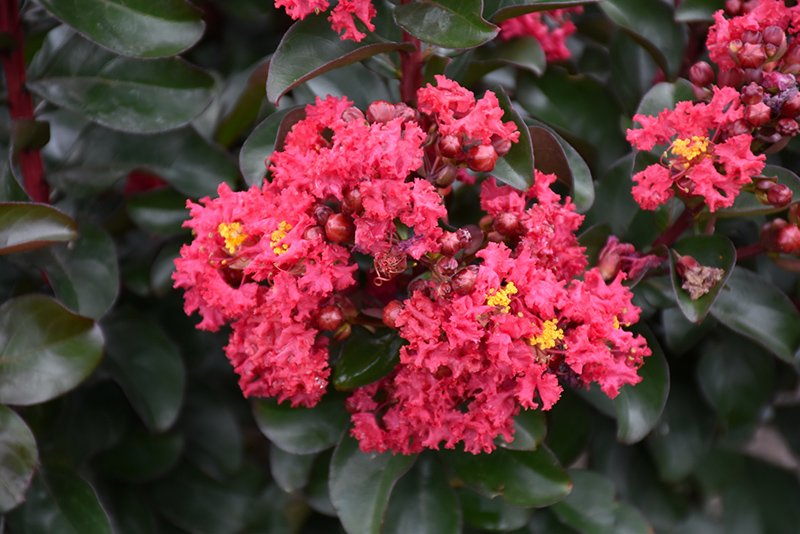

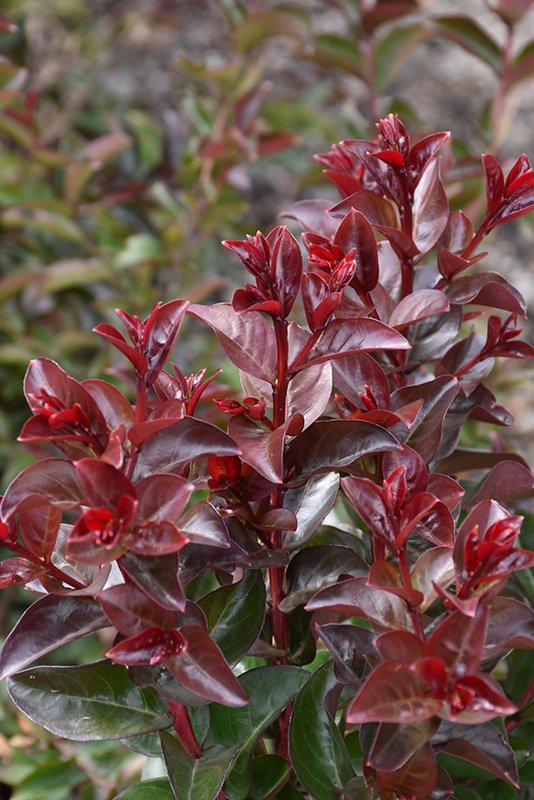
Another small ornamental deciduous shrub with an upright growing habit, Cherry Mocha Crepe Myrtle has decorative appeal in every season.
Burgundy coloured stems with semi-glossy burgundy leaves makes this plant stand out. To add to that, new growth at the tips starts out glossy, deep red. If that’s not enough, in late summer and early fall, the blooms on this cultivar are large, cherry-red flowers which stand out from the burgundy foliage. Its flowers late in the season provide important food for bees. After flowering, green seed pods provide extra interest.
Note: Have you ever wondered why leaves on trees and shrubs change each fall? Here’s a simple explanation. During the long, sunny days of summer, trees and shrubs produce plenty of chlorophyll - the food needed to keep the leaves green. In autumn, as the days grow shorter and temperatures are cooler, there is less chlorophyll produced and the plant breaks down residual chemicals on the surface of the leaves which produces shades of red, orange and yellow.
You’ll find more information in our handy Eisings online Plant Finder!
The promise of Spring signals the season of revitalization, even for your wardrobe. Wouldn’t it be great to open your closet and find clothes that go together and that fit? Also, why is it that just when you find the perfect pair of black pants, there is never anything in the closet that seems to go with them?
Reorganizing your closet so that you can find what you need and know what is missing is easier than you might think. Even if you are already organized and can effortlessly pull an outfit together, this is always a great exercise to freshen things up. A revitalized closet just makes life easier! And organizing each year can be a quick, simple task that is quite enjoyable. Especially when you know there’s a payoff at the end of the job - getting something new to add to the mix!
These simple steps will help you see what items you need to update your closet. Then, when you come in to shop, you will know whether you need something with a burst of colour to freshen things up, like a colour block tee, or one of the great graphic tees at Sassyfras. Or maybe you bought a men’s dryweave shirt from us last year, and one just isn’t enough to use for sports, supper out, and that vacation in Spain. Once you follow this plan, you will know, and it will probably save you money.
If you set an afternoon aside, and do this with a friend - in person or on a video chat - time will fly by. Or, just put on some good music now and let’s get started.

1 - Make a Pile
First take everything out of your closet. Empty out drawers and all the things on the shelves above and below, including those birthday presents you meant to give out last year. Put it all on the bed or the floor, depending on the amount of space needed.
2 - Sort
Grab five boxes, bags or bins and label them as: Keep, Donate, Sell, Other and Trash.
As you pick up each article of clothing from the pile, decide which of the five containers it should go into. It can be a tough thing to do if you hate to part with old favourites. This is when you need that friend to support you and ask questions like “How often do you wear this? Is it still useful to you?” If you’re going it alone, and you’re not sure, just put it in the Other bin for now, along with those birthday gifts from last year.

3 - Clean
Don’t let this one scare you! It’s an empty closet, so it will go quickly. Give the closet a good vacuum. Wipe down poles, shelves, drawers and the floor. Maybe even add a quick coat of paint. Just make sure that it’s dry before continuing to the next step!
4 - Organize
Drawing from the Keep pile, start to put these items back into the closet in an organized way - pants in one section, blouses in another, etc. Keep colour in mind as you go so that you can organize items by colour as well. For example, keep all the blue blouses together.
If anything on the shelves was disorganized when you emptied the closet (sweaters, t-shirts, shoes), find containers to gather each of these items into and label them clearly. Even if it’s cardboard boxes with labels written in magic marker for now - you can always find a clear bin later and swap them out if you like.
Once everything that you know you want to keep is back in the closet, take another look in the Other bin. Where those items go may be more clear to you now. If not, put that box into the closet, except those birthday gifts - for heaven’s sake give those away. Or, hang these items up with the hangers facing backwards. If the hangers are still facing backwards in a year, or the Other box still has items in it, it’s time for those things to go!

5 - Remove
Now you’re ready to post the items you’re selling, or put the box in the car to take to a consignment store, along with the box of items that you’re donating.
Take the trash bag out to the curb, pull your shoulders back, and brush your hands together because you’ve done some great work! Doesn’t it feel good?! The final step is your sweet reward.
6 - Revitalize
While a sparkling clean and organized closet does feel good… nothing feels better than a new piece of clothing. It’s time to think about what’s next.
Take a look inside your beautiful closet, and see what you need. It should be so much easier to make a list of items that will revitalise your wardrobe now.
Bring that list with you on your next shopping trip! Of course, Sassyfras is stocked up with lots of great clothing, and ready to help you when Eising Garden Centre reopens on Thursday, March 2 for the 2023 season.
If you would like updates with everything that’s happening at Eising Garden Centre, this is the link to sign up for our fabulous newsletter.
We look forward to seeing you soon!
Sassyfras Hours
Beginning March 2, 2023
Monday - Saturday 10am-5pm
Eising Garden Centre
Spring Hours - Beginning March 2, 2023
Monday - Saturday 9am-5pm
Believe it or not, winter is the absolute best time to ponder, dream, and plan your garden and landscape design. Why? Spring is the optimal season to plant and transplant, and with a design in hand, we can hit the ground running once warmer temperatures arrive. Can you plant and transplant throughout the garden season? There are some exceptions, but for the most part the answer is yes. But why not get a head start, and take advantage of having plants established at the start of the growing season? Sure, we have designers sitting by the phone right now on these long, cold winter days but don’t just feel sorry for them - take advantage of the fact that it’s a great time to contact them! Contact details for Eising Garden Centre Landscape Design* are at the end of this post.
You may be asking why you should bother having someone else design your garden? One reason that I have learned the hard way is that it pays off in the long run. I’m probably not the only one who has planted flowers before putting in a patio or walkway, only to rip everything up because of construction, then re-plant all over again.
Besides saving you money on costly mistakes, here are a couple more things to consider:



1. Curb appeal and property value
When most people think of those two concepts, they think about preparing a home for selling. I’m not referring to that. Every day, when you arrive home from work, or errands, wouldn’t it be great to love the way your home and garden looks when you pull into the driveway? That’s curb appeal and property value for your own benefit! However, if you are planning to sell, investing a bit of money in sprucing up the yard definitely impacts the selling price.
2. Design for living
Because we have a few precious months to enjoy our outdoor spaces, landscaping allows you to make better use of the space available. What do you use your space for? What do you need to incorporate into your plan to include those activities? Will you need to install a patio, or create a garden, and where should you put them on the property? Maybe you need to create privacy with an evergreen hedge? Landscape design makes sense of all of it.
Maybe you’re interested in an opportunity to make your garden more environmentally friendly. For example, adding native plants, a birdhouse and birdbath. Perhaps you want to add shade trees to shelter birds, and decrease the need for air conditioning your house in the summer.

3. Structure and a plan are sexier than you think
Lastly, I want to tell you a personal story about my experience hiring a landscape designer. I’m a plant lover and I never considered design. I studied plants, and spent several years joyously collecting all kinds of perennials, shrubs, water and bog plants, and trees.
My garden was chaotic! But I loved the wild looking patchwork quilt of rare and unusual plants scattered within the confines of borders around my property. I nurtured each individual plant, and when I looked at my garden that’s what I saw, individual plants. Then I hired a landscaper to build a bigger pond for my growing collection of water and bog plants.
When the time came to build the pond, he moved my plants to make way for all of the construction. Once that was complete, he placed my plant material back following his design. My plants, the same plants I had before the project, looked completely different. There was harmony in the arrangement.
The overall effect was such an incredible improvement that I could not believe my eyes. It was a whole new garden, and proved the value of good garden design. Hint: it doesn’t involve buying a new, spectacular plant and plunking it into an empty spot, or digging another bed in some random location that gets sunlight. That was my AHA! moment.
Someone who understands plants AND design can take the things on your wish list and make them all come together in a way that just works.


*Eising Garden Centre Landscape Design
Contact Roman Bodnar to set up an appointment: by email here or call 519-428-4607.
Consultation Fee: $175 consultation fee per space (2023 pricing) - for example, the front yard would be considered one space.
What your consultation includes:
1) A knowledgeable staff member will meet with you at the site of the project for up to 1 hour.
2) Any questions and concerns that the customer has will be reviewed and helpful suggestions will be made to ensure a successful project.
3) A simple 3D visual landscape design will be made, to enable the customer to see the potential of their space.
4) A detailed list will be provided to exhibit the needs, amounts and prices of the materials.
5) A 10% discount will be made available on all plant material in the design within 90 days of the consultation purchase.
Our specialty is soft-scaping: plants, soil and mulch. If the design we create warrants it, we will also utilize some armour stone and other natural stone features. We can’t wait to show you the potential of your property! Don’t delay your planning any longer…contact Eising Garden Centre today.