
5 Easy Steps To Get Started
By Ava Green
There’s a common myth that you need a lot of space to grow vegetables, but whether you have a few containers, a small sunny corner, or a larger garden bed, there’s lots you can grow! Here in Norfolk County, which is Zone 6 in Southern Ontario, some vegetables can go in the ground as early as the beginning of May, while many others are usually safe to plant around the May 24th weekend, once the risk of frost has passed. Here are five simple steps to get you growing your own food this season if you’re new to vegetable gardening.
Step 1: Decide What You’d Love To Grow
Start with a list of the vegetables you actually want to eat. Coming into Eising Garden Centre with a list in hand makes choosing plants so much easier! When building your list, consider:
- Vegetables you love
- High-value vegetables, the ones that are expensive at the grocery store but easy and economical to grow yourself
- Anything that tastes better when it’s freshly picked, like tomatoes, cucumbers, and fresh herbs

Step 2: Make a Simple Plan
You don’t need an elaborate design; a rough sketch on a scrap of paper is just fine. The goal is simply to get a sense of your space and where things will go before you start digging. We recommend starting a garden notebook or journal to track what you plant each year and how it performs. It will be especially helpful next spring!! A few planning tips to keep in mind:
- Most heat-loving vegetables, such as tomatoes, peppers, zucchini, eggplant and beans, need at least six hours of sun per day
- Cool-weather and shade-tolerant crops like lettuce, chard, kale, radishes, and beets do well with just three to four hours of sun
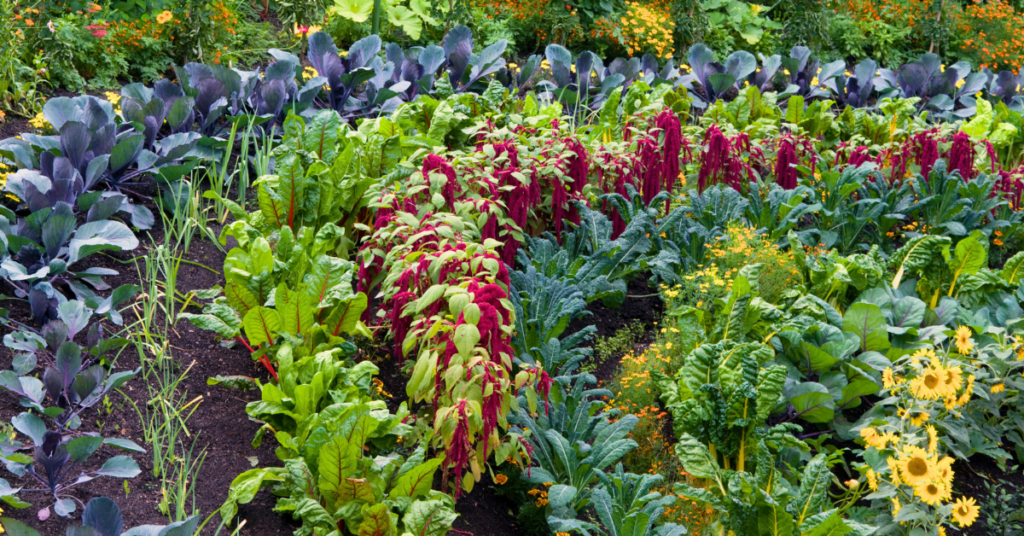
- Spacing in a vegetable garden can be much tighter than in other types of gardens. Less empty space means fewer weeds and bigger harvests. Square foot gardening is an excellent method to explore
- Layer your garden beds with plants that are great companions. For example, basil and marigolds planted beside tomatoes are said to improve flavour and repel pests. Carrot and beet seeds tucked in beside and between your lettuce plants (which are a cool-weather crop) are a smart pairing; as your lettuce finishes in the summer heat, your carrots and beets will be sprouting up to take their place. This is referred to as succession planting and optimizes the space in your garden
- Make use of vertical space with poles or trellises for peas, pole beans and cucumbers
- Tuck herbs into any gaps between your vegetables; they’re useful, beautiful, and most pollinators love them
Step 3: Prepare Your Space
Once you’ve chosen a spot with enough light, it’s time to get the soil ready:
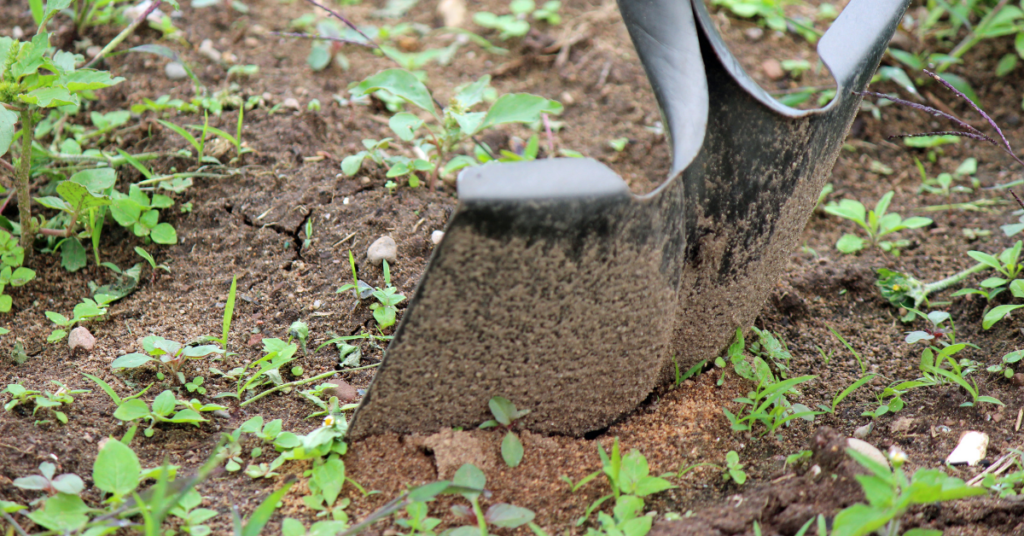
- Remove any sod or weeds before planting. If you’d rather not dig, the No Dig gardening method uses a layer of cardboard as the base for the new bed. This suppresses weeds naturally and breaks down into the soil over time
- Add a good-quality compost to your soil by either spreading a layer across the top of the garden bed or scooping some into each plant hole
- For container gardening, almost any container works, just make sure it’s deep and wide enough for the mature size of your plants. Also, drainage holes are a must! Fill containers with a soilless mix containing compost, peat moss or a peat alternative, and one of the following: sand, vermiculite, or perlite. Avoid using garden soil, triple mix, or topsoil in containers, as they compact easily and will restrict root growth. Learn more about soil mixes, amendments, and fertilizers here
Step 4: Water and Feed Consistently
Consistent watering and feeding are the foundation of a productive vegetable garden:
- Vegetables need regular, reliable watering. Inconsistent moisture leads to stressed plants and poor yields
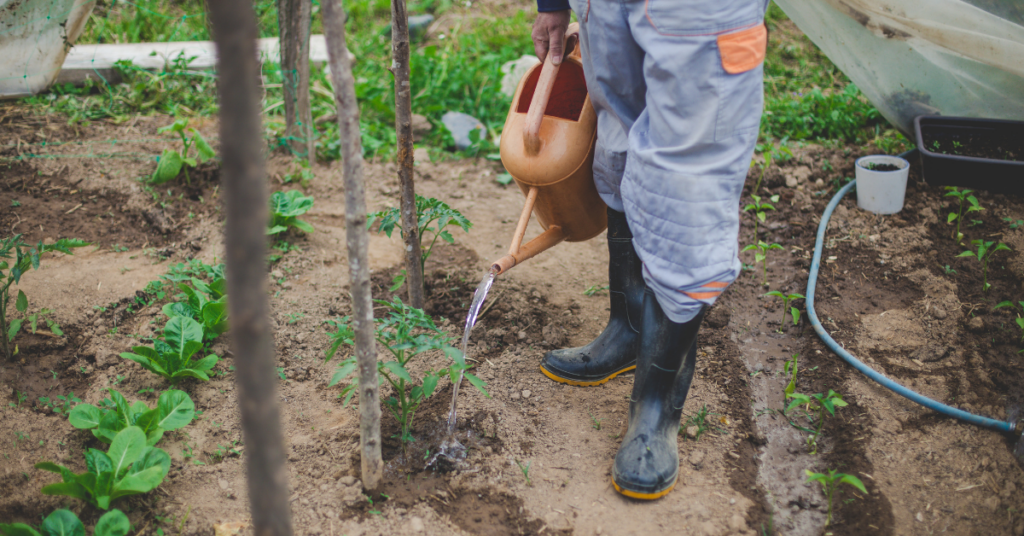
- Always water the soil, not the leaves. Plant roots take in water, and wet foliage can invite disease. Water deeply so moisture reaches the roots. Use your fingers to check how far down the water has penetrated into the soil
- Containers dry out faster than garden beds and will need more frequent attention
- Morning is the best time to water. If your plants are struggling on a particularly hot afternoon, a second watering is fine. Just be sure to aim at the base of the plant and avoid the foliage, which can scorch in direct sun
- Feed with organic fertilizers throughout the season to keep your plants healthy and productive. Follow the package instructions for the product you choose
Step 5: Plant Flowers for Your Pollinators
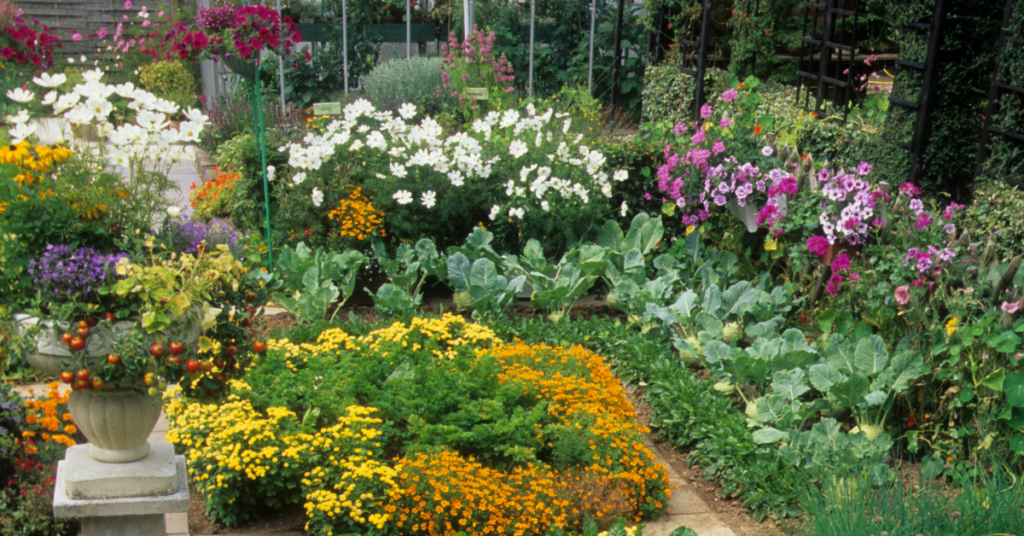
A vegetable garden without pollinators is a garden that won’t reach its full potential. Attracting bees, butterflies and other beneficial insects to your garden is one of the best things you can do for your harvest. Some of our favourite pollinator-friendly flowers for the vegetable garden include marigold, calendula, nasturtium, borage, sunflowers and culinary lavender. As a bonus, most of these are edible, so they earn their space twice over.
It’s Time
Starting a vegetable garden is one of the most rewarding things you can do with an outdoor space. There’s a quiet satisfaction in growing something from seed or a seedling and bringing it to your own table.
Start simple, grow what you love and don’t be afraid to learn as you go.
The team at Eising Garden Centre is always happy to help you choose the right plants for your space and answer any questions along the way. This could be the season that changes the way you think about your garden!
Resources:
Why Use a Garden Journal?: https://eising.ca/why-use-a-garden-journal/
Square Foot Gardening: https://www.almanac.com/planning-square-foot-garden-grow-more-less-space
Fertilizers & Soil Amendments: https://eising.ca/fertilizers-soil-amendments/
Companion Planting: https://eising.ca/companion-planting-with-herbs/ and https://eising.ca/incorporating-vegetables-into-your-garden/
Optimizing the Gardening Season: https://eising.ca/optimizing-the-gardening-season/
No Dig Gardening Method: https://charlesdowding.co.uk/blogs/no-dig-resources/beginners-guide
Reading Plant Tags: https://eising.ca/full-sun-part-shade-what-do-plant-tags-actually-mean/
Growing Vegetables in Pots: https://eising.ca/planters-are-for-more-than-flowers/
How to Identify These Annoying Little Gnats
By Ava Green
Do you have tiny flies buzzing around your home and have no idea where they came from? Before you can get rid of them, you need to know what you're dealing with. Most people assume they're fruit flies, but there's a good chance they're not.
There are three common culprits:
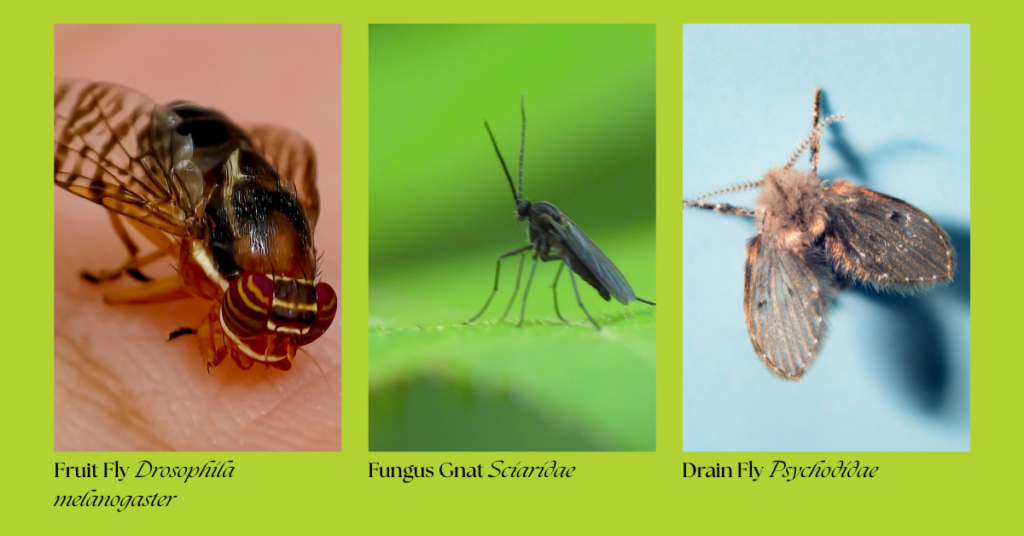
- Drain flies breed in moist drains. Keep drains closed when not in use.
- Fruit flies hover around overripe produce.
- Fungus gnats, the most commonly misidentified of the three, love the damp soil in your houseplants, and they're the ones most likely buzzing around the house.
Fungus Gnats are Probably Already in Your Home
Every time you bring a plant indoors, whether it's brand new or returning after a summer outside, there's a very good chance it's carrying fungus gnat eggs in its soil. When you purchase bagged soil, it will often contain fungus gnat eggs as well. They're small, they're sneaky, and here's the most important thing to know: they multiply fast. Left unmanaged, a handful of gnats can turn into hundreds within weeks.
What Makes Fungus Gnats Thrive?
Fungus gnats love warm, moist conditions and organic material, like your potting soil. Adult gnats lay eggs in damp soil, which gives their larvae everything they need to develop.
The good news? Once you understand what they need to survive, stopping them is very easy and straightforward.
7 Proven Ways to Get Rid of Fungus Gnats
1. Quarantine any new or returning plants for 4 weeks. This single step prevents gnats from spreading to your other houseplants while you treat the soil.
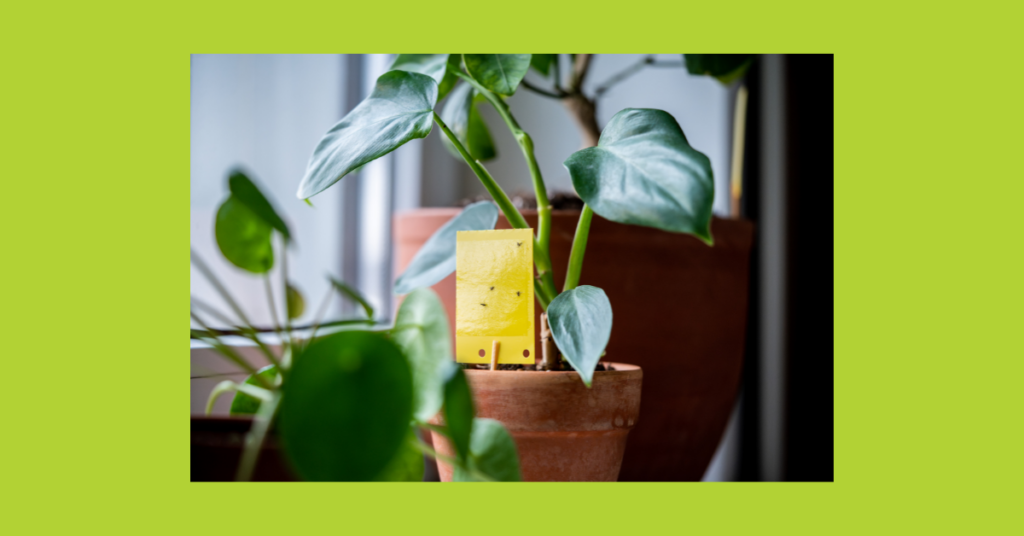
2. Use yellow sticky traps. These inexpensive traps attract and catch adult gnats before they can lay more eggs. Place one directly into the soil near your plant. Putting a sticky trap in a planter, whether it’s a new plant or one you’ve had a while, is also a good way to monitor whether or not you have pests in your plants.
3. Let the top inch of soil dry out completely between waterings. Fungus gnats need moist soil to lay their eggs. Deny them that, and you deny them a future. To test whether the soil has dried out, poke one of your fingers in it about an inch to check for moisture.
4. Cover the soil surface with coarse sand or vermiculite. A layer of sharp, gritty material on top of the soil is uninviting to egg-laying adult gnats. Make sure to use coarse sand, fine sand won't do the trick.
5. Switch to bottom watering. This is the best watering method for a number of reasons, including discouraging fungus gnats. Fill a tub or sink one-quarter full and set your pot in it for about 30 minutes allowing water to be absorbed into the soil via the drainage hole in the pot. When the soil and roots absorb water from below, it keeps the top layer of soil, where gnats want to lay their eggs, dry and uninviting. Make sure the water level covers no more than one-third of the pot, not the entire pot.
6. Try Mosquito Dunks (the secret weapon most gardeners don't know about). These contain BTI, a naturally occurring bacterium that is harmless to humans, pets, and plants, but lethal to fungus gnat larvae. Simply follow the package instructions and water your plants as normal. Water activates mosquito dunks.
7. Water with diluted hydrogen peroxide once a week. Mix one part 3% hydrogen peroxide with four parts water (so ¼ cup peroxide to 1 cup water). Apply this solution once a week for three weeks, and let the soil surface dry out between each application. It kills larvae on contact. Don't overdo it though. Too much, too often can damage roots.
Don’t Forget Your Fruit Bowl: Try This Banana Trick
Fungus gnats aren't just plant pests, they're also drawn to fruit, especially bananas. The stem end of a bunch of bananas is a prime spot for gnat eggs. The fix is simple: as soon as you get home from the grocery store, rinse your bananas under lukewarm running water and give the stem a gentle scrub with a soft brush. It takes about a minute and can prevent a whole new infestation before it starts.
The Bottom Line
Fungus gnats feel impossible to eliminate because most people only address the adults they can see and not the larvae multiplying in damp soil. Use these tips in combination for the best results, and remember: even a fresh bag of potting soil can carry eggs, so treat new soil with BTI or a hydrogen peroxide solution before use.
Stick with it for a few weeks and your home and your plants will be gnat-free.
By Ava Green
Usually, by the time February or March rolls around, I’m pretty tired of the health crazes like extreme diets and exercise plans I’ve been trying for the fifth year in a row. This year, let’s take a look at something that naturally supports our good health, both mental and physical. It’s time to stop and “smell the flowers,” so to speak.
Mental and Physical Health
Many gardeners already realize this, but studies are showing that simply seeing greenery can benefit our mental health. Whether it's a walk in the woods or a handful of houseplants, seeing green leaves makes a difference for humans! Research shows that it helps boost our mood and improve how we get along with people. Who doesn’t need a mood booster during cold, dark days? And getting along with people, well, the world just needs more of that, too, doesn’t it?
You may also already know that tending to plants reduces stress, but did you know that science is proving it? PubMed published a study stating:
"Interaction with indoor plants may reduce psychological and physiological stress by suppressing autonomic nervous system activity in young adults: a randomized crossover study."
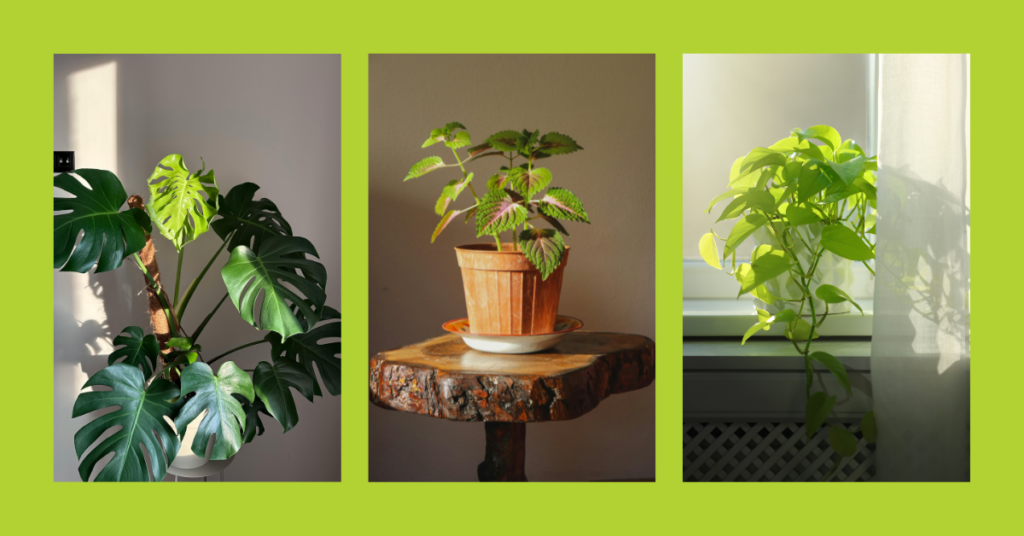
This isn’t the common thinking about working outside in the garden increasing physical strength and stamina. It’s a study that examines our autonomic nervous system, the one responsible for automatic and essential bodily functions we don’t even think about, like breathing. The study compared participants performing two tasks: one on a computer and the other doing plant transplanting. The results suggest that interaction with plants indeed reduce stress without us even thinking about it! No task that requires willpower, just daily tending to plants like transplanting, watering, dusting, pruning, or turning the pots to get sun on the flipside.
So plants boost our mood, improve interactions with others and physically reduce our stress levels without us even trying. It’s no wonder we just feel better when we’re around plants.

Air Quality
Research also shows that indoor air pollution is often worse than outdoor air pollution. VOCs (Volatile Organic Compounds) from washing detergents, paint, furnishings, and building materials, as well as bacteria, fungal spores, and dust, negatively affect human health.
Fresh air can counter the impact of indoor pollutants, but often it’s too cold to open the windows in the middle of winter. When you can’t let fresh air into the house, indoor plants will help. We know that growing trees outdoors has a massive impact on air quality and the health of the planet, and inside our home, tropical plants contribute in the same way. The contribution of each type of plant varies, so having a variety is a very good idea.
What to Grow
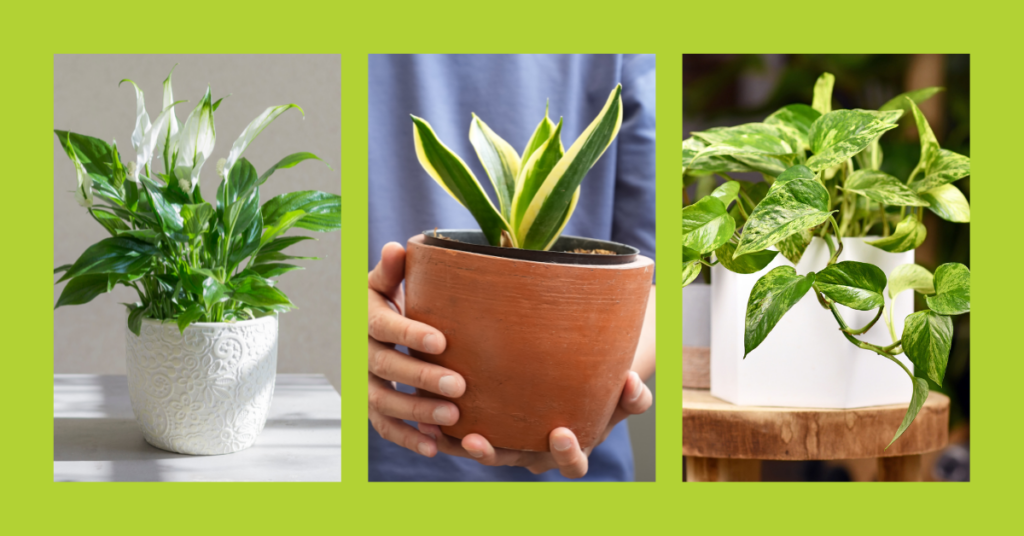
Here’s a list of easy-to-grow, green indoor plants that Eising’s resident tropical plant expert, Courtney, and the UK’s Royal Horticultural Society (RHS) recommend:
Aglaonema ‘Silver Queen’ (Chinese evergreen ‘Silver Queen’)
Aspidistra elatior (common Aspidistra, Cast Iron plant)
Chamaedorea elegans (Parlour Palm)
Chamaedorea seifrizii (Bamboo Palm)
Chlorophytum comosum (Spider Plant)
Crassula ovata (syn. Crassula portulacea) (Jade plant, Jade tree)
Dracaena fragrans ‘Janet Craig’ (Dragon Plant)
Dieffenbachia ‘Tropic Snow’ (v) (Dumb Cane)
Dracaena marginata (v) (Madagascar dragon tree)
Epipremnum aureum and ‘Marble Queen’
Ferns - many types
Ficus elastica (Rubber tree, Rubber plant)
Hedera helix (English ivy, common ivy)
Howea forsteriana (Flat Palm, Kentia palm)
Rhapis excelsa (Bamboo Palm, Lady Palm)
Sansevieria (Snake Plant) - many types
Spathiphyllum sp. (Peace Lily)
Syngonium podophyllum (Nephthytis)
Zamioculcas zamiifolia (ZZ plant, fern arum)
Is there a downside to having houseplants? Yes, if you have small children or pets, be mindful of the plants that can be toxic if ingested (see resources listed below).
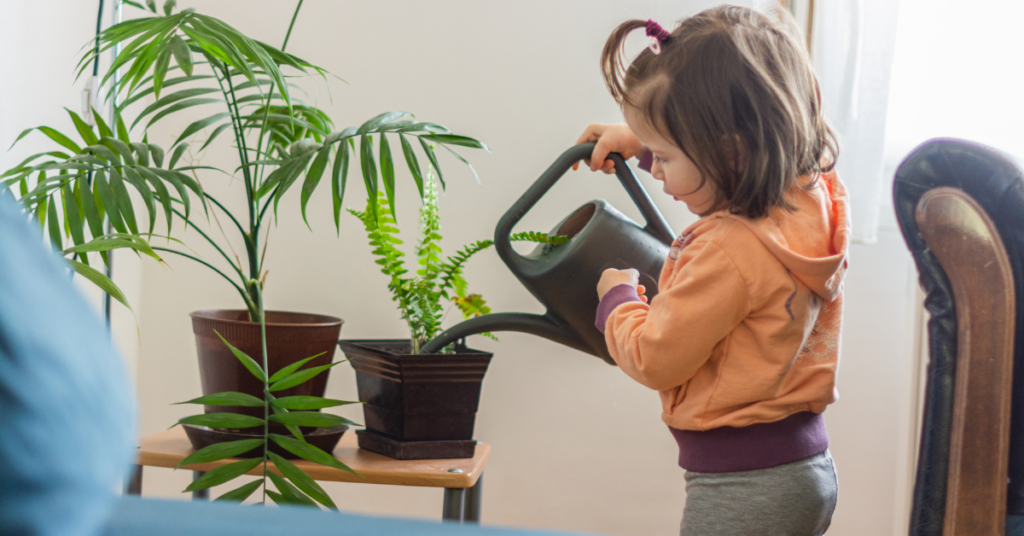
While many of us in Ontario focus on “nice” weather and getting outside to garden, it’s pretty clear that our indoor plants do much of the heavy lifting to improve our health through the cooler seasons. Even if you don’t have a “green thumb”, it’s worth giving tropical, indoor houseplants their well-deserved space in our homes, hospitals, offices, nursing homes, classrooms, restaurants…or any indoor space!
Resources:
PubMed study on indoor plants and their impact on human stress - https://pmc.ncbi.nlm.nih.gov/articles/PMC4419447/
Sally Augustin, PhD, Environmental Psychologist - https://www.psychologytoday.com/ca/blog/people-places-and-things/201802/benefits-of-the-indoor-plant
RHS - https://www.rhs.org.uk/plants/types/houseplants/for-human-health
For a list of indoor plants and the VOCs they have the potential to reduce, PubMed review article by Dela Cruz et al., 2014 - https://pubmed.ncbi.nlm.nih.gov/25056742/
PETAs list of plants that are safe for pets: https://www.peta.org/living/humane-home/animal-friendly-houseplants/?utm_source=PETA::Google&utm_medium=Ad&utm_campaign=0422::veg::PETA::Google::SEA-Vegan-Grant::::searchad&gad_source=1&gad_campaignid=96533821&gbraid=0AAAAADu2DAt3SGF9vPRkHJqkNw-eZ6kEH&gclid=CjwKCAiAvaLLBhBFEiwAYCNTf9nyavbUnefHx0FaUekq4HZyXPrIwYhnJqgnu_g_TPea3nExhT-jOhoCqLUQAvD_BwE
RHS list of safest plants for children: https://www.rhs.org.uk/plants/types/houseplants/houseplants-for-children
By Dave Zeldon and Ely Schweyer
Starting the first week of January, seed packets of many vegetable garden delicacies began arriving at your local garden centres. It’s a great time to plan your gardens and purchase your seeds while the selection is good but don't sow your seeds too early!

If started too soon, your plants will be leggy and overgrown long before you can transplant them into the garden. The general rule of thumb (even if yours isn't green), is if the seed packet recommends sowing four to six weeks before the last frost date, it's better to pick the four - rather than the six-week date (to calculate the sowing date, count back from the third week of May).
In this blog post, we’ll discuss the proper timing of the beneficial companion planting practice, to ensure an organic triple-play of pesticide reduction, nutrient sharing, and the fruits of your labour actually tasting better!
What is Companion Planting?
The use of companion plants is an organic approach embracing plant diversity that involves growing certain different types of plants near each other. By mixing a variety of plants together you confuse harmful insects (i.e., the ‘Three Sisters,’ corn, beans, and squash). When you plant certain vegetables together or alongside flowers or herbs, you can often camouflage the scent of a given plant so that its potential enemies can't find it. For example, if you plant onions and carrots together, the Carrot Rust Fly can no longer detect the scent of its "prey," the carrot.
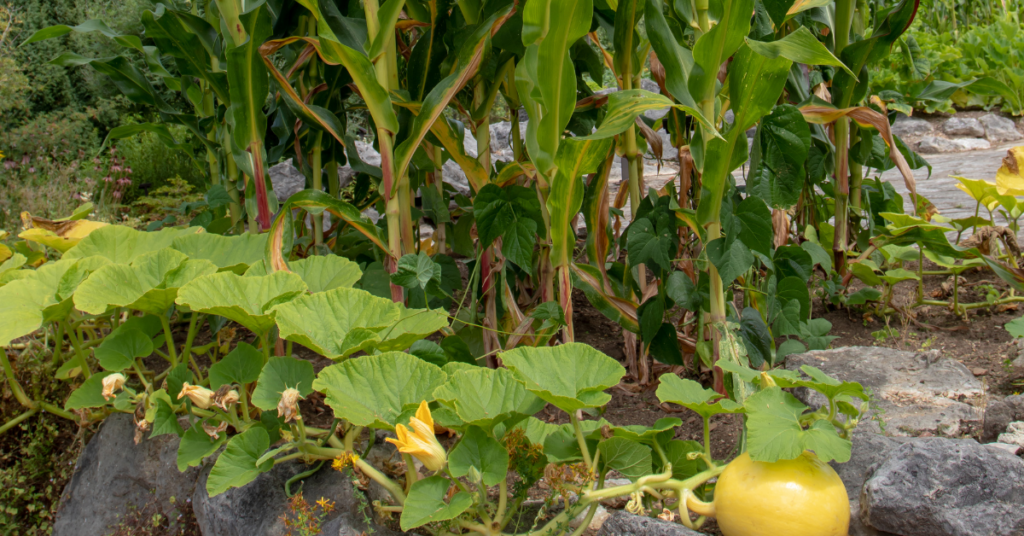
☝️ Plants also share nutrients and amend the soil below ground – in the instance of the Three Sisters, beans fix the nitrogen content of the soil for corn, who has long lost its ability to produce its own nitrogen.
What to Plant?
Herbs Make Excellent Companion Plants
Instead of grouping them all together in a corner, plant them in among your vegetables. Tarragon and marjoram give off a scent that repels most insects. Sage, rosemary, and thyme repel insects that feed on the different plants of the cabbage family. Plant these herbs near your cabbage, cauliflower, and brussels sprouts. Coriander attracts parasitic wasps that are very useful in controlling all sorts of pests.
🖱️ See more on companion planting with herbs here.
Why Not Try Flowers in the Vegetable Patch?
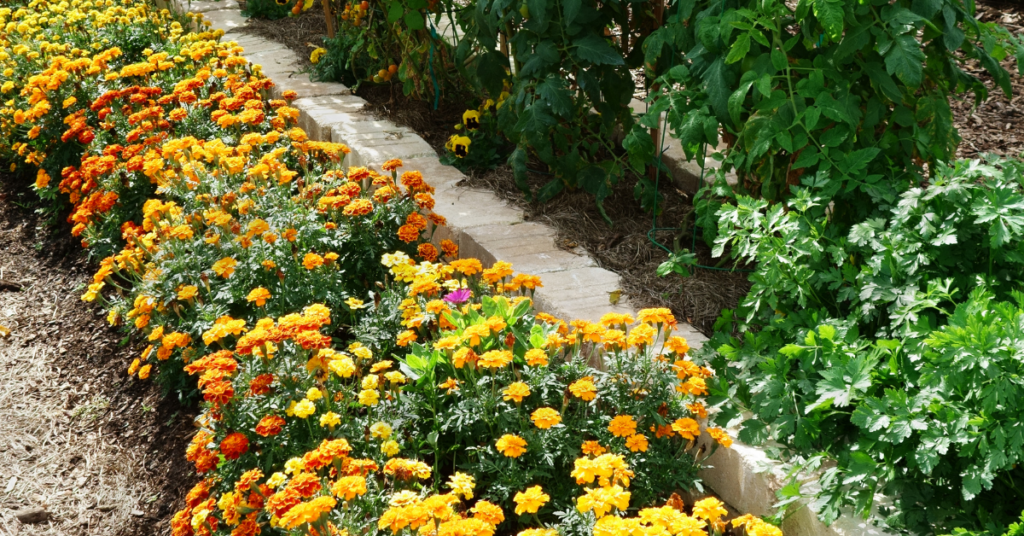
Nothing will make your vegetables happier! Plant borders of alyssum and cosmos; these attract beneficial insects and repel certain harmful ones. Marigolds protect tomatoes from threadworms, and nasturtiums and petunias attract aphids. If you plant them near your tomatoes, the aphids will choose the flowers instead of your tomatoes.
Meet My Plant Friends!
Plant friends are plants that can be grouped together because they mutually help each other grow. Basil stimulates the growth of Tomatoes and enhances the quality of the yield. Chamomile improves the growth and taste of cabbage and onions. It has been found that peas and beans enhance the growth of cucumbers and potatoes. Peas and beans also repel the Colorado Potato Beetle that commonly attacks potatoes and eggplant.
Once you’ve decided who is going where, it’s time to focus on when who is going where.
When To Plant?
It is important to know when the last spring frost date is for your area. Many plants need to be planted after the last frost, so that they don't freeze their little buds off! Follow this guide so that you can have healthy, sturdy little plants that will become good friends in your garden this summer.
| Ten Weeks Before Last Frost Sow indoors: broccoli, brussels sprouts, cabbage, cauliflower, eggplant, lettuce, peppers, and onion |
| Eight Weeks Before Last Frost Sow indoors: tomatoes Sow outdoors: spinach |
| Five Weeks Before Last Frost Sow indoors: marigolds (do not transplant until after last frost) Sow outdoors: peas Transplant: broccoli, cabbage, cauliflower, onion |
| Four Weeks Before Last Frost Sow indoors: cantaloupe, cucumbers, okra, pumpkins, squash, and watermelon |
| Three Weeks Before Last Frost Sow outdoors: carrots Transplant: brussels sprouts, hardened off frost-hardy herbs like chives and oregano |
| Week of Last Frost Sow outdoors: pole beans Transplant: cantaloupe, eggplant, lettuce, okra, peppers, pumpkins, squash, tomatoes, and watermelon |
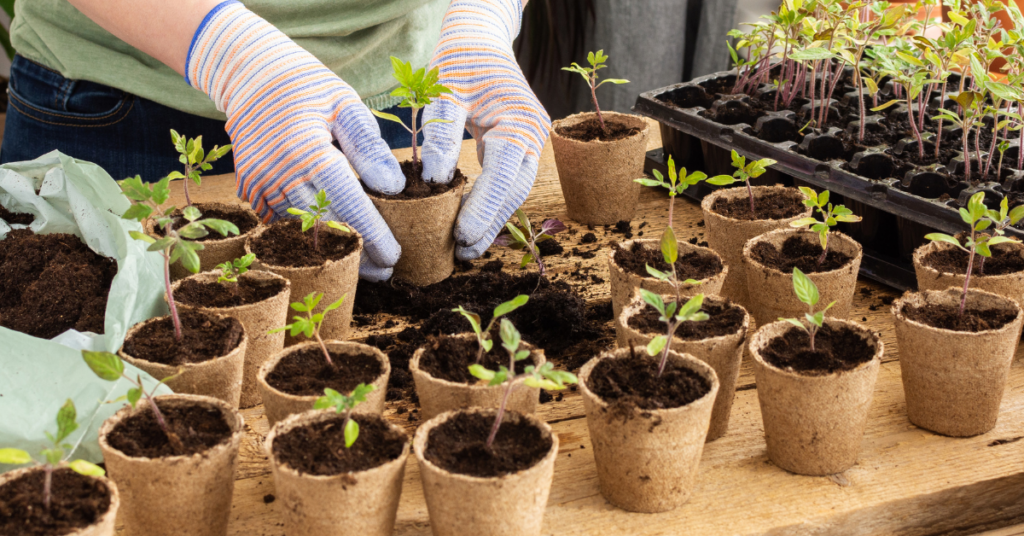
BONUS: Tips on Ensuring Your Seeds Have the Best Start!
🌱 To ensure success it is always best to use fresh, sterile seed-starting mixture (available from garden centres). Moisten mixture about an hour before sowing; it shouldn't be soggy, just as damp as a wrung-out sponge.
🌱 Follow the information contained on seed packets in terms of timing, lighting requirements, sowing depth, and optimal germination and growing temperatures.
🌱 Lightly water freshly sown flats, then cover with plastic dome lid, or if reusing containers try placing them inside a plastic zip-lock bag. At the first signs of germination, uncover or remove from plastic bag.
🌱 As the seedlings develop, wait until the top of the soil looks dry, water carefully using a small watering can with a fine spray. Avoid over watering: soggy soil and poor air circulation can lead to damping off, a fungal disease that can kill seedlings.
🌱 Locate your seeding flat in a bright window but grow lights or cool fluorescent tubes are better. Keep seedlings about eight to 10 centimetres from light source to prevent plants from becoming too spindly. Plug lights into an automatic timer set for 16 hours on, eight hours off. Be careful if you’re using the windowsill method though, as extremes in temperature may occur from hot drying sunny days to frigid evenings.
🌱 When seedlings have two sets of true leaves (the first leaves are called cotyledons — or seed leaves — so wait for the true ones, start feeding once a week with a balanced (20-20-20), water-soluble fertilizer at half-strength, working up to full strength after a few weeks.
🌱 Finally, the plants which have been raised under sheltered conditions must now be hardened off (see more here) before planting out. Gradually lower the temperature and reduce the watering while exposing the plants to brighter light for seven days prior moving them out to a cold frame. Keep an eye on the weather as sudden changes, as it often happens in spring, could spell disaster to your young plants.
We hope your garden is biodiverse and fruitful this year! For more information – and companion plants – visit Eising Greenhouse and Garden Centre this spring! 🌿
Figures.
By Dave Zeldon and Ely Schweyer
Now that we’ve brought our plants inside the house to over-winter, we begin to notice those slender, dark gray flies (0.2- 0.4 cm long) flitting about atop the pot soil. Yuck!
These insects are known as fungus gnats (Bradysia sp.). Whereas they are considered only to be a minor nuisance in house plants, due to their sheer numbers hovering around an attractive plant, they can certainly take away from its appeal. Below is a bit about these pests and some basic control measures.
How Do Fungus Gnats Affect Your Plant?
Other than their swarming presence, fungus gnats are not a direct threat to your plant, but an indirect threat. As their name implies, they are concerned with snacking on the fungi mycelium living in your plants’ soil. (Yes, it’s there and it’s a good thing!) However, these little flies can transfer disease between plants, making them nuisance pests.
A Quick Look at Their Life Cycle:
Adults may lay 300 eggs at a time, which hatch a week later into tiny, threadlike larvae. The larvae feed upon organic matter in the potting soil. After two weeks, they pupate into winged adults, that have no trouble annoying you to no end.
Basic Control Measures:
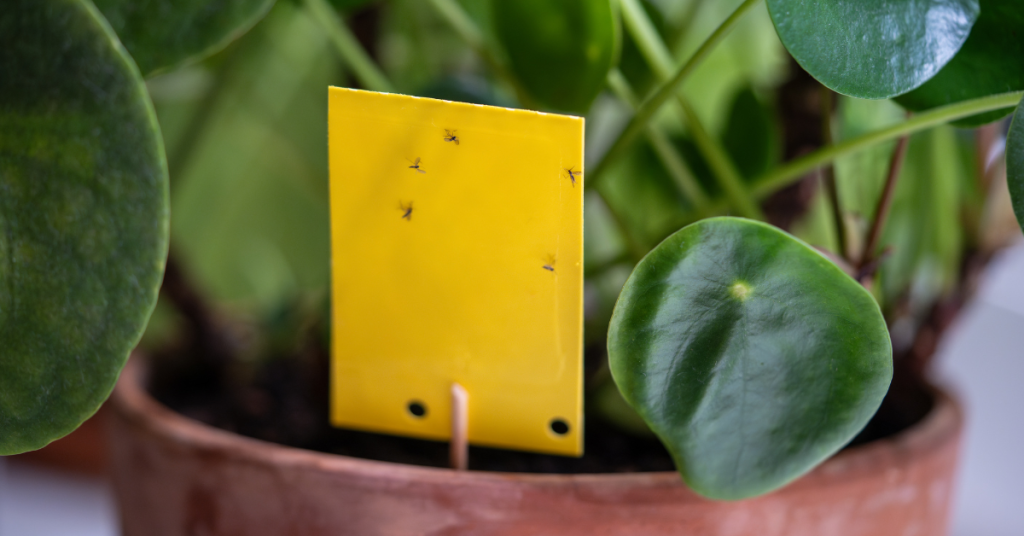
- The fastest and easiest method of control is to catch the flying adults with yellow sticky cards. The large cards can be cut into little strips and mounted onto little wooden splints (popsicle sticks) then placed around the base of the plant out of the line of sight.
- Water your potted plant from the bottom (sub-irrigation) by adding water to the saucer it is sitting in. This will keep the soil surface dry, making it uninhabitable for the hatching insect larvae. If the surface soil is already very wet, try placing a few potato discs or slices on the surface of the soil. This will attract the larvae as they migrate to the potato to feed. Simply replace the discs every three to four days with fresh slices to eliminate the next generation of adults.
- If you have a large number of plants afflicted as in a greenhouse situation, an application of predatory nematodes (Steinernema feltiae) as a soil drench is suggested. Nematodes will attack the fungus gnat larvae in the soil which will in turn lead to more nematodes being produced.
Good Bugs Are Working at Eising Greenhouse and Garden Centre!
Here at Eising’s Greenhouse and Garden Centre, we practice what as known as I.P.M. or Integrated Pest Management. Since we try to create a perfect environment for our plants, we also, unintentionally create perfect conditions for their related pests. To keep the pests at bay, we institute series of steps:
1 - Cultural Controls: We select only the healthiest of plant material to sell and keep them healthy through proper fertilization and growing conditions. We’ve learned that insects are attracted to stressed-out plants!
2 - Physical Controls: We are constantly walking through our plant aisles checking for insect and disease presence and removing the affected plants. Also a clean growing area means there is less chance of pest populations building up on alternate host plants such as weeds.
3 - Biological Controls: At the beginning of the growing season, even before there is any evidence of pest problems, we introduce naturally occurring predators into the growing areas. This is to be at the ready for when the pests do arrive!
In our arsenal we have a series of tiny parasitic wasps, microscopic wire-worms called nematodes, predatory mites as well as bacterial inoculants. So therefore, we cannot spray any chemical insecticides as they will hurt our very valuable biological cache!
Did you ever imagine all the behind-the-scenes work that goes into your plant purchases from Eising's to make them the best value around?
For more information – and bug products - visit Eising Greenhouse and Garden Centre soon! 🪰
By: Dave Zeldon and Ely Schweyer with tips from Mary K, Zach C, Sandy M, and Jeanine LT!
Now is the time to prep our outdoor landscapes for the coming cold weather and the ensuing spring! Perhaps your autumn is calmer than your spring, and this is the best time to clean up and begin new projects. The following are some simple but effective tips to get your yard winter-ready - so your spring will be a little more pleasant for you!
Planting
When warm weather still allows it, plant trees, shrubs, perennials, and bulbs to allow them to establish for budding and blooming next spring.
Pond Care
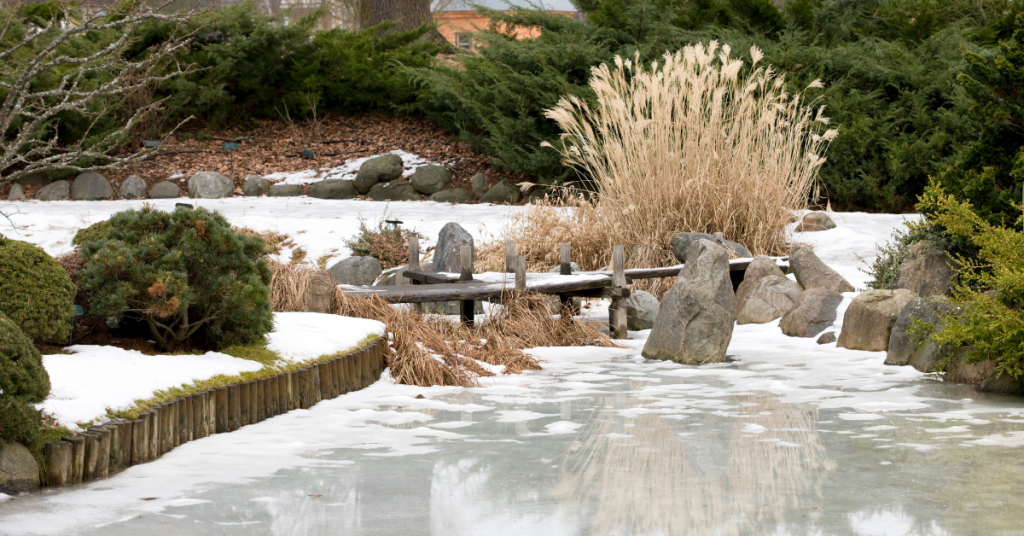
Mary, our perennials gal, suggests not removing any water from your pond but instead aerating it all winter. She skims out the leaves to maintain the balance of the nitrogen cycle in the water and suggests waiting to do a big pond clean out in the spring, as that’s when the water’s culture can bounce back easier.
Fertilizing
After top growth of your landscape plants ceases, reduce your annual fertilizer application by up to half of the requirement. Autumn is a major root growth period for woody and herbaceous perennials; roots will grow and absorb nutrients whenever soil temperatures remain above 5 °C but can be over fertilized quickly in these cooling temperatures.
Produce gardens could benefit at this time from a top layer of compost that will break down during the winter so it isn't too 'hot' for spring planting.
Leaf Litter
Here’s our pitch on the ‘leave it – don’t leave it’ debate: It DEPENDS.
Ideally, we should leave litter leaf on the ground for our pollinator friends and endangered species like fireflies to hide out in the winter. But, there are appropriate situations in which to remove leaf litter.
- When they’re covering your bulbs and tender perennials, remove SOME. Leaf litter acts as a ground insulant, which can amplify our temperamental zone 6b temperatures. This freezing and thawing can often confuse and kill early spring bulbs and tender perennials.
- Zach, our trees and shrubs guy, suggests that if a tree shedding leaves has been diagnosed with pests and fungi, remove the leaf matter to reduce the spread to other plants. Diseased matter should always be removed in a quarantined fashion and taken to a landfill or burned.
☝️Please note: Unless diseased, compost your leaves, they contain vital nutrients specific to the plants they came from!
Lawncare
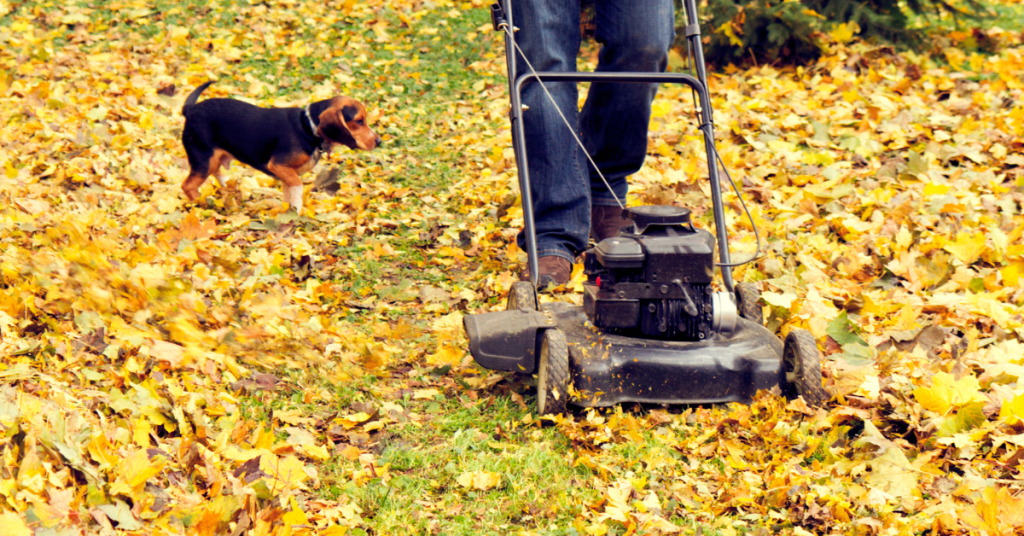
With autumn mowing practices you have the opportunity for the addition of much needed organic matter for your lawn, which is also an excellent source of slow release nutrients. Keep mower blades sharp since leaves can be tougher than grass. Raise the mower height up and mow leaves when they are lightly wet (e.g., morning dew). This will keep the leaves from blowing all over and will prevent the mower from getting bogged down in wet leaves.
See more on general lawncare in Dave's Lawncare 101 post.
Clean Up
Now is a good time to wash your tools with soap and water to prevent diseases spreading from plant to plant.
☝️Mary's tip is to spray garden tools with PAM before use, so the dirt slides right off them!

Pruning Perennials
Mary, our perennials gal, suggests leaving things until frost to cut back. This way they're easier to compost. Make sure to leave seedheads (i.e., coneflowers and black-eyed Susans) for wildlife, and things like hydrangeas for winter interest.
☝️Make sure if things are cut back, to leave them sticking up enough you can still find them in the spring!
Dividing and Moving Perennials
Moving or dividing perennials in the autumn is a great way to reduce your work next spring. The cool, moist weather is an ideal time for perennial roots to become well established.
👍The rule of green thumb for moving perennials: If the plant blooms between early spring and late June, then early fall division/moving is ideal. If the plant blooms after late June, then early spring division is ideal (except for Peonies which should only moved or divided in the fall, Poppies in August, Irises in July & Lilies in the Fall).
Overwintering Trees
Zach and Sandy from trees and shrubs suggest a couple of things to help your favourite trees along this winter:
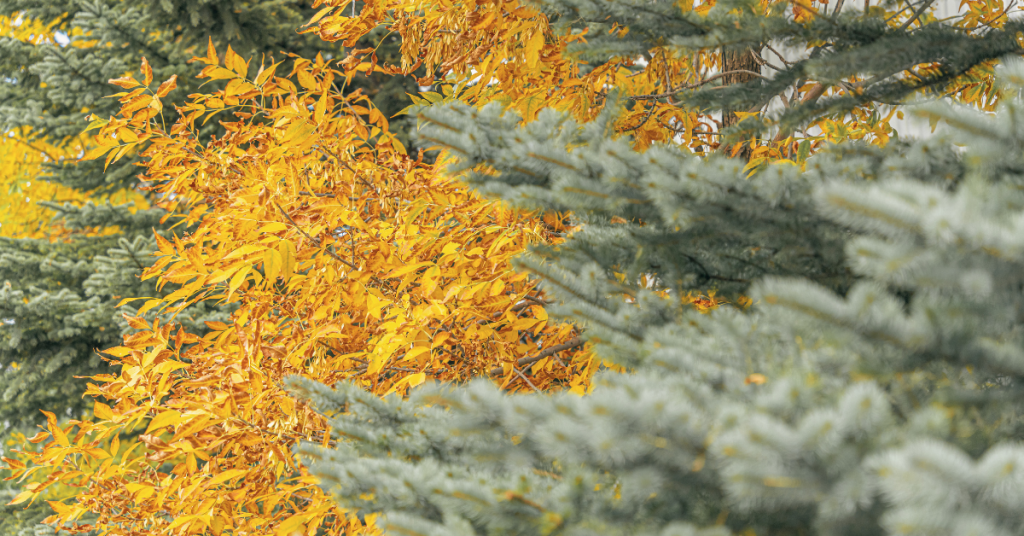
- To reduce winter injury in evergreens: Keep properly watered throughout the growing season and into the fall is another way to reduce winter injury. Decrease watering slightly in September to encourage hardening off, then water thoroughly in October until freeze-up.
- Cedars - Spray cedars with antidesiccant spray (available at Eising GC) or wrap in burlap (with stakes to create dead air space) so wind doesn't dry out and burn tips.
- Fruit trees - In late fall, spray fruit trees with sulfur-horticultural oil (available at Eising GC) for protection against fungi and pests overwintering in the bark.
- Ornamental trees - wrap the base of young trees to protect from chewing rodents.
- Pruning trees - trees that prefer winter pruning rather than spring pruning are maples, oaks, birches, and elms, as well as with fruiting trees such as apples and pears. This ensures blight and pests will not affect the tree's open wounds.
If you missed the frosty deadline for transplanting trees, Sandy suggests insulating unplanted potted trees to help them best survive the coming winter. Here are some methods:
- Double-pot your tree with an insulative barrier (i.e., burlap, straw, mulch, etc.) stuffed between the two pots and securely cover the top with tarp to deflect moisture.
- Bury your potted tree in the ground, level with the top of the pot (don’t forget to dig it back up!) and mulch the area.
- Huddle all of your unplanted trees and plants together when using the above methods.
Mulching
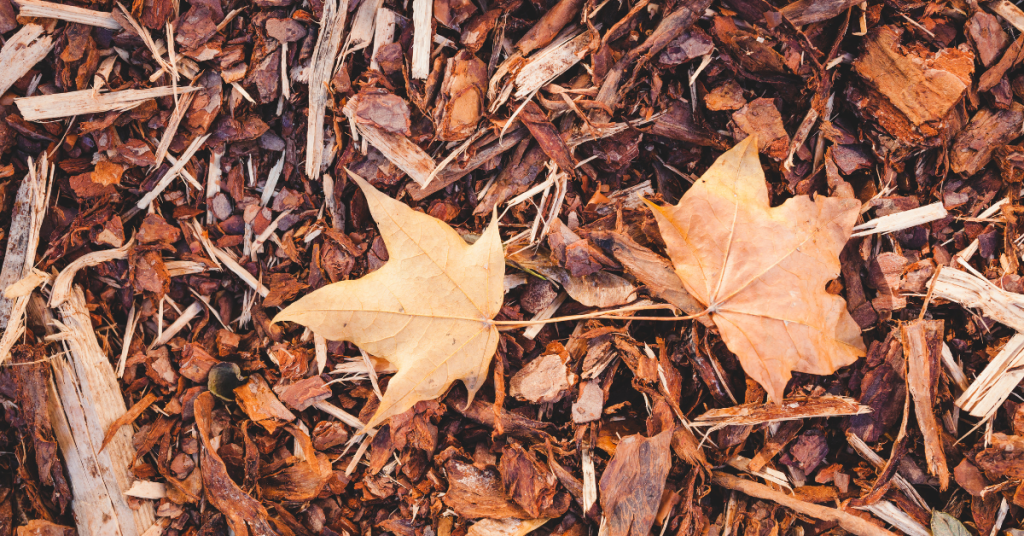
Mulching is one of the simplest and most beneficial practices you can do for your garden. Just by simply placing a protective layer of material over the bare soil will benefit the soil as it decomposes providing the much-needed organic matter which improves root growth, the infiltration of water and the nutrient-holding capacity of the soil while reducing soil erosion.
A good layer of mulch allows the soil to warm more slowly in the spring, so perennials aren't fooled into breaking dormancy too early, as you want the ground to stay cold until it really is spring!
☝️Make sure your mulch application won't stunt the growth of your plants come spring as discussed in our Transplant Troubleshooting blog post!
Japanese Beetle Prevention
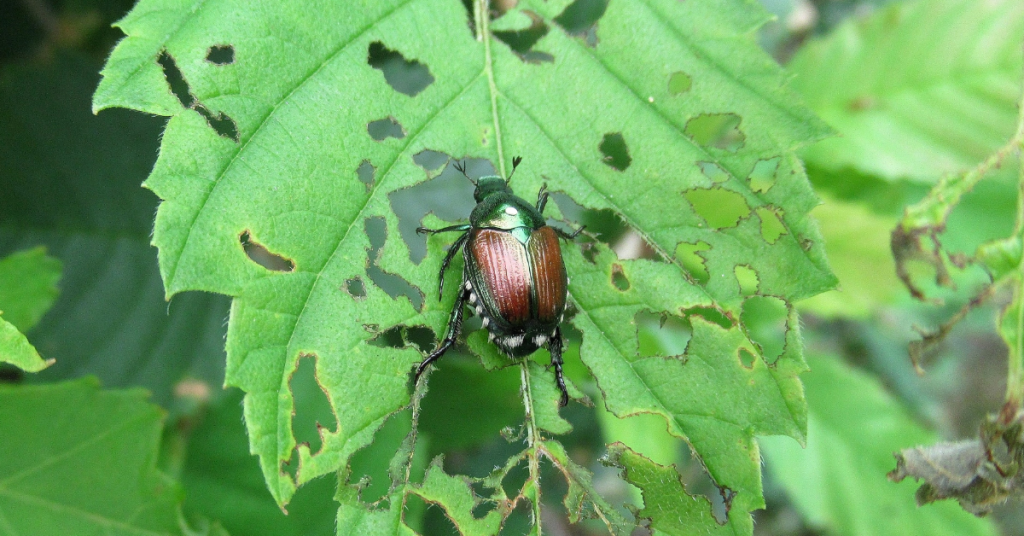
Nematodes are microscopic worms that should be applied to lawns that have been ravaged by grubs especially of the Japanese Beetle. Nematodes have a short shelf life and must be refrigerated until they are applied. Normally, they are sprayed onto the lawn from mid-May to mid-June and then again (for best practice) from mid-August to mid-September.
Pots
To prevent freezing and cracking, Mary suggests emptying and turning your pots upside down. You can disinfect at this time too.
Design Time!
Jeanine, from production, suggests writing down what worked best in your produce garden this year so you can implement it again in the spring.
With the trees and land being barren enough you can see its contour, now is a great time to plan ahead for spring landscaping! Don't forget Eising GC would love to offer help with your landscape designing!
We hope these tips help your landscape plants enjoy your winter abode as much as you do this season, for more information - and plants – visit Eising Greenhouse and Garden Centre! 🍁
By: Dave Zeldon and Ely Schweyer
Most experts agree that we shouldn't bother bringing in our favourite summer potted plants for the winter and that we should buy new again the next season. But this seems to go against our sensibilities after paying good money earlier in the season. Why not try to save that bay tree, those Rosemary, and French Tarragon containers, as well as expensive Phormium, Mandeville, Passionflower, and Jasmine plants?
The secret to indoor survival for summer plants is to slow down their growth during the winter, so they’re ready to be put outside again once all the danger of frost has passed. How? A few weeks before fall frosts are expected, gradually introduce plants to life indoors by moving them inside (to a quarantined spot*) for half a day, working up to a full day over a week or so. Don't wait until nighttime temperatures are only slightly above freezing as the plants may go into shock and drop leaves!
How to Keep These Guys Comfy During the Winter Months?
- It is suggested that you should prune back excessive growth and re-pot with new lighter growing media.
- Place them in the sunniest location you have and then water sparingly but regularly over the Winter.
- Raising humidity by using a humidifier helps too.
- Resist the urge to fertilize these plants until just before you reintroduce them to outdoor living.
- Perhaps just for fun, you could repot them into the appropriate seasonal pots and planters!
It Seems They Brought Others in With Them - And They're Not Nice House Guests
*Before long, you may notice some unwanted guests, such as thrips and spider mites, on and around your precious plants as their natural predators are no longer present to keep their populations at bay. In many cases, it may be too late, and your plants may have to be discarded before the Holidays, but that’s not always the case!
Common problems that make themselves apparent indoors would be the brown soft scale insect, whiteflies, mealybugs, aphids, spider mites and most often, fungus gnats (those pesky little black flies).
Fungus gnats are considered to be the most common nuisance in houseplants. Sometimes their sheer numbers just hovering around an attractive plant take away from its appeal.
Basic Fungus Gnat Control Measures:
The fastest and easiest method of control is to catch the flying adults with yellow sticky cards. The large cards can be cut into little strips and mounted onto little wooden splints (popsicle sticks) then placed around the base of the plant out of the line of sight.
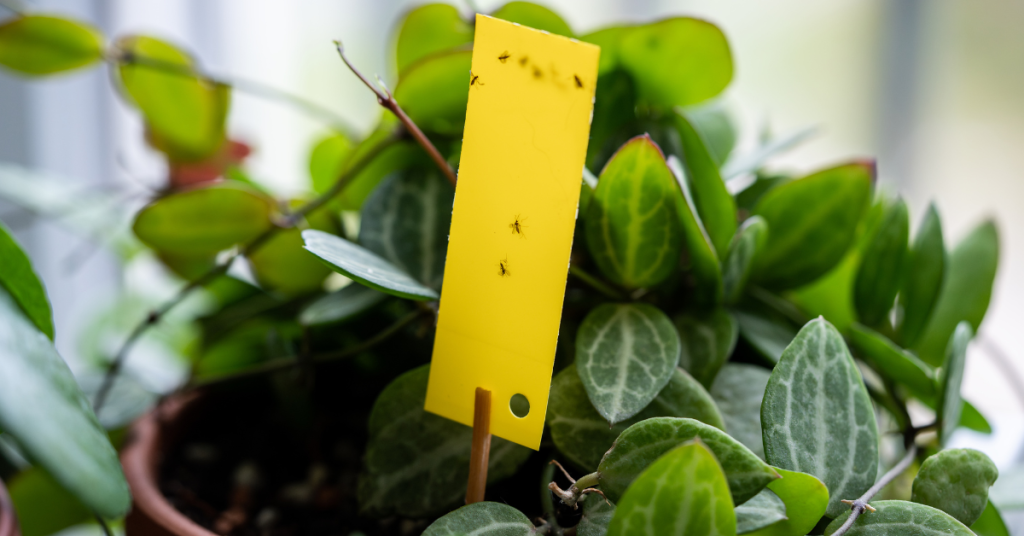
The chances are that the adults have already deposited eggs in the growing media (soil) of the plant as it is rich in organic matter, so we can disrupt its life cycle by:
- Subirrigation - water your potted plant from the bottom by adding water to the saucer it is sitting in. This will dry out the soil surface making it uninhabitable for the hatching larvae.
- Trapping larvae - If the surface soil it already very wet, try placing a few potato discs or slices on the surface of the soil. This will attract the larvae as they migrate to the potato to feed. Simply replace the discs every five days or so with fresh slices to eliminate the next generation of adults.
- Inoculating the soil with beneficial nematodes. Most garden centres will carry the Guardian line of beneficial nematode products.
We hope this helps your plants enjoy your winter abode as much as you do this season, for more information - and plants – visit Eising Greenhouse and Garden Centre!
For tomato lovers, picking a warm, flavourful tomato right off the plant for a sandwich, burger, or salad is a sure sign of summer! I eagerly await the day the first fruit begins to turn red, knowing that I am a day or two away from the first of many toasted tomato sandwiches for the season!
By the end of June, your tomato plants should be in the ground or pot, staked, and well on their way to producing fruit. But how do you keep your plants healthy all summer so that you can maximize your investment? Here are a few tips to help keep your tomato sandwiches coming until frost!

Water
Water early in the morning and water deeply. For tomatoes, consistent moisture is best.
Keep the water on the ground, not on the foliage. This is important because damp foliage can lead to diseases like early blight, which can ultimately cause the entire plant to die. Mulching around the base of plants will reduce the amount of water that can splash up onto the leaves. A soaker hose or drip line is also a great way to ensure that water stays on the ground, rather than on the plant.
Pruning
Reducing the amount of foliage on a tomato plant is necessary for a couple of reasons: good air flow, which reduces the chance of powdery mildew forming, and less foliage means that the plant can send energy to growing fruit instead of lots of leaves.
Follow these easy steps when you prune your tomato plants:
- Before you begin, remember to follow the rule for pruning - no more than ⅓ of a plant should be removed at a time.
- Use clean scissors or pruning shears to cut the leaves off the bottom of the plant. Remove any leaves that are touching the ground. These are particularly susceptible to mildew formation.

When fruit starts forming, remove the leaves from the bottom of the plant up to the first or lowest fruit.
Remove suckers ongoingly. What are suckers? When you look at your tomato plant, you will see the main stem that comes up from the ground, and branches of leaves that come out of the main stem. As the plant grows, suckers begin to form in the “Y” between the main stem and a branch of leaves. Suckers won’t harm a plant; they just make it very unruly and reduce airflow.

If your tomatoes are indeterminate (growing into a tall vine), remove the top of the plant when frost is forecasted at the end of the season. Topping the plant allows energy to ripen the fruit that’s already set, rather than being used to continue growing the vine.

NOTE: Some gardeners like to leave suckers on determinate tomato plants as this can increase the yield.
TIP: Tomatoes ripen from the inside out. That means that by the time you see fruit beginning to flush on the outside, the inside is already ripe. If you have competition for tomatoes from pesky critters, or when there’s a chance of frost in the weather forecast, you can pick fruit that has just begun to turn colour and leave it on the kitchen counter to continue to ripen.
Fertilizer
Using organic material is one of the best ways to feed your crop. A good layer of compost, 1-2 inches, in the spring when you’re planting and again in the fall each year is one of the best ways to improve your soil structure in the garden, and it also adds lots of nutrition.
If you missed this step when planting your garden, you can always add a layer of compost around your plants or use other organic fertilizers, such as compost tea, seaweed, worm castings, or fish emulsion.
Alternatively, you can use a fertilizer that’s formulated especially for tomatoes - these usually have a ratio like 3-4-6 or 4-7-10. Follow label directions for amounts and err on the side of caution. Using less fertilizer is always better than using too much, as an excess can stress the plant and make it more prone to disease.
Following these simple steps for tomato care will help to ensure your plants stay healthy and producing fruit, but if you should have problems, here are some great resources to identify tomato issues:
- Ontario.ca: Bacterial diseases of tomato: bacterial spot, bacterial speck and bacterial canker
- Guelph.ca: Healthy Landscapes – Plant List Native and Drought-Tolerant Plants
A lot of attention has been focused on buying local and shopping for Canadian-made products recently. At Sassyfras Boutique inside Eising’s Garden Centre we’ve always been proud to offer high quality Canadian fashion brands and locally made products. In a world of fast fashion, having choices that benefit our community and the environment is important to us.
There are many reasons to choose Canadian, and your choices do matter:
- Contributes towards building a thriving local fashion industry
- Keeps our economy healthy by keeping our money in the country
- Workers within Canada receive fair wages and work in safe conditions
- Garments that are designed to last, using superior materials and workmanship
Canadiana in Store
Here’s a sneak preview of a few Canadian manufacturers you’ll find in Sassyfras!
Dévia
This women’s clothing collection is made in Montreal, Québec and is eclectic and inspiring. Tops, t-shirts, blouses, cardigans, pants, and shorts are all included in their wide range of fashions.
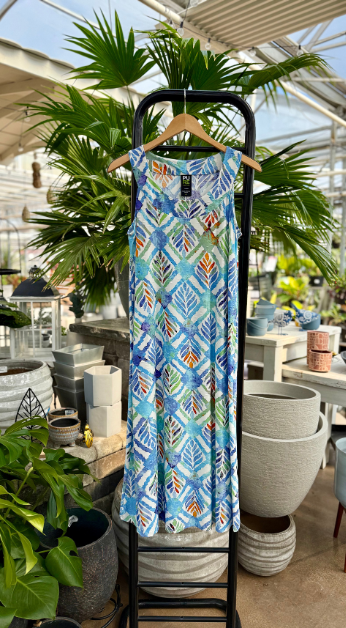
Pure
Combining quality and comfort, Pure is a Canadian company that creates garments for women with active lifestyles who also like to look good. That’s a winning trifecta for certain!
Terrera
Ethically made with natural, earth-friendly fabrics like bamboo and organic cotton, Terrera clothing is soft, comfortable and long-lasting. Their undergarments, leggings and tops will quickly become your favourites.
La Volta Accessories
La Volta’s handbags are fashionable and designed in Canada. Their high quality bags have plenty of personality and each unique style is named after a woman.

Merx Jewelry
With a new collection each season, Merx has become known for staying ahead of trends, but they also manufacture classic and timeless designs. Using pure materials that are lead-free and nickel-free, their jewelry is also attractive to anyone with sensitive skin.
Proud To Be Local - Artisans and Products
Crystal McMaster
Local jewelry designer, Crystal McMaster has been creating beautiful pieces with love and care since 2005.
Jennie’s Jewelry
Local and sustainable, Jennie’s Jewelry transforms silverware into unique earrings, necklaces and bracelets. She also makes custom pieces as well!
Springknoll Farms
Made by a farming family in Haldimand County, their luxurious whipped tallow lotion is a must try.
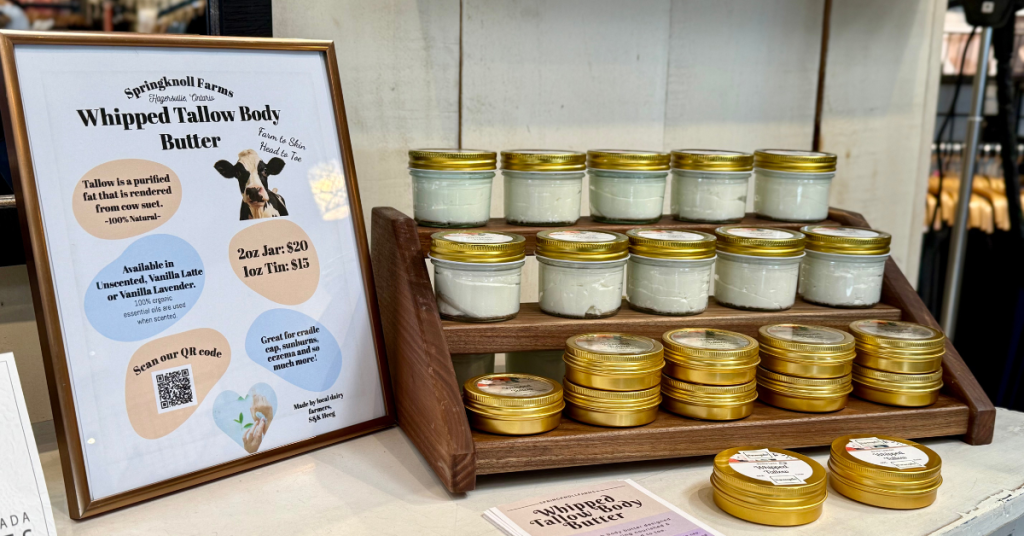
Please drop by soon to see all the fashions and products made by talented fellow Canadians. Thank you for supporting our local business, and for choosing Canadian!
Every day our understanding and awareness of the products and chemicals in our lives grows. From lotion to moisturize your skin, to chemicals to clean our homes, and to the fertilizers and pesticides applied to our lawns, chemicals are starting to be less and less invisible in our daily lives. There seem to be hidden chemicals and risks everywhere around us, and learning more about them can be important to living a healthy life and taking care of our vulnerable pets. Collectively, we’re starting to want to really understand the products we use and just how risky they actually are.
Pesticides, Herbicides, and Fertilizers
If you’ve ever had your lawn treated for weeds or have fertilized in hopes of a golf-green carpet of grass, you know just how unpleasant some of the chemicals that we use in our garden can be. Some of them have foul smells, others require precautions to keep us safe from touching them… it’s no mystery that what we use in our gardens and yards can be potent. On the other hand, most of us don’t want to have a struggling and ragged lawn and garden while our neighbours’ flourish.
There’s a middle ground between taking care of your lawn and garden to help it thrive and using harsh and scary chemicals that might be questionably unsafe for your family. There are tons of organic solutions for a thriving lawn that simply take a little work and some patience, but you can rest easy knowing you’re keeping your home safe to enjoy. Here’s how to get started:

Dethatch
This is as simple as dragging a hard rake across your lawn to clear out some of the dead old growth. These accumulated old layers can stifle your lawn and get in the way of new spring sprouts. A little elbow grease to rake the lawn will show you just how much old growth is in the way and will be the perfect way to get your lawn ready for spring.
Aerate
Your grass is a living thing and has basic needs for survival! Aerating is a great way to boost how much air, space, water, and nutrients can make their way through compacted soil to their roots.
Dethatching and aerating go hand in hand as a once-a-year chore to rejuvenate your lawn in the late fall or early spring. Your lawn might look rough after you dethatch and aerate, but it’s all a necessary to have a natural, thriving lawn when it fills in.
Seed With Good Seed
If you try to start your lawn off with poor seed, you’re setting a poor foundation for your lawn. Choose something that meets your needs, like something that is drought-resistant or perfectly suited for the conditions of your lawn. Even if your lawn was originally seeded with grass seed that is a poor match to your lawn needs, you can always interseed or overseed after you’ve thatched and aerated to re-establish your turf.
Watch Your Watering
Many lawns these days are totally dependent on regular watering to look lush. For many people, their fresh sod needs some extra pampering, and then it’s never weaned off. Ultimately, if you can try to wean your lawn off of constant watering it’ll be encouraged to develop deeper roots that will make it hardier and better able to tolerate dry conditions. A bit of thought into your watering schedule can make the difference between a nice lawn, and a gorgeous one that has the depth to be tough, too.
Working By Hand to Treat Weeds
The dream of a beautiful lawn that is thriving is always compromised by weeds. Thankfully, the healthier your turf is, the more it’ll take up room that opportunistic weeds might have sprouted in the past. All of this work to make a gorgeous lawn isn’t just about getting your greens greener, but about getting rid of opportunities for weeds to take over.

Of course, weeds are stubborn enough that even the healthiest lawns are bound to have a few. If you’re trying to stay away from chemical solutions so your space is always safe for everyone to use, a bit of elbow grease is the solution. Grab a trowel and some gloves and pick away at whatever weeds make it through your defences. It’s actually therapeutic once you aren’t fighting overwhelming numbers of them. The more consistent you are with your weeding, the easier it gets.
Saying goodbye to chemicals in your yard doesn’t mean that you have to say goodbye to a beautiful lawn! A little bit of strategically timed work is exactly what you need to encourage your grass to thrive while keeping your landscape accessible to everyone — you, your kids, your pets, your guests, and your local beneficial critters — to enjoy.