The Queen of the Classic Garden Border
By Ava Green
Tall, stately, and undeniably dramatic, the Delphinium or Larkspur is one of those perennial plants that stops people in their tracks. When given the right conditions, its towering floral spikes are magnificent. For gardeners who love a classic English border, nothing else compares. Yes, Delphiniums have lots of preferences, but tend to them, and they will reward you with a floral display that makes every bit of effort worthwhile.
Choosing Your Delphiniums
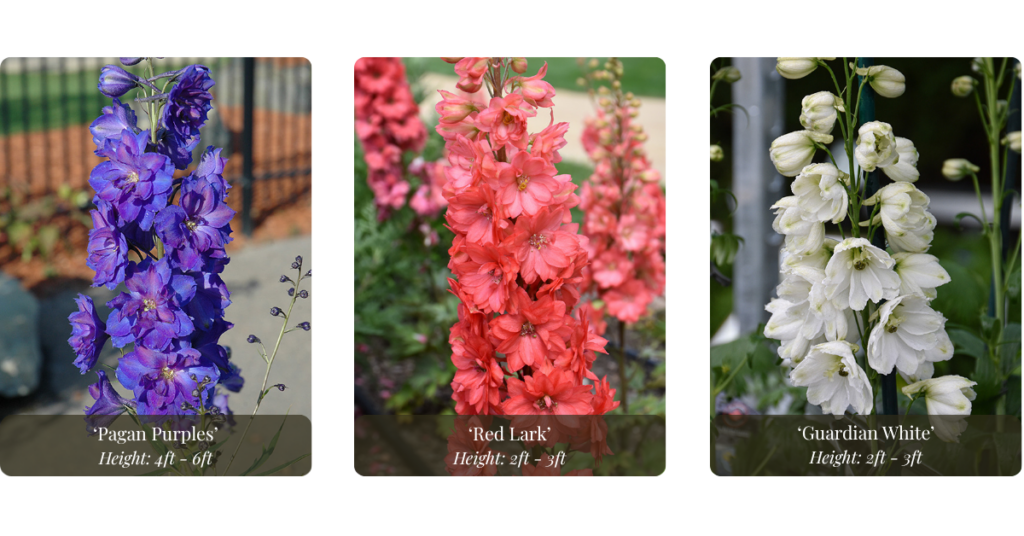
With a wide number of varieties to choose from, there’s one that’s sure to fit every garden. Heights range from a modest 36 inches to an impressive 72 inches tall (Yes, 6 feet!), with a spread of 24 to 36 inches depending on the variety. So whether you have a compact border or a large sweeping bed, there’s a Delphinium to suit your space.
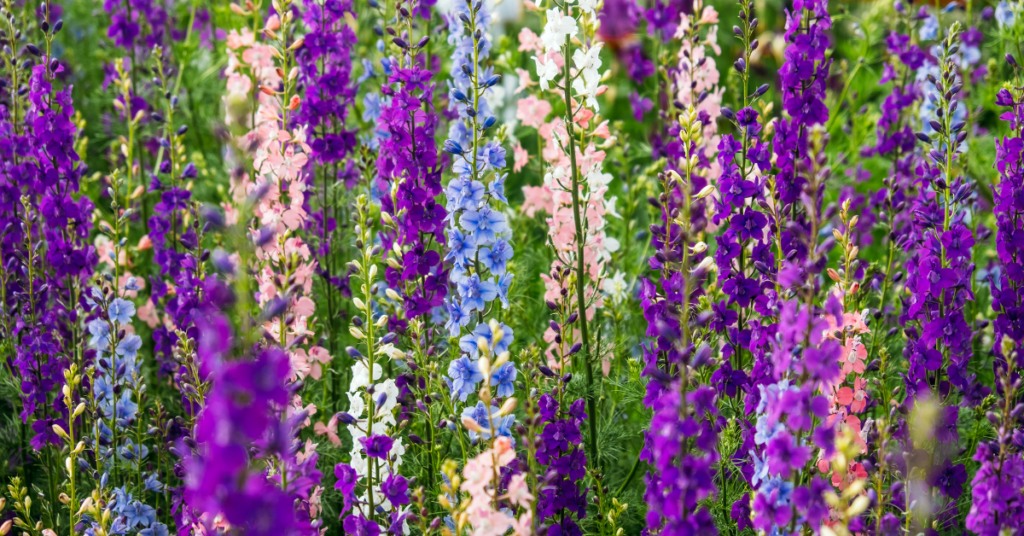
Their colour palette is equally diverse: rich blues and purples, soft pinks, crisp whites, and beautiful bicolours. Few flowers offer such a wide range.
Planting
While Delphiniums prefer abundant moisture, be sure to plant the crown of the plant (where the stems meet the root ball) at soil level to avoid crown rot. Planting them too deeply is the most common way to lose these plants.
Spring and Fall are the ideal times to plant, giving roots a chance to establish themselves in cooler, more forgiving conditions. That said, a cool, overcast summer day works well too, just avoid planting during hot or humid spells. Spacing will depend on the variety you choose, so check the tag and give each plant the room it needs to breathe.
Growing
Delphiniums are what gardeners affectionately call “Goldilocks plants”, they like things just right. Full sun, protection from strong winds, and fertile, humus-rich soil with excellent drainage are keys to success. They also love manure mixed into the soil to enrich their growing conditions.
Their height is both their greatest asset and vulnerability. Because Delphinium flower stalks have hollow centres, they break easily if they’re exposed to the wind. Planting them in a sheltered spot is genuinely important. Once plants reach about 12 inches tall, stake each flower spike individually, or place a tomato cage around a clump early in the season before it’s needed. It’s much easier to stake proactively than to rescue a snapped stem after the fact.
Delphiniums are hungry plants and will perform best when fed generously. A dose of fertilizer, compost, or well-rotted manure in both spring and summer keeps them healthy and productive throughout the season.
Finally, don’t overlook dividing. Each spring, simply dig up the plant and cut the root ball in half. Now you have two plants for your border, or one to keep and one to share!
The Show
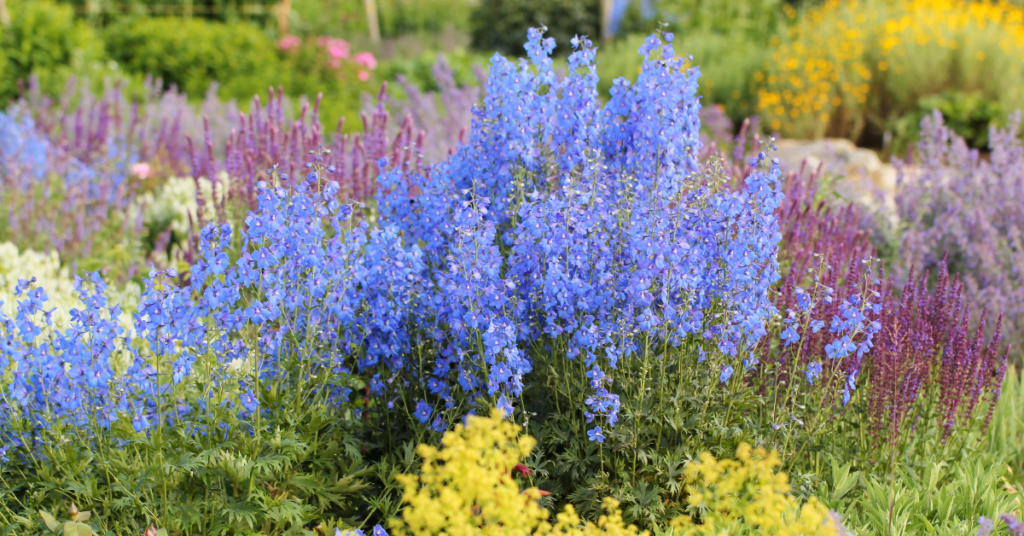
All that care pays off in late spring and early summer, when Delphiniums put on one of the most spectacular displays in the garden. Tall, densely packed spikes covered in richly coloured blooms rise above the border like beacons. Bold, beautiful, and completely unforgettable.
Once the first flush of flowers begins to fade, and before the blooms turn to seed pods, cut the spent spikes back to just above the foliage. This encourages the plant to produce a second, smaller flush of blooms later in the season and extends the show! As the old foliage fades, trim it away to allow the fresh new growth to replace it.

Inspiration
There are plants you fit into a garden, and then there are plants you plan a garden around. Delphiniums belong firmly in the second category. Their height, colour, and presence make them one of the most inspiring and rewarding perennials a gardener can grow.
Stop by Eising Garden Centre to see what Delphinium varieties we have available this season. Our team is always happy to help you find the right fit for your garden and set you up for success.
A lot of attention has been focused on buying local and shopping for Canadian-made products recently. At Sassyfras Boutique inside Eising’s Garden Centre we’ve always been proud to offer high quality Canadian fashion brands and locally made products. In a world of fast fashion, having choices that benefit our community and the environment is important to us.
There are many reasons to choose Canadian, and your choices do matter:
- Contributes towards building a thriving local fashion industry
- Keeps our economy healthy by keeping our money in the country
- Workers within Canada receive fair wages and work in safe conditions
- Garments that are designed to last, using superior materials and workmanship
Canadiana in Store
Here’s a sneak preview of a few Canadian manufacturers you’ll find in Sassyfras!
Dévia
This women’s clothing collection is made in Montreal, Québec and is eclectic and inspiring. Tops, t-shirts, blouses, cardigans, pants, and shorts are all included in their wide range of fashions.
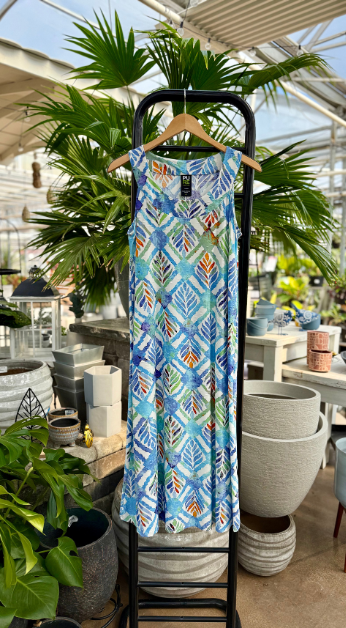
Pure
Combining quality and comfort, Pure is a Canadian company that creates garments for women with active lifestyles who also like to look good. That’s a winning trifecta for certain!
Terrera
Ethically made with natural, earth-friendly fabrics like bamboo and organic cotton, Terrera clothing is soft, comfortable and long-lasting. Their undergarments, leggings and tops will quickly become your favourites.
La Volta Accessories
La Volta’s handbags are fashionable and designed in Canada. Their high quality bags have plenty of personality and each unique style is named after a woman.

Merx Jewelry
With a new collection each season, Merx has become known for staying ahead of trends, but they also manufacture classic and timeless designs. Using pure materials that are lead-free and nickel-free, their jewelry is also attractive to anyone with sensitive skin.
Proud To Be Local - Artisans and Products
Crystal McMaster
Local jewelry designer, Crystal McMaster has been creating beautiful pieces with love and care since 2005.
Jennie’s Jewelry
Local and sustainable, Jennie’s Jewelry transforms silverware into unique earrings, necklaces and bracelets. She also makes custom pieces as well!
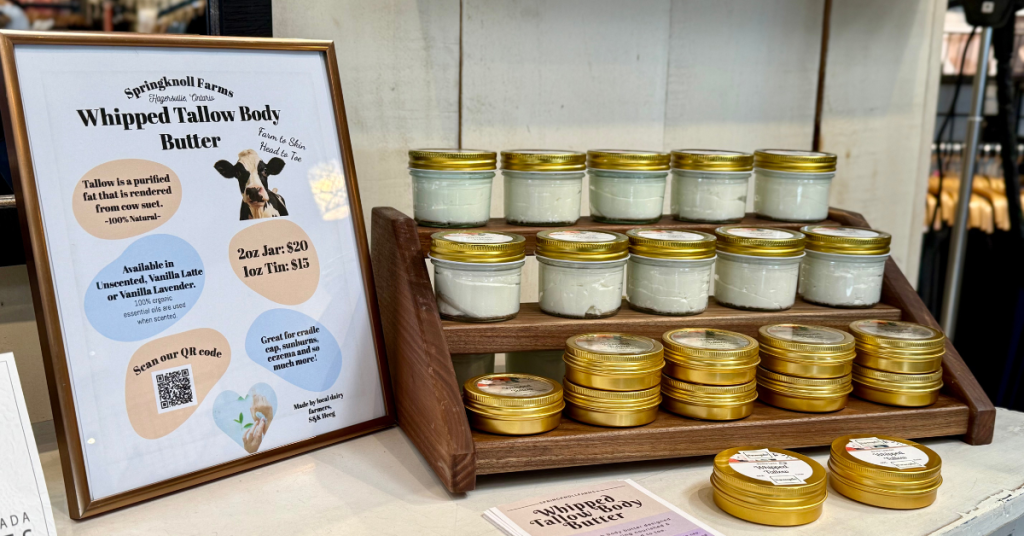
Springknoll Farms
Made by a farming family in Haldimand County, their luxurious whipped tallow lotion is a must try.
Please drop by soon to see all the fashions and products made by talented fellow Canadians. Thank you for supporting our local business, and for choosing Canadian!
Looking for something that blooms in the garden when everything else is fading? Bluebeard (aka Caryopteris or Blue Mist) blooms from late summer until frost sets in!
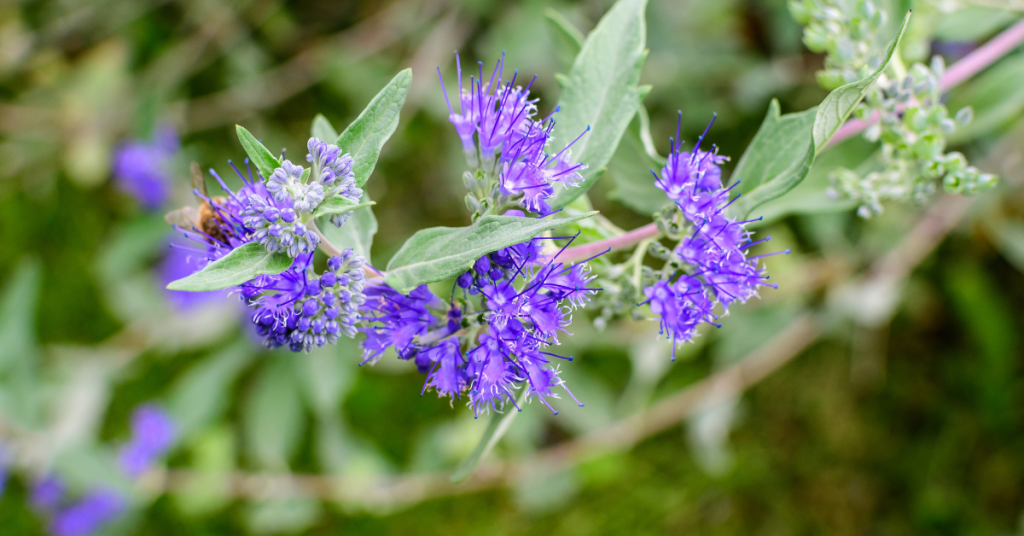
This shrub-like perennial thrives in full sun and sandy soil with good drainage. In exchange for these conditions, it provides an abundance of blooms in vivid, genuine blue (a colour that’s very difficult to find in the garden) or it can have pink or blueish-purple flowers depending on the hybrid variety. Foliage can range from soft grey to golden yellow to dark and glossy green, depending on the variety. Intrigued?
Bluebeard is a great perennial shrub for almost any size of garden and does well here in Norfolk County. Plants grow in a range from two to four feet in height and width and in a well-behaved, compact mound.
Beautiful Blooms
Such a unique flower! Bluebeards form fluffy clusters of flowers, like clouds or mist and can bloom from July until there’s a frost. Like most flowering plants, deadheading spent flowers will promote continued blooming.
Bluebeard flowers have a mildly sweet scent and are full of nectar for pollinator friends like bees, hummingbirds and butterflies. The features don’t stop there! Birds love the seeds that form in the Fall too.
Planting & Care
Find a nice, sunny spot with ample space for the plant to grow. Bluebeard aren’t heavy feeders and don’t need fertilizer. Some compost in the planting hole is all that’s needed. After that, top dress with some compost each Spring.
Water in new plants thoroughly after planting them. Once established, they don’t need watering unless it’s an extremely dry season.
Crown rot from consistently over-watering, or from being planted in wet, heavy soil is the only disease to be concerned about. Branches will begin to die, one by one, if this plant has crown rot.
While Bluebeard will tolerate drought and shade, the amount of flowers will be greatly reduced.
Pruning
Bluebeard’s foliage and flowers form on new branches or new growth. So, early each Spring, cut the stems down by at least half. Cutting them down to 12-18” does not harm the plant. It will send up new shoots, and it’s those new shoots that produce leaves and blooms!
You may find that established plants have some dead wood in the centre. If this happens, prune out any dead wood, and that will ensure that your shrub stays looking full and happy.


Sunshine Blue Bluebeard
Grows 2-3’ tall.
An extremely hardy variety with gold foliage and blue blooms.

One final note. Sometimes Bluebeard is called “blue mist spirea”. However, Bluebeard or Caryopteris is not related to spirea.
The sight and sound of water in the garden can bring life to its surroundings and a sense of calm that we all seem to need right now.
A water garden can be created in many forms with varying degrees of simplicity or complexity. A small water feature in a half-barrel-sized container on a patio. A small to medium one in a preformed fibreglass pool or pond in the ground. An old stock tank or bathtub. A pool liner laid over a hole dug into the ground. A natural pond fed by springs. A fountain, stream or waterfall for moving water. Planning is key, but there are endless options! Just be sure to check any local zoning restrictions before you build.

Whatever the pond form, water can immediately attract nature even in the middle of an urban space. Dragonflies, birds, and frogs will show up to sip, dip and enjoy!
Water gardens also provide a space to garden with plants that bring unexpected beauty and intrigue. It’s a whole new world of native and tropical, annual and perennial plants that exist in the water or on the edge of a pond.
Three Categories of Water Garden Plants
1. Underwater or Submerged Plants

Deep-water plants with floating leaves and flowers, like water lilies and lotus, are included in this group. Often the showy main feature of a water garden, water lilies come in various sizes and colours and produce blooms from late Spring to early Fall. Hardy lilies thrive year after year with very little effort. Full sun and water 18 to 36 inches deep will give a water lily the conditions it needs.
Oxygenating plants are not showy but are also found underwater, and they are essential. Anyone who owns an aquarium knows the importance of good oxygenators to improve water quality. They compete with algae for nutrients and win the battle each time. Elodia canadensis looks a little bit like seaweed, but it’s a hardy and vigorous water perennial here in southern Ontario, which makes it a very popular choice.
2. Floating
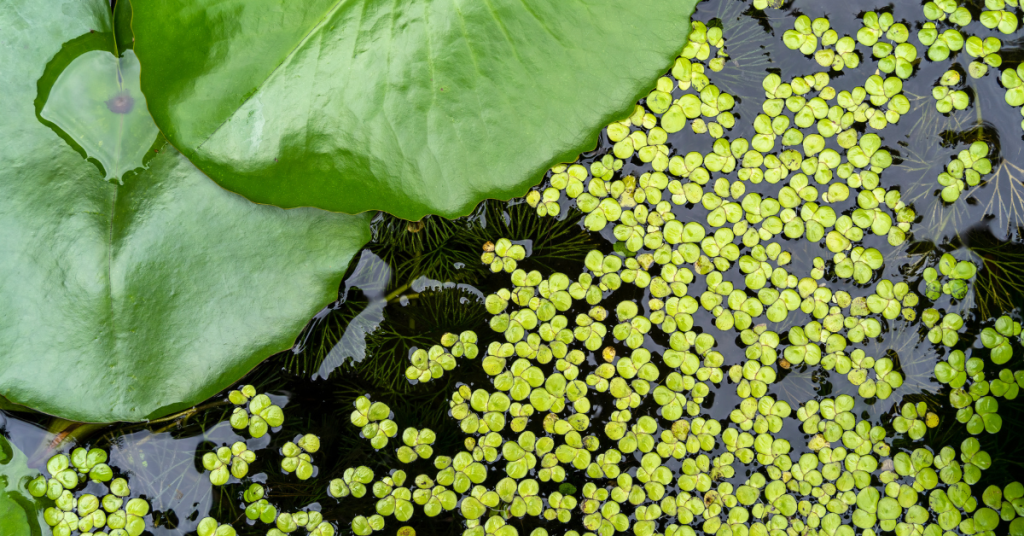
Duckweed and Water hyacinth are examples of plants that float freely on water. No soil is required! While Water hyacinth is a problematic invasive perennial in southern U.S. climates, here in Ontario, it’s a carefree annual and probably one of the most beneficial plants for a garden pond. Water hyacinths provide much-needed shade (algae requires sunlight to thrive), and the roots absorb excess nutrients, helping control algae and purify the water. If that’s not enough, its shiny green leaves can stand up to 4 inches out of the water, and they surround a spike of lovely blueish-purple flowers. It also provides shelter for fish.

3. Shallow water or Marginal Plants
This is the bog folks! The plants grown here are also known as marginal plants. While the term bog doesn’t conjure dreamy Monet water lily paintings, the plants in this area of a pond or wetland can be beautiful, interesting and beneficial. Marginal plants and moisture-loving perennials, grow in the soil just below the water's surface or in consistently wet soil. They are beneficial because they keep water clear by keeping algae at bay. However, as previously mentioned there are many beautiful and interesting plants that grow on the pond's edge.
Here are just a few:
- Cattail - Hardy
- Water Iris - Hardy
- Variegated Sweet Flag - Hardy
- Corkscrew Rush - Hardy
- Pickerel Rush - Hardy
- Dwarf Papyrus - Tropical
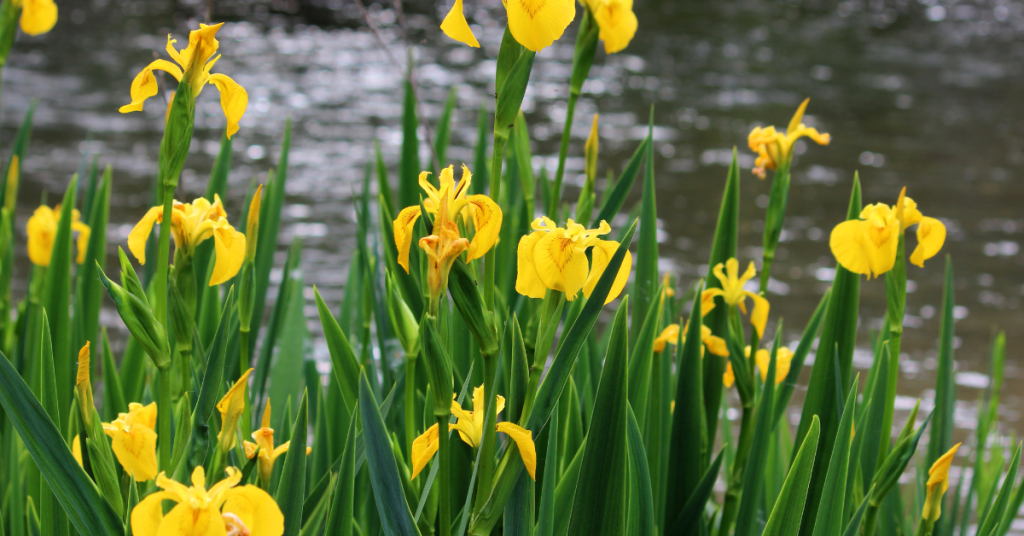

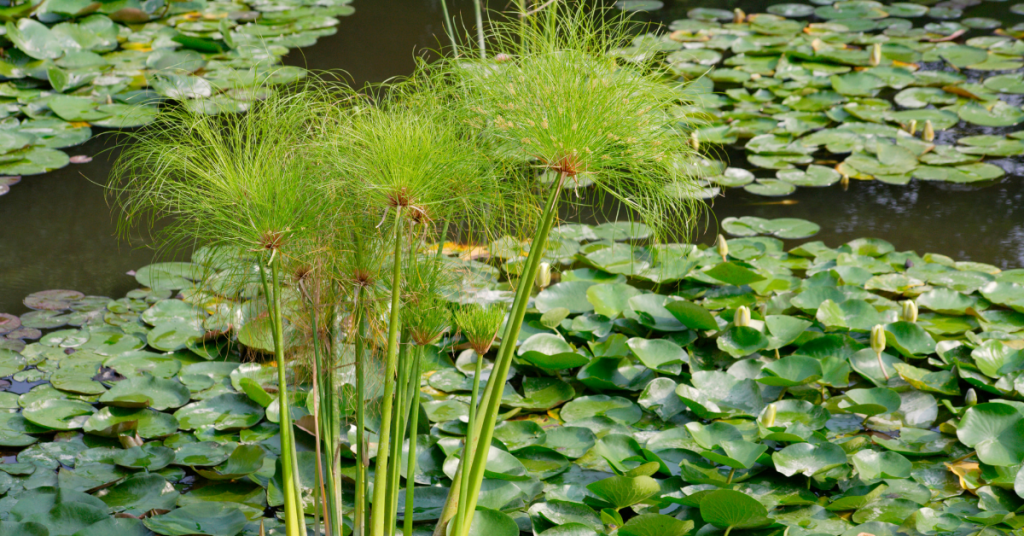
Growing plants in and around a water garden can be a very satisfying project. Curious guests will love to chat about it and ask questions making it a great conversation starter. It also provides a peaceful spot in your backyard to relax and watch the dragonflies whiz by!
The much-loved boxwood hedge has been a classic for centuries and is widely used in gardens worldwide. Neatly trimmed and manicured boxwood becomes the framework for containing everything from roses to riots of perennial blooms. From extensive estate gardens to small and modest yards, boxwood is a versatile shrub that earned its place by being easy to care for and prune.
Unfortunately, this staple shrub has trouble brewing, which impacts its leafy lifespan.
Since its first appearance in Ontario in 2014, the Boxwood Blight has become a significant concern for gardeners. However, the University of Guelph is not sitting idly by. They are actively researching this issue and working hard to find solutions to protect beloved boxwood shrubs.
Sometimes, being popular isn’t all it’s cracked up to be. Because Boxwood is a widely planted favourite, a new pest attracted to it, the Boxwood Moth (from Asia), has easily spread and is infecting shrubs.
Beautiful Boxwood Alternatives
Boxwood Blight and Boxwood Moth do pose severe threats to Boxwood shrubs, but here's the good news—many shrubs make great alternatives! Using a similar shrub is one of the simplest solutions to Boxwood's issues. You have lots of options to protect and diversify your garden.
Inkberry Holly
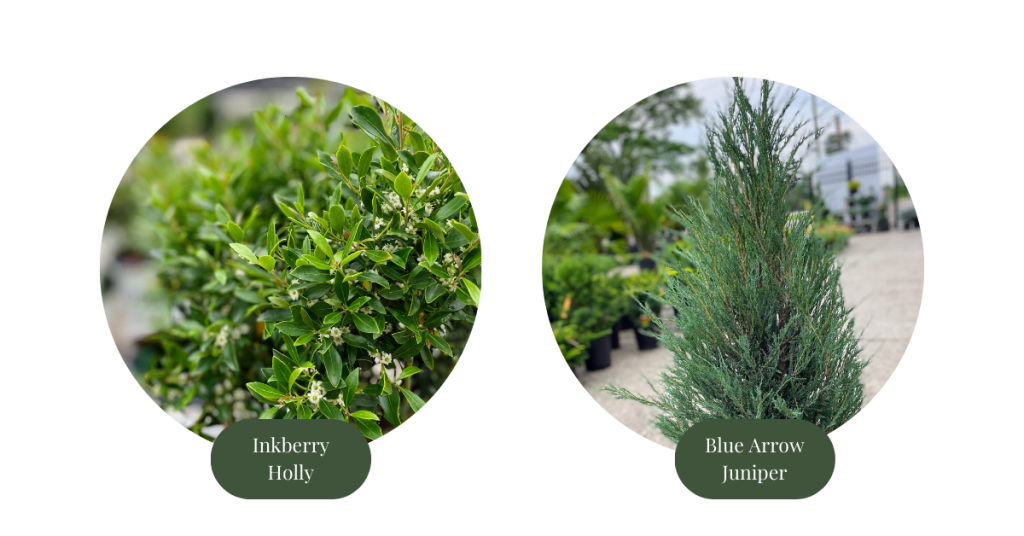
The closest Boxwood lookalike is the Inkberry holly. It naturally grows in a rounded evergreen mound, can be trimmed like a traditional boxwood hedge, and has other enticing bonuses! Not only is it native to North America, but unlike boxwood, it blooms. In the spring, Inkberry holly is covered in showy white flowers, making it a standout alternative to boxwood. Here at Eising Greenhouses, look for Gem Box Inkberry Holly.
Upright Junipers
Blue Arrow and Moffat Blue Junipers make beautiful hedges and stand-alone accent trees. Both have an elegant upright form, striking blue evergreen foliage, and silvery blue berries from late spring to late fall. If that isn’t enticing enough, add drought tolerance to the list of features!
Showy Shapes and Standards
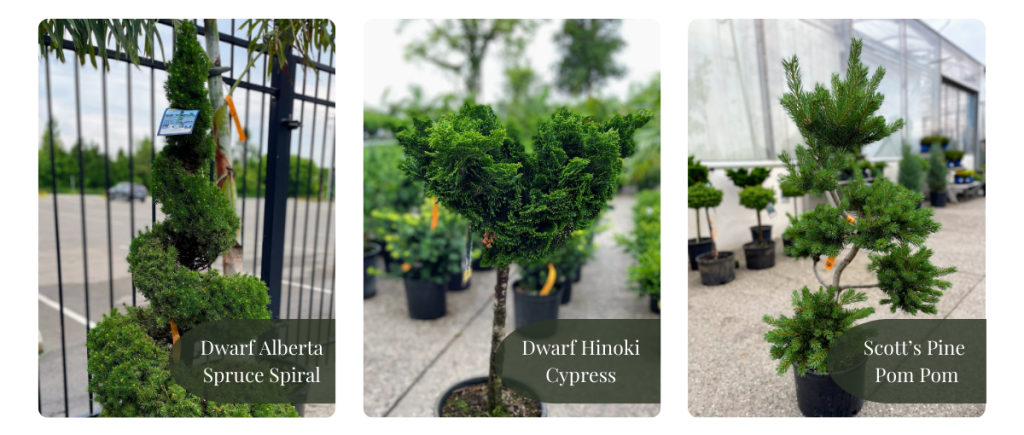
Consider a standard evergreen or a dwarf variety that has been pruned and sculpted to become a piece of art if you want to add something even more unusual. What’s a standard? It’s usually a single trunk with a plant at the top, like a compact evergreen shrub.
Standards and shaped dwarf evergreens can make a bold statement or add wonderful whimsy to your garden. We have lots to choose from, but here are a few examples to get your imagination going!
When it comes to replacing boxwood, there are many creative solutions and beautiful plants to choose from!
For more information:
Landscape Ontario - Boxwood Blight and Boxwood Moth
Toronto Master Gardeners - Rethinking Boxwood
Canada.ca - Box tree Moth
It’s the question we probably hear the most when it comes to flower gardens…”What can I buy that will flower all season long?” While some annuals bloom for a very long time, no plant will bloom from early Spring to late Fall, and no vegetable plant will produce for that duration either. The solution? Succession Planting! It’s a simple strategy that maximizes the time your garden is blooming or producing vegetables.
What is Succession Planting?
Plant early (earlier than you think) and plant things in succession that thrive in the current weather conditions - right up until there is a hard frost. Simply plan to plant another crop or flower once one is harvested or finished blooming. Many gardeners here in southern Ontario wait until the May 24th weekend to plant everything - all at once. Succession gardening staggers planting times so there is a continuous harvest of vegetables or an everchanging series of blooming flowers. While it takes a little more planning, the results are worth it.


A Succession of Blooms
The best way to ensure a parade of colour in your garden is to choose a variety of annuals, perennials, and biennials that bloom at different times. There is a notion that a garden can only have annual flowers or just perennials, but the best results come from a mix of both. You’re allowed to mix them together! Most annuals bloom during the heat of the summer, but perennial flowers can extend the season for you by blooming in early spring or in the fall. A list of perennial bloom times can be found in this Landscape Ontario article to help you choose your plants.
Some flowering plants, like pansies, love cooler weather and are easy to purchase in the spring. A little planning and planting in the fall will provide a flush of colour from Spring bulbs like Daffodils, Crocus, and Hyacinth. Spring bulbs look great alongside early-blooming shrubs or trees like Canada Serviceberry and Forsythia.
April or early May is also an excellent time to directly sow annual flowers like sunflowers, nasturtium, borage, and herbs like cilantro and dill to give them a head start.
Cool Weather Veggies
It’s surprising how many vegetables thrive in cool weather and withstand light frost. Keep tender plants indoors until the third week of April and slowly harden them off, but get outdoors any time in April and begin directly sowing fast-growing cool crops like leafy greens, root vegetables, and some herbs.
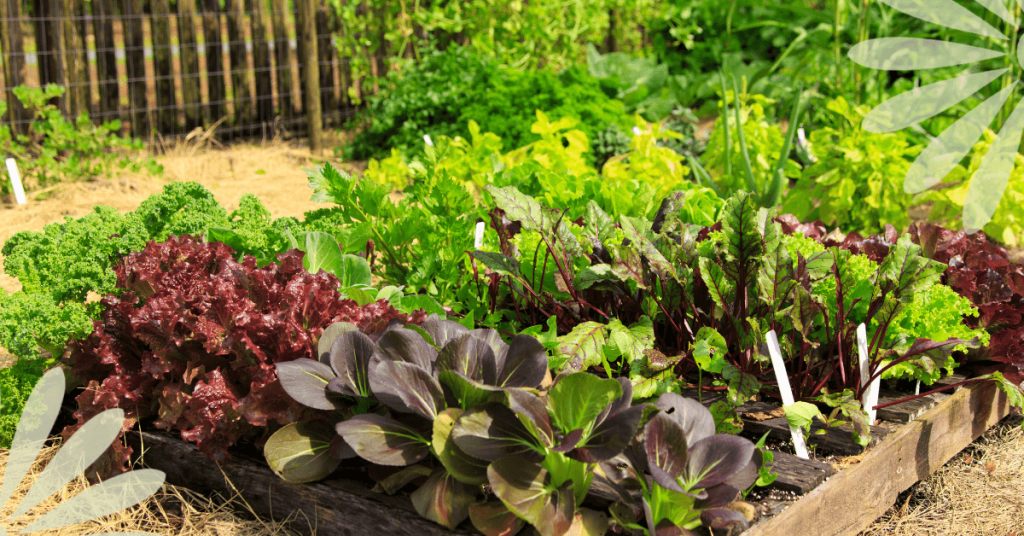
Lettuce planted in late spring will tend to “bolt” and taste bitter once hotter temperatures arrive. Lettuce loves cooler conditions. So you don’t have to wait until May 24th to sow lettuce and other vegetables. Which Vegetables? We have a list of examples for you in our article: Starting Seeds Indoors and Cold Weather Crops. Starting early means you can harvest a whole crop of vegetables before you plant heat-loving crops like peppers and tomatoes.
Sow All Season
If you’ve ever been overwhelmed by planting too much of one crop at once, you will love succession gardening. While you may be able to freeze a batch of 2,000 string beans from the entire packet of seeds you planted in one go, sometimes stretching out the harvest is nice. Plant smaller batches of beans, peas, and herbs like cilantro, dill, and basil every three weeks to ensure continuous summer harvests. This approach is also known as interval gardening.
Sow cool-weather crops like leaf lettuce, Swiss Chard, and Radishes in April or early May and again in September.
Continuous Harvest
Once your early Spring vegetables like lettuce, peas and radishes have been harvested, it’s time to sow your second crop of cool-weather veggies for harvesting in the Fall. Do you know veggies like parsnips, Brussels sprouts, peas, and kale have more flavour after a mild frost?! A mild winter this year meant we were still harvesting some Brussels sprouts in December.
Double Up
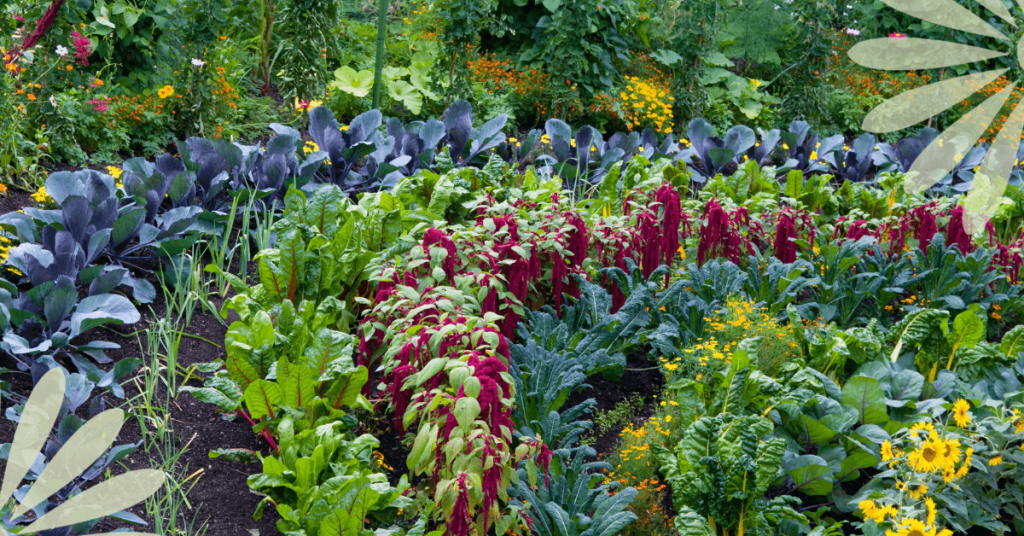
Another tip is to plant things that grow well together. For example, plant seeds for a root crop like carrots below your tomato plants, peas or bush beans in the vegetable garden. The carrot crop will be next after the tomatoes, peas or beans are done for the season. There are many combinations like this - tomatoes and basil, kale and dill, lettuce and beets, broccoli and borage, just to name a few. Doing this helps to increase the production of your plot of land and keeps the soil covered, which is always better for soil health.
One final strategy for flower succession planting is to use containers. Consider placing a well-positioned pot of annual blooms beside perennial plants resting after flowering.
Once you get started, researching companion plant combinations like these can be a fun game. These combinations will extend the time you can enjoy lots of colourful blooms and increase the amount of vegetables a garden can produce!
Come along on a little journey with me and imagine this… It’s Springtime. The sun shines, and the air finally feels warmer after a long, grey winter. You take a little trip to your favourite garden centre and find that special plant you’ve been reading about and hoping for. Of course, you buy the plant, take it home, and proudly place it on your sunny patio on this beautiful day. Two more sunny days go by, and the plant does not look good at all. It seems to be dying, so you give it lots of water, but that makes no difference. It is in fact dying. So disappointing! How could this be happening?
In our excitement to get outdoors and plant flowers, or add greenery, we forget that the plants we’ve been growing indoors or inside a greenhouse, aren’t used to the elements in the great outdoors. They’ve been sheltered indoors, out of the wind and direct sun, and watered and fertilized regularly with the utmost attention. They’ve been pampered in a plant spa and are quite literally hothouse flowers! Being plunked outside afterwards is the equivalent of us going outside in a bathing suit with no sunblock on for the first sunny, warm days of Spring, exposing our lily-white skin that’s been covered up by a parka all winter long!
Red, sunburned skin is not a great image, but hopefully, this comparison helps to explain the importance of transitioning or hardening off plants. Much like us, indoor plants need to be gradually exposed to the elements and given protection in the process.
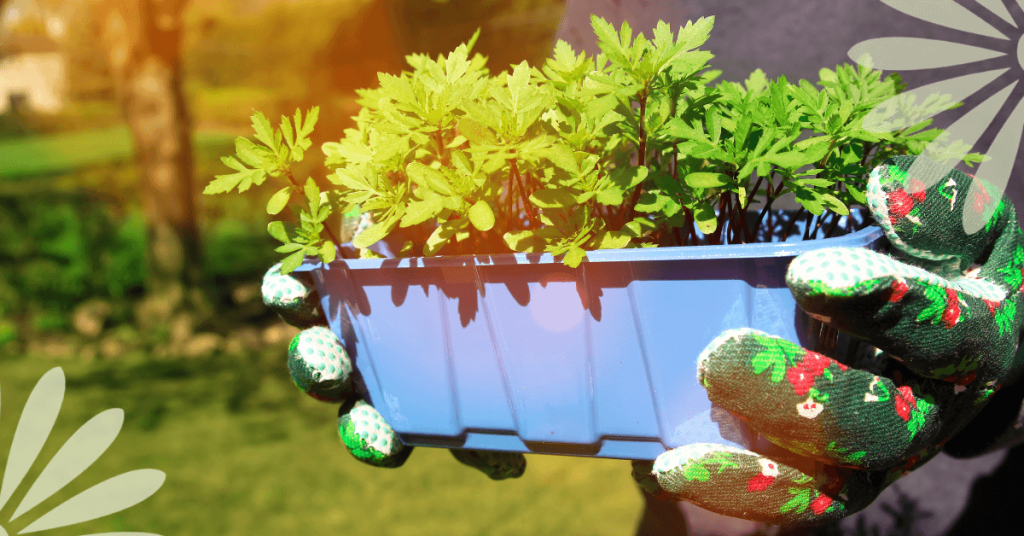
The same will be true if you have planted seeds indoors or purchased greenhouse-grown seedlings. Seedlings grown in a greenhouse, a sunny window, or under grow lights in your home need up to 14 days to acclimate to being moved from their cozy indoor space to the great outdoors.
What is Hardening Off?
Hardening off ensures that you will not lose another plant or seedling! It’s a sensible process for all the plants you’re moving from indoors to outdoors. By helping plants or seedlings to gradually toughen to withstand the elements, you prevent transplant shock, which can cause your plants to be stunted or, worse, die.
To ensure success, the process of hardening off takes up to 14 days, so you will want to begin two weeks before transplanting plants and seedlings into your garden. Houseplants may only need 7 to 10 days, but tender, tiny seedlings need the full two weeks to strengthen and get used to their new environments.
When to Harden Off
Cold-weather plants like lettuce, kale, pansies, violas, dianthus, and potted or forced spring bulbs can be hardened off once daytime temperatures consistently reach 5 Celsius, usually in April in southern Ontario.
Perennial plants, tropical houseplants, and heat-loving seedlings like most annual flowers, tomatoes, peppers, and basil should wait until temperatures are around 7-10 Celsius to begin hardening off. For vegetables and annual flowers, start hardening off around May 10 here in Norfolk County if your target is planting seedlings around May 24th.
Successfully Hardening Off Your Seedlings and Plants
Days 1 and 2
Begin on a day that is optimally warm (At least 5 Celsius for cold-weather-tolerant plants, 7 Celsius for heat-loving plants, or 15 Celsius for tropical houseplants) and place your plants or seedlings outside in full shade and protected from the wind.
If you don't have a wind-sheltered area in the shade, putting your plants in an open cardboard box is a good way to protect them from the wind at this stage.
Leave them in this protected area for 1-2 hours before returning them indoors.
Days 3 to 5
Each day, gradually increase the length of time your plants are outside and begin to place them in an area where they will get dappled shade and some wind.
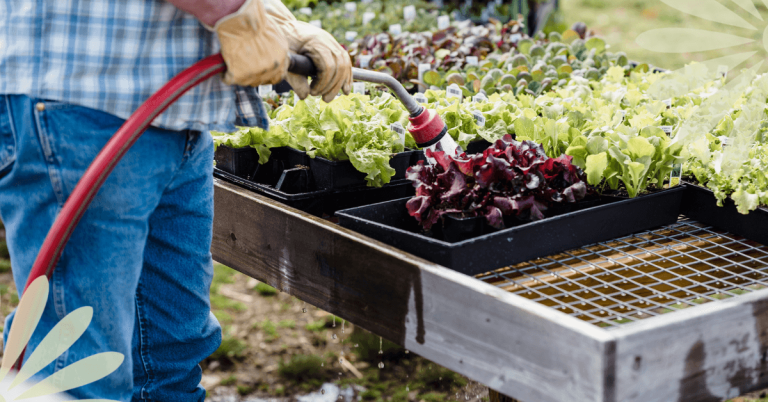
Pay close attention to watering while you’re hardening off your plants as they will require more frequent watering.
Days 6 to 10
On day 6, start to increase your plant’s exposure to direct sunlight by placing them in the morning sun, which is less intense than the afternoon sun.
Begin to leave them outside overnight from this point on unless the temperature is expected to drop below 7 Celcius.
Days 10 to 14
After 10 days of acclimation, it is safe to move houseplants that require more sun to a location that meets their needs.
After 14 days of acclimation, it’s safe to transplant seedlings to their place in the garden or to large pots if you’re growing in containers.
As soon as your plants are transplanted, be sure to water them well! This will help them transition and eliminate air pockets in the soil that can harm the roots.
If the temperature drops and a fluke, unexpected freeze is forecasted after you’ve planted everything, cover your plants with row cover, cloches (you can use plastic water jugs with the bottom cut out, just leave the screw cap off to act as a vent), or cardboard boxes to protect them.
To summarize, when Spring arrives, protect your skin with sunblock, and harden off your plants before you move them outdoors!

You read that right. Easy houseplants exist, and there are some very cool varieties too. Easy does not mean boring!
Plenty of tropical plants are forgiving and require little fussing—you just need to know which ones and how to care for them.
These plants are generally resilient and forgiving of occasional neglect, making them perfect choices for new growers. When choosing any houseplant, consider your home's lighting conditions and the care you can provide.

Pothos
Pothos vine is one of the easiest houseplants to grow and is perfect for beginners.
Bright and indirect light is what this plant loves, but it will also grow in low light - just not no light.
Allow the soil to dry out between waterings. Too much moisture will cause the roots to rot. The plant’s leaves will droop and let you know when it needs a drink!
Feed Pothos with a balanced fertilizer monthly in Spring and Summer only to keep it thriving.
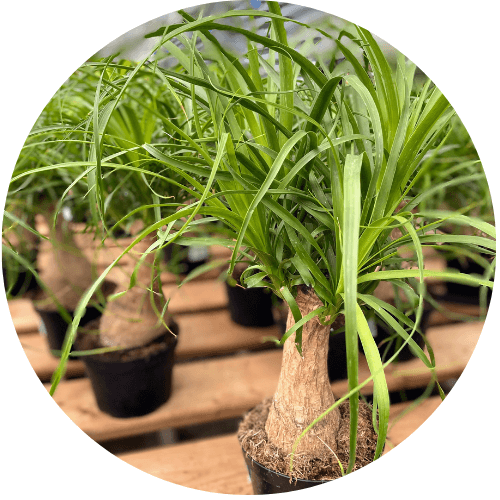
Ponytail Palm
Give this plant the brightest location in the house. It loves full sun or bright, indirect light. They will survive to 10 Celsius, but this plant loves warmer temperatures.
Be careful not to overwater Ponytail Palms. Because water is stored in the bulbous stem, they only need a drink every 7 to 10 days during the summer. In the winter, cut back to monthly watering.
Use a slow-release pellet fertilizer in the Spring for carefree maintenance.
Trimming the tips off damaged leaves will keep them healthy.
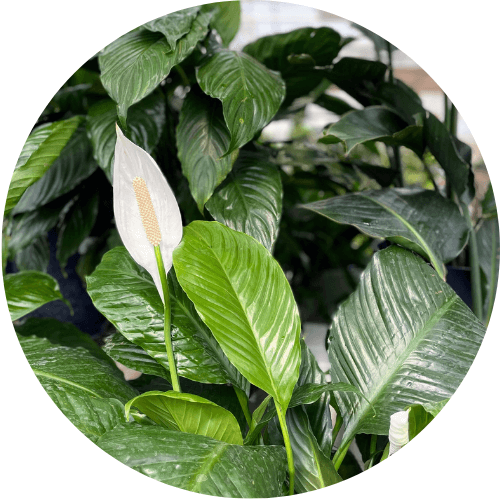
Peace Lily
This plant loves filtered or indirect sun (place it a few feet away from a sunny window or in an east-facing window) and moderately moist soil.
While Peace Lilies love moist and warm conditions, keeping them under-watered is best. Use your finger to check the soil’s moisture. Water this plant when the top inch of soil has dried out.
Use slow-release fertilizer pellets in the Spring or feed the soil weekly during the summer with liquid fertilizer. This plant enjoys frequent feeding during the growing season.
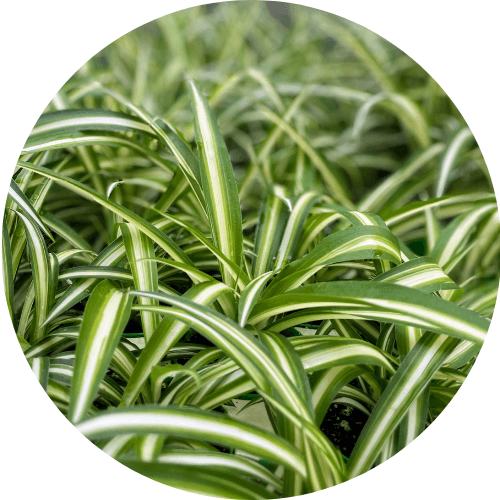
Spider Plant
Spider plants are straightforward to grow. They prefer an area with partial sun or semi-shade that is warm.
Keep the soil lightly moist, not soggy!
Use an all-purpose fertilizer during the summer months. Trim off any brown leaves as needed.
Snake Plant
Indirect sun (a few feet away from a sunny window) or a couple hours of early morning sun will keep this plant happy. These tropicals thrive in warm temperatures with no cold drafts.
Do not allow your Snake plant to sit in water! Water deeply, then let it drain only when the soil is dry.
A 10-10-10 balanced fertilizer at half strength once in the spring and again in mid-summer is all the plant food it needs!

One Final Tip
Most houseplants do not like chlorinated or treated tap water. If possible, water your plants with filtered, distilled, or rainwater. If you only have access to tap water, allow it to sit in an open container for several days until the chlorine evaporates.
Following these simple guidelines will keep your plants healthy, and in return, they will provide natural beauty to your home.
Christmas gatherings are special, even without any holiday decorations. A certain Cindy Loo Who schooled the Grinch on that! But oh how special a gathering feels when you’re surrounded by festive lights, and some fresh greenery to liven things up. It truly does make a dinner or party more magical.
While there are folks who can’t wait to unleash the holiday spirit and begin decorating, it may seem a little too overwhelming for some. We’re here to help, no matter which camp you’re in!
If decorating comes easy to you, stop by Eising Greenhouses when you’re ready for fresh greenery, planters and some new decor.
If the thought of decorating is daunting, here are five simple steps to make it easier - for Christmas, or any special holiday!
5 Simple Steps for Easy Christmas Decorating
1 - Where to decorate. Even if it seems like it’s too early, pour yourself a cup of tea, crack open a notepad and let your imagination begin to percolate. Think about the area(s) you would like to “spruce” up! Front entrance? Living room? Dining room? Think about things like where in the house your party will take place, and whether or not you want a theme or a specific colour palette. Pinterest can help if you need inspiration and we have some Holiday Home Decor Ideas You Can Make Yourself to inspire you as well.
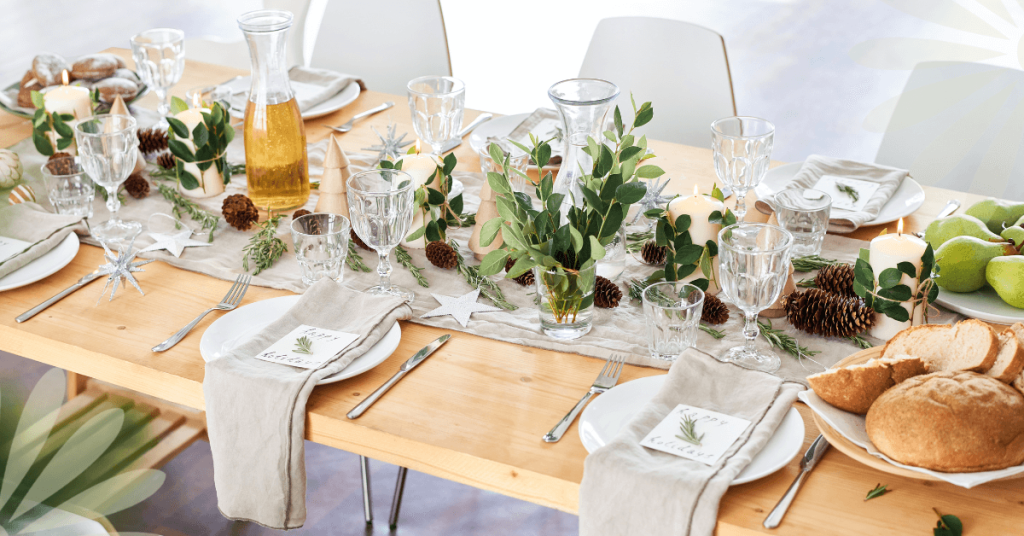
2 - Plan early. Look at your ‘Where To Decorate’ ideas and begin to create a wish list. What will you need to decorate the space(s) you’re imagining? Garland? Wreaths? Centrepieces? A tree? Once you have a wish list, make a plan for what to buy, and what to make.
3 - Schedule it. One of our family’s mottos is that if it’s not scheduled and on the calendar, it never happens. If you find that’s the case for you, use the plan you’ve made and begin to schedule dates to pick up the things you will need, and when you will make or decorate. Next, invite family and friends to join in. Why do this alone? Decorating can be a big part of holiday fun. For example, have everything ready to make or decorate while you watch your favourite holiday movies with friends or family.

4 - Declutter. Now that you have a plan and dates are set, reducing what is in the space will make decorating easier when that day comes. Move, or pack away anything that will limit space or detract from the new holiday decor you’re planning. Editing and clearing out what you have will really draw attention to the Christmas items you’re about to add!
5 - Incorporate natural elements. The holidays are the best time of year to incorporate natural decorations. It’s the only time of year we bring evergreens to the front porch and into our living room. If you’ve never used them, here is our How to Decorate with Fresh Greenery for Christmas guide.
Then, come see us at Eising Greenhouses, and pick out your fresh greenery, wreaths and decorations. You can also select from holiday plants like Amaryllis, Paperwhites and Christmas Cactus, and our arranged-for-you planters, urns and centrepieces. We can even create a custom arrangement in one of your favourite vases, urns, or that big Grinch-themed gravy boat from Aunt Martha if you leave it with us!
We hope these five tips and our holiday decorations help to make your Yule celebrations brighter, so you can sit back and enjoy the beauty of the holiday season!

Fall is the time to plant garlic if you want to harvest them next summer. Why grow your own garlic? Like any vegetable, fresh garlic just tastes great. It’s also very satisfying to plant one little clove and get a whole head of garlic from it. Think of it as a garlic bank: put in a little effort in the Fall, and next summer you will profit from that small investment in spades!
If you’ve never planted garlic, it’s quite an easy crop to grow. Just follow these seasonal steps to help you get started. Hint: Mid-October to early November is when the majority of the work takes place.
FALL
Choose a location that is in the sunniest area of the garden. Lots of sun will produce large heads of garlic.
Prepare the soil in late summer, or as early in the Fall as possible. Or prepare the day before you plant if you can’t get to it sooner! Amending the soil is an often missed step but it will provide valuable nutrients for your garlic throughout the seasons.
Add organic compost like mushroom or sea compost, composted green waste, aged or composted manure, or a mix of any of these. Variety is best and all are great options. If you’re starting a new, raised bed, mix a ratio of 75% compost with 25% vermiculite to create a nice, light soil for your plants. This mix can also be added on top of the soil of an existing bed, making harvesting easier next summer!
Choose a garlic variety based on the flavour and size you like. There is softneck or hardneck garlic, but hardneck is recommended for growing in Canada. Also, hardneck varieties produce scapes which are a bonus crop - you can read more about that below. Red Russian, Music and Chesnock are just a few of the popular varieties grown in Ontario.
Separate the garlic cloves, or teeth, from the heads. As you’re breaking down the heads of garlic, it’s important to choose the largest cloves to plant. Starting with large cloves will increase your chances of growing large heads of garlic. Set aside any small cloves to cook with.

Planting! Sometime between early October to mid-November is a good range to get your garlic in the ground in Norfolk County. Basically, 4 to 6 weeks before the ground is frozen.
Here’s how to get your garlic in the ground!
- When it comes to spacing, there are two options.
Using a dibber or a hand trowel, create 3 to 4” deep holes in one of the following patterns:
a) Make holes that are approximately 6” apart and in rows that are 6” apart.
b) Make holes that are approximately 7” apart and in rows that are 7” apart. Then, go halfway between each row and make an offset row. This method is best if you don’t have a lot of space and will not impact the growth of the garlic.
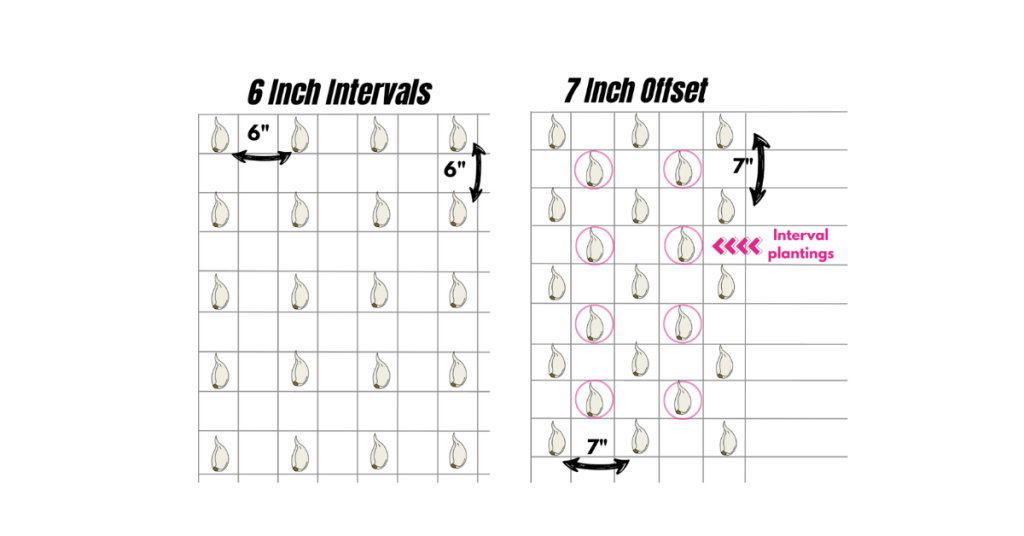
2. Place a handful of worm castings or organic 4:4:4 fertilizer in each hole and mix into the soil a bit.
3. Place ONE clove in each hole, with the pointy end facing up and the flat end down.
4. Backfill with surrounding soil so that each clove is covered 2-3”. This acts as protection during the cold winter months.
5. Top with leaf mulch, leaves, or straw, and water in your garlic if there is no rain in the forecast for several days.
SPRING
This is the time to check on your garlic and give it a little more nutrition.
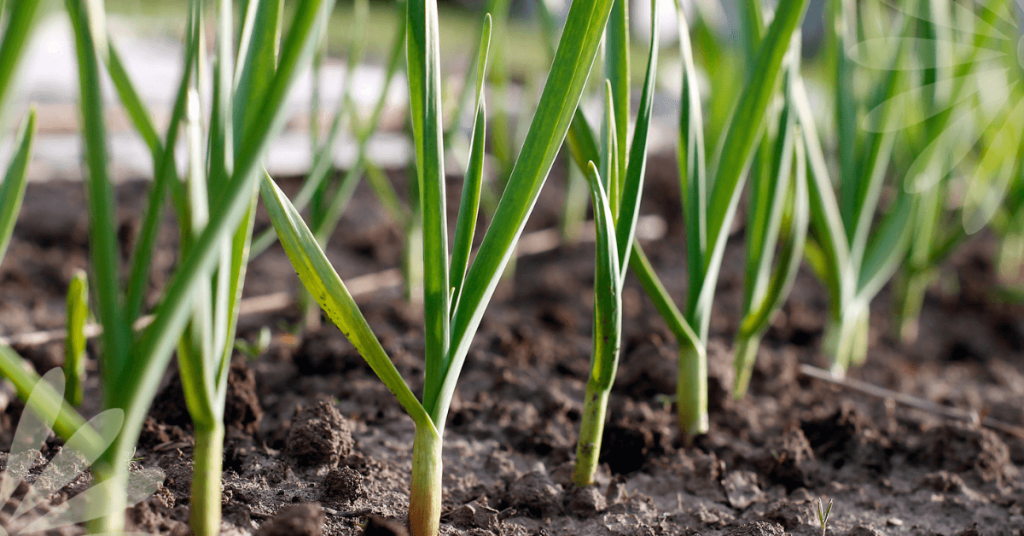
Look for signs of first growth in February or March, depending on how warm the weather is. When you see 3”- 4” of growth, remove the mulch from around each plant, or from the bed, and add it to the compost pile.
Add nutrients by amending the soil with 1 tablespoon of 4:4:4 organic fertilizer per square foot of the garden, or add a 1”- 2” layer of fresh compost.
Water deeply from now on when the soil dries out. And that’s it! Your garlic is well set up to go into a BIG growth cycle.

SUMMER
Remove the scapes! Around mid-June look for the top of the stem of each plant to curl around forming what’s referred to as a “scape”. These curls, or scapes NEED to be removed so that the energy from the plant goes into growing the bulb, not into growing the seed head that is part of the curly scape. One full loop is a good time to cut or snap off the scape just above the top foliage.
All of the growth in the bulb happens once you remove the scape!
Here’s the bonus - garlic scapes are delicious! Chop them up and add them to soups, stews or anything you’re grilling. They also make excellent pesto!
Water and check your garlic for any pests throughout the growing season, just as you would with any other plants.
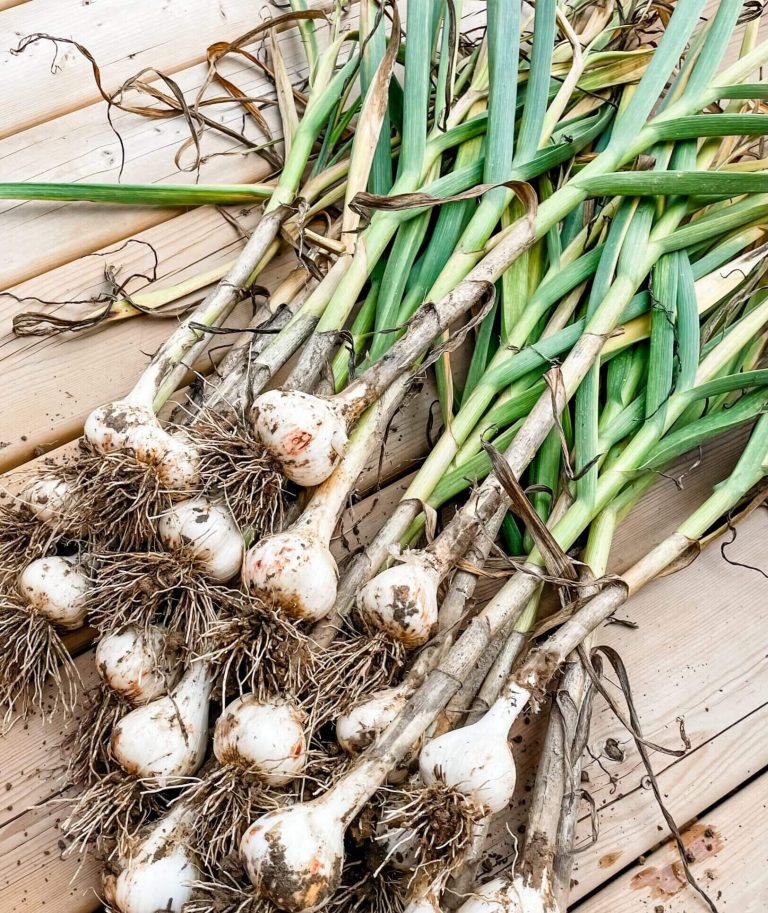
Harvest! Sometime in July, you will start to notice that the bottom leaves of your plant are dying. Don’t worry! The leaves on the plant correspond with the protective layers forming around the outside of your bulb, and they’re getting ready for harvest.
Around mid-July, 4 or 5 of the bottom leaves will be dead and this is your sign that it’s time to harvest your bulbs.
- Stop watering your garlic 4 to 5 days before harvesting.
- Use a pitchfork or shovel to loosen the soil, keeping well away from each plant so that you don’t slice through the garlic heads.
- Gently pull up each bulb and shake off any soil hanging on to the roots. Resist the urge to wash the bulbs as moisture at this stage will promote mould or rot!
Cure your garlic harvest by hanging it in a cool, dry place that’s out of the sun and has good airflow for 2 to 3 weeks. You may need to use a fan for this step.
Once cured, trim off the stems leaving 1-2” and the roots, and store in a dark, cool and dry spot in the house. Well-cured and stored garlic can last until sometime between December and February… unless you’re cooking, canning, and freezing with it and use most of it up! But don’t forget to save the biggest cloves to plant again in the Fall!