
Fall is the time to plant garlic if you want to harvest them next summer. Why grow your own garlic? Like any vegetable, fresh garlic just tastes great. It’s also very satisfying to plant one little clove and get a whole head of garlic from it. Think of it as a garlic bank: put in a little effort in the Fall, and next summer you will profit from that small investment in spades!
If you’ve never planted garlic, it’s quite an easy crop to grow. Just follow these seasonal steps to help you get started. Hint: Mid-October to early November is when the majority of the work takes place.
FALL
Choose a location that is in the sunniest area of the garden. Lots of sun will produce large heads of garlic.
Prepare the soil in late summer, or as early in the Fall as possible. Or prepare the day before you plant if you can’t get to it sooner! Amending the soil is an often missed step but it will provide valuable nutrients for your garlic throughout the seasons.
Add organic compost like mushroom or sea compost, composted green waste, aged or composted manure, or a mix of any of these. Variety is best and all are great options. If you’re starting a new, raised bed, mix a ratio of 75% compost with 25% vermiculite to create a nice, light soil for your plants. This mix can also be added on top of the soil of an existing bed, making harvesting easier next summer!
Choose a garlic variety based on the flavour and size you like. There is softneck or hardneck garlic, but hardneck is recommended for growing in Canada. Also, hardneck varieties produce scapes which are a bonus crop - you can read more about that below. Red Russian, Music and Chesnock are just a few of the popular varieties grown in Ontario.
Separate the garlic cloves, or teeth, from the heads. As you’re breaking down the heads of garlic, it’s important to choose the largest cloves to plant. Starting with large cloves will increase your chances of growing large heads of garlic. Set aside any small cloves to cook with.

Planting! Sometime between early October to mid-November is a good range to get your garlic in the ground in Norfolk County. Basically, 4 to 6 weeks before the ground is frozen.
Here’s how to get your garlic in the ground!
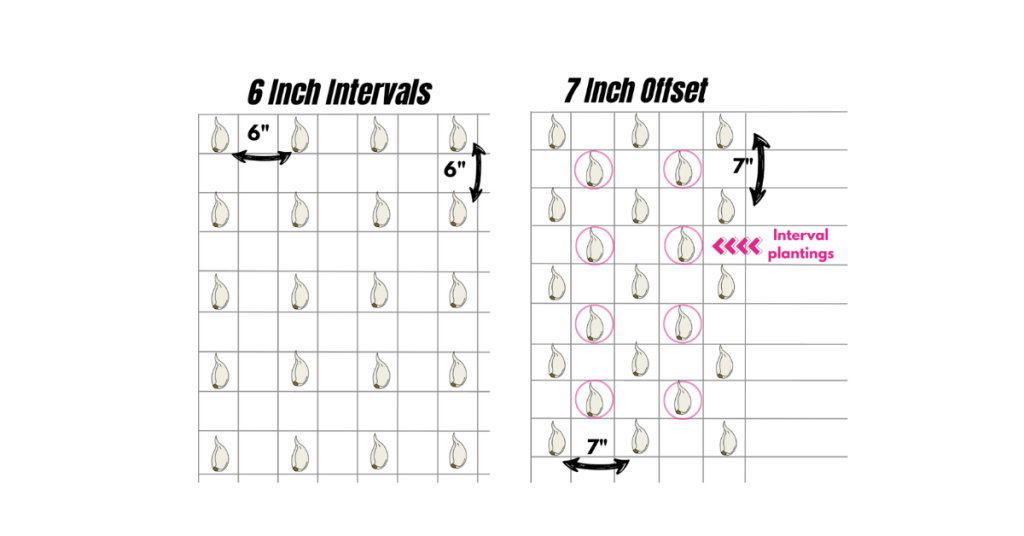
- When it comes to spacing, there are two options.
Using a dibber or a hand trowel, create 3 to 4” deep holes in one of the following patterns:
a) Make holes that are approximately 6” apart and in rows that are 6” apart.
b) Make holes that are approximately 7” apart and in rows that are 7” apart. Then, go halfway between each row and make an offset row. This method is best if you don’t have a lot of space and will not impact the growth of the garlic.
2. Place a handful of worm castings or organic 4:4:4 fertilizer in each hole and mix into the soil a bit.
3. Place ONE clove in each hole, with the pointy end facing up and the flat end down.
4. Backfill with surrounding soil so that each clove is covered 2-3”. This acts as protection during the cold winter months.
5. Top with leaf mulch, leaves, or straw, and water in your garlic if there is no rain in the forecast for several days.
SPRING
This is the time to check on your garlic and give it a little more nutrition.
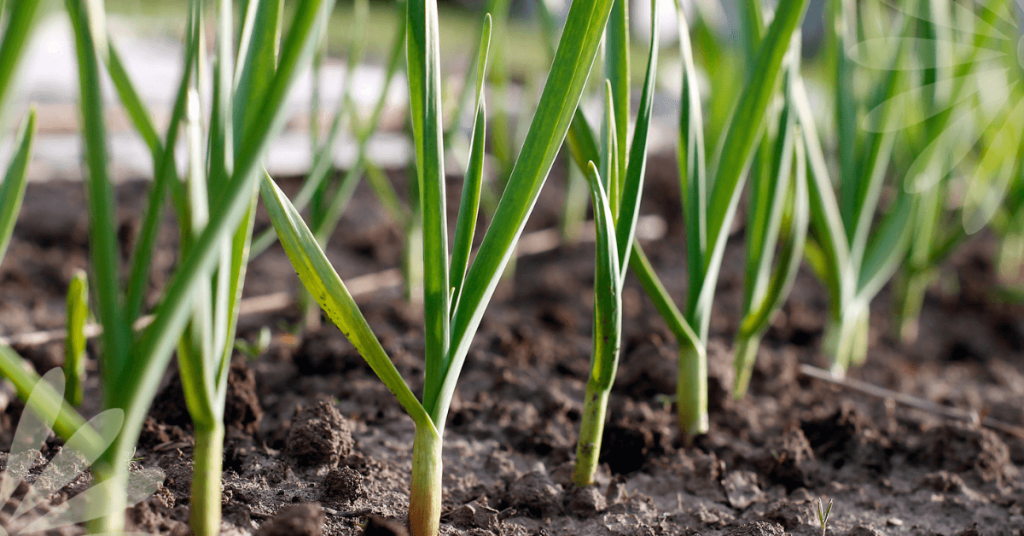
Look for signs of first growth in February or March, depending on how warm the weather is. When you see 3”- 4” of growth, remove the mulch from around each plant, or from the bed, and add it to the compost pile.
Add nutrients by amending the soil with 1 tablespoon of 4:4:4 organic fertilizer per square foot of the garden, or add a 1”- 2” layer of fresh compost.
Water deeply from now on when the soil dries out. And that’s it! Your garlic is well set up to go into a BIG growth cycle.

SUMMER
Remove the scapes! Around mid-June look for the top of the stem of each plant to curl around forming what’s referred to as a “scape”. These curls, or scapes NEED to be removed so that the energy from the plant goes into growing the bulb, not into growing the seed head that is part of the curly scape. One full loop is a good time to cut or snap off the scape just above the top foliage.
All of the growth in the bulb happens once you remove the scape!
Here’s the bonus - garlic scapes are delicious! Chop them up and add them to soups, stews or anything you’re grilling. They also make excellent pesto!
Water and check your garlic for any pests throughout the growing season, just as you would with any other plants.
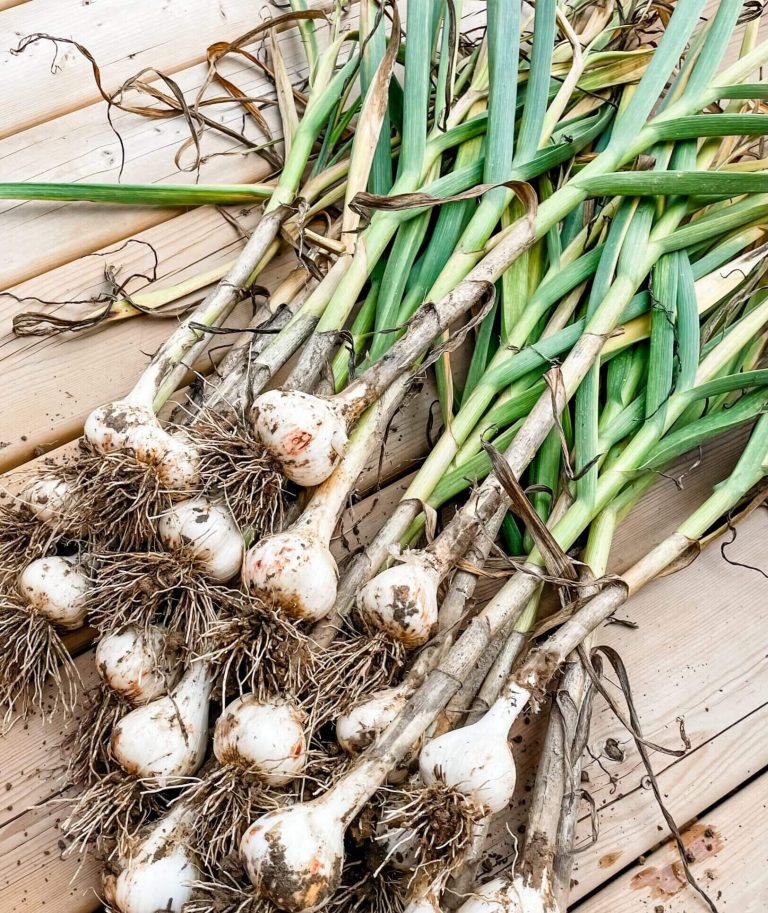
Harvest! Sometime in July, you will start to notice that the bottom leaves of your plant are dying. Don’t worry! The leaves on the plant correspond with the protective layers forming around the outside of your bulb, and they’re getting ready for harvest.
Around mid-July, 4 or 5 of the bottom leaves will be dead and this is your sign that it’s time to harvest your bulbs.
- Stop watering your garlic 4 to 5 days before harvesting.
- Use a pitchfork or shovel to loosen the soil, keeping well away from each plant so that you don’t slice through the garlic heads.
- Gently pull up each bulb and shake off any soil hanging on to the roots. Resist the urge to wash the bulbs as moisture at this stage will promote mould or rot!
Cure your garlic harvest by hanging it in a cool, dry place that’s out of the sun and has good airflow for 2 to 3 weeks. You may need to use a fan for this step.
Once cured, trim off the stems leaving 1-2” and the roots, and store in a dark, cool and dry spot in the house. Well-cured and stored garlic can last until sometime between December and February… unless you’re cooking, canning, and freezing with it and use most of it up! But don’t forget to save the biggest cloves to plant again in the Fall!
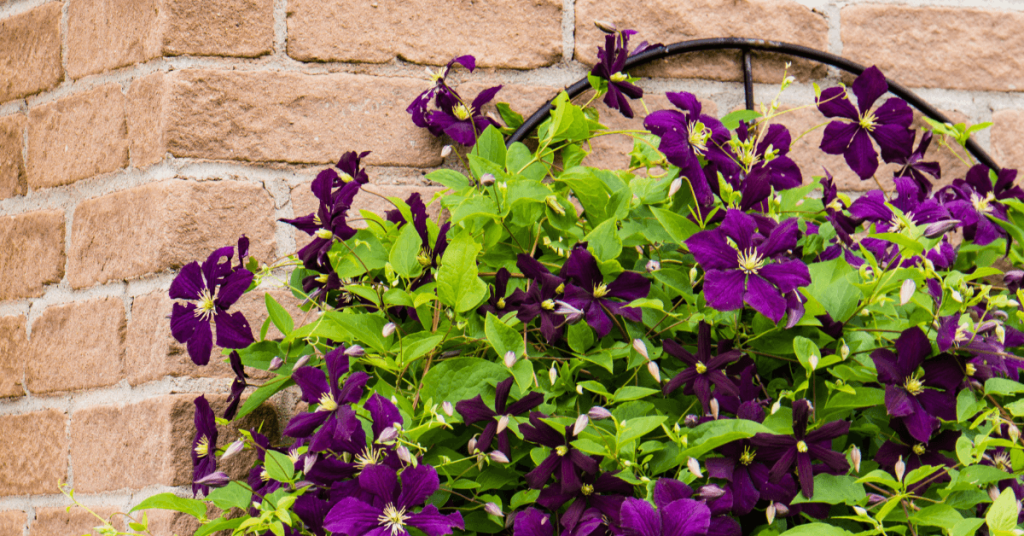
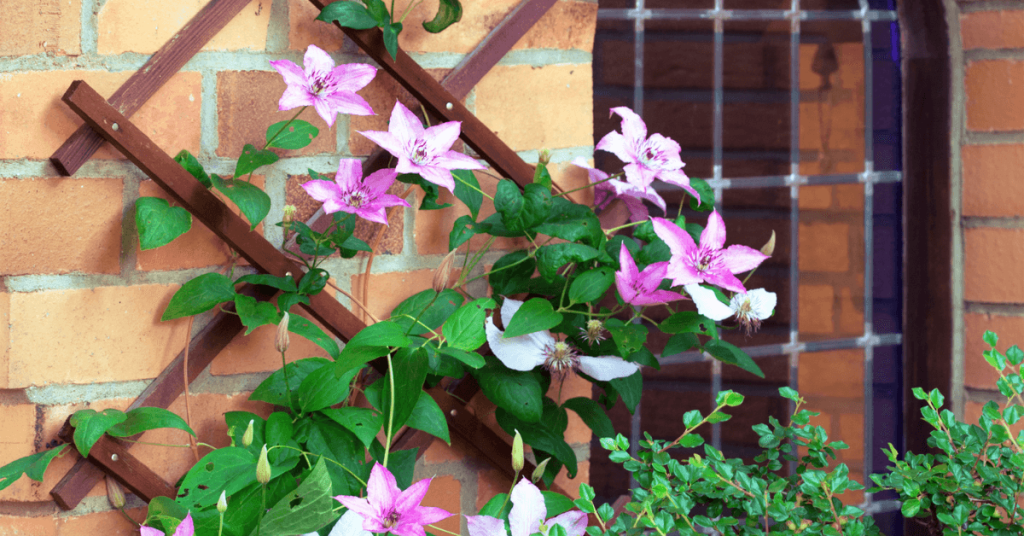
Clematis, the climbing plant that looks far too elegant and exotic to be growing in Ontario! Not only beautiful, Clematis gets along well with climbing roses (this is a gorgeous combination), trees, shrubs, and perennials. Different varieties of Clematis can also be grown together and provide a succession of blooms!
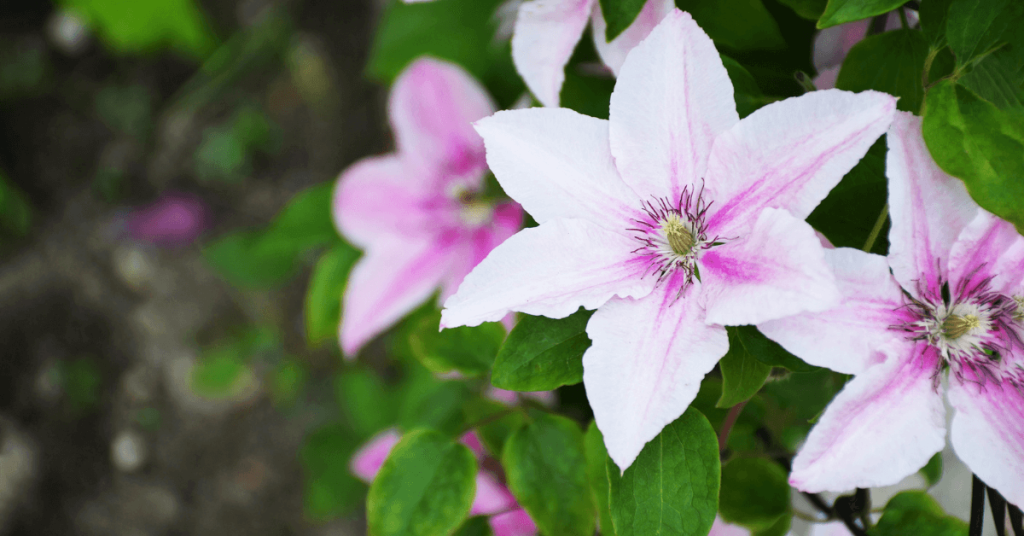
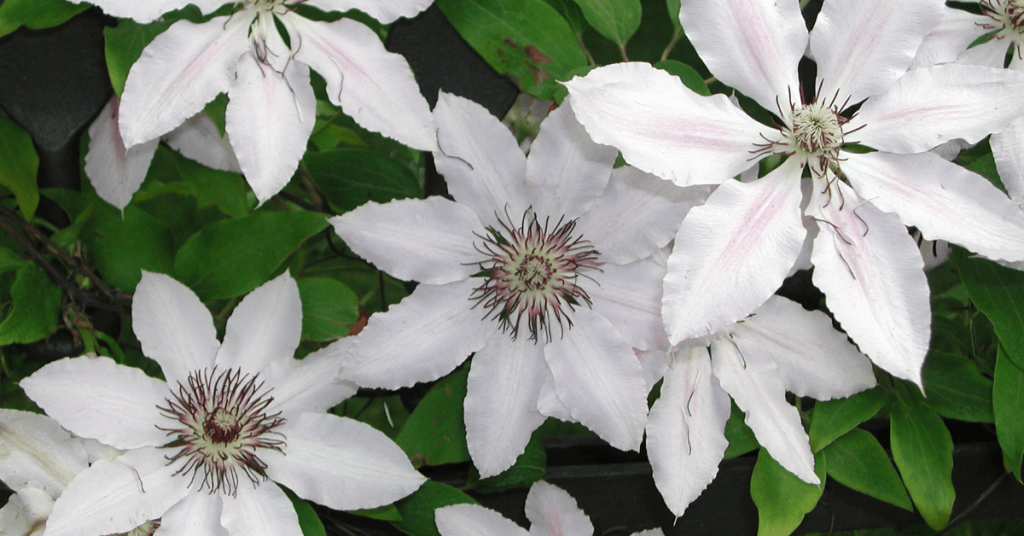
The variety of shapes, sizes, and colours available make Clematis a very desirable plant. Ranging from delicate, white, bell-shaped blossoms to dreamy, pastel rosettes, or sumptuous, deep purple double-flowers, and everything in between.
A stroll through the garden centre is a must to peruse Clematis labels and choose the ones that are most appealing to you. The varieties that we have will all suit our southern Ontario climate.
While the blooms vary widely, planting Clematis is straightforward. A few simple considerations when planting will help avoid root stress or Clematis Wilt, which are common problems when the location is wrong and the soil isn’t enriched. Here are some simple steps to ensure success!
Location, location, location!
Clematis like at least 6 hours of sunlight a day, but not an excessively hot location. Some shade in the late afternoon will extend the length of time that a bloom looks good.
Provide Support
A trellis, archway, arbor, or even a shrub or tree, all make excellent supports for your clematis. Install a well-secured support system first, to avoid damaging your clematis roots.
Soil is the Key
Fertile, well-drained soil is essential to successfully growing Clematis. These vines are heavy feeders and require nutrients to produce their show-stopping flowers. Prepare your soil by mixing in plenty of compost or well-rotted manure.
Prepare the Planting Site
Dig a hole that’s as deep as it is wide. Use the plant as your guide and dig approximately 13 cm or 5 inches deeper than the root ball. Add some of the soil that’s been amended with compost, then check to see that your plant is sitting at the right height - the top of the root ball should be even with the soil around it. Once the root ball is sitting at the right height, backfill the rest of the hole with more amended soil and gently firm the soil around the plant with your hands.
Watering
Water deeply after planting, and keep the soil and root ball moist, not water-logged, throughout the season. Be sure to water at soil level, not with an overhead sprinkler which can scorch leaves and flowers.
Mulch
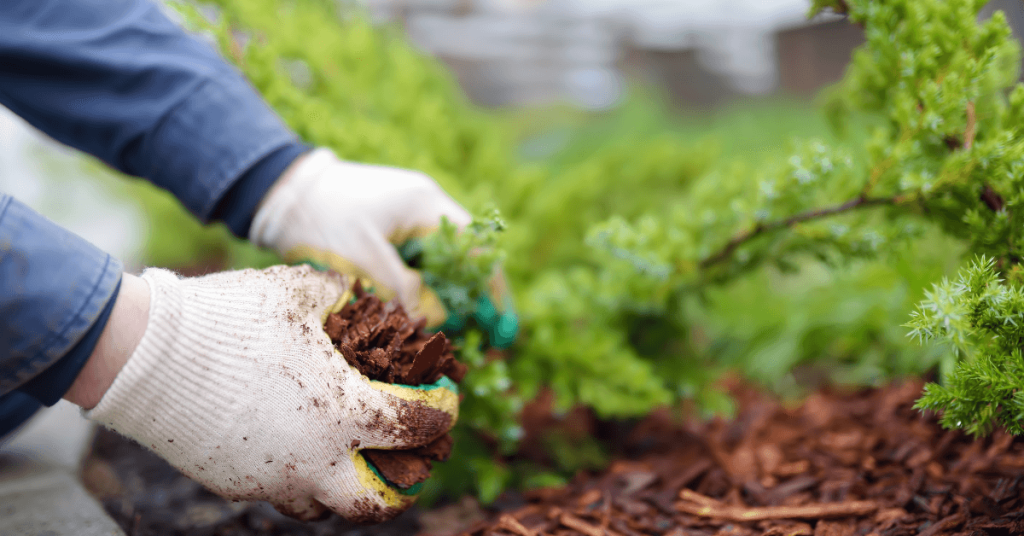
Mulch the soil around your plant to help suppress weeds and maintain moisture. Compost, organic shredded bark, or straw works well.
Fertilizer
Fertilize regularly throughout the season, or apply a slow-release fertilizer at the beginning of the season to maximize the blooming potential of your Clematis. For more information about fertilizer, see this article about caring for annuals and perennials.
Pruning
Pruning instructions are often included on your plant label as requirements vary from variety to variety. If in doubt, there are many growers who recommend pruning early blooming Clematis a little, after they bloom, to maintain the desired shape of the plant. For later blooming types, cut the vines right back to 45-60 cm in early spring.
Following these steps will provide a healthy environment for your Clematis to thrive. But be careful, Clematis are like potato chips - bet you can’t have just one!
You’ve selected your annual and perennial plants, chosen their location in the garden, amended the soil and everything is planted. Or close to it! Now what? How can you take care of them to maximize their potential? A bit of simple and easy maintenance will keep your plants healthy and blooming.
Once they start blooming, most annuals will flower all season long, until cold temperatures or frost put an end to their display. Many perennials will bloom for several weeks. We listed some of our favourites in this article if you missed it.
Here are some simple tips to keep your plants looking great!
Water
Newly planted annuals and perennials, even drought tolerant plants need to be watered at planting time.
Perennials will need water every week for the first two weeks and during periods without rain. Most perennials do well with a minimum of one inch of water per week.
Water is absorbed through the roots, so water the soil and not the foliage. Low (pressure) and slow (volume) allows water to adequately soak into the soil instead of running all over the place! It’s also best to water in the morning rather than at night because foliage that stays wet all night is susceptible to rot and foliar diseases.
Annuals planted in containers will need to be watered more frequently than annuals in a flower bed. Hanging baskets and planters will most likely need water daily, and in the heat of summer twice a day. For hanging baskets, the water should run out of the bottom.
In planters or the garden, use your finger in the soil to test it out - if it feels dry, your plant needs water.

Mulch
Mulch is always a very good idea to maintain soil health in the garden no matter what you’re planting!
An organic mulch will help enrich your soil, and keep it moist. A layer of at least 2 inches of mulch will also suppress weeds. Who doesn’t love that? The only caveat: don’t allow the mulch to touch your plants.
Deadhead
Deadheading or removing flowers that have finished blooming is important for many plants. Doing this allows the energy from the plant to be sent to producing new blossoms in annuals, and some perennials.
How do you do it? Take sharp, clean scissors or pruners, and cut off any dead flowers just below the base of the flower or above the first leaf. With some plants you can simply break off the spent flowers.
Bonus: your plants will look much better without dead flowers on them!
Note: some annuals don’t need deadheading. For example, Verbena, Lantana, Lobelia, Impatiens, Petunias, and Begonia.
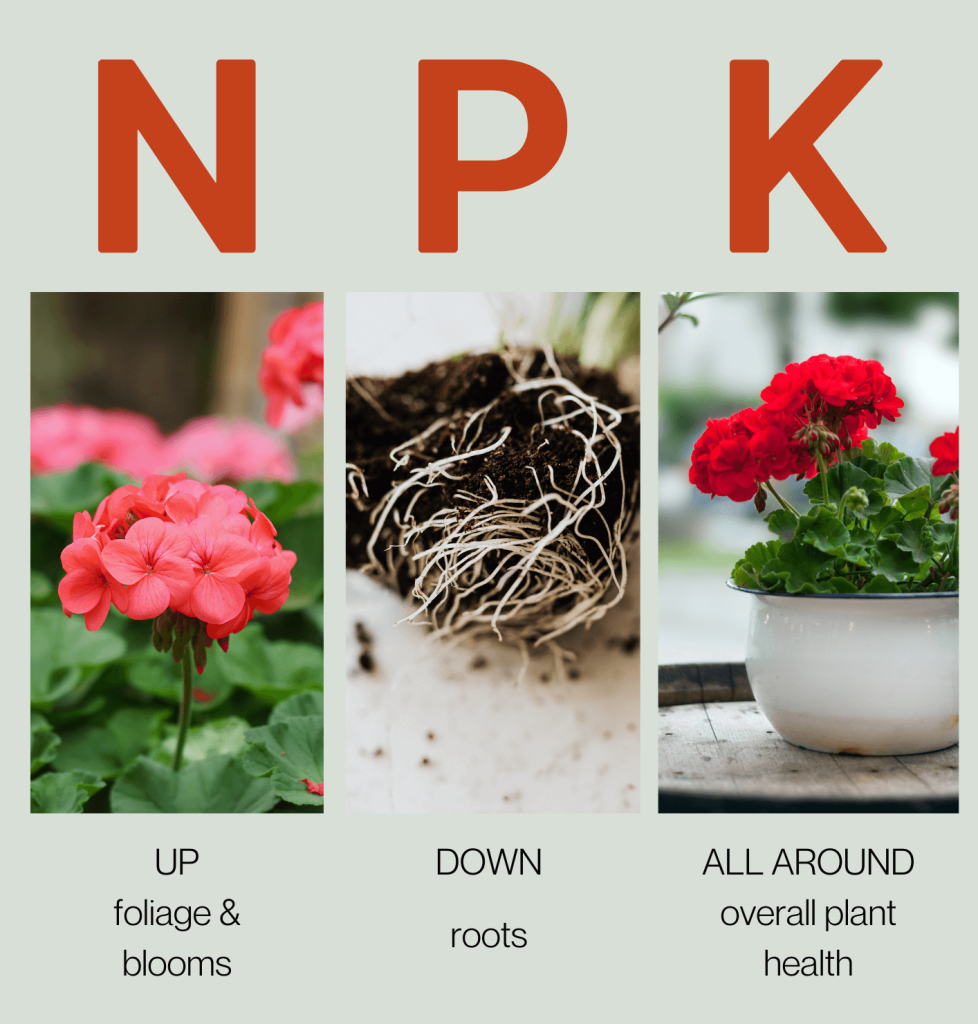
Fertilizer
Let’s face it, fertilizer packaging can be confusing. They often feature three letters and three numbers. What does it all mean? What is N-P-K? This Eising article explains all you need to know about fertilizing and is worth the read.
However, in a nutshell, this is a really easy way to remember the function of N (nitrogen), P (phosphorous and K (potassium) when it comes to fertilizing. The numbers are the percentage of each of those nutrients that the fertilizer package contains.
N = UP - foliage and blooms
P = DOWN - roots
K = ALL AROUND - overall plant health
If you used an organic, slow-release fertilizer when you planted your annuals or perennials in the ground, you shouldn’t have to fertilize again during the season.
Most potting soil in planters or hanging baskets contains the nutrients needed to help your plants get started. An easy way to maintain nutrients throughout the season is sprinkling Shake n’ Feed Ultra Bloom 10-18-9 slow release fertilizer on top of the soil. It will slowly feed your plants for three months. For heavy feeders like petunias or plants that are hungry, looking light, and in need of an instant boost, use a water-soluble fertilizer with an NPK ratio of approximately 20-20-20 every two weeks to keep them blooming.
For perennials, trees and shrubs that need more nutrients during the year, Shake n’ Feed slow release 18-6-12 fertilizer can be applied in the spring and it will feed your plants for three months during the growing season. The same fertilizer can be used for trees, shrubs and perennials in subsequent seasons.
As a rule of thumb, it’s better to under-fertilize and watch how your plants respond. Over-fertilizing can lead to sick plants that have yellow or brown leaves. In your garden, the only way to know what your plants need is to test the soil. Otherwise you’re guessing! To test your soil in Ontario, samples can be sent to The University of Guelph.
The promise of Spring signals the season of revitalization, even for your wardrobe. Wouldn’t it be great to open your closet and find clothes that go together and that fit? Also, why is it that just when you find the perfect pair of black pants, there is never anything in the closet that seems to go with them?
Reorganizing your closet so that you can find what you need and know what is missing is easier than you might think. Even if you are already organized and can effortlessly pull an outfit together, this is always a great exercise to freshen things up. A revitalized closet just makes life easier! And organizing each year can be a quick, simple task that is quite enjoyable. Especially when you know there’s a payoff at the end of the job - getting something new to add to the mix!
These simple steps will help you see what items you need to update your closet. Then, when you come in to shop, you will know whether you need something with a burst of colour to freshen things up, like a colour block tee, or one of the great graphic tees at Sassyfras. Or maybe you bought a men’s dryweave shirt from us last year, and one just isn’t enough to use for sports, supper out, and that vacation in Spain. Once you follow this plan, you will know, and it will probably save you money.
If you set an afternoon aside, and do this with a friend - in person or on a video chat - time will fly by. Or, just put on some good music now and let’s get started.

1 - Make a Pile
First take everything out of your closet. Empty out drawers and all the things on the shelves above and below, including those birthday presents you meant to give out last year. Put it all on the bed or the floor, depending on the amount of space needed.
2 - Sort
Grab five boxes, bags or bins and label them as: Keep, Donate, Sell, Other and Trash.
As you pick up each article of clothing from the pile, decide which of the five containers it should go into. It can be a tough thing to do if you hate to part with old favourites. This is when you need that friend to support you and ask questions like “How often do you wear this? Is it still useful to you?” If you’re going it alone, and you’re not sure, just put it in the Other bin for now, along with those birthday gifts from last year.

3 - Clean
Don’t let this one scare you! It’s an empty closet, so it will go quickly. Give the closet a good vacuum. Wipe down poles, shelves, drawers and the floor. Maybe even add a quick coat of paint. Just make sure that it’s dry before continuing to the next step!
4 - Organize
Drawing from the Keep pile, start to put these items back into the closet in an organized way - pants in one section, blouses in another, etc. Keep colour in mind as you go so that you can organize items by colour as well. For example, keep all the blue blouses together.
If anything on the shelves was disorganized when you emptied the closet (sweaters, t-shirts, shoes), find containers to gather each of these items into and label them clearly. Even if it’s cardboard boxes with labels written in magic marker for now - you can always find a clear bin later and swap them out if you like.
Once everything that you know you want to keep is back in the closet, take another look in the Other bin. Where those items go may be more clear to you now. If not, put that box into the closet, except those birthday gifts - for heaven’s sake give those away. Or, hang these items up with the hangers facing backwards. If the hangers are still facing backwards in a year, or the Other box still has items in it, it’s time for those things to go!

5 - Remove
Now you’re ready to post the items you’re selling, or put the box in the car to take to a consignment store, along with the box of items that you’re donating.
Take the trash bag out to the curb, pull your shoulders back, and brush your hands together because you’ve done some great work! Doesn’t it feel good?! The final step is your sweet reward.
6 - Revitalize
While a sparkling clean and organized closet does feel good… nothing feels better than a new piece of clothing. It’s time to think about what’s next.
Take a look inside your beautiful closet, and see what you need. It should be so much easier to make a list of items that will revitalise your wardrobe now.
Bring that list with you on your next shopping trip! Of course, Sassyfras is stocked up with lots of great clothing, and ready to help you when Eising Garden Centre reopens on Thursday, March 2 for the 2023 season.
If you would like updates with everything that’s happening at Eising Garden Centre, this is the link to sign up for our fabulous newsletter.
We look forward to seeing you soon!
Sassyfras Hours
Beginning March 2, 2023
Monday - Saturday 10am-5pm
Eising Garden Centre
Spring Hours - Beginning March 2, 2023
Monday - Saturday 9am-5pm
Believe it or not, winter is the absolute best time to ponder, dream, and plan your garden and landscape design. Why? Spring is the optimal season to plant and transplant, and with a design in hand, we can hit the ground running once warmer temperatures arrive. Can you plant and transplant throughout the garden season? There are some exceptions, but for the most part the answer is yes. But why not get a head start, and take advantage of having plants established at the start of the growing season? Sure, we have designers sitting by the phone right now on these long, cold winter days but don’t just feel sorry for them - take advantage of the fact that it’s a great time to contact them! Contact details for Eising Garden Centre Landscape Design* are at the end of this post.
You may be asking why you should bother having someone else design your garden? One reason that I have learned the hard way is that it pays off in the long run. I’m probably not the only one who has planted flowers before putting in a patio or walkway, only to rip everything up because of construction, then re-plant all over again.
Besides saving you money on costly mistakes, here are a couple more things to consider:



1. Curb appeal and property value
When most people think of those two concepts, they think about preparing a home for selling. I’m not referring to that. Every day, when you arrive home from work, or errands, wouldn’t it be great to love the way your home and garden looks when you pull into the driveway? That’s curb appeal and property value for your own benefit! However, if you are planning to sell, investing a bit of money in sprucing up the yard definitely impacts the selling price.
2. Design for living
Because we have a few precious months to enjoy our outdoor spaces, landscaping allows you to make better use of the space available. What do you use your space for? What do you need to incorporate into your plan to include those activities? Will you need to install a patio, or create a garden, and where should you put them on the property? Maybe you need to create privacy with an evergreen hedge? Landscape design makes sense of all of it.
Maybe you’re interested in an opportunity to make your garden more environmentally friendly. For example, adding native plants, a birdhouse and birdbath. Perhaps you want to add shade trees to shelter birds, and decrease the need for air conditioning your house in the summer.

3. Structure and a plan are sexier than you think
Lastly, I want to tell you a personal story about my experience hiring a landscape designer. I’m a plant lover and I never considered design. I studied plants, and spent several years joyously collecting all kinds of perennials, shrubs, water and bog plants, and trees.
My garden was chaotic! But I loved the wild looking patchwork quilt of rare and unusual plants scattered within the confines of borders around my property. I nurtured each individual plant, and when I looked at my garden that’s what I saw, individual plants. Then I hired a landscaper to build a bigger pond for my growing collection of water and bog plants.
When the time came to build the pond, he moved my plants to make way for all of the construction. Once that was complete, he placed my plant material back following his design. My plants, the same plants I had before the project, looked completely different. There was harmony in the arrangement.
The overall effect was such an incredible improvement that I could not believe my eyes. It was a whole new garden, and proved the value of good garden design. Hint: it doesn’t involve buying a new, spectacular plant and plunking it into an empty spot, or digging another bed in some random location that gets sunlight. That was my AHA! moment.
Someone who understands plants AND design can take the things on your wish list and make them all come together in a way that just works.


*Eising Garden Centre Landscape Design
Contact Roman Bodnar to set up an appointment: by email here or call 519-428-4607.
Consultation Fee: $175 consultation fee per space (2023 pricing) - for example, the front yard would be considered one space.
What your consultation includes:
1) A knowledgeable staff member will meet with you at the site of the project for up to 1 hour.
2) Any questions and concerns that the customer has will be reviewed and helpful suggestions will be made to ensure a successful project.
3) A simple 3D visual landscape design will be made, to enable the customer to see the potential of their space.
4) A detailed list will be provided to exhibit the needs, amounts and prices of the materials.
5) A 10% discount will be made available on all plant material in the design within 90 days of the consultation purchase.
Our specialty is soft-scaping: plants, soil and mulch. If the design we create warrants it, we will also utilize some armour stone and other natural stone features. We can’t wait to show you the potential of your property! Don’t delay your planning any longer…contact Eising Garden Centre today.
If you bought a live tree for Christmas, maybe from your friends at Eising, and you’re wondering what to do with it after the holidays, we have 7 ways to recycle or upcycle it. The needles and tinsel may be falling off, and you’re probably ready to give it the “Heave Ho!”, but wait! Check out these ideas first:
1. Create a wildlife shelter and winter interest
Let's put our Christmas trees to work in our gardens! If you have a bare spot in the yard, moving your Christmas tree outside is a great way to instantly “spruce” it up! You can leave the tree right in the stand, or prop it up on a fence, maybe even add a string of outdoor lights to enjoy on the dark winter nights coming our way. Doing this will give you something pretty to look at for sure, but more importantly, it provides additional shelter for birds and wildlife.

2. Enhance your garden soil
A live Christmas tree is 100% biodegradable. By turning it into mulch or compost it will break down and return stored nutrients back to the soil. Now that’s a win-win! And it’s easier than you may think. If you don’t have a shredder, branches can be chopped up by using good ‘ol pruning shears. Needles are full of nutrients and will also help soil from becoming dense and compacted. Using wood chips, chopped branches, and needles as a mulch is also a great way to help your garden trees stay moist and healthy during the winter. If you’re adding the needles and branches to your compost pile, be sure to add some water and mix it well with the rest of the compost. Another option is to add the chopped branches and needles to a garden path.
3. Protect your plants
There’s still a lot of winter weather ahead of us, and your tree can help protect perennials that are marginally hardy. Simply cut long branches from your Christmas tree using loppers, pruners, or a saw, and lay them over perennial plants to add insulation. The boughs will protect your plants from winter freezes and spring thaws, which could be the difference between losing a plant and seeing it grow again next year.

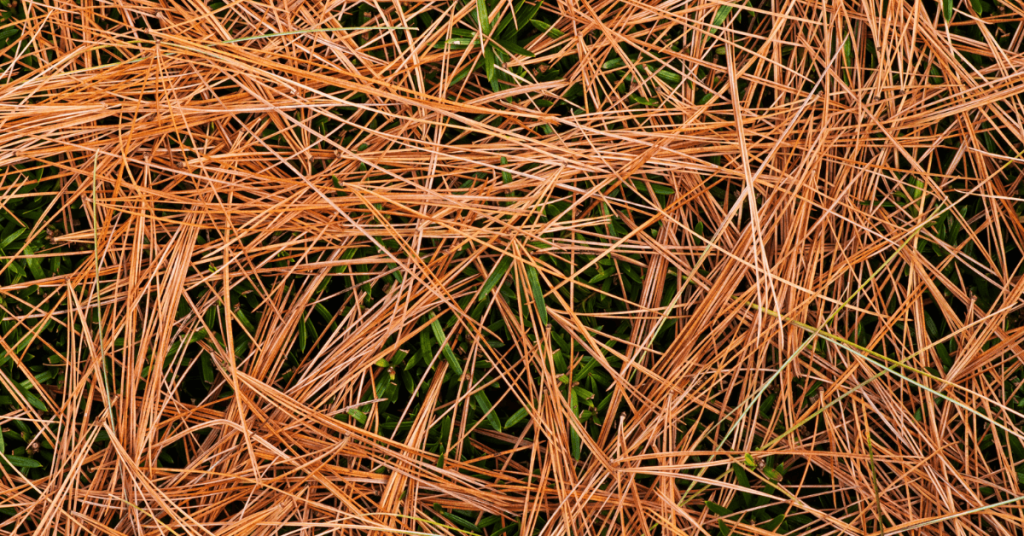
4. Keep the fresh pine scent
Are the needles on your tree still green? Use gloves or scissors to strip them from the tree, then store the needles in paper bags to use as room fresheners. The needles can retain their scent for months to come.
5. Support for Spring
Branches make lovely natural supports for any plants that need a little propping up - like peonies for example. Once the branches are trimmed off, the trunk can be used to support vines like Morning Glories or pole beans, or by laying it on it’s side as an edge for a garden.
6. Get creative
Crafts like ornaments and coasters are a great way to upcycle a tree trunk. Be sure to let the tree completely dry first or the wood will split when you cut it into 6 to 10 millimeter thick rounds. Then get creative by painting or varnishing and drilling holes in them if you’re making ornaments. They’re attractive, practical, and make great gifts.

7. Donate it, or take it to a recycling centre
If you have no need for recycling your living tree for home use, then look for a local program to donate your tree to. For over a decade, the Royal Botanical Gardens in Hamilton has used donated Christmas trees for various stream restoration projects. More information about their programs can be found on the RBG site. Or, skip the drive to Hamilton and check for your county recycling program. In Norfolk County for example, you must drop your tree off.
What’s not on our list? Burning your tree. You definitely do not want to burn it in your fireplace as it’s creosote content makes for a sticky, sooty fireplace. It’s not recommend that you burn it outdoors either. Coniferous needles contain nitrogen and substances called terpenes which are very toxic when burned, making the smoke unsafe for anyone around your fire pit to breathe. It’s much better to do any of the things listed above, or, if you have your own wooded area or pond, you can also put your tree in either of those places to enhance the natural habitat for woodland animals or fish.

We tend to get a lot of questions about rose care, and while roses do require more maintenance than other common shrubs, they’re by no means difficult to look after. A little bit of regular upkeep leads to some pretty impressive results, so if you’re a gardening novice, it’s definitely a worthwhile project. Here’s how you can grow and care for roses in Simcoe, Ontario.
Planting Roses In Southern Ontario
Depending on the variety you choose, you can use roses for border plants, garden bed accents, climbing plants to train over arbours and patio lattice, or as container plants. Whatever location or growing medium you select, just ensure it’s suited to the size and growth habit of your chosen rose variety, since there are so many different kinds to choose from. That being said, almost all roses will need at least 6 hours of direct sun every day, so make sure your chosen location has plenty of light.

The best soil for roses has excellent drainage and high nutrients, to set your rose bushes off to a good start, you’ll want to loosen up the soil thoroughly. Ideally, you’ll want sandier, loamy soil with a lot of compost mixed in.
If you’ve purchased a rose bush with bare roots, you’ll want to soak the root ball in water for up to 24 hours before planting. If it’s a potted rose, you won’t have to worry about that step. Plant your roses about 1.5–2 feet deep to fit their large root system, then fill the hole back up with the soil, compost and bone meal mix. Mound it up slightly around the base of the plant.

How Often Should I Water Roses?
Generally, roses need about 1-3 inches of water per week. The thing is, roses are pretty susceptible to mildew and other fungal diseases if they get soggy and don’t receive much air circulation. That means you’ll want to avoid getting the leaves wet whenever possible and stick to watering the soil directly. The easiest way to do this is with a trickle hose set up near the base of the plant. Just turn it on and leave it for a while, so it thoroughly saturates the ground.
If we experience a lot of rain in a short period, you can skip on watering, and should check your roses regularly for any signs of bacteria or fungal growth. Remove any damaged pieces with sanitized shears, wiping the blades clean between every cut, and disposing of the damaged parts safely in the garbage, not the compost bin.
Rose Care: Mulch, Fertilizer, And More
Applying a layer of mulch on top of the soil around your roses will help to retain moisture and control weeds. Some gardeners insist that cocoa bean shells are the best mulch for roses, but we’ve found that classic bark mulch still works perfectly fine.

In spring, feed your roses with a fertilizer formulated specifically for roses. For best performance and blooms, apply the fertilizer every 2-3 weeks during the growing season. There are also special fertilizers made for transplanting, easing the transition when planting your rose. Be sure to water your rose before and after applying fertilizer as their roots are susceptible to being burnt.
Since there are so many types of roses, this means there are different times of the seasons and different styles of pruning. Use a pruning saw or hand pruners to remove any damaged branches or awkward pieces that jut out too far. If there are some densely packed areas with branches, it may help to thin them out a bit to help prevent fungal growth.
We have so many spectacular colours and varieties of roses to grow in Southern Ontario. Visit Eising to see our full collection, or check out our online store! We have citywide delivery and curbside pickup available all summer long.
Mulching is a common gardening technique that protects your plant and gives your garden a little more vibrancy with less work! Sprinkling a simple insulating layer of mulch material around your plants will help to maintain moisture levels, prevent weeds, insulate your plants, and clean up the appearance of your garden. The benefits are clear and there are lots of materials to choose from to meet your needs. Here’s how mulching can help your garden’s aesthetic and more:
The Importance of Mulching
Summers can get hot, leaving us with thirsty plants that need water seemingly constantly. Using hundreds of litres to keep our plants hydrated is not only a waste of resources and money, but of our time, too. Mulching will help to lock moisture in by cracking down on evaporation so that the water that you do give to your plants actually gets used at the roots rather than (literally) disappearing into thin air.
Mulching is also super effective in our wild temperature swings from summer to winter and back. For those perennials in your garden that are left out shivering through the coldest of our winter days, mulch can provide a much-needed insulative layer that blocks out the worst of the cold and freeze-thaw cycle, keeping our plants safe until temperatures are mild again. Mulching will give your plants a better success rate with surviving the winter, and you’ll have happier plants in the spring that are ready to thrive, instead of battling winter damage.
Finally, mulch does wonders to clean up the look of your garden. Mulch is a great buffer layer between our soil - where weed seeds lie in wait - and the sun that they need to thrive, effectively stifling most weed growth. You’ll save time and appreciate a cleaner looking garden where all of your soil’s resources can be spent on the plants that you want. Not only does mulch prevent unwanted weed growth, but it simply cleans up the aesthetic of your garden, providing an upgrade from the look of normally exposed dirt. There are lots of styles and materials to choose from so you can choose an effective mulch material for your home that also adds to the style and look of your landscape.

Mulching or Stone?
While some people might like the look of decorative stone to shade their soil, it simply doesn’t provide all of the benefits that most natural options offer. In addition to their lacklustre performance in all areas other than style, they can also end up being quite an expensive addition to your landscape. While stone might offer a clean look that provides a slight barrier to evaporation, biodegradable options do a better job of the health of your soil and plants while offering a similar look at a better price point.
Options for Mulching Your Garden
There are tons of materials and methods for mulching your garden, so the main questions that you should ask yourself are: What do I want to get out of my mulch? What kind of look am I going for in my garden? Do I want to use synthetic materials or natural materials?
Once you have an idea of what you want, consider these great mulch options:
Bark Mulch consists of shredded bark, creating a fantastic all-natural mulch material that will provide all of the moisture-locking and weed-blocking benefits of mulch, while also slowly boosting the health of your garden as the organic material decomposes. Bark mulches come in a variety of colours depending on the type of tree they are sourced from.
Wood Chips provide a look that is similar to bark chips, but a little more robust. Again, colours depend on the type of wood they are sourced from, but there is the additional option of treated chips that have a more uniform colour. These chips will also break down slowly to supplement your soil, so opting for an all-natural dye on the treated chips is a good idea to prevent chemicals leaching into the soil.
Straw is a good option for those that want cost-effective and all-natural mulch solutions, but are also okay with a more rustic look in the garden. We love the country aesthetic that it gives our flower beds! Keep in mind that some straw varieties might have weeds and seeds of their own that pop up when applied, so they may not be the ideal choice for those looking to cut down on weed pressure.
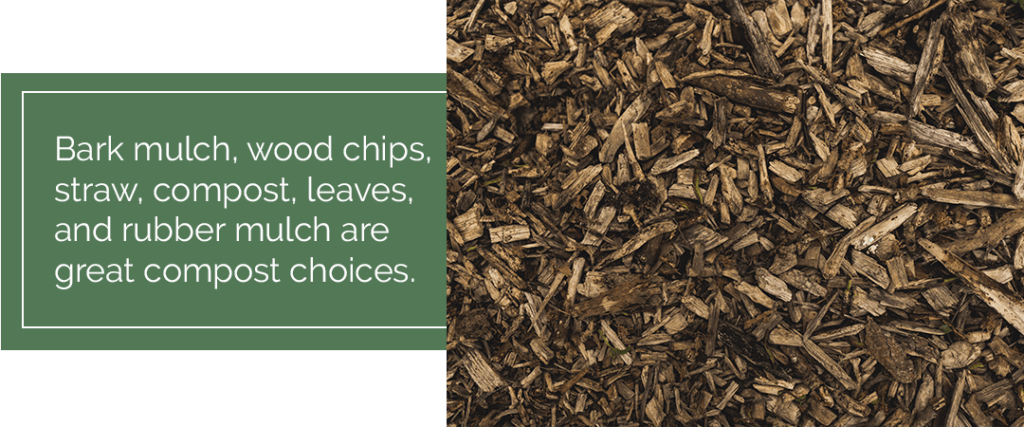
Compost or Manure, when applied in a thick layer will deliver a massive nutritional boost to your soil and plants, resulting in lush and beautiful growth that can’t be matched with synthetic fertilizers. If you’re looking to mulch with compost or manure, you’ll need to provide a generous coat of 2-4 inches of material to effectively insulate the soil.
Leaves and Grass Clippings are another great natural option that is very easy to source from your own yard! The clippings straight from your lawn mower bag and the leaves you collect in the fall are more welcome in your garden than the garbage. While this might not be the cleanest look in your mulching options, it’s incredibly effective and very straightforward - and the freshly clipped grass smells great.
Rubber Mulch is another option, though it is not natural and won’t contribute to the nutritional health of your soil as the other mulches do. However, it is still very effective at locking in moisture, choking out weeds, and keeping the soil insulated, all while looking clean and uniform. As it doesn’t break down like the other options, this is certainly a mulch choice that is more permanent - you won’t have to replace it, but moving it might become difficult.
Mulch is the secret weapon that goes unappreciated in many gardens, stepping up the performance and look of your landscape in one simple application. With so many options, there’s bound to be something that is the perfect fit for you and your garden’s goals.