5 Easy Steps To Get Started
By Ava Green
There’s a common myth that you need a lot of space to grow vegetables, but whether you have a few containers, a small sunny corner, or a larger garden bed, there’s lots you can grow! Here in Norfolk County, which is Zone 6 in Southern Ontario, some vegetables can go in the ground as early as the beginning of May, while many others are usually safe to plant around the May 24th weekend, once the risk of frost has passed. Here are five simple steps to get you growing your own food this season if you’re new to vegetable gardening.
Step 1: Decide What You’d Love To Grow
Start with a list of the vegetables you actually want to eat. Coming into Eising Garden Centre with a list in hand makes choosing plants so much easier! When building your list, consider:
- Vegetables you love
- High-value vegetables, the ones that are expensive at the grocery store but easy and economical to grow yourself
- Anything that tastes better when it’s freshly picked, like tomatoes, cucumbers, and fresh herbs

Step 2: Make a Simple Plan
You don’t need an elaborate design; a rough sketch on a scrap of paper is just fine. The goal is simply to get a sense of your space and where things will go before you start digging. We recommend starting a garden notebook or journal to track what you plant each year and how it performs. It will be especially helpful next spring!! A few planning tips to keep in mind:
- Most heat-loving vegetables, such as tomatoes, peppers, zucchini, eggplant and beans, need at least six hours of sun per day
- Cool-weather and shade-tolerant crops like lettuce, chard, kale, radishes, and beets do well with just three to four hours of sun

- Spacing in a vegetable garden can be much tighter than in other types of gardens. Less empty space means fewer weeds and bigger harvests. Square foot gardening is an excellent method to explore
- Layer your garden beds with plants that are great companions. For example, basil and marigolds planted beside tomatoes are said to improve flavour and repel pests. Carrot and beet seeds tucked in beside and between your lettuce plants (which are a cool-weather crop) are a smart pairing; as your lettuce finishes in the summer heat, your carrots and beets will be sprouting up to take their place. This is referred to as succession planting and optimizes the space in your garden
- Make use of vertical space with poles or trellises for peas, pole beans and cucumbers
- Tuck herbs into any gaps between your vegetables; they’re useful, beautiful, and most pollinators love them
Step 3: Prepare Your Space
Once you’ve chosen a spot with enough light, it’s time to get the soil ready:
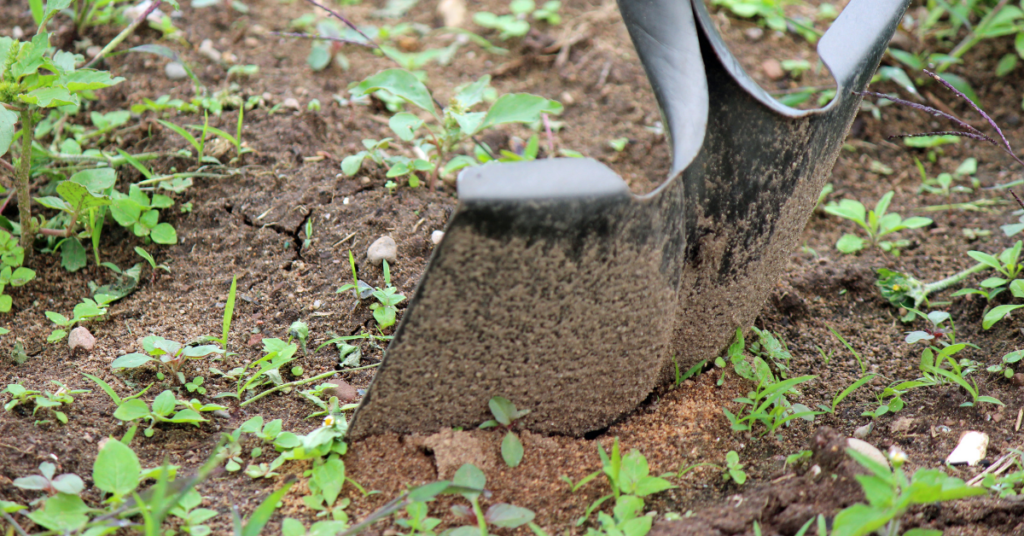
- Remove any sod or weeds before planting. If you’d rather not dig, the No Dig gardening method uses a layer of cardboard as the base for the new bed. This suppresses weeds naturally and breaks down into the soil over time
- Add a good-quality compost to your soil by either spreading a layer across the top of the garden bed or scooping some into each plant hole
- For container gardening, almost any container works, just make sure it’s deep and wide enough for the mature size of your plants. Also, drainage holes are a must! Fill containers with a soilless mix containing compost, peat moss or a peat alternative, and one of the following: sand, vermiculite, or perlite. Avoid using garden soil, triple mix, or topsoil in containers, as they compact easily and will restrict root growth. Learn more about soil mixes, amendments, and fertilizers here

Step 4: Water and Feed Consistently
Consistent watering and feeding are the foundation of a productive vegetable garden:
- Vegetables need regular, reliable watering. Inconsistent moisture leads to stressed plants and poor yields
- Always water the soil, not the leaves. Plant roots take in water, and wet foliage can invite disease. Water deeply so moisture reaches the roots. Use your fingers to check how far down the water has penetrated into the soil
- Containers dry out faster than garden beds and will need more frequent attention
- Morning is the best time to water. If your plants are struggling on a particularly hot afternoon, a second watering is fine. Just be sure to aim at the base of the plant and avoid the foliage, which can scorch in direct sun
- Feed with organic fertilizers throughout the season to keep your plants healthy and productive. Follow the package instructions for the product you choose
Step 5: Plant Flowers for Your Pollinators
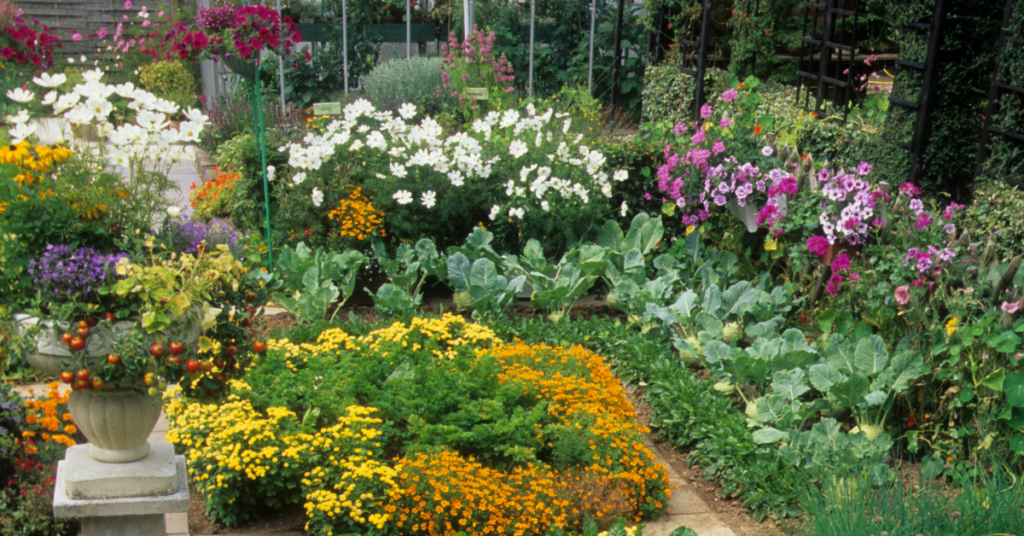
A vegetable garden without pollinators is a garden that won’t reach its full potential. Attracting bees, butterflies and other beneficial insects to your garden is one of the best things you can do for your harvest. Some of our favourite pollinator-friendly flowers for the vegetable garden include marigold, calendula, nasturtium, borage, sunflowers and culinary lavender. As a bonus, most of these are edible, so they earn their space twice over.
It’s Time
Starting a vegetable garden is one of the most rewarding things you can do with an outdoor space. There’s a quiet satisfaction in growing something from seed or a seedling and bringing it to your own table.
Start simple, grow what you love and don’t be afraid to learn as you go.
The team at Eising Garden Centre is always happy to help you choose the right plants for your space and answer any questions along the way. This could be the season that changes the way you think about your garden!
Resources:
Why Use a Garden Journal?: https://eising.ca/why-use-a-garden-journal/
Square Foot Gardening: https://www.almanac.com/planning-square-foot-garden-grow-more-less-space
Fertilizers & Soil Amendments: https://eising.ca/fertilizers-soil-amendments/
Companion Planting: https://eising.ca/companion-planting-with-herbs/ and https://eising.ca/incorporating-vegetables-into-your-garden/
Optimizing the Gardening Season: https://eising.ca/optimizing-the-gardening-season/
No Dig Gardening Method: https://charlesdowding.co.uk/blogs/no-dig-resources/beginners-guide
Reading Plant Tags: https://eising.ca/full-sun-part-shade-what-do-plant-tags-actually-mean/
Growing Vegetables in Pots: https://eising.ca/planters-are-for-more-than-flowers/
By Ava Green ☀️
One of the most common reasons plants struggle comes down to light. Specifically, whether the spot you’ve chosen gives your plant the light conditions it actually needs.
The good news? Once you understand what the terms on a plant tag really mean, matching the right plant to the right spot becomes second nature. And when a plant is happy in its environment, it grows stronger, looks better, and is far less vulnerable to pests and disease because it simply isn’t under stress.
Before You Plant Anything, Do This First
Light conditions in a garden can be surprisingly tricky to read unless you’re paying attention. A garden that feels sunny might not actually deliver the hours of direct light that certain plants require. A shady corner might get more sun than you think.
So here’s your homework assignment, and it’s a very nice one.
Go outside and sit for a while. Find the spot where you would like to plant and observe it for a few days in the summer. Track how many hours of direct sunlight that area receives, hour by hour. Jot it down on a piece of paper. Average it out over a few days for a reliable picture.
Fair warning: this assignment may require a chaise lounge, a good book, and something cold to drink.
Once you have this data, you’re ready to move forward!

Decoding Light Terms
No more guessing at the garden centre! Here’s exactly what each term means.

Full Sun
At least 6 hours of direct sunlight each day. Plants in this category are sun-lovers: most vegetables, lavender, roses and many annuals and perennials.

Part Sun
4 to 6 hours of sun including some afternoon sun. The hours don’t need to be consecutive; a few hours in the morning and a couple more in the afternoon. Not all of it needs to be intense, direct light.

Part Shade
Also 4 to 6 hours of sun, but with a preference for morning light rather than the stronger afternoon sun. These plants appreciate some protection from the harshest part of the day.

Full Shade
Fewer than 4 hours of direct sun per day. If direct sun hits these plants, morning sun is ideal. Plants that appreciate these conditions are woodland plants, hostas and ferns.
Why Getting This Right Saves You Time and Money
A little observation before you plant is genuinely one of the most valuable things you can do as a gardener. It takes the guesswork out of every purchase and saves you from replacing plants that were never suited to that spot. Most importantly, it gives you a garden full of plants that actually thrive there.
The best gardens aren’t built on luck. They’re built on knowing your conditions and planting accordingly. Now that you’ve cracked the code on light, you’re already ahead of the game.
Bonus - Signage at Eising Greenhouses and Garden Centre!
You'll notice our signage has icons to help you best decide which plants are right for you and your situation!

- If you see a little paw print on our signs or pots, this means we're proud to say this plant is pet friendly! We love your little critters too!

- The number of raindrops on our signs indicates how much water this plant will need

- Signs with these icons indicate the plant naturally deters pests like deer and rabbits
Adding Year-Round Interest to Your Garden
By Ava Green
Spring brings excitement and the hope of fresh beginnings, but also the harsh reality that our gardens can look a little…well…blah, in between seasons. Even when you have evergreens, well shaped trees, shrubs or perennials with “good bones” (strong framework or structure) a garden can look bare off season. This is when garden features and ornaments can really make a dramatic difference!

Create Year-Round Interest In Your Garden
Do you have a spot in the garden where plants struggle to grow? Or an area where you feel like your garden is missing something?
Items like benches, patios, ornamental urns, decorative fencing, statues, a pond, gazing balls, birdhouses and birdbaths add beauty and function in every season. In Southern Ontario’s long shoulder seasons (early spring, late fall, and the longest of all - winter) these permanent elements help to make your garden look inviting all year.

Why Every Garden Benefits from a Focal Point
A garden filled with colourful annuals and perennials can be stunning, but without a focal point, it can feel visually overwhelming. A garden focal point like a bench, statement urn, a piece of statuary, or a water feature draws your attention, and creates a sense of purpose.
Focal points guide movement through the garden and help tell a story, leading visitors toward a destination. While naturalized gardens and wildflower areas don’t always require structure, for gardeners who prefer a more organized look, incorporating a focal point can create a sense of order and transform your space.

Add Contrast With Texture and Shape
Many gardeners naturally gravitate toward favourite plant forms. Tall, spiky perennials like coneflowers, salvia, and Black-eyed Susan are popular in Ontario gardens but they can feel repetitive when planted together.
Introducing contrast changes everything. A round birdbath nestled among upright perennials adds softness and contrast making it more visually interesting. In shady gardens dominated by hostas, a tall iron obelisk or trellis creates height and drama. Mixing plant textures with garden features like lighting instantly elevates beds and borders.

Express Your Personality!
Gardening is a creative process, and experimentation is part of the joy. Moving plants to find the right light or shelter often leads to surprising combinations and successes. Garden features allow you to express that creativity even further.
Statuary, ornaments, and structures, whether handcrafted or purchased, add personality and meaning. From whimsical accents to bold architectural elements, these features bring height, structure, and style to your garden in ways plants alone can’t.
More Than Just Flowers
Flowers bloom and fade with the seasons here in Southern Ontario. Garden features provide continuity, offering year-round interest, structure, and charm. With just a few additional elements, your garden can look beautiful in every season, not just when it’s in bloom.
How To Keep Your Orchid Alive
By Ava Green
Orchids have become very popular gifts, and a great hobby for indoor plant enthusiasts who discover the wide range of colours and shapes available. Orchids are also loved for their long-lasting and exotic blooms.
While some may choose to only enjoy these tropical plants as long as they’re blooming, orchid-lovers look forward to nurturing the plant and encouraging it to flower regularly. It may be a little daunting at first, but once orchids grace you with their stunningly beautiful blossoms, you will find that a little bit of care is very worthwhile!

It’s estimated that there are 25,000 different species of orchids and over 100,000 hybrids! The ones you’ll find most readily in Ontario stores are Phalaenopsis or moth orchid, because it’s fairly easy to grow. Phalaenopsis are the best choice for beginners.

Other orchids you may find easily are Cattleyas (Corsage Orchids), Cymbidiums (Boat Orchids) and Dendrobium orchids.
While all of these may be orchids, they don’t necessarily require the same care, so it’s a good idea to check the tag for the type you have and its specific care requirements. The following is a general guide to light, water, fertilizer, and growing medium for the most commonly found orchids, but it does not apply to all breeds.
Light and Air
For most orchids, light, and lots of it, is the general rule. Place your plants within 3 feet of a window (not to the side) in the sun. South, east, and west-facing windows are all fine for maximizing the light your plant receives.
Orchids also enjoy a breeze or circulating air in your house. They do not like temperature extremes, though 15 to 20 degrees Celsius is safe. Keep in mind that the more warmth and air movement there is, the more often you will need to water your orchid.
Water
A general rule is to use water that is not hard and has not been softened with salt. Salt will kill an orchid. Rainwater, reverse osmosis, or distilled water are good choices. Chlorinated water is not an issue for orchids - high sodium levels are.
The biggest issue many people have is either over-watering or underwatering their orchids. Here is the method we recommend:
Every 5-7 days, place the pot in a container or the sink, then fill it with enough water to cover the top of the pot. Be careful not to let water collect in the crook at the base of the leaves, as standing water will rot the leaves and the plant. Once the plant’s growing medium is thoroughly soaked, remove it from the water and allow the pot to fully drain in the sink before placing it back in its saucer.
We prefer using a container of water rather than the sink, so the remaining water can be used to water other plants.
Here’s the best watering advice we can give you: look at the overall health of both the plant AND its root system. Full, plump leaves and vibrant, green roots indicate that your plant is getting enough moisture. Puckered leaves and a silver sheen on the roots indicate insufficient water. Mushy, brown leaves and roots are signs of rot caused by too much water.

You may hear of another watering method that involves using ice cubes, but it’s controversial and not widely recommended. To quote the American Orchid Society, “Ice is for cocktails, not orchids. Never use ice on tropical plants to water them.”
“Soil” and Nutrients
Most orchids naturally grow high up in trees, where their roots cling to bark and absorb moisture from the air. At home, we try to mimic those conditions, which is why orchids are typically planted in chunky mediums like bark, coconut husk, charcoal, or perlite rather than traditional soil. While many of the roots stay inside the pot, it’s completely normal for some to grow up and over the edge.

These “escapee” roots might look a little wild, but don’t worry, there’s nothing wrong with your orchid. In fact, those aerial roots are a sign that the plant is healthy and doing exactly what orchids do in nature.
It’s worth noting that not all orchids grow the same way. Many, like Dendrobiums, are epiphytic (growing on trees) or lithophytic (growing on rocks), though some orchid varieties are terrestrial and grow in the ground. The good news is that the growing medium your orchid comes in is chosen specifically for that variety, so you can trust it’s in the right environment.
The bark that your orchid is planted in will slowly break down and become mushy. It’s a very good idea to repot your plant every two years.
It’s generally recommended to feed most orchids, and bloom time dictates which fertilizer to use and how often to feed. Begin by using a water-soluble 20-20-20 fertilizer, mixing it at ¼ the amount recommended for other houseplants. Apply this solution every 2 weeks in the summer and every 3 weeks in the winter.

“The orchid, with its many forms, is a reminder that life is full of surprises.” — Leonardo da Vinci.

Lastly, here’s an orchid fun fact: While we have been talking about tropical orchids in this article, there are also orchids that grow right here in Ontario! That’s right, there are over 50 species in this province, including the much-loved Pink Lady’s Slipper (Cypripedium acaule).
Resources for more detailed and specific information:
Toronto Master Gardeners - https://www.torontomastergardeners.ca/gardeningguides/growing-orchids-a-toronto-master-gardeners-guide/
Canadian Orchid Congress - https://canadianorchidcongress.ca/basics/growing-orchids/
American Orchid Society - https://www.aos.org/orchid-care/indoor-orchid-care
Ontario Wildflowers - https://ontariowildflowers.com/main/group.php?id=18
By Dave Zeldon and Ely Schweyer
This is the time of year that most garden centres will have on display their wide variety of Amaryllis bulbs, including the evermore popular waxed dipped. These enormous bulbs that are appearing now will be ready to burst into bloom within 4-8 weeks after planting.
Non-Wax Dipped: Planting
All Amaryllis need is a bit of commercial potting soil that should not cover the shoulders of the bulb (try leaving about 1/3rd of the bulb showing above the soil line), with the nose (or narrow end) of the bulb peeping well over the top of the pot. Make sure that you use a well-drained container that is 3-4” bigger in diameter than the bulb itself.
☝️A heavy clay pot will prevent this top-heavy plant from toppling over. To achieve continuous bloom, plant at intervals of two weeks for stunning colour in your home.

Non-Wax Dipped: Care
Once leaves emerge, fertilize once a month with a 20-20-20 water soluble fertilizer for houseplants. Water sparingly and wait for the miracle in a warm sunny room. Sub-irrigation or watering from the bottom of the drip tray will keep the surface soil dry, thus keeping and bulb rot organisms and those pesky fungus gnats at bay.
Non-Wax Dipped: It's Not Done Yet!
When blooming is over, remove the scape (or flower stock) and place the plant in a sunny spot and continue to water. This is to allow the leaves to regenerate the bulb. In springtime, when all danger of frost has passed, bring the bulb outdoors and let it spend its holidays in a shady spot. In some varieties the leaves will die back in September to give the plant a rest for a couple months. Stop watering and store the bulb on its side in a cool place for about eight weeks, when the leaves will once again begin to emerge.
Amaryllis can go 3-4 years without repotting as they don’t mind a little crowding. Try growing a couple of bulbs in larger pots to see if you can get a clump of flowers from the offshoots or babies that will develop after a couple of years.
Or, Try One of These Wax Dipped Bulbs!
Now growing more popular are the care-free waxed-bulb Amaryllis!



Experienced growers and beginners alike love that these waxed bulbs do not need to be planted or watered! Each of these robust bulbs are carefully prepared in festive-coloured wax, allowing you the freedom to place them among your holiday decorations.
Simply keep the bulbs at an ambient room temperature of at least 16C (70F) for beautiful blooms in five to six weeks.
These novelty items are low commitment! Their only fault is their lack of longevity - gardeners don’t get to enjoy them after year as these waxed bulbs were designed to be a one-use throwaway item!
BUT with a little luck and perseverance you may be able to save the bulb for next season after blooming. All you have to do is to carefully remove the wax layer, remove the flower stalk and place the bulb and with its remaining leaves into a pot of good growing media, allowing the leaves to regenerate the food stores in the expired bulb.
If you’re looking for more information – or perhaps, Amaryllis – visit Eising Greenhouse and Garden Centre! Happy Holidays! ✨
By: Dave Zeldon and Ely Schweyer
Spring and early fall are generally the best times for planting trees. It has been found that newly planted trees thrive when exposed to moderate temperatures and rainfall, as they need time to root and acclimatize before the onset of intense heat and dryness of summer or the freezing temperatures of winter.
Now whilst planting different types of trees differ in detail, all trees eventually end up in a hole. But remember not just any old hole will do.

Let’s Get Digging!
1. Some trees are buried too deeply, causing the tree roots to decline in health and condition. We have a whole other article dedicated to transplanting depth if you wish to read more, but here’s the just of it: Poor tree health results in reduced growth rate, atypical leaf size and colour, increased disease susceptibility, and reduced cold hardiness. Always make sure that the root collar flare is visible after planting; if settling occurs, reset the tree to the proper depth.
👉 Note: Many times, homeowners build a raised bed garden around an existing tree in the yard (thus burying the root collar flare) only to find within a year or two their favourite tree now is in decline. Don’t bury that root collar flare!
2. As a general rule, trees should be transplanted no deeper than the soil in which they were originally grown. The width of the hole should be at least three times the diameter of the root ball or container or the spread of the roots in the case of bareroot trees. This will provide the tree with enough worked earth for its root structure to establish itself.
3. When digging in poorly drained clay soil, it is important to avoid 'glazing'. Glazing occurs when the sides and bottom of a hole become smoothed forming a barrier, through which water has difficulty passing. To break up the glaze, use a fork to work the bottom and drag the points along the sides of the completed hole. Also, raising the centre bottom of the hole slightly higher than the surrounding area. This allows water to disperse, reducing the possibility of water pooling in the planting zone.
4. The backfill soil should be a mixture of composted manure and topsoil. The mixture should then be placed in the hole surrounding the tree just to the height of the ball or slightly lower to allow for some settling. Be careful not to compress the backfill soil as this may prevent water from reaching the roots and the roots from expanding beyond the ball.
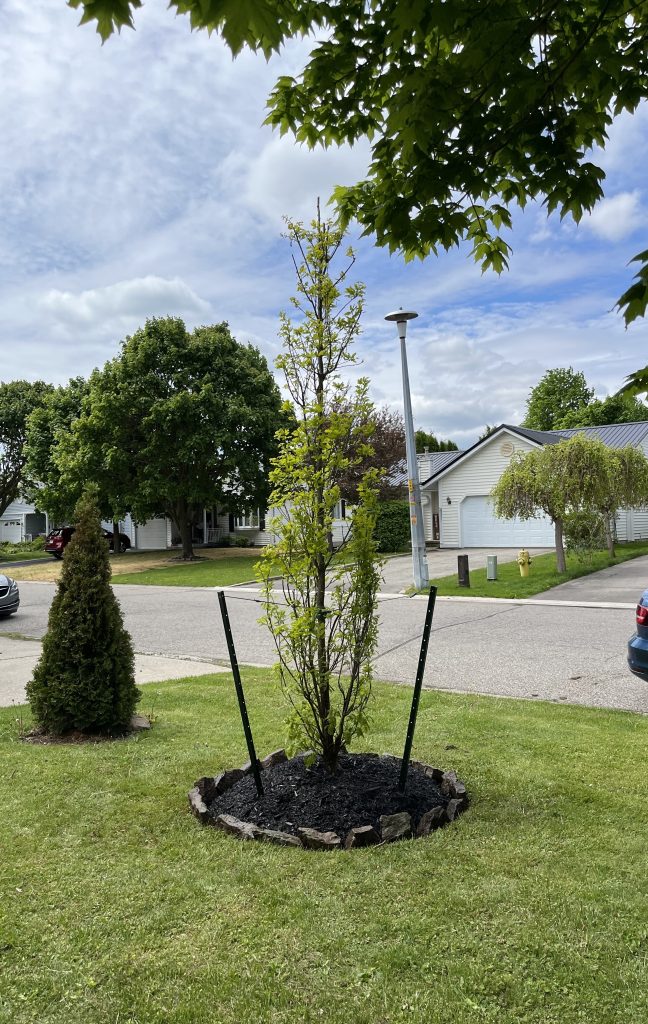

Jobs well done by the Eising landscaping team!
Standing On Its Own Roots
Young trees should be able to support their own weight when they are transplanted. If the tree is unable to do so, try thinning out the upper branches to reduce wind resistance. If that is not enough, you may have to stake a tree.
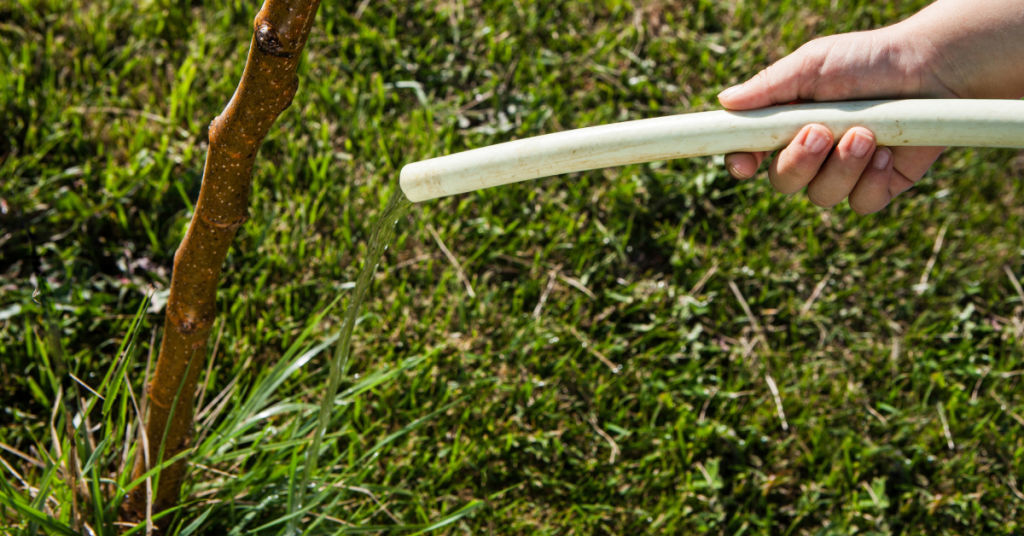
Watering Your New Tree
Newly planted trees should be watered at the time of planting. In addition, during the first growing season, they should be watered at least once a week in the absence of a good rain.
👉 Remember: Regular deep soakings are better than frequent light wettings.
We hope these tips can help you encourage the longevity of your new tree! For more information - and trees - visit our Trees & Shrubs section at Eising Greenhouse and Garden Centre. We hope to see you soon!
By: Ava Green
As temperatures begin to cool down, autumn colours set in and surround us with the beauty that is fall in southern Ontario. Suddenly summer is gone and it’s time to think about creating a cozy atmosphere inside and outside that is inspired by the world around us.
Autumn Outside
Whether you gather items from the garden or from the garden centre for a display, there are lots of natural materials all around us to draw from. Take some plumes from ornamental grasses and put them in decorative buckets. Add branches with colourful leaves or dried seed pods, and pumpkins or mums for a pop of colour. A bland background becomes the perfect backdrop.
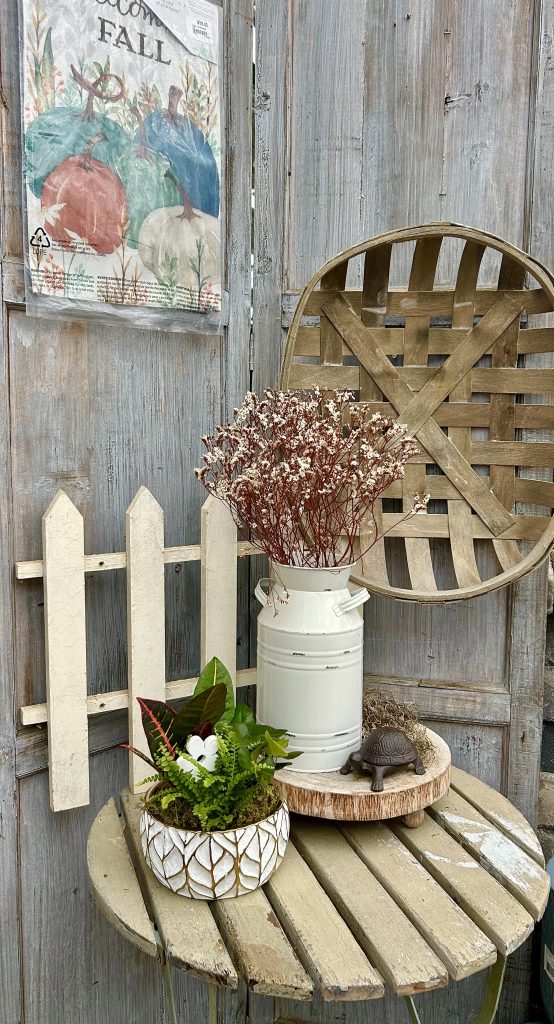

Looking for something to grow? Create fall planters with sunflowers, ornamental kale, ornamental peppers, live grasses, and, of course, fall mums.
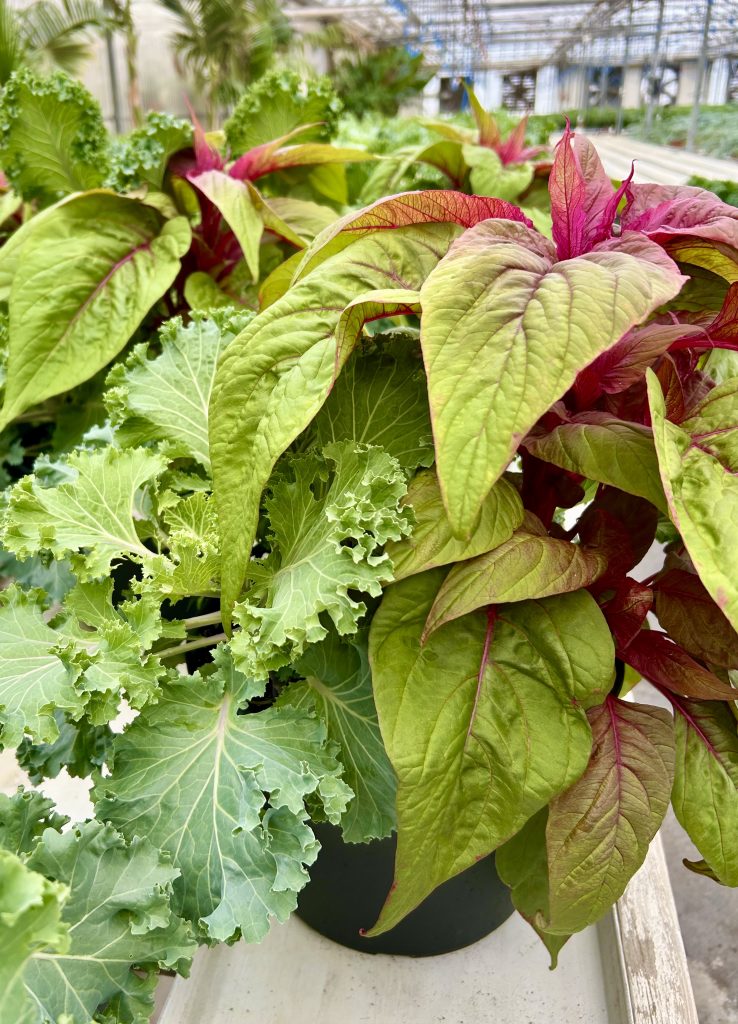
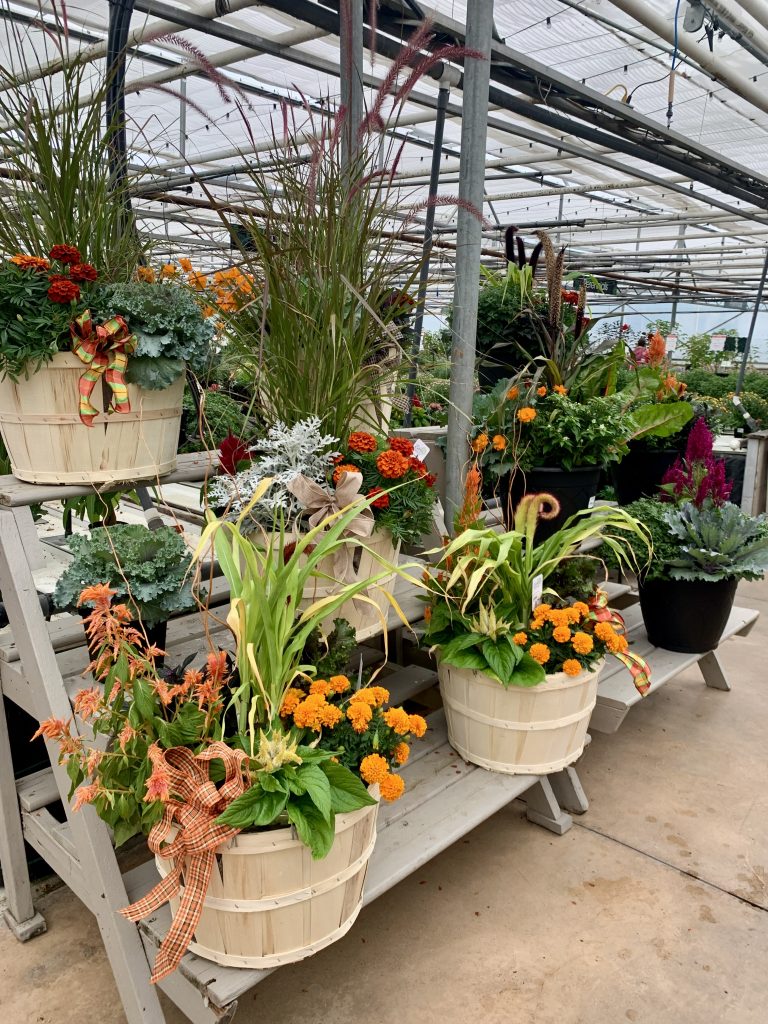
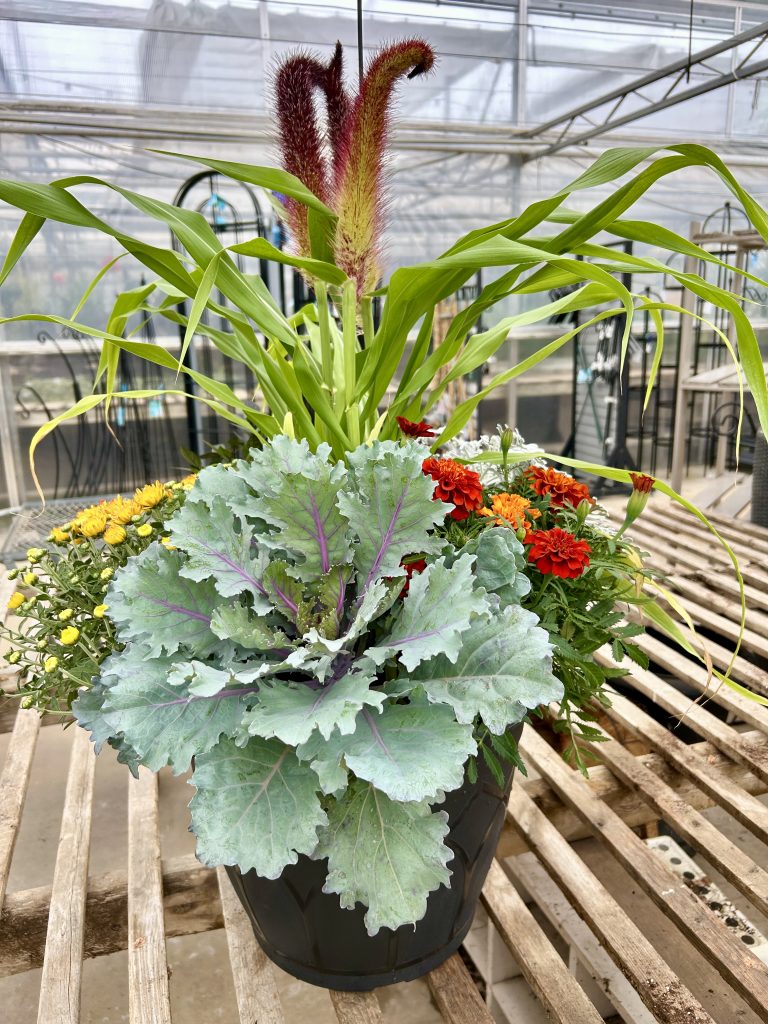
We offer beautifully festive arrangements with a variety of ornamental fall plants, as well as individual plants to decorate an outdoor table, or as a planter creating a warm welcome on your front porch (watch here: Jeanine create a fall planter on our IG).
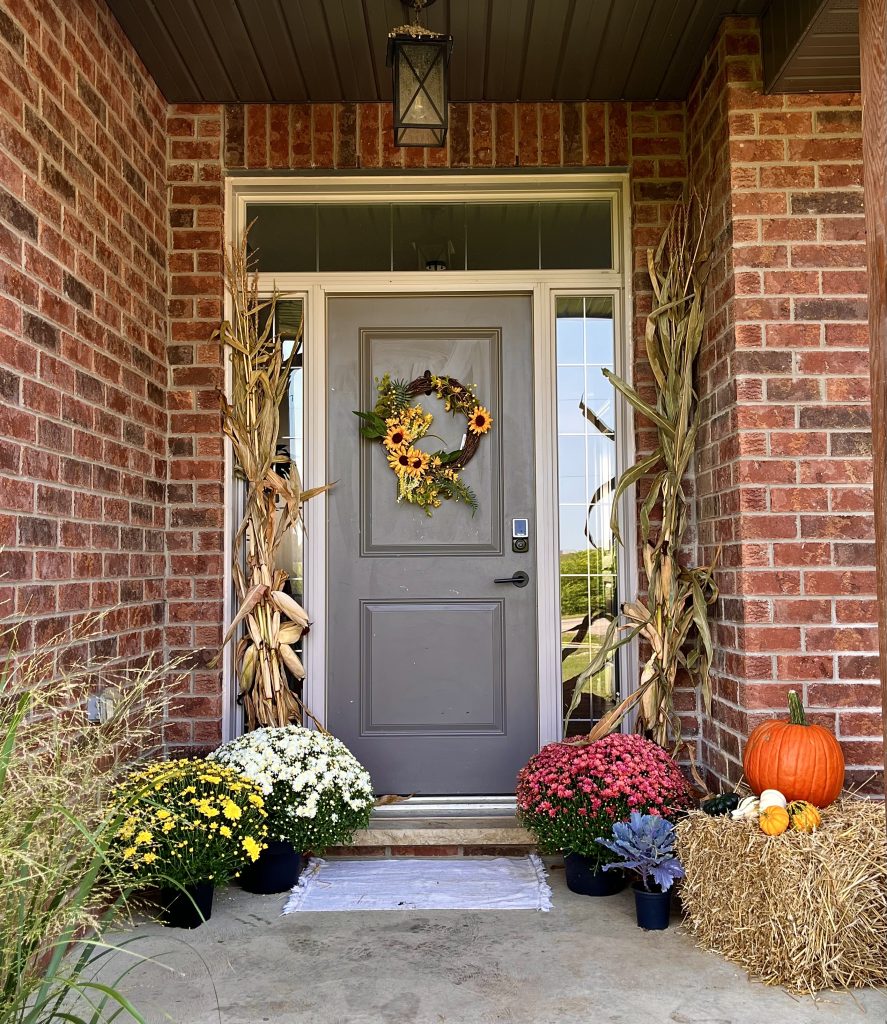
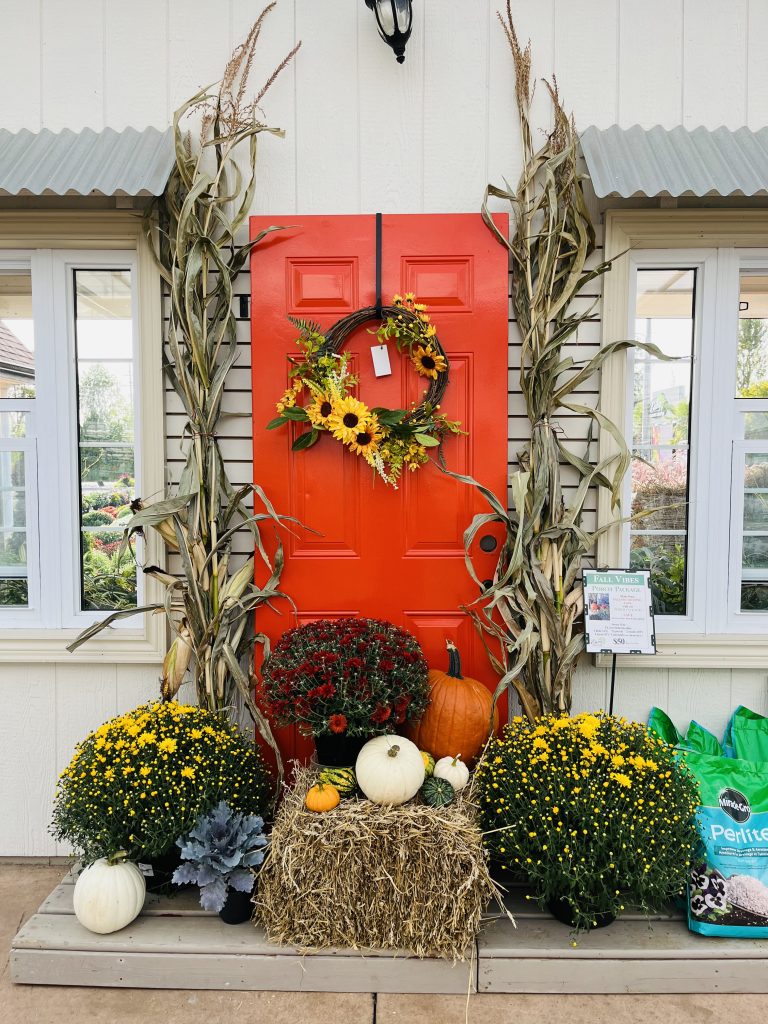
Eising’s popular Porch Packages make it easy to decorate the entryway to your home. But don’t wait, they sell out quickly!
Autumn Inside
When there are fall colours outside, autumn displays inside create continuity that will carry your indoor decorating right into the holiday season in December.
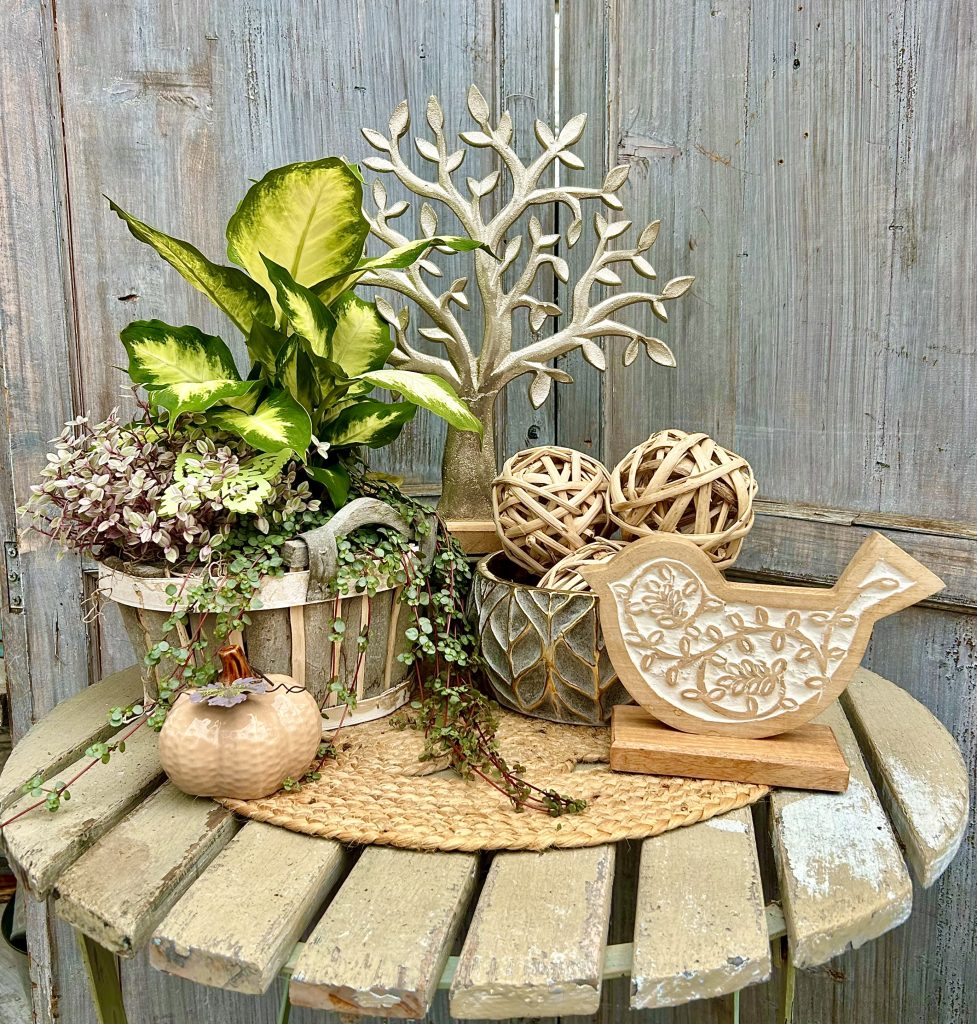
Displays that are vibrant, warm, rustic or whimsical are fun and easy to make. Here are some basic design principles that will help you get started, along with examples we’ve created using items in the Eisng shop.
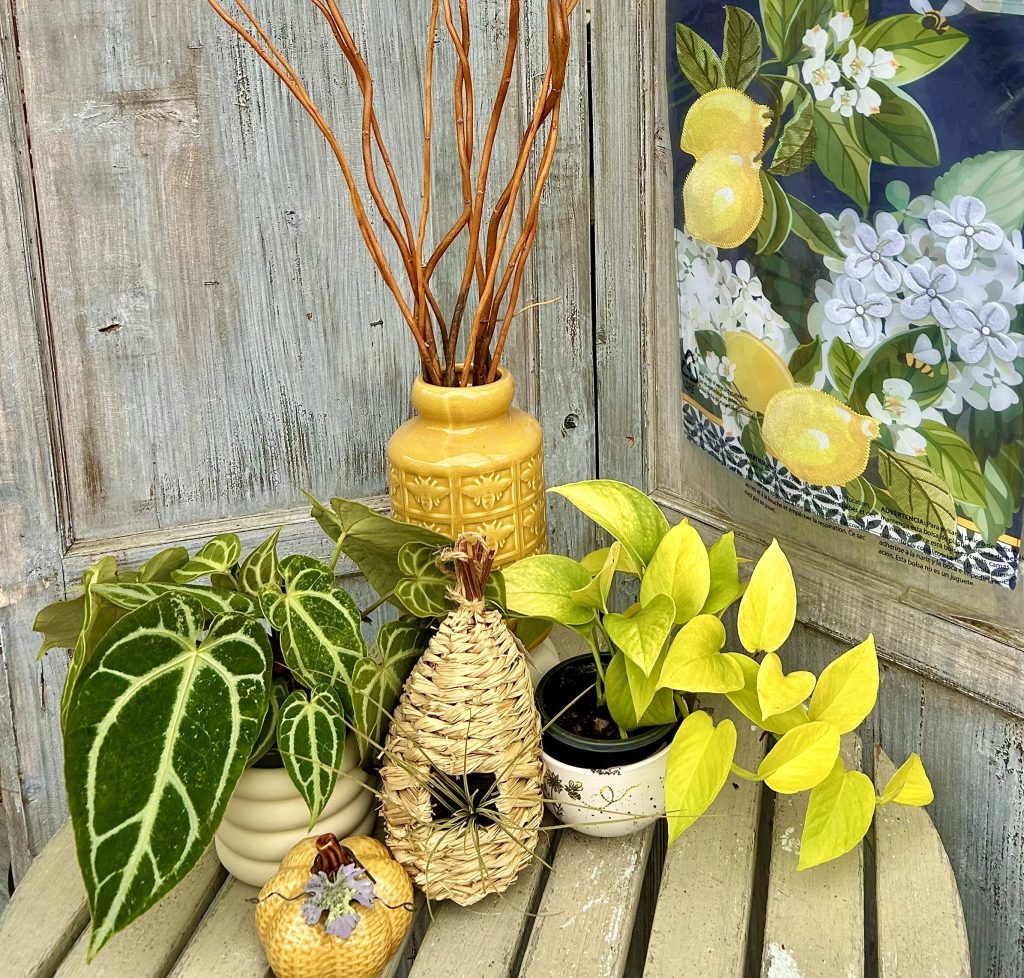
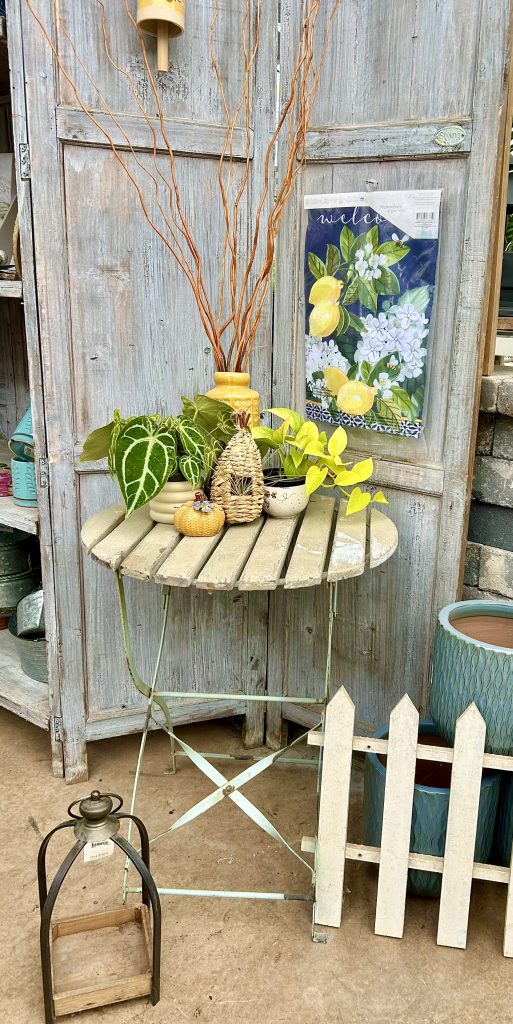
The Rule of Odds
Using an odd number of items (3, 5 or 7) is always more appealing. Why? For some reason, odd numbers are just more harmonious for us to take in. Designers and photographers call it the rule of odds.
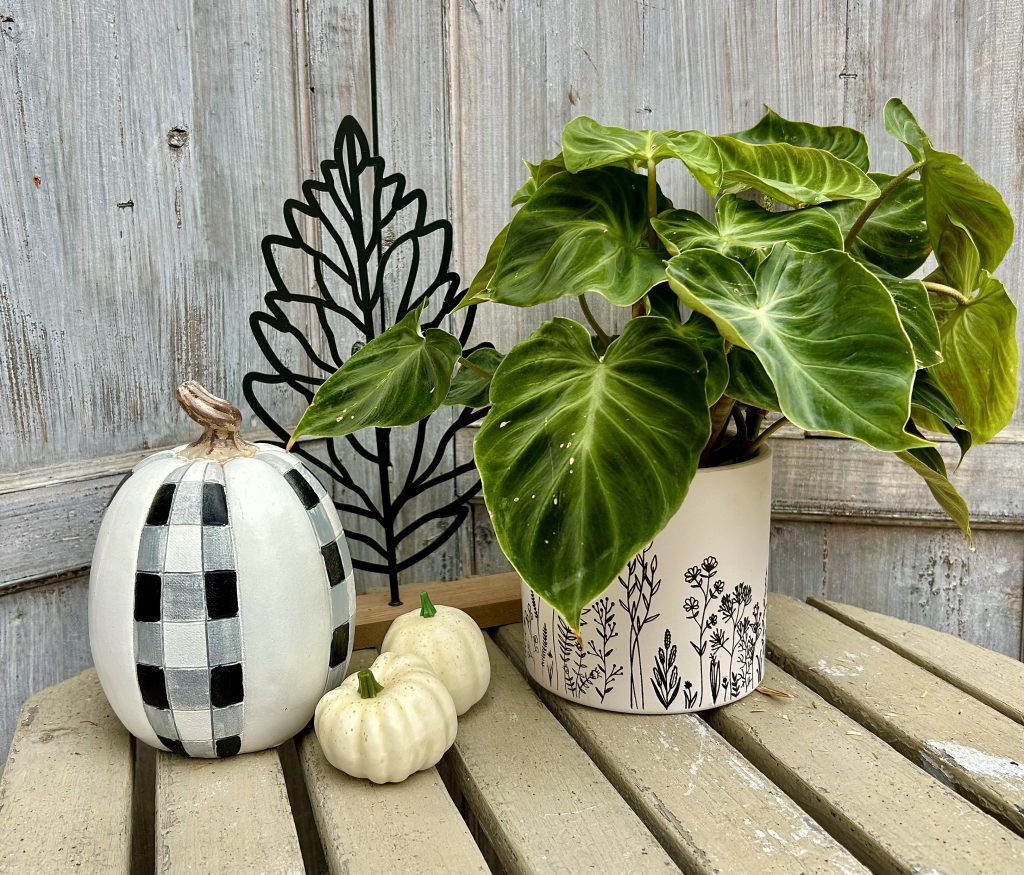
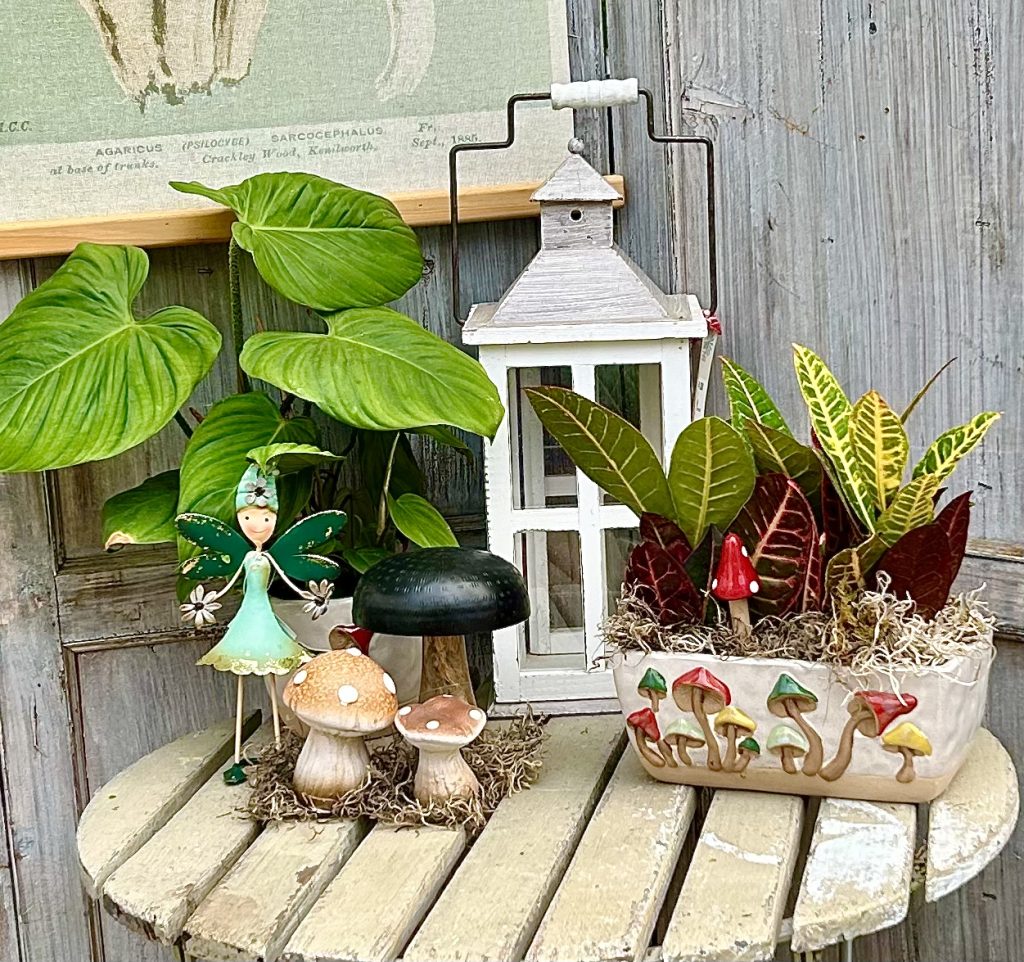
Pick a Theme
Pick a theme like a common colour, a shape, a design or motif. Look for containers or items you can include that fit in with your theme.
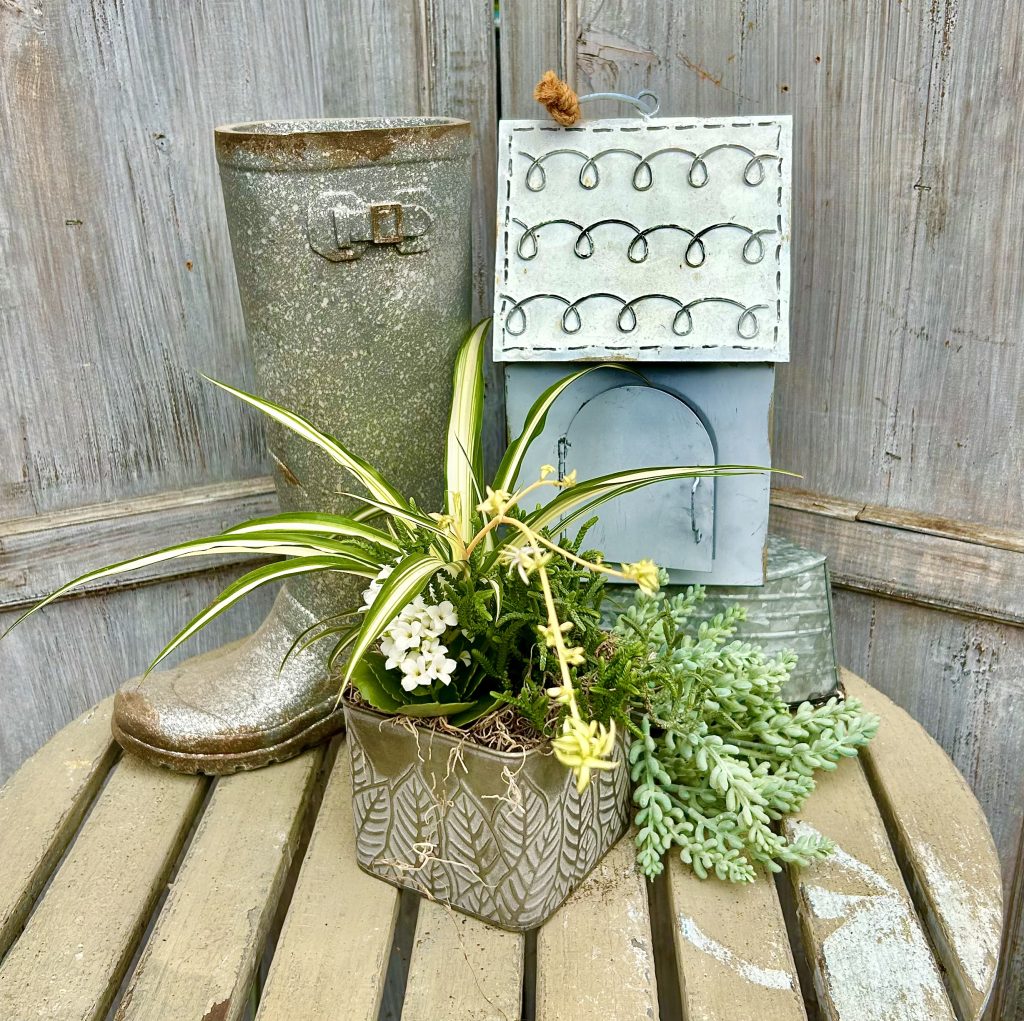
Like the arrangements we offer at Eising Garden Centre, include the following in your designs:
- a thriller like a beautiful vase or container, a tropical plant, or fresh or dried flowers
- a spiller like a plant, dried or silk leaves or moss around the base of containers
- and a filler like foliage plants, fruit, candy, mini pumpkins and gourds, or moss
Size and Scale
Scale is important! Keep the display short if it’s for the centre of a dining table so that guests can see each other across the table! Create taller displays if you’re decorating a corner table or a mantlepiece.
Light it Up
Adding light, including flameless candles or fairy lights, instantly brings warmth to any display.
Aromatics
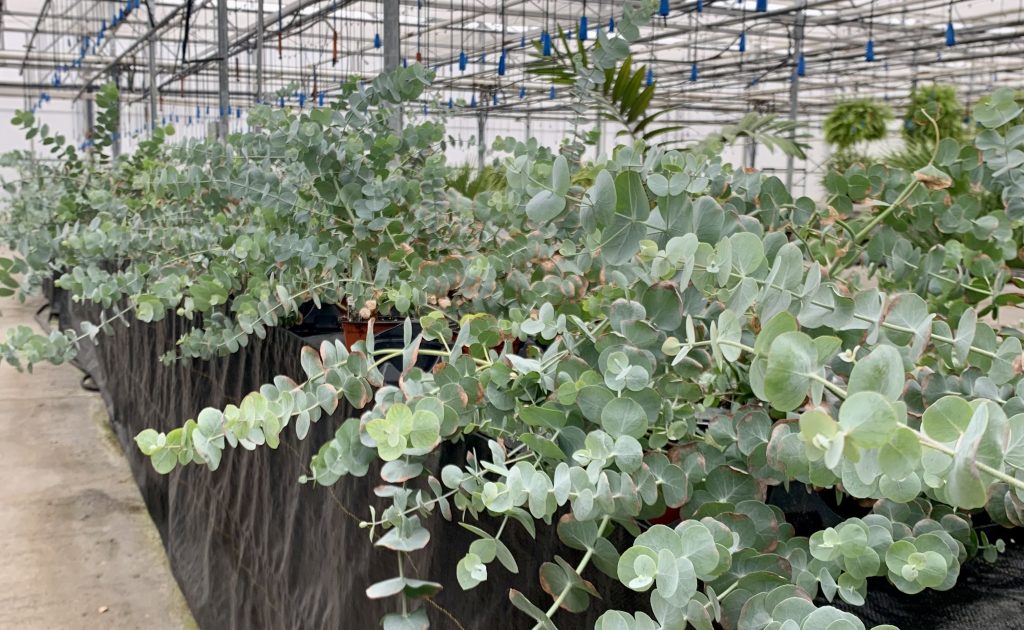
Include scent: using plants like eucalyptus, or fruit like apples or oranges, and spices like whole cloves and cinnamon sticks all add a homey touch.
We would love to see what you create and hope this has sparked your creativity. Don’t forget to tag @Eising Greenhouses & Garden Centre on your Instagram and Facebook posts when you share your decorations online - we would love to see them!
By: Dave Zeldon and Ely Schweyer
Most experts agree that we shouldn't bother bringing in our favourite summer potted plants for the winter and that we should buy new again the next season. But this seems to go against our sensibilities after paying good money earlier in the season. Why not try to save that bay tree, those Rosemary, and French Tarragon containers, as well as expensive Phormium, Mandeville, Passionflower, and Jasmine plants?
The secret to indoor survival for summer plants is to slow down their growth during the winter, so they’re ready to be put outside again once all the danger of frost has passed. How? A few weeks before fall frosts are expected, gradually introduce plants to life indoors by moving them inside (to a quarantined spot*) for half a day, working up to a full day over a week or so. Don't wait until nighttime temperatures are only slightly above freezing as the plants may go into shock and drop leaves!
How to Keep These Guys Comfy During the Winter Months?
- It is suggested that you should prune back excessive growth and re-pot with new lighter growing media.
- Place them in the sunniest location you have and then water sparingly but regularly over the Winter.
- Raising humidity by using a humidifier helps too.
- Resist the urge to fertilize these plants until just before you reintroduce them to outdoor living.
- Perhaps just for fun, you could repot them into the appropriate seasonal pots and planters!
It Seems They Brought Others in With Them - And They're Not Nice House Guests
*Before long, you may notice some unwanted guests, such as thrips and spider mites, on and around your precious plants as their natural predators are no longer present to keep their populations at bay. In many cases, it may be too late, and your plants may have to be discarded before the Holidays, but that’s not always the case!
Common problems that make themselves apparent indoors would be the brown soft scale insect, whiteflies, mealybugs, aphids, spider mites and most often, fungus gnats (those pesky little black flies).
Fungus gnats are considered to be the most common nuisance in houseplants. Sometimes their sheer numbers just hovering around an attractive plant take away from its appeal.
Basic Fungus Gnat Control Measures:
The fastest and easiest method of control is to catch the flying adults with yellow sticky cards. The large cards can be cut into little strips and mounted onto little wooden splints (popsicle sticks) then placed around the base of the plant out of the line of sight.
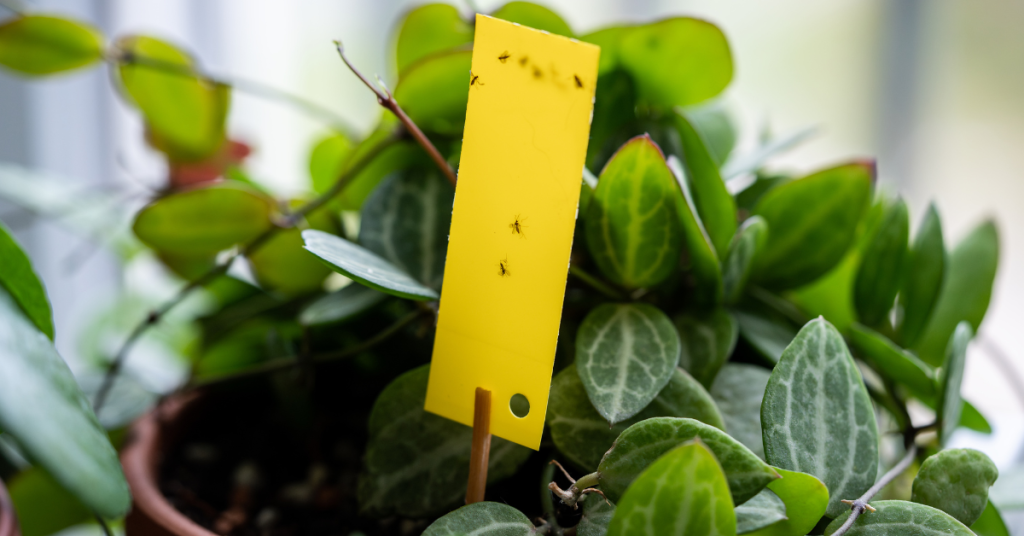
The chances are that the adults have already deposited eggs in the growing media (soil) of the plant as it is rich in organic matter, so we can disrupt its life cycle by:
- Subirrigation - water your potted plant from the bottom by adding water to the saucer it is sitting in. This will dry out the soil surface making it uninhabitable for the hatching larvae.
- Trapping larvae - If the surface soil it already very wet, try placing a few potato discs or slices on the surface of the soil. This will attract the larvae as they migrate to the potato to feed. Simply replace the discs every five days or so with fresh slices to eliminate the next generation of adults.
- Inoculating the soil with beneficial nematodes. Most garden centres will carry the Guardian line of beneficial nematode products.
We hope this helps your plants enjoy your winter abode as much as you do this season, for more information - and plants – visit Eising Greenhouse and Garden Centre!
By: Ava Green
More than just a name, the brands we love and trust at Sassyfras not only have a great reputation but also offer excellent quality, fit, and, importantly, style. We trust their track record and can enthusiastically recommend these brands to you!
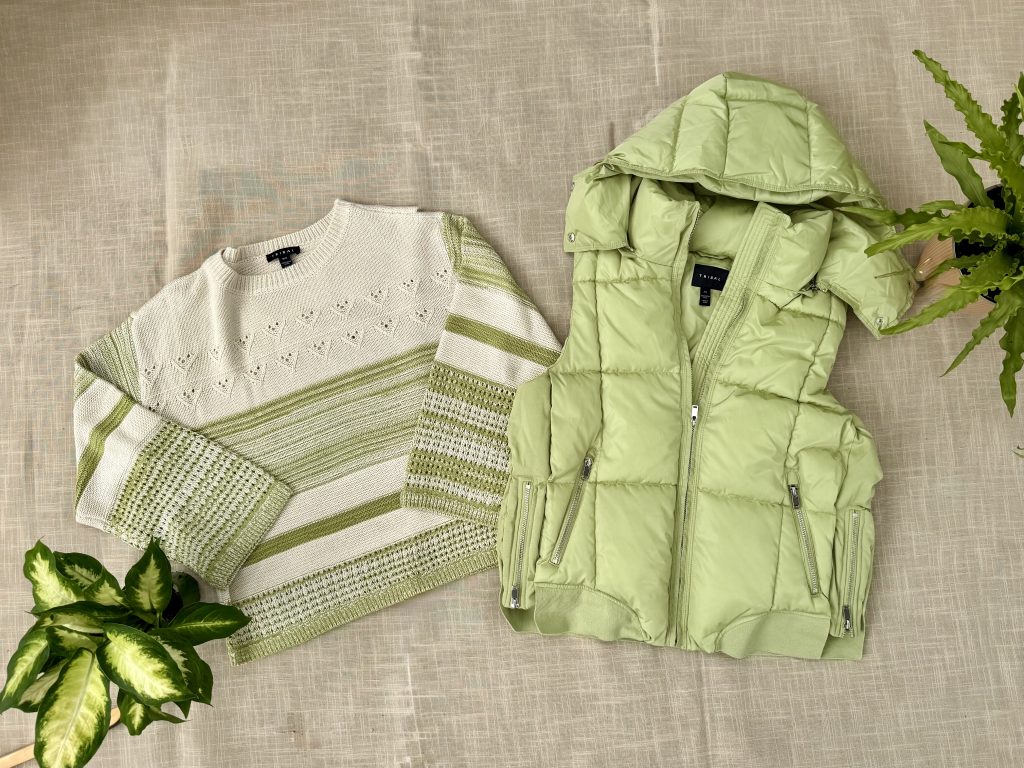
Tribal
Founded more than 50 years ago in Montreal, their mission still remains the same - to make women look and feel their best, no matter what they’re doing. They know first-hand what that is because women design Tribal clothing for women. Consistent fit and premium fabrics are hallmarks of their quality garments.
Habitat
Comfort, fit and detail are the priorities for clothing from the Habitat brand. Founder and designer Suzanne Connelly is committed to creating clothing that fits well and suits customers’ tastes. This is not fast fashion that you’ll find everywhere, Habitat produces limited quantities for specialty boutiques - like Sassyfras!
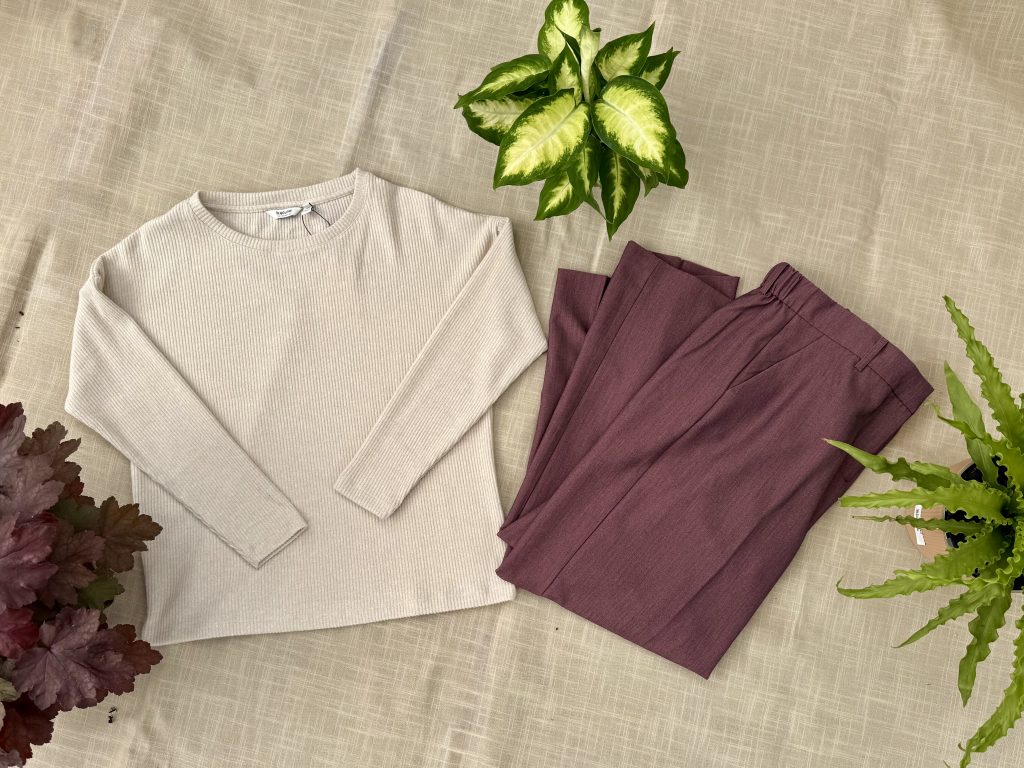
b.Young 🍁
Great quality designs with value for your money have been the focus of b.Young since their inception in 1991 in Denmark. Creating timeless pieces using improved processes with an eye on the environmental impact of textile production, their goal is to produce pieces that will last. This is a brand that creates beautiful styles with integrity.
Culture Clothing
Daring to be different, and urging you to be you, Culture Clothing is a brand that stands out. Whether you’re looking for a piece that’s comfy and classic or a colourful statement piece, this is a brand worth checking out!
Soya Concept
Fashionable, colourful, and feminine for everything from shirts to skirts that are made for women. With a focus on sustainability, high-quality fabrics, affordable prices, and the latest trends, Soya Concept is a brand that aims to earn your loyalty.

Point Zero🍁
One of Canada’s leading clothing brands for men and women since 1979, Point Zero has lots to offer. Based in the heart of Montreal’s fashion district, this Canadian company is focused on great design, superior quality, and trendy fashions all at an attractive price. Additionally, they focus on their ecological footprint in terms of materials and the manufacturing process. An admirable brand that’s homegrown.
Dévia 🍁
Based in Montreal, Devia clothing is proudly designed and made in Canada. With a passion for fashion, they create inspiring and eclectic designs at affordable prices.
Terrera 🍁
Earth-friendly fibres, conscious production, and a commitment to giving back make Terrera an outstanding, sustainable, Canadian company. We think you’ll fall in love with their comfortable, easy-to-wear bamboo basics like bralettes, undies and leggings all created to fit and flatter women.
Moffi
Unique, high-quality clothing with sophisticated details and elegant design. Moffi is designed to appeal to every woman.
What’s In Store For You?
Step into Sassyfras at Eising Garden Centre and explore our carefully curated collection of trusted clothing brands. We’re here to provide great personal service and high-quality pieces from brands you’ll be proud to wear!
If you’re looking for blooms that come back each Spring with a burst of colour, here are ten of our favourite flowering perennials and ground covers.
Plant These for a Spring Show!
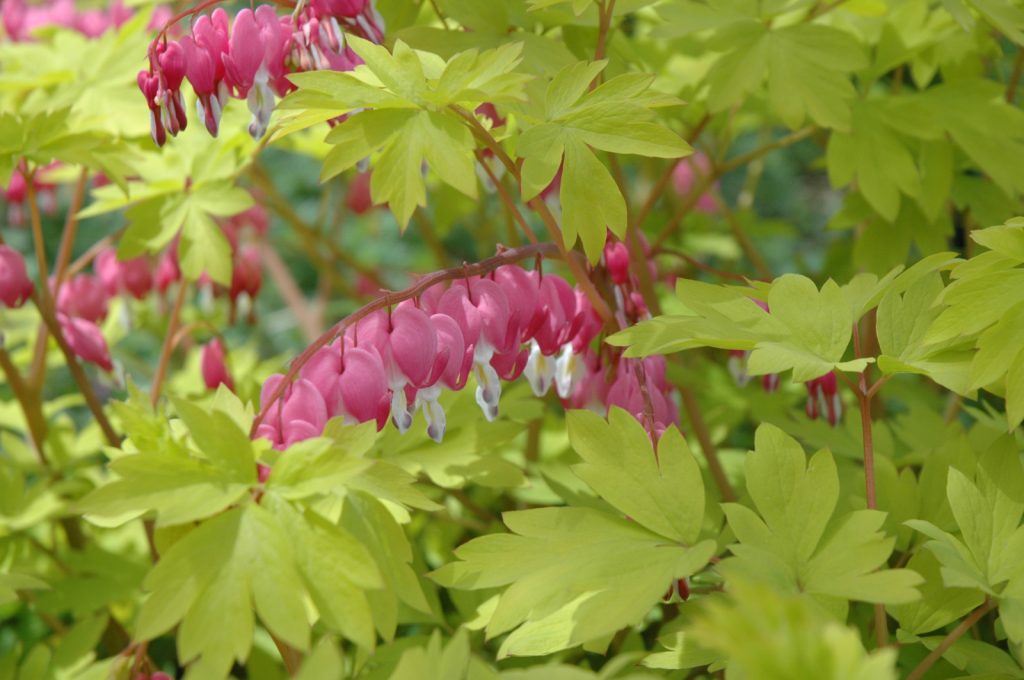
Bleeding Heart (Dicentra)
Height: 30-120 cm, Spread: 45-90 cm
Flower Colour: white, pink, red, purple
Blooms: spring, summer
Growing: While Bleeding Hearts will tolerate full sun or full shade, they prefer the protection of light shade. This perennial is fairly drought tolerant, but it will thrive in evenly moist soil, and blooms will last much longer if the soil is moist.
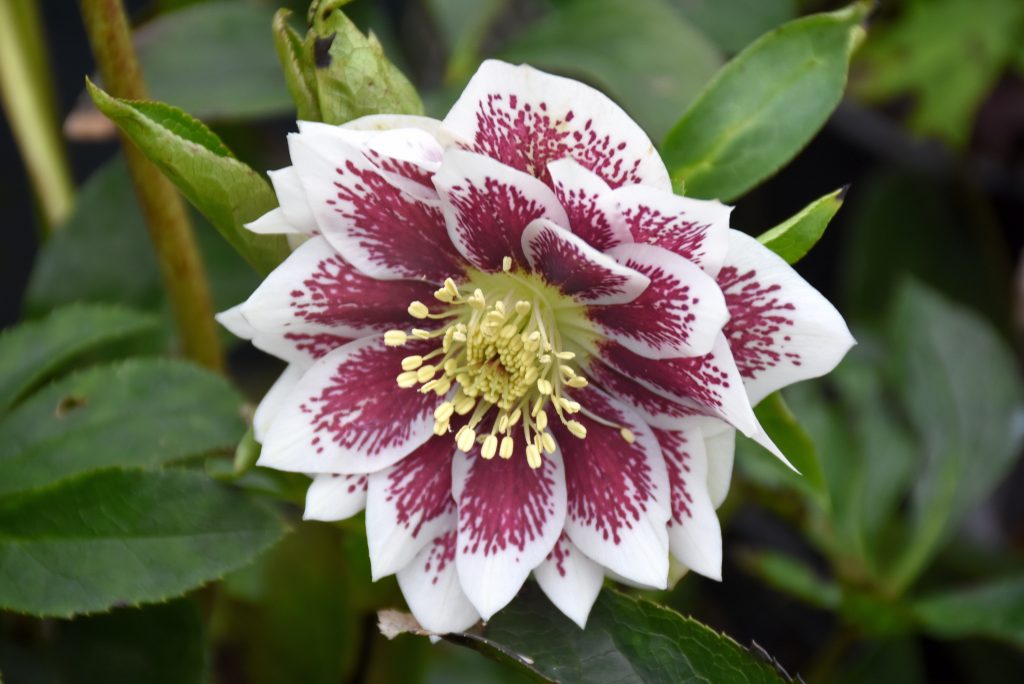
Hellebore Christmas Rose (Helleborus)
Height: 30-45 cm, Spread: 30-45 cm
Flower Colour: white, green, pink, purple, yellow
Blooms: late winter to mid-spring
Growing: Moist, humus-rich, well-drained soil in lightly dappled shade is where hellebores do best.
Primrose (Primula)
Height: 15-60 cm, Spread: 15-45 cm
Flower Colour: blue, red, orange, white, pink, purple, yellow
Blooms: spring, early summer
Growing: Full sun or partial shade and moist, well-drained, humus-rich soil.
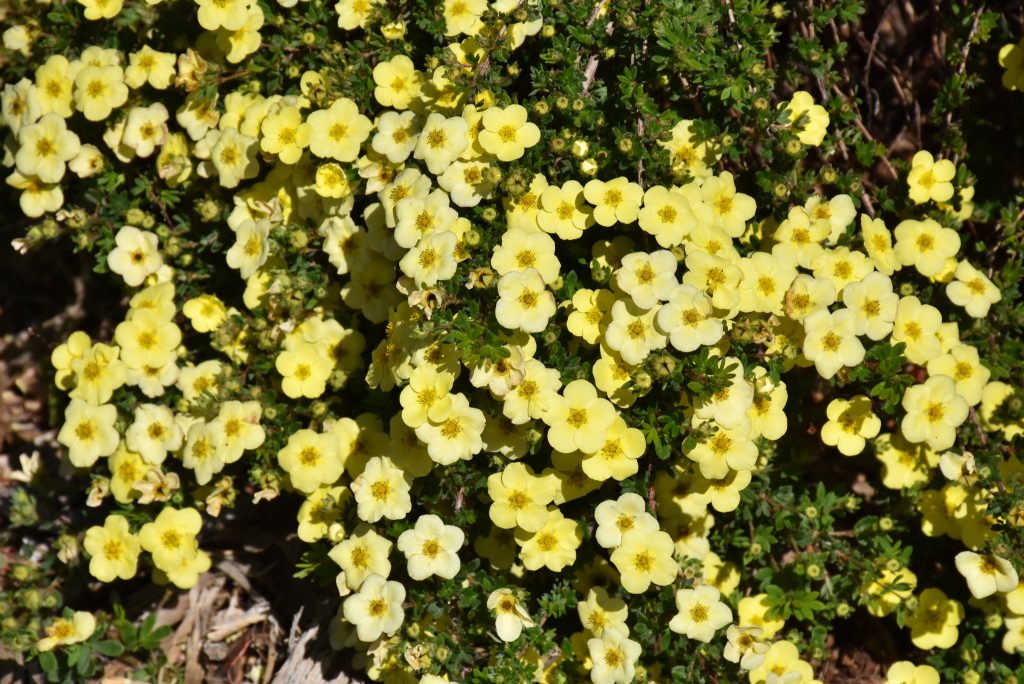
Anemone Windflower (Anemone)
Height: 8-150 cm, Spread: 15-60 cm
Flower Colour: white, yellow, pink, blue
Blooms: spring, summer or fall
Growing: Anemone does best in moist soil and partial or light shade, but they will tolerate full sun. While Anemone can take a while to become established, they’re worth the wait!
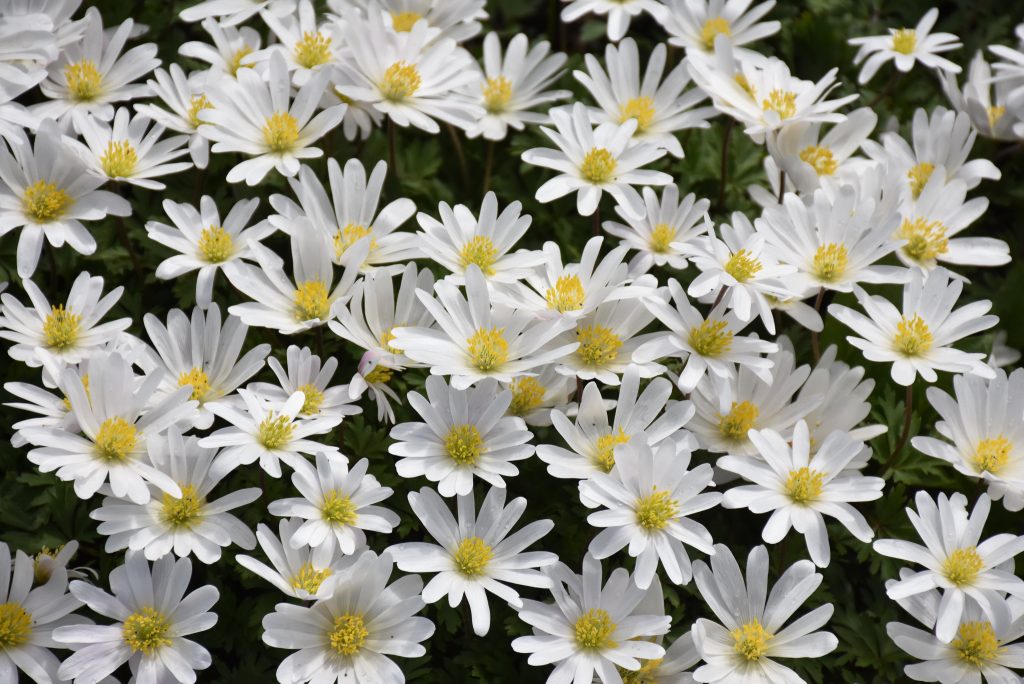
Columbine (Aquilegia canadensis)
Height: 45-90 cm, Spread: 30-60 cm
Flower Colour: white, red, yellow, pink, blue, purple (The colour of the spurs is often different than the petals)
Blooms: spring, summer
Growing: Columbines love full sun or part shade and moist, well-drained soil. This plant will self-seed and seedlings can be transplanted.
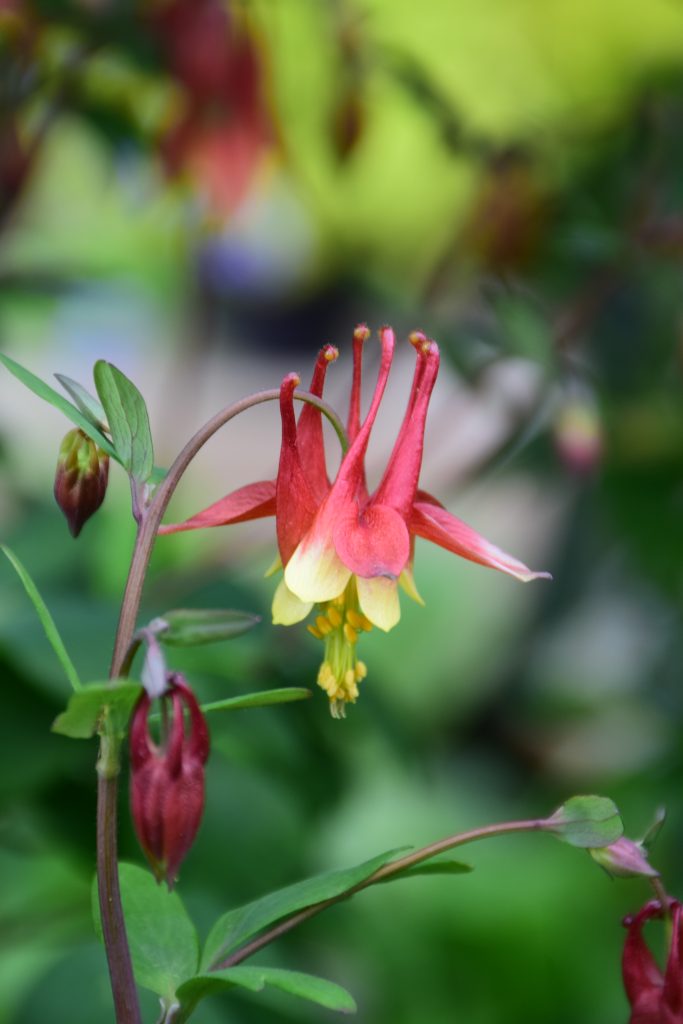
Virginia Bluebells (Mertensia virginica)
Height: 30-60 cm, Spread: forms groupings
Flower Colour: blue, pink, purple
Blooms: spring
Growing: Plant in partial to full shade with humus-rich, moist, well-drained soil. This woodland plant has blooms that are attractive to Hummingbirds and pollinators. Foliage dies back right after it blooms.
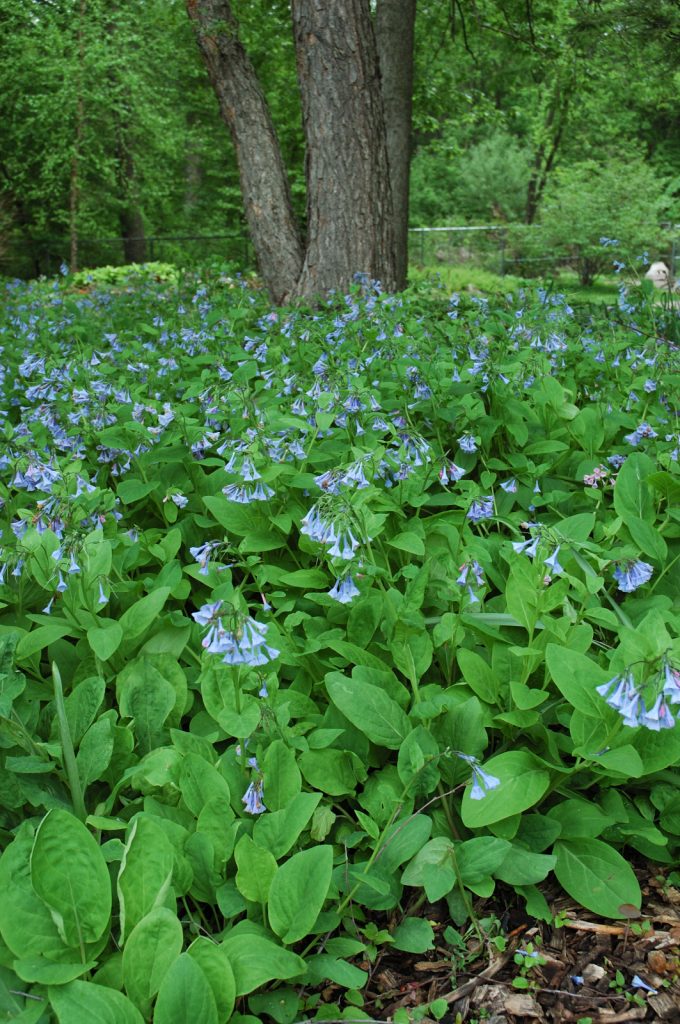
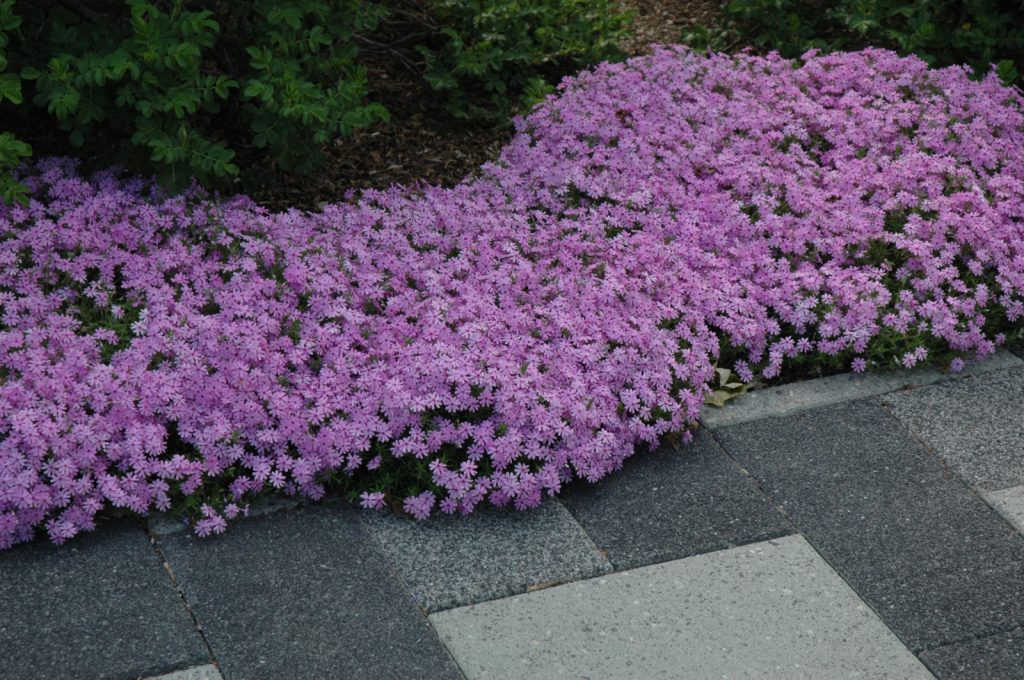
Moss Phlox or Creeping Phlox (Phlox subulata)
Height: 10-15 cm, Spread: 60 cm
Flower Colour: white, red, lavender, pink, bluish purple
Blooms: early spring
Growing: Plant in sun to partial shade with humus-rich, moist, well-drained soil. Spreads horizontally as it grows and creates new roots where the stems touch the ground. Do not prune in the fall as Spring’s flowers will already be forming on these plants.
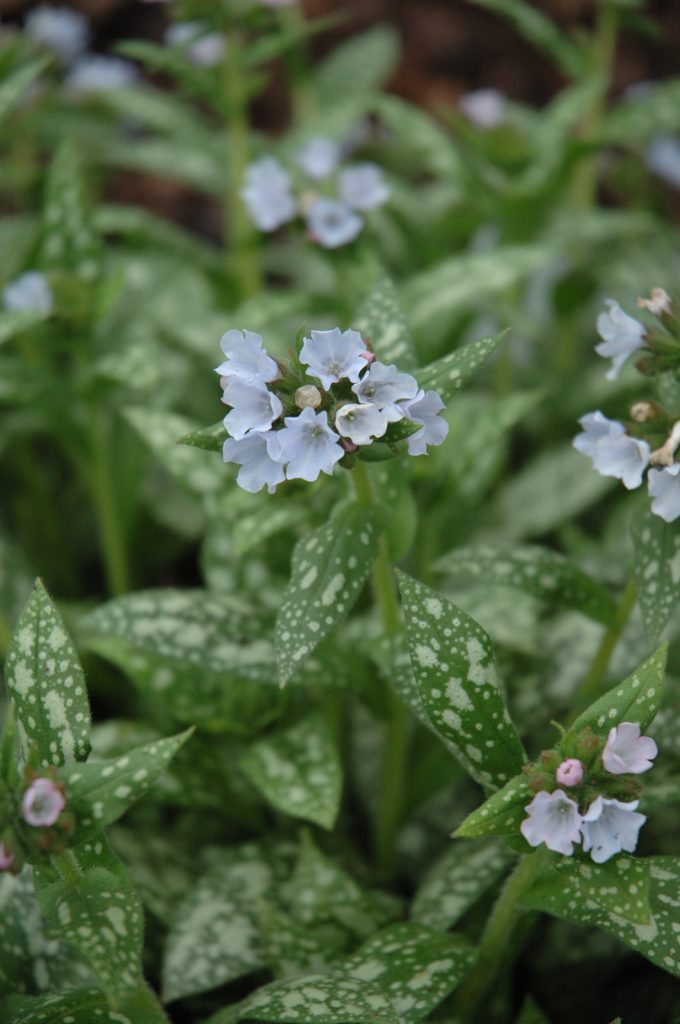
Lungwort (Pulmonaria)
Height: 20-60 cm, Spread: 20-90 cm
Flower Colour: white, red, pink, blue
Blooms: spring
Growing: To avoid root rot, grow Lungwort in moist, humus-rich soil that’s well drained. They prefer partial shade to full shade.
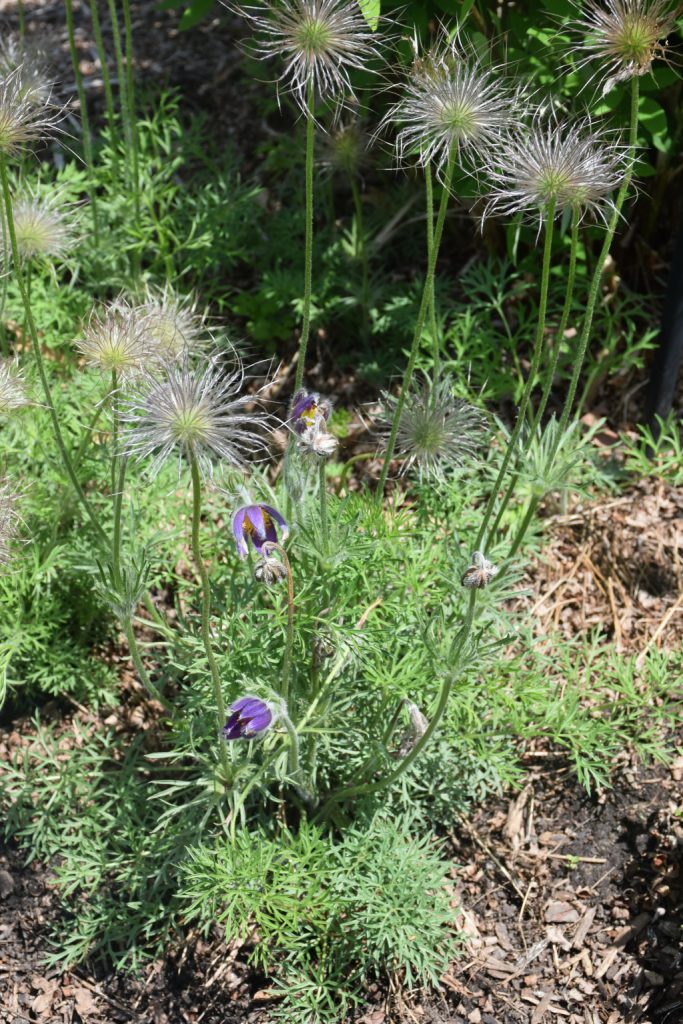
Pasque Flower (Pulsatilla)
Height: 10-30 cm, Spread: 20-30 cm
Flower Colour: white, red, purple, blue
Blooms: early to mid-spring
Growing: Very well drained soil is important for Pasque Flower, which does not like to sit in wet soil. It will grow well in full sun or partial shade.
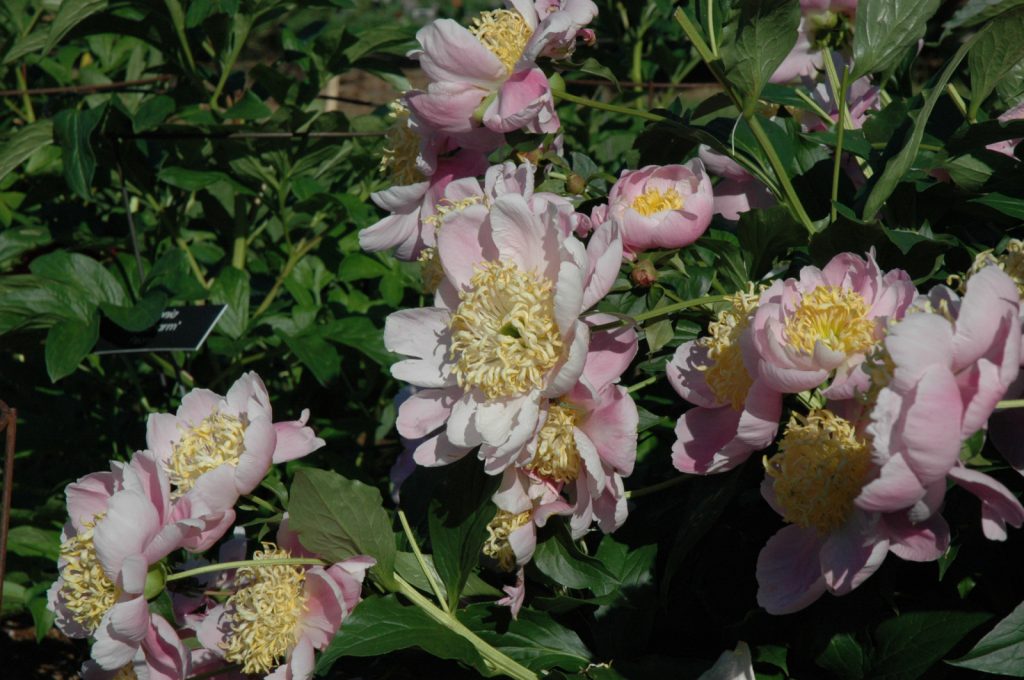
Peony (Paeonia)
Height: 60-80 cm, Spread: 60-80 cm
Flower Colour: yellow, pink, red, purple, and shades of white
Blooms: spring, early summer
Growing: Humus-rich, moist and well-drained soil in full sun or partial shade is where peonies do best. Adding lots of compost and planting at the proper depth is very important for peonies to bloom. Be sure to plant potted peonies at the same level as the soil around them, not higher.