
By Dave Zeldon and Ely Schweyer
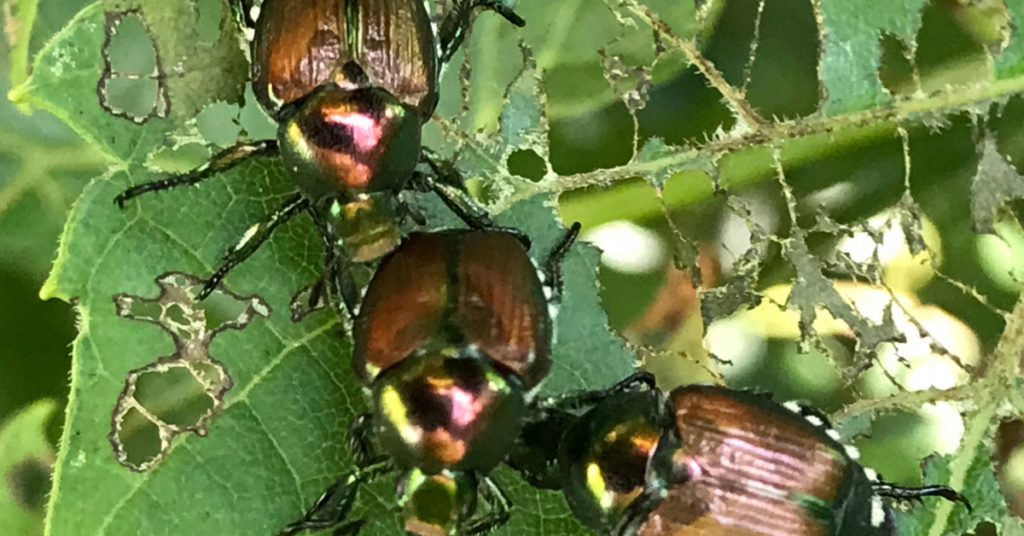
In late June and early July we will be witnessing the annual invasion of the Japanese Beetle on many of our favourite landscape plantings including Hollyhocks, Dahlias, Hibiscus, Roses, Grapes, and Raspberries.
Adult beetles skeletonize foliage.
Many of us have tried the various means available to curb this yearly destruction like pheromone traps, Nematode lawn inoculation, hand picking, and concoctive sprays. But still, we get substantive damage.
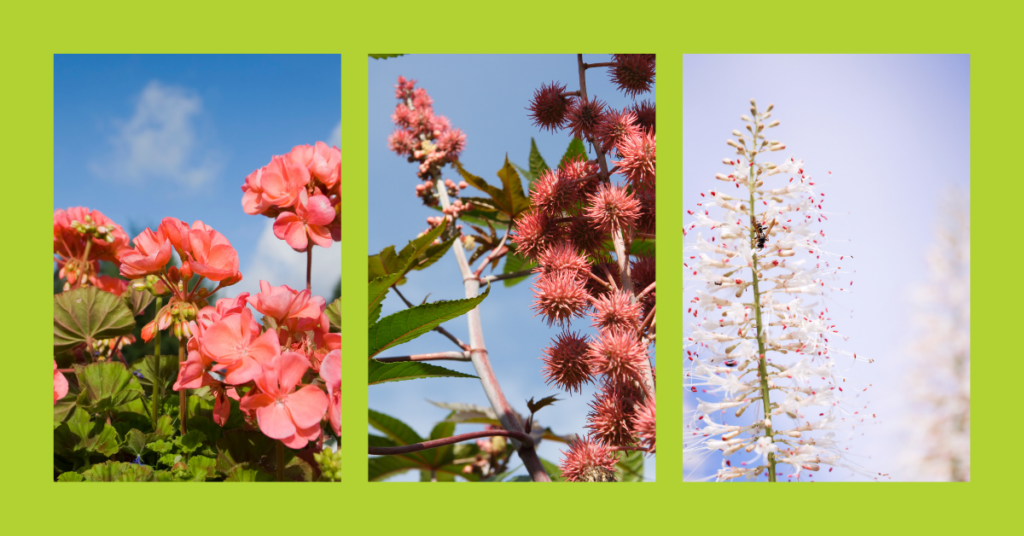
Interestingly enough, some plants such as Geranium, Castor Bean, and the flowers of Bottlebrush Buckeye, will cause paralysis and death of these beetles when eaten.
Maybe it’s Time We Look at Whole New Approach
Why not slowly invest in a landscape makeover? One with Japanese Beetle resistant plants!
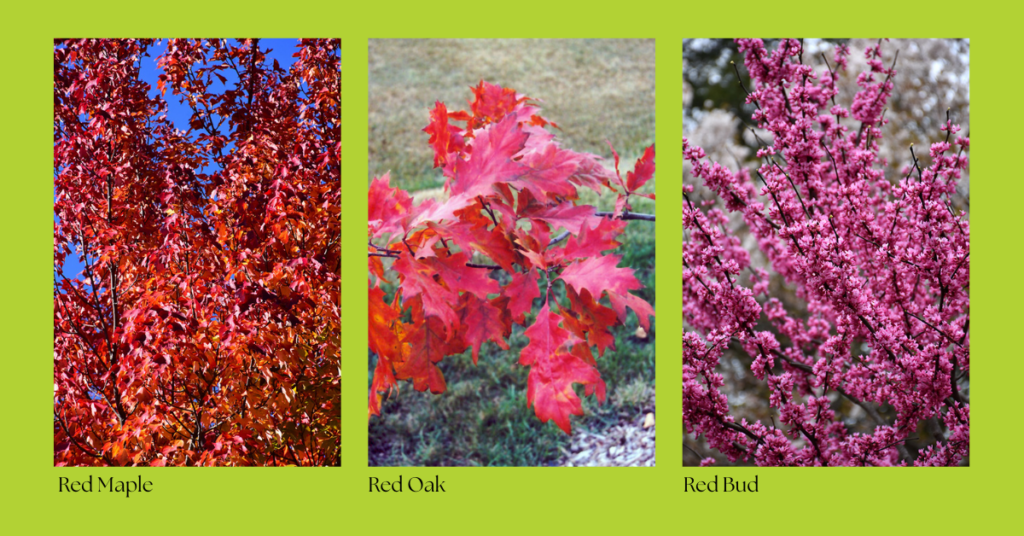
Trees such as Red Maple, Red Oak, Hickory, and Redbud could replace the susceptible Japanese Maple, Norway Maple, Pin Oak, Linden, and Mountain Ash.
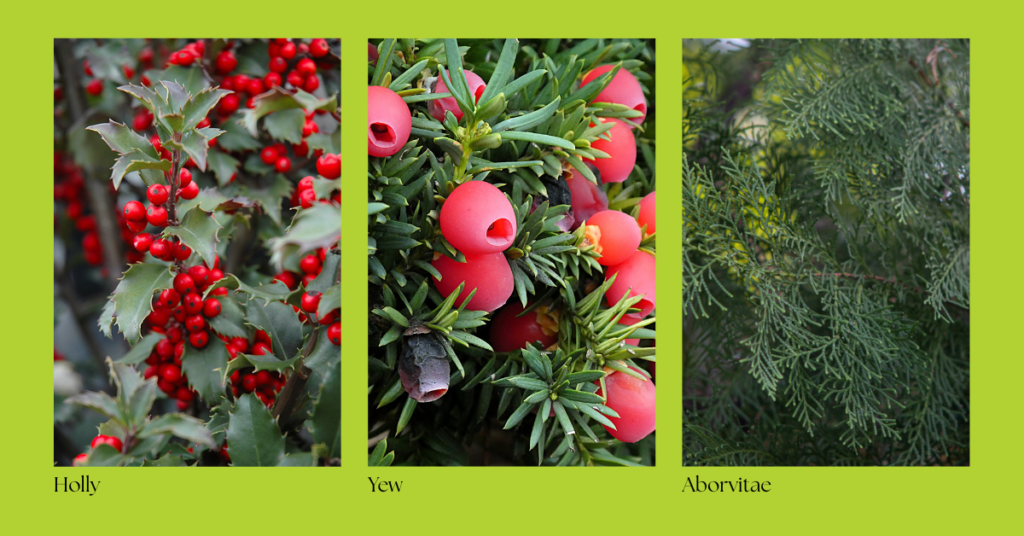
Why not consider growing more Evergreens such as Holly, Yew, Boxwood, and Aborvitae instead of the prone Virginia Creeper, Apple and Plum family of trees, and Birches.
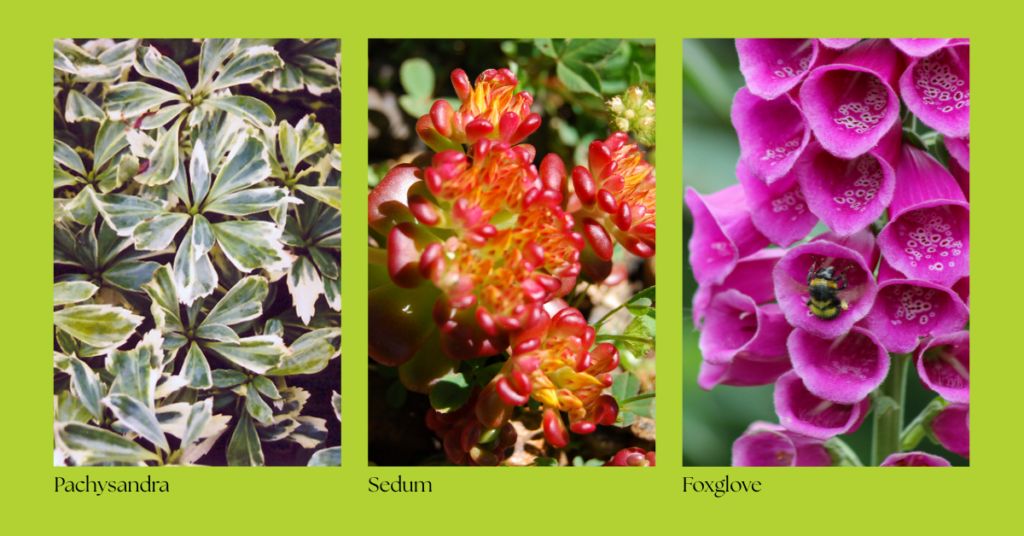
You also may want to contemplate planting perennials such as Coral-Bells, Hostas, Pachysandra, Sedum and Foxglove as opposed to the Japanese Beetle standard menu fare of Evening Primrose, Hydrangea, Clematis, Potentilla, and Zinnia.
Yes, we do have some preventative measures at our disposal to battle the Japanese Beetle (find how to use beneficial nematodes in our fall chore blog) but due to the nature of this pest, it will inevitably win the war. If we continue to grow the some 400+ preferred host plants in our landscape, providing an adequate food source for this invasive pest rather than replacing them with resistant species, surely this pest will make gardening a chore instead of the pleasure it should be.
We hope this article will aid in the prevention of Japanese Beetles in your garden space! For more information – and Japanese Beetle resistant plants – visit Eising Greenhouse and Garden Centre! 🪲
Expert Picks You Can Plant Right Now
By Ava Green
Looking for a flowering shrub that delivers season after season? We asked our experts at Eising Garden Centre to share their top picks, the ones that customers and staff love most, and they delivered. Whether you’re looking for spring blooms, fall colour, wildlife and pollinator value, or a shrub to suit your space, there’s something on this list for every garden.
Fuji Cherry ‘Little Twist’, Prunus incisa ‘CarltonLT’
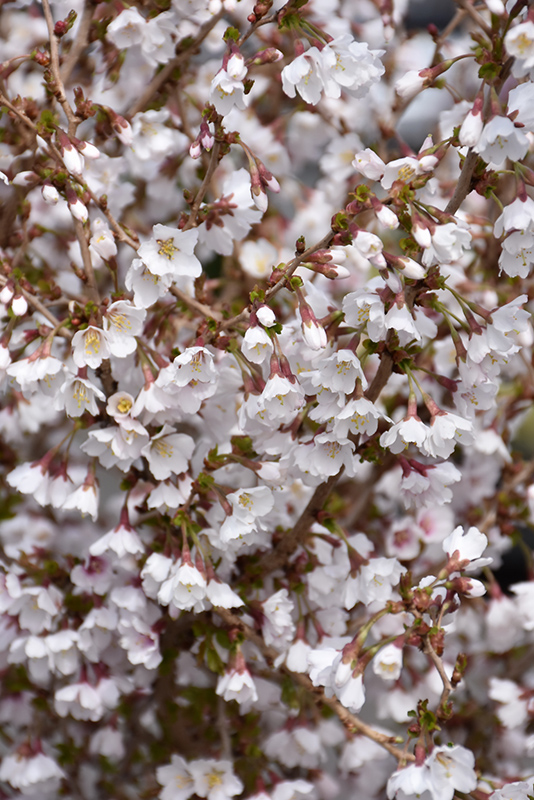
As an accent in a small garden, or planted in a grouping in a larger garden, this multi-stemmed shrub is a gem!
In early spring, crimson buds emerge before the leaves appear. Little Twist then produces clusters of lightly scented white, bell-shaped flowers with soft pink centres that grow along its stems, a stunning early-season display. It is a deciduous shrub, and leaves begin as green before shifting to coppery-bronze, then deepen to a rich burgundy in fall. Smooth, dark red bark adds interest in the winter once the leaves are gone.
This slow-growing, multi-stemmed shrub makes a striking feature in your garden.
Best for: Small gardens, accent planting, four-season interest. | Sun: Full sun | Mature size: 6 ft. tall × 6 ft. wide
Downy Serviceberry, Amelanchier canadensis
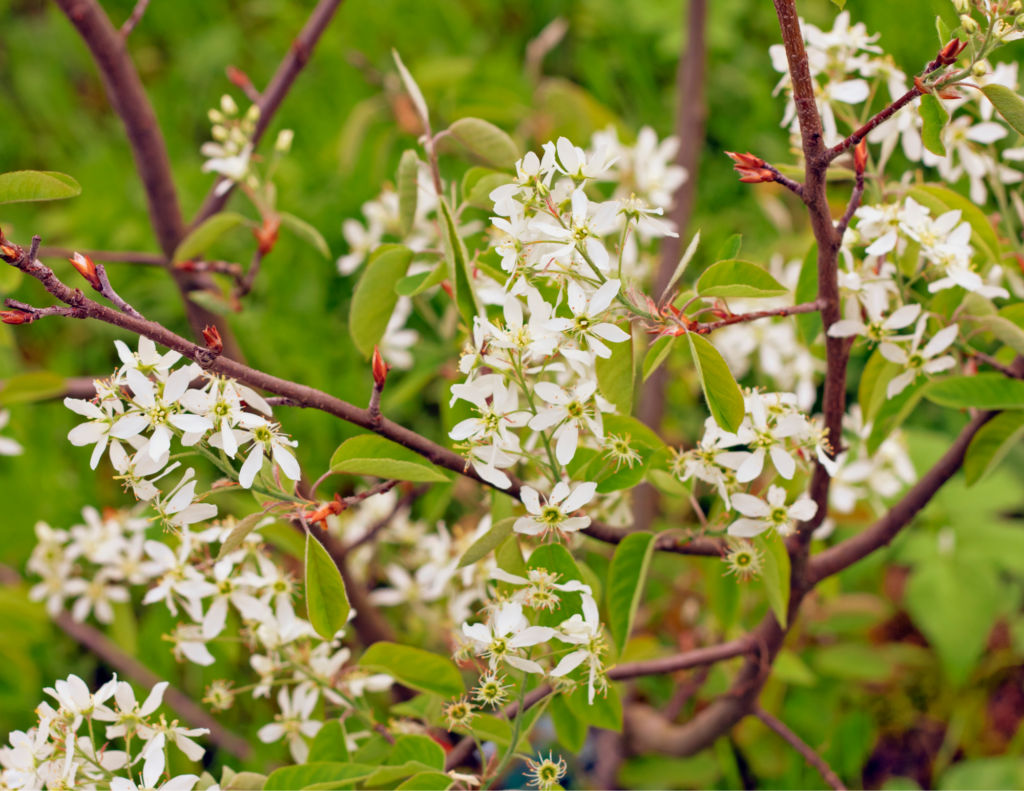
One of the most rewarding native shrubs you can plant, Downy Serviceberry earns its place in the garden from spring right through to fall. Showy clusters of fragrant white flowers in early spring, followed by small, sweet, edible purple-blue berries in early summer that are wonderful for making jam and an absolute favourite for birds. Come fall, the foliage puts on a spectacular show in shades of yellow, red, and orange.
As a bonus, choosing a native plant like Serviceberry supports local pollinators and wildlife, making it as ecologically valuable as it is beautiful. It works well as a specimen plant on it’s own, in a grouping or hedge, or naturalized in a larger landscape.
Best for: Wildlife gardens, naturalized areas, multi-season interest | Sun: Full sun to part shade | Mature size: 20 ft. tall × 10 ft. wide
Amur Privet, Ligustrum Amurense
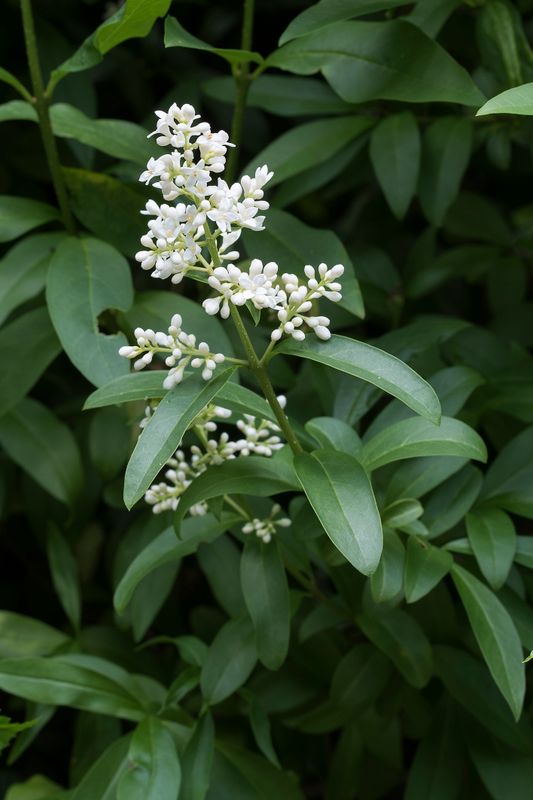

Amur Privet
When fast growth and privacy matter, Amur Privet is one of the best choices available. This dense, dark green shrub produces white flower panicles in late spring and small black berries in fall. It responds exceptionally well to pruning after it blooms, making it an ideal candidate for a formal or informal hedge. If you need to fill a space quickly and create structure in your garden, this is a reliable, low-maintenance option.
Best for: Hedging, screening, fast coverage | Sun: Full sun to part shade | Mature size: 12–15 ft. tall × 8–15 ft. wide
Viburnum ‘Fragrant Snowball’, Viburnum Opulus ‘Roseum’
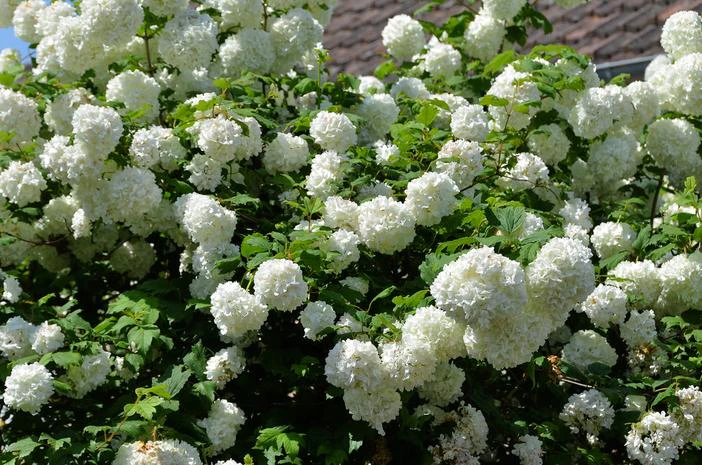
Few shrubs stop people in their tracks quite like Fragrant Snowball Viburnum in full bloom. Large, rounded clusters of sweetly scented white flowers cover the plant in spring, creating a display that’s hard to match. While it doesn’t produce fruit, it earns its place again in the fall when the foliage transitions to rich shades of purple.
Pruning after it blooms will help to keep it a manageable size and encourage healthy new growth. It’s also available as a standard, or tree form, which matures to a more compact 6 to 8 feet tall.
Sun or part shade are best for this deciduous shrub, a beautiful, solitary accent plant for the garden growing 12 feet high and 10 feet wide. As a standard, it is smaller, maturing at 6 to 8 feet tall and 5 to 6 feet wide.
Best for: Specimen planting, cottage gardens, fragrance | Sun: Full sun to part shade | Mature size: 12 ft. tall × 10 ft. wide (shrub); 6–8 ft. tall (standard)
Snowbelle Mockorange, Philadelphus ‘Snowbelle’
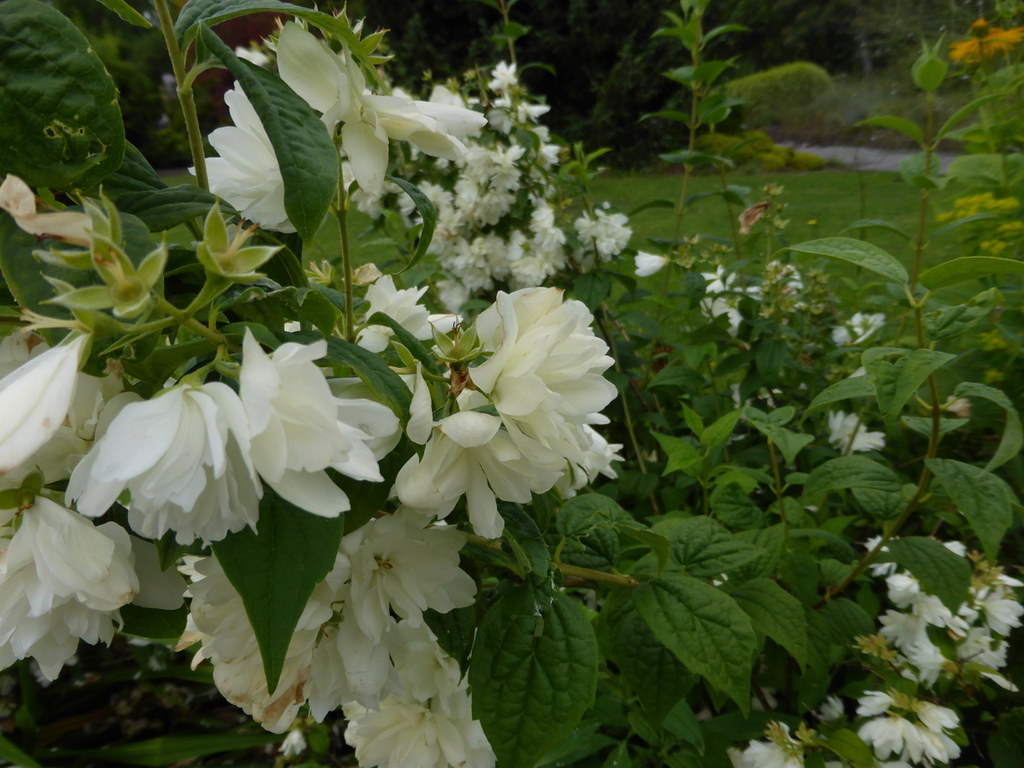
Don’t let its compact size fool you; when Snowbelle Mockorange blooms in early summer, it puts on a big show. This dense, mounded shrub is blanketed in sweetly fragrant double white blooms that are absolutely irresistible to bees and butterflies. Once the flowers fade, its rich, dark-green deciduous foliage makes it a lovely backdrop for other blooming plants in the border.
Growing just four feet tall and wide, it’s one of the best choices for smaller beds, borders and foundation plantings. It prefers full sun but handles part shade as well.
Best for: Small borders, foundation planting, fragrance | Sun: Full sun to part shade | Mature size: 4 ft. tall × 4 ft. wide
More Flowering Shrubs Worth Exploring
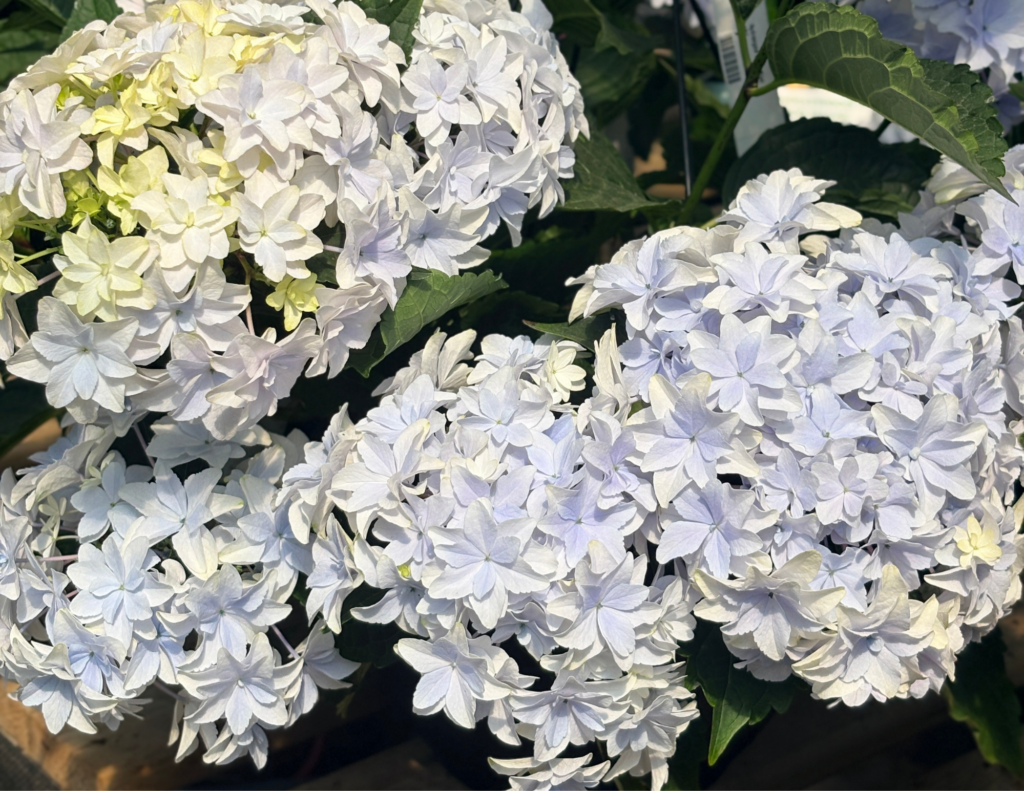
This is just the beginning! At Eising Garden Centre, we also carry a wonderful selection of Azalea, Eastern Redbud, Kwanzan Flowering Cherry, Hydrangea, Dogwood, Butterfly Bush, Beauty Bush, Lilac, Rose of Sharon, Forsythia, and Potentilla, to name a few.
The best way to find the right flowering shrub for your garden is to come in and see them in person, and right now is the perfect time to plant. Stop by and chat with Zach or Donna, who are always happy to help you find exactly what you’re looking for, based on your space, soil, and vision. We’re here to help you make the most of every corner of your garden!
By Ava Green
As soon as warm weather and sunshine arrive in Southern Ontario, it’s time to head to the garden centre and pick up all the plants we’ve been dreaming about all winter long! May 24th is generally the date we look forward to — the unofficial marker when frosty mornings are behind us and the promise of summer is ahead.
By now, cool-weather plants like cabbage, Brussels sprouts, peas, and lettuce should be well established in the vegetable garden. And for everything else, it’s go time!
TIP: Before you start planting, this is the ideal time to amend your soil. Top up your garden beds with fresh topsoil or enrich them with compost to improve soil health, add nutrients, and promote vigorous plant growth. Don’t forget to refresh the soil in your containers as well, with potting mix or compost.
Warm Weather Vegetables
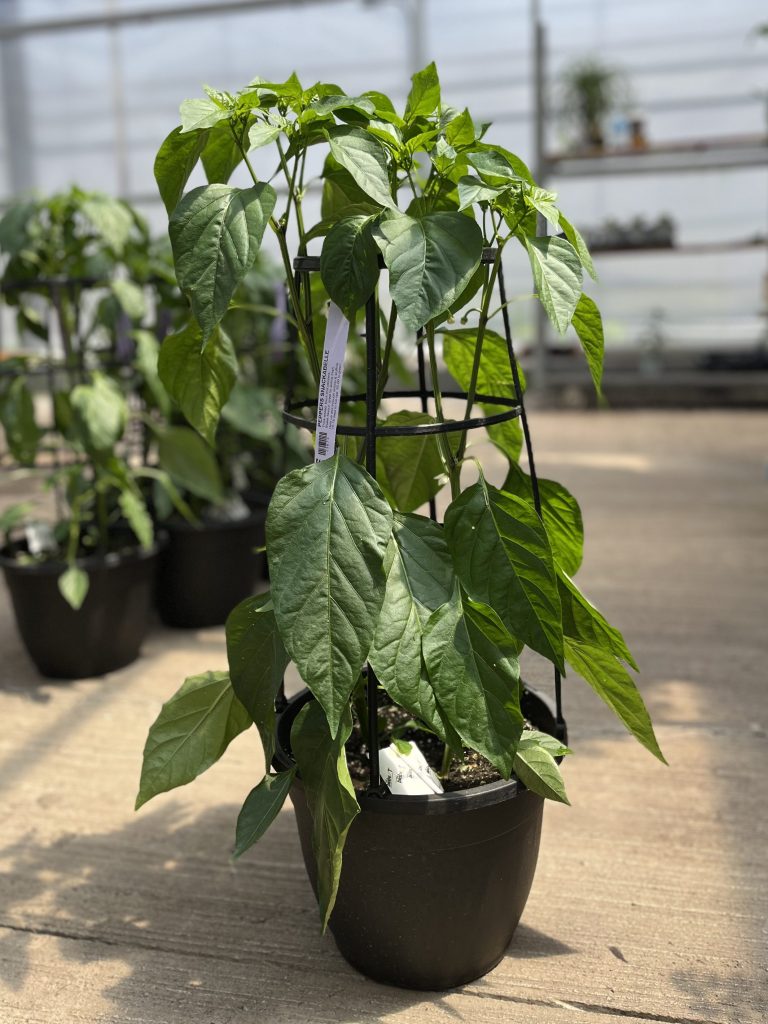
When soil temperatures are consistently 60°F (15°C) or higher, it’s safe to plant all the warm-weather vegetable crops we’ve been waiting for! Plants that thrive in warmer weather include tomatoes, peppers, eggplants, cucumbers, zucchini and corn.
At Eising Garden Centre, you’ll find vegetables in 6-packs, 4” pots, trellised patio containers, patio bowls and hanging baskets - while supplies last, of course!
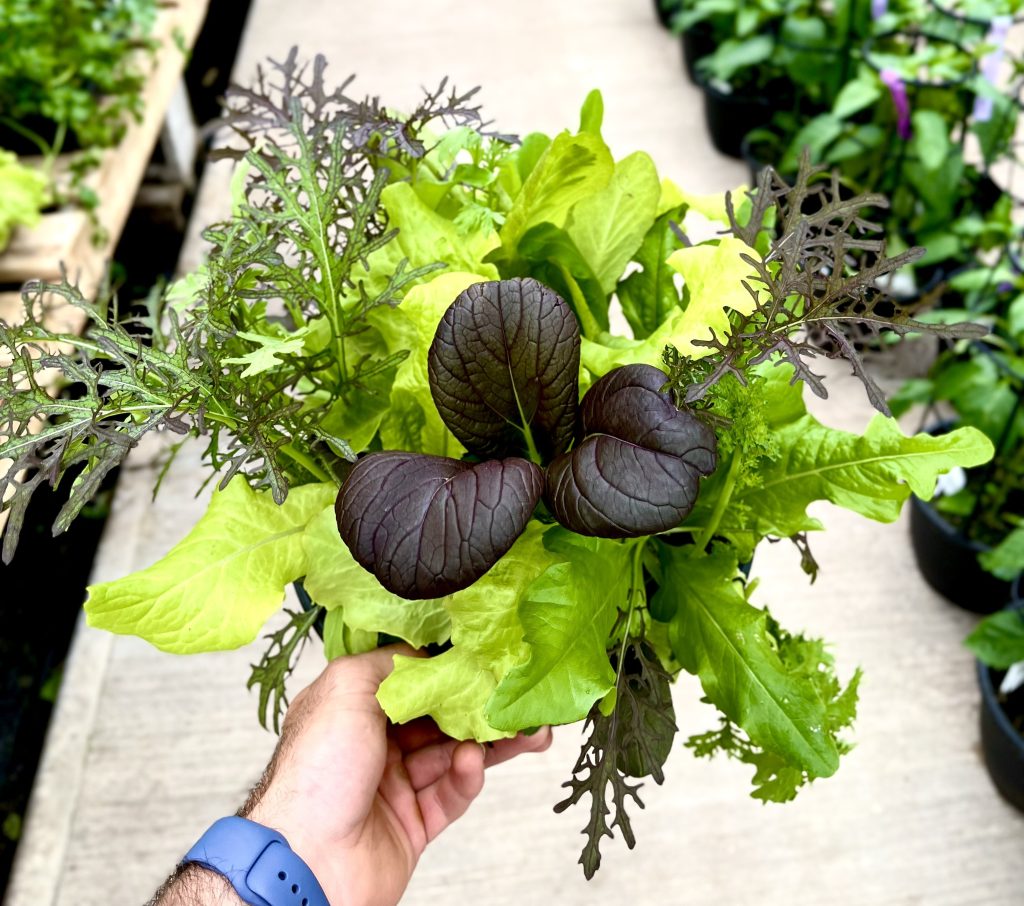

Herbs also love warm weather, and tender varieties like basil are safe to plant once all danger of frost has passed. Whether you plant herbs directly into the ground or create a potted herb garden near the kitchen door, they’ll add fresh flavour to your meals all season long. A container of herbs also makes a wonderful gift when visiting friends and family for a summer BBQ.
While you’re in the vegetable and herb aisle, keep an eye out for everbearing strawberries in planters and containers of tropical fruits like lemons, limes, and oranges.
Annual Flowers
Winter-weary flower beds can be revived almost instantly with a burst of colourful annuals! If you’re looking for an immediate impact and blooms that last all summer long, annual flowers are the answer.
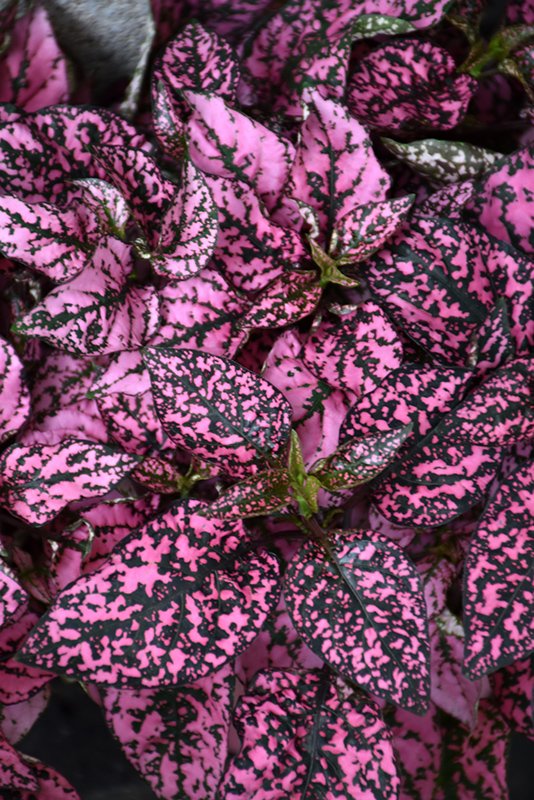
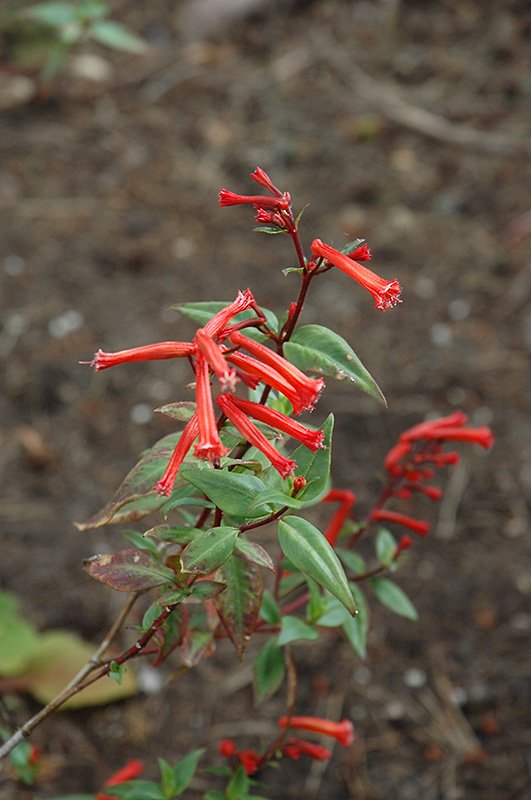
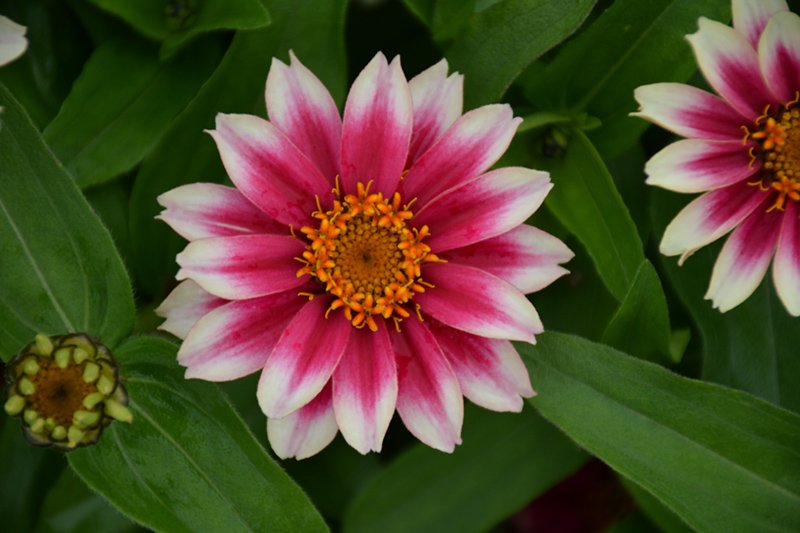
Whether you plant them in beds, containers, window boxes, or hanging baskets — or choose from one of our gorgeous pre-planted options — just add water and fertilizer, and you’ll be rewarded with a vibrant display that keeps on giving.
Perennials
While perennials may not bloom all summer, many offer extended bloom periods, and by combining different varieties, you can create a succession of flowers that lasts for months. Perennials also provide essential greenery to anchor your garden and enhance the look of your flowering plants.
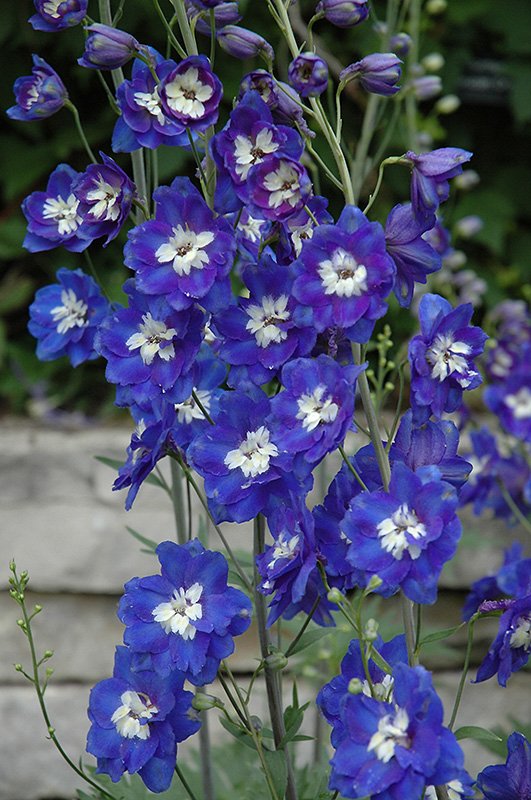
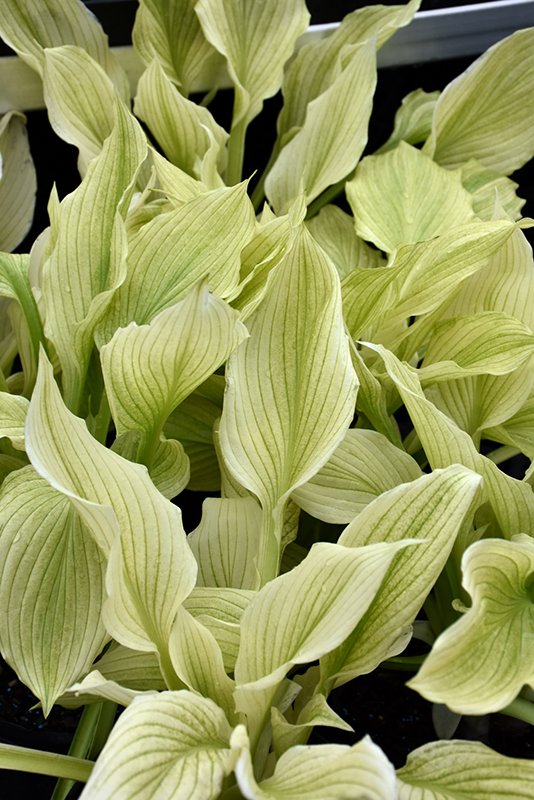
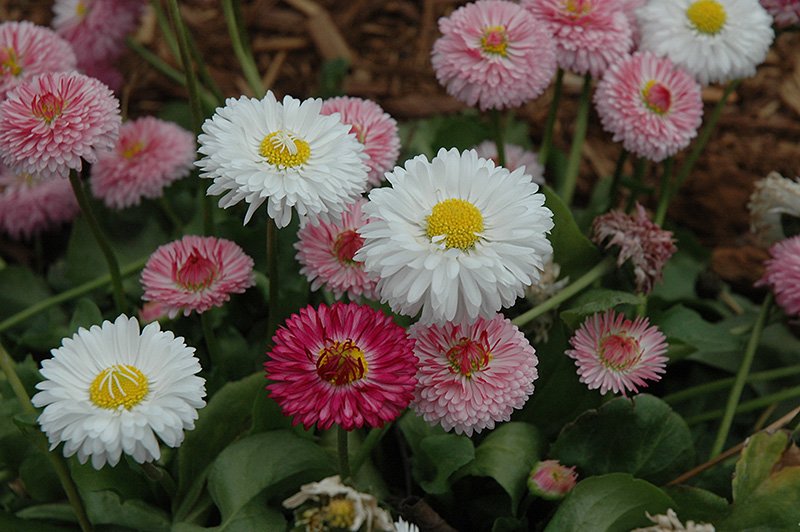
You can plant perennials from spring through fall, but getting them into the ground now gives them a strong start. From hostas and ornamental grasses to daisies and delphiniums, there’s a perennial for every style of garden — and the best part is, they’ll return each spring like dependable old friends.
Trees, Shrubs and Vines
Often called “the bones” of the garden, trees, shrubs, and climbing vines add essential structure, height, and seasonal interest. Planting them now allows you to design your garden layers thoughtfully, incorporating annuals and perennials around their base.
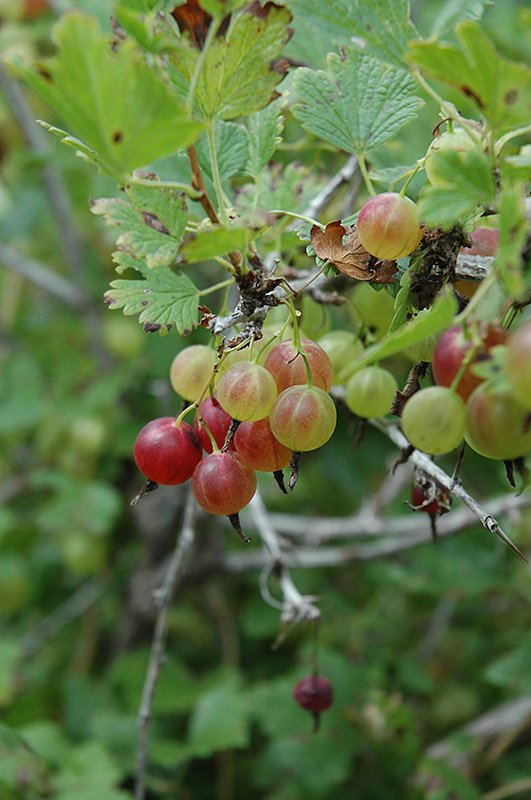
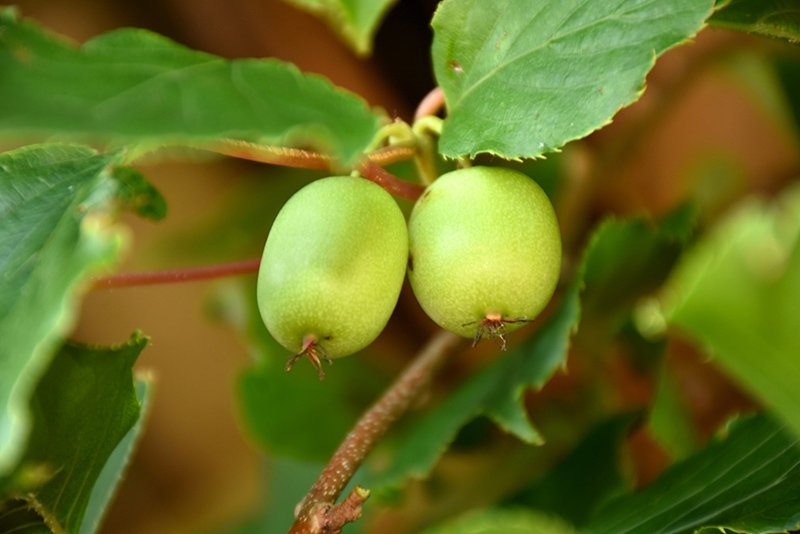
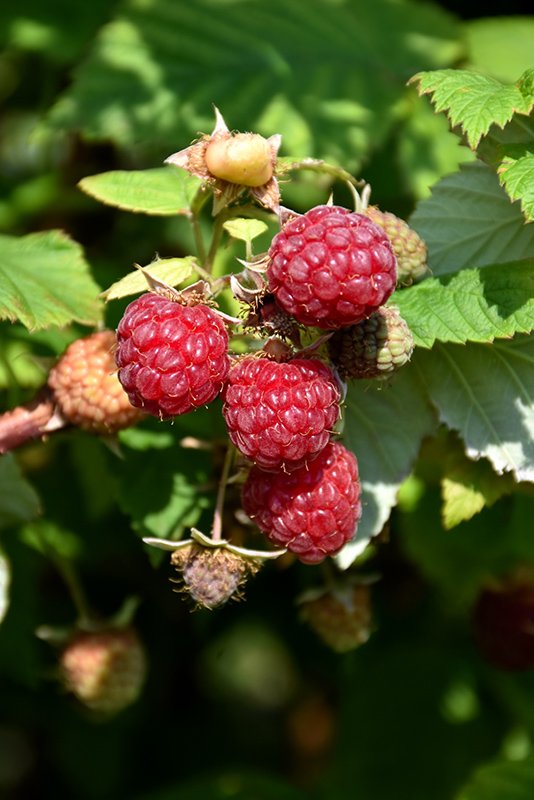
Spring is also the prime time to purchase and plant fruit trees and fruiting shrubs. At Eising, spring offers the best selection for starting your home orchard. Are you thinking of adding a few edible shrubs? Gooseberries, haskaps, hardy kiwi, rhubarb and raspberries are excellent choices.
Mulch
Okay, it’s not a plant, but this is a reminder to add mulch to your garden beds or containers. After planting, adding a layer of mulch to your garden beds or containers helps retain soil moisture, reduces transplant shock, and suppresses weeds. Even if a few weeds manage to sneak through, mulch makes them easier to pull.
Water Garden Plants
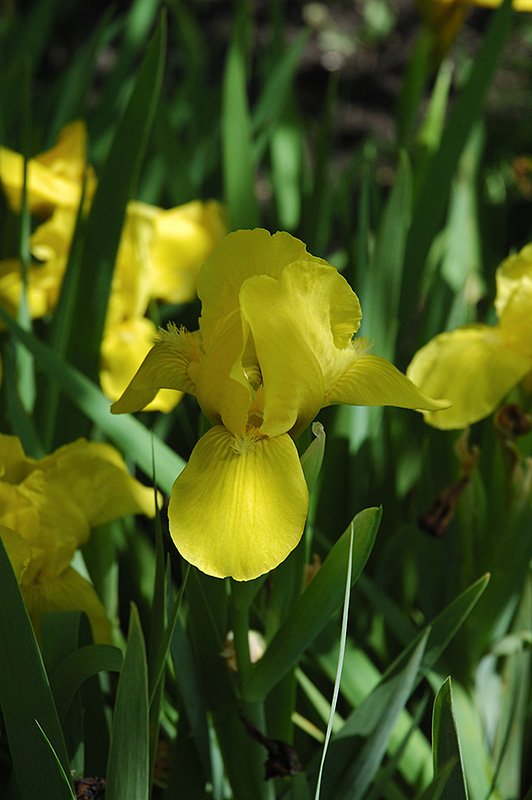
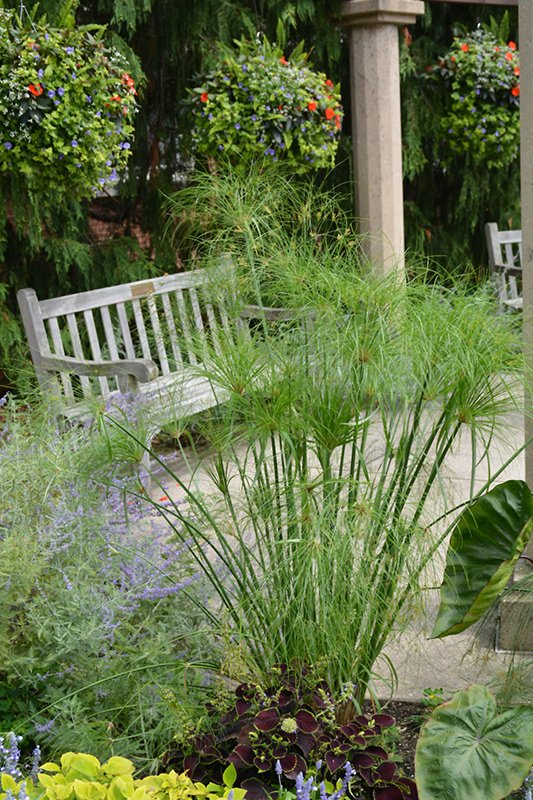
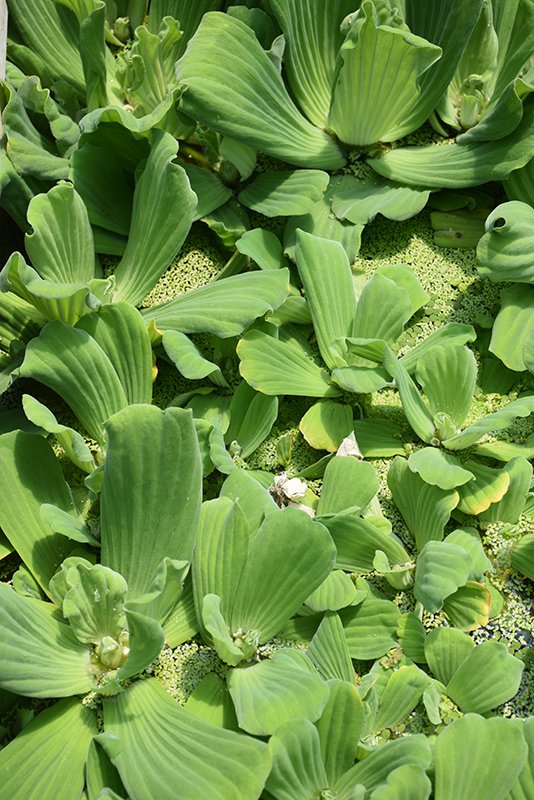
If you have a garden pond, spring is the perfect time to add water plants. Floating plants, such as water hyacinths and water lilies, help shade the pond’s surface, reducing algae blooms. Marginal or bog plants, such as water iris, papyrus, and cattails, also help keep the water healthy and clear by improving oxygen levels and providing habitats for beneficial wildlife.
Time to Grow!
May is one of the most anticipated and exciting months in the garden. Whether you’re dreaming of fresh vegetables, a lush landscape, or a colourful flower display, planting now sets the stage for a beautiful, bountiful season. Visit us at Eising Garden Centre to find everything you need — and let’s get growing!
How To Keep Your Orchid Alive
By Ava Green
Orchids have become very popular gifts, and a great hobby for indoor plant enthusiasts who discover the wide range of colours and shapes available. Orchids are also loved for their long-lasting and exotic blooms.
While some may choose to only enjoy these tropical plants as long as they’re blooming, orchid-lovers look forward to nurturing the plant and encouraging it to flower regularly. It may be a little daunting at first, but once orchids grace you with their stunningly beautiful blossoms, you will find that a little bit of care is very worthwhile!

It’s estimated that there are 25,000 different species of orchids and over 100,000 hybrids! The ones you’ll find most readily in Ontario stores are Phalaenopsis or moth orchid, because it’s fairly easy to grow. Phalaenopsis are the best choice for beginners.

Other orchids you may find easily are Cattleyas (Corsage Orchids), Cymbidiums (Boat Orchids) and Dendrobium orchids.
While all of these may be orchids, they don’t necessarily require the same care, so it’s a good idea to check the tag for the type you have and its specific care requirements. The following is a general guide to light, water, fertilizer, and growing medium for the most commonly found orchids, but it does not apply to all breeds.
Light and Air
For most orchids, light, and lots of it, is the general rule. Place your plants within 3 feet of a window (not to the side) in the sun. South, east, and west-facing windows are all fine for maximizing the light your plant receives.
Orchids also enjoy a breeze or circulating air in your house. They do not like temperature extremes, though 15 to 20 degrees Celsius is safe. Keep in mind that the more warmth and air movement there is, the more often you will need to water your orchid.
Water
A general rule is to use water that is not hard and has not been softened with salt. Salt will kill an orchid. Rainwater, reverse osmosis, or distilled water are good choices. Chlorinated water is not an issue for orchids - high sodium levels are.
The biggest issue many people have is either over-watering or underwatering their orchids. Here is the method we recommend:
Every 5-7 days, place the pot in a container or the sink, then fill it with enough water to cover the top of the pot. Be careful not to let water collect in the crook at the base of the leaves, as standing water will rot the leaves and the plant. Once the plant’s growing medium is thoroughly soaked, remove it from the water and allow the pot to fully drain in the sink before placing it back in its saucer.
We prefer using a container of water rather than the sink, so the remaining water can be used to water other plants.
Here’s the best watering advice we can give you: look at the overall health of both the plant AND its root system. Full, plump leaves and vibrant, green roots indicate that your plant is getting enough moisture. Puckered leaves and a silver sheen on the roots indicate insufficient water. Mushy, brown leaves and roots are signs of rot caused by too much water.

You may hear of another watering method that involves using ice cubes, but it’s controversial and not widely recommended. To quote the American Orchid Society, “Ice is for cocktails, not orchids. Never use ice on tropical plants to water them.”
“Soil” and Nutrients
Most orchids naturally grow high up in trees, where their roots cling to bark and absorb moisture from the air. At home, we try to mimic those conditions, which is why orchids are typically planted in chunky mediums like bark, coconut husk, charcoal, or perlite rather than traditional soil. While many of the roots stay inside the pot, it’s completely normal for some to grow up and over the edge.

These “escapee” roots might look a little wild, but don’t worry, there’s nothing wrong with your orchid. In fact, those aerial roots are a sign that the plant is healthy and doing exactly what orchids do in nature.
It’s worth noting that not all orchids grow the same way. Many, like Dendrobiums, are epiphytic (growing on trees) or lithophytic (growing on rocks), though some orchid varieties are terrestrial and grow in the ground. The good news is that the growing medium your orchid comes in is chosen specifically for that variety, so you can trust it’s in the right environment.
The bark that your orchid is planted in will slowly break down and become mushy. It’s a very good idea to repot your plant every two years.
It’s generally recommended to feed most orchids, and bloom time dictates which fertilizer to use and how often to feed. Begin by using a water-soluble 20-20-20 fertilizer, mixing it at ¼ the amount recommended for other houseplants. Apply this solution every 2 weeks in the summer and every 3 weeks in the winter.

“The orchid, with its many forms, is a reminder that life is full of surprises.” — Leonardo da Vinci.

Lastly, here’s an orchid fun fact: While we have been talking about tropical orchids in this article, there are also orchids that grow right here in Ontario! That’s right, there are over 50 species in this province, including the much-loved Pink Lady’s Slipper (Cypripedium acaule).
Resources for more detailed and specific information:
Toronto Master Gardeners - https://www.torontomastergardeners.ca/gardeningguides/growing-orchids-a-toronto-master-gardeners-guide/
Canadian Orchid Congress - https://canadianorchidcongress.ca/basics/growing-orchids/
American Orchid Society - https://www.aos.org/orchid-care/indoor-orchid-care
Ontario Wildflowers - https://ontariowildflowers.com/main/group.php?id=18
By Dave Zeldon and Ely Schweyer
This is the time of year that most garden centres will have on display their wide variety of Amaryllis bulbs, including the evermore popular waxed dipped. These enormous bulbs that are appearing now will be ready to burst into bloom within 4-8 weeks after planting.
Non-Wax Dipped: Planting
All Amaryllis need is a bit of commercial potting soil that should not cover the shoulders of the bulb (try leaving about 1/3rd of the bulb showing above the soil line), with the nose (or narrow end) of the bulb peeping well over the top of the pot. Make sure that you use a well-drained container that is 3-4” bigger in diameter than the bulb itself.
☝️A heavy clay pot will prevent this top-heavy plant from toppling over. To achieve continuous bloom, plant at intervals of two weeks for stunning colour in your home.

Non-Wax Dipped: Care
Once leaves emerge, fertilize once a month with a 20-20-20 water soluble fertilizer for houseplants. Water sparingly and wait for the miracle in a warm sunny room. Sub-irrigation or watering from the bottom of the drip tray will keep the surface soil dry, thus keeping and bulb rot organisms and those pesky fungus gnats at bay.
Non-Wax Dipped: It's Not Done Yet!
When blooming is over, remove the scape (or flower stock) and place the plant in a sunny spot and continue to water. This is to allow the leaves to regenerate the bulb. In springtime, when all danger of frost has passed, bring the bulb outdoors and let it spend its holidays in a shady spot. In some varieties the leaves will die back in September to give the plant a rest for a couple months. Stop watering and store the bulb on its side in a cool place for about eight weeks, when the leaves will once again begin to emerge.
Amaryllis can go 3-4 years without repotting as they don’t mind a little crowding. Try growing a couple of bulbs in larger pots to see if you can get a clump of flowers from the offshoots or babies that will develop after a couple of years.
Or, Try One of These Wax Dipped Bulbs!
Now growing more popular are the care-free waxed-bulb Amaryllis!



Experienced growers and beginners alike love that these waxed bulbs do not need to be planted or watered! Each of these robust bulbs are carefully prepared in festive-coloured wax, allowing you the freedom to place them among your holiday decorations.
Simply keep the bulbs at an ambient room temperature of at least 16C (70F) for beautiful blooms in five to six weeks.
These novelty items are low commitment! Their only fault is their lack of longevity - gardeners don’t get to enjoy them after year as these waxed bulbs were designed to be a one-use throwaway item!
BUT with a little luck and perseverance you may be able to save the bulb for next season after blooming. All you have to do is to carefully remove the wax layer, remove the flower stalk and place the bulb and with its remaining leaves into a pot of good growing media, allowing the leaves to regenerate the food stores in the expired bulb.
If you’re looking for more information – or perhaps, Amaryllis – visit Eising Greenhouse and Garden Centre! Happy Holidays! ✨
By: Dave Zeldon and Ely Schweyer
If you’ve ever wondered how the warm weather succulent came to be a seasonally regarded indoor plant, or how to keep one going, read on!
History and Cultural Significance
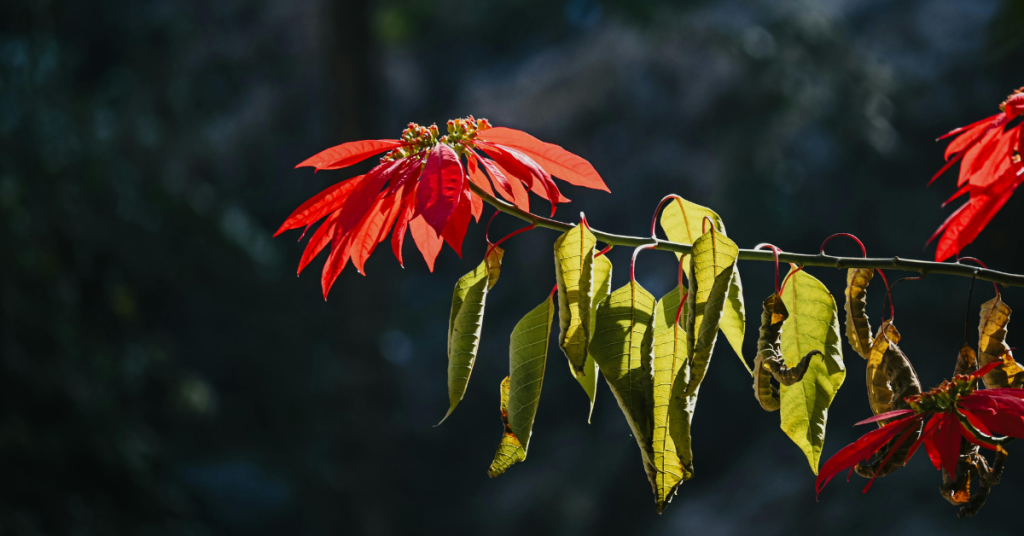
The Poinsettia was named after Joel Roberts Poinsett, the first U.S. Minister to Mexico. He introduced this native Mexican the United States in 1828. In the Mexican Christmas tradition, the star-shaped leaf pattern is said to symbolize the Star of Bethlehem, and the red colour represents the blood sacrifice through the crucifixion of Jesus.
Since the species is native to Mexico and found in the wild in deciduous tropical forest at moderate elevations, we then have a challenge to keep this plant alive and in a healthy form in our colder, northern climate.
It's Just A Rumour!
There is a common misconception that the poinsettia is highly toxic. This is not true.
Yes, it may be mildly irritating to the skin or the stomach if it is eaten, but otherwise, there have been no documented cases of poisoning. The origin of this myth could be found in the fact that most plants of the spurge genus (Euphorbia) are indeed toxic. Fortunately, this family member is a good one!

Here are Some Helpful Hints to Get the Most Longevity Out of Your Plant:
☝️Unsleeve the plant as soon as possible as the leaves may become droopy if left too long in the wrapper. Fortunately, the plant should recover in a few days if this does occur.
☝️If you want to try to keep your plant until next Christmas then fertilize after the blooming season with an all-purpose fertilizer, repot it later in the early Summer and then introduce it to 12 hours of uninterrupted darkness come September.
For more information on Poinsettia care (i.e., temperature, lighting, and watering), visit Ava's blog Caring for Poinsettias.
If you’re looking for more information – or perhaps a Poinsettia – visit Eising Greenhouse and Garden Centre! Happy Holidays! ✨
By: Dave Zeldon and Ely Schweyer with tips from Mary K, Zach C, Sandy M, and Jeanine LT!
Now is the time to prep our outdoor landscapes for the coming cold weather and the ensuing spring! Perhaps your autumn is calmer than your spring, and this is the best time to clean up and begin new projects. The following are some simple but effective tips to get your yard winter-ready - so your spring will be a little more pleasant for you!
Planting
When warm weather still allows it, plant trees, shrubs, perennials, and bulbs to allow them to establish for budding and blooming next spring.
Pond Care
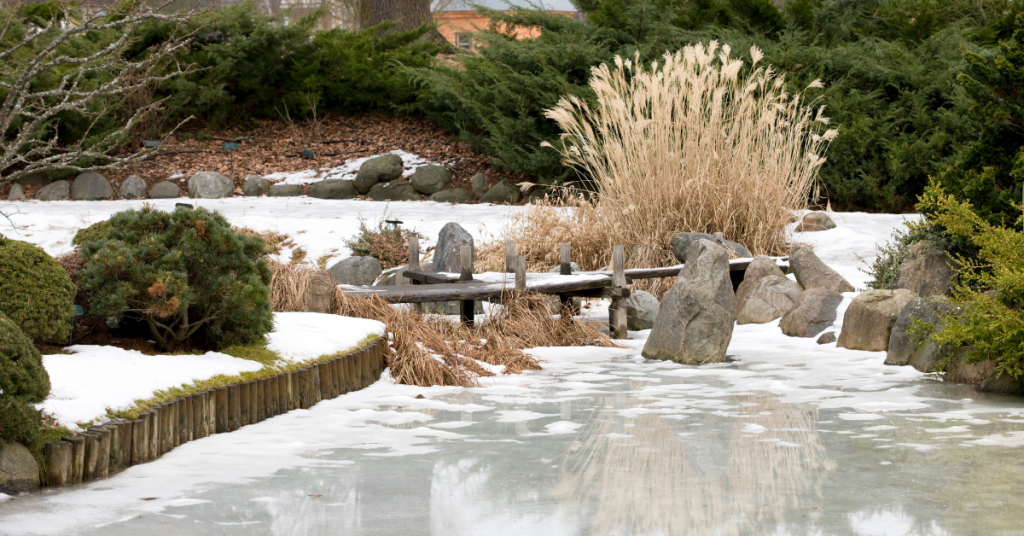
Mary, our perennials gal, suggests not removing any water from your pond but instead aerating it all winter. She skims out the leaves to maintain the balance of the nitrogen cycle in the water and suggests waiting to do a big pond clean out in the spring, as that’s when the water’s culture can bounce back easier.
Fertilizing
After top growth of your landscape plants ceases, reduce your annual fertilizer application by up to half of the requirement. Autumn is a major root growth period for woody and herbaceous perennials; roots will grow and absorb nutrients whenever soil temperatures remain above 5 °C but can be over fertilized quickly in these cooling temperatures.
Produce gardens could benefit at this time from a top layer of compost that will break down during the winter so it isn't too 'hot' for spring planting.
Leaf Litter
Here’s our pitch on the ‘leave it – don’t leave it’ debate: It DEPENDS.
Ideally, we should leave litter leaf on the ground for our pollinator friends and endangered species like fireflies to hide out in the winter. But, there are appropriate situations in which to remove leaf litter.
- When they’re covering your bulbs and tender perennials, remove SOME. Leaf litter acts as a ground insulant, which can amplify our temperamental zone 6b temperatures. This freezing and thawing can often confuse and kill early spring bulbs and tender perennials.
- Zach, our trees and shrubs guy, suggests that if a tree shedding leaves has been diagnosed with pests and fungi, remove the leaf matter to reduce the spread to other plants. Diseased matter should always be removed in a quarantined fashion and taken to a landfill or burned.
☝️Please note: Unless diseased, compost your leaves, they contain vital nutrients specific to the plants they came from!

Lawncare
With autumn mowing practices you have the opportunity for the addition of much needed organic matter for your lawn, which is also an excellent source of slow release nutrients. Keep mower blades sharp since leaves can be tougher than grass. Raise the mower height up and mow leaves when they are lightly wet (e.g., morning dew). This will keep the leaves from blowing all over and will prevent the mower from getting bogged down in wet leaves.
See more on general lawncare in Dave's Lawncare 101 post.
Clean Up
Now is a good time to wash your tools with soap and water to prevent diseases spreading from plant to plant.
☝️Mary's tip is to spray garden tools with PAM before use, so the dirt slides right off them!

Pruning Perennials
Mary, our perennials gal, suggests leaving things until frost to cut back. This way they're easier to compost. Make sure to leave seedheads (i.e., coneflowers and black-eyed Susans) for wildlife, and things like hydrangeas for winter interest.
☝️Make sure if things are cut back, to leave them sticking up enough you can still find them in the spring!
Dividing and Moving Perennials
Moving or dividing perennials in the autumn is a great way to reduce your work next spring. The cool, moist weather is an ideal time for perennial roots to become well established.
👍The rule of green thumb for moving perennials: If the plant blooms between early spring and late June, then early fall division/moving is ideal. If the plant blooms after late June, then early spring division is ideal (except for Peonies which should only moved or divided in the fall, Poppies in August, Irises in July & Lilies in the Fall).
Overwintering Trees
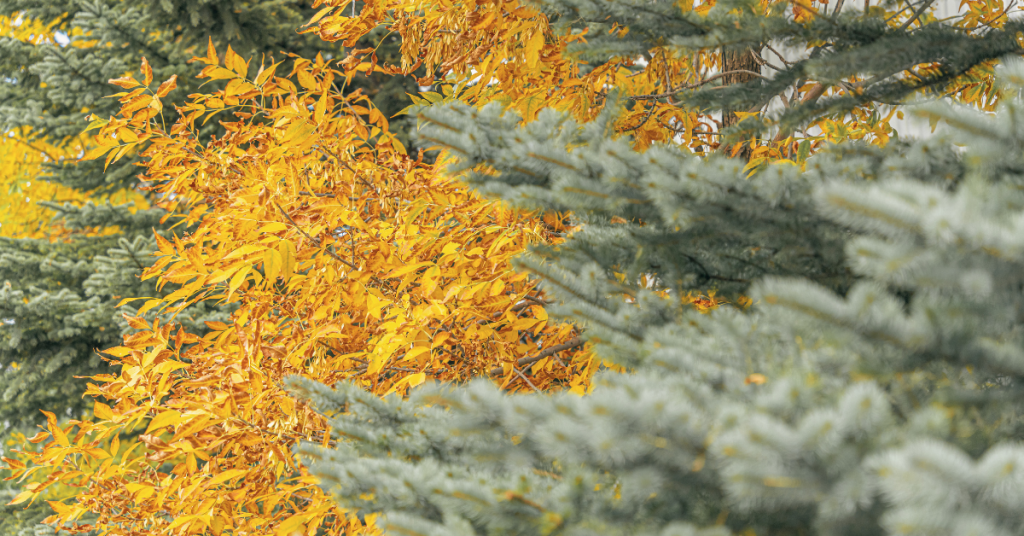
Zach and Sandy from trees and shrubs suggest a couple of things to help your favourite trees along this winter:
- To reduce winter injury in evergreens: Keep properly watered throughout the growing season and into the fall is another way to reduce winter injury. Decrease watering slightly in September to encourage hardening off, then water thoroughly in October until freeze-up.
- Cedars - Spray cedars with antidesiccant spray (available at Eising GC) or wrap in burlap (with stakes to create dead air space) so wind doesn't dry out and burn tips.
- Fruit trees - In late fall, spray fruit trees with sulfur-horticultural oil (available at Eising GC) for protection against fungi and pests overwintering in the bark.
- Ornamental trees - wrap the base of young trees to protect from chewing rodents.
- Pruning trees - trees that prefer winter pruning rather than spring pruning are maples, oaks, birches, and elms, as well as with fruiting trees such as apples and pears. This ensures blight and pests will not affect the tree's open wounds.
If you missed the frosty deadline for transplanting trees, Sandy suggests insulating unplanted potted trees to help them best survive the coming winter. Here are some methods:
- Double-pot your tree with an insulative barrier (i.e., burlap, straw, mulch, etc.) stuffed between the two pots and securely cover the top with tarp to deflect moisture.
- Bury your potted tree in the ground, level with the top of the pot (don’t forget to dig it back up!) and mulch the area.
- Huddle all of your unplanted trees and plants together when using the above methods.

Mulching
Mulching is one of the simplest and most beneficial practices you can do for your garden. Just by simply placing a protective layer of material over the bare soil will benefit the soil as it decomposes providing the much-needed organic matter which improves root growth, the infiltration of water and the nutrient-holding capacity of the soil while reducing soil erosion.
A good layer of mulch allows the soil to warm more slowly in the spring, so perennials aren't fooled into breaking dormancy too early, as you want the ground to stay cold until it really is spring!
☝️Make sure your mulch application won't stunt the growth of your plants come spring as discussed in our Transplant Troubleshooting blog post!
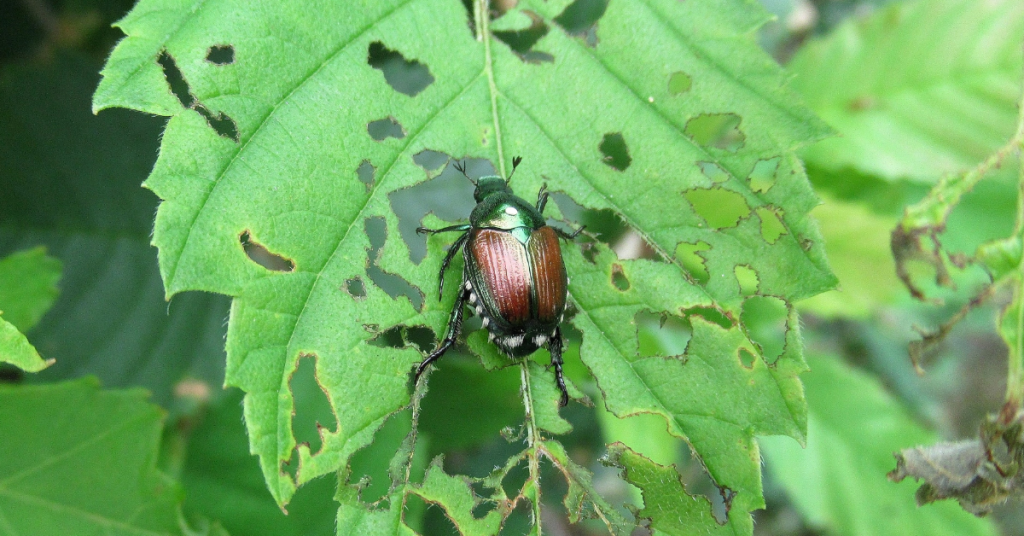
Japanese Beetle Prevention
Nematodes are microscopic worms that should be applied to lawns that have been ravaged by grubs especially of the Japanese Beetle. Nematodes have a short shelf life and must be refrigerated until they are applied. Normally, they are sprayed onto the lawn from mid-May to mid-June and then again (for best practice) from mid-August to mid-September.
Pots
To prevent freezing and cracking, Mary suggests emptying and turning your pots upside down. You can disinfect at this time too.
Design Time!
Jeanine, from production, suggests writing down what worked best in your produce garden this year so you can implement it again in the spring.
With the trees and land being barren enough you can see its contour, now is a great time to plan ahead for spring landscaping! Don't forget Eising GC would love to offer help with your landscape designing!
We hope these tips help your landscape plants enjoy your winter abode as much as you do this season, for more information - and plants – visit Eising Greenhouse and Garden Centre! 🍁
By: Ava Green
As temperatures begin to cool down, autumn colours set in and surround us with the beauty that is fall in southern Ontario. Suddenly summer is gone and it’s time to think about creating a cozy atmosphere inside and outside that is inspired by the world around us.
Autumn Outside
Whether you gather items from the garden or from the garden centre for a display, there are lots of natural materials all around us to draw from. Take some plumes from ornamental grasses and put them in decorative buckets. Add branches with colourful leaves or dried seed pods, and pumpkins or mums for a pop of colour. A bland background becomes the perfect backdrop.
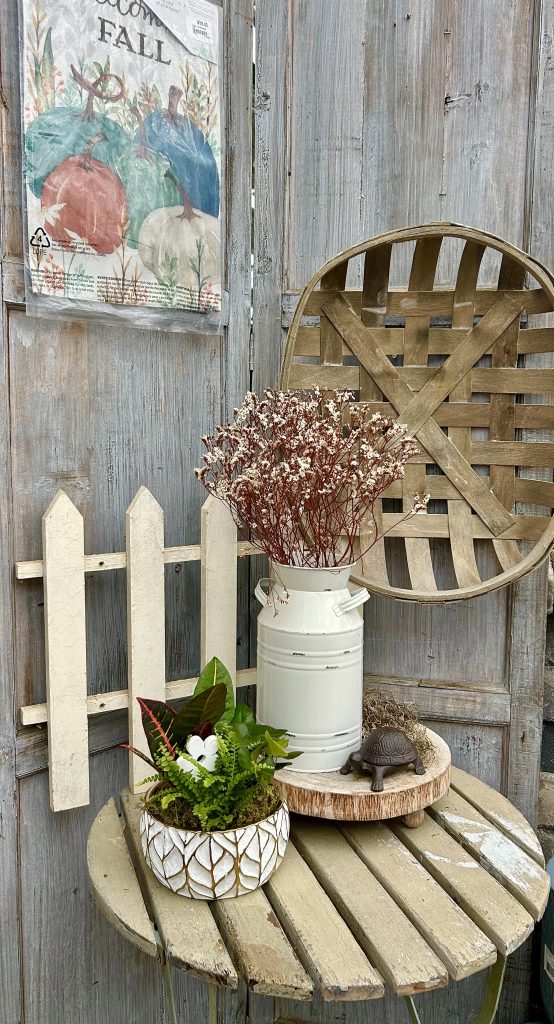

Looking for something to grow? Create fall planters with sunflowers, ornamental kale, ornamental peppers, live grasses, and, of course, fall mums.
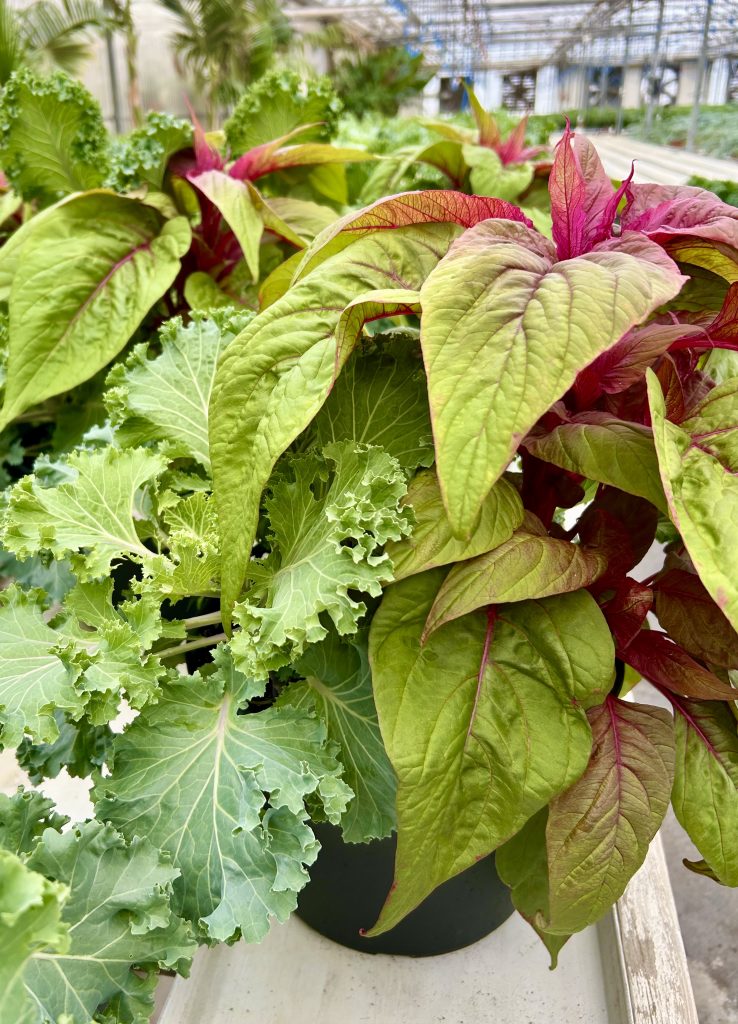
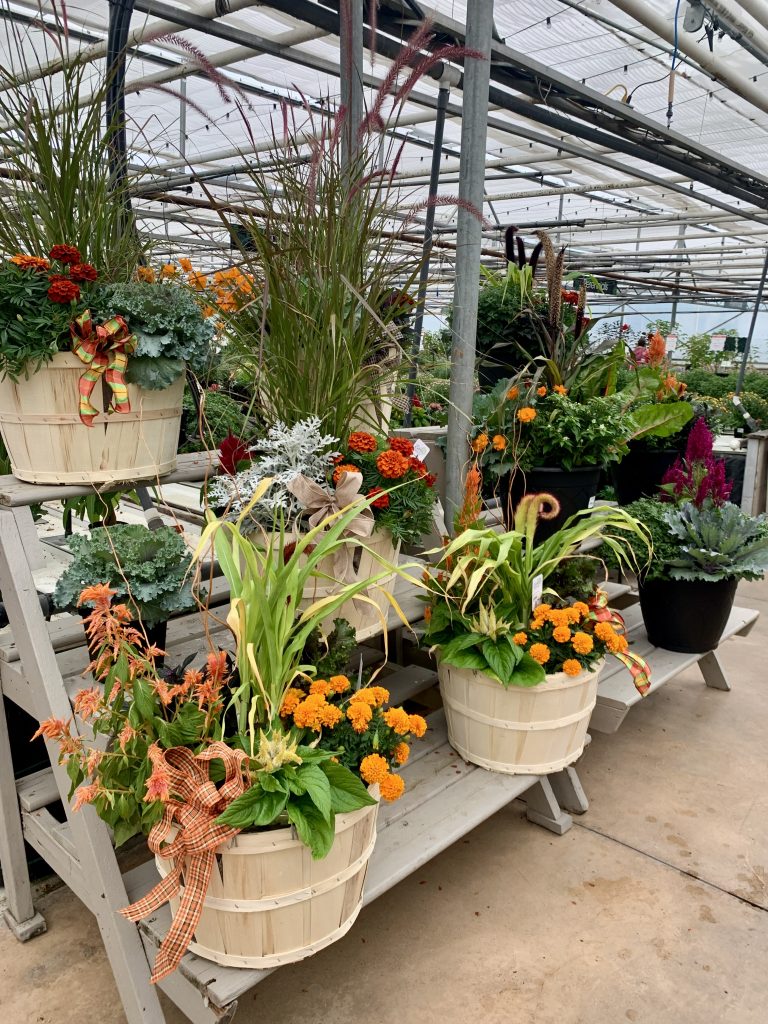
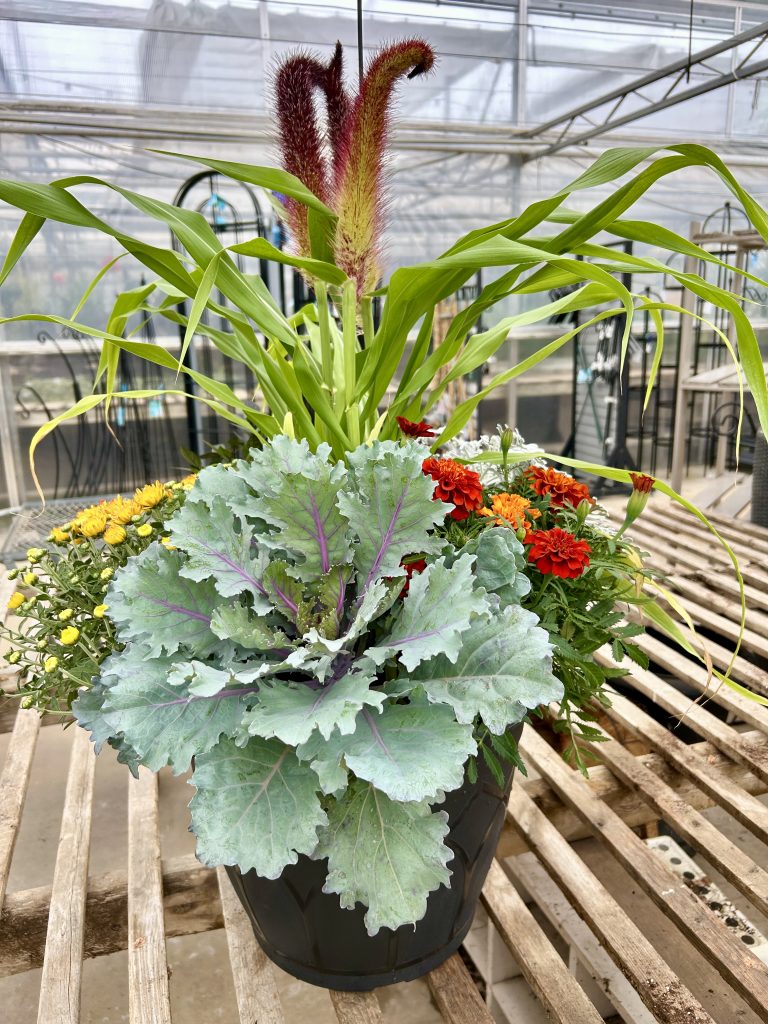
We offer beautifully festive arrangements with a variety of ornamental fall plants, as well as individual plants to decorate an outdoor table, or as a planter creating a warm welcome on your front porch (watch here: Jeanine create a fall planter on our IG).

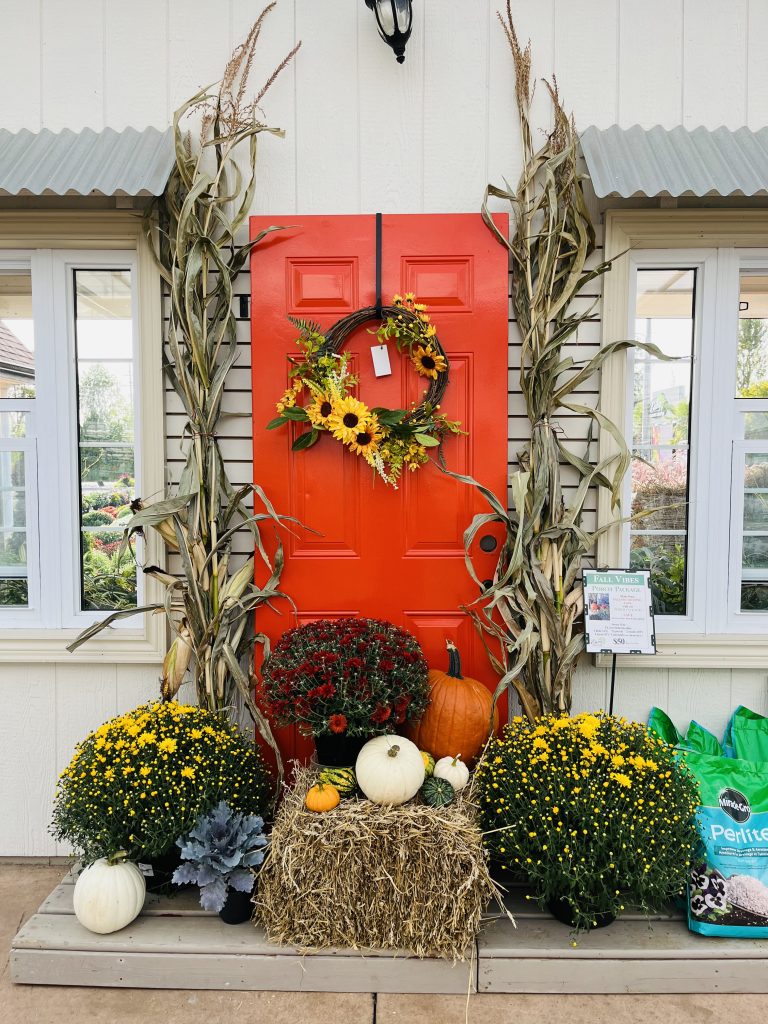
Eising’s popular Porch Packages make it easy to decorate the entryway to your home. But don’t wait, they sell out quickly!
Autumn Inside
When there are fall colours outside, autumn displays inside create continuity that will carry your indoor decorating right into the holiday season in December.
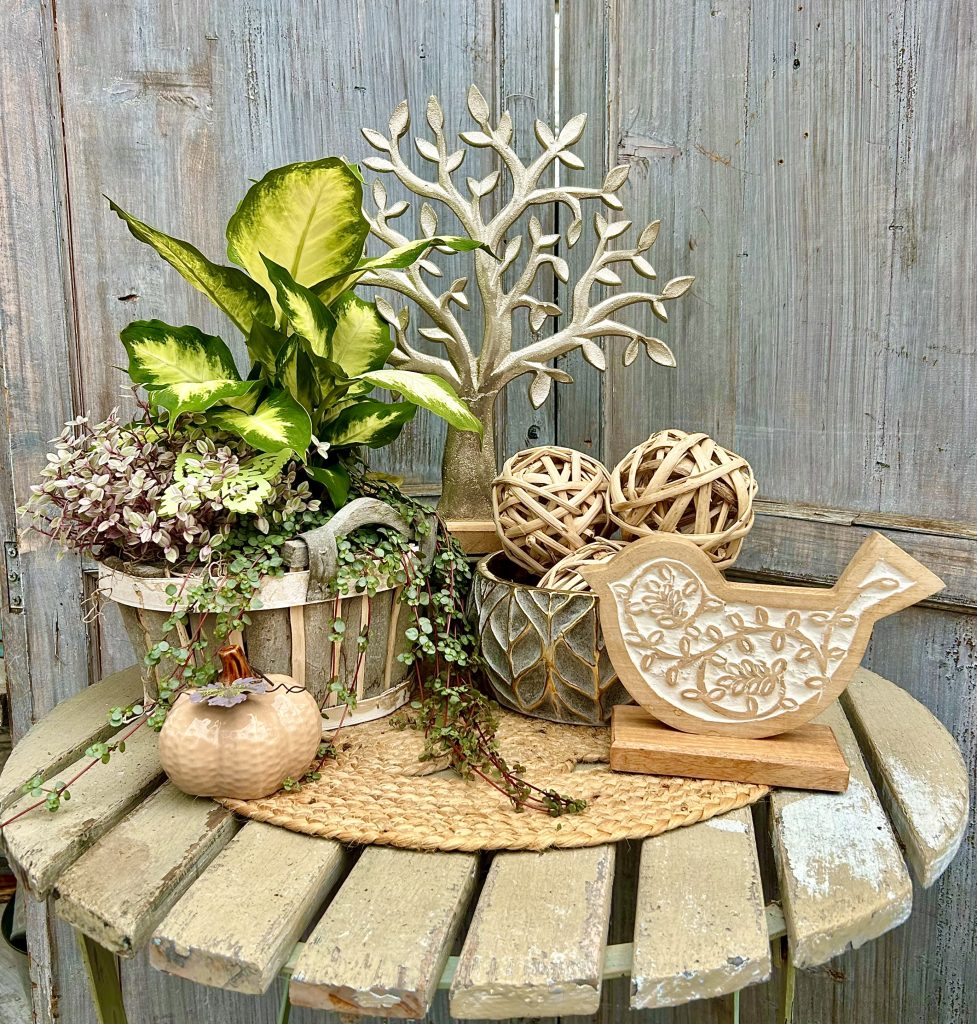
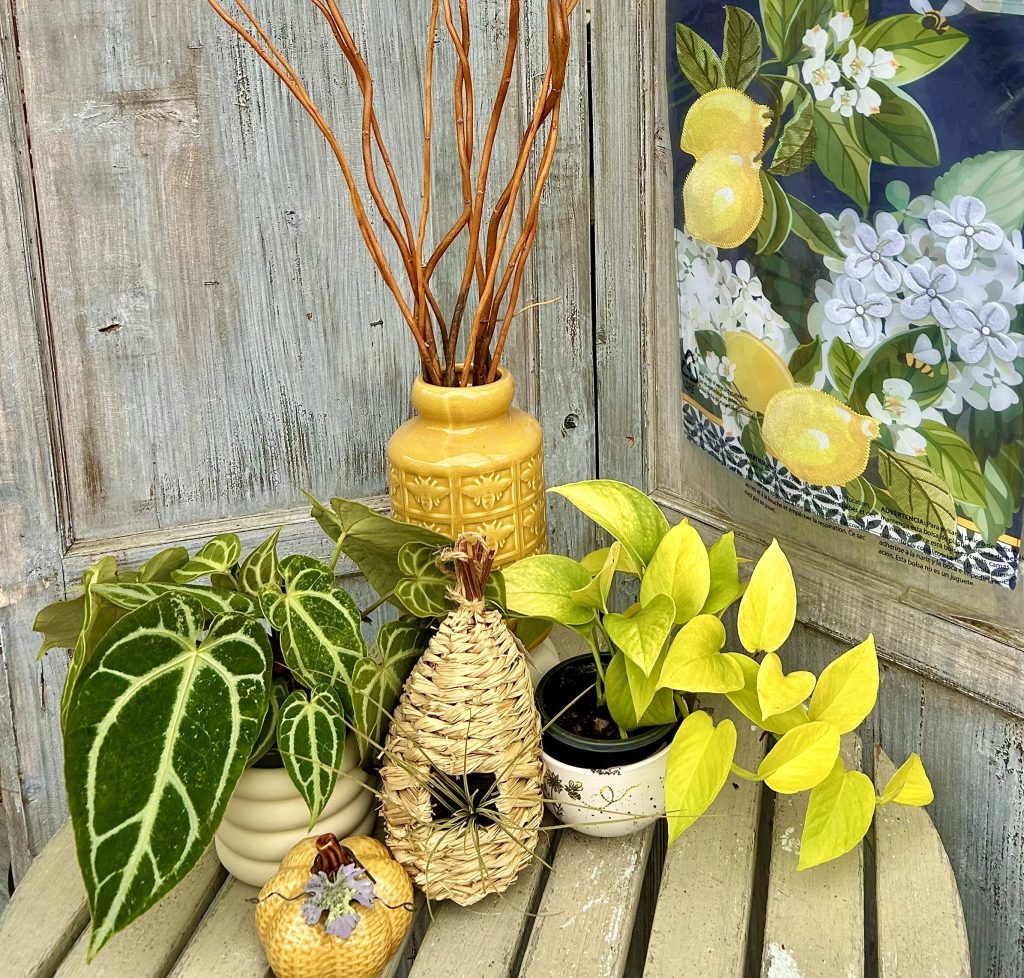
Displays that are vibrant, warm, rustic or whimsical are fun and easy to make. Here are some basic design principles that will help you get started, along with examples we’ve created using items in the Eisng shop.
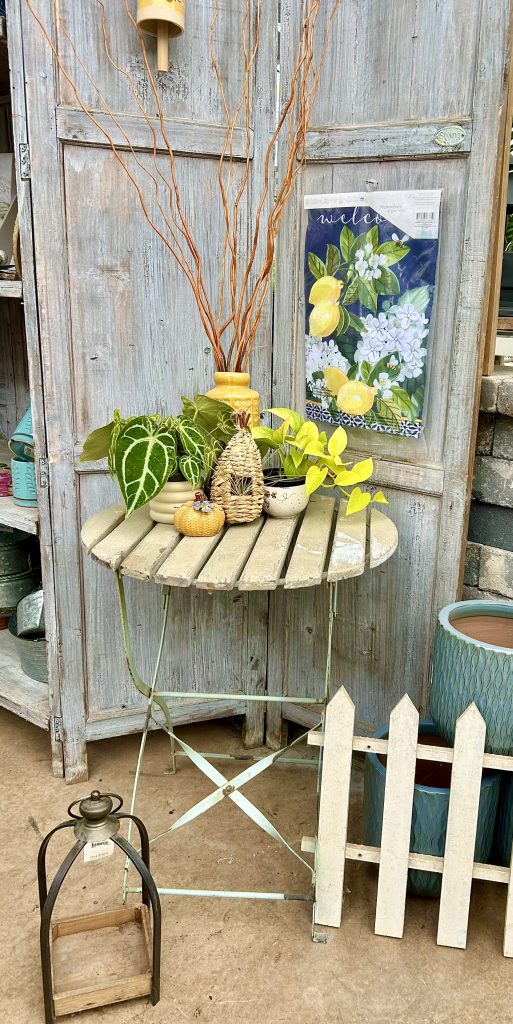
The Rule of Odds
Using an odd number of items (3, 5 or 7) is always more appealing. Why? For some reason, odd numbers are just more harmonious for us to take in. Designers and photographers call it the rule of odds.
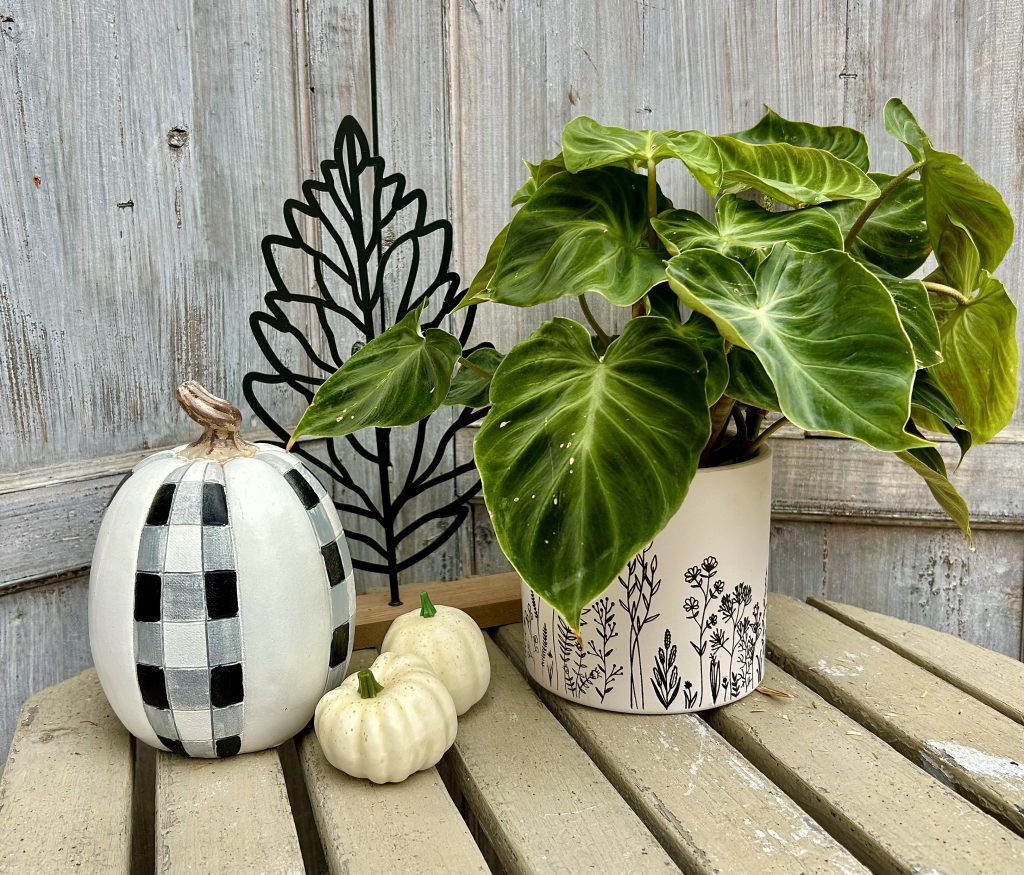
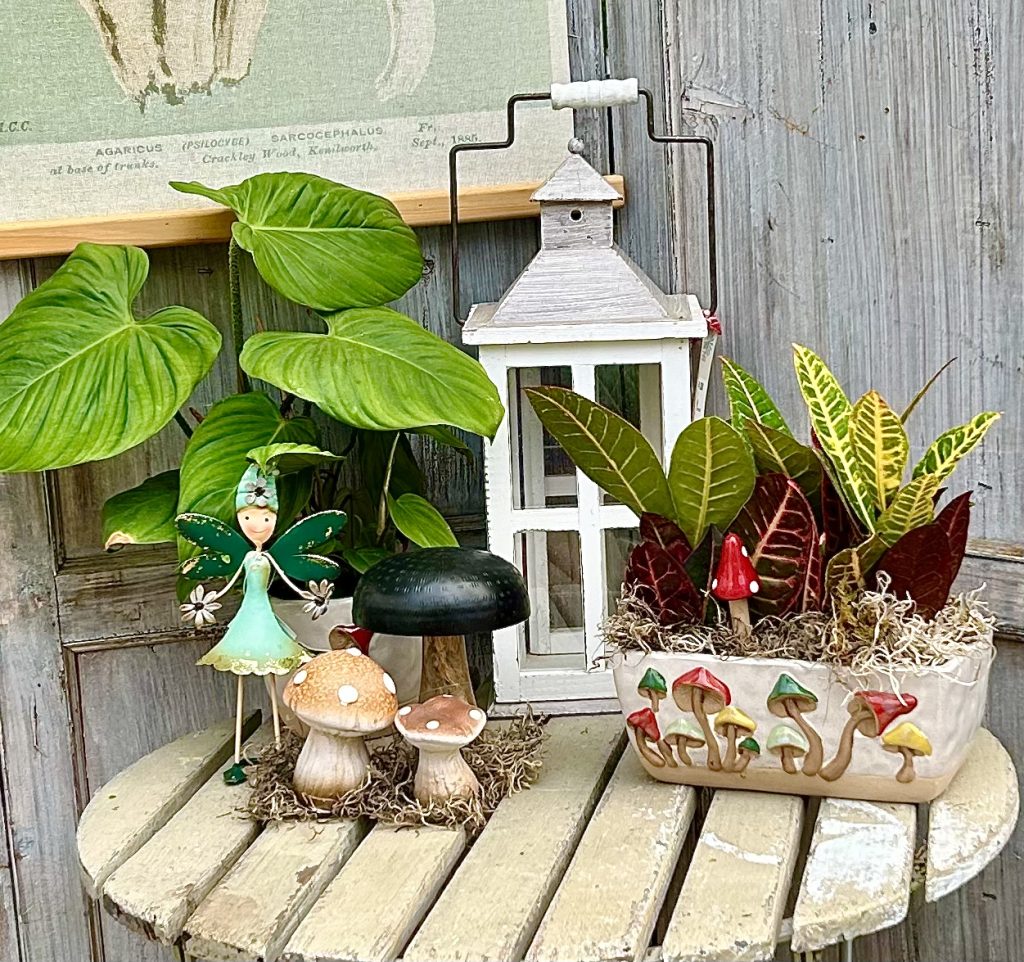
Pick a Theme
Pick a theme like a common colour, a shape, a design or motif. Look for containers or items you can include that fit in with your theme.
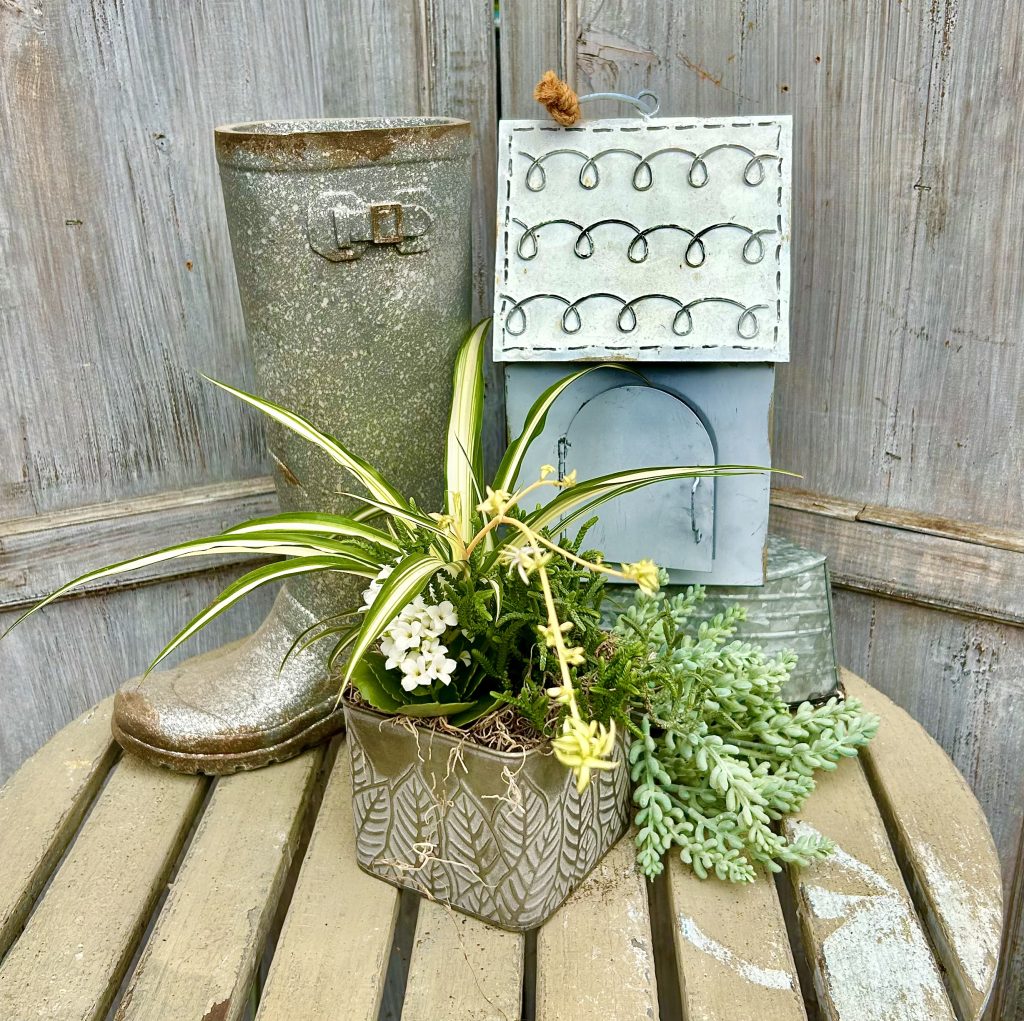
Like the arrangements we offer at Eising Garden Centre, include the following in your designs:
- a thriller like a beautiful vase or container, a tropical plant, or fresh or dried flowers
- a spiller like a plant, dried or silk leaves or moss around the base of containers
- and a filler like foliage plants, fruit, candy, mini pumpkins and gourds, or moss
Size and Scale
Scale is important! Keep the display short if it’s for the centre of a dining table so that guests can see each other across the table! Create taller displays if you’re decorating a corner table or a mantlepiece.
Light it Up
Adding light, including flameless candles or fairy lights, instantly brings warmth to any display.

Aromatics
Include scent: using plants like eucalyptus, or fruit like apples or oranges, and spices like whole cloves and cinnamon sticks all add a homey touch.
We would love to see what you create and hope this has sparked your creativity. Don’t forget to tag @Eising Greenhouses & Garden Centre on your Instagram and Facebook posts when you share your decorations online - we would love to see them!
By: Ava Green
One of the best things about living in southern Ontario is the beautiful show our deciduous trees and shrubs put on each fall.
Autumn is also the perfect time to plant trees, shrubs, and perennials. The sun is less intense, temperatures are slightly cooler, and with regular, deep watering, the plants are less prone to transplant shock, ensuring a successful planting.
As the leaves begin to change, they mark the arrival of autumn, a season full of colour and celebration. If fall is a special time of year for you, our staff have handpicked their favourite deciduous trees and shrubs with the most stunning seasonal displays. Here are their top recommendations.
Autumn Blaze Maple
Botanical Name: Acer x freemanii 'Jeffersred'
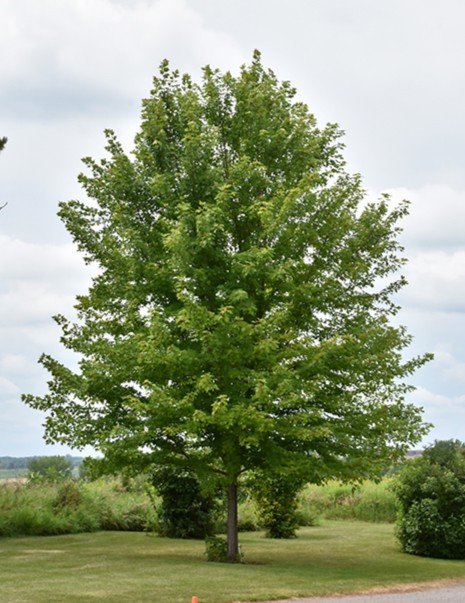
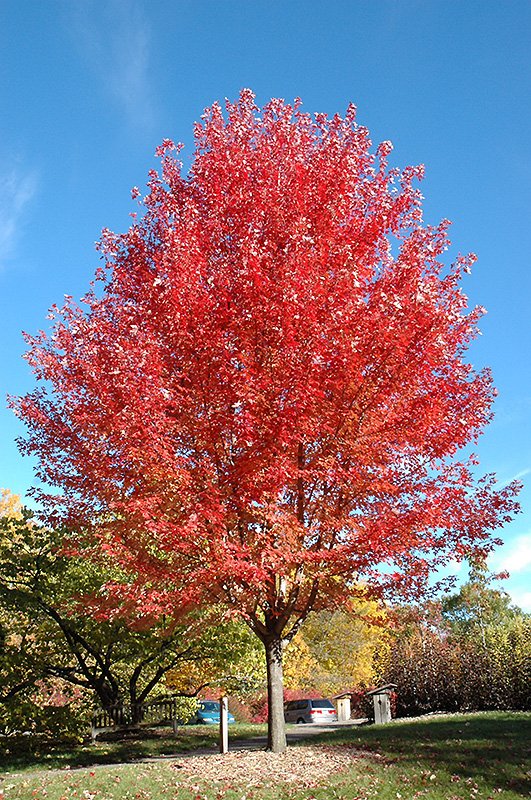
This tree is a cross between the fast-growing Silver Maple and the showy Red Maple - two very popular trees!
Autumn Blaze will provide a display of colour throughout autumn by starting earlier and lasting longer than most other trees. It’s large, with 5-inch leaves that begin by turning red at the top, then eventually shades of red and orange cascade down the length of the tree.
Even in the winter, this is a beautiful specimen because its shape is so symmetrical.
Seven-Son Flower
Botanical Name: Heptacodium miconioides
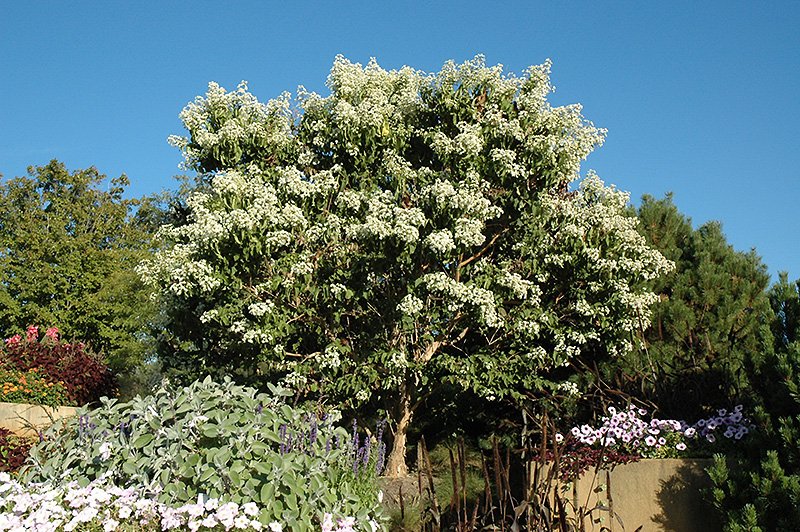
Considered a small tree or large shrub, Seven-Son Flower is popular for its year-round beauty!
Growing to a maximum of 6.1 metres (20 feet) tall and 3 metres (9.8 feet) wide, the leaves of this plant change from spring to summer, making it an interesting specimen plant in the garden.
The biggest attraction is the fragrant white blooms it produces late in summer, which are highly attractive to hummingbirds and other pollinators. As the blooms fall, they leave behind pink sepals, so it looks like it’s in bloom all over again!
Its unusual bark makes this tree beautiful year-round, but especially in the winter.
Washington Hawthorn
Botanical Name: Crataegus phaenopyrum
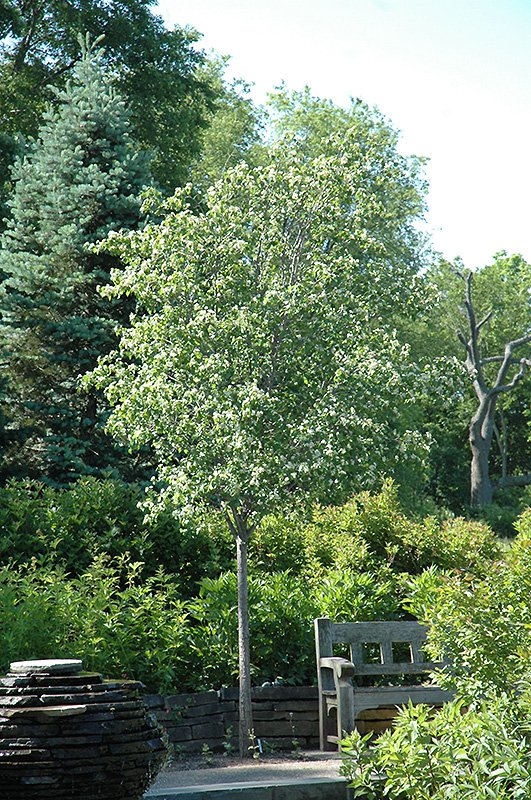
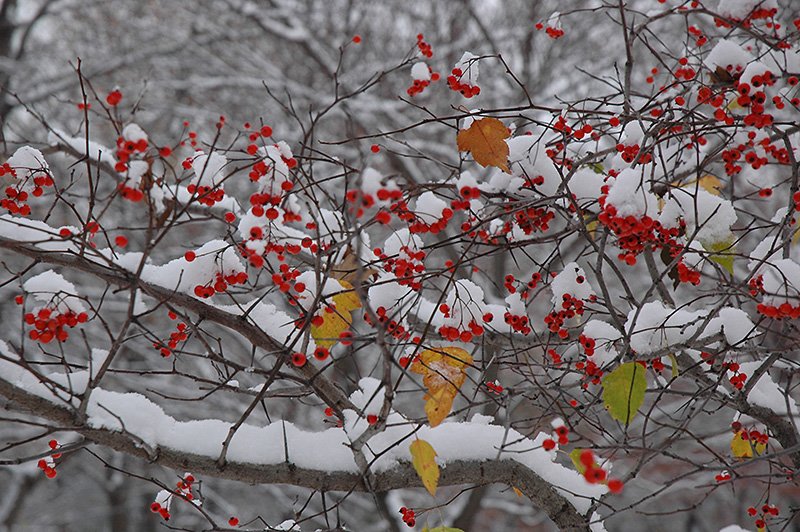
Leaves that turn vibrant shades of orange, purple or scarlet red in the fall are just part of the beauty of this small tree.
This is another specimen with year-round interest. In early spring, reddish-purple leaves emerge, which eventually turn dark green, followed by graceful white flowers. After its fall show, it produces bright red berries that last for most of the winter.
Maturing at 8 to 9 metres (25-30 feet) tall, Washington Hawthorn is also an important nectar plant for pollinators and provides food for birds in the winter.
Barberries
Botanical Name: Berberis thunbergii
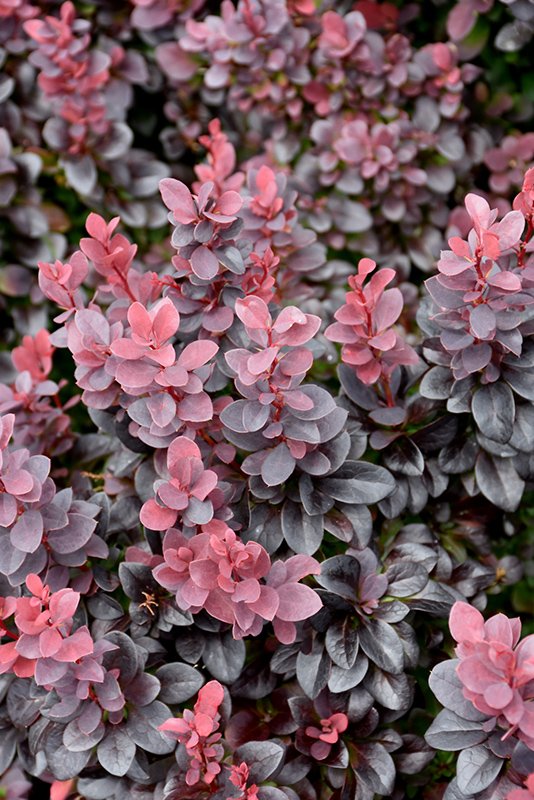
Concorde Japanese Barberry
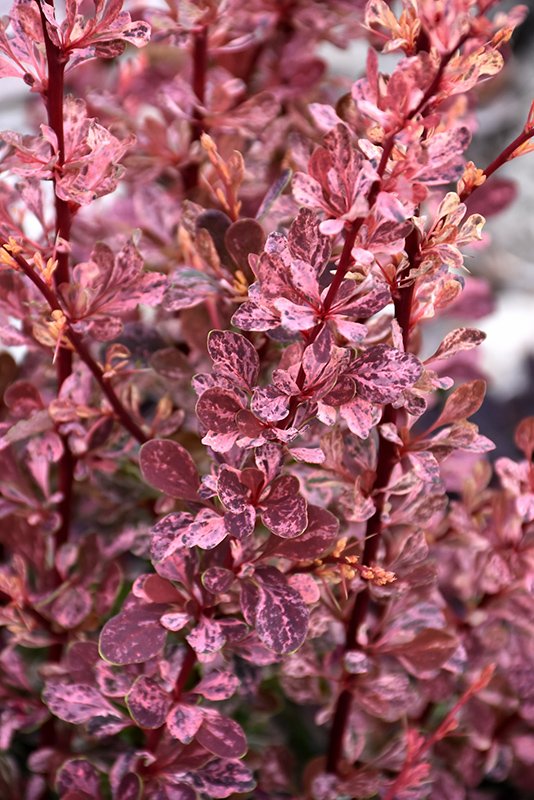
Rose Glow Japanese Barberry
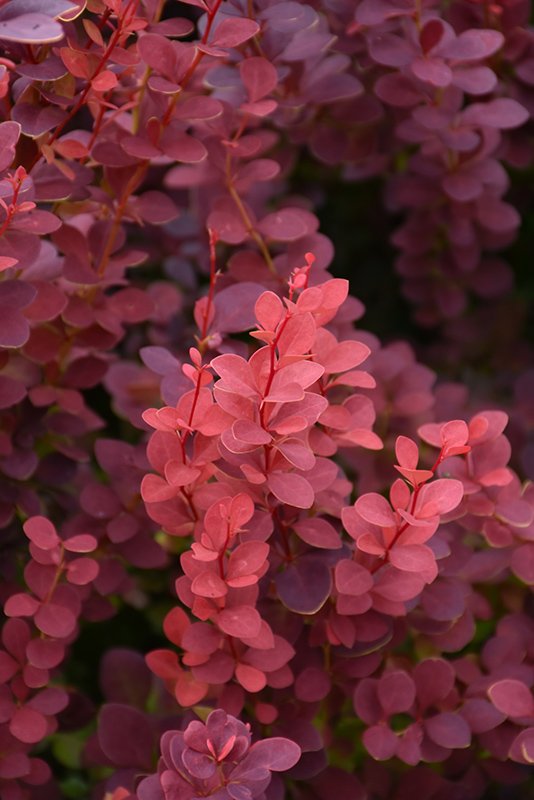
Ruby Carousel Japanese Barberry
Depending on the type of Barberry these deciduous shrubs can grow ½ to 3 metres (1-10 feet) tall and have varied shapes and features as well. For example:
- Barberry, Concorde (Berberis thunbergii 'Concorde')forms a nice globe when it's mature. Leaves start out red and gradually turn a deep, dark purple as they mature.
- Barberry, Ruby Carousel (Berberis thunbergii 'Bailone') is a compact variety with vibrant, ruby-red foliage.
- Barberry, Rose Glow (Berberis thunbergii 'Rose Glow') which matures to 1 to 1 ½ metres (3-5 feet) tall, starts out with a combination of green, white, and deep rose-red foliage in the spring. In the fall, it produces bright red berries that persist into winter.
Beautyberry, Pearl Glam
Botanical Name: Callicarpa 'NCCX2'
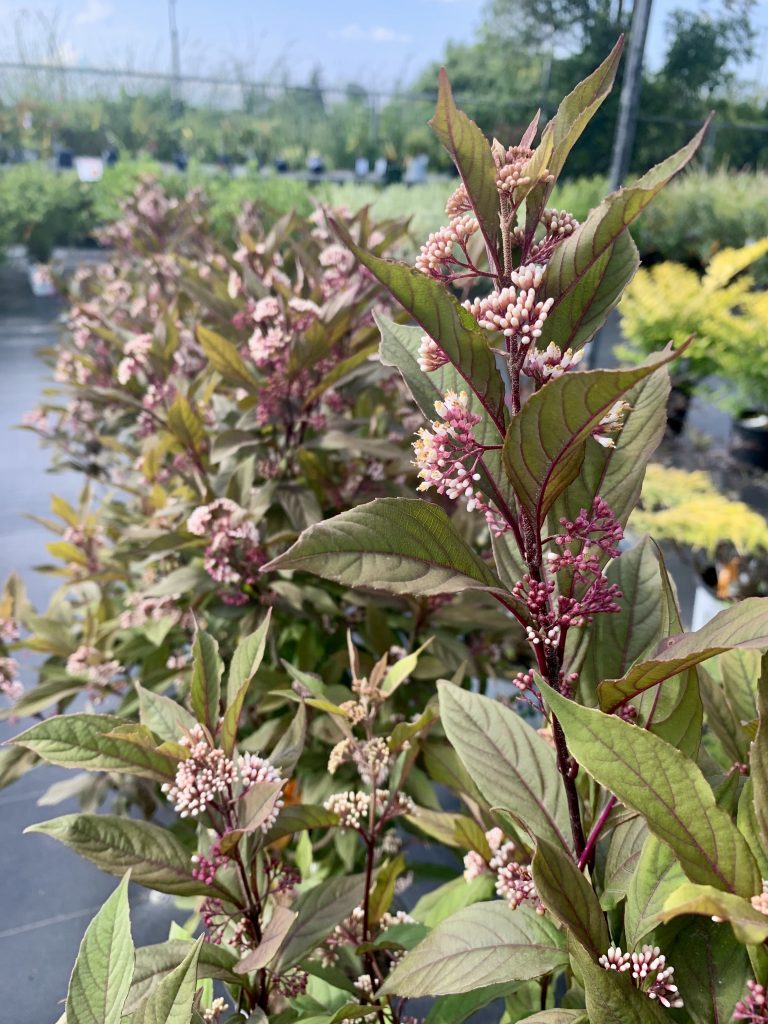
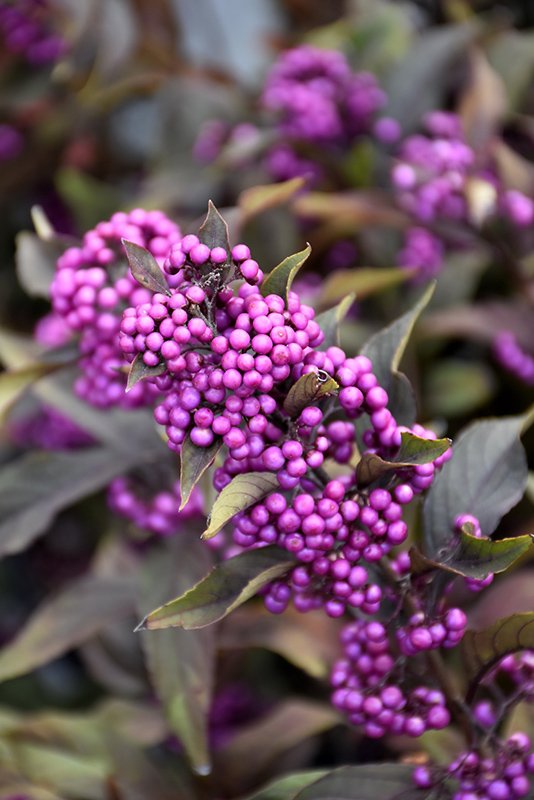
While many Beautyberry are showy in the fall, Pearl Glam is an upright, small shrub that has all-season interest. Its dark purple foliage emerges in the spring that lasts until frost.
In late summer it’s adorned with white flowers which attract butterflies and bees. After blooming it produces hundreds of beautiful violet-purple berries which last long after the leaves have fallen.
Crepe Myrtle, Cherry Mocha
Botanical Name: Lagerstroemia 'Cherry Mocha'
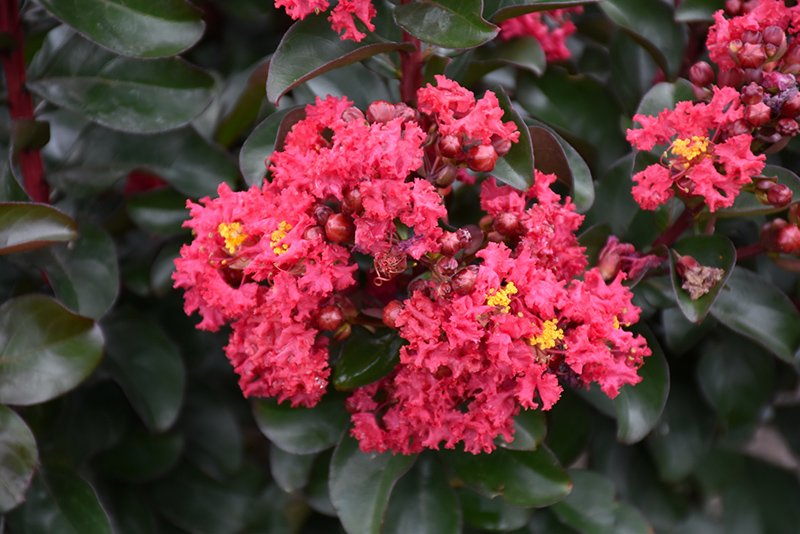

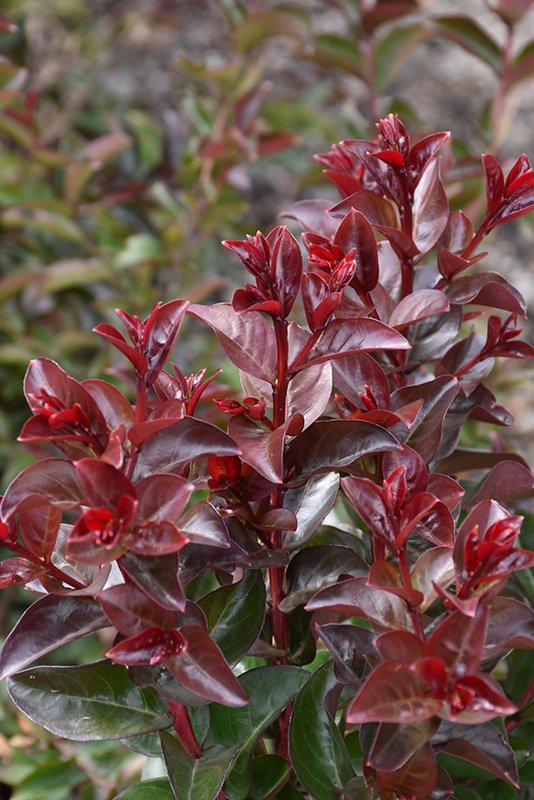
Another small ornamental deciduous shrub with an upright growing habit, Cherry Mocha Crepe Myrtle has decorative appeal in every season.
Burgundy coloured stems with semi-glossy burgundy leaves makes this plant stand out. To add to that, new growth at the tips starts out glossy, deep red. If that’s not enough, in late summer and early fall, the blooms on this cultivar are large, cherry-red flowers which stand out from the burgundy foliage. Its flowers late in the season provide important food for bees. After flowering, green seed pods provide extra interest.
Note: Have you ever wondered why leaves on trees and shrubs change each fall? Here’s a simple explanation. During the long, sunny days of summer, trees and shrubs produce plenty of chlorophyll - the food needed to keep the leaves green. In autumn, as the days grow shorter and temperatures are cooler, there is less chlorophyll produced and the plant breaks down residual chemicals on the surface of the leaves which produces shades of red, orange and yellow.
You’ll find more information in our handy Eisings online Plant Finder!
For tomato lovers, picking a warm, flavourful tomato right off the plant for a sandwich, burger, or salad is a sure sign of summer! I eagerly await the day the first fruit begins to turn red, knowing that I am a day or two away from the first of many toasted tomato sandwiches for the season!
By the end of June, your tomato plants should be in the ground or pot, staked, and well on their way to producing fruit. But how do you keep your plants healthy all summer so that you can maximize your investment? Here are a few tips to help keep your tomato sandwiches coming until frost!

Water
Water early in the morning and water deeply. For tomatoes, consistent moisture is best.
Keep the water on the ground, not on the foliage. This is important because damp foliage can lead to diseases like early blight, which can ultimately cause the entire plant to die. Mulching around the base of plants will reduce the amount of water that can splash up onto the leaves. A soaker hose or drip line is also a great way to ensure that water stays on the ground, rather than on the plant.
Pruning
Reducing the amount of foliage on a tomato plant is necessary for a couple of reasons: good air flow, which reduces the chance of powdery mildew forming, and less foliage means that the plant can send energy to growing fruit instead of lots of leaves.
Follow these easy steps when you prune your tomato plants:
- Before you begin, remember to follow the rule for pruning - no more than ⅓ of a plant should be removed at a time.
- Use clean scissors or pruning shears to cut the leaves off the bottom of the plant. Remove any leaves that are touching the ground. These are particularly susceptible to mildew formation.

When fruit starts forming, remove the leaves from the bottom of the plant up to the first or lowest fruit.
Remove suckers ongoingly. What are suckers? When you look at your tomato plant, you will see the main stem that comes up from the ground, and branches of leaves that come out of the main stem. As the plant grows, suckers begin to form in the “Y” between the main stem and a branch of leaves. Suckers won’t harm a plant; they just make it very unruly and reduce airflow.

If your tomatoes are indeterminate (growing into a tall vine), remove the top of the plant when frost is forecasted at the end of the season. Topping the plant allows energy to ripen the fruit that’s already set, rather than being used to continue growing the vine.

NOTE: Some gardeners like to leave suckers on determinate tomato plants as this can increase the yield.
TIP: Tomatoes ripen from the inside out. That means that by the time you see fruit beginning to flush on the outside, the inside is already ripe. If you have competition for tomatoes from pesky critters, or when there’s a chance of frost in the weather forecast, you can pick fruit that has just begun to turn colour and leave it on the kitchen counter to continue to ripen.
Fertilizer
Using organic material is one of the best ways to feed your crop. A good layer of compost, 1-2 inches, in the spring when you’re planting and again in the fall each year is one of the best ways to improve your soil structure in the garden, and it also adds lots of nutrition.
If you missed this step when planting your garden, you can always add a layer of compost around your plants or use other organic fertilizers, such as compost tea, seaweed, worm castings, or fish emulsion.
Alternatively, you can use a fertilizer that’s formulated especially for tomatoes - these usually have a ratio like 3-4-6 or 4-7-10. Follow label directions for amounts and err on the side of caution. Using less fertilizer is always better than using too much, as an excess can stress the plant and make it more prone to disease.
Following these simple steps for tomato care will help to ensure your plants stay healthy and producing fruit, but if you should have problems, here are some great resources to identify tomato issues:
- Ontario.ca: Bacterial diseases of tomato: bacterial spot, bacterial speck and bacterial canker
- Guelph.ca: Healthy Landscapes – Plant List Native and Drought-Tolerant Plants