
The Queen of the Classic Garden Border
By Ava Green
Tall, stately, and undeniably dramatic, the Delphinium or Larkspur is one of those perennial plants that stops people in their tracks. When given the right conditions, its towering floral spikes are magnificent. For gardeners who love a classic English border, nothing else compares. Yes, Delphiniums have lots of preferences, but tend to them, and they will reward you with a floral display that makes every bit of effort worthwhile.
Choosing Your Delphiniums
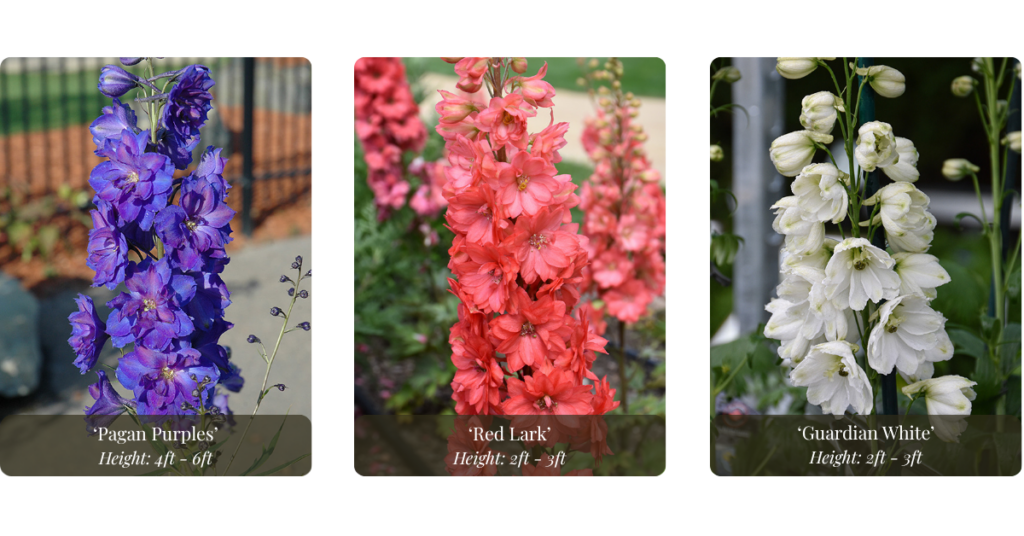
With a wide number of varieties to choose from, there’s one that’s sure to fit every garden. Heights range from a modest 36 inches to an impressive 72 inches tall (Yes, 6 feet!), with a spread of 24 to 36 inches depending on the variety. So whether you have a compact border or a large sweeping bed, there’s a Delphinium to suit your space.
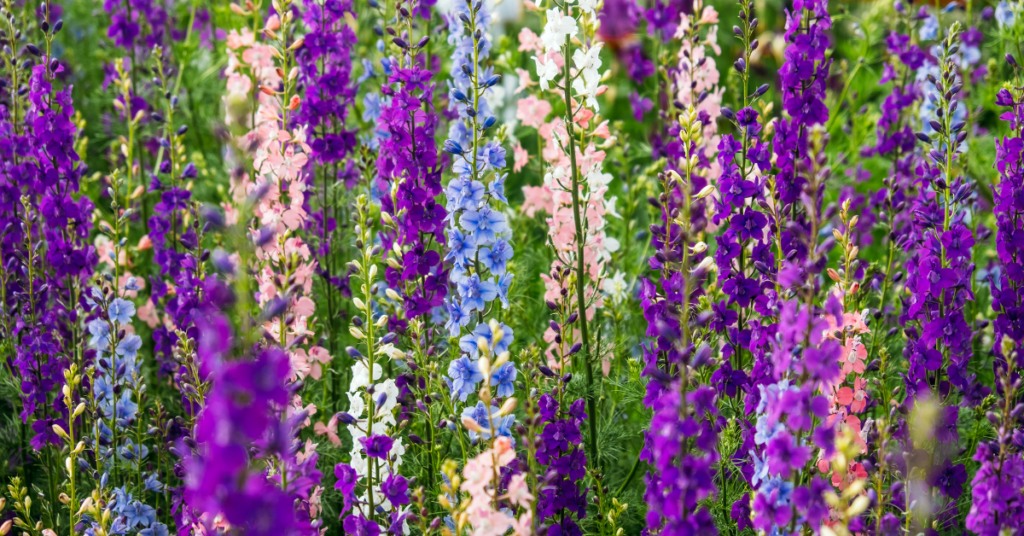
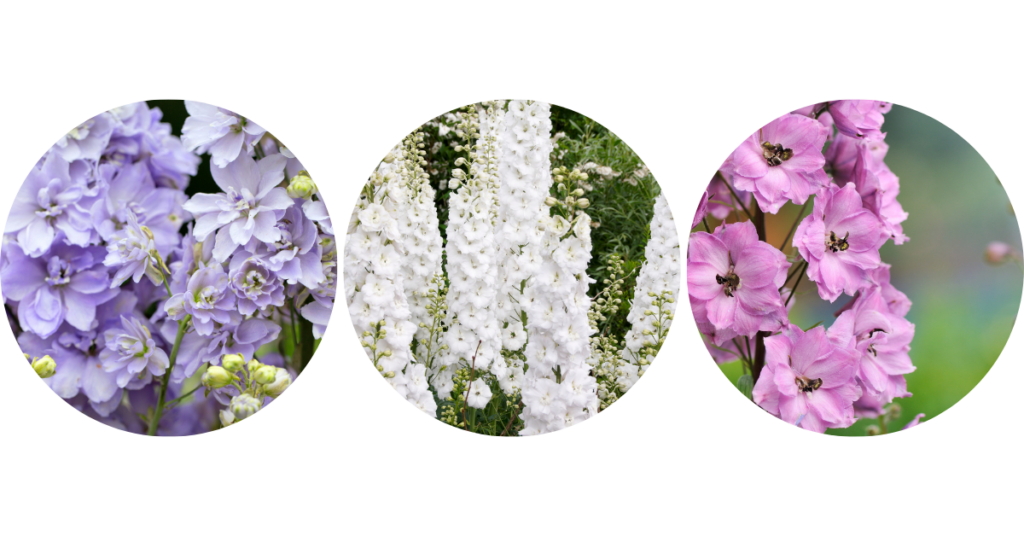
Their colour palette is equally diverse: rich blues and purples, soft pinks, crisp whites, and beautiful bicolours. Few flowers offer such a wide range.
Planting
While Delphiniums prefer abundant moisture, be sure to plant the crown of the plant (where the stems meet the root ball) at soil level to avoid crown rot. Planting them too deeply is the most common way to lose these plants.
Spring and Fall are the ideal times to plant, giving roots a chance to establish themselves in cooler, more forgiving conditions. That said, a cool, overcast summer day works well too, just avoid planting during hot or humid spells. Spacing will depend on the variety you choose, so check the tag and give each plant the room it needs to breathe.
Growing
Delphiniums are what gardeners affectionately call “Goldilocks plants”, they like things just right. Full sun, protection from strong winds, and fertile, humus-rich soil with excellent drainage are keys to success. They also love manure mixed into the soil to enrich their growing conditions.
Their height is both their greatest asset and vulnerability. Because Delphinium flower stalks have hollow centres, they break easily if they’re exposed to the wind. Planting them in a sheltered spot is genuinely important. Once plants reach about 12 inches tall, stake each flower spike individually, or place a tomato cage around a clump early in the season before it’s needed. It’s much easier to stake proactively than to rescue a snapped stem after the fact.
Delphiniums are hungry plants and will perform best when fed generously. A dose of fertilizer, compost, or well-rotted manure in both spring and summer keeps them healthy and productive throughout the season.
Finally, don’t overlook dividing. Each spring, simply dig up the plant and cut the root ball in half. Now you have two plants for your border, or one to keep and one to share!
The Show
All that care pays off in late spring and early summer, when Delphiniums put on one of the most spectacular displays in the garden. Tall, densely packed spikes covered in richly coloured blooms rise above the border like beacons. Bold, beautiful, and completely unforgettable.
Once the first flush of flowers begins to fade, and before the blooms turn to seed pods, cut the spent spikes back to just above the foliage. This encourages the plant to produce a second, smaller flush of blooms later in the season and extends the show! As the old foliage fades, trim it away to allow the fresh new growth to replace it.
Inspiration
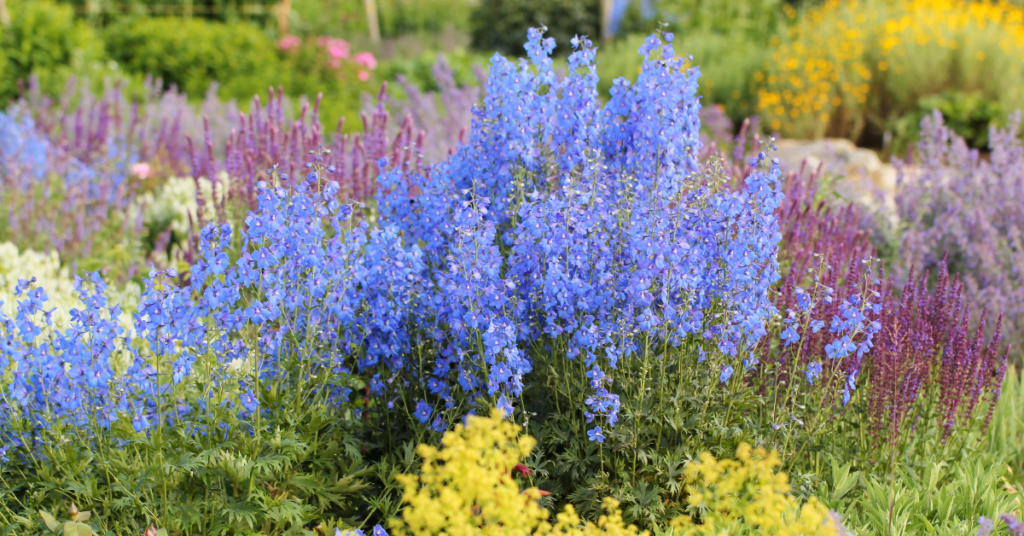
There are plants you fit into a garden, and then there are plants you plan a garden around. Delphiniums belong firmly in the second category. Their height, colour, and presence make them one of the most inspiring and rewarding perennials a gardener can grow.
Stop by Eising Garden Centre to see what Delphinium varieties we have available this season. Our team is always happy to help you find the right fit for your garden and set you up for success.
Perennial Climbers to Start Growing Now
By Ava Green
Great garden design plays with height, and vines are among nature’s most elegant solutions. They transform a bare wall, a plain fence or an open pergola into something that feels alive and intentional. And because these are perennial climbers, they come back every year, a little fuller and more beautiful than the season before.
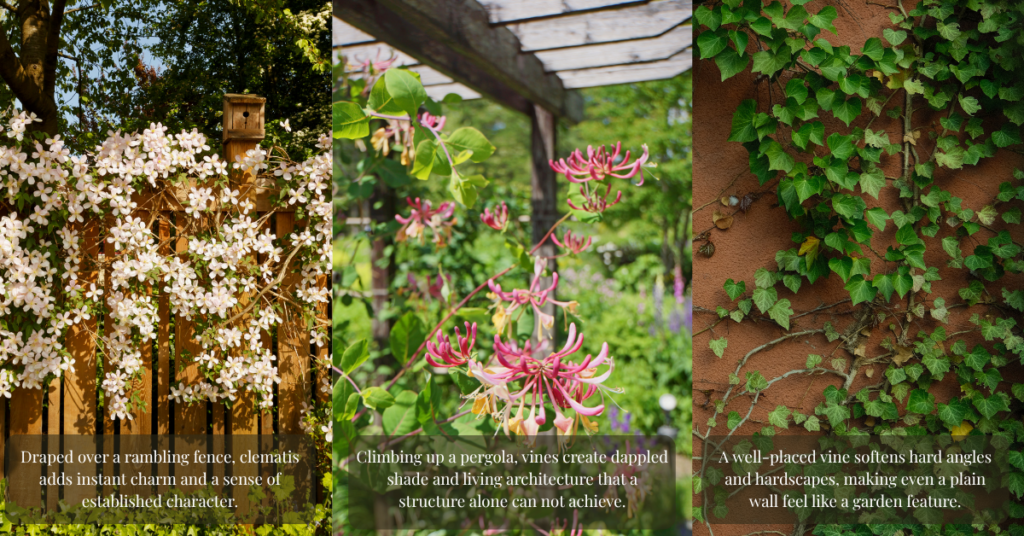
Start growing one of these beauties now, and you’ll be enjoying them for years to come!
Clematis
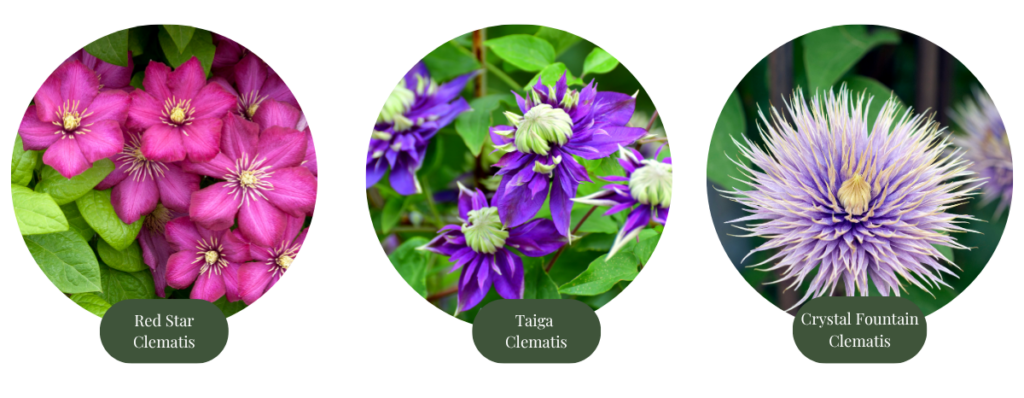
Clematis has earned its place as one of the most loved climbers in the garden, and once you discover the extraordinary range of flower shapes, sizes and colours available, you will understand why.
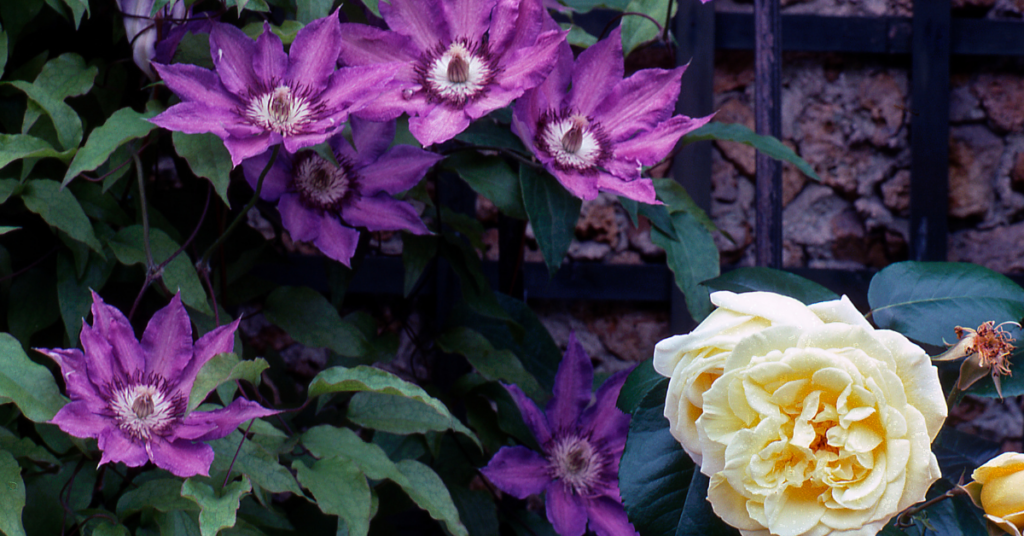
For a look that feels straight out of an English cottage garden, pair a Clematis with a climbing rose. The two intertwine beautifully, flowering together in a spectacular combination.
Honeysuckle
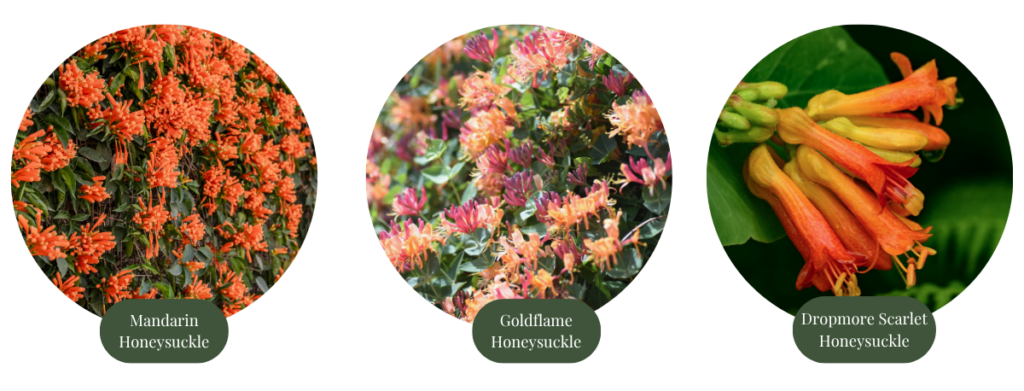
The sweet, heady scent of Honeysuckle wafting through the air on a warm summer evening is a good reason to include this climber in your garden. But its tubular or trumpet-shaped blossoms are also irresistible to hummingbirds, bees and butterflies, making it valuable to your local ecosystem too. Few vines reward you quite so generously for so little effort.
Climbing Hydrangea
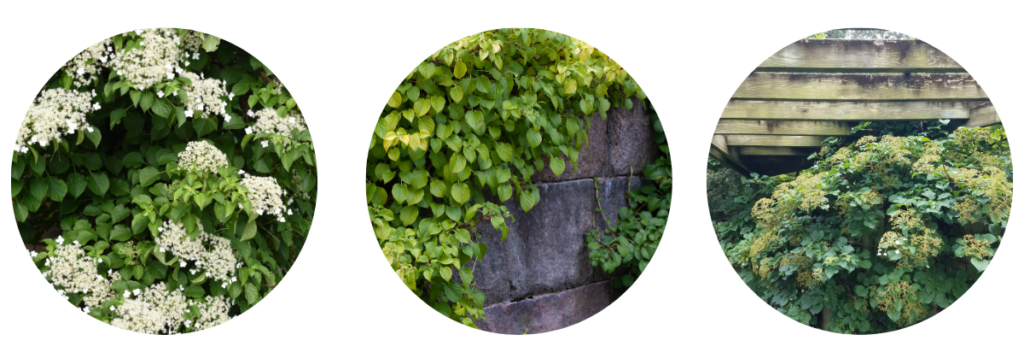
It may be slow to start, but once it’s established, Climbing Hydrangea grows with remarkable vigour, covering walls, fences and structures in lush, deep green foliage. No trellis is needed; it produces its own aerial rootlets that allow it to cling independently to almost any hard surface. In summer, the entire plant is blanketed in elegant white lacecap flowers! It tolerates shade better than most climbers, making it an exceptional choice for a north-facing wall or a shady spot in the garden.
Porcelain Vine
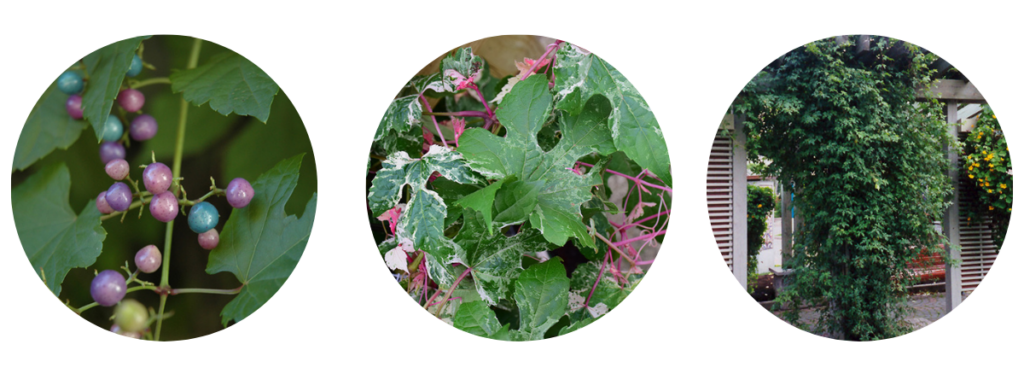
This fast-growing climber is a treasure for its extraordinary ornamental berries. Clusters of small, jewel-like fruits that ripen through a stunning progression of colours, from pale pink and lilac to a rich purple and a remarkable, almost iridescent turquoise blue, all appearing at the same time in fall. Train it up a fence, trellis or structure to let it climb, or allow it to trail gracefully down a slope or over a retaining wall for beautiful low-maintenance ground coverage. Please note: the berries are strictly ornamental, and not for eating.
Graceful, Useful and Very Worthwhile
Vines provide something that few other plants can; they add height, softness, privacy, and beauty all at once. They can disguise an unsightly fence, cool a sun-baked wall with natural shade, frame a garden entrance, or simply bring a sense of lushness to a space that feels too bare or flat.
Find Your Perfect Vine at Eising Garden Centre
Not sure which vine is right for your space? Bring us your questions and, if you have them, a photo of your wall, fence, or structure. Our team will help you find the perfect climber for your light conditions, your soil, and your vision. We’d love to help you get growing your perfect vine!
For Height, Drama, and Eye-Catching Interest
By Ava Green
Every well-designed garden needs an anchor, something tall and confident at the back that gives the whole planting a sense of structure and depth. While shrubs and trees often fill that role, perennials can also do the job beautifully. The back row perennials below are sturdy, reliable performers that thrive right here in Norfolk County. Plant them at the back of a border or the centre of an island bed as the backdrop that makes everything around them look better.
False Indigo, Baptisia australis
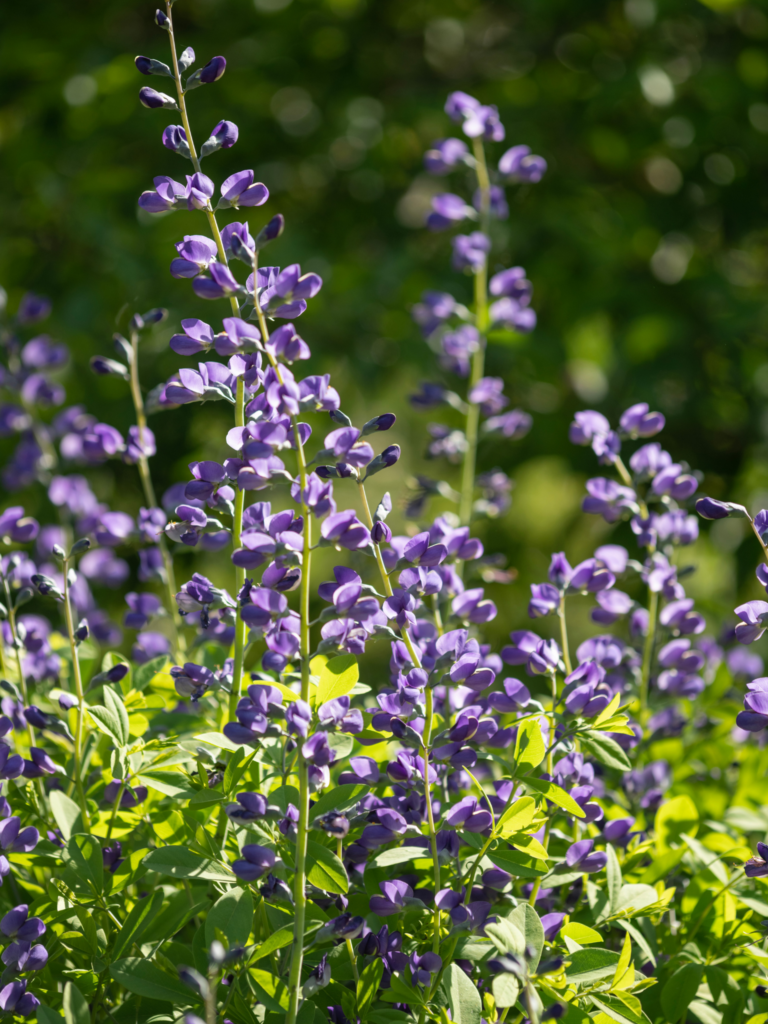
Baptisia is one of those perennials that gardeners discover and immediately wonder why they waited so long to plant it. In late spring, masses of stems are loaded with sweet pea-shaped flowers in shades of indigo blue, soft yellow, white or purple, and butterflies and bees absolutely love them. Once the blooms fade, the plant takes on a handsome, shrub-like form with blue-green foliage that holds its shape nicely for the rest of the season. While it’s slow to establish, it is extraordinarily long-lived, making it a plant you put in once and enjoy for decades.
Grows 3 ft tall and 3 ft wide | Full sun to partial shade | Blooms late spring to early summer
Hollyhocks, Alcea
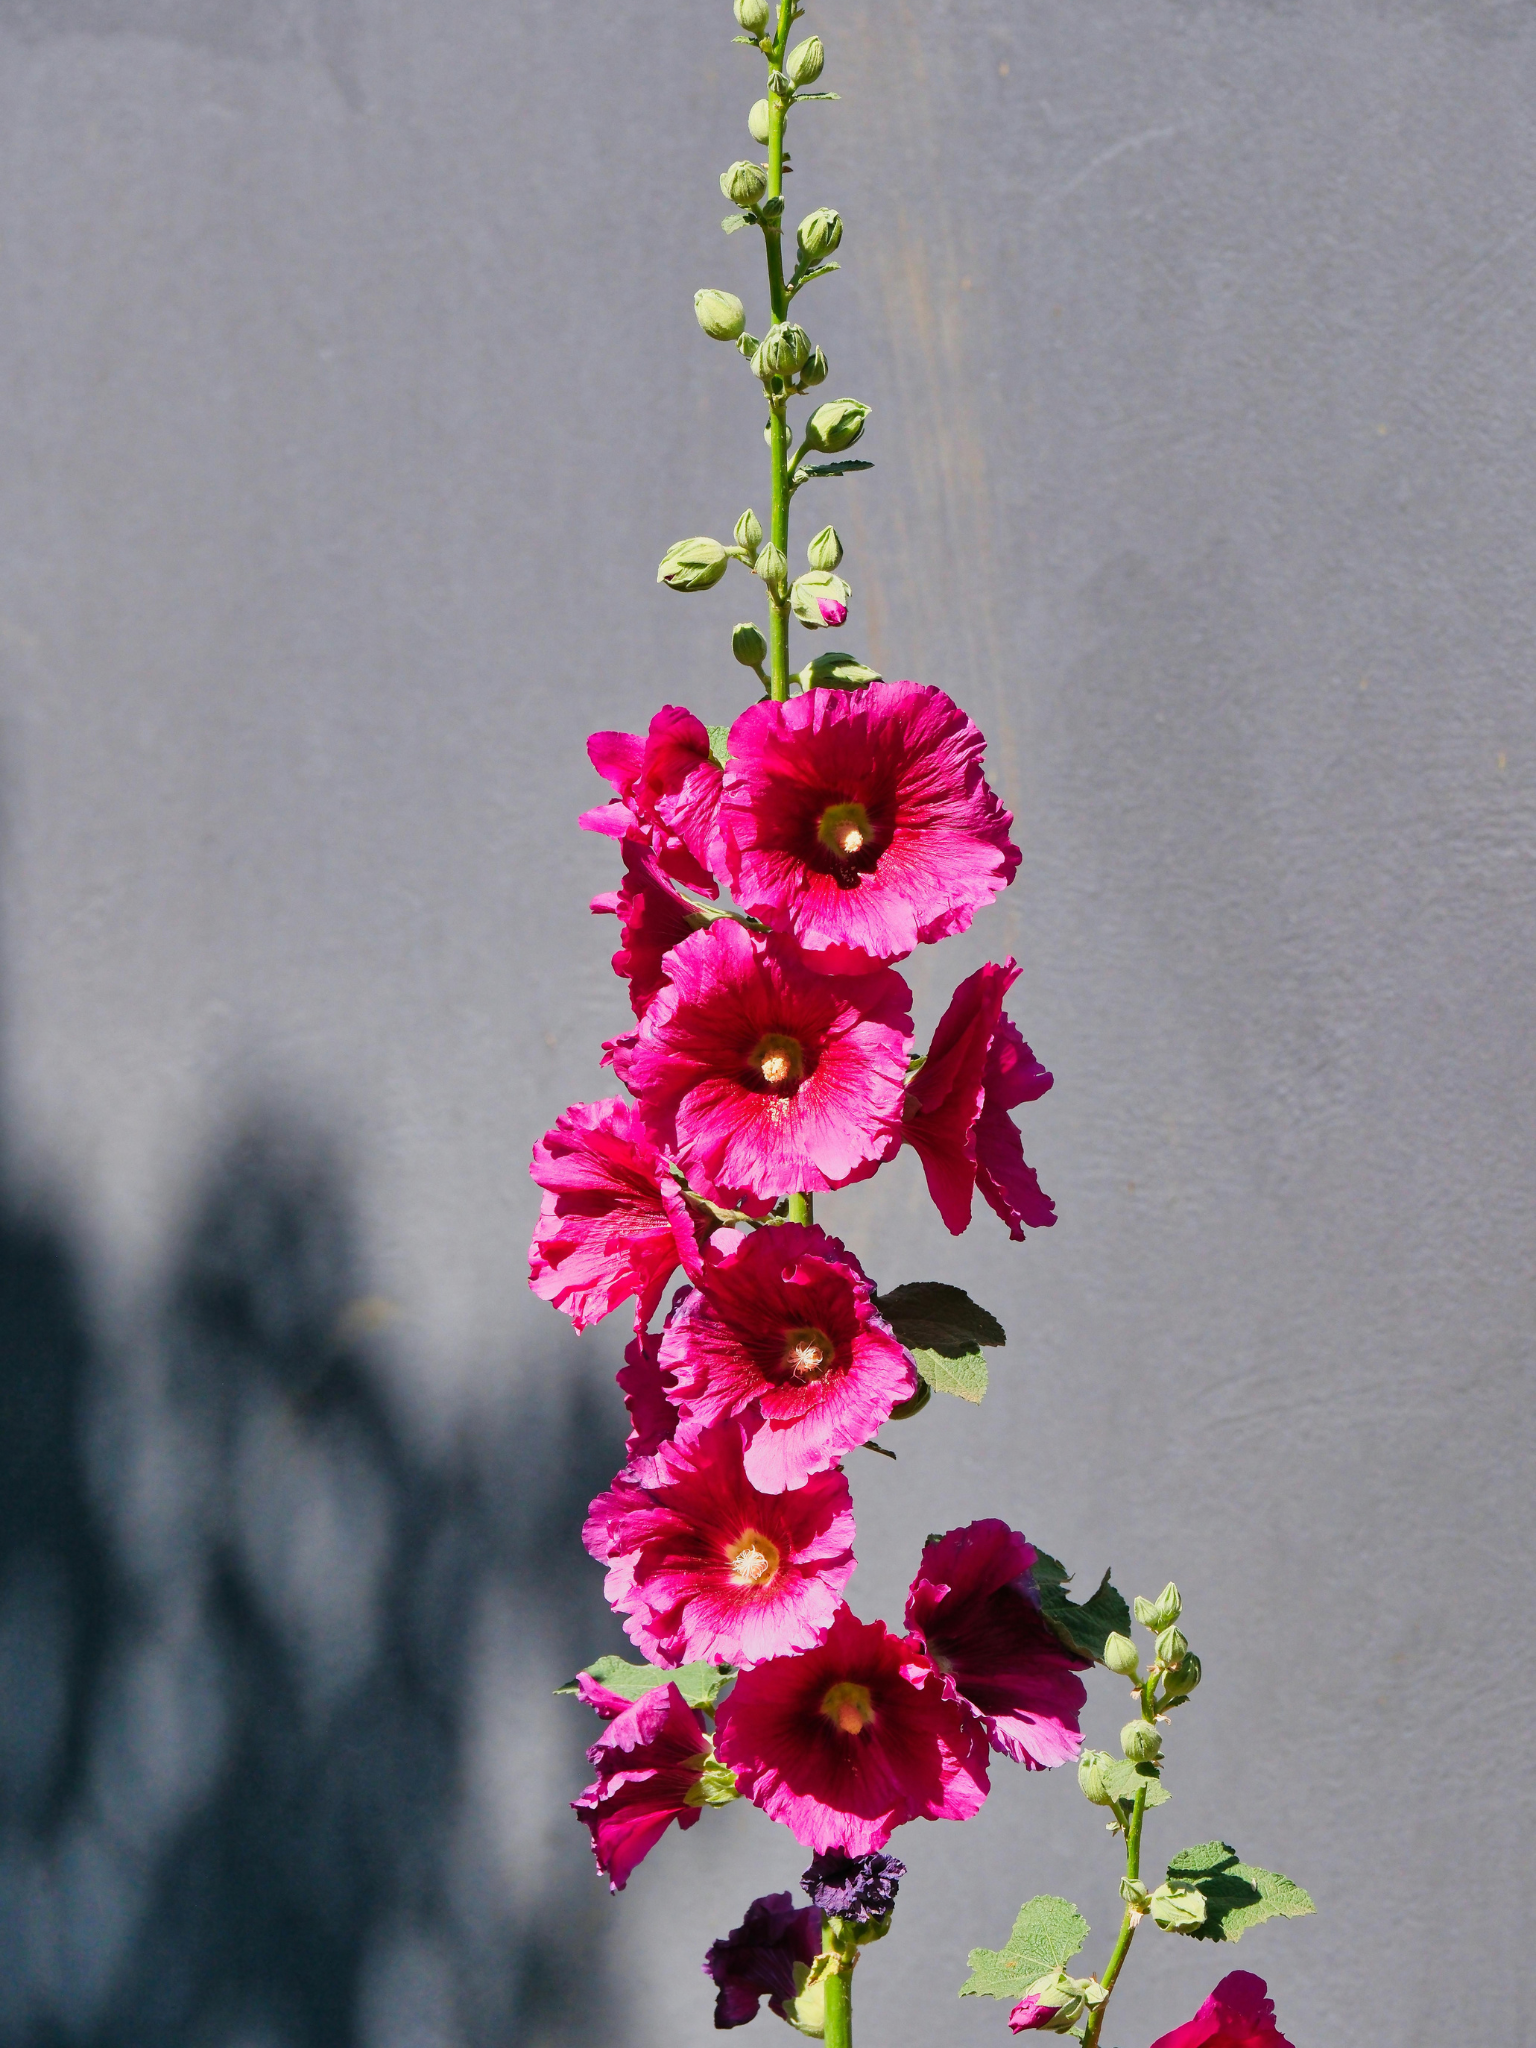
Few perennials carry the nostalgic, romantic charm of a Hollyhock in full bloom. Their tall, stately spires are covered in large, papery flowers and are available in an irresistible range of colours from soft pastels to rich burgundies and deep purples, to classic white. They have a way of making a garden feel established in their first season, making them a desirable back-row choice.
Grows 2-8 ft tall and 1-2 ft wide | Prefers full sun but will tolerate part shade | Blooms in summer
Joe Pye Weed, Eutrochium or Eupatorium
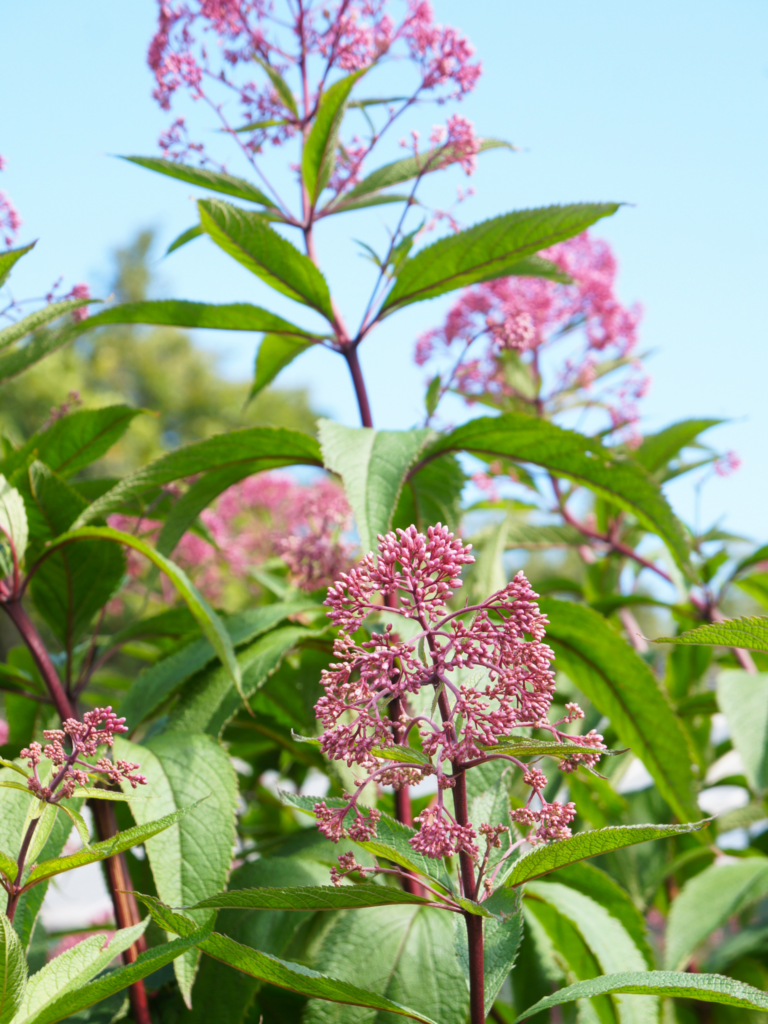
A native plant that is as ecologically valuable as it is beautiful. Its large, showy clusters of rosy-purple flowers are a magnet for butterflies and pollinators from mid-summer well into fall, long after many other perennials have finished their show. If you want a back-row plant that works hard for wildlife while adding bold colour to the garden, this is an excellent choice.
Grows 4-6 ft tall and 2-4 ft wide | Prefers part sun and moist soil | Blooms mid-summer to late fall
Russian Sage, Perovskia atriplicifolia or Salvia yangii
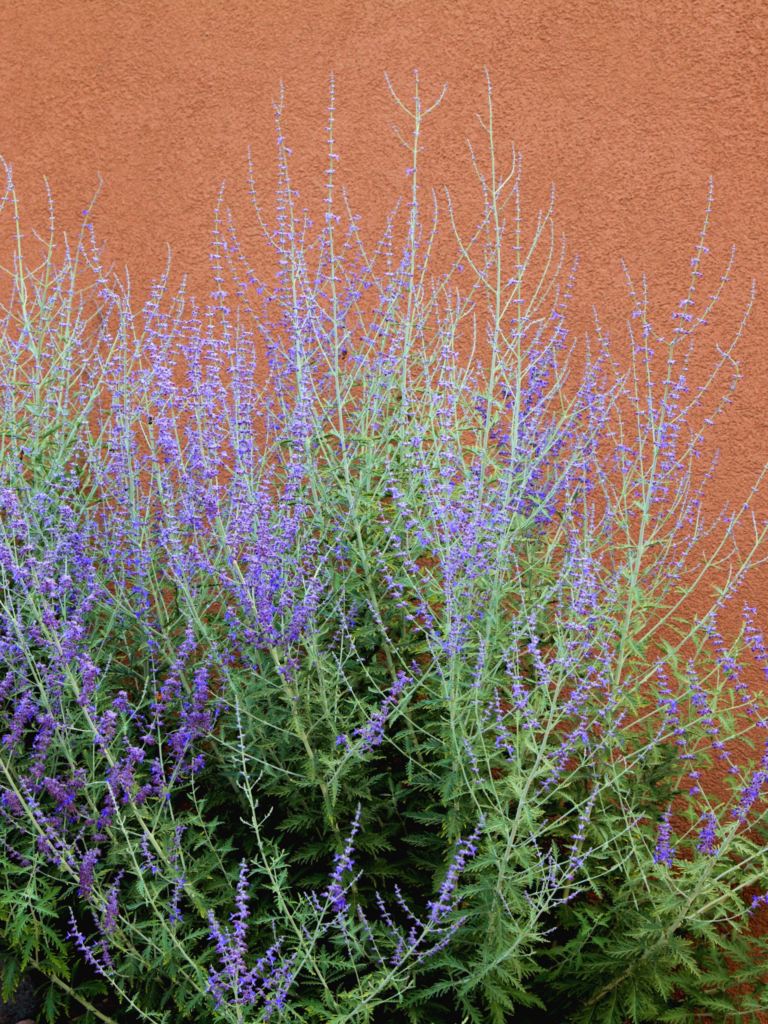
When the garden fills up with yellow and orange blooms in late summer, Russian Sage arrives with a billowy, airy cloud of lavender-blue flower spikes rising above silvery-grey foliage. It catches the light beautifully and adds a softness that few other plants can match. Drought-tolerant once established and virtually pest-free, it is one of the lowest-maintenance perennials you can grow. Compact varieties are also available if space is limited.
Grows 3-4 ft tall and 3-4 ft wide | Full sun | Blooms mid-summer to fall
Bear’s Breeches, Acanthus Mollis
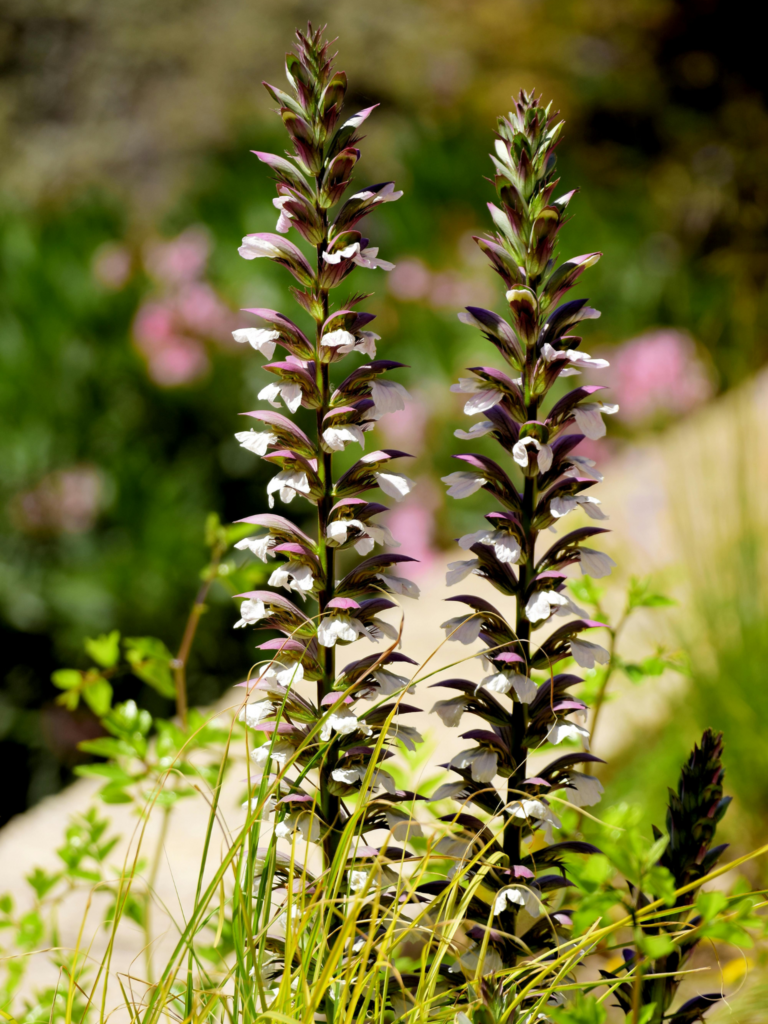
If you’re looking for a plant that makes a genuine architectural statement, Bear’s Breeches is in a category of its own. Its large, deeply lobed, glossy foliage forms an impressive mound, while dramatic flower spikes shoot three to five feet upward, bearing creamy white snapdragon-like blooms accented with striking reddish-purple bracts. It is bold, sculptural, and unlike almost anything else in the garden.
Grows 3-5 ft tall and 2-3 ft wide | Full sun to part shade | Blooms June to July
Foxglove, Digitalis
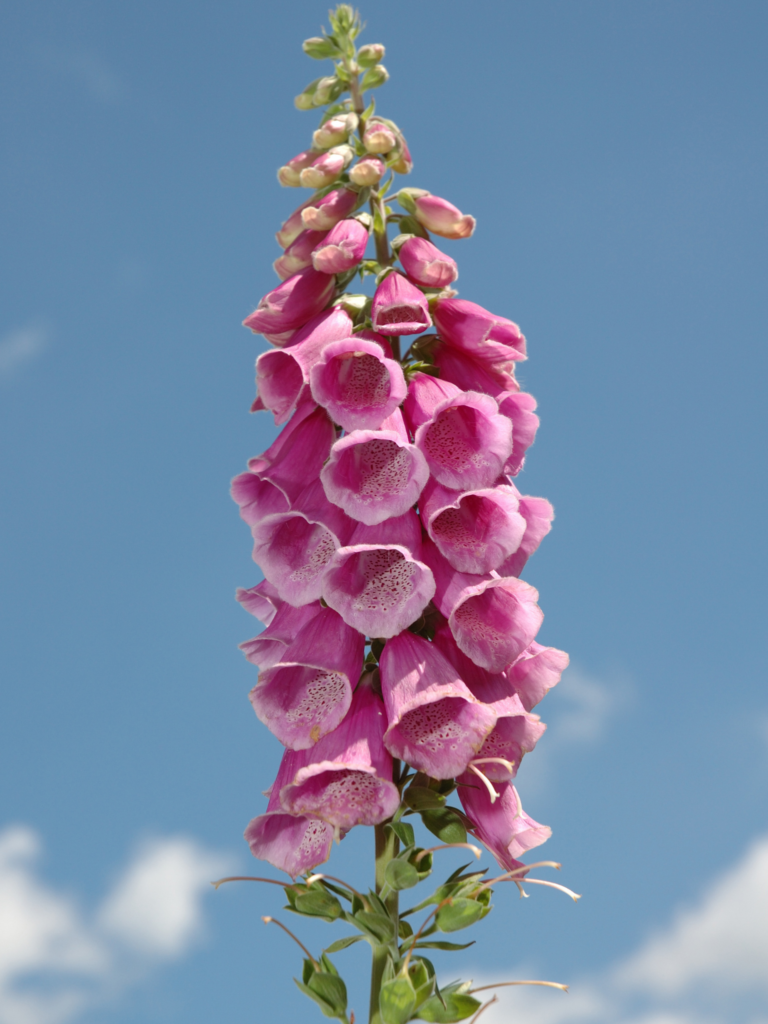
There is something undeniably enchanting and regal about Foxglove with its tall spires of tubular flowers freckled and spotted on the inside, nodding gently in the breeze. The colour range is also wonderful, from soft creamy whites and pale pinks to rich purples and deep rose. Many varieties self-seed freely, naturalizing happily in the garden over time. One important note: every part of the Foxglove plant is toxic to people and pets, so it is best planted away from areas where children or animals play. In the right spot, however, it is one of the most beautiful back-of-the-border plants available.
Grows 2-5 ft tall and 2 ft wide | Sun to part shade | Blooms in summer
Goat’s Beard, Aruncus diocus
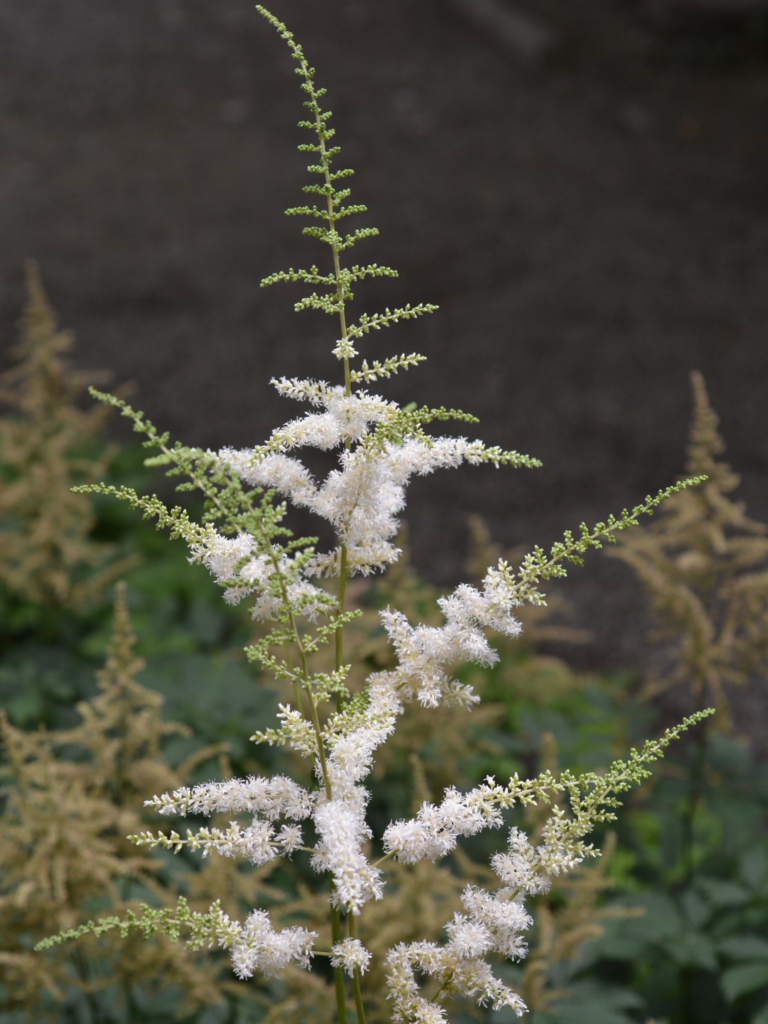
Despite its stature, this is one of the most graceful and softening plants you can add to a shady border. Large, feathery plumes of creamy white flowers rise above finely divided, elegant foliage, bringing lightness to even the darkest corners of the garden. It is especially effective at softening hard edges, filling bare spots under trees, and providing a lush, natural backdrop for smaller shade-loving plants. Dwarf varieties are available for smaller spaces.
Grows 6 inches (dwarf) to 6 ft tall and 2-4 ft wide | Partial to full shade | Blooms early to mid-summer
Gardener’s Tip:
Removing spent blooms before they go to seed, also known as deadheading, encourages many perennials to produce a second flush of flowers later in the season. It takes only a few minutes and can extend your bloom display by weeks.
Ready to Build Your Back Row?
The team at Eising Garden Centre is here to help you choose the right tall perennials for your space, your soil, and your sun conditions. Stop by and let us help you create a border that looks stunning from front to back, season after season.
Making a Lot ... A Lot More
By Ely Schweyer
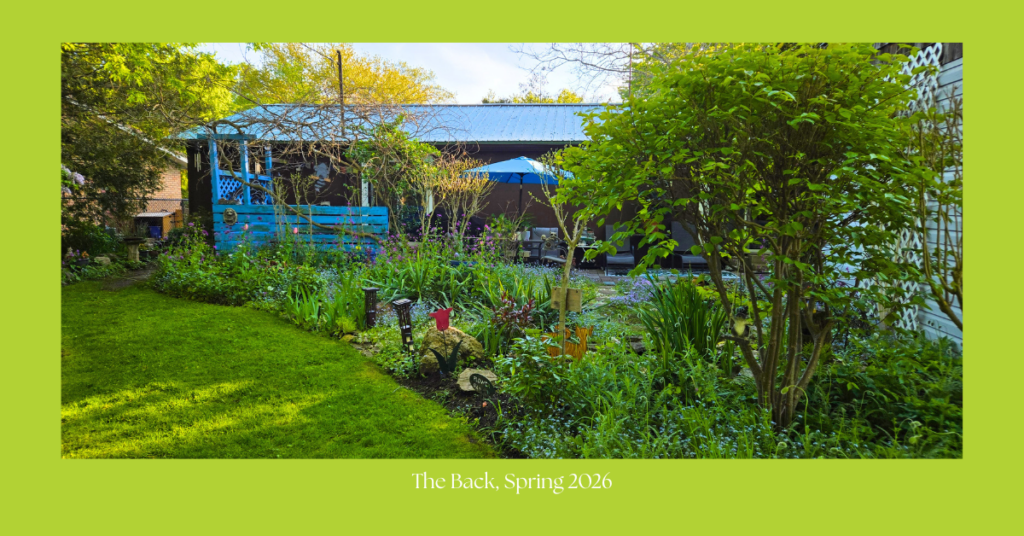
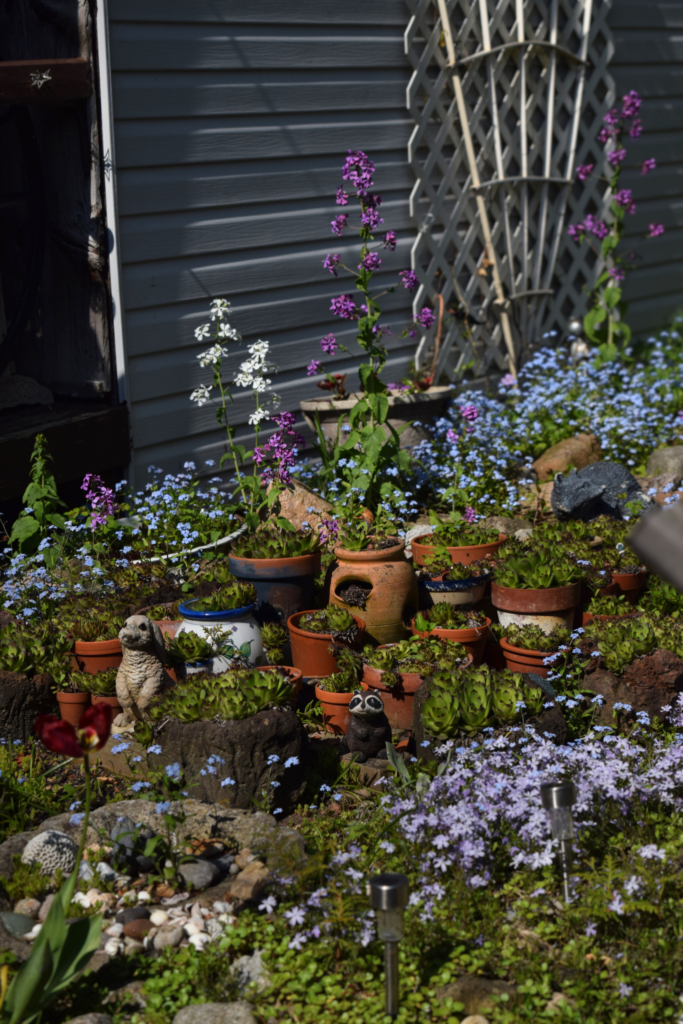
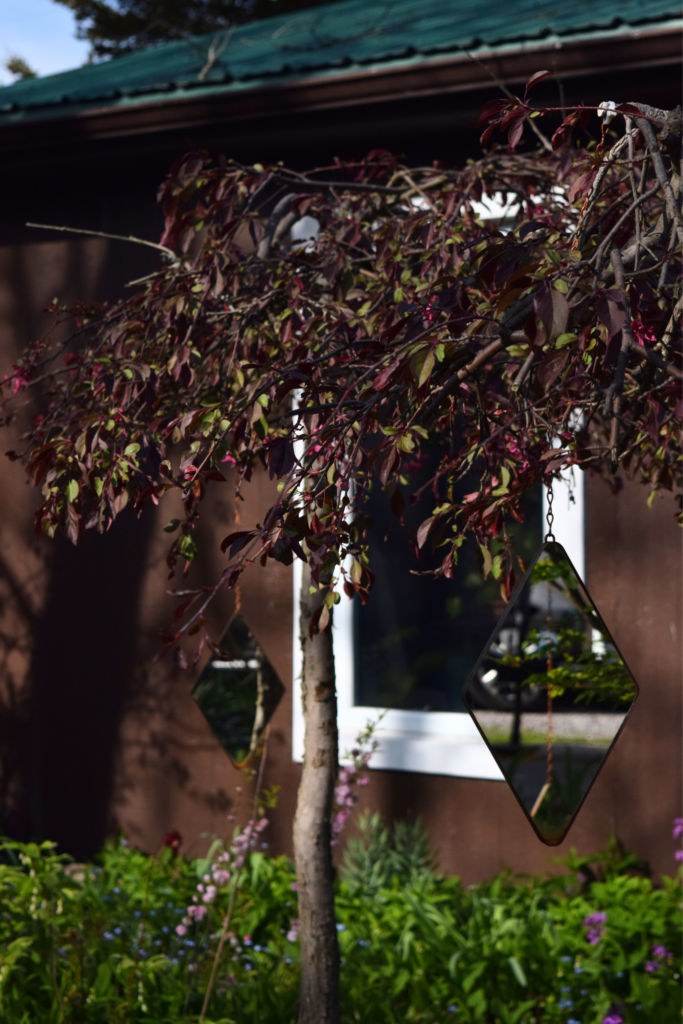
This spring, Mary – you may know her as the Perennials Gal at Eising Greenhouses and Garden Centre – invited me over for a garden tour. I knew to expect a good collection of perennials, but this garden also shines with personality and character. Having brought my big camera, I wanted to help Mary show off all her efforts, as this property has undergone some serious changes. If you wish to make your garden unique to you, whilst eco and budget friendly, may this garden tour inspire you!
A Clean Slate
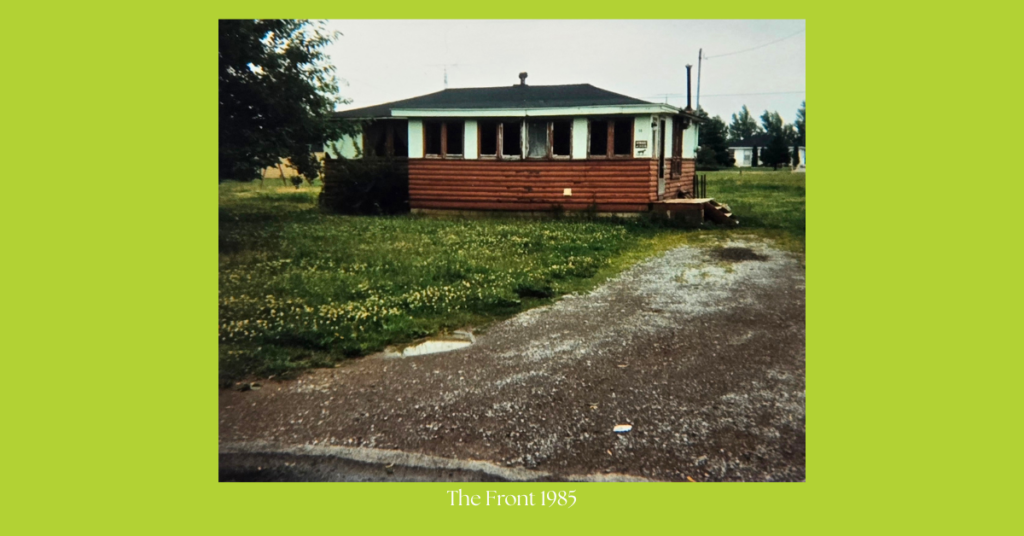
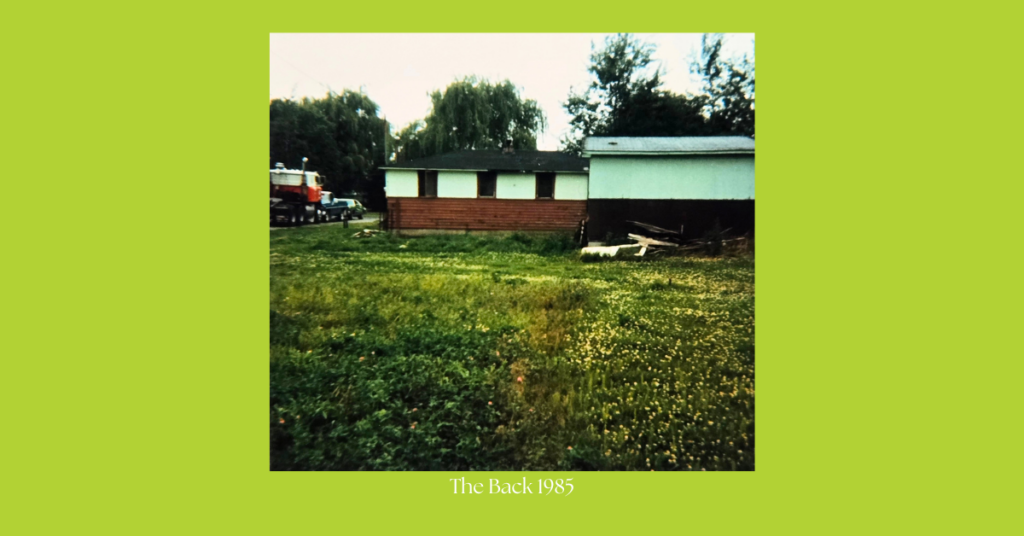
Mary and her husband, Chris, brought their 60’ x 120’ property in July of 1985, which was then “no trees, no lawn, just weeds.”
The lack of trees and the overabundance of Norfolk County clay resulted in drainage issues, which led to the first planted tree drowning, and quickly made mowing a strenuous chore.
The Fix
With her husband driving truck for a construction business, Mary and Chris had access to hauling 17 dump truck loads of sand home to raise the property. Mary says the blue-grey clumps of clay still make their way to the surface – but the drainage issues have subsided!
🖱️ Visit this blog to learn more about soil amendments!
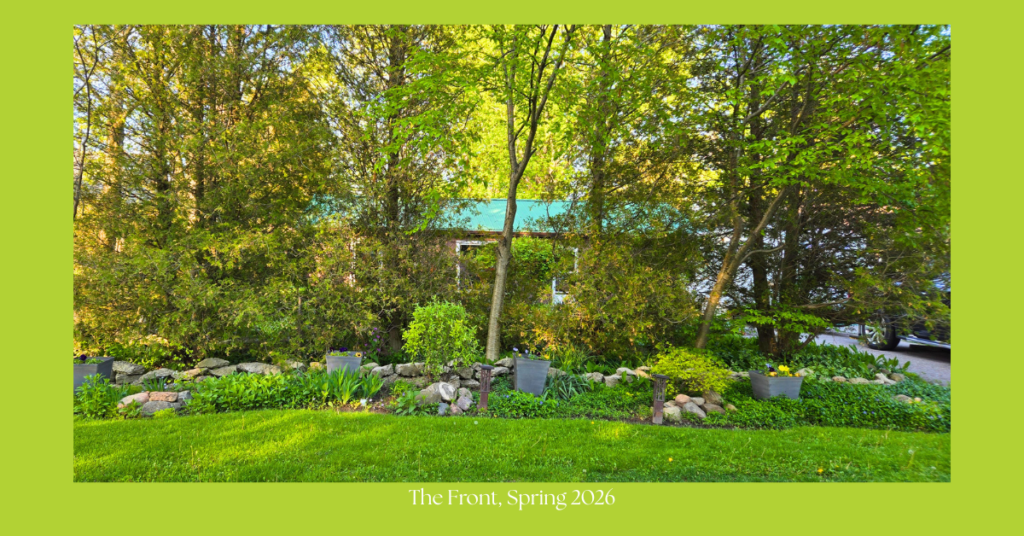
Mary then focused on establishing some native trees on a small budget, and that’s when the community began to grow in her garden. “We have had the best neighbors ever, for 46 years, watched their kids grow, and leave, and come back, and leave - pets come and go - quite the legacy!” With the leaves she collected from her neighbours, Maple Trees volunteered sporadically over the property. Then, after buying a native Carolinian forest seed package at a Toronto garden show, Mary carefully seeded Yellow Birch, White Birch, Wild Crab Apple, and three Sycamores, which now stand tall and proud in her garden. One of my favourites in the little forest was a variegated lilac!
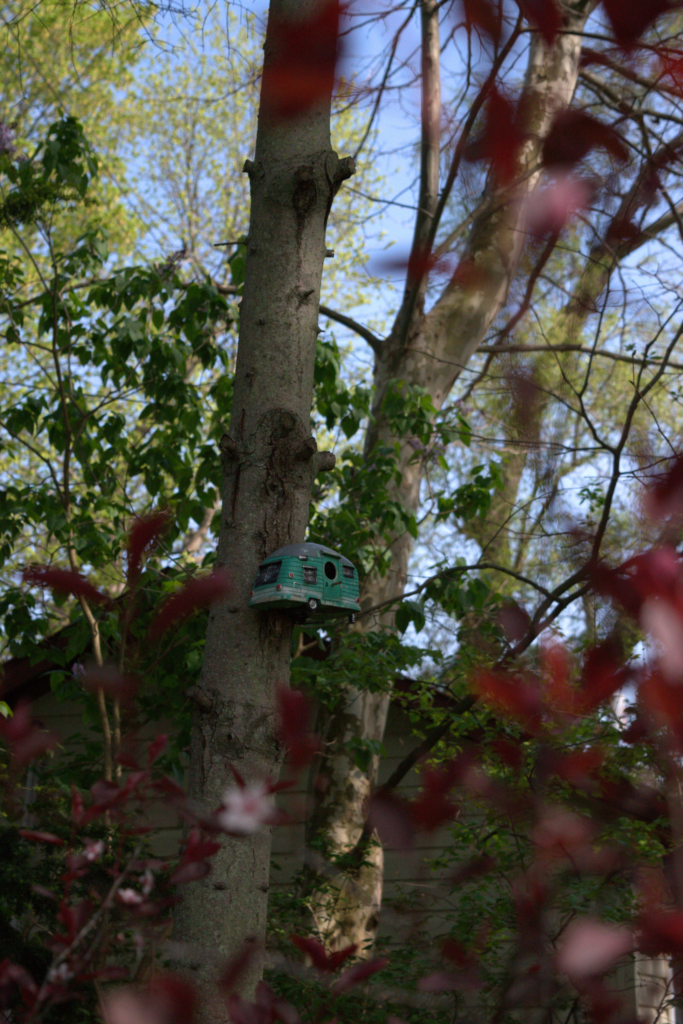
These trees not only provide protection for the house and the many birds but also offer enough shade to maintain a moss-like lawn that requires minimal mowing. The shady canopy offers a coziness adding to the overall quaintness of the garden.
The Perennials Gal’s Perennials
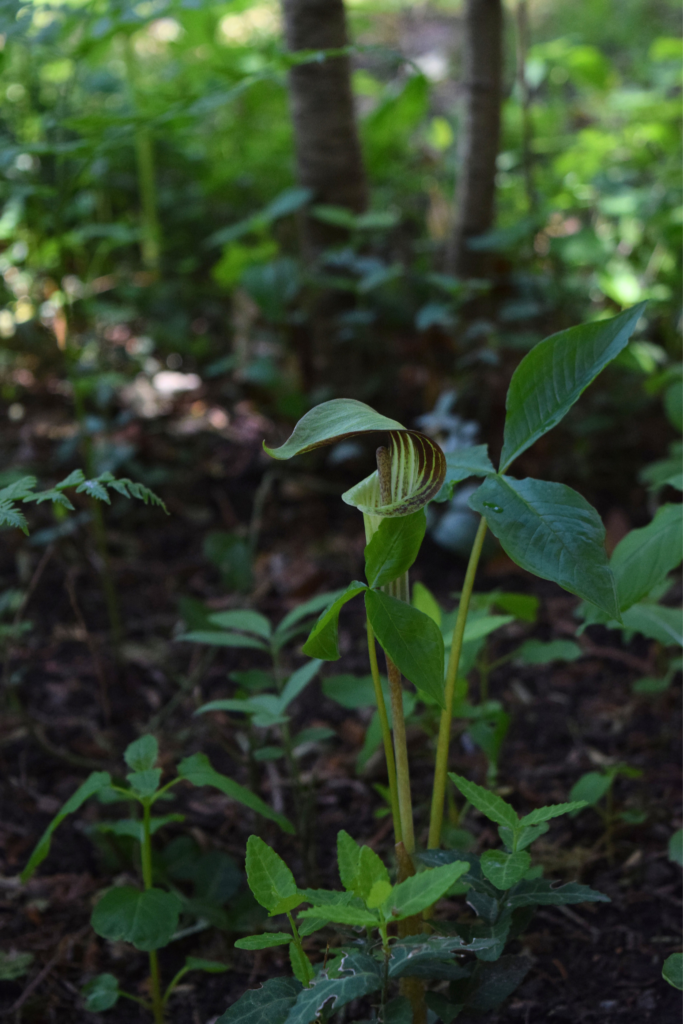
In 1985, the property was surrounded by woodlots; however, all is subject to change. “When we learned of a housing development planned for the forest across the highway from us, I lead crusades to save the native plants that were so abundant there.” The forest may now be gone, but the Trilliums, Mayapples, Violets, Solomon’s Seal, and Ferns are still growing happily and abundantly in Mary’s – and her neighbours’ – gardens. “Over the years I have shared many trunk loads of perennials, many of which were given to me!” Other notable perennials in Mary’s garden are an abundance of Crocus and Forget-Me-Nots, a Jack-in-the-Pulpit, and a Prickly Pear Cactus.

Hardscaping
One of my favourite things in any garden is creative ways to recycle and repurpose, and Mary’s garden does not disappoint!
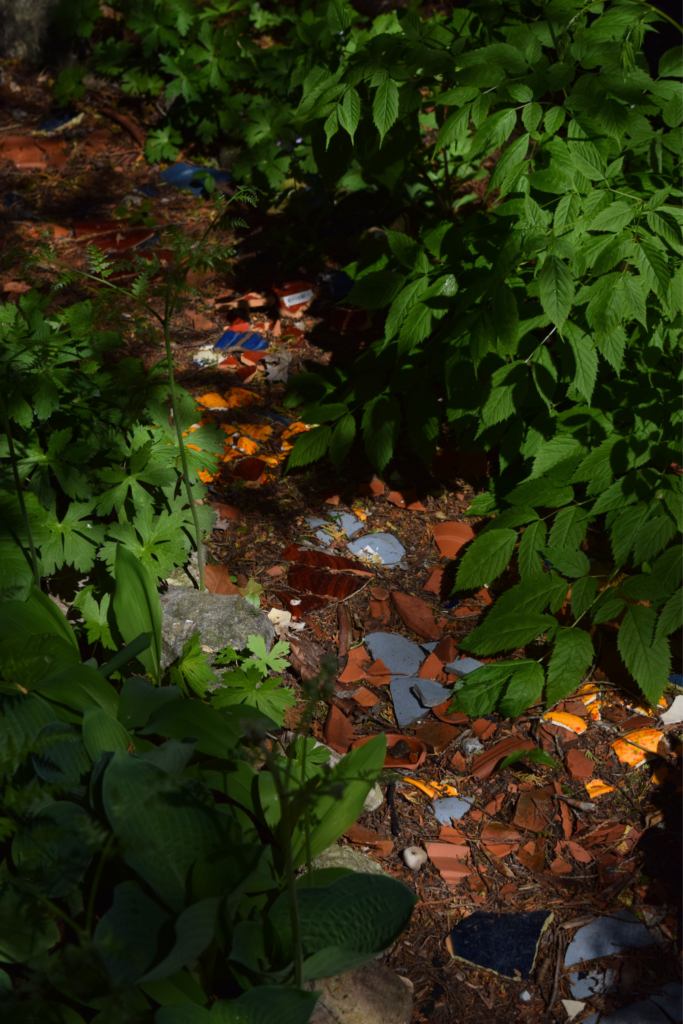
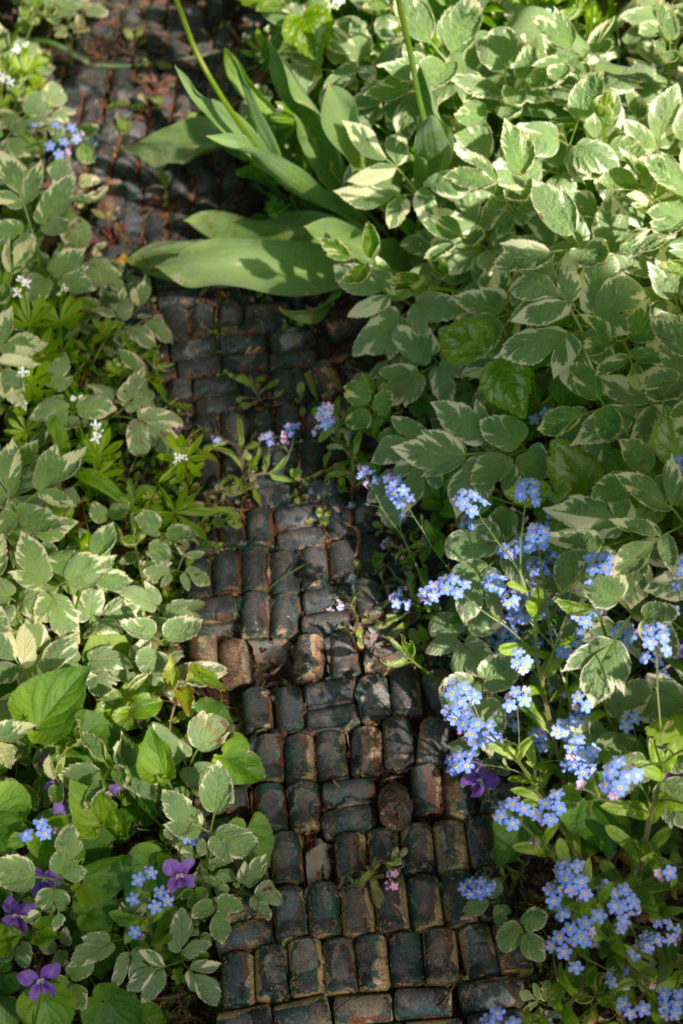
Immediately, one will notice the unique pathways that intertwine throughout the spaces. Mary collects broken terracotta and ceramic pottery pieces to create footpaths akin to mosaics. The addition of colour is not only visual but provides an audio sensory experience as one moves throughout the garden, “we can always tell when a little animal is coming to visit us sitting out here,” as the pieces gently clink underfoot.
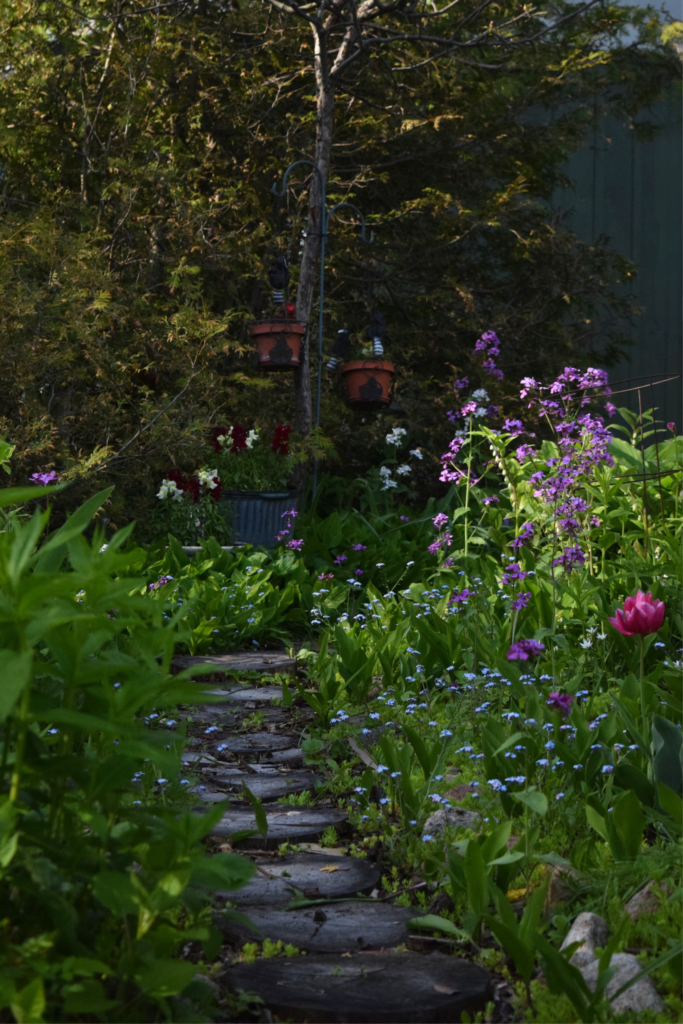
I also must make note of the wine cork pathway to the fairy garden!
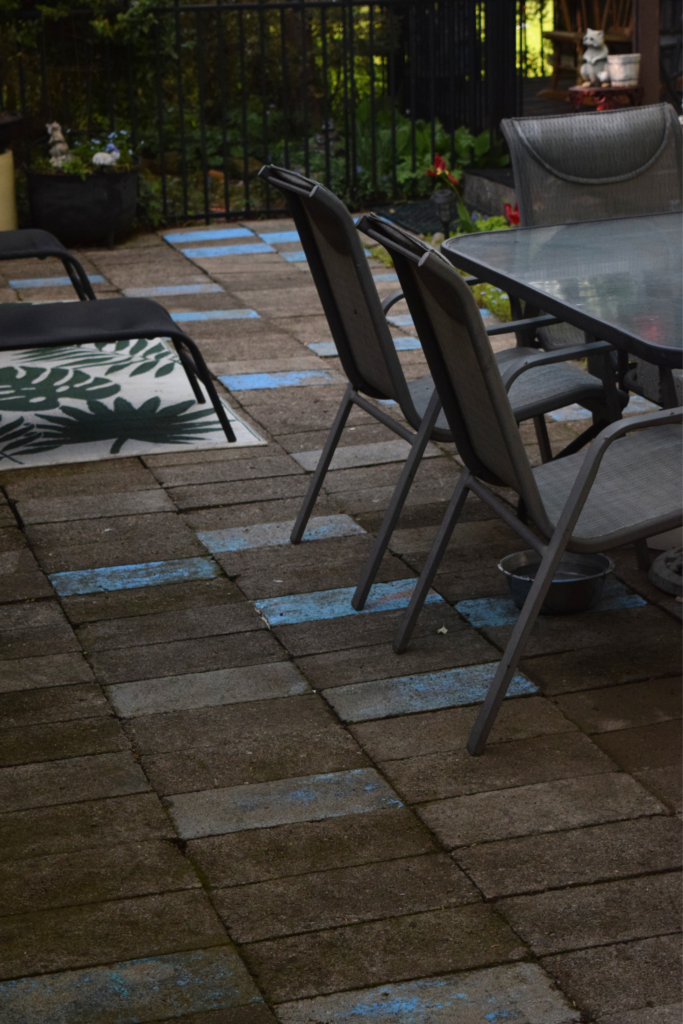
The back patio too is tasteful and playful visually, with blue blocks laid interspersed. You’ll be pleased to know that the Dover Arena lives on in Mary’s garden – the repurposed blocks lie on their sides – and the blue? Those came from the men’s washroom!
The Ponds
Two little ponds provide popular watering holes for birds, raccoons, skunks, opossums, and the neighbours' cats, all of which are welcome.
The pond nearest the patio is a fish tote off the Dover Fish Tugs. Mary dug into the clay to set the 4’ x 4’ x 3’ deep tote, knowing she had one chance or she’d never be able to pull the heavy tote out. “We figure that whoever inherits this property will have to dynamite the pond out, it is set in Norfolk County Clay!” The tote pond is home to a family of goldfish, who don’t mind wintering in it with its little waterfall that keeps the water moving. The goldfish weave through Irises, Waterlilies, and Dwarf Hyacinth.
Another small pond sits in the very back of the yard between the trees, visited by many birds and critters.
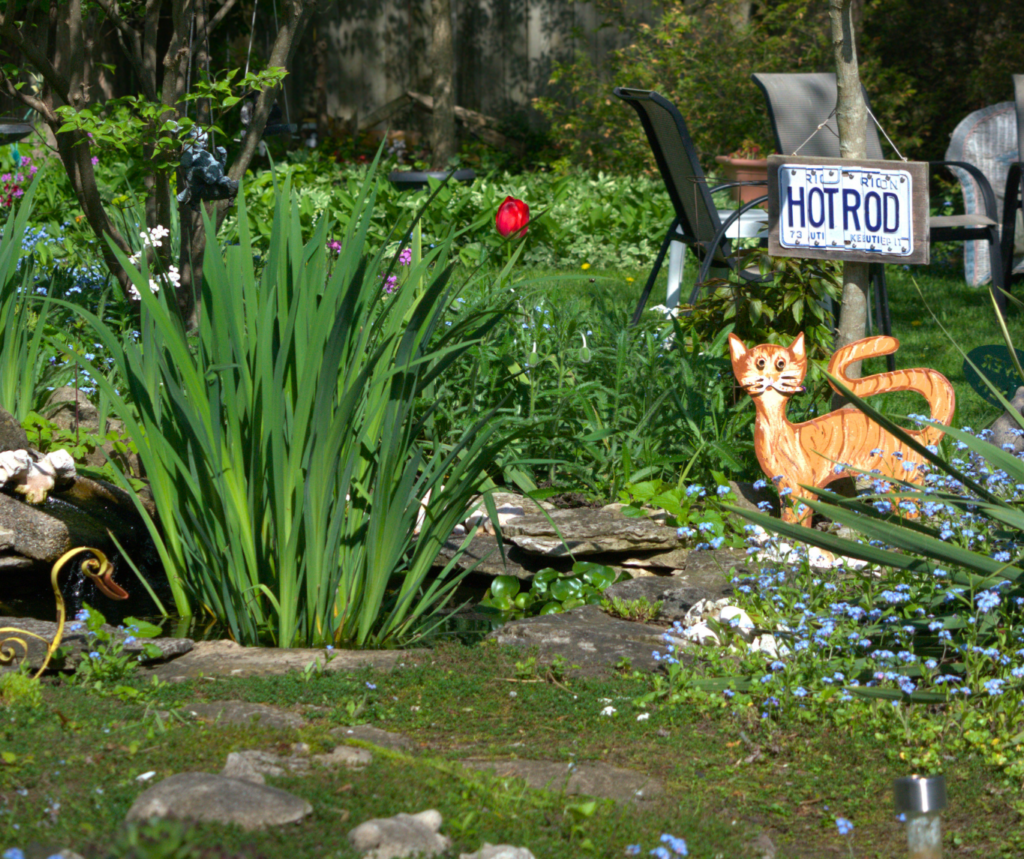
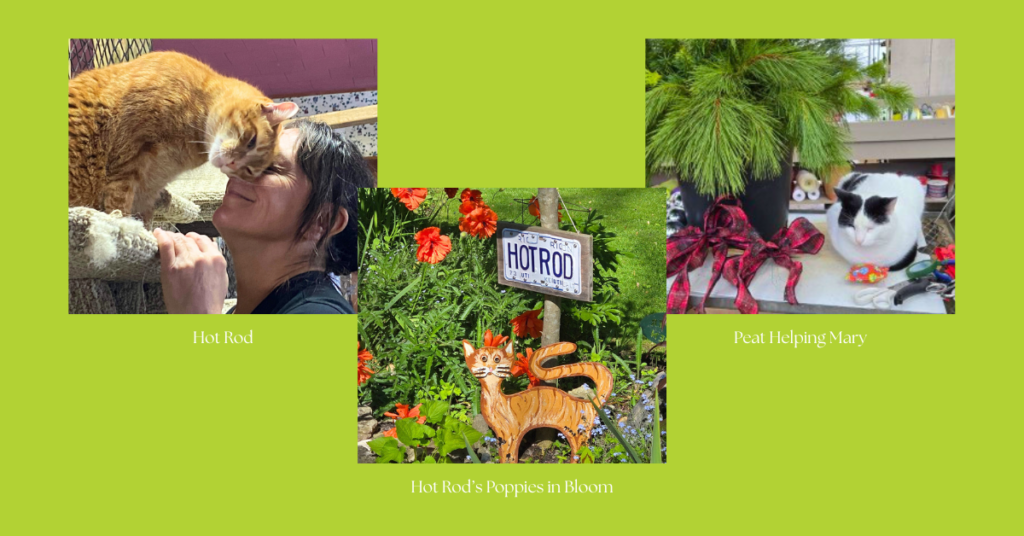
Mary's love for felines knows no bounds. During her time at Purrfect Companions, she treated 'Hot Rod,' a special-needs orange tabby, as her very own. Hot Rod had likely been injured in a vehicle accident, and would spend his remaining days in the shelter - brightened by Mary's big heart. Hot Rod is now buried and truly at home by Mary's pond. At Eising Garden Centre, Mary spoils Peat, the resident rodent controller. Peat makes sure to keep Mary company when she makes her many, many Christmas Urns.
The Fairy Garden
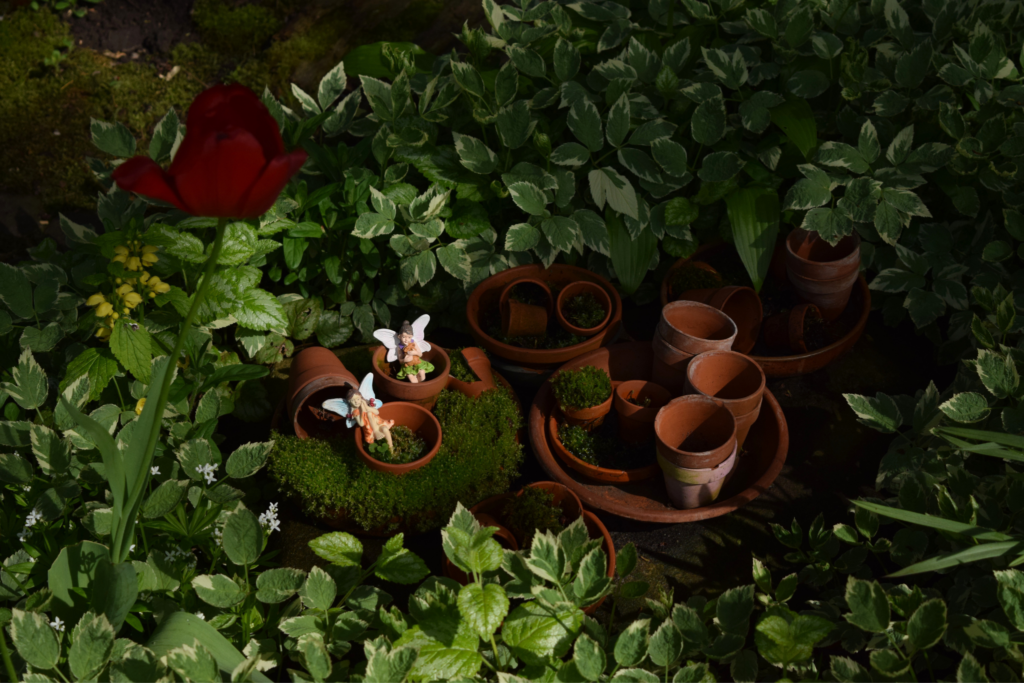
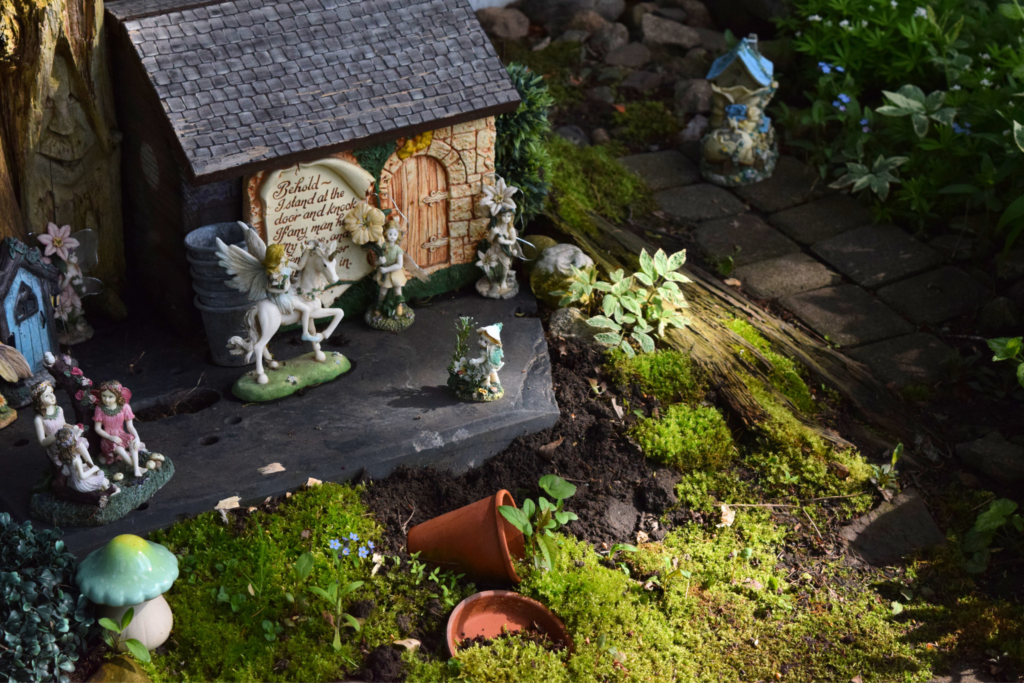
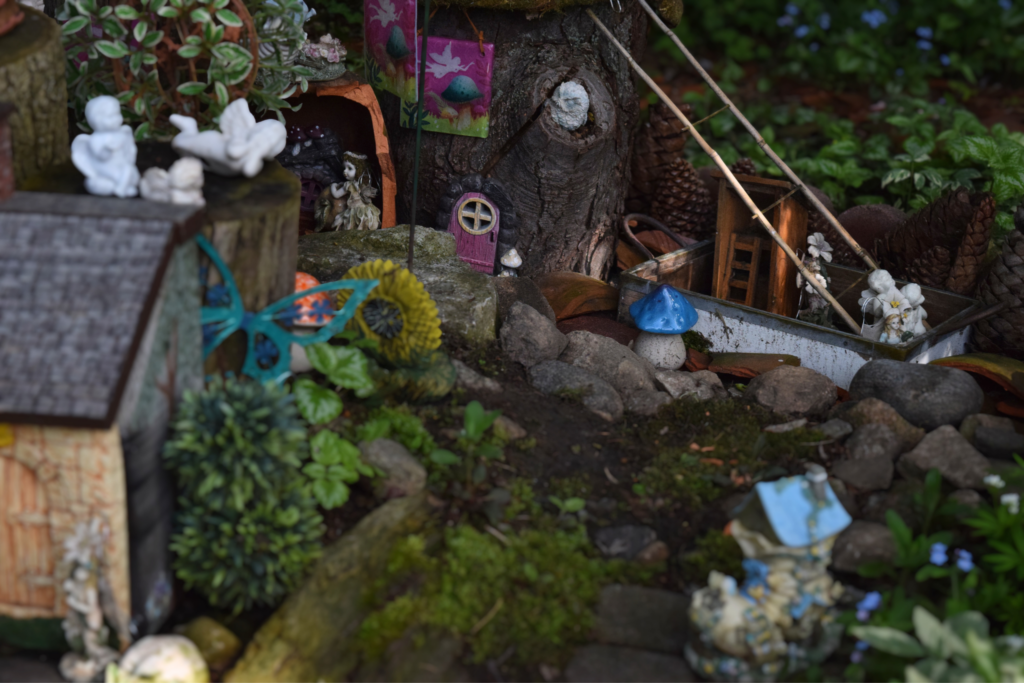
As a fun ongoing project, Mary recently began a fairy garden – and is it ever quaint! Central to a tree and skirted by a pathway, many of the pieces are thrifted or gifted!
Pots as More Than Just Containers
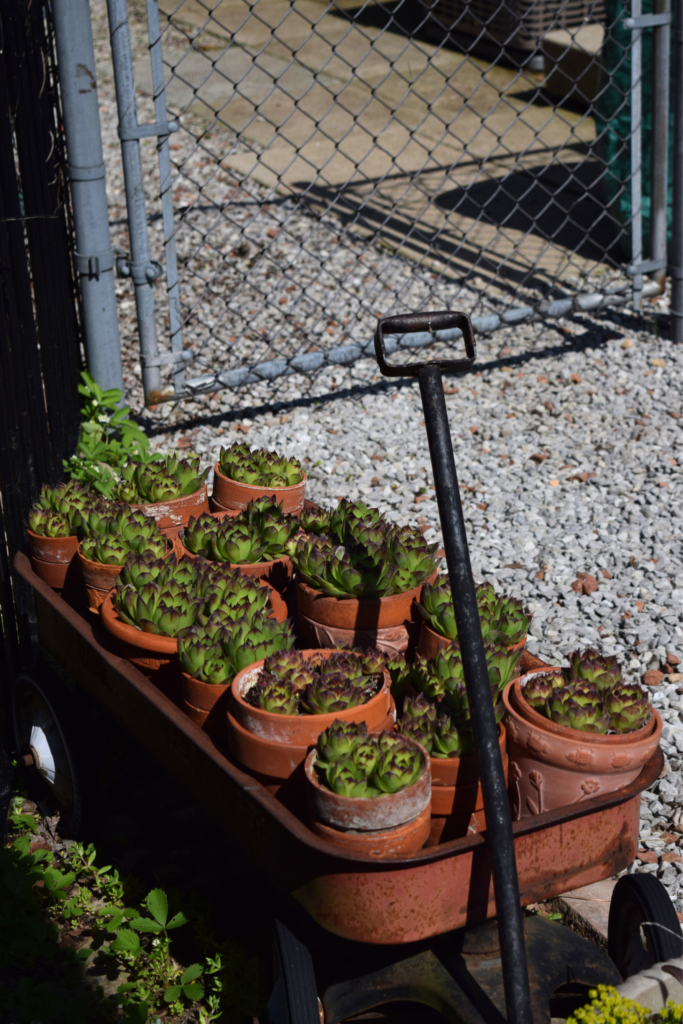
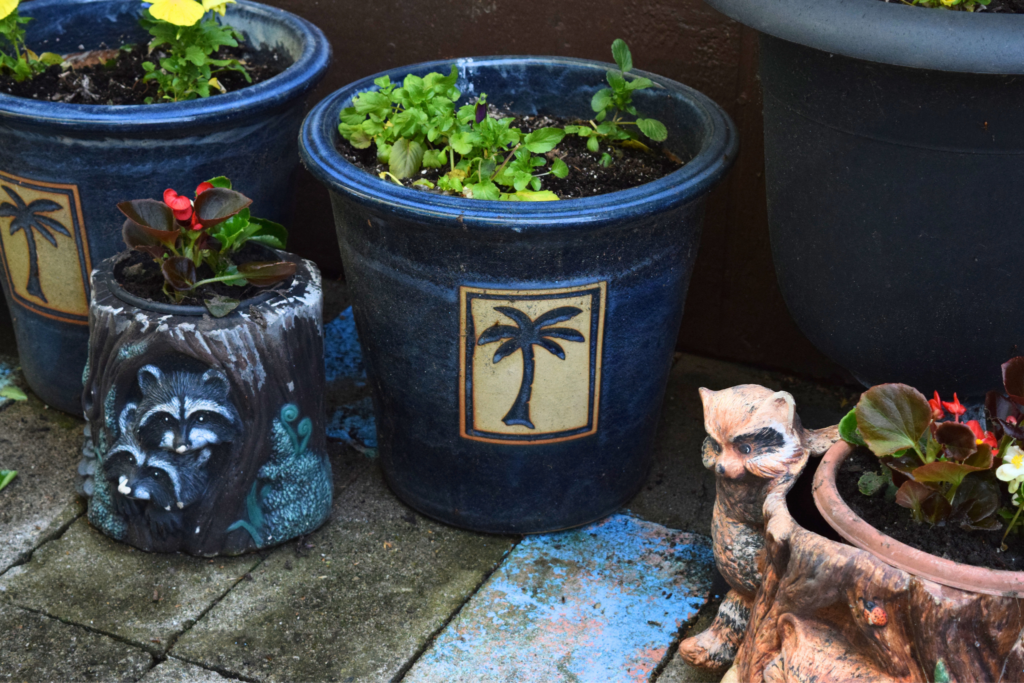
Mary uses pots to extend where she can grow her favourites; this is an excellent way to create varying heights, breaking up horizon lines and adding interest. The terracotta orange also contrasts beautifully with Mary’s frequent use of blue.
Things that Make it Just Mary and Chris
Vintage and found objects help to ground any space. Mary and Chris have collected rocks, driftwood, shells, “anything that makes a statement, big or small,” bringing unique natural elements into their garden that sync with their interests.
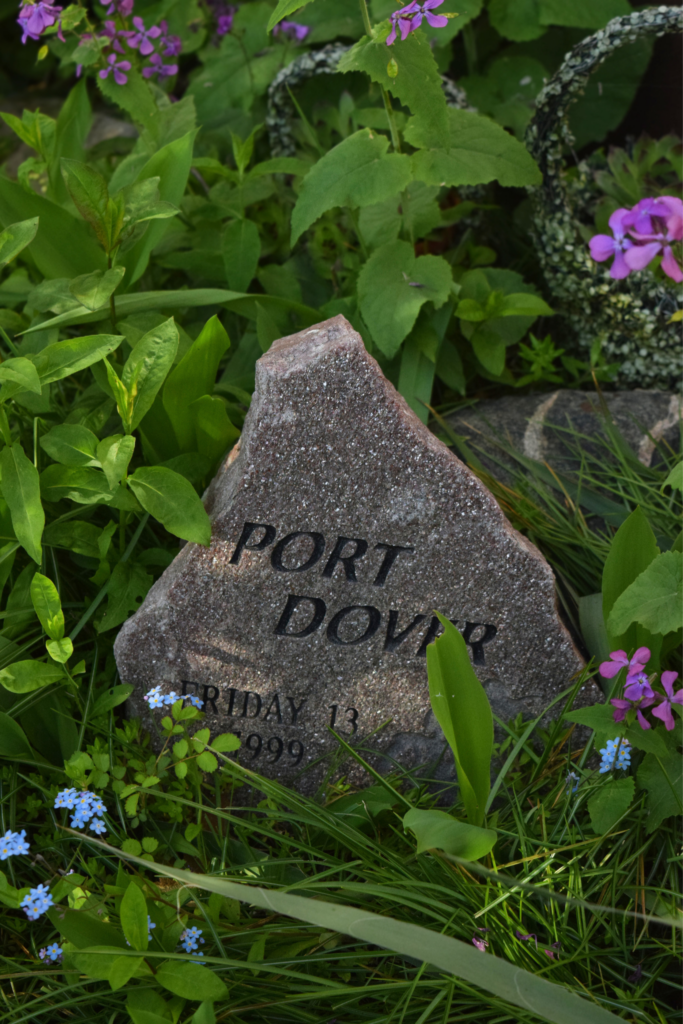
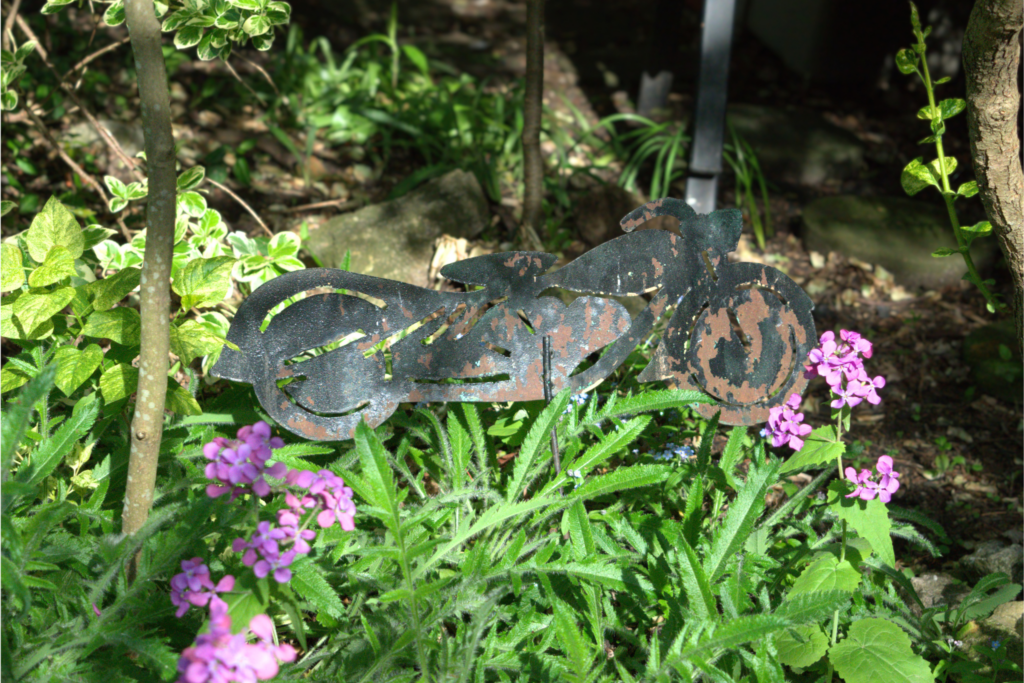
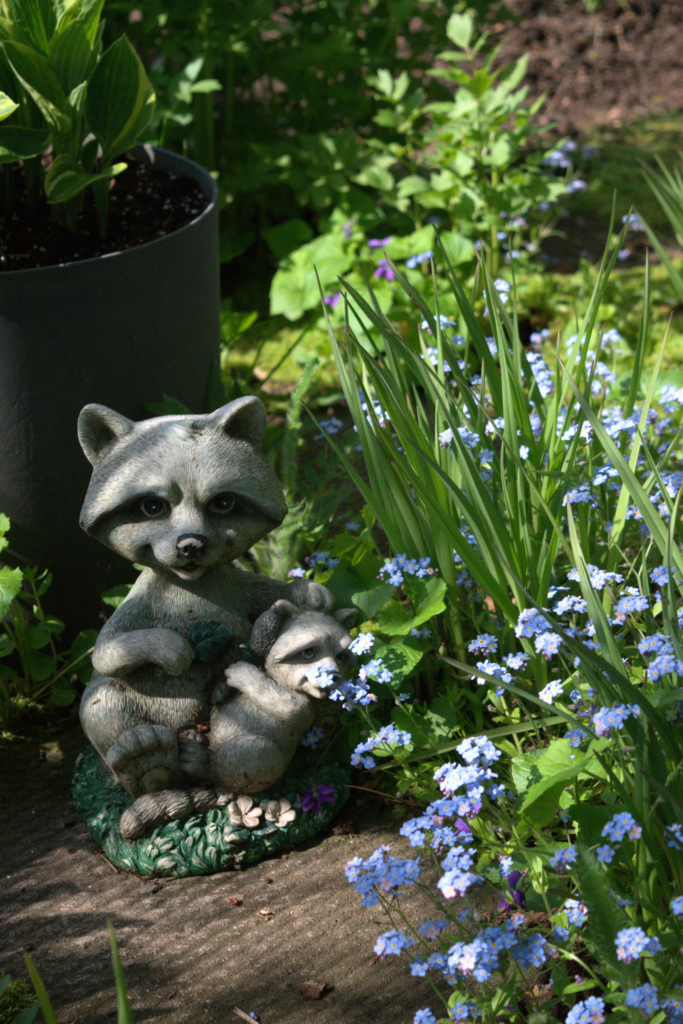
Mary and Chris, founders of Port Dover’s famed Friday the 13th, undoubtedly have a longtime love of motorcycles. In March of 1978, they travelled south to Daytona, Florida, for Bike Week, the largest motorcycle event in the world. There, Mary would earn a ‘raccoon’ nickname from wearing wide-brimmed shades all day in the sun. “Of all the stuffed toys Chris could possibly have owned at that time, he had a little raccoon at his bed side table, I still have it, it would be Number 1 of 3920! Yes, the collection is cataloged, every piece is given a number and recorded. I still collect to this day, but am very selective as to what I buy, as I have so many.” Mary’s raccoon collection is playfully hidden throughout her garden, with little mischievous eyes watching you as you move about. The ornaments help to draw the eye up into the trees and into the shrubs. Mary makes an effort to carefully pack them all up in the fall and bring them out again each spring.

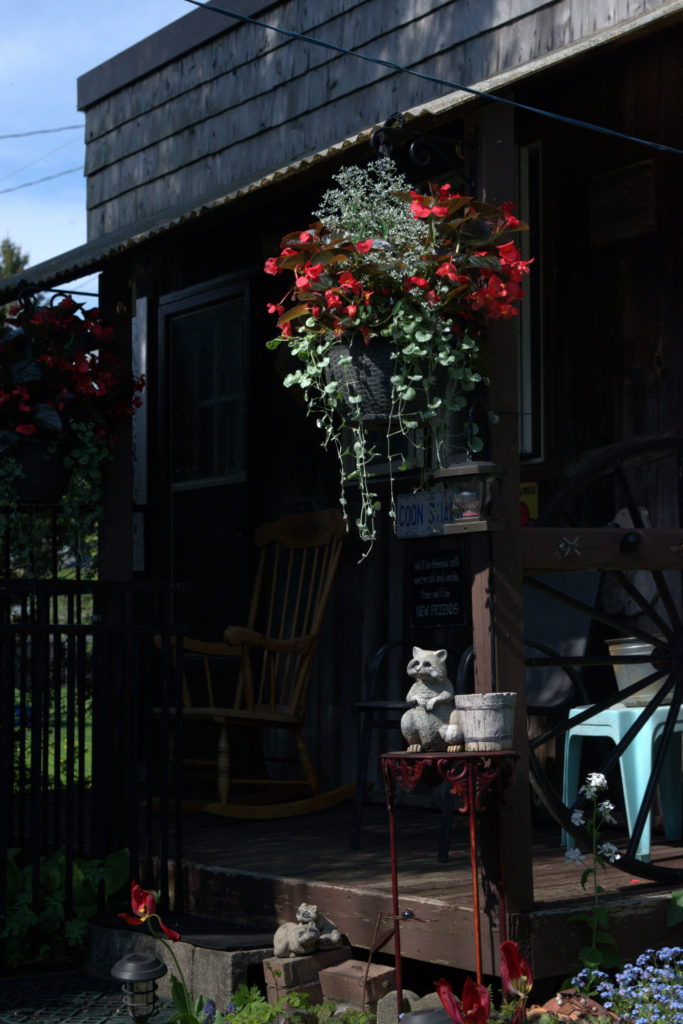
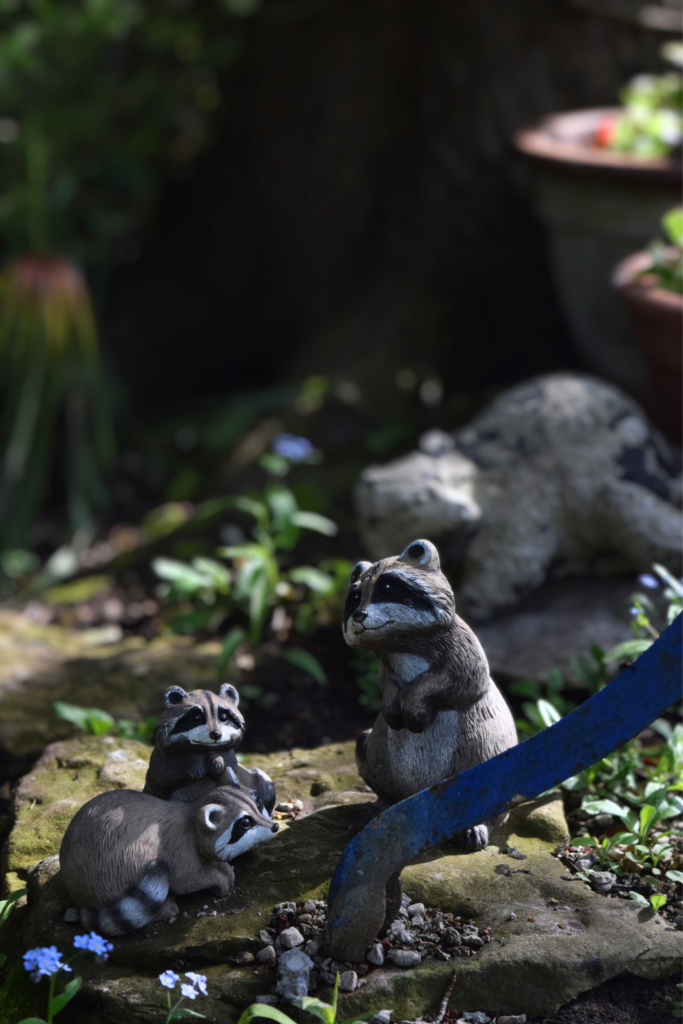
Speaking of spring, this blog will be updated with summer and fall pictures as the garden moves through time!
Mary’s garden is a little ode to a life well cherished; no one thing in it is without purpose or a memory. It is also a great example of reusing and repurposing – gardening does not have to cost an arm and a leg to be great. When you enter the space, you know whose energy is channeled into it, and that is, in my opinion, exactly how to garden!
A Full List of Plants that Grow in Mary’s Garden
Plants that Enjoy Zone 5a and 6b - Provided by Mary
TREES and SHRUBS
- Norway Maple
- Sugar Maple
- Sycamore
- White Birch
- Yellow Birch
- Cedars
- Forsythia
- Burning Bush
- Butterfly Bush
- Kousa Dogwood
- Weeping Cherry
- Sand Cherry
- Pine
- American Oak
- Ginkgo
- Red Bud
- Annabelle Hydrangia
- Variegated Lilac
- Wisteria
- Rose of Sharon
- Variegated Euonymus
- Juniper
- Holly Bush
- Wild Crabapple
SPRING BULB PERENNIALS
- Tulips, Daffodil, Hyacinth, Narcissus, Windflower, Snowdrops, Cilia, Crocus, Frittalaria, Grape Hyacinth
FREE SEEDERS
- Forget Me Nots
- Lunaria (Money Tree)
- Columbine
- Sun drops
GARDEN PERENNIALS
- Hostas (approx 10 species)
- Irises (approx 4 species)
- Tall Phlox: pink, purple, white, coral
- Creeping Phlox
- Candytuft
- Periwinkle
- Lily of the Valley
- Oriental Poppies
- Cranesbill Geranium
- Jacobs Ladder
- Lamnium
- Goutweed
- Lungwort
- Sweet Woodruff
- Clematis
- Ivy ground cover
- Sedum, creeping 2 Species
- Sedum tall
- Ajuga
- Blue Grass
- Hens and Chickens - 100’s!
- Variegated Solomon’s Seal
- Allium
- Beard Tongue
- Brunaria
- Goats Beard
- Bergenia
- Creeping Thyme
NATIVE PERENNIALS
- Red and white Trillium
- Jack in the Pulpit
- Wild Geranium
- Mayapple
- Wild Violet
- Ferns (approx 6 kinds)
- Solomon’s Seal
- Euphorbia
- Prickly Pear Cactus
POND PLANTS
- Yellow Iris
- Dwarf Hyacinth
- Water Lily
Be sure to visit Mary in the perennials section at Eising Greenhouse & Garden Centre this summer for many of the mentioned plants – and be sure to make your garden yours! 🪴
By Ava Green
Is there anything sweeter than the scent of Lilacs in the spring? These beloved shrubs are remarkably easy to grow and will reward you with weeks of fragrant blooms for little or no effort. But a bit of attention can make a big difference, especially if you’ve noticed your blooms getting smaller or fewer with each passing year.
To help your lilac put on its best show, keep these steps in mind:
- Plant in full sun, at least 6 hours of direct sunlight a day, in well-draining soil
- Water newer plants during prolonged periods of drought until established (the first 3 years)
- Feed your lilacs annually with a balanced fertilizer (10-10-10, for example)
- Follow spacing instructions and prune yearly. Pruning is a very important step, and it’s well worth it.
Knowing When to Prune is Key
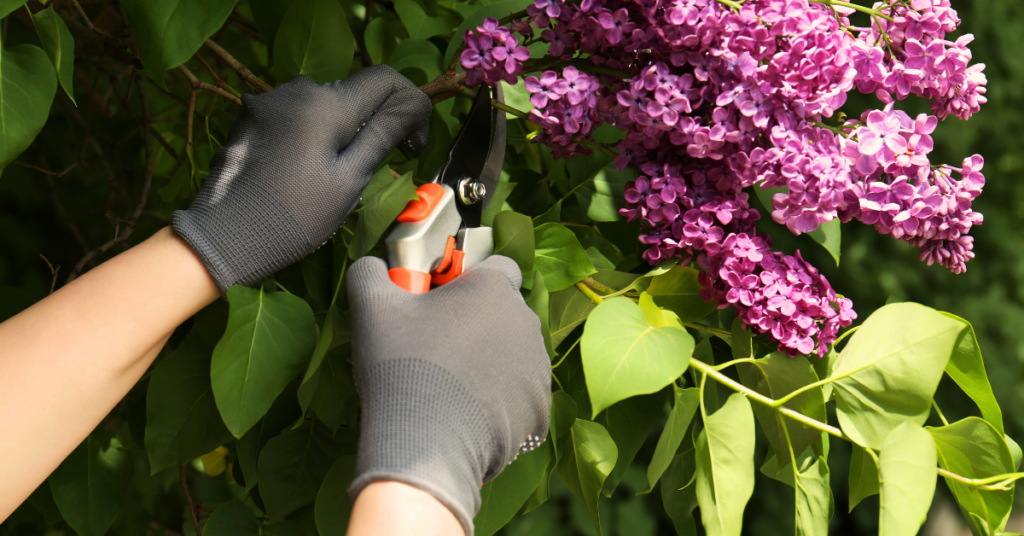
Timing is everything when it comes to pruning your lilacs. After the blooms fade, you have a two-week window to prune before the shrub sets its buds for next year's flowers. Yes, they set buds this year that will bloom next year! Pruning lilacs in the fall or the early spring risks cutting off all of the flower buds for the following year. Mark your calendar and prune promptly after flowering.
It also helps to understand how lilacs grow: Younger, thinner lilac stems produce more flowers. Older, thicker stems are more prone to disease and pests. Keeping this in mind will help with pruning decisions.
How To Prune Young Lilacs
If your lilac has been in the ground for less than three years, leave it alone; it doesn’t need pruning yet. Many young lilacs won’t bloom during those first few years.
After three years, once your shrub is established, begin by removing just one of the thickest, oldest stems down to the ground every 2 years. This gentle approach prevents the shrub from becoming overgrown while encouraging newer, flower-producing growth.
How To Prune Older, Overgrown Lilacs
If your lilac has been neglected or grown out of control, you have two options:
Option 1: Gradual Rejuvenation
Begin by removing any damaged stems, as these invite pests that can harm the entire shrub. Next, remove only the largest, oldest stems by cutting them right down to the ground. The key is to remove no more than one-third of the living wood (dead stems don’t count toward that total). Leave the younger, thinner stems intact so your shrub can still bloom the following year. Repeat this process each spring for three years, and you’ll gradually restore the shrub to its full, flowering potential without sacrificing a single bloom season.
Option 2: Full Cutback
For a severely overgrown lilac that has been largely ignored, a complete cutback is often the most practical solution. Cut the entire shrub as close to the ground as possible, either in early spring or immediately after blooming. Yes, this breaks the general rule of never removing more than one-third of live wood, but lilacs are remarkably resilient and respond well to this kind of hard reset. By the end of summer, you will have healthy new stems of three to five feet tall. While the shrub won’t bloom for approximately three years after a full cutback, the long-term results are well worth the wait.

Deadheading Your Lilacs
Deadheading, or removing spent flower clusters after the blooms fade, is a simple task that’s separate from pruning, and can be done during that same two-week post-bloom window. When you trim off faded blooms, the plant redirects its energy from seed production toward building bigger, healthier buds for the next year. It takes only minutes and can make a meaningful difference in the size and abundance of next year’s flowers.
A Note on Lawns and Lilacs
If your lilac grows near a lawn, be mindful of how much fertilizer you’re applying to the surrounding grass. Lawn fertilizers are typically high in nitrogen, which encourages lush leaf growth, but too much nitrogen reaching your lilac’s roots will suppress flower production.
Worthy Rewards
Lilacs are remarkably long-lived, often outlasting the gardens and even the homes they were planted beside. So whether you’re nursing a young shrub through its first few years or breathing new life into an old, overgrown beauty, the effort you put in now is an investment that will keep rewarding you, and perhaps generations after you. Every single spring!
By Ava Green
As soon as warm weather and sunshine arrive in Southern Ontario, it’s time to head to the garden centre and pick up all the plants we’ve been dreaming about all winter long! May 24th is generally the date we look forward to — the unofficial marker when frosty mornings are behind us and the promise of summer is ahead.
By now, cool-weather plants like cabbage, Brussels sprouts, peas, and lettuce should be well established in the vegetable garden. And for everything else, it’s go time!
TIP: Before you start planting, this is the ideal time to amend your soil. Top up your garden beds with fresh topsoil or enrich them with compost to improve soil health, add nutrients, and promote vigorous plant growth. Don’t forget to refresh the soil in your containers as well, with potting mix or compost.
Warm Weather Vegetables
When soil temperatures are consistently 60°F (15°C) or higher, it’s safe to plant all the warm-weather vegetable crops we’ve been waiting for! Plants that thrive in warmer weather include tomatoes, peppers, eggplants, cucumbers, zucchini and corn.
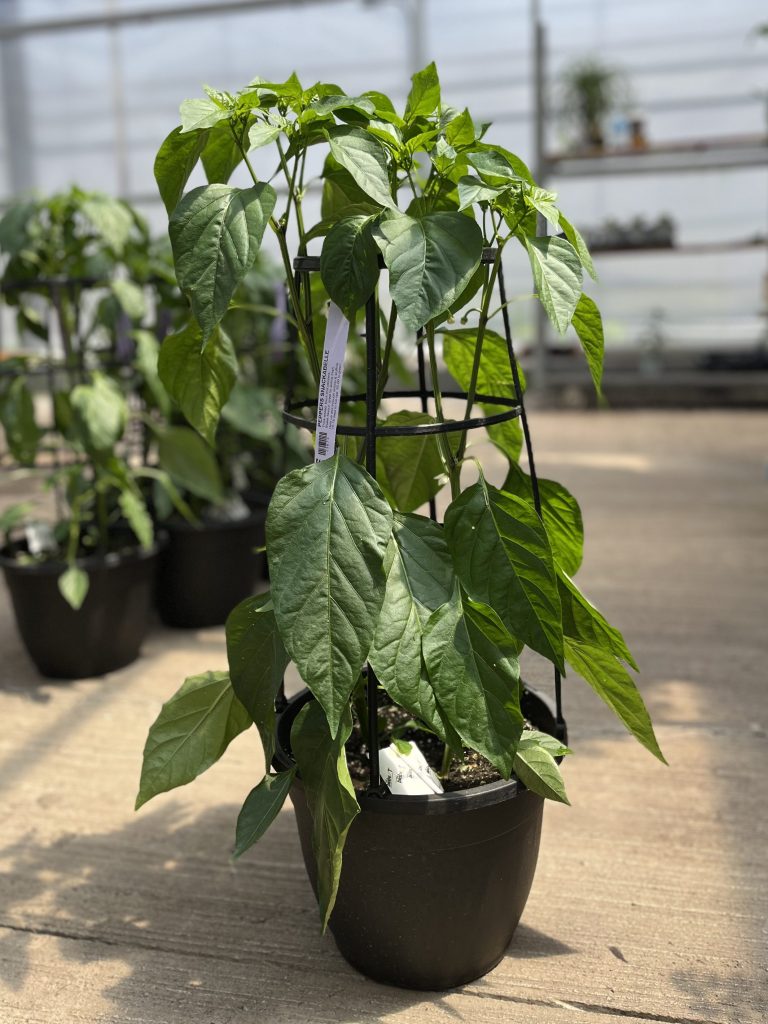
At Eising Garden Centre, you’ll find vegetables in 6-packs, 4” pots, trellised patio containers, patio bowls and hanging baskets - while supplies last, of course!
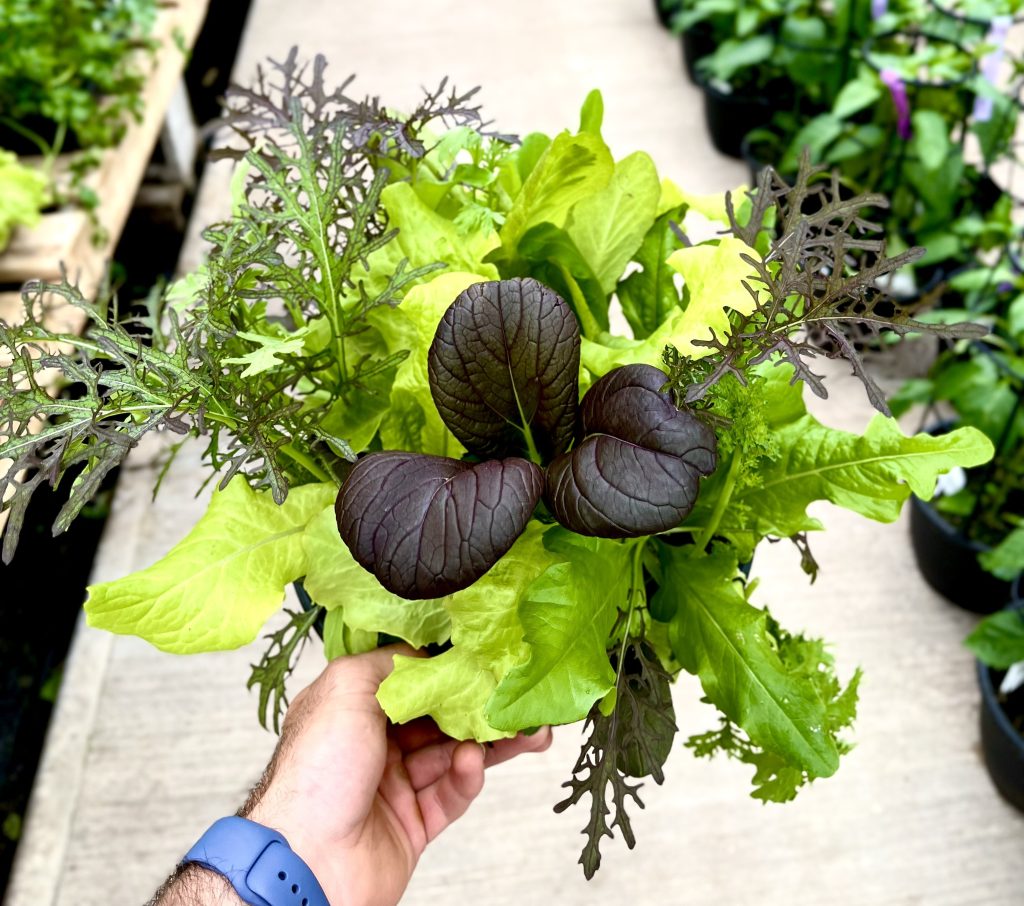

Herbs also love warm weather, and tender varieties like basil are safe to plant once all danger of frost has passed. Whether you plant herbs directly into the ground or create a potted herb garden near the kitchen door, they’ll add fresh flavour to your meals all season long. A container of herbs also makes a wonderful gift when visiting friends and family for a summer BBQ.
While you’re in the vegetable and herb aisle, keep an eye out for everbearing strawberries in planters and containers of tropical fruits like lemons, limes, and oranges.
Annual Flowers
Winter-weary flower beds can be revived almost instantly with a burst of colourful annuals! If you’re looking for an immediate impact and blooms that last all summer long, annual flowers are the answer.
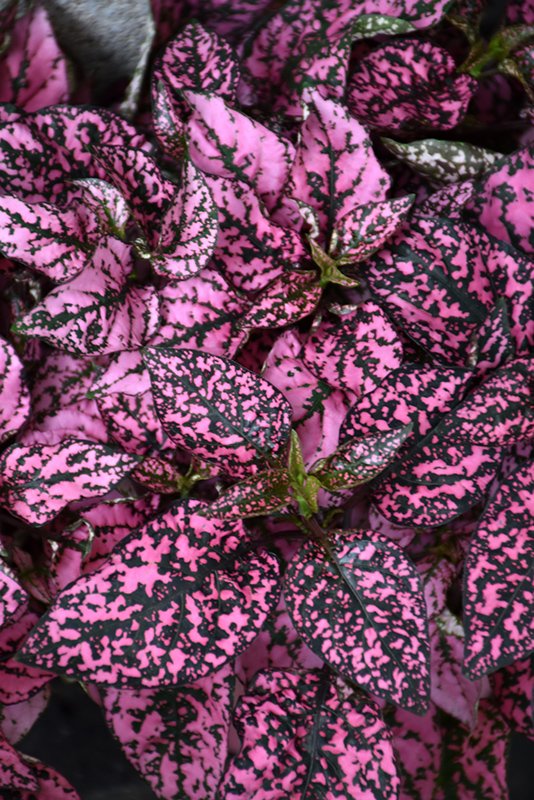
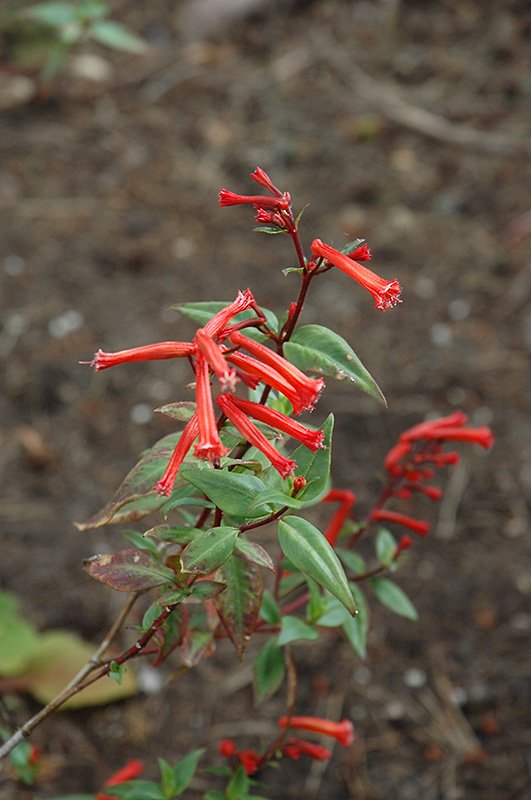
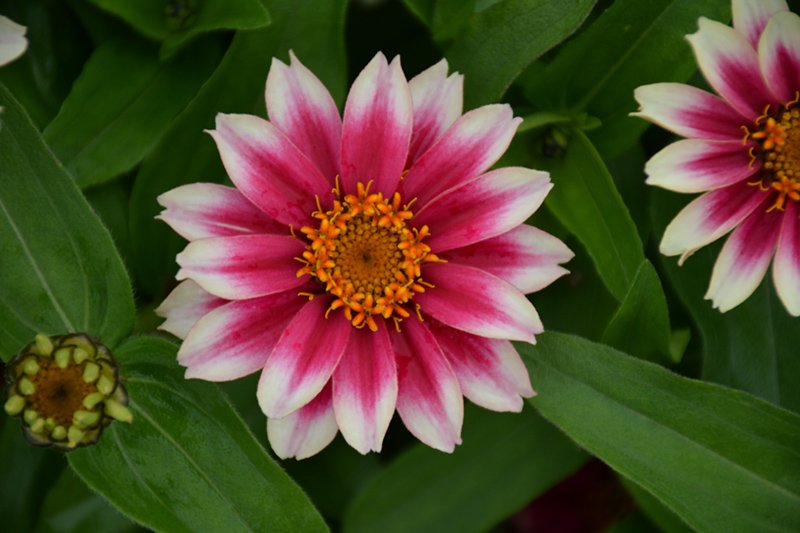
Whether you plant them in beds, containers, window boxes, or hanging baskets — or choose from one of our gorgeous pre-planted options — just add water and fertilizer, and you’ll be rewarded with a vibrant display that keeps on giving.
Perennials
While perennials may not bloom all summer, many offer extended bloom periods, and by combining different varieties, you can create a succession of flowers that lasts for months. Perennials also provide essential greenery to anchor your garden and enhance the look of your flowering plants.
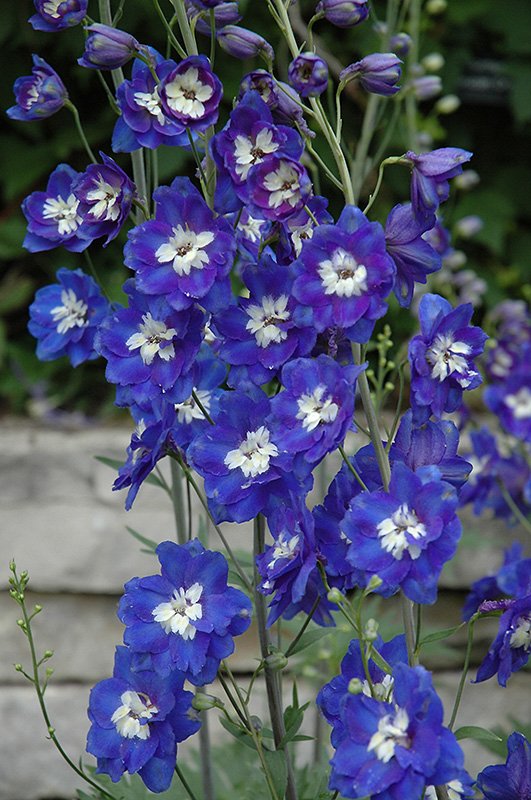
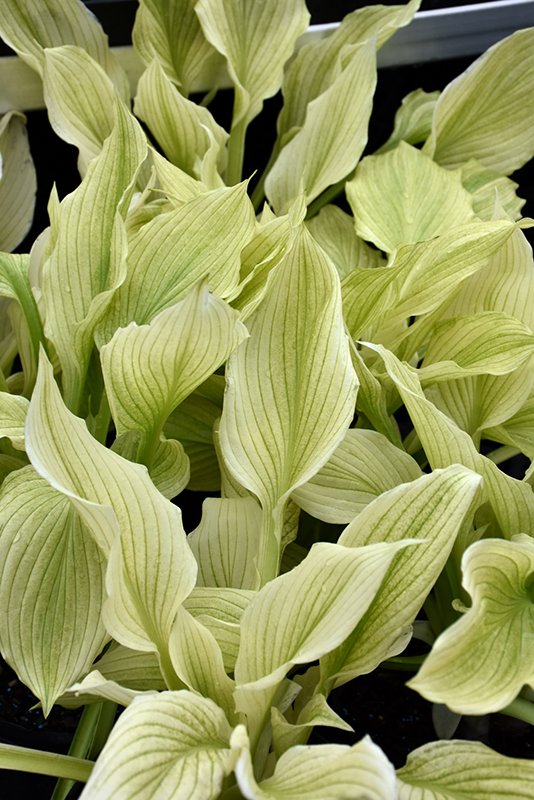
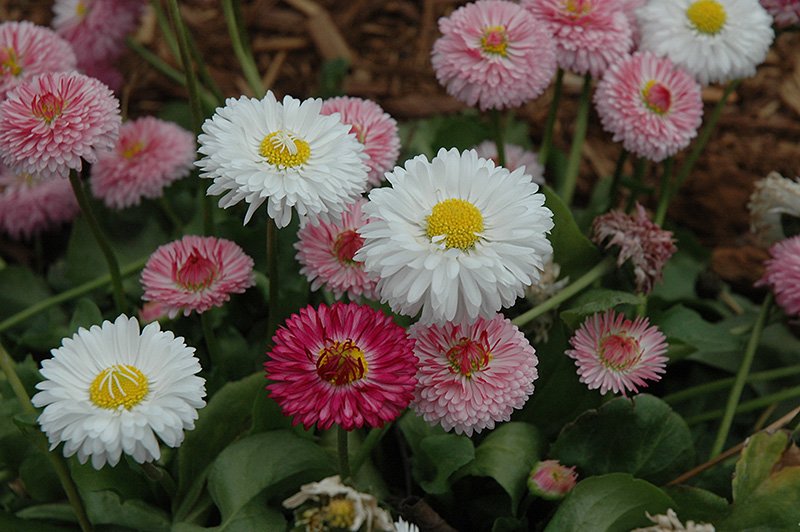
You can plant perennials from spring through fall, but getting them into the ground now gives them a strong start. From hostas and ornamental grasses to daisies and delphiniums, there’s a perennial for every style of garden — and the best part is, they’ll return each spring like dependable old friends.
Trees, Shrubs and Vines
Often called “the bones” of the garden, trees, shrubs, and climbing vines add essential structure, height, and seasonal interest. Planting them now allows you to design your garden layers thoughtfully, incorporating annuals and perennials around their base.
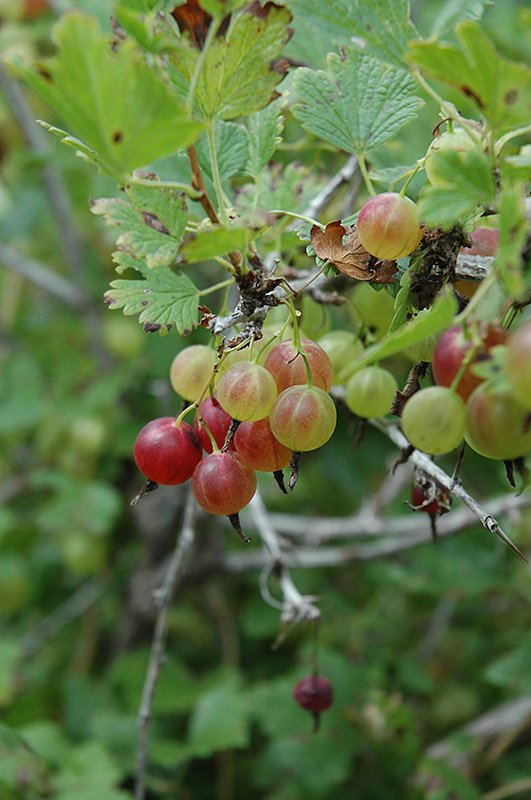
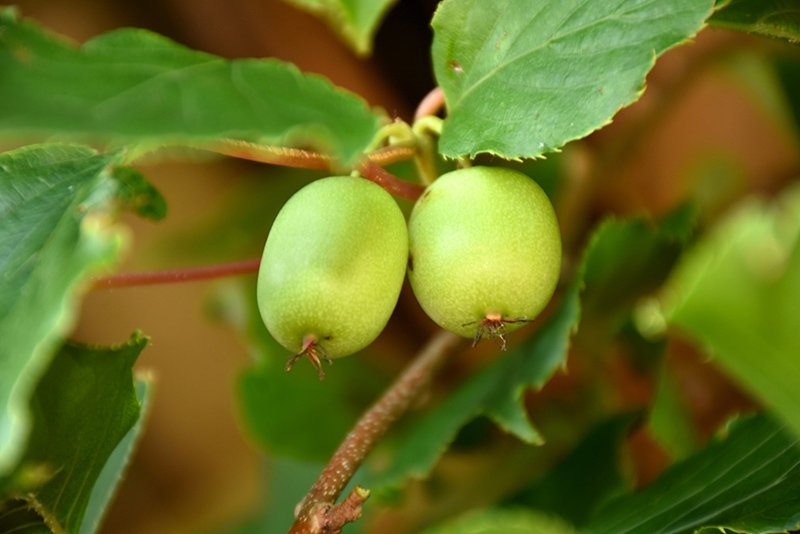

Spring is also the prime time to purchase and plant fruit trees and fruiting shrubs. At Eising, spring offers the best selection for starting your home orchard. Are you thinking of adding a few edible shrubs? Gooseberries, haskaps, hardy kiwi, rhubarb and raspberries are excellent choices.
Mulch
Okay, it’s not a plant, but this is a reminder to add mulch to your garden beds or containers. After planting, adding a layer of mulch to your garden beds or containers helps retain soil moisture, reduces transplant shock, and suppresses weeds. Even if a few weeds manage to sneak through, mulch makes them easier to pull.
Water Garden Plants
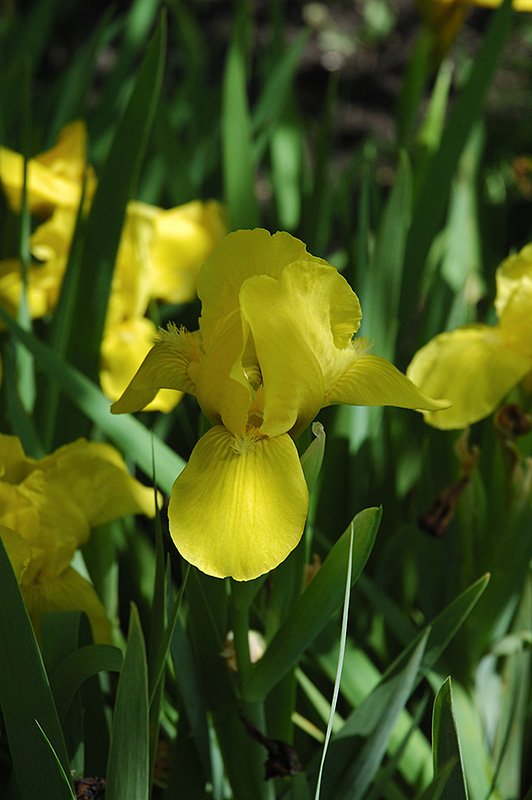
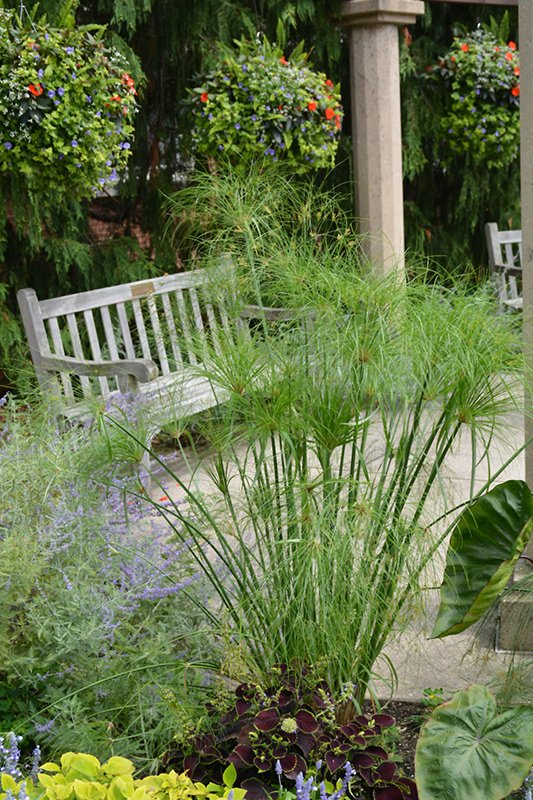
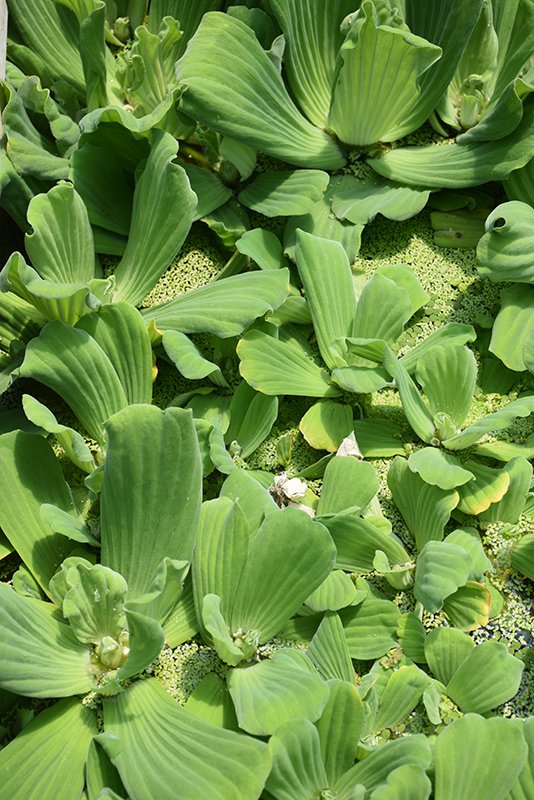
If you have a garden pond, spring is the perfect time to add water plants. Floating plants, such as water hyacinths and water lilies, help shade the pond’s surface, reducing algae blooms. Marginal or bog plants, such as water iris, papyrus, and cattails, also help keep the water healthy and clear by improving oxygen levels and providing habitats for beneficial wildlife.
Time to Grow!
May is one of the most anticipated and exciting months in the garden. Whether you’re dreaming of fresh vegetables, a lush landscape, or a colourful flower display, planting now sets the stage for a beautiful, bountiful season. Visit us at Eising Garden Centre to find everything you need — and let’s get growing!
By Dave Zeldon and Ely Schweyer
This is a question we hear daily during the spring, summer and, especially, the fall. Unfortunately, many homeowners do not see any adverse changes occurring in their trees until they look dead, or nearly so.
You Might Not Need to Panic Yet
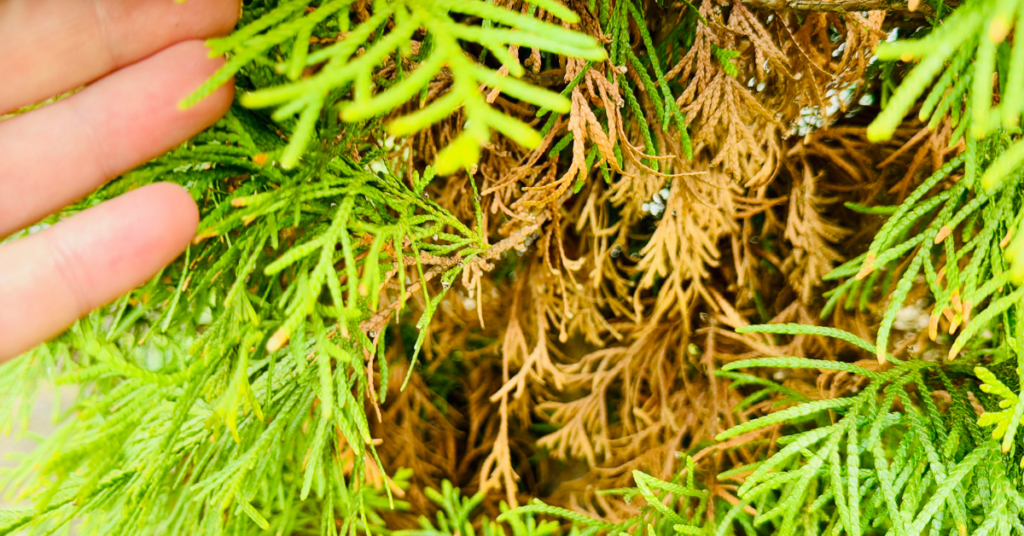
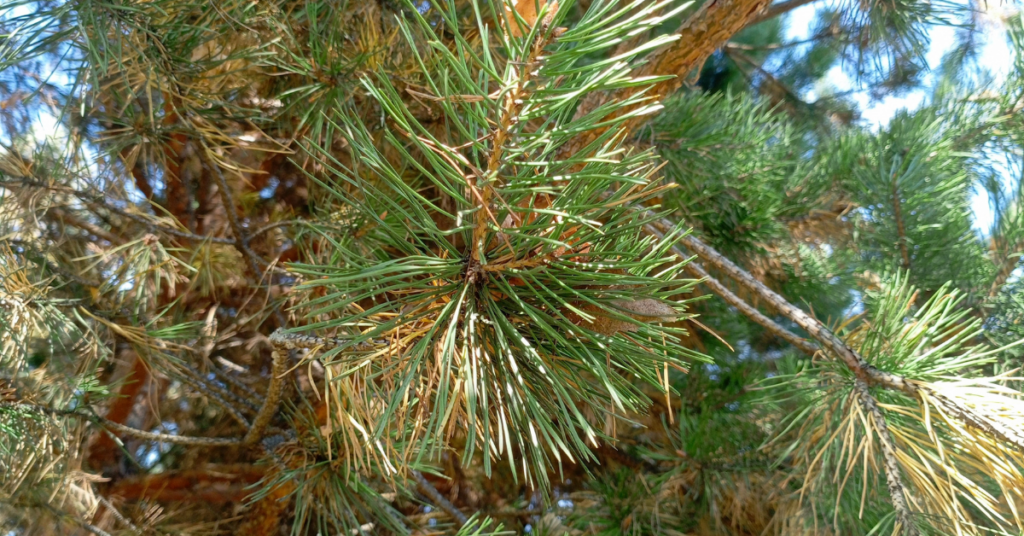
The discolouration and dropping of evergreen needles are a natural phenomenon and the main cause of needle loss in the wild. Evergreen needles, as the name implies, survive for a lengthy period, and in fact usually have a life span of five to seven years on healthy trees, however, they must be shed. The needles first start to die in the central and lower part of the tree, and this change progresses upward over time. You will see spruce trees naturally lose needles as they get older.
Age is an important factor here in causing needle loss and branch death, however, in landscape plantings of coniferous evergreen trees, pests and disease are likely the major cause of needle loss and dying branches. If there is a sudden fall of a very large number of brown needles and leaves, this signals to us that there is something drastically wrong!
This can happen as early as a year or two after a tree is planted. This is especially true in Haldimand and Eastern Norfolk County where heavy clay soils predominate. Spruce trees, for example, do not grow well on clay soils.
When You DO Need to Worry
Here are some of the more common problems, apart from natural aging that afflict spruce trees, the probable causes and ways of treating the problem.
☝️Unfortunately, these majestic trees, the most popular evergreen planted on our residential properties, incur many other pest and disease problems not dealt with here.
Symptom: Rusty brown needles that eventually fall.
Likely causes:
1. Internal fungus disease (called Cytospora or white blister canker). This creates cracks in the bark causing resin to drip and leave grey-white dripping streaks on the bark. The fungus also causes open wounds or blisters on tops of branches. These wounds can be greyish white or greyish blue in colour, eventually turning brown and black.
2. Feeding by spider mites which leave fine, poorly formed webs in the needles, especially near the ends of the twigs.
Best treatments:
1. Properly aerate and fertilize tree out to a distance of half its height in all directions, where possible.
2. Pressure wash thoroughly once a month with water only, all needles and branches as high as possible on the tree. Water pressure dislodges spider mites.
Symptom: Chewed up ends of twigs in June.
Likely cause:
Spruce bud worms which develop in the needle cluster that arises from a bud.
Best treatment:
Spray the biological pesticide, BTK (eg. Dipel), onto the entire tree when feeding is first noticed in early spring, to kill the young caterpillars.
Symptom: Black sooty mold covering twigs and needles.
Likely causes:
1. Spruce bud scales, ball-shaped insects, initially light brown in colour but eventually turning black. Often two to five scale balls cluster in one location on the twig; honey dew excretions from scales become infected with sooty mold.
2. An overhanging shade tree such as oak, maple or elm may have heavily infested leaves with aphids whose honey dew secretions become infected with sooty mold.
Best treatment:
1. Pressure wash tree using water only to dislodge young scales (called nymphs) in May and early June while they are in the crawling stage. Scale nymphs fall to the ground where they cease to be a threat to the tree.
2. Spray shade tree in early spring with insecticidal soap to control aphids. The problems of other coniferous evergreens such as pines, firs, cedars and junipers can usually be treated with correct diagnosis, though some diseases are lethal.
We hope these help you troubleshoot common issues often found in evergreen trees! For more information - and evergreens – visit Eising Greenhouse and Garden Centre! 🌲
By Dave Zeldon and Ely Schweyer
As plant people, we’ve all experienced that moment when we realize the novelty phase of that plant we brought home from the garden centre has worn off. The plant isn’t standing quite as tall, the flowers aren’t as bold, and the leaves are unravelling smaller or not at all. What is this magic they perform in the greenhouse? Perhaps you’ve provided sufficient lighting and adequate watering; there’s just one thing that is often overlooked because dirt is dirt, isn’t it?
97% percent of plant tissue is made up of carbon, hydrogen, and oxygen pulled from the air and water, the remaining 3% is comprised of 16 other elements taken up from the soil. The quality of soil then is crucial to your plant’s health. Whether your plants are in pots or in ground, each soil type you could provide your plant offers something unique and may lack in another.
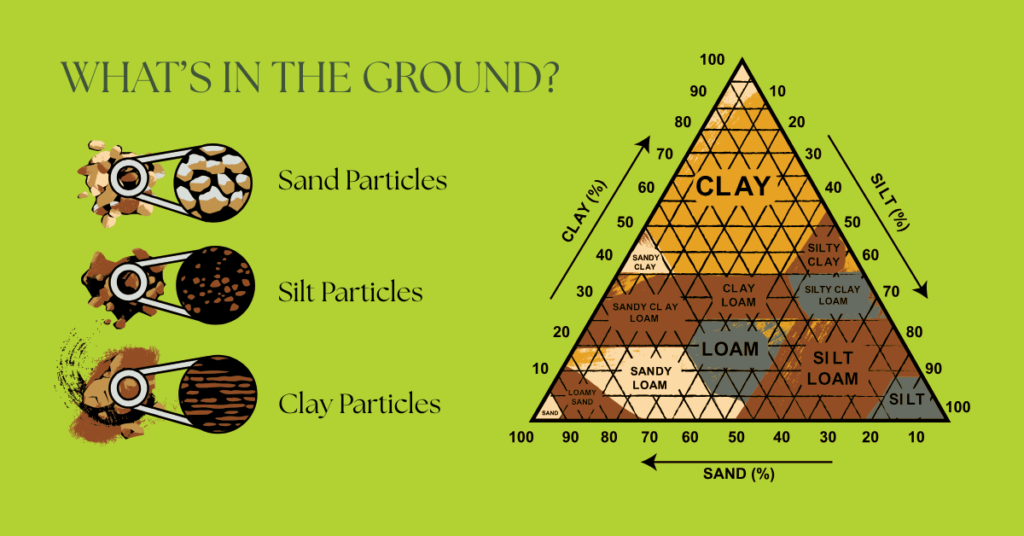
*Clay particles are even smaller than silt particles.
Resist the Urge to Slam Your Plant in Potting Soil
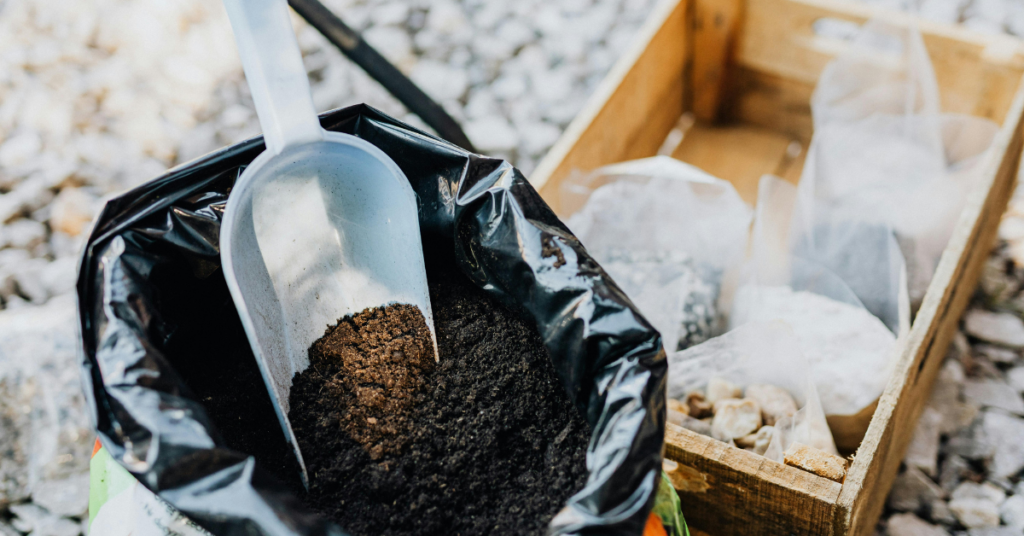
There’s bags and bags of rocks, sand, bark, manure, and moss on the shelves, yet the common buyer seems to always opt for potting mix. It’s fair; organic matter is usually great for plants and simple to use. However, most people don’t realize it’s merely an ingredient.
Strictly using potting mix is like attempting to make a loaf of bread out of only flour. All those bags of other materials on the shelves are also components for a successful plant diet!
Potting mix is a great base material, however, alone it presents risks of compacting, becoming waterlogged, can mold easily, and over time will become depleted of nutrients. Consider mixing the following ingredients into your pots, ground and raised beds to meet your plant’s required nutrients, pH level, and volume of moisture.
🖱️Use our Plant Finder to find some details on your plant! We try our best to keep this updated!
👍 Rule of Green Thumb: Plant roots can help you to determine the medium needed – thick, robust roots (i.e., yucca) typically enjoy chunkier materials, and smaller, delicate roots (i.e., begonias) enjoy finer materials.
Mulch and Bark Bites
- Mulch is the organic slow-release fertilizer, as it slowly decomposes, it lowers soil pH. However, may eventually compact soil once fully broken down.
- In the meantime, it creates shelves in the soil that create air pockets and prevent the soil from compacting. Mulch is a great short term medium for arid potted plants.
- If kept too wet, it can harbour fungus gnat larvae.
- Make sure when sourcing your mulch it doesn’t contain any black walnut.
🖱️ See more on mulching here.
Sphagnum Peat Moss
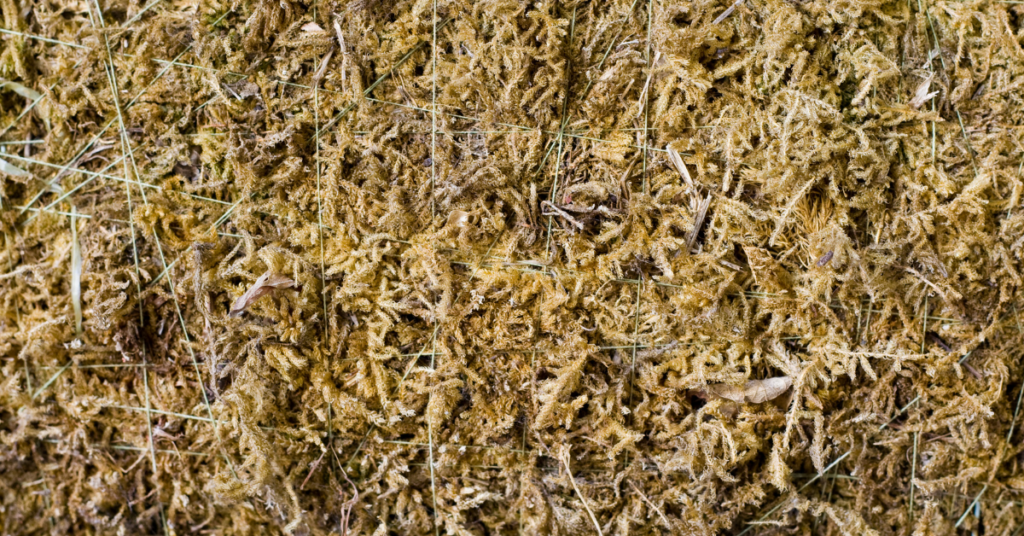
- Peat moss is used to help retain moisture and lower pH in the soil given it is harvested from bogs.
- Retains nutrients very well.
- It is difficult to rehydrate once it loses moisture.
Coconut Coir
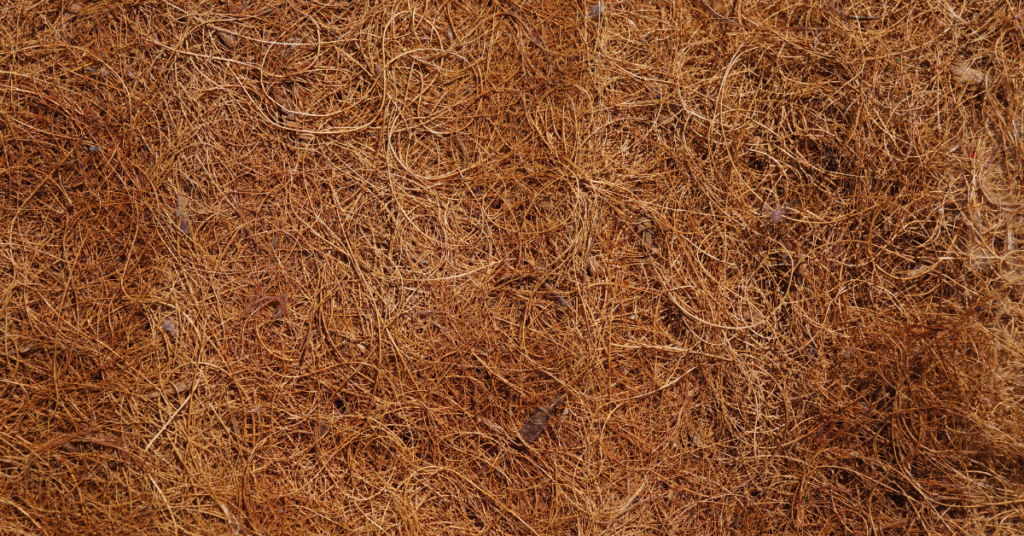
- Coco coir, much like peat moss is used to keep the soil moist and keep pH low, however it lasts longer and is possibly less invasive to harvest.
Sand
- Grains are relatively large and do not bind, allowing for excellent drainage depending on grade.
- Adds weight to top heavy plants.
- Has no ability to store minerals itself, however, pH can vary by its content of shells, minerals like silica, or fine organic matter.
Manure & Compost

- Source these organic by products locally and ensure they’re not too hot. These additions can significantly lower pH.
- Sheep manure is usually near free of weed seeds as sheep digest seeds better than cattle and horses!
Perlite
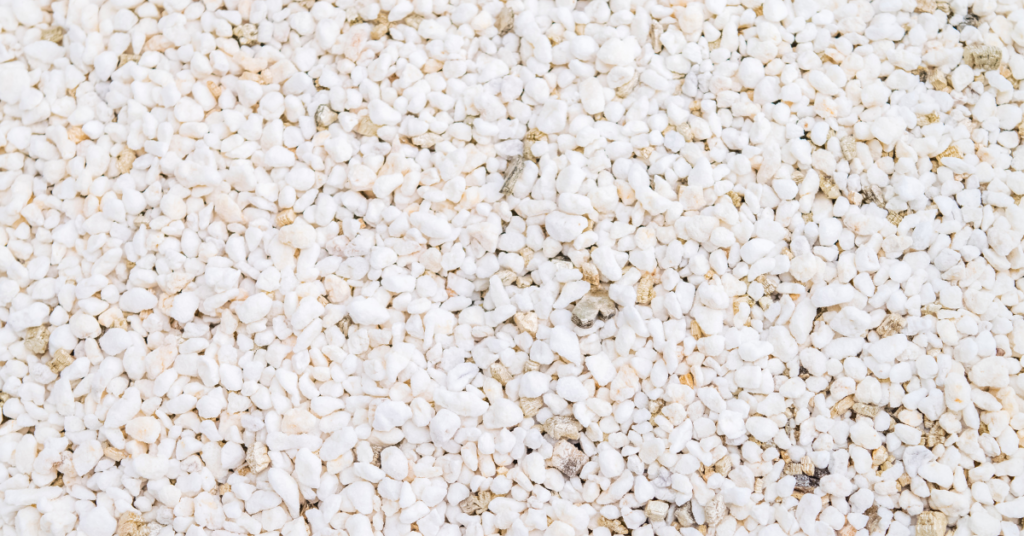
- Perlite is a volcanic byproduct (so it floats like pumice) that helps drainage in the soil and prevents compaction – vital in the case of starting seeds.
- If a rockier, well-draining medium is required for your plant, consider perlite.
- Perlite can expand holding trace amounts of water.
- Perlite has a neutral, slightly acidic pH.
- Make sure when sourcing perlite, that you are not being sold Styrofoam balls.
Vermiculite
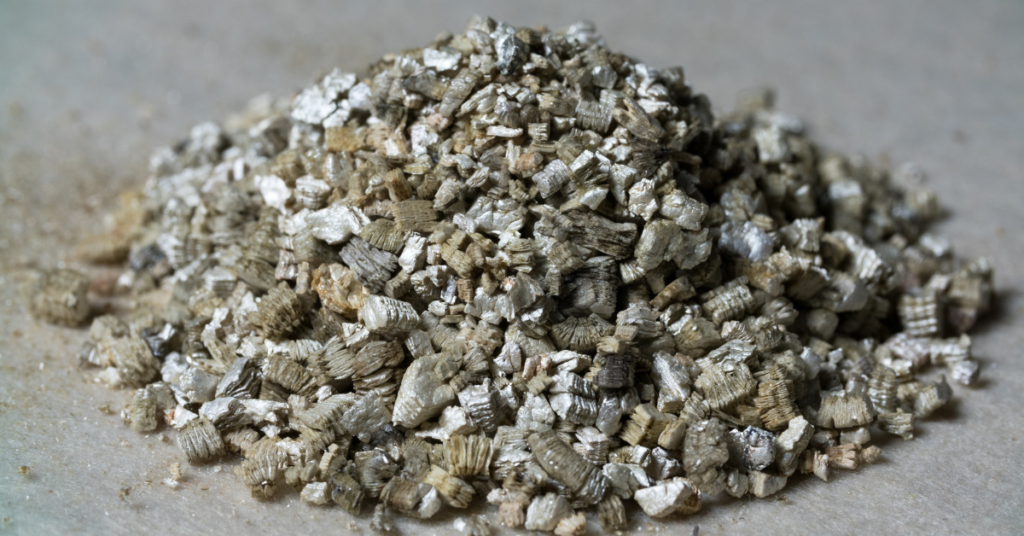
- Vermiculite is a recycled mineral used similarly to perlite, and too has a neutral, slightly acidic pH.
- Expands with water content.
- Can contain amounts of potassium and magnesium (as well as good cation exchange capacity).
- Runs the potential risk of introducing asbestos into your soil.
Calcined Clay Materials

- Clay materials like recycled brick bits, pottery, or lecca are typically used for arid plants as it improves aeration and drainage.
- Can raise pH.
- Can retain some water.
- High cation exchange.
- Can also be used for starting robust cuttings when kept moist.
- Probably not ideal for inground amendments.
Maintaining Your Plant’s Dietary Needs
Perhaps we’ve crafted the perfect soil type for your plant – your plant thanks you – but over time, we will end up in the same staling predicament. Why? Because with each thorough watering, we leech the soil of the provided nutrients. Best we use the plant-specific required fertilizer for your plant to prevent nutrient loss.

Organic sources of fertilizer such as bonemeal, composts, and manures, along with the application of lime, will improve the physical condition of the soil in terms of water and element holding ability. Unfortunately, in many cases though, manures and lime alone cannot be depended upon to provide enough available nutrients in soils with low essential element reserves.
Let’s talk about commercial fertilizers, which can help target your plant’s exact needs much like vitamins and supplements!
The Scoop on Fertilizers
Of the essential 16 elements your plant pulls from the soil, Nitrogen (N), Phosphorus (P), and Potassium (K) are the most critical for good plant growth. You’ll recognize the three numbers appearing on your commercial fertilizer labels known as the fertilizer analysis of the product, representing the percentage of each of the three "macronutrients" in the order of N, P & K.

Nitrogen (N) is necessary for green leafy or vegetative growth which is important in crops like corn, cabbage, and potatoes.
☝️ It is important to remember that you should not use a fertilizer which is high in nitrogen late in the summer on your perennials, as it may cause a boost of growth which will only freeze as the cold weather sets in. Also, too much nitrogen in the analysis could cause too much lush, leafy growth thus inhibiting the desired flowering aspect of a plant species.
Phosphorus (P) promotes the development of flowers, fruit and roots. Crops like tomatoes, cauliflower and garden flowers.
Potassium (K) boosts plant hardiness, stem strength, resistance to disease and drought which is important to all crops, but especially in potatoes, celery and rhubarb.
👍 Rule of Green Thumb: For foliage plants, provide them with shade and lots of nitrogen, and for flowering and fruiting plants, provide them with lots of sun and lots of phosphorus!

Amending Clay
Hello Haldimand and Eastern Norfolk!
We’re presented with the challenge of compacted, often shallow and waterlogged clay, which proves difficult but not impossible.
Clay becomes compacted and waterlogged as it is the smallest soil particle – smaller than a grain of sand, and even smaller than silt – with rough edges that allow it to interlock and bind. In this instance, roots cannot penetrate further into the soil, are susceptible to root rot, and air pockets are slim to none.
This, however, can be fixed with the addition and renewal of the above materials.
Mindful that you don’t create a watery bowl in the ground (score the edges the area being worked), you can add organic matter (i.e., manure, compost, and potting soil) for nutrients, as well as mulch, sand and perlite for aeration and drainage. Annual soil particle aggregation in clay soils increases air porosity (air pockets) and is accomplished by the incorporation of organic matter that breaks down to form humus.
🖱️ See more here for planting trees in clay.

We hope this soil and fertilizer guide helps you provide all the vital nutrients to your beloved plants in ground and above ground! For more information - and soil – visit Eising Greenhouse and Garden Centre! 🌱
How to Stay Warm and Stylish
By Ava Green
Colder temperatures are around the corner, and some of us are not looking forward to it! Whether you love winter or not, Sassyfras Boutique inside Eising Greenhouse and Garden Centre has the cozy, stylish clothes you need to look your best and stay warm all season long.
Begin with Layers
Fall, winter, and spring can all bring unpredictable weather to our corner of southern Ontario, so layering is key. Winter is an especially good time to follow the 3-layer rule:
- A base layer keeps you dry
- A mid-layer adds warmth
- An outer layer protects from the elements
Build Your Cold-Weather Capsule Wardrobe
Creating a winter capsule wardrobe makes dressing warm and stylish easy and stress-free. Here are a few ideas to get started:
Base Layer:
Start with a basic tee, a long-sleeve mock neck, or a long-sleeve crew neck top. Choose natural fabrics that wick moisture and keep you dry.

Tights or leggings make a great foundation under dresses or pants for added warmth.

Mid Layer:

For warmth, add a sweatshirt, a crewneck sweater, a v-neck sweater, or a turtleneck.

If you’re stopping at two layers, choose a chunky knit or oversized sweater for a cozy statement look.
On top of your tights or leggings, try a faux-suede skirt, faux-leather pants, wide-leg trousers, jeans, or a dress, maybe even a comfy sweater dress.
Outer Layer:

Top it all off with an eye-catching outer layer! Try a bomber jacket, blazer, faux-fur jacket, puffer vest or jacket, or a trendy coatigan for warmth and style.
Accessorize to Elevate Your Look
What makes an outfit really stand out? The accessories! At Sassyfras, you’ll find everything you need to complete your winter look.

From belts (perfect for cinching a blazer or dress) to trendy handbags, classic tote bags, sunglasses, and a wide selection of everyday jewellery, including locally made, one-of-a-kind pieces. You’ll find the perfect finishing touches that reflect your personal style.
Mix, Match and Stay Cozy

Once you’ve built your base, mid, and outer layers, the fun begins! Mix and match your pieces to create new combinations that make winter dressing simple, cozy, and chic.
With just a few well-chosen items from Sassyfras, you’ll be ready to step out in style, no matter how cold it gets! ❄️
Figures.
By Dave Zeldon and Ely Schweyer
Now that we’ve brought our plants inside the house to over-winter, we begin to notice those slender, dark gray flies (0.2- 0.4 cm long) flitting about atop the pot soil. Yuck!
These insects are known as fungus gnats (Bradysia sp.). Whereas they are considered only to be a minor nuisance in house plants, due to their sheer numbers hovering around an attractive plant, they can certainly take away from its appeal. Below is a bit about these pests and some basic control measures.
How Do Fungus Gnats Affect Your Plant?
Other than their swarming presence, fungus gnats are not a direct threat to your plant, but an indirect threat. As their name implies, they are concerned with snacking on the fungi mycelium living in your plants’ soil. (Yes, it’s there and it’s a good thing!) However, these little flies can transfer disease between plants, making them nuisance pests.
A Quick Look at Their Life Cycle:
Adults may lay 300 eggs at a time, which hatch a week later into tiny, threadlike larvae. The larvae feed upon organic matter in the potting soil. After two weeks, they pupate into winged adults, that have no trouble annoying you to no end.
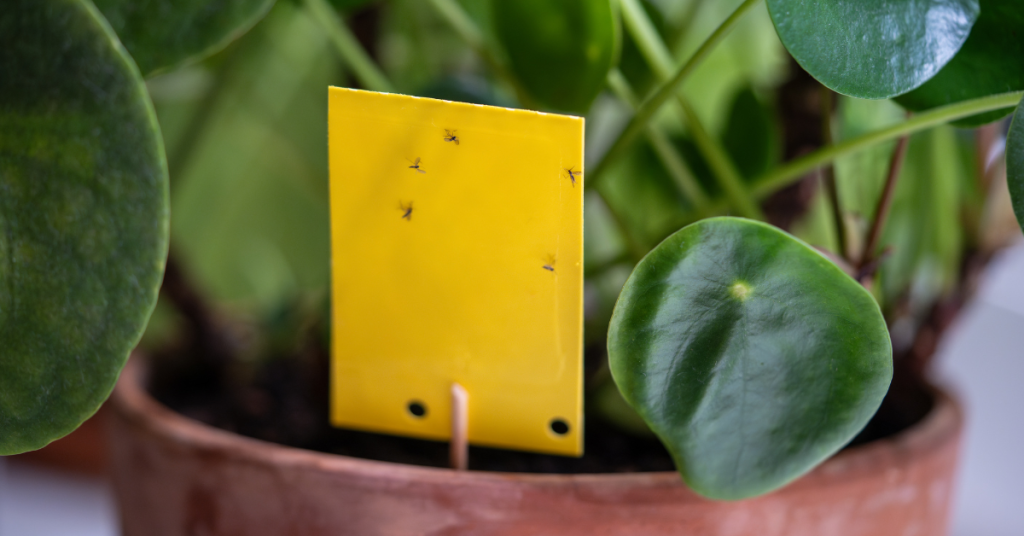
Basic Control Measures:
- The fastest and easiest method of control is to catch the flying adults with yellow sticky cards. The large cards can be cut into little strips and mounted onto little wooden splints (popsicle sticks) then placed around the base of the plant out of the line of sight.
- Water your potted plant from the bottom (sub-irrigation) by adding water to the saucer it is sitting in. This will keep the soil surface dry, making it uninhabitable for the hatching insect larvae. If the surface soil is already very wet, try placing a few potato discs or slices on the surface of the soil. This will attract the larvae as they migrate to the potato to feed. Simply replace the discs every three to four days with fresh slices to eliminate the next generation of adults.
- If you have a large number of plants afflicted as in a greenhouse situation, an application of predatory nematodes (Steinernema feltiae) as a soil drench is suggested. Nematodes will attack the fungus gnat larvae in the soil which will in turn lead to more nematodes being produced.
Good Bugs Are Working at Eising Greenhouse and Garden Centre!
Here at Eising’s Greenhouse and Garden Centre, we practice what as known as I.P.M. or Integrated Pest Management. Since we try to create a perfect environment for our plants, we also, unintentionally create perfect conditions for their related pests. To keep the pests at bay, we institute series of steps:
1 - Cultural Controls: We select only the healthiest of plant material to sell and keep them healthy through proper fertilization and growing conditions. We’ve learned that insects are attracted to stressed-out plants!
2 - Physical Controls: We are constantly walking through our plant aisles checking for insect and disease presence and removing the affected plants. Also a clean growing area means there is less chance of pest populations building up on alternate host plants such as weeds.
3 - Biological Controls: At the beginning of the growing season, even before there is any evidence of pest problems, we introduce naturally occurring predators into the growing areas. This is to be at the ready for when the pests do arrive!
In our arsenal we have a series of tiny parasitic wasps, microscopic wire-worms called nematodes, predatory mites as well as bacterial inoculants. So therefore, we cannot spray any chemical insecticides as they will hurt our very valuable biological cache!
Did you ever imagine all the behind-the-scenes work that goes into your plant purchases from Eising's to make them the best value around?
For more information – and bug products - visit Eising Greenhouse and Garden Centre soon! 🪰