
By Dave Zeldon and Ely Schweyer
Many home gardeners are really missing their harvest of fresh vegetables these wintry days – and many beginners have New Year’s resolutions to become greener thumbs.
If you’re looking for something kid friendly, easy on the budget, and nutritious to do this winter, you may want to try microgreen farming!

Seeds to Start
The seeds of many vegetables and beans are suitable for hydroponic sprouting into tasty young shoots that will be ready for the table in less than a week!
Seeds such as alfalfa, broccoli, clover, lentil, mung bean, mustard, onion, radish and soybean are excellent choices for this activity plus they are invaluable in terms of their nutritional content.
Sprouting seeds on your kitchen counter takes only minutes a day, and the reward is a steady supply of fresh, crunchy shoots.
It is important to start by purchasing some packaged seed expressly for sprouting. The directions will indicate how much is needed to produce 100 grams of sprouts. The seed-to-sprout ratio can differ substantially - anywhere from 1.5 to 8.5 units of sprouts or more per one unit of seed - so follow directions carefully and make sure your jar is large enough to accommodate all the sprouts while still leaving room for good air circulation. As a rule, begin with 1 tbsp. (15 mL) of seeds for small varieties such as alfalfa and radish, 2 to 3 tbsp. (30 to 45 mL) for medium ones such as lentil, and up to 4 tbsp. (60 mL) for large seeds such as beans and peas.
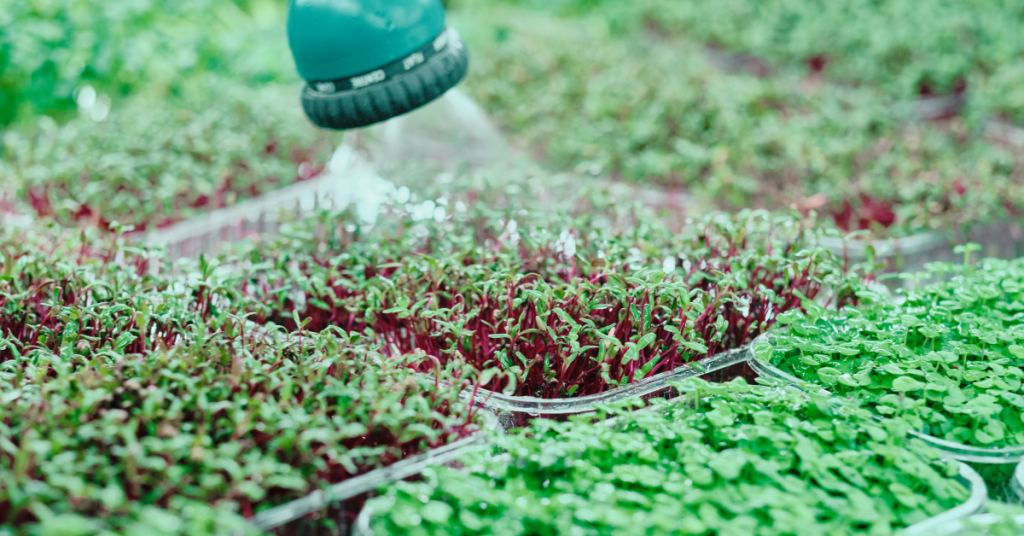
Seeds to Sprouts
Simply put seeds into jar and position screening over opening, using an elastic band to hold the covering in place. Fill jar one-third full of warm (about 40°C) water and swirl seeds around for a minute or so. With the covering in place, drain water. Refill jar one-third full of cool water and let seeds soak for four to eight hours.
Next, begin daily regimen of rinsing seeds three times a day at roughly eight-hour intervals. Drain and refill jar with cool water, swirl seeds for about 30 seconds and drain again. Then, invert the jar so screening is at the bottom and rest it at a 45-degree angle in the bowl. Place on the kitchen counter out of direct light (place bean shoots in complete darkness, as they often taste sweeter when they're grown this way). Repeat this process for three to five days.

Simple Sustenance
You can start to harvest your sprouts once they're three to five centimetres long. Rinse and drain them thoroughly and place them in an airtight container and refrigerate immediately; they should remain fresh for up to five days.
Clover, alfalfa, radish, and mustard seeds give rise to the delicious sandwich booster sprouts. Sprouts are one of the most concentrated natural sources of vitamins, minerals, enzymes, and amino acids.
Plants inside the home help bring life to a long winter, if you’re looking for more information – or plants – visit Eising Greenhouse and Garden Centre! 🌱
We’ve been seeing so many creative ideas for garden and landscape design lately, and we’re particularly interested in one element of backyard design that doesn’t get as much attention: garden paths and stepping stones. After all, it’s hard to truly appreciate your garden without a good path to help you navigate through it!
On top of giving you a better view of all the hard work you’ve put into your garden, you can also use pathway design as a tool for separating your yard into different areas, creating the illusion of more space and providing a framework for your design layout. A simple, straight path isn’t all that exciting, but a winding path that curves around trees and surrounding terrain adds a bit of whimsy, inviting you to explore the space.
We always love getting creative and thinking outside the box when it comes to landscaping projects. These stone pathway ideas are a perfect first step to transforming your space.

Recycled Mosaic Flower Stepping Stone
Lots of folks have been interested in recycled garden path ideas, because fancy stones aren’t always the most budget-friendly material. Plus, reusing our available resources and reducing landfill waste is always a big win! One of our favourite walkway ideas on a budget is the classic mosaic stepping stone, but with a fun twist that us garden geeks can really get behind: floral motifs!
Instead of placing your mosaic materials into a random pattern, arrange them in a swirling, geometric pattern that resembles a blooming flower! Use one round piece in the very centre, and then place the “petals” all around it. Suitable recyclable materials for your mosaic stones include:
- Broken china
- Bottles and glassware
- Crystals
- Colourful rocks
- Shells
A general-purpose sand-mix concrete will be the best material for walking path stones full of mosaic pieces, because it’s nice and smooth and won’t take away from the colorful accents, whereas a gravel mix would be too pebbly and uneven. Remember to use a generous layer of grout on top of your stones to fill in all the cracks and cover up any sharp edges.

Stone Pathways With Phlox And Other Groundcovers
Instead of plopping some paver stones on the lawn and calling it a day, why not jazz things up a bit with some colourful flowering groundcover plants? There are many low-growing plants that form dense mats of foliage and can handle a little bit of trampling without sustaining any damage, so they make lovely alternatives to grass, and they really make your pathway pop!
Creeping phlox is one of our favourite flowering groundcovers, because its candy-coloured shades of purple, pink and blue look like something out of a fantasy novel. Imagine, instead of the same old green lawn grass, your garden path was surrounded by a cotton candy meadow! Here are a few other eye-catching groundcovers we highly recommend:
- Creeping thyme
- Deadnettle
- Sedum
- Candytuft
- Bugleweed
- Clover
To see more flowering plants and groundcovers for the yard, check out our brand new webstore that’s loaded with images of our available plants!
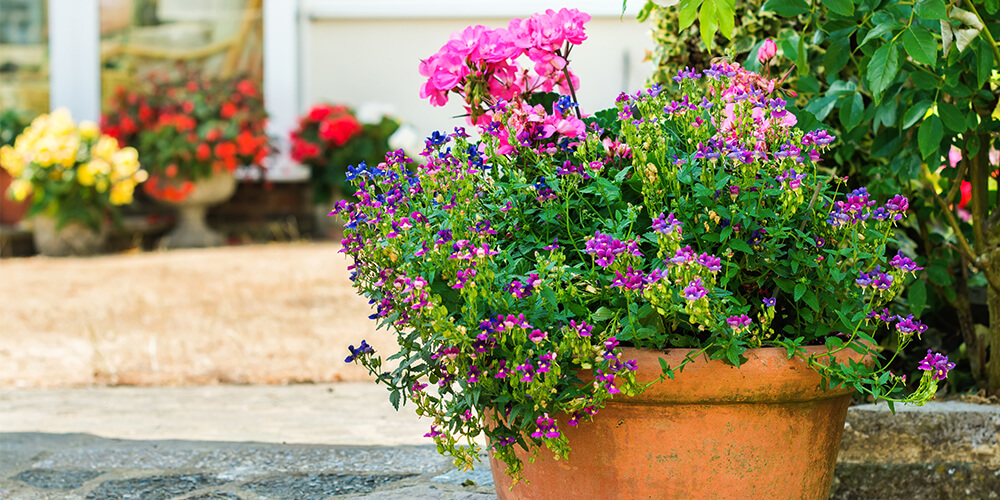
Container Garden Pathway Design
A clever way to add a border along your pathway without digging anything up is by lining the walkway with container gardens! This is an opportunity to really get creative, as you’ve got limitless options for your layout. You can go streamlined and buy a bunch of terracotta pots all in the same size, or you can mix and match different sizes and colours with a few funky accent containers thrown in for extra impact.
You can also play around with the different heights of the plants you put in your containers. Taller flowering plants like salvia and cardinal flowers, potted conifers, or even creeping plants on small trellises can act as a great divider between the yard and the walkway. Smaller flowering plants have more of an understated look, but are great if you don’t want to block the view of your surrounding garden plants.
Got any wild landscaping ideas of your own that you’d like to try to take on? We’d love to help! Our team of expert landscape consultants are happy to answer any questions you may have about DIY backyard makeovers. Visit us in-store or shop online to see our selection of plants and patio decor that are ready to make a new home in your backyard.