
For Height, Drama, and Eye-Catching Interest
By Ava Green
Every well-designed garden needs an anchor, something tall and confident at the back that gives the whole planting a sense of structure and depth. While shrubs and trees often fill that role, perennials can also do the job beautifully. The back row perennials below are sturdy, reliable performers that thrive right here in Norfolk County. Plant them at the back of a border or the centre of an island bed as the backdrop that makes everything around them look better.
False Indigo, Baptisia australis
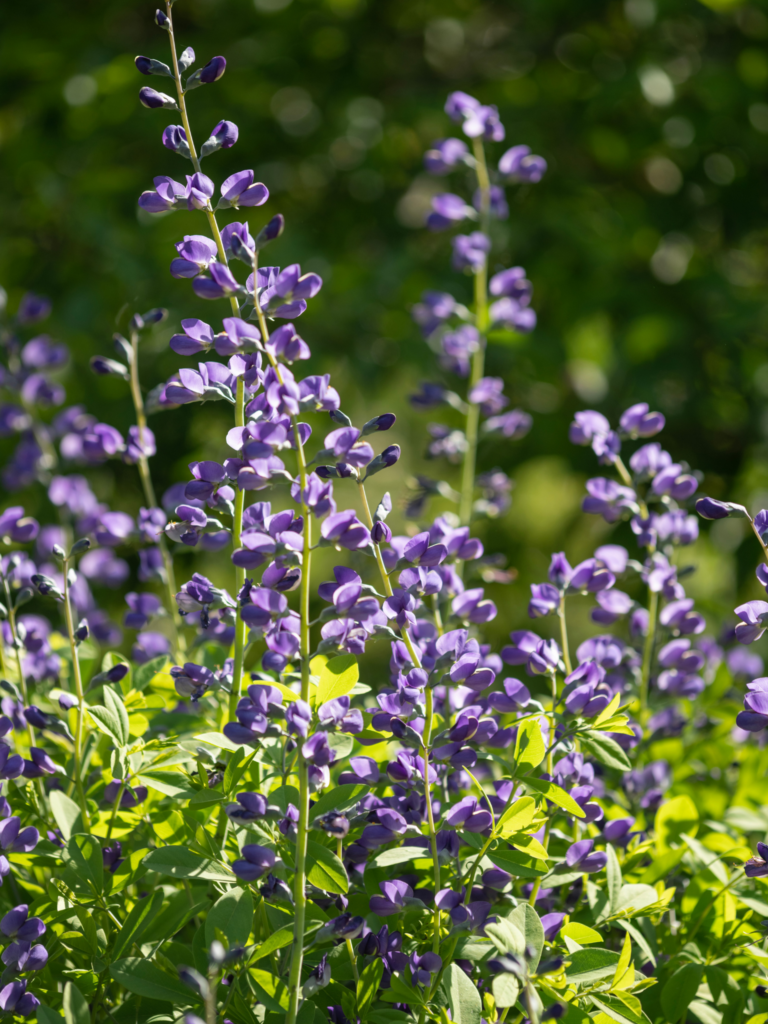
Baptisia is one of those perennials that gardeners discover and immediately wonder why they waited so long to plant it. In late spring, masses of stems are loaded with sweet pea-shaped flowers in shades of indigo blue, soft yellow, white or purple, and butterflies and bees absolutely love them. Once the blooms fade, the plant takes on a handsome, shrub-like form with blue-green foliage that holds its shape nicely for the rest of the season. While it’s slow to establish, it is extraordinarily long-lived, making it a plant you put in once and enjoy for decades.
Grows 3 ft tall and 3 ft wide | Full sun to partial shade | Blooms late spring to early summer
Hollyhocks, Alcea
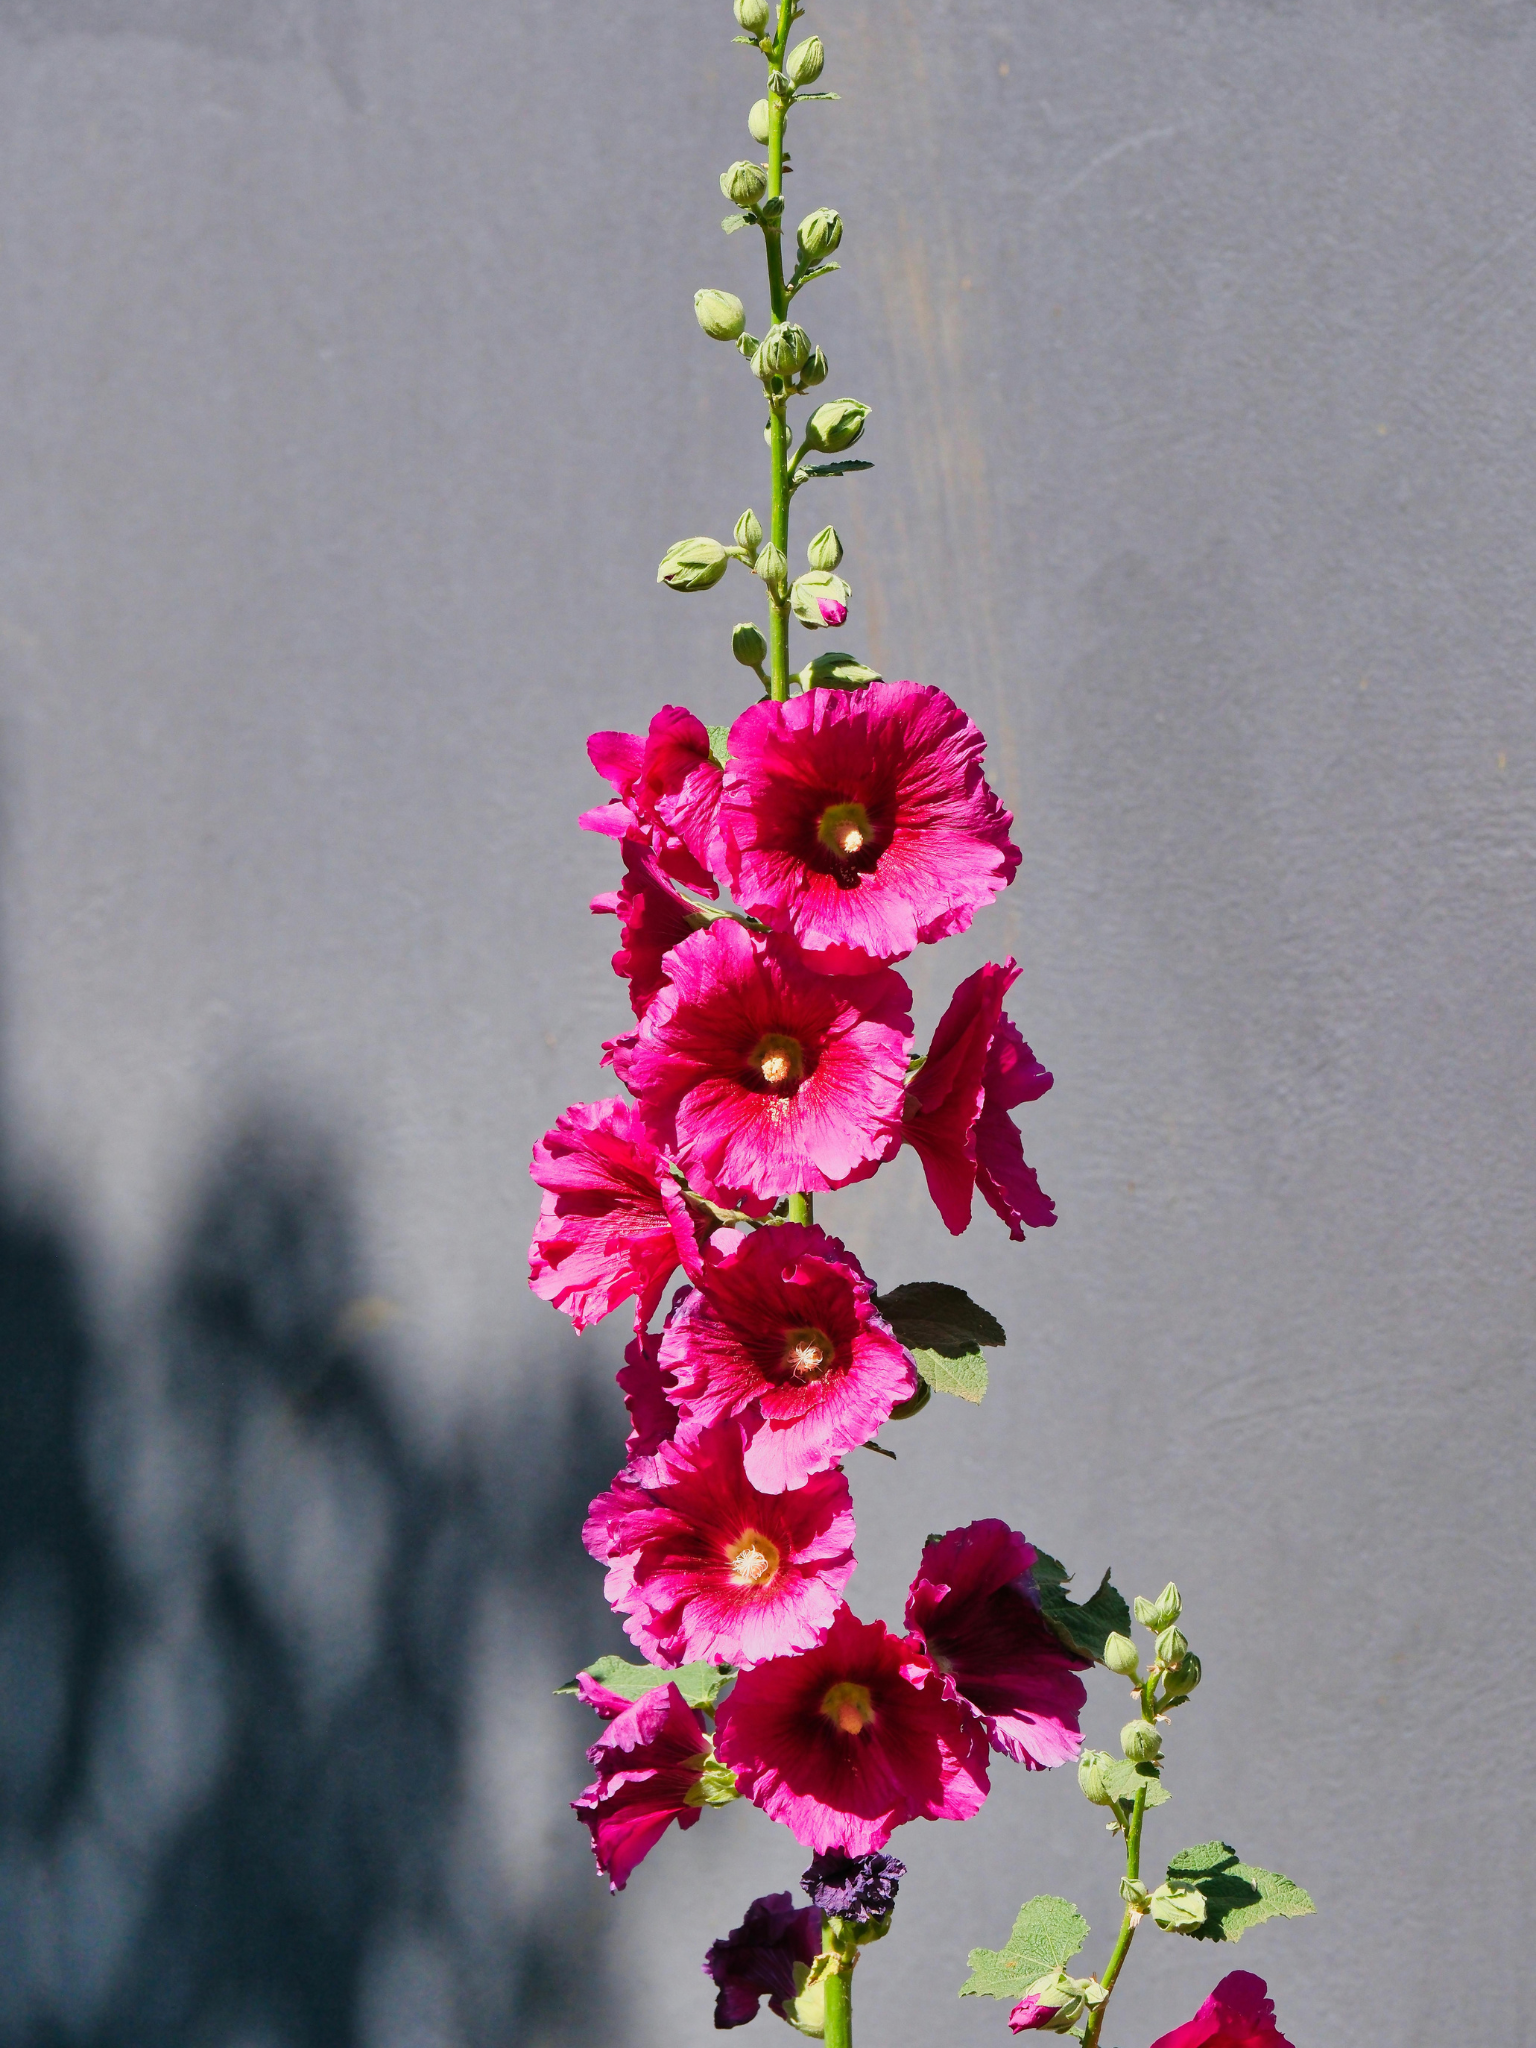
Few perennials carry the nostalgic, romantic charm of a Hollyhock in full bloom. Their tall, stately spires are covered in large, papery flowers and are available in an irresistible range of colours from soft pastels to rich burgundies and deep purples, to classic white. They have a way of making a garden feel established in their first season, making them a desirable back-row choice.
Grows 2-8 ft tall and 1-2 ft wide | Prefers full sun but will tolerate part shade | Blooms in summer
Joe Pye Weed, Eutrochium or Eupatorium
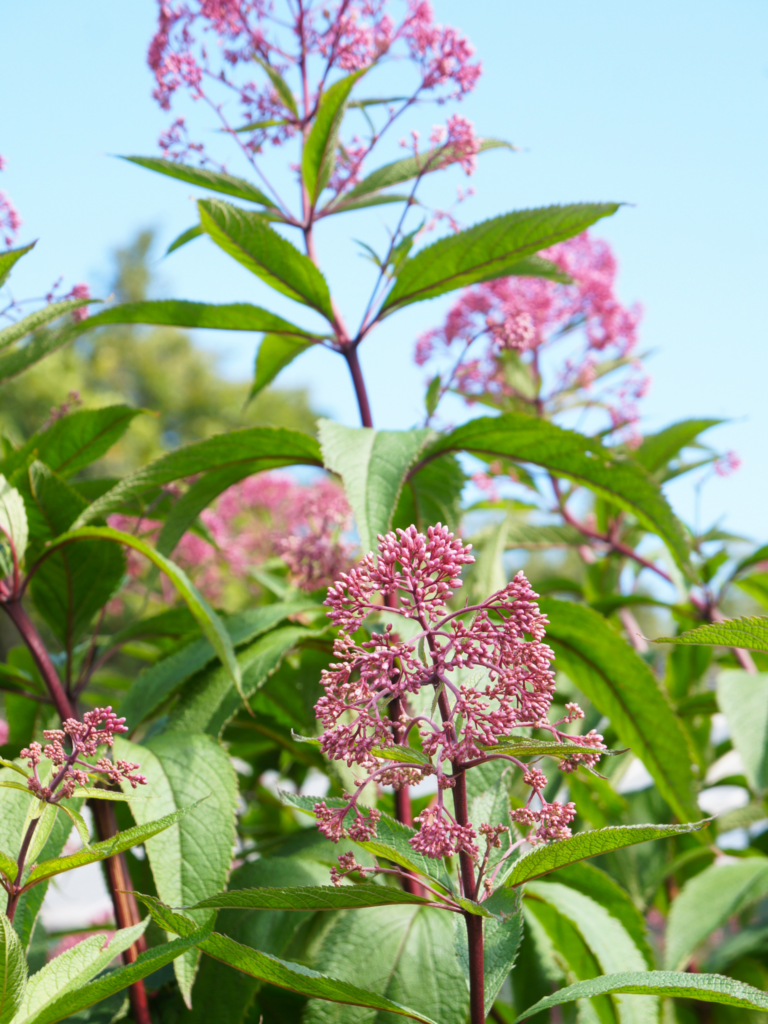
A native plant that is as ecologically valuable as it is beautiful. Its large, showy clusters of rosy-purple flowers are a magnet for butterflies and pollinators from mid-summer well into fall, long after many other perennials have finished their show. If you want a back-row plant that works hard for wildlife while adding bold colour to the garden, this is an excellent choice.
Grows 4-6 ft tall and 2-4 ft wide | Prefers part sun and moist soil | Blooms mid-summer to late fall
Russian Sage, Perovskia atriplicifolia or Salvia yangii
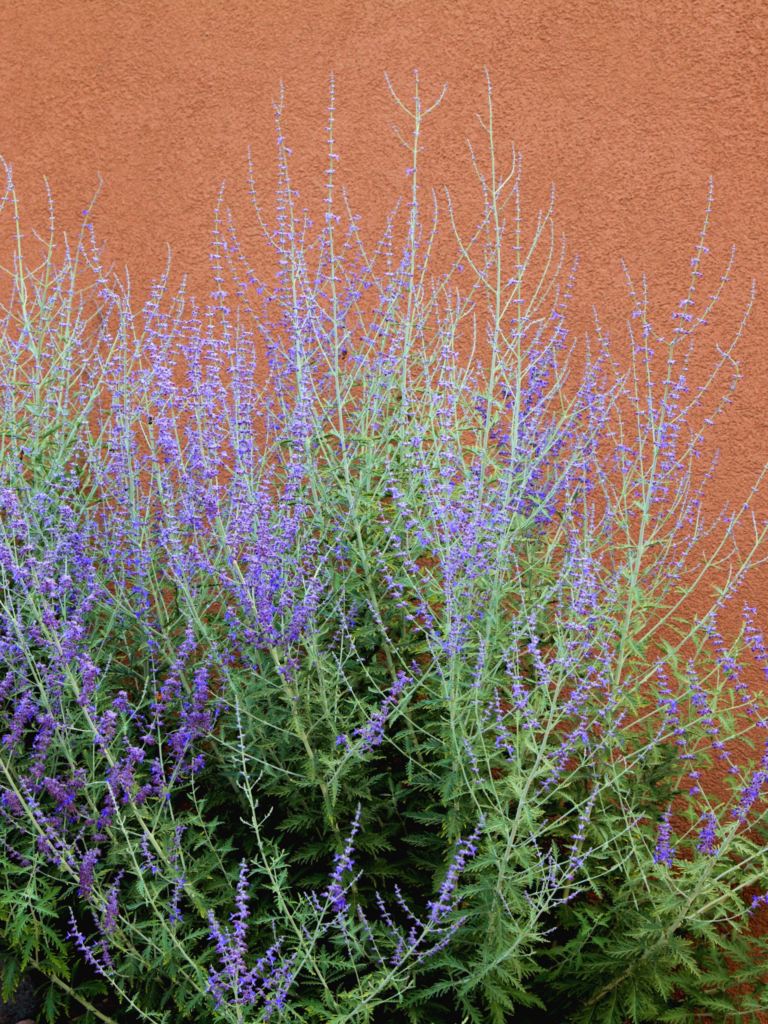
When the garden fills up with yellow and orange blooms in late summer, Russian Sage arrives with a billowy, airy cloud of lavender-blue flower spikes rising above silvery-grey foliage. It catches the light beautifully and adds a softness that few other plants can match. Drought-tolerant once established and virtually pest-free, it is one of the lowest-maintenance perennials you can grow. Compact varieties are also available if space is limited.
Grows 3-4 ft tall and 3-4 ft wide | Full sun | Blooms mid-summer to fall
Bear’s Breeches, Acanthus Mollis
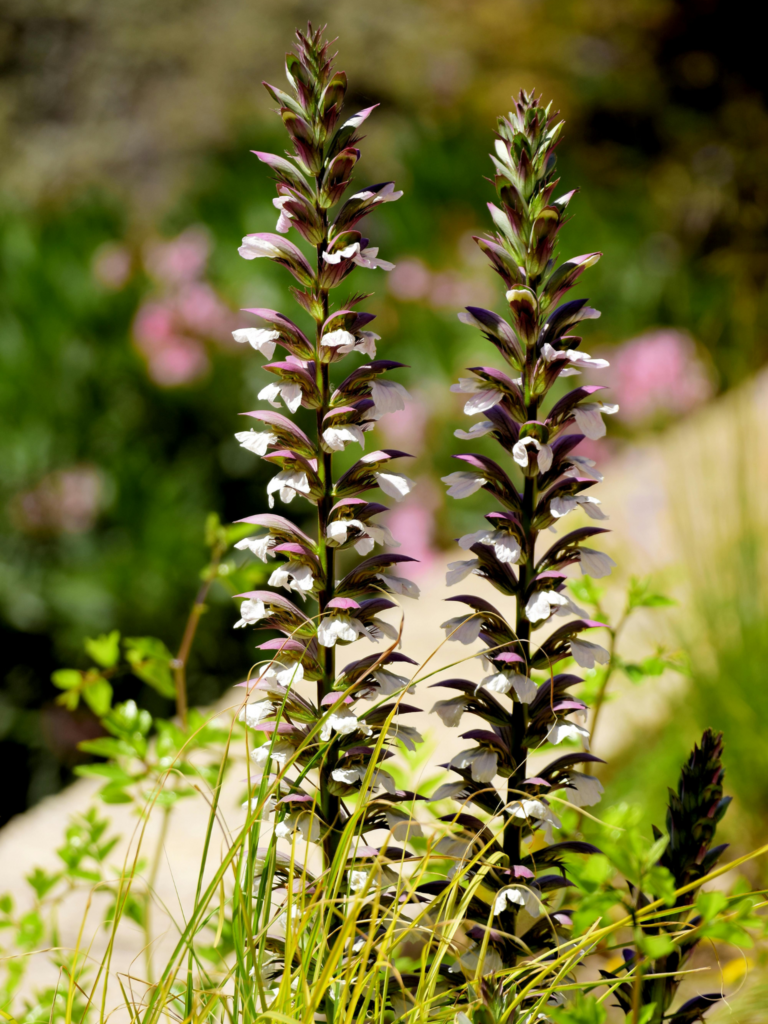
If you’re looking for a plant that makes a genuine architectural statement, Bear’s Breeches is in a category of its own. Its large, deeply lobed, glossy foliage forms an impressive mound, while dramatic flower spikes shoot three to five feet upward, bearing creamy white snapdragon-like blooms accented with striking reddish-purple bracts. It is bold, sculptural, and unlike almost anything else in the garden.
Grows 3-5 ft tall and 2-3 ft wide | Full sun to part shade | Blooms June to July
Foxglove, Digitalis
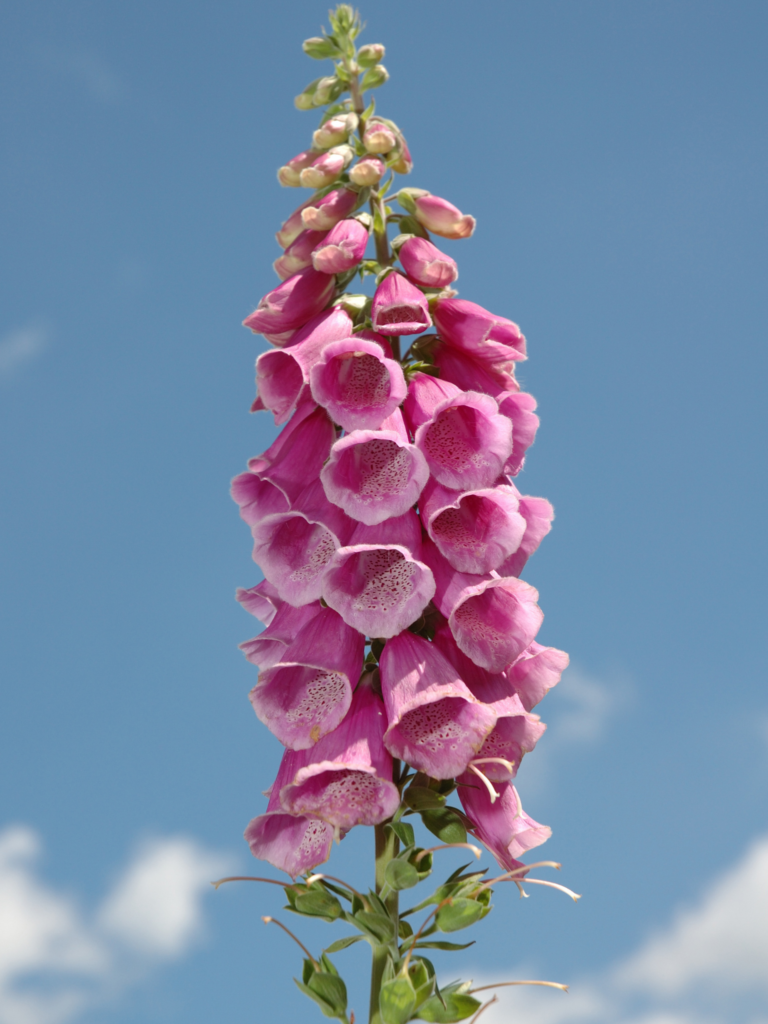
There is something undeniably enchanting and regal about Foxglove with its tall spires of tubular flowers freckled and spotted on the inside, nodding gently in the breeze. The colour range is also wonderful, from soft creamy whites and pale pinks to rich purples and deep rose. Many varieties self-seed freely, naturalizing happily in the garden over time. One important note: every part of the Foxglove plant is toxic to people and pets, so it is best planted away from areas where children or animals play. In the right spot, however, it is one of the most beautiful back-of-the-border plants available.
Grows 2-5 ft tall and 2 ft wide | Sun to part shade | Blooms in summer
Goat’s Beard, Aruncus diocus
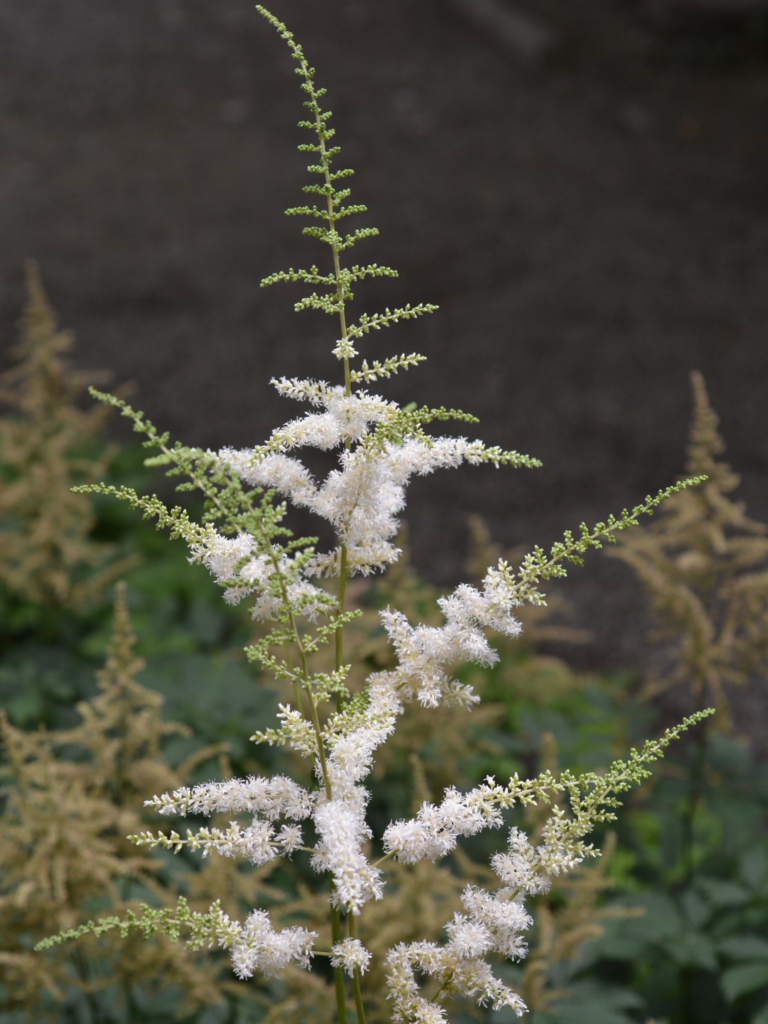
Despite its stature, this is one of the most graceful and softening plants you can add to a shady border. Large, feathery plumes of creamy white flowers rise above finely divided, elegant foliage, bringing lightness to even the darkest corners of the garden. It is especially effective at softening hard edges, filling bare spots under trees, and providing a lush, natural backdrop for smaller shade-loving plants. Dwarf varieties are available for smaller spaces.
Grows 6 inches (dwarf) to 6 ft tall and 2-4 ft wide | Partial to full shade | Blooms early to mid-summer
Gardener’s Tip:
Removing spent blooms before they go to seed, also known as deadheading, encourages many perennials to produce a second flush of flowers later in the season. It takes only a few minutes and can extend your bloom display by weeks.
Ready to Build Your Back Row?
The team at Eising Garden Centre is here to help you choose the right tall perennials for your space, your soil, and your sun conditions. Stop by and let us help you create a border that looks stunning from front to back, season after season.
Expert Picks You Can Plant Right Now
By Ava Green
Looking for a flowering shrub that delivers season after season? We asked our experts at Eising Garden Centre to share their top picks, the ones that customers and staff love most, and they delivered. Whether you’re looking for spring blooms, fall colour, wildlife and pollinator value, or a shrub to suit your space, there’s something on this list for every garden.
Fuji Cherry ‘Little Twist’, Prunus incisa ‘CarltonLT’
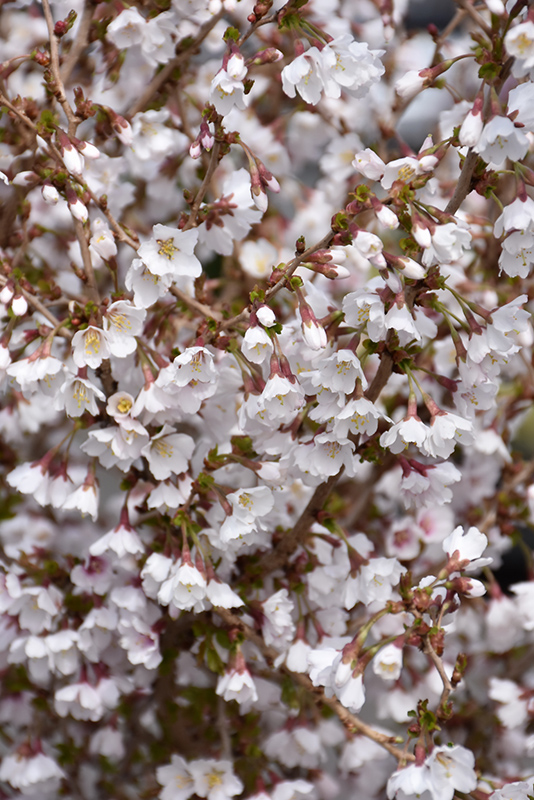
As an accent in a small garden, or planted in a grouping in a larger garden, this multi-stemmed shrub is a gem!
In early spring, crimson buds emerge before the leaves appear. Little Twist then produces clusters of lightly scented white, bell-shaped flowers with soft pink centres that grow along its stems, a stunning early-season display. It is a deciduous shrub, and leaves begin as green before shifting to coppery-bronze, then deepen to a rich burgundy in fall. Smooth, dark red bark adds interest in the winter once the leaves are gone.
This slow-growing, multi-stemmed shrub makes a striking feature in your garden.
Best for: Small gardens, accent planting, four-season interest. | Sun: Full sun | Mature size: 6 ft. tall × 6 ft. wide
Downy Serviceberry, Amelanchier canadensis
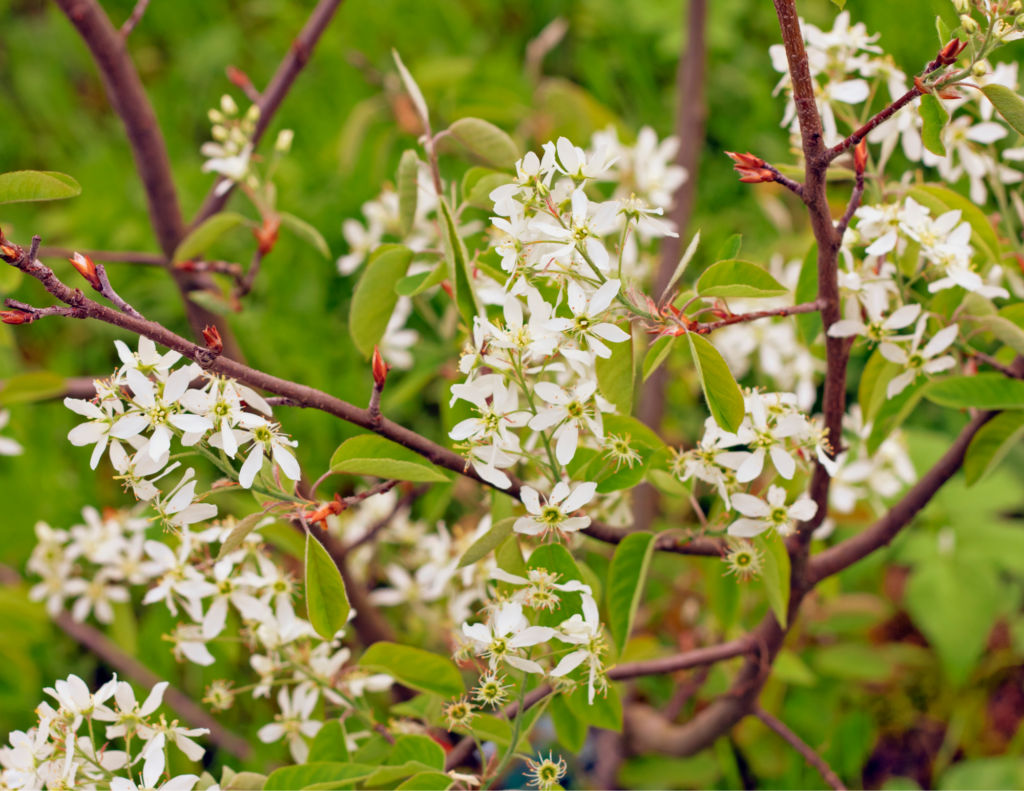
One of the most rewarding native shrubs you can plant, Downy Serviceberry earns its place in the garden from spring right through to fall. Showy clusters of fragrant white flowers in early spring, followed by small, sweet, edible purple-blue berries in early summer that are wonderful for making jam and an absolute favourite for birds. Come fall, the foliage puts on a spectacular show in shades of yellow, red, and orange.
As a bonus, choosing a native plant like Serviceberry supports local pollinators and wildlife, making it as ecologically valuable as it is beautiful. It works well as a specimen plant on it’s own, in a grouping or hedge, or naturalized in a larger landscape.
Best for: Wildlife gardens, naturalized areas, multi-season interest | Sun: Full sun to part shade | Mature size: 20 ft. tall × 10 ft. wide
Amur Privet, Ligustrum Amurense
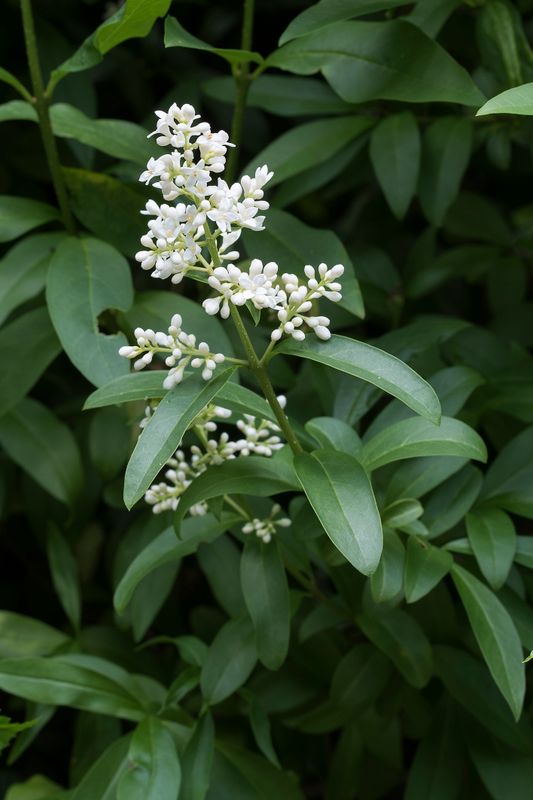

Amur Privet
When fast growth and privacy matter, Amur Privet is one of the best choices available. This dense, dark green shrub produces white flower panicles in late spring and small black berries in fall. It responds exceptionally well to pruning after it blooms, making it an ideal candidate for a formal or informal hedge. If you need to fill a space quickly and create structure in your garden, this is a reliable, low-maintenance option.
Best for: Hedging, screening, fast coverage | Sun: Full sun to part shade | Mature size: 12–15 ft. tall × 8–15 ft. wide
Viburnum ‘Fragrant Snowball’, Viburnum Opulus ‘Roseum’
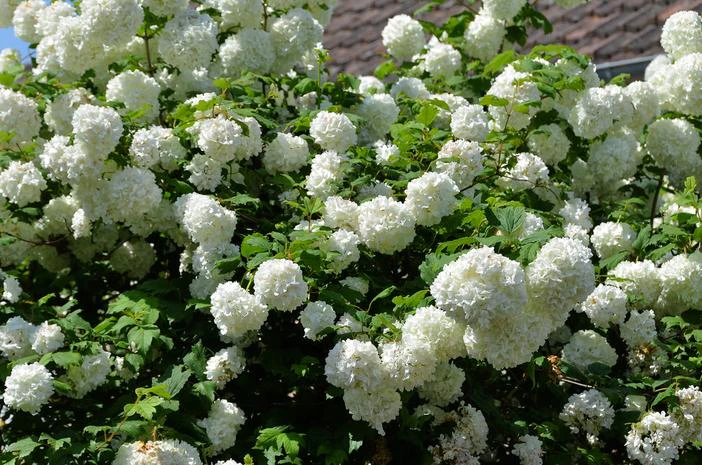
Few shrubs stop people in their tracks quite like Fragrant Snowball Viburnum in full bloom. Large, rounded clusters of sweetly scented white flowers cover the plant in spring, creating a display that’s hard to match. While it doesn’t produce fruit, it earns its place again in the fall when the foliage transitions to rich shades of purple.
Pruning after it blooms will help to keep it a manageable size and encourage healthy new growth. It’s also available as a standard, or tree form, which matures to a more compact 6 to 8 feet tall.
Sun or part shade are best for this deciduous shrub, a beautiful, solitary accent plant for the garden growing 12 feet high and 10 feet wide. As a standard, it is smaller, maturing at 6 to 8 feet tall and 5 to 6 feet wide.
Best for: Specimen planting, cottage gardens, fragrance | Sun: Full sun to part shade | Mature size: 12 ft. tall × 10 ft. wide (shrub); 6–8 ft. tall (standard)
Snowbelle Mockorange, Philadelphus ‘Snowbelle’
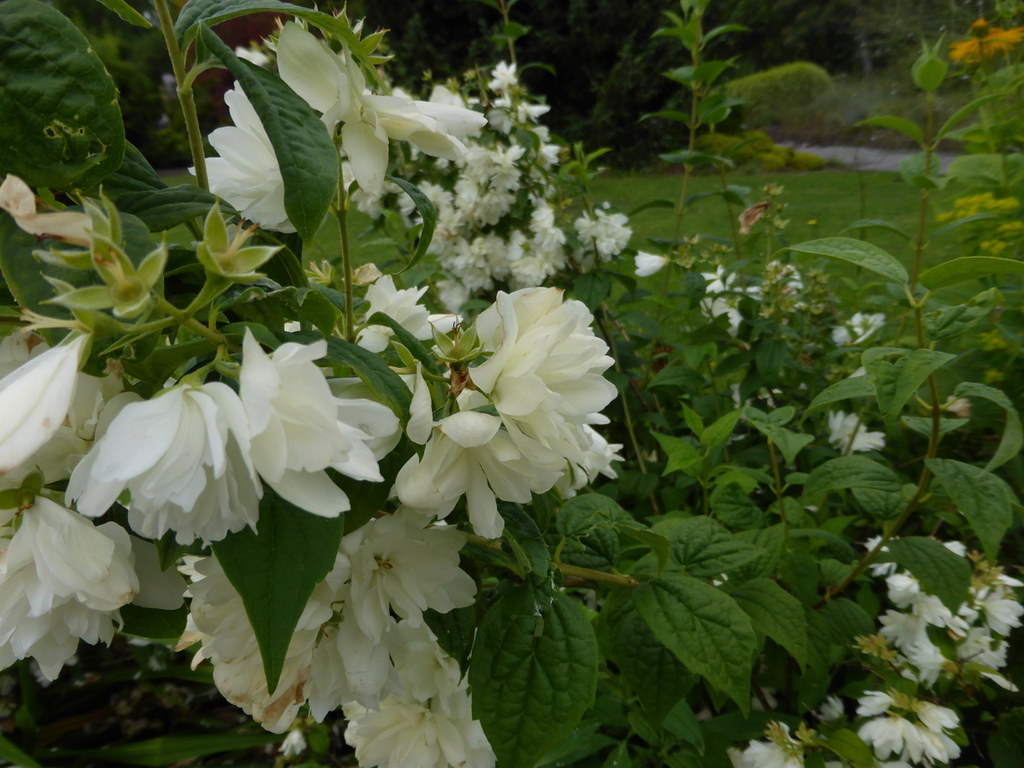
Don’t let its compact size fool you; when Snowbelle Mockorange blooms in early summer, it puts on a big show. This dense, mounded shrub is blanketed in sweetly fragrant double white blooms that are absolutely irresistible to bees and butterflies. Once the flowers fade, its rich, dark-green deciduous foliage makes it a lovely backdrop for other blooming plants in the border.
Growing just four feet tall and wide, it’s one of the best choices for smaller beds, borders and foundation plantings. It prefers full sun but handles part shade as well.
Best for: Small borders, foundation planting, fragrance | Sun: Full sun to part shade | Mature size: 4 ft. tall × 4 ft. wide
More Flowering Shrubs Worth Exploring
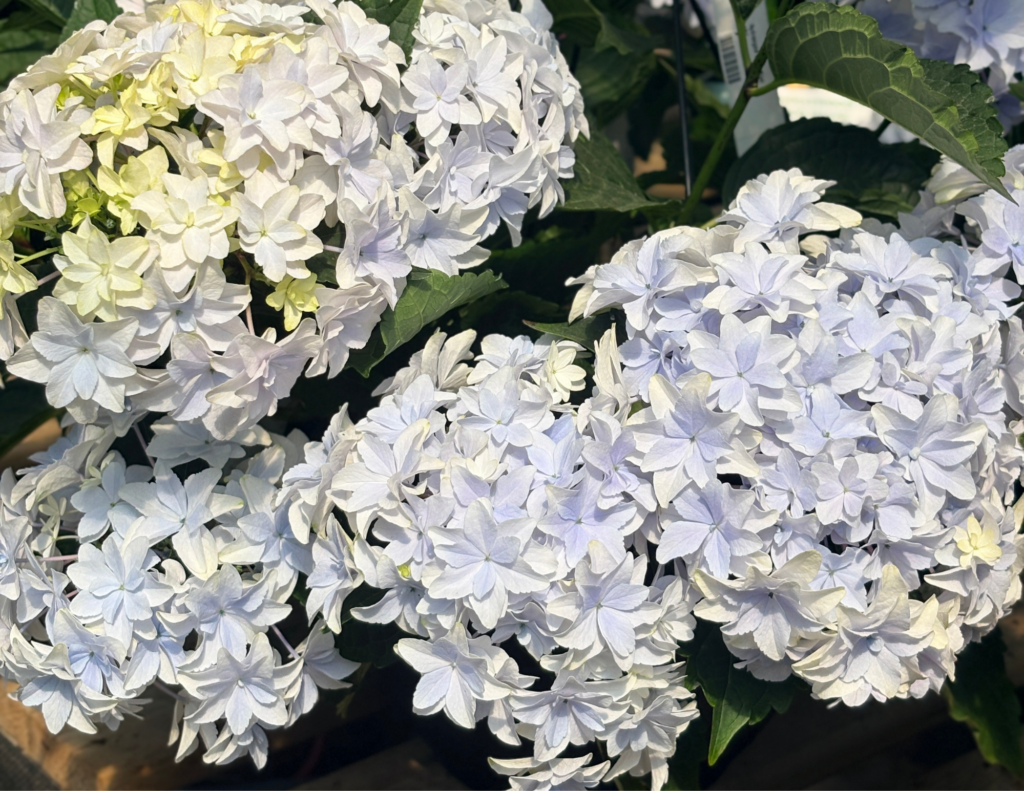
This is just the beginning! At Eising Garden Centre, we also carry a wonderful selection of Azalea, Eastern Redbud, Kwanzan Flowering Cherry, Hydrangea, Dogwood, Butterfly Bush, Beauty Bush, Lilac, Rose of Sharon, Forsythia, and Potentilla, to name a few.
The best way to find the right flowering shrub for your garden is to come in and see them in person, and right now is the perfect time to plant. Stop by and chat with Zach or Donna, who are always happy to help you find exactly what you’re looking for, based on your space, soil, and vision. We’re here to help you make the most of every corner of your garden!
By Ava Green
Is there anything sweeter than the scent of Lilacs in the spring? These beloved shrubs are remarkably easy to grow and will reward you with weeks of fragrant blooms for little or no effort. But a bit of attention can make a big difference, especially if you’ve noticed your blooms getting smaller or fewer with each passing year.
To help your lilac put on its best show, keep these steps in mind:
- Plant in full sun, at least 6 hours of direct sunlight a day, in well-draining soil
- Water newer plants during prolonged periods of drought until established (the first 3 years)
- Feed your lilacs annually with a balanced fertilizer (10-10-10, for example)
- Follow spacing instructions and prune yearly. Pruning is a very important step, and it’s well worth it.
Knowing When to Prune is Key
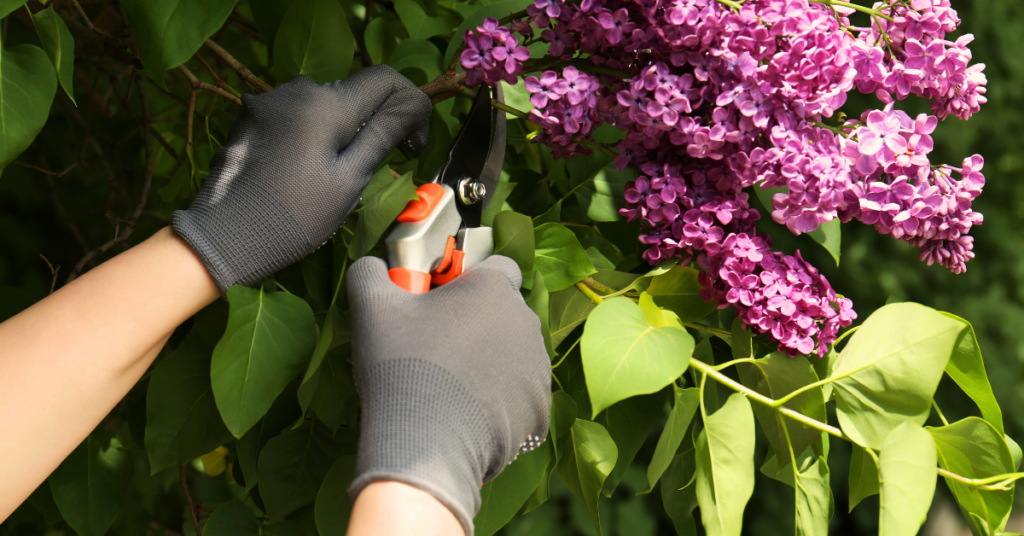
Timing is everything when it comes to pruning your lilacs. After the blooms fade, you have a two-week window to prune before the shrub sets its buds for next year's flowers. Yes, they set buds this year that will bloom next year! Pruning lilacs in the fall or the early spring risks cutting off all of the flower buds for the following year. Mark your calendar and prune promptly after flowering.
It also helps to understand how lilacs grow: Younger, thinner lilac stems produce more flowers. Older, thicker stems are more prone to disease and pests. Keeping this in mind will help with pruning decisions.
How To Prune Young Lilacs
If your lilac has been in the ground for less than three years, leave it alone; it doesn’t need pruning yet. Many young lilacs won’t bloom during those first few years.
After three years, once your shrub is established, begin by removing just one of the thickest, oldest stems down to the ground every 2 years. This gentle approach prevents the shrub from becoming overgrown while encouraging newer, flower-producing growth.
How To Prune Older, Overgrown Lilacs
If your lilac has been neglected or grown out of control, you have two options:
Option 1: Gradual Rejuvenation
Begin by removing any damaged stems, as these invite pests that can harm the entire shrub. Next, remove only the largest, oldest stems by cutting them right down to the ground. The key is to remove no more than one-third of the living wood (dead stems don’t count toward that total). Leave the younger, thinner stems intact so your shrub can still bloom the following year. Repeat this process each spring for three years, and you’ll gradually restore the shrub to its full, flowering potential without sacrificing a single bloom season.
Option 2: Full Cutback
For a severely overgrown lilac that has been largely ignored, a complete cutback is often the most practical solution. Cut the entire shrub as close to the ground as possible, either in early spring or immediately after blooming. Yes, this breaks the general rule of never removing more than one-third of live wood, but lilacs are remarkably resilient and respond well to this kind of hard reset. By the end of summer, you will have healthy new stems of three to five feet tall. While the shrub won’t bloom for approximately three years after a full cutback, the long-term results are well worth the wait.

Deadheading Your Lilacs
Deadheading, or removing spent flower clusters after the blooms fade, is a simple task that’s separate from pruning, and can be done during that same two-week post-bloom window. When you trim off faded blooms, the plant redirects its energy from seed production toward building bigger, healthier buds for the next year. It takes only minutes and can make a meaningful difference in the size and abundance of next year’s flowers.
A Note on Lawns and Lilacs
If your lilac grows near a lawn, be mindful of how much fertilizer you’re applying to the surrounding grass. Lawn fertilizers are typically high in nitrogen, which encourages lush leaf growth, but too much nitrogen reaching your lilac’s roots will suppress flower production.
Worthy Rewards
Lilacs are remarkably long-lived, often outlasting the gardens and even the homes they were planted beside. So whether you’re nursing a young shrub through its first few years or breathing new life into an old, overgrown beauty, the effort you put in now is an investment that will keep rewarding you, and perhaps generations after you. Every single spring!
By Ava Green
As soon as warm weather and sunshine arrive in Southern Ontario, it’s time to head to the garden centre and pick up all the plants we’ve been dreaming about all winter long! May 24th is generally the date we look forward to — the unofficial marker when frosty mornings are behind us and the promise of summer is ahead.
By now, cool-weather plants like cabbage, Brussels sprouts, peas, and lettuce should be well established in the vegetable garden. And for everything else, it’s go time!
TIP: Before you start planting, this is the ideal time to amend your soil. Top up your garden beds with fresh topsoil or enrich them with compost to improve soil health, add nutrients, and promote vigorous plant growth. Don’t forget to refresh the soil in your containers as well, with potting mix or compost.
Warm Weather Vegetables
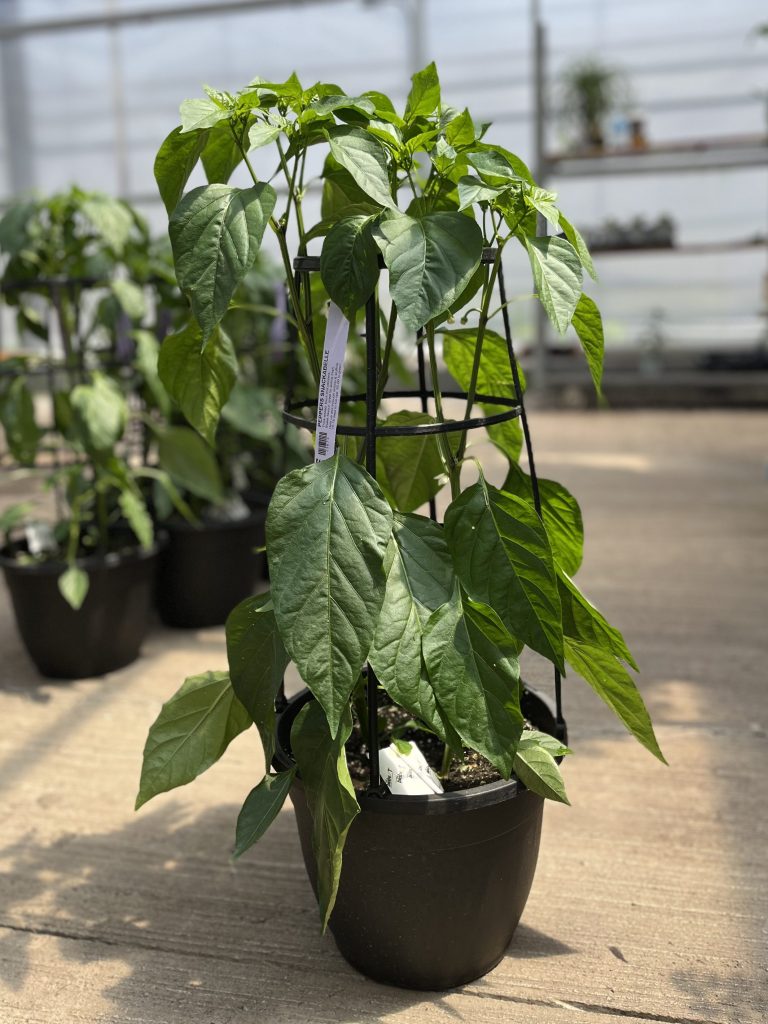
When soil temperatures are consistently 60°F (15°C) or higher, it’s safe to plant all the warm-weather vegetable crops we’ve been waiting for! Plants that thrive in warmer weather include tomatoes, peppers, eggplants, cucumbers, zucchini and corn.
At Eising Garden Centre, you’ll find vegetables in 6-packs, 4” pots, trellised patio containers, patio bowls and hanging baskets - while supplies last, of course!
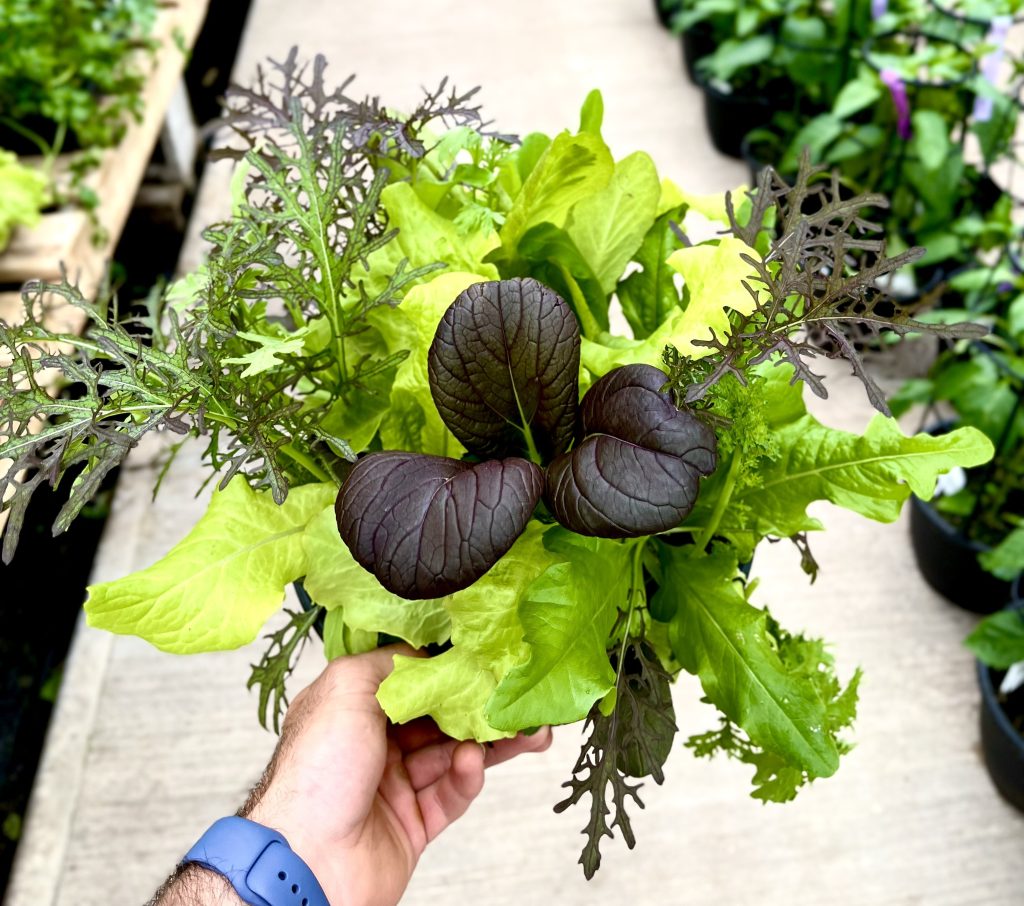

Herbs also love warm weather, and tender varieties like basil are safe to plant once all danger of frost has passed. Whether you plant herbs directly into the ground or create a potted herb garden near the kitchen door, they’ll add fresh flavour to your meals all season long. A container of herbs also makes a wonderful gift when visiting friends and family for a summer BBQ.
While you’re in the vegetable and herb aisle, keep an eye out for everbearing strawberries in planters and containers of tropical fruits like lemons, limes, and oranges.
Annual Flowers
Winter-weary flower beds can be revived almost instantly with a burst of colourful annuals! If you’re looking for an immediate impact and blooms that last all summer long, annual flowers are the answer.
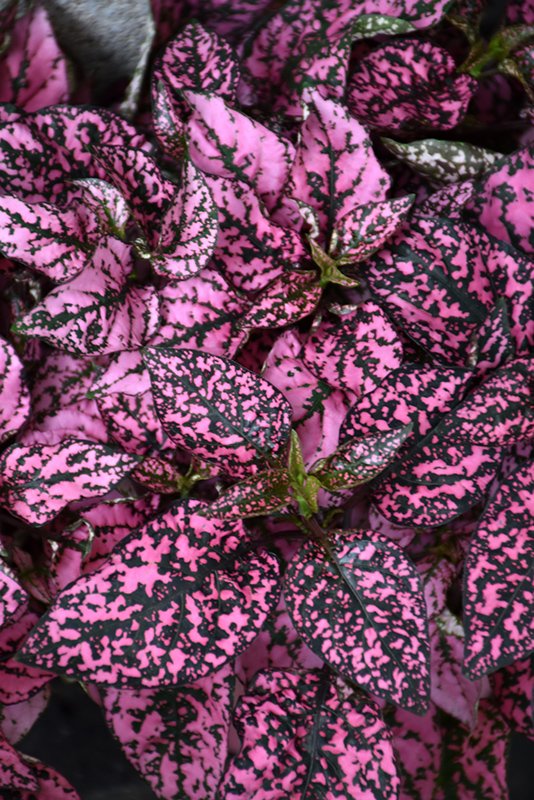
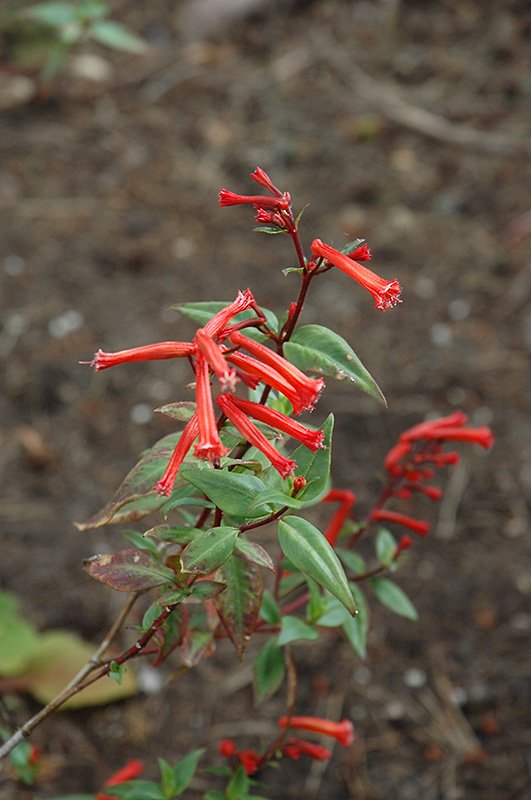
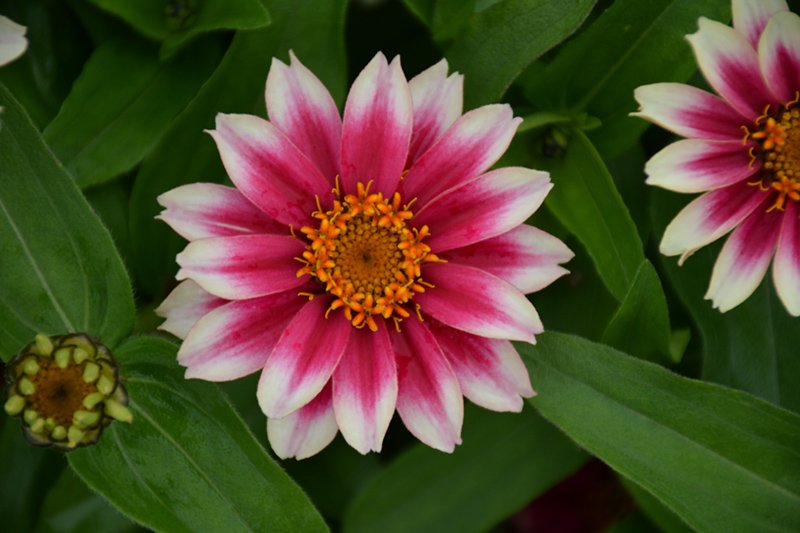
Whether you plant them in beds, containers, window boxes, or hanging baskets — or choose from one of our gorgeous pre-planted options — just add water and fertilizer, and you’ll be rewarded with a vibrant display that keeps on giving.
Perennials
While perennials may not bloom all summer, many offer extended bloom periods, and by combining different varieties, you can create a succession of flowers that lasts for months. Perennials also provide essential greenery to anchor your garden and enhance the look of your flowering plants.
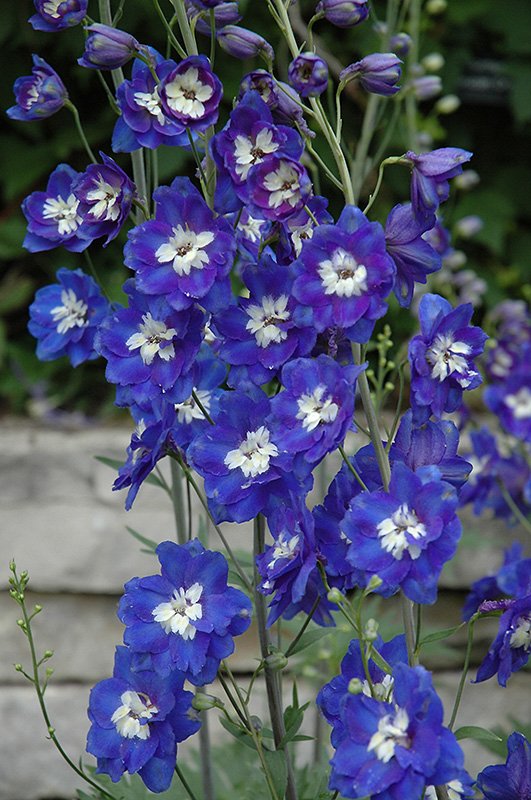
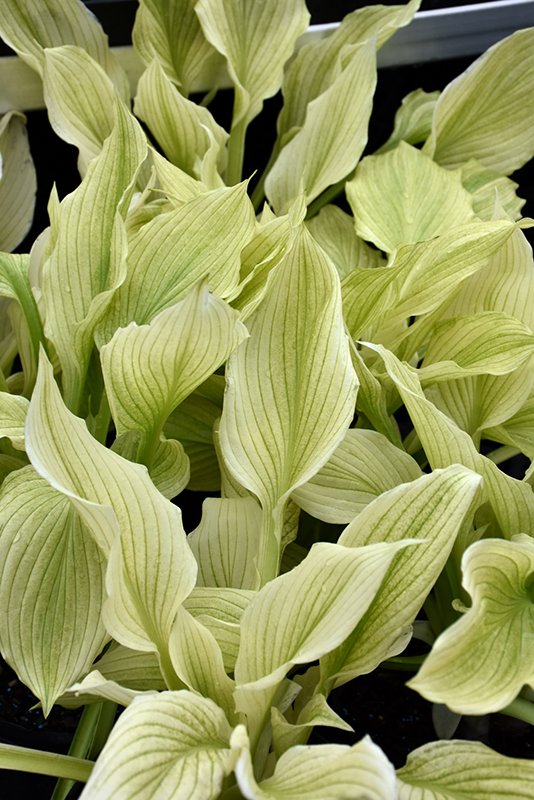
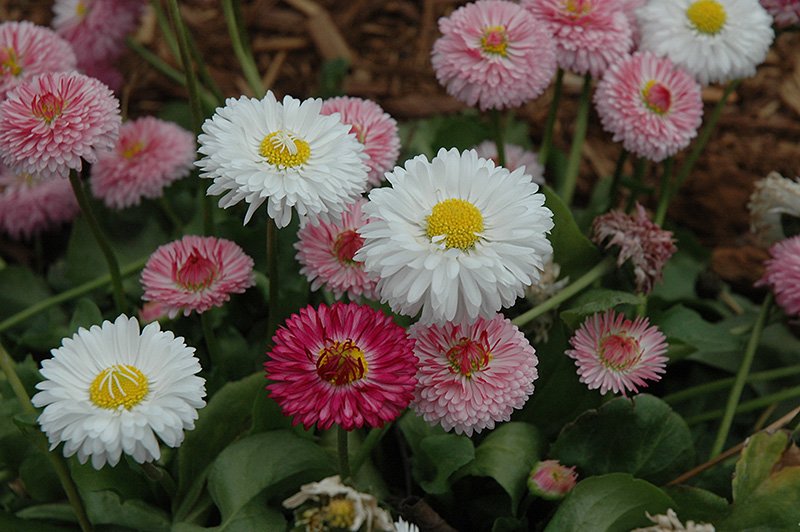
You can plant perennials from spring through fall, but getting them into the ground now gives them a strong start. From hostas and ornamental grasses to daisies and delphiniums, there’s a perennial for every style of garden — and the best part is, they’ll return each spring like dependable old friends.
Trees, Shrubs and Vines
Often called “the bones” of the garden, trees, shrubs, and climbing vines add essential structure, height, and seasonal interest. Planting them now allows you to design your garden layers thoughtfully, incorporating annuals and perennials around their base.
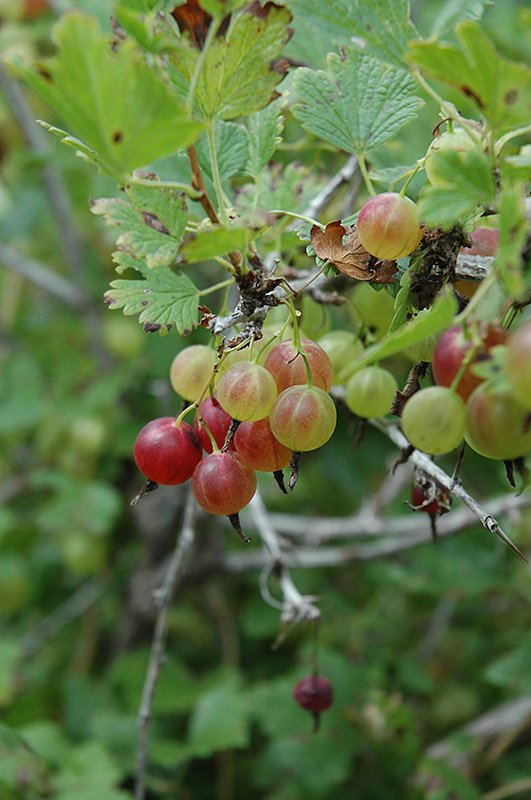
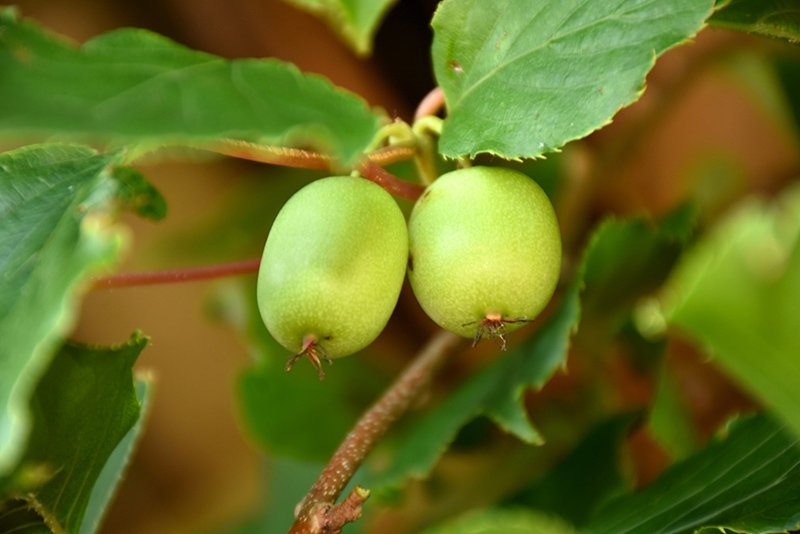

Spring is also the prime time to purchase and plant fruit trees and fruiting shrubs. At Eising, spring offers the best selection for starting your home orchard. Are you thinking of adding a few edible shrubs? Gooseberries, haskaps, hardy kiwi, rhubarb and raspberries are excellent choices.
Mulch
Okay, it’s not a plant, but this is a reminder to add mulch to your garden beds or containers. After planting, adding a layer of mulch to your garden beds or containers helps retain soil moisture, reduces transplant shock, and suppresses weeds. Even if a few weeds manage to sneak through, mulch makes them easier to pull.
Water Garden Plants
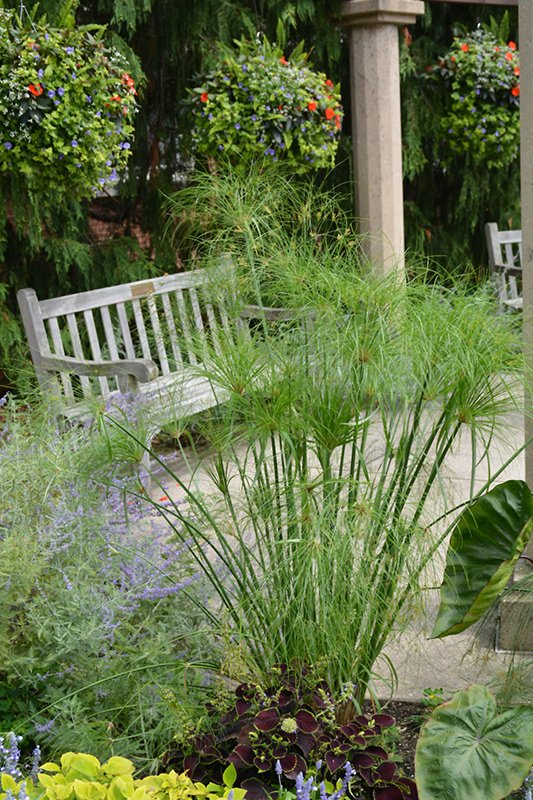
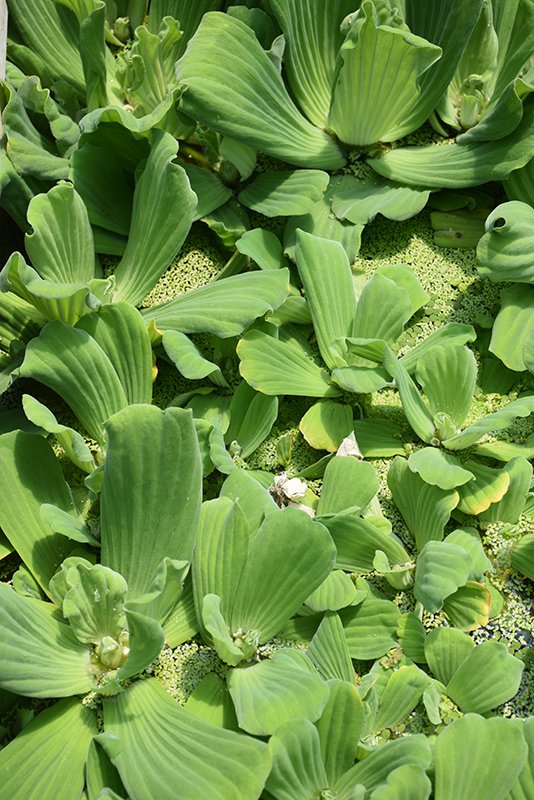
If you have a garden pond, spring is the perfect time to add water plants. Floating plants, such as water hyacinths and water lilies, help shade the pond’s surface, reducing algae blooms. Marginal or bog plants, such as water iris, papyrus, and cattails, also help keep the water healthy and clear by improving oxygen levels and providing habitats for beneficial wildlife.
Time to Grow!
May is one of the most anticipated and exciting months in the garden. Whether you’re dreaming of fresh vegetables, a lush landscape, or a colourful flower display, planting now sets the stage for a beautiful, bountiful season. Visit us at Eising Garden Centre to find everything you need — and let’s get growing!
How to Keep Your Hanging Basket as Gorgeous as the Day You Brought it Home, All Summer Long!
By Dave Zeldon and Ely Schweyer
Remember your Mother's Day hanging basket with its variety of colours, textures, and plant combinations? Maybe there was Verbena cascading elegantly with their colourful star like blossoms, double Begonias for the porch in spectacular shades of reds, pinks, and burgundies, and of course the vigorously growing Petunias and Geraniums, to name just a few. But as the Summer goes on, they just don’t seem to have that same stamina.
To keep your hanging baskets in great shape and avoid the dry, wilted, bald spotted, leggy look that occurs to containers every August, one should follow these easy tips.
Watering
Plastic, fibre, and especially moss lined baskets dry out quickly. They should be checked twice daily and watered every day. Be sure to wet the moss sides as well.
Try to maintain uniform soil moisture. When watering, fill the top of the container with pooling water until it ‘pees,’ and allow it to drip out of the bottom of the basket every time you apply water. Frequent severe wilting will impact upon the quality of the basket.
At this time of year, one could take the basket down and soak it in a tub of water for 20 minutes to hydrate the entire root ball, once every week.

Deadheading
Remove spent flowers on a weekly basis (this is called deadheading) to prevent plants from going to seed. This will encourage more flower production. Part of the beauty of the mixed basket is its prolonged display, just like in your garden.
Check for Pests!
During your weekly deadheading, keep a watchful eye out for aphids, whiteflies, and caterpillars. If you see any, try a quick spray of insecticidal soap to keep them from becoming an infestation.
🖱️ If you're noticing fungus gnats in your hanging baskets, find more on eradicating them here!
Pruning
Not every plant in the basket will be at its peak all season.
Cutting plants back after a flush of bloom will tidy them up and prepare them for a fresh crop of flowers. Meanwhile, other varieties will begin putting on a show. This is especially true for Petunias.
A good cut back of long, lanky branches will reap benefits.
Fertilizing
Daily watering means nutrients can leach out of the soil before the plants can absorb them. The baskets should have both slow release granular added to the growing media and a weekly feeding of 15-30-15 soluble fertilizer. Use a solution containing micronutrients, as plants like Petunias need extra iron.
Sheltering
It has been suggested, if possible, that during stretches of extreme heat, give your baskets a break and move them to a cooler, shaded spot to de-stress for a couple of days. This is also suggested when heading on vacation. Your flowers will rebound to their former beautiful selves!
We hope this long term hanging basket care guide helps you enjoy your purchase all summer long! For more information - and beautiful plants – visit Eising Greenhouse and Garden Centre! 🌸
How To Keep Your Orchid Alive
By Ava Green
Orchids have become very popular gifts, and a great hobby for indoor plant enthusiasts who discover the wide range of colours and shapes available. Orchids are also loved for their long-lasting and exotic blooms.
While some may choose to only enjoy these tropical plants as long as they’re blooming, orchid-lovers look forward to nurturing the plant and encouraging it to flower regularly. It may be a little daunting at first, but once orchids grace you with their stunningly beautiful blossoms, you will find that a little bit of care is very worthwhile!

It’s estimated that there are 25,000 different species of orchids and over 100,000 hybrids! The ones you’ll find most readily in Ontario stores are Phalaenopsis or moth orchid, because it’s fairly easy to grow. Phalaenopsis are the best choice for beginners.

Other orchids you may find easily are Cattleyas (Corsage Orchids), Cymbidiums (Boat Orchids) and Dendrobium orchids.
While all of these may be orchids, they don’t necessarily require the same care, so it’s a good idea to check the tag for the type you have and its specific care requirements. The following is a general guide to light, water, fertilizer, and growing medium for the most commonly found orchids, but it does not apply to all breeds.
Light and Air
For most orchids, light, and lots of it, is the general rule. Place your plants within 3 feet of a window (not to the side) in the sun. South, east, and west-facing windows are all fine for maximizing the light your plant receives.
Orchids also enjoy a breeze or circulating air in your house. They do not like temperature extremes, though 15 to 20 degrees Celsius is safe. Keep in mind that the more warmth and air movement there is, the more often you will need to water your orchid.
Water
A general rule is to use water that is not hard and has not been softened with salt. Salt will kill an orchid. Rainwater, reverse osmosis, or distilled water are good choices. Chlorinated water is not an issue for orchids - high sodium levels are.
The biggest issue many people have is either over-watering or underwatering their orchids. Here is the method we recommend:
Every 5-7 days, place the pot in a container or the sink, then fill it with enough water to cover the top of the pot. Be careful not to let water collect in the crook at the base of the leaves, as standing water will rot the leaves and the plant. Once the plant’s growing medium is thoroughly soaked, remove it from the water and allow the pot to fully drain in the sink before placing it back in its saucer.
We prefer using a container of water rather than the sink, so the remaining water can be used to water other plants.
Here’s the best watering advice we can give you: look at the overall health of both the plant AND its root system. Full, plump leaves and vibrant, green roots indicate that your plant is getting enough moisture. Puckered leaves and a silver sheen on the roots indicate insufficient water. Mushy, brown leaves and roots are signs of rot caused by too much water.

You may hear of another watering method that involves using ice cubes, but it’s controversial and not widely recommended. To quote the American Orchid Society, “Ice is for cocktails, not orchids. Never use ice on tropical plants to water them.”
“Soil” and Nutrients
Most orchids naturally grow high up in trees, where their roots cling to bark and absorb moisture from the air. At home, we try to mimic those conditions, which is why orchids are typically planted in chunky mediums like bark, coconut husk, charcoal, or perlite rather than traditional soil. While many of the roots stay inside the pot, it’s completely normal for some to grow up and over the edge.

These “escapee” roots might look a little wild, but don’t worry, there’s nothing wrong with your orchid. In fact, those aerial roots are a sign that the plant is healthy and doing exactly what orchids do in nature.
It’s worth noting that not all orchids grow the same way. Many, like Dendrobiums, are epiphytic (growing on trees) or lithophytic (growing on rocks), though some orchid varieties are terrestrial and grow in the ground. The good news is that the growing medium your orchid comes in is chosen specifically for that variety, so you can trust it’s in the right environment.
The bark that your orchid is planted in will slowly break down and become mushy. It’s a very good idea to repot your plant every two years.
It’s generally recommended to feed most orchids, and bloom time dictates which fertilizer to use and how often to feed. Begin by using a water-soluble 20-20-20 fertilizer, mixing it at ¼ the amount recommended for other houseplants. Apply this solution every 2 weeks in the summer and every 3 weeks in the winter.

“The orchid, with its many forms, is a reminder that life is full of surprises.” — Leonardo da Vinci.

Lastly, here’s an orchid fun fact: While we have been talking about tropical orchids in this article, there are also orchids that grow right here in Ontario! That’s right, there are over 50 species in this province, including the much-loved Pink Lady’s Slipper (Cypripedium acaule).
Resources for more detailed and specific information:
Toronto Master Gardeners - https://www.torontomastergardeners.ca/gardeningguides/growing-orchids-a-toronto-master-gardeners-guide/
Canadian Orchid Congress - https://canadianorchidcongress.ca/basics/growing-orchids/
American Orchid Society - https://www.aos.org/orchid-care/indoor-orchid-care
Ontario Wildflowers - https://ontariowildflowers.com/main/group.php?id=18
By Dave Zeldon and Ely Schweyer
This is the time of year that most garden centres will have on display their wide variety of Amaryllis bulbs, including the evermore popular waxed dipped. These enormous bulbs that are appearing now will be ready to burst into bloom within 4-8 weeks after planting.
Non-Wax Dipped: Planting
All Amaryllis need is a bit of commercial potting soil that should not cover the shoulders of the bulb (try leaving about 1/3rd of the bulb showing above the soil line), with the nose (or narrow end) of the bulb peeping well over the top of the pot. Make sure that you use a well-drained container that is 3-4” bigger in diameter than the bulb itself.
☝️A heavy clay pot will prevent this top-heavy plant from toppling over. To achieve continuous bloom, plant at intervals of two weeks for stunning colour in your home.

Non-Wax Dipped: Care
Once leaves emerge, fertilize once a month with a 20-20-20 water soluble fertilizer for houseplants. Water sparingly and wait for the miracle in a warm sunny room. Sub-irrigation or watering from the bottom of the drip tray will keep the surface soil dry, thus keeping and bulb rot organisms and those pesky fungus gnats at bay.
Non-Wax Dipped: It's Not Done Yet!
When blooming is over, remove the scape (or flower stock) and place the plant in a sunny spot and continue to water. This is to allow the leaves to regenerate the bulb. In springtime, when all danger of frost has passed, bring the bulb outdoors and let it spend its holidays in a shady spot. In some varieties the leaves will die back in September to give the plant a rest for a couple months. Stop watering and store the bulb on its side in a cool place for about eight weeks, when the leaves will once again begin to emerge.
Amaryllis can go 3-4 years without repotting as they don’t mind a little crowding. Try growing a couple of bulbs in larger pots to see if you can get a clump of flowers from the offshoots or babies that will develop after a couple of years.
Or, Try One of These Wax Dipped Bulbs!
Now growing more popular are the care-free waxed-bulb Amaryllis!



Experienced growers and beginners alike love that these waxed bulbs do not need to be planted or watered! Each of these robust bulbs are carefully prepared in festive-coloured wax, allowing you the freedom to place them among your holiday decorations.
Simply keep the bulbs at an ambient room temperature of at least 16C (70F) for beautiful blooms in five to six weeks.
These novelty items are low commitment! Their only fault is their lack of longevity - gardeners don’t get to enjoy them after year as these waxed bulbs were designed to be a one-use throwaway item!
BUT with a little luck and perseverance you may be able to save the bulb for next season after blooming. All you have to do is to carefully remove the wax layer, remove the flower stalk and place the bulb and with its remaining leaves into a pot of good growing media, allowing the leaves to regenerate the food stores in the expired bulb.
If you’re looking for more information – or perhaps, Amaryllis – visit Eising Greenhouse and Garden Centre! Happy Holidays! ✨
By: Dave Zeldon and Ely Schweyer
If you’ve ever wondered how the warm weather succulent came to be a seasonally regarded indoor plant, or how to keep one going, read on!
History and Cultural Significance
The Poinsettia was named after Joel Roberts Poinsett, the first U.S. Minister to Mexico. He introduced this native Mexican the United States in 1828. In the Mexican Christmas tradition, the star-shaped leaf pattern is said to symbolize the Star of Bethlehem, and the red colour represents the blood sacrifice through the crucifixion of Jesus.
Since the species is native to Mexico and found in the wild in deciduous tropical forest at moderate elevations, we then have a challenge to keep this plant alive and in a healthy form in our colder, northern climate.

It's Just A Rumour!
There is a common misconception that the poinsettia is highly toxic. This is not true.
Yes, it may be mildly irritating to the skin or the stomach if it is eaten, but otherwise, there have been no documented cases of poisoning. The origin of this myth could be found in the fact that most plants of the spurge genus (Euphorbia) are indeed toxic. Fortunately, this family member is a good one!

Here are Some Helpful Hints to Get the Most Longevity Out of Your Plant:
☝️Unsleeve the plant as soon as possible as the leaves may become droopy if left too long in the wrapper. Fortunately, the plant should recover in a few days if this does occur.
☝️If you want to try to keep your plant until next Christmas then fertilize after the blooming season with an all-purpose fertilizer, repot it later in the early Summer and then introduce it to 12 hours of uninterrupted darkness come September.
For more information on Poinsettia care (i.e., temperature, lighting, and watering), visit Ava's blog Caring for Poinsettias.
If you’re looking for more information – or perhaps a Poinsettia – visit Eising Greenhouse and Garden Centre! Happy Holidays! ✨
By: Dave Zeldon and Ely Schweyer with tips from Mary K, Zach C, Sandy M, and Jeanine LT!
Now is the time to prep our outdoor landscapes for the coming cold weather and the ensuing spring! Perhaps your autumn is calmer than your spring, and this is the best time to clean up and begin new projects. The following are some simple but effective tips to get your yard winter-ready - so your spring will be a little more pleasant for you!
Planting
When warm weather still allows it, plant trees, shrubs, perennials, and bulbs to allow them to establish for budding and blooming next spring.

Pond Care
Mary, our perennials gal, suggests not removing any water from your pond but instead aerating it all winter. She skims out the leaves to maintain the balance of the nitrogen cycle in the water and suggests waiting to do a big pond clean out in the spring, as that’s when the water’s culture can bounce back easier.
Fertilizing
After top growth of your landscape plants ceases, reduce your annual fertilizer application by up to half of the requirement. Autumn is a major root growth period for woody and herbaceous perennials; roots will grow and absorb nutrients whenever soil temperatures remain above 5 °C but can be over fertilized quickly in these cooling temperatures.
Produce gardens could benefit at this time from a top layer of compost that will break down during the winter so it isn't too 'hot' for spring planting.
Leaf Litter
Here’s our pitch on the ‘leave it – don’t leave it’ debate: It DEPENDS.
Ideally, we should leave litter leaf on the ground for our pollinator friends and endangered species like fireflies to hide out in the winter. But, there are appropriate situations in which to remove leaf litter.
- When they’re covering your bulbs and tender perennials, remove SOME. Leaf litter acts as a ground insulant, which can amplify our temperamental zone 6b temperatures. This freezing and thawing can often confuse and kill early spring bulbs and tender perennials.
- Zach, our trees and shrubs guy, suggests that if a tree shedding leaves has been diagnosed with pests and fungi, remove the leaf matter to reduce the spread to other plants. Diseased matter should always be removed in a quarantined fashion and taken to a landfill or burned.
☝️Please note: Unless diseased, compost your leaves, they contain vital nutrients specific to the plants they came from!

Lawncare
With autumn mowing practices you have the opportunity for the addition of much needed organic matter for your lawn, which is also an excellent source of slow release nutrients. Keep mower blades sharp since leaves can be tougher than grass. Raise the mower height up and mow leaves when they are lightly wet (e.g., morning dew). This will keep the leaves from blowing all over and will prevent the mower from getting bogged down in wet leaves.
See more on general lawncare in Dave's Lawncare 101 post.
Clean Up
Now is a good time to wash your tools with soap and water to prevent diseases spreading from plant to plant.
☝️Mary's tip is to spray garden tools with PAM before use, so the dirt slides right off them!

Pruning Perennials
Mary, our perennials gal, suggests leaving things until frost to cut back. This way they're easier to compost. Make sure to leave seedheads (i.e., coneflowers and black-eyed Susans) for wildlife, and things like hydrangeas for winter interest.
☝️Make sure if things are cut back, to leave them sticking up enough you can still find them in the spring!
Dividing and Moving Perennials
Moving or dividing perennials in the autumn is a great way to reduce your work next spring. The cool, moist weather is an ideal time for perennial roots to become well established.
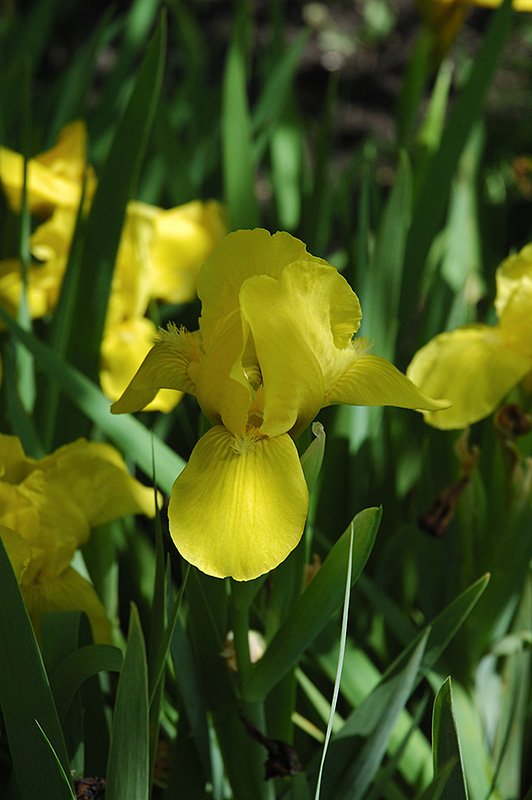
👍The rule of green thumb for moving perennials: If the plant blooms between early spring and late June, then early fall division/moving is ideal. If the plant blooms after late June, then early spring division is ideal (except for Peonies which should only moved or divided in the fall, Poppies in August, Irises in July & Lilies in the Fall).

Overwintering Trees
Zach and Sandy from trees and shrubs suggest a couple of things to help your favourite trees along this winter:
- To reduce winter injury in evergreens: Keep properly watered throughout the growing season and into the fall is another way to reduce winter injury. Decrease watering slightly in September to encourage hardening off, then water thoroughly in October until freeze-up.
- Cedars - Spray cedars with antidesiccant spray (available at Eising GC) or wrap in burlap (with stakes to create dead air space) so wind doesn't dry out and burn tips.
- Fruit trees - In late fall, spray fruit trees with sulfur-horticultural oil (available at Eising GC) for protection against fungi and pests overwintering in the bark.
- Ornamental trees - wrap the base of young trees to protect from chewing rodents.
- Pruning trees - trees that prefer winter pruning rather than spring pruning are maples, oaks, birches, and elms, as well as with fruiting trees such as apples and pears. This ensures blight and pests will not affect the tree's open wounds.
If you missed the frosty deadline for transplanting trees, Sandy suggests insulating unplanted potted trees to help them best survive the coming winter. Here are some methods:
- Double-pot your tree with an insulative barrier (i.e., burlap, straw, mulch, etc.) stuffed between the two pots and securely cover the top with tarp to deflect moisture.
- Bury your potted tree in the ground, level with the top of the pot (don’t forget to dig it back up!) and mulch the area.
- Huddle all of your unplanted trees and plants together when using the above methods.

Mulching
Mulching is one of the simplest and most beneficial practices you can do for your garden. Just by simply placing a protective layer of material over the bare soil will benefit the soil as it decomposes providing the much-needed organic matter which improves root growth, the infiltration of water and the nutrient-holding capacity of the soil while reducing soil erosion.
A good layer of mulch allows the soil to warm more slowly in the spring, so perennials aren't fooled into breaking dormancy too early, as you want the ground to stay cold until it really is spring!
☝️Make sure your mulch application won't stunt the growth of your plants come spring as discussed in our Transplant Troubleshooting blog post!
Japanese Beetle Prevention
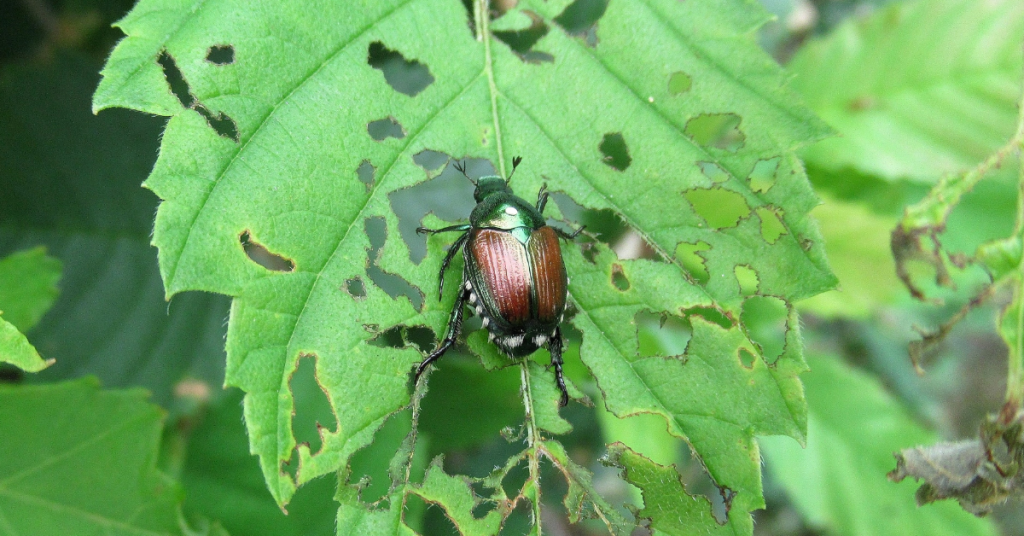
Nematodes are microscopic worms that should be applied to lawns that have been ravaged by grubs especially of the Japanese Beetle. Nematodes have a short shelf life and must be refrigerated until they are applied. Normally, they are sprayed onto the lawn from mid-May to mid-June and then again (for best practice) from mid-August to mid-September.
Pots
To prevent freezing and cracking, Mary suggests emptying and turning your pots upside down. You can disinfect at this time too.
Design Time!
Jeanine, from production, suggests writing down what worked best in your produce garden this year so you can implement it again in the spring.
With the trees and land being barren enough you can see its contour, now is a great time to plan ahead for spring landscaping! Don't forget Eising GC would love to offer help with your landscape designing!
We hope these tips help your landscape plants enjoy your winter abode as much as you do this season, for more information - and plants – visit Eising Greenhouse and Garden Centre! 🍁
By: Dave Zeldon and Ely Schweyer
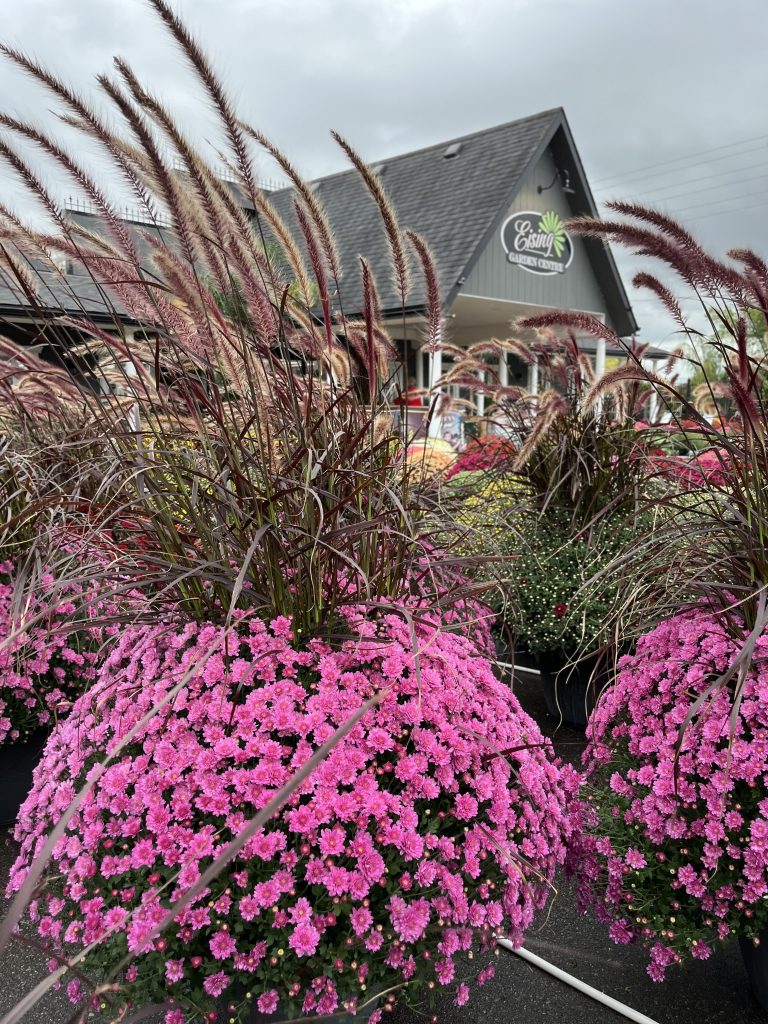
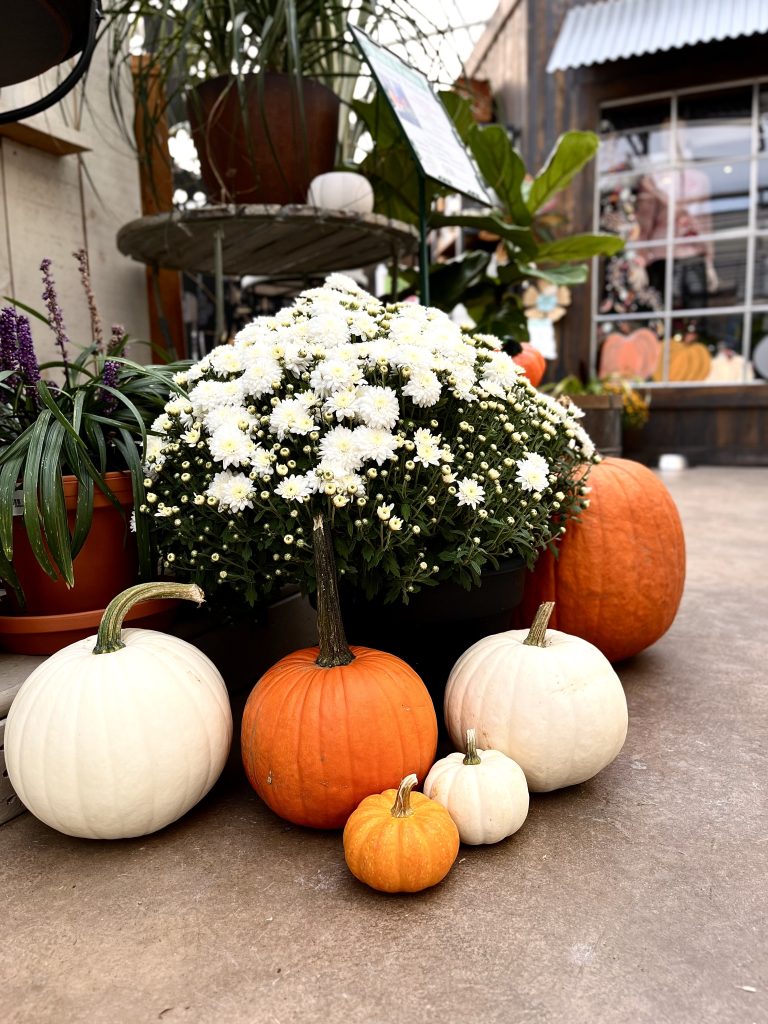
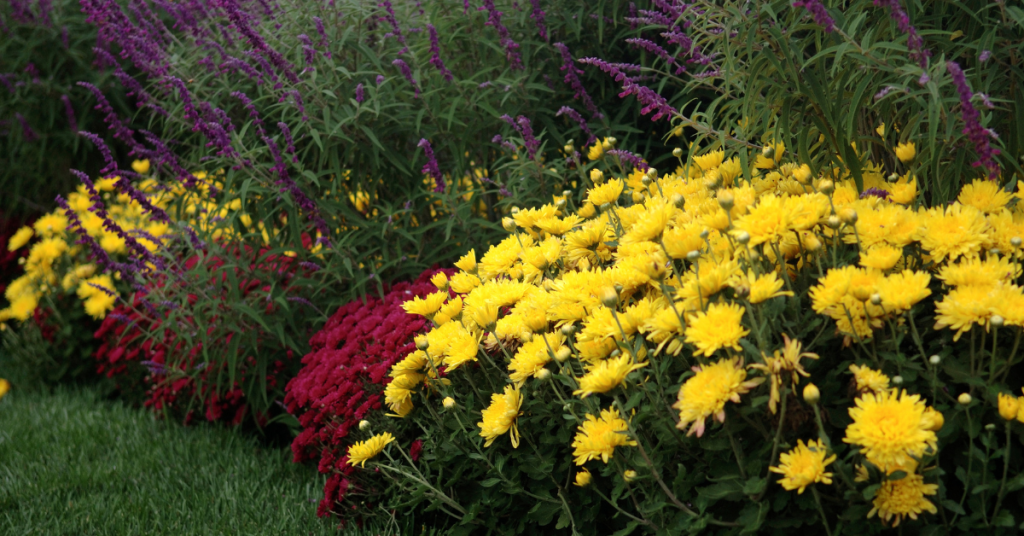
The classic fall-blooming Chrysanthemum varieties of burnt amber, golden yellow, and deep burgundy blooms have been enormously popular for years, and as each new fall season rolls around, there always seems to be new varietal introductions – like multicoloured pinks with the hues of sunrises - to enhance your front porch display of pumpkins, corn stalks, and gourds.
These robust plants will produce blooms for weeks, even in the coolest of autumn weather. Their hardiness even offers versatility when it comes to their display; some gardeners prefer less labour-intensive groundskeeping and leave them in their original store pots, whereas others prefer to transplant these flowers into larger planters, window boxes, or into flowerbeds to add an easy seasonal flair.

While resilient, these plants still need some TLC. Try these tips to keep your Mums looking fresh throughout the fall.
- Choose green plants with tightly closed buds. This way when your Mums do bloom, you will be able to keep those colourful displays for much longer.
- The Mums' foliage should have a deep green colour and lots of growth at the garden centre.
- Also, make sure the soil in the container is moist when purchasing your plant, as dried out Mums may have already suffered damage.
- You'll find out in short order that your potted Mums are very thirsty plants! Water them daily and make sure the soil remains moist. A shot of liquid fertilizer to the irrigation water once a week would be great as well.
Over-Wintering Mums
Modern Mum breeding is aimed primarily at creating plants that look good in their pots at their point of purchase, sacrificing the plant’s hardiness and performance for future years - meaning when home gardeners try to overwinter these big potted plants, they are not usually successful.

All Mum plants at garden centres are hardy, meaning that they are perennials in most climates. However, if these plants are put in the ground from August on, most won't make it through winter. The reason is that Mums planted late in the season are near, or at, the flowering stage, when their energy is focused into blooming, and they won't grow roots to sustain plants through the winter. This is why Mums should be planted in the spring if you want a perennial plant that has a spectacular autumn show!
If you really adore your fall purchase though, you can try to over-winter your Chrysanthemums in the basement or a dark, cold closet, after the first frost. Water well and place in an area where it is totally dark and 0°C to 10°C. The plants will hibernate for the winter if you keep their roots damp. Check the pots weekly.
In the spring, gradually acclimate your Mum plants to light and plant them out in the garden after the last killing frost, remembering to pinch them twice prior to the first of August for a full, lush plant.
We hope this helps you to enjoy your Mums just a little bit longer! Use our Plant Finder to search for a sample of our Mum selection by your preferred colour. You can find many Mum varieties and more information at Eising Greenhouse and Garden Centre, please stop in for a visit this autumn!