
5 Easy Steps To Get Started
By Ava Green
There’s a common myth that you need a lot of space to grow vegetables, but whether you have a few containers, a small sunny corner, or a larger garden bed, there’s lots you can grow! Here in Norfolk County, which is Zone 6 in Southern Ontario, some vegetables can go in the ground as early as the beginning of May, while many others are usually safe to plant around the May 24th weekend, once the risk of frost has passed. Here are five simple steps to get you growing your own food this season if you’re new to vegetable gardening.
Step 1: Decide What You’d Love To Grow
Start with a list of the vegetables you actually want to eat. Coming into Eising Garden Centre with a list in hand makes choosing plants so much easier! When building your list, consider:
- Vegetables you love
- High-value vegetables, the ones that are expensive at the grocery store but easy and economical to grow yourself
- Anything that tastes better when it’s freshly picked, like tomatoes, cucumbers, and fresh herbs

Step 2: Make a Simple Plan
You don’t need an elaborate design; a rough sketch on a scrap of paper is just fine. The goal is simply to get a sense of your space and where things will go before you start digging. We recommend starting a garden notebook or journal to track what you plant each year and how it performs. It will be especially helpful next spring!! A few planning tips to keep in mind:
- Most heat-loving vegetables, such as tomatoes, peppers, zucchini, eggplant and beans, need at least six hours of sun per day
- Cool-weather and shade-tolerant crops like lettuce, chard, kale, radishes, and beets do well with just three to four hours of sun
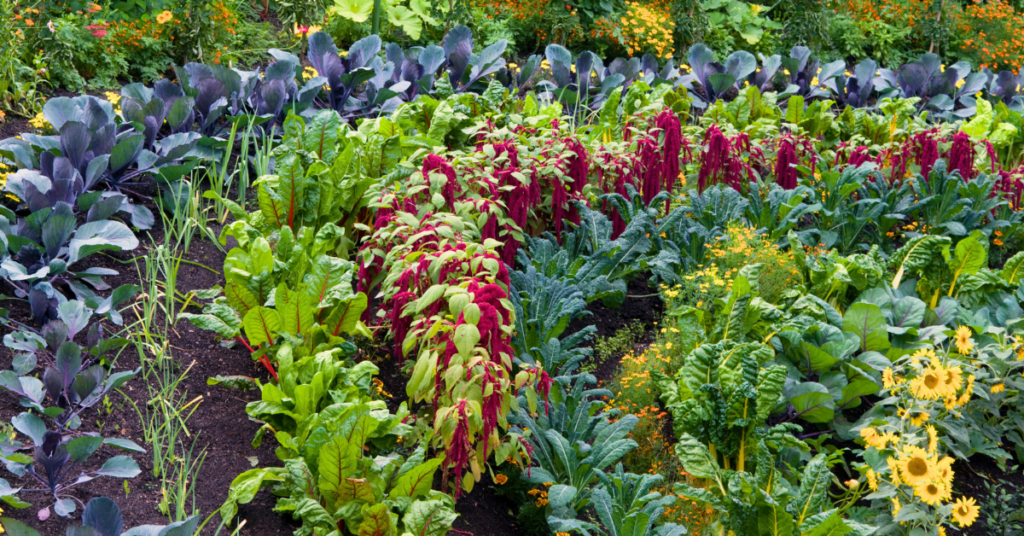
- Spacing in a vegetable garden can be much tighter than in other types of gardens. Less empty space means fewer weeds and bigger harvests. Square foot gardening is an excellent method to explore
- Layer your garden beds with plants that are great companions. For example, basil and marigolds planted beside tomatoes are said to improve flavour and repel pests. Carrot and beet seeds tucked in beside and between your lettuce plants (which are a cool-weather crop) are a smart pairing; as your lettuce finishes in the summer heat, your carrots and beets will be sprouting up to take their place. This is referred to as succession planting and optimizes the space in your garden
- Make use of vertical space with poles or trellises for peas, pole beans and cucumbers
- Tuck herbs into any gaps between your vegetables; they’re useful, beautiful, and most pollinators love them
Step 3: Prepare Your Space
Once you’ve chosen a spot with enough light, it’s time to get the soil ready:
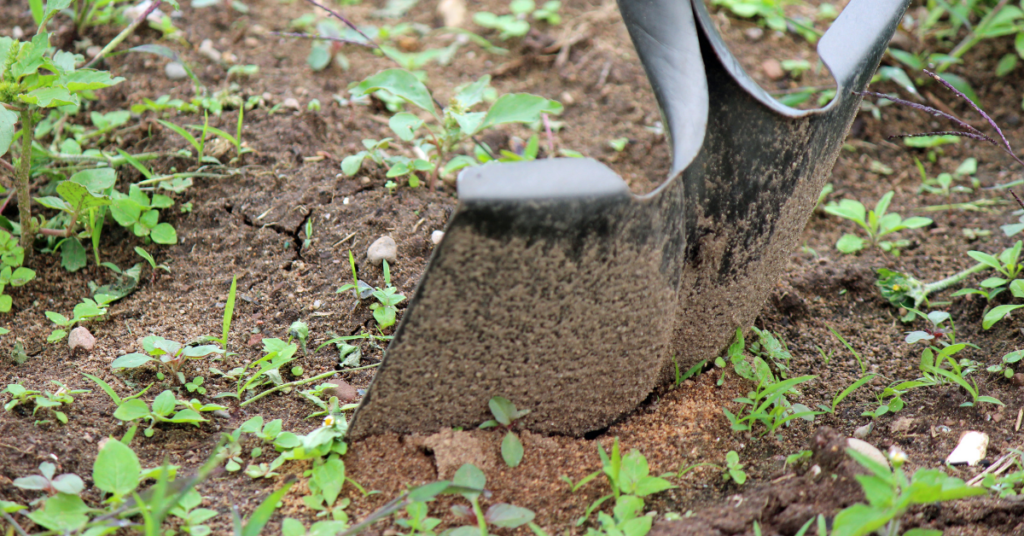
- Remove any sod or weeds before planting. If you’d rather not dig, the No Dig gardening method uses a layer of cardboard as the base for the new bed. This suppresses weeds naturally and breaks down into the soil over time
- Add a good-quality compost to your soil by either spreading a layer across the top of the garden bed or scooping some into each plant hole
- For container gardening, almost any container works, just make sure it’s deep and wide enough for the mature size of your plants. Also, drainage holes are a must! Fill containers with a soilless mix containing compost, peat moss or a peat alternative, and one of the following: sand, vermiculite, or perlite. Avoid using garden soil, triple mix, or topsoil in containers, as they compact easily and will restrict root growth. Learn more about soil mixes, amendments, and fertilizers here
Step 4: Water and Feed Consistently
Consistent watering and feeding are the foundation of a productive vegetable garden:
- Vegetables need regular, reliable watering. Inconsistent moisture leads to stressed plants and poor yields
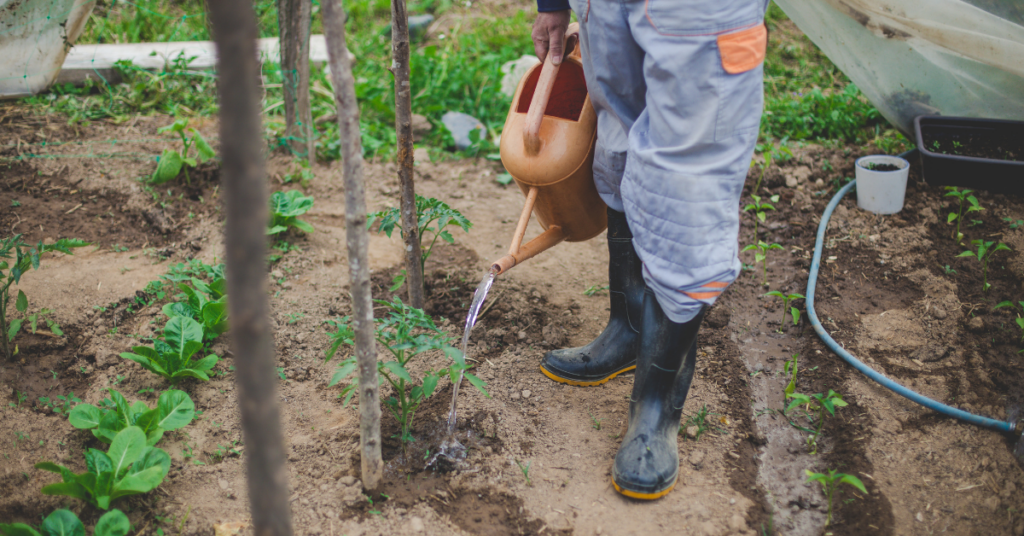
- Always water the soil, not the leaves. Plant roots take in water, and wet foliage can invite disease. Water deeply so moisture reaches the roots. Use your fingers to check how far down the water has penetrated into the soil
- Containers dry out faster than garden beds and will need more frequent attention
- Morning is the best time to water. If your plants are struggling on a particularly hot afternoon, a second watering is fine. Just be sure to aim at the base of the plant and avoid the foliage, which can scorch in direct sun
- Feed with organic fertilizers throughout the season to keep your plants healthy and productive. Follow the package instructions for the product you choose
Step 5: Plant Flowers for Your Pollinators
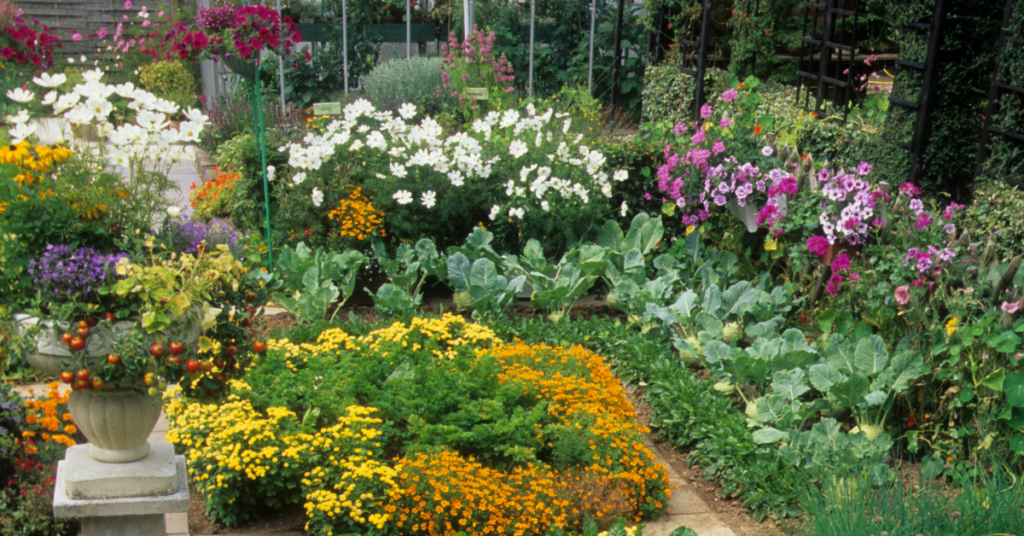
A vegetable garden without pollinators is a garden that won’t reach its full potential. Attracting bees, butterflies and other beneficial insects to your garden is one of the best things you can do for your harvest. Some of our favourite pollinator-friendly flowers for the vegetable garden include marigold, calendula, nasturtium, borage, sunflowers and culinary lavender. As a bonus, most of these are edible, so they earn their space twice over.
It’s Time
Starting a vegetable garden is one of the most rewarding things you can do with an outdoor space. There’s a quiet satisfaction in growing something from seed or a seedling and bringing it to your own table.
Start simple, grow what you love and don’t be afraid to learn as you go.
The team at Eising Garden Centre is always happy to help you choose the right plants for your space and answer any questions along the way. This could be the season that changes the way you think about your garden!
Resources:
Why Use a Garden Journal?: https://eising.ca/why-use-a-garden-journal/
Square Foot Gardening: https://www.almanac.com/planning-square-foot-garden-grow-more-less-space
Fertilizers & Soil Amendments: https://eising.ca/fertilizers-soil-amendments/
Companion Planting: https://eising.ca/companion-planting-with-herbs/ and https://eising.ca/incorporating-vegetables-into-your-garden/
Optimizing the Gardening Season: https://eising.ca/optimizing-the-gardening-season/
No Dig Gardening Method: https://charlesdowding.co.uk/blogs/no-dig-resources/beginners-guide
Reading Plant Tags: https://eising.ca/full-sun-part-shade-what-do-plant-tags-actually-mean/
Growing Vegetables in Pots: https://eising.ca/planters-are-for-more-than-flowers/
By Ava Green ☀️
One of the most common reasons plants struggle comes down to light. Specifically, whether the spot you’ve chosen gives your plant the light conditions it actually needs.
The good news? Once you understand what the terms on a plant tag really mean, matching the right plant to the right spot becomes second nature. And when a plant is happy in its environment, it grows stronger, looks better, and is far less vulnerable to pests and disease because it simply isn’t under stress.
Before You Plant Anything, Do This First
Light conditions in a garden can be surprisingly tricky to read unless you’re paying attention. A garden that feels sunny might not actually deliver the hours of direct light that certain plants require. A shady corner might get more sun than you think.
So here’s your homework assignment, and it’s a very nice one.
Go outside and sit for a while. Find the spot where you would like to plant and observe it for a few days in the summer. Track how many hours of direct sunlight that area receives, hour by hour. Jot it down on a piece of paper. Average it out over a few days for a reliable picture.
Fair warning: this assignment may require a chaise lounge, a good book, and something cold to drink.
Once you have this data, you’re ready to move forward!

Decoding Light Terms
No more guessing at the garden centre! Here’s exactly what each term means.

Full Sun
At least 6 hours of direct sunlight each day. Plants in this category are sun-lovers: most vegetables, lavender, roses and many annuals and perennials.

Part Sun
4 to 6 hours of sun including some afternoon sun. The hours don’t need to be consecutive; a few hours in the morning and a couple more in the afternoon. Not all of it needs to be intense, direct light.

Part Shade
Also 4 to 6 hours of sun, but with a preference for morning light rather than the stronger afternoon sun. These plants appreciate some protection from the harshest part of the day.

Full Shade
Fewer than 4 hours of direct sun per day. If direct sun hits these plants, morning sun is ideal. Plants that appreciate these conditions are woodland plants, hostas and ferns.
Why Getting This Right Saves You Time and Money
A little observation before you plant is genuinely one of the most valuable things you can do as a gardener. It takes the guesswork out of every purchase and saves you from replacing plants that were never suited to that spot. Most importantly, it gives you a garden full of plants that actually thrive there.
The best gardens aren’t built on luck. They’re built on knowing your conditions and planting accordingly. Now that you’ve cracked the code on light, you’re already ahead of the game.
Bonus - Signage at Eising Greenhouses and Garden Centre!
You'll notice our signage has icons to help you best decide which plants are right for you and your situation!

- If you see a little paw print on our signs or pots, this means we're proud to say this plant is pet friendly! We love your little critters too!

- The number of raindrops on our signs indicates how much water this plant will need

- Signs with these icons indicate the plant naturally deters pests like deer and rabbits
By Ava Green
Usually, by the time February or March rolls around, I’m pretty tired of the health crazes like extreme diets and exercise plans I’ve been trying for the fifth year in a row. This year, let’s take a look at something that naturally supports our good health, both mental and physical. It’s time to stop and “smell the flowers,” so to speak.
Mental and Physical Health
Many gardeners already realize this, but studies are showing that simply seeing greenery can benefit our mental health. Whether it's a walk in the woods or a handful of houseplants, seeing green leaves makes a difference for humans! Research shows that it helps boost our mood and improve how we get along with people. Who doesn’t need a mood booster during cold, dark days? And getting along with people, well, the world just needs more of that, too, doesn’t it?
You may also already know that tending to plants reduces stress, but did you know that science is proving it? PubMed published a study stating:
"Interaction with indoor plants may reduce psychological and physiological stress by suppressing autonomic nervous system activity in young adults: a randomized crossover study."
This isn’t the common thinking about working outside in the garden increasing physical strength and stamina. It’s a study that examines our autonomic nervous system, the one responsible for automatic and essential bodily functions we don’t even think about, like breathing. The study compared participants performing two tasks: one on a computer and the other doing plant transplanting. The results suggest that interaction with plants indeed reduce stress without us even thinking about it! No task that requires willpower, just daily tending to plants like transplanting, watering, dusting, pruning, or turning the pots to get sun on the flipside.
So plants boost our mood, improve interactions with others and physically reduce our stress levels without us even trying. It’s no wonder we just feel better when we’re around plants.

Air Quality
Research also shows that indoor air pollution is often worse than outdoor air pollution. VOCs (Volatile Organic Compounds) from washing detergents, paint, furnishings, and building materials, as well as bacteria, fungal spores, and dust, negatively affect human health.
Fresh air can counter the impact of indoor pollutants, but often it’s too cold to open the windows in the middle of winter. When you can’t let fresh air into the house, indoor plants will help. We know that growing trees outdoors has a massive impact on air quality and the health of the planet, and inside our home, tropical plants contribute in the same way. The contribution of each type of plant varies, so having a variety is a very good idea.
What to Grow
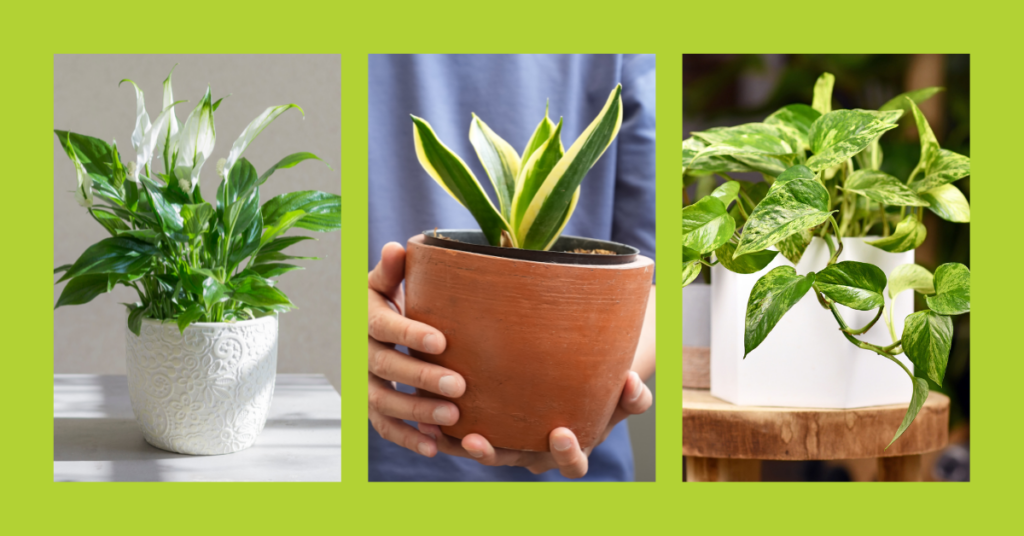
Here’s a list of easy-to-grow, green indoor plants that Eising’s resident tropical plant expert, Courtney, and the UK’s Royal Horticultural Society (RHS) recommend:
Aglaonema ‘Silver Queen’ (Chinese evergreen ‘Silver Queen’)
Aspidistra elatior (common Aspidistra, Cast Iron plant)
Chamaedorea elegans (Parlour Palm)
Chamaedorea seifrizii (Bamboo Palm)
Chlorophytum comosum (Spider Plant)
Crassula ovata (syn. Crassula portulacea) (Jade plant, Jade tree)
Dracaena fragrans ‘Janet Craig’ (Dragon Plant)
Dieffenbachia ‘Tropic Snow’ (v) (Dumb Cane)
Dracaena marginata (v) (Madagascar dragon tree)
Epipremnum aureum and ‘Marble Queen’
Ferns - many types
Ficus elastica (Rubber tree, Rubber plant)
Hedera helix (English ivy, common ivy)
Howea forsteriana (Flat Palm, Kentia palm)
Rhapis excelsa (Bamboo Palm, Lady Palm)
Sansevieria (Snake Plant) - many types
Spathiphyllum sp. (Peace Lily)
Syngonium podophyllum (Nephthytis)
Zamioculcas zamiifolia (ZZ plant, fern arum)
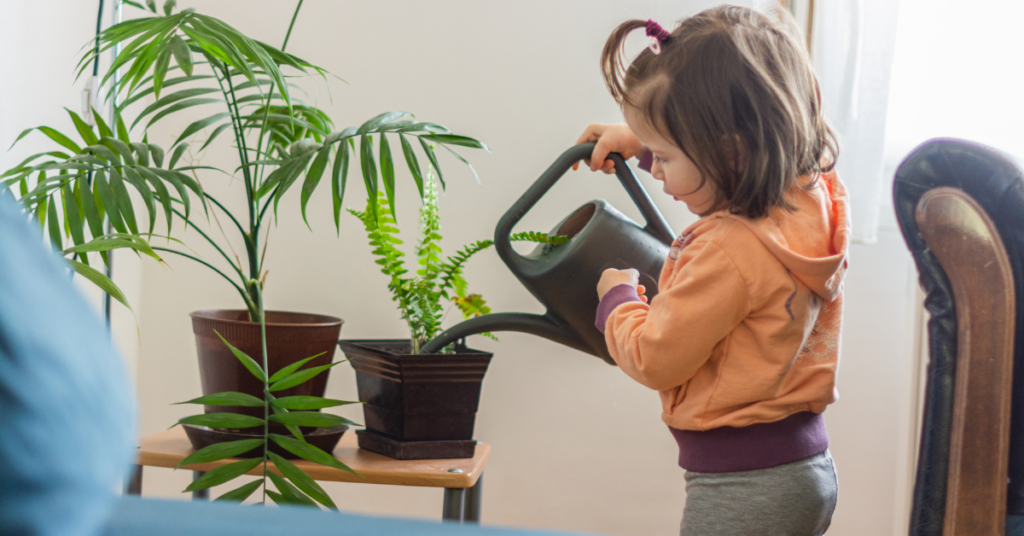
Is there a downside to having houseplants? Yes, if you have small children or pets, be mindful of the plants that can be toxic if ingested (see resources listed below).
While many of us in Ontario focus on “nice” weather and getting outside to garden, it’s pretty clear that our indoor plants do much of the heavy lifting to improve our health through the cooler seasons. Even if you don’t have a “green thumb”, it’s worth giving tropical, indoor houseplants their well-deserved space in our homes, hospitals, offices, nursing homes, classrooms, restaurants…or any indoor space!
Resources:
PubMed study on indoor plants and their impact on human stress - https://pmc.ncbi.nlm.nih.gov/articles/PMC4419447/
Sally Augustin, PhD, Environmental Psychologist - https://www.psychologytoday.com/ca/blog/people-places-and-things/201802/benefits-of-the-indoor-plant
RHS - https://www.rhs.org.uk/plants/types/houseplants/for-human-health
For a list of indoor plants and the VOCs they have the potential to reduce, PubMed review article by Dela Cruz et al., 2014 - https://pubmed.ncbi.nlm.nih.gov/25056742/
PETAs list of plants that are safe for pets: https://www.peta.org/living/humane-home/animal-friendly-houseplants/?utm_source=PETA::Google&utm_medium=Ad&utm_campaign=0422::veg::PETA::Google::SEA-Vegan-Grant::::searchad&gad_source=1&gad_campaignid=96533821&gbraid=0AAAAADu2DAt3SGF9vPRkHJqkNw-eZ6kEH&gclid=CjwKCAiAvaLLBhBFEiwAYCNTf9nyavbUnefHx0FaUekq4HZyXPrIwYhnJqgnu_g_TPea3nExhT-jOhoCqLUQAvD_BwE
RHS list of safest plants for children: https://www.rhs.org.uk/plants/types/houseplants/houseplants-for-children
By Dave Zeldon and Ely Schweyer
Many home gardeners are really missing their harvest of fresh vegetables these wintry days – and many beginners have New Year’s resolutions to become greener thumbs.
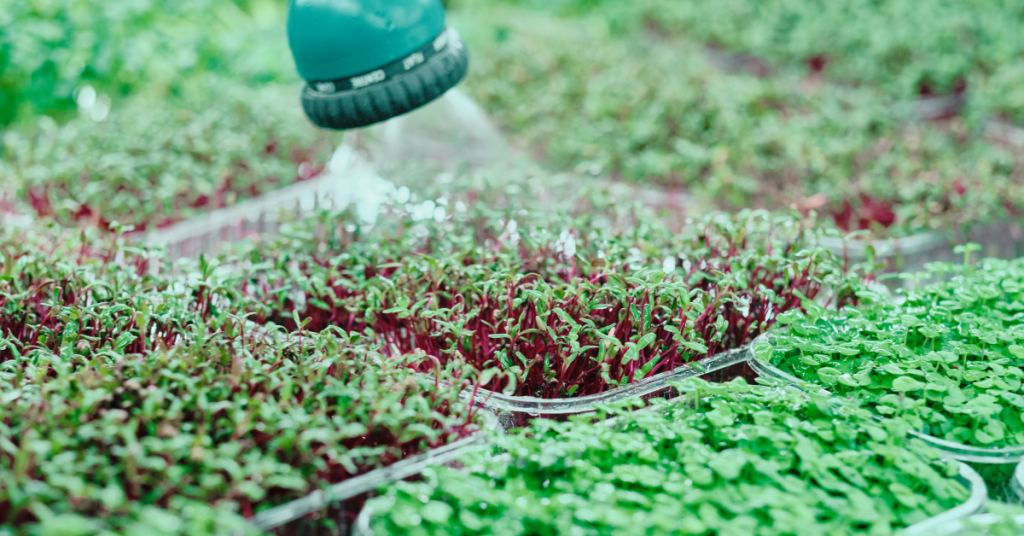
If you’re looking for something kid friendly, easy on the budget, and nutritious to do this winter, you may want to try microgreen farming!

Seeds to Start
The seeds of many vegetables and beans are suitable for hydroponic sprouting into tasty young shoots that will be ready for the table in less than a week!
Seeds such as alfalfa, broccoli, clover, lentil, mung bean, mustard, onion, radish and soybean are excellent choices for this activity plus they are invaluable in terms of their nutritional content.
Sprouting seeds on your kitchen counter takes only minutes a day, and the reward is a steady supply of fresh, crunchy shoots.
It is important to start by purchasing some packaged seed expressly for sprouting. The directions will indicate how much is needed to produce 100 grams of sprouts. The seed-to-sprout ratio can differ substantially - anywhere from 1.5 to 8.5 units of sprouts or more per one unit of seed - so follow directions carefully and make sure your jar is large enough to accommodate all the sprouts while still leaving room for good air circulation. As a rule, begin with 1 tbsp. (15 mL) of seeds for small varieties such as alfalfa and radish, 2 to 3 tbsp. (30 to 45 mL) for medium ones such as lentil, and up to 4 tbsp. (60 mL) for large seeds such as beans and peas.
Seeds to Sprouts
Simply put seeds into jar and position screening over opening, using an elastic band to hold the covering in place. Fill jar one-third full of warm (about 40°C) water and swirl seeds around for a minute or so. With the covering in place, drain water. Refill jar one-third full of cool water and let seeds soak for four to eight hours.
Next, begin daily regimen of rinsing seeds three times a day at roughly eight-hour intervals. Drain and refill jar with cool water, swirl seeds for about 30 seconds and drain again. Then, invert the jar so screening is at the bottom and rest it at a 45-degree angle in the bowl. Place on the kitchen counter out of direct light (place bean shoots in complete darkness, as they often taste sweeter when they're grown this way). Repeat this process for three to five days.

Simple Sustenance
You can start to harvest your sprouts once they're three to five centimetres long. Rinse and drain them thoroughly and place them in an airtight container and refrigerate immediately; they should remain fresh for up to five days.
Clover, alfalfa, radish, and mustard seeds give rise to the delicious sandwich booster sprouts. Sprouts are one of the most concentrated natural sources of vitamins, minerals, enzymes, and amino acids.
Plants inside the home help bring life to a long winter, if you’re looking for more information – or plants – visit Eising Greenhouse and Garden Centre! 🌱
How To Keep Your Orchid Alive
By Ava Green
Orchids have become very popular gifts, and a great hobby for indoor plant enthusiasts who discover the wide range of colours and shapes available. Orchids are also loved for their long-lasting and exotic blooms.
While some may choose to only enjoy these tropical plants as long as they’re blooming, orchid-lovers look forward to nurturing the plant and encouraging it to flower regularly. It may be a little daunting at first, but once orchids grace you with their stunningly beautiful blossoms, you will find that a little bit of care is very worthwhile!

It’s estimated that there are 25,000 different species of orchids and over 100,000 hybrids! The ones you’ll find most readily in Ontario stores are Phalaenopsis or moth orchid, because it’s fairly easy to grow. Phalaenopsis are the best choice for beginners.

Other orchids you may find easily are Cattleyas (Corsage Orchids), Cymbidiums (Boat Orchids) and Dendrobium orchids.
While all of these may be orchids, they don’t necessarily require the same care, so it’s a good idea to check the tag for the type you have and its specific care requirements. The following is a general guide to light, water, fertilizer, and growing medium for the most commonly found orchids, but it does not apply to all breeds.
Light and Air
For most orchids, light, and lots of it, is the general rule. Place your plants within 3 feet of a window (not to the side) in the sun. South, east, and west-facing windows are all fine for maximizing the light your plant receives.
Orchids also enjoy a breeze or circulating air in your house. They do not like temperature extremes, though 15 to 20 degrees Celsius is safe. Keep in mind that the more warmth and air movement there is, the more often you will need to water your orchid.
Water
A general rule is to use water that is not hard and has not been softened with salt. Salt will kill an orchid. Rainwater, reverse osmosis, or distilled water are good choices. Chlorinated water is not an issue for orchids - high sodium levels are.
The biggest issue many people have is either over-watering or underwatering their orchids. Here is the method we recommend:
Every 5-7 days, place the pot in a container or the sink, then fill it with enough water to cover the top of the pot. Be careful not to let water collect in the crook at the base of the leaves, as standing water will rot the leaves and the plant. Once the plant’s growing medium is thoroughly soaked, remove it from the water and allow the pot to fully drain in the sink before placing it back in its saucer.
We prefer using a container of water rather than the sink, so the remaining water can be used to water other plants.
Here’s the best watering advice we can give you: look at the overall health of both the plant AND its root system. Full, plump leaves and vibrant, green roots indicate that your plant is getting enough moisture. Puckered leaves and a silver sheen on the roots indicate insufficient water. Mushy, brown leaves and roots are signs of rot caused by too much water.

You may hear of another watering method that involves using ice cubes, but it’s controversial and not widely recommended. To quote the American Orchid Society, “Ice is for cocktails, not orchids. Never use ice on tropical plants to water them.”
“Soil” and Nutrients
Most orchids naturally grow high up in trees, where their roots cling to bark and absorb moisture from the air. At home, we try to mimic those conditions, which is why orchids are typically planted in chunky mediums like bark, coconut husk, charcoal, or perlite rather than traditional soil. While many of the roots stay inside the pot, it’s completely normal for some to grow up and over the edge.

These “escapee” roots might look a little wild, but don’t worry, there’s nothing wrong with your orchid. In fact, those aerial roots are a sign that the plant is healthy and doing exactly what orchids do in nature.
It’s worth noting that not all orchids grow the same way. Many, like Dendrobiums, are epiphytic (growing on trees) or lithophytic (growing on rocks), though some orchid varieties are terrestrial and grow in the ground. The good news is that the growing medium your orchid comes in is chosen specifically for that variety, so you can trust it’s in the right environment.
The bark that your orchid is planted in will slowly break down and become mushy. It’s a very good idea to repot your plant every two years.
It’s generally recommended to feed most orchids, and bloom time dictates which fertilizer to use and how often to feed. Begin by using a water-soluble 20-20-20 fertilizer, mixing it at ¼ the amount recommended for other houseplants. Apply this solution every 2 weeks in the summer and every 3 weeks in the winter.

“The orchid, with its many forms, is a reminder that life is full of surprises.” — Leonardo da Vinci.

Lastly, here’s an orchid fun fact: While we have been talking about tropical orchids in this article, there are also orchids that grow right here in Ontario! That’s right, there are over 50 species in this province, including the much-loved Pink Lady’s Slipper (Cypripedium acaule).
Resources for more detailed and specific information:
Toronto Master Gardeners - https://www.torontomastergardeners.ca/gardeningguides/growing-orchids-a-toronto-master-gardeners-guide/
Canadian Orchid Congress - https://canadianorchidcongress.ca/basics/growing-orchids/
American Orchid Society - https://www.aos.org/orchid-care/indoor-orchid-care
Ontario Wildflowers - https://ontariowildflowers.com/main/group.php?id=18
By Dave Zeldon and Ely Schweyer
This is the time of year that most garden centres will have on display their wide variety of Amaryllis bulbs, including the evermore popular waxed dipped. These enormous bulbs that are appearing now will be ready to burst into bloom within 4-8 weeks after planting.
Non-Wax Dipped: Planting
All Amaryllis need is a bit of commercial potting soil that should not cover the shoulders of the bulb (try leaving about 1/3rd of the bulb showing above the soil line), with the nose (or narrow end) of the bulb peeping well over the top of the pot. Make sure that you use a well-drained container that is 3-4” bigger in diameter than the bulb itself.
☝️A heavy clay pot will prevent this top-heavy plant from toppling over. To achieve continuous bloom, plant at intervals of two weeks for stunning colour in your home.

Non-Wax Dipped: Care
Once leaves emerge, fertilize once a month with a 20-20-20 water soluble fertilizer for houseplants. Water sparingly and wait for the miracle in a warm sunny room. Sub-irrigation or watering from the bottom of the drip tray will keep the surface soil dry, thus keeping and bulb rot organisms and those pesky fungus gnats at bay.
Non-Wax Dipped: It's Not Done Yet!
When blooming is over, remove the scape (or flower stock) and place the plant in a sunny spot and continue to water. This is to allow the leaves to regenerate the bulb. In springtime, when all danger of frost has passed, bring the bulb outdoors and let it spend its holidays in a shady spot. In some varieties the leaves will die back in September to give the plant a rest for a couple months. Stop watering and store the bulb on its side in a cool place for about eight weeks, when the leaves will once again begin to emerge.
Amaryllis can go 3-4 years without repotting as they don’t mind a little crowding. Try growing a couple of bulbs in larger pots to see if you can get a clump of flowers from the offshoots or babies that will develop after a couple of years.
Or, Try One of These Wax Dipped Bulbs!
Now growing more popular are the care-free waxed-bulb Amaryllis!



Experienced growers and beginners alike love that these waxed bulbs do not need to be planted or watered! Each of these robust bulbs are carefully prepared in festive-coloured wax, allowing you the freedom to place them among your holiday decorations.
Simply keep the bulbs at an ambient room temperature of at least 16C (70F) for beautiful blooms in five to six weeks.
These novelty items are low commitment! Their only fault is their lack of longevity - gardeners don’t get to enjoy them after year as these waxed bulbs were designed to be a one-use throwaway item!
BUT with a little luck and perseverance you may be able to save the bulb for next season after blooming. All you have to do is to carefully remove the wax layer, remove the flower stalk and place the bulb and with its remaining leaves into a pot of good growing media, allowing the leaves to regenerate the food stores in the expired bulb.
If you’re looking for more information – or perhaps, Amaryllis – visit Eising Greenhouse and Garden Centre! Happy Holidays! ✨
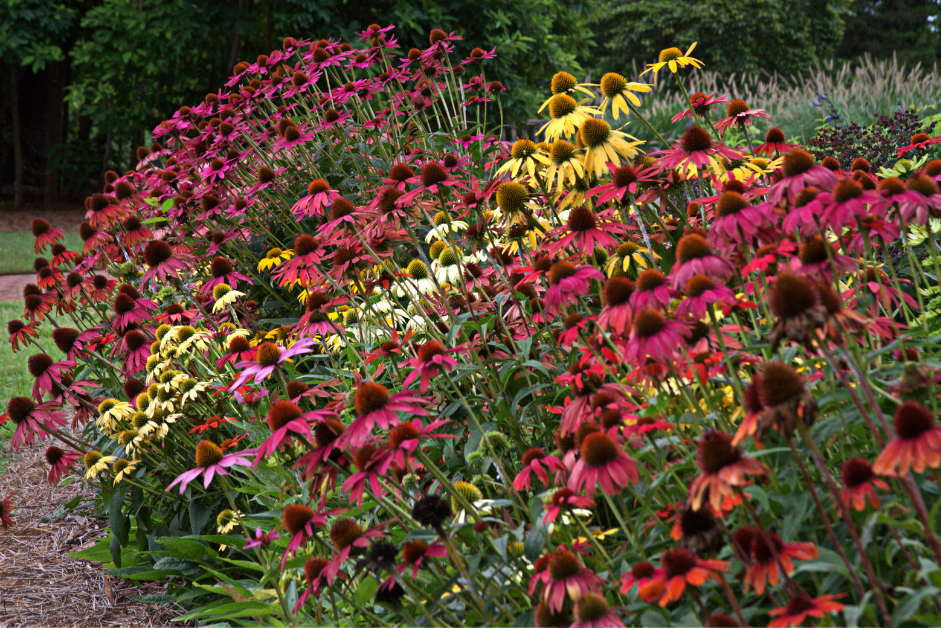
Coneflowers (Echinacea) have earned their place in perennial borders, pollinator gardens, and meadow-style landscapes—and for good reason. These hardy, vibrant perennials reliably return each spring in our Ontario Zone 6 climate, adding long-lasting colour and texture to any garden.
The classic Purple Coneflower (Echinacea purpurea) begins with soft, pink-tinged petals that deepen into rich purple hues as the season progresses. At its peak, the familiar domed centre cone emerges—an eye-catching structure that dries beautifully and provides winter interest in the garden.
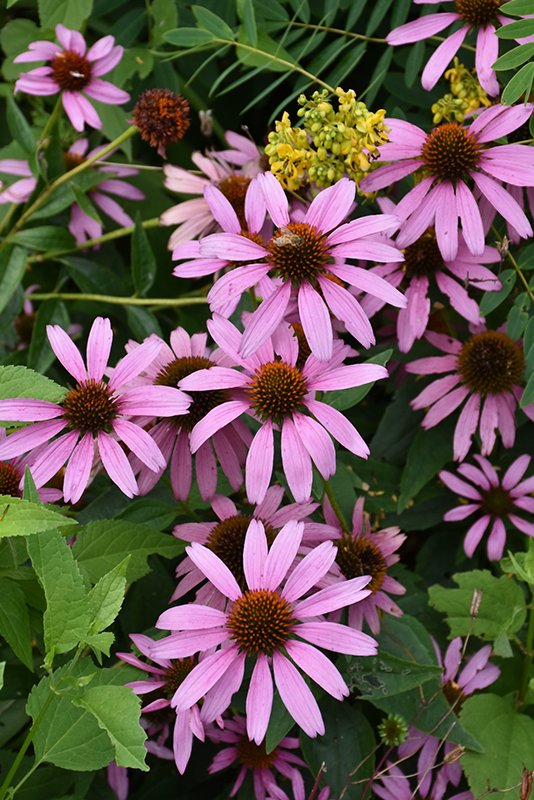
Purple Coneflower (Echinacea purpurea)
Choose From The Rainbow
While the purple coneflower is the most iconic, hybrids now come in nearly every colour of the rainbow. You'll find stunning varieties in pink, white, green, orange, and fiery reds.
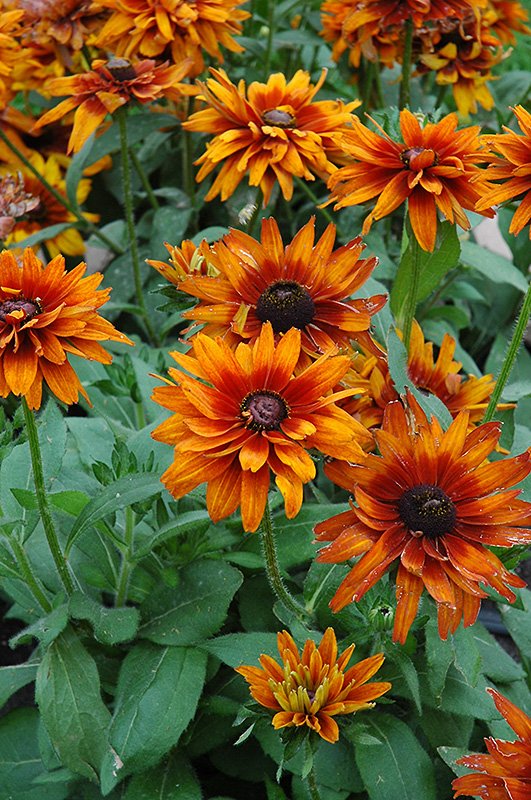
Rudbeckia hirta 'Cherokee Sunset'
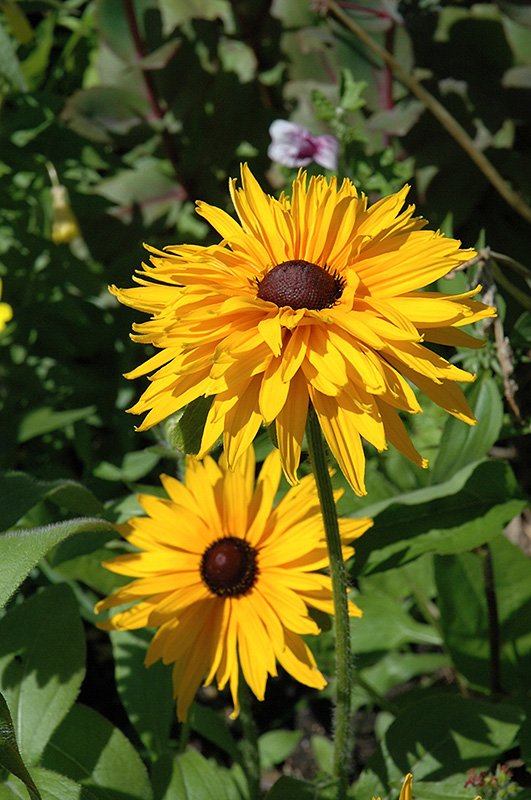
Rudbeckia hirta 'Double Gold'
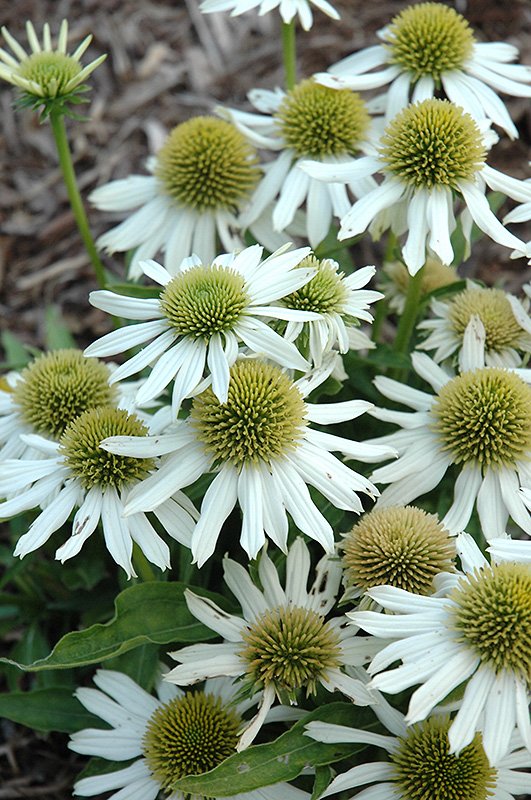
Echinacea 'Snow Cone'
No matter your garden’s colour scheme, there’s likely a coneflower to match. Even better, their bold blooms attract pollinators like bees and butterflies, while the seed heads feed songbirds in fall and winter.
Low Maintenance, Long-Blooming Beauty
Coneflowers are both showy and easy to care for—ideal for beginners and seasoned gardeners alike. Here’s what you need to know:
Growth habit:
- Height: 24–60 inches, depending on the variety
- Spread: 12–24 inches
- Bloom time: Mid-summer to fall
Growing conditions:
- Sun: Full sun is best, though light shade is tolerated
- Soil: Well-drained soil is key
- Water: Drought-tolerant once established, but thrives with consistent watering
- Fertilizer: Not necessary
Pro tips for success:
- Pinch back in early summer to encourage bushier, sturdier plants and decrease the chance of powdery mildew forming
- Deadhead spent blooms early in the season to prolong flowering
- Leave seed heads in late summer and fall for winter beauty and bird food
- Optional self-seeding: Let them go to seed for a naturalized look, or remove blooms to prevent self-seeding
Coneflower Companions
Coneflowers mix beautifully with a variety of other perennials. For vibrant, complementary plantings, try pairing them with:
- Hyssop (Agastache)
- Catmint (Nepeta)
These companions share similar growing requirements and will enhance the colour and texture of your garden throughout the growing season.
Visit Us for More Ideas
Want help choosing the perfect Coneflower variety or finding the right garden companions? Stop by Eising Garden Centre and chat with our perennial expert, Mary. She’ll help you create stunning combinations that bloom beautifully from summer into fall.
You read that right. Easy houseplants exist, and there are some very cool varieties too. Easy does not mean boring!
Plenty of tropical plants are forgiving and require little fussing—you just need to know which ones and how to care for them.
These plants are generally resilient and forgiving of occasional neglect, making them perfect choices for new growers. When choosing any houseplant, consider your home's lighting conditions and the care you can provide.
Pothos
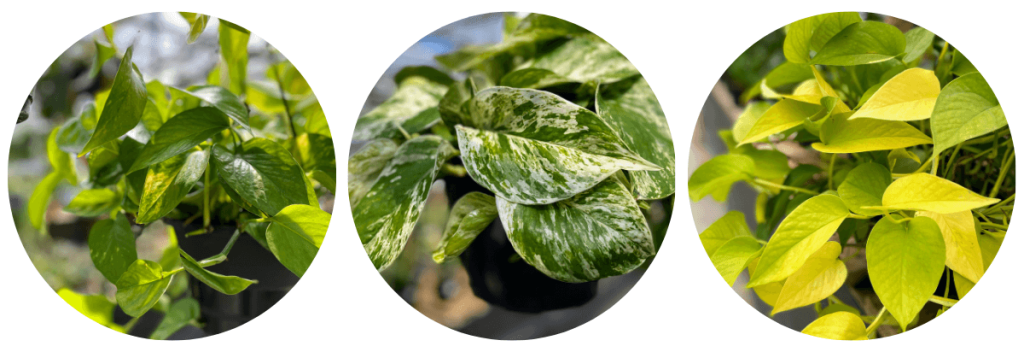
Pothos vine is one of the easiest houseplants to grow and is perfect for beginners.
Bright and indirect light is what this plant loves, but it will also grow in low light - just not no light.
Allow the soil to dry out between waterings. Too much moisture will cause the roots to rot. The plant’s leaves will droop and let you know when it needs a drink!
Feed Pothos with a balanced fertilizer monthly in Spring and Summer only to keep it thriving.
Ponytail Palm
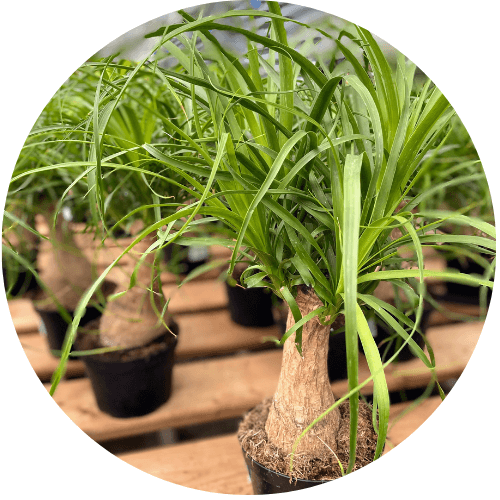
Give this plant the brightest location in the house. It loves full sun or bright, indirect light. They will survive to 10 Celsius, but this plant loves warmer temperatures.
Be careful not to overwater Ponytail Palms. Because water is stored in the bulbous stem, they only need a drink every 7 to 10 days during the summer. In the winter, cut back to monthly watering.
Use a slow-release pellet fertilizer in the Spring for carefree maintenance.
Trimming the tips off damaged leaves will keep them healthy.
Peace Lily
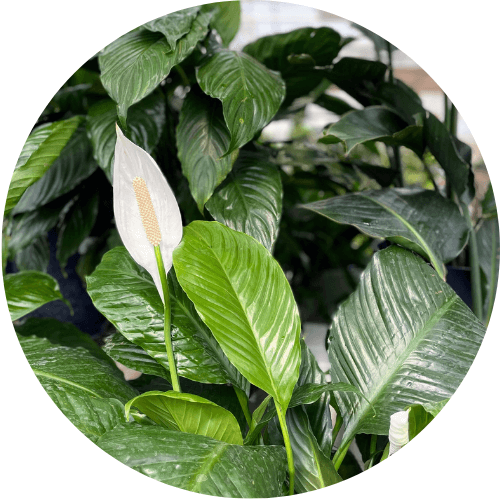
This plant loves filtered or indirect sun (place it a few feet away from a sunny window or in an east-facing window) and moderately moist soil.
While Peace Lilies love moist and warm conditions, keeping them under-watered is best. Use your finger to check the soil’s moisture. Water this plant when the top inch of soil has dried out.
Use slow-release fertilizer pellets in the Spring or feed the soil weekly during the summer with liquid fertilizer. This plant enjoys frequent feeding during the growing season.
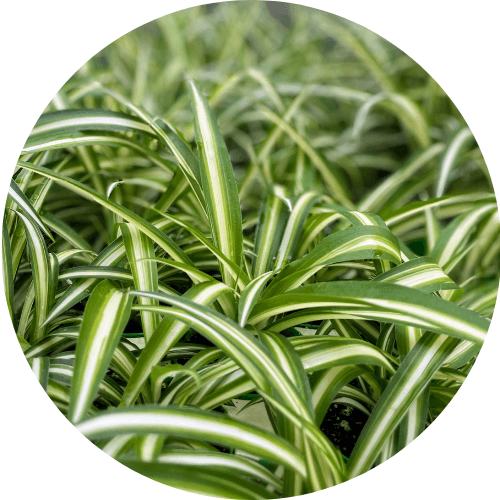
Spider Plant
Spider plants are straightforward to grow. They prefer an area with partial sun or semi-shade that is warm.
Keep the soil lightly moist, not soggy!
Use an all-purpose fertilizer during the summer months. Trim off any brown leaves as needed.
Snake Plant
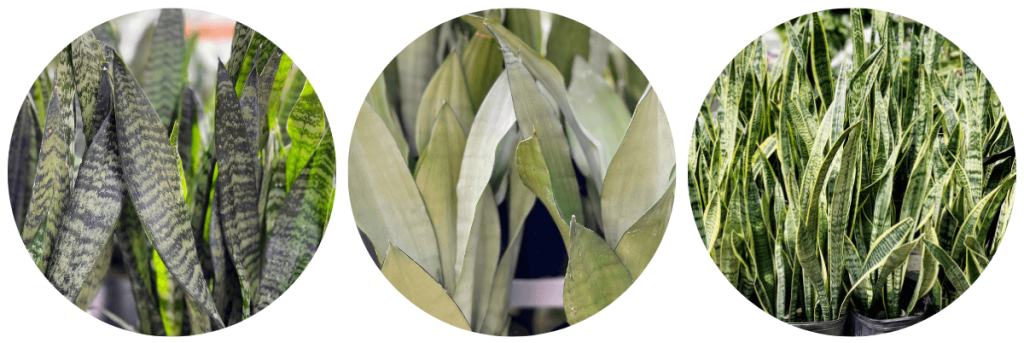
Indirect sun (a few feet away from a sunny window) or a couple hours of early morning sun will keep this plant happy. These tropicals thrive in warm temperatures with no cold drafts.
Do not allow your Snake plant to sit in water! Water deeply, then let it drain only when the soil is dry.
A 10-10-10 balanced fertilizer at half strength once in the spring and again in mid-summer is all the plant food it needs!
One Final Tip
Most houseplants do not like chlorinated or treated tap water. If possible, water your plants with filtered, distilled, or rainwater. If you only have access to tap water, allow it to sit in an open container for several days until the chlorine evaporates.
Following these simple guidelines will keep your plants healthy, and in return, they will provide natural beauty to your home.