
For Height, Drama, and Eye-Catching Interest
By Ava Green
Every well-designed garden needs an anchor, something tall and confident at the back that gives the whole planting a sense of structure and depth. While shrubs and trees often fill that role, perennials can also do the job beautifully. The back row perennials below are sturdy, reliable performers that thrive right here in Norfolk County. Plant them at the back of a border or the centre of an island bed as the backdrop that makes everything around them look better.
False Indigo, Baptisia australis
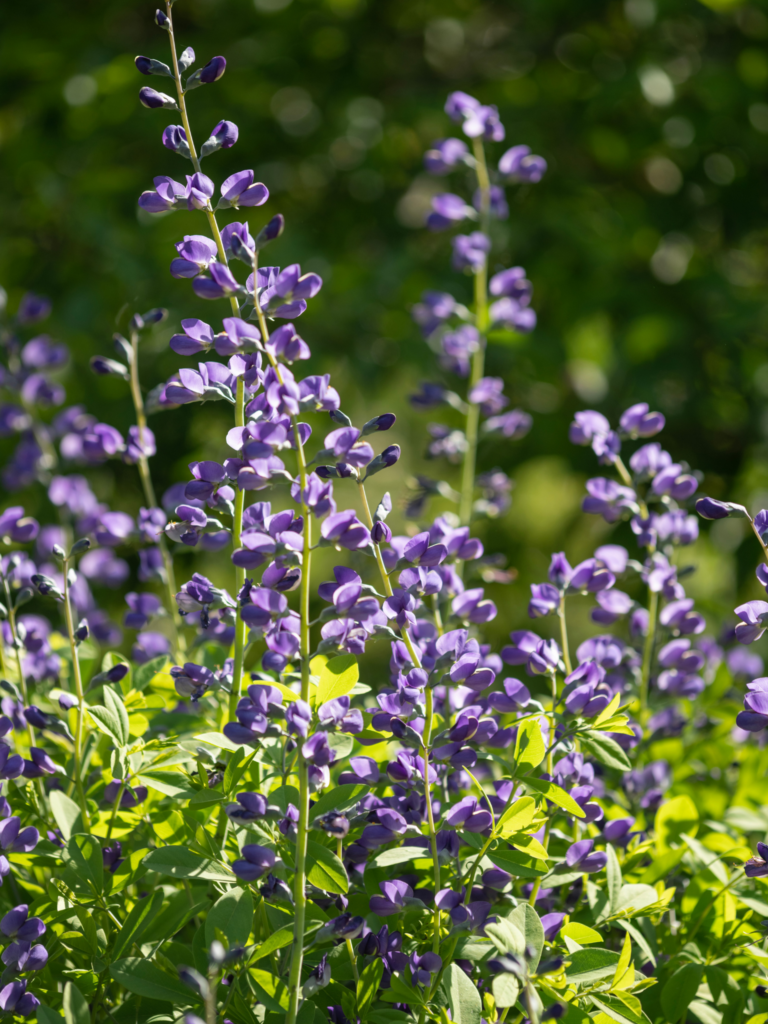
Baptisia is one of those perennials that gardeners discover and immediately wonder why they waited so long to plant it. In late spring, masses of stems are loaded with sweet pea-shaped flowers in shades of indigo blue, soft yellow, white or purple, and butterflies and bees absolutely love them. Once the blooms fade, the plant takes on a handsome, shrub-like form with blue-green foliage that holds its shape nicely for the rest of the season. While it’s slow to establish, it is extraordinarily long-lived, making it a plant you put in once and enjoy for decades.
Grows 3 ft tall and 3 ft wide | Full sun to partial shade | Blooms late spring to early summer
Hollyhocks, Alcea
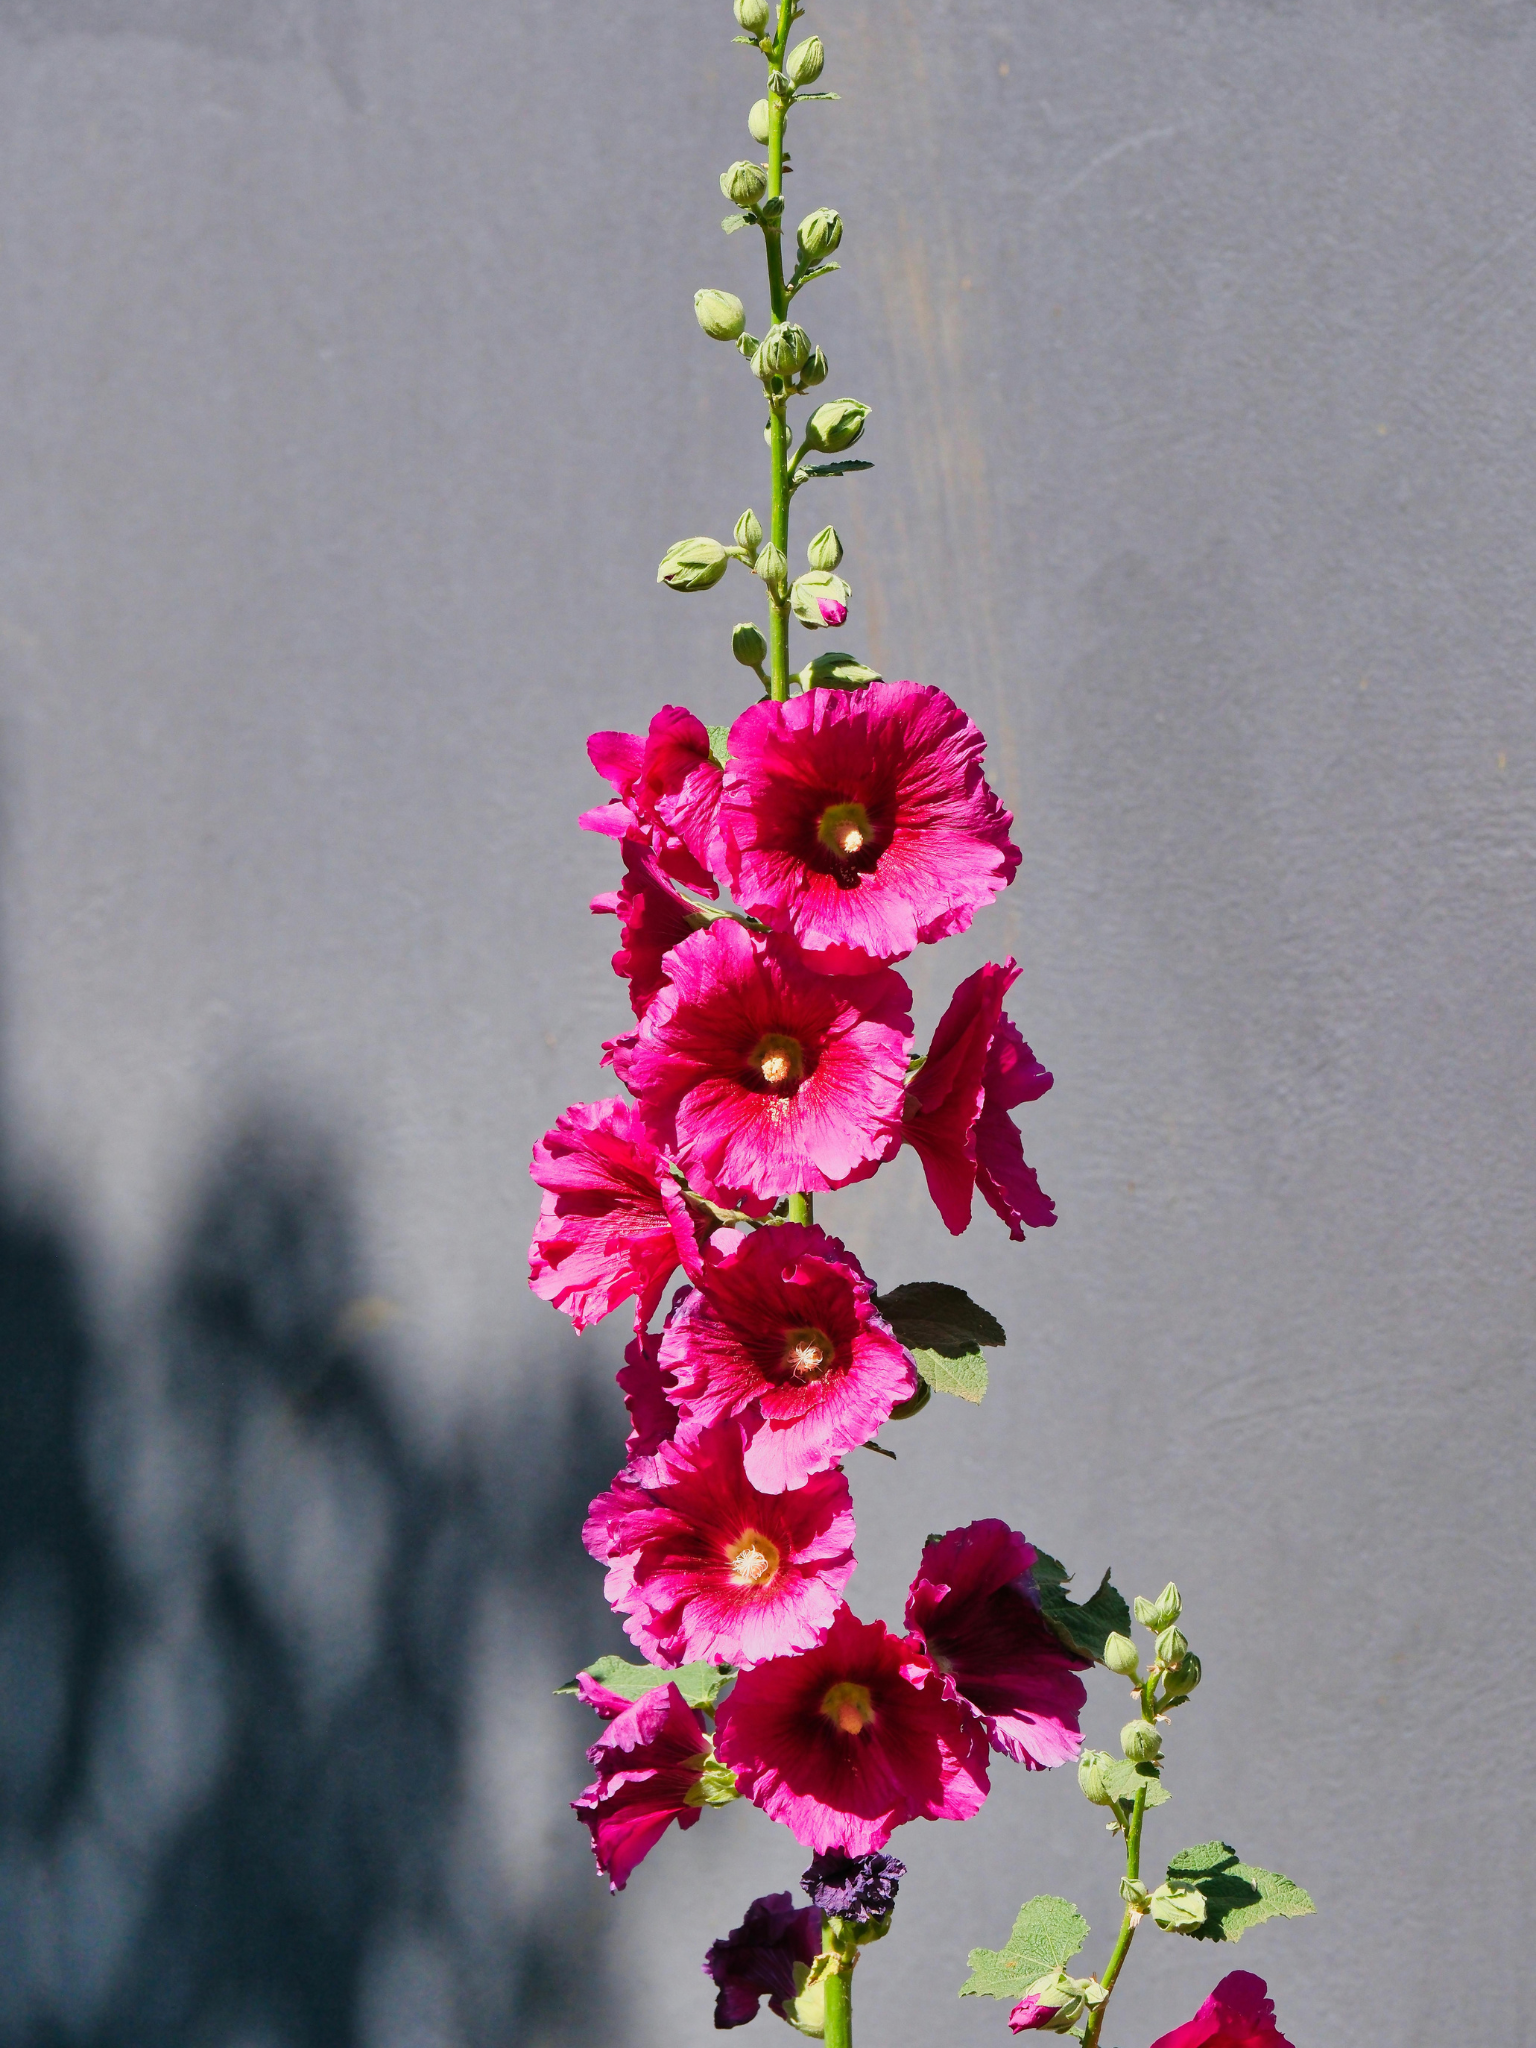
Few perennials carry the nostalgic, romantic charm of a Hollyhock in full bloom. Their tall, stately spires are covered in large, papery flowers and are available in an irresistible range of colours from soft pastels to rich burgundies and deep purples, to classic white. They have a way of making a garden feel established in their first season, making them a desirable back-row choice.
Grows 2-8 ft tall and 1-2 ft wide | Prefers full sun but will tolerate part shade | Blooms in summer
Joe Pye Weed, Eutrochium or Eupatorium
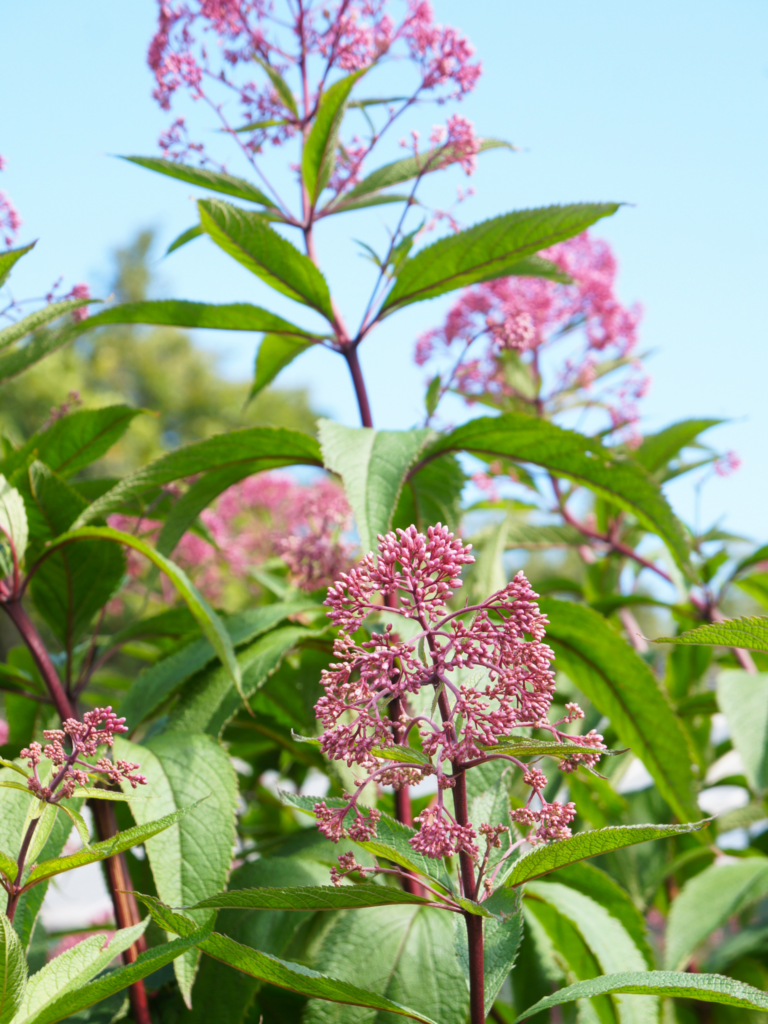
A native plant that is as ecologically valuable as it is beautiful. Its large, showy clusters of rosy-purple flowers are a magnet for butterflies and pollinators from mid-summer well into fall, long after many other perennials have finished their show. If you want a back-row plant that works hard for wildlife while adding bold colour to the garden, this is an excellent choice.
Grows 4-6 ft tall and 2-4 ft wide | Prefers part sun and moist soil | Blooms mid-summer to late fall
Russian Sage, Perovskia atriplicifolia or Salvia yangii
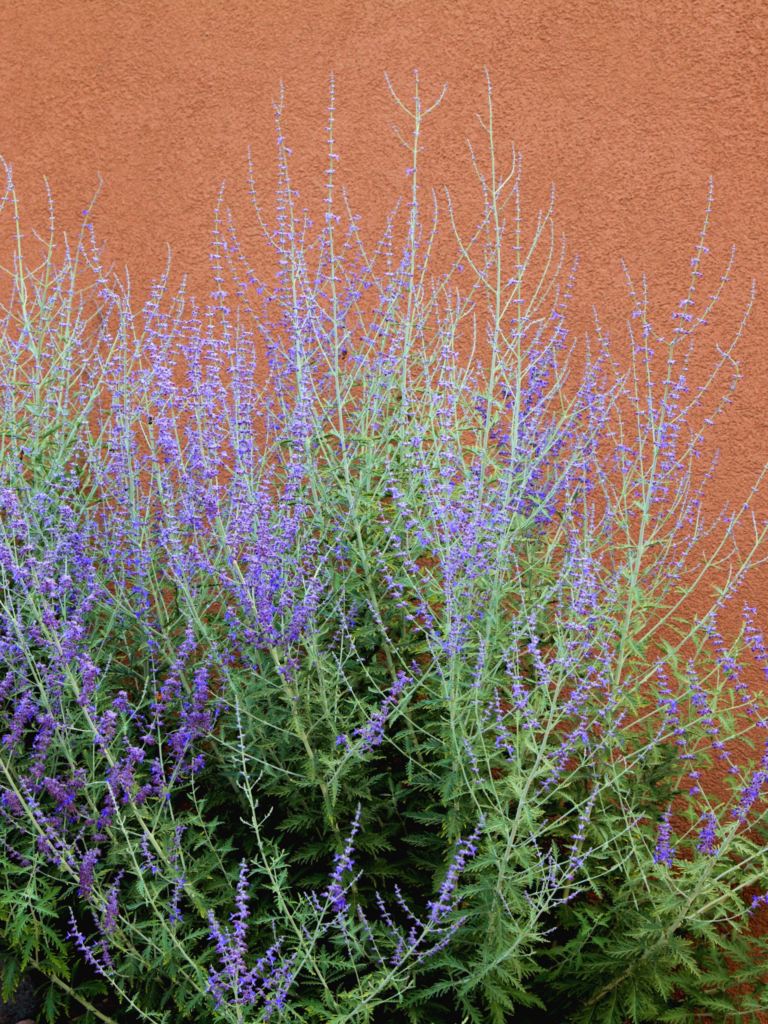
When the garden fills up with yellow and orange blooms in late summer, Russian Sage arrives with a billowy, airy cloud of lavender-blue flower spikes rising above silvery-grey foliage. It catches the light beautifully and adds a softness that few other plants can match. Drought-tolerant once established and virtually pest-free, it is one of the lowest-maintenance perennials you can grow. Compact varieties are also available if space is limited.
Grows 3-4 ft tall and 3-4 ft wide | Full sun | Blooms mid-summer to fall
Bear’s Breeches, Acanthus Mollis
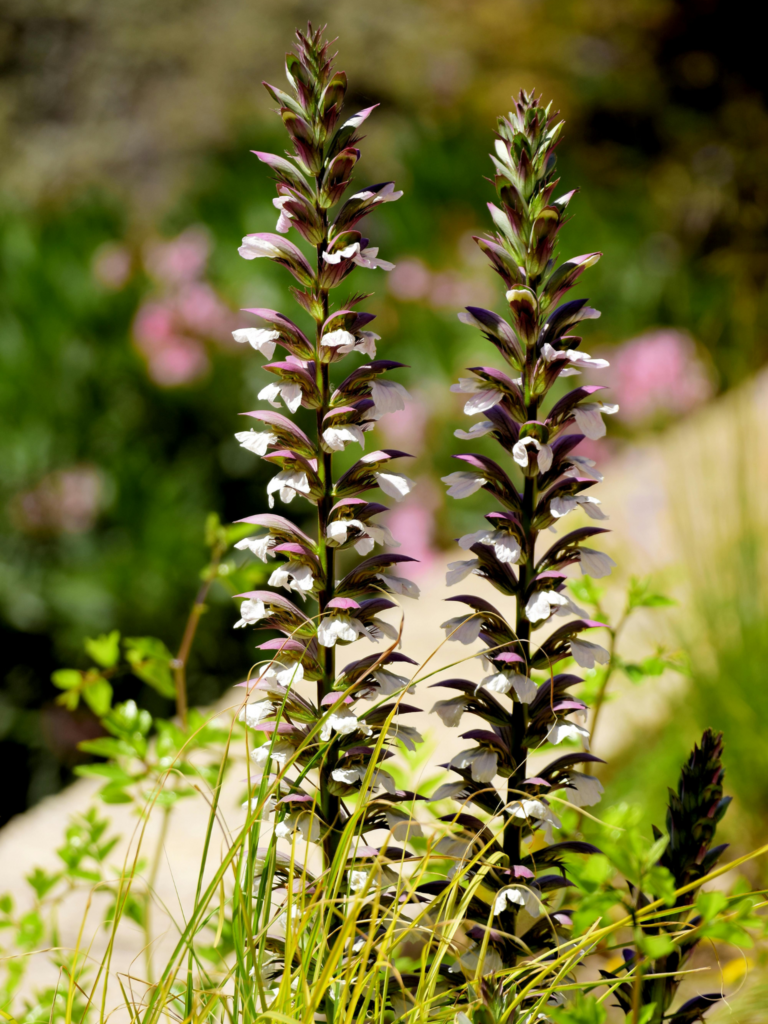
If you’re looking for a plant that makes a genuine architectural statement, Bear’s Breeches is in a category of its own. Its large, deeply lobed, glossy foliage forms an impressive mound, while dramatic flower spikes shoot three to five feet upward, bearing creamy white snapdragon-like blooms accented with striking reddish-purple bracts. It is bold, sculptural, and unlike almost anything else in the garden.
Grows 3-5 ft tall and 2-3 ft wide | Full sun to part shade | Blooms June to July
Foxglove, Digitalis
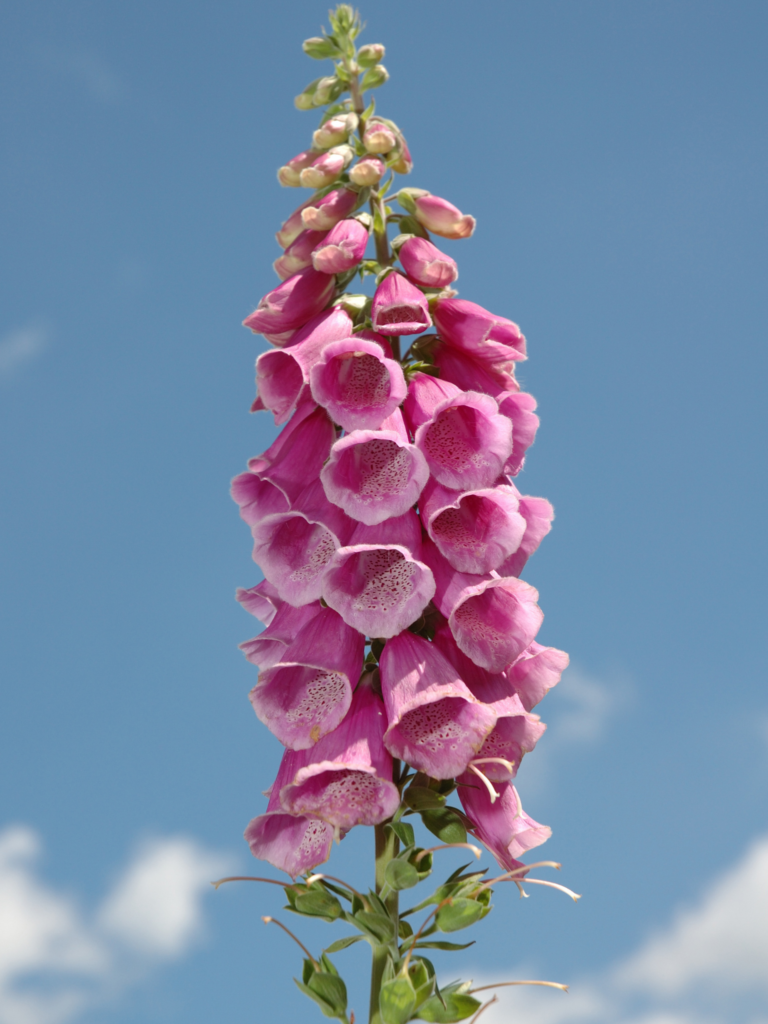
There is something undeniably enchanting and regal about Foxglove with its tall spires of tubular flowers freckled and spotted on the inside, nodding gently in the breeze. The colour range is also wonderful, from soft creamy whites and pale pinks to rich purples and deep rose. Many varieties self-seed freely, naturalizing happily in the garden over time. One important note: every part of the Foxglove plant is toxic to people and pets, so it is best planted away from areas where children or animals play. In the right spot, however, it is one of the most beautiful back-of-the-border plants available.
Grows 2-5 ft tall and 2 ft wide | Sun to part shade | Blooms in summer
Goat’s Beard, Aruncus diocus
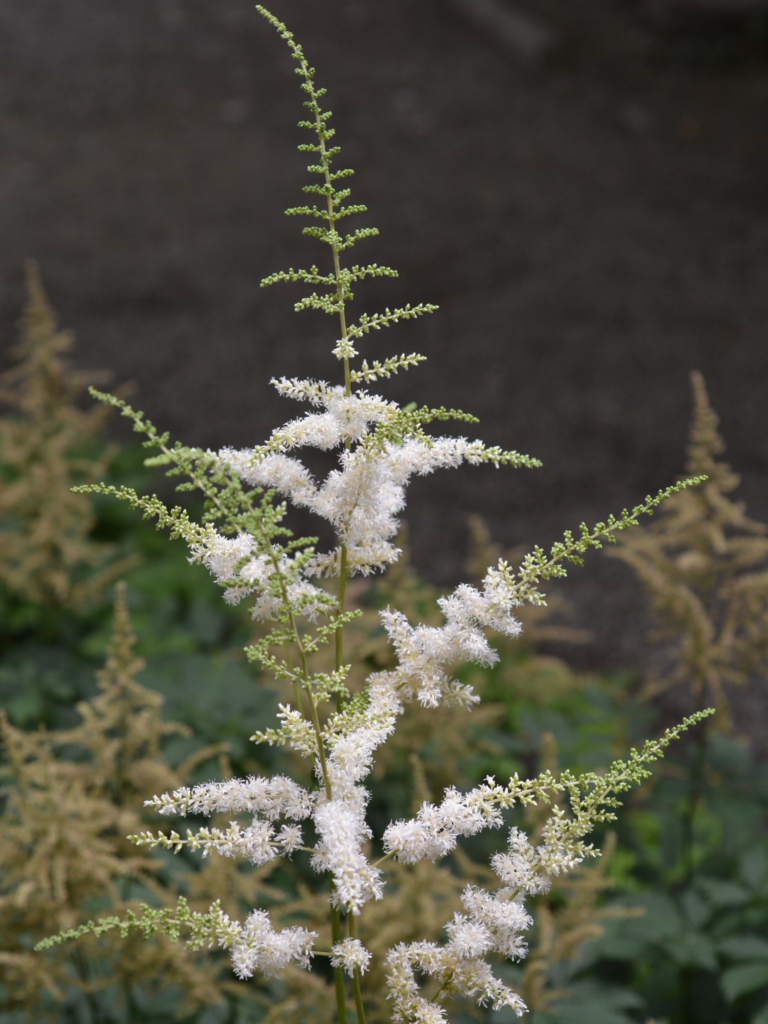
Despite its stature, this is one of the most graceful and softening plants you can add to a shady border. Large, feathery plumes of creamy white flowers rise above finely divided, elegant foliage, bringing lightness to even the darkest corners of the garden. It is especially effective at softening hard edges, filling bare spots under trees, and providing a lush, natural backdrop for smaller shade-loving plants. Dwarf varieties are available for smaller spaces.
Grows 6 inches (dwarf) to 6 ft tall and 2-4 ft wide | Partial to full shade | Blooms early to mid-summer
Gardener’s Tip:
Removing spent blooms before they go to seed, also known as deadheading, encourages many perennials to produce a second flush of flowers later in the season. It takes only a few minutes and can extend your bloom display by weeks.
Ready to Build Your Back Row?
The team at Eising Garden Centre is here to help you choose the right tall perennials for your space, your soil, and your sun conditions. Stop by and let us help you create a border that looks stunning from front to back, season after season.
Expert Picks You Can Plant Right Now
By Ava Green
Looking for a flowering shrub that delivers season after season? We asked our experts at Eising Garden Centre to share their top picks, the ones that customers and staff love most, and they delivered. Whether you’re looking for spring blooms, fall colour, wildlife and pollinator value, or a shrub to suit your space, there’s something on this list for every garden.
Fuji Cherry ‘Little Twist’, Prunus incisa ‘CarltonLT’
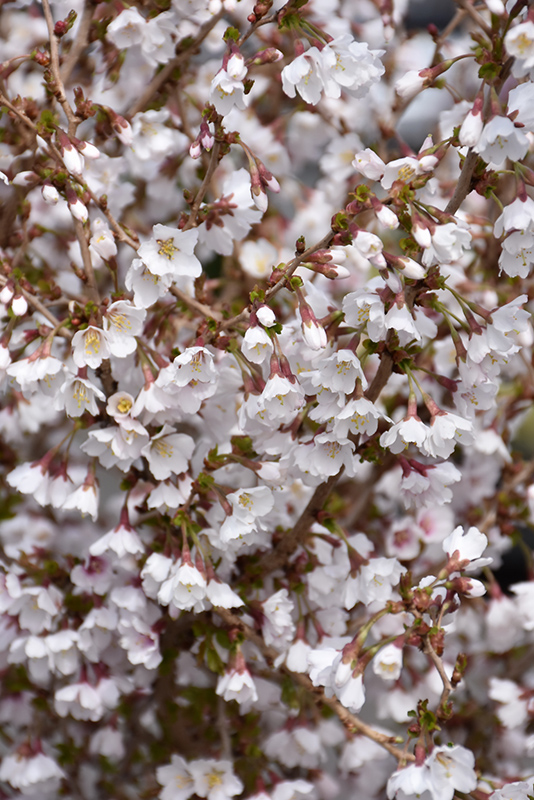
As an accent in a small garden, or planted in a grouping in a larger garden, this multi-stemmed shrub is a gem!
In early spring, crimson buds emerge before the leaves appear. Little Twist then produces clusters of lightly scented white, bell-shaped flowers with soft pink centres that grow along its stems, a stunning early-season display. It is a deciduous shrub, and leaves begin as green before shifting to coppery-bronze, then deepen to a rich burgundy in fall. Smooth, dark red bark adds interest in the winter once the leaves are gone.
This slow-growing, multi-stemmed shrub makes a striking feature in your garden.
Best for: Small gardens, accent planting, four-season interest. | Sun: Full sun | Mature size: 6 ft. tall × 6 ft. wide
Downy Serviceberry, Amelanchier canadensis
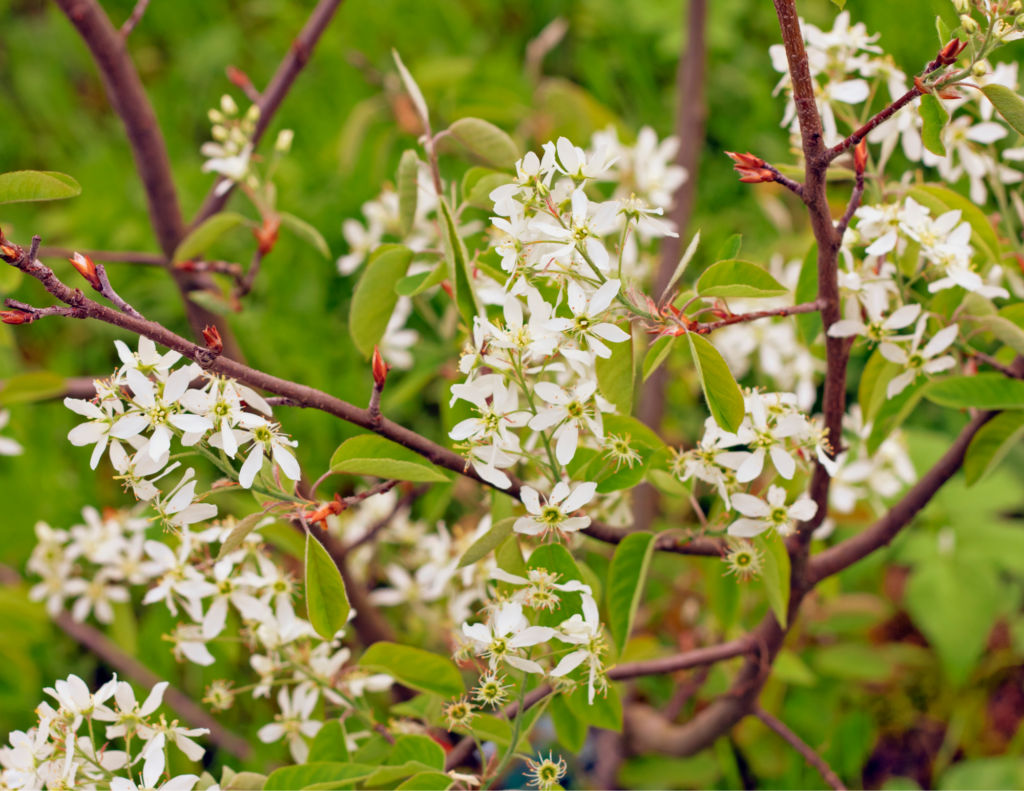
One of the most rewarding native shrubs you can plant, Downy Serviceberry earns its place in the garden from spring right through to fall. Showy clusters of fragrant white flowers in early spring, followed by small, sweet, edible purple-blue berries in early summer that are wonderful for making jam and an absolute favourite for birds. Come fall, the foliage puts on a spectacular show in shades of yellow, red, and orange.
As a bonus, choosing a native plant like Serviceberry supports local pollinators and wildlife, making it as ecologically valuable as it is beautiful. It works well as a specimen plant on it’s own, in a grouping or hedge, or naturalized in a larger landscape.
Best for: Wildlife gardens, naturalized areas, multi-season interest | Sun: Full sun to part shade | Mature size: 20 ft. tall × 10 ft. wide
Amur Privet, Ligustrum Amurense
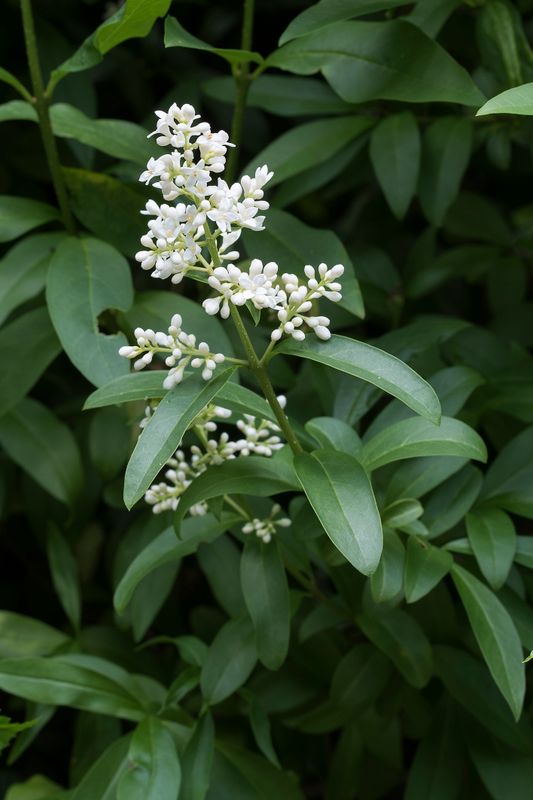
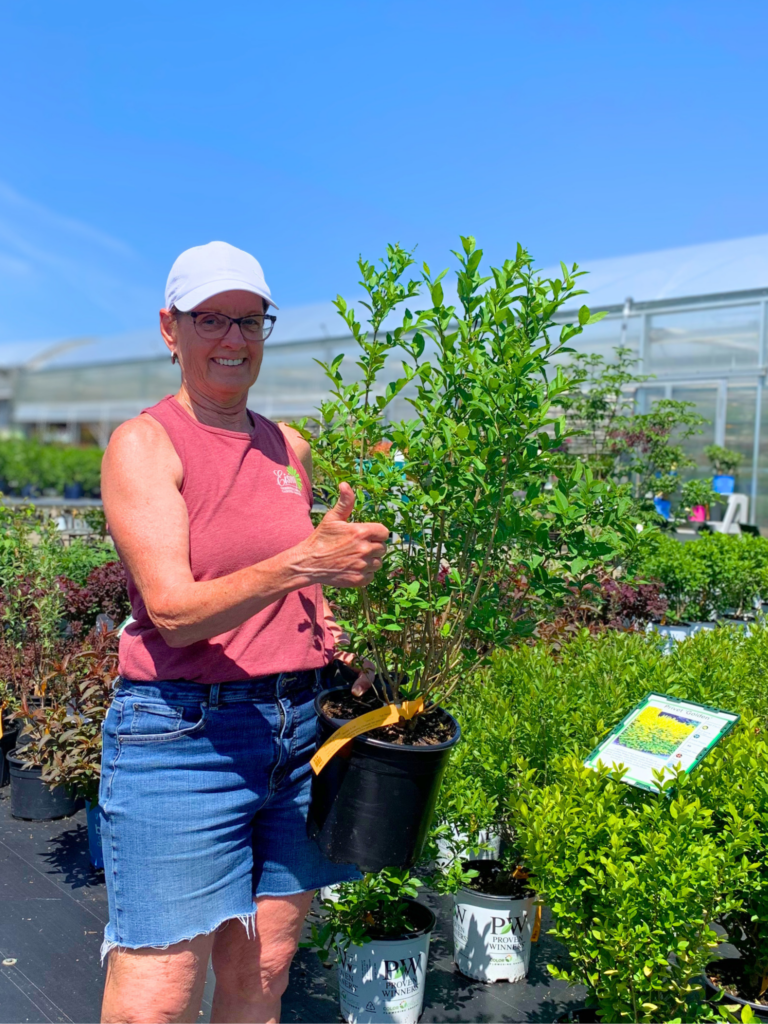
Amur Privet
When fast growth and privacy matter, Amur Privet is one of the best choices available. This dense, dark green shrub produces white flower panicles in late spring and small black berries in fall. It responds exceptionally well to pruning after it blooms, making it an ideal candidate for a formal or informal hedge. If you need to fill a space quickly and create structure in your garden, this is a reliable, low-maintenance option.
Best for: Hedging, screening, fast coverage | Sun: Full sun to part shade | Mature size: 12–15 ft. tall × 8–15 ft. wide
Viburnum ‘Fragrant Snowball’, Viburnum Opulus ‘Roseum’
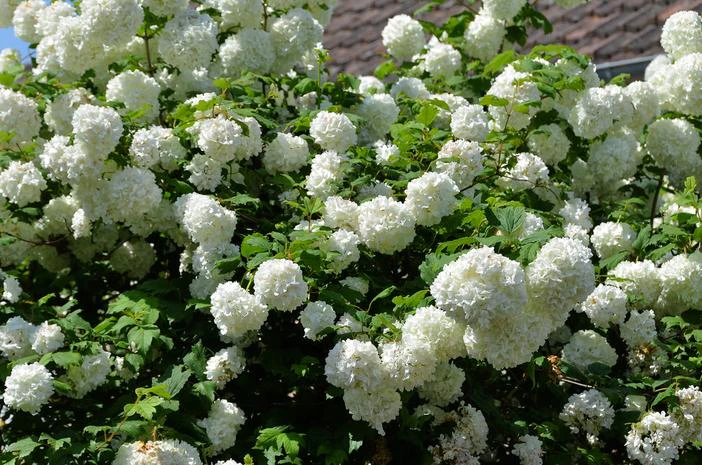
Few shrubs stop people in their tracks quite like Fragrant Snowball Viburnum in full bloom. Large, rounded clusters of sweetly scented white flowers cover the plant in spring, creating a display that’s hard to match. While it doesn’t produce fruit, it earns its place again in the fall when the foliage transitions to rich shades of purple.
Pruning after it blooms will help to keep it a manageable size and encourage healthy new growth. It’s also available as a standard, or tree form, which matures to a more compact 6 to 8 feet tall.
Sun or part shade are best for this deciduous shrub, a beautiful, solitary accent plant for the garden growing 12 feet high and 10 feet wide. As a standard, it is smaller, maturing at 6 to 8 feet tall and 5 to 6 feet wide.
Best for: Specimen planting, cottage gardens, fragrance | Sun: Full sun to part shade | Mature size: 12 ft. tall × 10 ft. wide (shrub); 6–8 ft. tall (standard)
Snowbelle Mockorange, Philadelphus ‘Snowbelle’
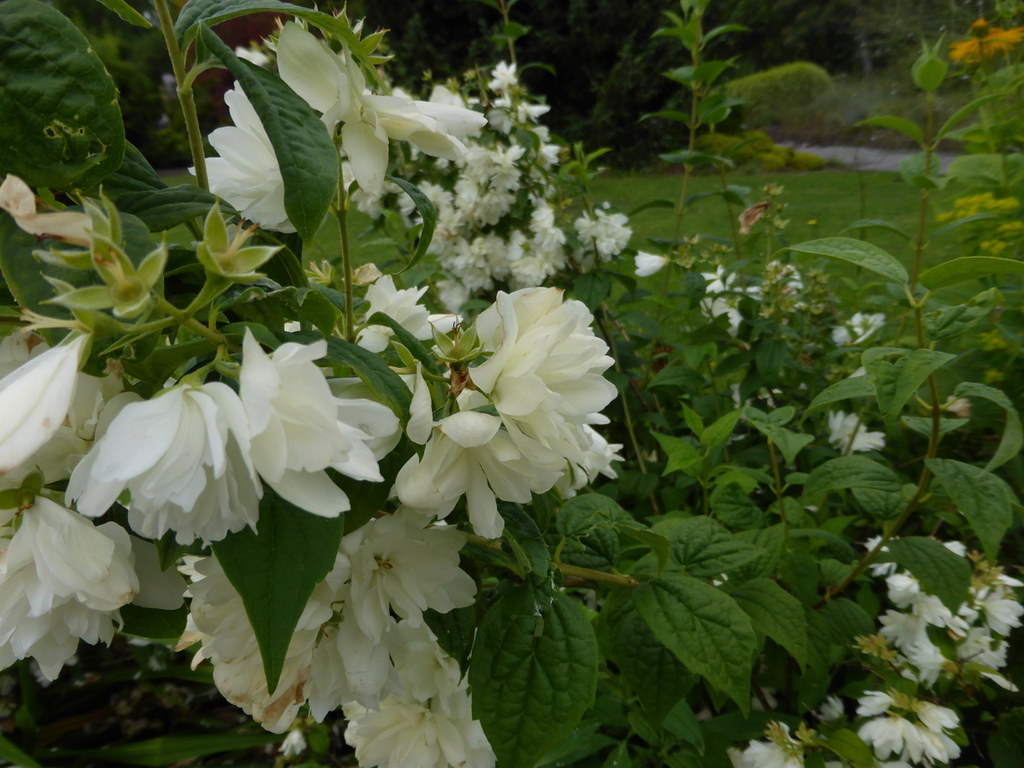
Don’t let its compact size fool you; when Snowbelle Mockorange blooms in early summer, it puts on a big show. This dense, mounded shrub is blanketed in sweetly fragrant double white blooms that are absolutely irresistible to bees and butterflies. Once the flowers fade, its rich, dark-green deciduous foliage makes it a lovely backdrop for other blooming plants in the border.
Growing just four feet tall and wide, it’s one of the best choices for smaller beds, borders and foundation plantings. It prefers full sun but handles part shade as well.
Best for: Small borders, foundation planting, fragrance | Sun: Full sun to part shade | Mature size: 4 ft. tall × 4 ft. wide
More Flowering Shrubs Worth Exploring
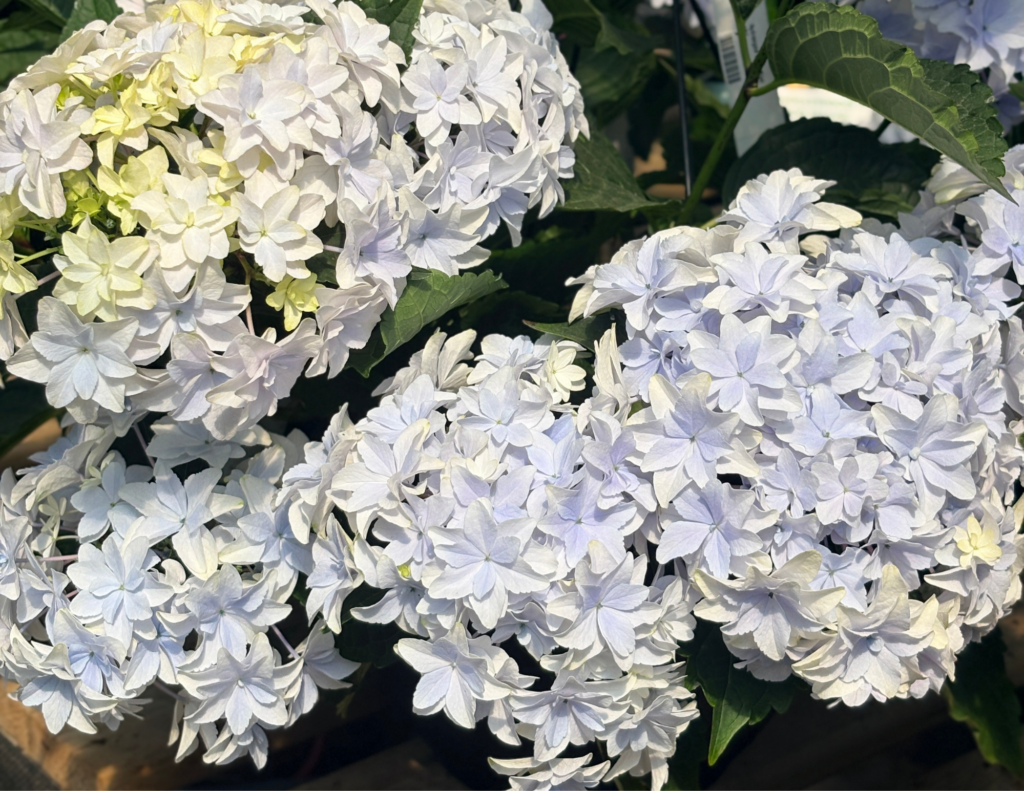
This is just the beginning! At Eising Garden Centre, we also carry a wonderful selection of Azalea, Eastern Redbud, Kwanzan Flowering Cherry, Hydrangea, Dogwood, Butterfly Bush, Beauty Bush, Lilac, Rose of Sharon, Forsythia, and Potentilla, to name a few.
The best way to find the right flowering shrub for your garden is to come in and see them in person, and right now is the perfect time to plant. Stop by and chat with Zach or Donna, who are always happy to help you find exactly what you’re looking for, based on your space, soil, and vision. We’re here to help you make the most of every corner of your garden!
By Dave Zeldon and Ely Schweyer
Got cabin fever? Perhaps you’re going a little stir crazy looking out the window and seeing the drab, limited pallete in your seemingly lifeless outdoor space. It’s important to embrace this time of year as the composting and cleansing part of Earth’s cycle before spring’s renewal – but that doesn’t mean we should be trapped inside forever. Here’s a winter/early spring list of activities, divided by indoor (Part 1) and outdoor (Part 2), for the gardener and yard keeper.
☝️ First, let’s quickly note the important activity happening under the snow – and how your actions now will affect the summer garden!
What's Going on Outside When We Aren't Paying Attention?
Before heading out to attend to these jobs have a look at the ground beneath you.
If it is frozen hard you are good to go but avoid treading on the crowns of perennials.
If it has been warm and sunny and the soil is warm and dry, consider laying down a few planks to walk on.
If the soil is soggy then postpone those tasks until it has dried. What we are trying to protect is not your shoes but the soil itself.
Ideally, soil is comprised of 50% solid materials such as minerals and organic matter in various stages of decomposition, and 50% open air space. Water from rain or melting snow enters the soil, displacing the air. Wet soil is easier to squish down and that process is called compaction.
While walking on wet soil would not seem to have much effect, it occurs within the depth where annuals, perennials and lawn grasses have their roots. Compaction makes it harder for roots to grow through the soil. Roots can grow stronger to push aside the soil particles, but tougher roots are less effective at drawing in nutrients and moisture. Removing air spaces makes it more difficult for water to percolate down so compacted soils remain wetter. Plants don’t grow as well and are more prone to insect damage.
The freeze/thaw cycles of fall, spring, and winter heave the soil relieving compaction and aerating the soil; a good way to start the growing season. Preventing further damage to the soil is relatively simple. Stay off it when it’s wet. Later, consider using pavers or pathways in heavily travelled areas of the lawn. Aerate the lawn with a machine that removes small plugs of soil and redistributes them over the surface. In beds and borders, add compost and use a thick mulch layer to absorb some of the pressure.
And stay off it when it’s wet.
With this in mind, we can appreciate Earth’s renewal capabilities, as well as prevent destroying our yards and gardens!

Part 1: Activities for When it’s too Cold and the Soil isn’t Ready Yet
Yup, it’s bleak out there. It’s time we make that herbal tea and turn our attention to creating a lively, green indoor environment, even if just to get us through the winter. Here’s a to-do list for trapped gardeners and plant enthusiasts to make the most of our wintry sentence.
Indoors: Get Inspired!
- Expand your knowledge: There’s an endless plethora of botanical media at our fingertips, use this down time to learn more!
- Sustainable winter crafts: Why buy décor and gifts when you can make them from materials found outside? Perhaps you dried flowers or found some interesting seed pods – time to display them, and perhaps, eventually compost them.
- Visit botanical gardens: Ely’s boyfriend took her to the Royal Botanical Gardens as a birthday gift last year! Botanical gardens are a great way to experience interesting plants being preserved in a welcoming environment that differ from the dreary winter outside.
- Get floral: Try buying flowers and displaying your own arrangements! Colour is something we sometimes lack in the wintry months, and this is a good way to introduce it impermanently.

Indoors: Thinking Ahead!
- Use this winter down time to plan the next garden season - find more here on garden planning.
- Use a garden journal to assist your garden planning - see here inspo for garden journaling.
- Consider planning companion plants - see more here on companion planting.
- Go pot shopping – your local greenhouses and ceramic shops would love your support in the winter.

Indoors: New Beginnings!
- Bulb forcing and small science experiments: Flowering bulbs like amaryllis (more on amaryllis here) aren’t just a holiday splendor! Now is also the time to create cuttings to share with friends.
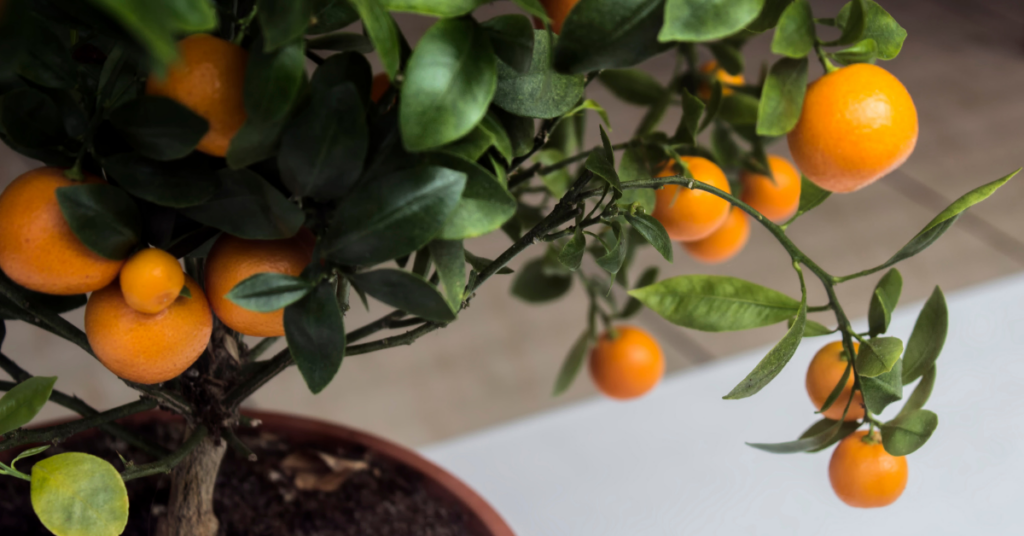
- Invest in winter fruiting botanicals like indoor fruit trees. Small, potted citrus by the window don’t only liven up the place but offer nutritious treats in the winter. Consider a calamondin!
- Microgreens - see our blog about it! When it’s too early to start seedlings that will go in the ground, you can still garden right on your kitchen counter.
- In late winter, start seedlings: but make sure you don't do so too early! Untimely seedlings can be too leggy before it's time to plant them outside - learn about hardening off seedlings here.
Part 2: When the Soil IS Ready!
Suit up!
Outdoors: Don’t Fall Behind!
- Appropriate seasonal décor: It goes without saying stringing lights and ornaments everywhere is good for the spirits in these dreary months… however 😬… come February, they seem to lose their vigor. Taking the décor down in preparation for new exciting things to come is also good for the soul! Remember to recycle your Christmas tree (see how here)!
- Turn your compost! Perhaps you’ve faithfully continued to add to your compost all year – your garden thanks you! On a warm day, remember to turn it and aerate it so it’s ready for spring.
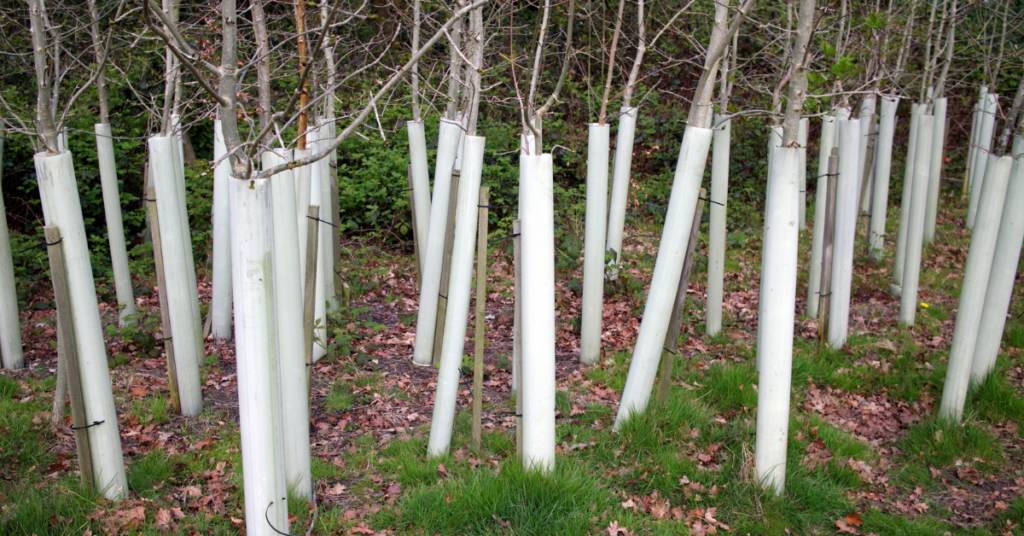
- Cover all your bases: Make sure to prevent rodents from damaging your tree bases by wrapping them well above the anticipated snow level – so rodents can’t chew your unprotected trees with the helpful elevation of snow!
Outdoors: Get Inspired!
- Go for nature walks: if you can safely go for a walk, hit the trails or stroll around your neighbourhood! A slow-paced change of scenery will help to fight your cabin fever, keep you active, and help you gather inspiration from the natural world.
- Visit your local maple syrup producers for tours.
- Don’t forget our critters: Provide winter homage and appropriate food for our nonmigratory friends (i.e., hutches and feeders) outside windows where pets can observe nature too!
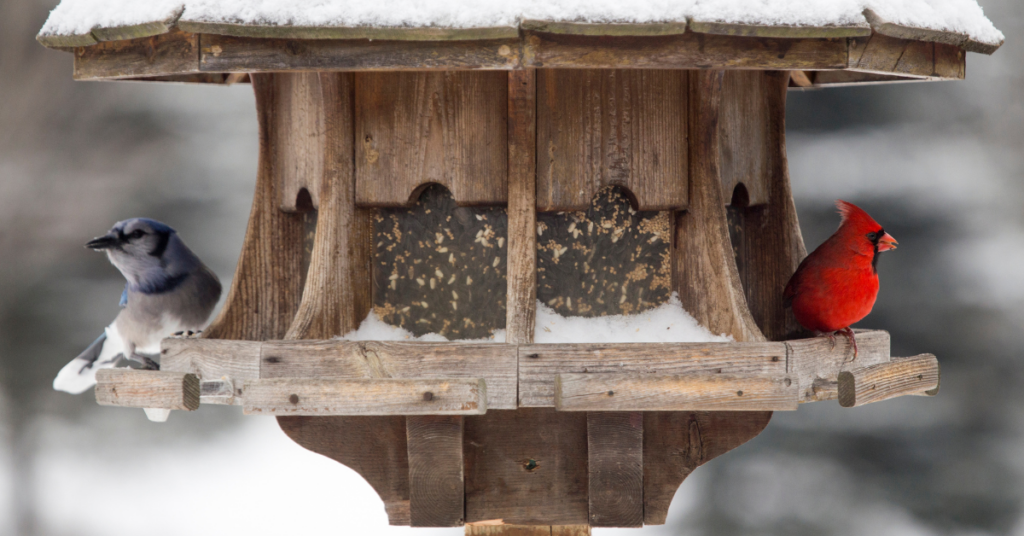
Outdoors: Thinking Ahead!
- Winter weeding: Some tough varieties of plants have evolved to use other plants’ winter dormancy to their advantage, tugging them out now will ensure that you and all the wanted plants in your garden have a fair start this spring.
- Manage snow piling: Heaped snow piling can kill plants including lawn, as well as introduce gravel and debris to areas where gravel is not wanted. Make sure your snow piles aren’t suppressing anything you’d like to live this summer.
- Early spring: Perhaps ice storms and plows have done a number on your trees and shrubs - prune broken branches to prevent pests and disease from entering your plants.
- Litter control: pick up the debris revealed by melting snow so it doesn’t venture farther into natural habitats or tempt wild animals to hurt themselves.

Outdoors: Start Something New!
- Cold hardy crops in cold frames: Cold frames are doable! Use recycled materials - Victory gardens often used car windshields and old windows – to construct in-ground beds facing the sun (southwards) for passive solar heating.
- Winter sowing: Find more on winter sowing here.
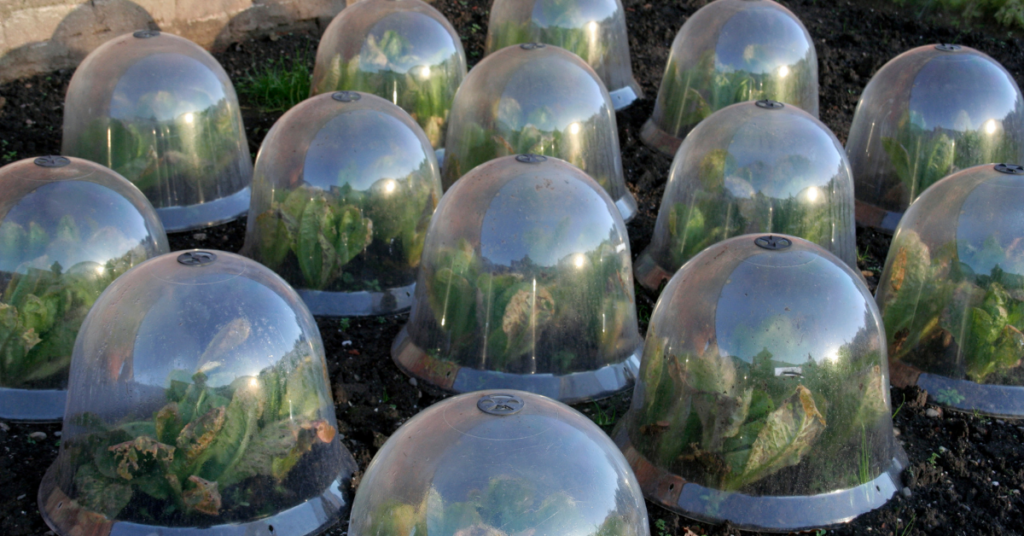
We hope these suggestions help you stay green this spring and winter! For more gardening activities, see our other blogs here. We hope to see you this spring (March 5th, 2026) at Eising Greenhouses and Garden Centre! 🌱❄️
By Dave Zeldon and Ely Schweyer
Many home gardeners are really missing their harvest of fresh vegetables these wintry days – and many beginners have New Year’s resolutions to become greener thumbs.
If you’re looking for something kid friendly, easy on the budget, and nutritious to do this winter, you may want to try microgreen farming!

Seeds to Start
The seeds of many vegetables and beans are suitable for hydroponic sprouting into tasty young shoots that will be ready for the table in less than a week!
Seeds such as alfalfa, broccoli, clover, lentil, mung bean, mustard, onion, radish and soybean are excellent choices for this activity plus they are invaluable in terms of their nutritional content.
Sprouting seeds on your kitchen counter takes only minutes a day, and the reward is a steady supply of fresh, crunchy shoots.
It is important to start by purchasing some packaged seed expressly for sprouting. The directions will indicate how much is needed to produce 100 grams of sprouts. The seed-to-sprout ratio can differ substantially - anywhere from 1.5 to 8.5 units of sprouts or more per one unit of seed - so follow directions carefully and make sure your jar is large enough to accommodate all the sprouts while still leaving room for good air circulation. As a rule, begin with 1 tbsp. (15 mL) of seeds for small varieties such as alfalfa and radish, 2 to 3 tbsp. (30 to 45 mL) for medium ones such as lentil, and up to 4 tbsp. (60 mL) for large seeds such as beans and peas.
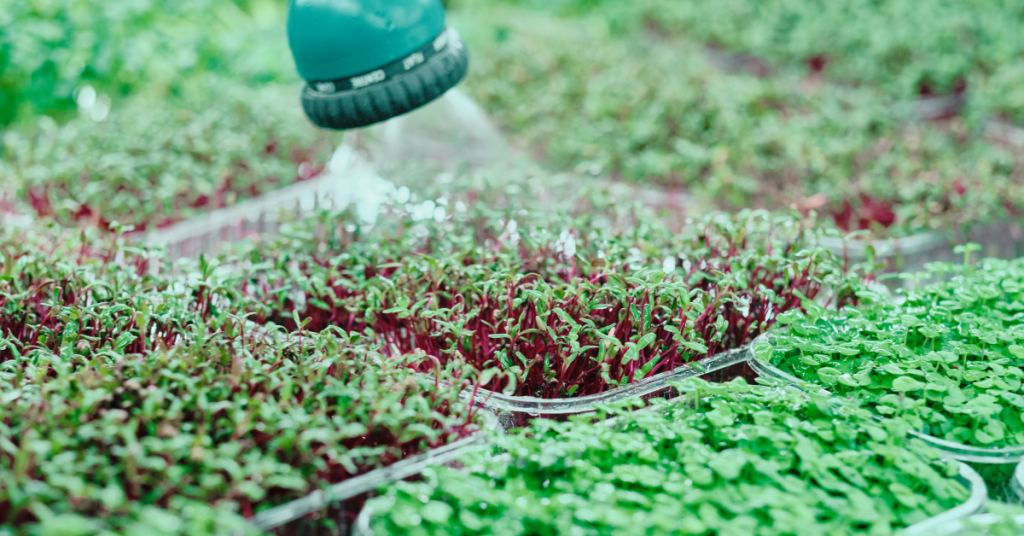
Seeds to Sprouts
Simply put seeds into jar and position screening over opening, using an elastic band to hold the covering in place. Fill jar one-third full of warm (about 40°C) water and swirl seeds around for a minute or so. With the covering in place, drain water. Refill jar one-third full of cool water and let seeds soak for four to eight hours.
Next, begin daily regimen of rinsing seeds three times a day at roughly eight-hour intervals. Drain and refill jar with cool water, swirl seeds for about 30 seconds and drain again. Then, invert the jar so screening is at the bottom and rest it at a 45-degree angle in the bowl. Place on the kitchen counter out of direct light (place bean shoots in complete darkness, as they often taste sweeter when they're grown this way). Repeat this process for three to five days.

Simple Sustenance
You can start to harvest your sprouts once they're three to five centimetres long. Rinse and drain them thoroughly and place them in an airtight container and refrigerate immediately; they should remain fresh for up to five days.
Clover, alfalfa, radish, and mustard seeds give rise to the delicious sandwich booster sprouts. Sprouts are one of the most concentrated natural sources of vitamins, minerals, enzymes, and amino acids.
Plants inside the home help bring life to a long winter, if you’re looking for more information – or plants – visit Eising Greenhouse and Garden Centre! 🌱
How to Stay Warm and Stylish
By Ava Green
Colder temperatures are around the corner, and some of us are not looking forward to it! Whether you love winter or not, Sassyfras Boutique inside Eising Greenhouse and Garden Centre has the cozy, stylish clothes you need to look your best and stay warm all season long.
Begin with Layers
Fall, winter, and spring can all bring unpredictable weather to our corner of southern Ontario, so layering is key. Winter is an especially good time to follow the 3-layer rule:
- A base layer keeps you dry
- A mid-layer adds warmth
- An outer layer protects from the elements
Build Your Cold-Weather Capsule Wardrobe
Creating a winter capsule wardrobe makes dressing warm and stylish easy and stress-free. Here are a few ideas to get started:
Base Layer:
Start with a basic tee, a long-sleeve mock neck, or a long-sleeve crew neck top. Choose natural fabrics that wick moisture and keep you dry.

Tights or leggings make a great foundation under dresses or pants for added warmth.

Mid Layer:

For warmth, add a sweatshirt, a crewneck sweater, a v-neck sweater, or a turtleneck.

If you’re stopping at two layers, choose a chunky knit or oversized sweater for a cozy statement look.
On top of your tights or leggings, try a faux-suede skirt, faux-leather pants, wide-leg trousers, jeans, or a dress, maybe even a comfy sweater dress.
Outer Layer:

Top it all off with an eye-catching outer layer! Try a bomber jacket, blazer, faux-fur jacket, puffer vest or jacket, or a trendy coatigan for warmth and style.
Accessorize to Elevate Your Look
What makes an outfit really stand out? The accessories! At Sassyfras, you’ll find everything you need to complete your winter look.

From belts (perfect for cinching a blazer or dress) to trendy handbags, classic tote bags, sunglasses, and a wide selection of everyday jewellery, including locally made, one-of-a-kind pieces. You’ll find the perfect finishing touches that reflect your personal style.
Mix, Match and Stay Cozy
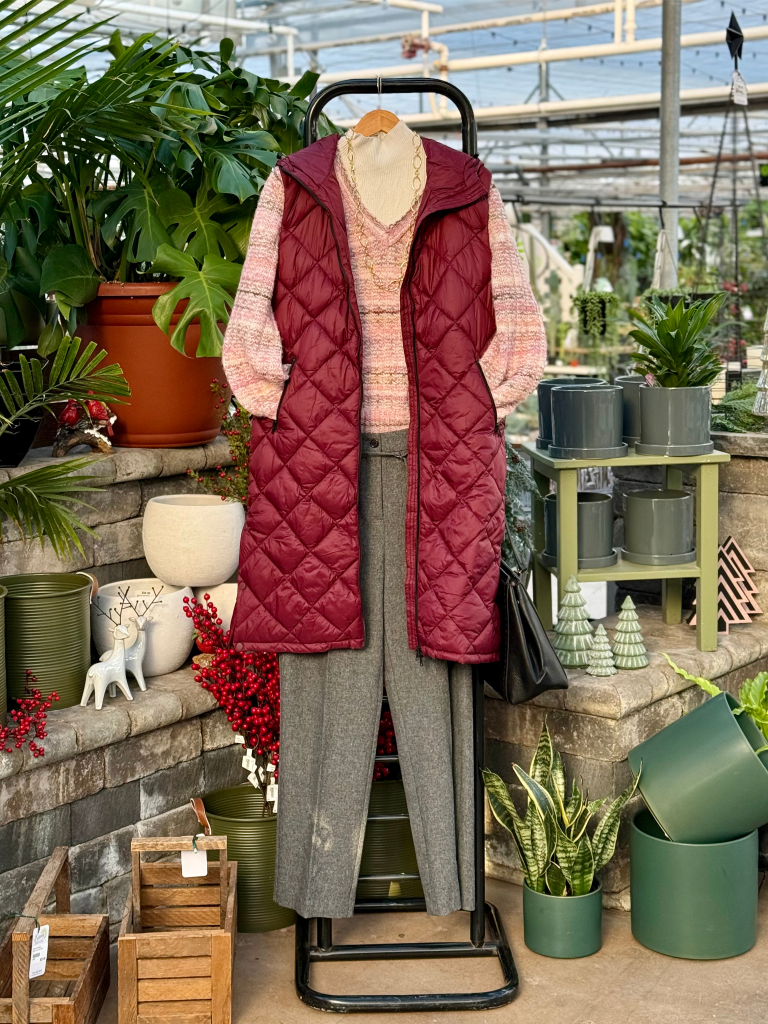
Once you’ve built your base, mid, and outer layers, the fun begins! Mix and match your pieces to create new combinations that make winter dressing simple, cozy, and chic.
With just a few well-chosen items from Sassyfras, you’ll be ready to step out in style, no matter how cold it gets! ❄️
By: Dave Zeldon and Ely Schweyer
If you’ve ever wondered how the warm weather succulent came to be a seasonally regarded indoor plant, or how to keep one going, read on!
History and Cultural Significance
The Poinsettia was named after Joel Roberts Poinsett, the first U.S. Minister to Mexico. He introduced this native Mexican the United States in 1828. In the Mexican Christmas tradition, the star-shaped leaf pattern is said to symbolize the Star of Bethlehem, and the red colour represents the blood sacrifice through the crucifixion of Jesus.
Since the species is native to Mexico and found in the wild in deciduous tropical forest at moderate elevations, we then have a challenge to keep this plant alive and in a healthy form in our colder, northern climate.

It's Just A Rumour!
There is a common misconception that the poinsettia is highly toxic. This is not true.
Yes, it may be mildly irritating to the skin or the stomach if it is eaten, but otherwise, there have been no documented cases of poisoning. The origin of this myth could be found in the fact that most plants of the spurge genus (Euphorbia) are indeed toxic. Fortunately, this family member is a good one!

Here are Some Helpful Hints to Get the Most Longevity Out of Your Plant:
☝️Unsleeve the plant as soon as possible as the leaves may become droopy if left too long in the wrapper. Fortunately, the plant should recover in a few days if this does occur.
☝️If you want to try to keep your plant until next Christmas then fertilize after the blooming season with an all-purpose fertilizer, repot it later in the early Summer and then introduce it to 12 hours of uninterrupted darkness come September.
For more information on Poinsettia care (i.e., temperature, lighting, and watering), visit Ava's blog Caring for Poinsettias.
If you’re looking for more information – or perhaps a Poinsettia – visit Eising Greenhouse and Garden Centre! Happy Holidays! ✨
Figures.
By Dave Zeldon and Ely Schweyer
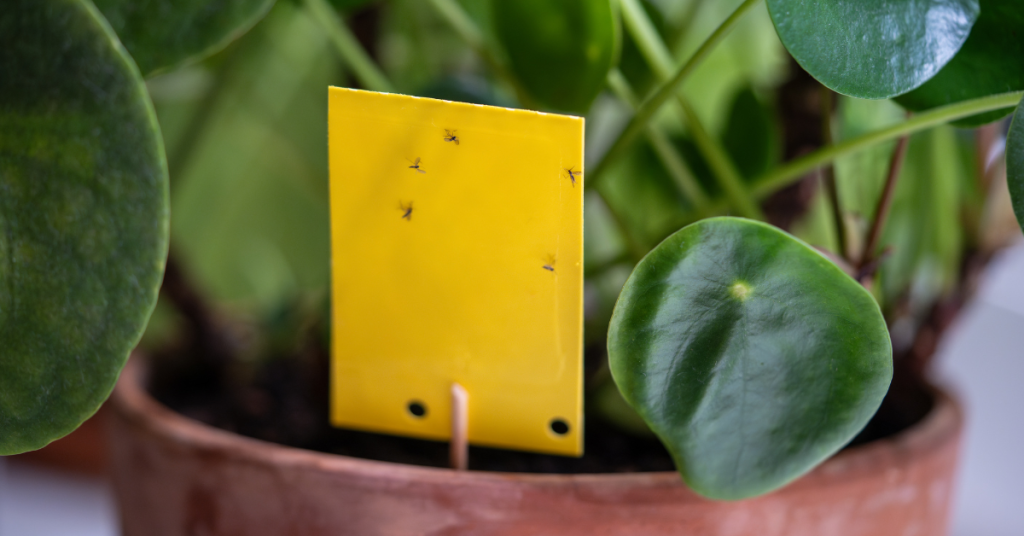
Now that we’ve brought our plants inside the house to over-winter, we begin to notice those slender, dark gray flies (0.2- 0.4 cm long) flitting about atop the pot soil. Yuck!
These insects are known as fungus gnats (Bradysia sp.). Whereas they are considered only to be a minor nuisance in house plants, due to their sheer numbers hovering around an attractive plant, they can certainly take away from its appeal. Below is a bit about these pests and some basic control measures.
How Do Fungus Gnats Affect Your Plant?
Other than their swarming presence, fungus gnats are not a direct threat to your plant, but an indirect threat. As their name implies, they are concerned with snacking on the fungi mycelium living in your plants’ soil. (Yes, it’s there and it’s a good thing!) However, these little flies can transfer disease between plants, making them nuisance pests.
A Quick Look at Their Life Cycle:
Adults may lay 300 eggs at a time, which hatch a week later into tiny, threadlike larvae. The larvae feed upon organic matter in the potting soil. After two weeks, they pupate into winged adults, that have no trouble annoying you to no end.
Basic Control Measures:
- The fastest and easiest method of control is to catch the flying adults with yellow sticky cards. The large cards can be cut into little strips and mounted onto little wooden splints (popsicle sticks) then placed around the base of the plant out of the line of sight.
- Water your potted plant from the bottom (sub-irrigation) by adding water to the saucer it is sitting in. This will keep the soil surface dry, making it uninhabitable for the hatching insect larvae. If the surface soil is already very wet, try placing a few potato discs or slices on the surface of the soil. This will attract the larvae as they migrate to the potato to feed. Simply replace the discs every three to four days with fresh slices to eliminate the next generation of adults.
- If you have a large number of plants afflicted as in a greenhouse situation, an application of predatory nematodes (Steinernema feltiae) as a soil drench is suggested. Nematodes will attack the fungus gnat larvae in the soil which will in turn lead to more nematodes being produced.
Good Bugs Are Working at Eising Greenhouse and Garden Centre!
Here at Eising’s Greenhouse and Garden Centre, we practice what as known as I.P.M. or Integrated Pest Management. Since we try to create a perfect environment for our plants, we also, unintentionally create perfect conditions for their related pests. To keep the pests at bay, we institute series of steps:
1 - Cultural Controls: We select only the healthiest of plant material to sell and keep them healthy through proper fertilization and growing conditions. We’ve learned that insects are attracted to stressed-out plants!
2 - Physical Controls: We are constantly walking through our plant aisles checking for insect and disease presence and removing the affected plants. Also a clean growing area means there is less chance of pest populations building up on alternate host plants such as weeds.
3 - Biological Controls: At the beginning of the growing season, even before there is any evidence of pest problems, we introduce naturally occurring predators into the growing areas. This is to be at the ready for when the pests do arrive!
In our arsenal we have a series of tiny parasitic wasps, microscopic wire-worms called nematodes, predatory mites as well as bacterial inoculants. So therefore, we cannot spray any chemical insecticides as they will hurt our very valuable biological cache!
Did you ever imagine all the behind-the-scenes work that goes into your plant purchases from Eising's to make them the best value around?
For more information – and bug products - visit Eising Greenhouse and Garden Centre soon! 🪰
By: Dave Zeldon and Ely Schweyer with tips from Mary K, Zach C, Sandy M, and Jeanine LT!
Now is the time to prep our outdoor landscapes for the coming cold weather and the ensuing spring! Perhaps your autumn is calmer than your spring, and this is the best time to clean up and begin new projects. The following are some simple but effective tips to get your yard winter-ready - so your spring will be a little more pleasant for you!
Planting
When warm weather still allows it, plant trees, shrubs, perennials, and bulbs to allow them to establish for budding and blooming next spring.
Pond Care
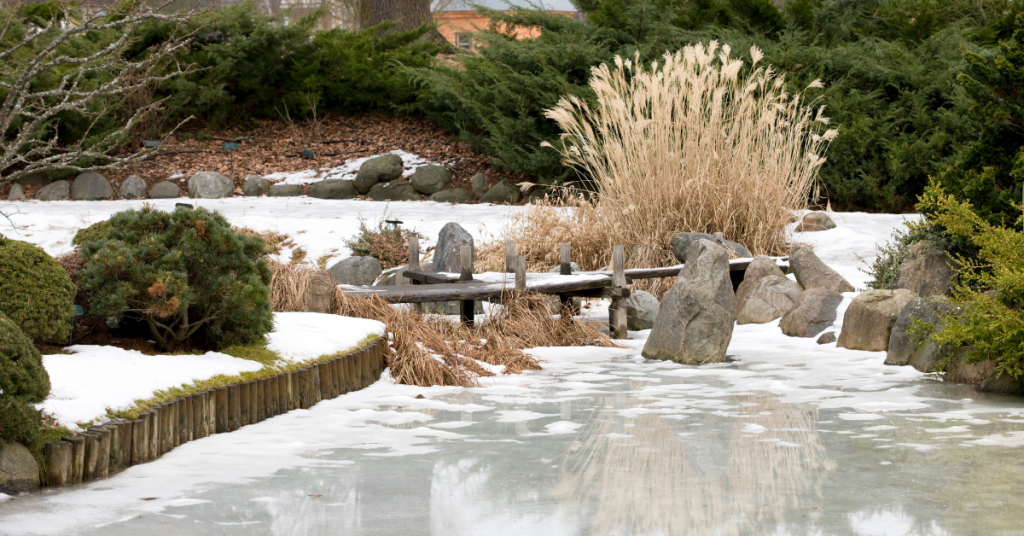
Mary, our perennials gal, suggests not removing any water from your pond but instead aerating it all winter. She skims out the leaves to maintain the balance of the nitrogen cycle in the water and suggests waiting to do a big pond clean out in the spring, as that’s when the water’s culture can bounce back easier.
Fertilizing
After top growth of your landscape plants ceases, reduce your annual fertilizer application by up to half of the requirement. Autumn is a major root growth period for woody and herbaceous perennials; roots will grow and absorb nutrients whenever soil temperatures remain above 5 °C but can be over fertilized quickly in these cooling temperatures.
Produce gardens could benefit at this time from a top layer of compost that will break down during the winter so it isn't too 'hot' for spring planting.
Leaf Litter
Here’s our pitch on the ‘leave it – don’t leave it’ debate: It DEPENDS.
Ideally, we should leave litter leaf on the ground for our pollinator friends and endangered species like fireflies to hide out in the winter. But, there are appropriate situations in which to remove leaf litter.
- When they’re covering your bulbs and tender perennials, remove SOME. Leaf litter acts as a ground insulant, which can amplify our temperamental zone 6b temperatures. This freezing and thawing can often confuse and kill early spring bulbs and tender perennials.
- Zach, our trees and shrubs guy, suggests that if a tree shedding leaves has been diagnosed with pests and fungi, remove the leaf matter to reduce the spread to other plants. Diseased matter should always be removed in a quarantined fashion and taken to a landfill or burned.
☝️Please note: Unless diseased, compost your leaves, they contain vital nutrients specific to the plants they came from!

Lawncare
With autumn mowing practices you have the opportunity for the addition of much needed organic matter for your lawn, which is also an excellent source of slow release nutrients. Keep mower blades sharp since leaves can be tougher than grass. Raise the mower height up and mow leaves when they are lightly wet (e.g., morning dew). This will keep the leaves from blowing all over and will prevent the mower from getting bogged down in wet leaves.
See more on general lawncare in Dave's Lawncare 101 post.
Clean Up
Now is a good time to wash your tools with soap and water to prevent diseases spreading from plant to plant.
☝️Mary's tip is to spray garden tools with PAM before use, so the dirt slides right off them!

Pruning Perennials
Mary, our perennials gal, suggests leaving things until frost to cut back. This way they're easier to compost. Make sure to leave seedheads (i.e., coneflowers and black-eyed Susans) for wildlife, and things like hydrangeas for winter interest.
☝️Make sure if things are cut back, to leave them sticking up enough you can still find them in the spring!
Dividing and Moving Perennials
Moving or dividing perennials in the autumn is a great way to reduce your work next spring. The cool, moist weather is an ideal time for perennial roots to become well established.
👍The rule of green thumb for moving perennials: If the plant blooms between early spring and late June, then early fall division/moving is ideal. If the plant blooms after late June, then early spring division is ideal (except for Peonies which should only moved or divided in the fall, Poppies in August, Irises in July & Lilies in the Fall).

Overwintering Trees
Zach and Sandy from trees and shrubs suggest a couple of things to help your favourite trees along this winter:
- To reduce winter injury in evergreens: Keep properly watered throughout the growing season and into the fall is another way to reduce winter injury. Decrease watering slightly in September to encourage hardening off, then water thoroughly in October until freeze-up.
- Cedars - Spray cedars with antidesiccant spray (available at Eising GC) or wrap in burlap (with stakes to create dead air space) so wind doesn't dry out and burn tips.
- Fruit trees - In late fall, spray fruit trees with sulfur-horticultural oil (available at Eising GC) for protection against fungi and pests overwintering in the bark.
- Ornamental trees - wrap the base of young trees to protect from chewing rodents.
- Pruning trees - trees that prefer winter pruning rather than spring pruning are maples, oaks, birches, and elms, as well as with fruiting trees such as apples and pears. This ensures blight and pests will not affect the tree's open wounds.
If you missed the frosty deadline for transplanting trees, Sandy suggests insulating unplanted potted trees to help them best survive the coming winter. Here are some methods:
- Double-pot your tree with an insulative barrier (i.e., burlap, straw, mulch, etc.) stuffed between the two pots and securely cover the top with tarp to deflect moisture.
- Bury your potted tree in the ground, level with the top of the pot (don’t forget to dig it back up!) and mulch the area.
- Huddle all of your unplanted trees and plants together when using the above methods.

Mulching
Mulching is one of the simplest and most beneficial practices you can do for your garden. Just by simply placing a protective layer of material over the bare soil will benefit the soil as it decomposes providing the much-needed organic matter which improves root growth, the infiltration of water and the nutrient-holding capacity of the soil while reducing soil erosion.
A good layer of mulch allows the soil to warm more slowly in the spring, so perennials aren't fooled into breaking dormancy too early, as you want the ground to stay cold until it really is spring!
☝️Make sure your mulch application won't stunt the growth of your plants come spring as discussed in our Transplant Troubleshooting blog post!
Japanese Beetle Prevention
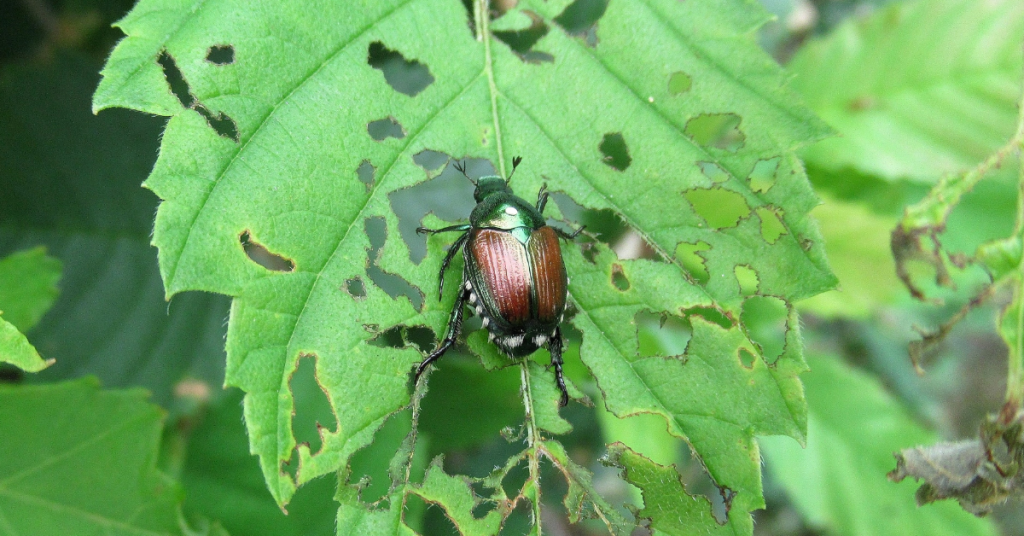
Nematodes are microscopic worms that should be applied to lawns that have been ravaged by grubs especially of the Japanese Beetle. Nematodes have a short shelf life and must be refrigerated until they are applied. Normally, they are sprayed onto the lawn from mid-May to mid-June and then again (for best practice) from mid-August to mid-September.
Pots
To prevent freezing and cracking, Mary suggests emptying and turning your pots upside down. You can disinfect at this time too.
Design Time!
Jeanine, from production, suggests writing down what worked best in your produce garden this year so you can implement it again in the spring.
With the trees and land being barren enough you can see its contour, now is a great time to plan ahead for spring landscaping! Don't forget Eising GC would love to offer help with your landscape designing!
We hope these tips help your landscape plants enjoy your winter abode as much as you do this season, for more information - and plants – visit Eising Greenhouse and Garden Centre! 🍁
By: Dave Zeldon and Ely Schweyer
Spring and early fall are generally the best times for planting trees. It has been found that newly planted trees thrive when exposed to moderate temperatures and rainfall, as they need time to root and acclimatize before the onset of intense heat and dryness of summer or the freezing temperatures of winter.
Now whilst planting different types of trees differ in detail, all trees eventually end up in a hole. But remember not just any old hole will do.
Let’s Get Digging!
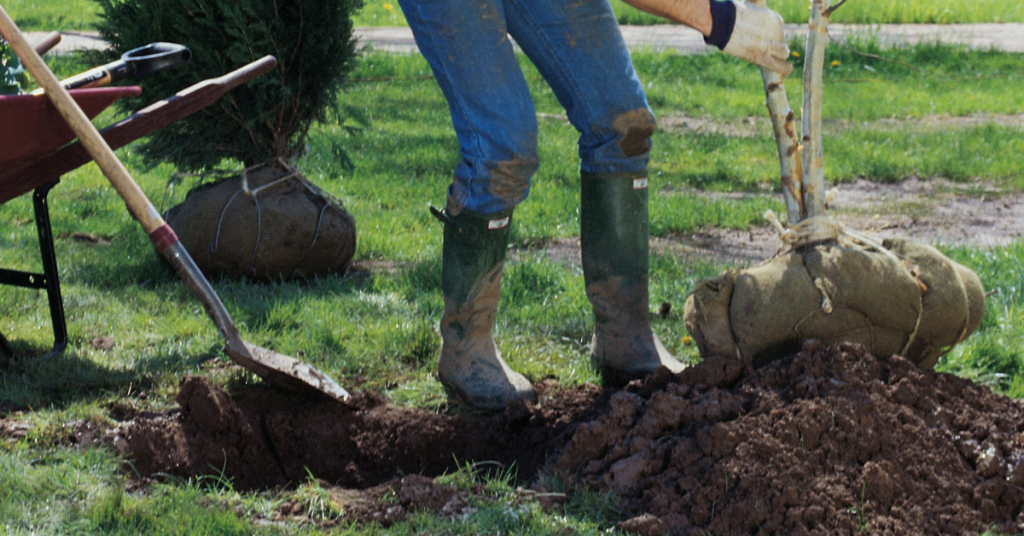
1. Some trees are buried too deeply, causing the tree roots to decline in health and condition. We have a whole other article dedicated to transplanting depth if you wish to read more, but here’s the just of it: Poor tree health results in reduced growth rate, atypical leaf size and colour, increased disease susceptibility, and reduced cold hardiness. Always make sure that the root collar flare is visible after planting; if settling occurs, reset the tree to the proper depth.
👉 Note: Many times, homeowners build a raised bed garden around an existing tree in the yard (thus burying the root collar flare) only to find within a year or two their favourite tree now is in decline. Don’t bury that root collar flare!
2. As a general rule, trees should be transplanted no deeper than the soil in which they were originally grown. The width of the hole should be at least three times the diameter of the root ball or container or the spread of the roots in the case of bareroot trees. This will provide the tree with enough worked earth for its root structure to establish itself.
3. When digging in poorly drained clay soil, it is important to avoid 'glazing'. Glazing occurs when the sides and bottom of a hole become smoothed forming a barrier, through which water has difficulty passing. To break up the glaze, use a fork to work the bottom and drag the points along the sides of the completed hole. Also, raising the centre bottom of the hole slightly higher than the surrounding area. This allows water to disperse, reducing the possibility of water pooling in the planting zone.
4. The backfill soil should be a mixture of composted manure and topsoil. The mixture should then be placed in the hole surrounding the tree just to the height of the ball or slightly lower to allow for some settling. Be careful not to compress the backfill soil as this may prevent water from reaching the roots and the roots from expanding beyond the ball.
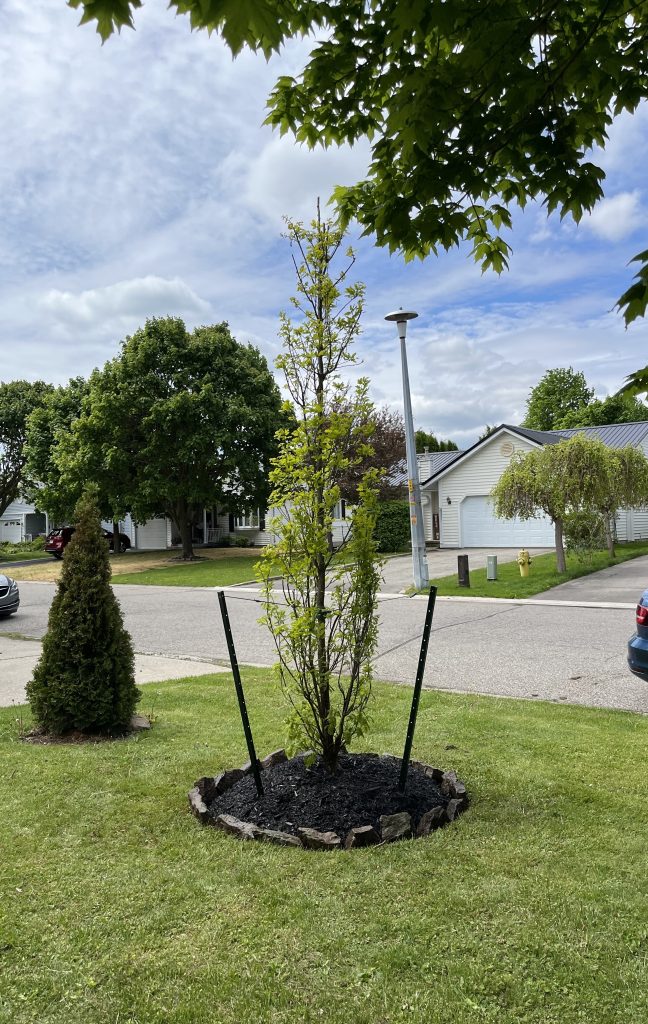

Jobs well done by the Eising landscaping team!
Standing On Its Own Roots
Young trees should be able to support their own weight when they are transplanted. If the tree is unable to do so, try thinning out the upper branches to reduce wind resistance. If that is not enough, you may have to stake a tree.
Watering Your New Tree
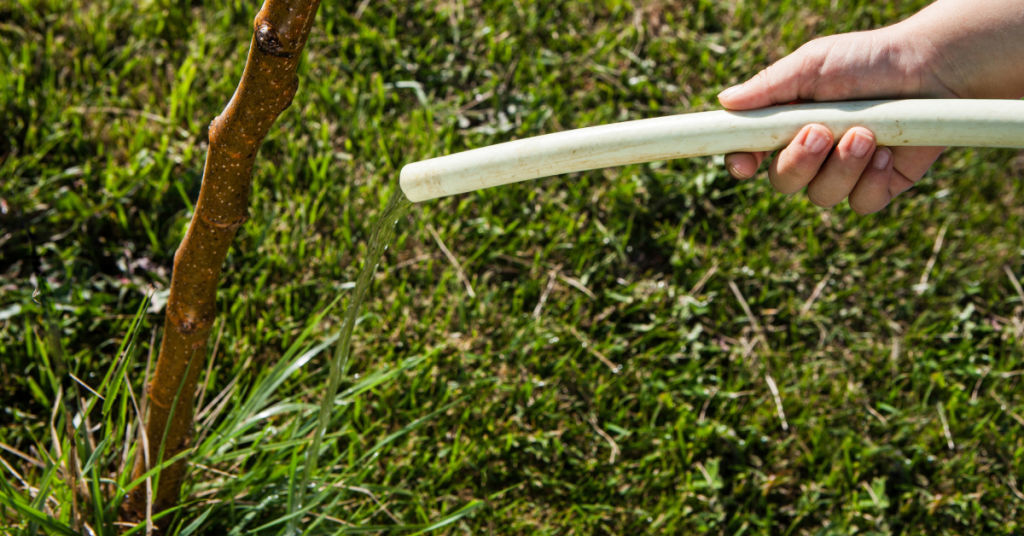
Newly planted trees should be watered at the time of planting. In addition, during the first growing season, they should be watered at least once a week in the absence of a good rain.
👉 Remember: Regular deep soakings are better than frequent light wettings.
We hope these tips can help you encourage the longevity of your new tree! For more information - and trees - visit our Trees & Shrubs section at Eising Greenhouse and Garden Centre. We hope to see you soon!
By: Dave Zeldon and Ely Schweyer
If you can’t wait for Mother Nature’s next great colour show, the time is now (mid September) to get rolling on those early spring flowering bulbs! Even though you can start planting in October or early November, buying bulbs now is advantageous as the selection at your local garden centre is at their best. Being the very first to bloom during the last dreary days of winter, bulbs announce that spring is returning once more, and as you think about the colourful show of tulips and daffodils next year, remember all spring’s groundwork begins now!
Your bulbs may be planted in your lawn, rock beds, at the foot of trees and bushes, in annual or perennial flower beds, or even in flower stands and pots. Combining the emerging fresh colors and textures of bulbs with the established foliage creates a harmonious relationship opportune for a complimenting or contrasting garden-scape. With a bit of planning and creative selection you can easily extend the joy of having spring flowering bulbs in your garden from a few weeks to several months, furthermore, planting bulbs amongst perennials offers that the new growth of the perennials will hide the fading foliage of the bulbs once they have finished flowering! Not long after the fading of the bulbs most perennials themselves will bloom, smoothly extending the sequence of flowering plants for you to enjoy.
Read on for all there is to know about planting bulbs!
Buying Your Bulbs:
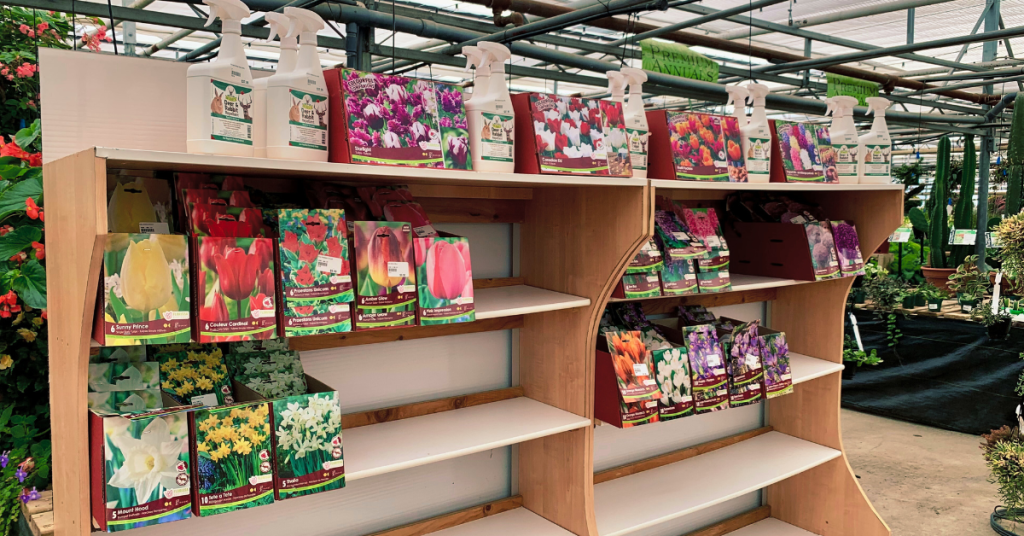
When buying, look for nice, plump, firm, bulbs. Avoid those with scars or that feel spongy to the touch. The general rule is the larger the bulb the bigger the plant. If you're buying daffodils, look for bulbs that have two or more "noses" as you will get extra flowers for free!
To have a good display of colour in your garden, right from March to the end of June. Be sure to check the blooming times on the packages and get a variety of early, mid and late-blooming spring bulbs.
👉 Tip: To extend the season, plant some bulbs in places where the sun beats down in early spring and some in cooler, shady areas of the garden allowing them to emerge in later spring.
Planting Your Bulbs:
When planting, the soil must be warm enough under the surface to stimulate a little root growth prior to the winter freeze. Winter chilling is necessary to break the flower bud dormancy (vernalization) to have our bulbs produce blooms in the spring (see below how to force bulbs if you’re reading this in the spring).
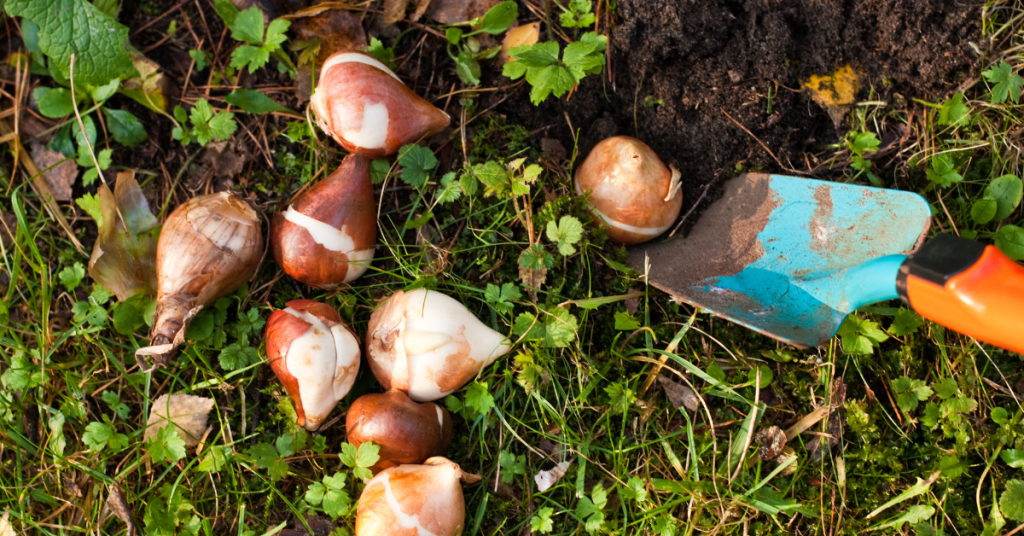
Remember to plant your bulbs with the pointed end up! If it doesn't seem to have a pointed end, look for the flatter side and evidence of roots, which is the end that goes down. If you still can't be sure, plant the bulb on its side and it will figure out the proper direction by itself!
The rule of thumb is to plant the bulb two or three times as deep as the bulb is tall. The depth is to the base of the bulb, not the top. Typically, 8 inches (20 cm) for big bulbs such as daffodils, tulips and hyacinths and 5 inches (13 cm) for small bulbs like grape hyacinths and crocus. Plant in well-drained soil, cover up, water well and wait for spring.
In a wide hole, place bulbs - so they aren't touching - in threes, fives, or sevens per hole for the most natural look. You can throw a handful of bonemeal in the planting hole and mix it lightly with the soil, this will give your bulbs a good boost for the best bloom. Water to the depth of the hole.
Tulips, daffodils and other spring-flowering bulbs require a long period of cool temperatures to undergo the biochemical process that allows them to flower. So, in the fall, get them in the ground ideally six weeks before hard freezes to give them the time they need to develop strong roots.
Fertilizing Bulbs:
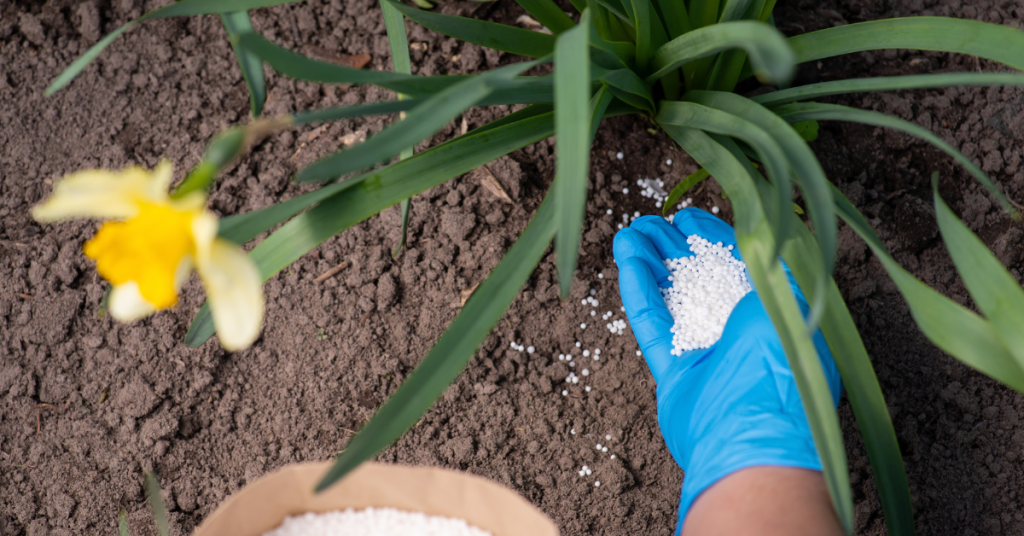
Bulbs contain the nutrients they need to bloom their first year, but a fertilizing program will keep plants healthy and ward off diseases and pests. Compost and manure are two good organic fertilizers that not only enrich the soil but ensure a good soil structure for bulbs. Additionally, organic supplements can be used to add nutritional balance. Compound mineral fertilizers can also be applied, however, check the label to see if fertilizing is appropriate for your bulbs and the best time of year to do so. Top-dressing with fertilizers like 9-9-6 slow release or either 8-8-8 or 10-10-10 soluble fertilizers are examples.
Once a bed of spring flowering bulbs are established, the process of naturalizing occurs which simply means that a bulb flowers again after the first year and starts producing more bulbs on their own. However, they will need your help to get the food they require to recharge and regenerate for the next season's bloom.
Some Helpful Tips:
- Squirrels enjoy the taste of tulip bulbs if they are easily accessible but not so with daffodil bulbs; interplanting the two together and/or mulching the garden will help protect them.
- Resist the urge to tidy up fading foliage or mow over it as the plants require about six weeks to build up reserves for the next season.
- Deadhead the tulips as the formation of seeds will sap the energy from the bulb. Daffodils & other bulbs do not require this action.
Forcing Bulbs:
Now if you can't wait for spring to smell the fragrant hyacinths, or you missed the fall planting, why not try your hand at bulb forcing?
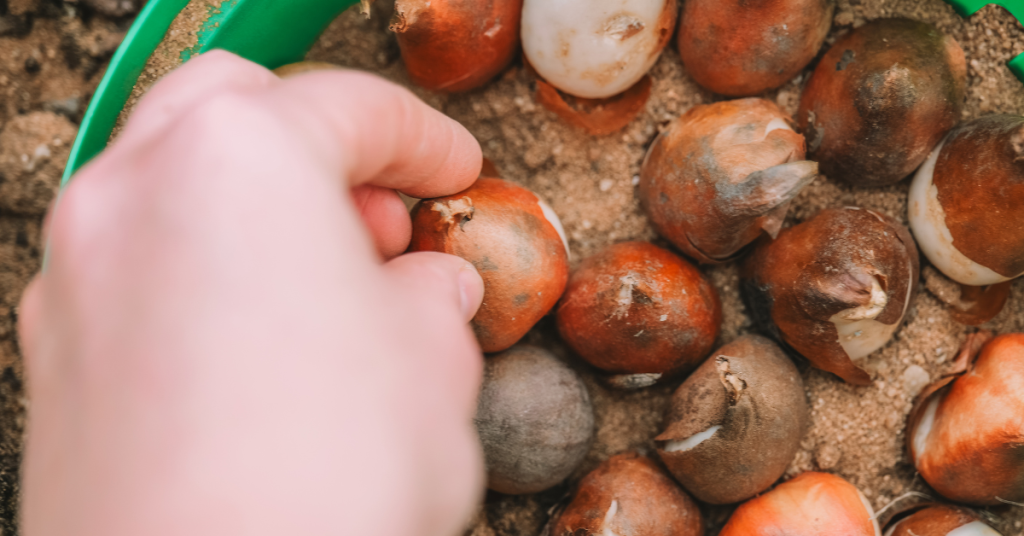
All you have to do is plant any extra bulbs in a pot with a drainage hole. Choose a pot that is at least twice as deep as the bulbs to allow for proper root growth. Fill the pot half full of soilless potting mix. Then place as many bulbs as possible in the pot, without letting them touch. For a thick show, layer more than one kind of bulb in the same pot; place larger bulbs on the bottom as they will grow around the smaller ones. A six inch-wide pot holds up to six tulips, three narcissus (daffodils), or 15 minor bulbs, such as crocuses or grape hyacinths.
Cover the bulbs with potting mix, leaving their tips showing. Water the bulbs thoroughly. Label with name and date; loosely cover pot with a paper bag. Place in cool (1-7 degrees Celsius or 35-45 degrees Fahrenheit), dark place for chilling such as an unheated attic, basement, or attached garage or in a 12 inch-deep trench covered in a tarp.
Check moisture in pot periodically keeping the soil damp but not wet. When chilling is complete, you'll see roots poking out of the bottom of the pot and green sprouts emerging at the bulb tips. It's time to move the potted bulbs into a warm room.
Chilling and Blooming Times:
- Daffodils: 12-15 weeks of chilling; 2-3 weeks to bloom after chilling.
- Tulips: 10-16 weeks of chilling; 2-3 weeks to bloom after chilling.
- Crocus: 8-15 weeks of chilling; 2-3 weeks to bloom after chilling.
- Grape hyacinth (Muscari): 8-15 weeks of chilling; 2-3 weeks to bloom after chilling.
- Iris reticulata: 13-15 weeks of chilling; 2-3 weeks to bloom after chilling.
- Snowdrop (Galanthus): 15 weeks of chilling; 2 weeks to bloom after chilling.
- Hyacinth: 12-15 weeks of chilling; 2-3 weeks to bloom after chilling.
We wish you all the best with your bulb planting this autumn! For more information - and bulbs - stop by Eising Greenhouse and Garden Centre this fall!