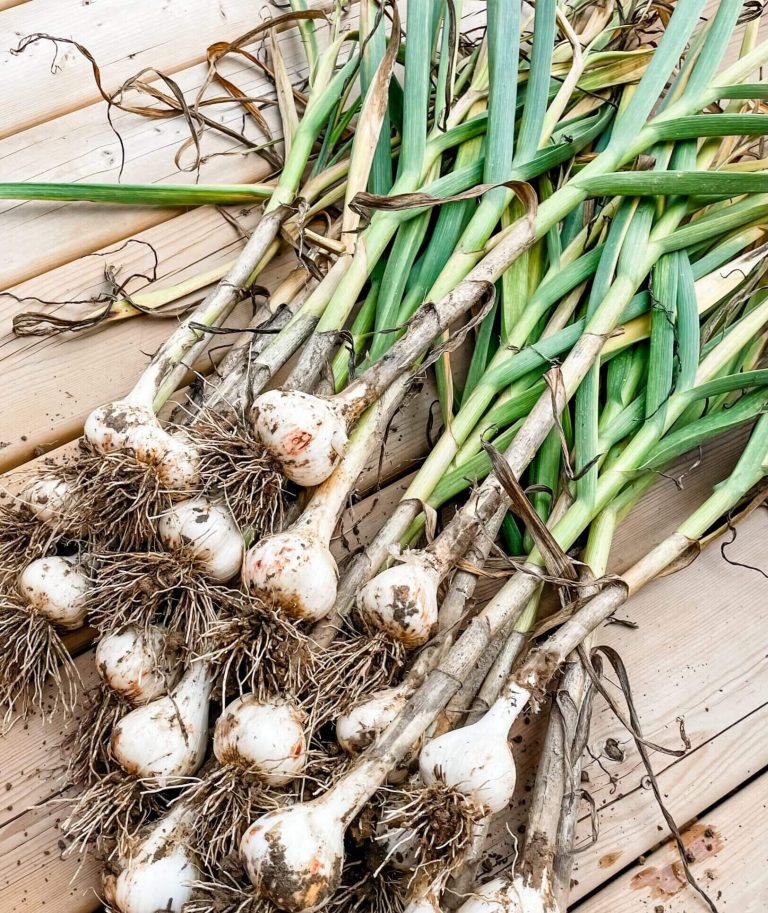
By: Dave Zeldon and Ely Schweyer
Bearing in mind that a lawn is a very unnatural situation in that we are trying to sustain a large area with very little plant diversity (monoculture), in the eye of the homeowner, lawns may remain an important part of the domestic landscape! As well as in very necessary areas like tile beds, paths, roadsides, and recreational areas, lawns provide a background that enhances the overall effect of the home and the various gardens and landscape features.
From nematodes to dog pee spots, the following tips will help you to maintain a healthy lawn naturally.
Mowing
Of all the cultural practices, mowing exerts the greatest influence on growth, development, and ease of management. By keeping the grass blade height between 6 & 8 cm (2.5 to 3 inches) high you'll be able to produce a more competitive lawn against young and germinating weeds.
Grass Species Selection
Seed mixtures with Titanium Tall Fescue have shown to be more drought, disease, and insect resistant than many other lawn grasses such as the traditional Kentucky bluegrasses. Tall fescue roots penetrate deeper into the soil providing better regrowth and wear tolerance, making it ideal for heavy foot traffic areas and recreational areas.

Carried by Eising Garden Centre
Time of Sowing
The best time to establish a lawn from seed is late summer and early fall (mid-August to mid-September) in southern Ontario. During this period, soil moisture and temperature conditions are optimal for germination and establishment. There is also less competition from germinating weeds in the fall. Make sure that seeding is done early in the fall so that the grass is well established before winter. The plants are then well rooted and more drought- and heat-tolerant the following summer.
Seed the shady areas in the fall for best results. Trees will have shed their leaves by then, so plenty of light is available for the new growth. The grass also gets off to an early start in the spring before the trees leaf out.
Spring seeding should be done as soon as the ground can be worked. Slow, irregular germination may result if the seed is sown when the soil is too cold and damp. (Soil Temp. around 15oC is ideal and there is also strong competition from germinating weeds during the spring. When practical, wait until weed seeds germinate, work the land to kill them and then sow the grass seed. ) If you choose to plant your new lawn in the spring, begin just as soon as the soil is dry enough to work, preferably mid-April to mid-May. This will give your new grass time to get well established before the hot, dry weather sets in.
Fall is often a better time to start your lawn, from mid-August to the end of September. Your seedbed is less likely to dry out at this time of year, and the grass should be well established before winter.
Watering
Your typical lawn needs about 2.5 cm (one inch) of water per week through either rain or irrigation. If irrigating, water in the morning as more will be absorbed as opposed to being lost to evaporation in the sun and the warmer temperatures later in the day.
Fertilization
Lawns require relatively large amounts of nitrogen-based fertilizers which should be applied several times during the growing season. Since lawn clippings are high in nutrients, especially nitrogen, much of your initial nitrogen fertilizer investment may be recycled back into your lawn! A fertilizer with a nitrogen, phosphorus, and potassium ratio of 4:1:2 (e.g., 20-5-10) is normally the best in most situations. It should be noted though, that a soil nutrient test can accurately determine the actual needs of your lawn including lime if the pH is too low.
(Lawn Liming Rate: 20-50 lbs/1000 ft2)
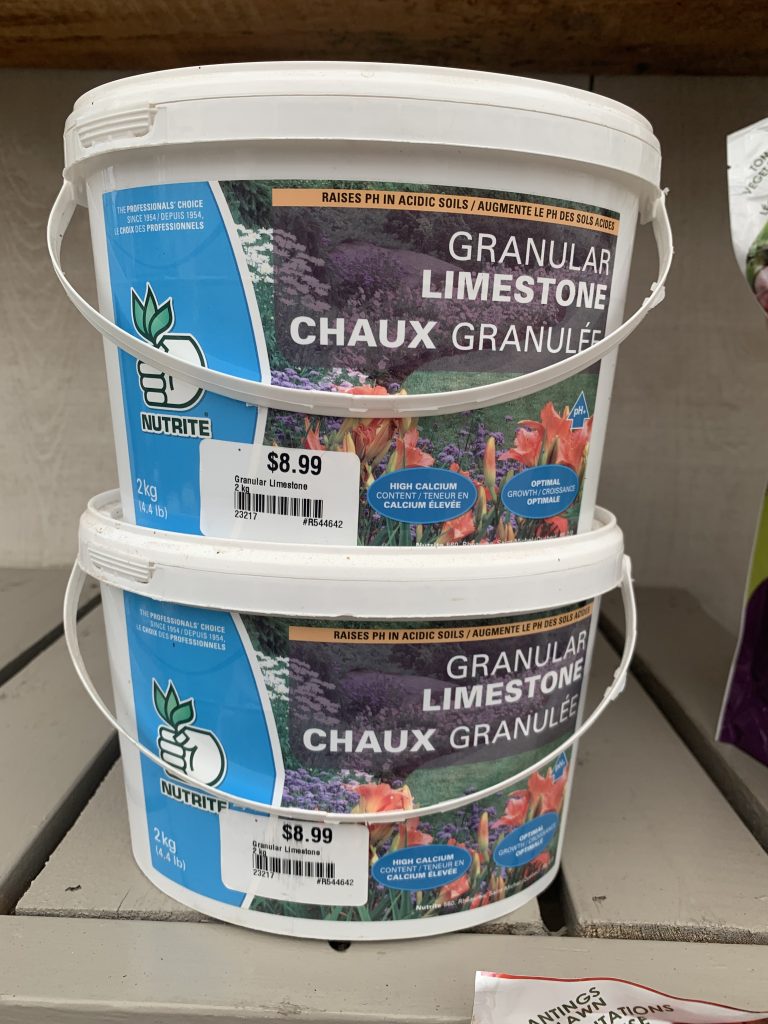
Carried by Eising Garden Centre
Corn Gluten
An application of this product early in the spring and then later on in the summer will inhibit the growth of weeds from germinating seeds especially the annual problem, crabgrass. Established weeds though have to be dug out by hand.
Dog Pee Spots
There is a misconception that the pH level of your dog’s pee is leaving those unsightly spots in your lawn, when it is in fact the high concentration of nitrogen and salts being introduced into the soil. To prevent this, should you see your four-legged friend raising its leg or popping a squat, give that spot a good watering to dilute the minerals. In addition to this, ensuring your dog is well hydrated will help to water down their urine. However, your lawn may already have several severe yellow and bald patches. You may opt to resod or reseed the area, but the soil is what’s affected. Before giving up altogether and adding a scree to the affected area, Eising Greenhouse and Garden Centre offers a fertilizer to help balance and remedy your dog pee spots!
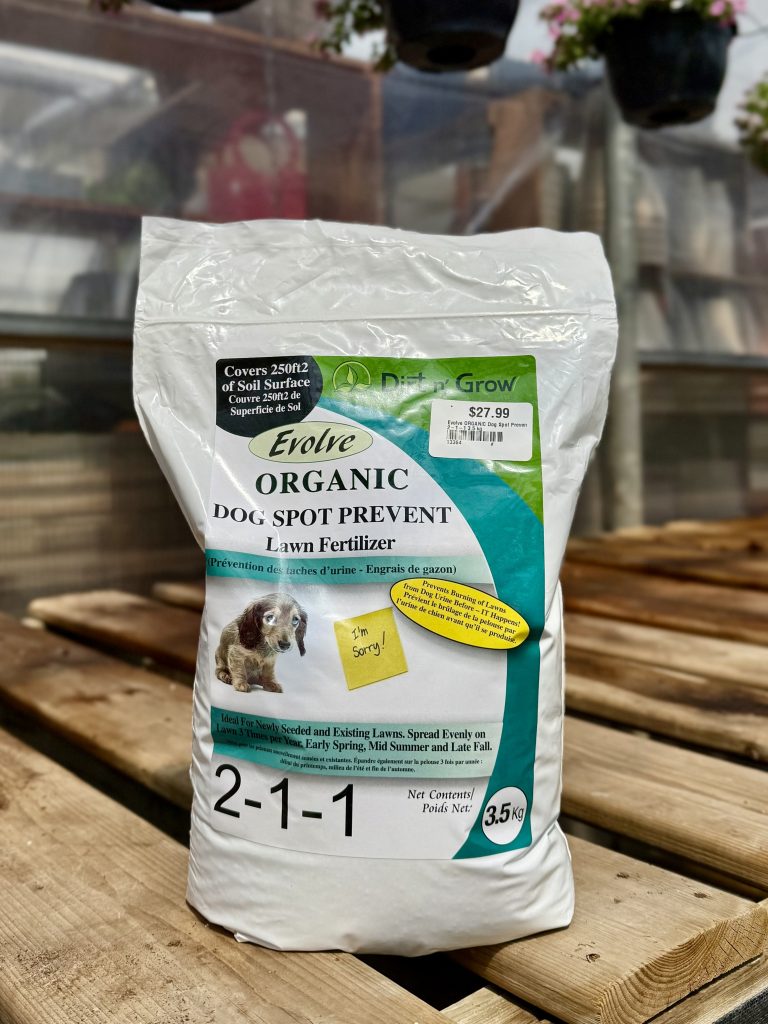
Carried by Eising Garden Centre
Thatch Control
Thatch is a layer of dead leaves, stems and roots that intermingle with the living plants above the soil surface. A one-inch layer of thatch is desirable as it has a cushioning effect against compaction and an insulating effect in cold weather. De-thatching a lawn is an extreme measure that may be considered if the drainage is poor. Lawn aeration may be required as well as the lawn and the soil below must establish a drainage pattern.
Nematodes - Aid Against Japanese Beetles and More!
If the Japanese Beetle has been destroying certain plants in your landscape plantings or their grubs have been feeding on the roots of your lawn, causing unsightly brown patches maybe it's time to use Mother Nature's secret weapon: Beneficial Nematodes.
Beneficial Nematodes are a natural way to control Japanese Beetle grubs and over some 200 species other pest insects in your lawn while having no detrimental effect on Ladybugs, Earthworms, and other helpful beneficial insects.
Nematodes are naturally occurring microscopic worms of the soil and are used to control soil pest insects in their larvae or grub stages while not posing any health or environmental risks to humans or animals. The beneficial Nematodes enter the JB larva via mouth, anus, or respiratory openings and begins to feed. This causes specific bacteria to emerge from the intestinal tract of the Nematode, spreading inside the insect and multiply very rapidly; the bacteria convert host tissue into products which can easily be taken up by the Nematodes, ceasing the soil dwelling pest insect within a few days. Beneficial Nematodes are effective against not only the larval or grub stage of Japanese Beetles, but the Northern Masked Chafer, European Chafer, Rose Chafer, Crane Fly larvae (Leather Jackets), Oriental Beetles, and June Beetles.
The nematode product you purchase should contain two genera: Steinernema and Heterorhabditis for better grub control.
Beneficial Nematodes are very easy to use. Mix with water and spray on the lawn with a water-can, irrigation system, or a hose-end sprayer. Most homeowners spray at a rate of 10 million nematodes per 600 square feet on grub damaged lawns. After an application, keep the soil moist during the first two weeks for the nematodes to get established.
In Ontario, there are two windows of opportunity to apply Beneficial Nematodes to be effective against the JB grub stage.
The first application should be in May as the soil warms up and then again at the end of August or the first two weeks of September as the JB are hatching into their first larval stage.

We hope these tips help to ensure your healthiest lawn! For more information – and lawncare products - visit Eising Greenhouse and Garden Centre! 🌾
By: Dave Zeldon and Ely Schweyer
The classic fall-blooming Chrysanthemum varieties of burnt amber, golden yellow, and deep burgundy blooms have been enormously popular for years, and as each new fall season rolls around, there always seems to be new varietal introductions – like multicoloured pinks with the hues of sunrises - to enhance your front porch display of pumpkins, corn stalks, and gourds.
These robust plants will produce blooms for weeks, even in the coolest of autumn weather. Their hardiness even offers versatility when it comes to their display; some gardeners prefer less labour-intensive groundskeeping and leave them in their original store pots, whereas others prefer to transplant these flowers into larger planters, window boxes, or into flowerbeds to add an easy seasonal flair.



While resilient, these plants still need some TLC. Try these tips to keep your Mums looking fresh throughout the fall.
- Choose green plants with tightly closed buds. This way when your Mums do bloom, you will be able to keep those colourful displays for much longer.
- The Mums' foliage should have a deep green colour and lots of growth at the garden centre.
- Also, make sure the soil in the container is moist when purchasing your plant, as dried out Mums may have already suffered damage.
- You'll find out in short order that your potted Mums are very thirsty plants! Water them daily and make sure the soil remains moist. A shot of liquid fertilizer to the irrigation water once a week would be great as well.
Over-Wintering Mums
Modern Mum breeding is aimed primarily at creating plants that look good in their pots at their point of purchase, sacrificing the plant’s hardiness and performance for future years - meaning when home gardeners try to overwinter these big potted plants, they are not usually successful.

All Mum plants at garden centres are hardy, meaning that they are perennials in most climates. However, if these plants are put in the ground from August on, most won't make it through winter. The reason is that Mums planted late in the season are near, or at, the flowering stage, when their energy is focused into blooming, and they won't grow roots to sustain plants through the winter. This is why Mums should be planted in the spring if you want a perennial plant that has a spectacular autumn show!
If you really adore your fall purchase though, you can try to over-winter your Chrysanthemums in the basement or a dark, cold closet, after the first frost. Water well and place in an area where it is totally dark and 0°C to 10°C. The plants will hibernate for the winter if you keep their roots damp. Check the pots weekly.

In the spring, gradually acclimate your Mum plants to light and plant them out in the garden after the last killing frost, remembering to pinch them twice prior to the first of August for a full, lush plant.
We hope this helps you to enjoy your Mums just a little bit longer! Use our Plant Finder to search for a sample of our Mum selection by your preferred colour. You can find many Mum varieties and more information at Eising Greenhouse and Garden Centre, please stop in for a visit this autumn!
If flowers are the divas of the garden, foliage is the harmonious backup group that makes the whole performance shine. Colour, texture, and form don’t just come from blooms—there’s a world of interesting leaves that not only set the stage but often steal the show. Flowers may be the stars, but foliage is the picture frame, the atmosphere, and often the soul of a beautiful garden.
Start with a Standout
When choosing plants—whether for a garden bed or a container—don’t just focus on flowers. Especially in shady spots, standout foliage can create all the visual impact you need. Look for leaves that draw your eye, like the delicate structure of a cutleaf Japanese maple or the bold colour variations of Heuchera (Coral Bells), which range from deep burgundy to vibrant chartreuse.
Your standout feature doesn’t have to be a plant—it could be a sculptural shrub, an ornamental tree, or even a favourite birdbath. Try placing that birdbath atop a lush carpet of Irish moss, or line a path with the spotted leaves of Pulmonaria, silvery Artemisia, or graceful ferns. Light up a shady corner with glossy Bergenia or classic Hostas, which offer endless variety in shape, texture, and hues from bright green to cool blue-ish tones.
Build the Framework
Once you’ve chosen your focal foliage, you can build your planting scheme around it in creative ways. Think of it like building a quilt—each plant contributes a piece to the overall picture.
- Create a patchwork of leaf shapes: Group together plants with small, intricate foliage for a richly textured look.
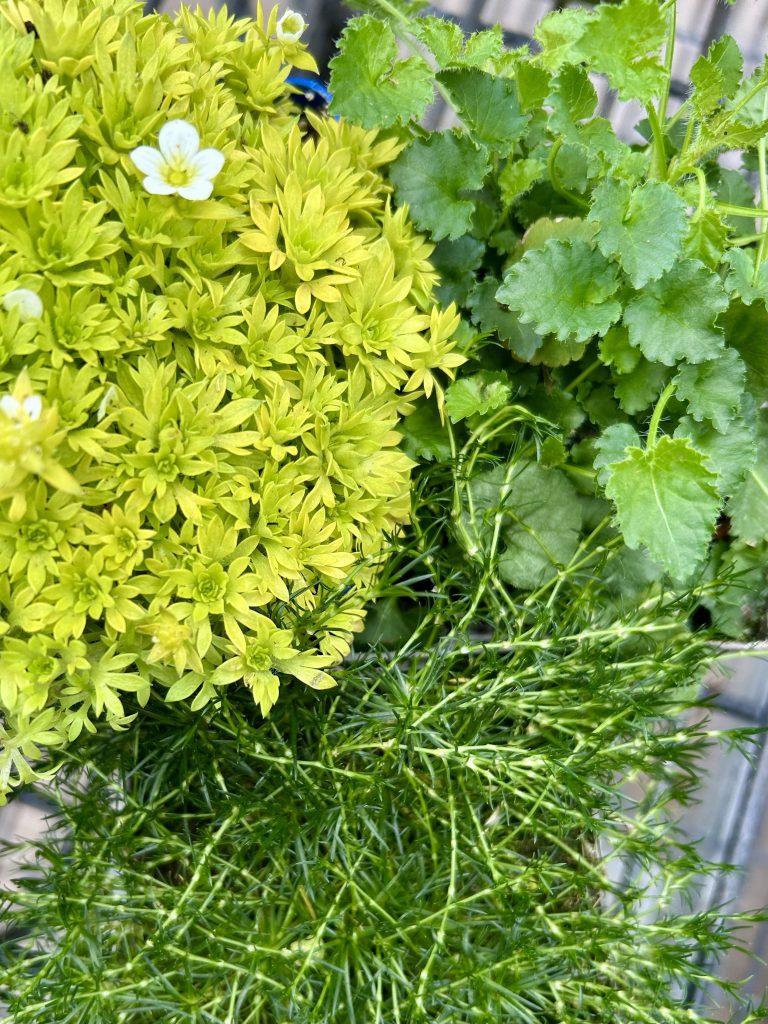
Mossy Saxifrage 'Cloth of Gold,' Sagina Subulata 'Irish Moss,' and Bellflower Campanula Carpatica 'Pearl Deep Blue'
- Echo colour tones: Pair burgundy Heuchera with other plants in similar shades, like dark-toned Euphorbia, for a cohesive palette.

Foamy Bells 'Catching Fire,' and 'Onyx'
- Choose a colour theme: Work with warm hues like gold, rust, and copper.
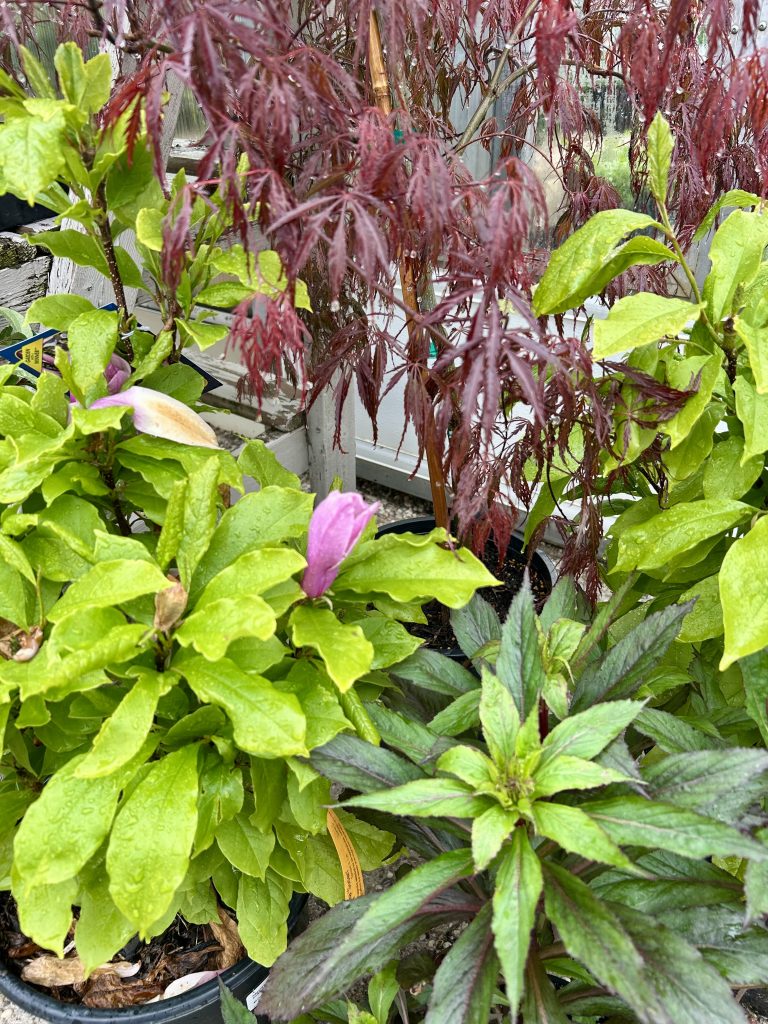
Japanese Maple 'Tamukeyama,' 'Magnolia x Soulangeana,' and Lobelia Speciosa 'Starship Scarlet'
- Mix textures, repeat colours: Choose different textures but repeat colour combinations like white and green.

Pulmonaria 'Pink-a-Blue' and Artemesia 'Silver Mound'
Top it Off
Once your foliage framework is in place, add a statement piece to elevate it all - that favourite birdbath, a piece of artwork, an ornamental tree or shrub, or an unexpectedly showy flower. The layered, leafy backdrop with make your feature stand out even more.
Visit us at Eising Garden Centre to find all the foliage stars and supporting players you need to bring your garden vision to life!
Most of us want to easily pull together everyday outfits without overthinking it or overspending. In reality, putting stylish clothing combos together can feel harder than it should. If you stare into the closet and can’t find anything to wear, you’re not alone! Many of us struggle to assemble outfits that feel stylish and put together.
Your friends at Sassyfras Boutique in Eising Garden Centre are here to help with 4 go-to outfit tricks that always work!
These are simple style tricks you can rely on, and they're built around versatile essentials you may already own, plus just-right combinations and accessories that pull everything together. You’ll also find new ways to assemble simple pieces to create countless outfits.
These tricks come from years of helping people in our shop to build their wardrobes. Ready to get started? Let’s make getting dressed and looking great one of the easiest parts of your day!
4 Easy Outfit Tricks
- Get a Great Jacket
In every season, a great top layer pulls an outfit together. Invest in a jacket, blazer and coat for cool or cold weather. Wearing a linen shirt/shirt jacket, sweater, shacket, or cardigan works well for summer, spring and fall. Or you can simply drape it over your shoulders just in case temperatures dip a bit while you’re out or the A/C is a little too drafty.

The top, jacket, and pants are from B. Young, found in Sassyfras at Eising's Garden Centre.
2. Start with a Matching Base Layer
Begin with a neutral, matching base. Easy peasy. Once you have a neutral base, add any jacket colour and accessories! One of the great jackets you’ve invested in will enhance a neutral outfit and create multiple great looks. The key is to start with a dress, or a top and pants/skirt that are similar shades. Some examples of a neutral base are: blue/faded blue, cream/beige, grey/grey, white/white, or black/black. From there, add on any colour jacket or sweater and a similar or complementary shade of bag/purse/earrings/shoes.

Pants by B. Young. Top by Culture. Bag by LaVolta.
3. Match Your Top and Jacket
Here’s a trick you can probably achieve with the clothes that you already have! Instead of matching your top and bottom pieces, match your top and jacket or sweater. Once you put together similar neutral shades on top, you can add almost any skirt or pants and look stylish.

Jacket by Tribal. Pants by B. Young.
4. Camel Adds Class
So you’ve put your outfit together using a neutral shade for your top and bottom, or matched your top and jacket…now do you want to make your ensemble look even better? Add a touch of tan or camel, maybe even a bit of gold. Camel colour bags and shoes go with everything and are staples for easy, classic outfits. Add some gold earrings and a pair of sunglasses, and you’re set!

Top and skirt by B. Young. Hat by Kooriginal. Bag by La Volta.
Help!
We’re here to help you put it all together. Come into Sassyfras wearing your neutral base, and we can help you find that great jacket or cardigan, handbag and accessories to go with it. Or, start from scratch and find a neutral base you can build on. And for heaven's sake, let’s make it easy to look good!
Looking for something that blooms in the garden when everything else is fading? Bluebeard (aka Caryopteris or Blue Mist) blooms from late summer until frost sets in!
This shrub-like perennial thrives in full sun and sandy soil with good drainage. In exchange for these conditions, it provides an abundance of blooms in vivid, genuine blue (a colour that’s very difficult to find in the garden) or it can have pink or blueish-purple flowers depending on the hybrid variety. Foliage can range from soft grey to golden yellow to dark and glossy green, depending on the variety. Intrigued?
Bluebeard is a great perennial shrub for almost any size of garden and does well here in Norfolk County. Plants grow in a range from two to four feet in height and width and in a well-behaved, compact mound.
Beautiful Blooms
Such a unique flower! Bluebeards form fluffy clusters of flowers, like clouds or mist and can bloom from July until there’s a frost. Like most flowering plants, deadheading spent flowers will promote continued blooming.
Bluebeard flowers have a mildly sweet scent and are full of nectar for pollinator friends like bees, hummingbirds and butterflies. The features don’t stop there! Birds love the seeds that form in the Fall too.

Planting & Care
Find a nice, sunny spot with ample space for the plant to grow. Bluebeard aren’t heavy feeders and don’t need fertilizer. Some compost in the planting hole is all that’s needed. After that, top dress with some compost each Spring.
Water in new plants thoroughly after planting them. Once established, they don’t need watering unless it’s an extremely dry season.
Crown rot from consistently over-watering, or from being planted in wet, heavy soil is the only disease to be concerned about. Branches will begin to die, one by one, if this plant has crown rot.
While Bluebeard will tolerate drought and shade, the amount of flowers will be greatly reduced.
Pruning
Bluebeard’s foliage and flowers form on new branches or new growth. So, early each Spring, cut the stems down by at least half. Cutting them down to 12-18” does not harm the plant. It will send up new shoots, and it’s those new shoots that produce leaves and blooms!
You may find that established plants have some dead wood in the centre. If this happens, prune out any dead wood, and that will ensure that your shrub stays looking full and happy.


Sunshine Blue Bluebeard
Grows 2-3’ tall.
An extremely hardy variety with gold foliage and blue blooms.

One final note. Sometimes Bluebeard is called “blue mist spirea”. However, Bluebeard or Caryopteris is not related to spirea.
Whether you’re just starting to explore the world of unusual plants, or you’re already an avid collector, there are a wide array of weird and wonderful houseplants to satisfy your quest for something a little different.
Tropical plants and houseplants come in every shape, size, texture, and colour imaginable, plus some you would never have imagined!
Exotic houseplants often have striking appearances which make them valuable as eye-catching focal points in your decor. The range of distinctive features can also make them a natural choice to express your personality and style.
Like your more common houseplants, unusual varieties can also contribute to indoor air quality, as well as the overall benefits to your well-being that come with having living plants in the home.
The unique characteristics of rare or unusual houseplants often have interesting backgrounds. Learning about their natural habitats and origins only makes them more intriguing!
Here are some wild and wonderful houseplants that will add interesting foliage, blooms, or both to your home right now!
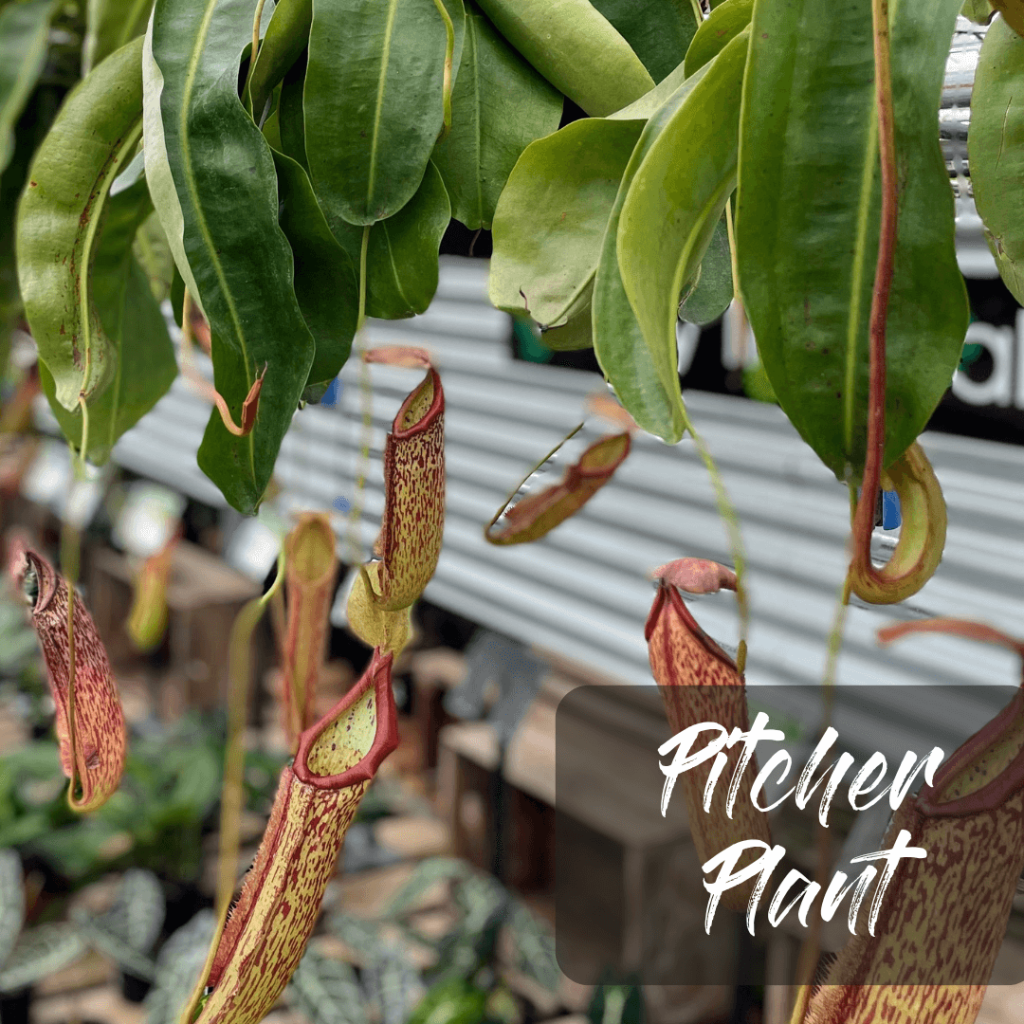
Pitcher Plant
A rare and exotic group of tropical plants with pitcher-shaped leaves that are carnivorous. That’s right, they eat insects to obtain the nutrients they need! This means that with most varieties you do not have to fertilize them. Most are happy catching a bug or two for food.
Keep this plant from drying out completely between waterings by temporarily placing it in a water-filled tray to absorb moisture through the roots. Remove the pot from the tray once it’s saturated, and allow the excess water to drain away. Pitcher plants prefer pure, mineral-free water like rainwater. No tap water for these precious prima donnas!
One Pitcher Plant variety that we love is Miranda (aka Nepenthes x Miranda). From tropical Malaysia, it is a very large pitcher plant with attractive spotted pitchers that can be over 18” wide when fully mature. Because of its size, it is quite effective at catching larger insects like wasps. It’s easy to grow, either in a sunny window or outdoors (only in the summer) and is heat tolerant but not drought tolerant.
ZZ Plants
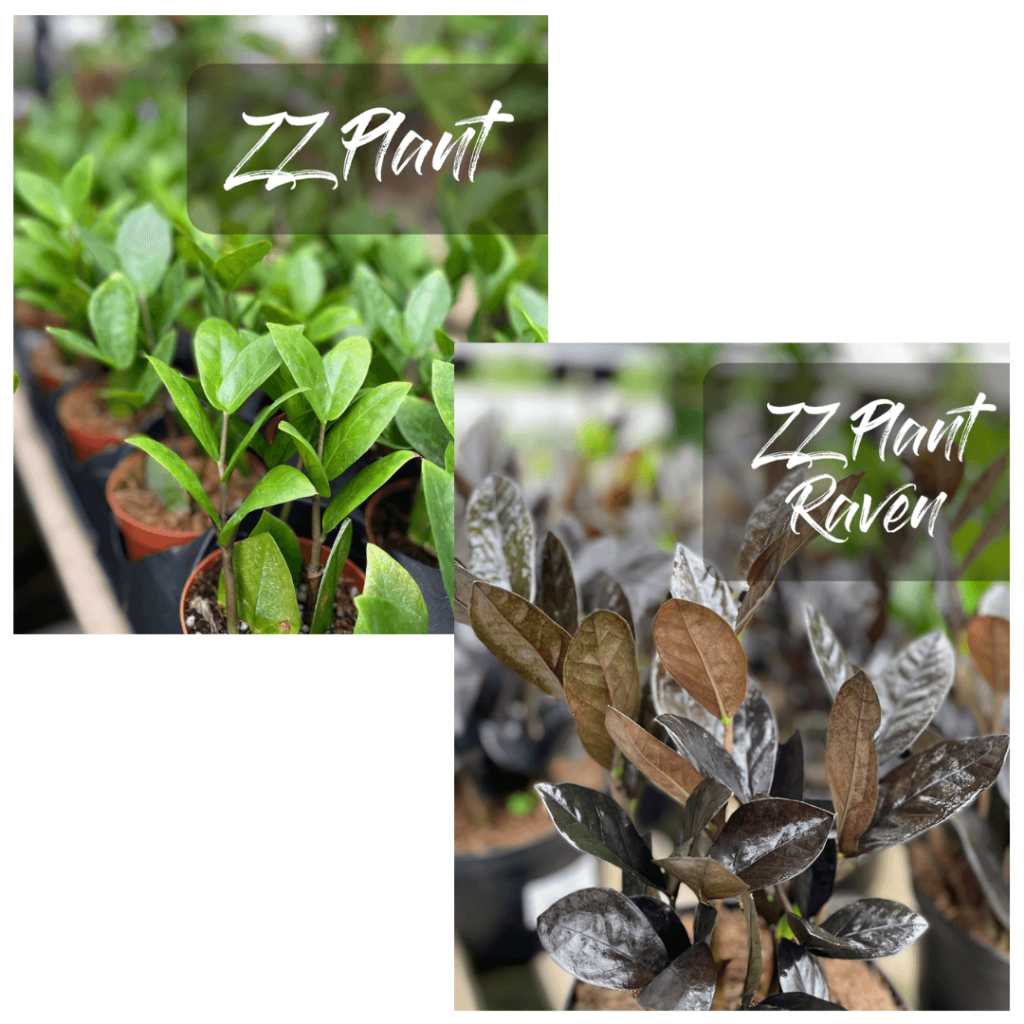
Native to East Africa, Zamioculcas zamiifolia is also known as the houseplant ZZ, or Zanzibar Gem. While the name is complicated, this plant is not fussy at all, making it great for beginners! ZZ will thrive in almost any lighting conditions except direct sunlight, plus it is drought tolerant so you can allow it to dry out between waterings.
The biggest attraction to the Zanzibar Gem though is its thick, dark green and glossy leaves that almost look fake! If that sounds intriguing, hang on. There’s more!
Black Raven ZZ is a new variation with stunningly dramatic black-toned leaves. Unique to be sure, but luckily with the same low care requirements!
Cactus
There are so many weird and wonderful varieties of cacti that come in all shapes and sizes! These sun-loving plants require little care, but here are a couple of tips that will keep them looking sharp. (Ouch!).
- Give their pot a little turn each day so that your plant is eventually exposed to light on all sides. This saves you from having a lopsided cactus.
- Water is essential but monitor how often your cacti need it. In the winter, when they’re dormant, they will need less water. Let the soil dry out completely between waterings. Using room-temperature rainwater is ideal. Tap water contains minerals which can disrupt the flow of nutrients to the cactus. Water it well, then allow the excess moisture to drain away rather than pool under the plant. Cacti don’t necessarily need fertilizer, but they do welcome a feeding during their summer growing season. We can help you choose a fertilizer that’s been specially formulated for cactus to ensure the proper nutrient ratio.

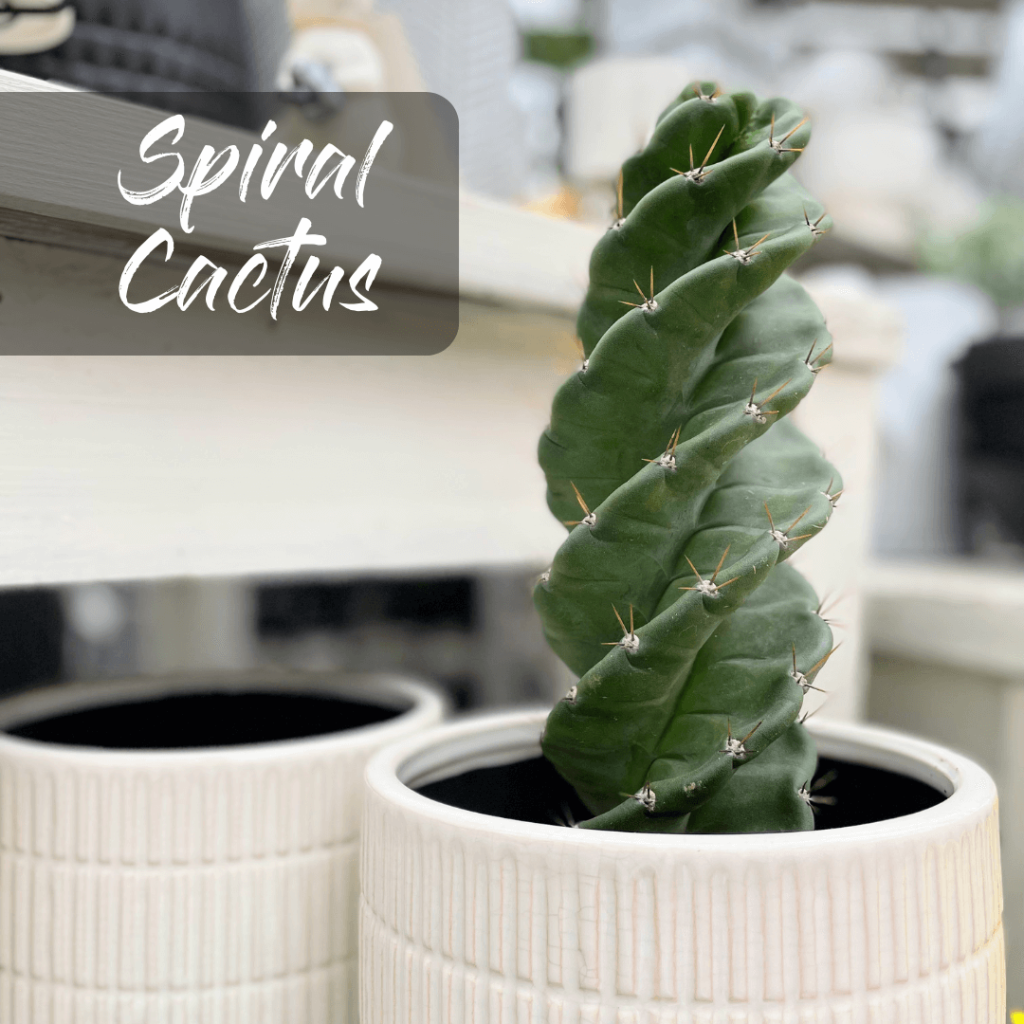

A few varieties of cacti that we love are:
- Monkey Tail (Hildewintera colademonosis)
- Boobie (Myrtillocactus Geometrizans Fukurokuryuzinboku)
- Spiral (Cereus forbesii Spiralis)
With their evocative names and exotic shapes, cacti are so much fun to grow! And don’t be surprised if the kids want to have a few to call their own.
Stop by Eising Greenhouses and see what we have in store. While you’re here, say hello to Courtney who is always happy to talk about unusual houseplants!
Fall is the time to plant garlic if you want to harvest them next summer. Why grow your own garlic? Like any vegetable, fresh garlic just tastes great. It’s also very satisfying to plant one little clove and get a whole head of garlic from it. Think of it as a garlic bank: put in a little effort in the Fall, and next summer you will profit from that small investment in spades!
If you’ve never planted garlic, it’s quite an easy crop to grow. Just follow these seasonal steps to help you get started. Hint: Mid-October to early November is when the majority of the work takes place.
FALL
Choose a location that is in the sunniest area of the garden. Lots of sun will produce large heads of garlic.
Prepare the soil in late summer, or as early in the Fall as possible. Or prepare the day before you plant if you can’t get to it sooner! Amending the soil is an often missed step but it will provide valuable nutrients for your garlic throughout the seasons.
Add organic compost like mushroom or sea compost, composted green waste, aged or composted manure, or a mix of any of these. Variety is best and all are great options. If you’re starting a new, raised bed, mix a ratio of 75% compost with 25% vermiculite to create a nice, light soil for your plants. This mix can also be added on top of the soil of an existing bed, making harvesting easier next summer!
Choose a garlic variety based on the flavour and size you like. There is softneck or hardneck garlic, but hardneck is recommended for growing in Canada. Also, hardneck varieties produce scapes which are a bonus crop - you can read more about that below. Red Russian, Music and Chesnock are just a few of the popular varieties grown in Ontario.
Separate the garlic cloves, or teeth, from the heads. As you’re breaking down the heads of garlic, it’s important to choose the largest cloves to plant. Starting with large cloves will increase your chances of growing large heads of garlic. Set aside any small cloves to cook with.

Planting! Sometime between early October to mid-November is a good range to get your garlic in the ground in Norfolk County. Basically, 4 to 6 weeks before the ground is frozen.
Here’s how to get your garlic in the ground!
- When it comes to spacing, there are two options.
Using a dibber or a hand trowel, create 3 to 4” deep holes in one of the following patterns:
a) Make holes that are approximately 6” apart and in rows that are 6” apart.
b) Make holes that are approximately 7” apart and in rows that are 7” apart. Then, go halfway between each row and make an offset row. This method is best if you don’t have a lot of space and will not impact the growth of the garlic.
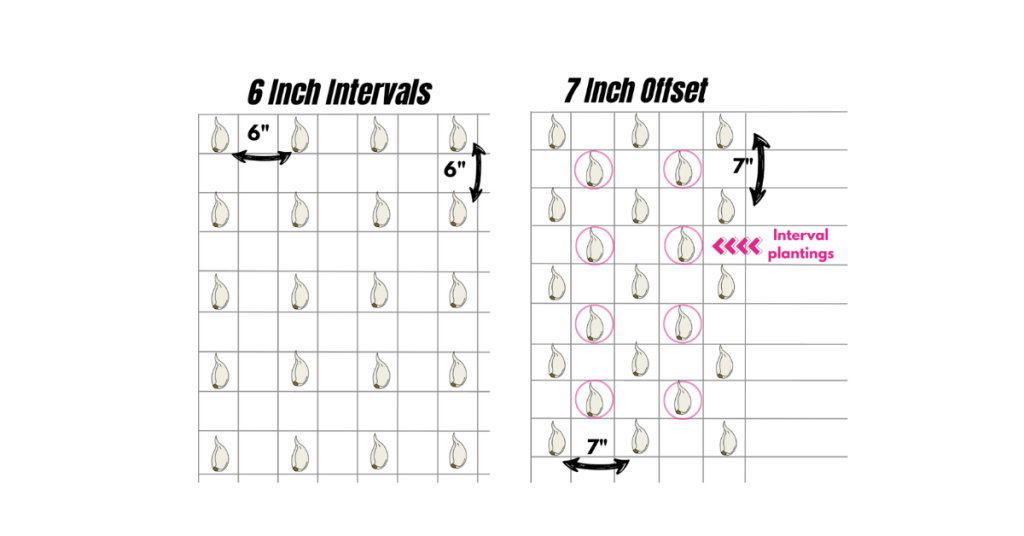
2. Place a handful of worm castings or organic 4:4:4 fertilizer in each hole and mix into the soil a bit.
3. Place ONE clove in each hole, with the pointy end facing up and the flat end down.
4. Backfill with surrounding soil so that each clove is covered 2-3”. This acts as protection during the cold winter months.
5. Top with leaf mulch, leaves, or straw, and water in your garlic if there is no rain in the forecast for several days.
SPRING
This is the time to check on your garlic and give it a little more nutrition.
Look for signs of first growth in February or March, depending on how warm the weather is. When you see 3”- 4” of growth, remove the mulch from around each plant, or from the bed, and add it to the compost pile.
Add nutrients by amending the soil with 1 tablespoon of 4:4:4 organic fertilizer per square foot of the garden, or add a 1”- 2” layer of fresh compost.
Water deeply from now on when the soil dries out. And that’s it! Your garlic is well set up to go into a BIG growth cycle.


SUMMER
Remove the scapes! Around mid-June look for the top of the stem of each plant to curl around forming what’s referred to as a “scape”. These curls, or scapes NEED to be removed so that the energy from the plant goes into growing the bulb, not into growing the seed head that is part of the curly scape. One full loop is a good time to cut or snap off the scape just above the top foliage.
All of the growth in the bulb happens once you remove the scape!
Here’s the bonus - garlic scapes are delicious! Chop them up and add them to soups, stews or anything you’re grilling. They also make excellent pesto!
Water and check your garlic for any pests throughout the growing season, just as you would with any other plants.
Harvest! Sometime in July, you will start to notice that the bottom leaves of your plant are dying. Don’t worry! The leaves on the plant correspond with the protective layers forming around the outside of your bulb, and they’re getting ready for harvest.
Around mid-July, 4 or 5 of the bottom leaves will be dead and this is your sign that it’s time to harvest your bulbs.
- Stop watering your garlic 4 to 5 days before harvesting.
- Use a pitchfork or shovel to loosen the soil, keeping well away from each plant so that you don’t slice through the garlic heads.
- Gently pull up each bulb and shake off any soil hanging on to the roots. Resist the urge to wash the bulbs as moisture at this stage will promote mould or rot!
Cure your garlic harvest by hanging it in a cool, dry place that’s out of the sun and has good airflow for 2 to 3 weeks. You may need to use a fan for this step.
Once cured, trim off the stems leaving 1-2” and the roots, and store in a dark, cool and dry spot in the house. Well-cured and stored garlic can last until sometime between December and February… unless you’re cooking, canning, and freezing with it and use most of it up! But don’t forget to save the biggest cloves to plant again in the Fall!