
By Dave Zeldon and Ely Schweyer
As plant people, we’ve all experienced that moment when we realize the novelty phase of that plant we brought home from the garden centre has worn off. The plant isn’t standing quite as tall, the flowers aren’t as bold, and the leaves are unravelling smaller or not at all. What is this magic they perform in the greenhouse? Perhaps you’ve provided sufficient lighting and adequate watering; there’s just one thing that is often overlooked because dirt is dirt, isn’t it?
97% percent of plant tissue is made up of carbon, hydrogen, and oxygen pulled from the air and water, the remaining 3% is comprised of 16 other elements taken up from the soil. The quality of soil then is crucial to your plant’s health. Whether your plants are in pots or in ground, each soil type you could provide your plant offers something unique and may lack in another.
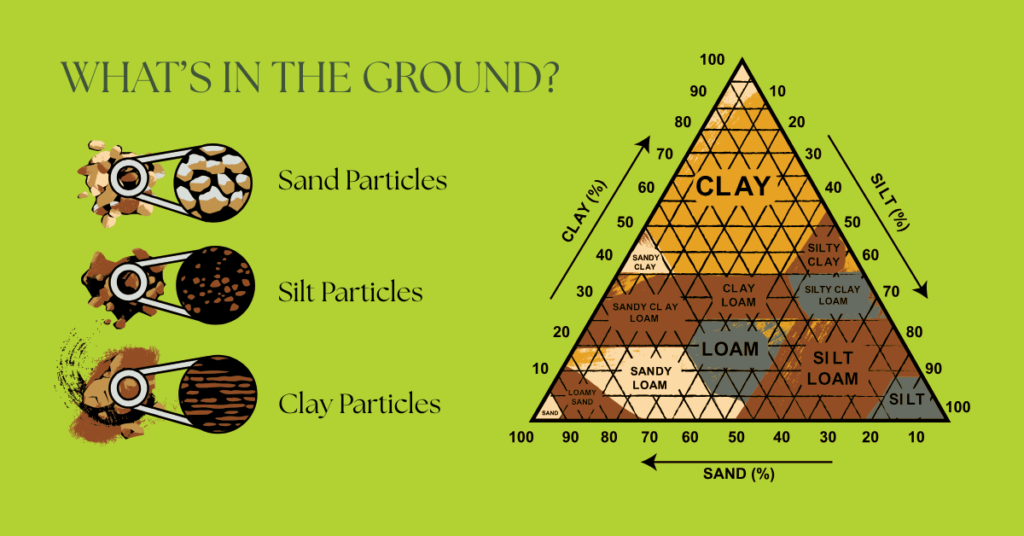
*Clay particles are even smaller than silt particles.
Resist the Urge to Slam Your Plant in Potting Soil
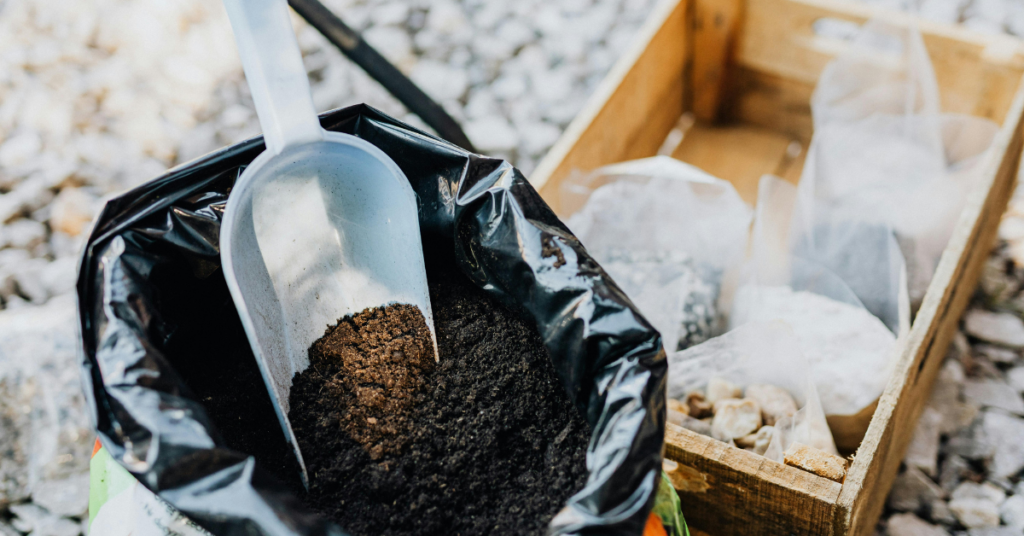
There’s bags and bags of rocks, sand, bark, manure, and moss on the shelves, yet the common buyer seems to always opt for potting mix. It’s fair; organic matter is usually great for plants and simple to use. However, most people don’t realize it’s merely an ingredient.
Strictly using potting mix is like attempting to make a loaf of bread out of only flour. All those bags of other materials on the shelves are also components for a successful plant diet!
Potting mix is a great base material, however, alone it presents risks of compacting, becoming waterlogged, can mold easily, and over time will become depleted of nutrients. Consider mixing the following ingredients into your pots, ground and raised beds to meet your plant’s required nutrients, pH level, and volume of moisture.
🖱️Use our Plant Finder to find some details on your plant! We try our best to keep this updated!
👍 Rule of Green Thumb: Plant roots can help you to determine the medium needed – thick, robust roots (i.e., yucca) typically enjoy chunkier materials, and smaller, delicate roots (i.e., begonias) enjoy finer materials.
Mulch and Bark Bites
- Mulch is the organic slow-release fertilizer, as it slowly decomposes, it lowers soil pH. However, may eventually compact soil once fully broken down.
- In the meantime, it creates shelves in the soil that create air pockets and prevent the soil from compacting. Mulch is a great short term medium for arid potted plants.
- If kept too wet, it can harbour fungus gnat larvae.
- Make sure when sourcing your mulch it doesn’t contain any black walnut.
🖱️ See more on mulching here.
Sphagnum Peat Moss
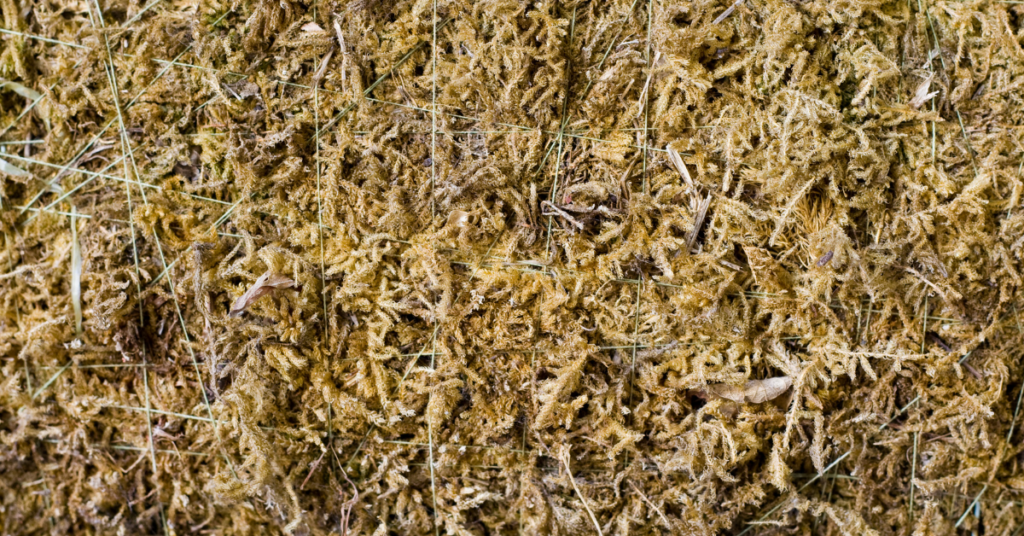
- Peat moss is used to help retain moisture and lower pH in the soil given it is harvested from bogs.
- Retains nutrients very well.
- It is difficult to rehydrate once it loses moisture.
Coconut Coir
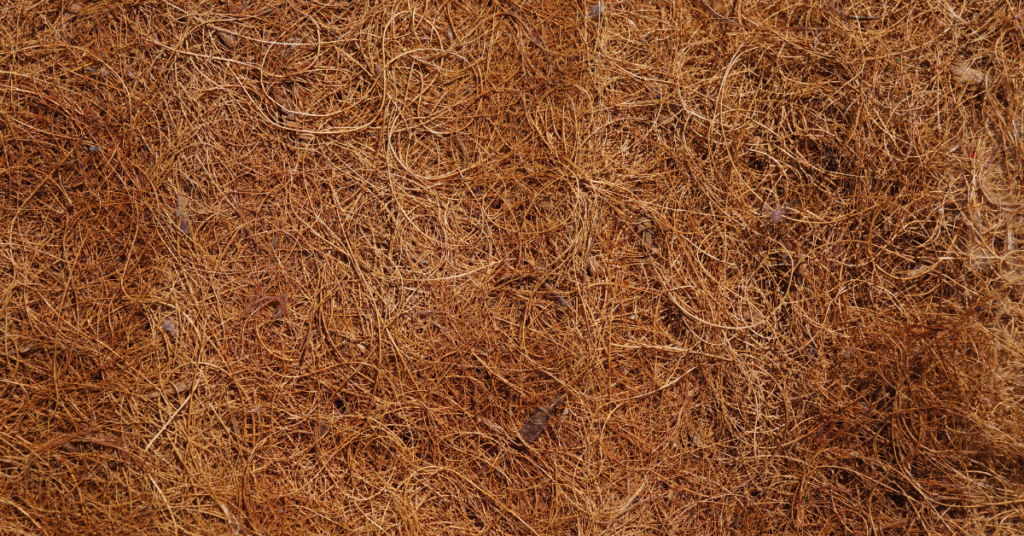
- Coco coir, much like peat moss is used to keep the soil moist and keep pH low, however it lasts longer and is possibly less invasive to harvest.
Sand
- Grains are relatively large and do not bind, allowing for excellent drainage depending on grade.
- Adds weight to top heavy plants.
- Has no ability to store minerals itself, however, pH can vary by its content of shells, minerals like silica, or fine organic matter.
Manure & Compost

- Source these organic by products locally and ensure they’re not too hot. These additions can significantly lower pH.
- Sheep manure is usually near free of weed seeds as sheep digest seeds better than cattle and horses!
Perlite
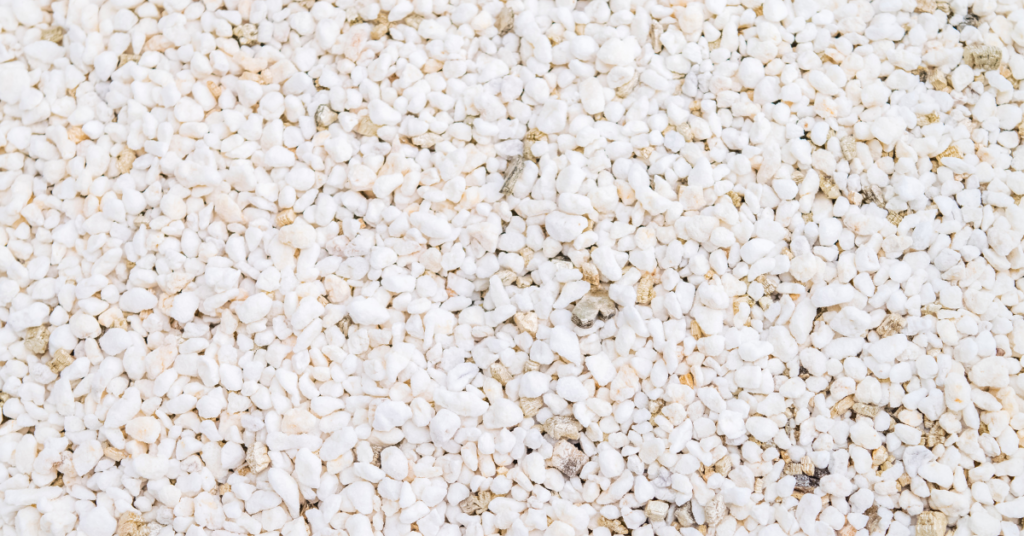
- Perlite is a volcanic byproduct (so it floats like pumice) that helps drainage in the soil and prevents compaction – vital in the case of starting seeds.
- If a rockier, well-draining medium is required for your plant, consider perlite.
- Perlite can expand holding trace amounts of water.
- Perlite has a neutral, slightly acidic pH.
- Make sure when sourcing perlite, that you are not being sold Styrofoam balls.
Vermiculite
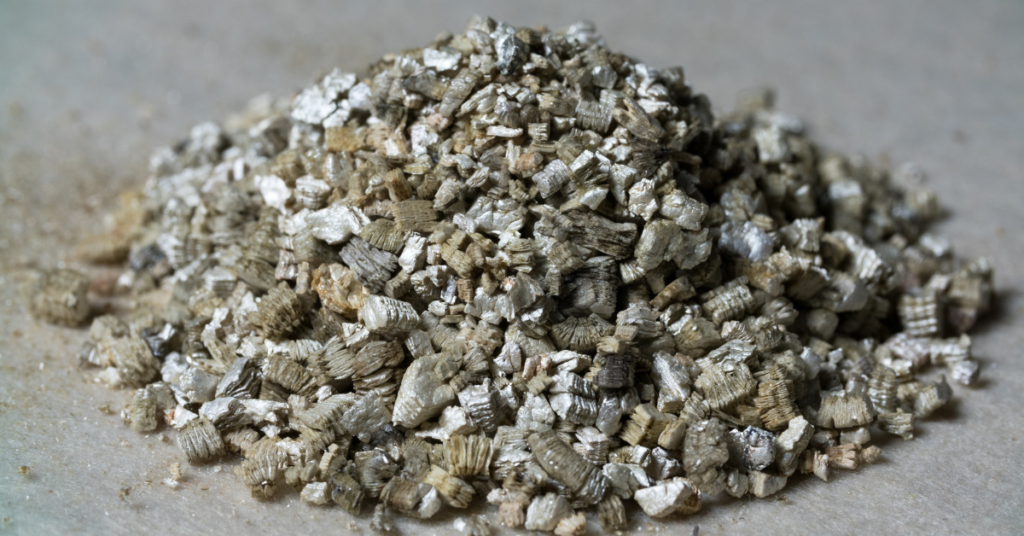
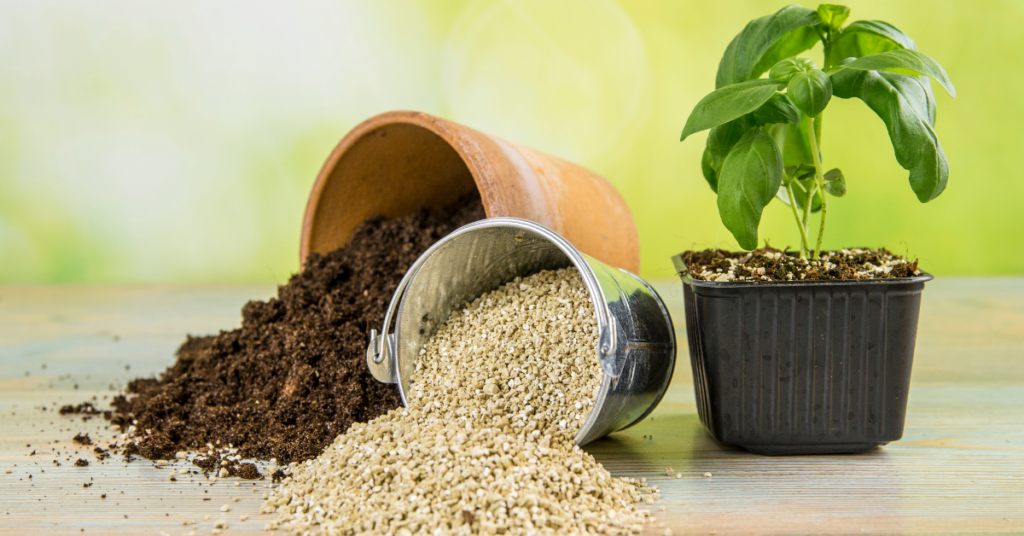
- Vermiculite is a recycled mineral used similarly to perlite, and too has a neutral, slightly acidic pH.
- Expands with water content.
- Can contain amounts of potassium and magnesium (as well as good cation exchange capacity).
- Runs the potential risk of introducing asbestos into your soil.
Calcined Clay Materials

- Clay materials like recycled brick bits, pottery, or lecca are typically used for arid plants as it improves aeration and drainage.
- Can raise pH.
- Can retain some water.
- High cation exchange.
- Can also be used for starting robust cuttings when kept moist.
- Probably not ideal for inground amendments.
Maintaining Your Plant’s Dietary Needs
Perhaps we’ve crafted the perfect soil type for your plant – your plant thanks you – but over time, we will end up in the same staling predicament. Why? Because with each thorough watering, we leech the soil of the provided nutrients. Best we use the plant-specific required fertilizer for your plant to prevent nutrient loss.
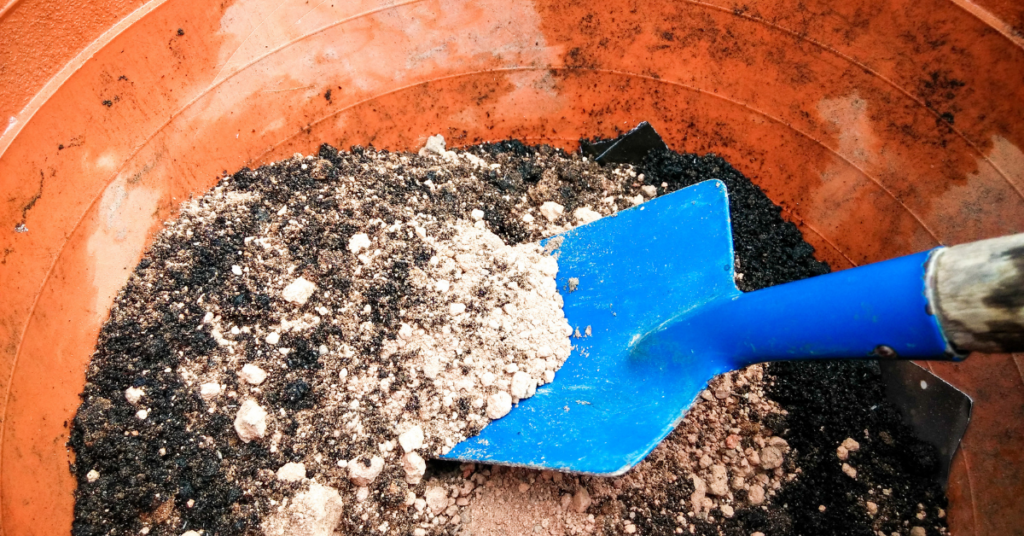
Organic sources of fertilizer such as bonemeal, composts, and manures, along with the application of lime, will improve the physical condition of the soil in terms of water and element holding ability. Unfortunately, in many cases though, manures and lime alone cannot be depended upon to provide enough available nutrients in soils with low essential element reserves.
Let’s talk about commercial fertilizers, which can help target your plant’s exact needs much like vitamins and supplements!
The Scoop on Fertilizers
Of the essential 16 elements your plant pulls from the soil, Nitrogen (N), Phosphorus (P), and Potassium (K) are the most critical for good plant growth. You’ll recognize the three numbers appearing on your commercial fertilizer labels known as the fertilizer analysis of the product, representing the percentage of each of the three "macronutrients" in the order of N, P & K.
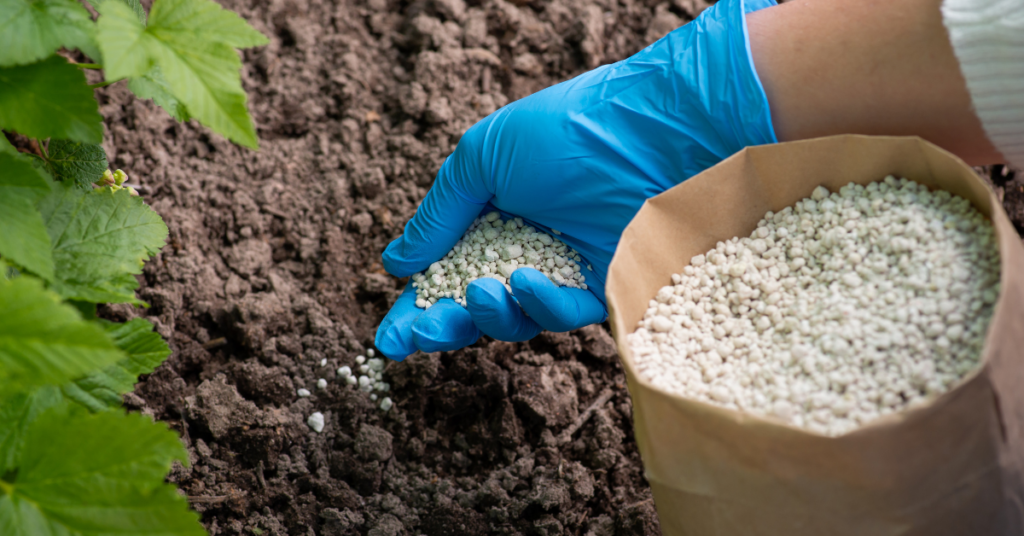
Nitrogen (N) is necessary for green leafy or vegetative growth which is important in crops like corn, cabbage, and potatoes.
☝️ It is important to remember that you should not use a fertilizer which is high in nitrogen late in the summer on your perennials, as it may cause a boost of growth which will only freeze as the cold weather sets in. Also, too much nitrogen in the analysis could cause too much lush, leafy growth thus inhibiting the desired flowering aspect of a plant species.
Phosphorus (P) promotes the development of flowers, fruit and roots. Crops like tomatoes, cauliflower and garden flowers.
Potassium (K) boosts plant hardiness, stem strength, resistance to disease and drought which is important to all crops, but especially in potatoes, celery and rhubarb.
👍 Rule of Green Thumb: For foliage plants, provide them with shade and lots of nitrogen, and for flowering and fruiting plants, provide them with lots of sun and lots of phosphorus!

Amending Clay
Hello Haldimand and Eastern Norfolk!
We’re presented with the challenge of compacted, often shallow and waterlogged clay, which proves difficult but not impossible.
Clay becomes compacted and waterlogged as it is the smallest soil particle – smaller than a grain of sand, and even smaller than silt – with rough edges that allow it to interlock and bind. In this instance, roots cannot penetrate further into the soil, are susceptible to root rot, and air pockets are slim to none.
This, however, can be fixed with the addition and renewal of the above materials.
Mindful that you don’t create a watery bowl in the ground (score the edges the area being worked), you can add organic matter (i.e., manure, compost, and potting soil) for nutrients, as well as mulch, sand and perlite for aeration and drainage. Annual soil particle aggregation in clay soils increases air porosity (air pockets) and is accomplished by the incorporation of organic matter that breaks down to form humus.
🖱️ See more here for planting trees in clay.
We hope this soil and fertilizer guide helps you provide all the vital nutrients to your beloved plants in ground and above ground! For more information - and soil – visit Eising Greenhouse and Garden Centre! 🌱
By Dave Zeldon and Ely Schweyer
Starting the first week of January, seed packets of many vegetable garden delicacies began arriving at your local garden centres. It’s a great time to plan your gardens and purchase your seeds while the selection is good but don't sow your seeds too early!

If started too soon, your plants will be leggy and overgrown long before you can transplant them into the garden. The general rule of thumb (even if yours isn't green), is if the seed packet recommends sowing four to six weeks before the last frost date, it's better to pick the four - rather than the six-week date (to calculate the sowing date, count back from the third week of May).
In this blog post, we’ll discuss the proper timing of the beneficial companion planting practice, to ensure an organic triple-play of pesticide reduction, nutrient sharing, and the fruits of your labour actually tasting better!
What is Companion Planting?
The use of companion plants is an organic approach embracing plant diversity that involves growing certain different types of plants near each other. By mixing a variety of plants together you confuse harmful insects (i.e., the ‘Three Sisters,’ corn, beans, and squash). When you plant certain vegetables together or alongside flowers or herbs, you can often camouflage the scent of a given plant so that its potential enemies can't find it. For example, if you plant onions and carrots together, the Carrot Rust Fly can no longer detect the scent of its "prey," the carrot.
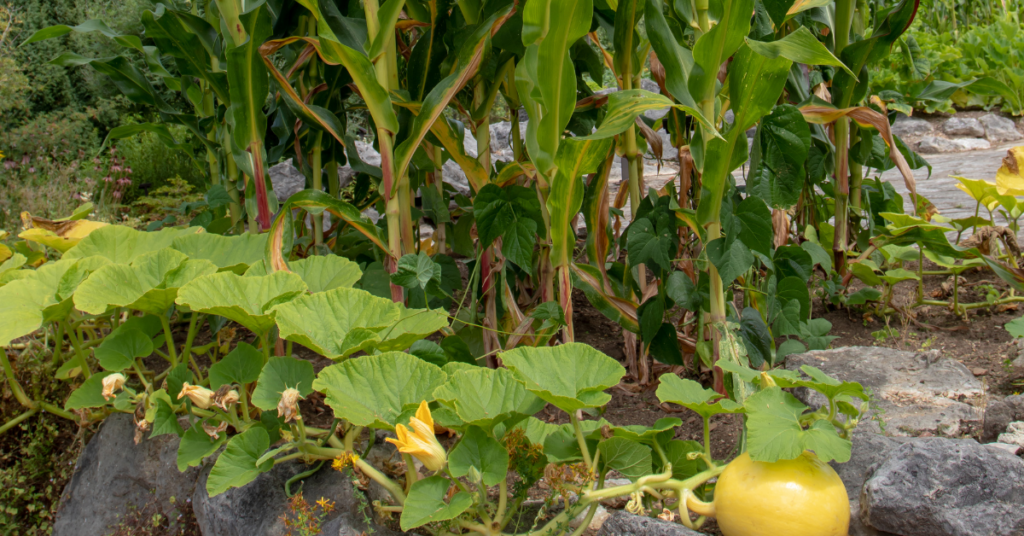
☝️ Plants also share nutrients and amend the soil below ground – in the instance of the Three Sisters, beans fix the nitrogen content of the soil for corn, who has long lost its ability to produce its own nitrogen.
What to Plant?
Herbs Make Excellent Companion Plants
Instead of grouping them all together in a corner, plant them in among your vegetables. Tarragon and marjoram give off a scent that repels most insects. Sage, rosemary, and thyme repel insects that feed on the different plants of the cabbage family. Plant these herbs near your cabbage, cauliflower, and brussels sprouts. Coriander attracts parasitic wasps that are very useful in controlling all sorts of pests.
🖱️ See more on companion planting with herbs here.

Why Not Try Flowers in the Vegetable Patch?
Nothing will make your vegetables happier! Plant borders of alyssum and cosmos; these attract beneficial insects and repel certain harmful ones. Marigolds protect tomatoes from threadworms, and nasturtiums and petunias attract aphids. If you plant them near your tomatoes, the aphids will choose the flowers instead of your tomatoes.
Meet My Plant Friends!
Plant friends are plants that can be grouped together because they mutually help each other grow. Basil stimulates the growth of Tomatoes and enhances the quality of the yield. Chamomile improves the growth and taste of cabbage and onions. It has been found that peas and beans enhance the growth of cucumbers and potatoes. Peas and beans also repel the Colorado Potato Beetle that commonly attacks potatoes and eggplant.
Once you’ve decided who is going where, it’s time to focus on when who is going where.
When To Plant?
It is important to know when the last spring frost date is for your area. Many plants need to be planted after the last frost, so that they don't freeze their little buds off! Follow this guide so that you can have healthy, sturdy little plants that will become good friends in your garden this summer.
| Ten Weeks Before Last Frost Sow indoors: broccoli, brussels sprouts, cabbage, cauliflower, eggplant, lettuce, peppers, and onion |
| Eight Weeks Before Last Frost Sow indoors: tomatoes Sow outdoors: spinach |
| Five Weeks Before Last Frost Sow indoors: marigolds (do not transplant until after last frost) Sow outdoors: peas Transplant: broccoli, cabbage, cauliflower, onion |
| Four Weeks Before Last Frost Sow indoors: cantaloupe, cucumbers, okra, pumpkins, squash, and watermelon |
| Three Weeks Before Last Frost Sow outdoors: carrots Transplant: brussels sprouts, hardened off frost-hardy herbs like chives and oregano |
| Week of Last Frost Sow outdoors: pole beans Transplant: cantaloupe, eggplant, lettuce, okra, peppers, pumpkins, squash, tomatoes, and watermelon |

BONUS: Tips on Ensuring Your Seeds Have the Best Start!
🌱 To ensure success it is always best to use fresh, sterile seed-starting mixture (available from garden centres). Moisten mixture about an hour before sowing; it shouldn't be soggy, just as damp as a wrung-out sponge.
🌱 Follow the information contained on seed packets in terms of timing, lighting requirements, sowing depth, and optimal germination and growing temperatures.
🌱 Lightly water freshly sown flats, then cover with plastic dome lid, or if reusing containers try placing them inside a plastic zip-lock bag. At the first signs of germination, uncover or remove from plastic bag.
🌱 As the seedlings develop, wait until the top of the soil looks dry, water carefully using a small watering can with a fine spray. Avoid over watering: soggy soil and poor air circulation can lead to damping off, a fungal disease that can kill seedlings.
🌱 Locate your seeding flat in a bright window but grow lights or cool fluorescent tubes are better. Keep seedlings about eight to 10 centimetres from light source to prevent plants from becoming too spindly. Plug lights into an automatic timer set for 16 hours on, eight hours off. Be careful if you’re using the windowsill method though, as extremes in temperature may occur from hot drying sunny days to frigid evenings.
🌱 When seedlings have two sets of true leaves (the first leaves are called cotyledons — or seed leaves — so wait for the true ones, start feeding once a week with a balanced (20-20-20), water-soluble fertilizer at half-strength, working up to full strength after a few weeks.
🌱 Finally, the plants which have been raised under sheltered conditions must now be hardened off (see more here) before planting out. Gradually lower the temperature and reduce the watering while exposing the plants to brighter light for seven days prior moving them out to a cold frame. Keep an eye on the weather as sudden changes, as it often happens in spring, could spell disaster to your young plants.
We hope your garden is biodiverse and fruitful this year! For more information – and companion plants – visit Eising Greenhouse and Garden Centre this spring! 🌿
By Dave Zeldon and Ely Schweyer
Many home gardeners are really missing their harvest of fresh vegetables these wintry days – and many beginners have New Year’s resolutions to become greener thumbs.
If you’re looking for something kid friendly, easy on the budget, and nutritious to do this winter, you may want to try microgreen farming!

Seeds to Start
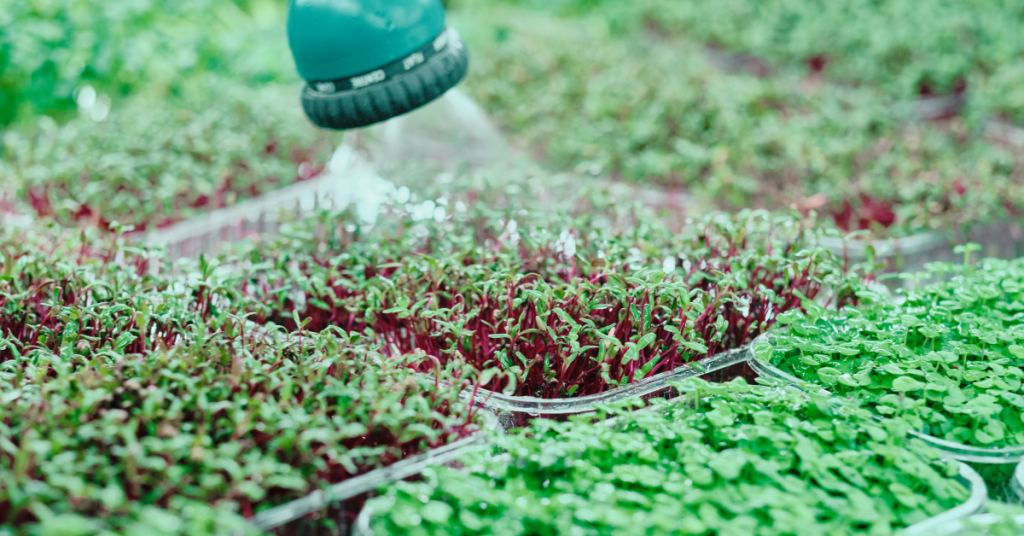
The seeds of many vegetables and beans are suitable for hydroponic sprouting into tasty young shoots that will be ready for the table in less than a week!
Seeds such as alfalfa, broccoli, clover, lentil, mung bean, mustard, onion, radish and soybean are excellent choices for this activity plus they are invaluable in terms of their nutritional content.
Sprouting seeds on your kitchen counter takes only minutes a day, and the reward is a steady supply of fresh, crunchy shoots.
It is important to start by purchasing some packaged seed expressly for sprouting. The directions will indicate how much is needed to produce 100 grams of sprouts. The seed-to-sprout ratio can differ substantially - anywhere from 1.5 to 8.5 units of sprouts or more per one unit of seed - so follow directions carefully and make sure your jar is large enough to accommodate all the sprouts while still leaving room for good air circulation. As a rule, begin with 1 tbsp. (15 mL) of seeds for small varieties such as alfalfa and radish, 2 to 3 tbsp. (30 to 45 mL) for medium ones such as lentil, and up to 4 tbsp. (60 mL) for large seeds such as beans and peas.
Seeds to Sprouts
Simply put seeds into jar and position screening over opening, using an elastic band to hold the covering in place. Fill jar one-third full of warm (about 40°C) water and swirl seeds around for a minute or so. With the covering in place, drain water. Refill jar one-third full of cool water and let seeds soak for four to eight hours.
Next, begin daily regimen of rinsing seeds three times a day at roughly eight-hour intervals. Drain and refill jar with cool water, swirl seeds for about 30 seconds and drain again. Then, invert the jar so screening is at the bottom and rest it at a 45-degree angle in the bowl. Place on the kitchen counter out of direct light (place bean shoots in complete darkness, as they often taste sweeter when they're grown this way). Repeat this process for three to five days.

Simple Sustenance
You can start to harvest your sprouts once they're three to five centimetres long. Rinse and drain them thoroughly and place them in an airtight container and refrigerate immediately; they should remain fresh for up to five days.
Clover, alfalfa, radish, and mustard seeds give rise to the delicious sandwich booster sprouts. Sprouts are one of the most concentrated natural sources of vitamins, minerals, enzymes, and amino acids.
Plants inside the home help bring life to a long winter, if you’re looking for more information – or plants – visit Eising Greenhouse and Garden Centre! 🌱
How To Keep Your Orchid Alive
By Ava Green
Orchids have become very popular gifts, and a great hobby for indoor plant enthusiasts who discover the wide range of colours and shapes available. Orchids are also loved for their long-lasting and exotic blooms.
While some may choose to only enjoy these tropical plants as long as they’re blooming, orchid-lovers look forward to nurturing the plant and encouraging it to flower regularly. It may be a little daunting at first, but once orchids grace you with their stunningly beautiful blossoms, you will find that a little bit of care is very worthwhile!

It’s estimated that there are 25,000 different species of orchids and over 100,000 hybrids! The ones you’ll find most readily in Ontario stores are Phalaenopsis or moth orchid, because it’s fairly easy to grow. Phalaenopsis are the best choice for beginners.

Other orchids you may find easily are Cattleyas (Corsage Orchids), Cymbidiums (Boat Orchids) and Dendrobium orchids.
While all of these may be orchids, they don’t necessarily require the same care, so it’s a good idea to check the tag for the type you have and its specific care requirements. The following is a general guide to light, water, fertilizer, and growing medium for the most commonly found orchids, but it does not apply to all breeds.
Light and Air
For most orchids, light, and lots of it, is the general rule. Place your plants within 3 feet of a window (not to the side) in the sun. South, east, and west-facing windows are all fine for maximizing the light your plant receives.
Orchids also enjoy a breeze or circulating air in your house. They do not like temperature extremes, though 15 to 20 degrees Celsius is safe. Keep in mind that the more warmth and air movement there is, the more often you will need to water your orchid.
Water
A general rule is to use water that is not hard and has not been softened with salt. Salt will kill an orchid. Rainwater, reverse osmosis, or distilled water are good choices. Chlorinated water is not an issue for orchids - high sodium levels are.
The biggest issue many people have is either over-watering or underwatering their orchids. Here is the method we recommend:
Every 5-7 days, place the pot in a container or the sink, then fill it with enough water to cover the top of the pot. Be careful not to let water collect in the crook at the base of the leaves, as standing water will rot the leaves and the plant. Once the plant’s growing medium is thoroughly soaked, remove it from the water and allow the pot to fully drain in the sink before placing it back in its saucer.
We prefer using a container of water rather than the sink, so the remaining water can be used to water other plants.
Here’s the best watering advice we can give you: look at the overall health of both the plant AND its root system. Full, plump leaves and vibrant, green roots indicate that your plant is getting enough moisture. Puckered leaves and a silver sheen on the roots indicate insufficient water. Mushy, brown leaves and roots are signs of rot caused by too much water.

You may hear of another watering method that involves using ice cubes, but it’s controversial and not widely recommended. To quote the American Orchid Society, “Ice is for cocktails, not orchids. Never use ice on tropical plants to water them.”
“Soil” and Nutrients
Most orchids naturally grow high up in trees, where their roots cling to bark and absorb moisture from the air. At home, we try to mimic those conditions, which is why orchids are typically planted in chunky mediums like bark, coconut husk, charcoal, or perlite rather than traditional soil. While many of the roots stay inside the pot, it’s completely normal for some to grow up and over the edge.

These “escapee” roots might look a little wild, but don’t worry, there’s nothing wrong with your orchid. In fact, those aerial roots are a sign that the plant is healthy and doing exactly what orchids do in nature.
It’s worth noting that not all orchids grow the same way. Many, like Dendrobiums, are epiphytic (growing on trees) or lithophytic (growing on rocks), though some orchid varieties are terrestrial and grow in the ground. The good news is that the growing medium your orchid comes in is chosen specifically for that variety, so you can trust it’s in the right environment.
The bark that your orchid is planted in will slowly break down and become mushy. It’s a very good idea to repot your plant every two years.
It’s generally recommended to feed most orchids, and bloom time dictates which fertilizer to use and how often to feed. Begin by using a water-soluble 20-20-20 fertilizer, mixing it at ¼ the amount recommended for other houseplants. Apply this solution every 2 weeks in the summer and every 3 weeks in the winter.

“The orchid, with its many forms, is a reminder that life is full of surprises.” — Leonardo da Vinci.

Lastly, here’s an orchid fun fact: While we have been talking about tropical orchids in this article, there are also orchids that grow right here in Ontario! That’s right, there are over 50 species in this province, including the much-loved Pink Lady’s Slipper (Cypripedium acaule).
Resources for more detailed and specific information:
Toronto Master Gardeners - https://www.torontomastergardeners.ca/gardeningguides/growing-orchids-a-toronto-master-gardeners-guide/
Canadian Orchid Congress - https://canadianorchidcongress.ca/basics/growing-orchids/
American Orchid Society - https://www.aos.org/orchid-care/indoor-orchid-care
Ontario Wildflowers - https://ontariowildflowers.com/main/group.php?id=18
By Dave Zeldon and Ely Schweyer
This is the time of year that most garden centres will have on display their wide variety of Amaryllis bulbs, including the evermore popular waxed dipped. These enormous bulbs that are appearing now will be ready to burst into bloom within 4-8 weeks after planting.
Non-Wax Dipped: Planting
All Amaryllis need is a bit of commercial potting soil that should not cover the shoulders of the bulb (try leaving about 1/3rd of the bulb showing above the soil line), with the nose (or narrow end) of the bulb peeping well over the top of the pot. Make sure that you use a well-drained container that is 3-4” bigger in diameter than the bulb itself.
☝️A heavy clay pot will prevent this top-heavy plant from toppling over. To achieve continuous bloom, plant at intervals of two weeks for stunning colour in your home.

Non-Wax Dipped: Care
Once leaves emerge, fertilize once a month with a 20-20-20 water soluble fertilizer for houseplants. Water sparingly and wait for the miracle in a warm sunny room. Sub-irrigation or watering from the bottom of the drip tray will keep the surface soil dry, thus keeping and bulb rot organisms and those pesky fungus gnats at bay.
Non-Wax Dipped: It's Not Done Yet!
When blooming is over, remove the scape (or flower stock) and place the plant in a sunny spot and continue to water. This is to allow the leaves to regenerate the bulb. In springtime, when all danger of frost has passed, bring the bulb outdoors and let it spend its holidays in a shady spot. In some varieties the leaves will die back in September to give the plant a rest for a couple months. Stop watering and store the bulb on its side in a cool place for about eight weeks, when the leaves will once again begin to emerge.
Amaryllis can go 3-4 years without repotting as they don’t mind a little crowding. Try growing a couple of bulbs in larger pots to see if you can get a clump of flowers from the offshoots or babies that will develop after a couple of years.
Or, Try One of These Wax Dipped Bulbs!
Now growing more popular are the care-free waxed-bulb Amaryllis!



Experienced growers and beginners alike love that these waxed bulbs do not need to be planted or watered! Each of these robust bulbs are carefully prepared in festive-coloured wax, allowing you the freedom to place them among your holiday decorations.
Simply keep the bulbs at an ambient room temperature of at least 16C (70F) for beautiful blooms in five to six weeks.
These novelty items are low commitment! Their only fault is their lack of longevity - gardeners don’t get to enjoy them after year as these waxed bulbs were designed to be a one-use throwaway item!
BUT with a little luck and perseverance you may be able to save the bulb for next season after blooming. All you have to do is to carefully remove the wax layer, remove the flower stalk and place the bulb and with its remaining leaves into a pot of good growing media, allowing the leaves to regenerate the food stores in the expired bulb.
If you’re looking for more information – or perhaps, Amaryllis – visit Eising Greenhouse and Garden Centre! Happy Holidays! ✨
How to Stay Warm and Stylish
By Ava Green
Colder temperatures are around the corner, and some of us are not looking forward to it! Whether you love winter or not, Sassyfras Boutique inside Eising Greenhouse and Garden Centre has the cozy, stylish clothes you need to look your best and stay warm all season long.
Begin with Layers
Fall, winter, and spring can all bring unpredictable weather to our corner of southern Ontario, so layering is key. Winter is an especially good time to follow the 3-layer rule:
- A base layer keeps you dry
- A mid-layer adds warmth
- An outer layer protects from the elements
Build Your Cold-Weather Capsule Wardrobe
Creating a winter capsule wardrobe makes dressing warm and stylish easy and stress-free. Here are a few ideas to get started:
Base Layer:
Start with a basic tee, a long-sleeve mock neck, or a long-sleeve crew neck top. Choose natural fabrics that wick moisture and keep you dry.

Tights or leggings make a great foundation under dresses or pants for added warmth.

Mid Layer:

For warmth, add a sweatshirt, a crewneck sweater, a v-neck sweater, or a turtleneck.

If you’re stopping at two layers, choose a chunky knit or oversized sweater for a cozy statement look.
On top of your tights or leggings, try a faux-suede skirt, faux-leather pants, wide-leg trousers, jeans, or a dress, maybe even a comfy sweater dress.
Outer Layer:

Top it all off with an eye-catching outer layer! Try a bomber jacket, blazer, faux-fur jacket, puffer vest or jacket, or a trendy coatigan for warmth and style.
Accessorize to Elevate Your Look
What makes an outfit really stand out? The accessories! At Sassyfras, you’ll find everything you need to complete your winter look.

From belts (perfect for cinching a blazer or dress) to trendy handbags, classic tote bags, sunglasses, and a wide selection of everyday jewellery, including locally made, one-of-a-kind pieces. You’ll find the perfect finishing touches that reflect your personal style.
Mix, Match and Stay Cozy

Once you’ve built your base, mid, and outer layers, the fun begins! Mix and match your pieces to create new combinations that make winter dressing simple, cozy, and chic.
With just a few well-chosen items from Sassyfras, you’ll be ready to step out in style, no matter how cold it gets! ❄️
Figures.
By Dave Zeldon and Ely Schweyer
Now that we’ve brought our plants inside the house to over-winter, we begin to notice those slender, dark gray flies (0.2- 0.4 cm long) flitting about atop the pot soil. Yuck!
These insects are known as fungus gnats (Bradysia sp.). Whereas they are considered only to be a minor nuisance in house plants, due to their sheer numbers hovering around an attractive plant, they can certainly take away from its appeal. Below is a bit about these pests and some basic control measures.
How Do Fungus Gnats Affect Your Plant?
Other than their swarming presence, fungus gnats are not a direct threat to your plant, but an indirect threat. As their name implies, they are concerned with snacking on the fungi mycelium living in your plants’ soil. (Yes, it’s there and it’s a good thing!) However, these little flies can transfer disease between plants, making them nuisance pests.
A Quick Look at Their Life Cycle:
Adults may lay 300 eggs at a time, which hatch a week later into tiny, threadlike larvae. The larvae feed upon organic matter in the potting soil. After two weeks, they pupate into winged adults, that have no trouble annoying you to no end.
Basic Control Measures:
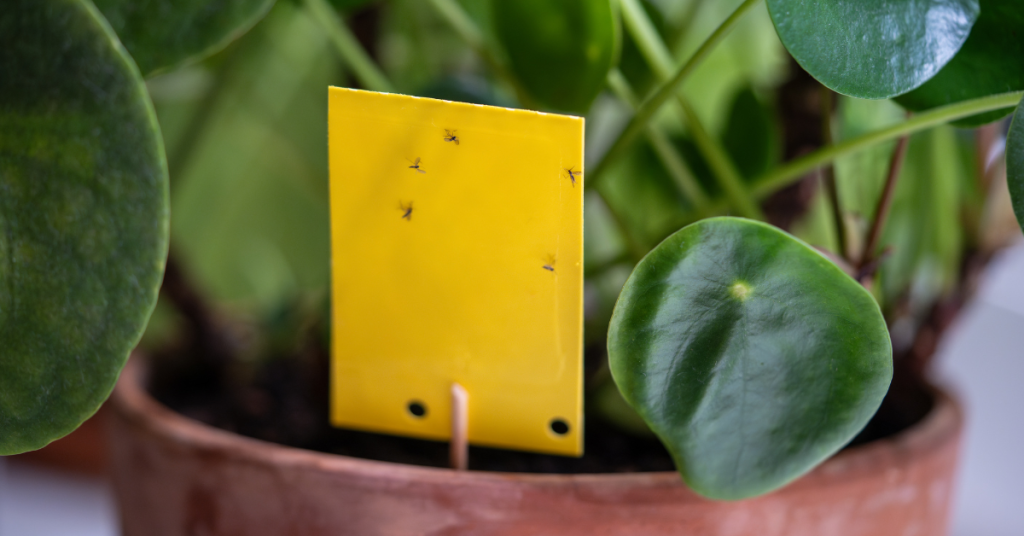
- The fastest and easiest method of control is to catch the flying adults with yellow sticky cards. The large cards can be cut into little strips and mounted onto little wooden splints (popsicle sticks) then placed around the base of the plant out of the line of sight.
- Water your potted plant from the bottom (sub-irrigation) by adding water to the saucer it is sitting in. This will keep the soil surface dry, making it uninhabitable for the hatching insect larvae. If the surface soil is already very wet, try placing a few potato discs or slices on the surface of the soil. This will attract the larvae as they migrate to the potato to feed. Simply replace the discs every three to four days with fresh slices to eliminate the next generation of adults.
- If you have a large number of plants afflicted as in a greenhouse situation, an application of predatory nematodes (Steinernema feltiae) as a soil drench is suggested. Nematodes will attack the fungus gnat larvae in the soil which will in turn lead to more nematodes being produced.
Good Bugs Are Working at Eising Greenhouse and Garden Centre!
Here at Eising’s Greenhouse and Garden Centre, we practice what as known as I.P.M. or Integrated Pest Management. Since we try to create a perfect environment for our plants, we also, unintentionally create perfect conditions for their related pests. To keep the pests at bay, we institute series of steps:
1 - Cultural Controls: We select only the healthiest of plant material to sell and keep them healthy through proper fertilization and growing conditions. We’ve learned that insects are attracted to stressed-out plants!
2 - Physical Controls: We are constantly walking through our plant aisles checking for insect and disease presence and removing the affected plants. Also a clean growing area means there is less chance of pest populations building up on alternate host plants such as weeds.
3 - Biological Controls: At the beginning of the growing season, even before there is any evidence of pest problems, we introduce naturally occurring predators into the growing areas. This is to be at the ready for when the pests do arrive!
In our arsenal we have a series of tiny parasitic wasps, microscopic wire-worms called nematodes, predatory mites as well as bacterial inoculants. So therefore, we cannot spray any chemical insecticides as they will hurt our very valuable biological cache!
Did you ever imagine all the behind-the-scenes work that goes into your plant purchases from Eising's to make them the best value around?
For more information – and bug products - visit Eising Greenhouse and Garden Centre soon! 🪰
By: Dave Zeldon and Ely Schweyer
Bearing in mind that a lawn is a very unnatural situation in that we are trying to sustain a large area with very little plant diversity (monoculture), in the eye of the homeowner, lawns may remain an important part of the domestic landscape! As well as in very necessary areas like tile beds, paths, roadsides, and recreational areas, lawns provide a background that enhances the overall effect of the home and the various gardens and landscape features.
From nematodes to dog pee spots, the following tips will help you to maintain a healthy lawn naturally.
Mowing
Of all the cultural practices, mowing exerts the greatest influence on growth, development, and ease of management. By keeping the grass blade height between 6 & 8 cm (2.5 to 3 inches) high you'll be able to produce a more competitive lawn against young and germinating weeds.
Grass Species Selection
Seed mixtures with Titanium Tall Fescue have shown to be more drought, disease, and insect resistant than many other lawn grasses such as the traditional Kentucky bluegrasses. Tall fescue roots penetrate deeper into the soil providing better regrowth and wear tolerance, making it ideal for heavy foot traffic areas and recreational areas.
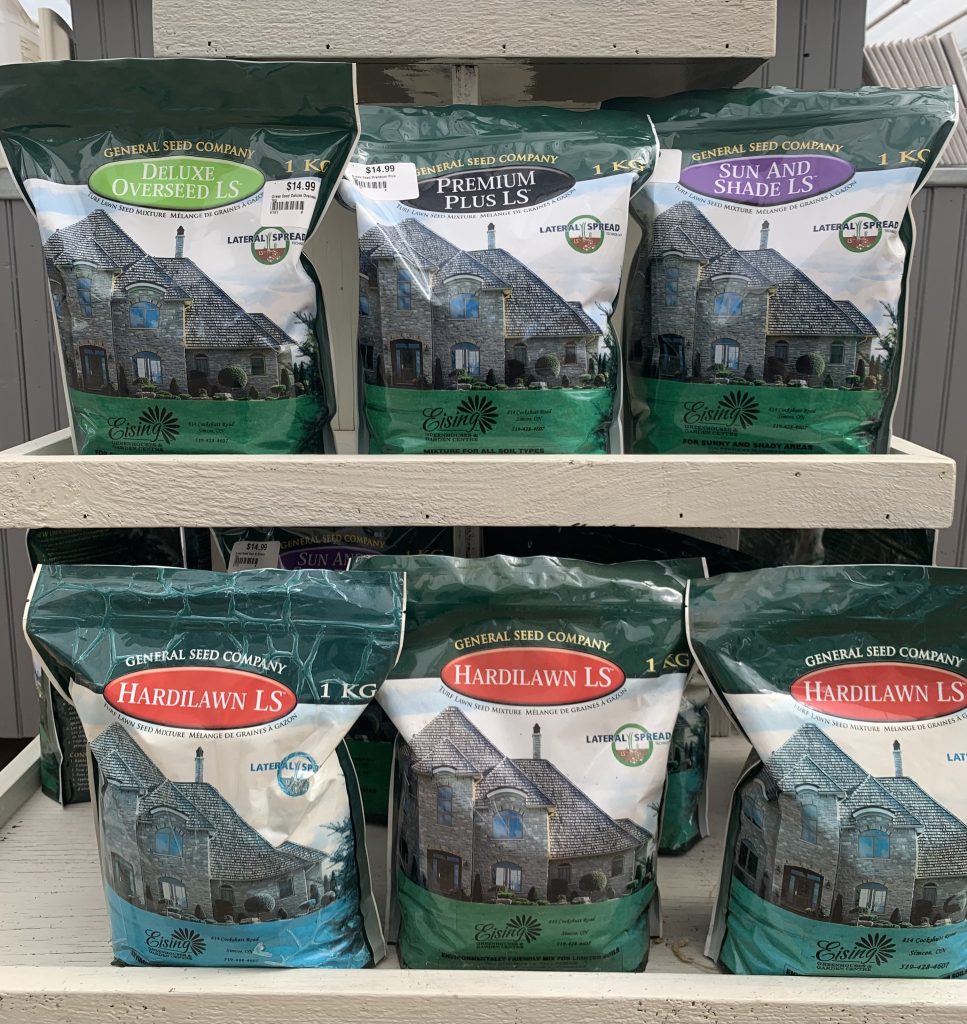
Carried by Eising Garden Centre
Time of Sowing
The best time to establish a lawn from seed is late summer and early fall (mid-August to mid-September) in southern Ontario. During this period, soil moisture and temperature conditions are optimal for germination and establishment. There is also less competition from germinating weeds in the fall. Make sure that seeding is done early in the fall so that the grass is well established before winter. The plants are then well rooted and more drought- and heat-tolerant the following summer.
Seed the shady areas in the fall for best results. Trees will have shed their leaves by then, so plenty of light is available for the new growth. The grass also gets off to an early start in the spring before the trees leaf out.
Spring seeding should be done as soon as the ground can be worked. Slow, irregular germination may result if the seed is sown when the soil is too cold and damp. (Soil Temp. around 15oC is ideal and there is also strong competition from germinating weeds during the spring. When practical, wait until weed seeds germinate, work the land to kill them and then sow the grass seed. ) If you choose to plant your new lawn in the spring, begin just as soon as the soil is dry enough to work, preferably mid-April to mid-May. This will give your new grass time to get well established before the hot, dry weather sets in.
Fall is often a better time to start your lawn, from mid-August to the end of September. Your seedbed is less likely to dry out at this time of year, and the grass should be well established before winter.
Watering
Your typical lawn needs about 2.5 cm (one inch) of water per week through either rain or irrigation. If irrigating, water in the morning as more will be absorbed as opposed to being lost to evaporation in the sun and the warmer temperatures later in the day.
Fertilization
Lawns require relatively large amounts of nitrogen-based fertilizers which should be applied several times during the growing season. Since lawn clippings are high in nutrients, especially nitrogen, much of your initial nitrogen fertilizer investment may be recycled back into your lawn! A fertilizer with a nitrogen, phosphorus, and potassium ratio of 4:1:2 (e.g., 20-5-10) is normally the best in most situations. It should be noted though, that a soil nutrient test can accurately determine the actual needs of your lawn including lime if the pH is too low.
(Lawn Liming Rate: 20-50 lbs/1000 ft2)
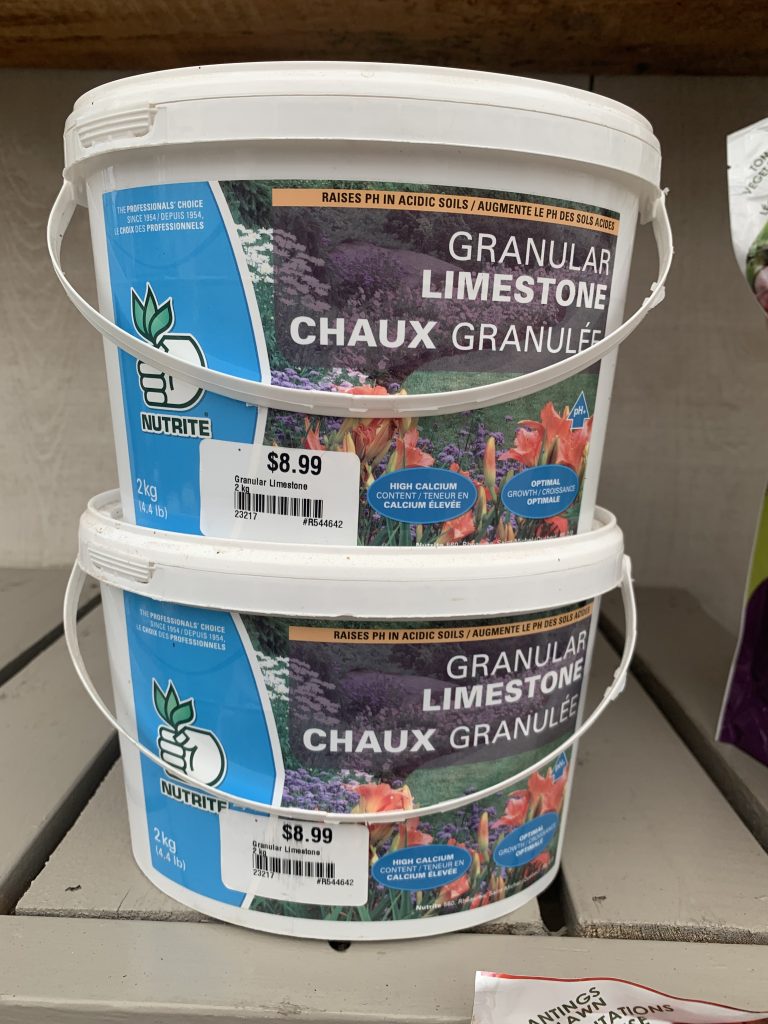
Carried by Eising Garden Centre
Corn Gluten
An application of this product early in the spring and then later on in the summer will inhibit the growth of weeds from germinating seeds especially the annual problem, crabgrass. Established weeds though have to be dug out by hand.
Dog Pee Spots
There is a misconception that the pH level of your dog’s pee is leaving those unsightly spots in your lawn, when it is in fact the high concentration of nitrogen and salts being introduced into the soil. To prevent this, should you see your four-legged friend raising its leg or popping a squat, give that spot a good watering to dilute the minerals. In addition to this, ensuring your dog is well hydrated will help to water down their urine. However, your lawn may already have several severe yellow and bald patches. You may opt to resod or reseed the area, but the soil is what’s affected. Before giving up altogether and adding a scree to the affected area, Eising Greenhouse and Garden Centre offers a fertilizer to help balance and remedy your dog pee spots!
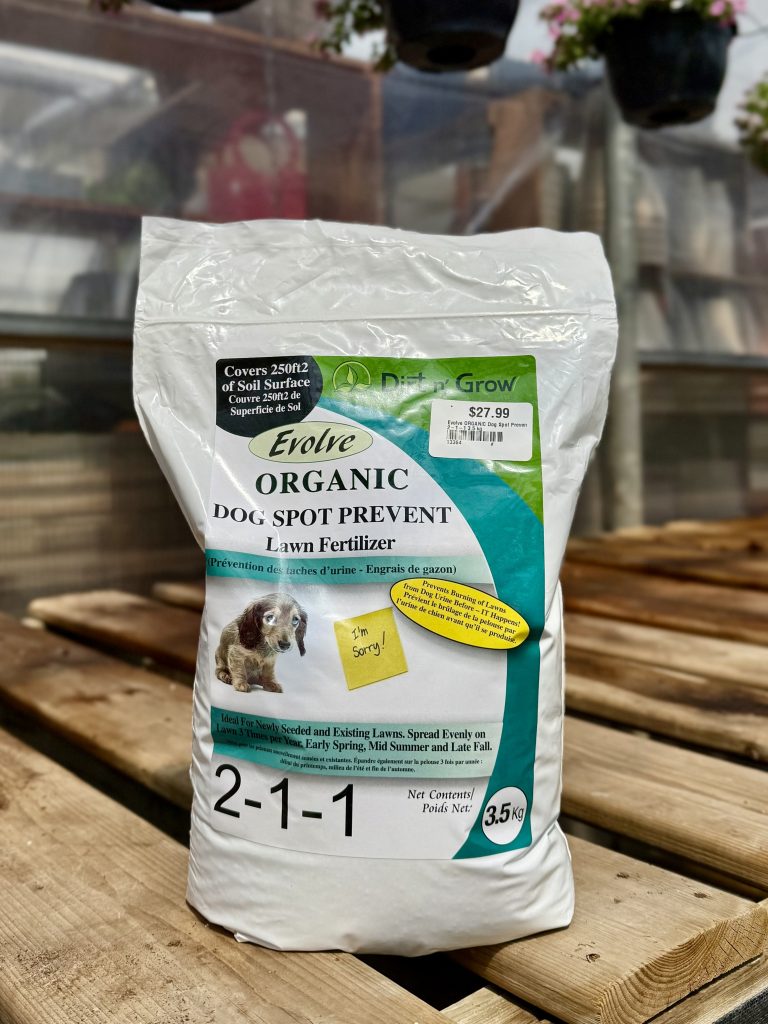
Carried by Eising Garden Centre
Thatch Control
Thatch is a layer of dead leaves, stems and roots that intermingle with the living plants above the soil surface. A one-inch layer of thatch is desirable as it has a cushioning effect against compaction and an insulating effect in cold weather. De-thatching a lawn is an extreme measure that may be considered if the drainage is poor. Lawn aeration may be required as well as the lawn and the soil below must establish a drainage pattern.
Nematodes - Aid Against Japanese Beetles and More!
If the Japanese Beetle has been destroying certain plants in your landscape plantings or their grubs have been feeding on the roots of your lawn, causing unsightly brown patches maybe it's time to use Mother Nature's secret weapon: Beneficial Nematodes.
Beneficial Nematodes are a natural way to control Japanese Beetle grubs and over some 200 species other pest insects in your lawn while having no detrimental effect on Ladybugs, Earthworms, and other helpful beneficial insects.
Nematodes are naturally occurring microscopic worms of the soil and are used to control soil pest insects in their larvae or grub stages while not posing any health or environmental risks to humans or animals. The beneficial Nematodes enter the JB larva via mouth, anus, or respiratory openings and begins to feed. This causes specific bacteria to emerge from the intestinal tract of the Nematode, spreading inside the insect and multiply very rapidly; the bacteria convert host tissue into products which can easily be taken up by the Nematodes, ceasing the soil dwelling pest insect within a few days. Beneficial Nematodes are effective against not only the larval or grub stage of Japanese Beetles, but the Northern Masked Chafer, European Chafer, Rose Chafer, Crane Fly larvae (Leather Jackets), Oriental Beetles, and June Beetles.
The nematode product you purchase should contain two genera: Steinernema and Heterorhabditis for better grub control.
Beneficial Nematodes are very easy to use. Mix with water and spray on the lawn with a water-can, irrigation system, or a hose-end sprayer. Most homeowners spray at a rate of 10 million nematodes per 600 square feet on grub damaged lawns. After an application, keep the soil moist during the first two weeks for the nematodes to get established.
In Ontario, there are two windows of opportunity to apply Beneficial Nematodes to be effective against the JB grub stage.
The first application should be in May as the soil warms up and then again at the end of August or the first two weeks of September as the JB are hatching into their first larval stage.
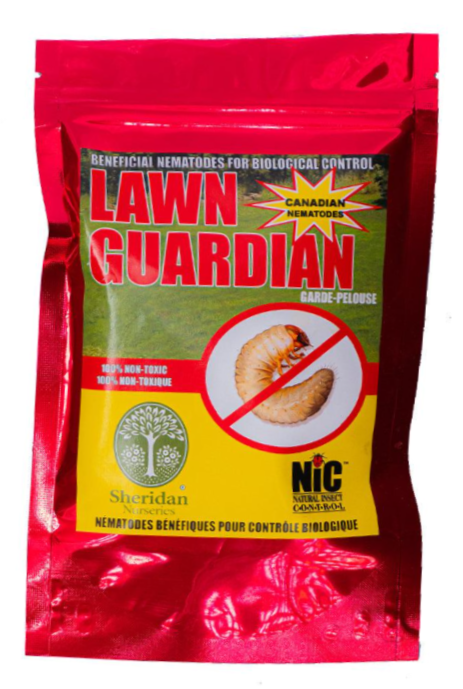
We hope these tips help to ensure your healthiest lawn! For more information – and lawncare products - visit Eising Greenhouse and Garden Centre! 🌾
By: Dave Zeldon and Ely Schweyer with tips from Mary K, Zach C, Sandy M, and Jeanine LT!
Now is the time to prep our outdoor landscapes for the coming cold weather and the ensuing spring! Perhaps your autumn is calmer than your spring, and this is the best time to clean up and begin new projects. The following are some simple but effective tips to get your yard winter-ready - so your spring will be a little more pleasant for you!
Planting
When warm weather still allows it, plant trees, shrubs, perennials, and bulbs to allow them to establish for budding and blooming next spring.
Pond Care
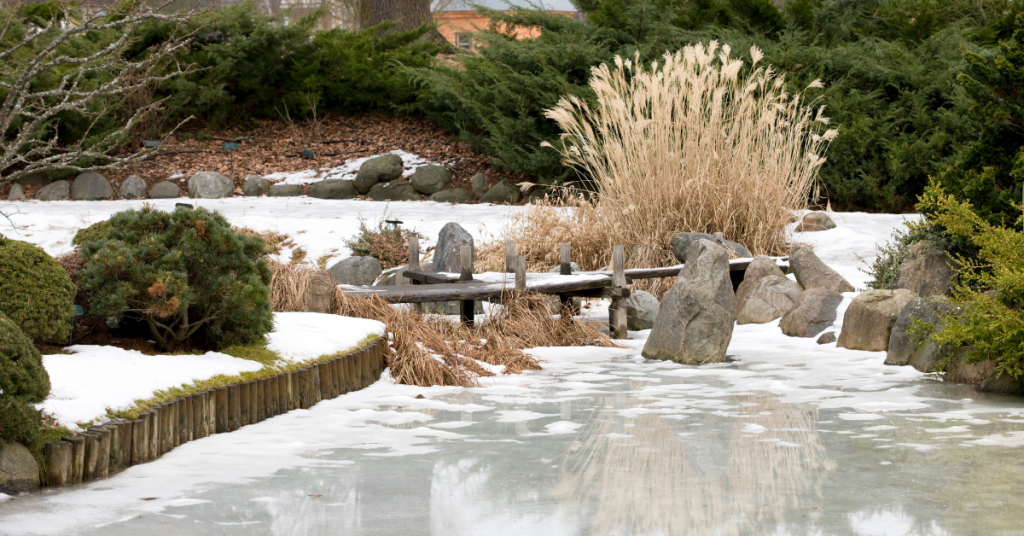
Mary, our perennials gal, suggests not removing any water from your pond but instead aerating it all winter. She skims out the leaves to maintain the balance of the nitrogen cycle in the water and suggests waiting to do a big pond clean out in the spring, as that’s when the water’s culture can bounce back easier.
Fertilizing
After top growth of your landscape plants ceases, reduce your annual fertilizer application by up to half of the requirement. Autumn is a major root growth period for woody and herbaceous perennials; roots will grow and absorb nutrients whenever soil temperatures remain above 5 °C but can be over fertilized quickly in these cooling temperatures.
Produce gardens could benefit at this time from a top layer of compost that will break down during the winter so it isn't too 'hot' for spring planting.
Leaf Litter
Here’s our pitch on the ‘leave it – don’t leave it’ debate: It DEPENDS.
Ideally, we should leave litter leaf on the ground for our pollinator friends and endangered species like fireflies to hide out in the winter. But, there are appropriate situations in which to remove leaf litter.
- When they’re covering your bulbs and tender perennials, remove SOME. Leaf litter acts as a ground insulant, which can amplify our temperamental zone 6b temperatures. This freezing and thawing can often confuse and kill early spring bulbs and tender perennials.
- Zach, our trees and shrubs guy, suggests that if a tree shedding leaves has been diagnosed with pests and fungi, remove the leaf matter to reduce the spread to other plants. Diseased matter should always be removed in a quarantined fashion and taken to a landfill or burned.
☝️Please note: Unless diseased, compost your leaves, they contain vital nutrients specific to the plants they came from!

Lawncare
With autumn mowing practices you have the opportunity for the addition of much needed organic matter for your lawn, which is also an excellent source of slow release nutrients. Keep mower blades sharp since leaves can be tougher than grass. Raise the mower height up and mow leaves when they are lightly wet (e.g., morning dew). This will keep the leaves from blowing all over and will prevent the mower from getting bogged down in wet leaves.
See more on general lawncare in Dave's Lawncare 101 post.
Clean Up
Now is a good time to wash your tools with soap and water to prevent diseases spreading from plant to plant.
☝️Mary's tip is to spray garden tools with PAM before use, so the dirt slides right off them!

Pruning Perennials
Mary, our perennials gal, suggests leaving things until frost to cut back. This way they're easier to compost. Make sure to leave seedheads (i.e., coneflowers and black-eyed Susans) for wildlife, and things like hydrangeas for winter interest.
☝️Make sure if things are cut back, to leave them sticking up enough you can still find them in the spring!
Dividing and Moving Perennials
Moving or dividing perennials in the autumn is a great way to reduce your work next spring. The cool, moist weather is an ideal time for perennial roots to become well established.
👍The rule of green thumb for moving perennials: If the plant blooms between early spring and late June, then early fall division/moving is ideal. If the plant blooms after late June, then early spring division is ideal (except for Peonies which should only moved or divided in the fall, Poppies in August, Irises in July & Lilies in the Fall).

Overwintering Trees
Zach and Sandy from trees and shrubs suggest a couple of things to help your favourite trees along this winter:
- To reduce winter injury in evergreens: Keep properly watered throughout the growing season and into the fall is another way to reduce winter injury. Decrease watering slightly in September to encourage hardening off, then water thoroughly in October until freeze-up.
- Cedars - Spray cedars with antidesiccant spray (available at Eising GC) or wrap in burlap (with stakes to create dead air space) so wind doesn't dry out and burn tips.
- Fruit trees - In late fall, spray fruit trees with sulfur-horticultural oil (available at Eising GC) for protection against fungi and pests overwintering in the bark.
- Ornamental trees - wrap the base of young trees to protect from chewing rodents.
- Pruning trees - trees that prefer winter pruning rather than spring pruning are maples, oaks, birches, and elms, as well as with fruiting trees such as apples and pears. This ensures blight and pests will not affect the tree's open wounds.
If you missed the frosty deadline for transplanting trees, Sandy suggests insulating unplanted potted trees to help them best survive the coming winter. Here are some methods:
- Double-pot your tree with an insulative barrier (i.e., burlap, straw, mulch, etc.) stuffed between the two pots and securely cover the top with tarp to deflect moisture.
- Bury your potted tree in the ground, level with the top of the pot (don’t forget to dig it back up!) and mulch the area.
- Huddle all of your unplanted trees and plants together when using the above methods.

Mulching
Mulching is one of the simplest and most beneficial practices you can do for your garden. Just by simply placing a protective layer of material over the bare soil will benefit the soil as it decomposes providing the much-needed organic matter which improves root growth, the infiltration of water and the nutrient-holding capacity of the soil while reducing soil erosion.
A good layer of mulch allows the soil to warm more slowly in the spring, so perennials aren't fooled into breaking dormancy too early, as you want the ground to stay cold until it really is spring!
☝️Make sure your mulch application won't stunt the growth of your plants come spring as discussed in our Transplant Troubleshooting blog post!
Japanese Beetle Prevention
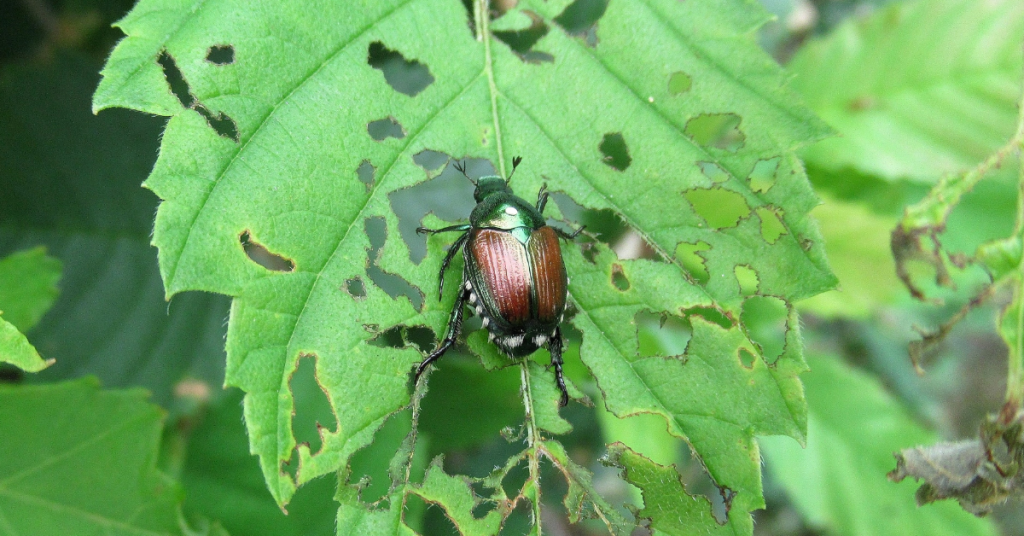
Nematodes are microscopic worms that should be applied to lawns that have been ravaged by grubs especially of the Japanese Beetle. Nematodes have a short shelf life and must be refrigerated until they are applied. Normally, they are sprayed onto the lawn from mid-May to mid-June and then again (for best practice) from mid-August to mid-September.
Pots
To prevent freezing and cracking, Mary suggests emptying and turning your pots upside down. You can disinfect at this time too.
Design Time!
Jeanine, from production, suggests writing down what worked best in your produce garden this year so you can implement it again in the spring.
With the trees and land being barren enough you can see its contour, now is a great time to plan ahead for spring landscaping! Don't forget Eising GC would love to offer help with your landscape designing!
We hope these tips help your landscape plants enjoy your winter abode as much as you do this season, for more information - and plants – visit Eising Greenhouse and Garden Centre! 🍁
By: Dave Zeldon and Ely Schweyer
Spring and early fall are generally the best times for planting trees. It has been found that newly planted trees thrive when exposed to moderate temperatures and rainfall, as they need time to root and acclimatize before the onset of intense heat and dryness of summer or the freezing temperatures of winter.
Now whilst planting different types of trees differ in detail, all trees eventually end up in a hole. But remember not just any old hole will do.
Let’s Get Digging!
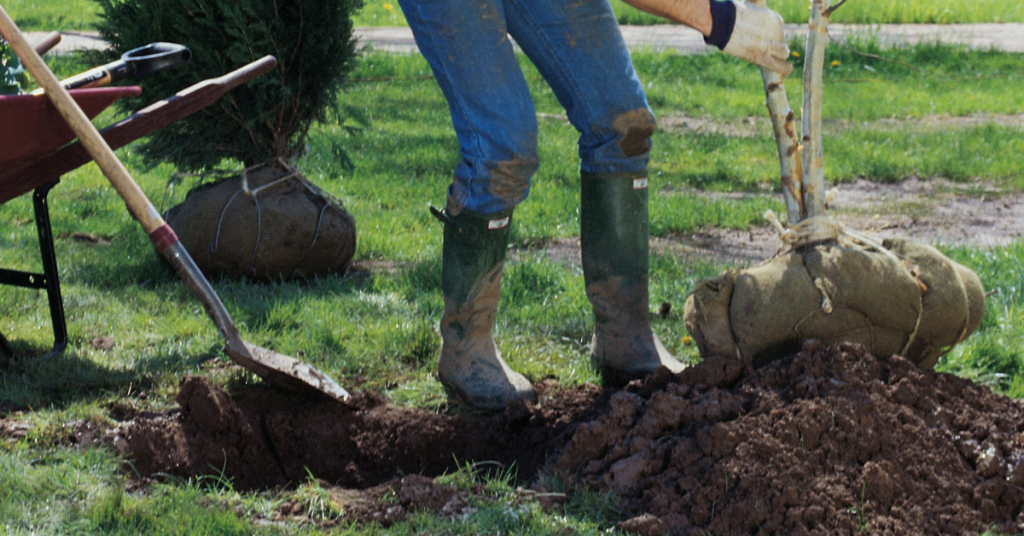
1. Some trees are buried too deeply, causing the tree roots to decline in health and condition. We have a whole other article dedicated to transplanting depth if you wish to read more, but here’s the just of it: Poor tree health results in reduced growth rate, atypical leaf size and colour, increased disease susceptibility, and reduced cold hardiness. Always make sure that the root collar flare is visible after planting; if settling occurs, reset the tree to the proper depth.
👉 Note: Many times, homeowners build a raised bed garden around an existing tree in the yard (thus burying the root collar flare) only to find within a year or two their favourite tree now is in decline. Don’t bury that root collar flare!
2. As a general rule, trees should be transplanted no deeper than the soil in which they were originally grown. The width of the hole should be at least three times the diameter of the root ball or container or the spread of the roots in the case of bareroot trees. This will provide the tree with enough worked earth for its root structure to establish itself.
3. When digging in poorly drained clay soil, it is important to avoid 'glazing'. Glazing occurs when the sides and bottom of a hole become smoothed forming a barrier, through which water has difficulty passing. To break up the glaze, use a fork to work the bottom and drag the points along the sides of the completed hole. Also, raising the centre bottom of the hole slightly higher than the surrounding area. This allows water to disperse, reducing the possibility of water pooling in the planting zone.
4. The backfill soil should be a mixture of composted manure and topsoil. The mixture should then be placed in the hole surrounding the tree just to the height of the ball or slightly lower to allow for some settling. Be careful not to compress the backfill soil as this may prevent water from reaching the roots and the roots from expanding beyond the ball.
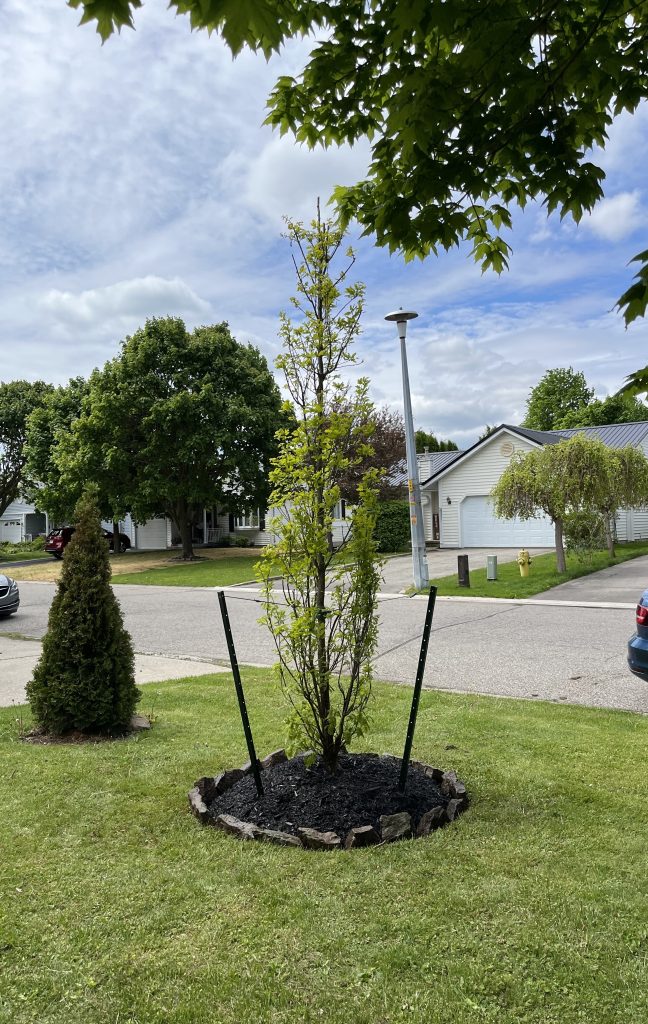

Jobs well done by the Eising landscaping team!
Standing On Its Own Roots
Young trees should be able to support their own weight when they are transplanted. If the tree is unable to do so, try thinning out the upper branches to reduce wind resistance. If that is not enough, you may have to stake a tree.
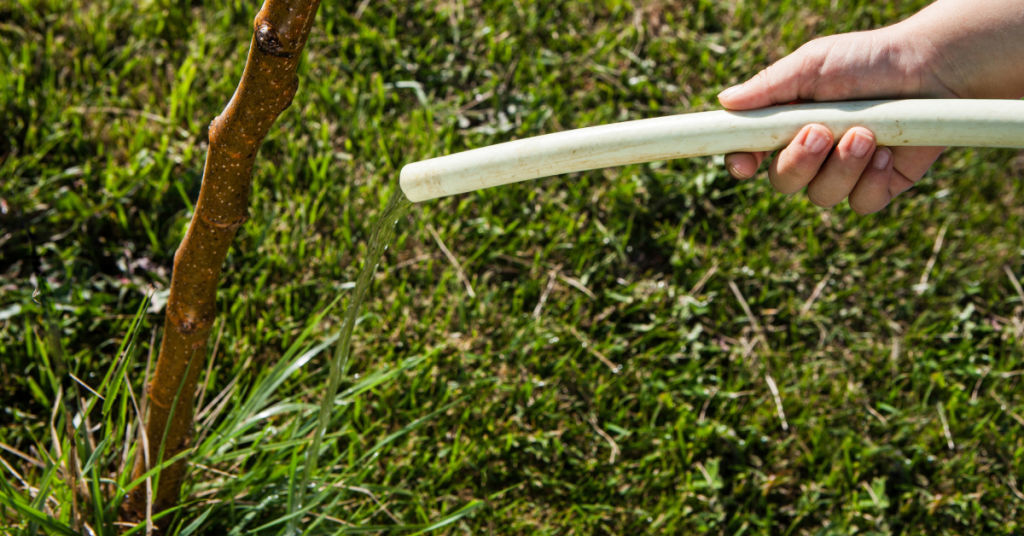
Watering Your New Tree
Newly planted trees should be watered at the time of planting. In addition, during the first growing season, they should be watered at least once a week in the absence of a good rain.
👉 Remember: Regular deep soakings are better than frequent light wettings.
We hope these tips can help you encourage the longevity of your new tree! For more information - and trees - visit our Trees & Shrubs section at Eising Greenhouse and Garden Centre. We hope to see you soon!