By Dave Zeldon and Ely Schweyer
In late June and early July we will be witnessing the annual invasion of the Japanese Beetle on many of our favourite landscape plantings including Hollyhocks, Dahlias, Hibiscus, Roses, Grapes, and Raspberries.
Adult beetles skeletonize foliage.
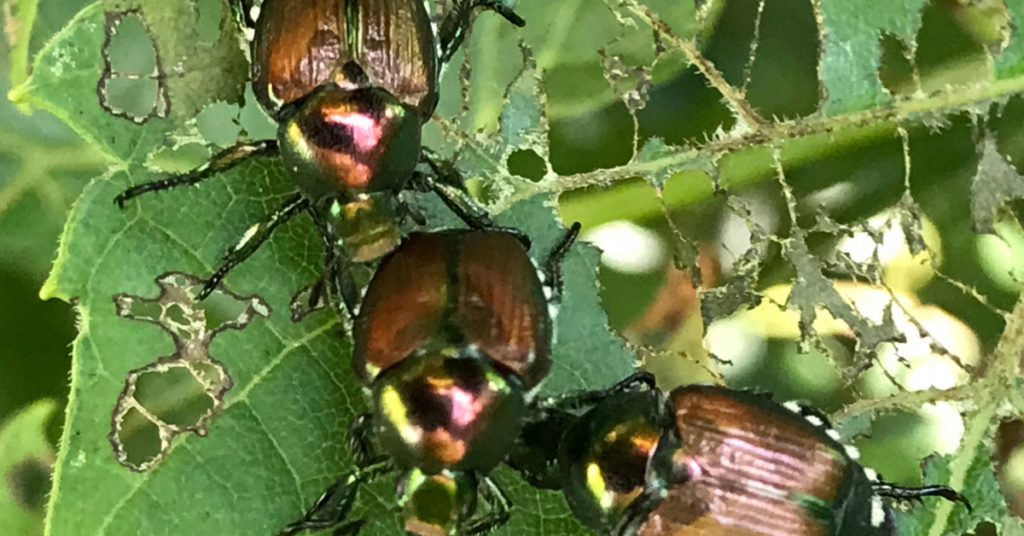
Many of us have tried the various means available to curb this yearly destruction like pheromone traps, Nematode lawn inoculation, hand picking, and concoctive sprays. But still, we get substantive damage.
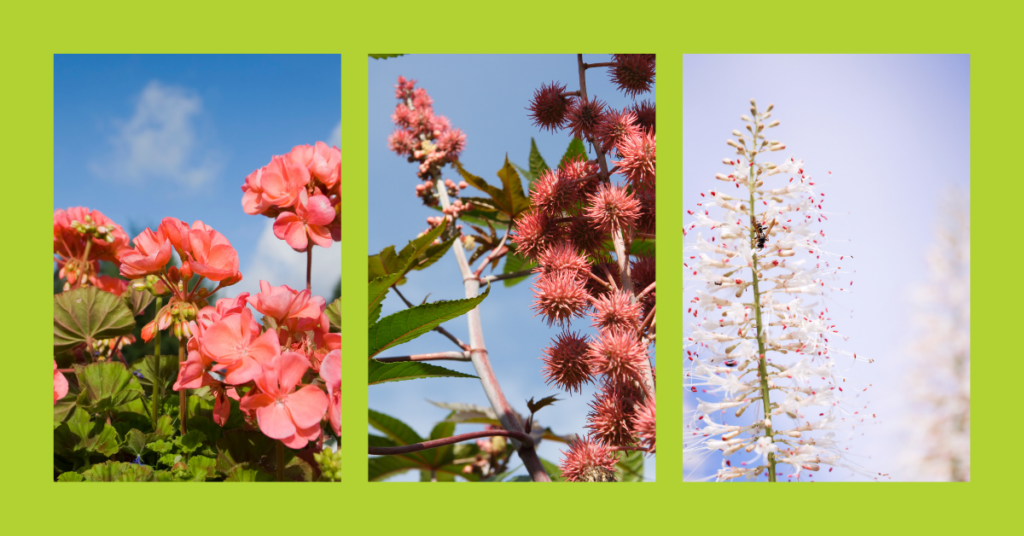
Interestingly enough, some plants such as Geranium, Castor Bean, and the flowers of Bottlebrush Buckeye, will cause paralysis and death of these beetles when eaten.
Maybe it’s Time We Look at Whole New Approach
Why not slowly invest in a landscape makeover? One with Japanese Beetle resistant plants!
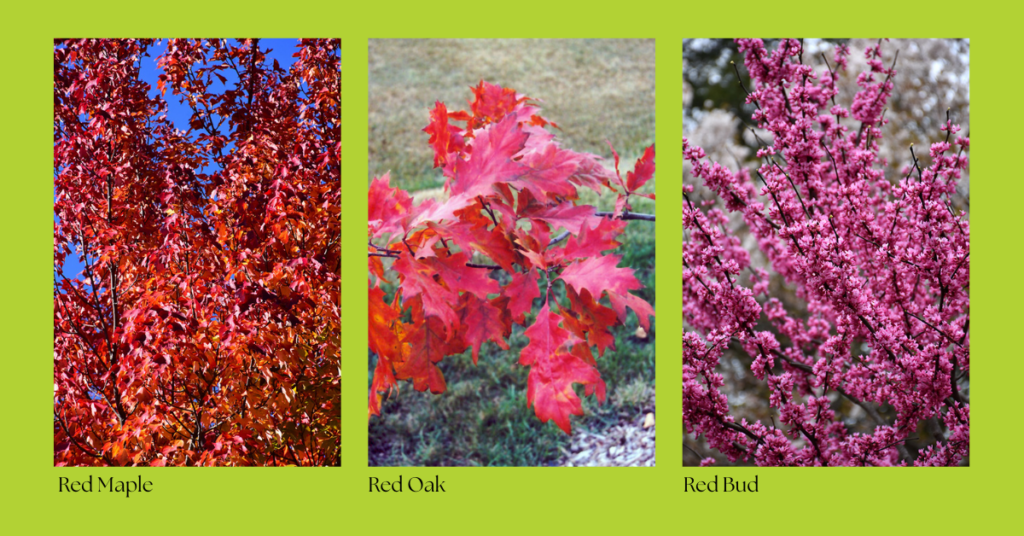
Trees such as Red Maple, Red Oak, Hickory, and Redbud could replace the susceptible Japanese Maple, Norway Maple, Pin Oak, Linden, and Mountain Ash.
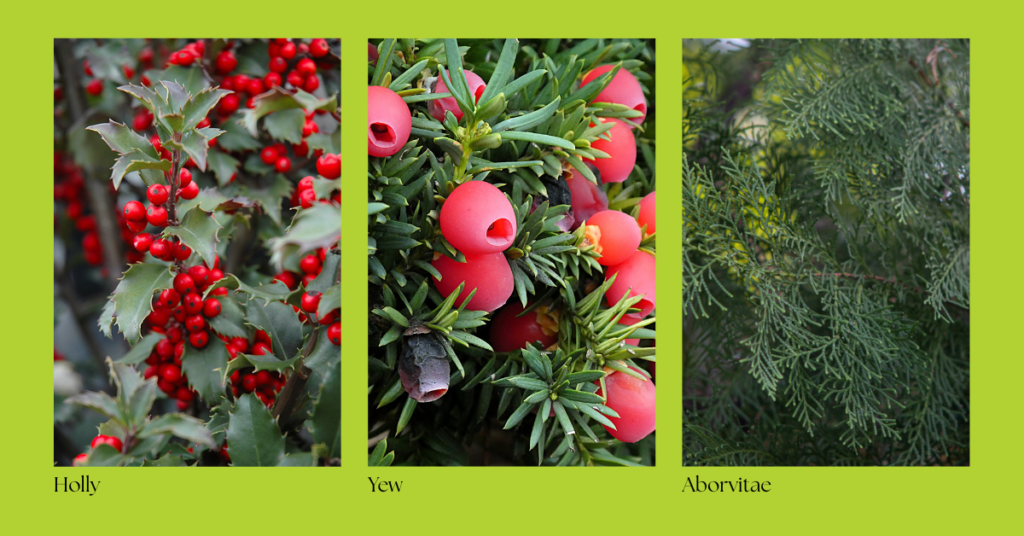
Why not consider growing more Evergreens such as Holly, Yew, Boxwood, and Aborvitae instead of the prone Virginia Creeper, Apple and Plum family of trees, and Birches.
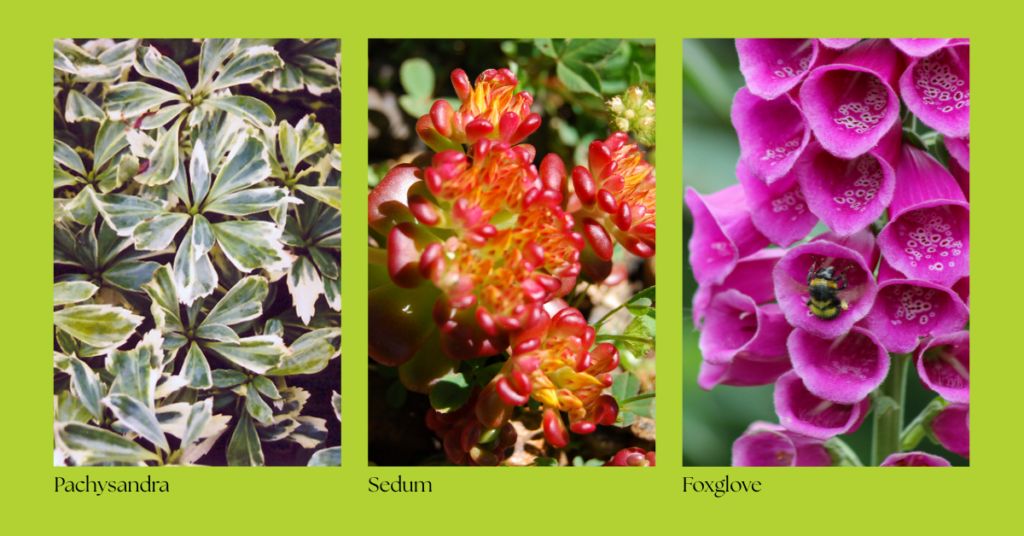
You also may want to contemplate planting perennials such as Coral-Bells, Hostas, Pachysandra, Sedum and Foxglove as opposed to the Japanese Beetle standard menu fare of Evening Primrose, Hydrangea, Clematis, Potentilla, and Zinnia.
Yes, we do have some preventative measures at our disposal to battle the Japanese Beetle (find how to use beneficial nematodes in our fall chore blog) but due to the nature of this pest, it will inevitably win the war. If we continue to grow the some 400+ preferred host plants in our landscape, providing an adequate food source for this invasive pest rather than replacing them with resistant species, surely this pest will make gardening a chore instead of the pleasure it should be.
We hope this article will aid in the prevention of Japanese Beetles in your garden space! For more information – and Japanese Beetle resistant plants – visit Eising Greenhouse and Garden Centre! 🪲
How To Keep Your Orchid Alive
By Ava Green
Orchids have become very popular gifts, and a great hobby for indoor plant enthusiasts who discover the wide range of colours and shapes available. Orchids are also loved for their long-lasting and exotic blooms.
While some may choose to only enjoy these tropical plants as long as they’re blooming, orchid-lovers look forward to nurturing the plant and encouraging it to flower regularly. It may be a little daunting at first, but once orchids grace you with their stunningly beautiful blossoms, you will find that a little bit of care is very worthwhile!

It’s estimated that there are 25,000 different species of orchids and over 100,000 hybrids! The ones you’ll find most readily in Ontario stores are Phalaenopsis or moth orchid, because it’s fairly easy to grow. Phalaenopsis are the best choice for beginners.

Other orchids you may find easily are Cattleyas (Corsage Orchids), Cymbidiums (Boat Orchids) and Dendrobium orchids.
While all of these may be orchids, they don’t necessarily require the same care, so it’s a good idea to check the tag for the type you have and its specific care requirements. The following is a general guide to light, water, fertilizer, and growing medium for the most commonly found orchids, but it does not apply to all breeds.
Light and Air
For most orchids, light, and lots of it, is the general rule. Place your plants within 3 feet of a window (not to the side) in the sun. South, east, and west-facing windows are all fine for maximizing the light your plant receives.
Orchids also enjoy a breeze or circulating air in your house. They do not like temperature extremes, though 15 to 20 degrees Celsius is safe. Keep in mind that the more warmth and air movement there is, the more often you will need to water your orchid.
Water
A general rule is to use water that is not hard and has not been softened with salt. Salt will kill an orchid. Rainwater, reverse osmosis, or distilled water are good choices. Chlorinated water is not an issue for orchids - high sodium levels are.
The biggest issue many people have is either over-watering or underwatering their orchids. Here is the method we recommend:
Every 5-7 days, place the pot in a container or the sink, then fill it with enough water to cover the top of the pot. Be careful not to let water collect in the crook at the base of the leaves, as standing water will rot the leaves and the plant. Once the plant’s growing medium is thoroughly soaked, remove it from the water and allow the pot to fully drain in the sink before placing it back in its saucer.
We prefer using a container of water rather than the sink, so the remaining water can be used to water other plants.
Here’s the best watering advice we can give you: look at the overall health of both the plant AND its root system. Full, plump leaves and vibrant, green roots indicate that your plant is getting enough moisture. Puckered leaves and a silver sheen on the roots indicate insufficient water. Mushy, brown leaves and roots are signs of rot caused by too much water.

You may hear of another watering method that involves using ice cubes, but it’s controversial and not widely recommended. To quote the American Orchid Society, “Ice is for cocktails, not orchids. Never use ice on tropical plants to water them.”
“Soil” and Nutrients
Most orchids naturally grow high up in trees, where their roots cling to bark and absorb moisture from the air. At home, we try to mimic those conditions, which is why orchids are typically planted in chunky mediums like bark, coconut husk, charcoal, or perlite rather than traditional soil. While many of the roots stay inside the pot, it’s completely normal for some to grow up and over the edge.

These “escapee” roots might look a little wild, but don’t worry, there’s nothing wrong with your orchid. In fact, those aerial roots are a sign that the plant is healthy and doing exactly what orchids do in nature.
It’s worth noting that not all orchids grow the same way. Many, like Dendrobiums, are epiphytic (growing on trees) or lithophytic (growing on rocks), though some orchid varieties are terrestrial and grow in the ground. The good news is that the growing medium your orchid comes in is chosen specifically for that variety, so you can trust it’s in the right environment.
The bark that your orchid is planted in will slowly break down and become mushy. It’s a very good idea to repot your plant every two years.
It’s generally recommended to feed most orchids, and bloom time dictates which fertilizer to use and how often to feed. Begin by using a water-soluble 20-20-20 fertilizer, mixing it at ¼ the amount recommended for other houseplants. Apply this solution every 2 weeks in the summer and every 3 weeks in the winter.

“The orchid, with its many forms, is a reminder that life is full of surprises.” — Leonardo da Vinci.

Lastly, here’s an orchid fun fact: While we have been talking about tropical orchids in this article, there are also orchids that grow right here in Ontario! That’s right, there are over 50 species in this province, including the much-loved Pink Lady’s Slipper (Cypripedium acaule).
Resources for more detailed and specific information:
Toronto Master Gardeners - https://www.torontomastergardeners.ca/gardeningguides/growing-orchids-a-toronto-master-gardeners-guide/
Canadian Orchid Congress - https://canadianorchidcongress.ca/basics/growing-orchids/
American Orchid Society - https://www.aos.org/orchid-care/indoor-orchid-care
Ontario Wildflowers - https://ontariowildflowers.com/main/group.php?id=18
By: Dave Zeldon and Ely Schweyer
If you’ve ever wondered how the warm weather succulent came to be a seasonally regarded indoor plant, or how to keep one going, read on!
History and Cultural Significance
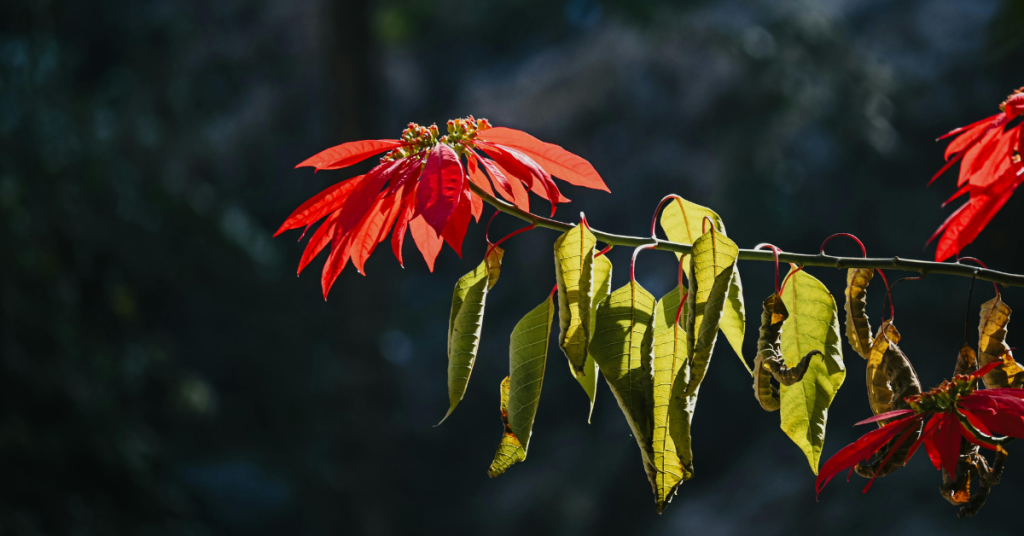
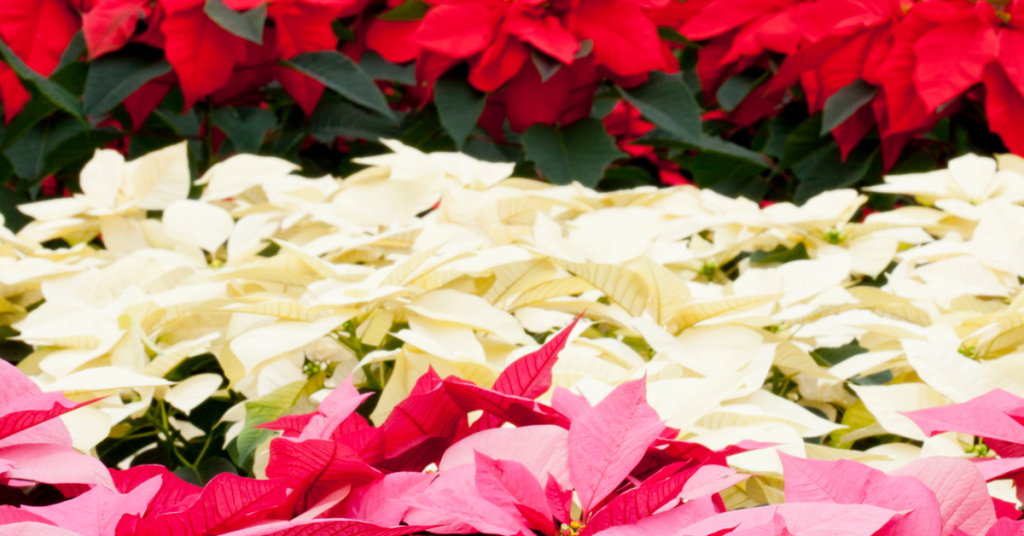
The Poinsettia was named after Joel Roberts Poinsett, the first U.S. Minister to Mexico. He introduced this native Mexican the United States in 1828. In the Mexican Christmas tradition, the star-shaped leaf pattern is said to symbolize the Star of Bethlehem, and the red colour represents the blood sacrifice through the crucifixion of Jesus.
Since the species is native to Mexico and found in the wild in deciduous tropical forest at moderate elevations, we then have a challenge to keep this plant alive and in a healthy form in our colder, northern climate.
It's Just A Rumour!
There is a common misconception that the poinsettia is highly toxic. This is not true.
Yes, it may be mildly irritating to the skin or the stomach if it is eaten, but otherwise, there have been no documented cases of poisoning. The origin of this myth could be found in the fact that most plants of the spurge genus (Euphorbia) are indeed toxic. Fortunately, this family member is a good one!
Here are Some Helpful Hints to Get the Most Longevity Out of Your Plant:
☝️Unsleeve the plant as soon as possible as the leaves may become droopy if left too long in the wrapper. Fortunately, the plant should recover in a few days if this does occur.
☝️If you want to try to keep your plant until next Christmas then fertilize after the blooming season with an all-purpose fertilizer, repot it later in the early Summer and then introduce it to 12 hours of uninterrupted darkness come September.
For more information on Poinsettia care (i.e., temperature, lighting, and watering), visit Ava's blog Caring for Poinsettias.
If you’re looking for more information – or perhaps a Poinsettia – visit Eising Greenhouse and Garden Centre! Happy Holidays! ✨
Dealing with water restrictions or choosing to conserve water? You’re not alone. Many gardeners in Norfolk County are facing the challenge of keeping gardens thriving with less water. The good news? A lush, colourful garden is still within reach—thanks to drought-tolerant perennials.
When we think of drought-tolerant plants, cacti might be the first thing that comes to mind. But there’s a surprising variety of beautiful, hardy perennials that can handle our region’s dry spells—no desert landscape required.
While these plants do need regular watering when first planted, once established, they’re low-maintenance and well-suited to Southern Ontario’s climate, including periods of limited rainfall.
Full Sun Ground Cover
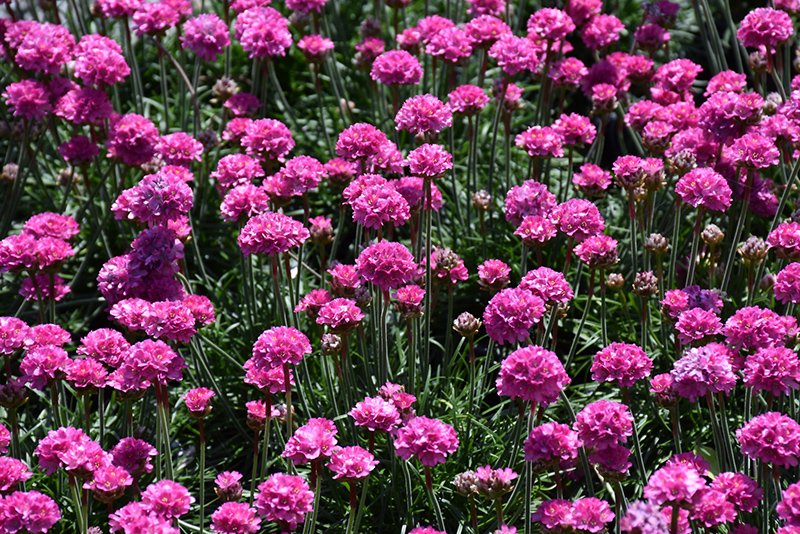
Botanical Name: Armeria maritima 'Dusseldorf Pride'
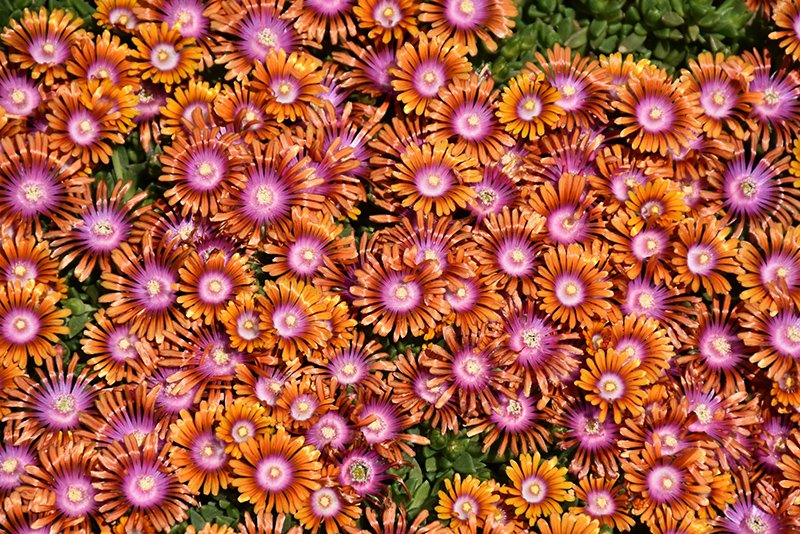
Botanical Name: Delosperma 'Fire Spinner'
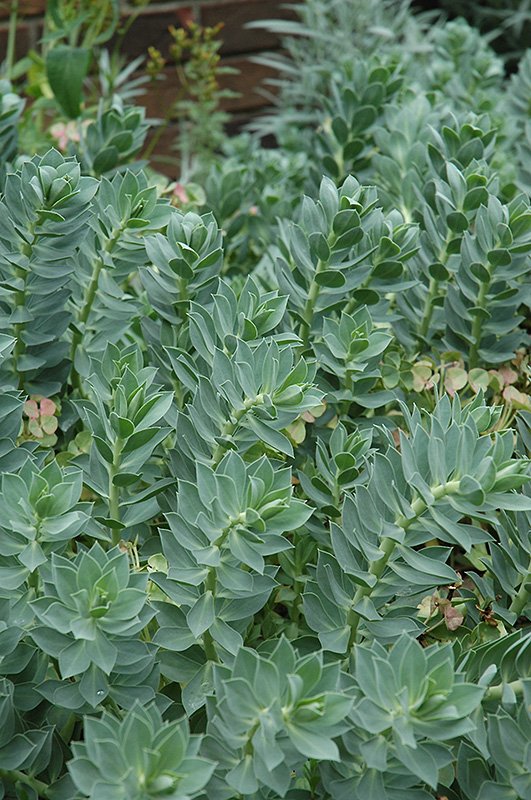
Botanical Name: Euphorbia myrsinites
- Candytuft (Iberis sempervirens)
- Catmint (Nepeta x faassenii)
- Hardy ice plant (Delosperma nubigenum)
- Hens and chicks (Sempervivum tectorum)
- Moss phlox, creeping phlox (Phlox subulata)
- Pincushion flower (Scabiosa japonica var. alpina) (S. ‘Butterfly Blue’)
- Pinks (Dianthus alpinus)
- Rock cress, wall cress (Arabis species)
- Rock rose, sun rose (Helianthemum hybrids)
- Spurge (Euphorbia myrsinites) (E. polychroma)
- Stonecrop (Sedum acre) - dwarf varieties
- Thrift, sea pink (Armeria maritima)
- Thyme (Thymus species)
Full Sun, Medium to Tall Plants
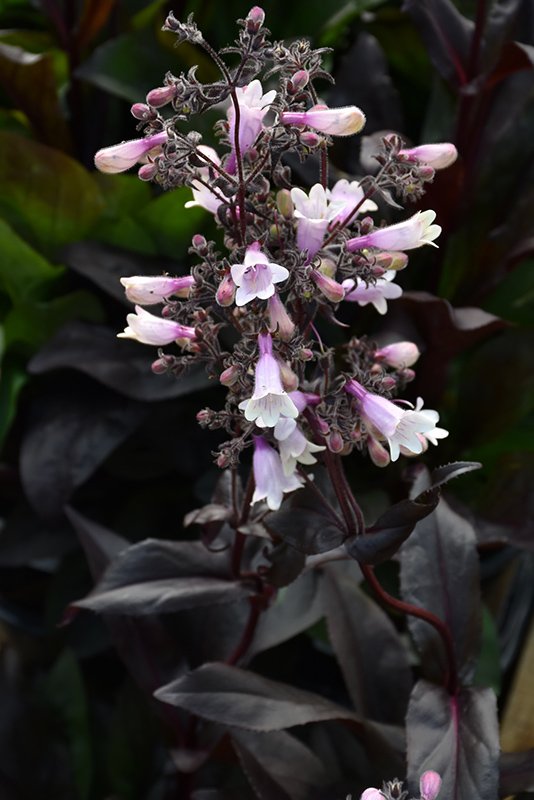
Botanical Name: Penstemon 'Dark Towers'
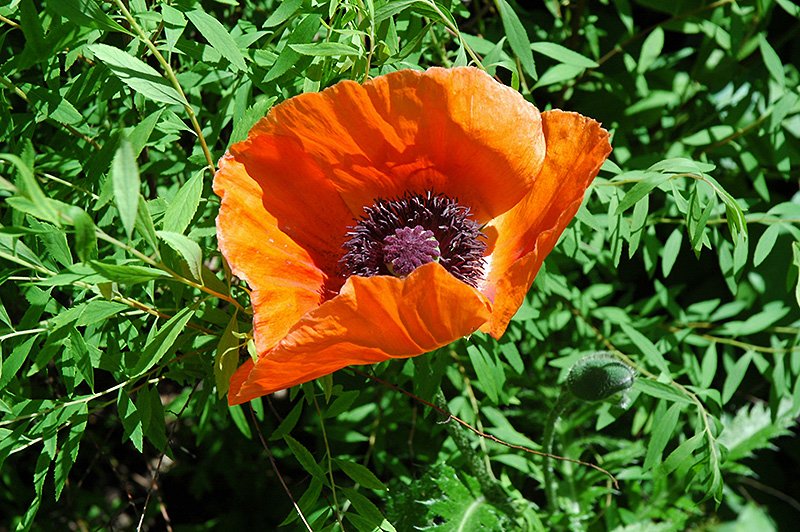
Botanical Name: Papaver orientale
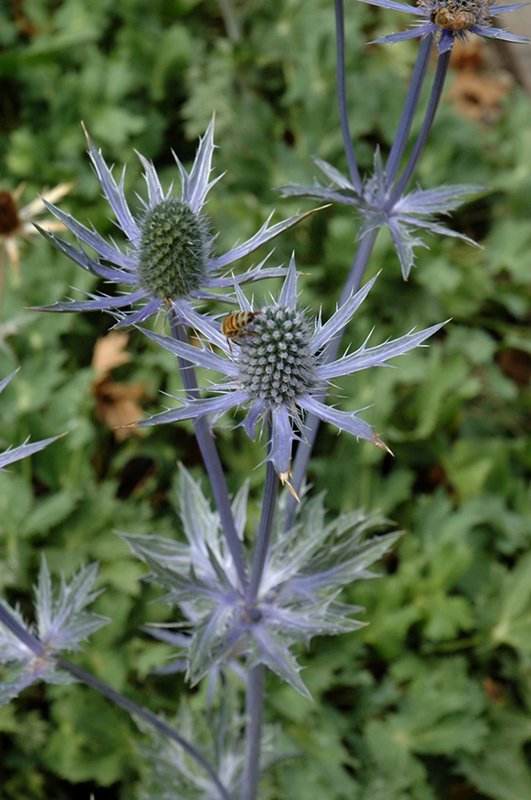
Botanical Name: Eryngium 'Big Blue'
- Beard-tongue (Penstemon digitalis) – Native
- Bergenia (Bergenia crassifolia)
- Black-eyed Susan (Rudbeckia hirta) – Native
- Blanket flower (Gaillardia x grandiflora)
- Butterflyweed (Asclepias tuberosa) – Native
- False indigo, wild indigo (Baptisia australis)
- Hairy penstemon (Penstemon hirsutus) – Native
- Lanceleaf coreopsis (Coreopsis lanceolata) – Native
- Lavender (Lavandula angustifolia)
- Orange coneflower (Rudbeckia fulgida ‘Goldsturm’)
- Perennial cornflower (Centaurea montana)
- Poppy (Papaver species)
- Purple coneflower (Echinacea purpurea)
- Prickly pear cactus (Opuntia compressa) – Native
- Russian sage (Perovskia atriplicifolia)
- Salvia (Salvia nemerosa hybrids)
- Sea Holly (Eryngium species)
- Silver sage, wormwood (Artemisia ludoviciana)
- Threadleaf coreopsis (Coreopsis verticillata) – Native
- Yarrow (Achillea millefolium)
Full Sun Grasses
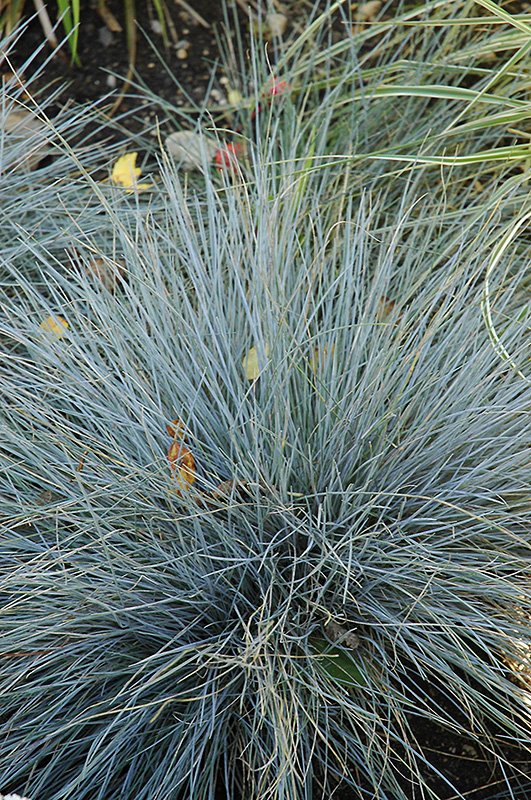
Botanical Name: Festuca glauca
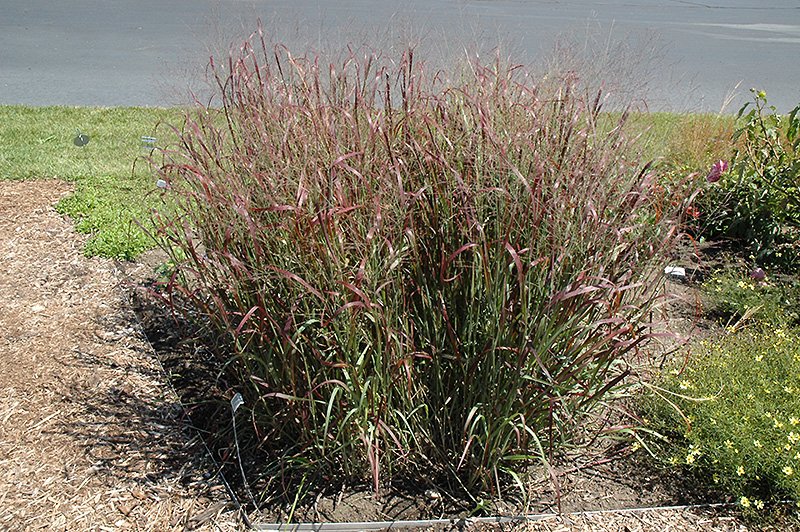
Botanical Name: Panicum virgatum 'Prairie Fire'
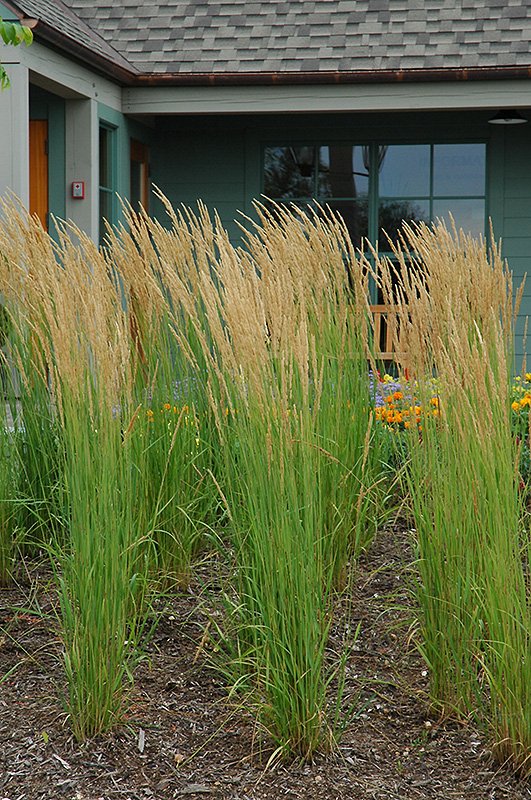
Botanical Name: Calamagrostis x acutiflora 'Karl Foerster'
- Big bluestem (Andropogon gerardii) – Native
- Blue fescue (Festuca glauca)
- Blue oat grass (Helictotrichon sempervirens)
- Feather reed grass (Calamagrostis x acutiflora ‘Karl Foerster’)
- Little blue stem (Schizachyrium scoparium) – Native
- Switch grass (Panicum virgatum) – Native
Groundcover for Shade
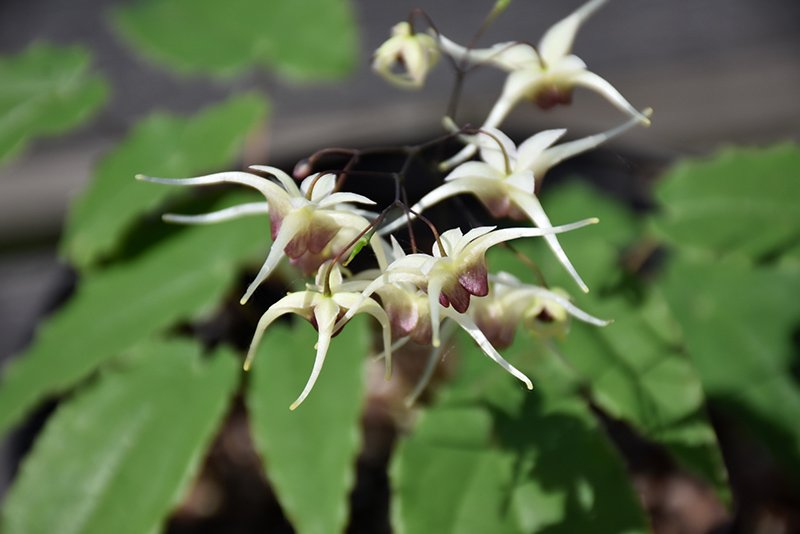
Botanical Name: Epimedium 'Domino'
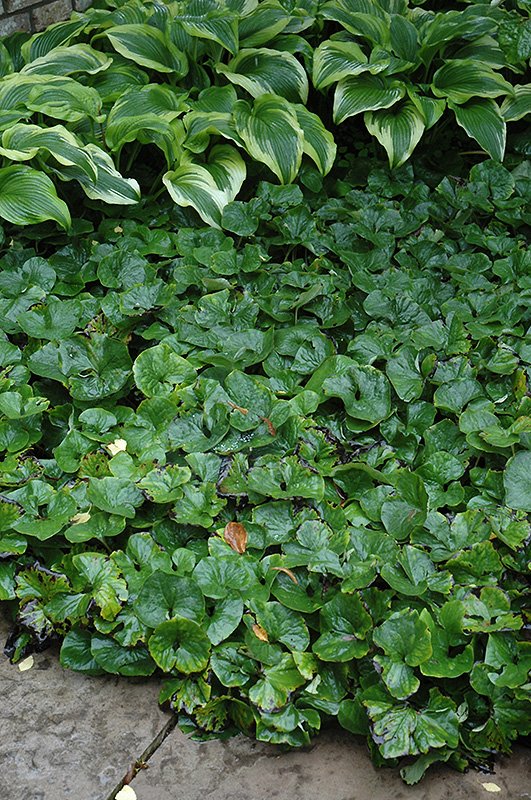
Botanical Name: Asarum canadense
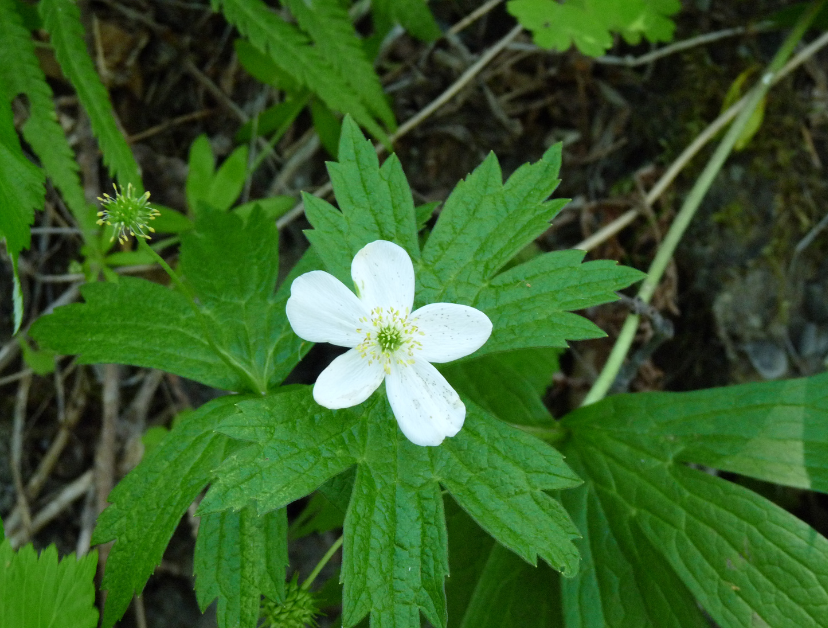
Botanical Name: Anemone canadensis
- Barrenwort (Epimedium hybrids)
- Bigroot geranium (Geranium macrorrhizum)
- Canada anemone (Anemone canadensis) – Native
- Creeping phlox (Phlox stolonifera)
- Sweet Woodruff (Galium odoratum)
- Wild ginger (Asarum canadense) – Native
- Woodland phlox (Phlox divaricata) – Native
Medium to Tall Plants for Shade
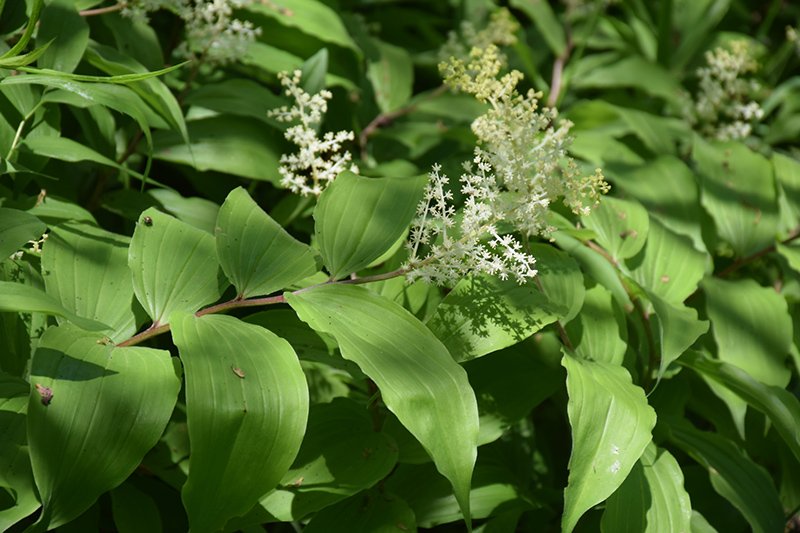
Botanical Name: Maianthemum racemosum
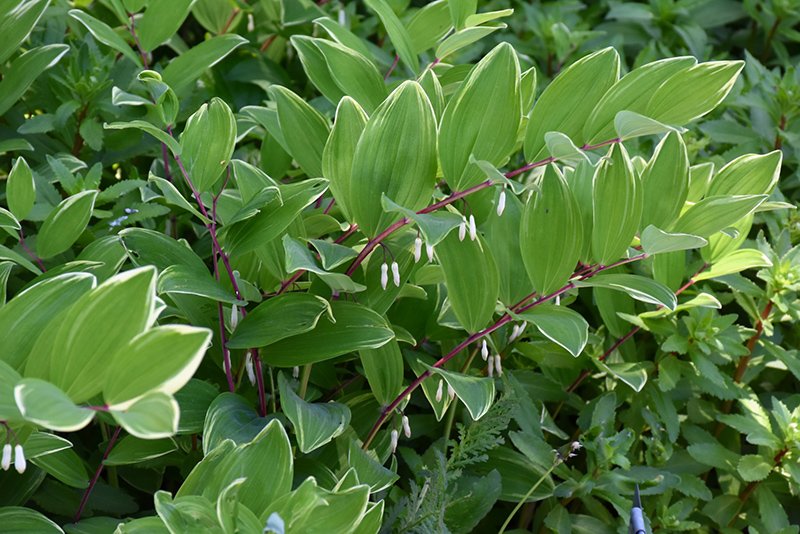
Botanical Name: Polygonatum odoratum 'Variegatum'
- False Solomon’s seal (Maianthemum racemosum) – Native
- Solomon’s seal (Polygonatum biflorum) – Native
Ferns for Dry Shade
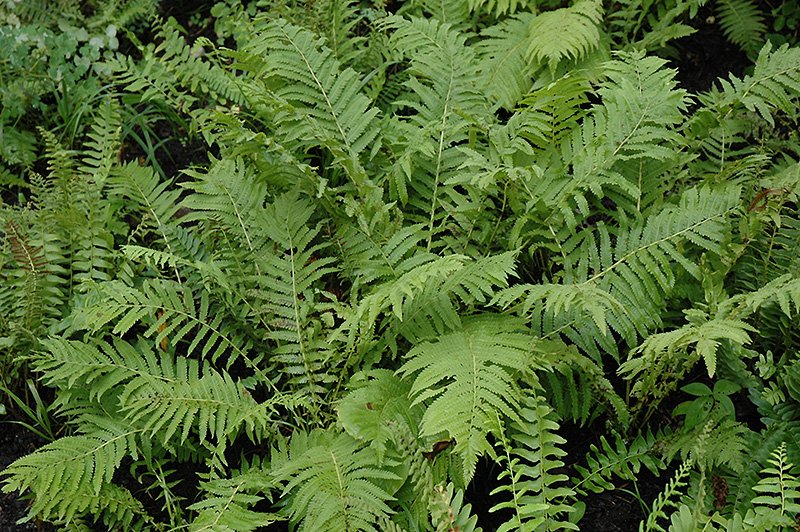
Botanical Name: Polystichum acrostichoides
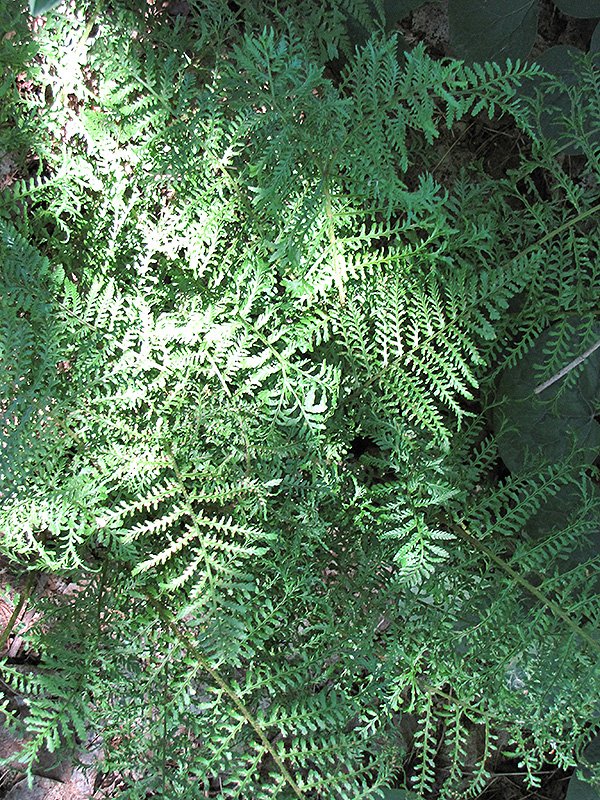
Botanical Name: Dryopteris filix-mas
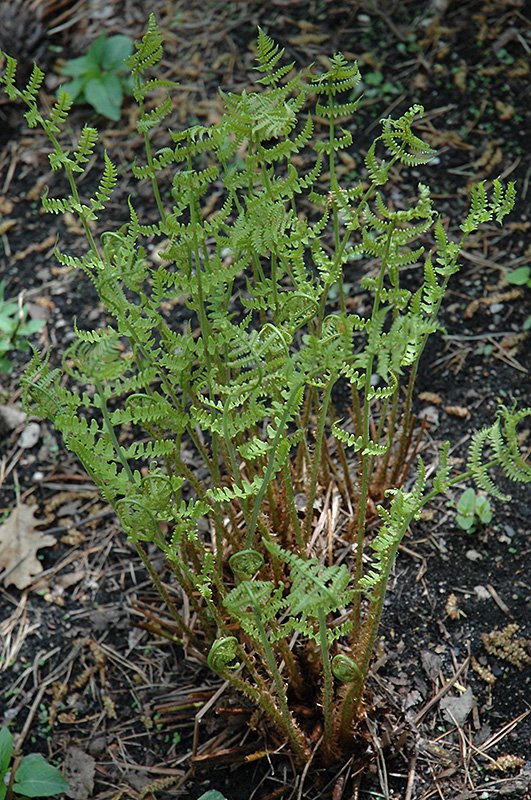
Botanical Name: Dryopteris marginalis
- Christmas fern (Polystichum acrostichoides) – Native
- Hay-scented fern (Dennstaedtia punctilobula) – Native
- Marginal wood fern (Dryopteris marginalis) – Native
- Male fern (Dryopteris filix-mas) – Native
- Rock fern (Polypodium virginianum) – Native
A Little TLC
It doesn’t take much to keep drought-tolerant plants thriving—just a little attention and some seasonal TLC. While they’re tough, even these hardy perennials appreciate an occasional deep watering during extended dry spells, especially in their first year.
For sun-loving perennials, skip the heavy fertilizers. Instead, an annual layer of compost is all they need to stay healthy and strong.
Shade-loving drought-tolerant plants, on the other hand, benefit from a layer of mulch. This helps retain moisture and reduces evaporation, especially in dry shade, which is one of the most challenging conditions for any plant to thrive in.
And don’t forget to deadhead regularly! Removing spent blooms encourages your plants to keep producing flowers instead of going to seed, meaning more colour, for longer.
With a few simple care tips, your drought-tolerant garden can remain beautiful and resilient throughout the entire season.
Other resources:
- Landscape Ontario: Eight Beautiful Drought Tolerant Plants
- Toronto Master Gardeners: Drought Tolerant Plants
- Guelph.ca: Drought Tolerant Native Plants
Pruning is an essential part of gardening. Essential, but a little intimidating at first because it’s a broad subject. That said, there are some basic rules that apply to most trees and shrubs that will get you started.
There are a number of reasons to prune; the most obvious is for safety, to keep a branch from doing damage or harm by falling or rubbing against something like a building or another tree. Other important reasons include:
- Removing dead, diseased or damaged wood
- Shaping to make a plant bushier, reduce the size and bulk, or slow down growth
- Thinning to increase light penetration and airflow and reduce the possibility of disease
- Rejuvenation to encourage growth, blooming and fruit
Correctly pruning trees and shrubs can help with everything listed above and, most importantly, help maintain the health of your plants. Proper techniques and timing ensure the best results.
The Right Tools
You may need fewer tools to prune than you think!
Secateurs or hand pruners work well on smaller branches.
Loppers or lopping shears have longer handles for more leverage and are ideal for medium-sized branches.
A pruning saw works best for larger branches.
Electric or manual hedge shears are best for cutting a tidy wall of foliage like hedges and shaped evergreens.
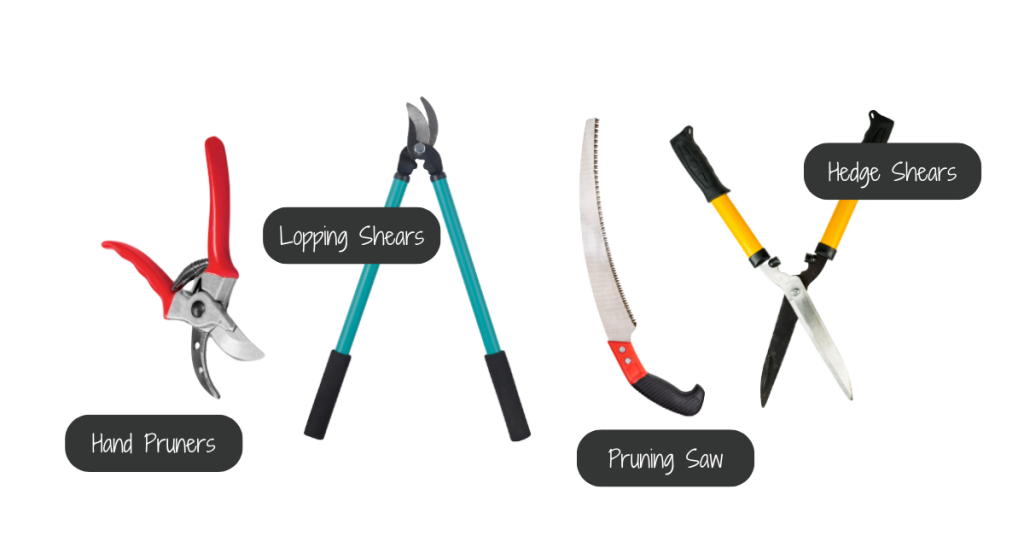
The key with garden tools is to make sure they’re sharp and sterile. This can prevent the spread of disease. Clean tool blades with rubbing alcohol after trimming each branch.
When to Prune
Pruning timing requires some research as it depends on the species of the plant and the result you’re aiming to achieve. For example, some trees may be best pruned in the winter while they’re dormant and buds have not yet appeared. To shape a tree, it’s easier to prune before the leaves have formed so that all of the branches can clearly be seen. Pruning early in the gardening season will invigorate the tree. Conversely, pruning after the tree has formed leaves in June will tend to slow down growth.
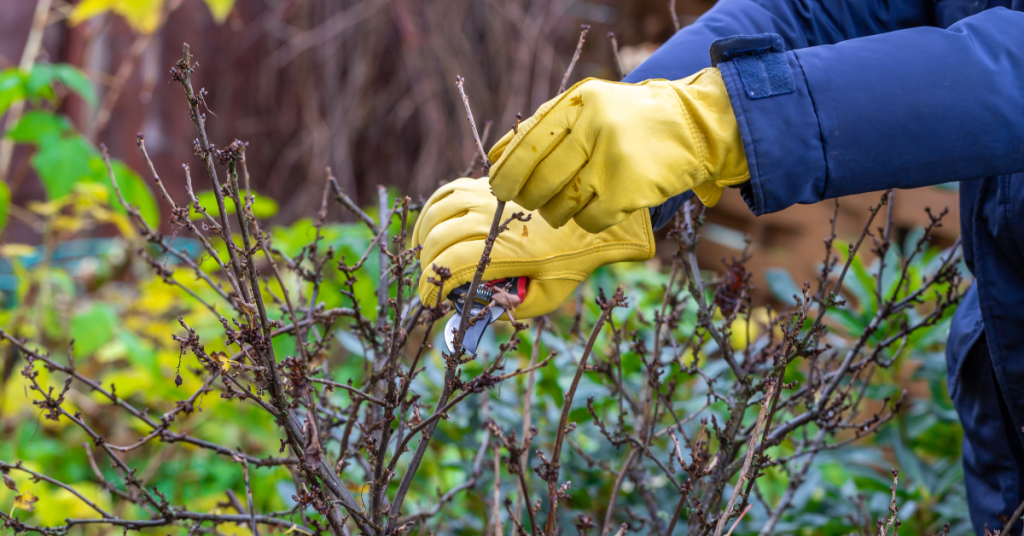
When pruning flowering trees and bushes, there are other timing considerations. Some ornamentals bloom on branches that grew the previous year. Pruning those branches too early will result in fewer or no blooms. For these plants, it’s best to wait until after they have bloomed.
If you’re unsure about pruning timing for your tree or shrub, this is a fairly comprehensive list to use as a guide. We have also linked other resources below this article.
In general, late fall or early winter is not the time to prune any plant as it encourages new growth, which may be damaged by colder weather.
Pruning Techniques
While some trees may require specific care (pines, for example), here are the basic techniques for pruning trees and shrubs. It’s a good idea to know these basics before you head out to begin cutting branches.
Examine the branch, buds and shoots before cutting. Cutting above a bud facing away from the trunk of the tree will have the branch continue to grow in that direction.

Cut on a 45° angle just above a bud whenever possible. Keep your cut above the lowest bud (the bud closest to the trunk), or the branch will die back.
Before removing a large branch, cut ⅔ off the end of the length to reduce the weight. Once the bulk of the branch has been removed, then cut the rest of the branch away from the trunk by cutting close to, but not into, the “collar” of the branch where it meets the trunk of the tree.

Now You’re Ready to Begin Cutting!
Now that you know the techniques for pruning, where do you begin? Here’s a logical set of steps to follow:
1 - Remove any dead or diseased wood
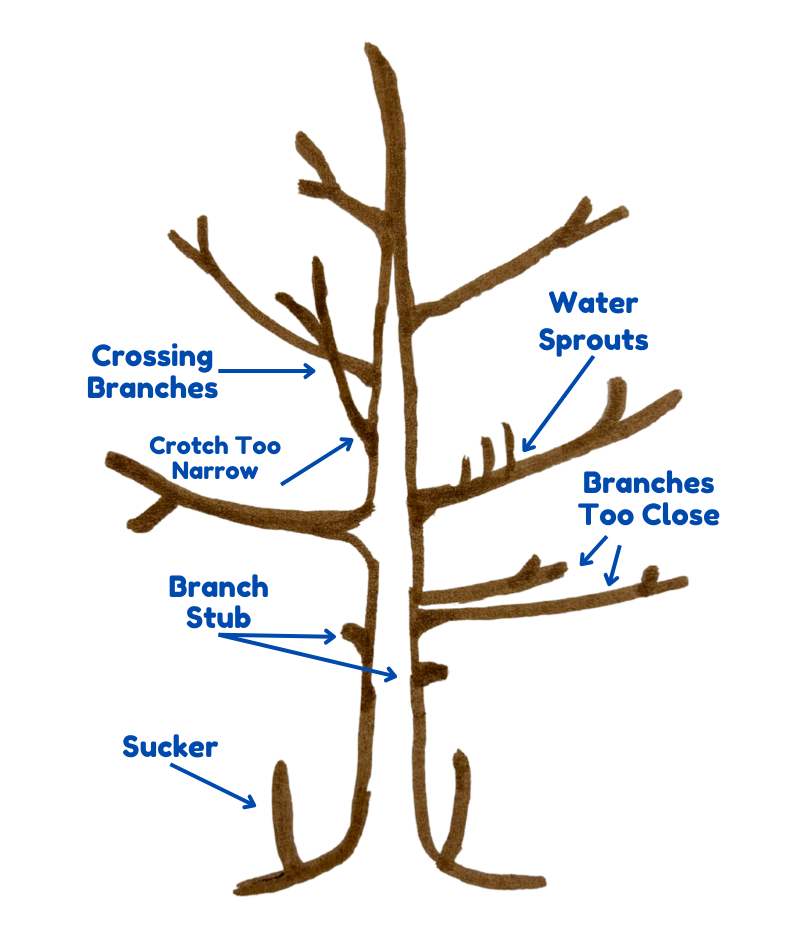
2 - Remove any branches that are crossing and rubbing together. For a shrub that’s too crowded, remove the thickest branches down to the ground first
3 - Remove water sprouts
4 - Stand back and observe the shape of the tree. If anything is not pleasing about the look (lopsided growth or branches growing too close together or at a sharp angle to the trunk, for example), begin removing or trimming back one unsightly branch at a time. Observing the shape between each cut
5 - Remove any suckers or stubs
Follow The ⅓ Rule!
Once you start, pruning can be fun, but be careful not to get too carried away. Trim up to ⅓ off of an established plant (not a newly transplanted tree or shrub) in one growing season - maximum. Cutting off too much can stress the plant and impact its overall health.
Lastly, know that you can always hire a certified arborist if the task is too much or the tree is simply too large!
Other Resources:
- City of Moose Jaw: Pruning Trees
- Landscape Ontario: Pruning Shrubs and Evergreens
- Ontario Government: Pruning Fruit Trees
- University of Georgia: Pruning Ornamental Plants