
Perennial Climbers to Start Growing Now
By Ava Green
Great garden design plays with height, and vines are among nature’s most elegant solutions. They transform a bare wall, a plain fence or an open pergola into something that feels alive and intentional. And because these are perennial climbers, they come back every year, a little fuller and more beautiful than the season before.
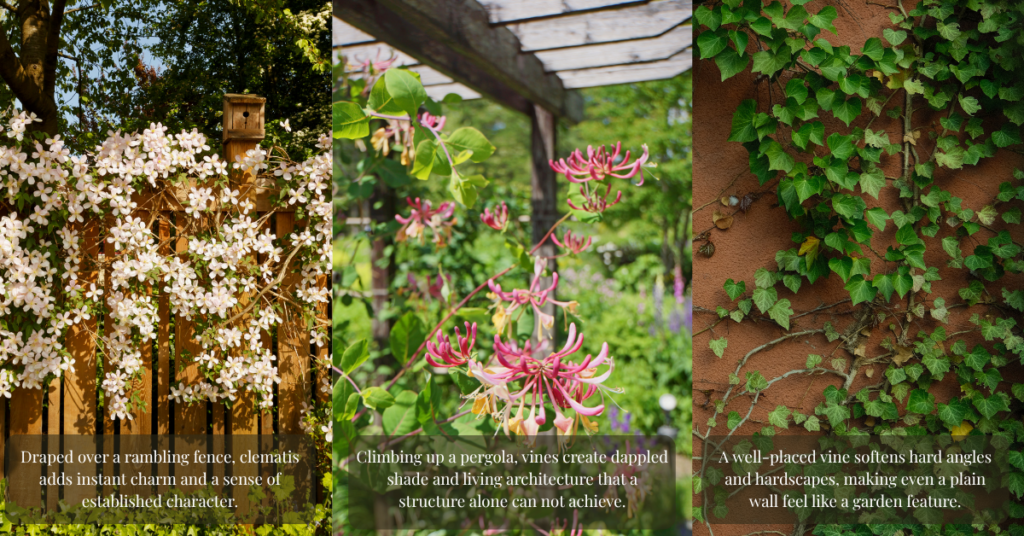
Start growing one of these beauties now, and you’ll be enjoying them for years to come!
Clematis
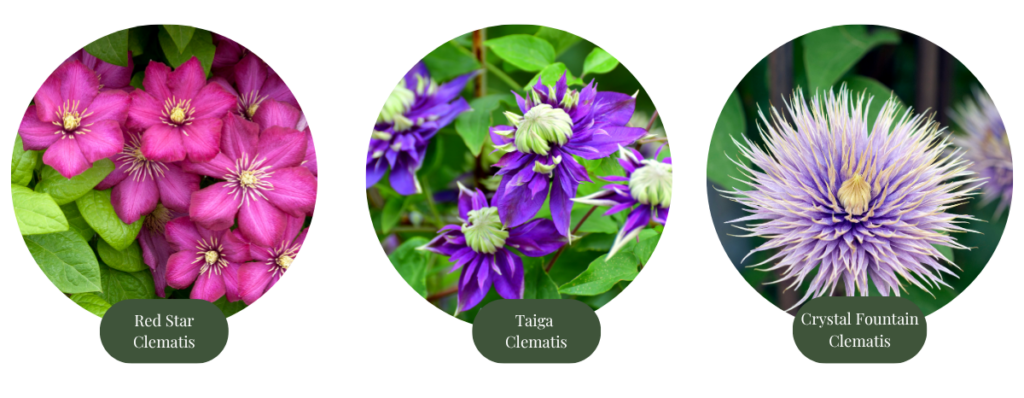
Clematis has earned its place as one of the most loved climbers in the garden, and once you discover the extraordinary range of flower shapes, sizes and colours available, you will understand why.
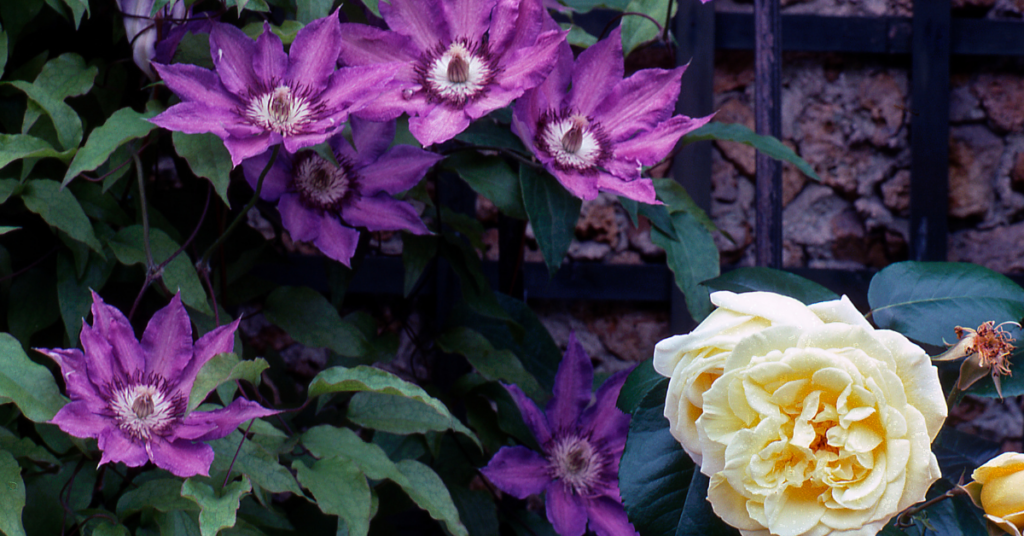
For a look that feels straight out of an English cottage garden, pair a Clematis with a climbing rose. The two intertwine beautifully, flowering together in a spectacular combination.
Honeysuckle
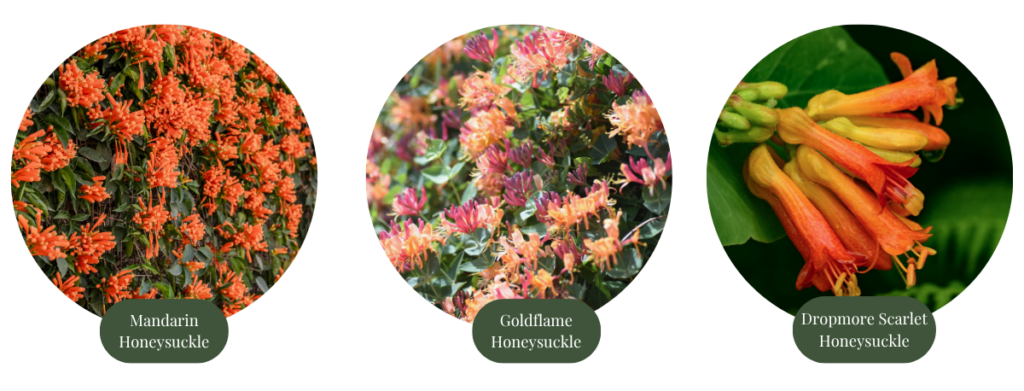
The sweet, heady scent of Honeysuckle wafting through the air on a warm summer evening is a good reason to include this climber in your garden. But its tubular or trumpet-shaped blossoms are also irresistible to hummingbirds, bees and butterflies, making it valuable to your local ecosystem too. Few vines reward you quite so generously for so little effort.
Climbing Hydrangea
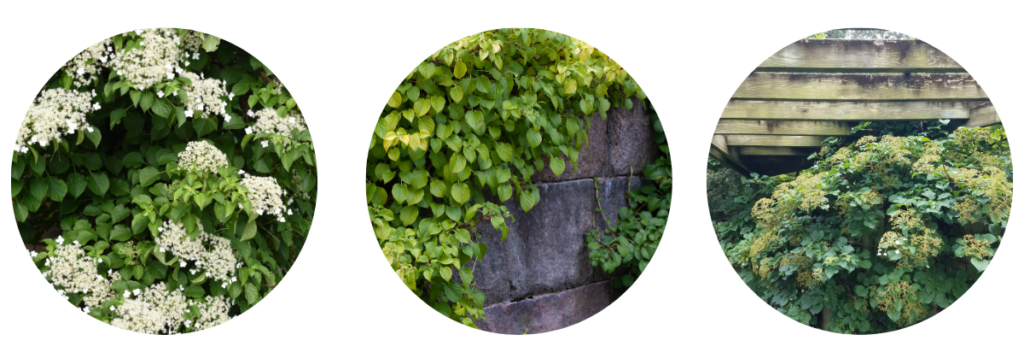
It may be slow to start, but once it’s established, Climbing Hydrangea grows with remarkable vigour, covering walls, fences and structures in lush, deep green foliage. No trellis is needed; it produces its own aerial rootlets that allow it to cling independently to almost any hard surface. In summer, the entire plant is blanketed in elegant white lacecap flowers! It tolerates shade better than most climbers, making it an exceptional choice for a north-facing wall or a shady spot in the garden.
Porcelain Vine
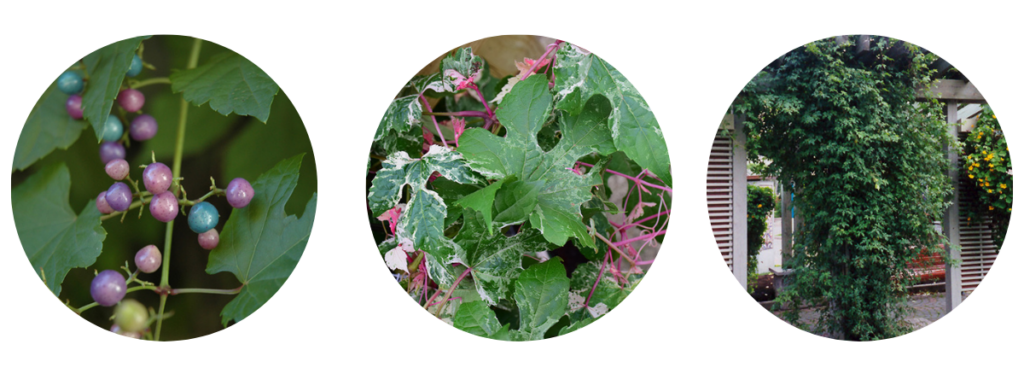
This fast-growing climber is a treasure for its extraordinary ornamental berries. Clusters of small, jewel-like fruits that ripen through a stunning progression of colours, from pale pink and lilac to a rich purple and a remarkable, almost iridescent turquoise blue, all appearing at the same time in fall. Train it up a fence, trellis or structure to let it climb, or allow it to trail gracefully down a slope or over a retaining wall for beautiful low-maintenance ground coverage. Please note: the berries are strictly ornamental, and not for eating.
Graceful, Useful and Very Worthwhile
Vines provide something that few other plants can; they add height, softness, privacy, and beauty all at once. They can disguise an unsightly fence, cool a sun-baked wall with natural shade, frame a garden entrance, or simply bring a sense of lushness to a space that feels too bare or flat.
Find Your Perfect Vine at Eising Garden Centre
Not sure which vine is right for your space? Bring us your questions and, if you have them, a photo of your wall, fence, or structure. Our team will help you find the perfect climber for your light conditions, your soil, and your vision. We’d love to help you get growing your perfect vine!
Expert Picks You Can Plant Right Now
By Ava Green
Looking for a flowering shrub that delivers season after season? We asked our experts at Eising Garden Centre to share their top picks, the ones that customers and staff love most, and they delivered. Whether you’re looking for spring blooms, fall colour, wildlife and pollinator value, or a shrub to suit your space, there’s something on this list for every garden.
Fuji Cherry ‘Little Twist’, Prunus incisa ‘CarltonLT’
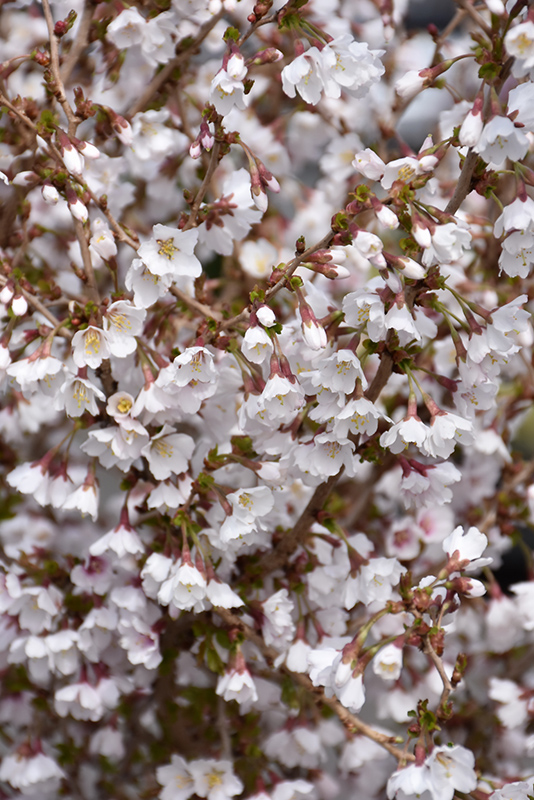
As an accent in a small garden, or planted in a grouping in a larger garden, this multi-stemmed shrub is a gem!
In early spring, crimson buds emerge before the leaves appear. Little Twist then produces clusters of lightly scented white, bell-shaped flowers with soft pink centres that grow along its stems, a stunning early-season display. It is a deciduous shrub, and leaves begin as green before shifting to coppery-bronze, then deepen to a rich burgundy in fall. Smooth, dark red bark adds interest in the winter once the leaves are gone.
This slow-growing, multi-stemmed shrub makes a striking feature in your garden.
Best for: Small gardens, accent planting, four-season interest. | Sun: Full sun | Mature size: 6 ft. tall × 6 ft. wide
Downy Serviceberry, Amelanchier canadensis
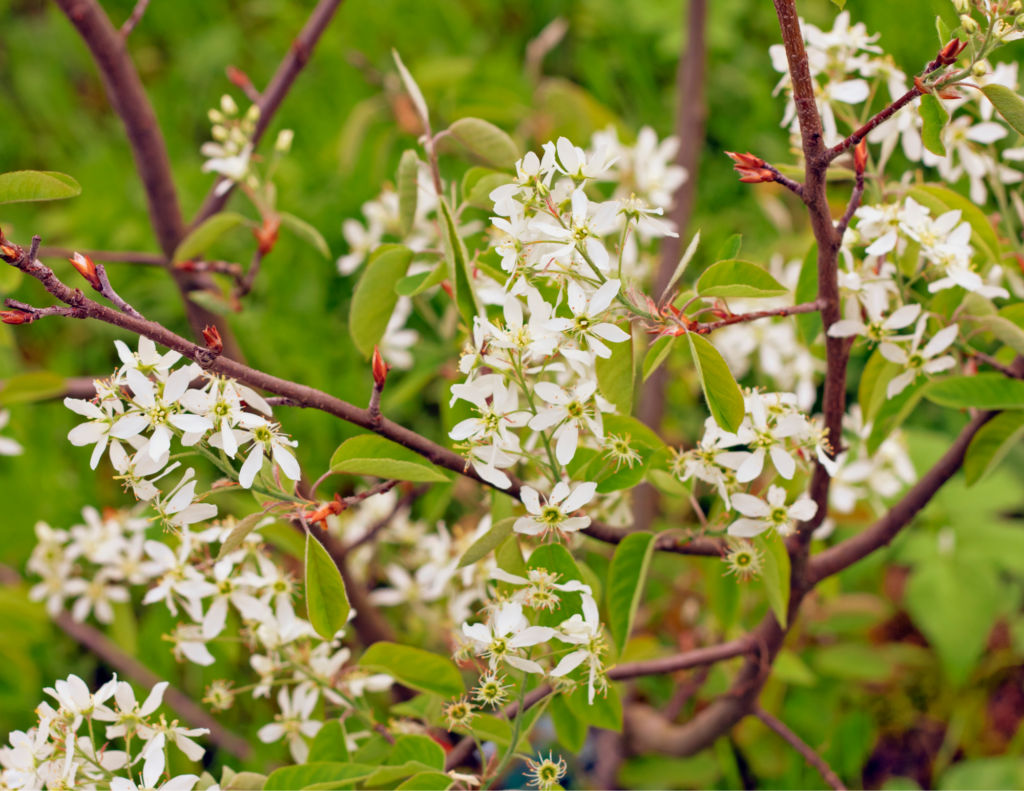
One of the most rewarding native shrubs you can plant, Downy Serviceberry earns its place in the garden from spring right through to fall. Showy clusters of fragrant white flowers in early spring, followed by small, sweet, edible purple-blue berries in early summer that are wonderful for making jam and an absolute favourite for birds. Come fall, the foliage puts on a spectacular show in shades of yellow, red, and orange.
As a bonus, choosing a native plant like Serviceberry supports local pollinators and wildlife, making it as ecologically valuable as it is beautiful. It works well as a specimen plant on it’s own, in a grouping or hedge, or naturalized in a larger landscape.
Best for: Wildlife gardens, naturalized areas, multi-season interest | Sun: Full sun to part shade | Mature size: 20 ft. tall × 10 ft. wide
Amur Privet, Ligustrum Amurense
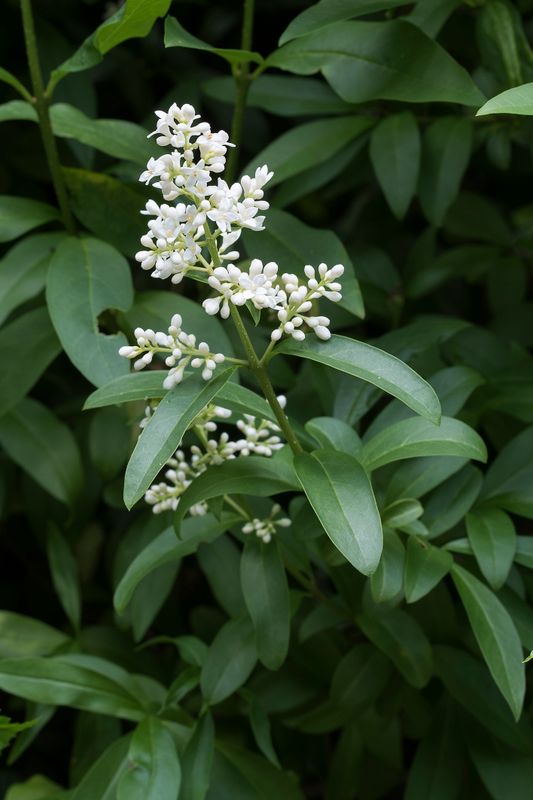
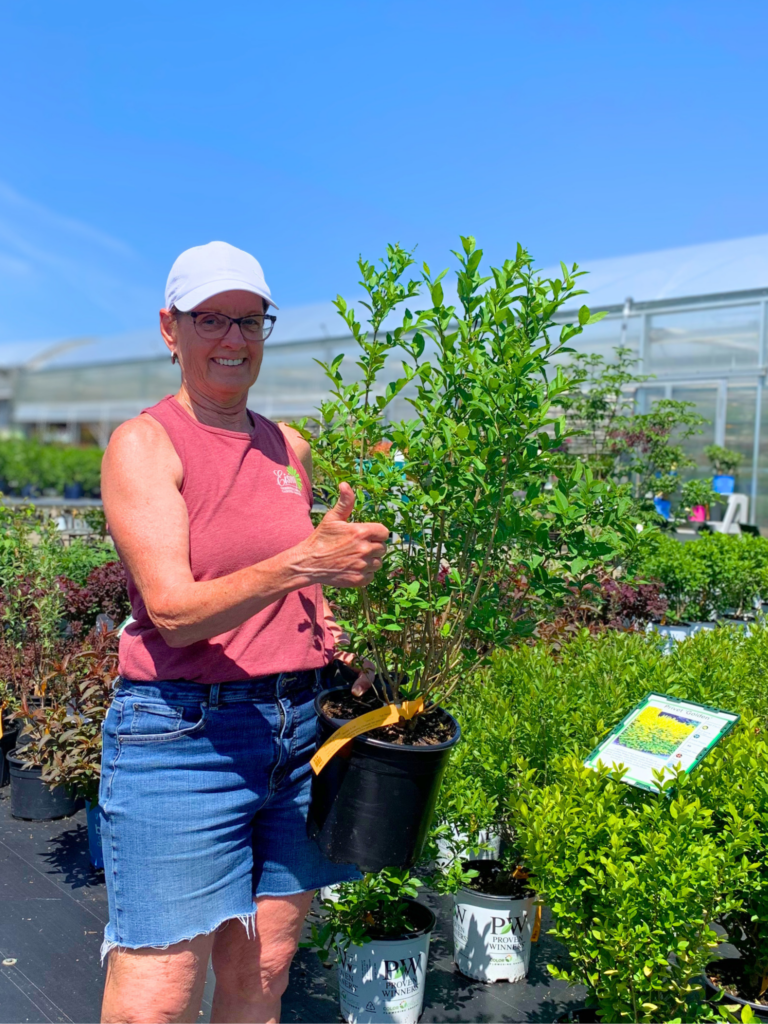
Amur Privet
When fast growth and privacy matter, Amur Privet is one of the best choices available. This dense, dark green shrub produces white flower panicles in late spring and small black berries in fall. It responds exceptionally well to pruning after it blooms, making it an ideal candidate for a formal or informal hedge. If you need to fill a space quickly and create structure in your garden, this is a reliable, low-maintenance option.
Best for: Hedging, screening, fast coverage | Sun: Full sun to part shade | Mature size: 12–15 ft. tall × 8–15 ft. wide
Viburnum ‘Fragrant Snowball’, Viburnum Opulus ‘Roseum’
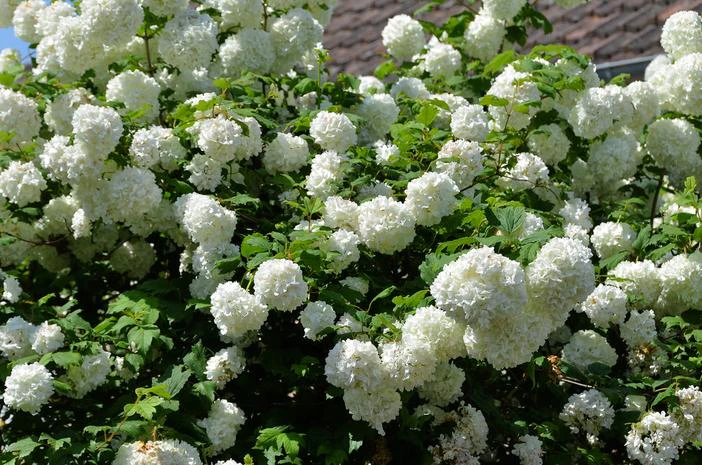
Few shrubs stop people in their tracks quite like Fragrant Snowball Viburnum in full bloom. Large, rounded clusters of sweetly scented white flowers cover the plant in spring, creating a display that’s hard to match. While it doesn’t produce fruit, it earns its place again in the fall when the foliage transitions to rich shades of purple.
Pruning after it blooms will help to keep it a manageable size and encourage healthy new growth. It’s also available as a standard, or tree form, which matures to a more compact 6 to 8 feet tall.
Sun or part shade are best for this deciduous shrub, a beautiful, solitary accent plant for the garden growing 12 feet high and 10 feet wide. As a standard, it is smaller, maturing at 6 to 8 feet tall and 5 to 6 feet wide.
Best for: Specimen planting, cottage gardens, fragrance | Sun: Full sun to part shade | Mature size: 12 ft. tall × 10 ft. wide (shrub); 6–8 ft. tall (standard)
Snowbelle Mockorange, Philadelphus ‘Snowbelle’
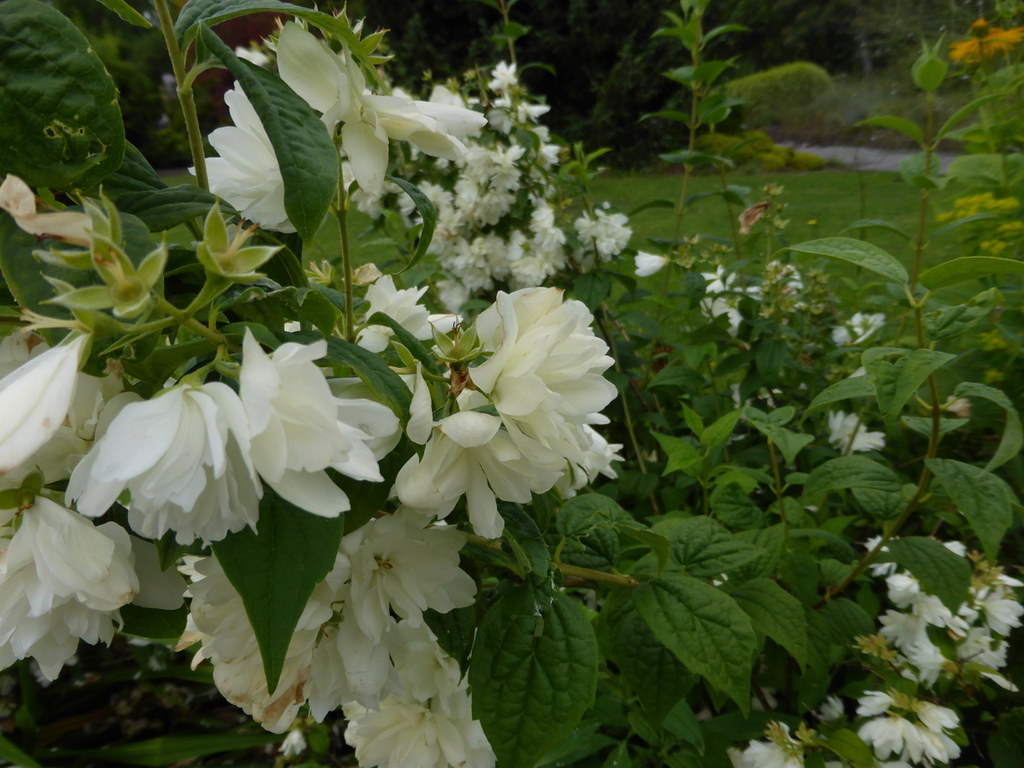
Don’t let its compact size fool you; when Snowbelle Mockorange blooms in early summer, it puts on a big show. This dense, mounded shrub is blanketed in sweetly fragrant double white blooms that are absolutely irresistible to bees and butterflies. Once the flowers fade, its rich, dark-green deciduous foliage makes it a lovely backdrop for other blooming plants in the border.
Growing just four feet tall and wide, it’s one of the best choices for smaller beds, borders and foundation plantings. It prefers full sun but handles part shade as well.
Best for: Small borders, foundation planting, fragrance | Sun: Full sun to part shade | Mature size: 4 ft. tall × 4 ft. wide
More Flowering Shrubs Worth Exploring
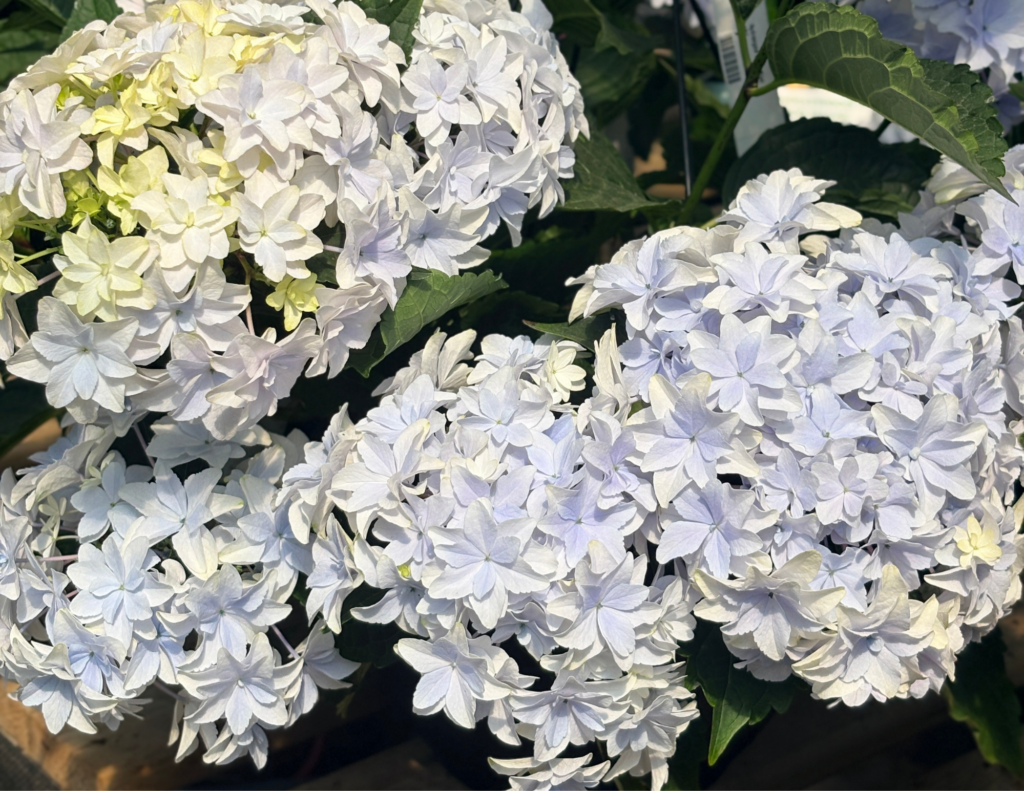
This is just the beginning! At Eising Garden Centre, we also carry a wonderful selection of Azalea, Eastern Redbud, Kwanzan Flowering Cherry, Hydrangea, Dogwood, Butterfly Bush, Beauty Bush, Lilac, Rose of Sharon, Forsythia, and Potentilla, to name a few.
The best way to find the right flowering shrub for your garden is to come in and see them in person, and right now is the perfect time to plant. Stop by and chat with Zach or Donna, who are always happy to help you find exactly what you’re looking for, based on your space, soil, and vision. We’re here to help you make the most of every corner of your garden!
By Ava Green ☀️
One of the most common reasons plants struggle comes down to light. Specifically, whether the spot you’ve chosen gives your plant the light conditions it actually needs.
The good news? Once you understand what the terms on a plant tag really mean, matching the right plant to the right spot becomes second nature. And when a plant is happy in its environment, it grows stronger, looks better, and is far less vulnerable to pests and disease because it simply isn’t under stress.
Before You Plant Anything, Do This First
Light conditions in a garden can be surprisingly tricky to read unless you’re paying attention. A garden that feels sunny might not actually deliver the hours of direct light that certain plants require. A shady corner might get more sun than you think.
So here’s your homework assignment, and it’s a very nice one.
Go outside and sit for a while. Find the spot where you would like to plant and observe it for a few days in the summer. Track how many hours of direct sunlight that area receives, hour by hour. Jot it down on a piece of paper. Average it out over a few days for a reliable picture.
Fair warning: this assignment may require a chaise lounge, a good book, and something cold to drink.
Once you have this data, you’re ready to move forward!

Decoding Light Terms
No more guessing at the garden centre! Here’s exactly what each term means.

Full Sun
At least 6 hours of direct sunlight each day. Plants in this category are sun-lovers: most vegetables, lavender, roses and many annuals and perennials.

Part Sun
4 to 6 hours of sun including some afternoon sun. The hours don’t need to be consecutive; a few hours in the morning and a couple more in the afternoon. Not all of it needs to be intense, direct light.

Part Shade
Also 4 to 6 hours of sun, but with a preference for morning light rather than the stronger afternoon sun. These plants appreciate some protection from the harshest part of the day.

Full Shade
Fewer than 4 hours of direct sun per day. If direct sun hits these plants, morning sun is ideal. Plants that appreciate these conditions are woodland plants, hostas and ferns.
Why Getting This Right Saves You Time and Money
A little observation before you plant is genuinely one of the most valuable things you can do as a gardener. It takes the guesswork out of every purchase and saves you from replacing plants that were never suited to that spot. Most importantly, it gives you a garden full of plants that actually thrive there.
The best gardens aren’t built on luck. They’re built on knowing your conditions and planting accordingly. Now that you’ve cracked the code on light, you’re already ahead of the game.
Bonus - Signage at Eising Greenhouses and Garden Centre!
You'll notice our signage has icons to help you best decide which plants are right for you and your situation!

- If you see a little paw print on our signs or pots, this means we're proud to say this plant is pet friendly! We love your little critters too!

- The number of raindrops on our signs indicates how much water this plant will need

- Signs with these icons indicate the plant naturally deters pests like deer and rabbits
How to Keep Your Hanging Basket as Gorgeous as the Day You Brought it Home, All Summer Long!
By Dave Zeldon and Ely Schweyer
Remember your Mother's Day hanging basket with its variety of colours, textures, and plant combinations? Maybe there was Verbena cascading elegantly with their colourful star like blossoms, double Begonias for the porch in spectacular shades of reds, pinks, and burgundies, and of course the vigorously growing Petunias and Geraniums, to name just a few. But as the Summer goes on, they just don’t seem to have that same stamina.
To keep your hanging baskets in great shape and avoid the dry, wilted, bald spotted, leggy look that occurs to containers every August, one should follow these easy tips.
Watering
Plastic, fibre, and especially moss lined baskets dry out quickly. They should be checked twice daily and watered every day. Be sure to wet the moss sides as well.
Try to maintain uniform soil moisture. When watering, fill the top of the container with pooling water until it ‘pees,’ and allow it to drip out of the bottom of the basket every time you apply water. Frequent severe wilting will impact upon the quality of the basket.
At this time of year, one could take the basket down and soak it in a tub of water for 20 minutes to hydrate the entire root ball, once every week.

Deadheading
Remove spent flowers on a weekly basis (this is called deadheading) to prevent plants from going to seed. This will encourage more flower production. Part of the beauty of the mixed basket is its prolonged display, just like in your garden.
Check for Pests!
During your weekly deadheading, keep a watchful eye out for aphids, whiteflies, and caterpillars. If you see any, try a quick spray of insecticidal soap to keep them from becoming an infestation.
🖱️ If you're noticing fungus gnats in your hanging baskets, find more on eradicating them here!
Pruning
Not every plant in the basket will be at its peak all season.
Cutting plants back after a flush of bloom will tidy them up and prepare them for a fresh crop of flowers. Meanwhile, other varieties will begin putting on a show. This is especially true for Petunias.
A good cut back of long, lanky branches will reap benefits.
Fertilizing
Daily watering means nutrients can leach out of the soil before the plants can absorb them. The baskets should have both slow release granular added to the growing media and a weekly feeding of 15-30-15 soluble fertilizer. Use a solution containing micronutrients, as plants like Petunias need extra iron.
Sheltering
It has been suggested, if possible, that during stretches of extreme heat, give your baskets a break and move them to a cooler, shaded spot to de-stress for a couple of days. This is also suggested when heading on vacation. Your flowers will rebound to their former beautiful selves!
We hope this long term hanging basket care guide helps you enjoy your purchase all summer long! For more information - and beautiful plants – visit Eising Greenhouse and Garden Centre! 🌸
By Dave Zeldon and Ely Schweyer
This is a question we hear daily during the spring, summer and, especially, the fall. Unfortunately, many homeowners do not see any adverse changes occurring in their trees until they look dead, or nearly so.
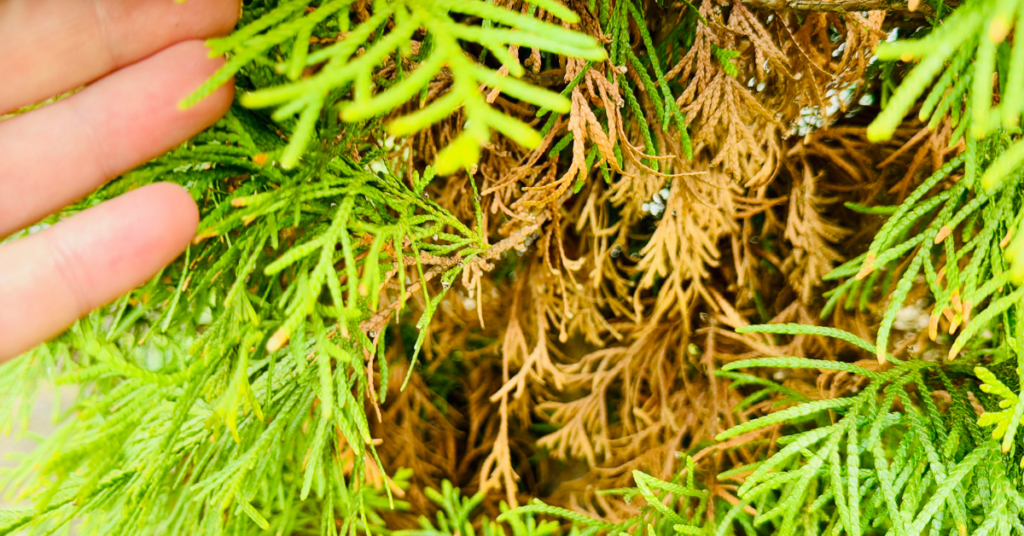
You Might Not Need to Panic Yet
The discolouration and dropping of evergreen needles are a natural phenomenon and the main cause of needle loss in the wild. Evergreen needles, as the name implies, survive for a lengthy period, and in fact usually have a life span of five to seven years on healthy trees, however, they must be shed. The needles first start to die in the central and lower part of the tree, and this change progresses upward over time. You will see spruce trees naturally lose needles as they get older.
Age is an important factor here in causing needle loss and branch death, however, in landscape plantings of coniferous evergreen trees, pests and disease are likely the major cause of needle loss and dying branches. If there is a sudden fall of a very large number of brown needles and leaves, this signals to us that there is something drastically wrong!
This can happen as early as a year or two after a tree is planted. This is especially true in Haldimand and Eastern Norfolk County where heavy clay soils predominate. Spruce trees, for example, do not grow well on clay soils.
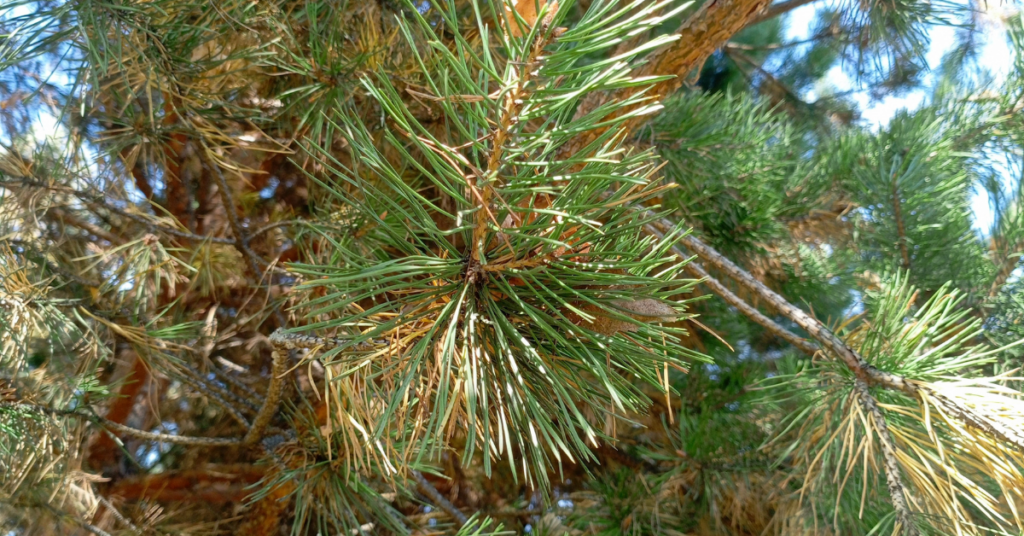
When You DO Need to Worry
Here are some of the more common problems, apart from natural aging that afflict spruce trees, the probable causes and ways of treating the problem.
☝️Unfortunately, these majestic trees, the most popular evergreen planted on our residential properties, incur many other pest and disease problems not dealt with here.
Symptom: Rusty brown needles that eventually fall.
Likely causes:
1. Internal fungus disease (called Cytospora or white blister canker). This creates cracks in the bark causing resin to drip and leave grey-white dripping streaks on the bark. The fungus also causes open wounds or blisters on tops of branches. These wounds can be greyish white or greyish blue in colour, eventually turning brown and black.
2. Feeding by spider mites which leave fine, poorly formed webs in the needles, especially near the ends of the twigs.
Best treatments:
1. Properly aerate and fertilize tree out to a distance of half its height in all directions, where possible.
2. Pressure wash thoroughly once a month with water only, all needles and branches as high as possible on the tree. Water pressure dislodges spider mites.
Symptom: Chewed up ends of twigs in June.
Likely cause:
Spruce bud worms which develop in the needle cluster that arises from a bud.
Best treatment:
Spray the biological pesticide, BTK (eg. Dipel), onto the entire tree when feeding is first noticed in early spring, to kill the young caterpillars.
Symptom: Black sooty mold covering twigs and needles.
Likely causes:
1. Spruce bud scales, ball-shaped insects, initially light brown in colour but eventually turning black. Often two to five scale balls cluster in one location on the twig; honey dew excretions from scales become infected with sooty mold.
2. An overhanging shade tree such as oak, maple or elm may have heavily infested leaves with aphids whose honey dew secretions become infected with sooty mold.
Best treatment:
1. Pressure wash tree using water only to dislodge young scales (called nymphs) in May and early June while they are in the crawling stage. Scale nymphs fall to the ground where they cease to be a threat to the tree.
2. Spray shade tree in early spring with insecticidal soap to control aphids. The problems of other coniferous evergreens such as pines, firs, cedars and junipers can usually be treated with correct diagnosis, though some diseases are lethal.
We hope these help you troubleshoot common issues often found in evergreen trees! For more information - and evergreens – visit Eising Greenhouse and Garden Centre! 🌲
By Dave Zeldon and Ely Schweyer
This is the time of year that most garden centres will have on display their wide variety of Amaryllis bulbs, including the evermore popular waxed dipped. These enormous bulbs that are appearing now will be ready to burst into bloom within 4-8 weeks after planting.
Non-Wax Dipped: Planting
All Amaryllis need is a bit of commercial potting soil that should not cover the shoulders of the bulb (try leaving about 1/3rd of the bulb showing above the soil line), with the nose (or narrow end) of the bulb peeping well over the top of the pot. Make sure that you use a well-drained container that is 3-4” bigger in diameter than the bulb itself.
☝️A heavy clay pot will prevent this top-heavy plant from toppling over. To achieve continuous bloom, plant at intervals of two weeks for stunning colour in your home.

Non-Wax Dipped: Care
Once leaves emerge, fertilize once a month with a 20-20-20 water soluble fertilizer for houseplants. Water sparingly and wait for the miracle in a warm sunny room. Sub-irrigation or watering from the bottom of the drip tray will keep the surface soil dry, thus keeping and bulb rot organisms and those pesky fungus gnats at bay.
Non-Wax Dipped: It's Not Done Yet!
When blooming is over, remove the scape (or flower stock) and place the plant in a sunny spot and continue to water. This is to allow the leaves to regenerate the bulb. In springtime, when all danger of frost has passed, bring the bulb outdoors and let it spend its holidays in a shady spot. In some varieties the leaves will die back in September to give the plant a rest for a couple months. Stop watering and store the bulb on its side in a cool place for about eight weeks, when the leaves will once again begin to emerge.
Amaryllis can go 3-4 years without repotting as they don’t mind a little crowding. Try growing a couple of bulbs in larger pots to see if you can get a clump of flowers from the offshoots or babies that will develop after a couple of years.
Or, Try One of These Wax Dipped Bulbs!
Now growing more popular are the care-free waxed-bulb Amaryllis!



Experienced growers and beginners alike love that these waxed bulbs do not need to be planted or watered! Each of these robust bulbs are carefully prepared in festive-coloured wax, allowing you the freedom to place them among your holiday decorations.
Simply keep the bulbs at an ambient room temperature of at least 16C (70F) for beautiful blooms in five to six weeks.
These novelty items are low commitment! Their only fault is their lack of longevity - gardeners don’t get to enjoy them after year as these waxed bulbs were designed to be a one-use throwaway item!
BUT with a little luck and perseverance you may be able to save the bulb for next season after blooming. All you have to do is to carefully remove the wax layer, remove the flower stalk and place the bulb and with its remaining leaves into a pot of good growing media, allowing the leaves to regenerate the food stores in the expired bulb.
If you’re looking for more information – or perhaps, Amaryllis – visit Eising Greenhouse and Garden Centre! Happy Holidays! ✨
By: Dave Zeldon and Ely Schweyer
Bearing in mind that a lawn is a very unnatural situation in that we are trying to sustain a large area with very little plant diversity (monoculture), in the eye of the homeowner, lawns may remain an important part of the domestic landscape! As well as in very necessary areas like tile beds, paths, roadsides, and recreational areas, lawns provide a background that enhances the overall effect of the home and the various gardens and landscape features.
From nematodes to dog pee spots, the following tips will help you to maintain a healthy lawn naturally.
Mowing
Of all the cultural practices, mowing exerts the greatest influence on growth, development, and ease of management. By keeping the grass blade height between 6 & 8 cm (2.5 to 3 inches) high you'll be able to produce a more competitive lawn against young and germinating weeds.
Grass Species Selection
Seed mixtures with Titanium Tall Fescue have shown to be more drought, disease, and insect resistant than many other lawn grasses such as the traditional Kentucky bluegrasses. Tall fescue roots penetrate deeper into the soil providing better regrowth and wear tolerance, making it ideal for heavy foot traffic areas and recreational areas.
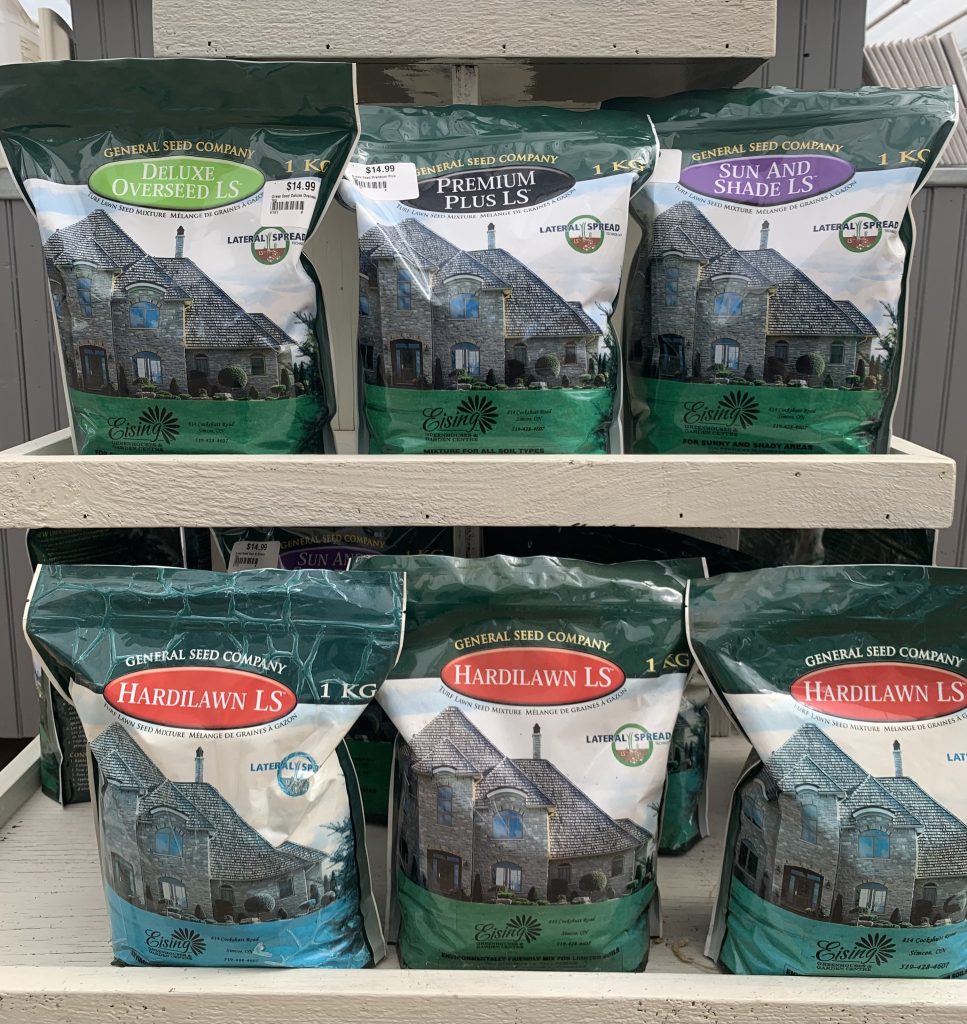
Carried by Eising Garden Centre
Time of Sowing
The best time to establish a lawn from seed is late summer and early fall (mid-August to mid-September) in southern Ontario. During this period, soil moisture and temperature conditions are optimal for germination and establishment. There is also less competition from germinating weeds in the fall. Make sure that seeding is done early in the fall so that the grass is well established before winter. The plants are then well rooted and more drought- and heat-tolerant the following summer.
Seed the shady areas in the fall for best results. Trees will have shed their leaves by then, so plenty of light is available for the new growth. The grass also gets off to an early start in the spring before the trees leaf out.
Spring seeding should be done as soon as the ground can be worked. Slow, irregular germination may result if the seed is sown when the soil is too cold and damp. (Soil Temp. around 15oC is ideal and there is also strong competition from germinating weeds during the spring. When practical, wait until weed seeds germinate, work the land to kill them and then sow the grass seed. ) If you choose to plant your new lawn in the spring, begin just as soon as the soil is dry enough to work, preferably mid-April to mid-May. This will give your new grass time to get well established before the hot, dry weather sets in.
Fall is often a better time to start your lawn, from mid-August to the end of September. Your seedbed is less likely to dry out at this time of year, and the grass should be well established before winter.
Watering
Your typical lawn needs about 2.5 cm (one inch) of water per week through either rain or irrigation. If irrigating, water in the morning as more will be absorbed as opposed to being lost to evaporation in the sun and the warmer temperatures later in the day.
Fertilization
Lawns require relatively large amounts of nitrogen-based fertilizers which should be applied several times during the growing season. Since lawn clippings are high in nutrients, especially nitrogen, much of your initial nitrogen fertilizer investment may be recycled back into your lawn! A fertilizer with a nitrogen, phosphorus, and potassium ratio of 4:1:2 (e.g., 20-5-10) is normally the best in most situations. It should be noted though, that a soil nutrient test can accurately determine the actual needs of your lawn including lime if the pH is too low.
(Lawn Liming Rate: 20-50 lbs/1000 ft2)
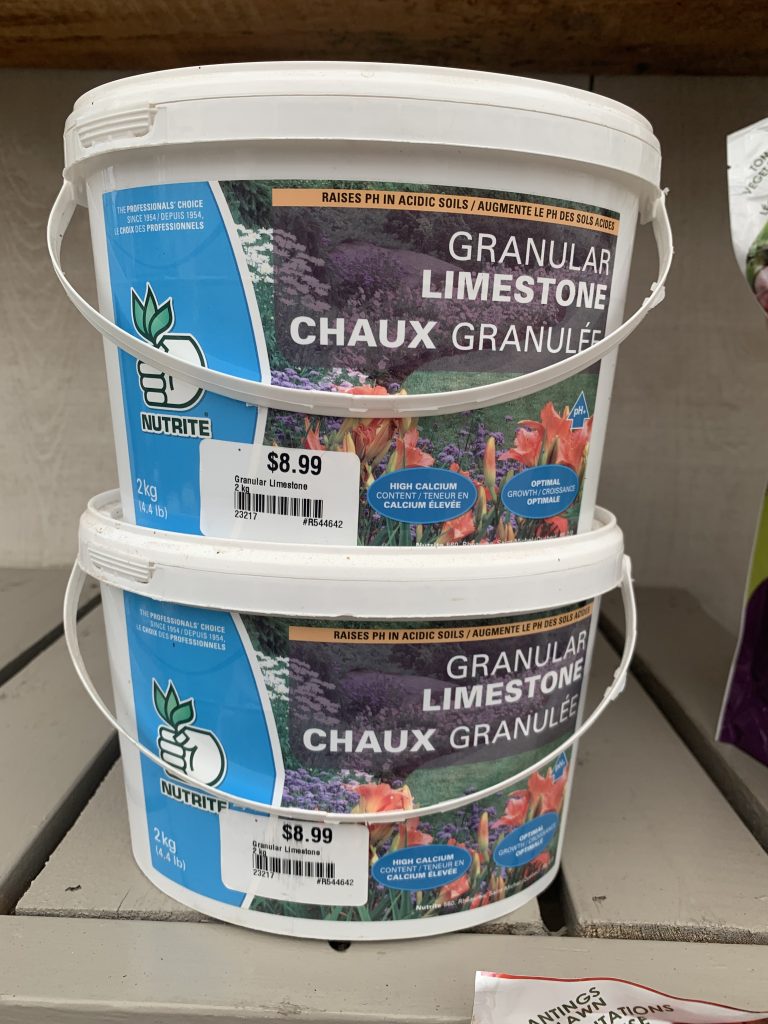
Carried by Eising Garden Centre
Corn Gluten
An application of this product early in the spring and then later on in the summer will inhibit the growth of weeds from germinating seeds especially the annual problem, crabgrass. Established weeds though have to be dug out by hand.
Dog Pee Spots
There is a misconception that the pH level of your dog’s pee is leaving those unsightly spots in your lawn, when it is in fact the high concentration of nitrogen and salts being introduced into the soil. To prevent this, should you see your four-legged friend raising its leg or popping a squat, give that spot a good watering to dilute the minerals. In addition to this, ensuring your dog is well hydrated will help to water down their urine. However, your lawn may already have several severe yellow and bald patches. You may opt to resod or reseed the area, but the soil is what’s affected. Before giving up altogether and adding a scree to the affected area, Eising Greenhouse and Garden Centre offers a fertilizer to help balance and remedy your dog pee spots!
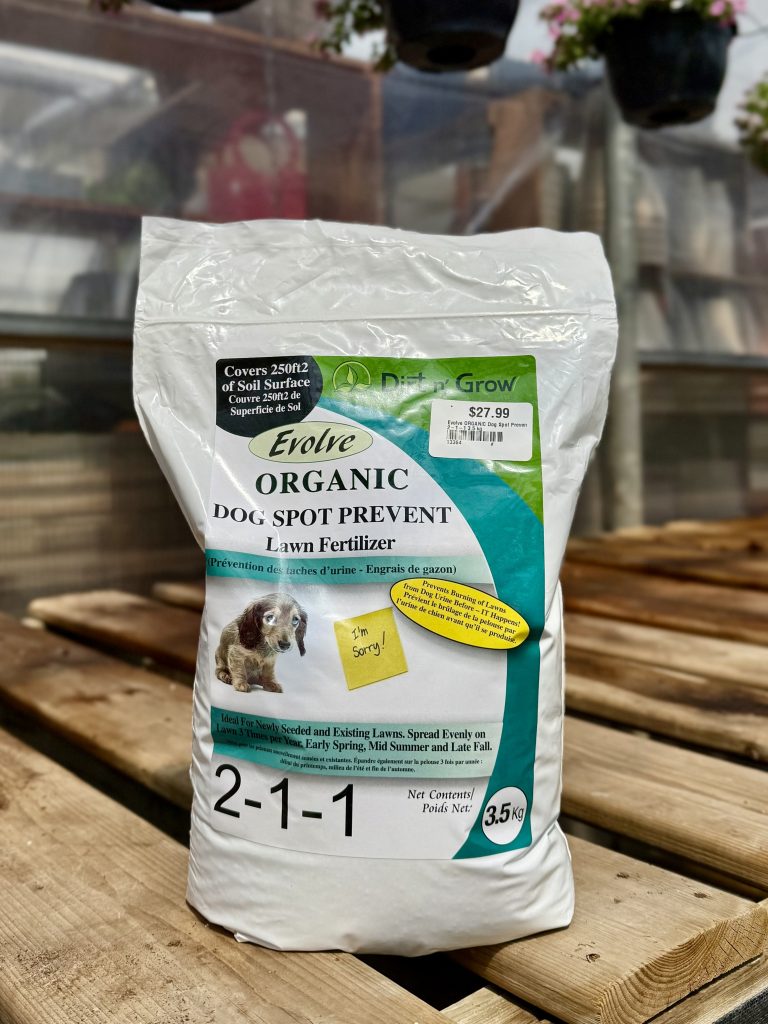
Carried by Eising Garden Centre
Thatch Control
Thatch is a layer of dead leaves, stems and roots that intermingle with the living plants above the soil surface. A one-inch layer of thatch is desirable as it has a cushioning effect against compaction and an insulating effect in cold weather. De-thatching a lawn is an extreme measure that may be considered if the drainage is poor. Lawn aeration may be required as well as the lawn and the soil below must establish a drainage pattern.
Nematodes - Aid Against Japanese Beetles and More!
If the Japanese Beetle has been destroying certain plants in your landscape plantings or their grubs have been feeding on the roots of your lawn, causing unsightly brown patches maybe it's time to use Mother Nature's secret weapon: Beneficial Nematodes.
Beneficial Nematodes are a natural way to control Japanese Beetle grubs and over some 200 species other pest insects in your lawn while having no detrimental effect on Ladybugs, Earthworms, and other helpful beneficial insects.
Nematodes are naturally occurring microscopic worms of the soil and are used to control soil pest insects in their larvae or grub stages while not posing any health or environmental risks to humans or animals. The beneficial Nematodes enter the JB larva via mouth, anus, or respiratory openings and begins to feed. This causes specific bacteria to emerge from the intestinal tract of the Nematode, spreading inside the insect and multiply very rapidly; the bacteria convert host tissue into products which can easily be taken up by the Nematodes, ceasing the soil dwelling pest insect within a few days. Beneficial Nematodes are effective against not only the larval or grub stage of Japanese Beetles, but the Northern Masked Chafer, European Chafer, Rose Chafer, Crane Fly larvae (Leather Jackets), Oriental Beetles, and June Beetles.
The nematode product you purchase should contain two genera: Steinernema and Heterorhabditis for better grub control.
Beneficial Nematodes are very easy to use. Mix with water and spray on the lawn with a water-can, irrigation system, or a hose-end sprayer. Most homeowners spray at a rate of 10 million nematodes per 600 square feet on grub damaged lawns. After an application, keep the soil moist during the first two weeks for the nematodes to get established.
In Ontario, there are two windows of opportunity to apply Beneficial Nematodes to be effective against the JB grub stage.
The first application should be in May as the soil warms up and then again at the end of August or the first two weeks of September as the JB are hatching into their first larval stage.

We hope these tips help to ensure your healthiest lawn! For more information – and lawncare products - visit Eising Greenhouse and Garden Centre! 🌾
Dealing with water restrictions or choosing to conserve water? You’re not alone. Many gardeners in Norfolk County are facing the challenge of keeping gardens thriving with less water. The good news? A lush, colourful garden is still within reach—thanks to drought-tolerant perennials.
When we think of drought-tolerant plants, cacti might be the first thing that comes to mind. But there’s a surprising variety of beautiful, hardy perennials that can handle our region’s dry spells—no desert landscape required.
While these plants do need regular watering when first planted, once established, they’re low-maintenance and well-suited to Southern Ontario’s climate, including periods of limited rainfall.
Full Sun Ground Cover
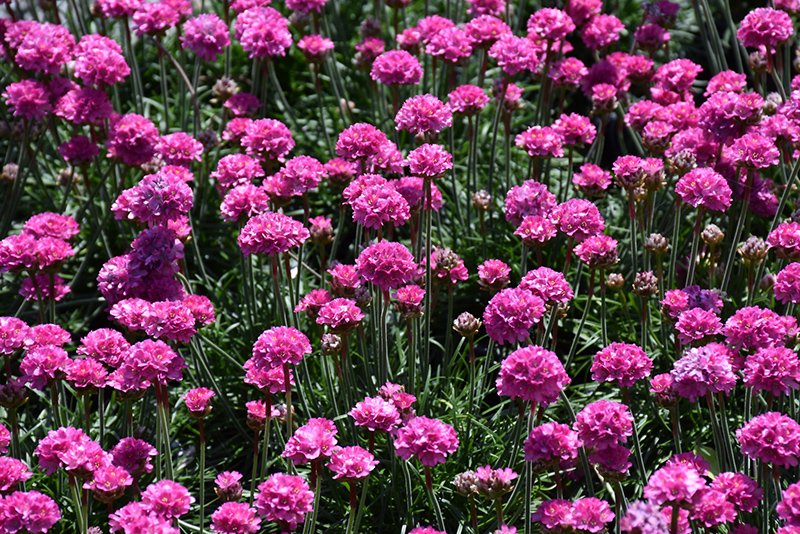
Botanical Name: Armeria maritima 'Dusseldorf Pride'

Botanical Name: Delosperma 'Fire Spinner'
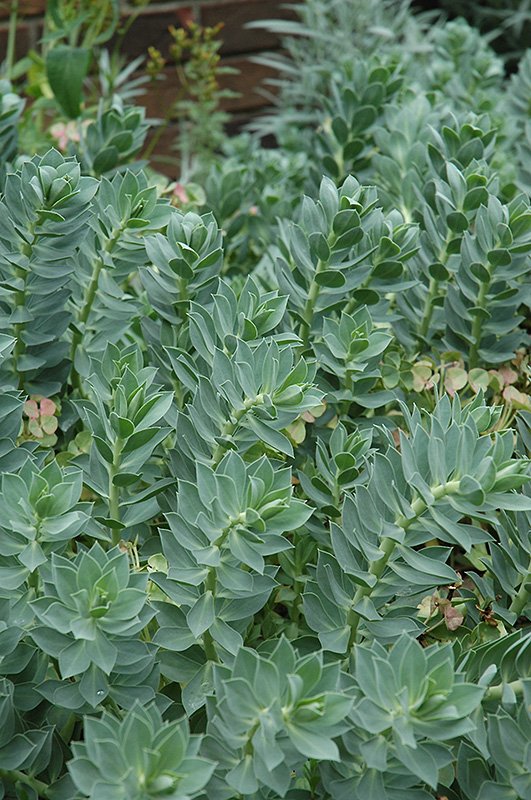
Botanical Name: Euphorbia myrsinites
- Candytuft (Iberis sempervirens)
- Catmint (Nepeta x faassenii)
- Hardy ice plant (Delosperma nubigenum)
- Hens and chicks (Sempervivum tectorum)
- Moss phlox, creeping phlox (Phlox subulata)
- Pincushion flower (Scabiosa japonica var. alpina) (S. ‘Butterfly Blue’)
- Pinks (Dianthus alpinus)
- Rock cress, wall cress (Arabis species)
- Rock rose, sun rose (Helianthemum hybrids)
- Spurge (Euphorbia myrsinites) (E. polychroma)
- Stonecrop (Sedum acre) - dwarf varieties
- Thrift, sea pink (Armeria maritima)
- Thyme (Thymus species)
Full Sun, Medium to Tall Plants
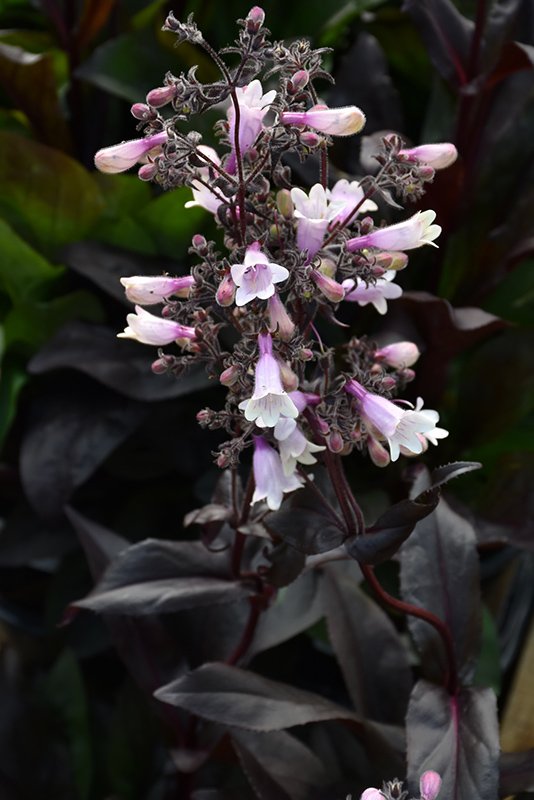
Botanical Name: Penstemon 'Dark Towers'

Botanical Name: Papaver orientale
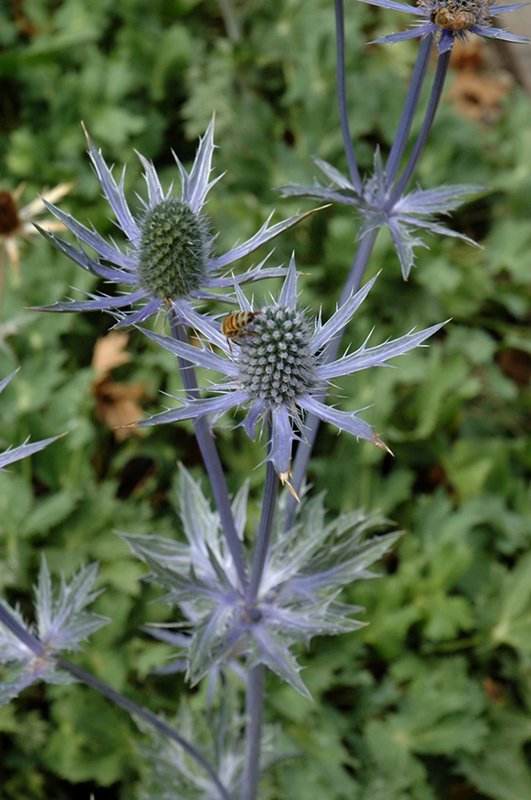
Botanical Name: Eryngium 'Big Blue'
- Beard-tongue (Penstemon digitalis) – Native
- Bergenia (Bergenia crassifolia)
- Black-eyed Susan (Rudbeckia hirta) – Native
- Blanket flower (Gaillardia x grandiflora)
- Butterflyweed (Asclepias tuberosa) – Native
- False indigo, wild indigo (Baptisia australis)
- Hairy penstemon (Penstemon hirsutus) – Native
- Lanceleaf coreopsis (Coreopsis lanceolata) – Native
- Lavender (Lavandula angustifolia)
- Orange coneflower (Rudbeckia fulgida ‘Goldsturm’)
- Perennial cornflower (Centaurea montana)
- Poppy (Papaver species)
- Purple coneflower (Echinacea purpurea)
- Prickly pear cactus (Opuntia compressa) – Native
- Russian sage (Perovskia atriplicifolia)
- Salvia (Salvia nemerosa hybrids)
- Sea Holly (Eryngium species)
- Silver sage, wormwood (Artemisia ludoviciana)
- Threadleaf coreopsis (Coreopsis verticillata) – Native
- Yarrow (Achillea millefolium)
Full Sun Grasses
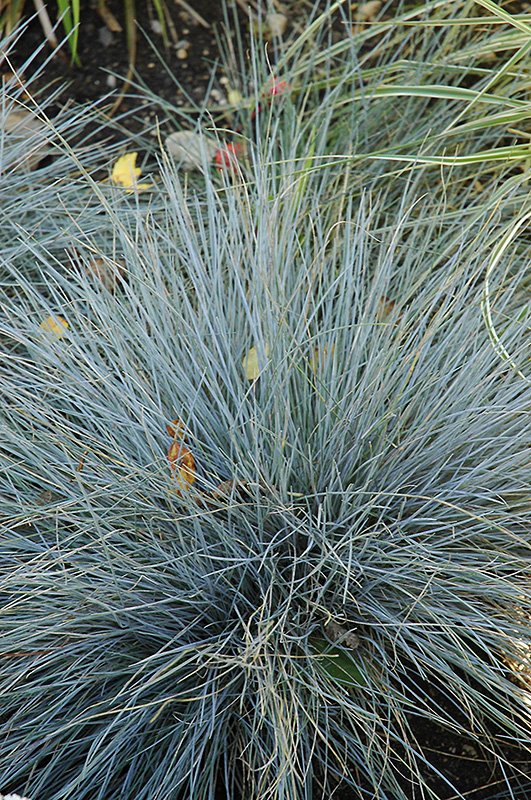
Botanical Name: Festuca glauca
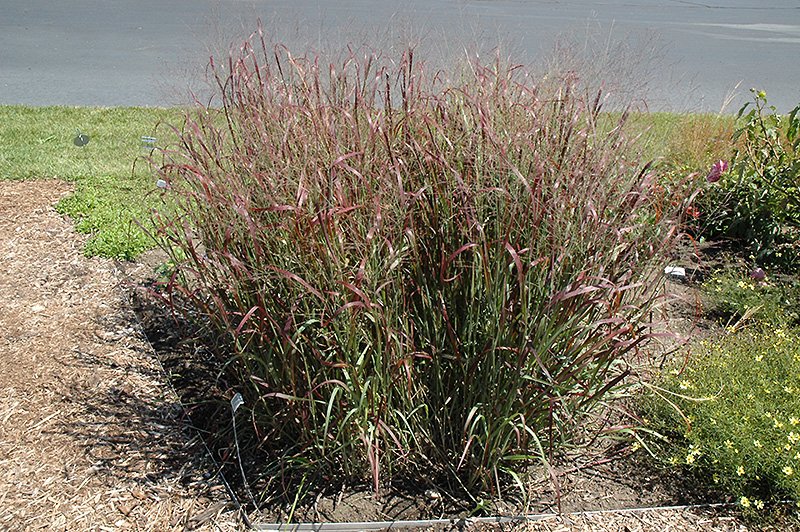
Botanical Name: Panicum virgatum 'Prairie Fire'
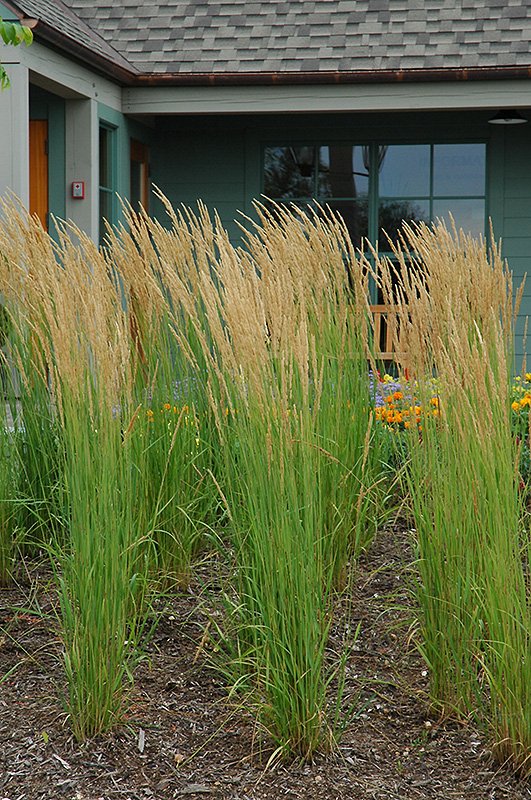
Botanical Name: Calamagrostis x acutiflora 'Karl Foerster'
- Big bluestem (Andropogon gerardii) – Native
- Blue fescue (Festuca glauca)
- Blue oat grass (Helictotrichon sempervirens)
- Feather reed grass (Calamagrostis x acutiflora ‘Karl Foerster’)
- Little blue stem (Schizachyrium scoparium) – Native
- Switch grass (Panicum virgatum) – Native
Groundcover for Shade
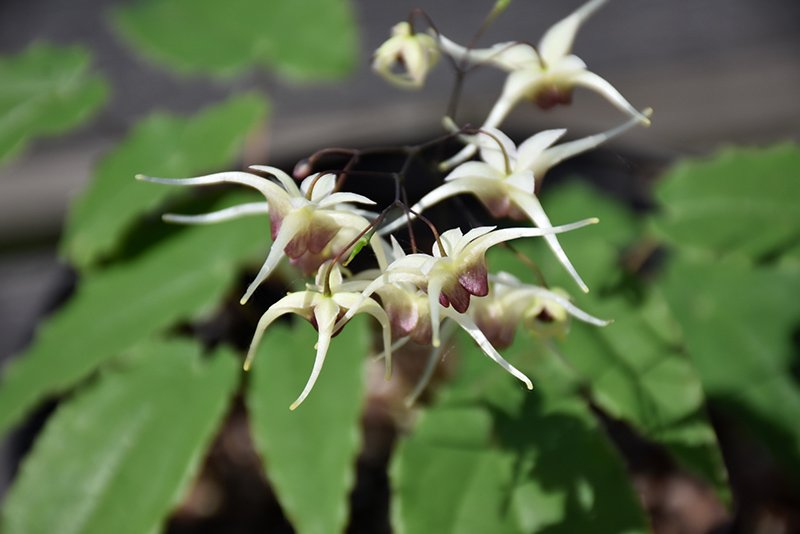
Botanical Name: Epimedium 'Domino'
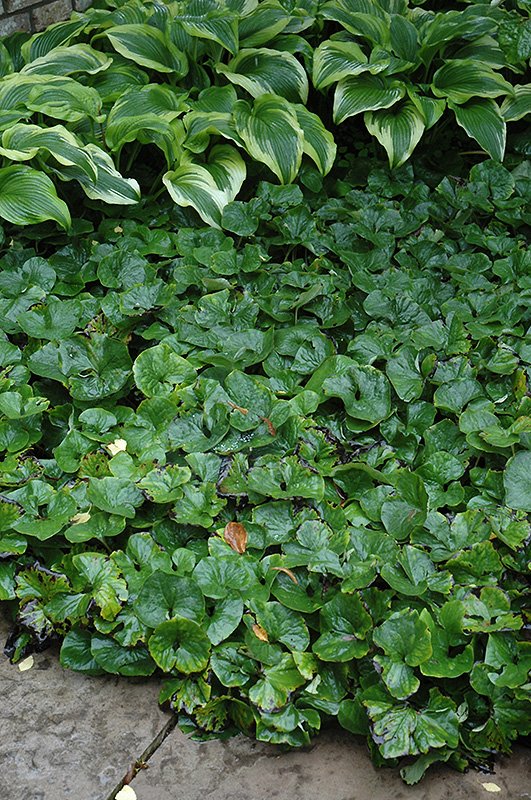
Botanical Name: Asarum canadense
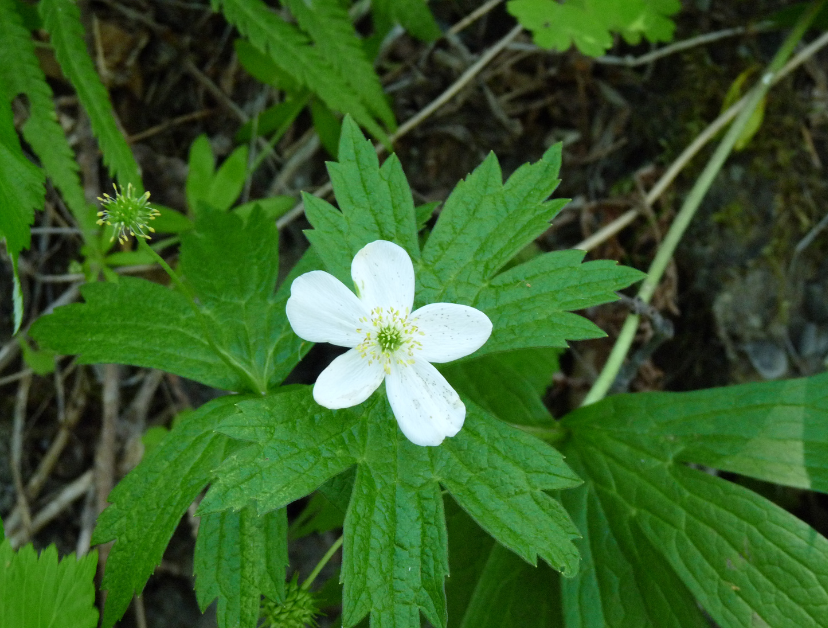
Botanical Name: Anemone canadensis
- Barrenwort (Epimedium hybrids)
- Bigroot geranium (Geranium macrorrhizum)
- Canada anemone (Anemone canadensis) – Native
- Creeping phlox (Phlox stolonifera)
- Sweet Woodruff (Galium odoratum)
- Wild ginger (Asarum canadense) – Native
- Woodland phlox (Phlox divaricata) – Native
Medium to Tall Plants for Shade
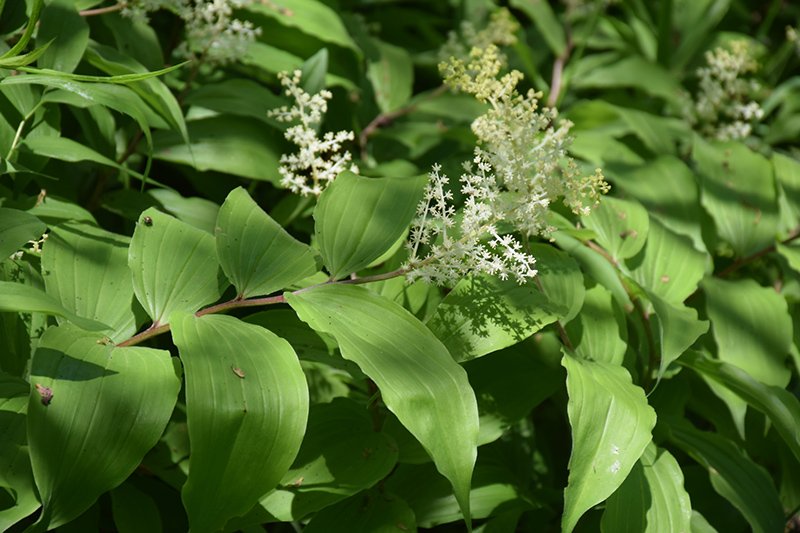
Botanical Name: Maianthemum racemosum
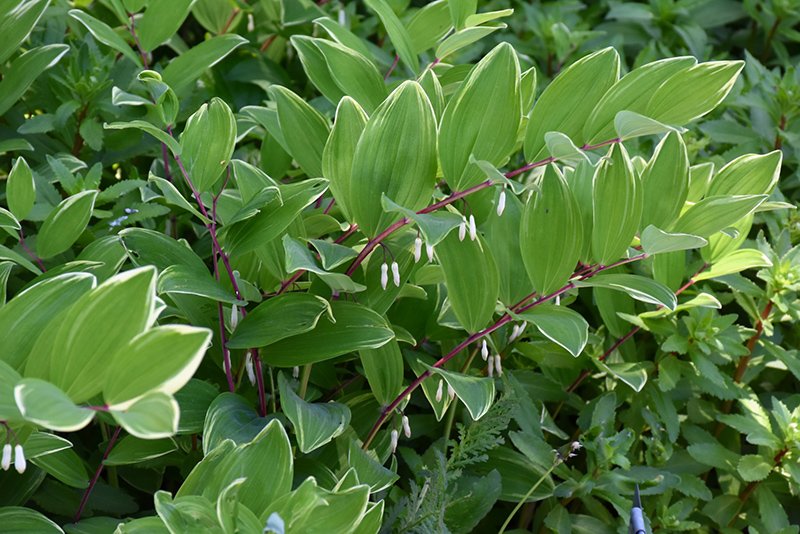
Botanical Name: Polygonatum odoratum 'Variegatum'
- False Solomon’s seal (Maianthemum racemosum) – Native
- Solomon’s seal (Polygonatum biflorum) – Native
Ferns for Dry Shade
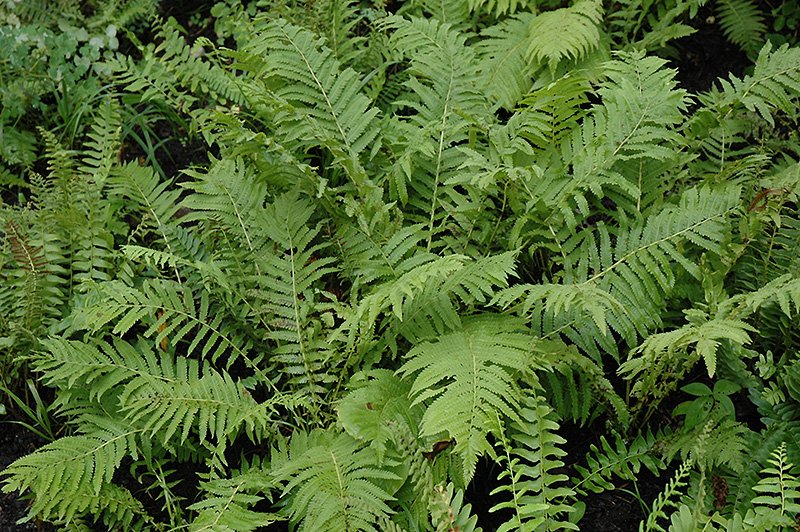
Botanical Name: Polystichum acrostichoides
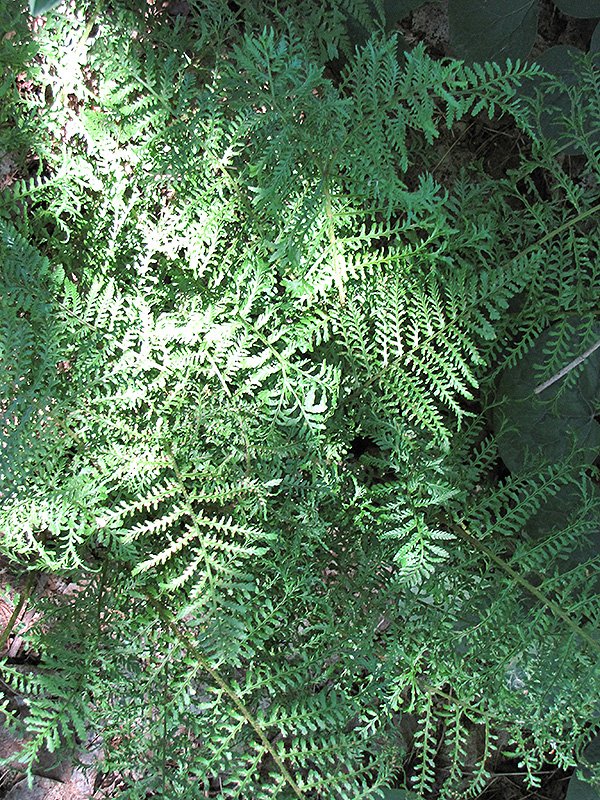
Botanical Name: Dryopteris filix-mas
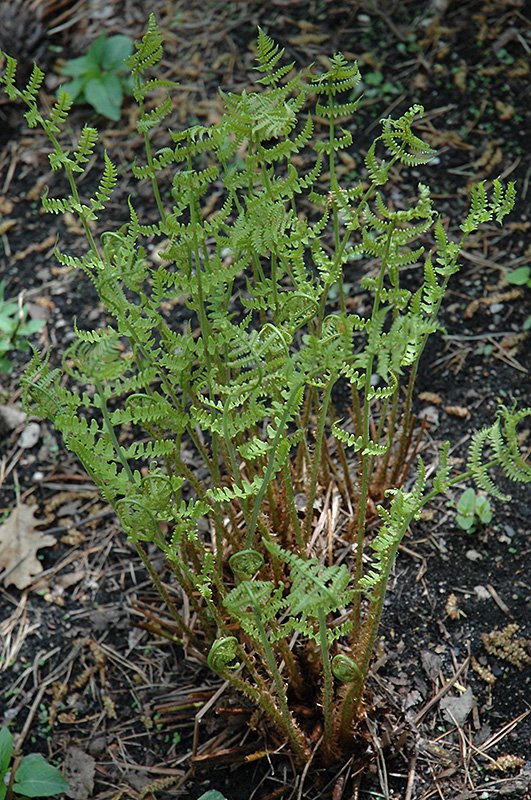
Botanical Name: Dryopteris marginalis
- Christmas fern (Polystichum acrostichoides) – Native
- Hay-scented fern (Dennstaedtia punctilobula) – Native
- Marginal wood fern (Dryopteris marginalis) – Native
- Male fern (Dryopteris filix-mas) – Native
- Rock fern (Polypodium virginianum) – Native
A Little TLC
It doesn’t take much to keep drought-tolerant plants thriving—just a little attention and some seasonal TLC. While they’re tough, even these hardy perennials appreciate an occasional deep watering during extended dry spells, especially in their first year.
For sun-loving perennials, skip the heavy fertilizers. Instead, an annual layer of compost is all they need to stay healthy and strong.
Shade-loving drought-tolerant plants, on the other hand, benefit from a layer of mulch. This helps retain moisture and reduces evaporation, especially in dry shade, which is one of the most challenging conditions for any plant to thrive in.
And don’t forget to deadhead regularly! Removing spent blooms encourages your plants to keep producing flowers instead of going to seed, meaning more colour, for longer.
With a few simple care tips, your drought-tolerant garden can remain beautiful and resilient throughout the entire season.
Other resources:
- Landscape Ontario: Eight Beautiful Drought Tolerant Plants
- Toronto Master Gardeners: Drought Tolerant Plants
- Guelph.ca: Drought Tolerant Native Plants
If flowers are the divas of the garden, foliage is the harmonious backup group that makes the whole performance shine. Colour, texture, and form don’t just come from blooms—there’s a world of interesting leaves that not only set the stage but often steal the show. Flowers may be the stars, but foliage is the picture frame, the atmosphere, and often the soul of a beautiful garden.
Start with a Standout
When choosing plants—whether for a garden bed or a container—don’t just focus on flowers. Especially in shady spots, standout foliage can create all the visual impact you need. Look for leaves that draw your eye, like the delicate structure of a cutleaf Japanese maple or the bold colour variations of Heuchera (Coral Bells), which range from deep burgundy to vibrant chartreuse.
Your standout feature doesn’t have to be a plant—it could be a sculptural shrub, an ornamental tree, or even a favourite birdbath. Try placing that birdbath atop a lush carpet of Irish moss, or line a path with the spotted leaves of Pulmonaria, silvery Artemisia, or graceful ferns. Light up a shady corner with glossy Bergenia or classic Hostas, which offer endless variety in shape, texture, and hues from bright green to cool blue-ish tones.
Build the Framework
Once you’ve chosen your focal foliage, you can build your planting scheme around it in creative ways. Think of it like building a quilt—each plant contributes a piece to the overall picture.
- Create a patchwork of leaf shapes: Group together plants with small, intricate foliage for a richly textured look.
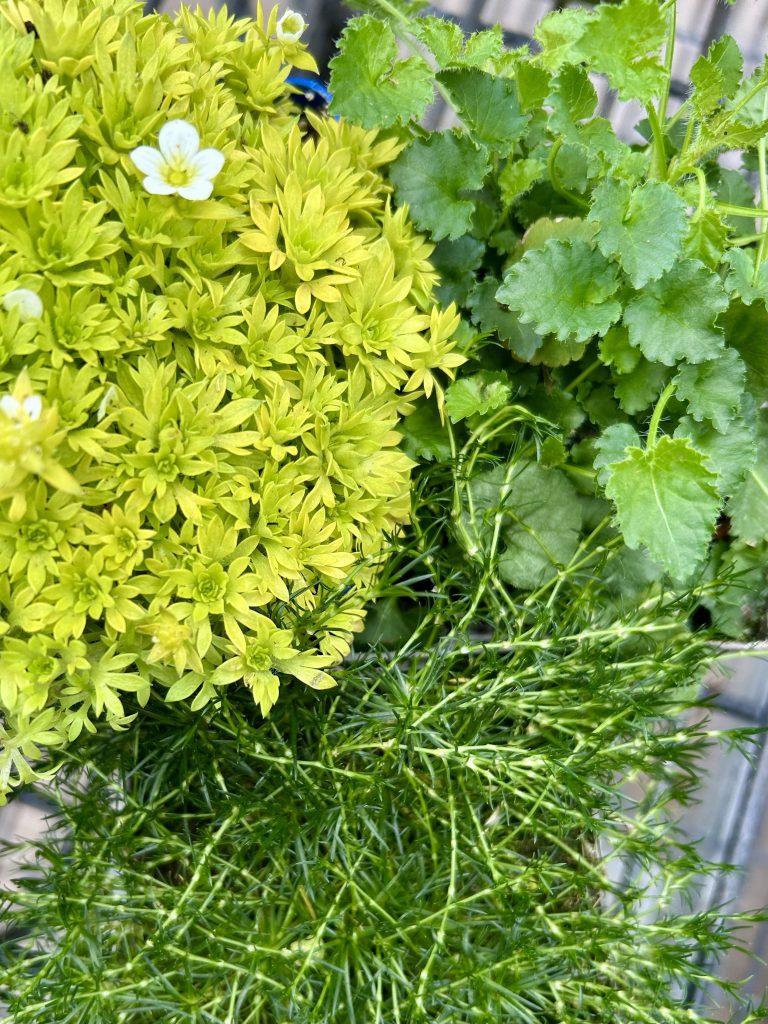
Mossy Saxifrage 'Cloth of Gold,' Sagina Subulata 'Irish Moss,' and Bellflower Campanula Carpatica 'Pearl Deep Blue'
- Echo colour tones: Pair burgundy Heuchera with other plants in similar shades, like dark-toned Euphorbia, for a cohesive palette.
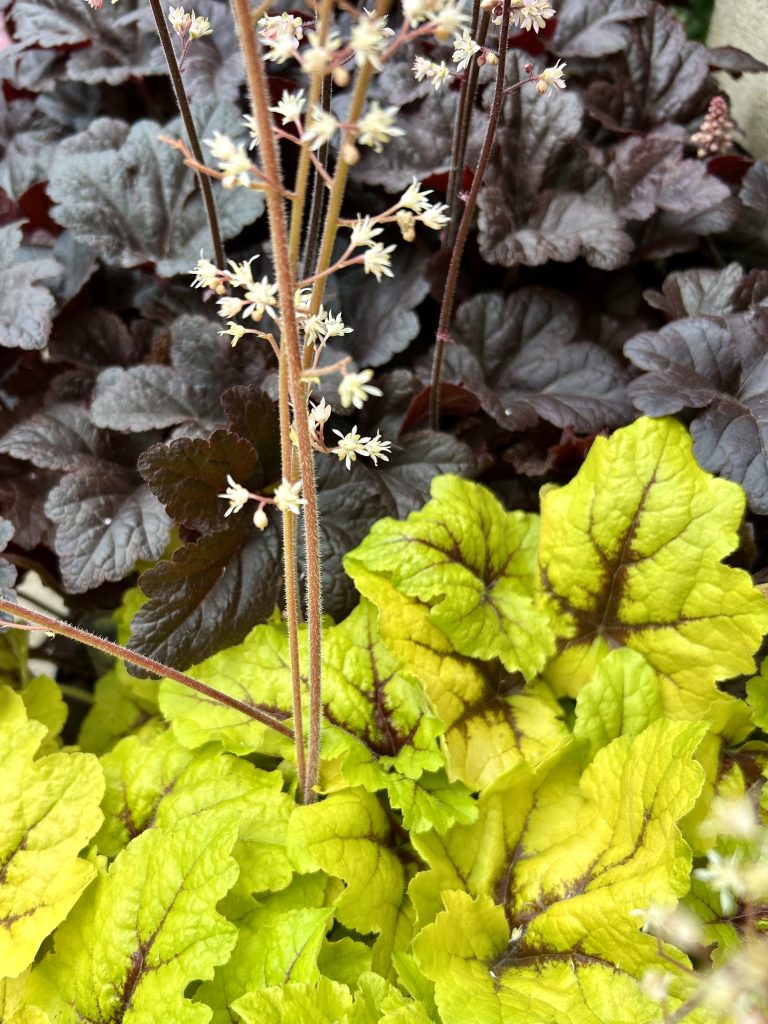
Foamy Bells 'Catching Fire,' and 'Onyx'
- Choose a colour theme: Work with warm hues like gold, rust, and copper.
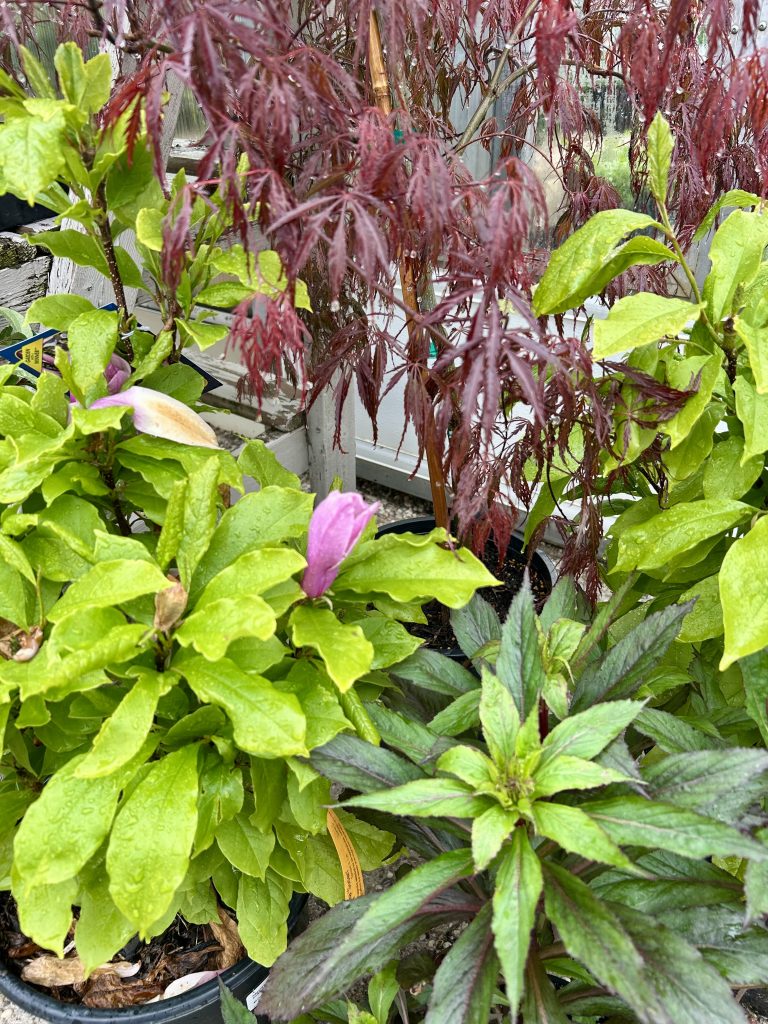
Japanese Maple 'Tamukeyama,' 'Magnolia x Soulangeana,' and Lobelia Speciosa 'Starship Scarlet'
- Mix textures, repeat colours: Choose different textures but repeat colour combinations like white and green.
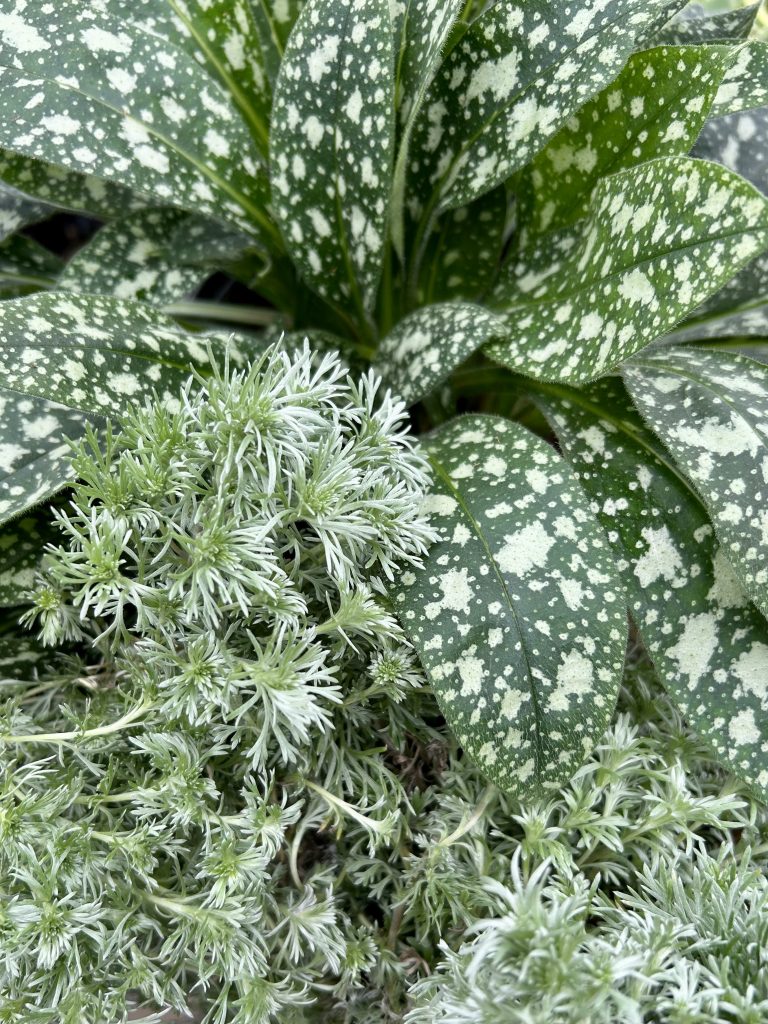
Pulmonaria 'Pink-a-Blue' and Artemesia 'Silver Mound'
Top it Off
Once your foliage framework is in place, add a statement piece to elevate it all - that favourite birdbath, a piece of artwork, an ornamental tree or shrub, or an unexpectedly showy flower. The layered, leafy backdrop with make your feature stand out even more.
Visit us at Eising Garden Centre to find all the foliage stars and supporting players you need to bring your garden vision to life!
Most of us want to easily pull together everyday outfits without overthinking it or overspending. In reality, putting stylish clothing combos together can feel harder than it should. If you stare into the closet and can’t find anything to wear, you’re not alone! Many of us struggle to assemble outfits that feel stylish and put together.
Your friends at Sassyfras Boutique in Eising Garden Centre are here to help with 4 go-to outfit tricks that always work!
These are simple style tricks you can rely on, and they're built around versatile essentials you may already own, plus just-right combinations and accessories that pull everything together. You’ll also find new ways to assemble simple pieces to create countless outfits.
These tricks come from years of helping people in our shop to build their wardrobes. Ready to get started? Let’s make getting dressed and looking great one of the easiest parts of your day!
4 Easy Outfit Tricks
- Get a Great Jacket
In every season, a great top layer pulls an outfit together. Invest in a jacket, blazer and coat for cool or cold weather. Wearing a linen shirt/shirt jacket, sweater, shacket, or cardigan works well for summer, spring and fall. Or you can simply drape it over your shoulders just in case temperatures dip a bit while you’re out or the A/C is a little too drafty.

The top, jacket, and pants are from B. Young, found in Sassyfras at Eising's Garden Centre.
2. Start with a Matching Base Layer
Begin with a neutral, matching base. Easy peasy. Once you have a neutral base, add any jacket colour and accessories! One of the great jackets you’ve invested in will enhance a neutral outfit and create multiple great looks. The key is to start with a dress, or a top and pants/skirt that are similar shades. Some examples of a neutral base are: blue/faded blue, cream/beige, grey/grey, white/white, or black/black. From there, add on any colour jacket or sweater and a similar or complementary shade of bag/purse/earrings/shoes.

Pants by B. Young. Top by Culture. Bag by LaVolta.
3. Match Your Top and Jacket
Here’s a trick you can probably achieve with the clothes that you already have! Instead of matching your top and bottom pieces, match your top and jacket or sweater. Once you put together similar neutral shades on top, you can add almost any skirt or pants and look stylish.

Jacket by Tribal. Pants by B. Young.
4. Camel Adds Class
So you’ve put your outfit together using a neutral shade for your top and bottom, or matched your top and jacket…now do you want to make your ensemble look even better? Add a touch of tan or camel, maybe even a bit of gold. Camel colour bags and shoes go with everything and are staples for easy, classic outfits. Add some gold earrings and a pair of sunglasses, and you’re set!

Top and skirt by B. Young. Hat by Kooriginal. Bag by La Volta.
Help!
We’re here to help you put it all together. Come into Sassyfras wearing your neutral base, and we can help you find that great jacket or cardigan, handbag and accessories to go with it. Or, start from scratch and find a neutral base you can build on. And for heaven's sake, let’s make it easy to look good!