
Eising Garden Centre is turning 60, and we want to celebrate this incredible milestone with the community that helped us grow!
Saturday, April 25th
10am to 2pm
Right here at the Garden Centre!
Fun for the Whole Family
We’re pulling out all the stops to make sure this is a day to remember. Bring the kids, grab a friend, and enjoy a full afternoon of festivities:
- Live Entertainment: Set the mood with great music while you explore the greenhouse.
- Kids’ Zone: We’ll have face painting and a variety of kids’ activities, like tallest sunflower growing competition (with a cash prize at the end of the season!), flower pot planting, and a colouring competition to keep the little gardeners busy.
- Free Treats: Enjoy complimentary coffee and cupcakes on us while you browse!
- Special Sales: Held across each department of the garden centre.
Food Trucks
Come hungry! We’ve invited some local favorites to keep you fueled up:
Grand Prize Draw: $600 Gift Card!
To celebrate 60 years, we’re giving away a $600 Eising Gift Card to one lucky winner! Just imagine the garden transformation you could pull off with that.
How to Enter: Fill out a ballot at the event on April 25th. The Draw: We will be drawing the winner at 12:30 PM. Important Note: You must be present at the time of the draw to win, so make sure you’re nearby when the clock strikes 12:30!
The Celebration Doesn't Stop There!
Can’t make it on the 25th? Don't worry—we’re spreading the love all spring long. From April 6th to June 8th, we are giving away 60 gift cards worth $60 each! Every week, we will be drawing 6 winners. To get your name in the hat, simply make a purchase at the garden centre. Your name will be entered into that specific week’s draw, and we’ll contact the winners directly.
Thank you for sixty wonderful years of gardening, community, and growth. We can't wait to see you on April 25th!

How to Keep Your Hanging Basket as Gorgeous as the Day You Brought it Home, All Summer Long!
By Dave Zeldon and Ely Schweyer
Remember your Mother's Day hanging basket with its variety of colours, textures, and plant combinations? Maybe there was Verbena cascading elegantly with their colourful star like blossoms, double Begonias for the porch in spectacular shades of reds, pinks, and burgundies, and of course the vigorously growing Petunias and Geraniums, to name just a few. But as the Summer goes on, they just don’t seem to have that same stamina.
To keep your hanging baskets in great shape and avoid the dry, wilted, bald spotted, leggy look that occurs to containers every August, one should follow these easy tips.
Watering
Plastic, fibre, and especially moss lined baskets dry out quickly. They should be checked twice daily and watered every day. Be sure to wet the moss sides as well.
Try to maintain uniform soil moisture. When watering, fill the top of the container with pooling water until it ‘pees,’ and allow it to drip out of the bottom of the basket every time you apply water. Frequent severe wilting will impact upon the quality of the basket.
At this time of year, one could take the basket down and soak it in a tub of water for 20 minutes to hydrate the entire root ball, once every week.

Deadheading
Remove spent flowers on a weekly basis (this is called deadheading) to prevent plants from going to seed. This will encourage more flower production. Part of the beauty of the mixed basket is its prolonged display, just like in your garden.
Check for Pests!
During your weekly deadheading, keep a watchful eye out for aphids, whiteflies, and caterpillars. If you see any, try a quick spray of insecticidal soap to keep them from becoming an infestation.
🖱️ If you're noticing fungus gnats in your hanging baskets, find more on eradicating them here!
Pruning
Not every plant in the basket will be at its peak all season.
Cutting plants back after a flush of bloom will tidy them up and prepare them for a fresh crop of flowers. Meanwhile, other varieties will begin putting on a show. This is especially true for Petunias.
A good cut back of long, lanky branches will reap benefits.
Fertilizing
Daily watering means nutrients can leach out of the soil before the plants can absorb them. The baskets should have both slow release granular added to the growing media and a weekly feeding of 15-30-15 soluble fertilizer. Use a solution containing micronutrients, as plants like Petunias need extra iron.
Sheltering
It has been suggested, if possible, that during stretches of extreme heat, give your baskets a break and move them to a cooler, shaded spot to de-stress for a couple of days. This is also suggested when heading on vacation. Your flowers will rebound to their former beautiful selves!
We hope this long term hanging basket care guide helps you enjoy your purchase all summer long! For more information - and beautiful plants – visit Eising Greenhouse and Garden Centre! 🌸
By Ava Green
Usually, by the time February or March rolls around, I’m pretty tired of the health crazes like extreme diets and exercise plans I’ve been trying for the fifth year in a row. This year, let’s take a look at something that naturally supports our good health, both mental and physical. It’s time to stop and “smell the flowers,” so to speak.
Mental and Physical Health
Many gardeners already realize this, but studies are showing that simply seeing greenery can benefit our mental health. Whether it's a walk in the woods or a handful of houseplants, seeing green leaves makes a difference for humans! Research shows that it helps boost our mood and improve how we get along with people. Who doesn’t need a mood booster during cold, dark days? And getting along with people, well, the world just needs more of that, too, doesn’t it?
You may also already know that tending to plants reduces stress, but did you know that science is proving it? PubMed published a study stating:
"Interaction with indoor plants may reduce psychological and physiological stress by suppressing autonomic nervous system activity in young adults: a randomized crossover study."
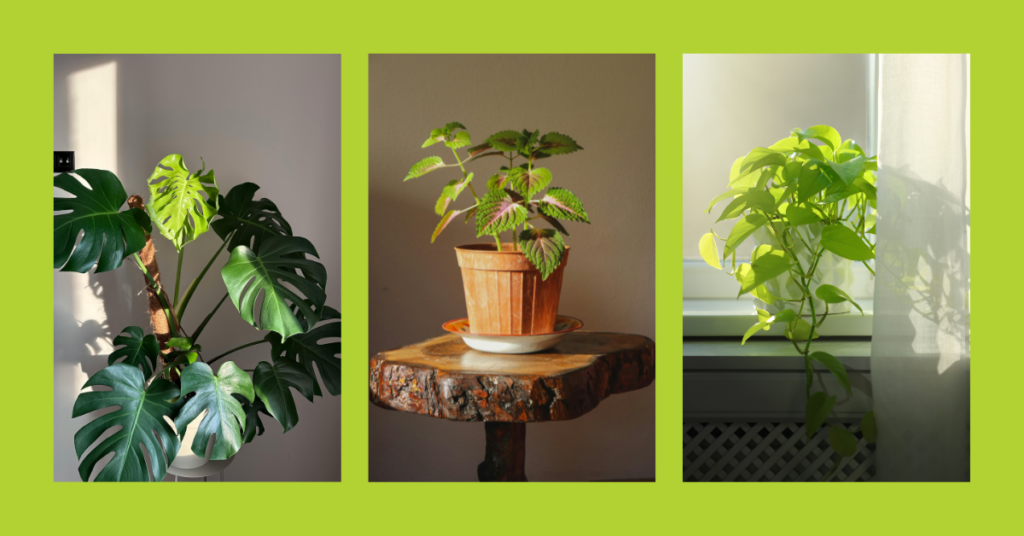
This isn’t the common thinking about working outside in the garden increasing physical strength and stamina. It’s a study that examines our autonomic nervous system, the one responsible for automatic and essential bodily functions we don’t even think about, like breathing. The study compared participants performing two tasks: one on a computer and the other doing plant transplanting. The results suggest that interaction with plants indeed reduce stress without us even thinking about it! No task that requires willpower, just daily tending to plants like transplanting, watering, dusting, pruning, or turning the pots to get sun on the flipside.
So plants boost our mood, improve interactions with others and physically reduce our stress levels without us even trying. It’s no wonder we just feel better when we’re around plants.

Air Quality
Research also shows that indoor air pollution is often worse than outdoor air pollution. VOCs (Volatile Organic Compounds) from washing detergents, paint, furnishings, and building materials, as well as bacteria, fungal spores, and dust, negatively affect human health.
Fresh air can counter the impact of indoor pollutants, but often it’s too cold to open the windows in the middle of winter. When you can’t let fresh air into the house, indoor plants will help. We know that growing trees outdoors has a massive impact on air quality and the health of the planet, and inside our home, tropical plants contribute in the same way. The contribution of each type of plant varies, so having a variety is a very good idea.
What to Grow
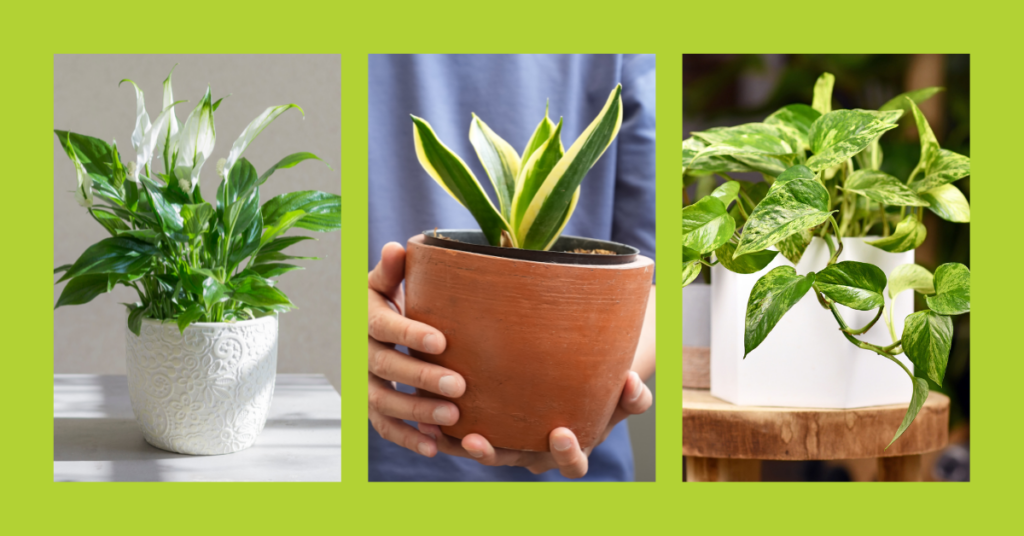
Here’s a list of easy-to-grow, green indoor plants that Eising’s resident tropical plant expert, Courtney, and the UK’s Royal Horticultural Society (RHS) recommend:
Aglaonema ‘Silver Queen’ (Chinese evergreen ‘Silver Queen’)
Aspidistra elatior (common Aspidistra, Cast Iron plant)
Chamaedorea elegans (Parlour Palm)
Chamaedorea seifrizii (Bamboo Palm)
Chlorophytum comosum (Spider Plant)
Crassula ovata (syn. Crassula portulacea) (Jade plant, Jade tree)
Dracaena fragrans ‘Janet Craig’ (Dragon Plant)
Dieffenbachia ‘Tropic Snow’ (v) (Dumb Cane)
Dracaena marginata (v) (Madagascar dragon tree)
Epipremnum aureum and ‘Marble Queen’
Ferns - many types
Ficus elastica (Rubber tree, Rubber plant)
Hedera helix (English ivy, common ivy)
Howea forsteriana (Flat Palm, Kentia palm)
Rhapis excelsa (Bamboo Palm, Lady Palm)
Sansevieria (Snake Plant) - many types
Spathiphyllum sp. (Peace Lily)
Syngonium podophyllum (Nephthytis)
Zamioculcas zamiifolia (ZZ plant, fern arum)
Is there a downside to having houseplants? Yes, if you have small children or pets, be mindful of the plants that can be toxic if ingested (see resources listed below).

While many of us in Ontario focus on “nice” weather and getting outside to garden, it’s pretty clear that our indoor plants do much of the heavy lifting to improve our health through the cooler seasons. Even if you don’t have a “green thumb”, it’s worth giving tropical, indoor houseplants their well-deserved space in our homes, hospitals, offices, nursing homes, classrooms, restaurants…or any indoor space!
Resources:
PubMed study on indoor plants and their impact on human stress - https://pmc.ncbi.nlm.nih.gov/articles/PMC4419447/
Sally Augustin, PhD, Environmental Psychologist - https://www.psychologytoday.com/ca/blog/people-places-and-things/201802/benefits-of-the-indoor-plant
RHS - https://www.rhs.org.uk/plants/types/houseplants/for-human-health
For a list of indoor plants and the VOCs they have the potential to reduce, PubMed review article by Dela Cruz et al., 2014 - https://pubmed.ncbi.nlm.nih.gov/25056742/
PETAs list of plants that are safe for pets: https://www.peta.org/living/humane-home/animal-friendly-houseplants/?utm_source=PETA::Google&utm_medium=Ad&utm_campaign=0422::veg::PETA::Google::SEA-Vegan-Grant::::searchad&gad_source=1&gad_campaignid=96533821&gbraid=0AAAAADu2DAt3SGF9vPRkHJqkNw-eZ6kEH&gclid=CjwKCAiAvaLLBhBFEiwAYCNTf9nyavbUnefHx0FaUekq4HZyXPrIwYhnJqgnu_g_TPea3nExhT-jOhoCqLUQAvD_BwE
RHS list of safest plants for children: https://www.rhs.org.uk/plants/types/houseplants/houseplants-for-children
Adding Year-Round Interest to Your Garden
By Ava Green
Spring brings excitement and the hope of fresh beginnings, but also the harsh reality that our gardens can look a little…well…blah, in between seasons. Even when you have evergreens, well shaped trees, shrubs or perennials with “good bones” (strong framework or structure) a garden can look bare off season. This is when garden features and ornaments can really make a dramatic difference!

Create Year-Round Interest In Your Garden
Do you have a spot in the garden where plants struggle to grow? Or an area where you feel like your garden is missing something?
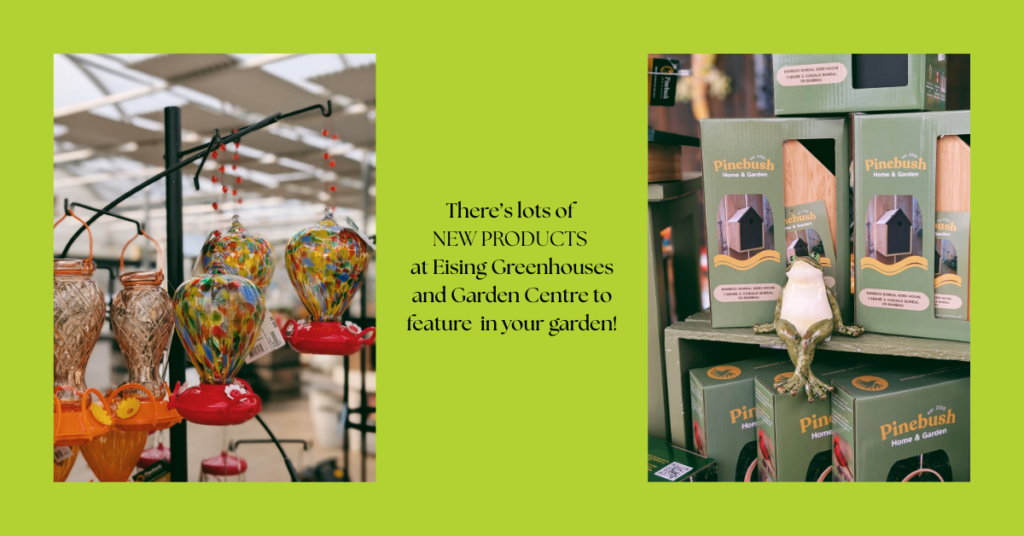
Items like benches, patios, ornamental urns, decorative fencing, statues, a pond, gazing balls, birdhouses and birdbaths add beauty and function in every season. In Southern Ontario’s long shoulder seasons (early spring, late fall, and the longest of all - winter) these permanent elements help to make your garden look inviting all year.

Why Every Garden Benefits from a Focal Point
A garden filled with colourful annuals and perennials can be stunning, but without a focal point, it can feel visually overwhelming. A garden focal point like a bench, statement urn, a piece of statuary, or a water feature draws your attention, and creates a sense of purpose.
Focal points guide movement through the garden and help tell a story, leading visitors toward a destination. While naturalized gardens and wildflower areas don’t always require structure, for gardeners who prefer a more organized look, incorporating a focal point can create a sense of order and transform your space.

Add Contrast With Texture and Shape
Many gardeners naturally gravitate toward favourite plant forms. Tall, spiky perennials like coneflowers, salvia, and Black-eyed Susan are popular in Ontario gardens but they can feel repetitive when planted together.
Introducing contrast changes everything. A round birdbath nestled among upright perennials adds softness and contrast making it more visually interesting. In shady gardens dominated by hostas, a tall iron obelisk or trellis creates height and drama. Mixing plant textures with garden features like lighting instantly elevates beds and borders.

Express Your Personality!
Gardening is a creative process, and experimentation is part of the joy. Moving plants to find the right light or shelter often leads to surprising combinations and successes. Garden features allow you to express that creativity even further.
Statuary, ornaments, and structures, whether handcrafted or purchased, add personality and meaning. From whimsical accents to bold architectural elements, these features bring height, structure, and style to your garden in ways plants alone can’t.
More Than Just Flowers
Flowers bloom and fade with the seasons here in Southern Ontario. Garden features provide continuity, offering year-round interest, structure, and charm. With just a few additional elements, your garden can look beautiful in every season, not just when it’s in bloom.
By Dave Zeldon and Ely Schweyer
Got cabin fever? Perhaps you’re going a little stir crazy looking out the window and seeing the drab, limited pallete in your seemingly lifeless outdoor space. It’s important to embrace this time of year as the composting and cleansing part of Earth’s cycle before spring’s renewal – but that doesn’t mean we should be trapped inside forever. Here’s a winter/early spring list of activities, divided by indoor (Part 1) and outdoor (Part 2), for the gardener and yard keeper.
☝️ First, let’s quickly note the important activity happening under the snow – and how your actions now will affect the summer garden!
What's Going on Outside When We Aren't Paying Attention?
Before heading out to attend to these jobs have a look at the ground beneath you.
If it is frozen hard you are good to go but avoid treading on the crowns of perennials.
If it has been warm and sunny and the soil is warm and dry, consider laying down a few planks to walk on.
If the soil is soggy then postpone those tasks until it has dried. What we are trying to protect is not your shoes but the soil itself.
Ideally, soil is comprised of 50% solid materials such as minerals and organic matter in various stages of decomposition, and 50% open air space. Water from rain or melting snow enters the soil, displacing the air. Wet soil is easier to squish down and that process is called compaction.
While walking on wet soil would not seem to have much effect, it occurs within the depth where annuals, perennials and lawn grasses have their roots. Compaction makes it harder for roots to grow through the soil. Roots can grow stronger to push aside the soil particles, but tougher roots are less effective at drawing in nutrients and moisture. Removing air spaces makes it more difficult for water to percolate down so compacted soils remain wetter. Plants don’t grow as well and are more prone to insect damage.
The freeze/thaw cycles of fall, spring, and winter heave the soil relieving compaction and aerating the soil; a good way to start the growing season. Preventing further damage to the soil is relatively simple. Stay off it when it’s wet. Later, consider using pavers or pathways in heavily travelled areas of the lawn. Aerate the lawn with a machine that removes small plugs of soil and redistributes them over the surface. In beds and borders, add compost and use a thick mulch layer to absorb some of the pressure.
And stay off it when it’s wet.
With this in mind, we can appreciate Earth’s renewal capabilities, as well as prevent destroying our yards and gardens!

Part 1: Activities for When it’s too Cold and the Soil isn’t Ready Yet
Yup, it’s bleak out there. It’s time we make that herbal tea and turn our attention to creating a lively, green indoor environment, even if just to get us through the winter. Here’s a to-do list for trapped gardeners and plant enthusiasts to make the most of our wintry sentence.
Indoors: Get Inspired!
- Expand your knowledge: There’s an endless plethora of botanical media at our fingertips, use this down time to learn more!
- Sustainable winter crafts: Why buy décor and gifts when you can make them from materials found outside? Perhaps you dried flowers or found some interesting seed pods – time to display them, and perhaps, eventually compost them.
- Visit botanical gardens: Ely’s boyfriend took her to the Royal Botanical Gardens as a birthday gift last year! Botanical gardens are a great way to experience interesting plants being preserved in a welcoming environment that differ from the dreary winter outside.
- Get floral: Try buying flowers and displaying your own arrangements! Colour is something we sometimes lack in the wintry months, and this is a good way to introduce it impermanently.

Indoors: Thinking Ahead!
- Use this winter down time to plan the next garden season - find more here on garden planning.
- Use a garden journal to assist your garden planning - see here inspo for garden journaling.
- Consider planning companion plants - see more here on companion planting.
- Go pot shopping – your local greenhouses and ceramic shops would love your support in the winter.

Indoors: New Beginnings!
- Bulb forcing and small science experiments: Flowering bulbs like amaryllis (more on amaryllis here) aren’t just a holiday splendor! Now is also the time to create cuttings to share with friends.
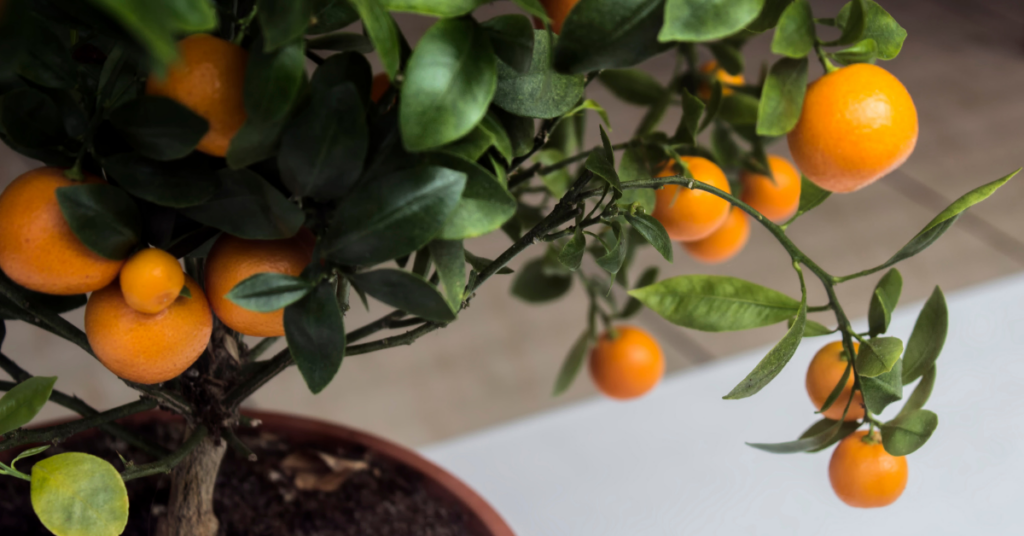
- Invest in winter fruiting botanicals like indoor fruit trees. Small, potted citrus by the window don’t only liven up the place but offer nutritious treats in the winter. Consider a calamondin!
- Microgreens - see our blog about it! When it’s too early to start seedlings that will go in the ground, you can still garden right on your kitchen counter.
- In late winter, start seedlings: but make sure you don't do so too early! Untimely seedlings can be too leggy before it's time to plant them outside - learn about hardening off seedlings here.
Part 2: When the Soil IS Ready!
Suit up!
Outdoors: Don’t Fall Behind!
- Appropriate seasonal décor: It goes without saying stringing lights and ornaments everywhere is good for the spirits in these dreary months… however 😬… come February, they seem to lose their vigor. Taking the décor down in preparation for new exciting things to come is also good for the soul! Remember to recycle your Christmas tree (see how here)!
- Turn your compost! Perhaps you’ve faithfully continued to add to your compost all year – your garden thanks you! On a warm day, remember to turn it and aerate it so it’s ready for spring.
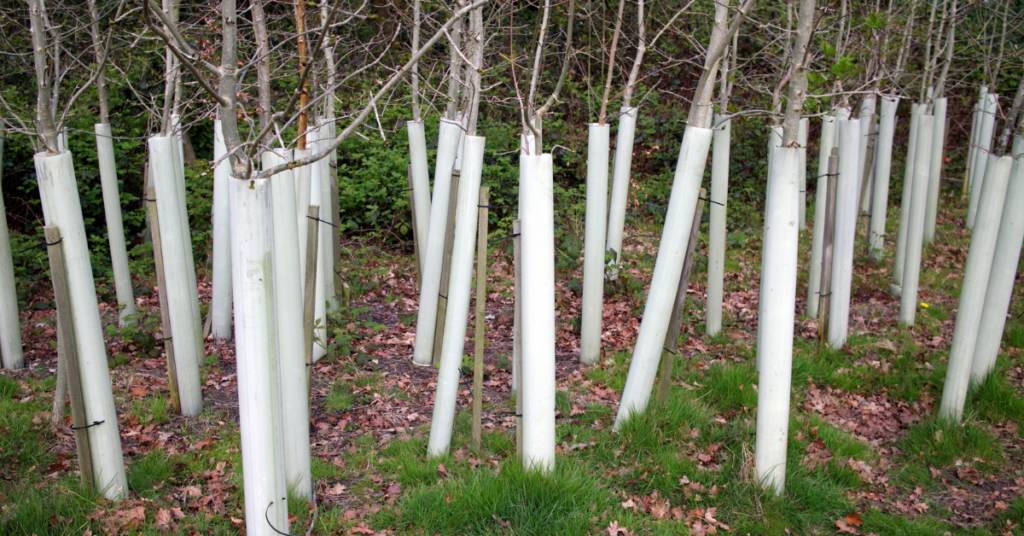
- Cover all your bases: Make sure to prevent rodents from damaging your tree bases by wrapping them well above the anticipated snow level – so rodents can’t chew your unprotected trees with the helpful elevation of snow!
Outdoors: Get Inspired!
- Go for nature walks: if you can safely go for a walk, hit the trails or stroll around your neighbourhood! A slow-paced change of scenery will help to fight your cabin fever, keep you active, and help you gather inspiration from the natural world.
- Visit your local maple syrup producers for tours.
- Don’t forget our critters: Provide winter homage and appropriate food for our nonmigratory friends (i.e., hutches and feeders) outside windows where pets can observe nature too!

Outdoors: Thinking Ahead!
- Winter weeding: Some tough varieties of plants have evolved to use other plants’ winter dormancy to their advantage, tugging them out now will ensure that you and all the wanted plants in your garden have a fair start this spring.
- Manage snow piling: Heaped snow piling can kill plants including lawn, as well as introduce gravel and debris to areas where gravel is not wanted. Make sure your snow piles aren’t suppressing anything you’d like to live this summer.
- Early spring: Perhaps ice storms and plows have done a number on your trees and shrubs - prune broken branches to prevent pests and disease from entering your plants.
- Litter control: pick up the debris revealed by melting snow so it doesn’t venture farther into natural habitats or tempt wild animals to hurt themselves.

Outdoors: Start Something New!
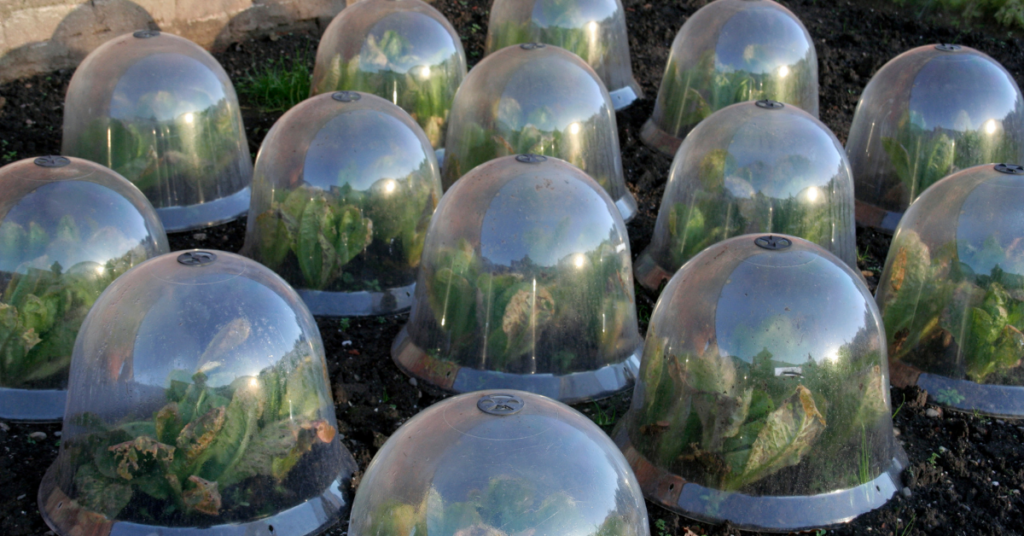
- Cold hardy crops in cold frames: Cold frames are doable! Use recycled materials - Victory gardens often used car windshields and old windows – to construct in-ground beds facing the sun (southwards) for passive solar heating.
- Winter sowing: Find more on winter sowing here.
We hope these suggestions help you stay green this spring and winter! For more gardening activities, see our other blogs here. We hope to see you this spring (March 5th, 2026) at Eising Greenhouses and Garden Centre! 🌱❄️
By Dave Zeldon and Ely Schweyer
This is a question we hear daily during the spring, summer and, especially, the fall. Unfortunately, many homeowners do not see any adverse changes occurring in their trees until they look dead, or nearly so.
You Might Not Need to Panic Yet
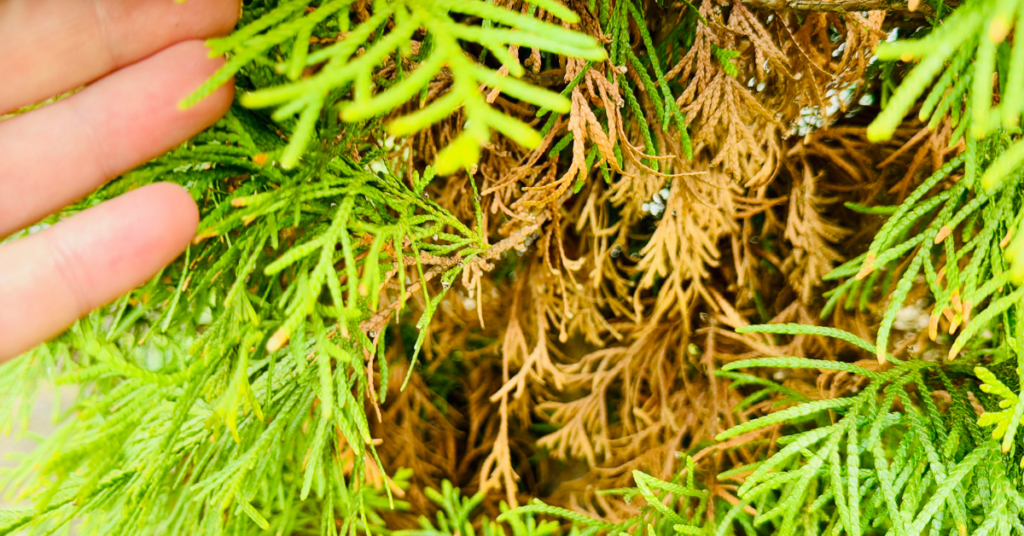
The discolouration and dropping of evergreen needles are a natural phenomenon and the main cause of needle loss in the wild. Evergreen needles, as the name implies, survive for a lengthy period, and in fact usually have a life span of five to seven years on healthy trees, however, they must be shed. The needles first start to die in the central and lower part of the tree, and this change progresses upward over time. You will see spruce trees naturally lose needles as they get older.
Age is an important factor here in causing needle loss and branch death, however, in landscape plantings of coniferous evergreen trees, pests and disease are likely the major cause of needle loss and dying branches. If there is a sudden fall of a very large number of brown needles and leaves, this signals to us that there is something drastically wrong!
This can happen as early as a year or two after a tree is planted. This is especially true in Haldimand and Eastern Norfolk County where heavy clay soils predominate. Spruce trees, for example, do not grow well on clay soils.
When You DO Need to Worry
Here are some of the more common problems, apart from natural aging that afflict spruce trees, the probable causes and ways of treating the problem.
☝️Unfortunately, these majestic trees, the most popular evergreen planted on our residential properties, incur many other pest and disease problems not dealt with here.
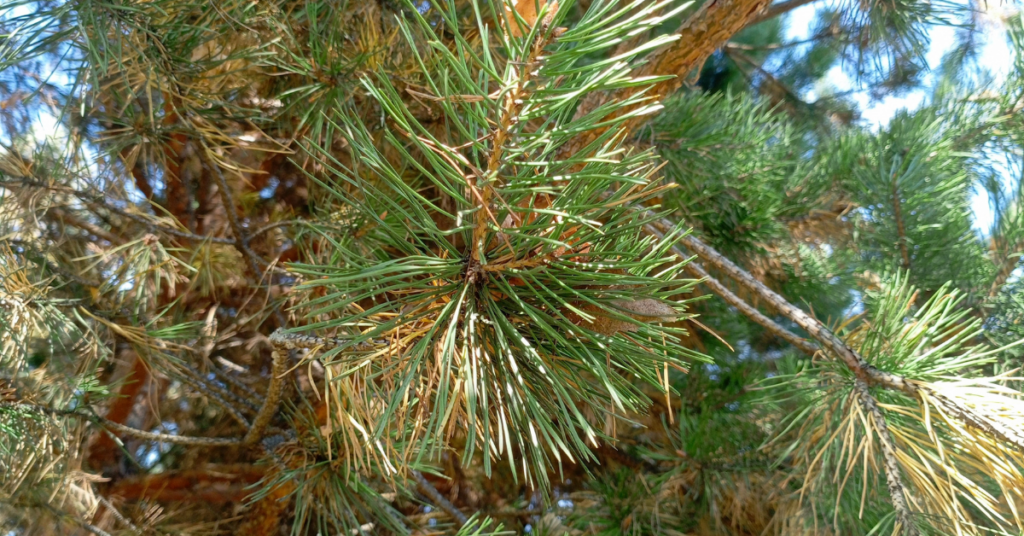
Symptom: Rusty brown needles that eventually fall.
Likely causes:
1. Internal fungus disease (called Cytospora or white blister canker). This creates cracks in the bark causing resin to drip and leave grey-white dripping streaks on the bark. The fungus also causes open wounds or blisters on tops of branches. These wounds can be greyish white or greyish blue in colour, eventually turning brown and black.
2. Feeding by spider mites which leave fine, poorly formed webs in the needles, especially near the ends of the twigs.
Best treatments:
1. Properly aerate and fertilize tree out to a distance of half its height in all directions, where possible.
2. Pressure wash thoroughly once a month with water only, all needles and branches as high as possible on the tree. Water pressure dislodges spider mites.
Symptom: Chewed up ends of twigs in June.
Likely cause:
Spruce bud worms which develop in the needle cluster that arises from a bud.
Best treatment:
Spray the biological pesticide, BTK (eg. Dipel), onto the entire tree when feeding is first noticed in early spring, to kill the young caterpillars.
Symptom: Black sooty mold covering twigs and needles.
Likely causes:
1. Spruce bud scales, ball-shaped insects, initially light brown in colour but eventually turning black. Often two to five scale balls cluster in one location on the twig; honey dew excretions from scales become infected with sooty mold.
2. An overhanging shade tree such as oak, maple or elm may have heavily infested leaves with aphids whose honey dew secretions become infected with sooty mold.
Best treatment:
1. Pressure wash tree using water only to dislodge young scales (called nymphs) in May and early June while they are in the crawling stage. Scale nymphs fall to the ground where they cease to be a threat to the tree.
2. Spray shade tree in early spring with insecticidal soap to control aphids. The problems of other coniferous evergreens such as pines, firs, cedars and junipers can usually be treated with correct diagnosis, though some diseases are lethal.
We hope these help you troubleshoot common issues often found in evergreen trees! For more information - and evergreens – visit Eising Greenhouse and Garden Centre! 🌲
By Dave Zeldon and Ely Schweyer
As plant people, we’ve all experienced that moment when we realize the novelty phase of that plant we brought home from the garden centre has worn off. The plant isn’t standing quite as tall, the flowers aren’t as bold, and the leaves are unravelling smaller or not at all. What is this magic they perform in the greenhouse? Perhaps you’ve provided sufficient lighting and adequate watering; there’s just one thing that is often overlooked because dirt is dirt, isn’t it?
97% percent of plant tissue is made up of carbon, hydrogen, and oxygen pulled from the air and water, the remaining 3% is comprised of 16 other elements taken up from the soil. The quality of soil then is crucial to your plant’s health. Whether your plants are in pots or in ground, each soil type you could provide your plant offers something unique and may lack in another.
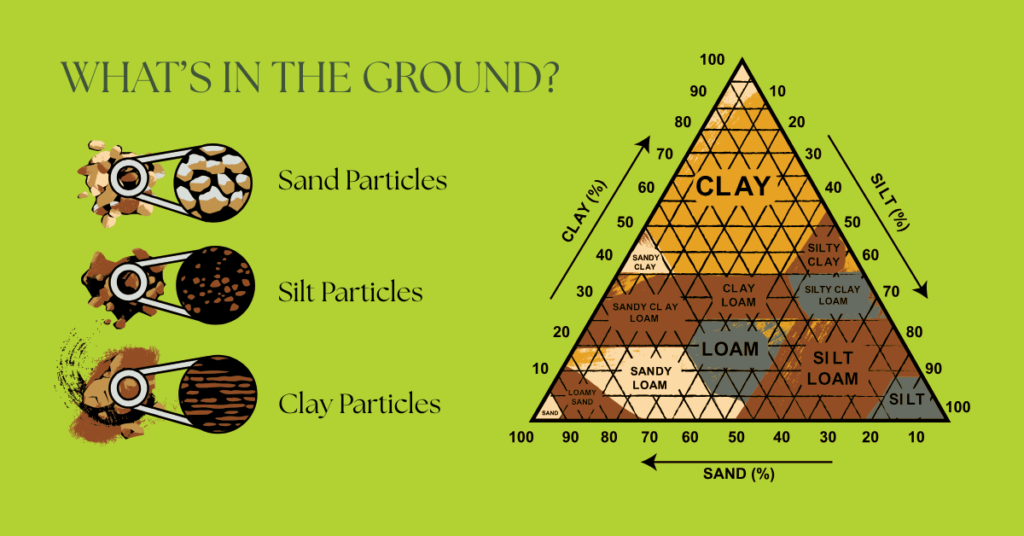
*Clay particles are even smaller than silt particles.
Resist the Urge to Slam Your Plant in Potting Soil
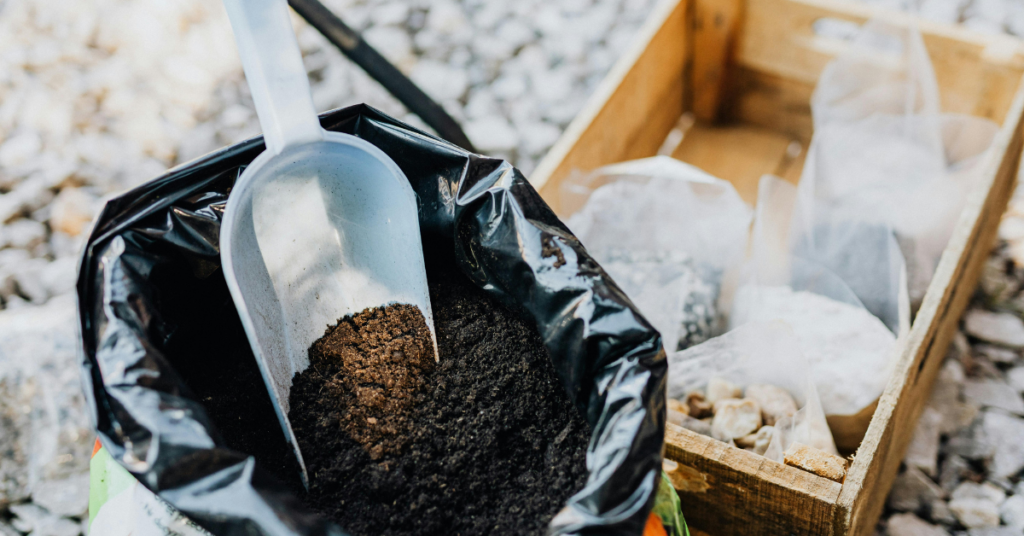
There’s bags and bags of rocks, sand, bark, manure, and moss on the shelves, yet the common buyer seems to always opt for potting mix. It’s fair; organic matter is usually great for plants and simple to use. However, most people don’t realize it’s merely an ingredient.
Strictly using potting mix is like attempting to make a loaf of bread out of only flour. All those bags of other materials on the shelves are also components for a successful plant diet!
Potting mix is a great base material, however, alone it presents risks of compacting, becoming waterlogged, can mold easily, and over time will become depleted of nutrients. Consider mixing the following ingredients into your pots, ground and raised beds to meet your plant’s required nutrients, pH level, and volume of moisture.
🖱️Use our Plant Finder to find some details on your plant! We try our best to keep this updated!
👍 Rule of Green Thumb: Plant roots can help you to determine the medium needed – thick, robust roots (i.e., yucca) typically enjoy chunkier materials, and smaller, delicate roots (i.e., begonias) enjoy finer materials.
Mulch and Bark Bites
- Mulch is the organic slow-release fertilizer, as it slowly decomposes, it lowers soil pH. However, may eventually compact soil once fully broken down.
- In the meantime, it creates shelves in the soil that create air pockets and prevent the soil from compacting. Mulch is a great short term medium for arid potted plants.
- If kept too wet, it can harbour fungus gnat larvae.
- Make sure when sourcing your mulch it doesn’t contain any black walnut.
🖱️ See more on mulching here.
Sphagnum Peat Moss
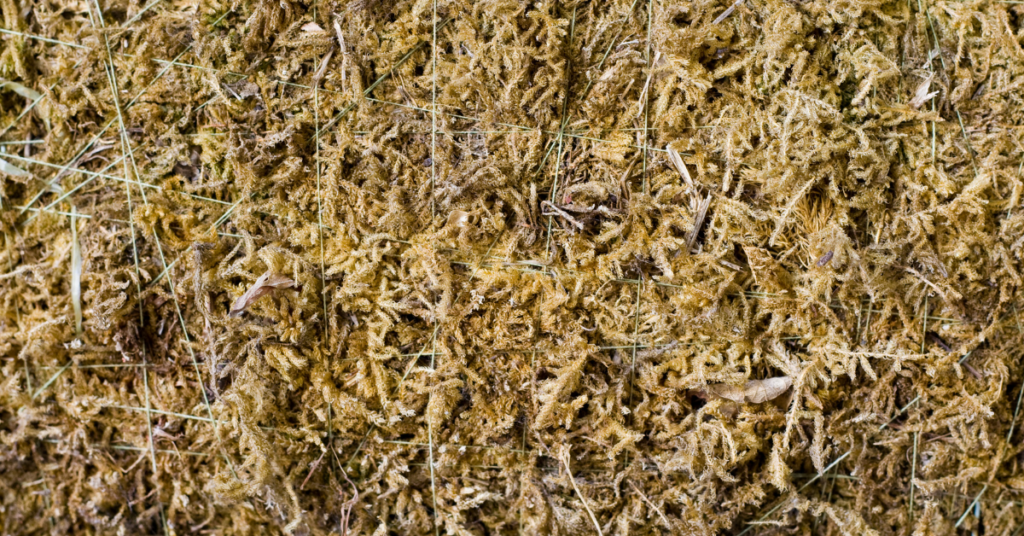
- Peat moss is used to help retain moisture and lower pH in the soil given it is harvested from bogs.
- Retains nutrients very well.
- It is difficult to rehydrate once it loses moisture.
Coconut Coir
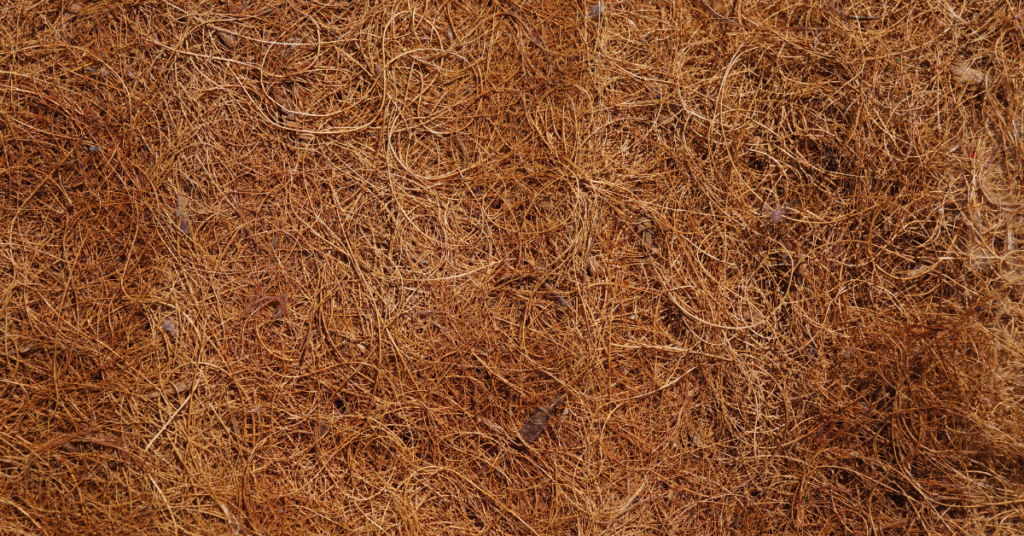
- Coco coir, much like peat moss is used to keep the soil moist and keep pH low, however it lasts longer and is possibly less invasive to harvest.
Sand
- Grains are relatively large and do not bind, allowing for excellent drainage depending on grade.
- Adds weight to top heavy plants.
- Has no ability to store minerals itself, however, pH can vary by its content of shells, minerals like silica, or fine organic matter.
Manure & Compost

- Source these organic by products locally and ensure they’re not too hot. These additions can significantly lower pH.
- Sheep manure is usually near free of weed seeds as sheep digest seeds better than cattle and horses!
Perlite
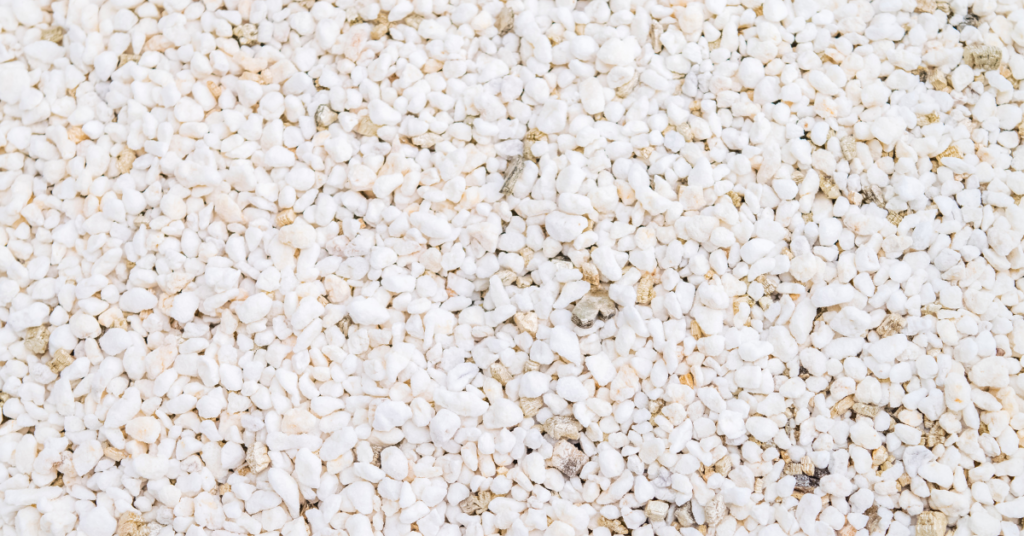
- Perlite is a volcanic byproduct (so it floats like pumice) that helps drainage in the soil and prevents compaction – vital in the case of starting seeds.
- If a rockier, well-draining medium is required for your plant, consider perlite.
- Perlite can expand holding trace amounts of water.
- Perlite has a neutral, slightly acidic pH.
- Make sure when sourcing perlite, that you are not being sold Styrofoam balls.
Vermiculite
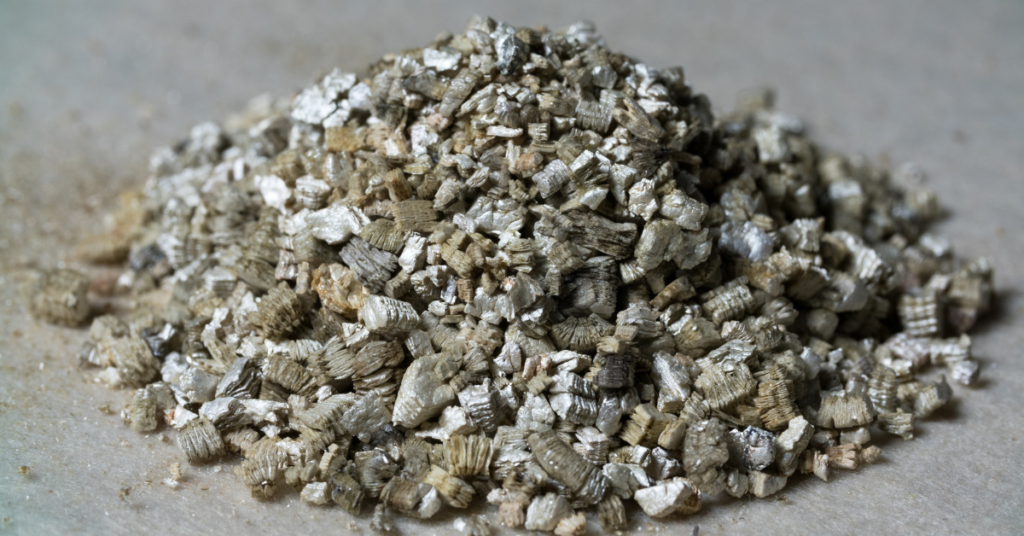
- Vermiculite is a recycled mineral used similarly to perlite, and too has a neutral, slightly acidic pH.
- Expands with water content.
- Can contain amounts of potassium and magnesium (as well as good cation exchange capacity).
- Runs the potential risk of introducing asbestos into your soil.
Calcined Clay Materials

- Clay materials like recycled brick bits, pottery, or lecca are typically used for arid plants as it improves aeration and drainage.
- Can raise pH.
- Can retain some water.
- High cation exchange.
- Can also be used for starting robust cuttings when kept moist.
- Probably not ideal for inground amendments.
Maintaining Your Plant’s Dietary Needs
Perhaps we’ve crafted the perfect soil type for your plant – your plant thanks you – but over time, we will end up in the same staling predicament. Why? Because with each thorough watering, we leech the soil of the provided nutrients. Best we use the plant-specific required fertilizer for your plant to prevent nutrient loss.
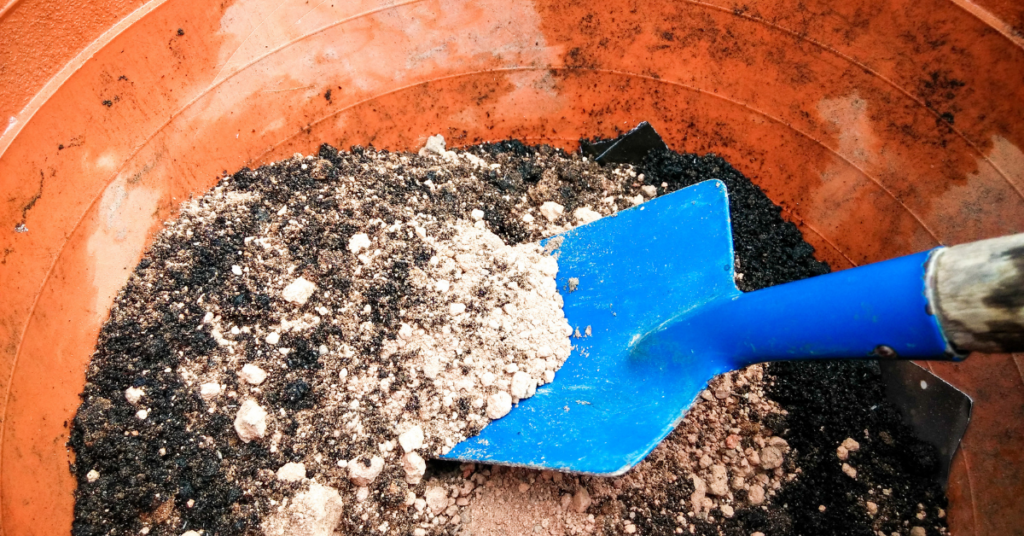
Organic sources of fertilizer such as bonemeal, composts, and manures, along with the application of lime, will improve the physical condition of the soil in terms of water and element holding ability. Unfortunately, in many cases though, manures and lime alone cannot be depended upon to provide enough available nutrients in soils with low essential element reserves.
Let’s talk about commercial fertilizers, which can help target your plant’s exact needs much like vitamins and supplements!
The Scoop on Fertilizers
Of the essential 16 elements your plant pulls from the soil, Nitrogen (N), Phosphorus (P), and Potassium (K) are the most critical for good plant growth. You’ll recognize the three numbers appearing on your commercial fertilizer labels known as the fertilizer analysis of the product, representing the percentage of each of the three "macronutrients" in the order of N, P & K.
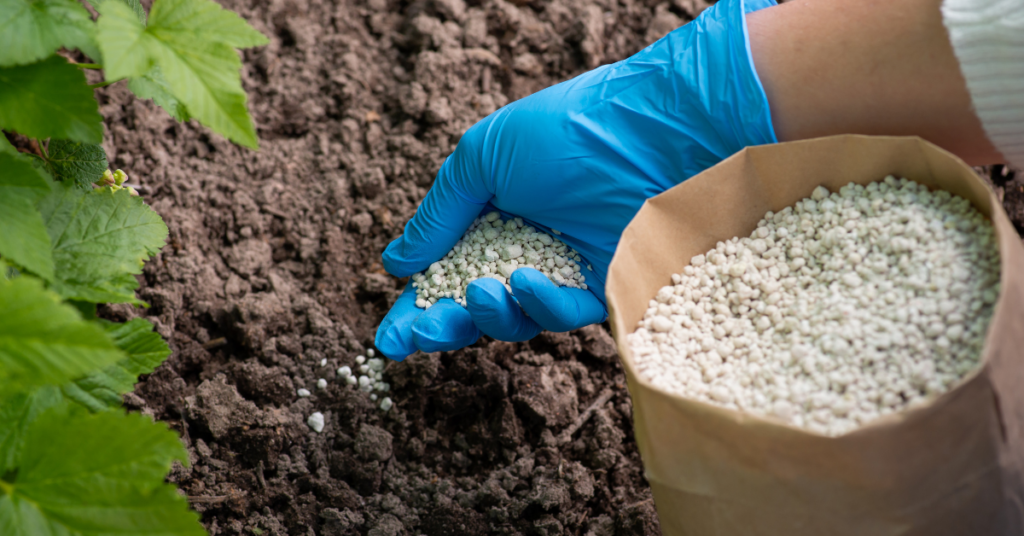
Nitrogen (N) is necessary for green leafy or vegetative growth which is important in crops like corn, cabbage, and potatoes.
☝️ It is important to remember that you should not use a fertilizer which is high in nitrogen late in the summer on your perennials, as it may cause a boost of growth which will only freeze as the cold weather sets in. Also, too much nitrogen in the analysis could cause too much lush, leafy growth thus inhibiting the desired flowering aspect of a plant species.
Phosphorus (P) promotes the development of flowers, fruit and roots. Crops like tomatoes, cauliflower and garden flowers.
Potassium (K) boosts plant hardiness, stem strength, resistance to disease and drought which is important to all crops, but especially in potatoes, celery and rhubarb.
👍 Rule of Green Thumb: For foliage plants, provide them with shade and lots of nitrogen, and for flowering and fruiting plants, provide them with lots of sun and lots of phosphorus!

Amending Clay
Hello Haldimand and Eastern Norfolk!
We’re presented with the challenge of compacted, often shallow and waterlogged clay, which proves difficult but not impossible.
Clay becomes compacted and waterlogged as it is the smallest soil particle – smaller than a grain of sand, and even smaller than silt – with rough edges that allow it to interlock and bind. In this instance, roots cannot penetrate further into the soil, are susceptible to root rot, and air pockets are slim to none.
This, however, can be fixed with the addition and renewal of the above materials.
Mindful that you don’t create a watery bowl in the ground (score the edges the area being worked), you can add organic matter (i.e., manure, compost, and potting soil) for nutrients, as well as mulch, sand and perlite for aeration and drainage. Annual soil particle aggregation in clay soils increases air porosity (air pockets) and is accomplished by the incorporation of organic matter that breaks down to form humus.
🖱️ See more here for planting trees in clay.
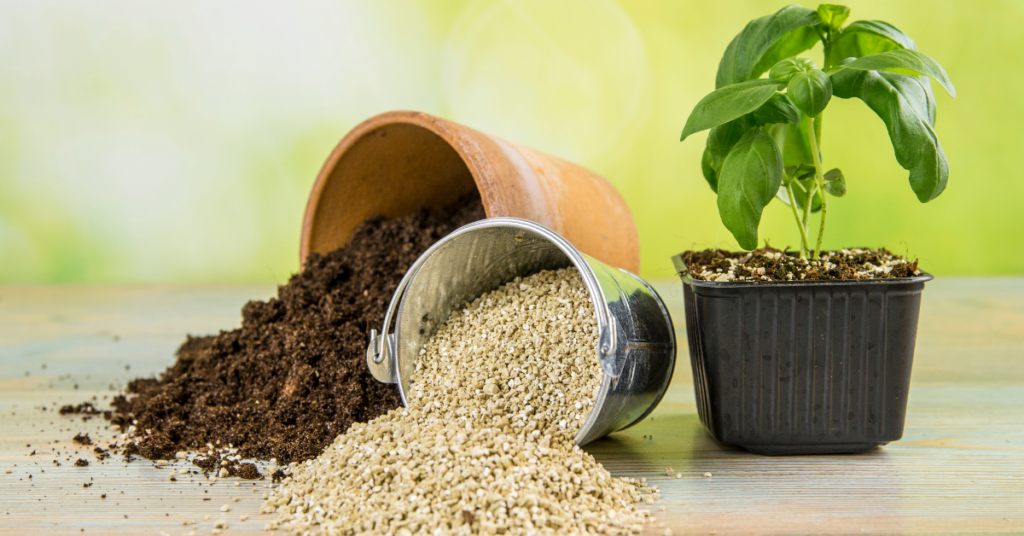
We hope this soil and fertilizer guide helps you provide all the vital nutrients to your beloved plants in ground and above ground! For more information - and soil – visit Eising Greenhouse and Garden Centre! 🌱
By Dave Zeldon and Ely Schweyer
Starting the first week of January, seed packets of many vegetable garden delicacies began arriving at your local garden centres. It’s a great time to plan your gardens and purchase your seeds while the selection is good but don't sow your seeds too early!

If started too soon, your plants will be leggy and overgrown long before you can transplant them into the garden. The general rule of thumb (even if yours isn't green), is if the seed packet recommends sowing four to six weeks before the last frost date, it's better to pick the four - rather than the six-week date (to calculate the sowing date, count back from the third week of May).
In this blog post, we’ll discuss the proper timing of the beneficial companion planting practice, to ensure an organic triple-play of pesticide reduction, nutrient sharing, and the fruits of your labour actually tasting better!
What is Companion Planting?
The use of companion plants is an organic approach embracing plant diversity that involves growing certain different types of plants near each other. By mixing a variety of plants together you confuse harmful insects (i.e., the ‘Three Sisters,’ corn, beans, and squash). When you plant certain vegetables together or alongside flowers or herbs, you can often camouflage the scent of a given plant so that its potential enemies can't find it. For example, if you plant onions and carrots together, the Carrot Rust Fly can no longer detect the scent of its "prey," the carrot.
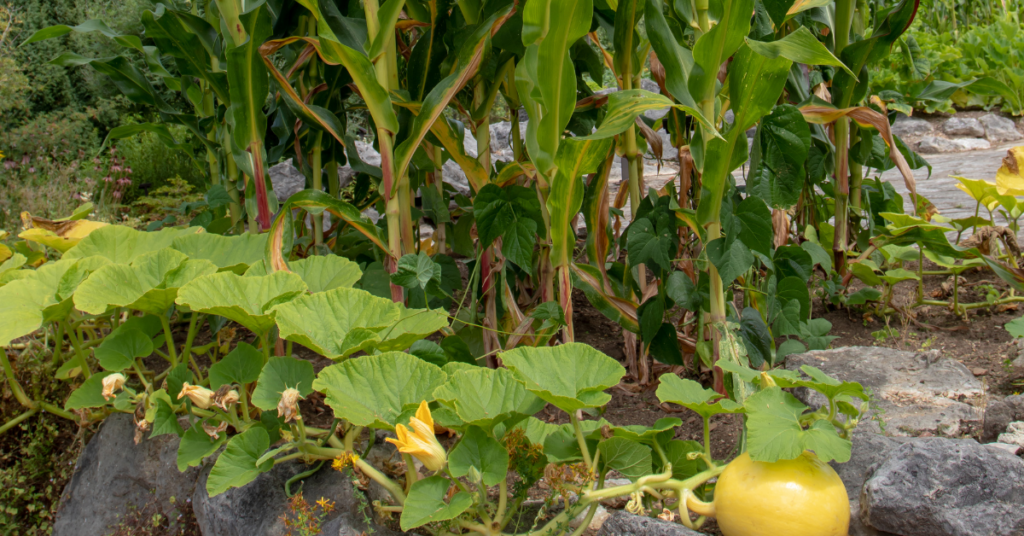
☝️ Plants also share nutrients and amend the soil below ground – in the instance of the Three Sisters, beans fix the nitrogen content of the soil for corn, who has long lost its ability to produce its own nitrogen.
What to Plant?
Herbs Make Excellent Companion Plants
Instead of grouping them all together in a corner, plant them in among your vegetables. Tarragon and marjoram give off a scent that repels most insects. Sage, rosemary, and thyme repel insects that feed on the different plants of the cabbage family. Plant these herbs near your cabbage, cauliflower, and brussels sprouts. Coriander attracts parasitic wasps that are very useful in controlling all sorts of pests.
🖱️ See more on companion planting with herbs here.

Why Not Try Flowers in the Vegetable Patch?
Nothing will make your vegetables happier! Plant borders of alyssum and cosmos; these attract beneficial insects and repel certain harmful ones. Marigolds protect tomatoes from threadworms, and nasturtiums and petunias attract aphids. If you plant them near your tomatoes, the aphids will choose the flowers instead of your tomatoes.
Meet My Plant Friends!
Plant friends are plants that can be grouped together because they mutually help each other grow. Basil stimulates the growth of Tomatoes and enhances the quality of the yield. Chamomile improves the growth and taste of cabbage and onions. It has been found that peas and beans enhance the growth of cucumbers and potatoes. Peas and beans also repel the Colorado Potato Beetle that commonly attacks potatoes and eggplant.
Once you’ve decided who is going where, it’s time to focus on when who is going where.
When To Plant?
It is important to know when the last spring frost date is for your area. Many plants need to be planted after the last frost, so that they don't freeze their little buds off! Follow this guide so that you can have healthy, sturdy little plants that will become good friends in your garden this summer.
| Ten Weeks Before Last Frost Sow indoors: broccoli, brussels sprouts, cabbage, cauliflower, eggplant, lettuce, peppers, and onion |
| Eight Weeks Before Last Frost Sow indoors: tomatoes Sow outdoors: spinach |
| Five Weeks Before Last Frost Sow indoors: marigolds (do not transplant until after last frost) Sow outdoors: peas Transplant: broccoli, cabbage, cauliflower, onion |
| Four Weeks Before Last Frost Sow indoors: cantaloupe, cucumbers, okra, pumpkins, squash, and watermelon |
| Three Weeks Before Last Frost Sow outdoors: carrots Transplant: brussels sprouts, hardened off frost-hardy herbs like chives and oregano |
| Week of Last Frost Sow outdoors: pole beans Transplant: cantaloupe, eggplant, lettuce, okra, peppers, pumpkins, squash, tomatoes, and watermelon |
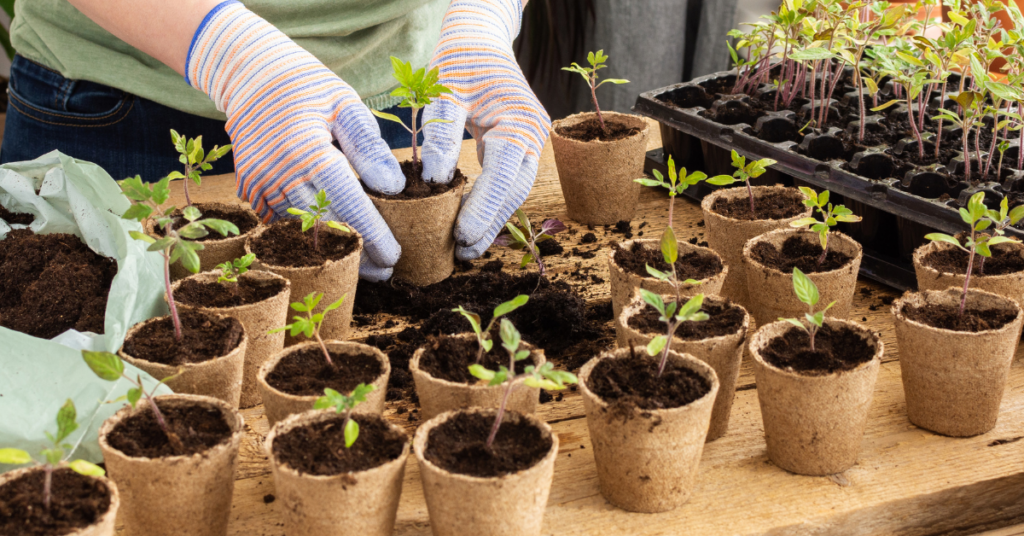
BONUS: Tips on Ensuring Your Seeds Have the Best Start!
🌱 To ensure success it is always best to use fresh, sterile seed-starting mixture (available from garden centres). Moisten mixture about an hour before sowing; it shouldn't be soggy, just as damp as a wrung-out sponge.
🌱 Follow the information contained on seed packets in terms of timing, lighting requirements, sowing depth, and optimal germination and growing temperatures.
🌱 Lightly water freshly sown flats, then cover with plastic dome lid, or if reusing containers try placing them inside a plastic zip-lock bag. At the first signs of germination, uncover or remove from plastic bag.
🌱 As the seedlings develop, wait until the top of the soil looks dry, water carefully using a small watering can with a fine spray. Avoid over watering: soggy soil and poor air circulation can lead to damping off, a fungal disease that can kill seedlings.
🌱 Locate your seeding flat in a bright window but grow lights or cool fluorescent tubes are better. Keep seedlings about eight to 10 centimetres from light source to prevent plants from becoming too spindly. Plug lights into an automatic timer set for 16 hours on, eight hours off. Be careful if you’re using the windowsill method though, as extremes in temperature may occur from hot drying sunny days to frigid evenings.
🌱 When seedlings have two sets of true leaves (the first leaves are called cotyledons — or seed leaves — so wait for the true ones, start feeding once a week with a balanced (20-20-20), water-soluble fertilizer at half-strength, working up to full strength after a few weeks.
🌱 Finally, the plants which have been raised under sheltered conditions must now be hardened off (see more here) before planting out. Gradually lower the temperature and reduce the watering while exposing the plants to brighter light for seven days prior moving them out to a cold frame. Keep an eye on the weather as sudden changes, as it often happens in spring, could spell disaster to your young plants.
We hope your garden is biodiverse and fruitful this year! For more information – and companion plants – visit Eising Greenhouse and Garden Centre this spring! 🌿
How To Keep Your Orchid Alive
By Ava Green
Orchids have become very popular gifts, and a great hobby for indoor plant enthusiasts who discover the wide range of colours and shapes available. Orchids are also loved for their long-lasting and exotic blooms.
While some may choose to only enjoy these tropical plants as long as they’re blooming, orchid-lovers look forward to nurturing the plant and encouraging it to flower regularly. It may be a little daunting at first, but once orchids grace you with their stunningly beautiful blossoms, you will find that a little bit of care is very worthwhile!

It’s estimated that there are 25,000 different species of orchids and over 100,000 hybrids! The ones you’ll find most readily in Ontario stores are Phalaenopsis or moth orchid, because it’s fairly easy to grow. Phalaenopsis are the best choice for beginners.

Other orchids you may find easily are Cattleyas (Corsage Orchids), Cymbidiums (Boat Orchids) and Dendrobium orchids.
While all of these may be orchids, they don’t necessarily require the same care, so it’s a good idea to check the tag for the type you have and its specific care requirements. The following is a general guide to light, water, fertilizer, and growing medium for the most commonly found orchids, but it does not apply to all breeds.
Light and Air
For most orchids, light, and lots of it, is the general rule. Place your plants within 3 feet of a window (not to the side) in the sun. South, east, and west-facing windows are all fine for maximizing the light your plant receives.
Orchids also enjoy a breeze or circulating air in your house. They do not like temperature extremes, though 15 to 20 degrees Celsius is safe. Keep in mind that the more warmth and air movement there is, the more often you will need to water your orchid.
Water
A general rule is to use water that is not hard and has not been softened with salt. Salt will kill an orchid. Rainwater, reverse osmosis, or distilled water are good choices. Chlorinated water is not an issue for orchids - high sodium levels are.
The biggest issue many people have is either over-watering or underwatering their orchids. Here is the method we recommend:
Every 5-7 days, place the pot in a container or the sink, then fill it with enough water to cover the top of the pot. Be careful not to let water collect in the crook at the base of the leaves, as standing water will rot the leaves and the plant. Once the plant’s growing medium is thoroughly soaked, remove it from the water and allow the pot to fully drain in the sink before placing it back in its saucer.
We prefer using a container of water rather than the sink, so the remaining water can be used to water other plants.
Here’s the best watering advice we can give you: look at the overall health of both the plant AND its root system. Full, plump leaves and vibrant, green roots indicate that your plant is getting enough moisture. Puckered leaves and a silver sheen on the roots indicate insufficient water. Mushy, brown leaves and roots are signs of rot caused by too much water.

You may hear of another watering method that involves using ice cubes, but it’s controversial and not widely recommended. To quote the American Orchid Society, “Ice is for cocktails, not orchids. Never use ice on tropical plants to water them.”
“Soil” and Nutrients
Most orchids naturally grow high up in trees, where their roots cling to bark and absorb moisture from the air. At home, we try to mimic those conditions, which is why orchids are typically planted in chunky mediums like bark, coconut husk, charcoal, or perlite rather than traditional soil. While many of the roots stay inside the pot, it’s completely normal for some to grow up and over the edge.

These “escapee” roots might look a little wild, but don’t worry, there’s nothing wrong with your orchid. In fact, those aerial roots are a sign that the plant is healthy and doing exactly what orchids do in nature.
It’s worth noting that not all orchids grow the same way. Many, like Dendrobiums, are epiphytic (growing on trees) or lithophytic (growing on rocks), though some orchid varieties are terrestrial and grow in the ground. The good news is that the growing medium your orchid comes in is chosen specifically for that variety, so you can trust it’s in the right environment.
The bark that your orchid is planted in will slowly break down and become mushy. It’s a very good idea to repot your plant every two years.
It’s generally recommended to feed most orchids, and bloom time dictates which fertilizer to use and how often to feed. Begin by using a water-soluble 20-20-20 fertilizer, mixing it at ¼ the amount recommended for other houseplants. Apply this solution every 2 weeks in the summer and every 3 weeks in the winter.

“The orchid, with its many forms, is a reminder that life is full of surprises.” — Leonardo da Vinci.

Lastly, here’s an orchid fun fact: While we have been talking about tropical orchids in this article, there are also orchids that grow right here in Ontario! That’s right, there are over 50 species in this province, including the much-loved Pink Lady’s Slipper (Cypripedium acaule).
Resources for more detailed and specific information:
Toronto Master Gardeners - https://www.torontomastergardeners.ca/gardeningguides/growing-orchids-a-toronto-master-gardeners-guide/
Canadian Orchid Congress - https://canadianorchidcongress.ca/basics/growing-orchids/
American Orchid Society - https://www.aos.org/orchid-care/indoor-orchid-care
Ontario Wildflowers - https://ontariowildflowers.com/main/group.php?id=18
Christmas Gift Buying Made Easy
By Ava Green
The Eising Holiday Gift Guide has become a popular tradition, and this year, I asked staff members to share their favourite gifts. We have some great picks to brighten anyone’s holidays: family, friends, teachers, hosts/hostesses, the cat sitter, the dog sitter - anyone you would like to wish a Merry Christmas to!
Everlasting Decorations

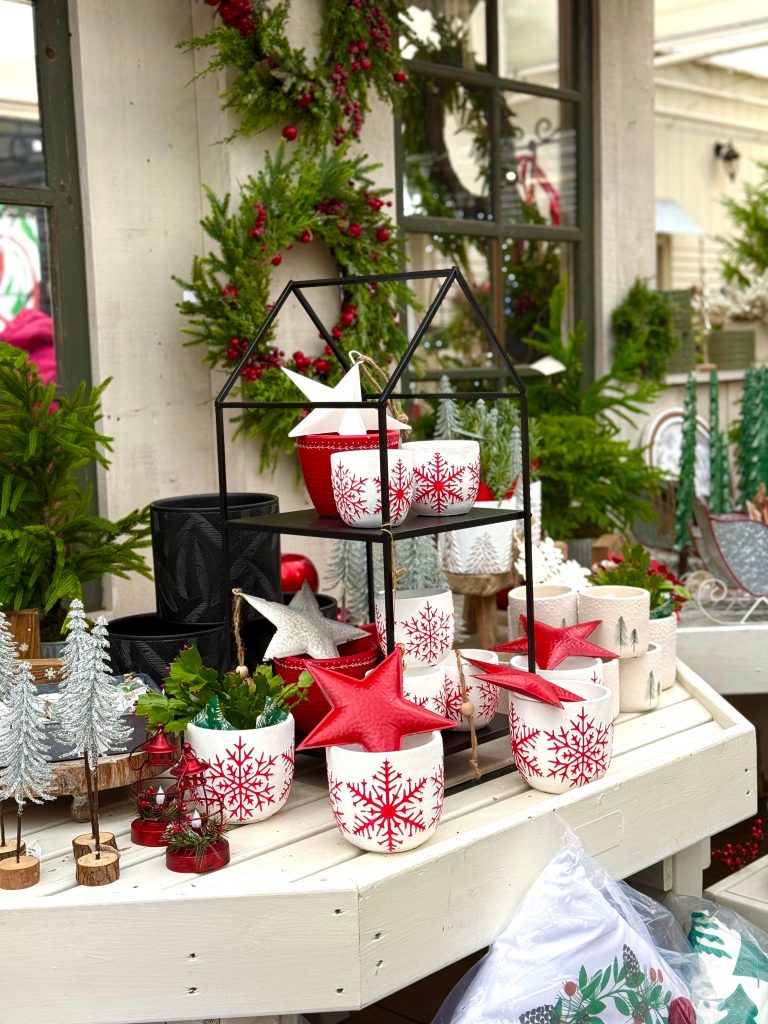

What looks good every year? Everlasting decorations! Kirsten’s favourites are natural wreaths with just a bit of an embellishment. Elegant, timeless and oh-so-festive!
An ornament from our Giving Tree is Arlene’s choice because she can gift the beautiful glass cardinal, and the proceeds go to the local toy drive. Now that’s a gift that keeps on giving!
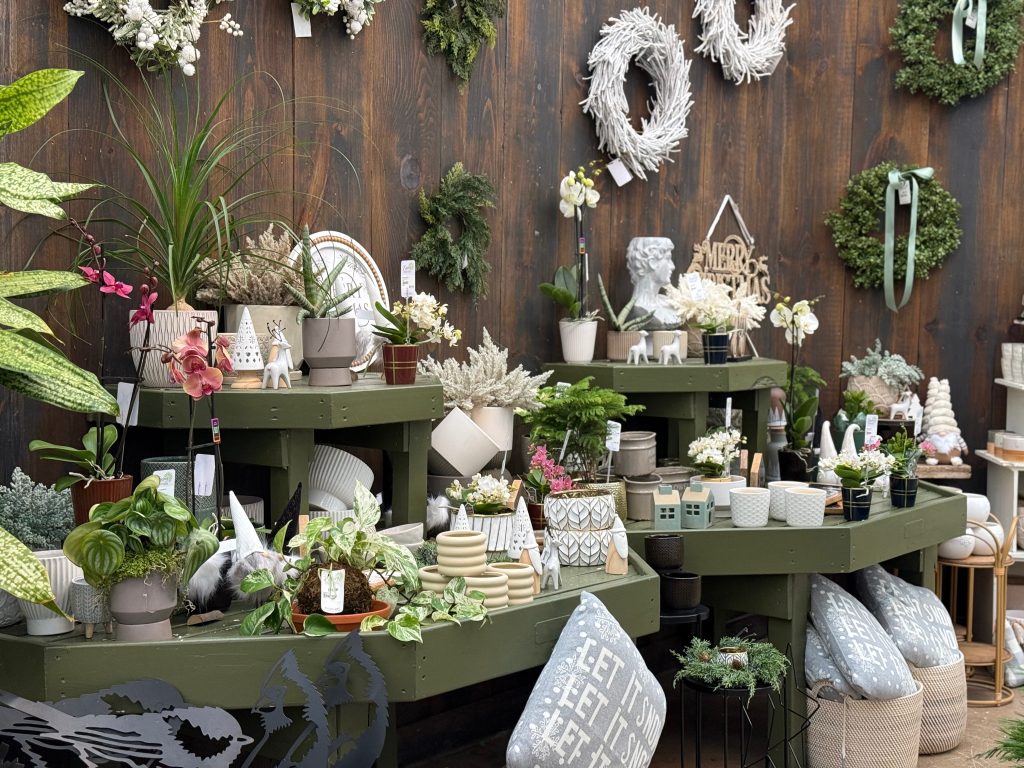
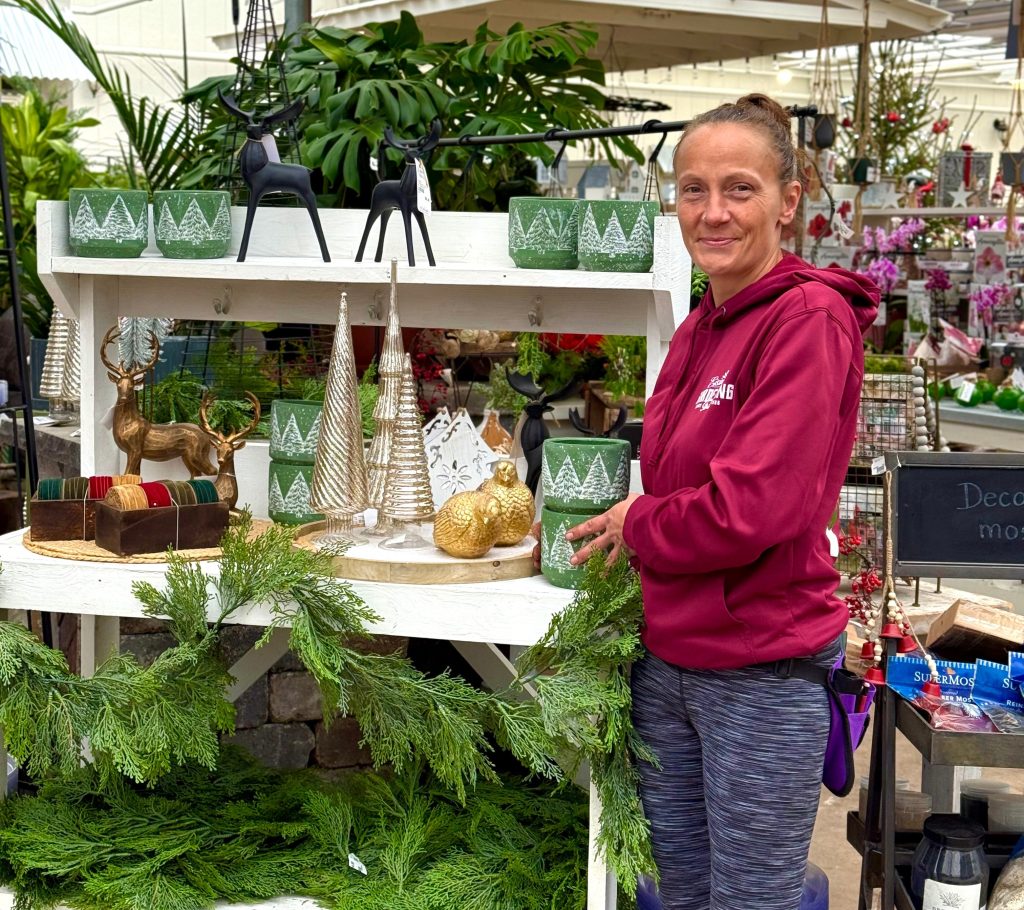
We also have lots of beautiful everlasting garlands, and Lindsey’s favourites: holiday-themed decorative containers to choose from. These festive plant pots transform any houseplant into a Christmasy gift or are perfect for holding other treasures if you’re creating a gift basket.
Fresh Greenery
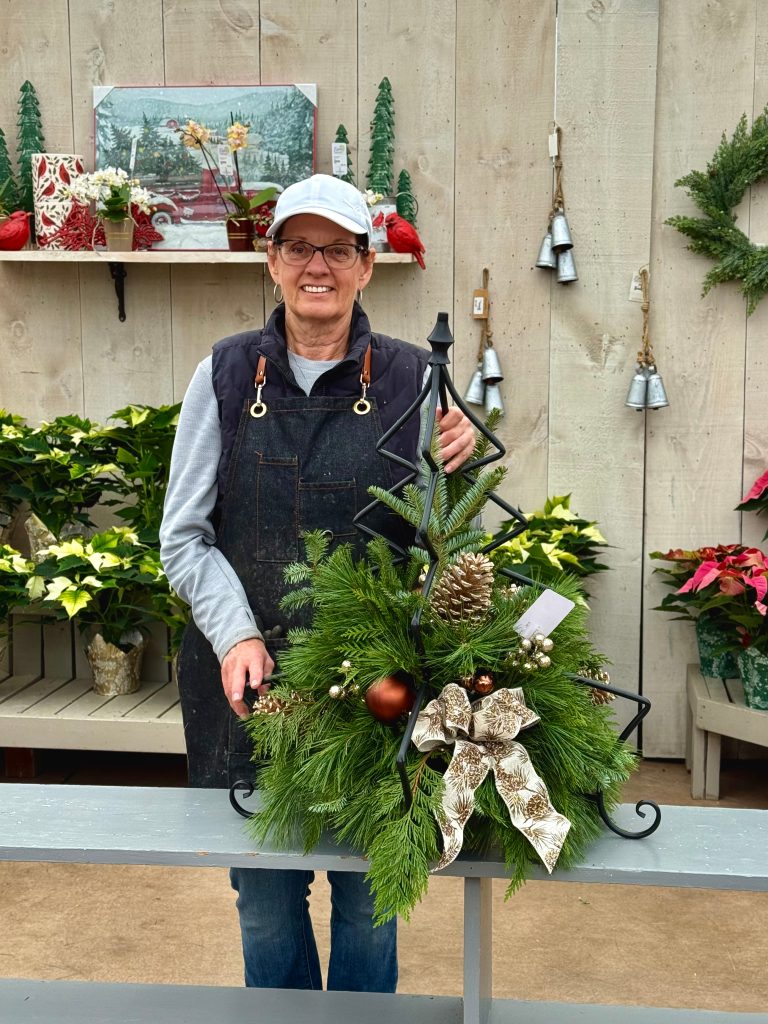


There’s an entire team of decorators, no…creators, no….elves, no…very talented staff members who spend the holiday season making the most beautiful urns, planters, and fresh greenery centrepieces. Donna and I are holding two of our favourites. Mary stopped making festive urns just long enough for this photo to be taken! She really pours her heart into it.
Tropicals, Holiday Plants, and Bulbs

As always, Courtney has a phenomenal selection of tropical plants to choose from. Do not ask her which one is her favourite. Trust me. Too many to count.
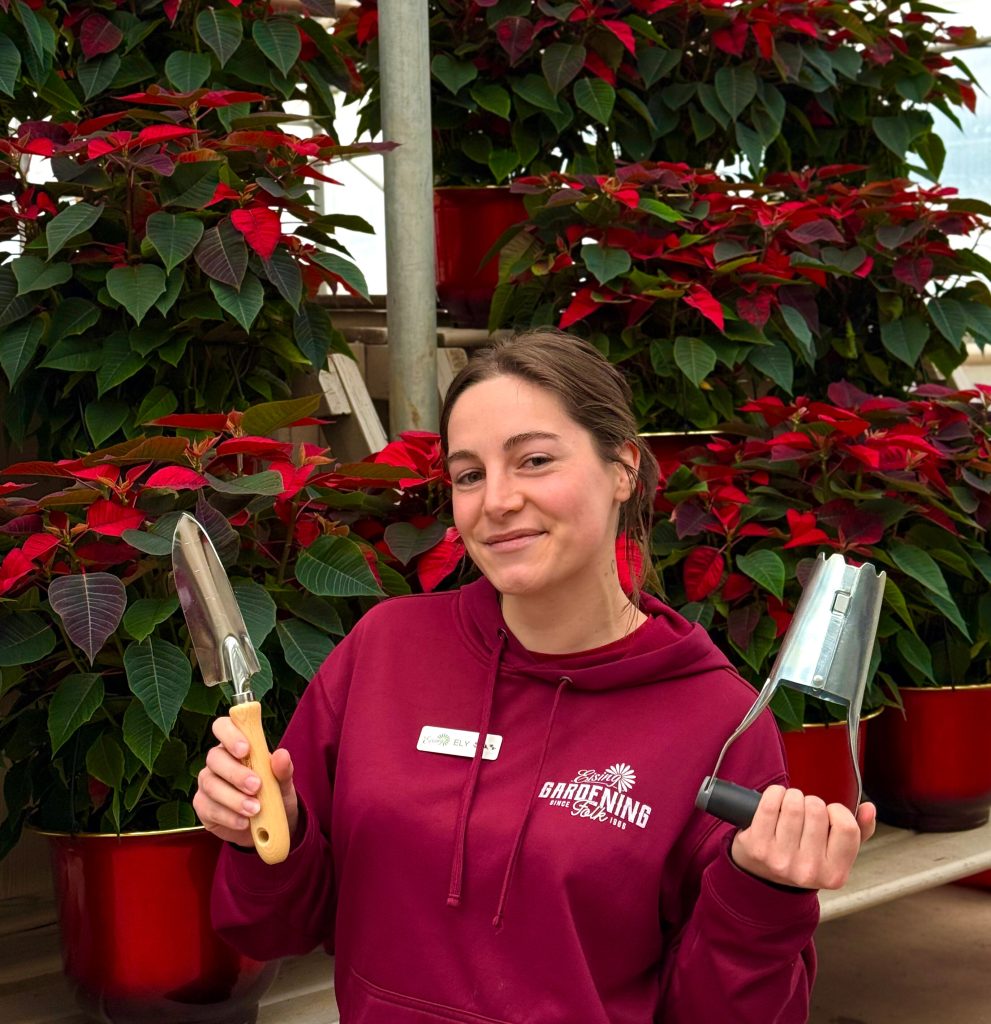
Ely is hoping for some gardening tools under the tree this year, and what gardener couldn’t use an array of trowels?!
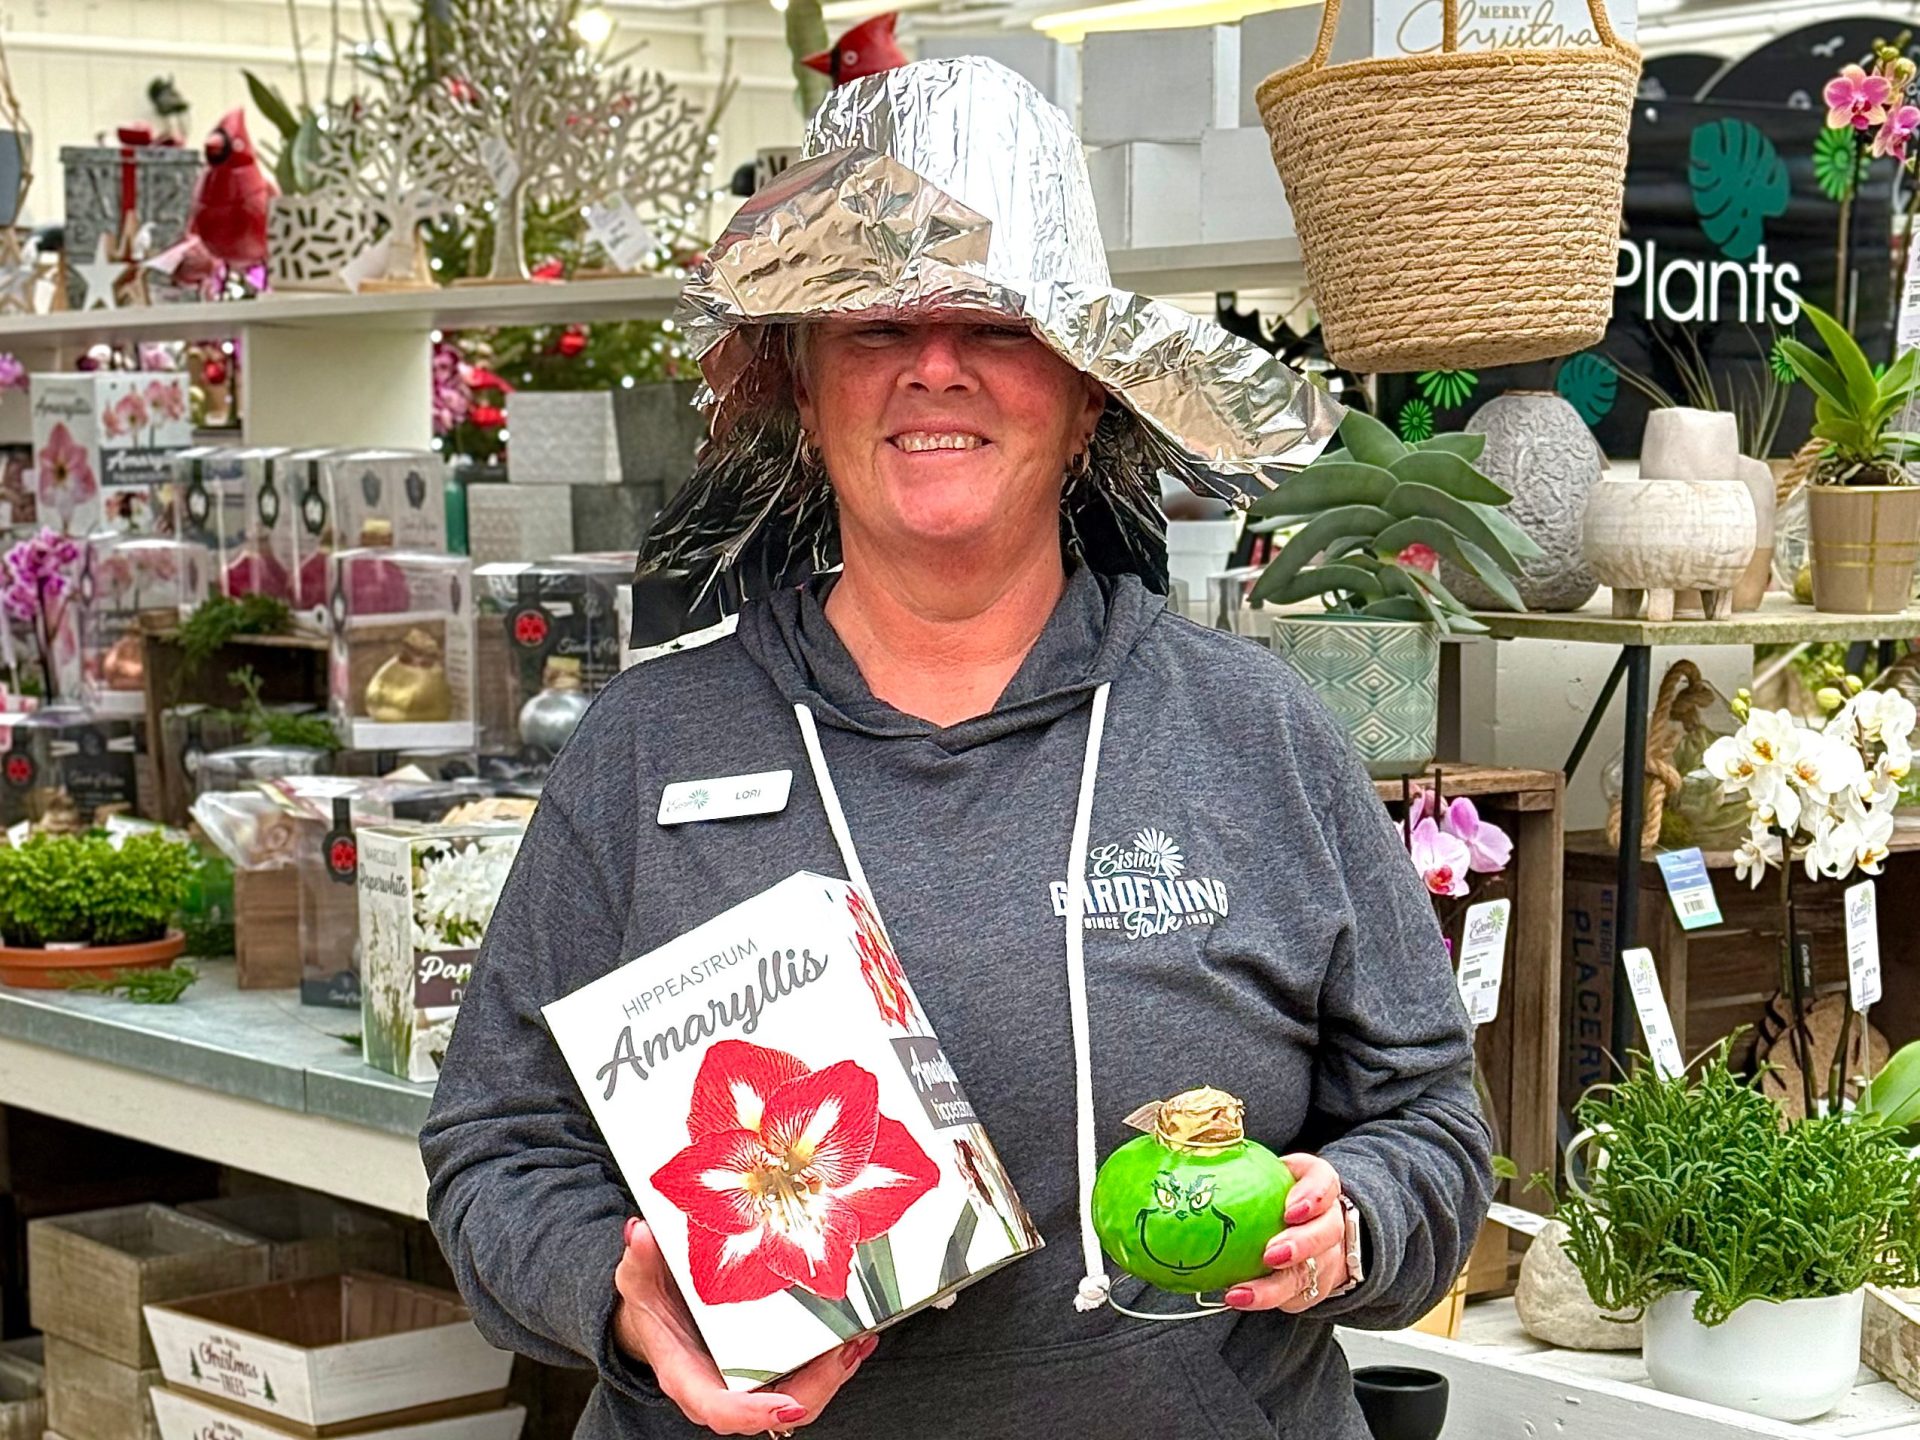
Lori is ready for a party with her favourite hostess gifts - Amaryllis bulbs. Apparently, the Grinch likes plants, too. Who knew? Cindy Lou Who, possibly, and Lori.
Sassy Fashion

Donna is wearing and holding some of her favourite clothes, jewelry, accessories, and products from Sassyfras Boutique inside Eising Greenhouse. Yes, she has many favourites. In her defence, who can pick just one thing from Sassyfras?! Not us.
For Your Favourite People!

Finally, this is THE most flexible item in the guide, our Eisings gift card. It can also be the perfect solution for the person who has everything already and is hard to buy for. Why is this Lucas’s favourite? Eising gift cards can be used for plants, landscaping, trees, shrubs, perennials, annuals, seeds, tropicals, decor, pots, garden tools, and any other items sold in the greenhouse. And that’s not all! Gift cards can also be used for anything in Sassyfras Boutique. So many options!
Good Tidings To All!

During this season of abundance, Henry and all of us at Eisings hope you get all of your favourite things, but mostly we wish you a safe and happy holiday season! ✨