
The Beauty of Dinner Plate Hibiscus
By Ava Green
The big, bold, showy, dinner-plate-sized flowers on hardy Hibiscus (Hibiscus moscheutos, also known as Swamp Rose-Mallow) are unforgettable, to say the least. What a surprise it is to discover that this perennial plant not only survives our Zone 6, Southern Ontario climate, but thrives here! And despite its dramatic, exotic look, this plant is genuinely easy to grow.
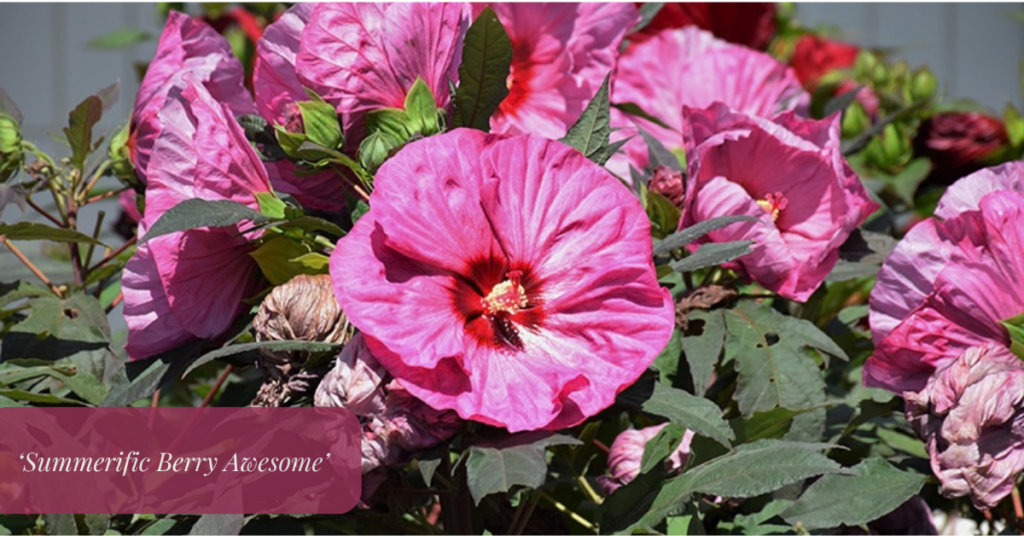
What Hardy Hibiscus Loves
Hardy hibiscus thrives in full sun with moist, well-drained soil and produces huge, gorgeous flowers without spreading and becoming invasive. As a rule of thumb: more sun means more blooms.
Give it ample space as it can grow 4-7 feet tall depending on the variety. Plant it 2-3 feet apart in a border, rain garden, meadow, or beside a fence, stream or pond, and it will thrive there for many years. Because it prefers consistently moist soil, avoid planting it near a brick wall or a driveway as these areas tend to dry out quickly.
When transplanting, add compost into the hole, and keep the base of the stem level with the surrounding soil. Don't mound soil or mulch up around the stems. If you’re planting your hibiscus in the fall, aim to do it at least 6 weeks before the ground freezes so the roots have time to settle in.
If you'd like a bushier, more compact shrub, you can cut these plants back by half in June.
One thing to keep in mind: hardy hibiscus is very slow to start in spring. Don’t be alarmed if it doesn’t show new growth until the soil warms to around 21º Celsius.
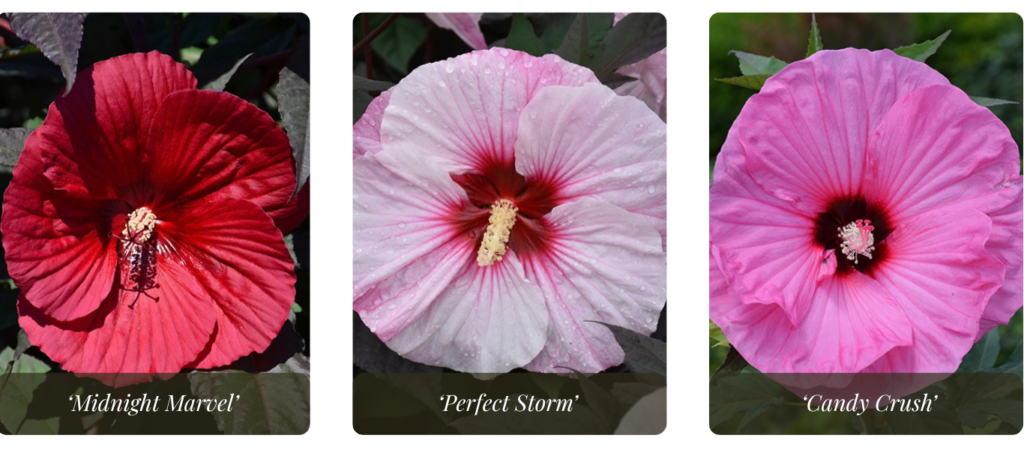
What We Love About Hardy Hibiscus
If everything mentioned above isn’t enough to entice you, there’s more!
Their enormous, ruffled flowers can reach a full foot in diameter, growing on sturdy, woody stems that stay upright on their own; no staking required. While they resemble their tropical hibiscus relatives, or Rose of Sharon (Hibiscus syriacus), hardy hibiscus produces noticeably larger blooms. They flower mid to late summer in dreamy shades of white, pink, and red.
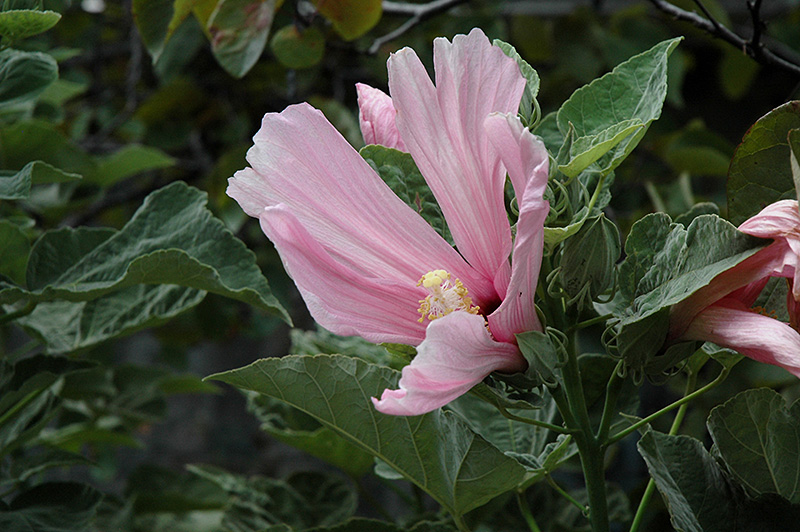
Beyond their beauty, Hibiscus moscheutos is also a valuable native plant of Ontario. It attracts hummingbirds, dragonflies, and butterflies, and in areas prone to stormwater runoff, it helps absorb moisture and reduce erosion.
Seeing Is Believing
Stop by Eising Garden Centre and see the stunning beauty of hardy hibiscus in person. You just might fall in love too!
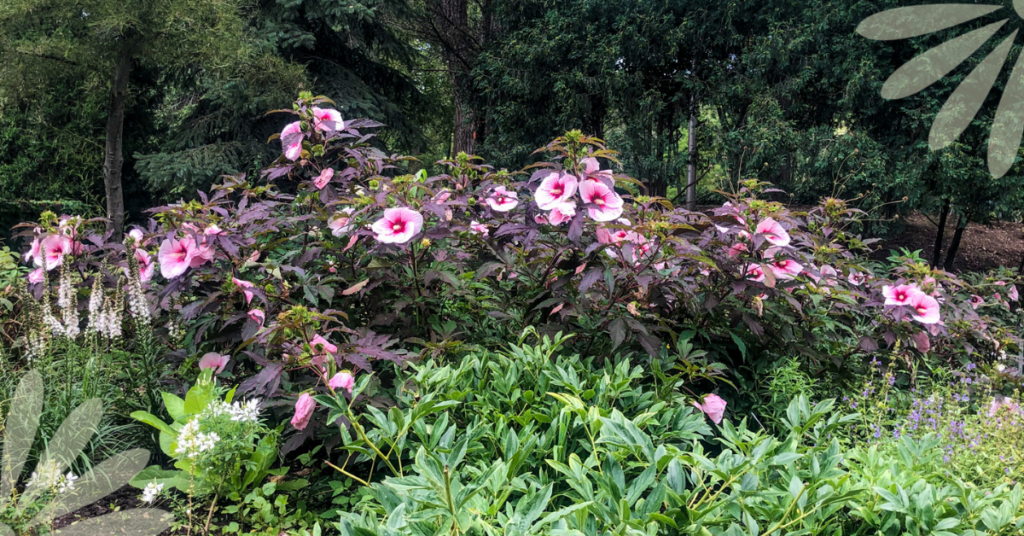
Staff Picks to Brighten Your Garden
By Ava Green
If I asked you to name a yellow perennial flower, you might immediately think of Black-eyed Susans. They’re definitely a perennial favourite!
The goal of this article is to introduce you to other yellow plants that we love and think you will too! These perennials come back reliably every year, and look sunny and gorgeous.
Some of these plants also come in other colours, but today we’re sharing yellow varieties.
Coreopsis
Also known as Tickseed, these versatile, native North American plants come in a wide range of yellow shades, from pale and subdued to bright and showy. They also come in various heights to suit a wide range of garden locations.
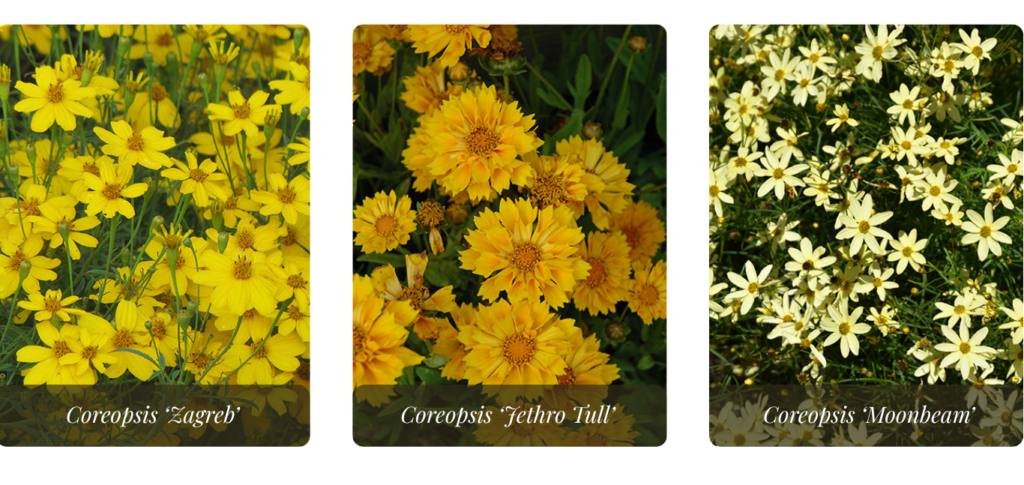
Best for: Well-drained, average soil. Coreopsis will become floppy or die in moist, fertile, or cool locations. They are tolerant of poor soil and drought | Sun: Full sun | Mature size: 1-2 ft. tall and wide; however, Tall Coreopsis can reach 5-9 ft. tall and 3-6 ft. wide
False Sunflower, Heliopsis helianthoides
False Sunflower checks a lot of wish-list boxes: radiant, long-blooming, heat-tolerant, loved by bees and butterflies, and an exceptionally hardy native perennial here in Zone 6 Southern Ontario. To keep these tall plants shorter, stronger and bushier, cut back new growth by half in May and divide them every three years so they don’t become too dense.
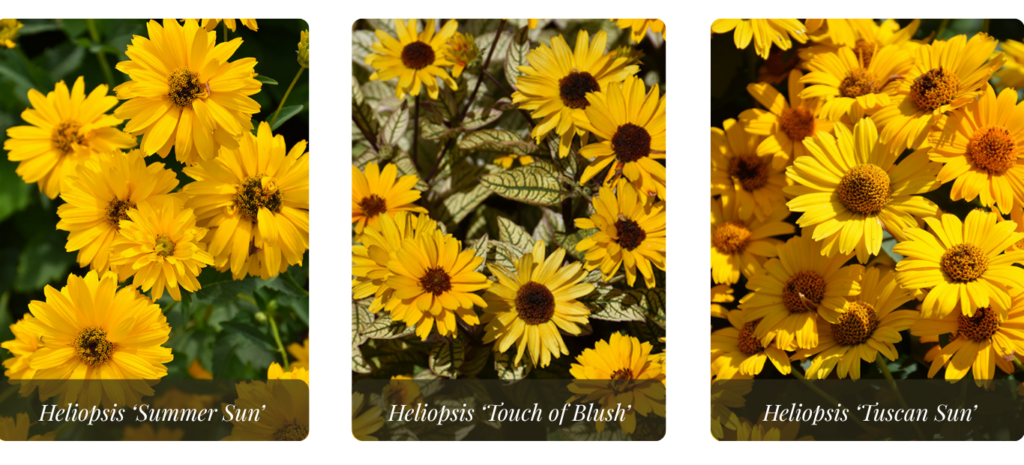
Best for: Moist, well-drained areas with lots of space to grow | Sun: Full sun, tolerates part shade | Mature size: 3-6 ft tall × 2-3 ft wide
Torch Flower, Kniphofia
Also known as Torch Lilies or Red Hot Poker, this unusual, striking plant is a stop-and-take-notice focal point in any border, providing weeks of continuous colour throughout summer. It’s also a magnet for plenty of pollinators.
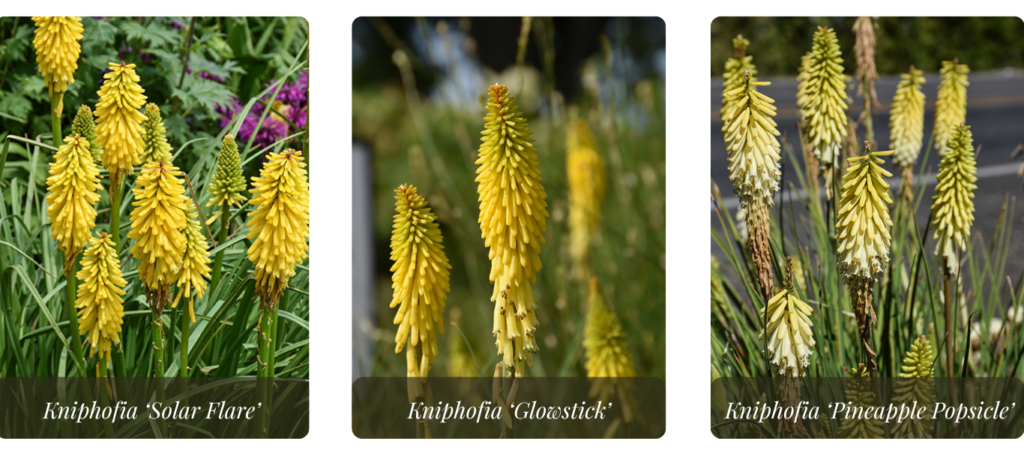
Best for: Areas with very good drainage, as wet soil can cause root rot | Sun: Full sun | Mature size: 3-3.5 ft. tall × 2-2.5 ft. wide
Hosta
Hostas provide season-long colour, with their sturdy foliage doing most of the work. While many varieties have green or blue-green leaves, some offer very pretty yellow foliage instead. Give them 2-4 hours of morning sun each day and an inch of water each week, and that bright yellow colour will stay vivid all season. Flowers are often the main selling point for perennials, but hosta foliage proves that structure, not just blooms, can be just as valuable in a garden.
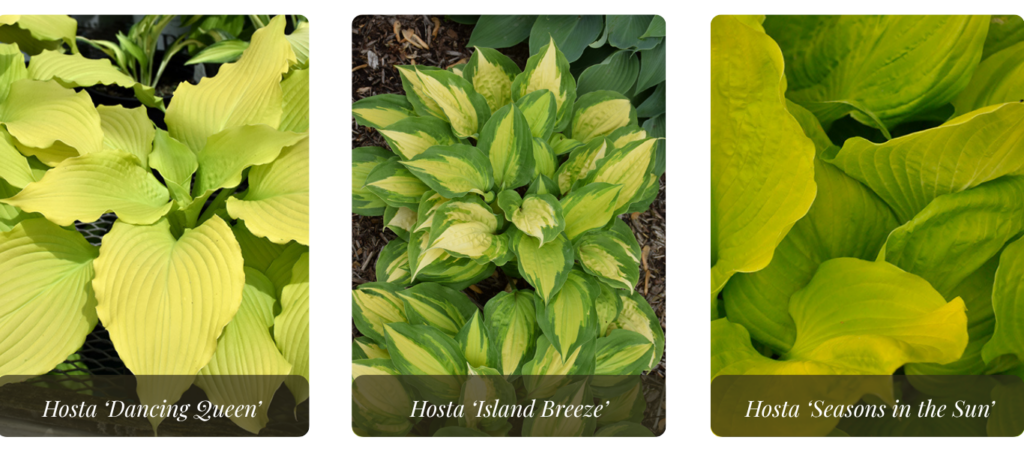
Best for: Areas with morning sun, which helps to intensify their colour | Sun: Part sun, preferably morning | Mature size: 6 in. to 3 ft. tall × 10 in. to 6 ft. wide depending on the variety (miniature cultivars stay toward the smaller end of that range)
Ligularia
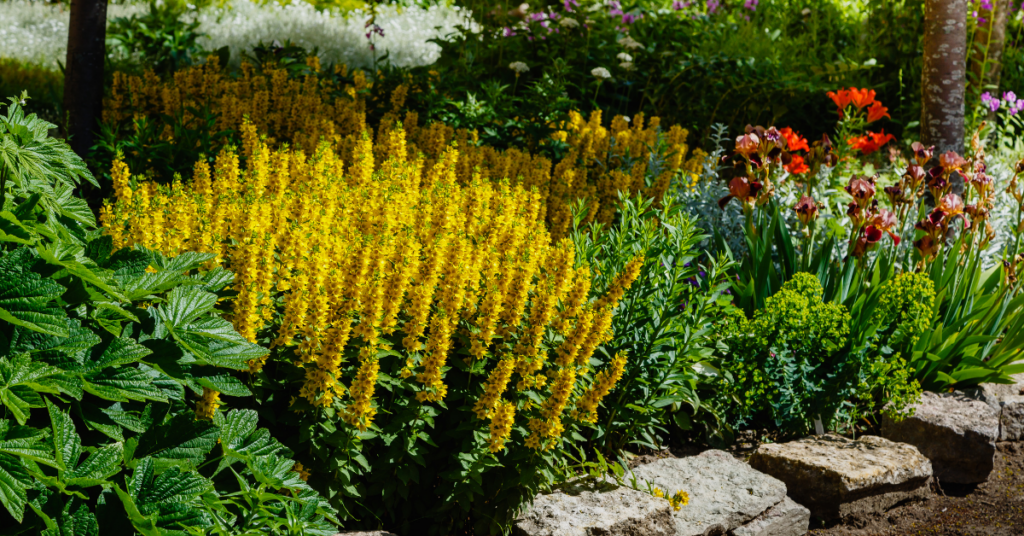
Ligularia are unforgettable, with their large “tractor seat” leaves and tall spikes of candelabra-like flowers. They're a little more finicky about location, though; they need plenty of moisture and abundant morning sun, but must be protected from hot afternoon sun to truly thrive. Give them the right conditions, and this dramatic, bold plant will command all of the attention in your garden.
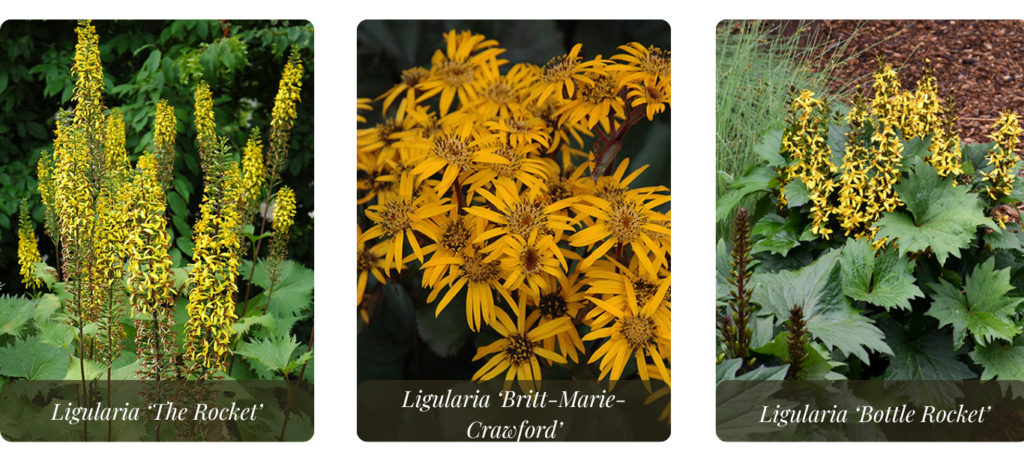
Best for: A woodland garden, rain garden, the edge of a pond or stream, in a swamp or bog where there is consistent moisture | Sun: Full sun where there is lots of moisture, otherwise Light or Partial shade with morning sun only | Mature size: 1-6 ft. tall × 1.5-4 ft. wide
More Yellow Perennials Worth Considering
Stop by Eising Garden Centre and chat with Mary or Donna; they’re always happy to help you find your favourite yellow perennials. Here are a more to check out:
Black-Eyed Susan (Rudbeckia), Stonecrop (Sedum ‘Yellow Brick Road’), Shasta Daisy (Leucanthemum ‘Banana Cream), Hardy Hibiscus (Hibiscus ‘French Vanilla’), Daylily (Hemerocallis ‘Hyperion’, ‘Happy Returns’, ‘Yellowstone’, ‘Going Bananas’ and ‘Stella D’oro’), Lenten Rose (Helleborus ‘Spanish Flare’, Coneflower (Echinacea ‘Yellow My Darling’), False Indigo (Baptisia ‘Lemon Meringue’ and ‘American Goldfinch’), Yarrow (Achillea ‘Firefly Sunshine’, ‘Moonshine’, ‘Coronation Gold’, and ‘Firefly Sunshine’), Cup Plant (Silphium perfoliatum), Hollyhock (Alcea), Helenium (‘Hay Day’, Dakota Gold’ and ‘Sombrero’, Itoh Peony (‘Yellow Emperor’, ‘Bartzella’, and ‘Garden Treasure’), Butterfly Weed (Asclepias tuberosa), Foxglove (Digitalis), Columbine (Yellow Queen), Eastern Prickly Pear Cactus (Opuntia cespitosa or Opuntia humifusa - native cactus), and Japanese Forest Grass (‘All Gold’).
That’s a lot of yellow, and as the saying goes: where yellow blooms, happiness follows!
How to Identify These Annoying Little Gnats
By Ava Green
Do you have tiny flies buzzing around your home and have no idea where they came from? Before you can get rid of them, you need to know what you're dealing with. Most people assume they're fruit flies, but there's a good chance they're not.
There are three common culprits:
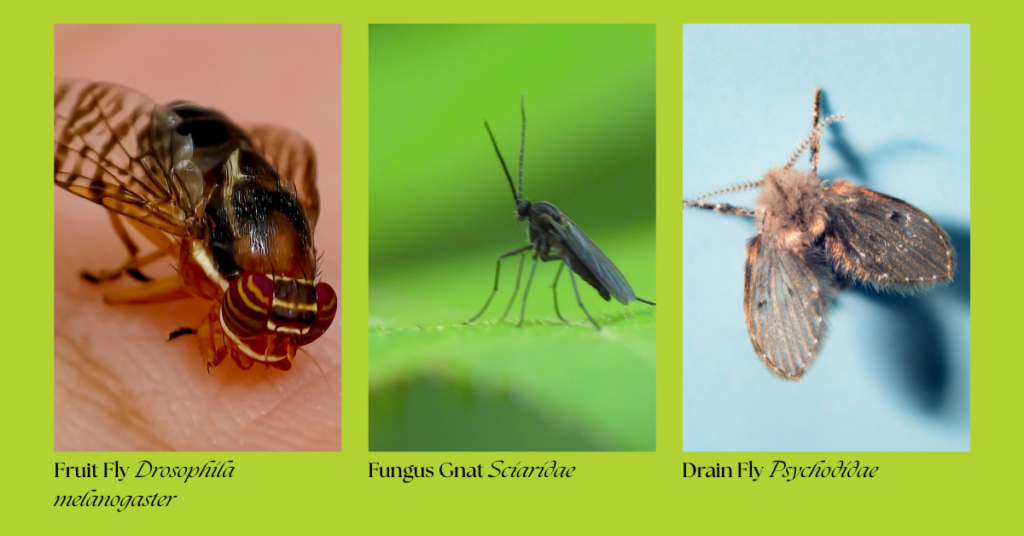
- Drain flies breed in moist drains. Keep drains closed when not in use.
- Fruit flies hover around overripe produce.
- Fungus gnats, the most commonly misidentified of the three, love the damp soil in your houseplants, and they're the ones most likely buzzing around the house.
Fungus Gnats are Probably Already in Your Home
Every time you bring a plant indoors, whether it's brand new or returning after a summer outside, there's a very good chance it's carrying fungus gnat eggs in its soil. When you purchase bagged soil, it will often contain fungus gnat eggs as well. They're small, they're sneaky, and here's the most important thing to know: they multiply fast. Left unmanaged, a handful of gnats can turn into hundreds within weeks.
What Makes Fungus Gnats Thrive?
Fungus gnats love warm, moist conditions and organic material, like your potting soil. Adult gnats lay eggs in damp soil, which gives their larvae everything they need to develop.
The good news? Once you understand what they need to survive, stopping them is very easy and straightforward.
7 Proven Ways to Get Rid of Fungus Gnats
1. Quarantine any new or returning plants for 4 weeks. This single step prevents gnats from spreading to your other houseplants while you treat the soil.

2. Use yellow sticky traps. These inexpensive traps attract and catch adult gnats before they can lay more eggs. Place one directly into the soil near your plant. Putting a sticky trap in a planter, whether it’s a new plant or one you’ve had a while, is also a good way to monitor whether or not you have pests in your plants.
3. Let the top inch of soil dry out completely between waterings. Fungus gnats need moist soil to lay their eggs. Deny them that, and you deny them a future. To test whether the soil has dried out, poke one of your fingers in it about an inch to check for moisture.
4. Cover the soil surface with coarse sand or vermiculite. A layer of sharp, gritty material on top of the soil is uninviting to egg-laying adult gnats. Make sure to use coarse sand, fine sand won't do the trick.
5. Switch to bottom watering. This is the best watering method for a number of reasons, including discouraging fungus gnats. Fill a tub or sink one-quarter full and set your pot in it for about 30 minutes allowing water to be absorbed into the soil via the drainage hole in the pot. When the soil and roots absorb water from below, it keeps the top layer of soil, where gnats want to lay their eggs, dry and uninviting. Make sure the water level covers no more than one-third of the pot, not the entire pot.
6. Try Mosquito Dunks (the secret weapon most gardeners don't know about). These contain BTI, a naturally occurring bacterium that is harmless to humans, pets, and plants, but lethal to fungus gnat larvae. Simply follow the package instructions and water your plants as normal. Water activates mosquito dunks.
7. Water with diluted hydrogen peroxide once a week. Mix one part 3% hydrogen peroxide with four parts water (so ¼ cup peroxide to 1 cup water). Apply this solution once a week for three weeks, and let the soil surface dry out between each application. It kills larvae on contact. Don't overdo it though. Too much, too often can damage roots.
Don’t Forget Your Fruit Bowl: Try This Banana Trick
Fungus gnats aren't just plant pests, they're also drawn to fruit, especially bananas. The stem end of a bunch of bananas is a prime spot for gnat eggs. The fix is simple: as soon as you get home from the grocery store, rinse your bananas under lukewarm running water and give the stem a gentle scrub with a soft brush. It takes about a minute and can prevent a whole new infestation before it starts.
The Bottom Line
Fungus gnats feel impossible to eliminate because most people only address the adults they can see and not the larvae multiplying in damp soil. Use these tips in combination for the best results, and remember: even a fresh bag of potting soil can carry eggs, so treat new soil with BTI or a hydrogen peroxide solution before use.
Stick with it for a few weeks and your home and your plants will be gnat-free.
By Dave Zeldon and Ely Schweyer
As plant people, we’ve all experienced that moment when we realize the novelty phase of that plant we brought home from the garden centre has worn off. The plant isn’t standing quite as tall, the flowers aren’t as bold, and the leaves are unravelling smaller or not at all. What is this magic they perform in the greenhouse? Perhaps you’ve provided sufficient lighting and adequate watering; there’s just one thing that is often overlooked because dirt is dirt, isn’t it?
97% percent of plant tissue is made up of carbon, hydrogen, and oxygen pulled from the air and water, the remaining 3% is comprised of 16 other elements taken up from the soil. The quality of soil then is crucial to your plant’s health. Whether your plants are in pots or in ground, each soil type you could provide your plant offers something unique and may lack in another.
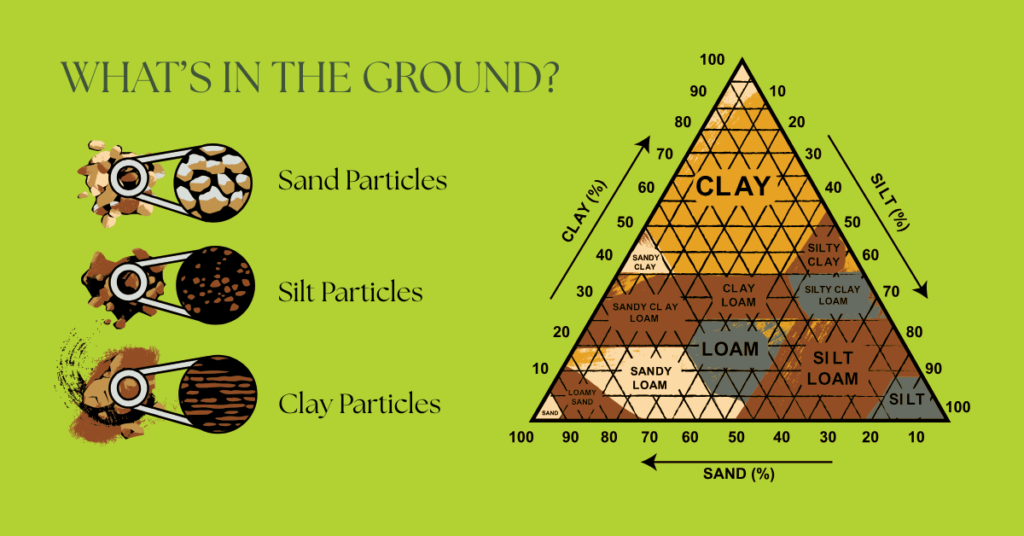
*Clay particles are even smaller than silt particles.
Resist the Urge to Slam Your Plant in Potting Soil
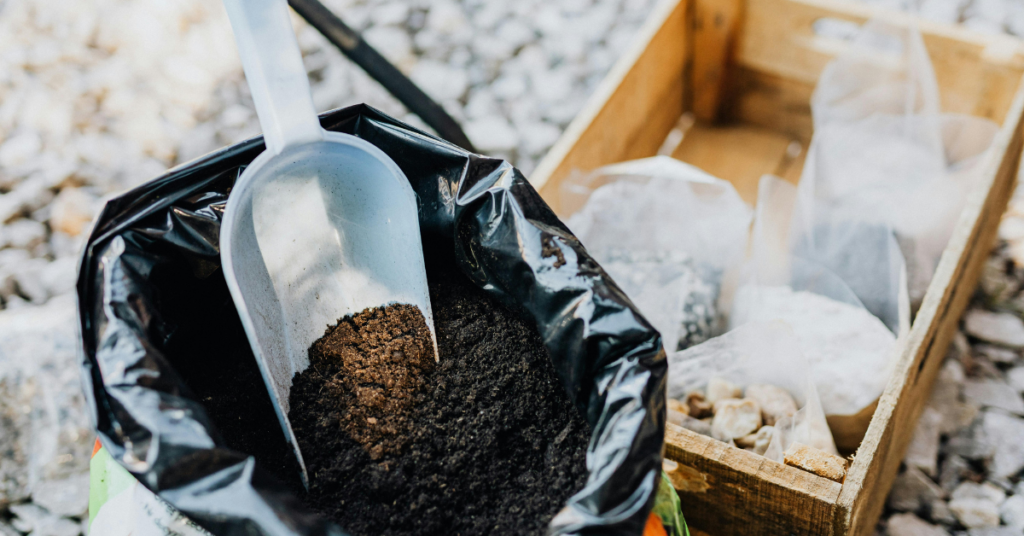
There’s bags and bags of rocks, sand, bark, manure, and moss on the shelves, yet the common buyer seems to always opt for potting mix. It’s fair; organic matter is usually great for plants and simple to use. However, most people don’t realize it’s merely an ingredient.
Strictly using potting mix is like attempting to make a loaf of bread out of only flour. All those bags of other materials on the shelves are also components for a successful plant diet!
Potting mix is a great base material, however, alone it presents risks of compacting, becoming waterlogged, can mold easily, and over time will become depleted of nutrients. Consider mixing the following ingredients into your pots, ground and raised beds to meet your plant’s required nutrients, pH level, and volume of moisture.
🖱️Use our Plant Finder to find some details on your plant! We try our best to keep this updated!
👍 Rule of Green Thumb: Plant roots can help you to determine the medium needed – thick, robust roots (i.e., yucca) typically enjoy chunkier materials, and smaller, delicate roots (i.e., begonias) enjoy finer materials.
Mulch and Bark Bites
- Mulch is the organic slow-release fertilizer, as it slowly decomposes, it lowers soil pH. However, may eventually compact soil once fully broken down.
- In the meantime, it creates shelves in the soil that create air pockets and prevent the soil from compacting. Mulch is a great short term medium for arid potted plants.
- If kept too wet, it can harbour fungus gnat larvae.
- Make sure when sourcing your mulch it doesn’t contain any black walnut.
🖱️ See more on mulching here.
Sphagnum Peat Moss
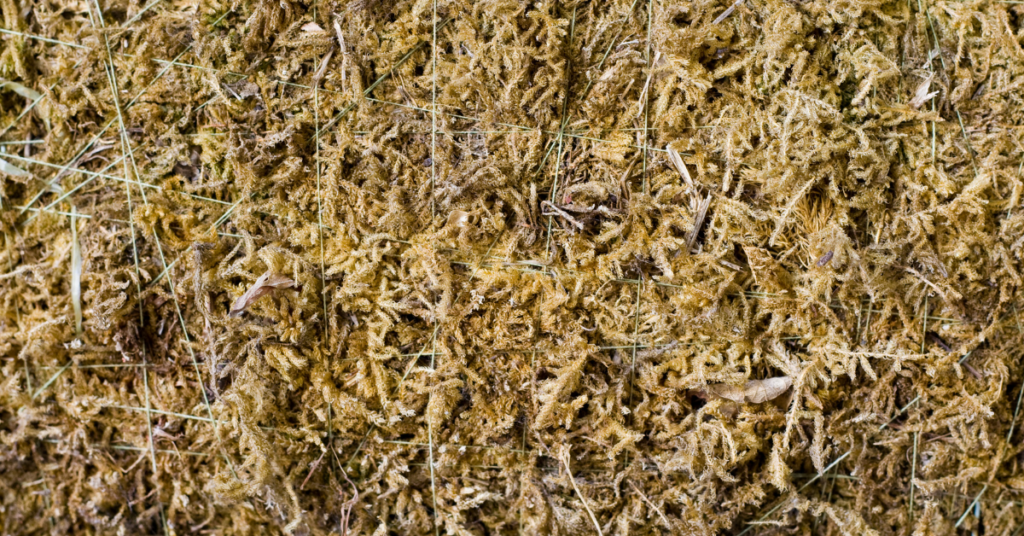
- Peat moss is used to help retain moisture and lower pH in the soil given it is harvested from bogs.
- Retains nutrients very well.
- It is difficult to rehydrate once it loses moisture.
Coconut Coir
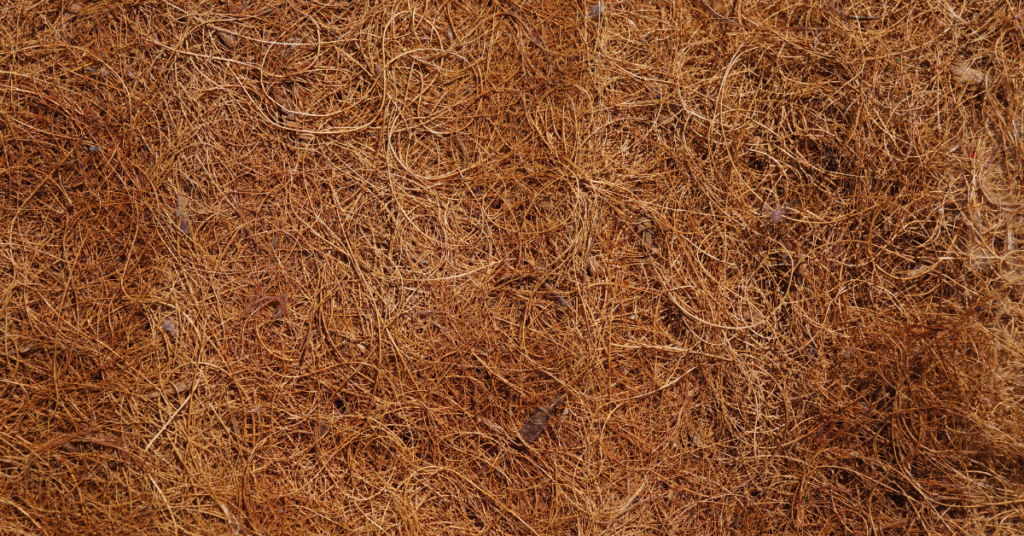
- Coco coir, much like peat moss is used to keep the soil moist and keep pH low, however it lasts longer and is possibly less invasive to harvest.
Sand
- Grains are relatively large and do not bind, allowing for excellent drainage depending on grade.
- Adds weight to top heavy plants.
- Has no ability to store minerals itself, however, pH can vary by its content of shells, minerals like silica, or fine organic matter.
Manure & Compost
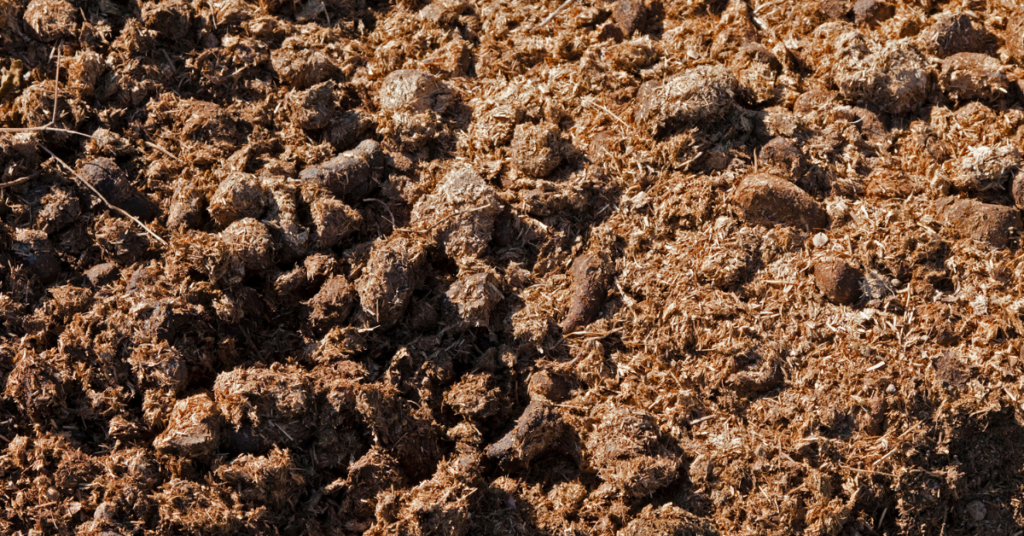
- Source these organic by products locally and ensure they’re not too hot. These additions can significantly lower pH.
- Sheep manure is usually near free of weed seeds as sheep digest seeds better than cattle and horses!
Perlite
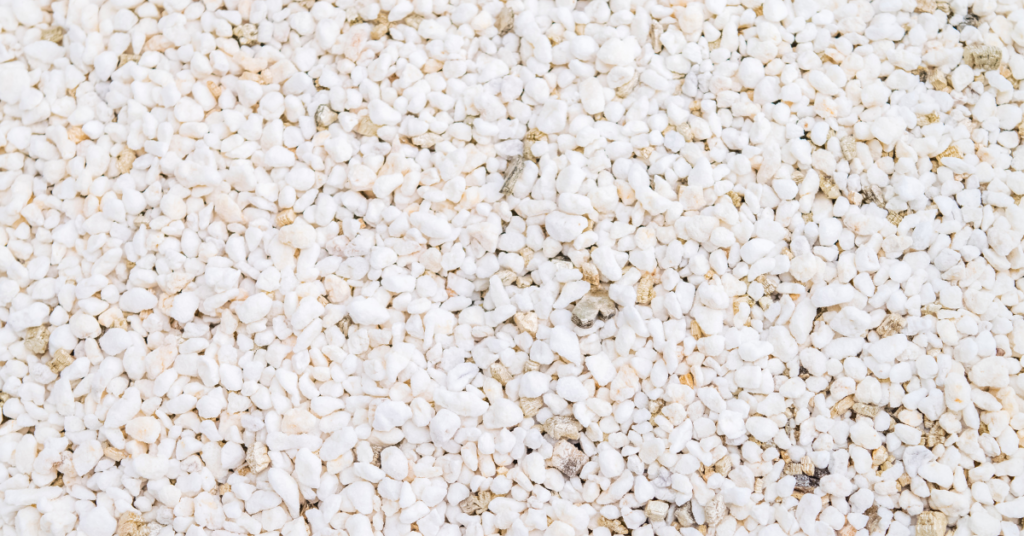
- Perlite is a volcanic byproduct (so it floats like pumice) that helps drainage in the soil and prevents compaction – vital in the case of starting seeds.
- If a rockier, well-draining medium is required for your plant, consider perlite.
- Perlite can expand holding trace amounts of water.
- Perlite has a neutral, slightly acidic pH.
- Make sure when sourcing perlite, that you are not being sold Styrofoam balls.
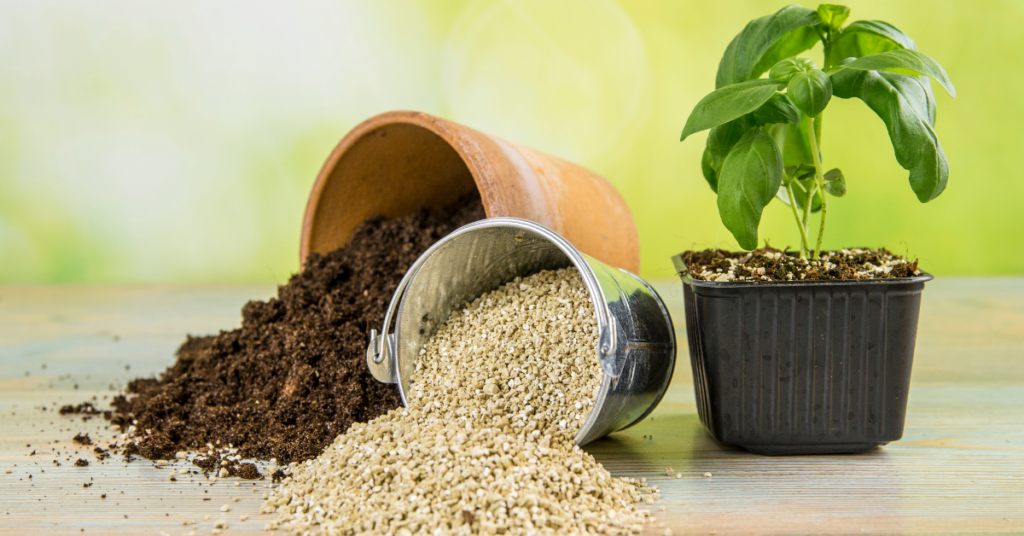
Vermiculite
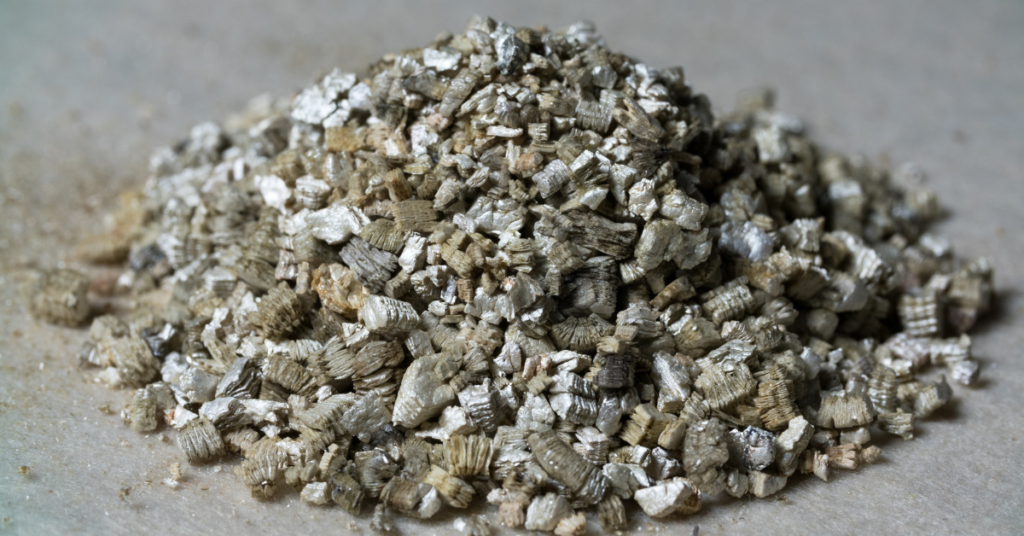
- Vermiculite is a recycled mineral used similarly to perlite, and too has a neutral, slightly acidic pH.
- Expands with water content.
- Can contain amounts of potassium and magnesium (as well as good cation exchange capacity).
- Runs the potential risk of introducing asbestos into your soil.
Calcined Clay Materials
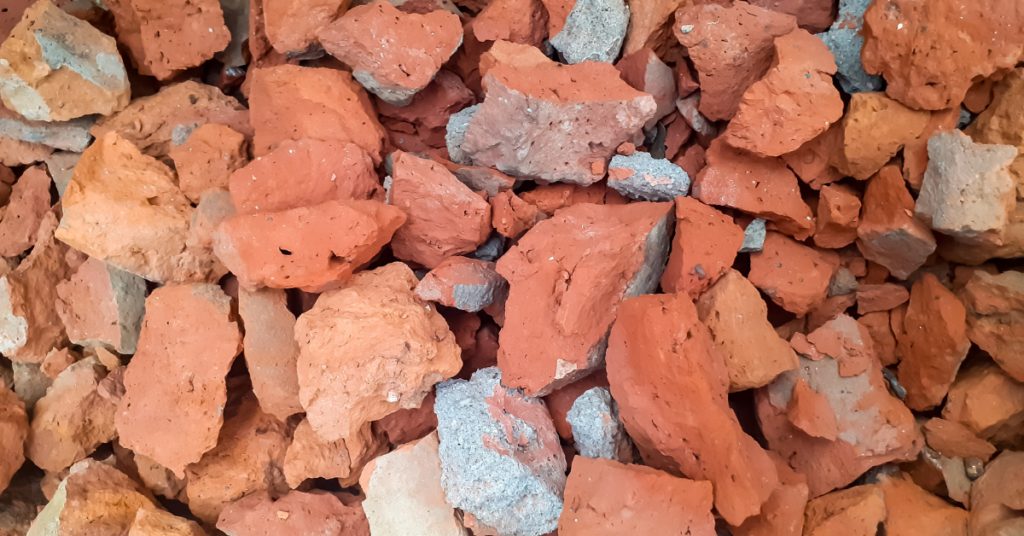
- Clay materials like recycled brick bits, pottery, or lecca are typically used for arid plants as it improves aeration and drainage.
- Can raise pH.
- Can retain some water.
- High cation exchange.
- Can also be used for starting robust cuttings when kept moist.
- Probably not ideal for inground amendments.
Maintaining Your Plant’s Dietary Needs
Perhaps we’ve crafted the perfect soil type for your plant – your plant thanks you – but over time, we will end up in the same staling predicament. Why? Because with each thorough watering, we leech the soil of the provided nutrients. Best we use the plant-specific required fertilizer for your plant to prevent nutrient loss.
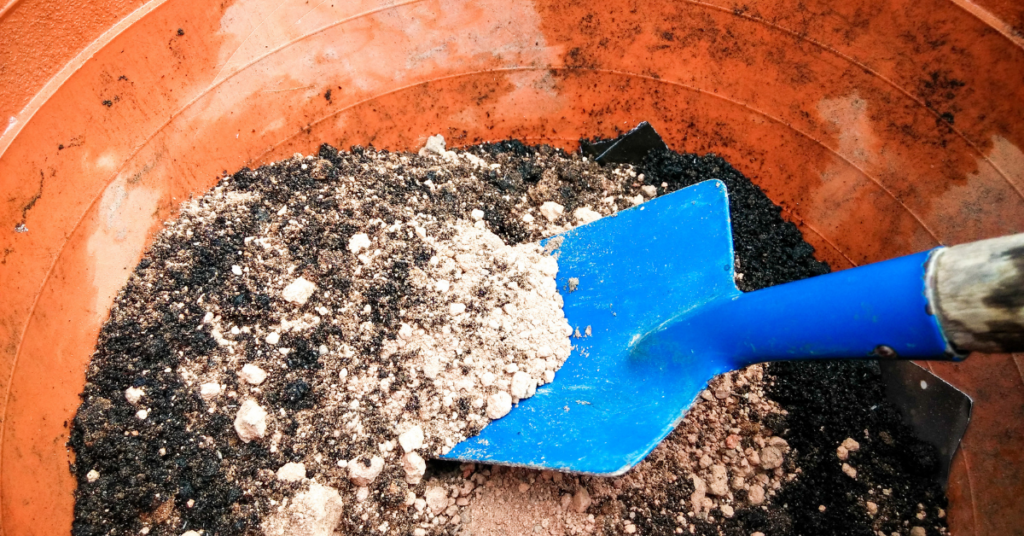
Organic sources of fertilizer such as bonemeal, composts, and manures, along with the application of lime, will improve the physical condition of the soil in terms of water and element holding ability. Unfortunately, in many cases though, manures and lime alone cannot be depended upon to provide enough available nutrients in soils with low essential element reserves.
Let’s talk about commercial fertilizers, which can help target your plant’s exact needs much like vitamins and supplements!
The Scoop on Fertilizers
Of the essential 16 elements your plant pulls from the soil, Nitrogen (N), Phosphorus (P), and Potassium (K) are the most critical for good plant growth. You’ll recognize the three numbers appearing on your commercial fertilizer labels known as the fertilizer analysis of the product, representing the percentage of each of the three "macronutrients" in the order of N, P & K.
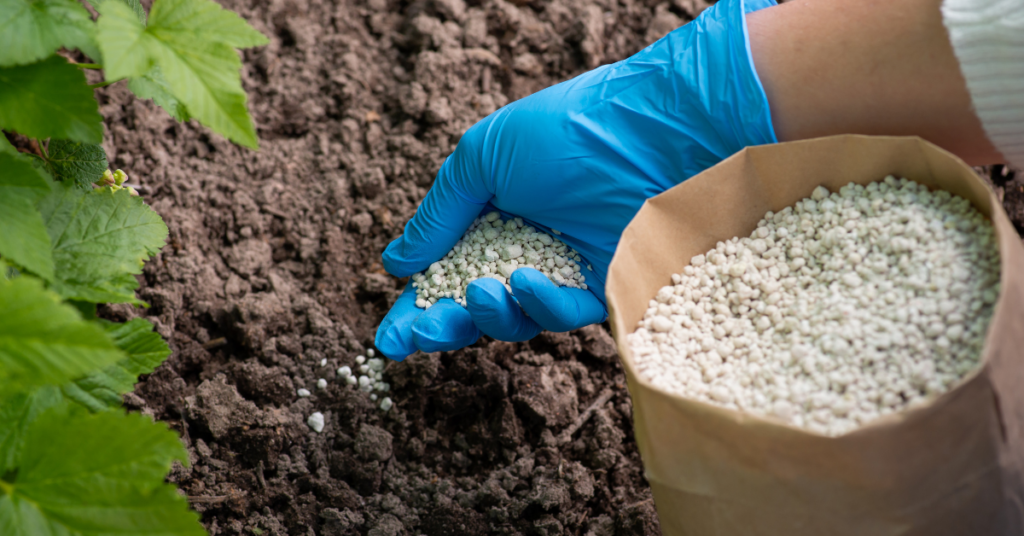
Nitrogen (N) is necessary for green leafy or vegetative growth which is important in crops like corn, cabbage, and potatoes.
☝️ It is important to remember that you should not use a fertilizer which is high in nitrogen late in the summer on your perennials, as it may cause a boost of growth which will only freeze as the cold weather sets in. Also, too much nitrogen in the analysis could cause too much lush, leafy growth thus inhibiting the desired flowering aspect of a plant species.
Phosphorus (P) promotes the development of flowers, fruit and roots. Crops like tomatoes, cauliflower and garden flowers.
Potassium (K) boosts plant hardiness, stem strength, resistance to disease and drought which is important to all crops, but especially in potatoes, celery and rhubarb.
👍 Rule of Green Thumb: For foliage plants, provide them with shade and lots of nitrogen, and for flowering and fruiting plants, provide them with lots of sun and lots of phosphorus!

Amending Clay
Hello Haldimand and Eastern Norfolk!
We’re presented with the challenge of compacted, often shallow and waterlogged clay, which proves difficult but not impossible.
Clay becomes compacted and waterlogged as it is the smallest soil particle – smaller than a grain of sand, and even smaller than silt – with rough edges that allow it to interlock and bind. In this instance, roots cannot penetrate further into the soil, are susceptible to root rot, and air pockets are slim to none.
This, however, can be fixed with the addition and renewal of the above materials.
Mindful that you don’t create a watery bowl in the ground (score the edges the area being worked), you can add organic matter (i.e., manure, compost, and potting soil) for nutrients, as well as mulch, sand and perlite for aeration and drainage. Annual soil particle aggregation in clay soils increases air porosity (air pockets) and is accomplished by the incorporation of organic matter that breaks down to form humus.
🖱️ See more here for planting trees in clay.
We hope this soil and fertilizer guide helps you provide all the vital nutrients to your beloved plants in ground and above ground! For more information - and soil – visit Eising Greenhouse and Garden Centre! 🌱
By: Dave Zeldon and Ely Schweyer
Bearing in mind that a lawn is a very unnatural situation in that we are trying to sustain a large area with very little plant diversity (monoculture), in the eye of the homeowner, lawns may remain an important part of the domestic landscape! As well as in very necessary areas like tile beds, paths, roadsides, and recreational areas, lawns provide a background that enhances the overall effect of the home and the various gardens and landscape features.
From nematodes to dog pee spots, the following tips will help you to maintain a healthy lawn naturally.
Mowing
Of all the cultural practices, mowing exerts the greatest influence on growth, development, and ease of management. By keeping the grass blade height between 6 & 8 cm (2.5 to 3 inches) high you'll be able to produce a more competitive lawn against young and germinating weeds.
Grass Species Selection
Seed mixtures with Titanium Tall Fescue have shown to be more drought, disease, and insect resistant than many other lawn grasses such as the traditional Kentucky bluegrasses. Tall fescue roots penetrate deeper into the soil providing better regrowth and wear tolerance, making it ideal for heavy foot traffic areas and recreational areas.
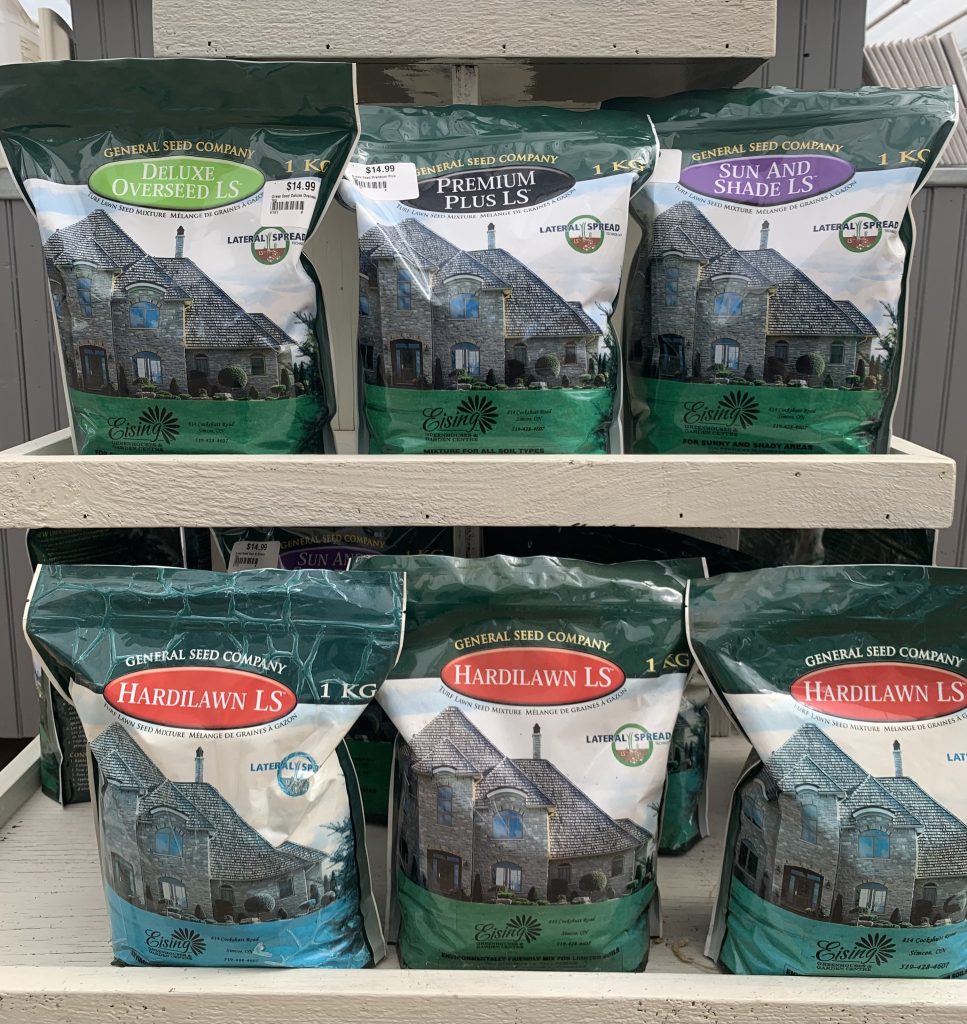
Carried by Eising Garden Centre
Time of Sowing
The best time to establish a lawn from seed is late summer and early fall (mid-August to mid-September) in southern Ontario. During this period, soil moisture and temperature conditions are optimal for germination and establishment. There is also less competition from germinating weeds in the fall. Make sure that seeding is done early in the fall so that the grass is well established before winter. The plants are then well rooted and more drought- and heat-tolerant the following summer.
Seed the shady areas in the fall for best results. Trees will have shed their leaves by then, so plenty of light is available for the new growth. The grass also gets off to an early start in the spring before the trees leaf out.
Spring seeding should be done as soon as the ground can be worked. Slow, irregular germination may result if the seed is sown when the soil is too cold and damp. (Soil Temp. around 15oC is ideal and there is also strong competition from germinating weeds during the spring. When practical, wait until weed seeds germinate, work the land to kill them and then sow the grass seed. ) If you choose to plant your new lawn in the spring, begin just as soon as the soil is dry enough to work, preferably mid-April to mid-May. This will give your new grass time to get well established before the hot, dry weather sets in.
Fall is often a better time to start your lawn, from mid-August to the end of September. Your seedbed is less likely to dry out at this time of year, and the grass should be well established before winter.
Watering
Your typical lawn needs about 2.5 cm (one inch) of water per week through either rain or irrigation. If irrigating, water in the morning as more will be absorbed as opposed to being lost to evaporation in the sun and the warmer temperatures later in the day.
Fertilization
Lawns require relatively large amounts of nitrogen-based fertilizers which should be applied several times during the growing season. Since lawn clippings are high in nutrients, especially nitrogen, much of your initial nitrogen fertilizer investment may be recycled back into your lawn! A fertilizer with a nitrogen, phosphorus, and potassium ratio of 4:1:2 (e.g., 20-5-10) is normally the best in most situations. It should be noted though, that a soil nutrient test can accurately determine the actual needs of your lawn including lime if the pH is too low.
(Lawn Liming Rate: 20-50 lbs/1000 ft2)
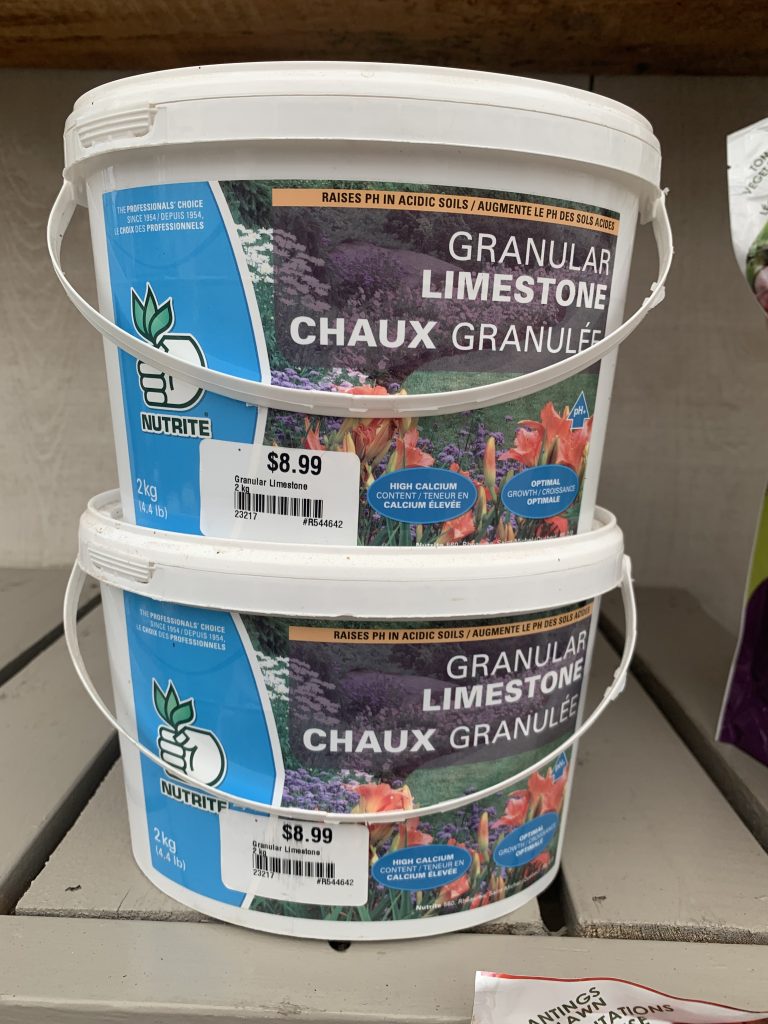
Carried by Eising Garden Centre
Corn Gluten
An application of this product early in the spring and then later on in the summer will inhibit the growth of weeds from germinating seeds especially the annual problem, crabgrass. Established weeds though have to be dug out by hand.
Dog Pee Spots
There is a misconception that the pH level of your dog’s pee is leaving those unsightly spots in your lawn, when it is in fact the high concentration of nitrogen and salts being introduced into the soil. To prevent this, should you see your four-legged friend raising its leg or popping a squat, give that spot a good watering to dilute the minerals. In addition to this, ensuring your dog is well hydrated will help to water down their urine. However, your lawn may already have several severe yellow and bald patches. You may opt to resod or reseed the area, but the soil is what’s affected. Before giving up altogether and adding a scree to the affected area, Eising Greenhouse and Garden Centre offers a fertilizer to help balance and remedy your dog pee spots!
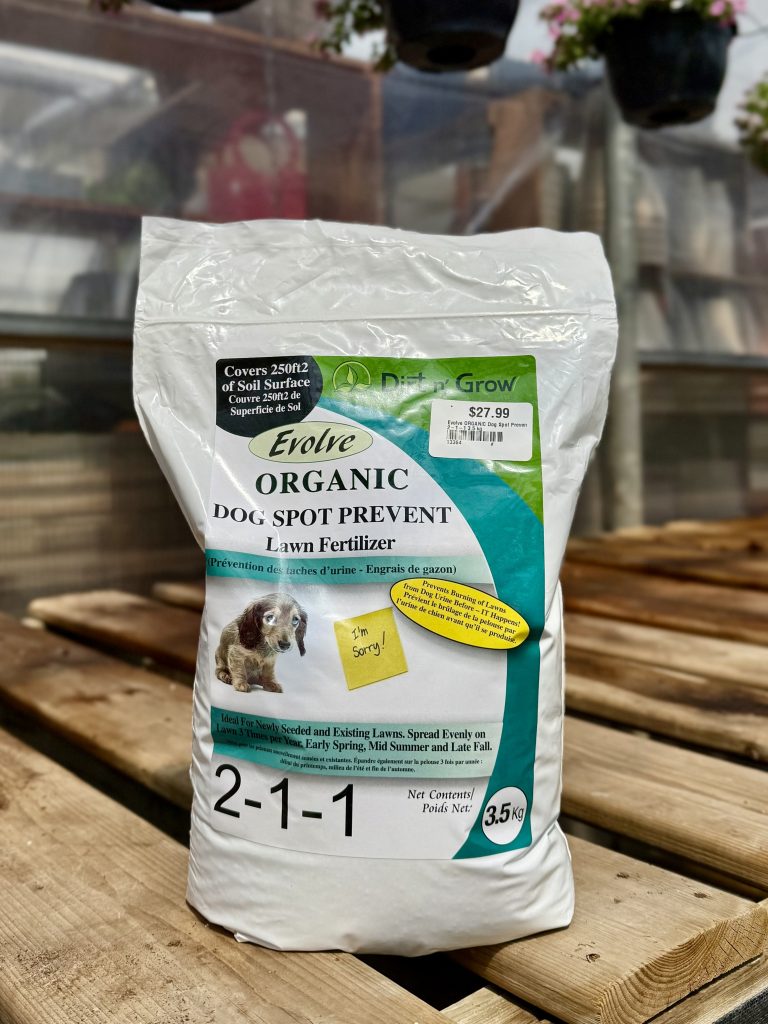
Carried by Eising Garden Centre
Thatch Control
Thatch is a layer of dead leaves, stems and roots that intermingle with the living plants above the soil surface. A one-inch layer of thatch is desirable as it has a cushioning effect against compaction and an insulating effect in cold weather. De-thatching a lawn is an extreme measure that may be considered if the drainage is poor. Lawn aeration may be required as well as the lawn and the soil below must establish a drainage pattern.
Nematodes - Aid Against Japanese Beetles and More!
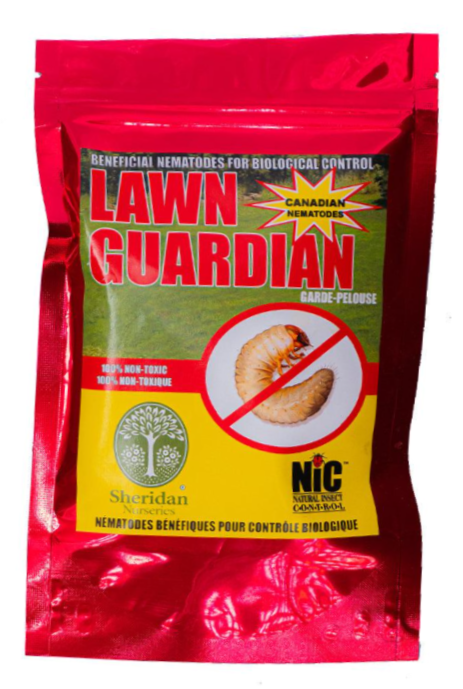
If the Japanese Beetle has been destroying certain plants in your landscape plantings or their grubs have been feeding on the roots of your lawn, causing unsightly brown patches maybe it's time to use Mother Nature's secret weapon: Beneficial Nematodes.
Beneficial Nematodes are a natural way to control Japanese Beetle grubs and over some 200 species other pest insects in your lawn while having no detrimental effect on Ladybugs, Earthworms, and other helpful beneficial insects.
Nematodes are naturally occurring microscopic worms of the soil and are used to control soil pest insects in their larvae or grub stages while not posing any health or environmental risks to humans or animals. The beneficial Nematodes enter the JB larva via mouth, anus, or respiratory openings and begins to feed. This causes specific bacteria to emerge from the intestinal tract of the Nematode, spreading inside the insect and multiply very rapidly; the bacteria convert host tissue into products which can easily be taken up by the Nematodes, ceasing the soil dwelling pest insect within a few days. Beneficial Nematodes are effective against not only the larval or grub stage of Japanese Beetles, but the Northern Masked Chafer, European Chafer, Rose Chafer, Crane Fly larvae (Leather Jackets), Oriental Beetles, and June Beetles.
The nematode product you purchase should contain two genera: Steinernema and Heterorhabditis for better grub control.
Beneficial Nematodes are very easy to use. Mix with water and spray on the lawn with a water-can, irrigation system, or a hose-end sprayer. Most homeowners spray at a rate of 10 million nematodes per 600 square feet on grub damaged lawns. After an application, keep the soil moist during the first two weeks for the nematodes to get established.
In Ontario, there are two windows of opportunity to apply Beneficial Nematodes to be effective against the JB grub stage.
The first application should be in May as the soil warms up and then again at the end of August or the first two weeks of September as the JB are hatching into their first larval stage.
We hope these tips help to ensure your healthiest lawn! For more information – and lawncare products - visit Eising Greenhouse and Garden Centre! 🌾