
By Dave Zeldon and Ely Schweyer
In late June and early July we will be witnessing the annual invasion of the Japanese Beetle on many of our favourite landscape plantings including Hollyhocks, Dahlias, Hibiscus, Roses, Grapes, and Raspberries.
Adult beetles skeletonize foliage.
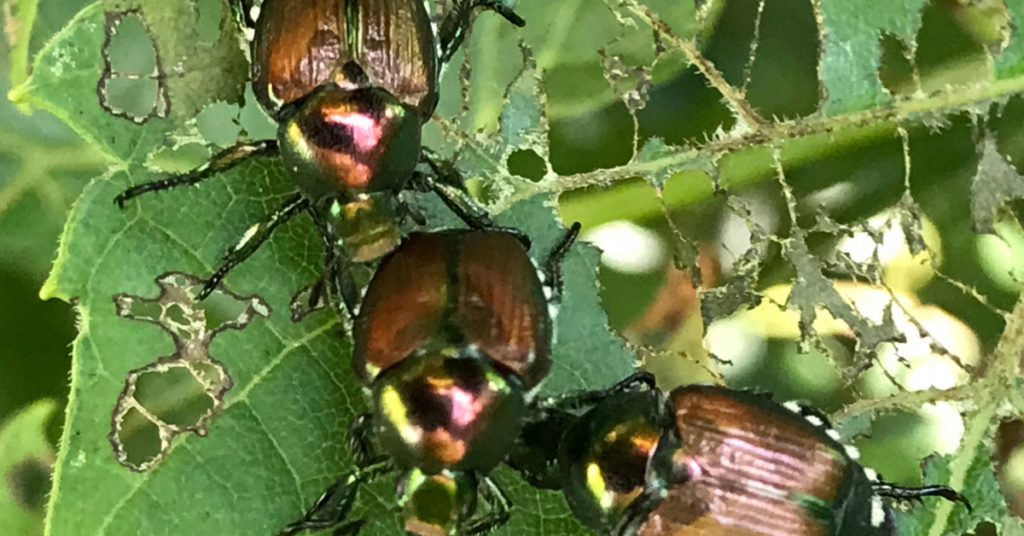
Many of us have tried the various means available to curb this yearly destruction like pheromone traps, Nematode lawn inoculation, hand picking, and concoctive sprays. But still, we get substantive damage.
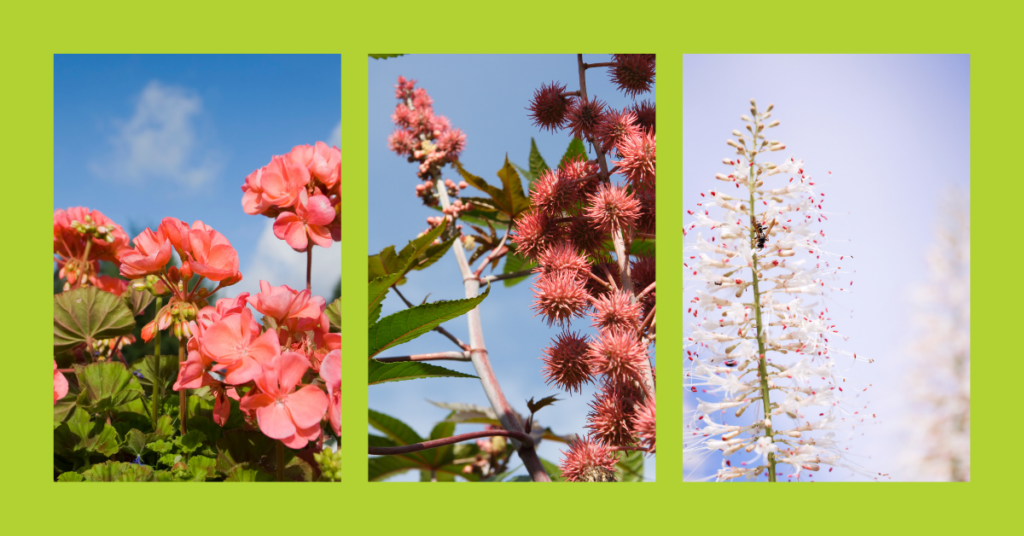
Interestingly enough, some plants such as Geranium, Castor Bean, and the flowers of Bottlebrush Buckeye, will cause paralysis and death of these beetles when eaten.
Maybe it’s Time We Look at Whole New Approach
Why not slowly invest in a landscape makeover? One with Japanese Beetle resistant plants!
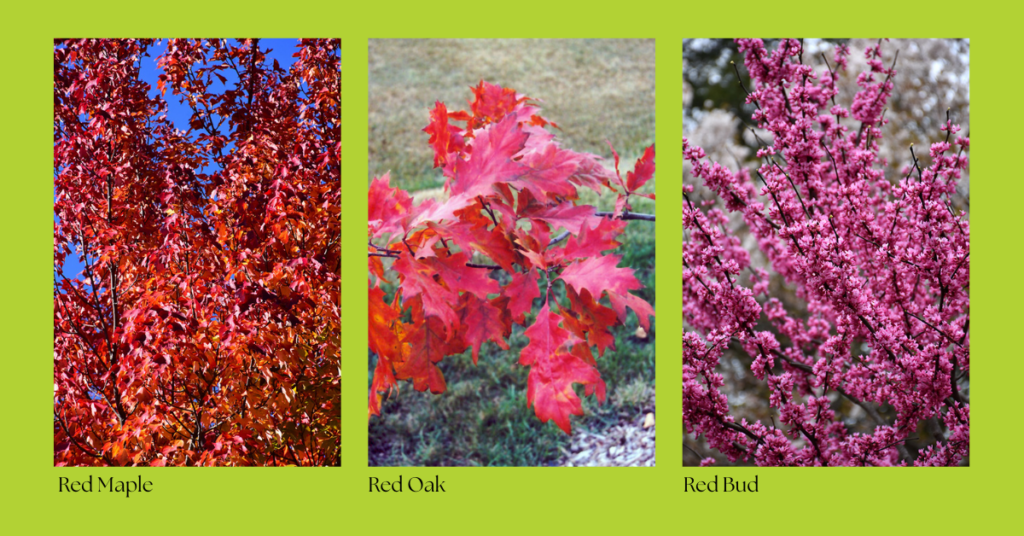
Trees such as Red Maple, Red Oak, Hickory, and Redbud could replace the susceptible Japanese Maple, Norway Maple, Pin Oak, Linden, and Mountain Ash.
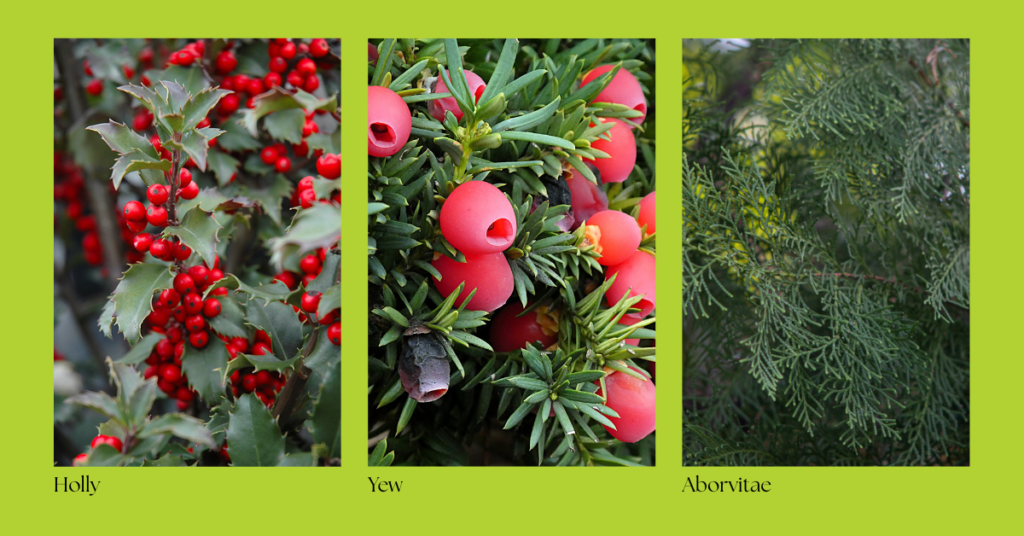
Why not consider growing more Evergreens such as Holly, Yew, Boxwood, and Aborvitae instead of the prone Virginia Creeper, Apple and Plum family of trees, and Birches.
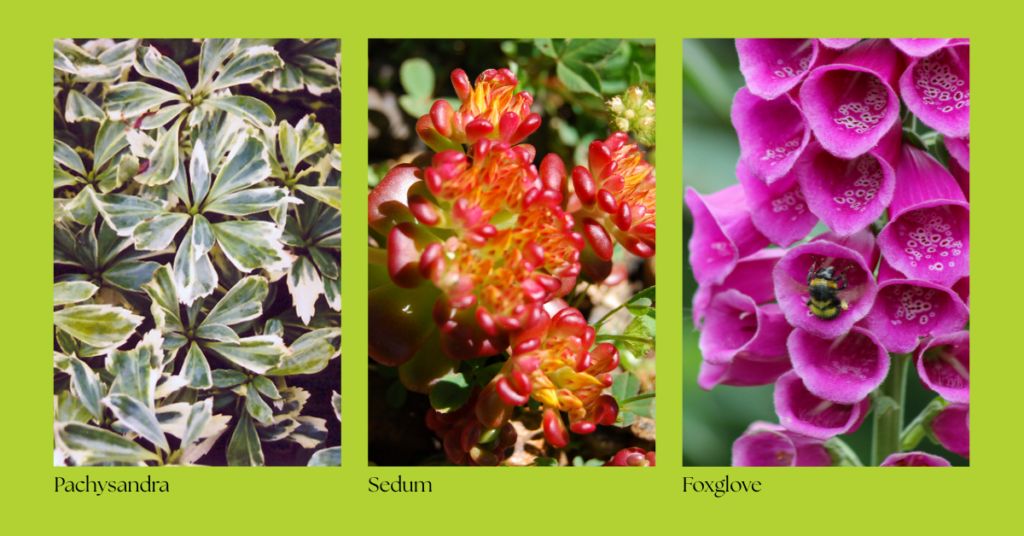
You also may want to contemplate planting perennials such as Coral-Bells, Hostas, Pachysandra, Sedum and Foxglove as opposed to the Japanese Beetle standard menu fare of Evening Primrose, Hydrangea, Clematis, Potentilla, and Zinnia.
Yes, we do have some preventative measures at our disposal to battle the Japanese Beetle (find how to use beneficial nematodes in our fall chore blog) but due to the nature of this pest, it will inevitably win the war. If we continue to grow the some 400+ preferred host plants in our landscape, providing an adequate food source for this invasive pest rather than replacing them with resistant species, surely this pest will make gardening a chore instead of the pleasure it should be.
We hope this article will aid in the prevention of Japanese Beetles in your garden space! For more information – and Japanese Beetle resistant plants – visit Eising Greenhouse and Garden Centre! 🪲
By Dave Zeldon and Ely Schweyer
This is a question we hear daily during the spring, summer and, especially, the fall. Unfortunately, many homeowners do not see any adverse changes occurring in their trees until they look dead, or nearly so.
You Might Not Need to Panic Yet
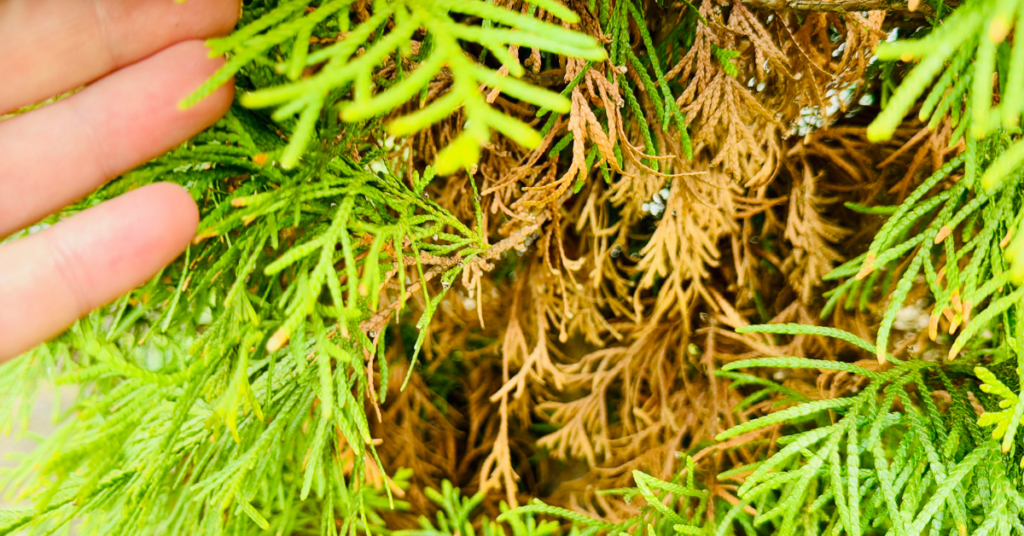
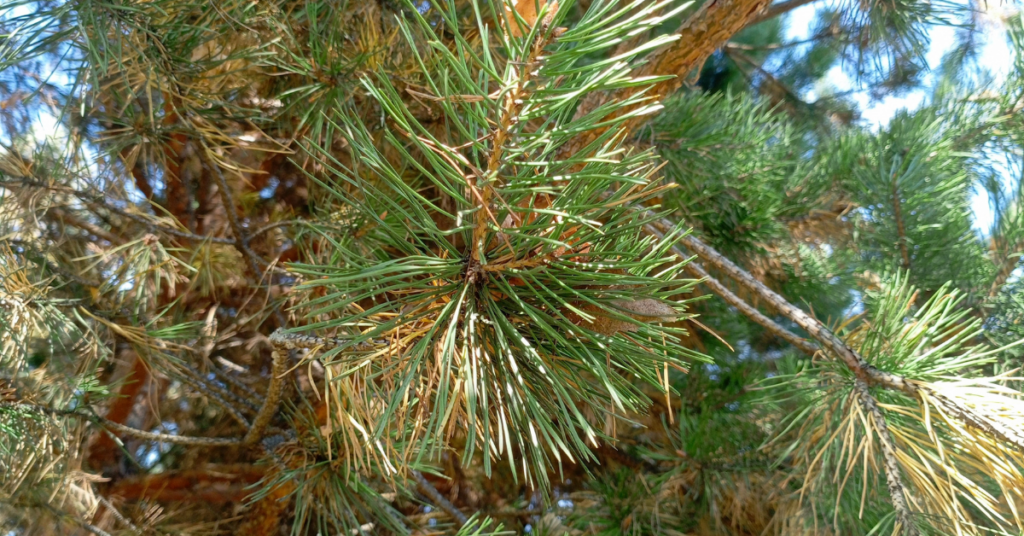
The discolouration and dropping of evergreen needles are a natural phenomenon and the main cause of needle loss in the wild. Evergreen needles, as the name implies, survive for a lengthy period, and in fact usually have a life span of five to seven years on healthy trees, however, they must be shed. The needles first start to die in the central and lower part of the tree, and this change progresses upward over time. You will see spruce trees naturally lose needles as they get older.
Age is an important factor here in causing needle loss and branch death, however, in landscape plantings of coniferous evergreen trees, pests and disease are likely the major cause of needle loss and dying branches. If there is a sudden fall of a very large number of brown needles and leaves, this signals to us that there is something drastically wrong!
This can happen as early as a year or two after a tree is planted. This is especially true in Haldimand and Eastern Norfolk County where heavy clay soils predominate. Spruce trees, for example, do not grow well on clay soils.
When You DO Need to Worry
Here are some of the more common problems, apart from natural aging that afflict spruce trees, the probable causes and ways of treating the problem.
☝️Unfortunately, these majestic trees, the most popular evergreen planted on our residential properties, incur many other pest and disease problems not dealt with here.
Symptom: Rusty brown needles that eventually fall.
Likely causes:
1. Internal fungus disease (called Cytospora or white blister canker). This creates cracks in the bark causing resin to drip and leave grey-white dripping streaks on the bark. The fungus also causes open wounds or blisters on tops of branches. These wounds can be greyish white or greyish blue in colour, eventually turning brown and black.
2. Feeding by spider mites which leave fine, poorly formed webs in the needles, especially near the ends of the twigs.
Best treatments:
1. Properly aerate and fertilize tree out to a distance of half its height in all directions, where possible.
2. Pressure wash thoroughly once a month with water only, all needles and branches as high as possible on the tree. Water pressure dislodges spider mites.
Symptom: Chewed up ends of twigs in June.
Likely cause:
Spruce bud worms which develop in the needle cluster that arises from a bud.
Best treatment:
Spray the biological pesticide, BTK (eg. Dipel), onto the entire tree when feeding is first noticed in early spring, to kill the young caterpillars.
Symptom: Black sooty mold covering twigs and needles.
Likely causes:
1. Spruce bud scales, ball-shaped insects, initially light brown in colour but eventually turning black. Often two to five scale balls cluster in one location on the twig; honey dew excretions from scales become infected with sooty mold.
2. An overhanging shade tree such as oak, maple or elm may have heavily infested leaves with aphids whose honey dew secretions become infected with sooty mold.
Best treatment:
1. Pressure wash tree using water only to dislodge young scales (called nymphs) in May and early June while they are in the crawling stage. Scale nymphs fall to the ground where they cease to be a threat to the tree.
2. Spray shade tree in early spring with insecticidal soap to control aphids. The problems of other coniferous evergreens such as pines, firs, cedars and junipers can usually be treated with correct diagnosis, though some diseases are lethal.
We hope these help you troubleshoot common issues often found in evergreen trees! For more information - and evergreens – visit Eising Greenhouse and Garden Centre! 🌲
By: Dave Zeldon and Ely Schweyer
If you can’t wait for Mother Nature’s next great colour show, the time is now (mid September) to get rolling on those early spring flowering bulbs! Even though you can start planting in October or early November, buying bulbs now is advantageous as the selection at your local garden centre is at their best. Being the very first to bloom during the last dreary days of winter, bulbs announce that spring is returning once more, and as you think about the colourful show of tulips and daffodils next year, remember all spring’s groundwork begins now!
Your bulbs may be planted in your lawn, rock beds, at the foot of trees and bushes, in annual or perennial flower beds, or even in flower stands and pots. Combining the emerging fresh colors and textures of bulbs with the established foliage creates a harmonious relationship opportune for a complimenting or contrasting garden-scape. With a bit of planning and creative selection you can easily extend the joy of having spring flowering bulbs in your garden from a few weeks to several months, furthermore, planting bulbs amongst perennials offers that the new growth of the perennials will hide the fading foliage of the bulbs once they have finished flowering! Not long after the fading of the bulbs most perennials themselves will bloom, smoothly extending the sequence of flowering plants for you to enjoy.
Read on for all there is to know about planting bulbs!
Buying Your Bulbs:
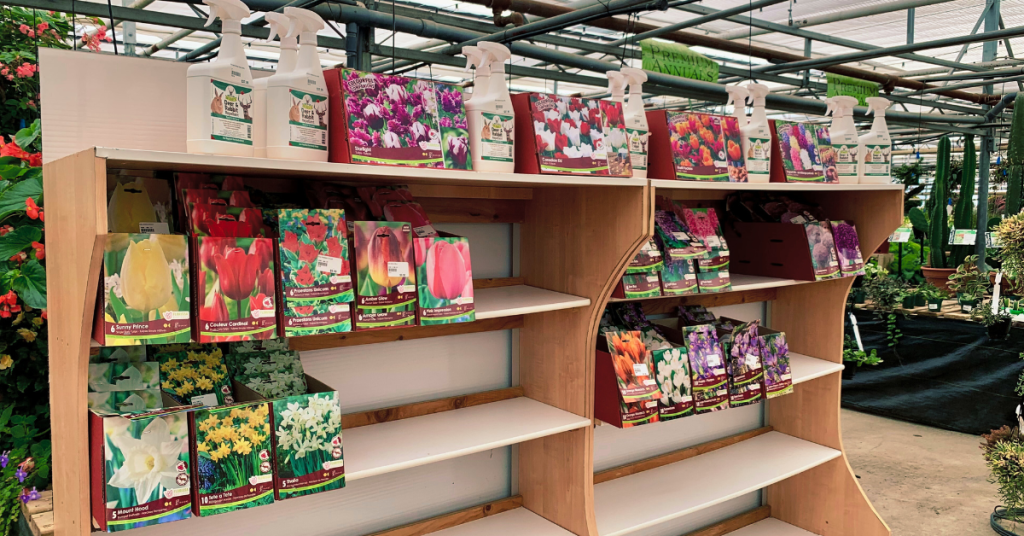
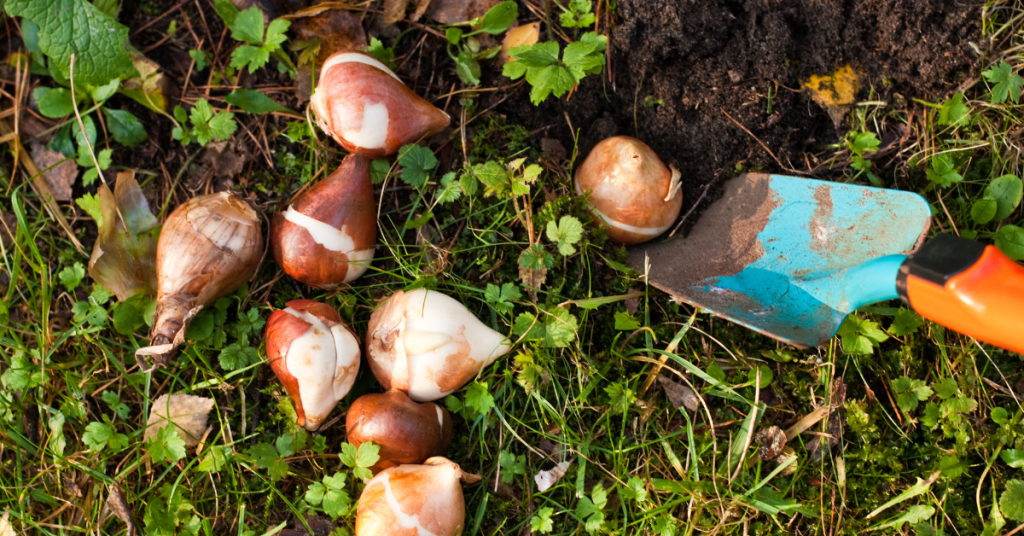
When buying, look for nice, plump, firm, bulbs. Avoid those with scars or that feel spongy to the touch. The general rule is the larger the bulb the bigger the plant. If you're buying daffodils, look for bulbs that have two or more "noses" as you will get extra flowers for free!
To have a good display of colour in your garden, right from March to the end of June. Be sure to check the blooming times on the packages and get a variety of early, mid and late-blooming spring bulbs.
👉 Tip: To extend the season, plant some bulbs in places where the sun beats down in early spring and some in cooler, shady areas of the garden allowing them to emerge in later spring.
Planting Your Bulbs:
When planting, the soil must be warm enough under the surface to stimulate a little root growth prior to the winter freeze. Winter chilling is necessary to break the flower bud dormancy (vernalization) to have our bulbs produce blooms in the spring (see below how to force bulbs if you’re reading this in the spring).
Remember to plant your bulbs with the pointed end up! If it doesn't seem to have a pointed end, look for the flatter side and evidence of roots, which is the end that goes down. If you still can't be sure, plant the bulb on its side and it will figure out the proper direction by itself!
The rule of thumb is to plant the bulb two or three times as deep as the bulb is tall. The depth is to the base of the bulb, not the top. Typically, 8 inches (20 cm) for big bulbs such as daffodils, tulips and hyacinths and 5 inches (13 cm) for small bulbs like grape hyacinths and crocus. Plant in well-drained soil, cover up, water well and wait for spring.
In a wide hole, place bulbs - so they aren't touching - in threes, fives, or sevens per hole for the most natural look. You can throw a handful of bonemeal in the planting hole and mix it lightly with the soil, this will give your bulbs a good boost for the best bloom. Water to the depth of the hole.
Tulips, daffodils and other spring-flowering bulbs require a long period of cool temperatures to undergo the biochemical process that allows them to flower. So, in the fall, get them in the ground ideally six weeks before hard freezes to give them the time they need to develop strong roots.
Fertilizing Bulbs:
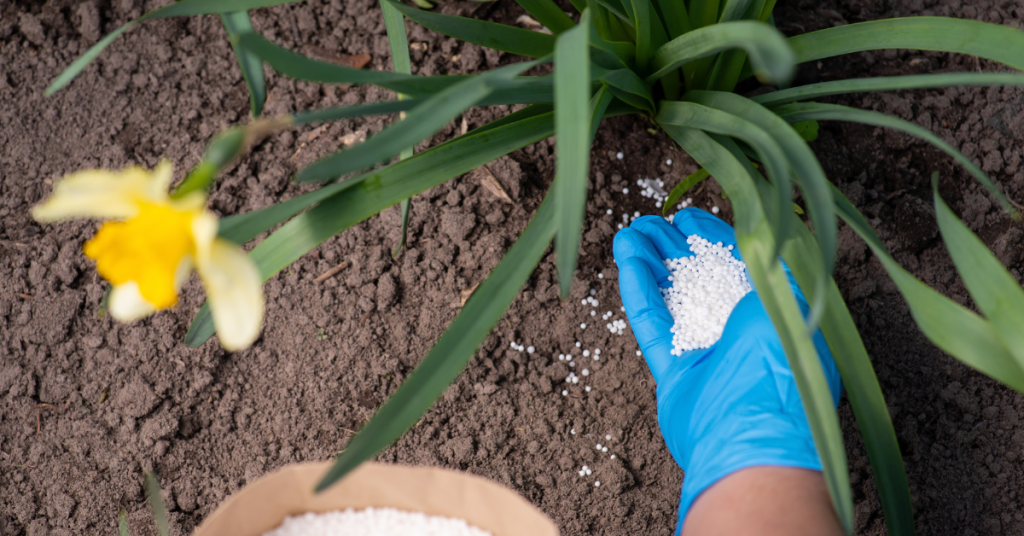
Bulbs contain the nutrients they need to bloom their first year, but a fertilizing program will keep plants healthy and ward off diseases and pests. Compost and manure are two good organic fertilizers that not only enrich the soil but ensure a good soil structure for bulbs. Additionally, organic supplements can be used to add nutritional balance. Compound mineral fertilizers can also be applied, however, check the label to see if fertilizing is appropriate for your bulbs and the best time of year to do so. Top-dressing with fertilizers like 9-9-6 slow release or either 8-8-8 or 10-10-10 soluble fertilizers are examples.
Once a bed of spring flowering bulbs are established, the process of naturalizing occurs which simply means that a bulb flowers again after the first year and starts producing more bulbs on their own. However, they will need your help to get the food they require to recharge and regenerate for the next season's bloom.
Some Helpful Tips:
- Squirrels enjoy the taste of tulip bulbs if they are easily accessible but not so with daffodil bulbs; interplanting the two together and/or mulching the garden will help protect them.
- Resist the urge to tidy up fading foliage or mow over it as the plants require about six weeks to build up reserves for the next season.
- Deadhead the tulips as the formation of seeds will sap the energy from the bulb. Daffodils & other bulbs do not require this action.
Forcing Bulbs:
Now if you can't wait for spring to smell the fragrant hyacinths, or you missed the fall planting, why not try your hand at bulb forcing?
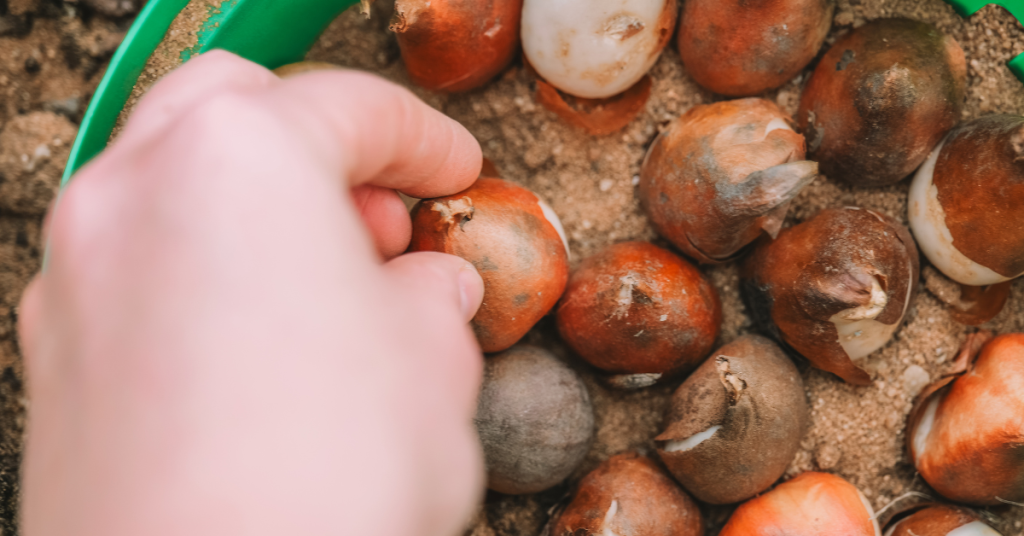
All you have to do is plant any extra bulbs in a pot with a drainage hole. Choose a pot that is at least twice as deep as the bulbs to allow for proper root growth. Fill the pot half full of soilless potting mix. Then place as many bulbs as possible in the pot, without letting them touch. For a thick show, layer more than one kind of bulb in the same pot; place larger bulbs on the bottom as they will grow around the smaller ones. A six inch-wide pot holds up to six tulips, three narcissus (daffodils), or 15 minor bulbs, such as crocuses or grape hyacinths.
Cover the bulbs with potting mix, leaving their tips showing. Water the bulbs thoroughly. Label with name and date; loosely cover pot with a paper bag. Place in cool (1-7 degrees Celsius or 35-45 degrees Fahrenheit), dark place for chilling such as an unheated attic, basement, or attached garage or in a 12 inch-deep trench covered in a tarp.
Check moisture in pot periodically keeping the soil damp but not wet. When chilling is complete, you'll see roots poking out of the bottom of the pot and green sprouts emerging at the bulb tips. It's time to move the potted bulbs into a warm room.
Chilling and Blooming Times:
- Daffodils: 12-15 weeks of chilling; 2-3 weeks to bloom after chilling.
- Tulips: 10-16 weeks of chilling; 2-3 weeks to bloom after chilling.
- Crocus: 8-15 weeks of chilling; 2-3 weeks to bloom after chilling.
- Grape hyacinth (Muscari): 8-15 weeks of chilling; 2-3 weeks to bloom after chilling.
- Iris reticulata: 13-15 weeks of chilling; 2-3 weeks to bloom after chilling.
- Snowdrop (Galanthus): 15 weeks of chilling; 2 weeks to bloom after chilling.
- Hyacinth: 12-15 weeks of chilling; 2-3 weeks to bloom after chilling.
We wish you all the best with your bulb planting this autumn! For more information - and bulbs - stop by Eising Greenhouse and Garden Centre this fall!
For tomato lovers, picking a warm, flavourful tomato right off the plant for a sandwich, burger, or salad is a sure sign of summer! I eagerly await the day the first fruit begins to turn red, knowing that I am a day or two away from the first of many toasted tomato sandwiches for the season!
By the end of June, your tomato plants should be in the ground or pot, staked, and well on their way to producing fruit. But how do you keep your plants healthy all summer so that you can maximize your investment? Here are a few tips to help keep your tomato sandwiches coming until frost!

Water
Water early in the morning and water deeply. For tomatoes, consistent moisture is best.
Keep the water on the ground, not on the foliage. This is important because damp foliage can lead to diseases like early blight, which can ultimately cause the entire plant to die. Mulching around the base of plants will reduce the amount of water that can splash up onto the leaves. A soaker hose or drip line is also a great way to ensure that water stays on the ground, rather than on the plant.
Pruning
Reducing the amount of foliage on a tomato plant is necessary for a couple of reasons: good air flow, which reduces the chance of powdery mildew forming, and less foliage means that the plant can send energy to growing fruit instead of lots of leaves.
Follow these easy steps when you prune your tomato plants:
- Before you begin, remember to follow the rule for pruning - no more than ⅓ of a plant should be removed at a time.
- Use clean scissors or pruning shears to cut the leaves off the bottom of the plant. Remove any leaves that are touching the ground. These are particularly susceptible to mildew formation.

When fruit starts forming, remove the leaves from the bottom of the plant up to the first or lowest fruit.
Remove suckers ongoingly. What are suckers? When you look at your tomato plant, you will see the main stem that comes up from the ground, and branches of leaves that come out of the main stem. As the plant grows, suckers begin to form in the “Y” between the main stem and a branch of leaves. Suckers won’t harm a plant; they just make it very unruly and reduce airflow.

If your tomatoes are indeterminate (growing into a tall vine), remove the top of the plant when frost is forecasted at the end of the season. Topping the plant allows energy to ripen the fruit that’s already set, rather than being used to continue growing the vine.

NOTE: Some gardeners like to leave suckers on determinate tomato plants as this can increase the yield.
TIP: Tomatoes ripen from the inside out. That means that by the time you see fruit beginning to flush on the outside, the inside is already ripe. If you have competition for tomatoes from pesky critters, or when there’s a chance of frost in the weather forecast, you can pick fruit that has just begun to turn colour and leave it on the kitchen counter to continue to ripen.
Fertilizer
Using organic material is one of the best ways to feed your crop. A good layer of compost, 1-2 inches, in the spring when you’re planting and again in the fall each year is one of the best ways to improve your soil structure in the garden, and it also adds lots of nutrition.
If you missed this step when planting your garden, you can always add a layer of compost around your plants or use other organic fertilizers, such as compost tea, seaweed, worm castings, or fish emulsion.
Alternatively, you can use a fertilizer that’s formulated especially for tomatoes - these usually have a ratio like 3-4-6 or 4-7-10. Follow label directions for amounts and err on the side of caution. Using less fertilizer is always better than using too much, as an excess can stress the plant and make it more prone to disease.
Following these simple steps for tomato care will help to ensure your plants stay healthy and producing fruit, but if you should have problems, here are some great resources to identify tomato issues:
- Ontario.ca: Bacterial diseases of tomato: bacterial spot, bacterial speck and bacterial canker
- Guelph.ca: Healthy Landscapes – Plant List Native and Drought-Tolerant Plants
What’s the best way to brighten up your garden? Add lots of annual flowers in the Spring! Here in Southern Ontario, the May holiday weekend is usually safe from frost - and go time for planting tender annuals!
At Eising Garden Centre, you’ll find a wide array of beautiful annual blooms. Here are ten of our sun-loving favourites to try.
Cosmos
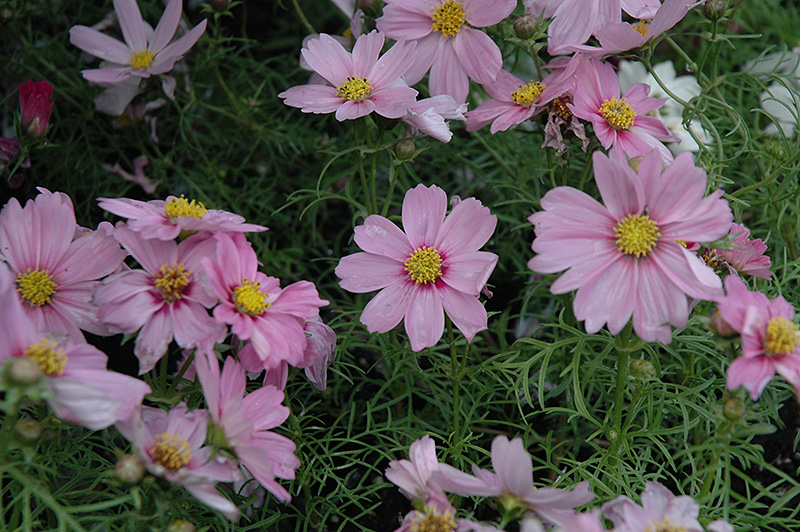
With daisy-like blooms in radiant shades of pink, red, and pure white adorned with mellow yellow centres—Cosmos are irresistible. They're perfect planted along a fence or at the back of a border, where they can lean on a little support. Depending on the variety, Cosmos can grow anywhere from 12 to 80 inches tall!
Zinnia
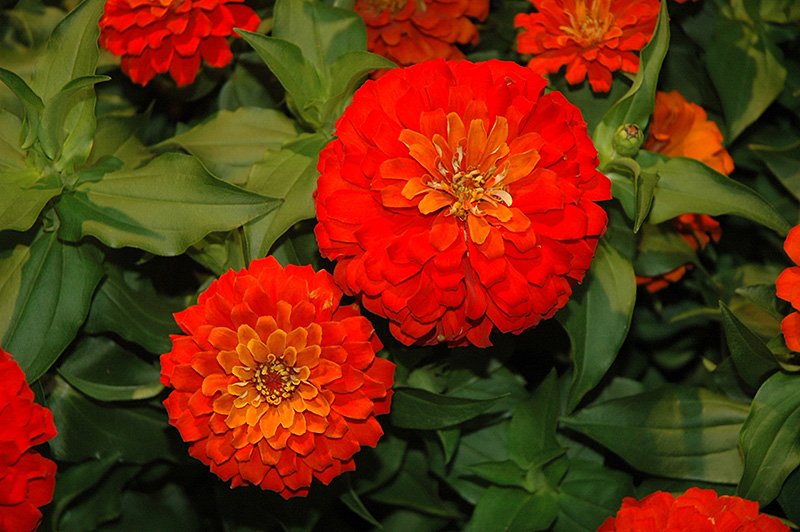
Bold, structured, and bursting with colour, Zinnias bring serious wow factor. Their cheerful blooms come in red, green, orange, yellow, purple, pink, and white. Depending on the variety, Zinnias grow between 6 and 36 inches tall and spread about 12 inches wide.
Calendula
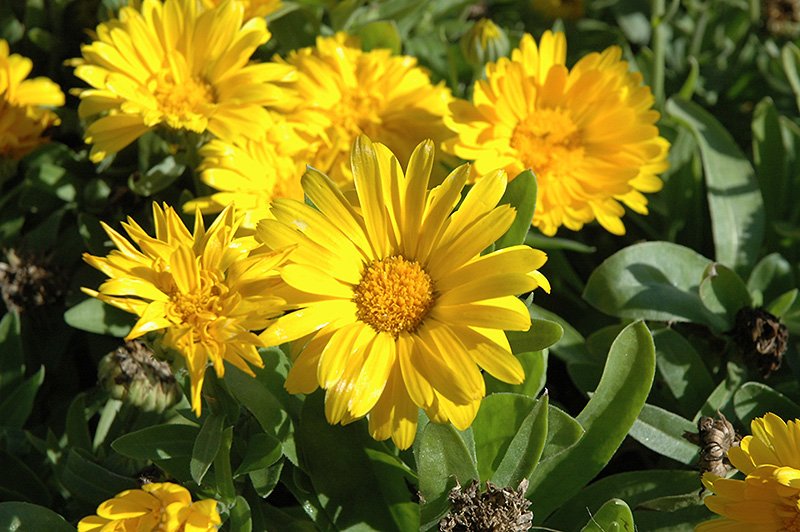
Decorative and useful, Calendulas are edible flowers with culinary and medicinal value. Their soothing, antiseptic properties make them popular beyond the garden. Calendula come in gorgeous, bright shades of copper, orange, gold, and yellow blooms and grow 10 to 24 inches tall.
Marigold
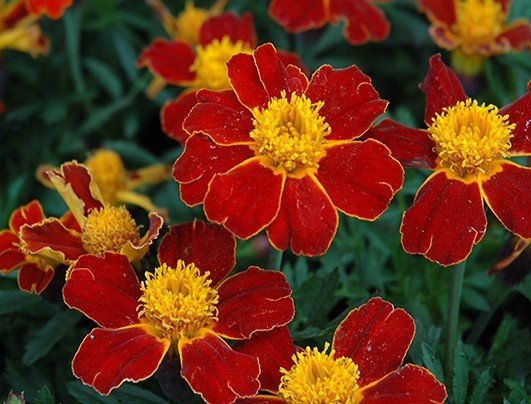
Tough and reliable, Marigolds handle heat and humidity with ease, thriving even in the driest parts of your garden. They offer a beautiful range of bloom types—from large, ruffled flowers to small, delicate blossoms—and a palette of cream, yellow, orange, red, and bi-colours. Depending on the variety, Marigolds can grow from 6 to 36 inches tall.
Amaranth
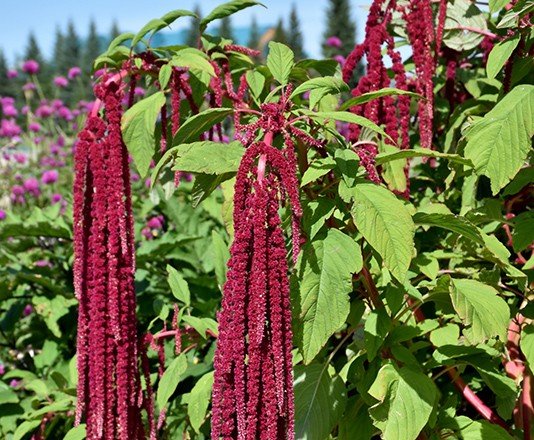
If you're after drama, Amaranth is your plant! Reaching heights of 3 to 5 feet, these bold beauties flaunt long, rope-like clusters of maroon or red flowers. While low-maintenance, Amaranths may need a bit of support to stay upright as they mature.
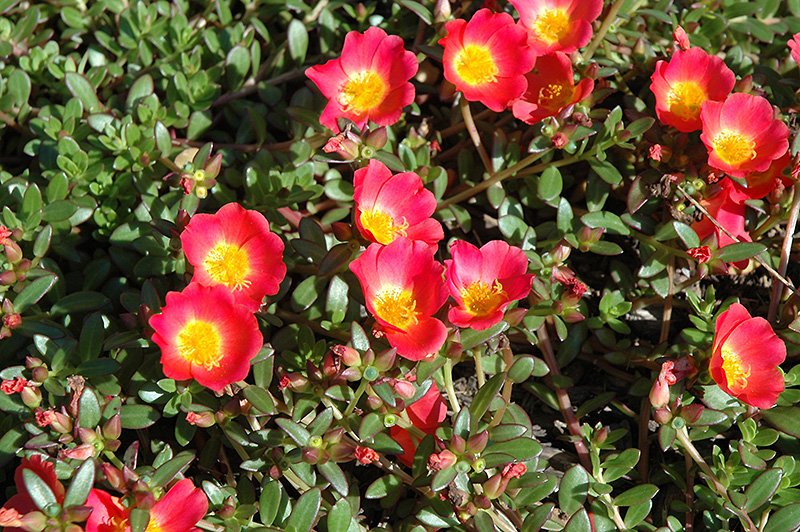
Portulaca
Perfect for hot, dry, and neglected spots, Portulacas deliver a brilliant show of colour with minimal effort. Their rose-like blooms come in vivid shades of red, pink, yellow, white, orange, and purple. Low-growing at just 4 to 8 inches tall, they're ideal for the front of borders, or alongside driveways, and patios.
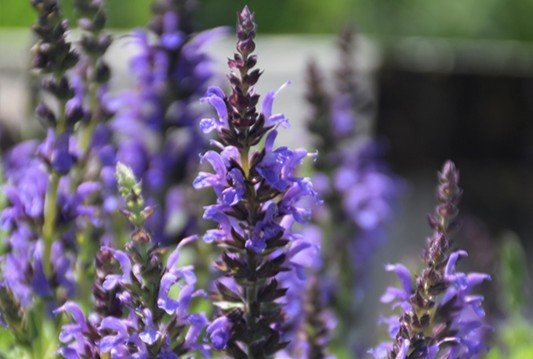
Salvia
With tall spikes of bold purple, red, blue, pink, or white blooms, Salvias are garden standouts. Growing 8 to 24 inches tall and often blooming continuously, they quickly become must-haves for flower beds or large containers.
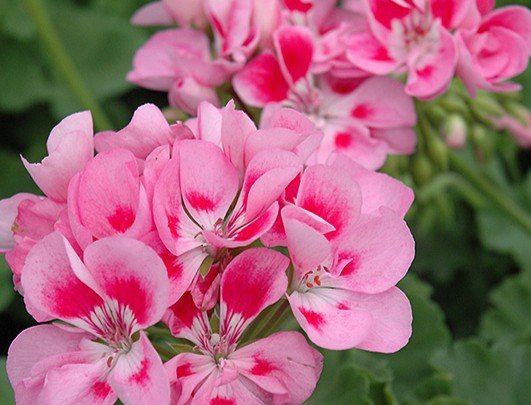
Geranium
Drought-tolerant and tough as nails, Geraniums have long been a gardener’s favourite. Regular deadheading (removing spent blooms) will reward you with non-stop flowers until frost. Their lush foliage and bright flowers—ranging from salmon, white, purple, violet, and orange to red and pink—also shine in mixed containers. Geraniums typically grow between 8 and 24 inches tall.
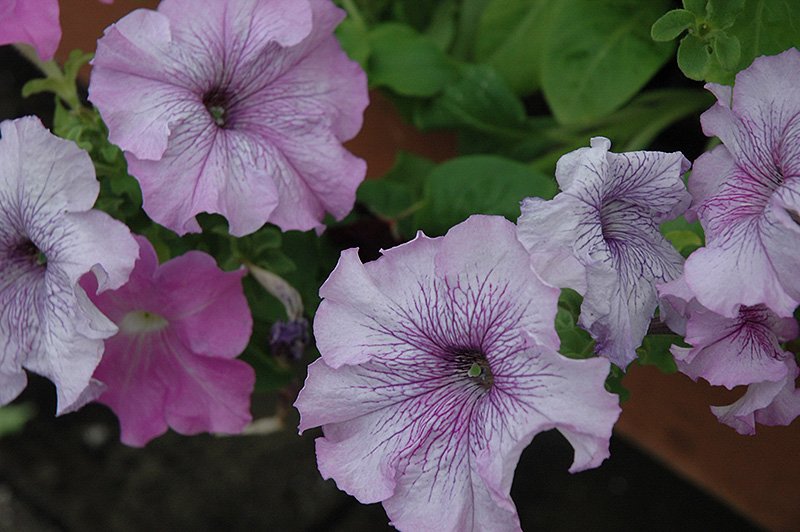
Petunia
It’s no surprise Petunias have remained beloved for generations. They grow quickly, bloom prolifically, and require little care. Available in mounding or trailing forms—and sometimes carrying a heavenly scent—Petunias are perfect for flower beds, hanging baskets, pots, or window boxes. Growing 6 to 18 inches tall, they come in white, yellow, pink, purple, red, bi-colours, and even black!
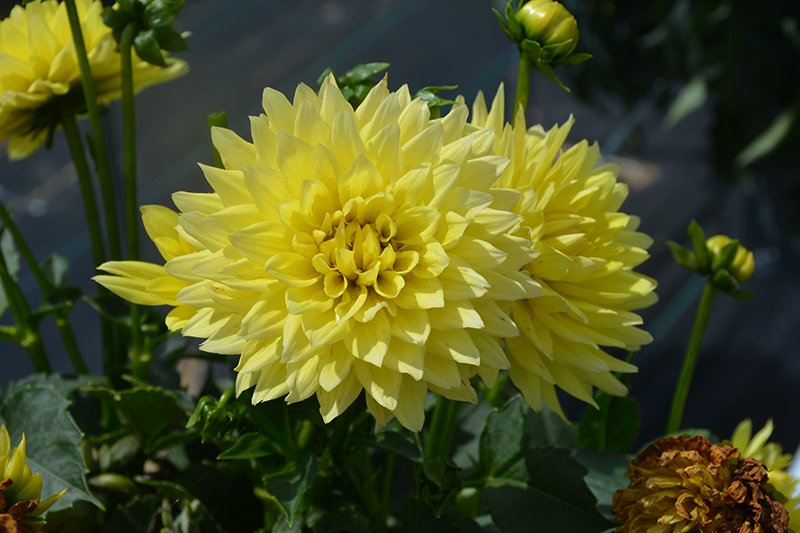
Dahlia
Dahlias can become a full-on passion project—and it’s easy to see why. Their breathtaking blooms come in a stunning range of sizes, shapes, and colours. While Dahlias can be a bit particular (they love rich, well-drained soil and plenty of water, but hate soggy conditions), they are absolutely worth the extra attention.
Sunshine + Food + Hydration = Success
All of these annuals thrive in full sun and will reward you with even more blooms when given consistent water and fertilizer.
Adding a continuous-release fertilizer to your soil at planting time—or feeding weekly with a balanced, water-soluble fertilizer—makes it easy to keep your garden thriving all summer long!
*TIP: Check our handy Plant Finder for more details! https://plants.eising.ca/11110015/