
By Dave Zeldon and Ely Schweyer
Got cabin fever? Perhaps you’re going a little stir crazy looking out the window and seeing the drab, limited pallete in your seemingly lifeless outdoor space. It’s important to embrace this time of year as the composting and cleansing part of Earth’s cycle before spring’s renewal – but that doesn’t mean we should be trapped inside forever. Here’s a winter/early spring list of activities, divided by indoor (Part 1) and outdoor (Part 2), for the gardener and yard keeper.
☝️ First, let’s quickly note the important activity happening under the snow – and how your actions now will affect the summer garden!
What's Going on Outside When We Aren't Paying Attention?
Before heading out to attend to these jobs have a look at the ground beneath you.
If it is frozen hard you are good to go but avoid treading on the crowns of perennials.
If it has been warm and sunny and the soil is warm and dry, consider laying down a few planks to walk on.
If the soil is soggy then postpone those tasks until it has dried. What we are trying to protect is not your shoes but the soil itself.
Ideally, soil is comprised of 50% solid materials such as minerals and organic matter in various stages of decomposition, and 50% open air space. Water from rain or melting snow enters the soil, displacing the air. Wet soil is easier to squish down and that process is called compaction.
While walking on wet soil would not seem to have much effect, it occurs within the depth where annuals, perennials and lawn grasses have their roots. Compaction makes it harder for roots to grow through the soil. Roots can grow stronger to push aside the soil particles, but tougher roots are less effective at drawing in nutrients and moisture. Removing air spaces makes it more difficult for water to percolate down so compacted soils remain wetter. Plants don’t grow as well and are more prone to insect damage.
The freeze/thaw cycles of fall, spring, and winter heave the soil relieving compaction and aerating the soil; a good way to start the growing season. Preventing further damage to the soil is relatively simple. Stay off it when it’s wet. Later, consider using pavers or pathways in heavily travelled areas of the lawn. Aerate the lawn with a machine that removes small plugs of soil and redistributes them over the surface. In beds and borders, add compost and use a thick mulch layer to absorb some of the pressure.
And stay off it when it’s wet.
With this in mind, we can appreciate Earth’s renewal capabilities, as well as prevent destroying our yards and gardens!

Part 1: Activities for When it’s too Cold and the Soil isn’t Ready Yet
Yup, it’s bleak out there. It’s time we make that herbal tea and turn our attention to creating a lively, green indoor environment, even if just to get us through the winter. Here’s a to-do list for trapped gardeners and plant enthusiasts to make the most of our wintry sentence.
Indoors: Get Inspired!
- Expand your knowledge: There’s an endless plethora of botanical media at our fingertips, use this down time to learn more!
- Sustainable winter crafts: Why buy décor and gifts when you can make them from materials found outside? Perhaps you dried flowers or found some interesting seed pods – time to display them, and perhaps, eventually compost them.
- Visit botanical gardens: Ely’s boyfriend took her to the Royal Botanical Gardens as a birthday gift last year! Botanical gardens are a great way to experience interesting plants being preserved in a welcoming environment that differ from the dreary winter outside.
- Get floral: Try buying flowers and displaying your own arrangements! Colour is something we sometimes lack in the wintry months, and this is a good way to introduce it impermanently.

Indoors: Thinking Ahead!
- Use this winter down time to plan the next garden season - find more here on garden planning.
- Use a garden journal to assist your garden planning - see here inspo for garden journaling.
- Consider planning companion plants - see more here on companion planting.
- Go pot shopping – your local greenhouses and ceramic shops would love your support in the winter.

Indoors: New Beginnings!
- Bulb forcing and small science experiments: Flowering bulbs like amaryllis (more on amaryllis here) aren’t just a holiday splendor! Now is also the time to create cuttings to share with friends.
- Invest in winter fruiting botanicals like indoor fruit trees. Small, potted citrus by the window don’t only liven up the place but offer nutritious treats in the winter. Consider a calamondin!
- Microgreens - see our blog about it! When it’s too early to start seedlings that will go in the ground, you can still garden right on your kitchen counter.
- In late winter, start seedlings: but make sure you don't do so too early! Untimely seedlings can be too leggy before it's time to plant them outside - learn about hardening off seedlings here.

Part 2: When the Soil IS Ready!
Suit up!
Outdoors: Don’t Fall Behind!
- Appropriate seasonal décor: It goes without saying stringing lights and ornaments everywhere is good for the spirits in these dreary months… however 😬… come February, they seem to lose their vigor. Taking the décor down in preparation for new exciting things to come is also good for the soul! Remember to recycle your Christmas tree (see how here)!
- Turn your compost! Perhaps you’ve faithfully continued to add to your compost all year – your garden thanks you! On a warm day, remember to turn it and aerate it so it’s ready for spring.
- Cover all your bases: Make sure to prevent rodents from damaging your tree bases by wrapping them well above the anticipated snow level – so rodents can’t chew your unprotected trees with the helpful elevation of snow!
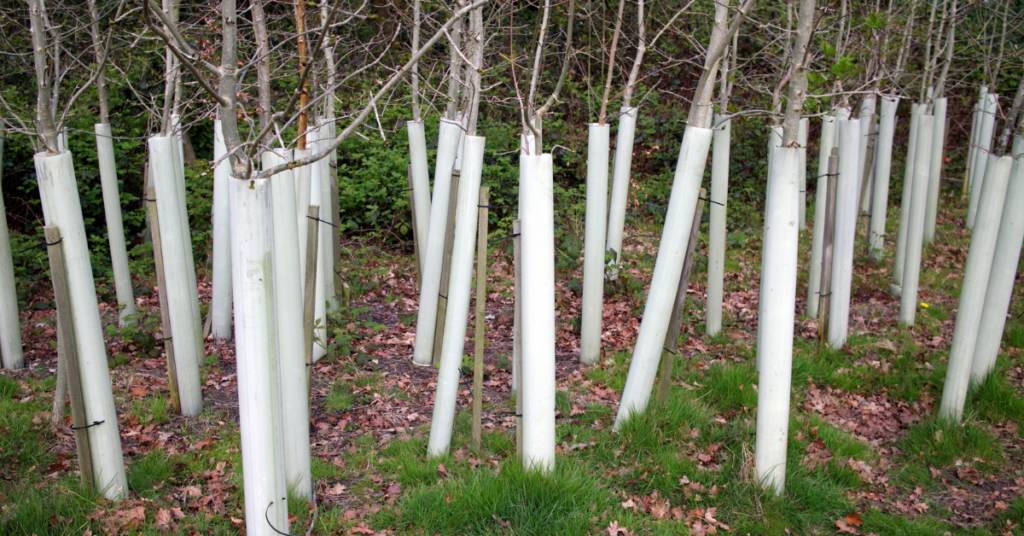
Outdoors: Get Inspired!
- Go for nature walks: if you can safely go for a walk, hit the trails or stroll around your neighbourhood! A slow-paced change of scenery will help to fight your cabin fever, keep you active, and help you gather inspiration from the natural world.
- Visit your local maple syrup producers for tours.
- Don’t forget our critters: Provide winter homage and appropriate food for our nonmigratory friends (i.e., hutches and feeders) outside windows where pets can observe nature too!
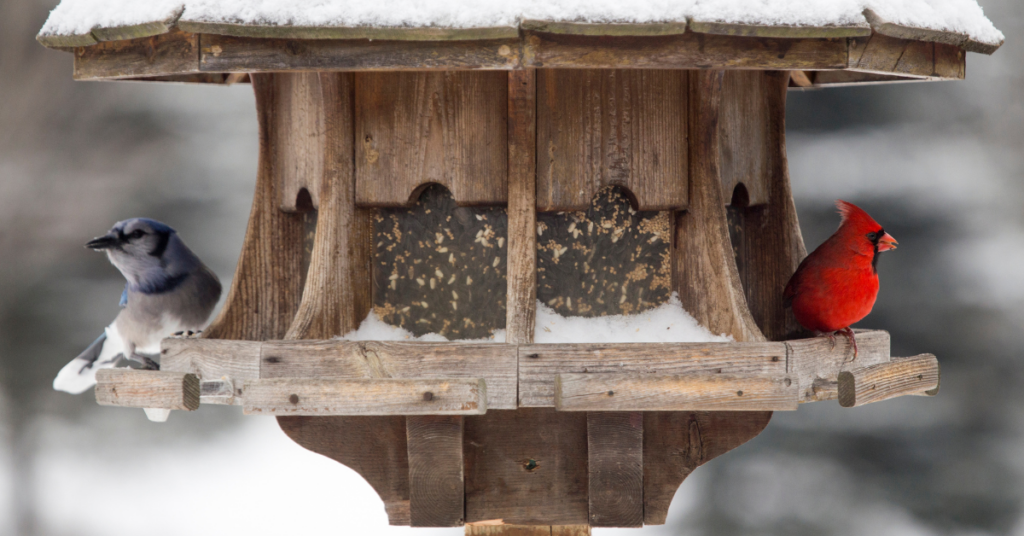
Outdoors: Thinking Ahead!
- Winter weeding: Some tough varieties of plants have evolved to use other plants’ winter dormancy to their advantage, tugging them out now will ensure that you and all the wanted plants in your garden have a fair start this spring.
- Manage snow piling: Heaped snow piling can kill plants including lawn, as well as introduce gravel and debris to areas where gravel is not wanted. Make sure your snow piles aren’t suppressing anything you’d like to live this summer.
- Early spring: Perhaps ice storms and plows have done a number on your trees and shrubs - prune broken branches to prevent pests and disease from entering your plants.
- Litter control: pick up the debris revealed by melting snow so it doesn’t venture farther into natural habitats or tempt wild animals to hurt themselves.

Outdoors: Start Something New!
- Cold hardy crops in cold frames: Cold frames are doable! Use recycled materials - Victory gardens often used car windshields and old windows – to construct in-ground beds facing the sun (southwards) for passive solar heating.
- Winter sowing: Find more on winter sowing here.
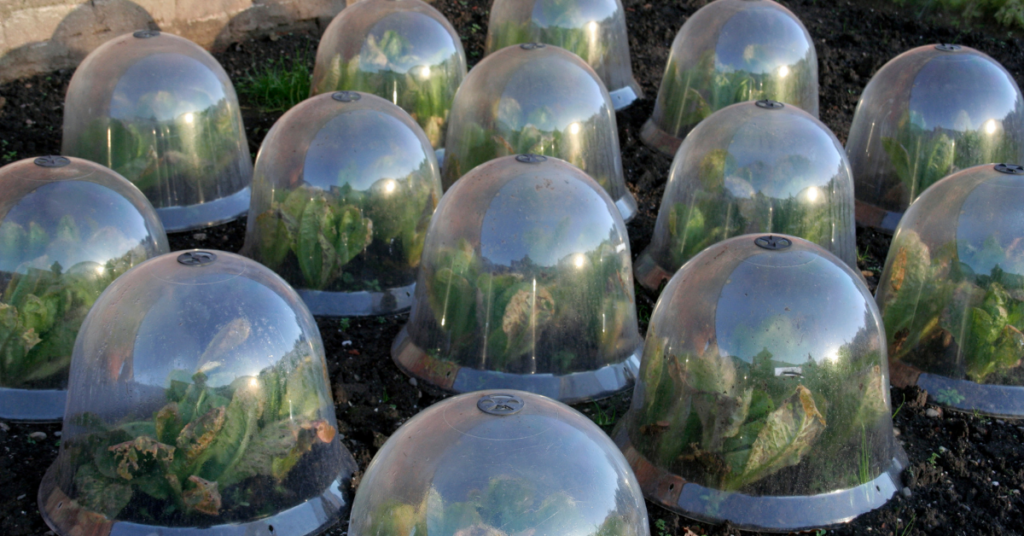
We hope these suggestions help you stay green this spring and winter! For more gardening activities, see our other blogs here. We hope to see you this spring (March 5th, 2026) at Eising Greenhouses and Garden Centre! 🌱❄️
How To Keep Your Orchid Alive
By Ava Green
Orchids have become very popular gifts, and a great hobby for indoor plant enthusiasts who discover the wide range of colours and shapes available. Orchids are also loved for their long-lasting and exotic blooms.
While some may choose to only enjoy these tropical plants as long as they’re blooming, orchid-lovers look forward to nurturing the plant and encouraging it to flower regularly. It may be a little daunting at first, but once orchids grace you with their stunningly beautiful blossoms, you will find that a little bit of care is very worthwhile!

It’s estimated that there are 25,000 different species of orchids and over 100,000 hybrids! The ones you’ll find most readily in Ontario stores are Phalaenopsis or moth orchid, because it’s fairly easy to grow. Phalaenopsis are the best choice for beginners.

Other orchids you may find easily are Cattleyas (Corsage Orchids), Cymbidiums (Boat Orchids) and Dendrobium orchids.
While all of these may be orchids, they don’t necessarily require the same care, so it’s a good idea to check the tag for the type you have and its specific care requirements. The following is a general guide to light, water, fertilizer, and growing medium for the most commonly found orchids, but it does not apply to all breeds.
Light and Air
For most orchids, light, and lots of it, is the general rule. Place your plants within 3 feet of a window (not to the side) in the sun. South, east, and west-facing windows are all fine for maximizing the light your plant receives.
Orchids also enjoy a breeze or circulating air in your house. They do not like temperature extremes, though 15 to 20 degrees Celsius is safe. Keep in mind that the more warmth and air movement there is, the more often you will need to water your orchid.
Water
A general rule is to use water that is not hard and has not been softened with salt. Salt will kill an orchid. Rainwater, reverse osmosis, or distilled water are good choices. Chlorinated water is not an issue for orchids - high sodium levels are.
The biggest issue many people have is either over-watering or underwatering their orchids. Here is the method we recommend:
Every 5-7 days, place the pot in a container or the sink, then fill it with enough water to cover the top of the pot. Be careful not to let water collect in the crook at the base of the leaves, as standing water will rot the leaves and the plant. Once the plant’s growing medium is thoroughly soaked, remove it from the water and allow the pot to fully drain in the sink before placing it back in its saucer.
We prefer using a container of water rather than the sink, so the remaining water can be used to water other plants.
Here’s the best watering advice we can give you: look at the overall health of both the plant AND its root system. Full, plump leaves and vibrant, green roots indicate that your plant is getting enough moisture. Puckered leaves and a silver sheen on the roots indicate insufficient water. Mushy, brown leaves and roots are signs of rot caused by too much water.

You may hear of another watering method that involves using ice cubes, but it’s controversial and not widely recommended. To quote the American Orchid Society, “Ice is for cocktails, not orchids. Never use ice on tropical plants to water them.”
“Soil” and Nutrients
Most orchids naturally grow high up in trees, where their roots cling to bark and absorb moisture from the air. At home, we try to mimic those conditions, which is why orchids are typically planted in chunky mediums like bark, coconut husk, charcoal, or perlite rather than traditional soil. While many of the roots stay inside the pot, it’s completely normal for some to grow up and over the edge.

These “escapee” roots might look a little wild, but don’t worry, there’s nothing wrong with your orchid. In fact, those aerial roots are a sign that the plant is healthy and doing exactly what orchids do in nature.
It’s worth noting that not all orchids grow the same way. Many, like Dendrobiums, are epiphytic (growing on trees) or lithophytic (growing on rocks), though some orchid varieties are terrestrial and grow in the ground. The good news is that the growing medium your orchid comes in is chosen specifically for that variety, so you can trust it’s in the right environment.
The bark that your orchid is planted in will slowly break down and become mushy. It’s a very good idea to repot your plant every two years.
It’s generally recommended to feed most orchids, and bloom time dictates which fertilizer to use and how often to feed. Begin by using a water-soluble 20-20-20 fertilizer, mixing it at ¼ the amount recommended for other houseplants. Apply this solution every 2 weeks in the summer and every 3 weeks in the winter.

“The orchid, with its many forms, is a reminder that life is full of surprises.” — Leonardo da Vinci.

Lastly, here’s an orchid fun fact: While we have been talking about tropical orchids in this article, there are also orchids that grow right here in Ontario! That’s right, there are over 50 species in this province, including the much-loved Pink Lady’s Slipper (Cypripedium acaule).
Resources for more detailed and specific information:
Toronto Master Gardeners - https://www.torontomastergardeners.ca/gardeningguides/growing-orchids-a-toronto-master-gardeners-guide/
Canadian Orchid Congress - https://canadianorchidcongress.ca/basics/growing-orchids/
American Orchid Society - https://www.aos.org/orchid-care/indoor-orchid-care
Ontario Wildflowers - https://ontariowildflowers.com/main/group.php?id=18