
Mulching is a common gardening technique that protects your plant and gives your garden a little more vibrancy with less work! Sprinkling a simple insulating layer of mulch material around your plants will help to maintain moisture levels, prevent weeds, insulate your plants, and clean up the appearance of your garden. The benefits are clear and there are lots of materials to choose from to meet your needs. Here’s how mulching can help your garden’s aesthetic and more:
The Importance of Mulching
Summers can get hot, leaving us with thirsty plants that need water seemingly constantly. Using hundreds of litres to keep our plants hydrated is not only a waste of resources and money, but of our time, too. Mulching will help to lock moisture in by cracking down on evaporation so that the water that you do give to your plants actually gets used at the roots rather than (literally) disappearing into thin air.
Mulching is also super effective in our wild temperature swings from summer to winter and back. For those perennials in your garden that are left out shivering through the coldest of our winter days, mulch can provide a much-needed insulative layer that blocks out the worst of the cold and freeze-thaw cycle, keeping our plants safe until temperatures are mild again. Mulching will give your plants a better success rate with surviving the winter, and you’ll have happier plants in the spring that are ready to thrive, instead of battling winter damage.
Finally, mulch does wonders to clean up the look of your garden. Mulch is a great buffer layer between our soil - where weed seeds lie in wait - and the sun that they need to thrive, effectively stifling most weed growth. You’ll save time and appreciate a cleaner looking garden where all of your soil’s resources can be spent on the plants that you want. Not only does mulch prevent unwanted weed growth, but it simply cleans up the aesthetic of your garden, providing an upgrade from the look of normally exposed dirt. There are lots of styles and materials to choose from so you can choose an effective mulch material for your home that also adds to the style and look of your landscape.

Mulching or Stone?
While some people might like the look of decorative stone to shade their soil, it simply doesn’t provide all of the benefits that most natural options offer. In addition to their lacklustre performance in all areas other than style, they can also end up being quite an expensive addition to your landscape. While stone might offer a clean look that provides a slight barrier to evaporation, biodegradable options do a better job of the health of your soil and plants while offering a similar look at a better price point.
Options for Mulching Your Garden
There are tons of materials and methods for mulching your garden, so the main questions that you should ask yourself are: What do I want to get out of my mulch? What kind of look am I going for in my garden? Do I want to use synthetic materials or natural materials?
Once you have an idea of what you want, consider these great mulch options:
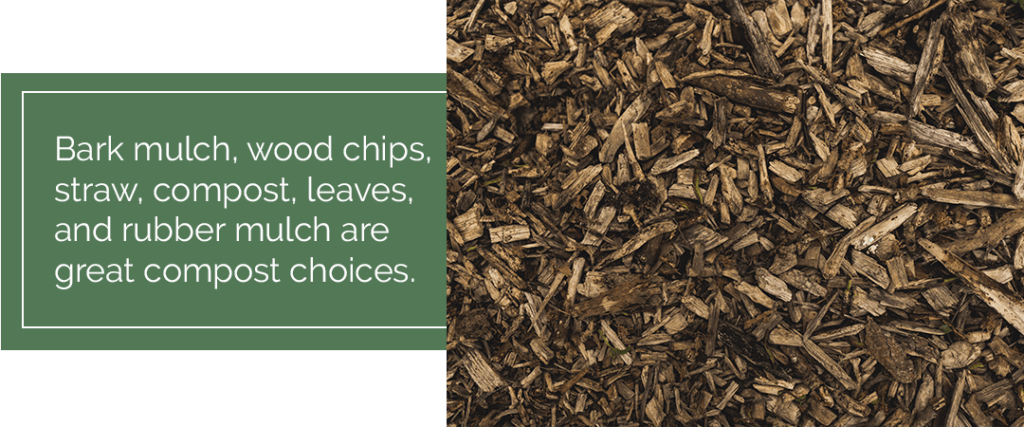
Bark Mulch consists of shredded bark, creating a fantastic all-natural mulch material that will provide all of the moisture-locking and weed-blocking benefits of mulch, while also slowly boosting the health of your garden as the organic material decomposes. Bark mulches come in a variety of colours depending on the type of tree they are sourced from.
Wood Chips provide a look that is similar to bark chips, but a little more robust. Again, colours depend on the type of wood they are sourced from, but there is the additional option of treated chips that have a more uniform colour. These chips will also break down slowly to supplement your soil, so opting for an all-natural dye on the treated chips is a good idea to prevent chemicals leaching into the soil.
Straw is a good option for those that want cost-effective and all-natural mulch solutions, but are also okay with a more rustic look in the garden. We love the country aesthetic that it gives our flower beds! Keep in mind that some straw varieties might have weeds and seeds of their own that pop up when applied, so they may not be the ideal choice for those looking to cut down on weed pressure.
Compost or Manure, when applied in a thick layer will deliver a massive nutritional boost to your soil and plants, resulting in lush and beautiful growth that can’t be matched with synthetic fertilizers. If you’re looking to mulch with compost or manure, you’ll need to provide a generous coat of 2-4 inches of material to effectively insulate the soil.
Leaves and Grass Clippings are another great natural option that is very easy to source from your own yard! The clippings straight from your lawn mower bag and the leaves you collect in the fall are more welcome in your garden than the garbage. While this might not be the cleanest look in your mulching options, it’s incredibly effective and very straightforward - and the freshly clipped grass smells great.
Rubber Mulch is another option, though it is not natural and won’t contribute to the nutritional health of your soil as the other mulches do. However, it is still very effective at locking in moisture, choking out weeds, and keeping the soil insulated, all while looking clean and uniform. As it doesn’t break down like the other options, this is certainly a mulch choice that is more permanent - you won’t have to replace it, but moving it might become difficult.
Mulch is the secret weapon that goes unappreciated in many gardens, stepping up the performance and look of your landscape in one simple application. With so many options, there’s bound to be something that is the perfect fit for you and your garden’s goals.
There’s nothing better than garden-fresh vegetables on your plate. But as a working generation with families to take care of, we don’t always have time to shop around the farmer’s markets on Saturday afternoons. Usually, a one-stop shop at the local grocery store is all we have time for.
While growing your own vegetables does require a time investment, it’ll save you plenty of time (and money!) in the long run! Plus, vegetable gardens add just as much beauty and value to your property as any other garden element. A thriving vegetable garden starts from the seed, and the first step to healthy seeds is indoor seeding.
What to Seed Indoors
The first step to seeding indoors is knowing what you’ll be seeding so you can plan in advance. Here in Ontario, we have a shorter growing season than our friends to the south. Our last frost dates can sometimes extend into mid-May, which is often too late to seed many vegetables. Seeding indoors gives us a head start on the growing season, ensuring we have a successful harvest that we can enjoy sooner. Another advantage of an early start is that it negates the need for chemical fertilizers to speed things along.
Heat-loving plants, like tomatoes and peppers, should definitely be started indoors. While many other vegetables can benefit from a head start on the growing season, others are quite content being sown right into the ground. Root vegetables, like potatoes, carrots, and turnip can withstand a light freeze. Beans, peas, and salad greens also don’t mind a little chill and can be sown into the ground or started indoors a few weeks early.
When to Start Seeds Indoors in Ontario
One of the biggest challenges of starting seeds indoors is knowing when to start them. This is due to the many factors that influence timing. The recommended dates you might find on a seeding calendar take into account the different growing timelines of different vegetables, as well as the last expected frost date of your region. But it’s not an exact science. Keep in mind that, depending on the conditions you provide and the climate patterns of the year, the ‘perfect’ date is pretty unpredictable.
Here in Southern Ontario, our last expected frost date for the year is sometime during the first week of May. Tomatoes and peppers need the longest time to be cozied up indoors at 6-8 weeks. Now that we’re in early March, we suggest you get peppers started ASAP if you haven’t already, and give them lots of light. Start your tomatoes in another week or two, depending on the variety, sticking them near a bright window once they begin to sprout. Broccoli and cauliflower can be started as soon as March rolls over to April, while cucumber, zucchini, and salad greens can wait until the middle of the month. When April showers bring May flowers, you can direct seed other vegetables into the ground!
How to Seed Indoors and the Materials You Need
Now that we’ve got the timing all straightened out, the process of seeding indoors is actually pretty simple! But before you start sowing your peppers and tomatoes, there are some materials you’ll need first:
Containers: The most important aspect of picking out containers is making sure they have enough drainage - you don’t want to drown your seeds before they even get a chance at life! Seeding trays with many individual cells are great choices since they can hold plenty of seedlings at once and don’t take up much space. Wash them well with soapy water first, to make sure they’re sterile and safe for your young plants.
Soil: Soil requirements will vary between different vegetables, but generally most plants will flourish in a mix of peat moss, vermiculite, and perlite. Never use dirt from your backyard for planting seeds indoors, you’ll likely be bringing unwanted pests into your home.
Lights: Light requirements will depend on what your particular seed needs for germination. While some need bright and direct sunlight right away, others don’t want to see the sun until they poke through the soil in search of light. While light from the window is great, bright, artificial light is often used as a supplement.
Once you have these three materials (and your seeds, of course), you’re ready to start planting! Follow the instructions on the packaging carefully to provide your seeds with the proper conditions they need to germinate. Use a sterile potting mix to cover seeds that need complete darkness to grow. Cover the container with a clear plastic dome to trap moisture, creating the humid environment required for germination.
Once the seedlings begin to poke through, you can remove the cover and let the oxygen flow. Remove any weak plants, allowing the strong ones to grow even stronger. It’s better to have a few great plants than plenty of unproductive ones. Keep the soil moist, but not wet. We recommend misting instead of watering, to prevent disturbing the soil.
Starting Seeds Indoors Without Grow Lights
While grow lights are super effective and allow you to start seeds anywhere in your home, they aren’t always the first thing new gardeners want to invest in. Plus, keeping these lights on for hours on end every day can definitely drive up your light bill, and isn’t a necessary use of energy. The good news is that you don’t need fancy grow lights to germinate seeds indoors, especially if you have plenty of windows.
The trick to maximizing sunlight is to place your growing trays in front of large, south- or west-facing windows. Be mindful of hills or trees that might block the sun in these parts of your home. Usually, the upper level of your home is your best bet!
Moving Your Plants Outdoors
While it’s important to get the timing right when it comes to starting seeds indoors, it’s also important when moving them outdoors. The beauty of indoor seeding is that you don’t have to be in such a rush to bring them outdoors, you’ve already given yourself the time to wait until the risk of frost has passed.
That being said, you don’t want to wait too long, or else your veggies’ growth might taper. You’ll know when your seedlings are ready to graduate from their containers to the ground when they begin to grow leaves. Don’t be fooled by the first leaves of your baby sprouts, as these are nourished by the seed. The true leaves develop afterward, indicating that the plant’s roots are now established enough to sustain the plant itself. Once you reach this stage, congratulations! Your seedlings are now ready for your beautiful vegetable garden.
No one likes to be thrown into an unfamiliar environment or situation, and the same goes for our tender new plants. They’ve been safe and cozy inside our warm homes for weeks, and now they’re being introduced to the great outdoors. Just like we sometimes get a ‘base tan’ before we head down South to prevent burning to a crisp, our seedlings need to be introduced to the sunlight gradually. Bring them outside on a cloudy day for a few hours first, and increase by an hour each day for a week or so to ‘harden them off’ before planting them outside for good.
Whether you’re a seasoned gardener or you’re just beginning your gardening journey, these simple steps to indoor seeding are all you need to get started. Soon enough, your flourishing veggie garden will be the cornerstone of your recipes and the envy of your neighbours!