
Is there anything better than a Christmas craft sale to lift your spirits and inspire a holiday mood?
Buying local makes good sense, and it’s one of the reasons that the Eising Garden Centre Christmas Craft Show has become so popular.
Join us this year and discover the many amazing makers and artists in Haldimand-Norfolk! The talent and creativity are truly unique.
Save the Dates!
This year, the craft show is happening for an entire week!
Plus, on Thursday and Friday, you can shop late under the Christmas lights.
Mark your calendar, invite your friends and family, and come early in the week for the best selection! Here are the dates and hours:
Monday, November 16th, 9 am – 5 pm
Tuesday, November 17th, 9 am – 5 pm
Wednesday, November 18th, 9 am – 5 pm
Thursday, November 19th, 9 am – 8 pm
Friday, November 20th, 9 am – 8 pm
Saturday, November 21st, 9 am – 5 pm
Where?
Eising Garden Centre, 814 Cockshutt Road, Simcoe, ON

Our Biggest Christmas Show Ever!
Thanks to its popularity, this will again be our biggest craft show ever, with 156 booths.
We’ve expanded into another section of the greenhouses, so 150 local artisans will be selling handmade items this year. Several new vendors will be participating, along with many of the usual favourites.
Holiday Greenery
The show is also a perfect opportunity to get fabulous holiday greenery, decorations and uniquely designed winter urns. Our staff Elves work their magic to create gorgeous wreaths, centrepieces and arrangements just for you!
Sassyfras
Are you looking for an outfit for an upcoming holiday gathering? Stop by the popular perennial Sassyfras Boutique just inside the greenhouse front entrance. The shop will conveniently be open during the same hours as the craft show and will offer lots of fabulous clothing, accessories, and gifts.

Get Your Holiday Shopping Done!
It's a great day to check off items on your holiday decorating and gift-buying list. You can find something for everyone on your list, so that you can sit back and enjoy the holidays!
How to Keep Your Hanging Basket as Gorgeous as the Day You Brought it Home, All Summer Long!
By Dave Zeldon and Ely Schweyer
Remember your Mother's Day hanging basket with its variety of colours, textures, and plant combinations? Maybe there was Verbena cascading elegantly with their colourful star like blossoms, double Begonias for the porch in spectacular shades of reds, pinks, and burgundies, and of course the vigorously growing Petunias and Geraniums, to name just a few. But as the Summer goes on, they just don’t seem to have that same stamina.
To keep your hanging baskets in great shape and avoid the dry, wilted, bald spotted, leggy look that occurs to containers every August, one should follow these easy tips.
Watering
Plastic, fibre, and especially moss lined baskets dry out quickly. They should be checked twice daily and watered every day. Be sure to wet the moss sides as well.
Try to maintain uniform soil moisture. When watering, fill the top of the container with pooling water until it ‘pees,’ and allow it to drip out of the bottom of the basket every time you apply water. Frequent severe wilting will impact upon the quality of the basket.
At this time of year, one could take the basket down and soak it in a tub of water for 20 minutes to hydrate the entire root ball, once every week.

Deadheading
Remove spent flowers on a weekly basis (this is called deadheading) to prevent plants from going to seed. This will encourage more flower production. Part of the beauty of the mixed basket is its prolonged display, just like in your garden.
Check for Pests!
During your weekly deadheading, keep a watchful eye out for aphids, whiteflies, and caterpillars. If you see any, try a quick spray of insecticidal soap to keep them from becoming an infestation.
🖱️ If you're noticing fungus gnats in your hanging baskets, find more on eradicating them here!
Pruning
Not every plant in the basket will be at its peak all season.
Cutting plants back after a flush of bloom will tidy them up and prepare them for a fresh crop of flowers. Meanwhile, other varieties will begin putting on a show. This is especially true for Petunias.
A good cut back of long, lanky branches will reap benefits.
Fertilizing
Daily watering means nutrients can leach out of the soil before the plants can absorb them. The baskets should have both slow release granular added to the growing media and a weekly feeding of 15-30-15 soluble fertilizer. Use a solution containing micronutrients, as plants like Petunias need extra iron.
Sheltering
It has been suggested, if possible, that during stretches of extreme heat, give your baskets a break and move them to a cooler, shaded spot to de-stress for a couple of days. This is also suggested when heading on vacation. Your flowers will rebound to their former beautiful selves!
We hope this long term hanging basket care guide helps you enjoy your purchase all summer long! For more information - and beautiful plants – visit Eising Greenhouse and Garden Centre! 🌸
By: Ava Green
Spring is the time of year known for new beginnings, and it’s also a very busy season in the garden as we hurry to get everything planted for the summer growing season here in Southern Ontario. But, did you know that fall is also an ideal time to get planting?
Similar to spring conditions, the cooler temperatures and more frequent rainfall make it easier for new plants to transition. This also decreases transplant stress. There’s time for roots to become established, and by springtime, you’ll be enjoying your plants instead of being busy planting them!
Don’t wait too long, though! At Eising Greenhouses, we recommend planting perennials, trees and shrubs before Thanksgiving weekend to give your new plants a little time to settle in before a hard frost arrives. A hard frost, or freeze, is when the temperature dips below zero for an extended period of time, killing tender plants.
What to Plant in Fall
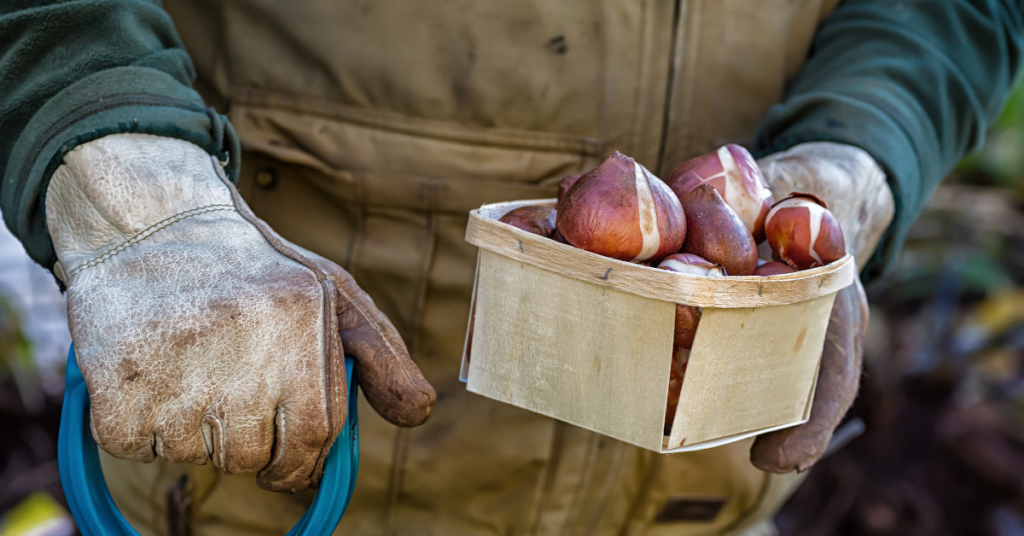
Spring-Flowering Bulbs
Tulips, Daffodils, Hyacinths, Crocus, Fritillaria and Alliums are just some of the bulbs that need to be planted in the fall in order to enjoy their flowers in the spring. Tulips especially appreciate being planted in cooler weather, but all of these bulbs require a cold period of about 12 weeks in order to grow in the spring. Many bulbs can be planted right up until the ground freezes. But why wait?!
👉 TIPS: While Tulips can be tasty and tempting for squirrels, rabbits and deer, many bulbs like Alliums, Frittilaria and Daffodils are not so delectable. Tamping down the soil after planting your bulbs makes it more difficult for critters to sniff them out. Laying some chicken wire over the area can also help deter from your bulbs becoming a meal for a critter.
Be sure to choose an area to plant your bulbs in that does not stay wet so the bulbs don’t rot.
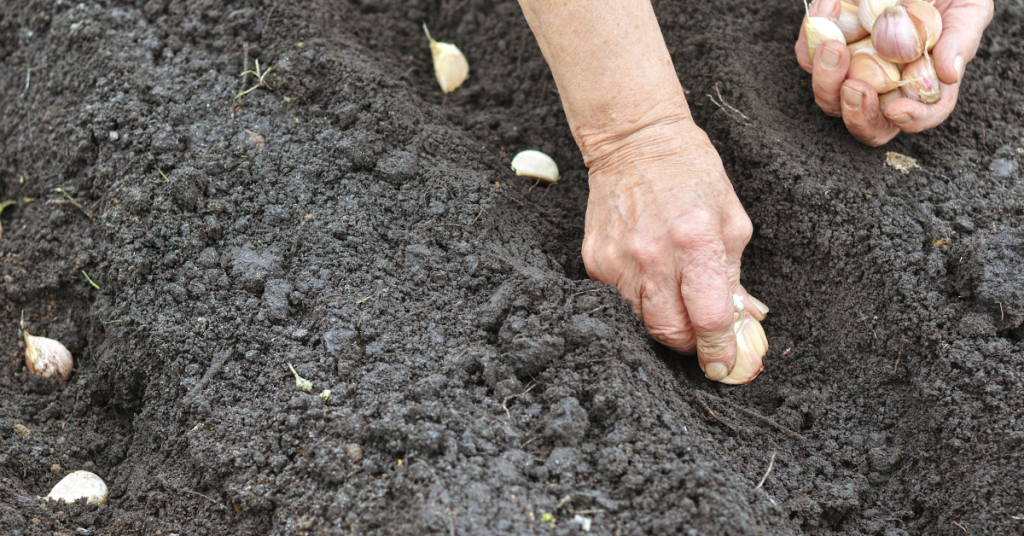
Garlic
While some folks choose to plant garlic in the early spring, many people choose to plant it in the fall. Why not get started now? When you plant your garlic in autumn, you will have a crop that’s ready for harvest next summer.
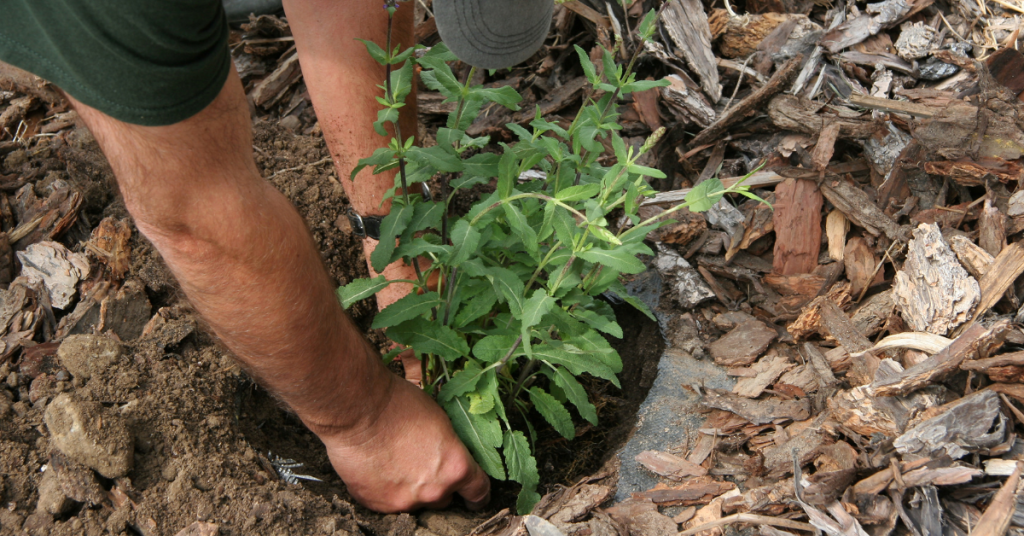
Plant, Divide, and Transplant Perennials
Yes, you can still plant perennial flowers in the fall! Whether you’re purchasing new plants or moving plants around, autumn is a great time of year to do it.
It’s also a great time to divide and transplant spring and summer blooming perennials. Why divide your plants? It’s a great way to revitalize the plant and also to create new plants.
Whether you’re planting, dividing or transplanting perennials, it’s best to do it 4-6 weeks before the first hard frost so that they have time to become established in the soil. Perennial plants will be available for sale at Eising Greenhouses until Thanksgiving weekend, so don’t delay too much!
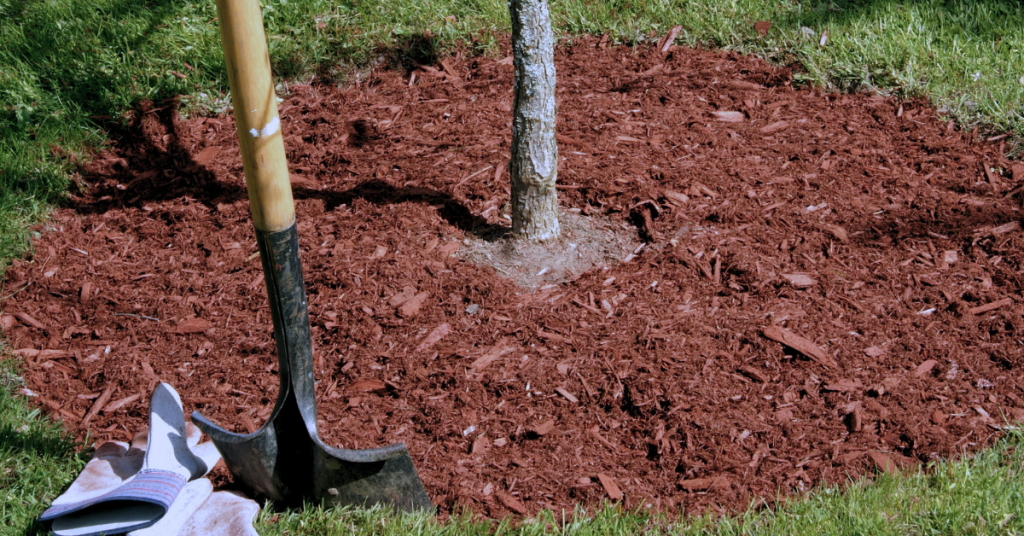
Trees and Shrubs
Container-grown or burlap-wrapped trees and shrubs can be planted as long as you can get a shovel in the ground! However, it’s a good idea to give them a few weeks in your garden before it freezes if you can.
It’s especially nice to see what a tree or shrub will look like in the fall before you plant it.
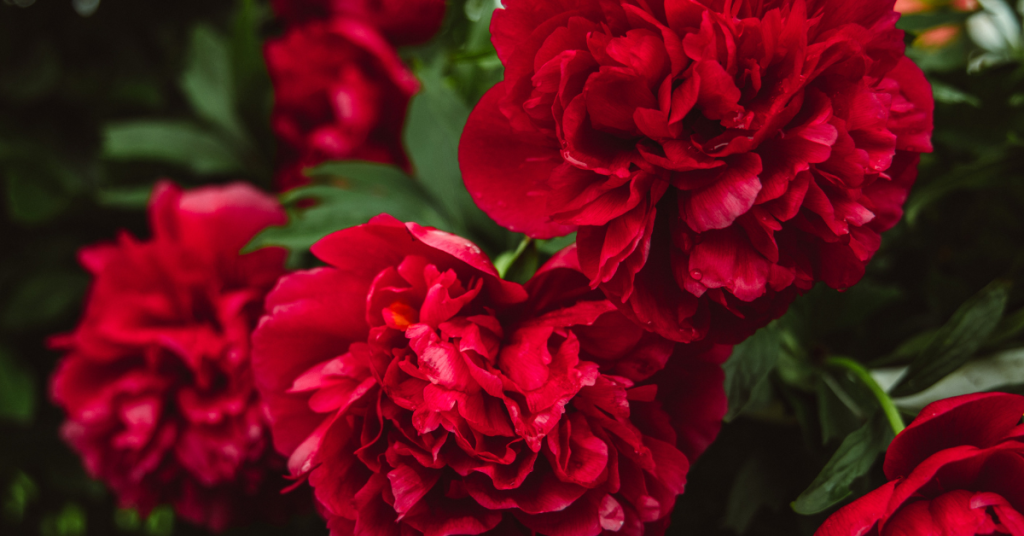
Peonies
Autumn is the best time to plant and establish roots so your peony is ready to bloom in spring! Planting them 4-6 weeks before the first hard frost will help your plant become established before cold weather descends.
👉 TIP: Be sure to add mulch to trees, shrubs and perennials after planting. But keep the mulch away from the trunks or stems. It’s never a good idea to put decaying plant material right up against a living plant!
Come in and take a look at what’s available, then enjoy the cool fall weather for planting!
Resources: If you’re new to dividing perennials, here’s a handy helper - A Guide to Dividing Perennials by the Toronto Master Gardeners
Dealing with water restrictions or choosing to conserve water? You’re not alone. Many gardeners in Norfolk County are facing the challenge of keeping gardens thriving with less water. The good news? A lush, colourful garden is still within reach—thanks to drought-tolerant perennials.
When we think of drought-tolerant plants, cacti might be the first thing that comes to mind. But there’s a surprising variety of beautiful, hardy perennials that can handle our region’s dry spells—no desert landscape required.
While these plants do need regular watering when first planted, once established, they’re low-maintenance and well-suited to Southern Ontario’s climate, including periods of limited rainfall.
Full Sun Ground Cover
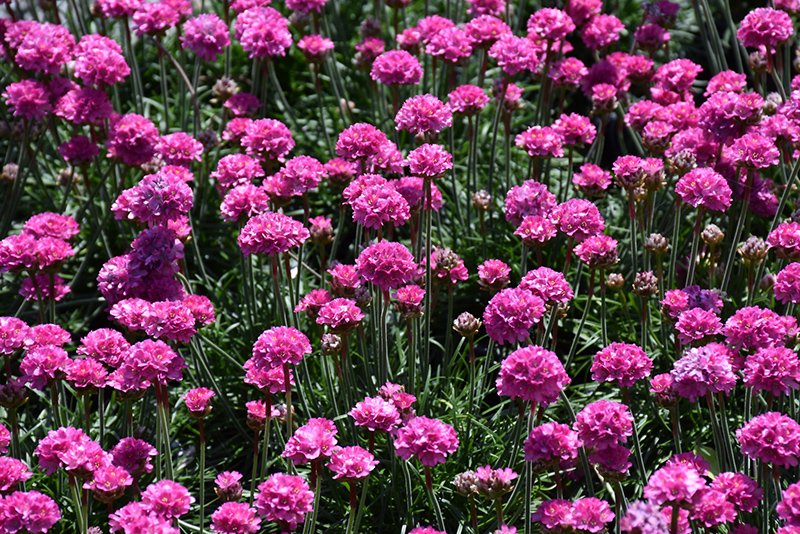
Botanical Name: Armeria maritima 'Dusseldorf Pride'
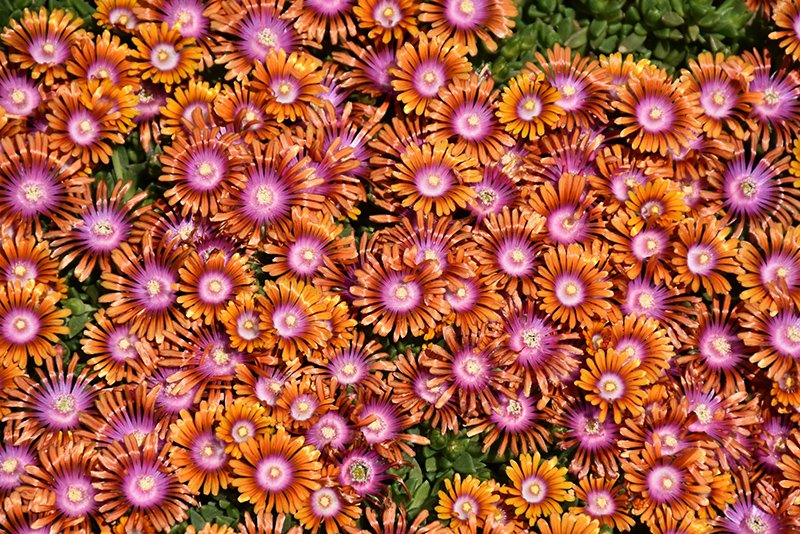
Botanical Name: Delosperma 'Fire Spinner'
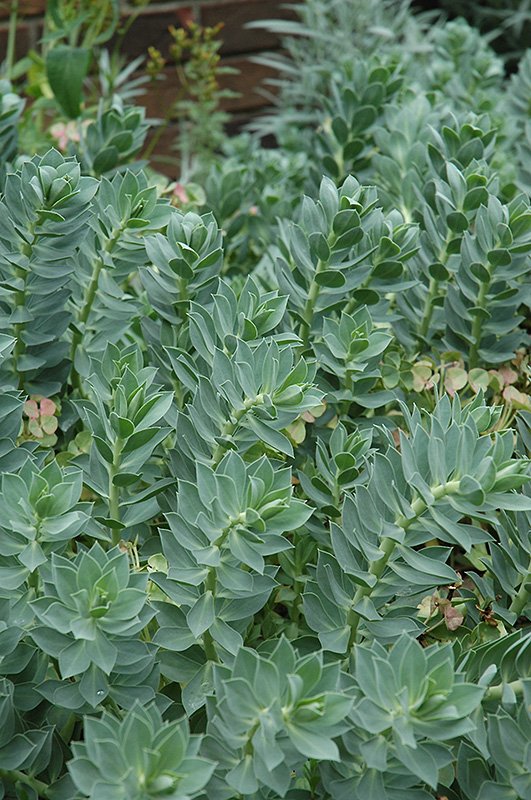
Botanical Name: Euphorbia myrsinites
- Candytuft (Iberis sempervirens)
- Catmint (Nepeta x faassenii)
- Hardy ice plant (Delosperma nubigenum)
- Hens and chicks (Sempervivum tectorum)
- Moss phlox, creeping phlox (Phlox subulata)
- Pincushion flower (Scabiosa japonica var. alpina) (S. ‘Butterfly Blue’)
- Pinks (Dianthus alpinus)
- Rock cress, wall cress (Arabis species)
- Rock rose, sun rose (Helianthemum hybrids)
- Spurge (Euphorbia myrsinites) (E. polychroma)
- Stonecrop (Sedum acre) - dwarf varieties
- Thrift, sea pink (Armeria maritima)
- Thyme (Thymus species)
Full Sun, Medium to Tall Plants
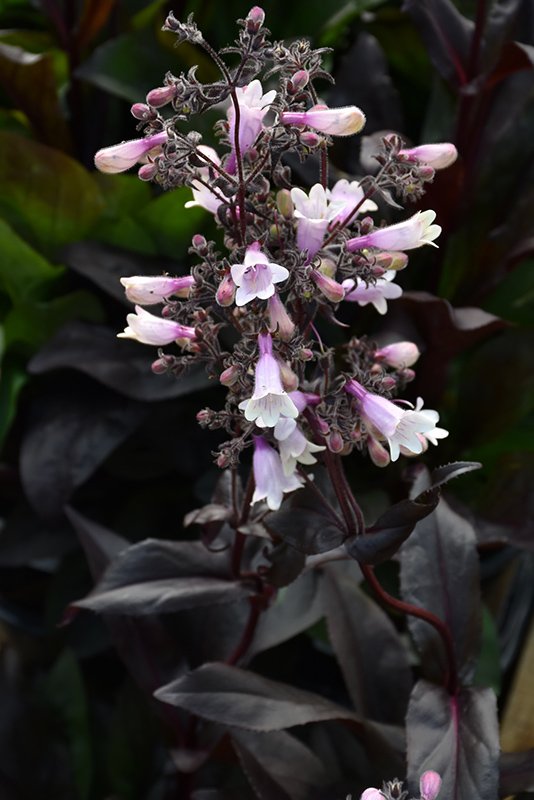
Botanical Name: Penstemon 'Dark Towers'
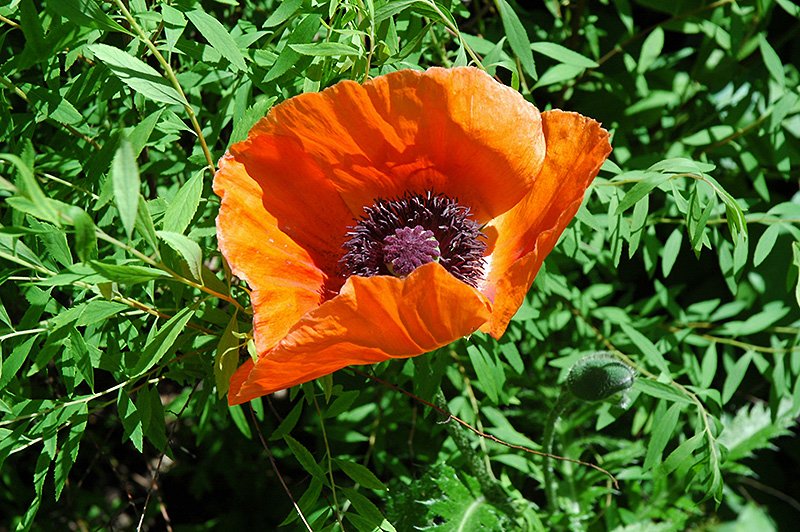
Botanical Name: Papaver orientale
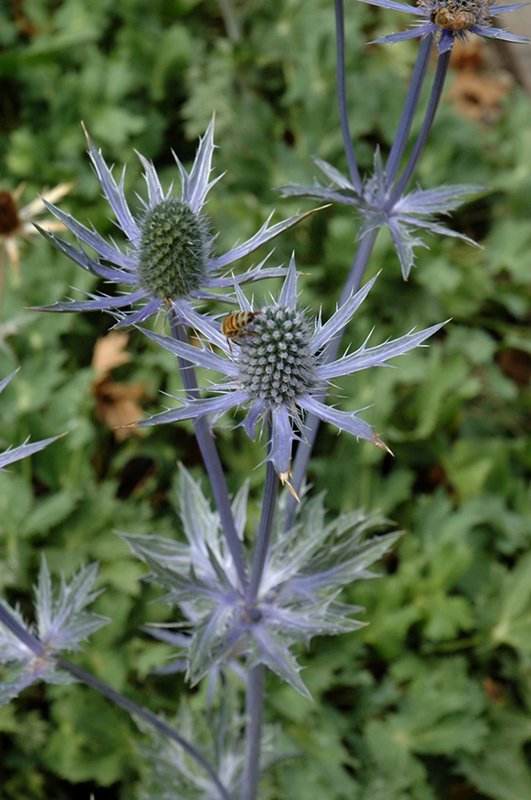
Botanical Name: Eryngium 'Big Blue'
- Beard-tongue (Penstemon digitalis) – Native
- Bergenia (Bergenia crassifolia)
- Black-eyed Susan (Rudbeckia hirta) – Native
- Blanket flower (Gaillardia x grandiflora)
- Butterflyweed (Asclepias tuberosa) – Native
- False indigo, wild indigo (Baptisia australis)
- Hairy penstemon (Penstemon hirsutus) – Native
- Lanceleaf coreopsis (Coreopsis lanceolata) – Native
- Lavender (Lavandula angustifolia)
- Orange coneflower (Rudbeckia fulgida ‘Goldsturm’)
- Perennial cornflower (Centaurea montana)
- Poppy (Papaver species)
- Purple coneflower (Echinacea purpurea)
- Prickly pear cactus (Opuntia compressa) – Native
- Russian sage (Perovskia atriplicifolia)
- Salvia (Salvia nemerosa hybrids)
- Sea Holly (Eryngium species)
- Silver sage, wormwood (Artemisia ludoviciana)
- Threadleaf coreopsis (Coreopsis verticillata) – Native
- Yarrow (Achillea millefolium)
Full Sun Grasses
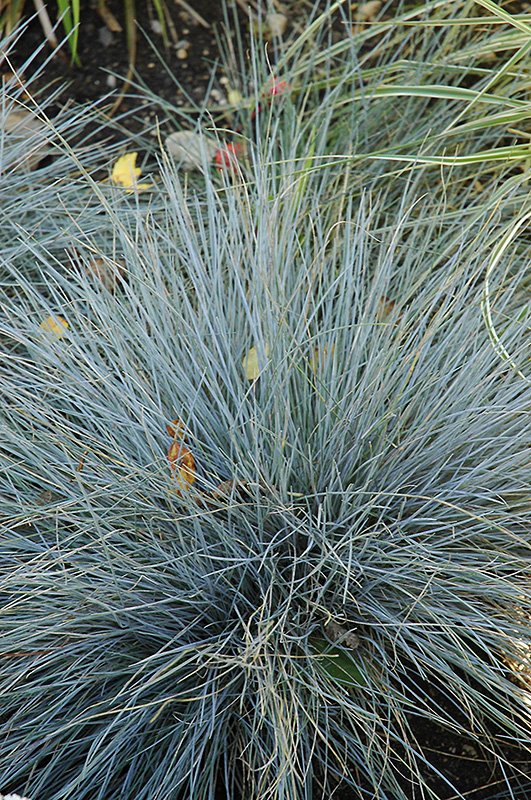
Botanical Name: Festuca glauca
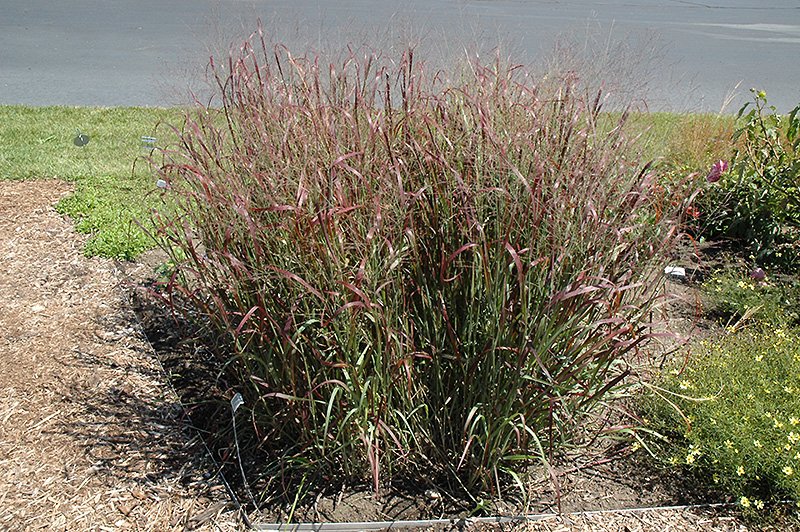
Botanical Name: Panicum virgatum 'Prairie Fire'
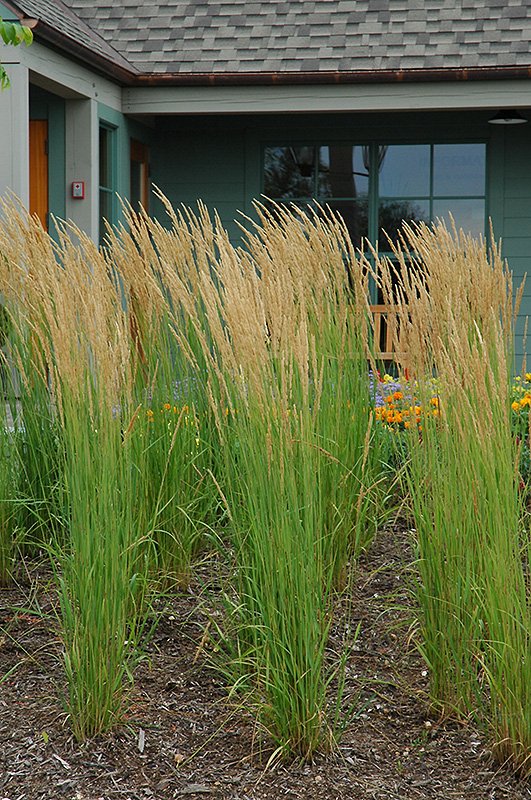
Botanical Name: Calamagrostis x acutiflora 'Karl Foerster'
- Big bluestem (Andropogon gerardii) – Native
- Blue fescue (Festuca glauca)
- Blue oat grass (Helictotrichon sempervirens)
- Feather reed grass (Calamagrostis x acutiflora ‘Karl Foerster’)
- Little blue stem (Schizachyrium scoparium) – Native
- Switch grass (Panicum virgatum) – Native
Groundcover for Shade
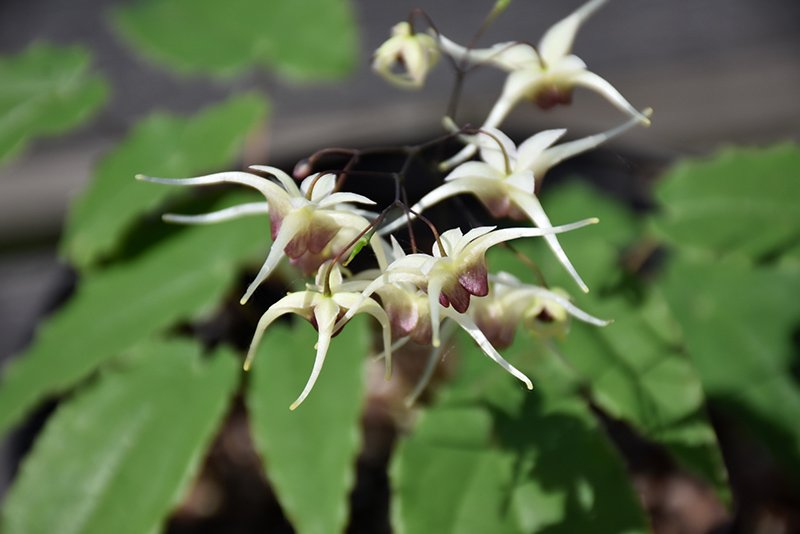
Botanical Name: Epimedium 'Domino'
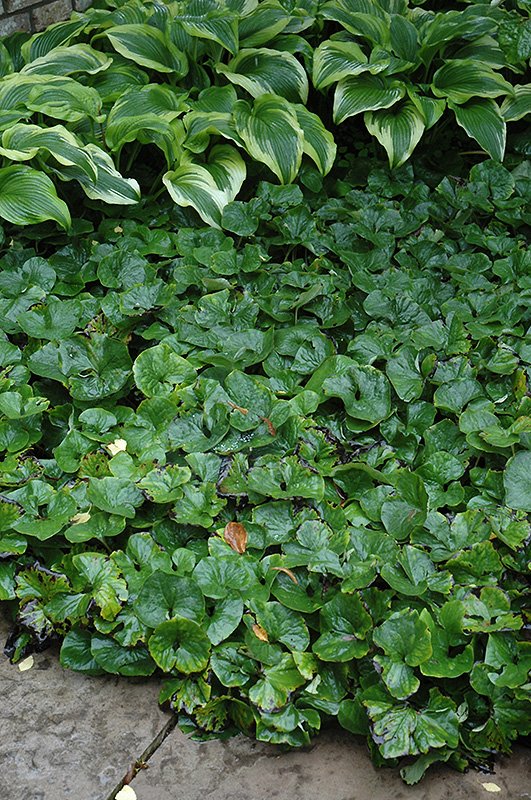
Botanical Name: Asarum canadense
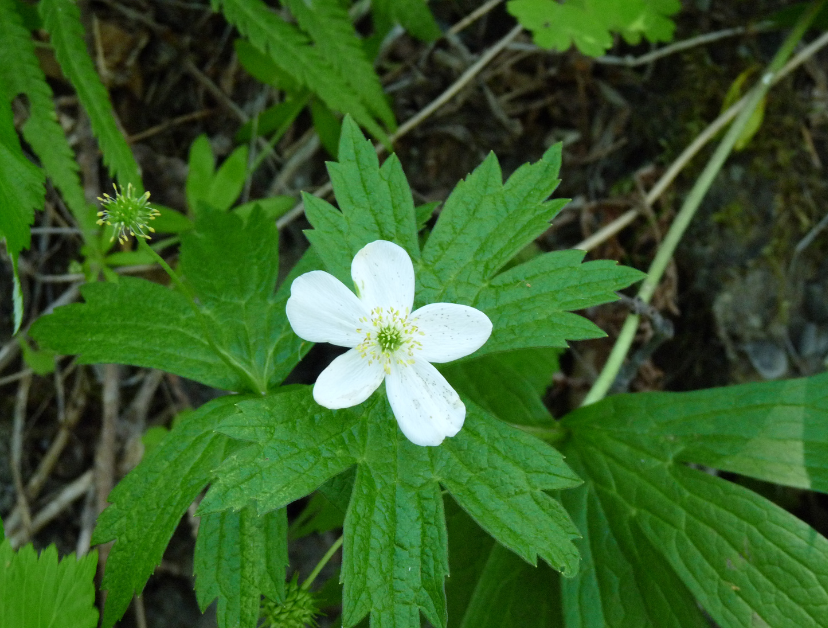
Botanical Name: Anemone canadensis
- Barrenwort (Epimedium hybrids)
- Bigroot geranium (Geranium macrorrhizum)
- Canada anemone (Anemone canadensis) – Native
- Creeping phlox (Phlox stolonifera)
- Sweet Woodruff (Galium odoratum)
- Wild ginger (Asarum canadense) – Native
- Woodland phlox (Phlox divaricata) – Native
Medium to Tall Plants for Shade
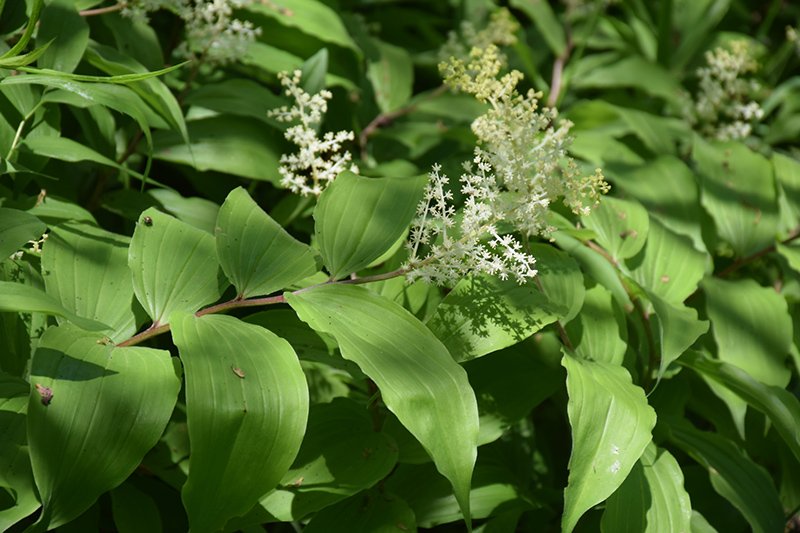
Botanical Name: Maianthemum racemosum
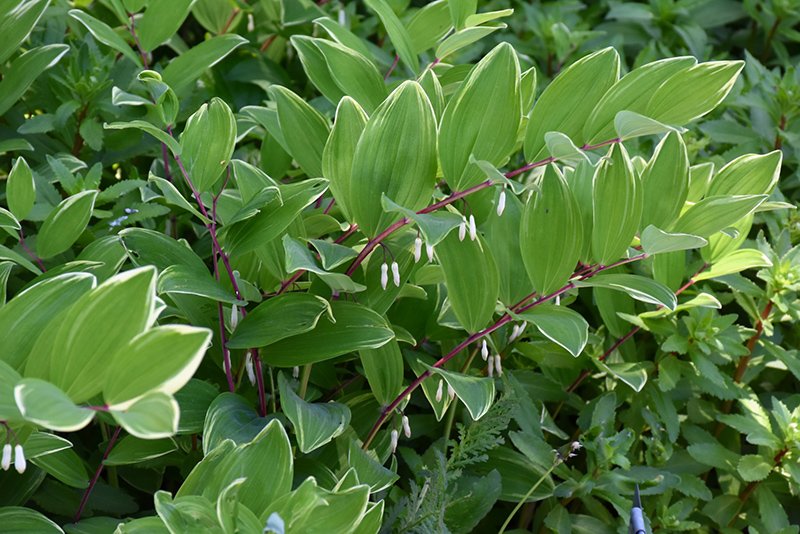
Botanical Name: Polygonatum odoratum 'Variegatum'
- False Solomon’s seal (Maianthemum racemosum) – Native
- Solomon’s seal (Polygonatum biflorum) – Native
Ferns for Dry Shade
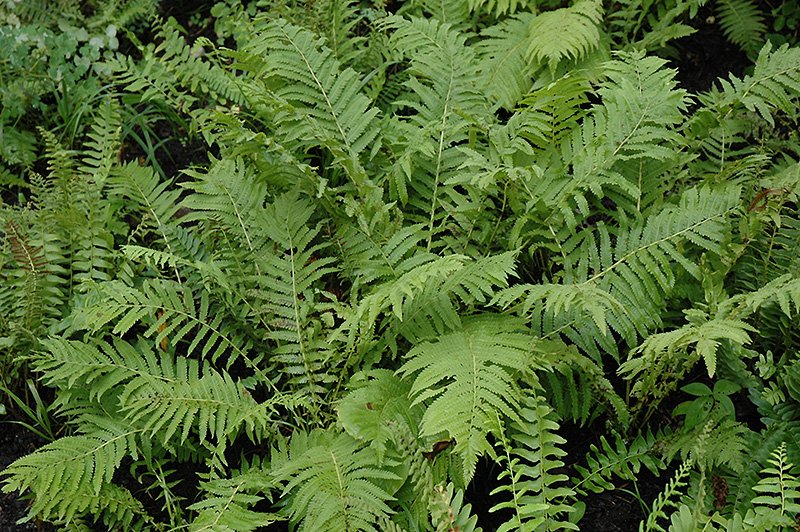
Botanical Name: Polystichum acrostichoides
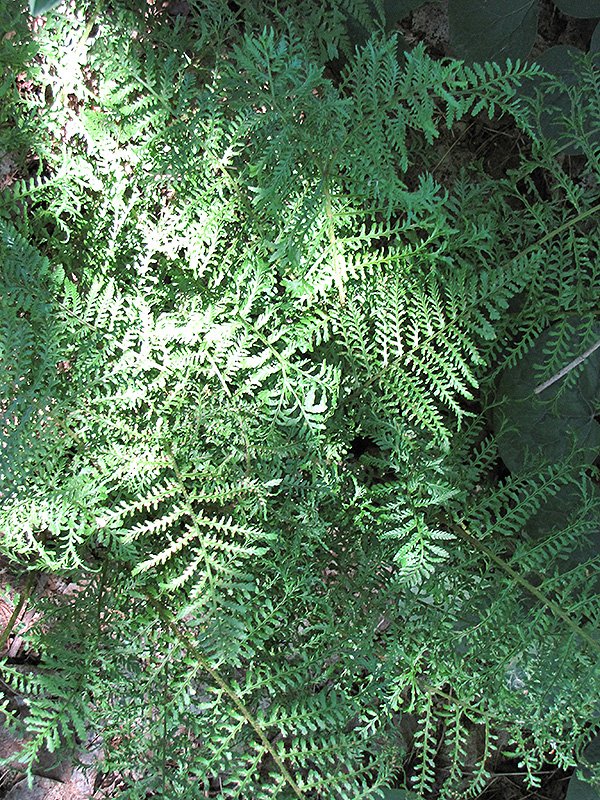
Botanical Name: Dryopteris filix-mas
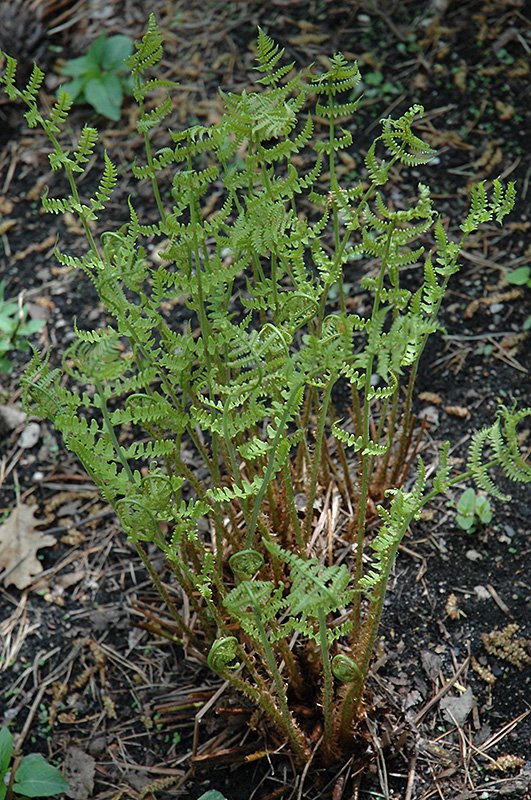
Botanical Name: Dryopteris marginalis
- Christmas fern (Polystichum acrostichoides) – Native
- Hay-scented fern (Dennstaedtia punctilobula) – Native
- Marginal wood fern (Dryopteris marginalis) – Native
- Male fern (Dryopteris filix-mas) – Native
- Rock fern (Polypodium virginianum) – Native
A Little TLC
It doesn’t take much to keep drought-tolerant plants thriving—just a little attention and some seasonal TLC. While they’re tough, even these hardy perennials appreciate an occasional deep watering during extended dry spells, especially in their first year.
For sun-loving perennials, skip the heavy fertilizers. Instead, an annual layer of compost is all they need to stay healthy and strong.
Shade-loving drought-tolerant plants, on the other hand, benefit from a layer of mulch. This helps retain moisture and reduces evaporation, especially in dry shade, which is one of the most challenging conditions for any plant to thrive in.
And don’t forget to deadhead regularly! Removing spent blooms encourages your plants to keep producing flowers instead of going to seed, meaning more colour, for longer.
With a few simple care tips, your drought-tolerant garden can remain beautiful and resilient throughout the entire season.
Other resources:
- Landscape Ontario: Eight Beautiful Drought Tolerant Plants
- Toronto Master Gardeners: Drought Tolerant Plants
- Guelph.ca: Drought Tolerant Native Plants
For tomato lovers, picking a warm, flavourful tomato right off the plant for a sandwich, burger, or salad is a sure sign of summer! I eagerly await the day the first fruit begins to turn red, knowing that I am a day or two away from the first of many toasted tomato sandwiches for the season!
By the end of June, your tomato plants should be in the ground or pot, staked, and well on their way to producing fruit. But how do you keep your plants healthy all summer so that you can maximize your investment? Here are a few tips to help keep your tomato sandwiches coming until frost!

Water
Water early in the morning and water deeply. For tomatoes, consistent moisture is best.
Keep the water on the ground, not on the foliage. This is important because damp foliage can lead to diseases like early blight, which can ultimately cause the entire plant to die. Mulching around the base of plants will reduce the amount of water that can splash up onto the leaves. A soaker hose or drip line is also a great way to ensure that water stays on the ground, rather than on the plant.
Pruning
Reducing the amount of foliage on a tomato plant is necessary for a couple of reasons: good air flow, which reduces the chance of powdery mildew forming, and less foliage means that the plant can send energy to growing fruit instead of lots of leaves.
Follow these easy steps when you prune your tomato plants:
- Before you begin, remember to follow the rule for pruning - no more than ⅓ of a plant should be removed at a time.
- Use clean scissors or pruning shears to cut the leaves off the bottom of the plant. Remove any leaves that are touching the ground. These are particularly susceptible to mildew formation.

When fruit starts forming, remove the leaves from the bottom of the plant up to the first or lowest fruit.
Remove suckers ongoingly. What are suckers? When you look at your tomato plant, you will see the main stem that comes up from the ground, and branches of leaves that come out of the main stem. As the plant grows, suckers begin to form in the “Y” between the main stem and a branch of leaves. Suckers won’t harm a plant; they just make it very unruly and reduce airflow.

If your tomatoes are indeterminate (growing into a tall vine), remove the top of the plant when frost is forecasted at the end of the season. Topping the plant allows energy to ripen the fruit that’s already set, rather than being used to continue growing the vine.

NOTE: Some gardeners like to leave suckers on determinate tomato plants as this can increase the yield.
TIP: Tomatoes ripen from the inside out. That means that by the time you see fruit beginning to flush on the outside, the inside is already ripe. If you have competition for tomatoes from pesky critters, or when there’s a chance of frost in the weather forecast, you can pick fruit that has just begun to turn colour and leave it on the kitchen counter to continue to ripen.
Fertilizer
Using organic material is one of the best ways to feed your crop. A good layer of compost, 1-2 inches, in the spring when you’re planting and again in the fall each year is one of the best ways to improve your soil structure in the garden, and it also adds lots of nutrition.
If you missed this step when planting your garden, you can always add a layer of compost around your plants or use other organic fertilizers, such as compost tea, seaweed, worm castings, or fish emulsion.
Alternatively, you can use a fertilizer that’s formulated especially for tomatoes - these usually have a ratio like 3-4-6 or 4-7-10. Follow label directions for amounts and err on the side of caution. Using less fertilizer is always better than using too much, as an excess can stress the plant and make it more prone to disease.
Following these simple steps for tomato care will help to ensure your plants stay healthy and producing fruit, but if you should have problems, here are some great resources to identify tomato issues:
- Ontario.ca: Bacterial diseases of tomato: bacterial spot, bacterial speck and bacterial canker
- Guelph.ca: Healthy Landscapes – Plant List Native and Drought-Tolerant Plants
While many gardeners in Southern Ontario follow the popular planting date of May 24th, when we’re usually safe from frost, you may be surprised to know that April is not too early for certain plants!
Once the ground has thawed and is workable, there’s plenty you can start growing. In Zones 6a-6b, this usually happens around four weeks before May 24th. While frost is still a possibility, many cold-tolerant plants not only survive a light frost but thrive in cooler weather. To check if the soil is ready, simply dig up a handful and squeeze it. If it sticks together, it’s too wet to work with—wait a few more days for it to dry out. Once the soil is ready, it’s time to plant those cool-weather crops!
Cool Weather Vegetables
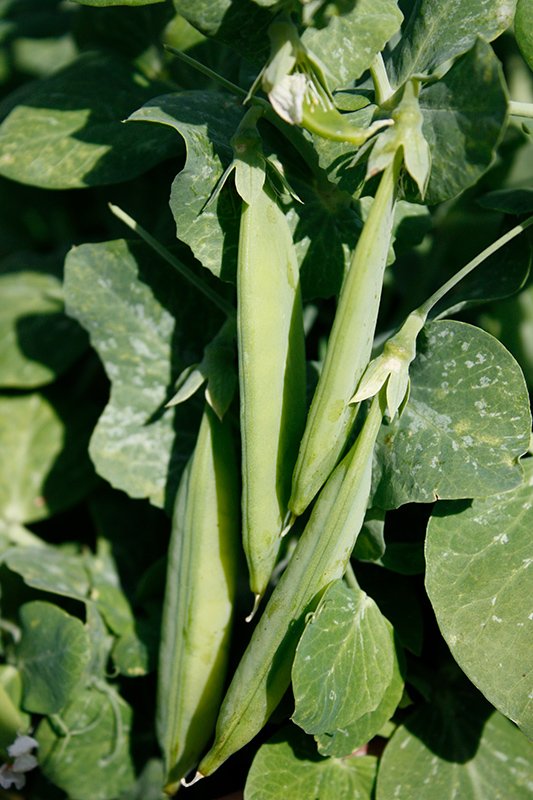
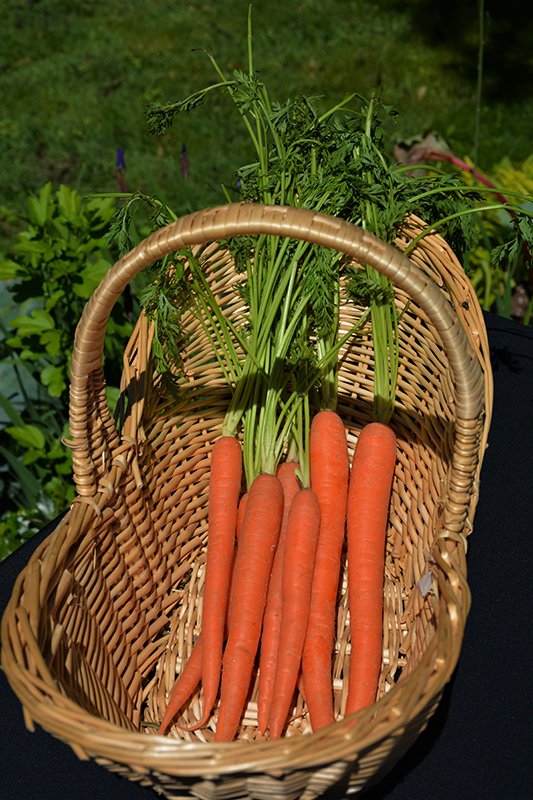
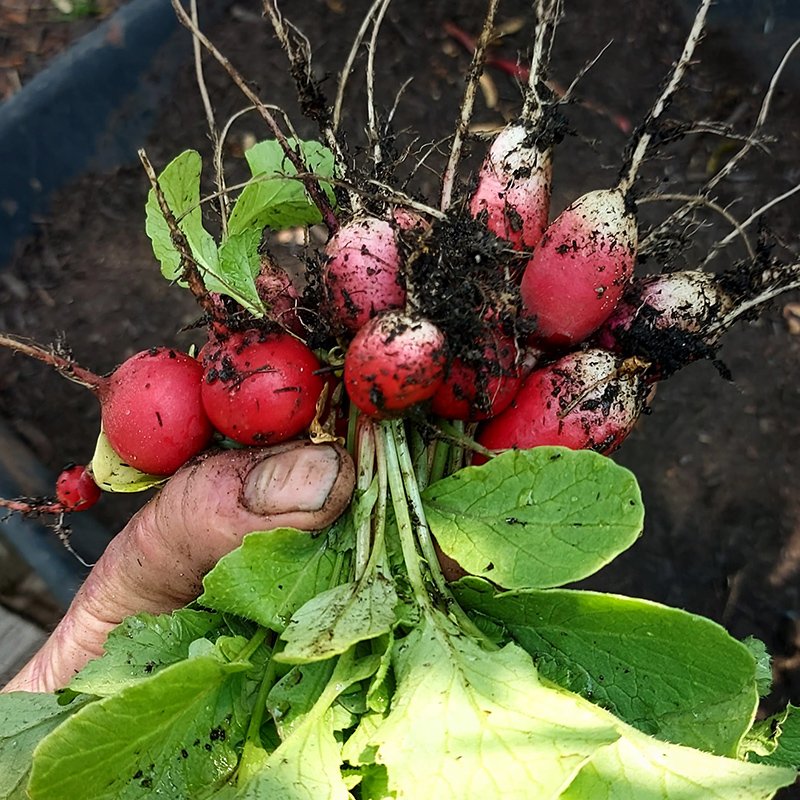
Radishes: Radishes are fast-growing and perfect for planting in April because they love cooler weather. Sow them directly from seed.
Peas: April is the perfect time to plant peas outdoors as soon as the soil is workable. Soak pea seeds in water for 8-10 hours before planting them to help germination.
Lettuce, Spinach, Arugula, Asian Greens (Tatsoi, Mizuna, Pak Choi and Leaf Mustard) : It’s best to sow seeds for leafy greens or plant seedlings early in the spring as they will grow quickly in cool weather. Plant more seeds or seedlings every 10-14 days for a succession of greens until hotter temperatures make them bolt (go to seed) and become bitter.
Potatoes: Seed potatoes can be planted in mid to late April as soon as the soil is workable.
Onions: Plant onion sets or seedlings that have already been started in early spring and enjoy a harvest in late summer or fall.
Carrots: Plant carrot seeds in April, and they will be ready for harvest later in the spring or early summer. They take a little longer to grow, but planting early gives you a head start. You will enjoy carrots all summer long by planting more seeds a few weeks later.
Tip: It’s a good idea to keep some frost protection like row cover handy for lettuce, peas and spinach just in case the temperatures dip below zero.
Bonus: Many garden pests, like earwigs and slugs, are still overwintering in April and won’t feast on your tender plants.
Cold-Tolerant Flowers
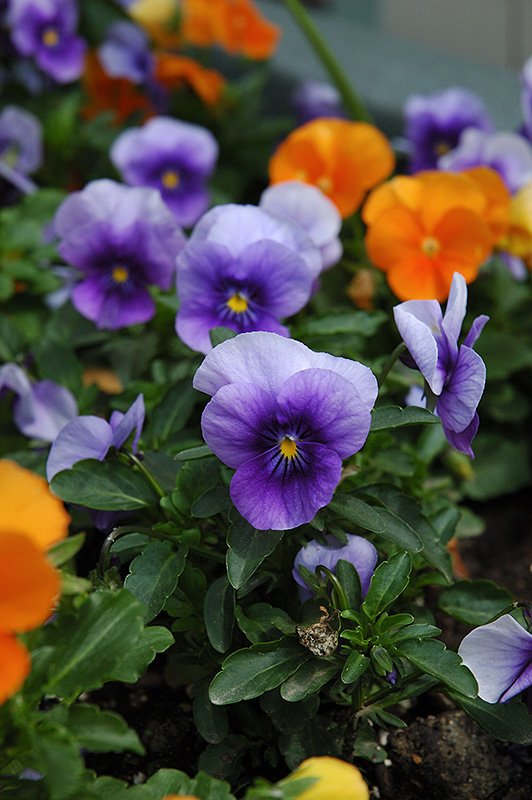
Pansies: Add a pot of Pansies to cheer up a front porch, and it instantly feels like spring! Plants can go into a sunny spot in the ground when temperatures reach 7-21 celsius and are regularly staying above freezing.
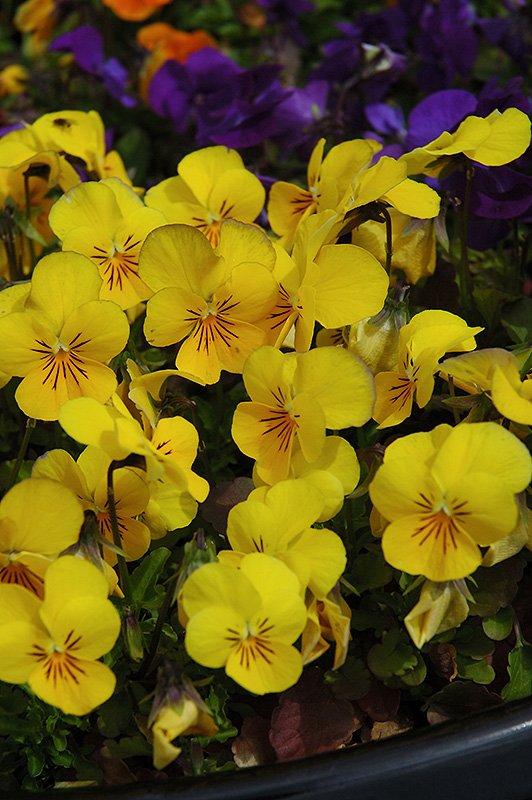
Violas: These cool-weather flowers can withstand light frosts and are perfect for containers or for planting in garden beds
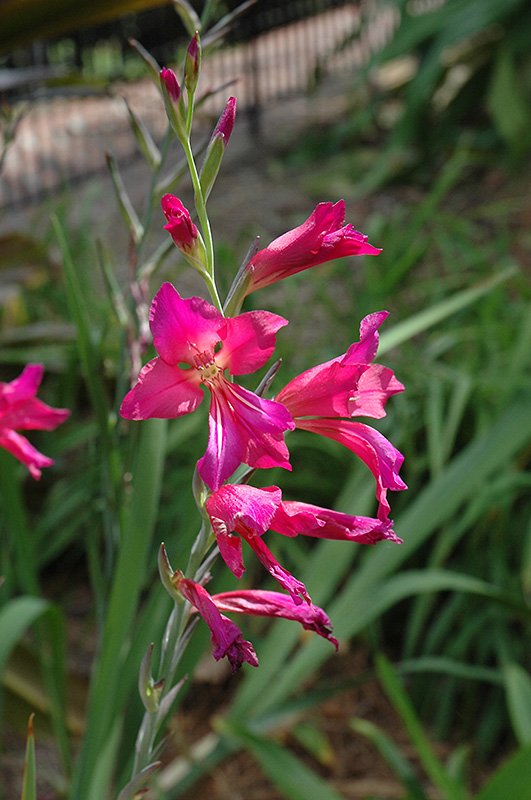
Gladiolas: Even though the weather is still cool, this resilient summer-blooming bulb can be planted in a sunny area of the garden in April.
Bonus: Pansies and Violas also love cool weather in the fall.
Perennials, Trees and Shrubs
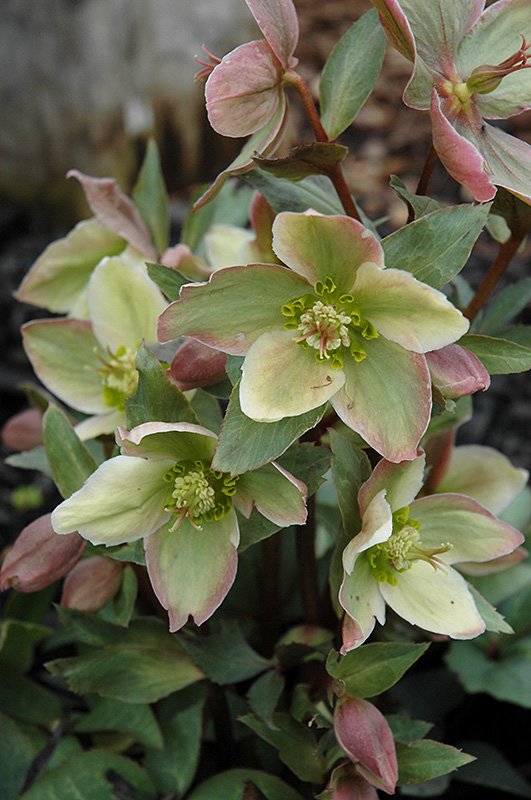
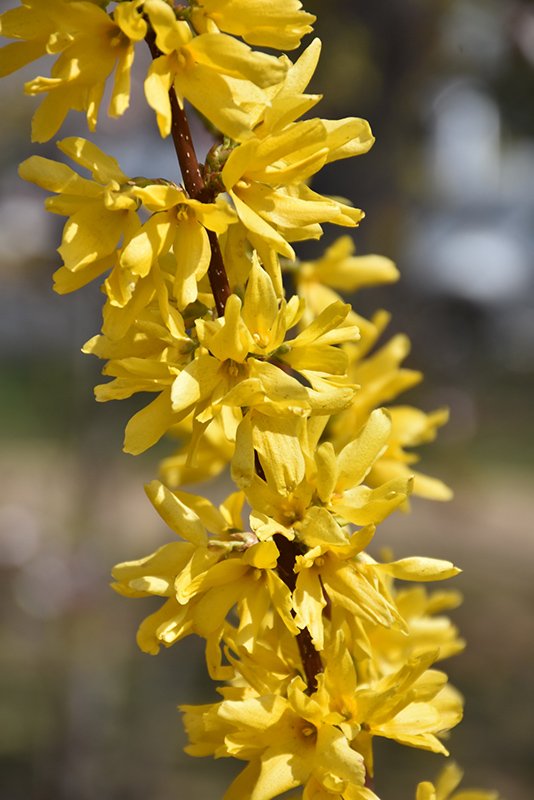
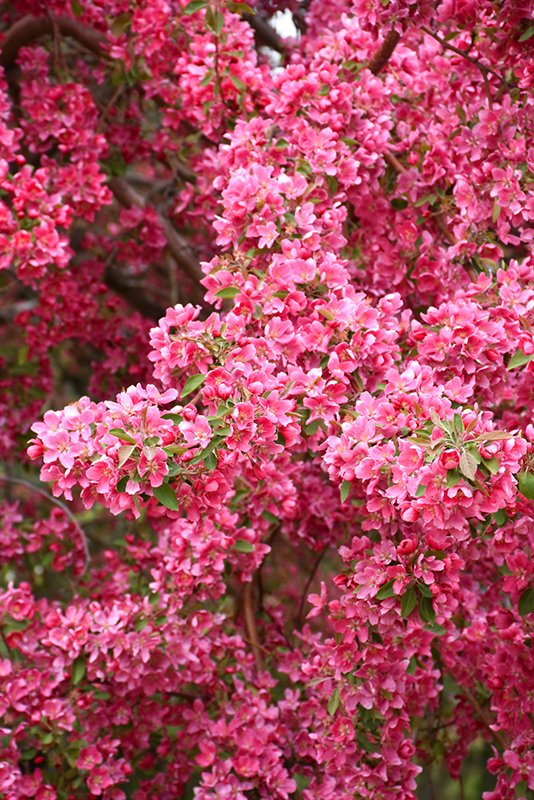
Two to three weeks before the threat of frost has passed, many potted perennials, shrubs and trees, either dormant or with leaves, can be planted. (If you’re not purchasing from us, be sure to check whether the plants were grown outdoors or acclimated to cooler temperatures and ensure they’re hardy enough for Southern Ontario.)
While perennials, trees, and shrubs can be planted throughout spring, summer, or fall, the combination of warming soil and increased rainfall in spring creates the perfect conditions for successful transplanting.
Come into Eising Garden Centre to see the many seeds and plants available for you to add to your garden in April!
Additional Resource: Landscape Ontario provides an excellent online Tree Planting Guide.
It’s the question we probably hear the most when it comes to flower gardens…”What can I buy that will flower all season long?” While some annuals bloom for a very long time, no plant will bloom from early Spring to late Fall, and no vegetable plant will produce for that duration either. The solution? Succession Planting! It’s a simple strategy that maximizes the time your garden is blooming or producing vegetables.
What is Succession Planting?
Plant early (earlier than you think) and plant things in succession that thrive in the current weather conditions - right up until there is a hard frost. Simply plan to plant another crop or flower once one is harvested or finished blooming. Many gardeners here in southern Ontario wait until the May 24th weekend to plant everything - all at once. Succession gardening staggers planting times so there is a continuous harvest of vegetables or an everchanging series of blooming flowers. While it takes a little more planning, the results are worth it.


A Succession of Blooms
The best way to ensure a parade of colour in your garden is to choose a variety of annuals, perennials, and biennials that bloom at different times. There is a notion that a garden can only have annual flowers or just perennials, but the best results come from a mix of both. You’re allowed to mix them together! Most annuals bloom during the heat of the summer, but perennial flowers can extend the season for you by blooming in early spring or in the fall. A list of perennial bloom times can be found in this Landscape Ontario article to help you choose your plants.
Some flowering plants, like pansies, love cooler weather and are easy to purchase in the spring. A little planning and planting in the fall will provide a flush of colour from Spring bulbs like Daffodils, Crocus, and Hyacinth. Spring bulbs look great alongside early-blooming shrubs or trees like Canada Serviceberry and Forsythia.
April or early May is also an excellent time to directly sow annual flowers like sunflowers, nasturtium, borage, and herbs like cilantro and dill to give them a head start.
Cool Weather Veggies
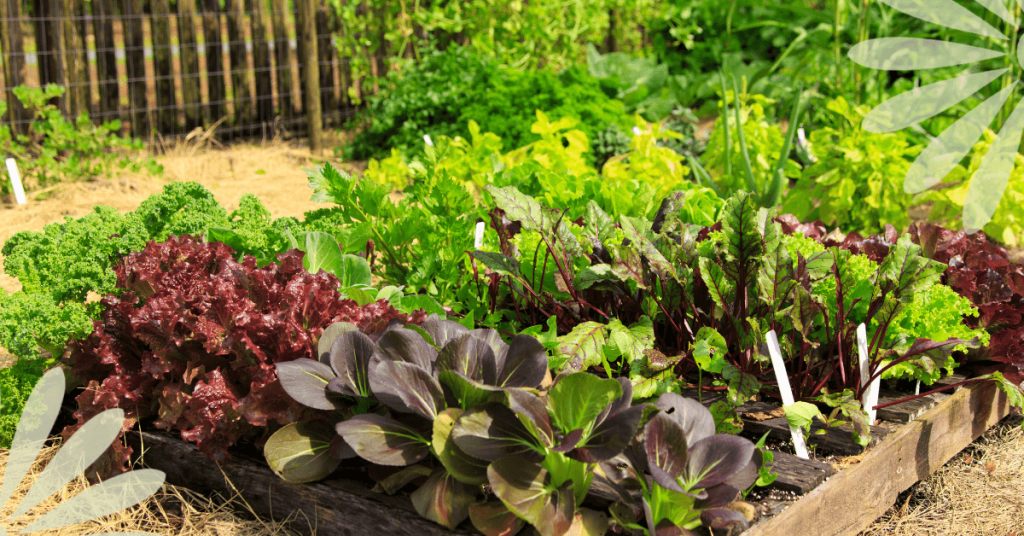
It’s surprising how many vegetables thrive in cool weather and withstand light frost. Keep tender plants indoors until the third week of April and slowly harden them off, but get outdoors any time in April and begin directly sowing fast-growing cool crops like leafy greens, root vegetables, and some herbs.
Lettuce planted in late spring will tend to “bolt” and taste bitter once hotter temperatures arrive. Lettuce loves cooler conditions. So you don’t have to wait until May 24th to sow lettuce and other vegetables. Which Vegetables? We have a list of examples for you in our article: Starting Seeds Indoors and Cold Weather Crops. Starting early means you can harvest a whole crop of vegetables before you plant heat-loving crops like peppers and tomatoes.
Sow All Season
If you’ve ever been overwhelmed by planting too much of one crop at once, you will love succession gardening. While you may be able to freeze a batch of 2,000 string beans from the entire packet of seeds you planted in one go, sometimes stretching out the harvest is nice. Plant smaller batches of beans, peas, and herbs like cilantro, dill, and basil every three weeks to ensure continuous summer harvests. This approach is also known as interval gardening.
Sow cool-weather crops like leaf lettuce, Swiss Chard, and Radishes in April or early May and again in September.
Continuous Harvest
Once your early Spring vegetables like lettuce, peas and radishes have been harvested, it’s time to sow your second crop of cool-weather veggies for harvesting in the Fall. Do you know veggies like parsnips, Brussels sprouts, peas, and kale have more flavour after a mild frost?! A mild winter this year meant we were still harvesting some Brussels sprouts in December.
Double Up
Another tip is to plant things that grow well together. For example, plant seeds for a root crop like carrots below your tomato plants, peas or bush beans in the vegetable garden. The carrot crop will be next after the tomatoes, peas or beans are done for the season. There are many combinations like this - tomatoes and basil, kale and dill, lettuce and beets, broccoli and borage, just to name a few. Doing this helps to increase the production of your plot of land and keeps the soil covered, which is always better for soil health.
One final strategy for flower succession planting is to use containers. Consider placing a well-positioned pot of annual blooms beside perennial plants resting after flowering.
Once you get started, researching companion plant combinations like these can be a fun game. These combinations will extend the time you can enjoy lots of colourful blooms and increase the amount of vegetables a garden can produce!
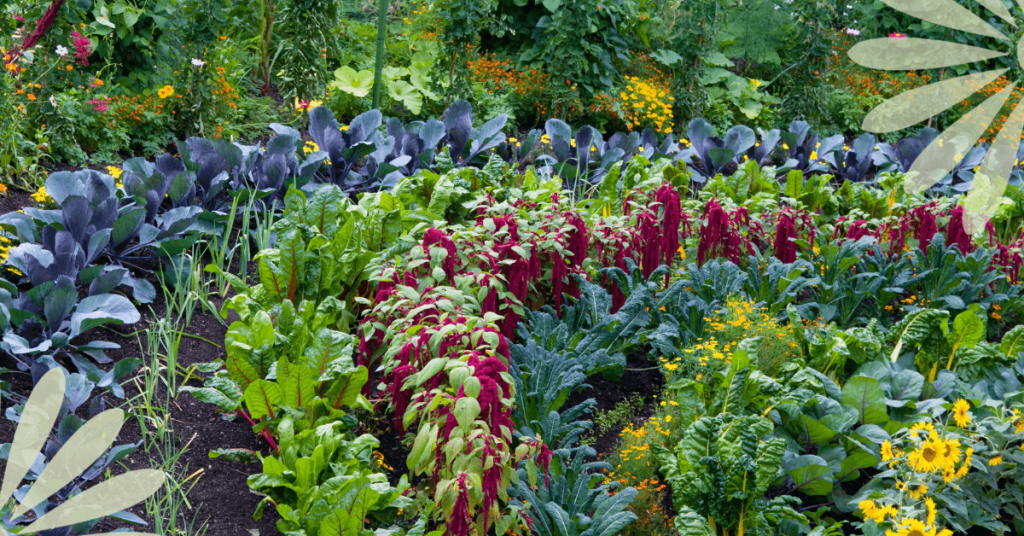
Come along on a little journey with me and imagine this… It’s Springtime. The sun shines, and the air finally feels warmer after a long, grey winter. You take a little trip to your favourite garden centre and find that special plant you’ve been reading about and hoping for. Of course, you buy the plant, take it home, and proudly place it on your sunny patio on this beautiful day. Two more sunny days go by, and the plant does not look good at all. It seems to be dying, so you give it lots of water, but that makes no difference. It is in fact dying. So disappointing! How could this be happening?
In our excitement to get outdoors and plant flowers, or add greenery, we forget that the plants we’ve been growing indoors or inside a greenhouse, aren’t used to the elements in the great outdoors. They’ve been sheltered indoors, out of the wind and direct sun, and watered and fertilized regularly with the utmost attention. They’ve been pampered in a plant spa and are quite literally hothouse flowers! Being plunked outside afterwards is the equivalent of us going outside in a bathing suit with no sunblock on for the first sunny, warm days of Spring, exposing our lily-white skin that’s been covered up by a parka all winter long!
Red, sunburned skin is not a great image, but hopefully, this comparison helps to explain the importance of transitioning or hardening off plants. Much like us, indoor plants need to be gradually exposed to the elements and given protection in the process.
The same will be true if you have planted seeds indoors or purchased greenhouse-grown seedlings. Seedlings grown in a greenhouse, a sunny window, or under grow lights in your home need up to 14 days to acclimate to being moved from their cozy indoor space to the great outdoors.
What is Hardening Off?
Hardening off ensures that you will not lose another plant or seedling! It’s a sensible process for all the plants you’re moving from indoors to outdoors. By helping plants or seedlings to gradually toughen to withstand the elements, you prevent transplant shock, which can cause your plants to be stunted or, worse, die.
To ensure success, the process of hardening off takes up to 14 days, so you will want to begin two weeks before transplanting plants and seedlings into your garden. Houseplants may only need 7 to 10 days, but tender, tiny seedlings need the full two weeks to strengthen and get used to their new environments.
When to Harden Off
Cold-weather plants like lettuce, kale, pansies, violas, dianthus, and potted or forced spring bulbs can be hardened off once daytime temperatures consistently reach 5 Celsius, usually in April in southern Ontario.
Perennial plants, tropical houseplants, and heat-loving seedlings like most annual flowers, tomatoes, peppers, and basil should wait until temperatures are around 7-10 Celsius to begin hardening off. For vegetables and annual flowers, start hardening off around May 10 here in Norfolk County if your target is planting seedlings around May 24th.
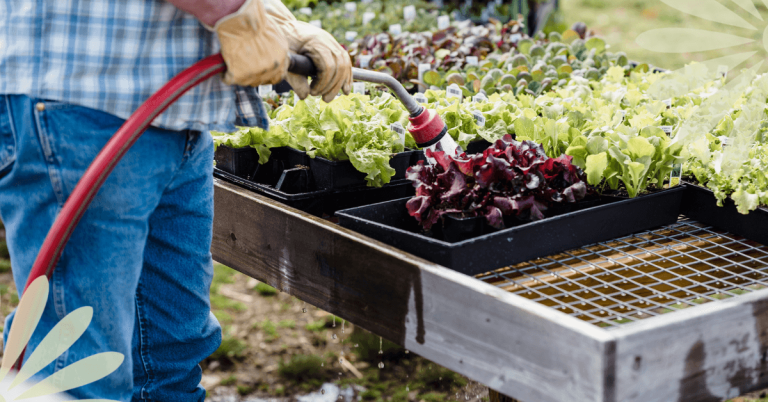
Successfully Hardening Off Your Seedlings and Plants
Days 1 and 2
Begin on a day that is optimally warm (At least 5 Celsius for cold-weather-tolerant plants, 7 Celsius for heat-loving plants, or 15 Celsius for tropical houseplants) and place your plants or seedlings outside in full shade and protected from the wind.
If you don't have a wind-sheltered area in the shade, putting your plants in an open cardboard box is a good way to protect them from the wind at this stage.
Leave them in this protected area for 1-2 hours before returning them indoors.
Days 3 to 5
Each day, gradually increase the length of time your plants are outside and begin to place them in an area where they will get dappled shade and some wind.
Pay close attention to watering while you’re hardening off your plants as they will require more frequent watering.
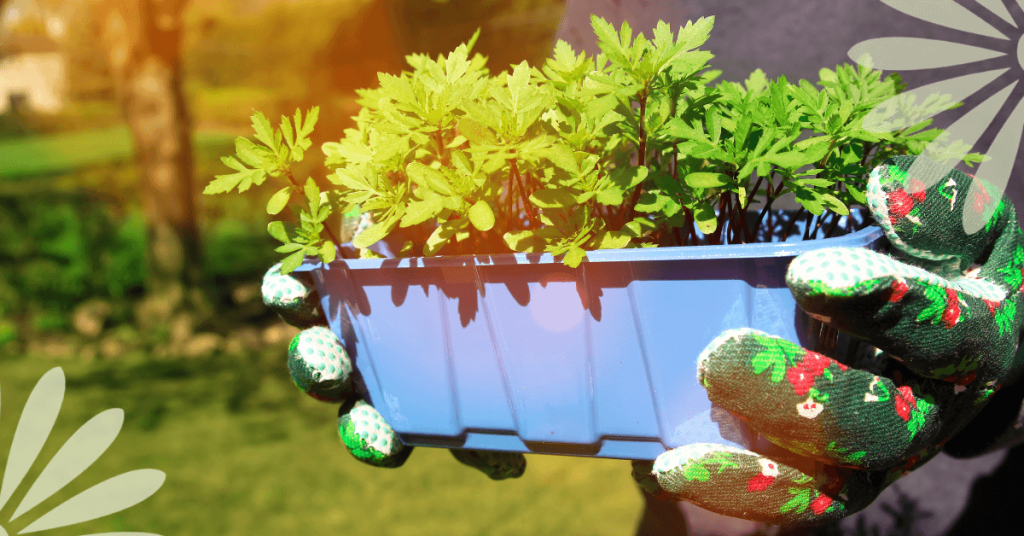
Days 6 to 10
On day 6, start to increase your plant’s exposure to direct sunlight by placing them in the morning sun, which is less intense than the afternoon sun.
Begin to leave them outside overnight from this point on unless the temperature is expected to drop below 7 Celcius.
Days 10 to 14
After 10 days of acclimation, it is safe to move houseplants that require more sun to a location that meets their needs.
After 14 days of acclimation, it’s safe to transplant seedlings to their place in the garden or to large pots if you’re growing in containers.
As soon as your plants are transplanted, be sure to water them well! This will help them transition and eliminate air pockets in the soil that can harm the roots.
If the temperature drops and a fluke, unexpected freeze is forecasted after you’ve planted everything, cover your plants with row cover, cloches (you can use plastic water jugs with the bottom cut out, just leave the screw cap off to act as a vent), or cardboard boxes to protect them.
To summarize, when Spring arrives, protect your skin with sunblock, and harden off your plants before you move them outdoors!

In this case, the plants Hens and Chicks, not the feathery friends.
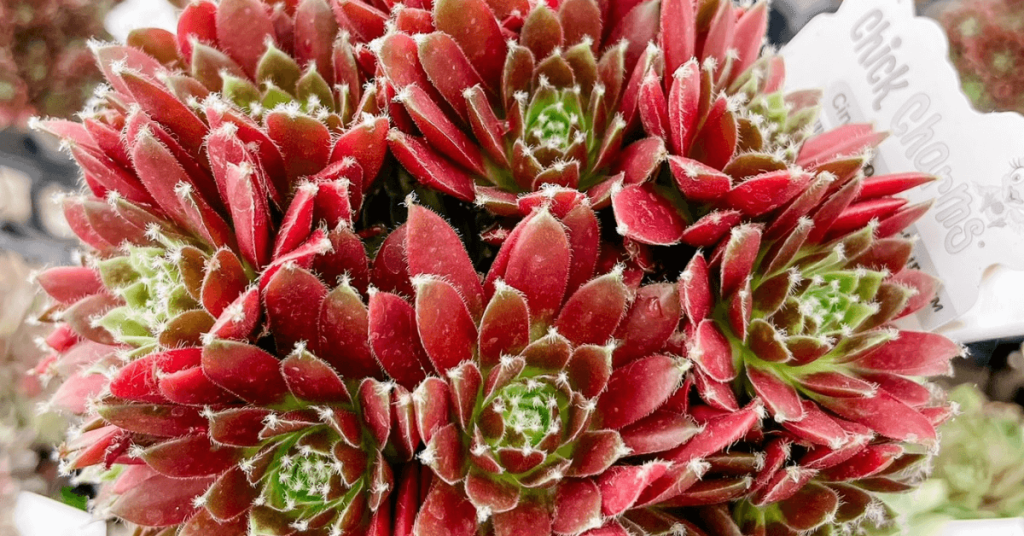
Sempervivum, also known as Hens and Chicks or Houseleek, are a group of succulents that are becoming very popular in Southern Ontario. Here’s why these cold hardy perennial plants are gaining attention.
Low-maintenance
Low-maintenance is the item on everyone’s checklist, right? Hens and Chicks are known for being no-fuss. Sempervivum require very little soil, fertilizer or water. They’re sun-loving, hardy, resilient, and drought-tolerant. When you don’t have a lot of time to garden, you’ll be grateful that your Hens and Chicks need minimal care once they become established.
Versatile, and Did We Mention Low-maintenance?
Sempervivum will grow in full sun to partial shade, and average to poor soil as long as they have good drainage. They will manage just fine in poor soil and harsh conditions like heat and cold! This makes Hens and Chicks the perfect candidate for that spot in the garden where nothing else wants to grow. The spot that’s too hot, or too windy, the soil is rocky or gritty and not ideal or it’s eroding, like on a slope.
These rugged warriors can be grown on rooftops, ledges, walls, in rock gardens, hanging baskets, troughs and containers. Just make sure there are drainage holes. Too much water is their only enemy and will result in their roots rotting.
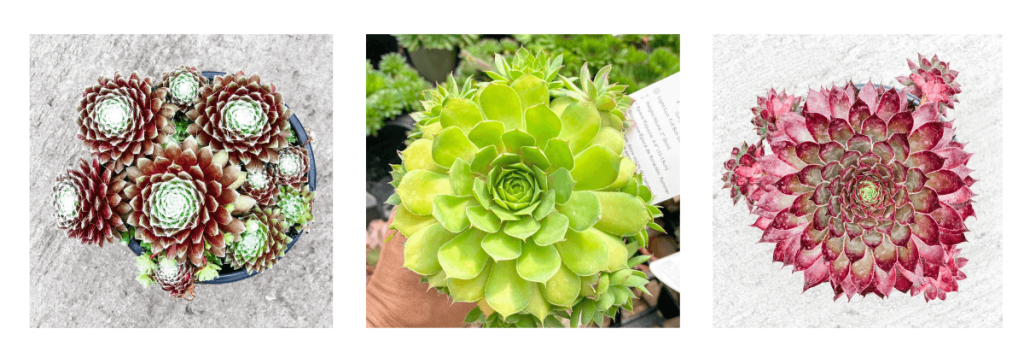
Chick Charms
While most Hens and Chicks are low-growing, 8-15 cm tall, they will all spread 30 cm and more - as much as you like, really. This is because they produce small plants, known as “chicks” or offsets around the main plant. The “Chick Charms”. Chicks can also be transplanted to start a whole new plant.
Tough and Beautiful
As a ground cover, Sempervivum can add visual interest and contrast to a border of annuals or perennials.
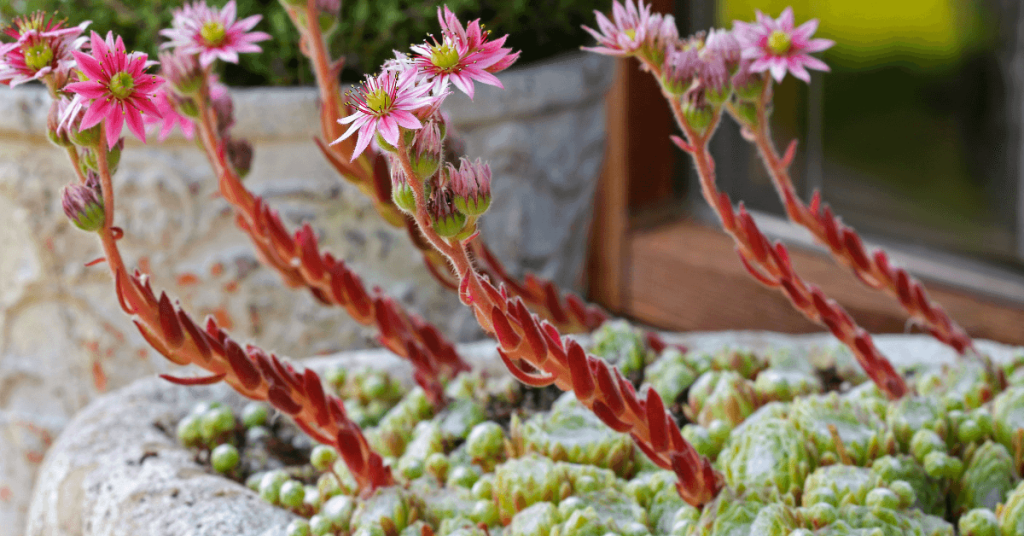
While they’re known for their pretty rosette-shaped clusters of foliage, you may not realize that Hens and Chicks also come in a variety of colours, and produce stunning blooms in summer.
Once a plant blooms, deadhead the flower and pull up the soft parent plant with it. The plant dies when it blooms, but new chicks will grow and replace it.
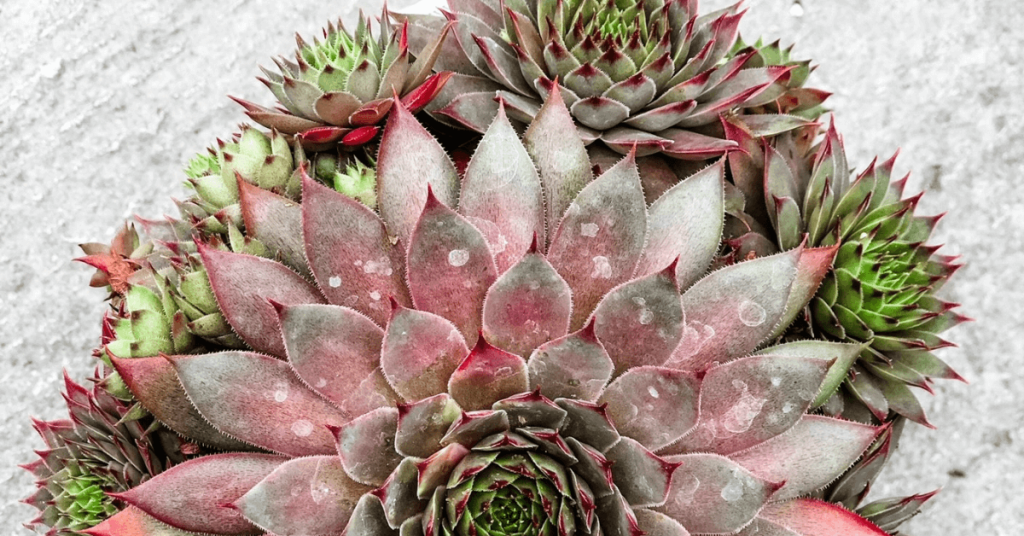
Hens and Chicks fleshy leaves make them less attractive to many garden pests and they are generally resistant to diseases. Tough plants for sure, and worthy of a spot in the garden. The next time you’re in Eising Garden Centre, we recommend that you peruse the Sempervivum section here in Simcoe and give these outstanding succulents a try!
Let’s face it, summers are short and when we invest in plants we all want annuals and perennials that are long blooming. Flowers that last the duration of the summer are ideal! To achieve this, there are a few things to consider like: the plants you choose, good soil, and the amount of sun the flowers will get. When you come into Eising Garden Centre we can help you find sun or shade loving plants, and soil for your hanging pots, planters or garden beds, but to get started you’ll find some of our favourite plants listed below. First, a little plant primer that will help you make decisions.
Annual? Perennial? What’s the Difference?
Annuals and perennials are in separate areas of the greenhouse because they are plants that we will treat differently in the garden.
Here is the best way to remember the difference:
- Annual plants are planted every year, annually, as they will not survive the winter
- Perennial plant’s roots survive the winter and the plant will regrow each Spring
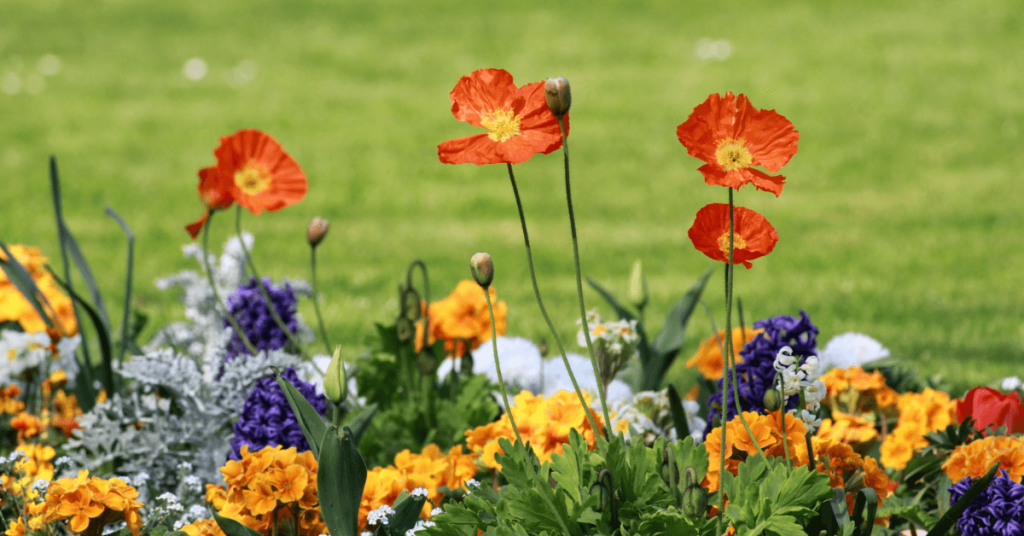
It’s good to know the difference, right? Now you know what to expect from the plants you buy!
Because Annuals and Perennials are in separate areas of the greenhouse, you might think that the two don’t mix in the garden, but they absolutely do. For example, Perennials can make a great backdrop for Annuals. Or, a well placed pot of Annuals amongst Perennials or shrubs can fill in a gap, or bring a pop of colour once other blooms have faded. Using Annuals, Perennials and Shrubs together can really maximize the beauty in your space!
If you’re not sure where to start, here are some of our favourite sun loving flowering plants that are easy to grow and long blooming!
Annual Flowers
- Petunias are one of the most popular blooming annuals for many reasons - there are a wide variety to choose from, they have a wonderful scent, they’re easy to grow and they bloom from Spring until frost.
- Zinnia flowers are low maintenance, fairly drought tolerant, come in many bright colours, will also bloom continuously from Spring until frost, and will attract butterflies to your garden! All things considered, they are one of the best annuals to grow.
- Geraniums are great for containers, hanging baskets, or as bedding plants and come in a variety of leaf shapes and bloom colours. Another reason why these Annuals are so popular is that they are easy to grow and will keep producing flowers late into the Fall.
- Marigolds come in vibrant colours and are another no-fuss Annual that’s tried and true. These long lasting flowers will also attract butterflies, bees, lady bugs, and other beneficial insects making them very good companion plants in any garden but especially your vegetable garden.
- Cosmos will bloom from late Spring into Fall especially if you remove dead flowers. In return, these colourful, daisy-like flowers will attract pollinating insects as well as birds. Cosmos are also fairly drought tolerant making it a delightful and easy to grow Annual.

Perennial Flowers
- Salvia have spikes of flowers that are long blooming, on plants that are easy to grow, and drought tolerant once they are established. These low maintenance plants will attract butterflies, bees and hummingbirds, and are deer and rabbit-resistant.
- Coreopsis is another drought tolerant perennial that will bloom summer through fall. Flowers are daisy-like and come in vibrant shades of yellow or red.
- Coneflower or Echinacea is a daisy-like flower that is drought-tolerant and long blooming. These sturdy plants have flowers in a wide range of colours from chartreuse to pink, orange, red, and yellow. They come in a range of blossom shapes which make them even more intriguing. If that wasn’t enough, they are also loved by birds and pollinators!
- Rudbeckia, or Black-Eyed Susan are classic perennials that liven up any garden with their sunny colours ranging from yellow to bronzy orange. This durable plant is popular because it is drought-tolerant, pollinators love it, and it’s long blooming.


While most annuals provide a continuous succession of flowers, perennials tend to bloom for two to six weeks. Many perennials will bloom, rest, and then rebloom if you cut off, or deadhead, any spent flowers. A little tender loving care for your annuals and perennials throughout the summer will help blooms last as long as possible. We’ll cover that in our next blog!