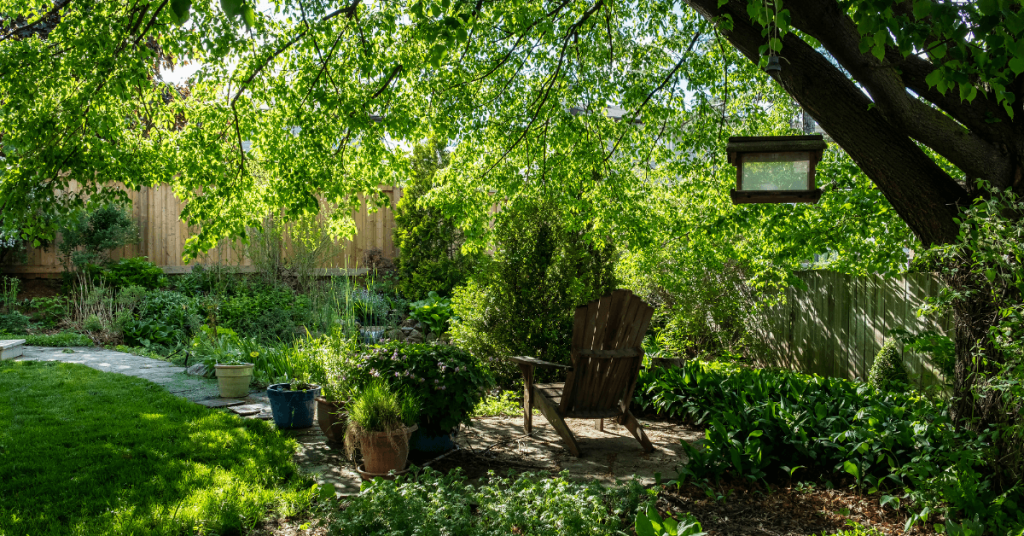
If you’re looking for blooms that come back each Spring with a burst of colour, here are ten of our favourite flowering perennials and ground covers.
Plant These for a Spring Show!
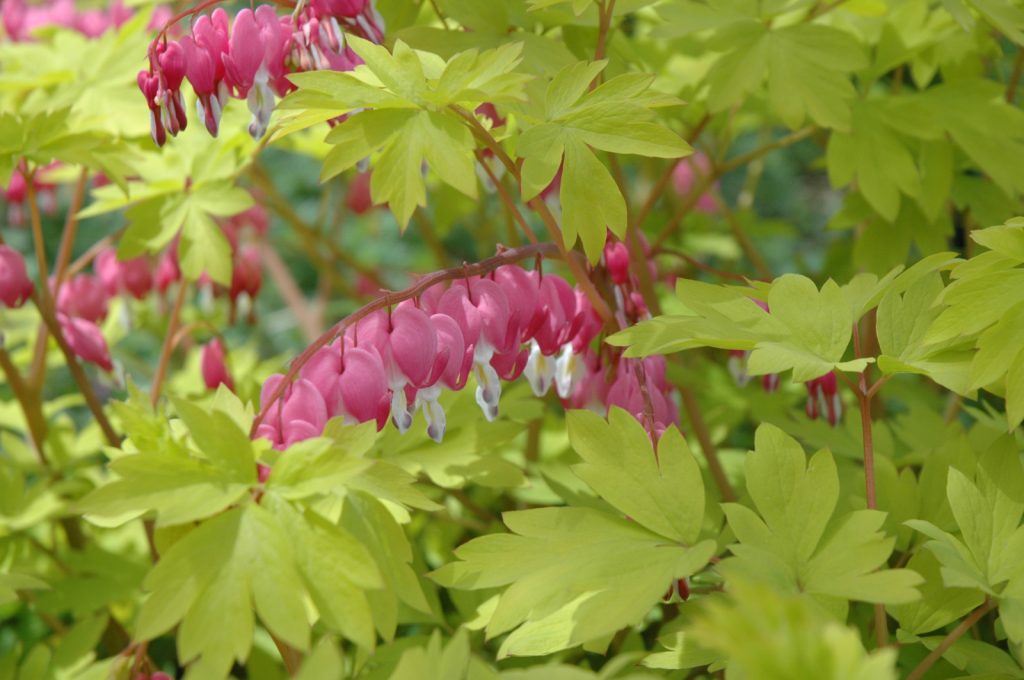
Bleeding Heart (Dicentra)
Height: 30-120 cm, Spread: 45-90 cm
Flower Colour: white, pink, red, purple
Blooms: spring, summer
Growing: While Bleeding Hearts will tolerate full sun or full shade, they prefer the protection of light shade. This perennial is fairly drought tolerant, but it will thrive in evenly moist soil, and blooms will last much longer if the soil is moist.
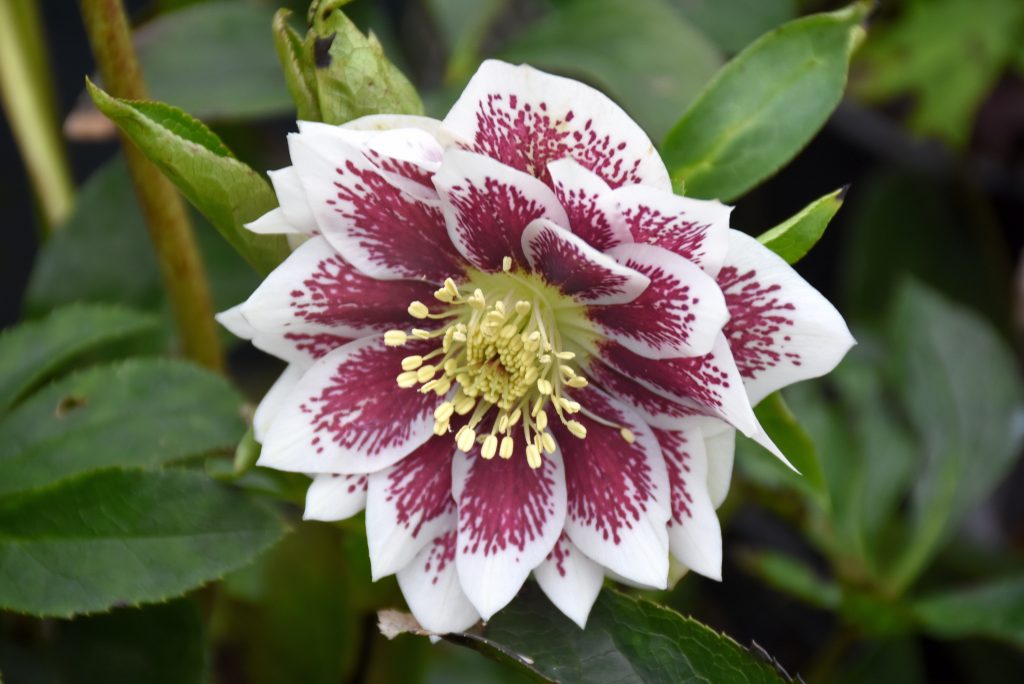
Hellebore Christmas Rose (Helleborus)
Height: 30-45 cm, Spread: 30-45 cm
Flower Colour: white, green, pink, purple, yellow
Blooms: late winter to mid-spring
Growing: Moist, humus-rich, well-drained soil in lightly dappled shade is where hellebores do best.
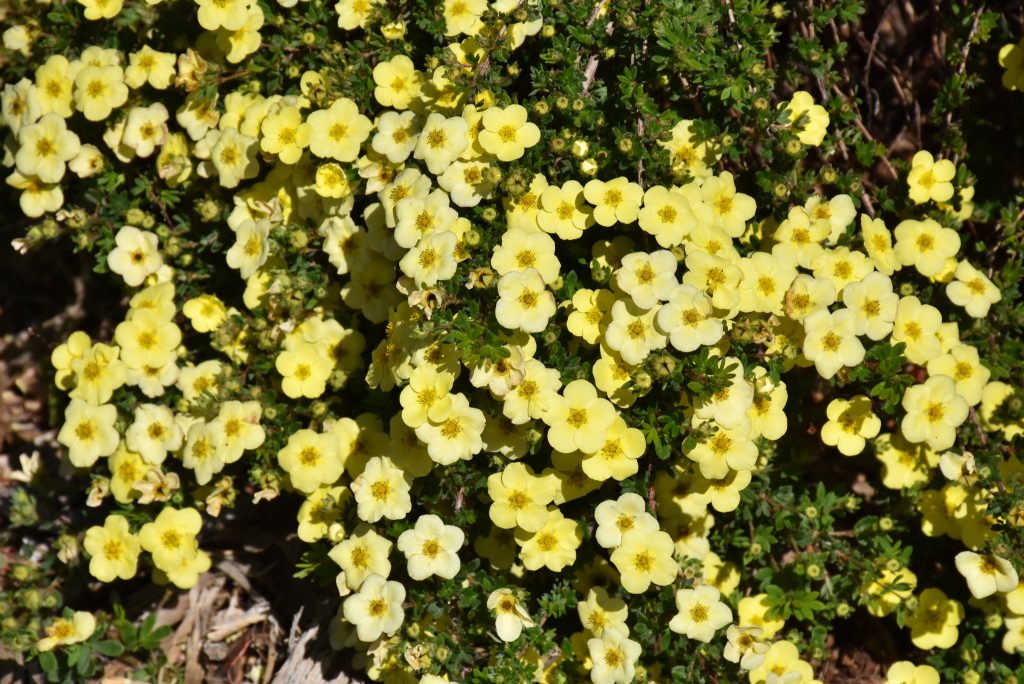
Primrose (Primula)
Height: 15-60 cm, Spread: 15-45 cm
Flower Colour: blue, red, orange, white, pink, purple, yellow
Blooms: spring, early summer
Growing: Full sun or partial shade and moist, well-drained, humus-rich soil.
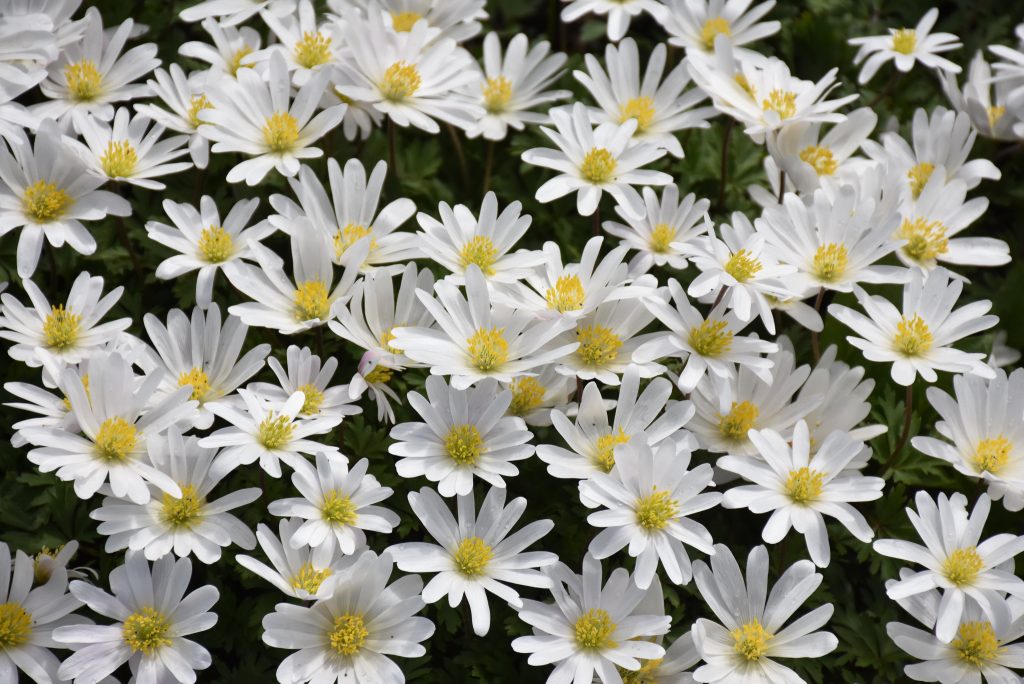
Anemone Windflower (Anemone)
Height: 8-150 cm, Spread: 15-60 cm
Flower Colour: white, yellow, pink, blue
Blooms: spring, summer or fall
Growing: Anemone does best in moist soil and partial or light shade, but they will tolerate full sun. While Anemone can take a while to become established, they’re worth the wait!
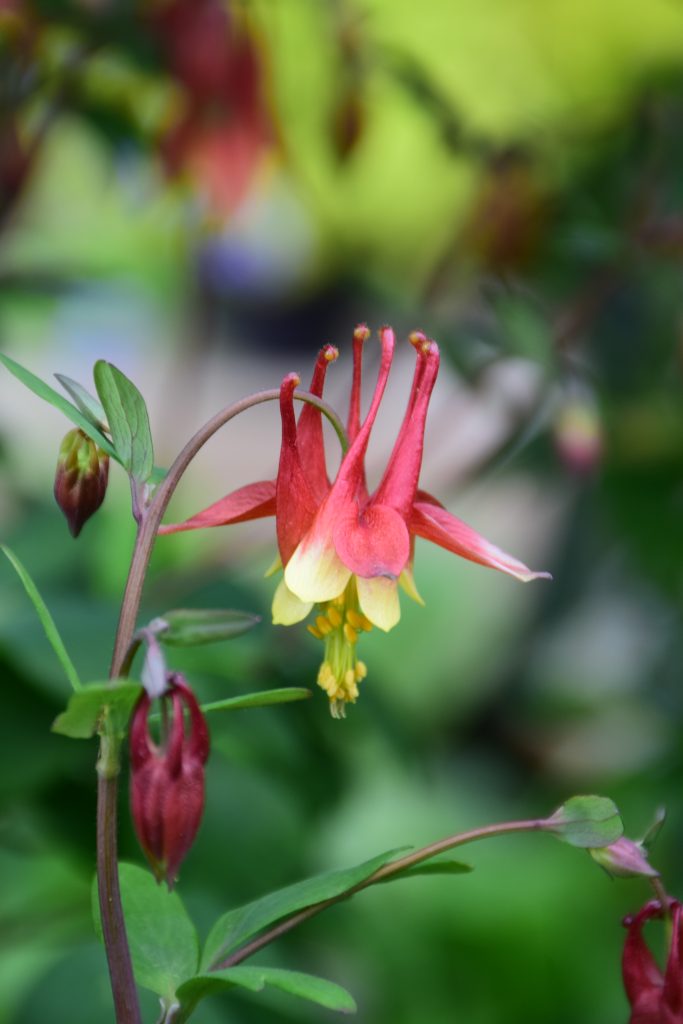
Columbine (Aquilegia canadensis)
Height: 45-90 cm, Spread: 30-60 cm
Flower Colour: white, red, yellow, pink, blue, purple (The colour of the spurs is often different than the petals)
Blooms: spring, summer
Growing: Columbines love full sun or part shade and moist, well-drained soil. This plant will self-seed and seedlings can be transplanted.
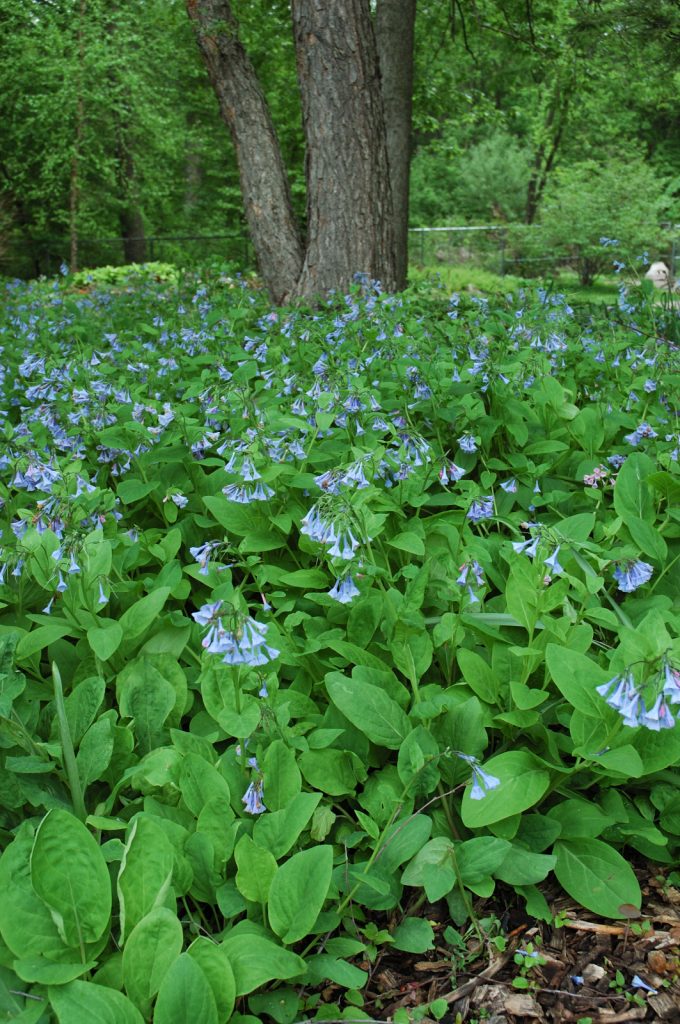
Virginia Bluebells (Mertensia virginica)
Height: 30-60 cm, Spread: forms groupings
Flower Colour: blue, pink, purple
Blooms: spring
Growing: Plant in partial to full shade with humus-rich, moist, well-drained soil. This woodland plant has blooms that are attractive to Hummingbirds and pollinators. Foliage dies back right after it blooms.
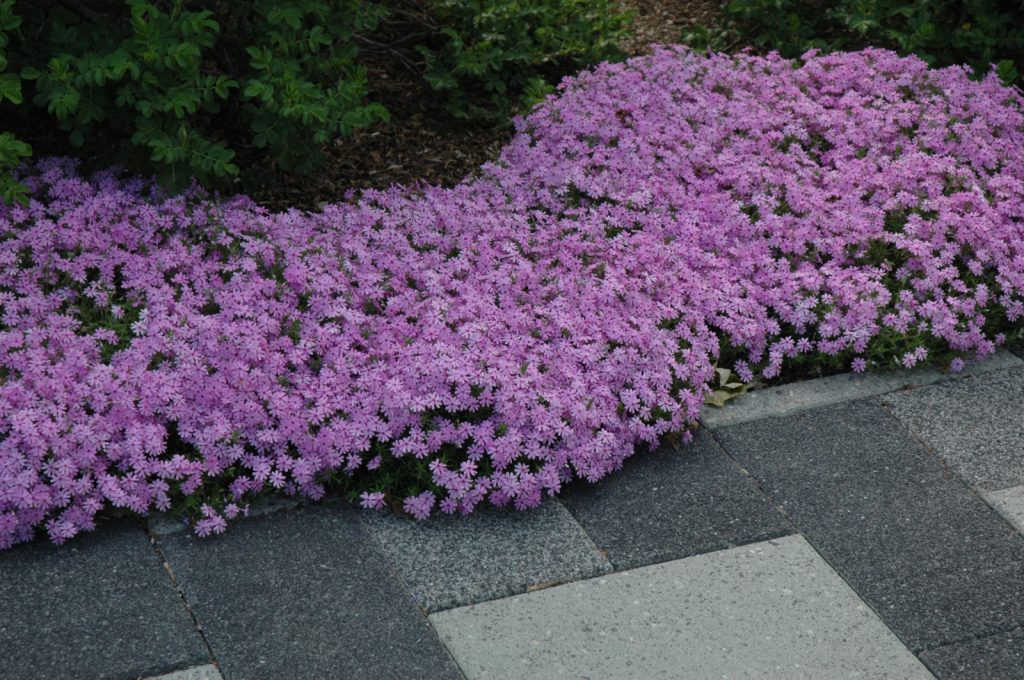
Moss Phlox or Creeping Phlox (Phlox subulata)
Height: 10-15 cm, Spread: 60 cm
Flower Colour: white, red, lavender, pink, bluish purple
Blooms: early spring
Growing: Plant in sun to partial shade with humus-rich, moist, well-drained soil. Spreads horizontally as it grows and creates new roots where the stems touch the ground. Do not prune in the fall as Spring’s flowers will already be forming on these plants.
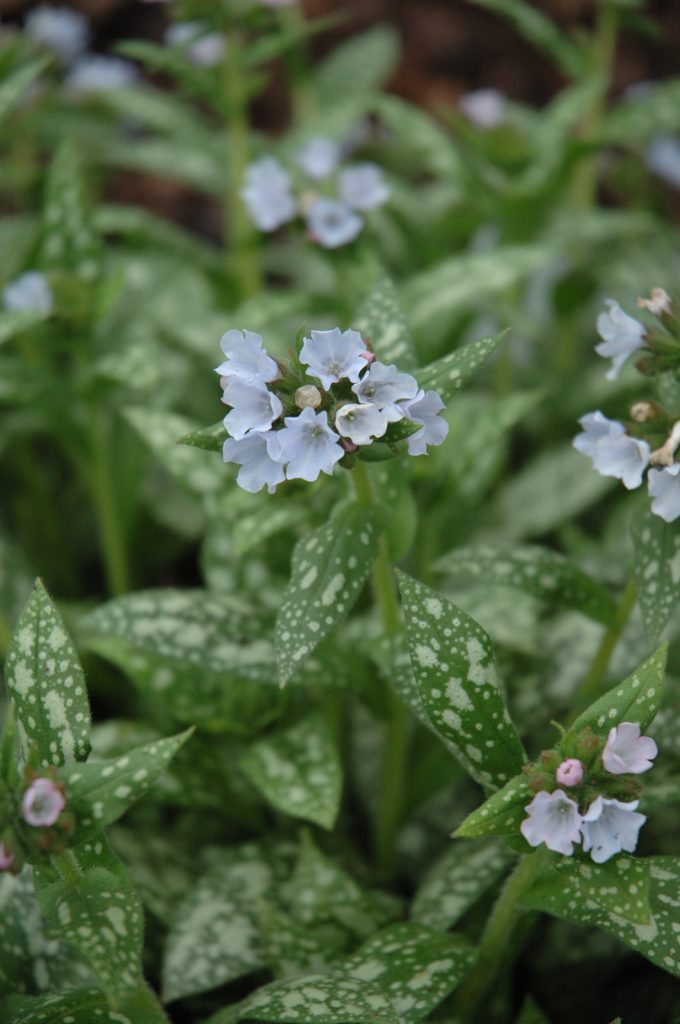
Lungwort (Pulmonaria)
Height: 20-60 cm, Spread: 20-90 cm
Flower Colour: white, red, pink, blue
Blooms: spring
Growing: To avoid root rot, grow Lungwort in moist, humus-rich soil that’s well drained. They prefer partial shade to full shade.
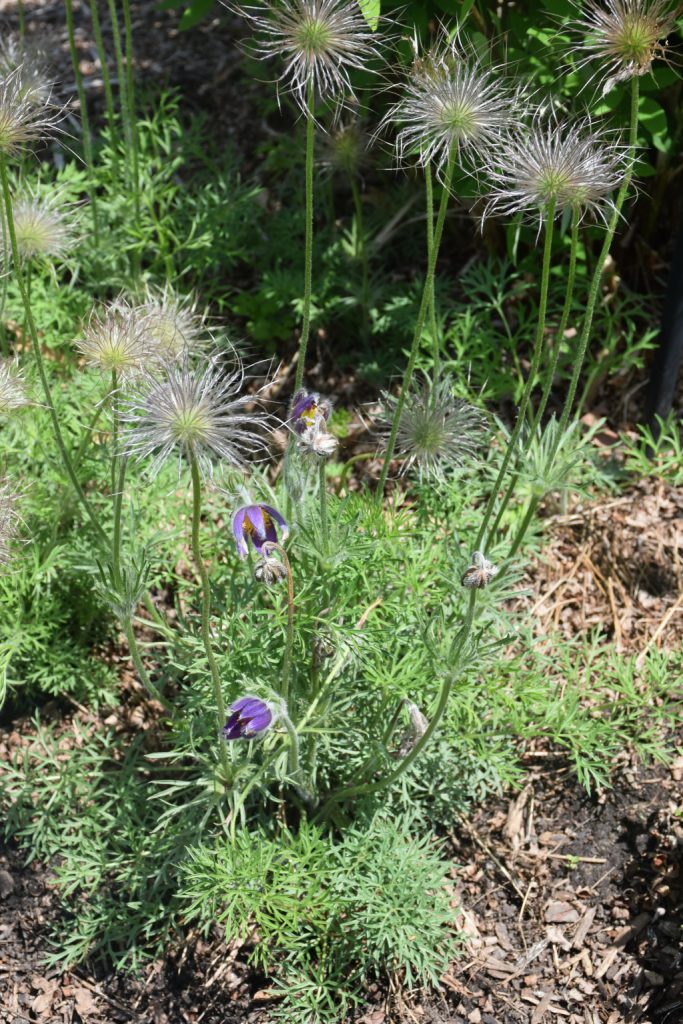
Pasque Flower (Pulsatilla)
Height: 10-30 cm, Spread: 20-30 cm
Flower Colour: white, red, purple, blue
Blooms: early to mid-spring
Growing: Very well drained soil is important for Pasque Flower, which does not like to sit in wet soil. It will grow well in full sun or partial shade.
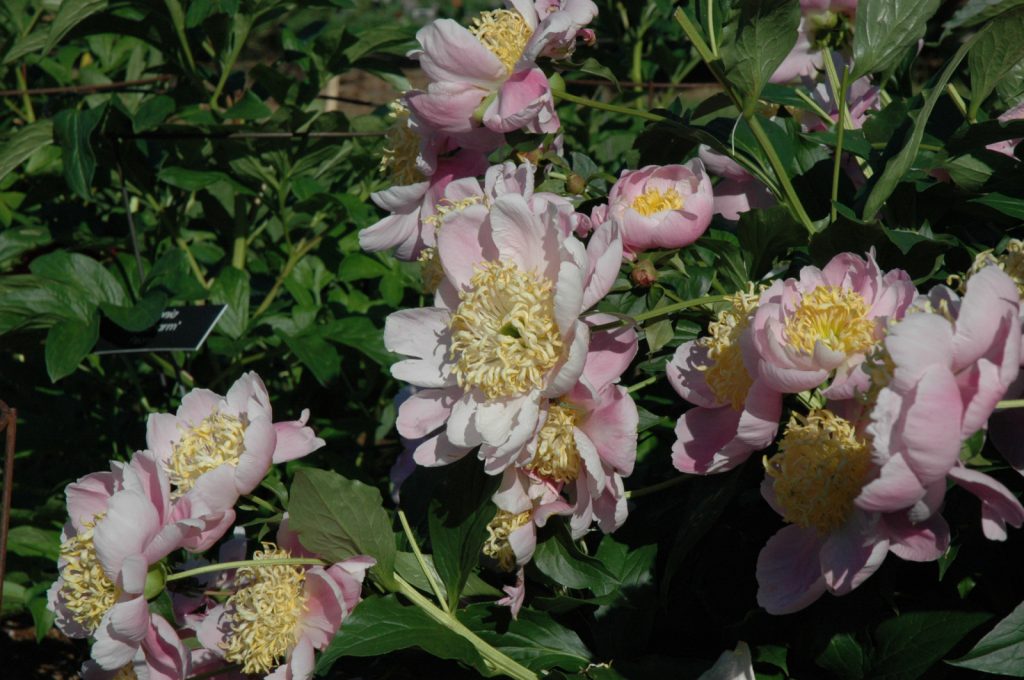
Peony (Paeonia)
Height: 60-80 cm, Spread: 60-80 cm
Flower Colour: yellow, pink, red, purple, and shades of white
Blooms: spring, early summer
Growing: Humus-rich, moist and well-drained soil in full sun or partial shade is where peonies do best. Adding lots of compost and planting at the proper depth is very important for peonies to bloom. Be sure to plant potted peonies at the same level as the soil around them, not higher.
Pruning is an essential part of gardening. Essential, but a little intimidating at first because it’s a broad subject. That said, there are some basic rules that apply to most trees and shrubs that will get you started.
There are a number of reasons to prune; the most obvious is for safety, to keep a branch from doing damage or harm by falling or rubbing against something like a building or another tree. Other important reasons include:
- Removing dead, diseased or damaged wood
- Shaping to make a plant bushier, reduce the size and bulk, or slow down growth
- Thinning to increase light penetration and airflow and reduce the possibility of disease
- Rejuvenation to encourage growth, blooming and fruit
Correctly pruning trees and shrubs can help with everything listed above and, most importantly, help maintain the health of your plants. Proper techniques and timing ensure the best results.
The Right Tools
You may need fewer tools to prune than you think!
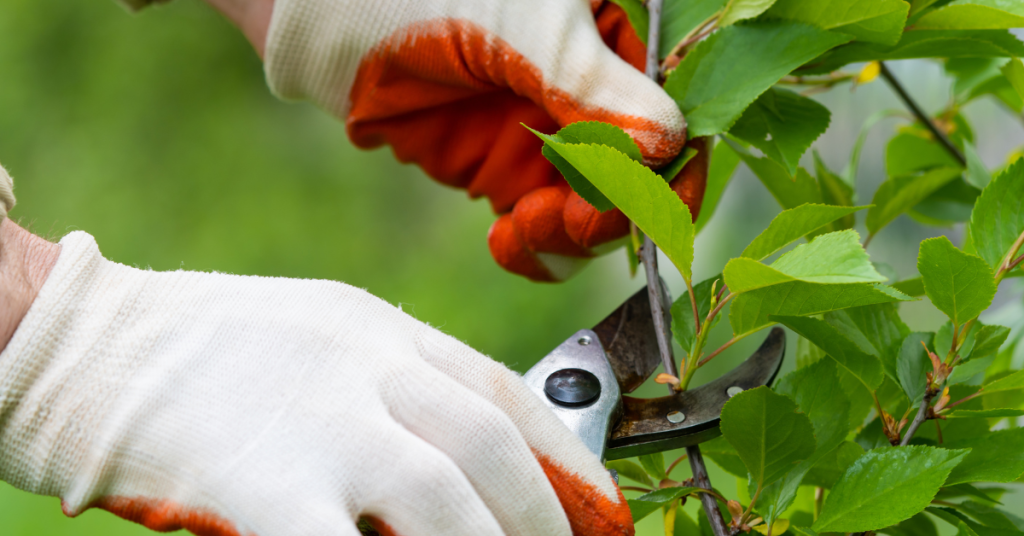
Secateurs or hand pruners work well on smaller branches.
Loppers or lopping shears have longer handles for more leverage and are ideal for medium-sized branches.
A pruning saw works best for larger branches.
Electric or manual hedge shears are best for cutting a tidy wall of foliage like hedges and shaped evergreens.
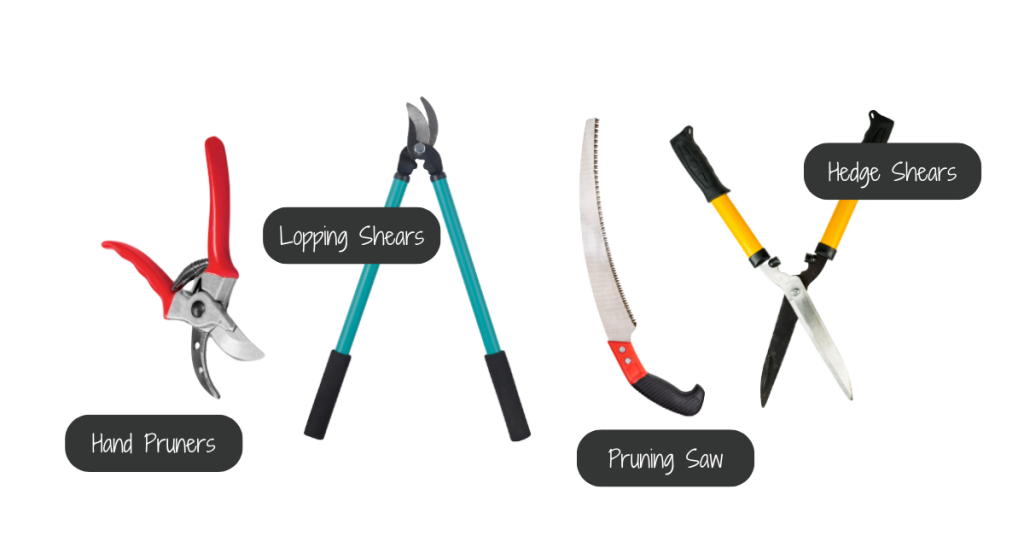
The key with garden tools is to make sure they’re sharp and sterile. This can prevent the spread of disease. Clean tool blades with rubbing alcohol after trimming each branch.
When to Prune
Pruning timing requires some research as it depends on the species of the plant and the result you’re aiming to achieve. For example, some trees may be best pruned in the winter while they’re dormant and buds have not yet appeared. To shape a tree, it’s easier to prune before the leaves have formed so that all of the branches can clearly be seen. Pruning early in the gardening season will invigorate the tree. Conversely, pruning after the tree has formed leaves in June will tend to slow down growth.
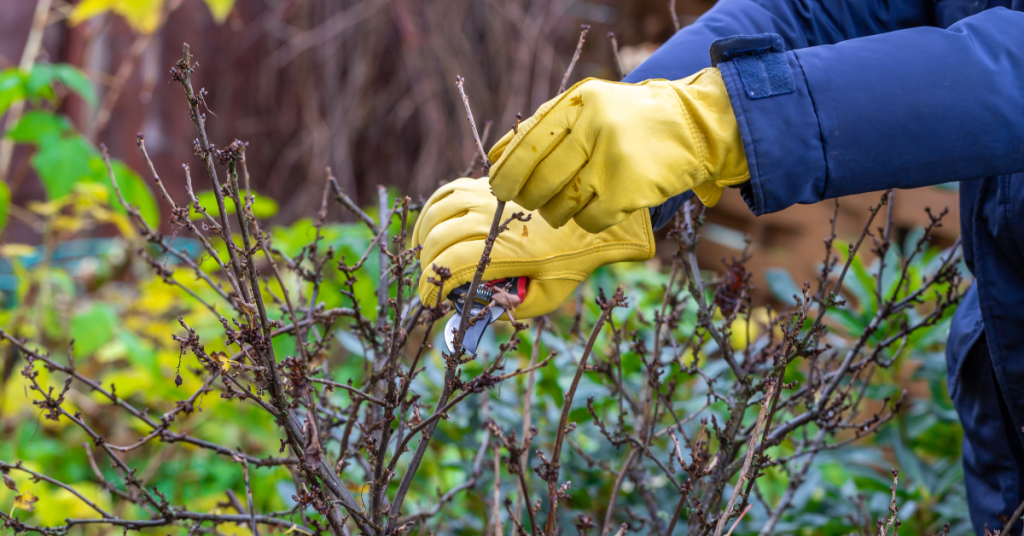
When pruning flowering trees and bushes, there are other timing considerations. Some ornamentals bloom on branches that grew the previous year. Pruning those branches too early will result in fewer or no blooms. For these plants, it’s best to wait until after they have bloomed.
If you’re unsure about pruning timing for your tree or shrub, this is a fairly comprehensive list to use as a guide. We have also linked other resources below this article.
In general, late fall or early winter is not the time to prune any plant as it encourages new growth, which may be damaged by colder weather.
Pruning Techniques
While some trees may require specific care (pines, for example), here are the basic techniques for pruning trees and shrubs. It’s a good idea to know these basics before you head out to begin cutting branches.
Examine the branch, buds and shoots before cutting. Cutting above a bud facing away from the trunk of the tree will have the branch continue to grow in that direction.

Cut on a 45° angle just above a bud whenever possible. Keep your cut above the lowest bud (the bud closest to the trunk), or the branch will die back.
Before removing a large branch, cut ⅔ off the end of the length to reduce the weight. Once the bulk of the branch has been removed, then cut the rest of the branch away from the trunk by cutting close to, but not into, the “collar” of the branch where it meets the trunk of the tree.

Now You’re Ready to Begin Cutting!
Now that you know the techniques for pruning, where do you begin? Here’s a logical set of steps to follow:
1 - Remove any dead or diseased wood
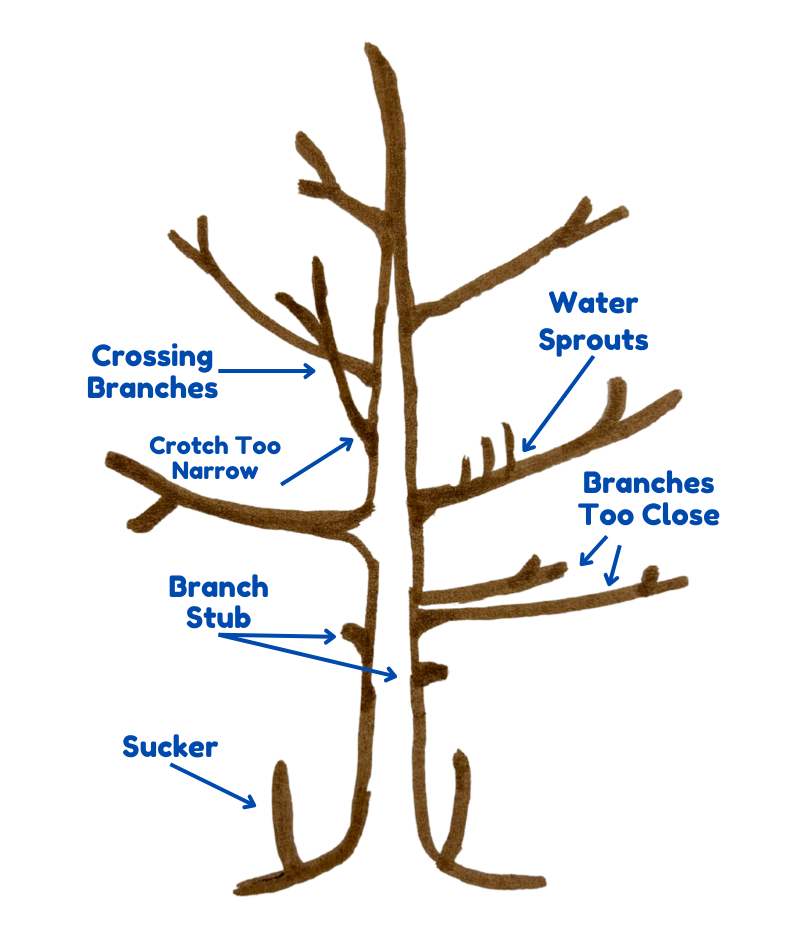
2 - Remove any branches that are crossing and rubbing together. For a shrub that’s too crowded, remove the thickest branches down to the ground first
3 - Remove water sprouts
4 - Stand back and observe the shape of the tree. If anything is not pleasing about the look (lopsided growth or branches growing too close together or at a sharp angle to the trunk, for example), begin removing or trimming back one unsightly branch at a time. Observing the shape between each cut
5 - Remove any suckers or stubs
Follow The ⅓ Rule!
Once you start, pruning can be fun, but be careful not to get too carried away. Trim up to ⅓ off of an established plant (not a newly transplanted tree or shrub) in one growing season - maximum. Cutting off too much can stress the plant and impact its overall health.
Lastly, know that you can always hire a certified arborist if the task is too much or the tree is simply too large!
Other Resources:
- City of Moose Jaw: Pruning Trees
- Landscape Ontario: Pruning Shrubs and Evergreens
- Ontario Government: Pruning Fruit Trees
- University of Georgia: Pruning Ornamental Plants
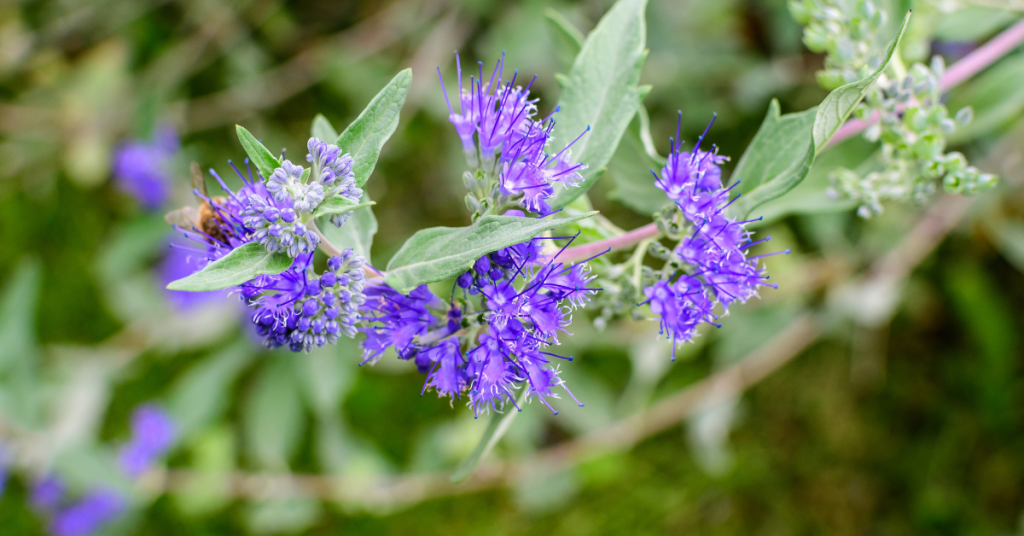
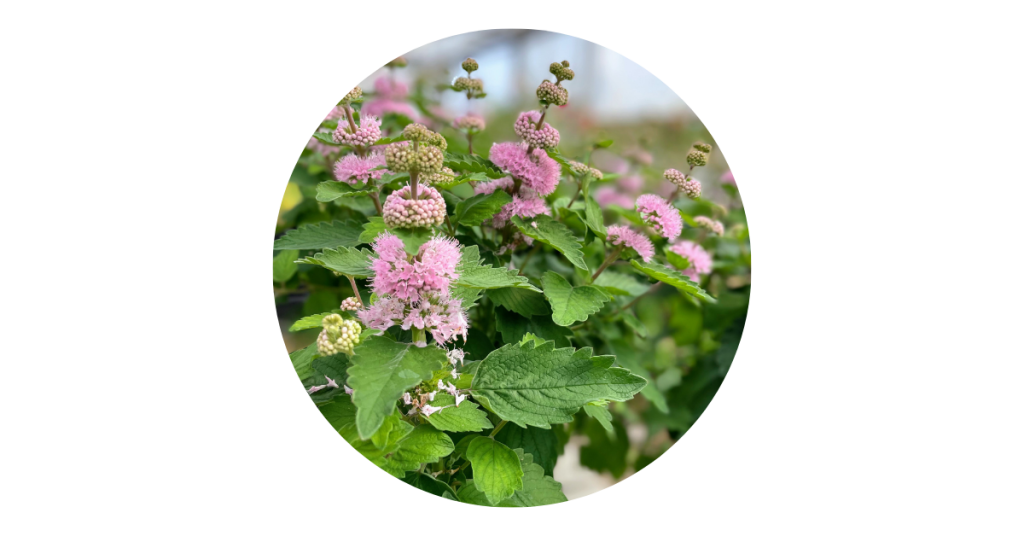
Looking for something that blooms in the garden when everything else is fading? Bluebeard (aka Caryopteris or Blue Mist) blooms from late summer until frost sets in!
This shrub-like perennial thrives in full sun and sandy soil with good drainage. In exchange for these conditions, it provides an abundance of blooms in vivid, genuine blue (a colour that’s very difficult to find in the garden) or it can have pink or blueish-purple flowers depending on the hybrid variety. Foliage can range from soft grey to golden yellow to dark and glossy green, depending on the variety. Intrigued?
Bluebeard is a great perennial shrub for almost any size of garden and does well here in Norfolk County. Plants grow in a range from two to four feet in height and width and in a well-behaved, compact mound.
Beautiful Blooms
Such a unique flower! Bluebeards form fluffy clusters of flowers, like clouds or mist and can bloom from July until there’s a frost. Like most flowering plants, deadheading spent flowers will promote continued blooming.
Bluebeard flowers have a mildly sweet scent and are full of nectar for pollinator friends like bees, hummingbirds and butterflies. The features don’t stop there! Birds love the seeds that form in the Fall too.
Planting & Care
Find a nice, sunny spot with ample space for the plant to grow. Bluebeard aren’t heavy feeders and don’t need fertilizer. Some compost in the planting hole is all that’s needed. After that, top dress with some compost each Spring.
Water in new plants thoroughly after planting them. Once established, they don’t need watering unless it’s an extremely dry season.
Crown rot from consistently over-watering, or from being planted in wet, heavy soil is the only disease to be concerned about. Branches will begin to die, one by one, if this plant has crown rot.
While Bluebeard will tolerate drought and shade, the amount of flowers will be greatly reduced.
Pruning
Bluebeard’s foliage and flowers form on new branches or new growth. So, early each Spring, cut the stems down by at least half. Cutting them down to 12-18” does not harm the plant. It will send up new shoots, and it’s those new shoots that produce leaves and blooms!
You may find that established plants have some dead wood in the centre. If this happens, prune out any dead wood, and that will ensure that your shrub stays looking full and happy.
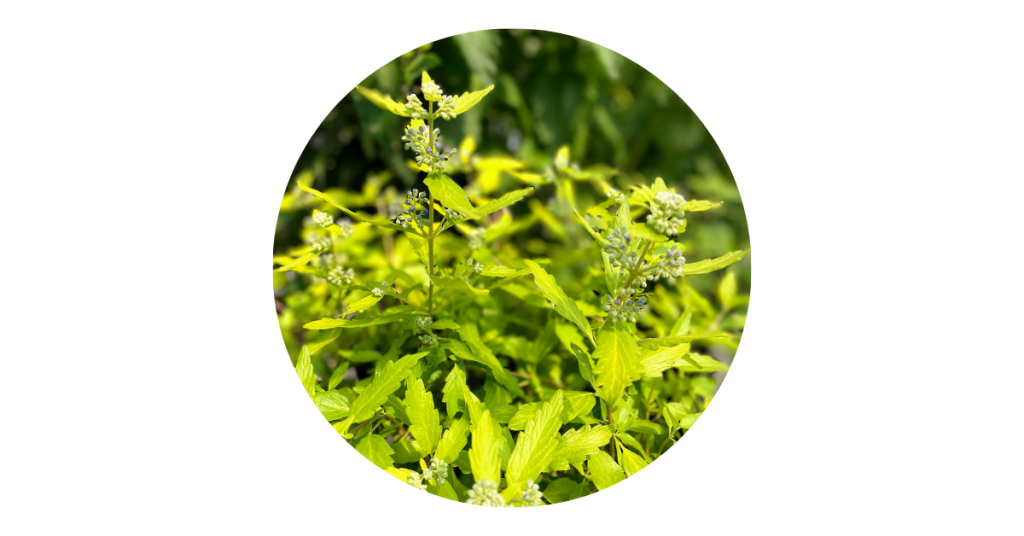
Sunshine Blue Bluebeard
Grows 2-3’ tall.
An extremely hardy variety with gold foliage and blue blooms.

One final note. Sometimes Bluebeard is called “blue mist spirea”. However, Bluebeard or Caryopteris is not related to spirea.
At some point, garden life calls to many of us. Even if you’ve never nurtured a plant before, planting something and keeping it alive offers a fun, low-cost, and highly rewarding experience. Whether you opt for a few potted plants on a patio or balcony, join a community garden, dedicate part of your yard to flowers, herbs, trees, or vegetables, install raised beds, or set aside a corner of your property to attract pollinators, it’s exciting to consider the possibilities!
The Benefits of Gardening
Stress Release
Nature has a calming effect, and gardening helps you stay grounded in the present moment, freeing your mind from worries about the past or future. For example, the repetitive task of weeding allows your brain to focus, turning the activity into a form of mindful meditation. Meditation doesn’t always involve sitting in solitude on a mountain—it can be as simple as engaging in repetitive tasks like planting or weeding. This process reduces stress and anxiety, ultimately leading to greater happiness.

Boosting Happiness
Speaking of happiness, research shows that certain bacteria in the soil get under fingernails and also get inhaled while you garden. This bacteria can boost your healthy gut flora and release happiness chemicals like serotonin. A healthy gut flora supports a strong immune system, making that dirt-under-the-nails gardener’s manicure well worth it.

Strength & Flexibility
At the start of each gardening season, you might hear from fellow gardeners about their sore muscles—backs, hands, shoulders, hips, and so on. The physical demands of gardening can be challenging at first, but over time, they help build muscle strength and improve flexibility.
If you find working in the garden too strenuous, try kneeling on a soft pad or using a small stool to sit on. Consider using a shovel or rake to assist you in moving up and down to your knees or the stool. Opt for smaller pots and smaller bags of soil and mulch - they’re easier to carry.

Growing Food & Healthy Eating
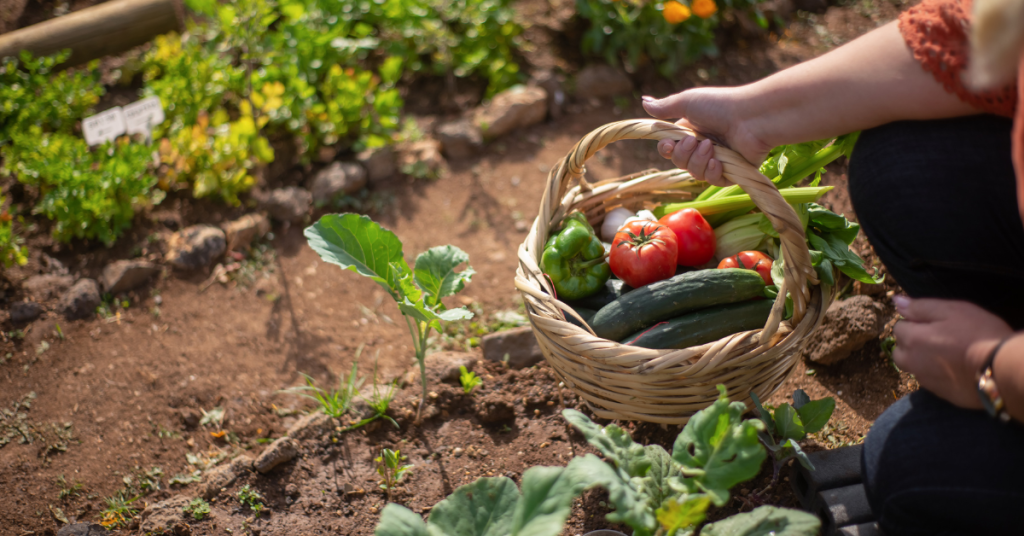
Anyone who’s tasted fresh, homegrown vegetables knows just how delicious they can be. Growing your own produce also encourages you to eat more fruits and vegetables, which naturally leads to better health. The fibre in these foods supports the healthy gut flora mentioned earlier, too!
The Perks of Being Outdoors
All the benefits of gardening—stress relief, happiness, strength, flexibility, and healthy eating contribute to your overall physical and mental well-being. But there’s more.
While outdoors, you absorb vitamin D from the sun, which boosts calcium levels in your body, promoting strong bones and a robust immune system.
Being outside and working in the garden also improves your sleep. After a day of gardening, you’re likely to feel pleasantly tired, helping you fall asleep faster and enjoy a deeper rest. Good quality sleep is essential for overall health, just as important as diet and exercise.
Finally, spending time outdoors encourages deeper breathing, which increases oxygen levels in your blood and boosts serotonin. Deep breathing also aids digestion and helps clear stagnant air from your lungs. Try stepping outside and taking a nice, deep breath. It just feels good, doesn’t it?
While your initial goals for gardening may include harvesting delicious vegetables or creating beautiful bouquets, you’ll also be improving your health in ways you might not have expected!

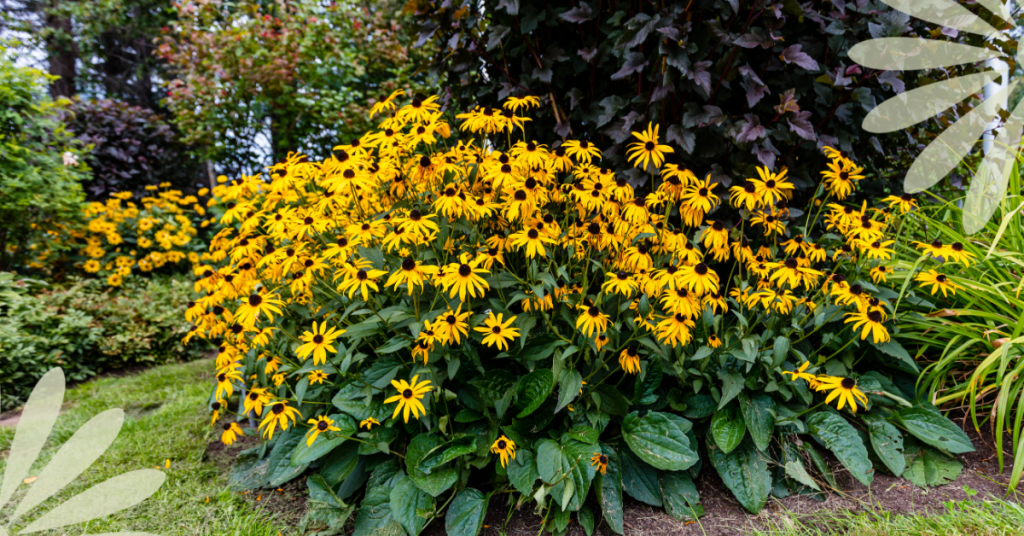
During the dog days of summer, having a resilient, dependable, and beautiful perennial flower in your garden is terrific. Meet the Black-Eyed Susan. They are quick to establish and mature, and perfect for a perennial border, cutting garden, or naturalized garden. Depending on the variety, they will grow 1-3 feet tall and spread about 2 feet wide, making them a show-stopping spectacle!
If that and the cheerful, dark-centred, golden-yellow, daisy-shaped flowers aren’t enough to draw you in, here are more reasons we love these plants!
Long Blooming
Black-Eyed Susan (Latin name: Rudbeckia) is a prolific bloomer whose flowers can last from July to October. At a time in the season when many other flowers can look weary, Rudbeckia is a shining star. Its flowers grow on sturdy stems, which adds to their resilience.

Easy to Grow
Rudbeckia are robust! They are drought—and heat-tolerant and generally do well in hard-to-grow locations. Once established, they do not require frequent watering. Rudbeckia hirta is an Ontario native plant, and exceptionally hardy.
Plant Black-Eyed Susan in full sun to partial shade and almost any type of soil. They are adaptable, generally trouble-free and do not require any extra care.
Pollinator-friendly
We aren’t the only ones who love Rudbeckia; butterflies, birds and bees do, too. This makes Black-Eyed Susan a perfect partner for other pollinator-friendly plants like Monarda (aka Wild Bergamot and Bee Balm), Gaillardia (Blanket flower), Yarrow and Echinacea (aka Coneflower).
Who doesn’t love Black-Eyed Susans? Because of the course hairs on the stems, this is a plant that rabbits and deer don’t care for.
Black-Eyed Susan is perfect to grow in a border, bed, planter, or in a field as a mass planting. It’s resilient, attractive, low maintenance and a beneficial addition to any garden!
It’s the question we probably hear the most when it comes to flower gardens…”What can I buy that will flower all season long?” While some annuals bloom for a very long time, no plant will bloom from early Spring to late Fall, and no vegetable plant will produce for that duration either. The solution? Succession Planting! It’s a simple strategy that maximizes the time your garden is blooming or producing vegetables.
What is Succession Planting?
Plant early (earlier than you think) and plant things in succession that thrive in the current weather conditions - right up until there is a hard frost. Simply plan to plant another crop or flower once one is harvested or finished blooming. Many gardeners here in southern Ontario wait until the May 24th weekend to plant everything - all at once. Succession gardening staggers planting times so there is a continuous harvest of vegetables or an everchanging series of blooming flowers. While it takes a little more planning, the results are worth it.


A Succession of Blooms
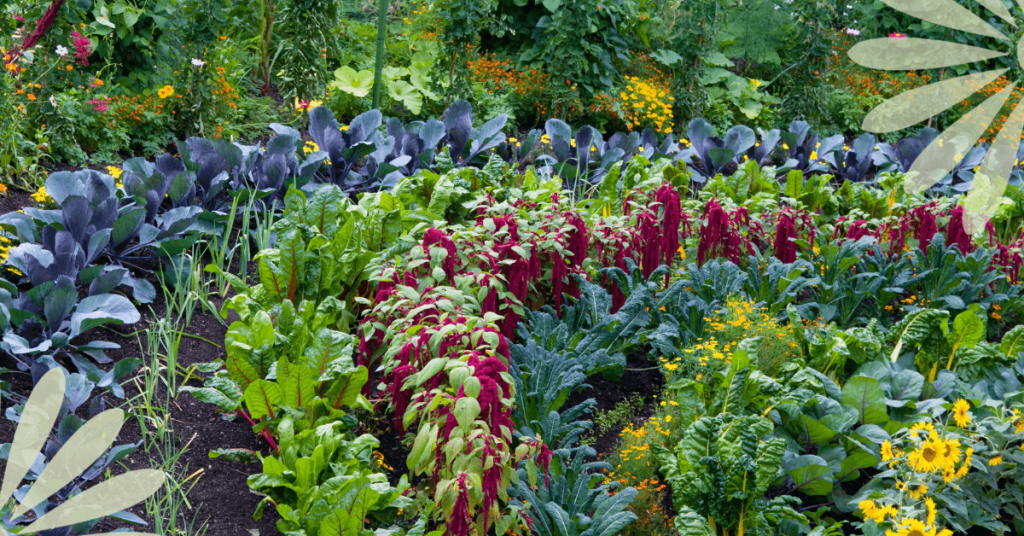
The best way to ensure a parade of colour in your garden is to choose a variety of annuals, perennials, and biennials that bloom at different times. There is a notion that a garden can only have annual flowers or just perennials, but the best results come from a mix of both. You’re allowed to mix them together! Most annuals bloom during the heat of the summer, but perennial flowers can extend the season for you by blooming in early spring or in the fall. A list of perennial bloom times can be found in this Landscape Ontario article to help you choose your plants.
Some flowering plants, like pansies, love cooler weather and are easy to purchase in the spring. A little planning and planting in the fall will provide a flush of colour from Spring bulbs like Daffodils, Crocus, and Hyacinth. Spring bulbs look great alongside early-blooming shrubs or trees like Canada Serviceberry and Forsythia.
April or early May is also an excellent time to directly sow annual flowers like sunflowers, nasturtium, borage, and herbs like cilantro and dill to give them a head start.
Cool Weather Veggies
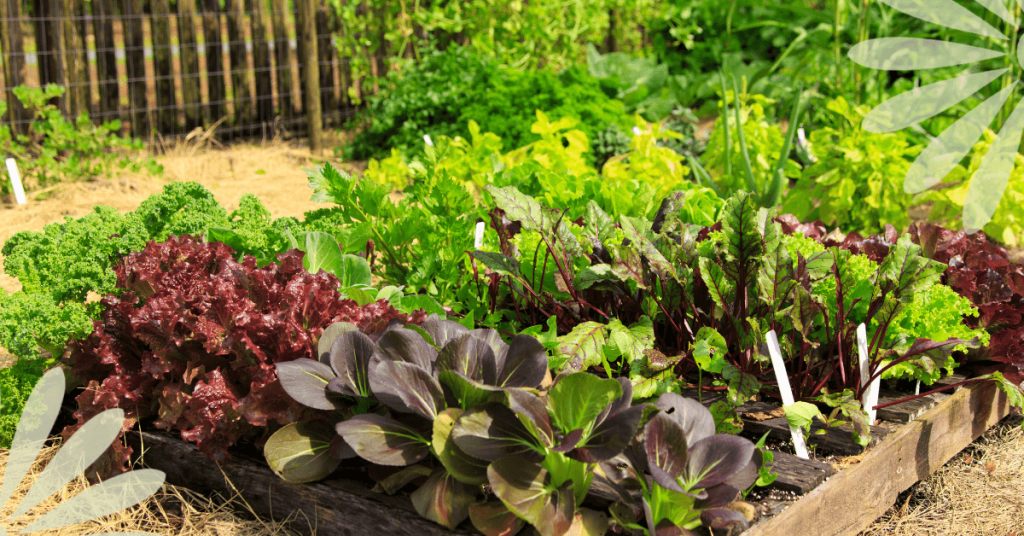
It’s surprising how many vegetables thrive in cool weather and withstand light frost. Keep tender plants indoors until the third week of April and slowly harden them off, but get outdoors any time in April and begin directly sowing fast-growing cool crops like leafy greens, root vegetables, and some herbs.
Lettuce planted in late spring will tend to “bolt” and taste bitter once hotter temperatures arrive. Lettuce loves cooler conditions. So you don’t have to wait until May 24th to sow lettuce and other vegetables. Which Vegetables? We have a list of examples for you in our article: Starting Seeds Indoors and Cold Weather Crops. Starting early means you can harvest a whole crop of vegetables before you plant heat-loving crops like peppers and tomatoes.
Sow All Season
If you’ve ever been overwhelmed by planting too much of one crop at once, you will love succession gardening. While you may be able to freeze a batch of 2,000 string beans from the entire packet of seeds you planted in one go, sometimes stretching out the harvest is nice. Plant smaller batches of beans, peas, and herbs like cilantro, dill, and basil every three weeks to ensure continuous summer harvests. This approach is also known as interval gardening.
Sow cool-weather crops like leaf lettuce, Swiss Chard, and Radishes in April or early May and again in September.
Continuous Harvest
Once your early Spring vegetables like lettuce, peas and radishes have been harvested, it’s time to sow your second crop of cool-weather veggies for harvesting in the Fall. Do you know veggies like parsnips, Brussels sprouts, peas, and kale have more flavour after a mild frost?! A mild winter this year meant we were still harvesting some Brussels sprouts in December.
Double Up
Another tip is to plant things that grow well together. For example, plant seeds for a root crop like carrots below your tomato plants, peas or bush beans in the vegetable garden. The carrot crop will be next after the tomatoes, peas or beans are done for the season. There are many combinations like this - tomatoes and basil, kale and dill, lettuce and beets, broccoli and borage, just to name a few. Doing this helps to increase the production of your plot of land and keeps the soil covered, which is always better for soil health.
One final strategy for flower succession planting is to use containers. Consider placing a well-positioned pot of annual blooms beside perennial plants resting after flowering.
Once you get started, researching companion plant combinations like these can be a fun game. These combinations will extend the time you can enjoy lots of colourful blooms and increase the amount of vegetables a garden can produce!
Come along on a little journey with me and imagine this… It’s Springtime. The sun shines, and the air finally feels warmer after a long, grey winter. You take a little trip to your favourite garden centre and find that special plant you’ve been reading about and hoping for. Of course, you buy the plant, take it home, and proudly place it on your sunny patio on this beautiful day. Two more sunny days go by, and the plant does not look good at all. It seems to be dying, so you give it lots of water, but that makes no difference. It is in fact dying. So disappointing! How could this be happening?
In our excitement to get outdoors and plant flowers, or add greenery, we forget that the plants we’ve been growing indoors or inside a greenhouse, aren’t used to the elements in the great outdoors. They’ve been sheltered indoors, out of the wind and direct sun, and watered and fertilized regularly with the utmost attention. They’ve been pampered in a plant spa and are quite literally hothouse flowers! Being plunked outside afterwards is the equivalent of us going outside in a bathing suit with no sunblock on for the first sunny, warm days of Spring, exposing our lily-white skin that’s been covered up by a parka all winter long!
Red, sunburned skin is not a great image, but hopefully, this comparison helps to explain the importance of transitioning or hardening off plants. Much like us, indoor plants need to be gradually exposed to the elements and given protection in the process.
The same will be true if you have planted seeds indoors or purchased greenhouse-grown seedlings. Seedlings grown in a greenhouse, a sunny window, or under grow lights in your home need up to 14 days to acclimate to being moved from their cozy indoor space to the great outdoors.
What is Hardening Off?
Hardening off ensures that you will not lose another plant or seedling! It’s a sensible process for all the plants you’re moving from indoors to outdoors. By helping plants or seedlings to gradually toughen to withstand the elements, you prevent transplant shock, which can cause your plants to be stunted or, worse, die.
To ensure success, the process of hardening off takes up to 14 days, so you will want to begin two weeks before transplanting plants and seedlings into your garden. Houseplants may only need 7 to 10 days, but tender, tiny seedlings need the full two weeks to strengthen and get used to their new environments.
When to Harden Off
Cold-weather plants like lettuce, kale, pansies, violas, dianthus, and potted or forced spring bulbs can be hardened off once daytime temperatures consistently reach 5 Celsius, usually in April in southern Ontario.
Perennial plants, tropical houseplants, and heat-loving seedlings like most annual flowers, tomatoes, peppers, and basil should wait until temperatures are around 7-10 Celsius to begin hardening off. For vegetables and annual flowers, start hardening off around May 10 here in Norfolk County if your target is planting seedlings around May 24th.
Successfully Hardening Off Your Seedlings and Plants
Days 1 and 2
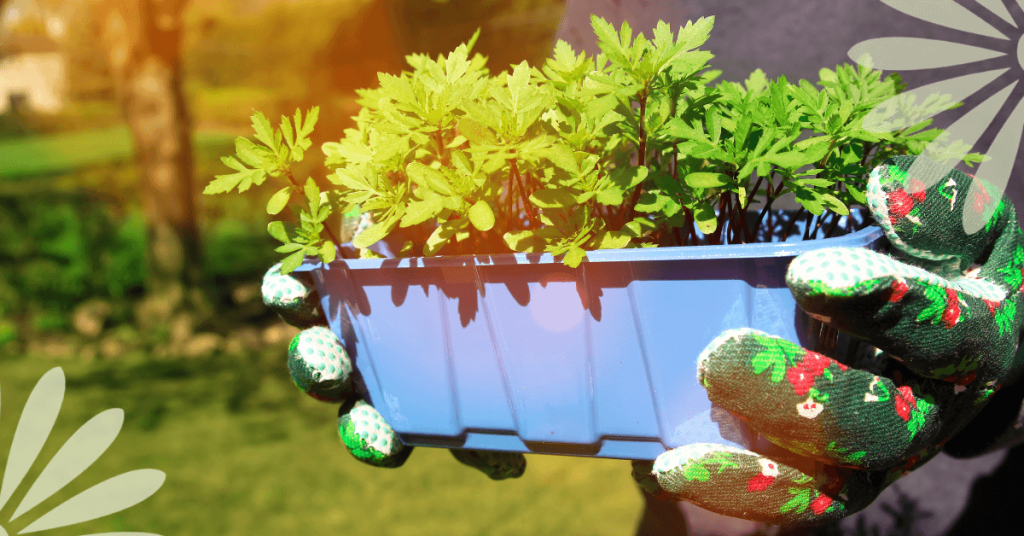
Begin on a day that is optimally warm (At least 5 Celsius for cold-weather-tolerant plants, 7 Celsius for heat-loving plants, or 15 Celsius for tropical houseplants) and place your plants or seedlings outside in full shade and protected from the wind.
If you don't have a wind-sheltered area in the shade, putting your plants in an open cardboard box is a good way to protect them from the wind at this stage.
Leave them in this protected area for 1-2 hours before returning them indoors.
Days 3 to 5
Each day, gradually increase the length of time your plants are outside and begin to place them in an area where they will get dappled shade and some wind.
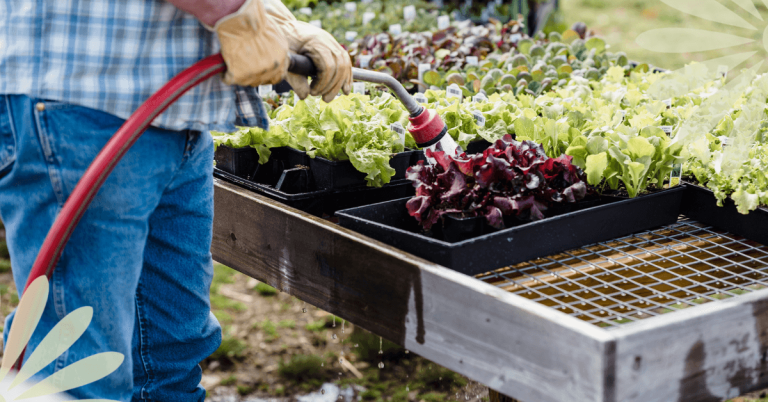
Pay close attention to watering while you’re hardening off your plants as they will require more frequent watering.
Days 6 to 10
On day 6, start to increase your plant’s exposure to direct sunlight by placing them in the morning sun, which is less intense than the afternoon sun.
Begin to leave them outside overnight from this point on unless the temperature is expected to drop below 7 Celcius.
Days 10 to 14
After 10 days of acclimation, it is safe to move houseplants that require more sun to a location that meets their needs.
After 14 days of acclimation, it’s safe to transplant seedlings to their place in the garden or to large pots if you’re growing in containers.
As soon as your plants are transplanted, be sure to water them well! This will help them transition and eliminate air pockets in the soil that can harm the roots.
If the temperature drops and a fluke, unexpected freeze is forecasted after you’ve planted everything, cover your plants with row cover, cloches (you can use plastic water jugs with the bottom cut out, just leave the screw cap off to act as a vent), or cardboard boxes to protect them.
To summarize, when Spring arrives, protect your skin with sunblock, and harden off your plants before you move them outdoors!

Fall, also known as Pumpkin Spice Season, is well underway. The leaves are changing colour and we’re saying so long to another garden season. But wait! There’s still plenty of enjoyment to be had from your hard-working garden. Temperatures may be falling, but Autumn is the perfect time to squeeze in a few more plants, and to slow down and connect with family, friends, and neighbours by hosting a backyard party.
Autumn Entertaining Ideas
This is a list of our favourite ideas to inspire your outdoor party plans and keep us in mind if you’re looking for decorations like pumpkins, gourds and flowers for your next event. Eising Porch Packages make decorating fun and easy!
Outdoor Movie or Game Night
Bring the patio furniture close to the house to protect everyone from a fall breeze, grab the basket of blankets or throws, warm some cider, and pop the popcorn. There’s nothing like a beautiful Autumn evening, now that the bugs are gone, to enjoy a night under the stars watching a great movie, your favourite team sport, or cracking open a fun board game.

Candy Apples Extravaganza
Create a self-serve candy apple bar with slices of apples on wooden skewers, bowls of dips like caramel, chocolate, hazelnut spread, and almond butter, and small bowls of toppings like mini marshmallows, sprinkles, and chocolate chips.
Harvest Abundance
Fall is the perfect time to enjoy a potluck featuring everything in season, or preserved from the garden. Sweet potatoes, squash, and yes, even Pumpkin Spice. Decorate the table with seasonal fruit, flowers, potted fall plants from Eising Greenhouses and fairy lights to add to the ambience. Maybe even a grazing board packed with favourite snacks.

Wreath or Garland Making Party
Looking to layer your Fall décor on the front door or a fireplace but don’t have a wreath or garland? Pick out a design with friends, and have everyone contribute one item for everyone to use. Forage for items in your yard, or buy them, then get together and create!
Backyard Bonfire
If you’re lucky enough to have a fire pit, or chiminea, Fall is the perfect time to host a backyard bonfire on a cool night. Marshmallows and hot chocolate will make it super cozy!

Oktoberfest Party
You may not want to hire the polka band, but soft pretzels, sausage, and local apple cider should definitely be on the menu. Fill a galvanized tub with ice, and add mason jars with premade drinks to make hosting a breeze.
Pumpkin Painting Party
All you’ll need is a pile of pumpkins and gourds, an inexpensive tablecloth, paint supplies, and some inspiration. It’s a canvas that can be painted over and over, so don’t be afraid to get creative. Kids love this, but so do adults!
Whatever you’re planning, we hope that you enjoy the season. You know where to find us: 814 Cockshutt Road in Simcoe, ON
P.S. Autumn is also the perfect time to plant perennials, shrubs and trees - stop by and peruse the garden centre to find some great last minute garden additions!

In this case, the plants Hens and Chicks, not the feathery friends.
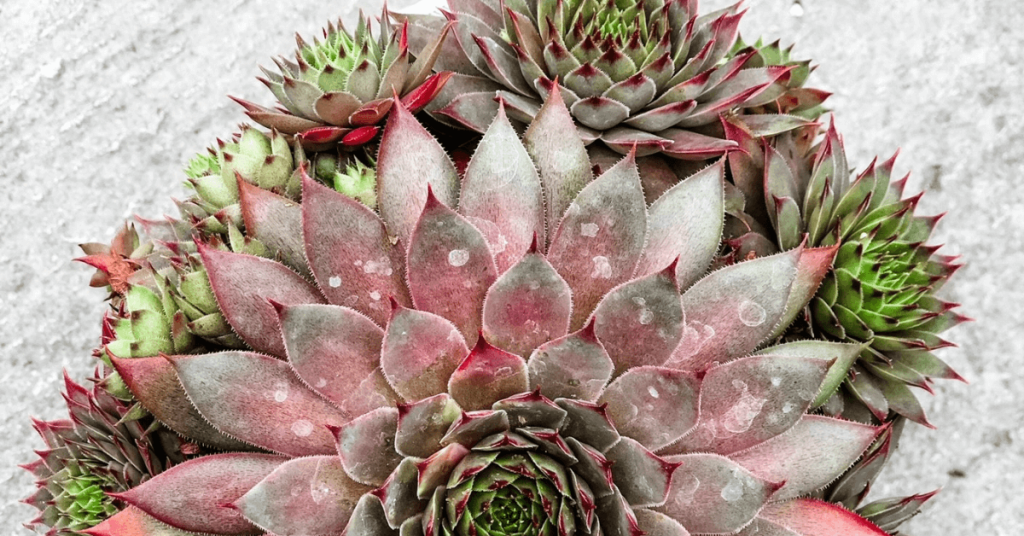
Sempervivum, also known as Hens and Chicks or Houseleek, are a group of succulents that are becoming very popular in Southern Ontario. Here’s why these cold hardy perennial plants are gaining attention.
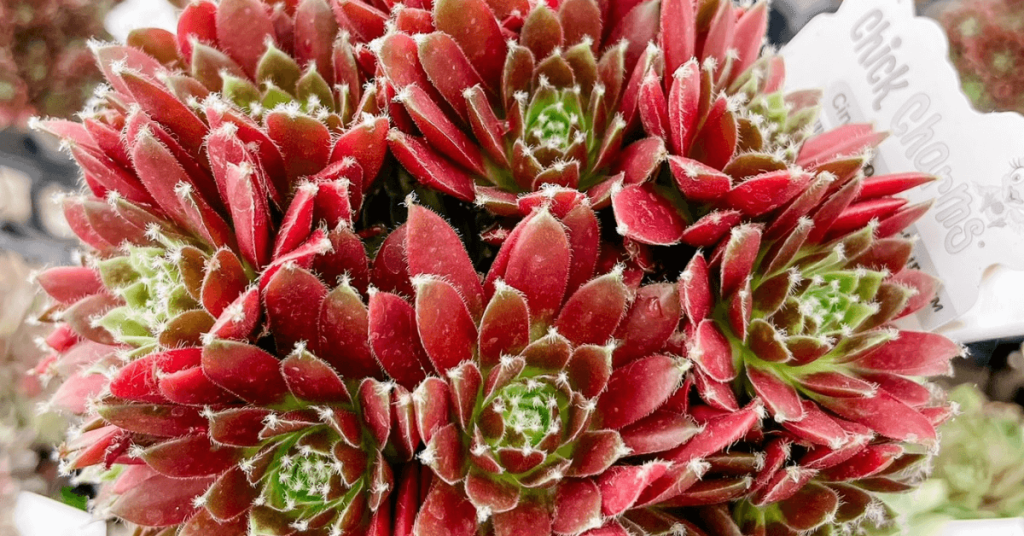
Low-maintenance
Low-maintenance is the item on everyone’s checklist, right? Hens and Chicks are known for being no-fuss. Sempervivum require very little soil, fertilizer or water. They’re sun-loving, hardy, resilient, and drought-tolerant. When you don’t have a lot of time to garden, you’ll be grateful that your Hens and Chicks need minimal care once they become established.
Versatile, and Did We Mention Low-maintenance?
Sempervivum will grow in full sun to partial shade, and average to poor soil as long as they have good drainage. They will manage just fine in poor soil and harsh conditions like heat and cold! This makes Hens and Chicks the perfect candidate for that spot in the garden where nothing else wants to grow. The spot that’s too hot, or too windy, the soil is rocky or gritty and not ideal or it’s eroding, like on a slope.
These rugged warriors can be grown on rooftops, ledges, walls, in rock gardens, hanging baskets, troughs and containers. Just make sure there are drainage holes. Too much water is their only enemy and will result in their roots rotting.
Chick Charms
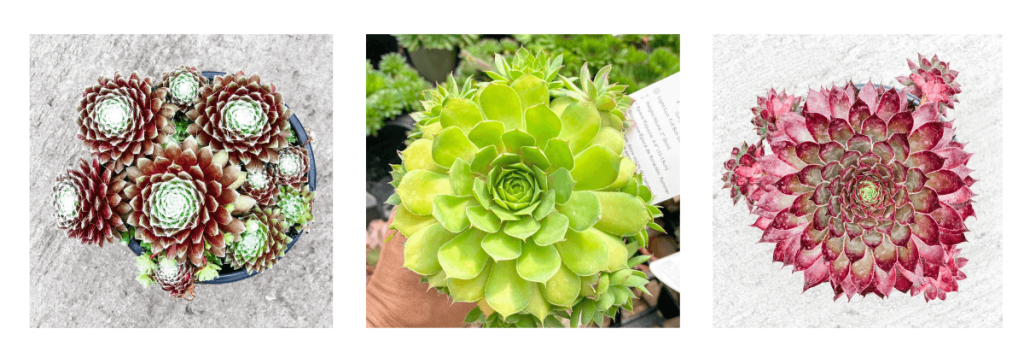
While most Hens and Chicks are low-growing, 8-15 cm tall, they will all spread 30 cm and more - as much as you like, really. This is because they produce small plants, known as “chicks” or offsets around the main plant. The “Chick Charms”. Chicks can also be transplanted to start a whole new plant.
Tough and Beautiful
As a ground cover, Sempervivum can add visual interest and contrast to a border of annuals or perennials.
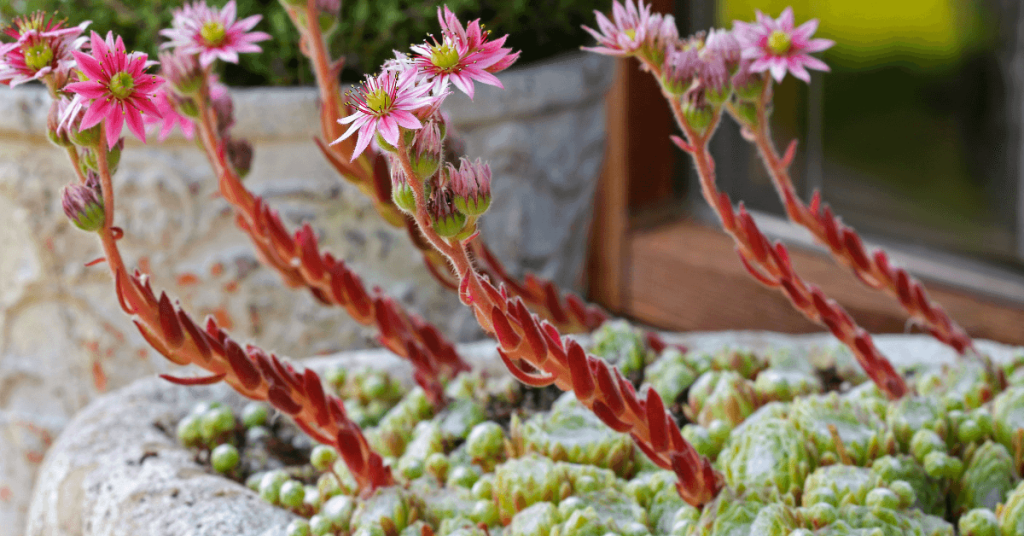
While they’re known for their pretty rosette-shaped clusters of foliage, you may not realize that Hens and Chicks also come in a variety of colours, and produce stunning blooms in summer.
Once a plant blooms, deadhead the flower and pull up the soft parent plant with it. The plant dies when it blooms, but new chicks will grow and replace it.
Hens and Chicks fleshy leaves make them less attractive to many garden pests and they are generally resistant to diseases. Tough plants for sure, and worthy of a spot in the garden. The next time you’re in Eising Garden Centre, we recommend that you peruse the Sempervivum section here in Simcoe and give these outstanding succulents a try!
Ah, the sanctuary of a nice, cool shade garden on a hot summer day. Lush foliage comes to mind, and maybe a nap in a hammock. But what do you do when you have a shady spot in the garden that isn’t so lush and could use a boost? A planted container or two can be just the thing!
Here’s a scenario that can happen to any of us. A plant isn’t doing well and needs to be moved. Or maybe something just didn’t survive. Now what to do with that gap? The beauty of planting in pots is that you can move them around, but also create conditions for plants that you might not have in the garden. For example, one of the toughest places to grow anything is in dry shade - tree roots can compete for space and for moisture. That’s when planting in a container, or several is the way to go.
What is a Shade Garden?
In general, a shade garden is an area that gets less than six hours of sunlight in a day. When choosing plants, remember that some will tolerate shade better than others. When it comes to plants, shady areas are divided into three categories:
- Full shade - no direct sunlight, only reflected sunlight from surrounding areas
- Partial or Semi shade - in the sun for part of the day and shade for the rest
- Light shade - sunlight that is filtered, like under a tree with smaller leaves

Choosing Containers and Pots
While containers can be made out of a variety of materials like plastic, concrete, wood or fiberglass, the key is using a pot with at least one drainage hole.
Keep in mind that smaller pots will dry out more quickly. Larger pots retain moisture longer, but when they’re full of soil and plants they get heavy. Look for a Goldilocks pot that’s “just right”, or splurge on a Schwarzenegger-sized pot if you’re looking to build up those biceps!
Whatever pot size you choose, always use a growing medium that’s designed especially for containers. At Eising Garden Centre you’ll find potting mix which is light and airy, unlike garden soil, which will compact and retain too much moisture. If you’re using a big container, you may want to use a smaller, more shallow pot as an insert, or put natural mulch in the bottom before you add potting soil. Doing this will reduce the amount of soil used, and keep the container lighter as well.
Plant Selection
This is the fun part! While many plants do well in pots, here are just some of our favourite shade plants for containers:
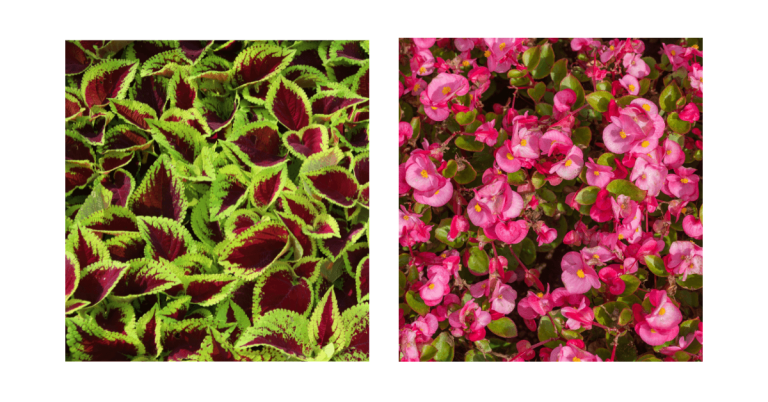
Coleus
Coleus is an annual that will grow in full shade and comes in a variety of very interesting leaf colours. This plant is known for its vibrant leaf colours, not its blooms.
Begonia
Begonias come in a wide variety of shapes and colours, making them a versatile annual for containers. Some varieties are happy in full shade, while others like light, or filtered shade. Most begonias like good drainage so their roots are not too wet.
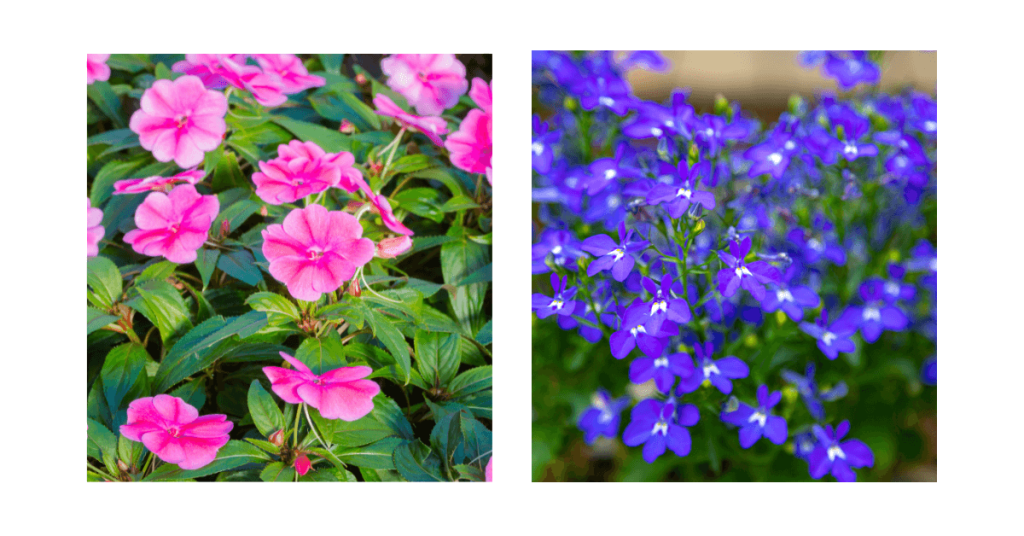
Impatiens
These annuals are popular for a reason! They come in a wide range of very brightly coloured flowers that do well in full shade.
Trailing Lobelia
The trailing type of Lobelia is an annual that grows well in shade. The masses of prolific blooms come in many pretty colours to mix and match with other plants.
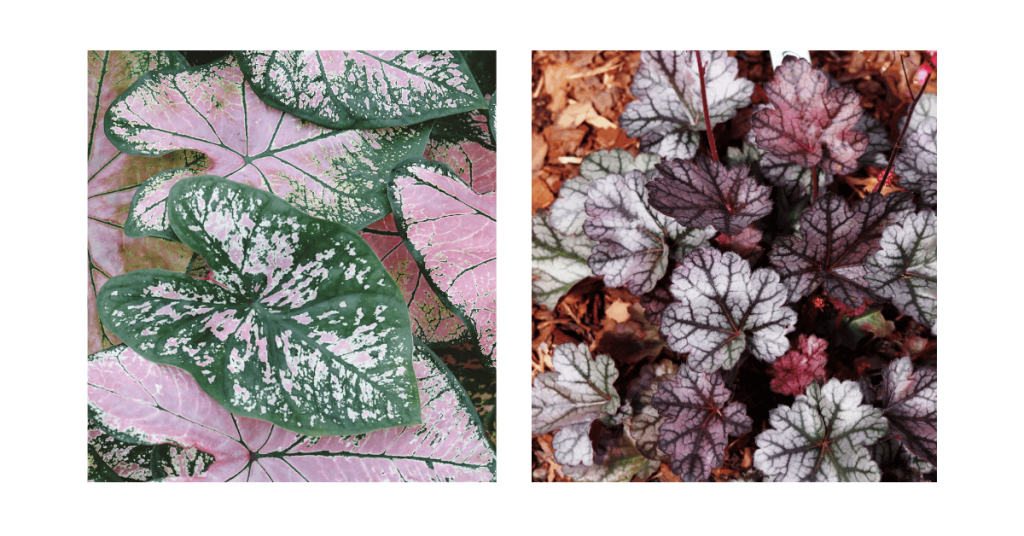
Caladium
A showy annual with vibrantly coloured leaves that will illuminate any shady area. Caladiums like partial to full shade but if you’re a pet owner be careful - this plant is toxic to cats and dogs.
Heuchera or Coral Bells
Coral Bells are perennials that also come in a wide variety of beautiful leaf colours. This plant will thrive in shade, but can also tolerate some sun and they are drought tolerant.
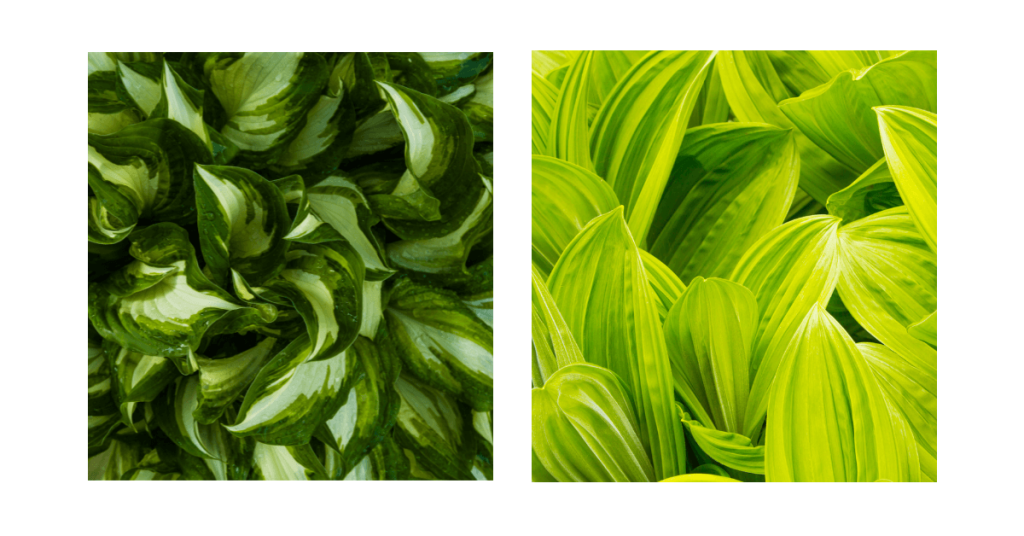
Hosta
Known for its lush foliage, this perennial comes in such a wide variety of sizes, colours, and sun tolerance, and is by far a favourite. Many people don’t think of it as a container plant but for all of the features mentioned, it makes a great choice as a potted plant.
Fertilizer
Like all plants in containers, check the moisture levels often and provide water and fertilizer throughout the growing season. This article contains more information on caring for annuals and perennials.
Design
While you can mix and match any plants for shade containers, this article about container design ideas for sun-loving annuals may inspire you!
As mentioned above, many plants will do very well in containers. It’s also fun to experiment with annuals and perennials you can’t necessarily grow in the garden, or for anyone with a patio or balcony. Don’t be afraid to mix annuals and perennials together in a container, or to use one statement plant. Some potted plants will need extra protection in the winter like perennials, small trees, and shrubs, but growing plants in containers is a great way to add a splash of colour, or include some bold foliage in tough-to-grow areas.