
How to Keep Your Hanging Basket as Gorgeous as the Day You Brought it Home, All Summer Long!
By Dave Zeldon and Ely Schweyer
Remember your Mother's Day hanging basket with its variety of colours, textures, and plant combinations? Maybe there was Verbena cascading elegantly with their colourful star like blossoms, double Begonias for the porch in spectacular shades of reds, pinks, and burgundies, and of course the vigorously growing Petunias and Geraniums, to name just a few. But as the Summer goes on, they just don’t seem to have that same stamina.
To keep your hanging baskets in great shape and avoid the dry, wilted, bald spotted, leggy look that occurs to containers every August, one should follow these easy tips.
Watering
Plastic, fibre, and especially moss lined baskets dry out quickly. They should be checked twice daily and watered every day. Be sure to wet the moss sides as well.
Try to maintain uniform soil moisture. When watering, fill the top of the container with pooling water until it ‘pees,’ and allow it to drip out of the bottom of the basket every time you apply water. Frequent severe wilting will impact upon the quality of the basket.
At this time of year, one could take the basket down and soak it in a tub of water for 20 minutes to hydrate the entire root ball, once every week.

Deadheading
Remove spent flowers on a weekly basis (this is called deadheading) to prevent plants from going to seed. This will encourage more flower production. Part of the beauty of the mixed basket is its prolonged display, just like in your garden.
Check for Pests!
During your weekly deadheading, keep a watchful eye out for aphids, whiteflies, and caterpillars. If you see any, try a quick spray of insecticidal soap to keep them from becoming an infestation.
🖱️ If you're noticing fungus gnats in your hanging baskets, find more on eradicating them here!
Pruning
Not every plant in the basket will be at its peak all season.
Cutting plants back after a flush of bloom will tidy them up and prepare them for a fresh crop of flowers. Meanwhile, other varieties will begin putting on a show. This is especially true for Petunias.
A good cut back of long, lanky branches will reap benefits.
Fertilizing
Daily watering means nutrients can leach out of the soil before the plants can absorb them. The baskets should have both slow release granular added to the growing media and a weekly feeding of 15-30-15 soluble fertilizer. Use a solution containing micronutrients, as plants like Petunias need extra iron.
Sheltering
It has been suggested, if possible, that during stretches of extreme heat, give your baskets a break and move them to a cooler, shaded spot to de-stress for a couple of days. This is also suggested when heading on vacation. Your flowers will rebound to their former beautiful selves!
We hope this long term hanging basket care guide helps you enjoy your purchase all summer long! For more information - and beautiful plants – visit Eising Greenhouse and Garden Centre! 🌸
By Dave Zeldon and Ely Schweyer
This is the time of year that most garden centres will have on display their wide variety of Amaryllis bulbs, including the evermore popular waxed dipped. These enormous bulbs that are appearing now will be ready to burst into bloom within 4-8 weeks after planting.
Non-Wax Dipped: Planting
All Amaryllis need is a bit of commercial potting soil that should not cover the shoulders of the bulb (try leaving about 1/3rd of the bulb showing above the soil line), with the nose (or narrow end) of the bulb peeping well over the top of the pot. Make sure that you use a well-drained container that is 3-4” bigger in diameter than the bulb itself.
☝️A heavy clay pot will prevent this top-heavy plant from toppling over. To achieve continuous bloom, plant at intervals of two weeks for stunning colour in your home.

Non-Wax Dipped: Care
Once leaves emerge, fertilize once a month with a 20-20-20 water soluble fertilizer for houseplants. Water sparingly and wait for the miracle in a warm sunny room. Sub-irrigation or watering from the bottom of the drip tray will keep the surface soil dry, thus keeping and bulb rot organisms and those pesky fungus gnats at bay.
Non-Wax Dipped: It's Not Done Yet!
When blooming is over, remove the scape (or flower stock) and place the plant in a sunny spot and continue to water. This is to allow the leaves to regenerate the bulb. In springtime, when all danger of frost has passed, bring the bulb outdoors and let it spend its holidays in a shady spot. In some varieties the leaves will die back in September to give the plant a rest for a couple months. Stop watering and store the bulb on its side in a cool place for about eight weeks, when the leaves will once again begin to emerge.
Amaryllis can go 3-4 years without repotting as they don’t mind a little crowding. Try growing a couple of bulbs in larger pots to see if you can get a clump of flowers from the offshoots or babies that will develop after a couple of years.
Or, Try One of These Wax Dipped Bulbs!
Now growing more popular are the care-free waxed-bulb Amaryllis!



Experienced growers and beginners alike love that these waxed bulbs do not need to be planted or watered! Each of these robust bulbs are carefully prepared in festive-coloured wax, allowing you the freedom to place them among your holiday decorations.
Simply keep the bulbs at an ambient room temperature of at least 16C (70F) for beautiful blooms in five to six weeks.
These novelty items are low commitment! Their only fault is their lack of longevity - gardeners don’t get to enjoy them after year as these waxed bulbs were designed to be a one-use throwaway item!
BUT with a little luck and perseverance you may be able to save the bulb for next season after blooming. All you have to do is to carefully remove the wax layer, remove the flower stalk and place the bulb and with its remaining leaves into a pot of good growing media, allowing the leaves to regenerate the food stores in the expired bulb.
If you’re looking for more information – or perhaps, Amaryllis – visit Eising Greenhouse and Garden Centre! Happy Holidays! ✨
How to Stay Warm and Stylish
By Ava Green
Colder temperatures are around the corner, and some of us are not looking forward to it! Whether you love winter or not, Sassyfras Boutique inside Eising Greenhouse and Garden Centre has the cozy, stylish clothes you need to look your best and stay warm all season long.
Begin with Layers
Fall, winter, and spring can all bring unpredictable weather to our corner of southern Ontario, so layering is key. Winter is an especially good time to follow the 3-layer rule:
- A base layer keeps you dry
- A mid-layer adds warmth
- An outer layer protects from the elements
Build Your Cold-Weather Capsule Wardrobe
Creating a winter capsule wardrobe makes dressing warm and stylish easy and stress-free. Here are a few ideas to get started:
Base Layer:
Start with a basic tee, a long-sleeve mock neck, or a long-sleeve crew neck top. Choose natural fabrics that wick moisture and keep you dry.

Tights or leggings make a great foundation under dresses or pants for added warmth.

Mid Layer:

For warmth, add a sweatshirt, a crewneck sweater, a v-neck sweater, or a turtleneck.

If you’re stopping at two layers, choose a chunky knit or oversized sweater for a cozy statement look.
On top of your tights or leggings, try a faux-suede skirt, faux-leather pants, wide-leg trousers, jeans, or a dress, maybe even a comfy sweater dress.
Outer Layer:

Top it all off with an eye-catching outer layer! Try a bomber jacket, blazer, faux-fur jacket, puffer vest or jacket, or a trendy coatigan for warmth and style.
Accessorize to Elevate Your Look
What makes an outfit really stand out? The accessories! At Sassyfras, you’ll find everything you need to complete your winter look.

From belts (perfect for cinching a blazer or dress) to trendy handbags, classic tote bags, sunglasses, and a wide selection of everyday jewellery, including locally made, one-of-a-kind pieces. You’ll find the perfect finishing touches that reflect your personal style.
Mix, Match and Stay Cozy
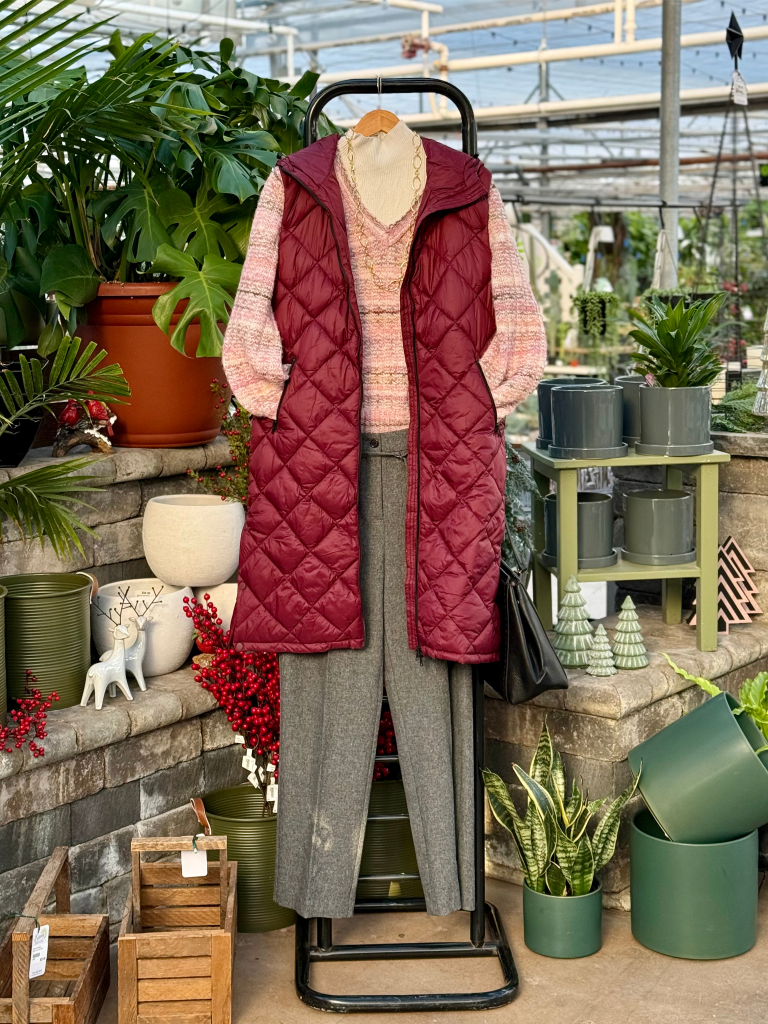
Once you’ve built your base, mid, and outer layers, the fun begins! Mix and match your pieces to create new combinations that make winter dressing simple, cozy, and chic.
With just a few well-chosen items from Sassyfras, you’ll be ready to step out in style, no matter how cold it gets! ❄️
By: Dave Zeldon and Ely Schweyer
If you’ve ever wondered how the warm weather succulent came to be a seasonally regarded indoor plant, or how to keep one going, read on!
History and Cultural Significance
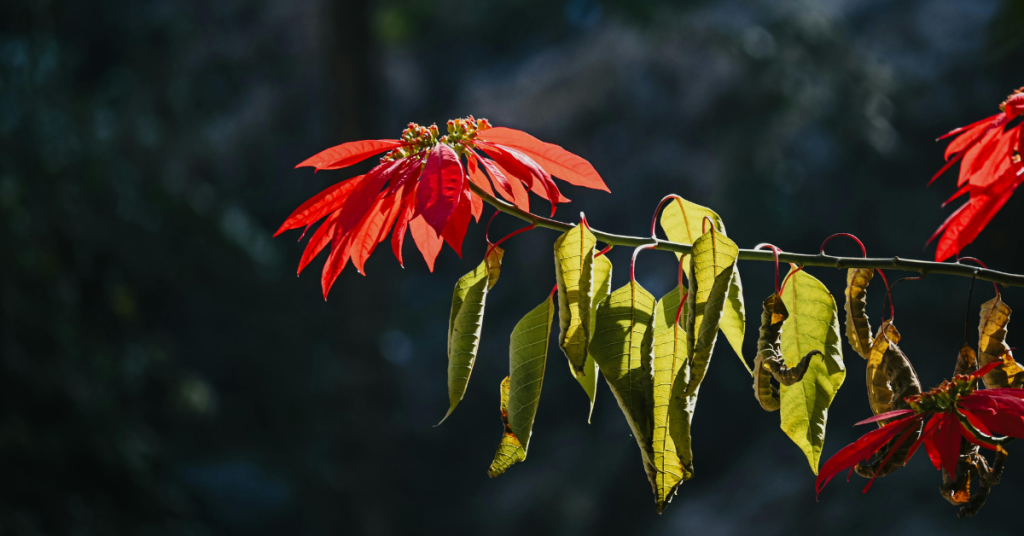
The Poinsettia was named after Joel Roberts Poinsett, the first U.S. Minister to Mexico. He introduced this native Mexican the United States in 1828. In the Mexican Christmas tradition, the star-shaped leaf pattern is said to symbolize the Star of Bethlehem, and the red colour represents the blood sacrifice through the crucifixion of Jesus.
Since the species is native to Mexico and found in the wild in deciduous tropical forest at moderate elevations, we then have a challenge to keep this plant alive and in a healthy form in our colder, northern climate.
It's Just A Rumour!
There is a common misconception that the poinsettia is highly toxic. This is not true.
Yes, it may be mildly irritating to the skin or the stomach if it is eaten, but otherwise, there have been no documented cases of poisoning. The origin of this myth could be found in the fact that most plants of the spurge genus (Euphorbia) are indeed toxic. Fortunately, this family member is a good one!

Here are Some Helpful Hints to Get the Most Longevity Out of Your Plant:
☝️Unsleeve the plant as soon as possible as the leaves may become droopy if left too long in the wrapper. Fortunately, the plant should recover in a few days if this does occur.
☝️If you want to try to keep your plant until next Christmas then fertilize after the blooming season with an all-purpose fertilizer, repot it later in the early Summer and then introduce it to 12 hours of uninterrupted darkness come September.
For more information on Poinsettia care (i.e., temperature, lighting, and watering), visit Ava's blog Caring for Poinsettias.
If you’re looking for more information – or perhaps a Poinsettia – visit Eising Greenhouse and Garden Centre! Happy Holidays! ✨
Figures.
By Dave Zeldon and Ely Schweyer
Now that we’ve brought our plants inside the house to over-winter, we begin to notice those slender, dark gray flies (0.2- 0.4 cm long) flitting about atop the pot soil. Yuck!
These insects are known as fungus gnats (Bradysia sp.). Whereas they are considered only to be a minor nuisance in house plants, due to their sheer numbers hovering around an attractive plant, they can certainly take away from its appeal. Below is a bit about these pests and some basic control measures.
How Do Fungus Gnats Affect Your Plant?
Other than their swarming presence, fungus gnats are not a direct threat to your plant, but an indirect threat. As their name implies, they are concerned with snacking on the fungi mycelium living in your plants’ soil. (Yes, it’s there and it’s a good thing!) However, these little flies can transfer disease between plants, making them nuisance pests.
A Quick Look at Their Life Cycle:
Adults may lay 300 eggs at a time, which hatch a week later into tiny, threadlike larvae. The larvae feed upon organic matter in the potting soil. After two weeks, they pupate into winged adults, that have no trouble annoying you to no end.
Basic Control Measures:
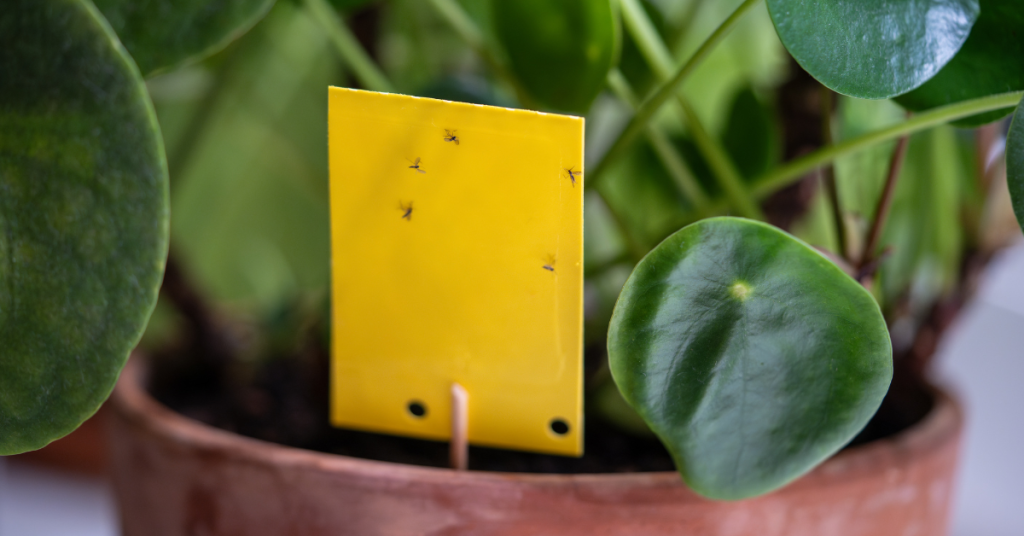
- The fastest and easiest method of control is to catch the flying adults with yellow sticky cards. The large cards can be cut into little strips and mounted onto little wooden splints (popsicle sticks) then placed around the base of the plant out of the line of sight.
- Water your potted plant from the bottom (sub-irrigation) by adding water to the saucer it is sitting in. This will keep the soil surface dry, making it uninhabitable for the hatching insect larvae. If the surface soil is already very wet, try placing a few potato discs or slices on the surface of the soil. This will attract the larvae as they migrate to the potato to feed. Simply replace the discs every three to four days with fresh slices to eliminate the next generation of adults.
- If you have a large number of plants afflicted as in a greenhouse situation, an application of predatory nematodes (Steinernema feltiae) as a soil drench is suggested. Nematodes will attack the fungus gnat larvae in the soil which will in turn lead to more nematodes being produced.
Good Bugs Are Working at Eising Greenhouse and Garden Centre!
Here at Eising’s Greenhouse and Garden Centre, we practice what as known as I.P.M. or Integrated Pest Management. Since we try to create a perfect environment for our plants, we also, unintentionally create perfect conditions for their related pests. To keep the pests at bay, we institute series of steps:
1 - Cultural Controls: We select only the healthiest of plant material to sell and keep them healthy through proper fertilization and growing conditions. We’ve learned that insects are attracted to stressed-out plants!
2 - Physical Controls: We are constantly walking through our plant aisles checking for insect and disease presence and removing the affected plants. Also a clean growing area means there is less chance of pest populations building up on alternate host plants such as weeds.
3 - Biological Controls: At the beginning of the growing season, even before there is any evidence of pest problems, we introduce naturally occurring predators into the growing areas. This is to be at the ready for when the pests do arrive!
In our arsenal we have a series of tiny parasitic wasps, microscopic wire-worms called nematodes, predatory mites as well as bacterial inoculants. So therefore, we cannot spray any chemical insecticides as they will hurt our very valuable biological cache!
Did you ever imagine all the behind-the-scenes work that goes into your plant purchases from Eising's to make them the best value around?
For more information – and bug products - visit Eising Greenhouse and Garden Centre soon! 🪰
By: Dave Zeldon and Ely Schweyer with tips from Mary K, Zach C, Sandy M, and Jeanine LT!
Now is the time to prep our outdoor landscapes for the coming cold weather and the ensuing spring! Perhaps your autumn is calmer than your spring, and this is the best time to clean up and begin new projects. The following are some simple but effective tips to get your yard winter-ready - so your spring will be a little more pleasant for you!
Planting
When warm weather still allows it, plant trees, shrubs, perennials, and bulbs to allow them to establish for budding and blooming next spring.
Pond Care
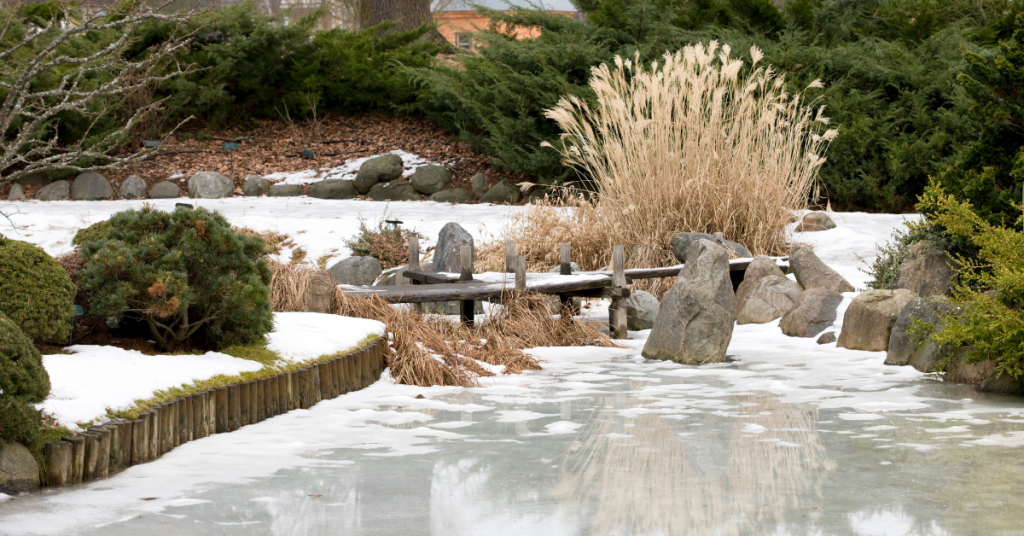
Mary, our perennials gal, suggests not removing any water from your pond but instead aerating it all winter. She skims out the leaves to maintain the balance of the nitrogen cycle in the water and suggests waiting to do a big pond clean out in the spring, as that’s when the water’s culture can bounce back easier.
Fertilizing
After top growth of your landscape plants ceases, reduce your annual fertilizer application by up to half of the requirement. Autumn is a major root growth period for woody and herbaceous perennials; roots will grow and absorb nutrients whenever soil temperatures remain above 5 °C but can be over fertilized quickly in these cooling temperatures.
Produce gardens could benefit at this time from a top layer of compost that will break down during the winter so it isn't too 'hot' for spring planting.
Leaf Litter
Here’s our pitch on the ‘leave it – don’t leave it’ debate: It DEPENDS.
Ideally, we should leave litter leaf on the ground for our pollinator friends and endangered species like fireflies to hide out in the winter. But, there are appropriate situations in which to remove leaf litter.
- When they’re covering your bulbs and tender perennials, remove SOME. Leaf litter acts as a ground insulant, which can amplify our temperamental zone 6b temperatures. This freezing and thawing can often confuse and kill early spring bulbs and tender perennials.
- Zach, our trees and shrubs guy, suggests that if a tree shedding leaves has been diagnosed with pests and fungi, remove the leaf matter to reduce the spread to other plants. Diseased matter should always be removed in a quarantined fashion and taken to a landfill or burned.
☝️Please note: Unless diseased, compost your leaves, they contain vital nutrients specific to the plants they came from!

Lawncare
With autumn mowing practices you have the opportunity for the addition of much needed organic matter for your lawn, which is also an excellent source of slow release nutrients. Keep mower blades sharp since leaves can be tougher than grass. Raise the mower height up and mow leaves when they are lightly wet (e.g., morning dew). This will keep the leaves from blowing all over and will prevent the mower from getting bogged down in wet leaves.
See more on general lawncare in Dave's Lawncare 101 post.
Clean Up
Now is a good time to wash your tools with soap and water to prevent diseases spreading from plant to plant.
☝️Mary's tip is to spray garden tools with PAM before use, so the dirt slides right off them!

Pruning Perennials
Mary, our perennials gal, suggests leaving things until frost to cut back. This way they're easier to compost. Make sure to leave seedheads (i.e., coneflowers and black-eyed Susans) for wildlife, and things like hydrangeas for winter interest.
☝️Make sure if things are cut back, to leave them sticking up enough you can still find them in the spring!
Dividing and Moving Perennials
Moving or dividing perennials in the autumn is a great way to reduce your work next spring. The cool, moist weather is an ideal time for perennial roots to become well established.
👍The rule of green thumb for moving perennials: If the plant blooms between early spring and late June, then early fall division/moving is ideal. If the plant blooms after late June, then early spring division is ideal (except for Peonies which should only moved or divided in the fall, Poppies in August, Irises in July & Lilies in the Fall).

Overwintering Trees
Zach and Sandy from trees and shrubs suggest a couple of things to help your favourite trees along this winter:
- To reduce winter injury in evergreens: Keep properly watered throughout the growing season and into the fall is another way to reduce winter injury. Decrease watering slightly in September to encourage hardening off, then water thoroughly in October until freeze-up.
- Cedars - Spray cedars with antidesiccant spray (available at Eising GC) or wrap in burlap (with stakes to create dead air space) so wind doesn't dry out and burn tips.
- Fruit trees - In late fall, spray fruit trees with sulfur-horticultural oil (available at Eising GC) for protection against fungi and pests overwintering in the bark.
- Ornamental trees - wrap the base of young trees to protect from chewing rodents.
- Pruning trees - trees that prefer winter pruning rather than spring pruning are maples, oaks, birches, and elms, as well as with fruiting trees such as apples and pears. This ensures blight and pests will not affect the tree's open wounds.
If you missed the frosty deadline for transplanting trees, Sandy suggests insulating unplanted potted trees to help them best survive the coming winter. Here are some methods:
- Double-pot your tree with an insulative barrier (i.e., burlap, straw, mulch, etc.) stuffed between the two pots and securely cover the top with tarp to deflect moisture.
- Bury your potted tree in the ground, level with the top of the pot (don’t forget to dig it back up!) and mulch the area.
- Huddle all of your unplanted trees and plants together when using the above methods.

Mulching
Mulching is one of the simplest and most beneficial practices you can do for your garden. Just by simply placing a protective layer of material over the bare soil will benefit the soil as it decomposes providing the much-needed organic matter which improves root growth, the infiltration of water and the nutrient-holding capacity of the soil while reducing soil erosion.
A good layer of mulch allows the soil to warm more slowly in the spring, so perennials aren't fooled into breaking dormancy too early, as you want the ground to stay cold until it really is spring!
☝️Make sure your mulch application won't stunt the growth of your plants come spring as discussed in our Transplant Troubleshooting blog post!
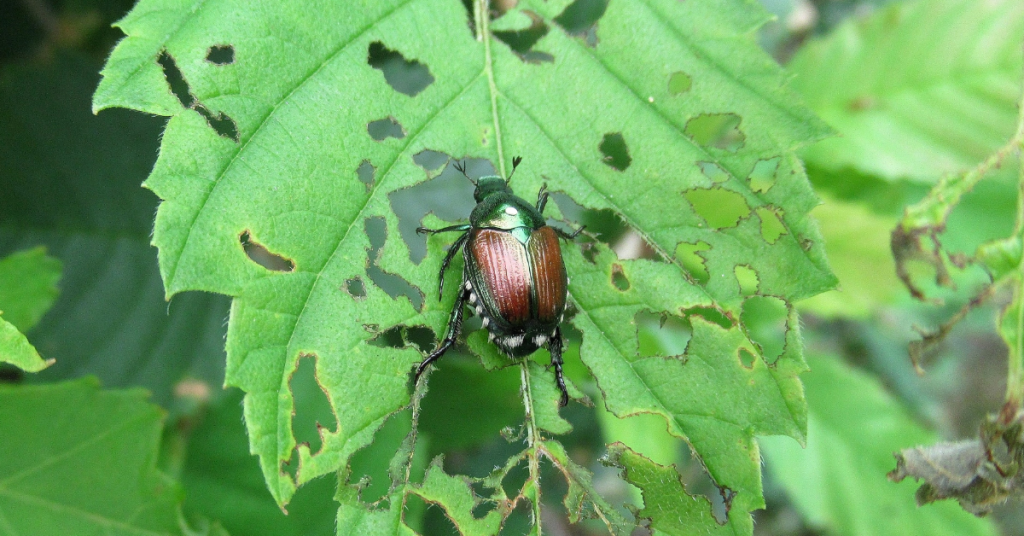
Japanese Beetle Prevention
Nematodes are microscopic worms that should be applied to lawns that have been ravaged by grubs especially of the Japanese Beetle. Nematodes have a short shelf life and must be refrigerated until they are applied. Normally, they are sprayed onto the lawn from mid-May to mid-June and then again (for best practice) from mid-August to mid-September.
Pots
To prevent freezing and cracking, Mary suggests emptying and turning your pots upside down. You can disinfect at this time too.
Design Time!
Jeanine, from production, suggests writing down what worked best in your produce garden this year so you can implement it again in the spring.
With the trees and land being barren enough you can see its contour, now is a great time to plan ahead for spring landscaping! Don't forget Eising GC would love to offer help with your landscape designing!
We hope these tips help your landscape plants enjoy your winter abode as much as you do this season, for more information - and plants – visit Eising Greenhouse and Garden Centre! 🍁
Dealing with water restrictions or choosing to conserve water? You’re not alone. Many gardeners in Norfolk County are facing the challenge of keeping gardens thriving with less water. The good news? A lush, colourful garden is still within reach—thanks to drought-tolerant perennials.
When we think of drought-tolerant plants, cacti might be the first thing that comes to mind. But there’s a surprising variety of beautiful, hardy perennials that can handle our region’s dry spells—no desert landscape required.
While these plants do need regular watering when first planted, once established, they’re low-maintenance and well-suited to Southern Ontario’s climate, including periods of limited rainfall.
Full Sun Ground Cover
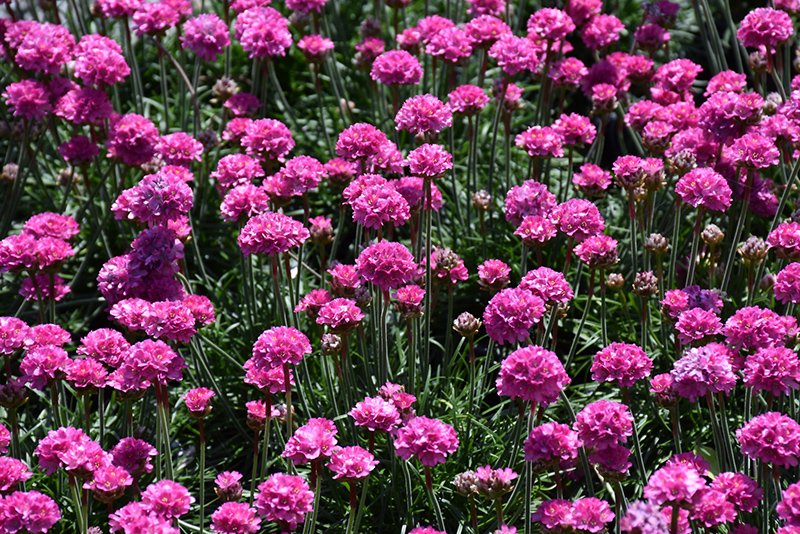
Botanical Name: Armeria maritima 'Dusseldorf Pride'

Botanical Name: Delosperma 'Fire Spinner'
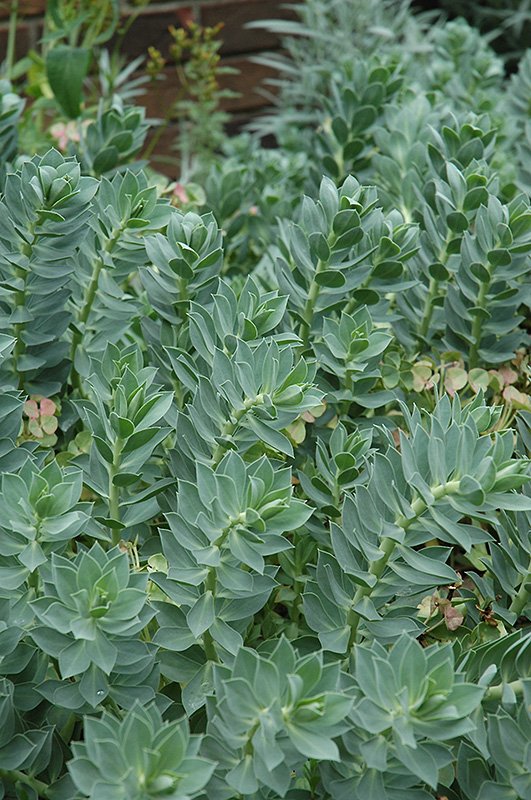
Botanical Name: Euphorbia myrsinites
- Candytuft (Iberis sempervirens)
- Catmint (Nepeta x faassenii)
- Hardy ice plant (Delosperma nubigenum)
- Hens and chicks (Sempervivum tectorum)
- Moss phlox, creeping phlox (Phlox subulata)
- Pincushion flower (Scabiosa japonica var. alpina) (S. ‘Butterfly Blue’)
- Pinks (Dianthus alpinus)
- Rock cress, wall cress (Arabis species)
- Rock rose, sun rose (Helianthemum hybrids)
- Spurge (Euphorbia myrsinites) (E. polychroma)
- Stonecrop (Sedum acre) - dwarf varieties
- Thrift, sea pink (Armeria maritima)
- Thyme (Thymus species)
Full Sun, Medium to Tall Plants
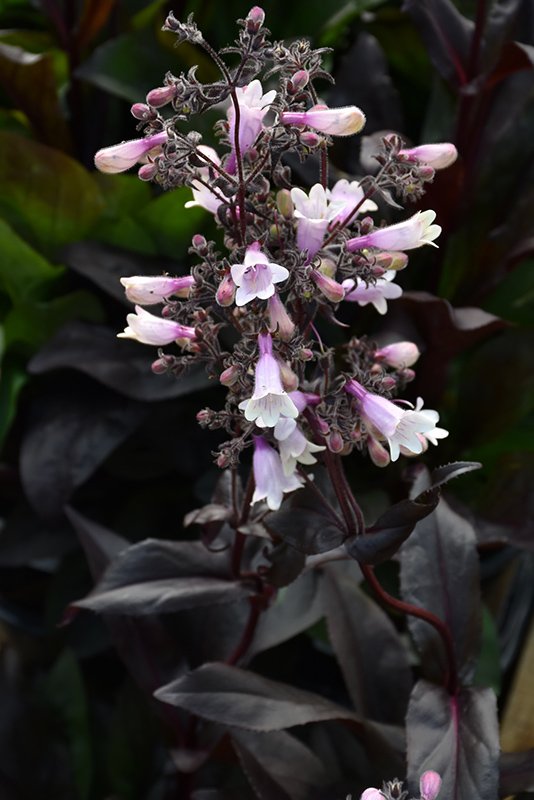
Botanical Name: Penstemon 'Dark Towers'
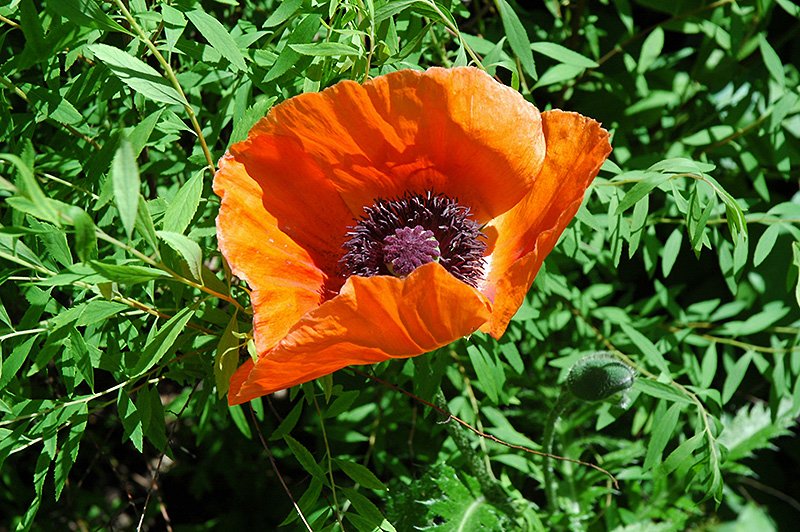
Botanical Name: Papaver orientale
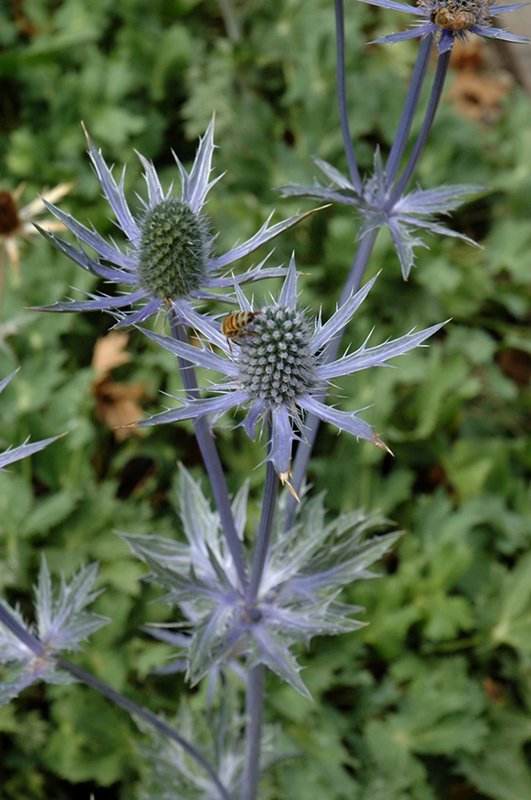
Botanical Name: Eryngium 'Big Blue'
- Beard-tongue (Penstemon digitalis) – Native
- Bergenia (Bergenia crassifolia)
- Black-eyed Susan (Rudbeckia hirta) – Native
- Blanket flower (Gaillardia x grandiflora)
- Butterflyweed (Asclepias tuberosa) – Native
- False indigo, wild indigo (Baptisia australis)
- Hairy penstemon (Penstemon hirsutus) – Native
- Lanceleaf coreopsis (Coreopsis lanceolata) – Native
- Lavender (Lavandula angustifolia)
- Orange coneflower (Rudbeckia fulgida ‘Goldsturm’)
- Perennial cornflower (Centaurea montana)
- Poppy (Papaver species)
- Purple coneflower (Echinacea purpurea)
- Prickly pear cactus (Opuntia compressa) – Native
- Russian sage (Perovskia atriplicifolia)
- Salvia (Salvia nemerosa hybrids)
- Sea Holly (Eryngium species)
- Silver sage, wormwood (Artemisia ludoviciana)
- Threadleaf coreopsis (Coreopsis verticillata) – Native
- Yarrow (Achillea millefolium)
Full Sun Grasses
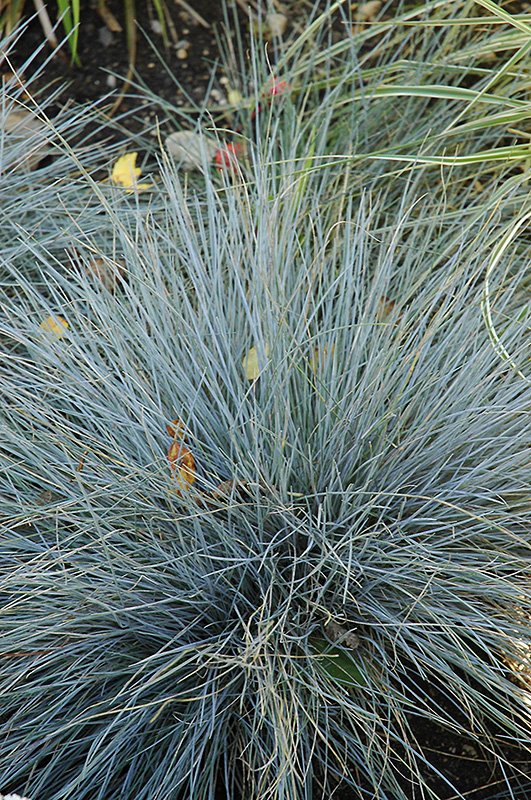
Botanical Name: Festuca glauca
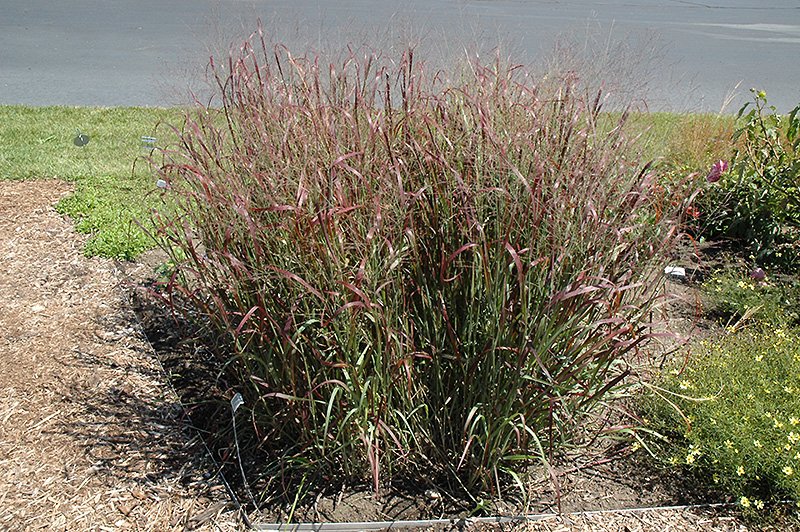
Botanical Name: Panicum virgatum 'Prairie Fire'

Botanical Name: Calamagrostis x acutiflora 'Karl Foerster'
- Big bluestem (Andropogon gerardii) – Native
- Blue fescue (Festuca glauca)
- Blue oat grass (Helictotrichon sempervirens)
- Feather reed grass (Calamagrostis x acutiflora ‘Karl Foerster’)
- Little blue stem (Schizachyrium scoparium) – Native
- Switch grass (Panicum virgatum) – Native
Groundcover for Shade
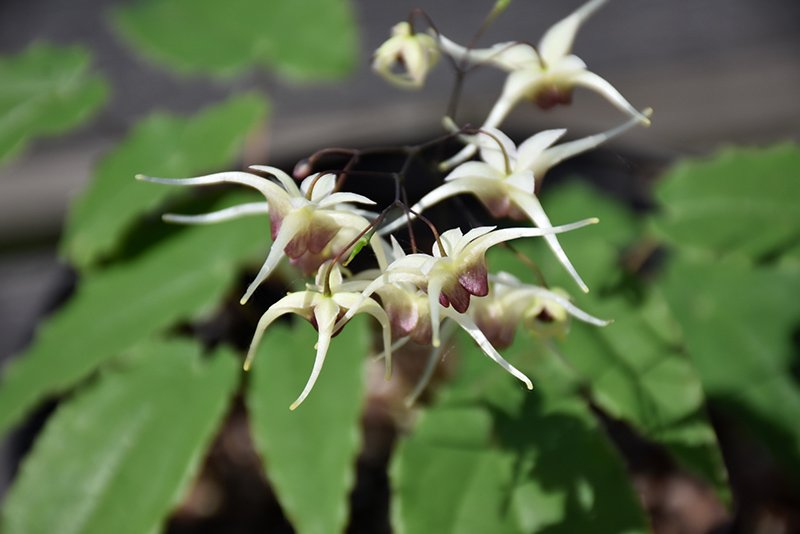
Botanical Name: Epimedium 'Domino'
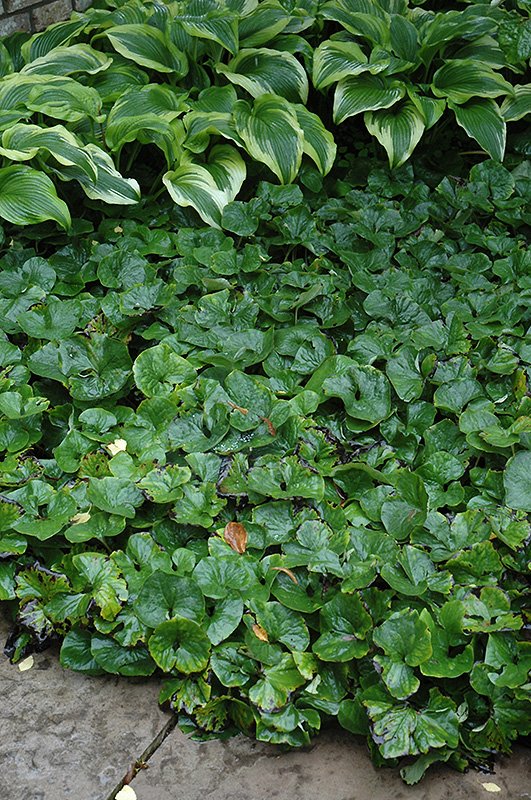
Botanical Name: Asarum canadense
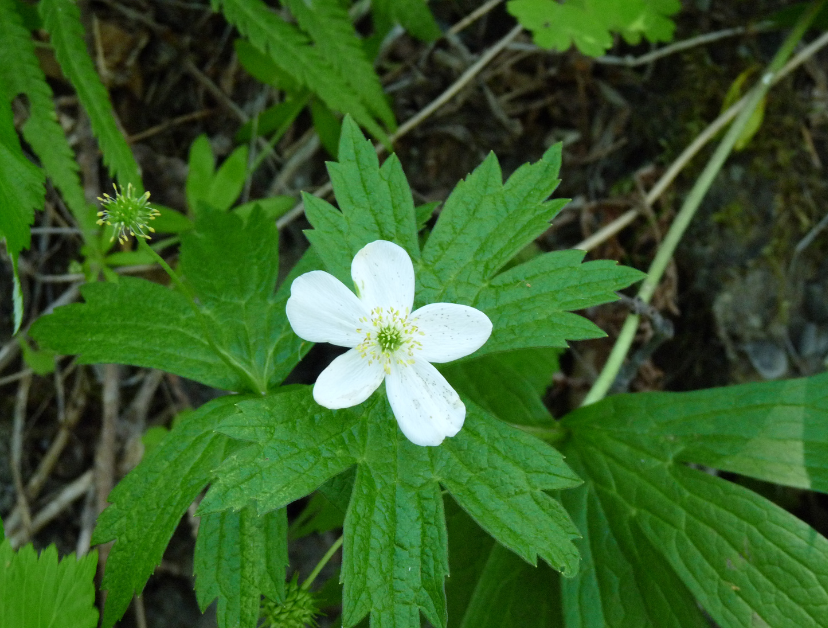
Botanical Name: Anemone canadensis
- Barrenwort (Epimedium hybrids)
- Bigroot geranium (Geranium macrorrhizum)
- Canada anemone (Anemone canadensis) – Native
- Creeping phlox (Phlox stolonifera)
- Sweet Woodruff (Galium odoratum)
- Wild ginger (Asarum canadense) – Native
- Woodland phlox (Phlox divaricata) – Native
Medium to Tall Plants for Shade
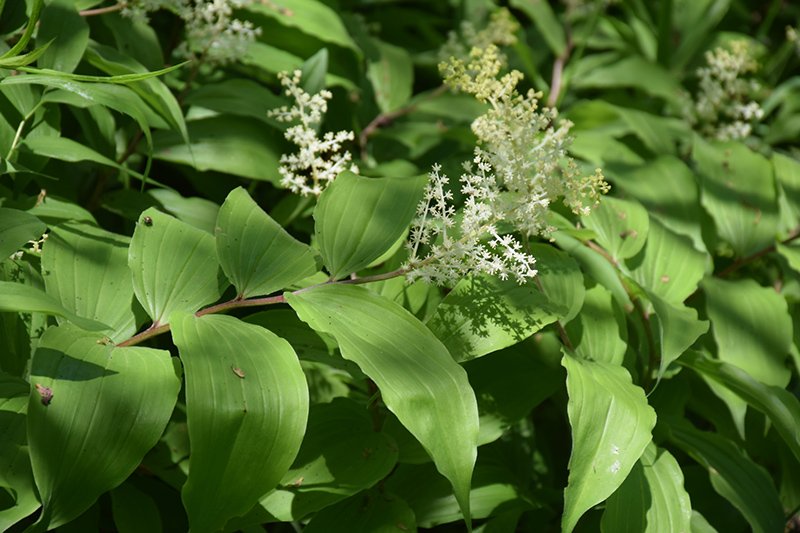
Botanical Name: Maianthemum racemosum
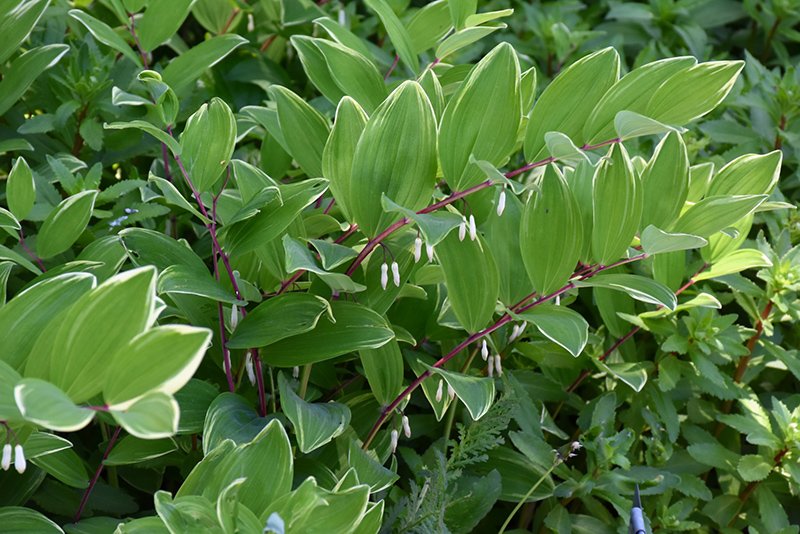
Botanical Name: Polygonatum odoratum 'Variegatum'
- False Solomon’s seal (Maianthemum racemosum) – Native
- Solomon’s seal (Polygonatum biflorum) – Native
Ferns for Dry Shade
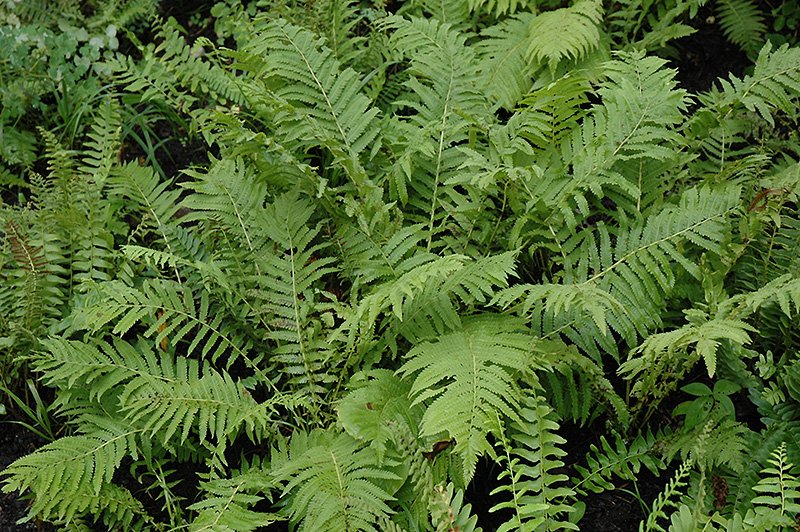
Botanical Name: Polystichum acrostichoides
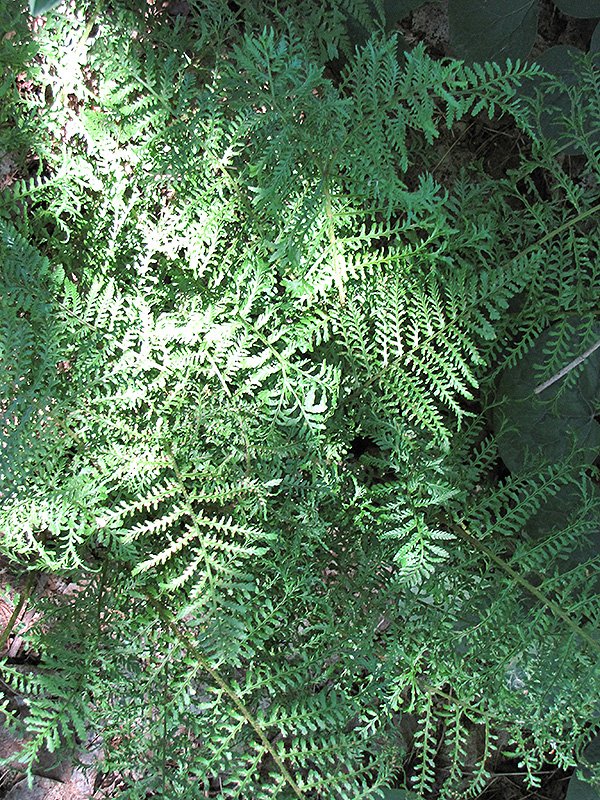
Botanical Name: Dryopteris filix-mas
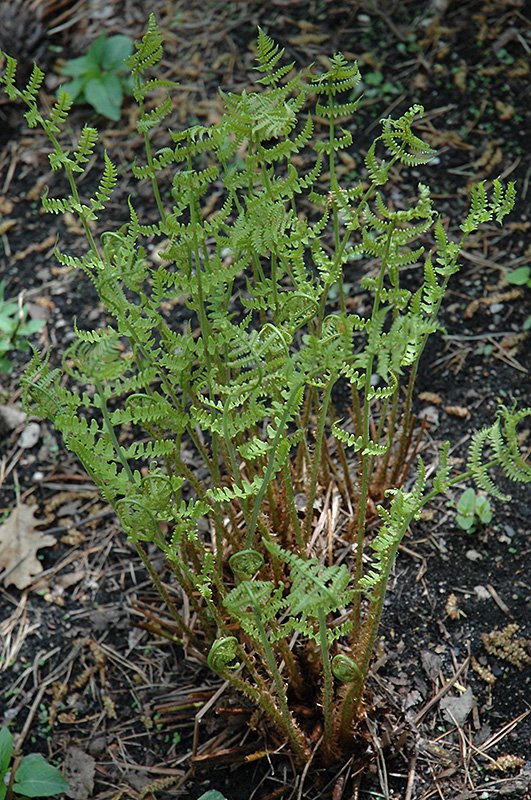
Botanical Name: Dryopteris marginalis
- Christmas fern (Polystichum acrostichoides) – Native
- Hay-scented fern (Dennstaedtia punctilobula) – Native
- Marginal wood fern (Dryopteris marginalis) – Native
- Male fern (Dryopteris filix-mas) – Native
- Rock fern (Polypodium virginianum) – Native
A Little TLC
It doesn’t take much to keep drought-tolerant plants thriving—just a little attention and some seasonal TLC. While they’re tough, even these hardy perennials appreciate an occasional deep watering during extended dry spells, especially in their first year.
For sun-loving perennials, skip the heavy fertilizers. Instead, an annual layer of compost is all they need to stay healthy and strong.
Shade-loving drought-tolerant plants, on the other hand, benefit from a layer of mulch. This helps retain moisture and reduces evaporation, especially in dry shade, which is one of the most challenging conditions for any plant to thrive in.
And don’t forget to deadhead regularly! Removing spent blooms encourages your plants to keep producing flowers instead of going to seed, meaning more colour, for longer.
With a few simple care tips, your drought-tolerant garden can remain beautiful and resilient throughout the entire season.
Other resources:
- Landscape Ontario: Eight Beautiful Drought Tolerant Plants
- Toronto Master Gardeners: Drought Tolerant Plants
- Guelph.ca: Drought Tolerant Native Plants
If you’re looking for blooms that come back each Spring with a burst of colour, here are ten of our favourite flowering perennials and ground covers.
Plant These for a Spring Show!
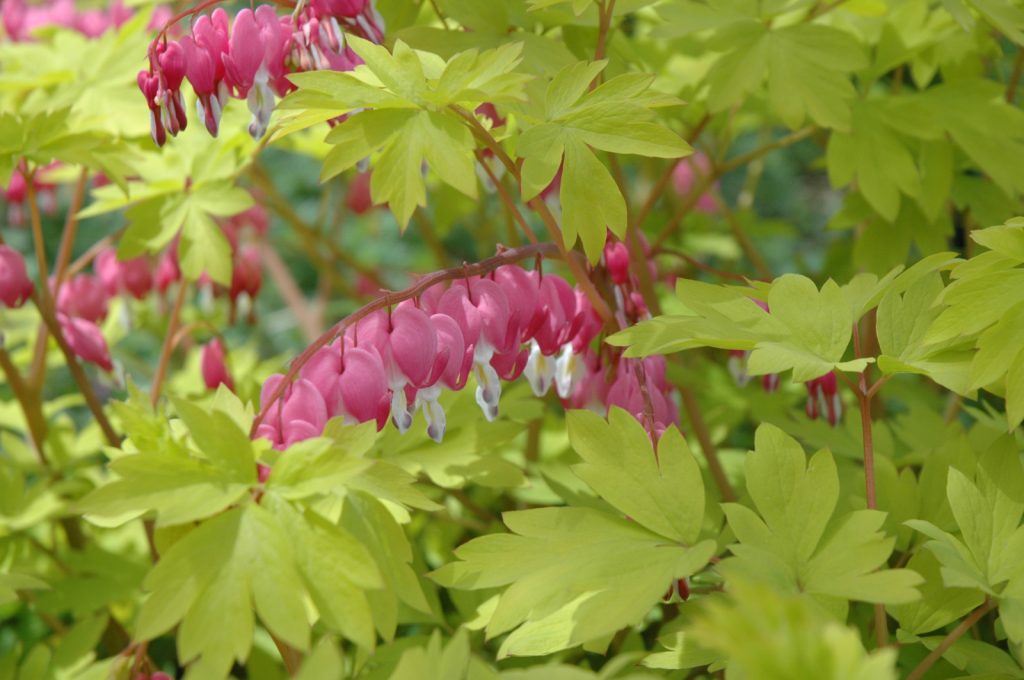
Bleeding Heart (Dicentra)
Height: 30-120 cm, Spread: 45-90 cm
Flower Colour: white, pink, red, purple
Blooms: spring, summer
Growing: While Bleeding Hearts will tolerate full sun or full shade, they prefer the protection of light shade. This perennial is fairly drought tolerant, but it will thrive in evenly moist soil, and blooms will last much longer if the soil is moist.
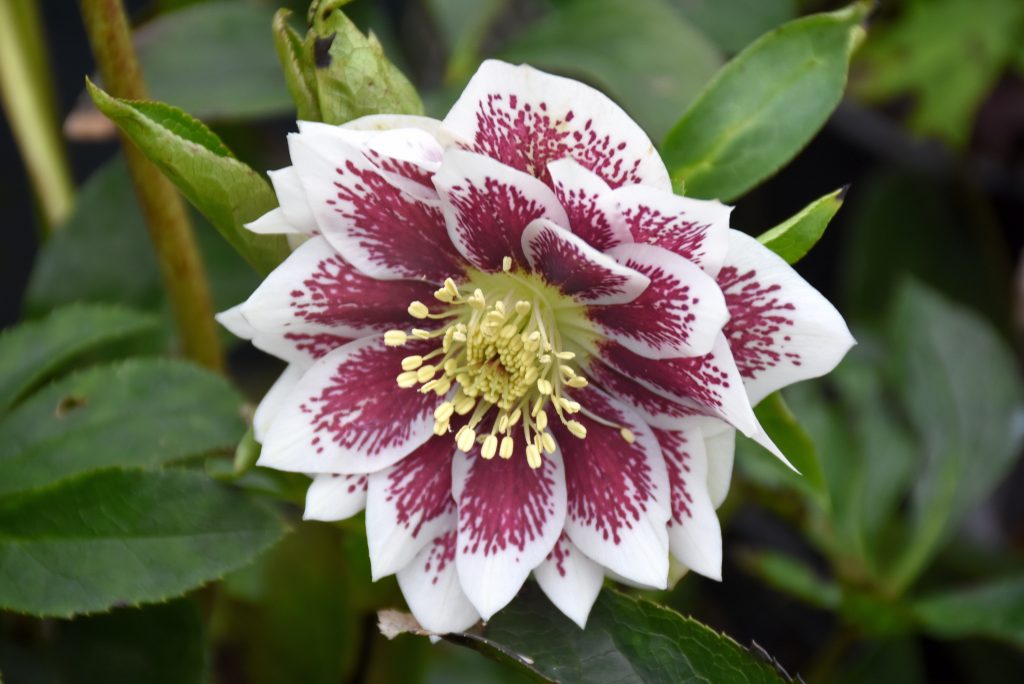
Hellebore Christmas Rose (Helleborus)
Height: 30-45 cm, Spread: 30-45 cm
Flower Colour: white, green, pink, purple, yellow
Blooms: late winter to mid-spring
Growing: Moist, humus-rich, well-drained soil in lightly dappled shade is where hellebores do best.
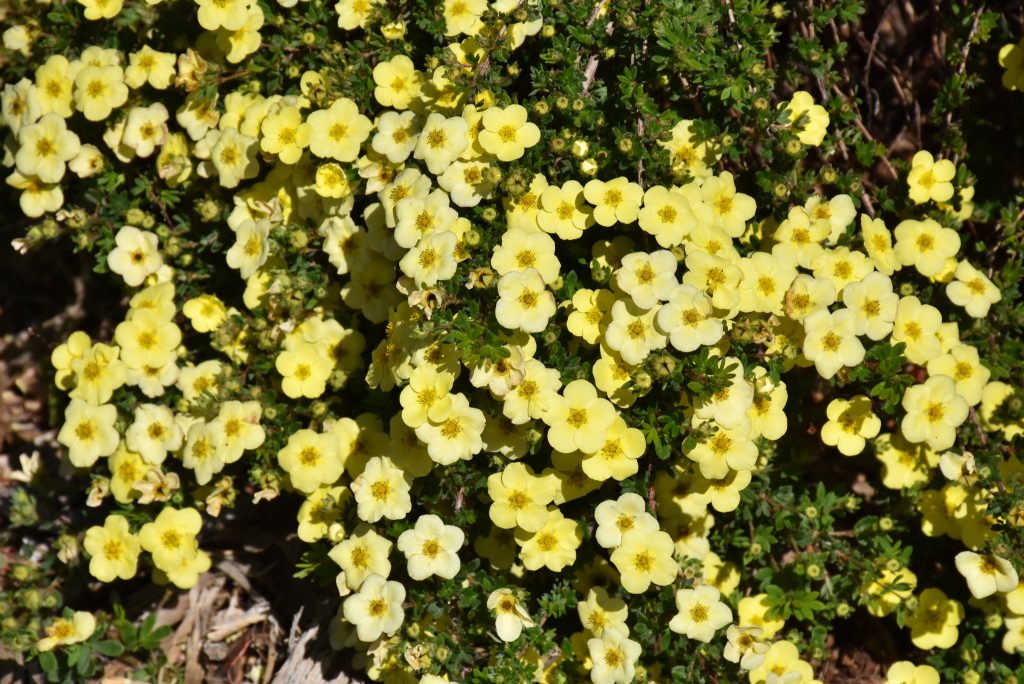
Primrose (Primula)
Height: 15-60 cm, Spread: 15-45 cm
Flower Colour: blue, red, orange, white, pink, purple, yellow
Blooms: spring, early summer
Growing: Full sun or partial shade and moist, well-drained, humus-rich soil.
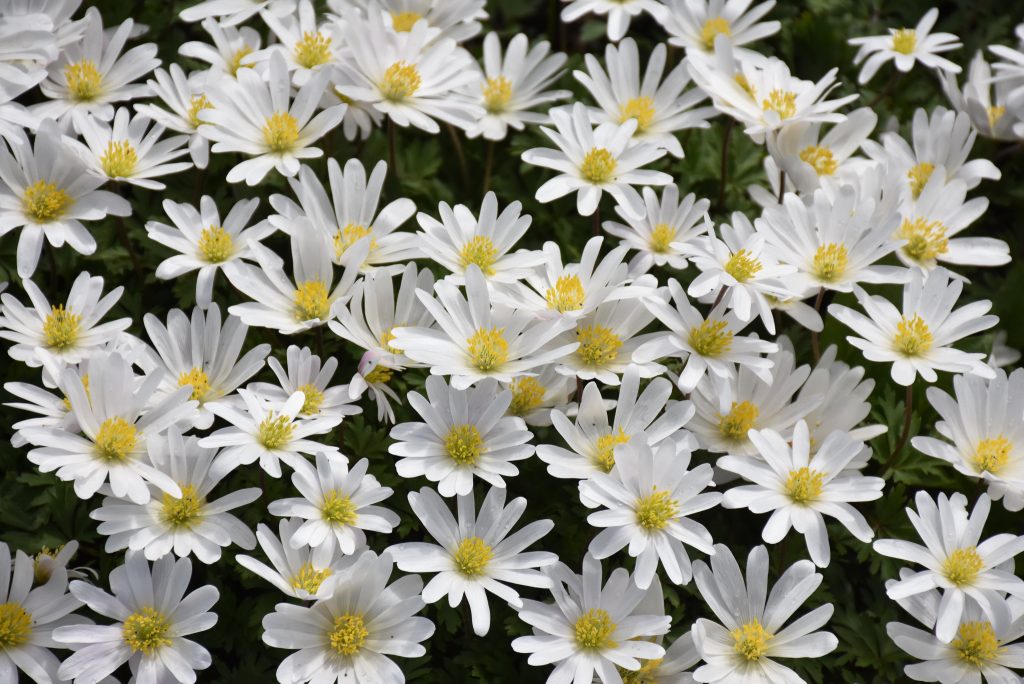
Anemone Windflower (Anemone)
Height: 8-150 cm, Spread: 15-60 cm
Flower Colour: white, yellow, pink, blue
Blooms: spring, summer or fall
Growing: Anemone does best in moist soil and partial or light shade, but they will tolerate full sun. While Anemone can take a while to become established, they’re worth the wait!
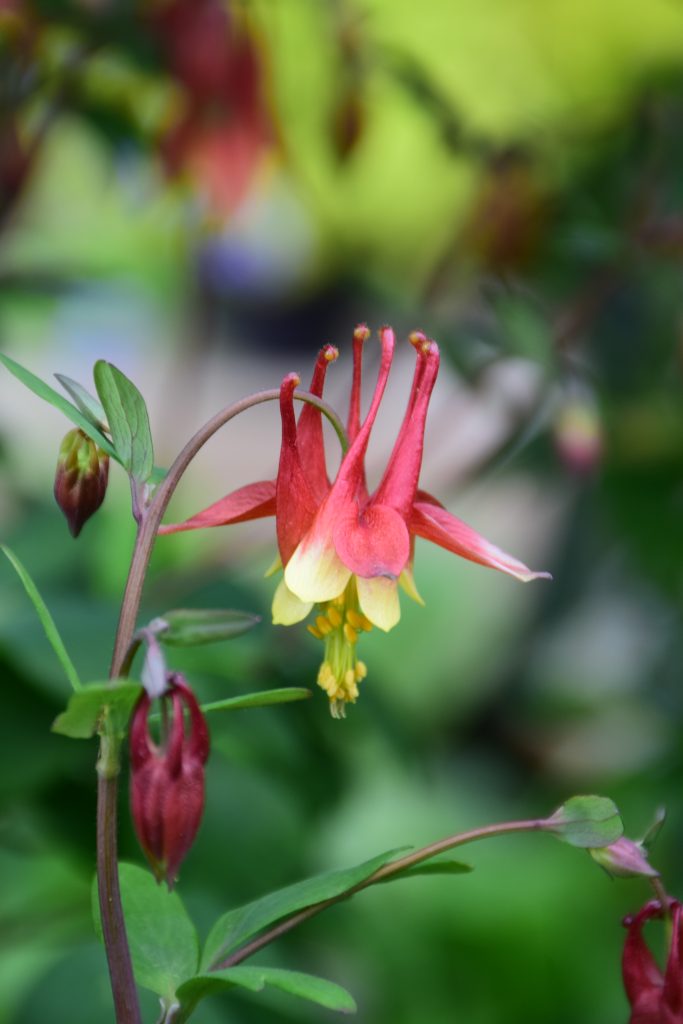
Columbine (Aquilegia canadensis)
Height: 45-90 cm, Spread: 30-60 cm
Flower Colour: white, red, yellow, pink, blue, purple (The colour of the spurs is often different than the petals)
Blooms: spring, summer
Growing: Columbines love full sun or part shade and moist, well-drained soil. This plant will self-seed and seedlings can be transplanted.
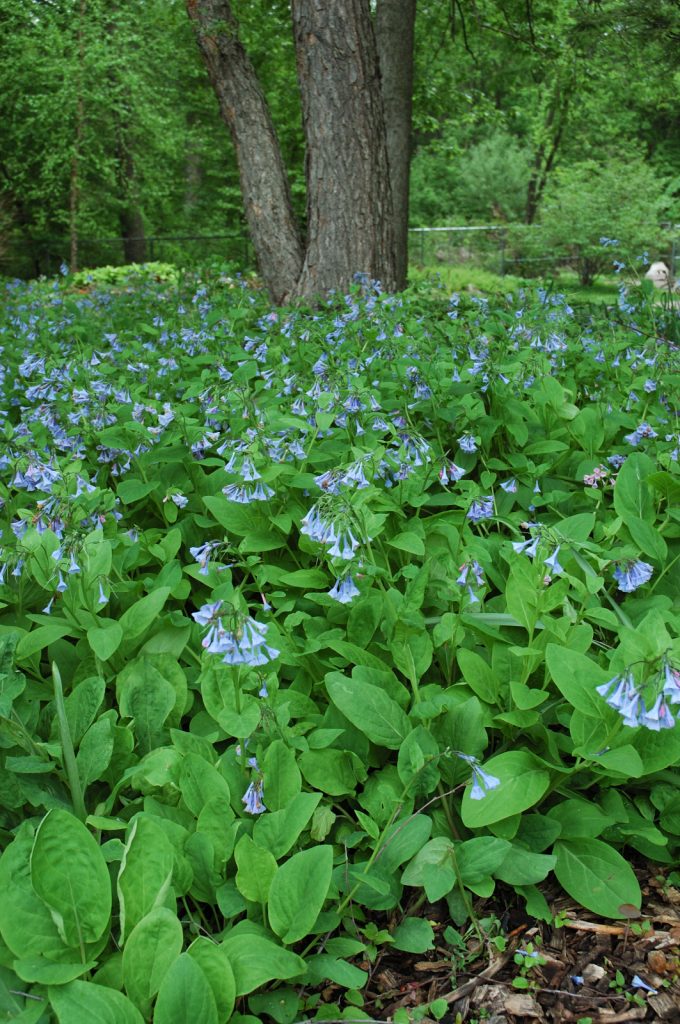
Virginia Bluebells (Mertensia virginica)
Height: 30-60 cm, Spread: forms groupings
Flower Colour: blue, pink, purple
Blooms: spring
Growing: Plant in partial to full shade with humus-rich, moist, well-drained soil. This woodland plant has blooms that are attractive to Hummingbirds and pollinators. Foliage dies back right after it blooms.
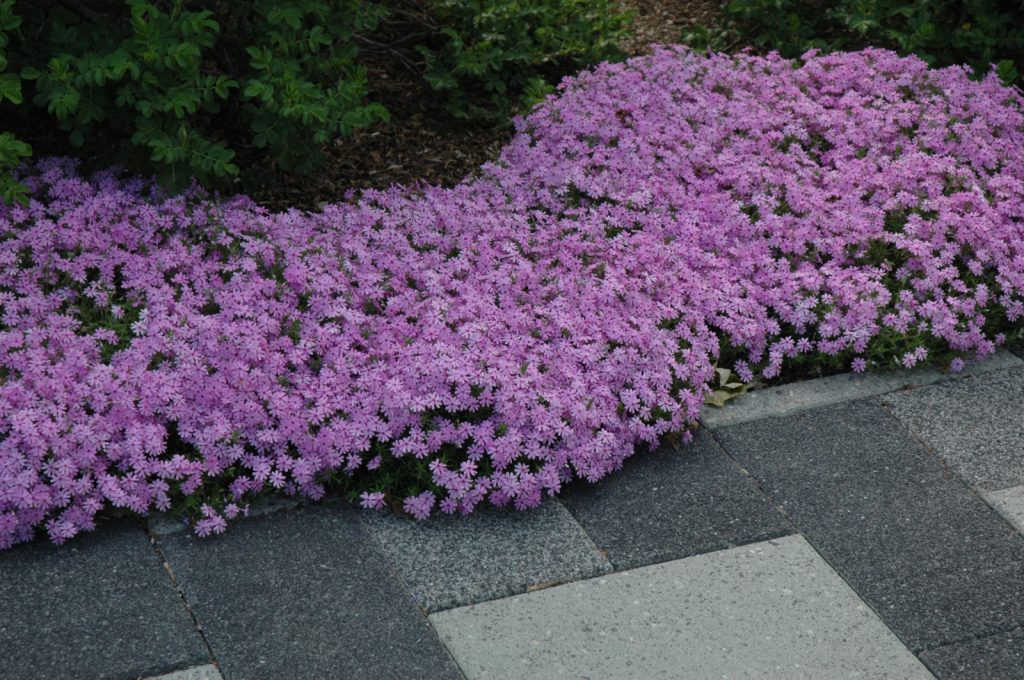
Moss Phlox or Creeping Phlox (Phlox subulata)
Height: 10-15 cm, Spread: 60 cm
Flower Colour: white, red, lavender, pink, bluish purple
Blooms: early spring
Growing: Plant in sun to partial shade with humus-rich, moist, well-drained soil. Spreads horizontally as it grows and creates new roots where the stems touch the ground. Do not prune in the fall as Spring’s flowers will already be forming on these plants.
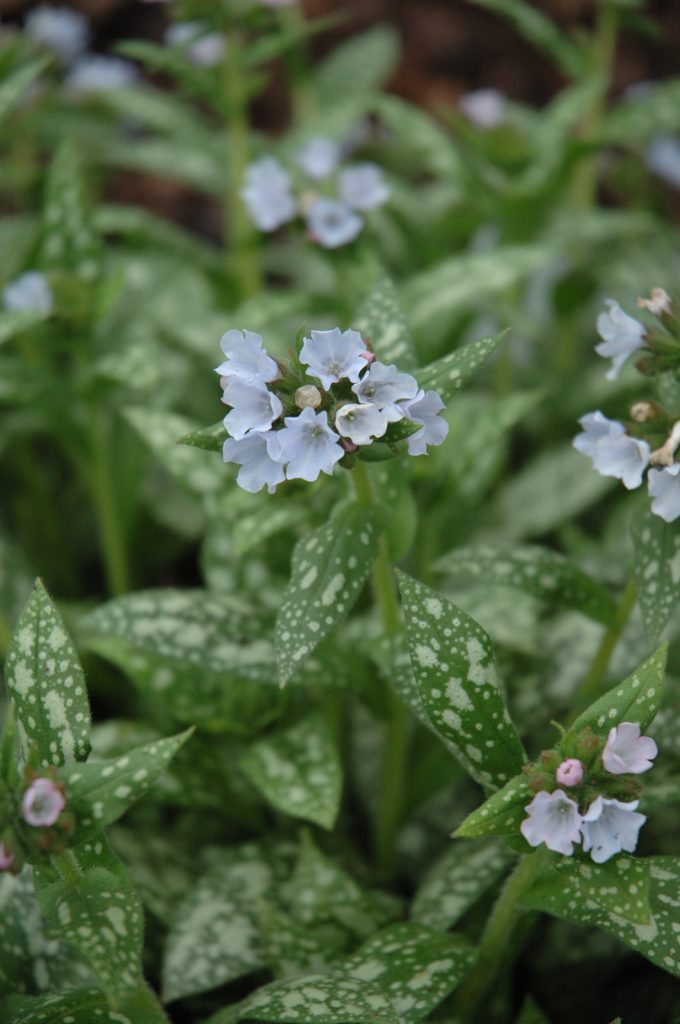
Lungwort (Pulmonaria)
Height: 20-60 cm, Spread: 20-90 cm
Flower Colour: white, red, pink, blue
Blooms: spring
Growing: To avoid root rot, grow Lungwort in moist, humus-rich soil that’s well drained. They prefer partial shade to full shade.
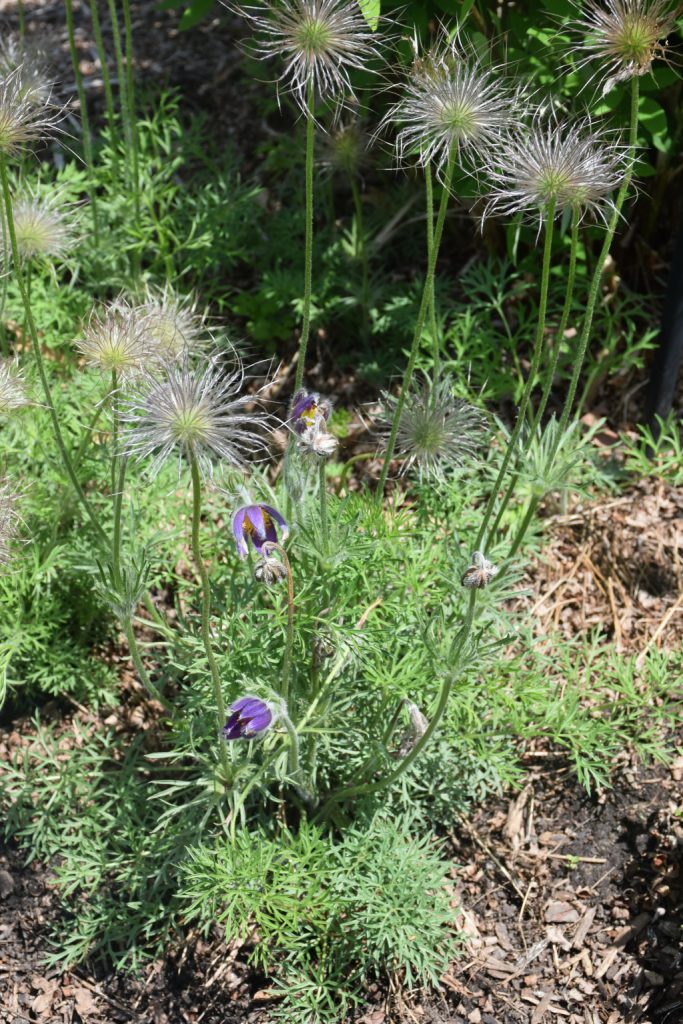
Pasque Flower (Pulsatilla)
Height: 10-30 cm, Spread: 20-30 cm
Flower Colour: white, red, purple, blue
Blooms: early to mid-spring
Growing: Very well drained soil is important for Pasque Flower, which does not like to sit in wet soil. It will grow well in full sun or partial shade.
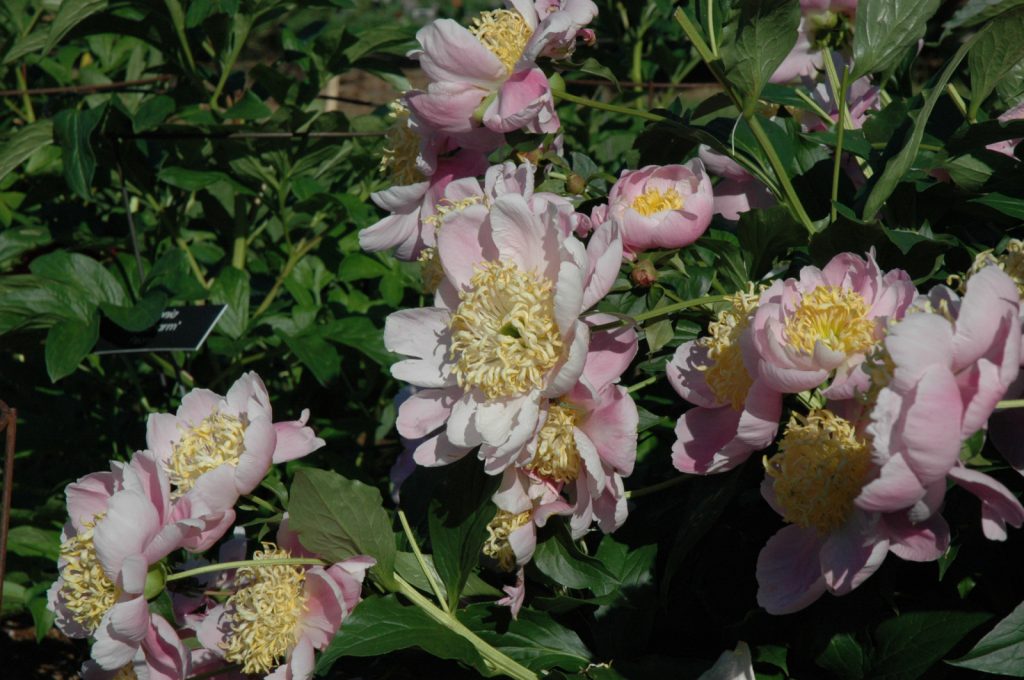
Peony (Paeonia)
Height: 60-80 cm, Spread: 60-80 cm
Flower Colour: yellow, pink, red, purple, and shades of white
Blooms: spring, early summer
Growing: Humus-rich, moist and well-drained soil in full sun or partial shade is where peonies do best. Adding lots of compost and planting at the proper depth is very important for peonies to bloom. Be sure to plant potted peonies at the same level as the soil around them, not higher.
It’s always nice to take some time away during the holiday season, but it’s kind of a hassle to arrange for a house sitter simply to take care of your houseplants. So, we recommend doing some thorough holiday-proofing before you go. With the right tools and a little prep work before you head off, you should be able to leave your plants for several weeks without worrying about them drying up. Here are the basics of holiday-proofing, so you can rest assured that your precious plants will be safe and sound through your vacation.
Holiday-Proofing Your Houseplants
Is it about time to start holiday-proofing your houseplants in Simcoe? Follow these simple steps for getting them all holiday ready for while you’re away.
First, water them thoroughly. Make sure the soil is thoroughly saturated, but if your pot doesn’t have drainage holes, try not to overdo it. If your pot has drainage holes and is placed on a dish, make sure you’ve watered it enough that water begins to collect on the dish. Be sure to dump the water in the dish before you leave so it doesn’t end up getting funky.
Remove any dead plant material. When dried up plant parts remain on a plant, it will still end up directing its energy toward those limbs. Nipping off those pieces should help your plant to grow stronger and use up resources and nutrients more efficiently.
Move them away from cold drafts and direct sunlight. An icy breeze sneaking in through a frozen window could shock your plant, and a ton of sun will end up drying the soil out too quickly. To maintain a safe temperature and reduce sun exposure without depriving your plants of light, try moving them a few feet away from the window.
Turn the thermostat down a bit. Indoor plants don’t mind a cooler base temperature as opposed to being in warm air. This will also help prevent the soil moisture from evaporating too quickly.
Huddle your plants together. It’s all about retaining that moisture, and plants that are all huddled in a bunch will be much better at conserving water.

How To Water Indoor Plants While On Vacation
If you’re going to be away on a holiday for over a week, you’ll want to put together a plan to keep your plants watered while you’re gone. There are a few ways to keep your plants watered while you’re lounging on a beach on the other side of the world, so try some of these methods for self-watering.
Purchase a drip-irrigation system. These automatic watering systems slowly release water over an extended period. There are several different models and designs to choose from, ranging from high-end electronic drip systems, and more budget-friendly options like glass water globes or spikes. Evaluate the size and quantity of your plant collection and select your irrigation system accordingly.
Build a DIY irrigation system. If you’re a crafty type who enjoys saving money by going the DIY route, there are tons of tutorials online for creating your own irrigation system using everyday household materials like mason jars or wine bottles. Browse through Pinterest to see if you can find one that works for your plants.
Mimic a humid climate with a water tray. If you’ve got plants that prefer humid environments and need to be misted occasionally, this is a great way to increase the moisture in the air. Simply fill a tray with pebbles or river stones, then pour some water in. Place your potted plant on top of the tray so it can enjoy some humid tropical air while you’re out soaking in the tropical sun!

Houseplants For Frequent Flyers
If holiday travelling is common practice for you, it might be worth sticking to plants that are low-maintenance and more tolerant of dry spells. These are our favourite options for all you globetrotters out there:
- Snake plants
- ZZ plants
- Succulents
- Cacti
- Chinese evergreens
- Ponytail palms
There’s no need to go to the trouble of paying a house sitter to come by your home just to water your plants. These tricks should keep your plants well-watered while you’re away on vacation. If you need to purchase any irrigation systems for while you’re away, come visit Eising and we’ll help you pick out the right models for your plant collection. Enjoy your holiday!