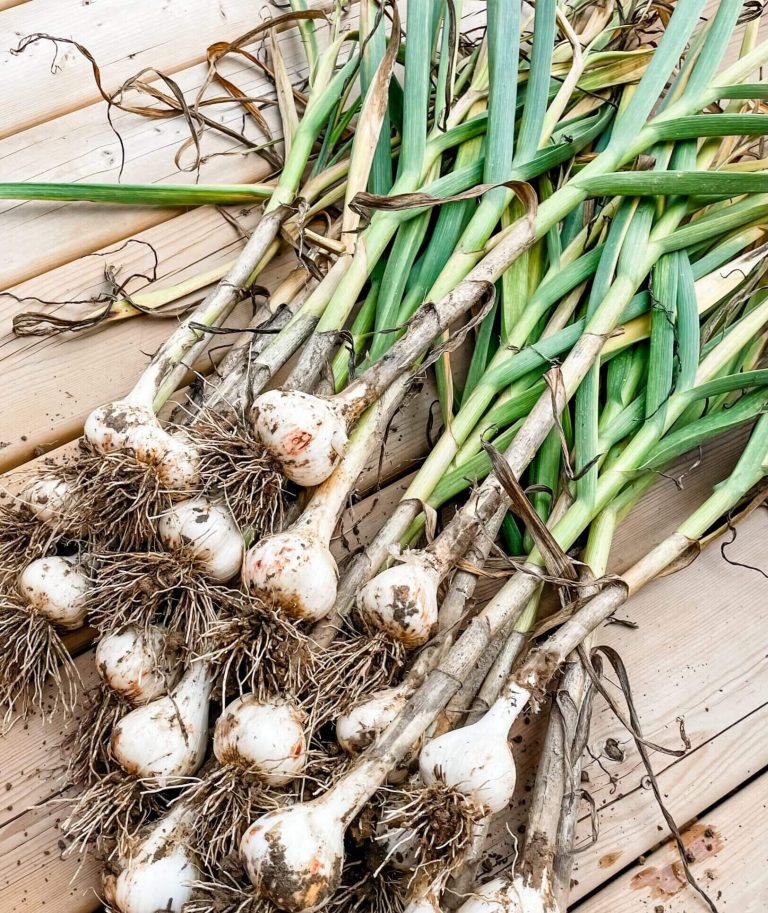
For Height, Drama, and Eye-Catching Interest
By Ava Green
Every well-designed garden needs an anchor, something tall and confident at the back that gives the whole planting a sense of structure and depth. While shrubs and trees often fill that role, perennials can also do the job beautifully. The back row perennials below are sturdy, reliable performers that thrive right here in Norfolk County. Plant them at the back of a border or the centre of an island bed as the backdrop that makes everything around them look better.
False Indigo, Baptisia australis
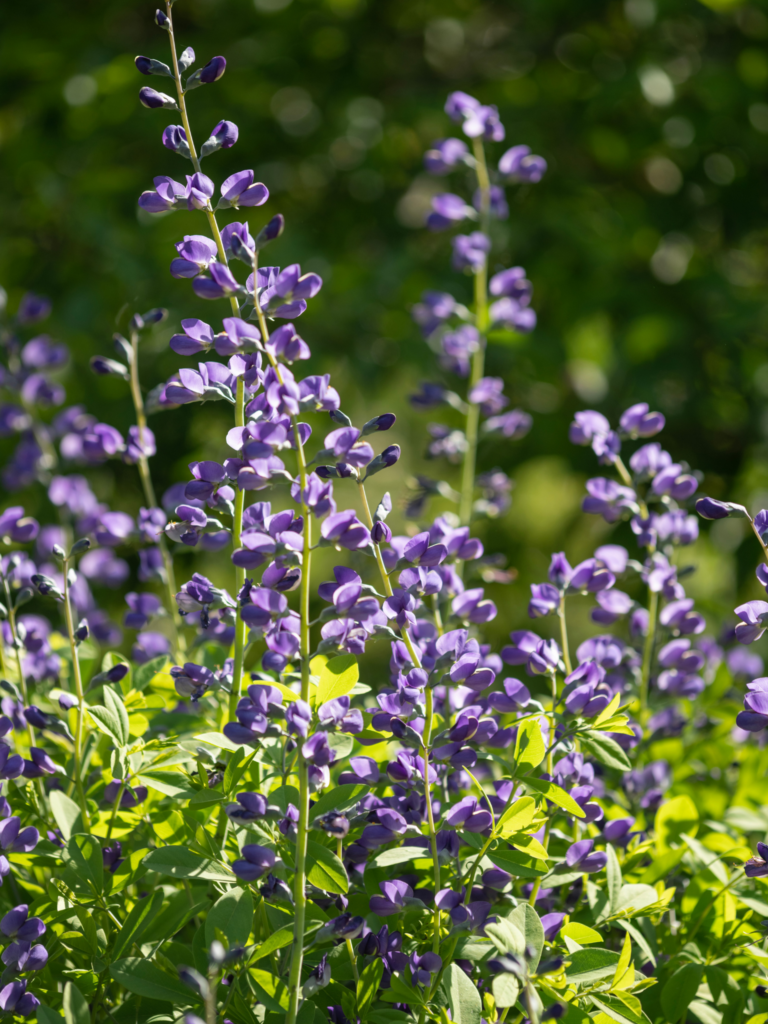
Baptisia is one of those perennials that gardeners discover and immediately wonder why they waited so long to plant it. In late spring, masses of stems are loaded with sweet pea-shaped flowers in shades of indigo blue, soft yellow, white or purple, and butterflies and bees absolutely love them. Once the blooms fade, the plant takes on a handsome, shrub-like form with blue-green foliage that holds its shape nicely for the rest of the season. While it’s slow to establish, it is extraordinarily long-lived, making it a plant you put in once and enjoy for decades.
Grows 3 ft tall and 3 ft wide | Full sun to partial shade | Blooms late spring to early summer
Hollyhocks, Alcea
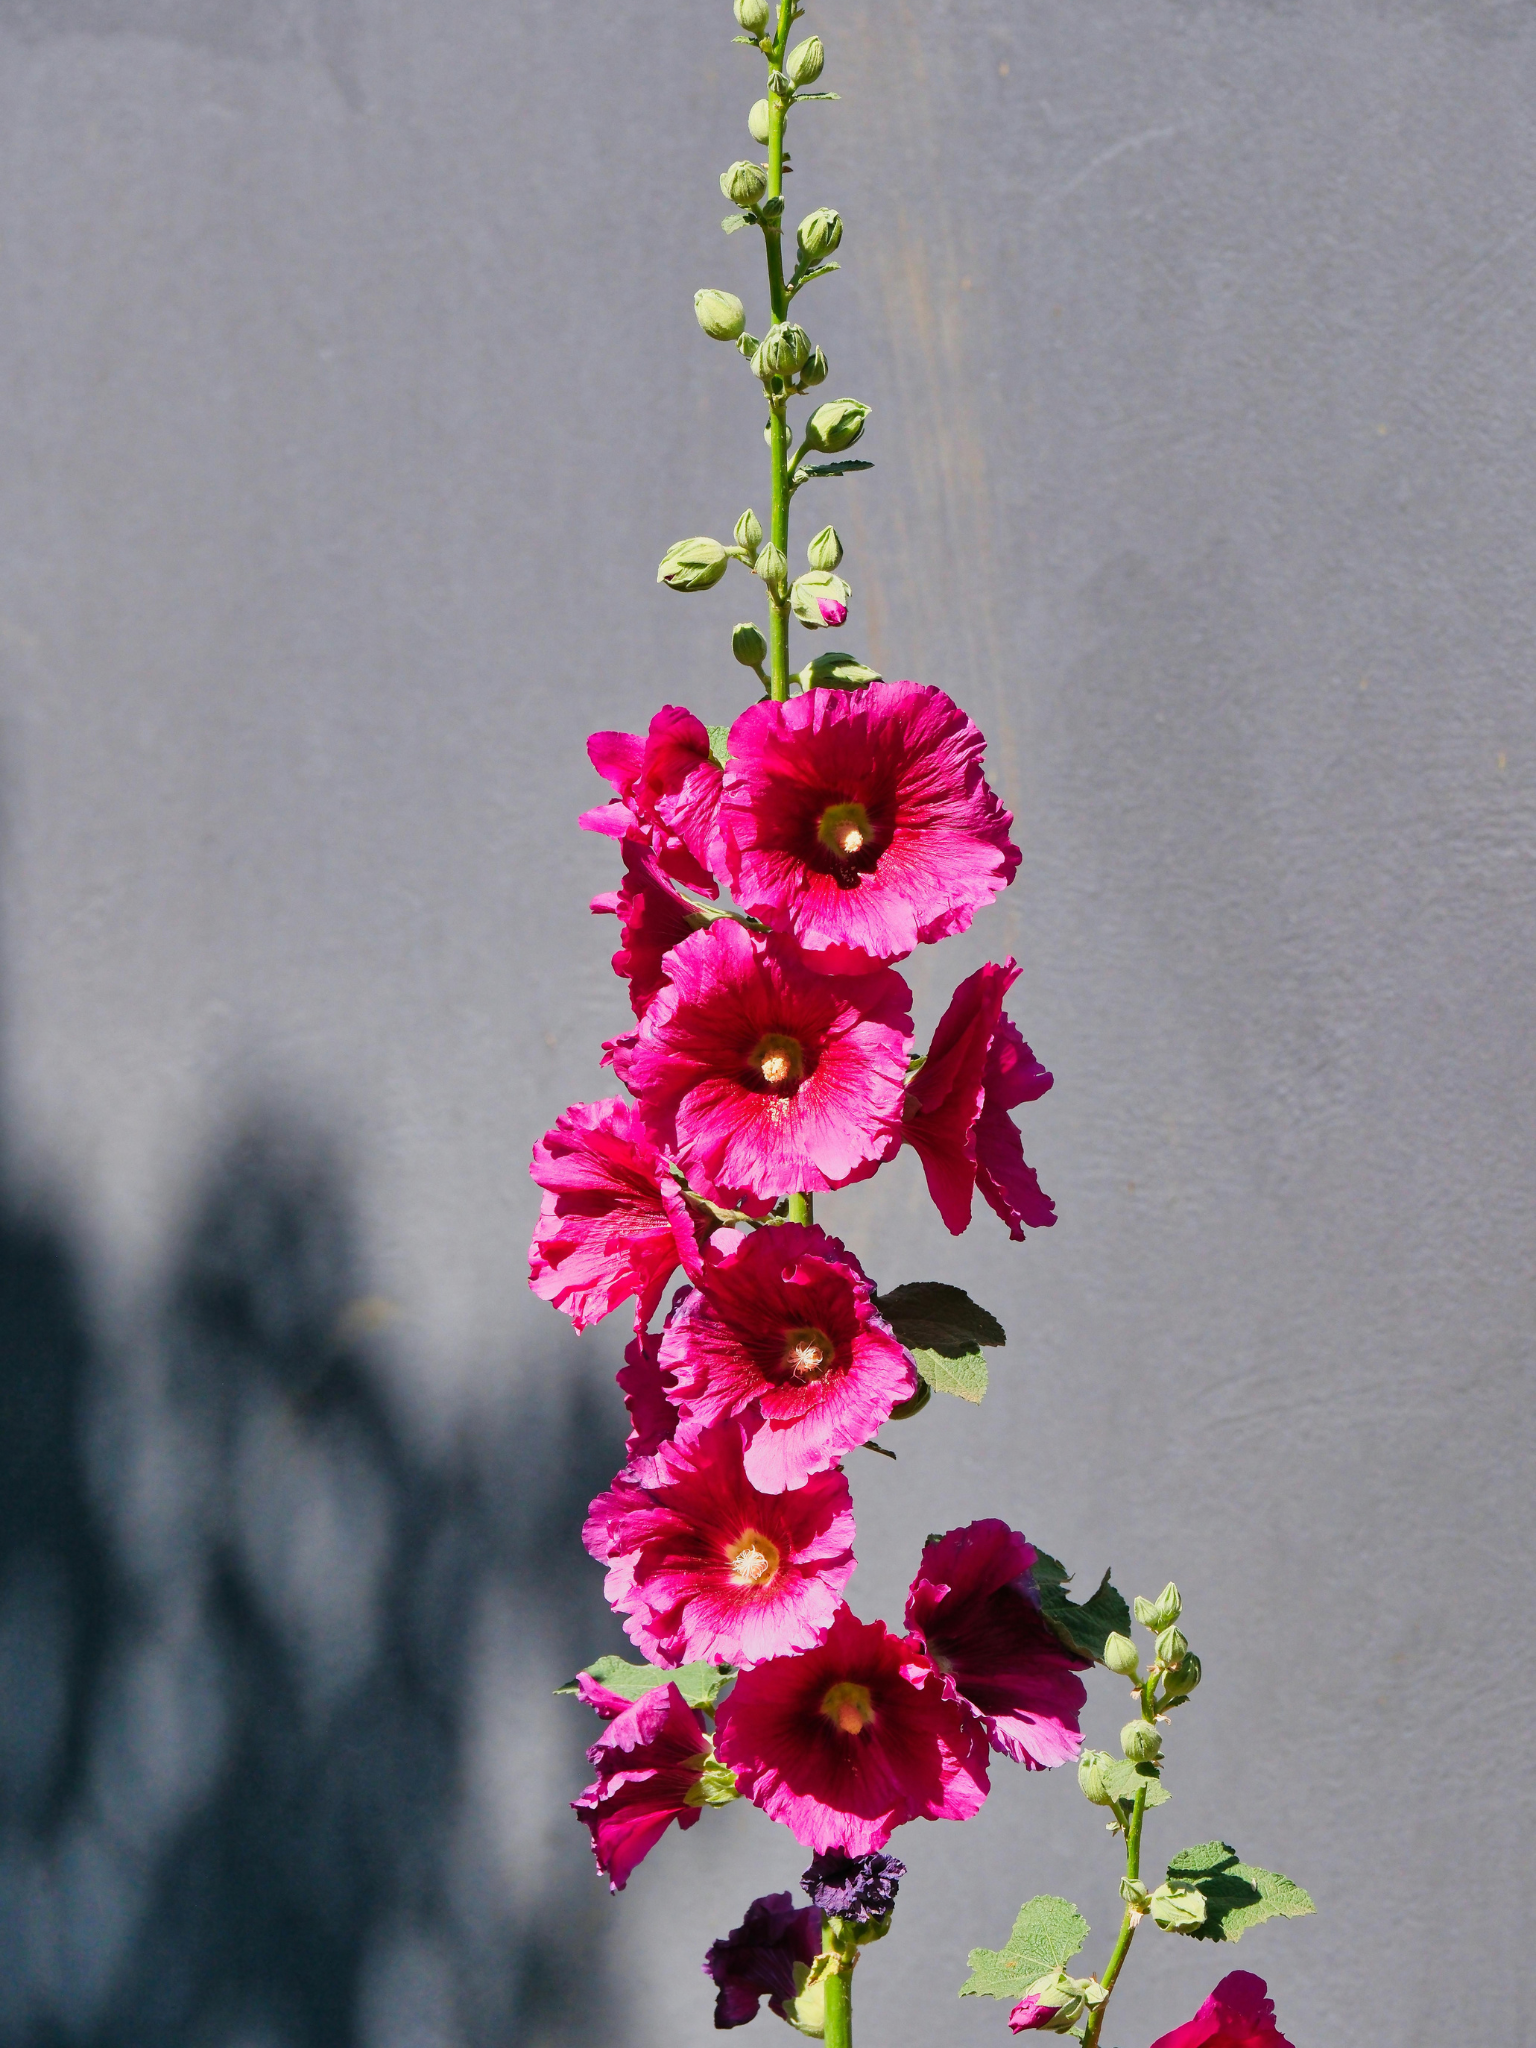
Few perennials carry the nostalgic, romantic charm of a Hollyhock in full bloom. Their tall, stately spires are covered in large, papery flowers and are available in an irresistible range of colours from soft pastels to rich burgundies and deep purples, to classic white. They have a way of making a garden feel established in their first season, making them a desirable back-row choice.
Grows 2-8 ft tall and 1-2 ft wide | Prefers full sun but will tolerate part shade | Blooms in summer
Joe Pye Weed, Eutrochium or Eupatorium
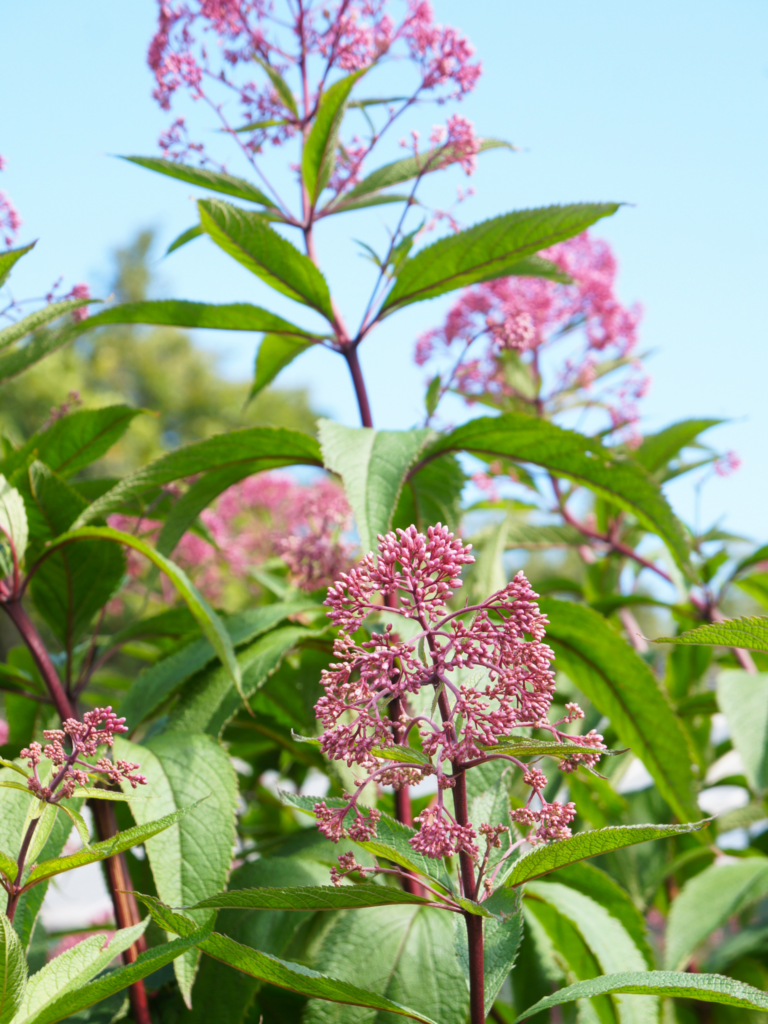
A native plant that is as ecologically valuable as it is beautiful. Its large, showy clusters of rosy-purple flowers are a magnet for butterflies and pollinators from mid-summer well into fall, long after many other perennials have finished their show. If you want a back-row plant that works hard for wildlife while adding bold colour to the garden, this is an excellent choice.
Grows 4-6 ft tall and 2-4 ft wide | Prefers part sun and moist soil | Blooms mid-summer to late fall
Russian Sage, Perovskia atriplicifolia or Salvia yangii
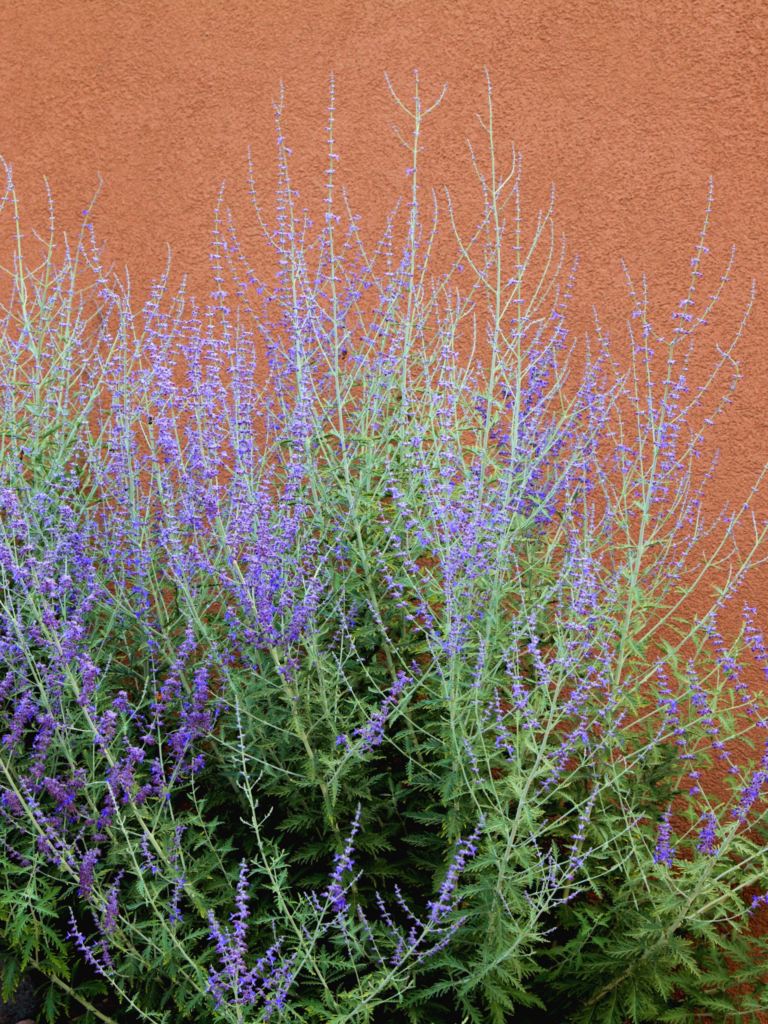
When the garden fills up with yellow and orange blooms in late summer, Russian Sage arrives with a billowy, airy cloud of lavender-blue flower spikes rising above silvery-grey foliage. It catches the light beautifully and adds a softness that few other plants can match. Drought-tolerant once established and virtually pest-free, it is one of the lowest-maintenance perennials you can grow. Compact varieties are also available if space is limited.
Grows 3-4 ft tall and 3-4 ft wide | Full sun | Blooms mid-summer to fall
Bear’s Breeches, Acanthus Mollis
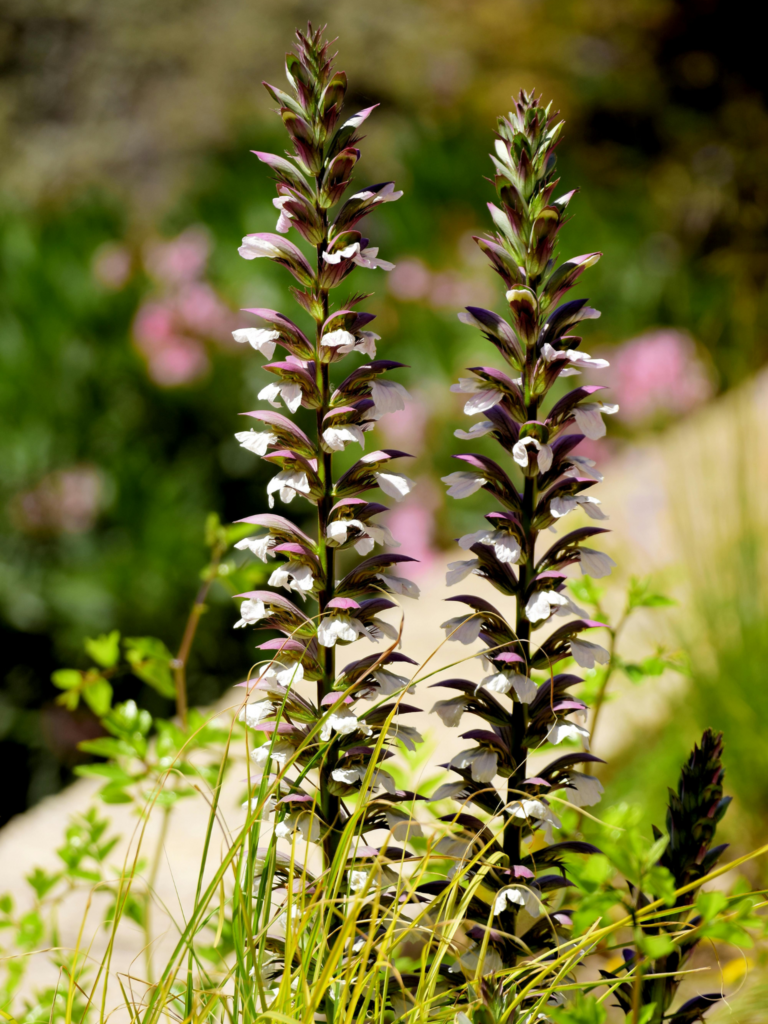
If you’re looking for a plant that makes a genuine architectural statement, Bear’s Breeches is in a category of its own. Its large, deeply lobed, glossy foliage forms an impressive mound, while dramatic flower spikes shoot three to five feet upward, bearing creamy white snapdragon-like blooms accented with striking reddish-purple bracts. It is bold, sculptural, and unlike almost anything else in the garden.
Grows 3-5 ft tall and 2-3 ft wide | Full sun to part shade | Blooms June to July
Foxglove, Digitalis
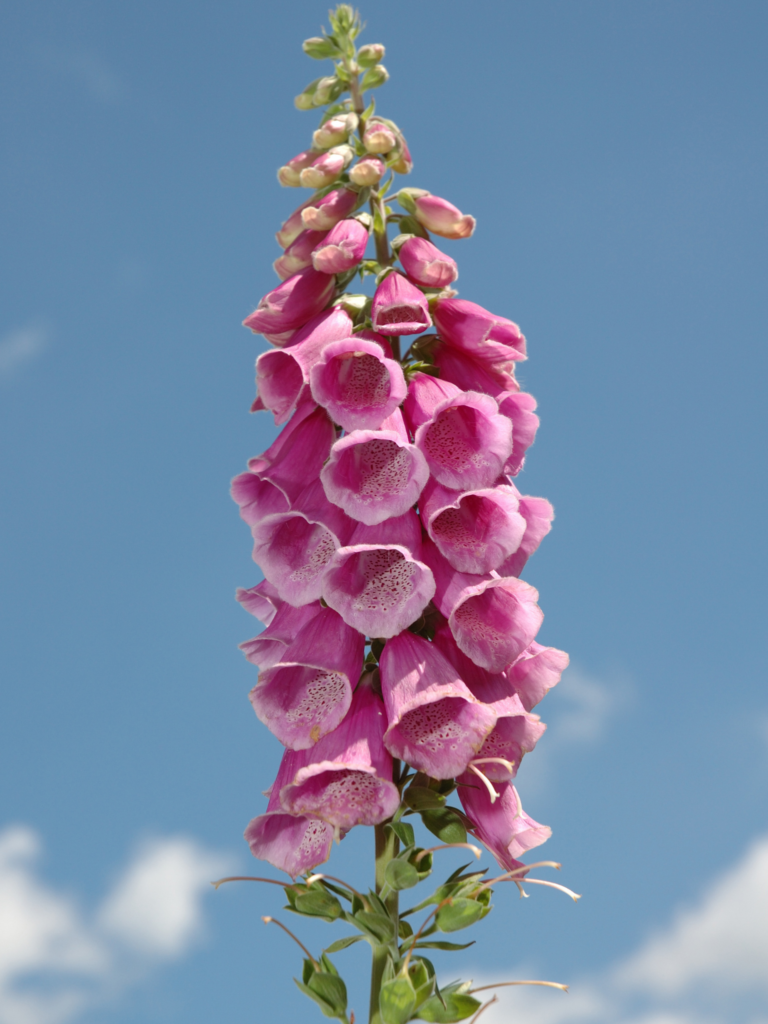
There is something undeniably enchanting and regal about Foxglove with its tall spires of tubular flowers freckled and spotted on the inside, nodding gently in the breeze. The colour range is also wonderful, from soft creamy whites and pale pinks to rich purples and deep rose. Many varieties self-seed freely, naturalizing happily in the garden over time. One important note: every part of the Foxglove plant is toxic to people and pets, so it is best planted away from areas where children or animals play. In the right spot, however, it is one of the most beautiful back-of-the-border plants available.
Grows 2-5 ft tall and 2 ft wide | Sun to part shade | Blooms in summer
Goat’s Beard, Aruncus diocus
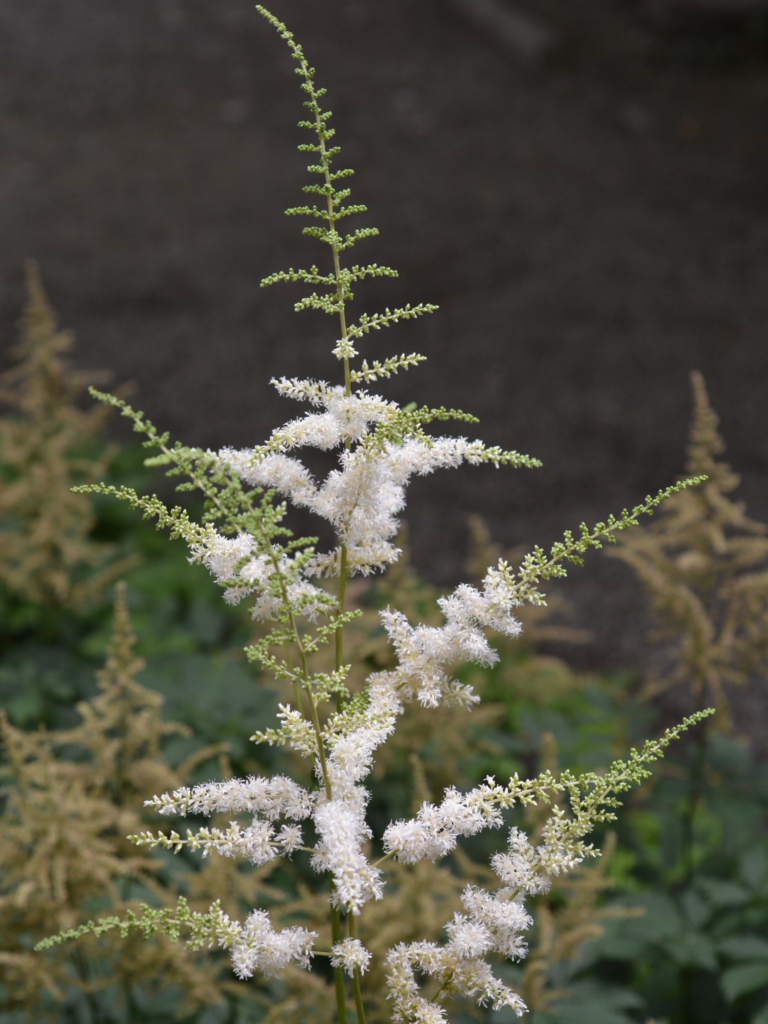
Despite its stature, this is one of the most graceful and softening plants you can add to a shady border. Large, feathery plumes of creamy white flowers rise above finely divided, elegant foliage, bringing lightness to even the darkest corners of the garden. It is especially effective at softening hard edges, filling bare spots under trees, and providing a lush, natural backdrop for smaller shade-loving plants. Dwarf varieties are available for smaller spaces.
Grows 6 inches (dwarf) to 6 ft tall and 2-4 ft wide | Partial to full shade | Blooms early to mid-summer
Gardener’s Tip:
Removing spent blooms before they go to seed, also known as deadheading, encourages many perennials to produce a second flush of flowers later in the season. It takes only a few minutes and can extend your bloom display by weeks.
Ready to Build Your Back Row?
The team at Eising Garden Centre is here to help you choose the right tall perennials for your space, your soil, and your sun conditions. Stop by and let us help you create a border that looks stunning from front to back, season after season.
By Dave Zeldon and Ely Schweyer
This is the time of year that most garden centres will have on display their wide variety of Amaryllis bulbs, including the evermore popular waxed dipped. These enormous bulbs that are appearing now will be ready to burst into bloom within 4-8 weeks after planting.
Non-Wax Dipped: Planting
All Amaryllis need is a bit of commercial potting soil that should not cover the shoulders of the bulb (try leaving about 1/3rd of the bulb showing above the soil line), with the nose (or narrow end) of the bulb peeping well over the top of the pot. Make sure that you use a well-drained container that is 3-4” bigger in diameter than the bulb itself.
☝️A heavy clay pot will prevent this top-heavy plant from toppling over. To achieve continuous bloom, plant at intervals of two weeks for stunning colour in your home.

Non-Wax Dipped: Care
Once leaves emerge, fertilize once a month with a 20-20-20 water soluble fertilizer for houseplants. Water sparingly and wait for the miracle in a warm sunny room. Sub-irrigation or watering from the bottom of the drip tray will keep the surface soil dry, thus keeping and bulb rot organisms and those pesky fungus gnats at bay.
Non-Wax Dipped: It's Not Done Yet!
When blooming is over, remove the scape (or flower stock) and place the plant in a sunny spot and continue to water. This is to allow the leaves to regenerate the bulb. In springtime, when all danger of frost has passed, bring the bulb outdoors and let it spend its holidays in a shady spot. In some varieties the leaves will die back in September to give the plant a rest for a couple months. Stop watering and store the bulb on its side in a cool place for about eight weeks, when the leaves will once again begin to emerge.
Amaryllis can go 3-4 years without repotting as they don’t mind a little crowding. Try growing a couple of bulbs in larger pots to see if you can get a clump of flowers from the offshoots or babies that will develop after a couple of years.
Or, Try One of These Wax Dipped Bulbs!
Now growing more popular are the care-free waxed-bulb Amaryllis!



Experienced growers and beginners alike love that these waxed bulbs do not need to be planted or watered! Each of these robust bulbs are carefully prepared in festive-coloured wax, allowing you the freedom to place them among your holiday decorations.
Simply keep the bulbs at an ambient room temperature of at least 16C (70F) for beautiful blooms in five to six weeks.
These novelty items are low commitment! Their only fault is their lack of longevity - gardeners don’t get to enjoy them after year as these waxed bulbs were designed to be a one-use throwaway item!
BUT with a little luck and perseverance you may be able to save the bulb for next season after blooming. All you have to do is to carefully remove the wax layer, remove the flower stalk and place the bulb and with its remaining leaves into a pot of good growing media, allowing the leaves to regenerate the food stores in the expired bulb.
If you’re looking for more information – or perhaps, Amaryllis – visit Eising Greenhouse and Garden Centre! Happy Holidays! ✨
By: Ava Green
As temperatures begin to cool down, autumn colours set in and surround us with the beauty that is fall in southern Ontario. Suddenly summer is gone and it’s time to think about creating a cozy atmosphere inside and outside that is inspired by the world around us.
Autumn Outside
Whether you gather items from the garden or from the garden centre for a display, there are lots of natural materials all around us to draw from. Take some plumes from ornamental grasses and put them in decorative buckets. Add branches with colourful leaves or dried seed pods, and pumpkins or mums for a pop of colour. A bland background becomes the perfect backdrop.
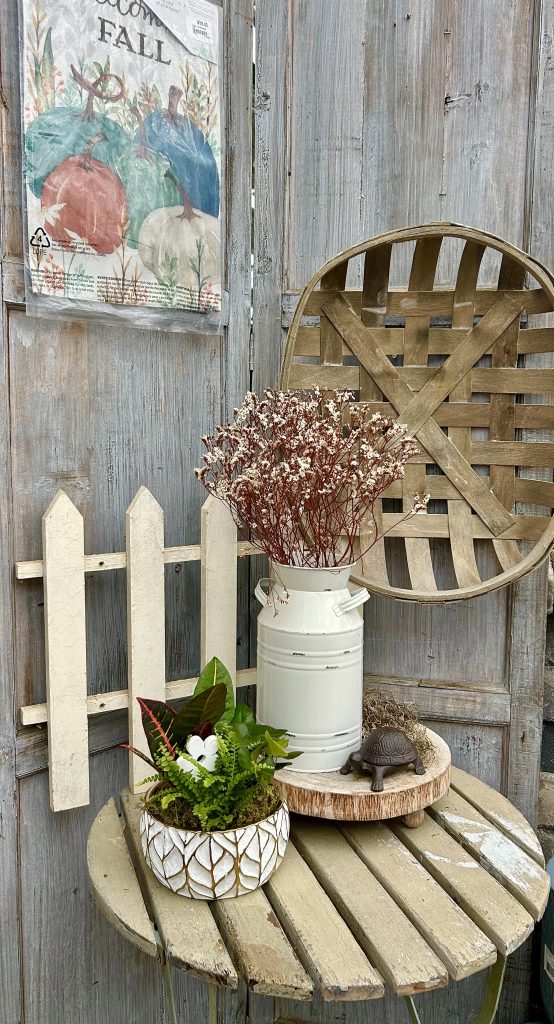

Looking for something to grow? Create fall planters with sunflowers, ornamental kale, ornamental peppers, live grasses, and, of course, fall mums.
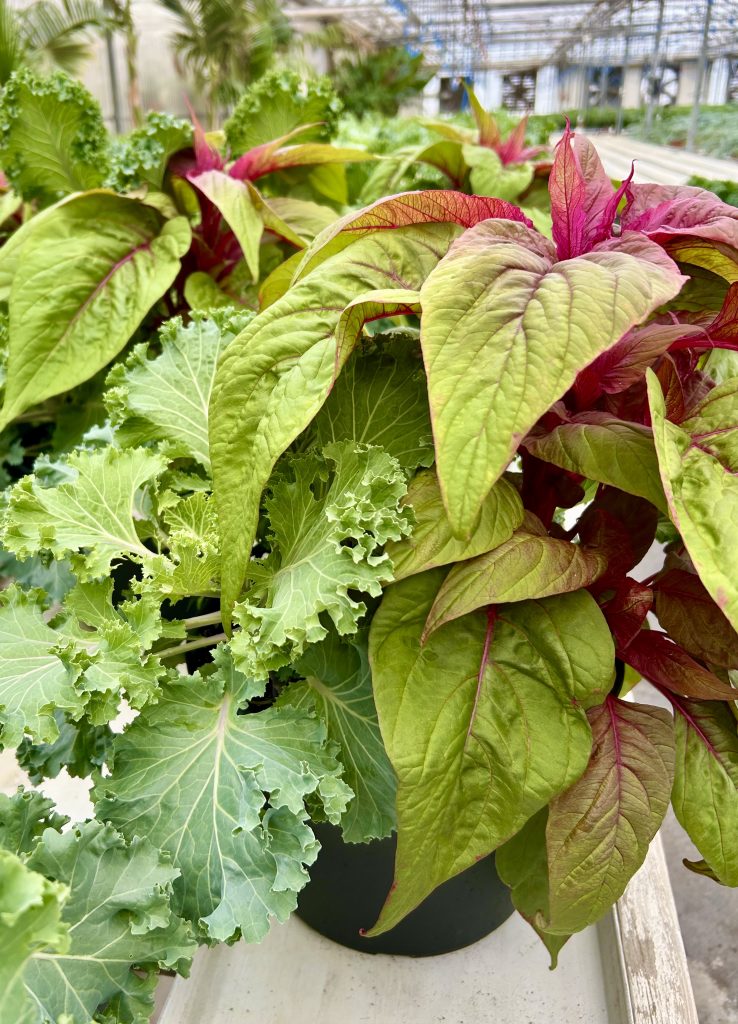
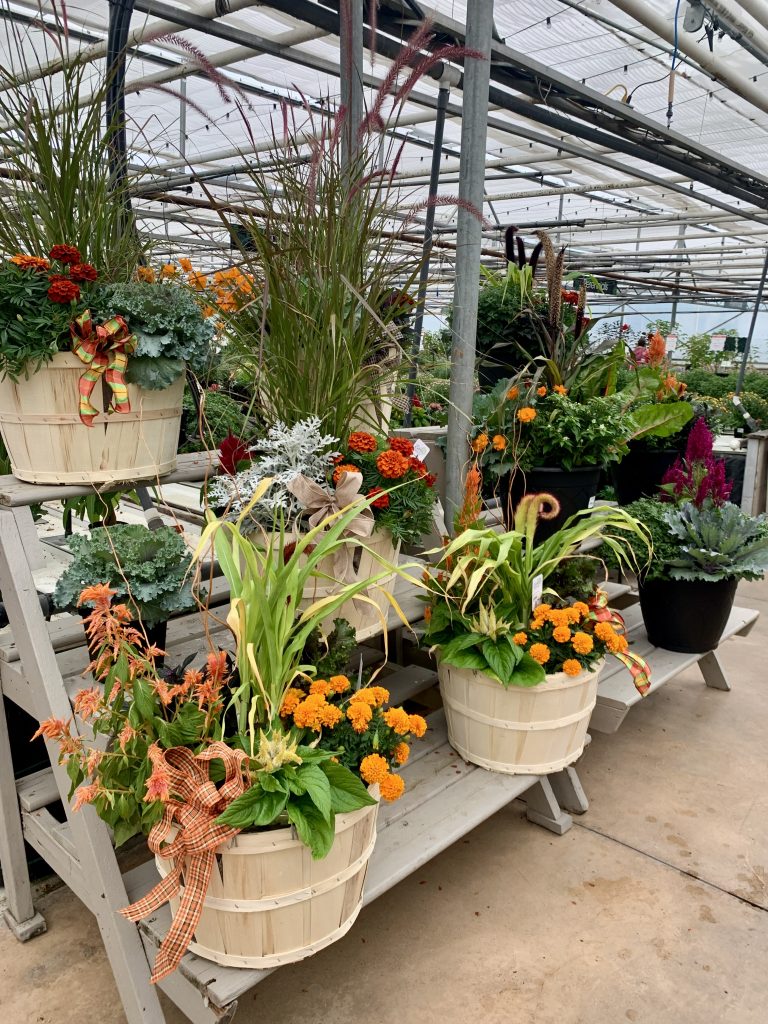
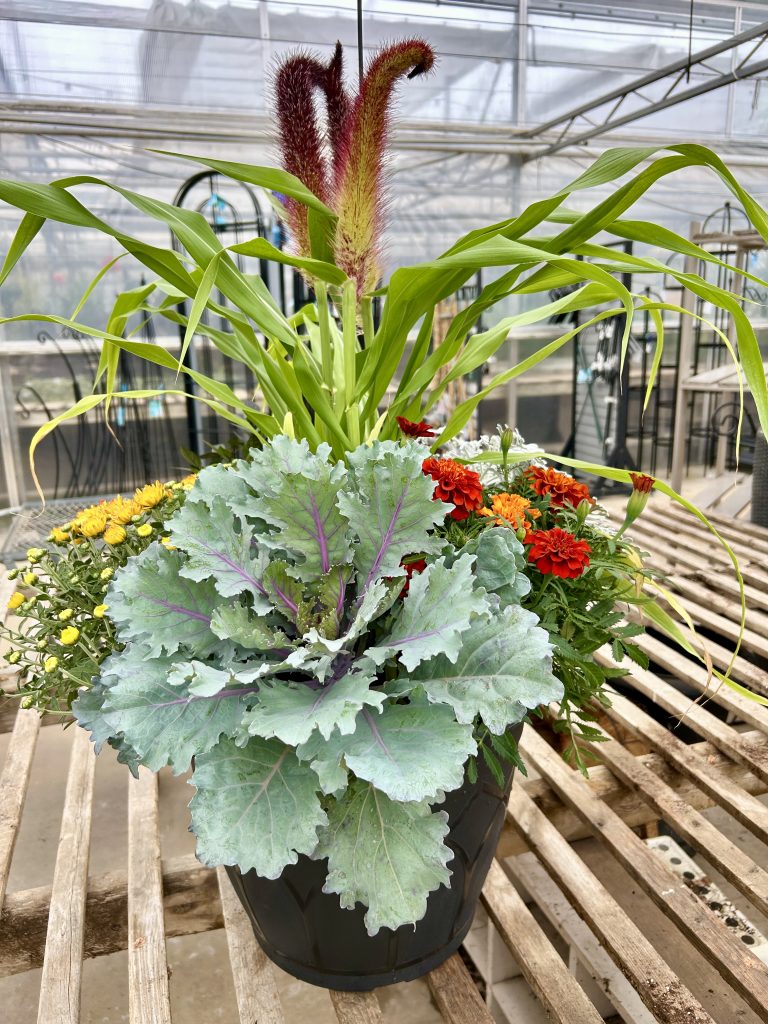
We offer beautifully festive arrangements with a variety of ornamental fall plants, as well as individual plants to decorate an outdoor table, or as a planter creating a warm welcome on your front porch (watch here: Jeanine create a fall planter on our IG).

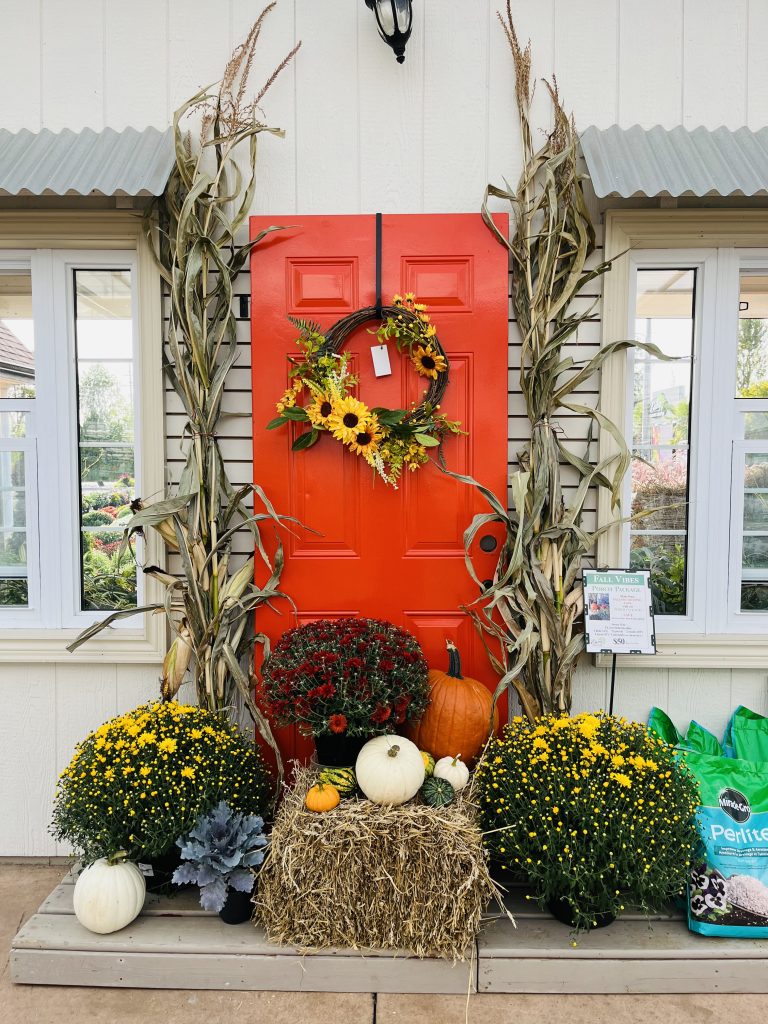
Eising’s popular Porch Packages make it easy to decorate the entryway to your home. But don’t wait, they sell out quickly!
Autumn Inside
When there are fall colours outside, autumn displays inside create continuity that will carry your indoor decorating right into the holiday season in December.
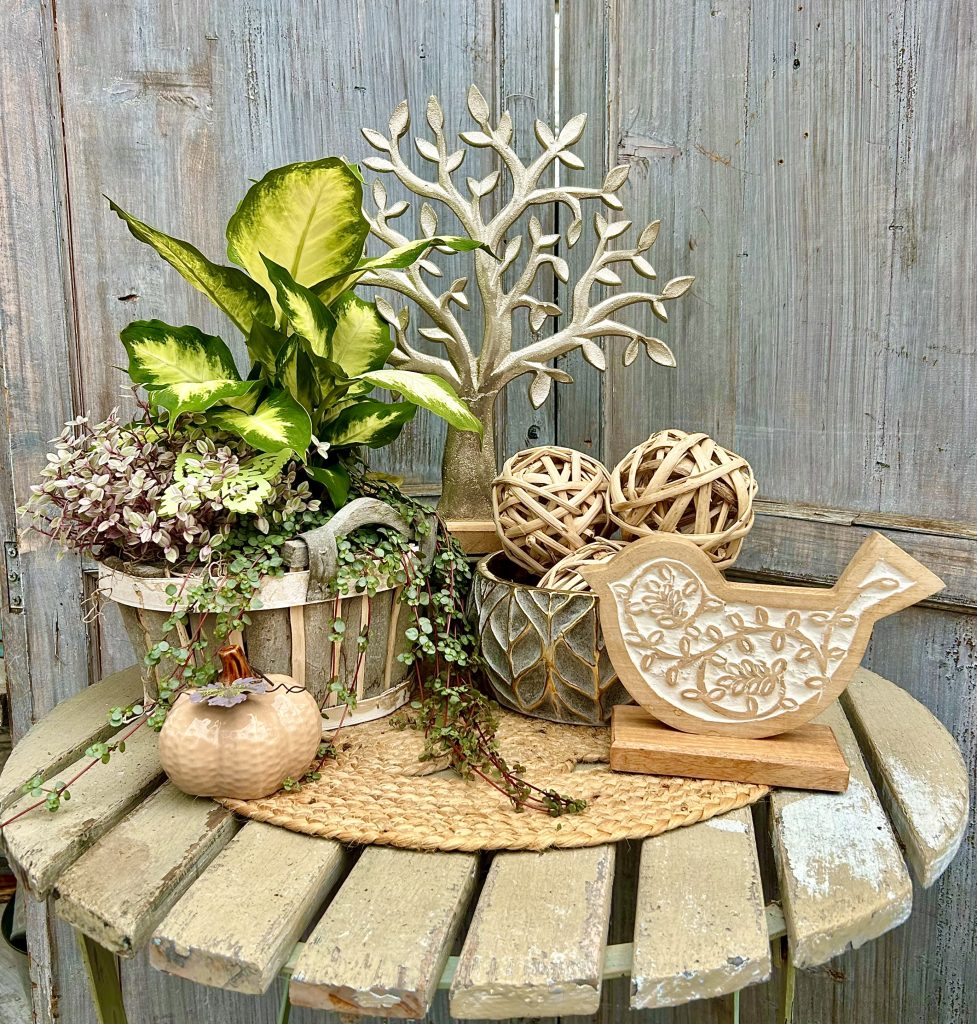
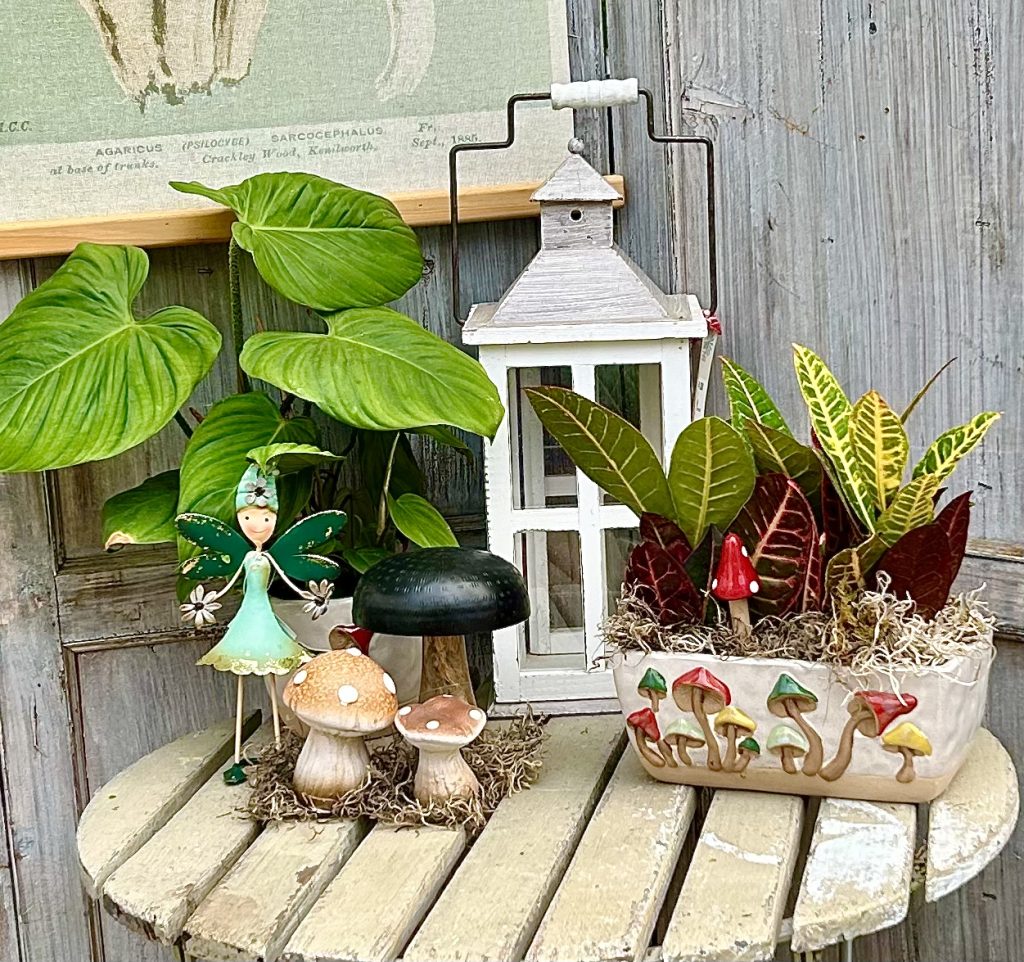
Displays that are vibrant, warm, rustic or whimsical are fun and easy to make. Here are some basic design principles that will help you get started, along with examples we’ve created using items in the Eisng shop.
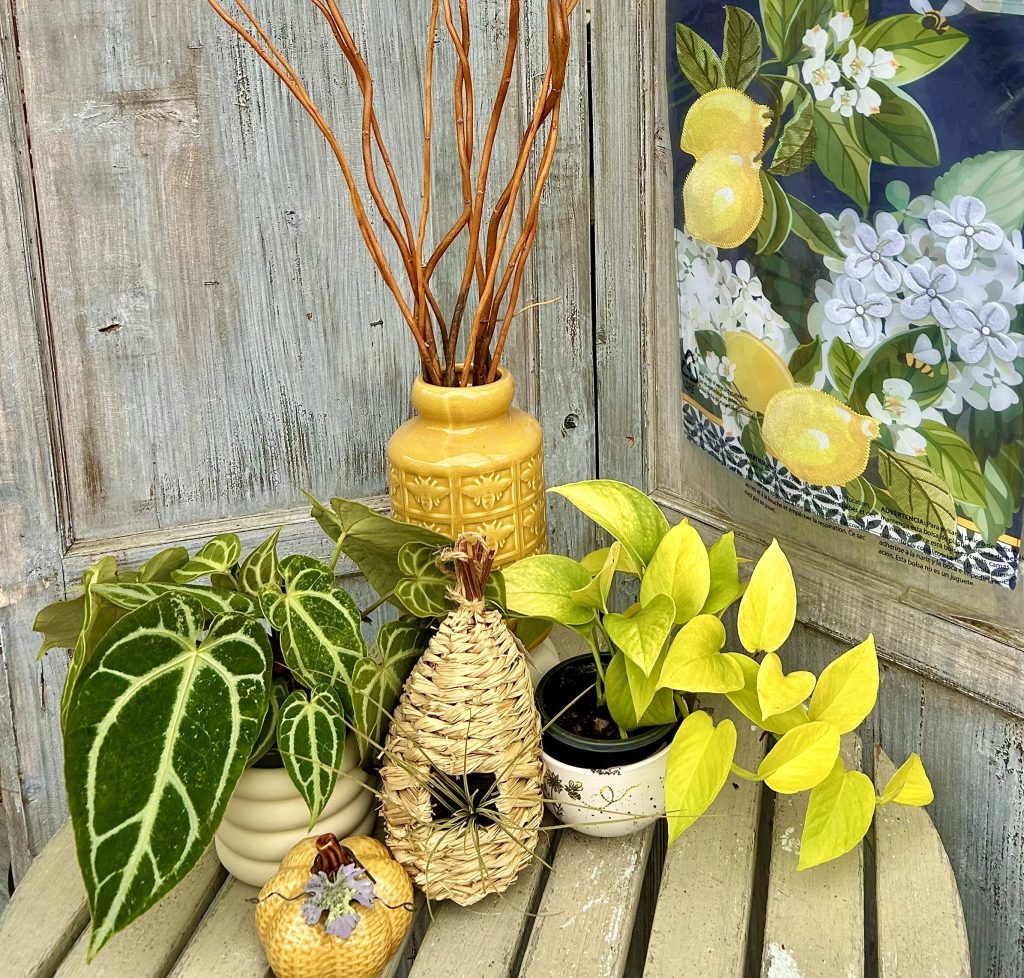
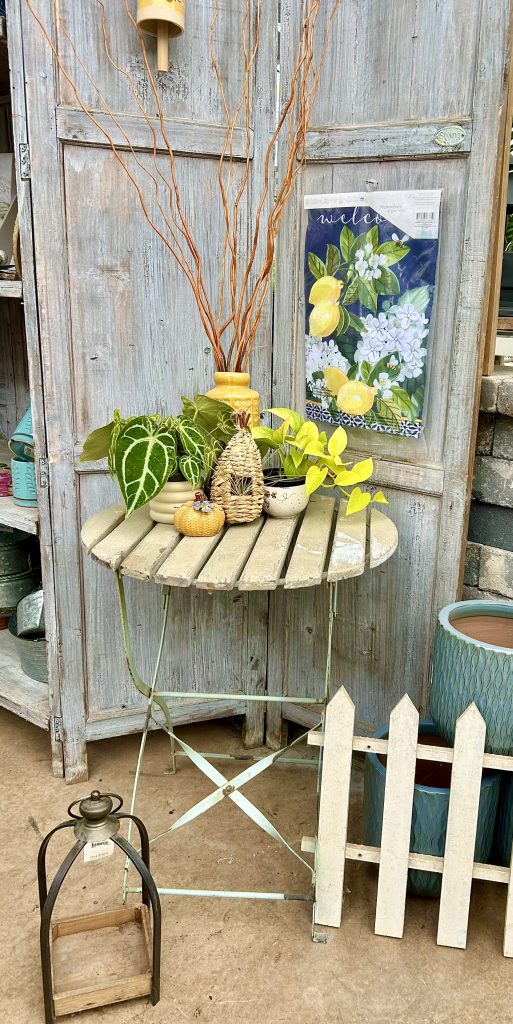
The Rule of Odds
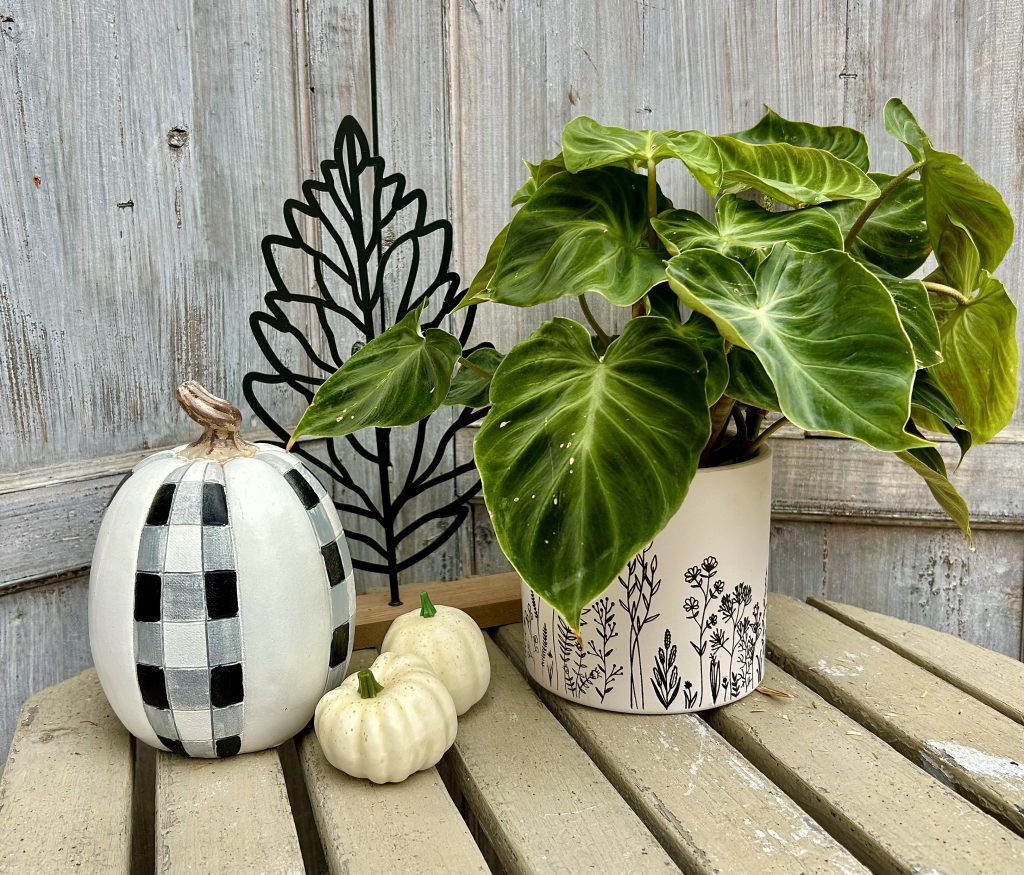
Using an odd number of items (3, 5 or 7) is always more appealing. Why? For some reason, odd numbers are just more harmonious for us to take in. Designers and photographers call it the rule of odds.
Pick a Theme
Pick a theme like a common colour, a shape, a design or motif. Look for containers or items you can include that fit in with your theme.
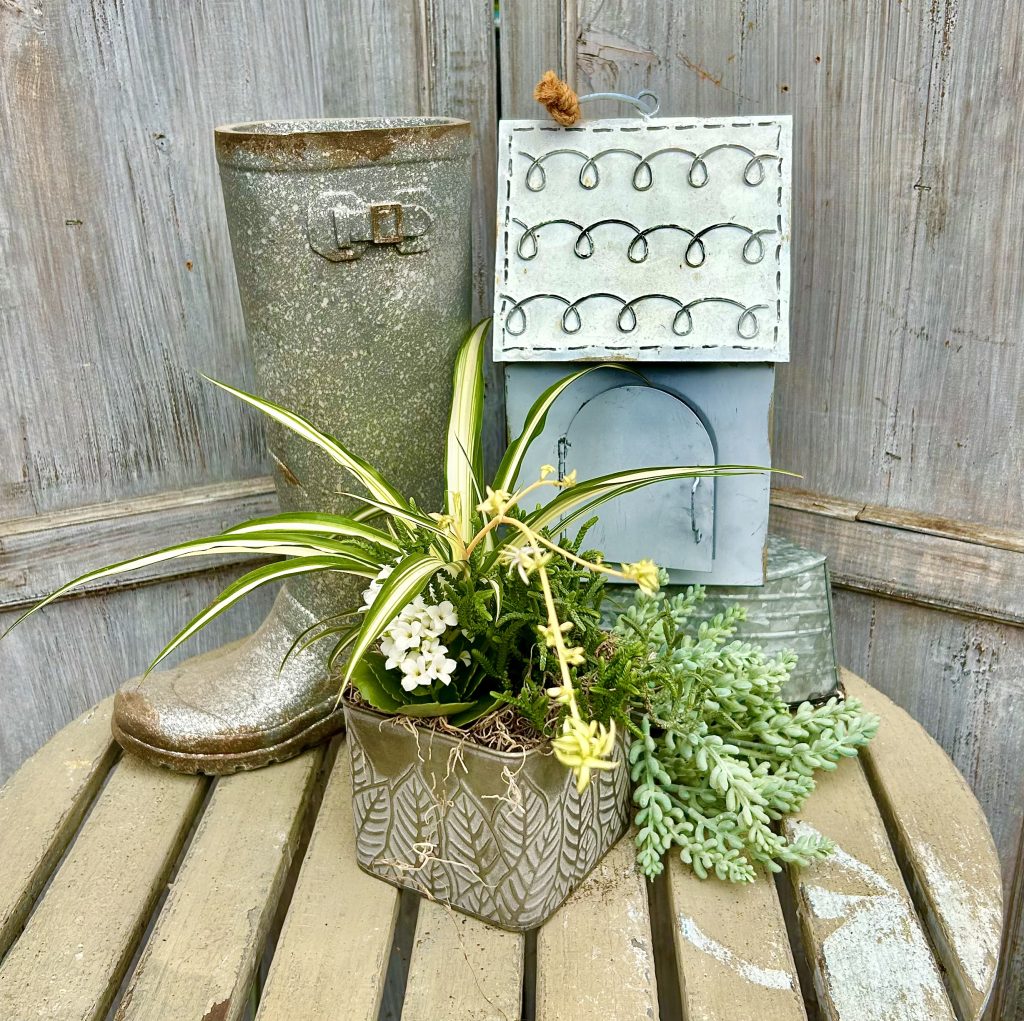
Like the arrangements we offer at Eising Garden Centre, include the following in your designs:
- a thriller like a beautiful vase or container, a tropical plant, or fresh or dried flowers
- a spiller like a plant, dried or silk leaves or moss around the base of containers
- and a filler like foliage plants, fruit, candy, mini pumpkins and gourds, or moss
Size and Scale
Scale is important! Keep the display short if it’s for the centre of a dining table so that guests can see each other across the table! Create taller displays if you’re decorating a corner table or a mantlepiece.
Light it Up
Adding light, including flameless candles or fairy lights, instantly brings warmth to any display.
Aromatics
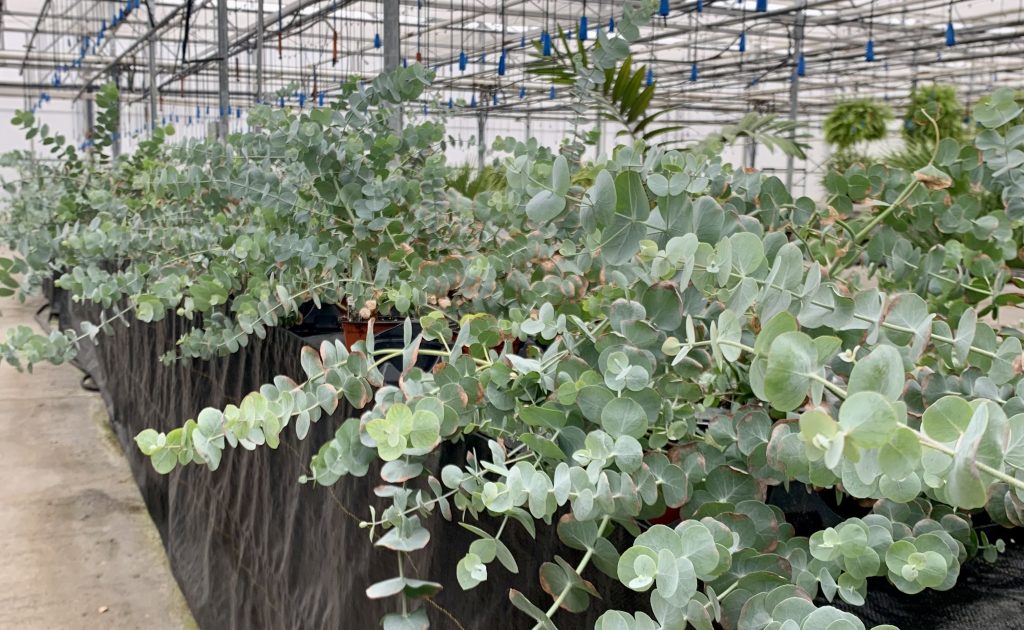
Include scent: using plants like eucalyptus, or fruit like apples or oranges, and spices like whole cloves and cinnamon sticks all add a homey touch.
We would love to see what you create and hope this has sparked your creativity. Don’t forget to tag @Eising Greenhouses & Garden Centre on your Instagram and Facebook posts when you share your decorations online - we would love to see them!
By: Ava Green
More than just a name, the brands we love and trust at Sassyfras not only have a great reputation but also offer excellent quality, fit, and, importantly, style. We trust their track record and can enthusiastically recommend these brands to you!
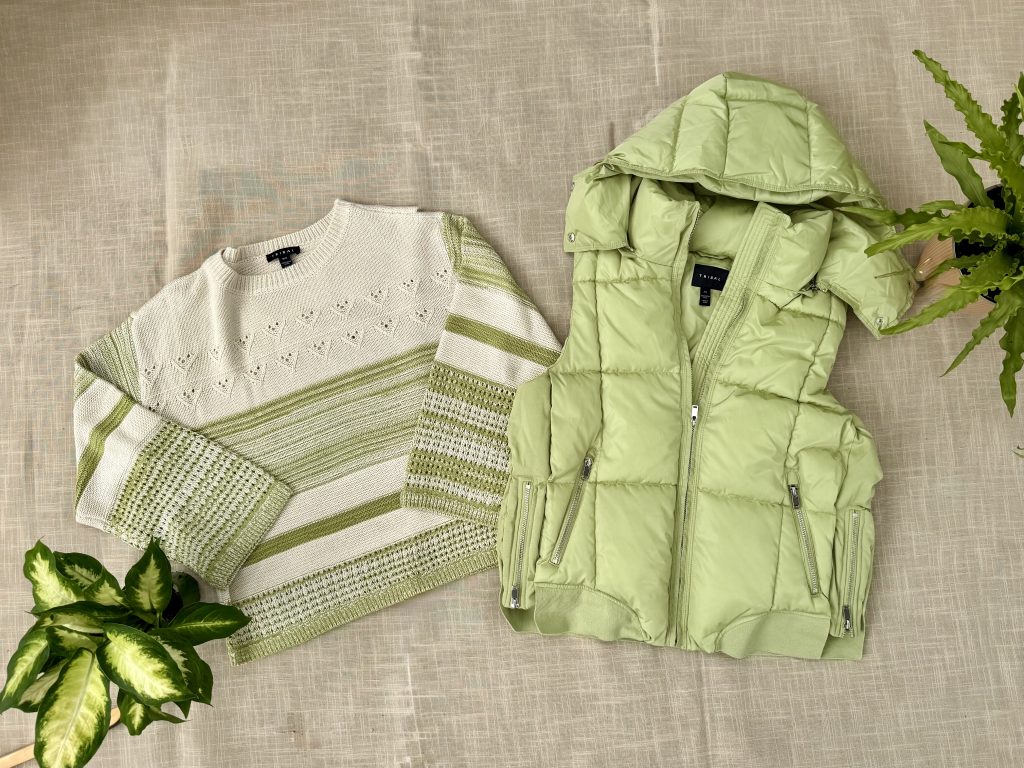
Tribal
Founded more than 50 years ago in Montreal, their mission still remains the same - to make women look and feel their best, no matter what they’re doing. They know first-hand what that is because women design Tribal clothing for women. Consistent fit and premium fabrics are hallmarks of their quality garments.
Habitat
Comfort, fit and detail are the priorities for clothing from the Habitat brand. Founder and designer Suzanne Connelly is committed to creating clothing that fits well and suits customers’ tastes. This is not fast fashion that you’ll find everywhere, Habitat produces limited quantities for specialty boutiques - like Sassyfras!

b.Young 🍁
Great quality designs with value for your money have been the focus of b.Young since their inception in 1991 in Denmark. Creating timeless pieces using improved processes with an eye on the environmental impact of textile production, their goal is to produce pieces that will last. This is a brand that creates beautiful styles with integrity.
Culture Clothing
Daring to be different, and urging you to be you, Culture Clothing is a brand that stands out. Whether you’re looking for a piece that’s comfy and classic or a colourful statement piece, this is a brand worth checking out!
Soya Concept
Fashionable, colourful, and feminine for everything from shirts to skirts that are made for women. With a focus on sustainability, high-quality fabrics, affordable prices, and the latest trends, Soya Concept is a brand that aims to earn your loyalty.

Point Zero🍁
One of Canada’s leading clothing brands for men and women since 1979, Point Zero has lots to offer. Based in the heart of Montreal’s fashion district, this Canadian company is focused on great design, superior quality, and trendy fashions all at an attractive price. Additionally, they focus on their ecological footprint in terms of materials and the manufacturing process. An admirable brand that’s homegrown.
Dévia 🍁
Based in Montreal, Devia clothing is proudly designed and made in Canada. With a passion for fashion, they create inspiring and eclectic designs at affordable prices.
Terrera 🍁
Earth-friendly fibres, conscious production, and a commitment to giving back make Terrera an outstanding, sustainable, Canadian company. We think you’ll fall in love with their comfortable, easy-to-wear bamboo basics like bralettes, undies and leggings all created to fit and flatter women.
Moffi
Unique, high-quality clothing with sophisticated details and elegant design. Moffi is designed to appeal to every woman.
What’s In Store For You?
Step into Sassyfras at Eising Garden Centre and explore our carefully curated collection of trusted clothing brands. We’re here to provide great personal service and high-quality pieces from brands you’ll be proud to wear!
Dealing with water restrictions or choosing to conserve water? You’re not alone. Many gardeners in Norfolk County are facing the challenge of keeping gardens thriving with less water. The good news? A lush, colourful garden is still within reach—thanks to drought-tolerant perennials.
When we think of drought-tolerant plants, cacti might be the first thing that comes to mind. But there’s a surprising variety of beautiful, hardy perennials that can handle our region’s dry spells—no desert landscape required.
While these plants do need regular watering when first planted, once established, they’re low-maintenance and well-suited to Southern Ontario’s climate, including periods of limited rainfall.
Full Sun Ground Cover
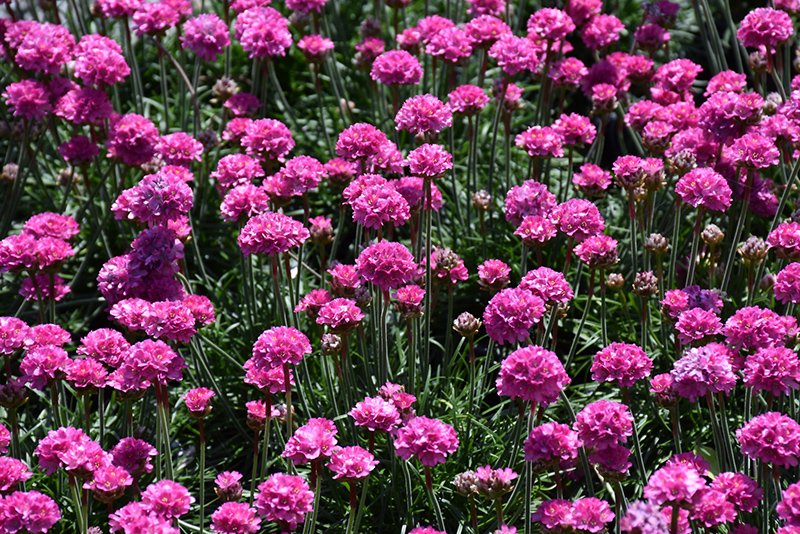
Botanical Name: Armeria maritima 'Dusseldorf Pride'

Botanical Name: Delosperma 'Fire Spinner'
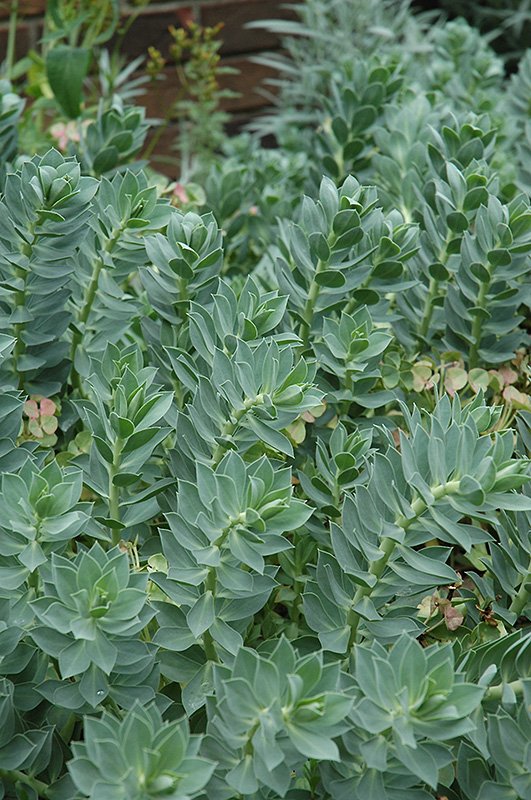
Botanical Name: Euphorbia myrsinites
- Candytuft (Iberis sempervirens)
- Catmint (Nepeta x faassenii)
- Hardy ice plant (Delosperma nubigenum)
- Hens and chicks (Sempervivum tectorum)
- Moss phlox, creeping phlox (Phlox subulata)
- Pincushion flower (Scabiosa japonica var. alpina) (S. ‘Butterfly Blue’)
- Pinks (Dianthus alpinus)
- Rock cress, wall cress (Arabis species)
- Rock rose, sun rose (Helianthemum hybrids)
- Spurge (Euphorbia myrsinites) (E. polychroma)
- Stonecrop (Sedum acre) - dwarf varieties
- Thrift, sea pink (Armeria maritima)
- Thyme (Thymus species)
Full Sun, Medium to Tall Plants
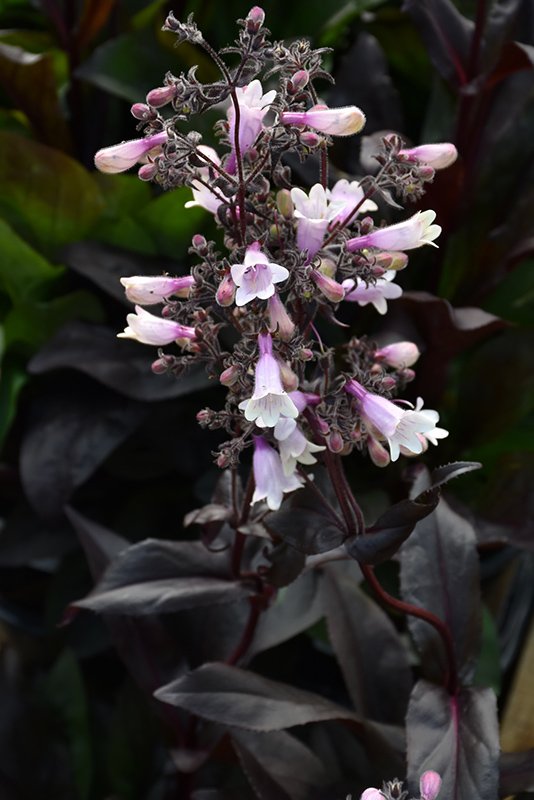
Botanical Name: Penstemon 'Dark Towers'

Botanical Name: Papaver orientale
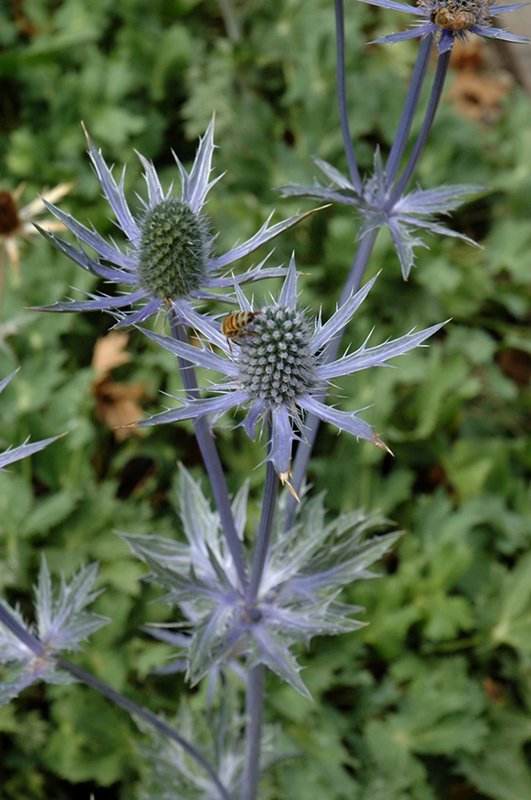
Botanical Name: Eryngium 'Big Blue'
- Beard-tongue (Penstemon digitalis) – Native
- Bergenia (Bergenia crassifolia)
- Black-eyed Susan (Rudbeckia hirta) – Native
- Blanket flower (Gaillardia x grandiflora)
- Butterflyweed (Asclepias tuberosa) – Native
- False indigo, wild indigo (Baptisia australis)
- Hairy penstemon (Penstemon hirsutus) – Native
- Lanceleaf coreopsis (Coreopsis lanceolata) – Native
- Lavender (Lavandula angustifolia)
- Orange coneflower (Rudbeckia fulgida ‘Goldsturm’)
- Perennial cornflower (Centaurea montana)
- Poppy (Papaver species)
- Purple coneflower (Echinacea purpurea)
- Prickly pear cactus (Opuntia compressa) – Native
- Russian sage (Perovskia atriplicifolia)
- Salvia (Salvia nemerosa hybrids)
- Sea Holly (Eryngium species)
- Silver sage, wormwood (Artemisia ludoviciana)
- Threadleaf coreopsis (Coreopsis verticillata) – Native
- Yarrow (Achillea millefolium)
Full Sun Grasses
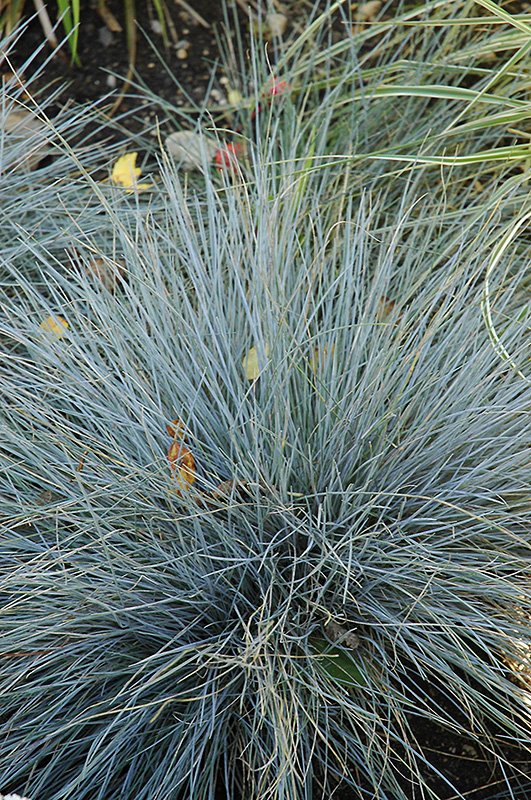
Botanical Name: Festuca glauca
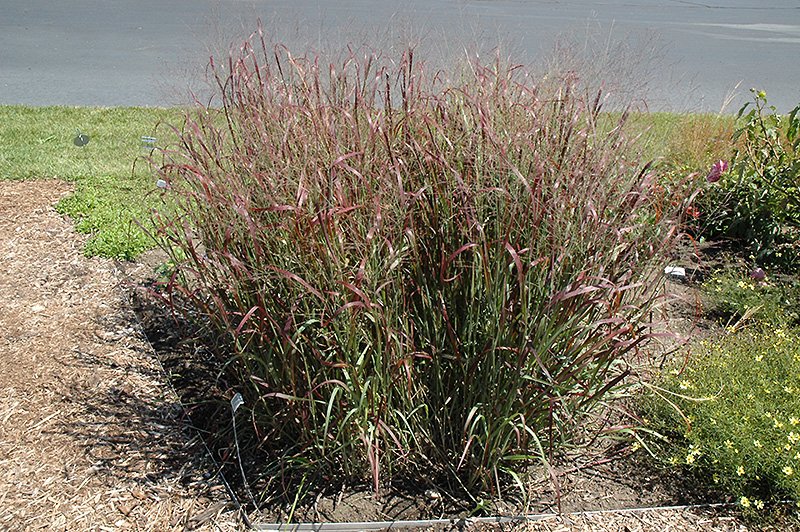
Botanical Name: Panicum virgatum 'Prairie Fire'
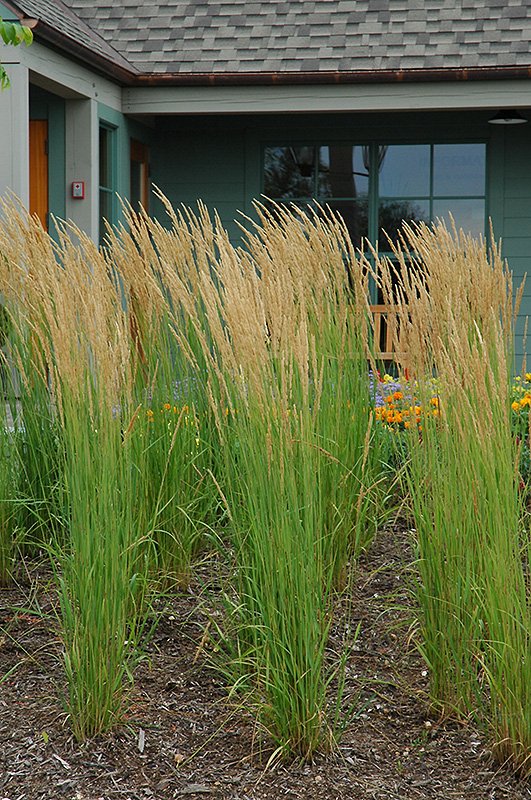
Botanical Name: Calamagrostis x acutiflora 'Karl Foerster'
- Big bluestem (Andropogon gerardii) – Native
- Blue fescue (Festuca glauca)
- Blue oat grass (Helictotrichon sempervirens)
- Feather reed grass (Calamagrostis x acutiflora ‘Karl Foerster’)
- Little blue stem (Schizachyrium scoparium) – Native
- Switch grass (Panicum virgatum) – Native
Groundcover for Shade
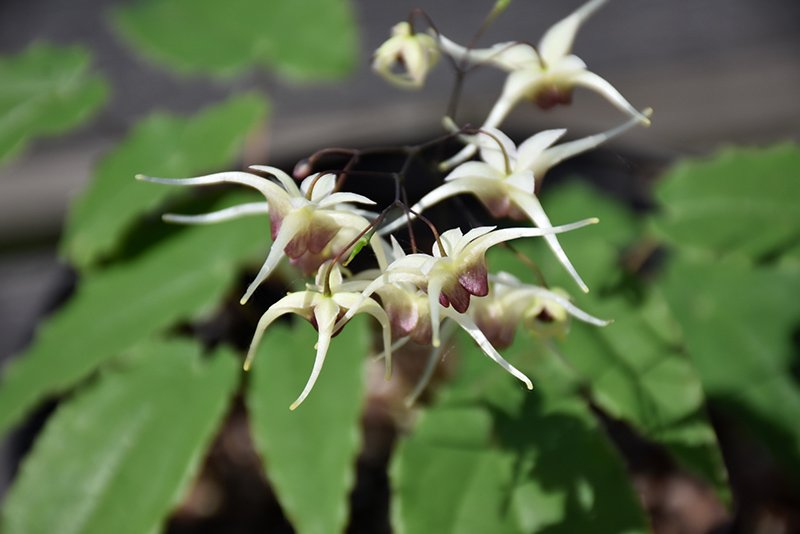
Botanical Name: Epimedium 'Domino'

Botanical Name: Asarum canadense
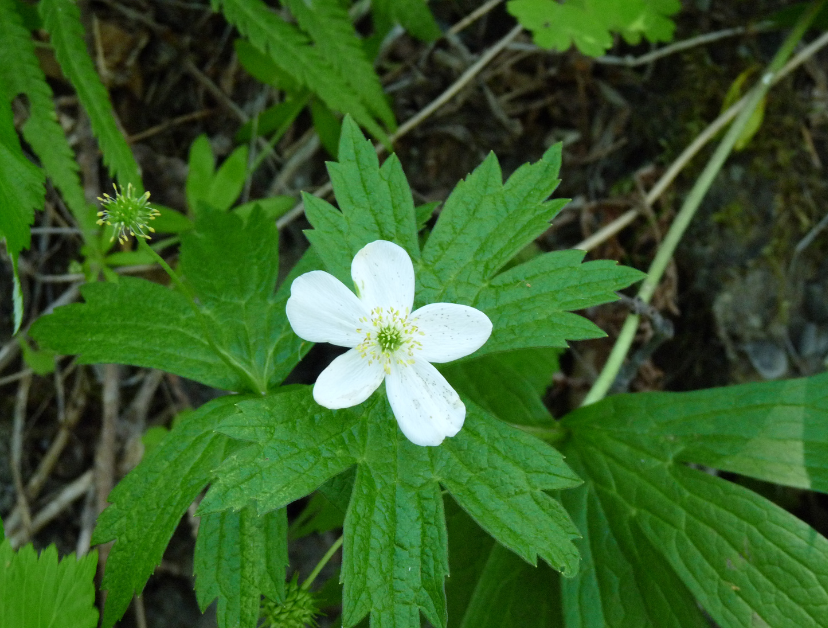
Botanical Name: Anemone canadensis
- Barrenwort (Epimedium hybrids)
- Bigroot geranium (Geranium macrorrhizum)
- Canada anemone (Anemone canadensis) – Native
- Creeping phlox (Phlox stolonifera)
- Sweet Woodruff (Galium odoratum)
- Wild ginger (Asarum canadense) – Native
- Woodland phlox (Phlox divaricata) – Native
Medium to Tall Plants for Shade
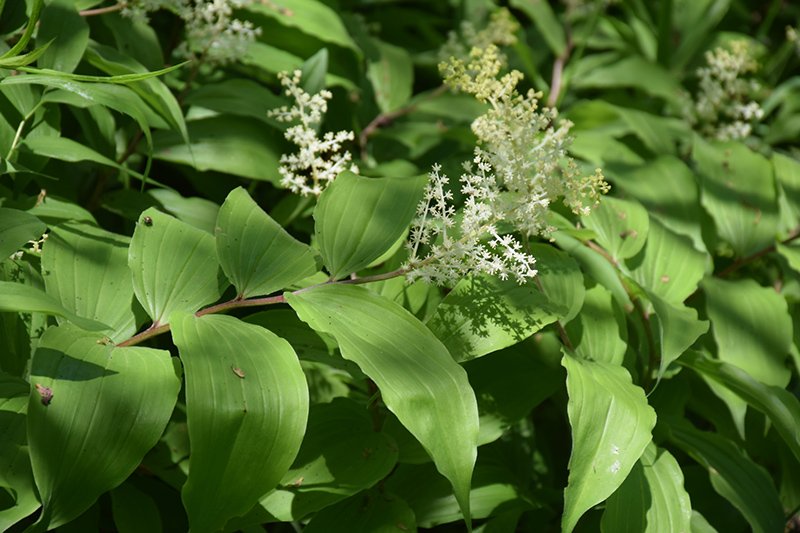
Botanical Name: Maianthemum racemosum
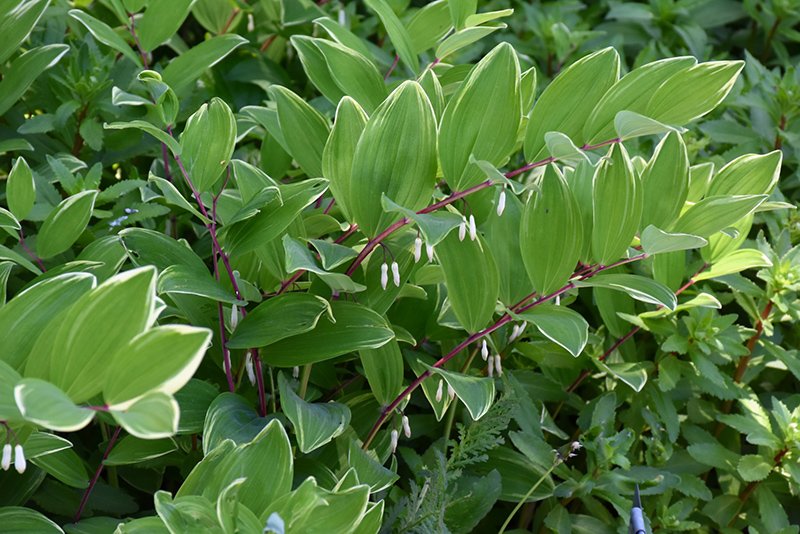
Botanical Name: Polygonatum odoratum 'Variegatum'
- False Solomon’s seal (Maianthemum racemosum) – Native
- Solomon’s seal (Polygonatum biflorum) – Native
Ferns for Dry Shade

Botanical Name: Polystichum acrostichoides
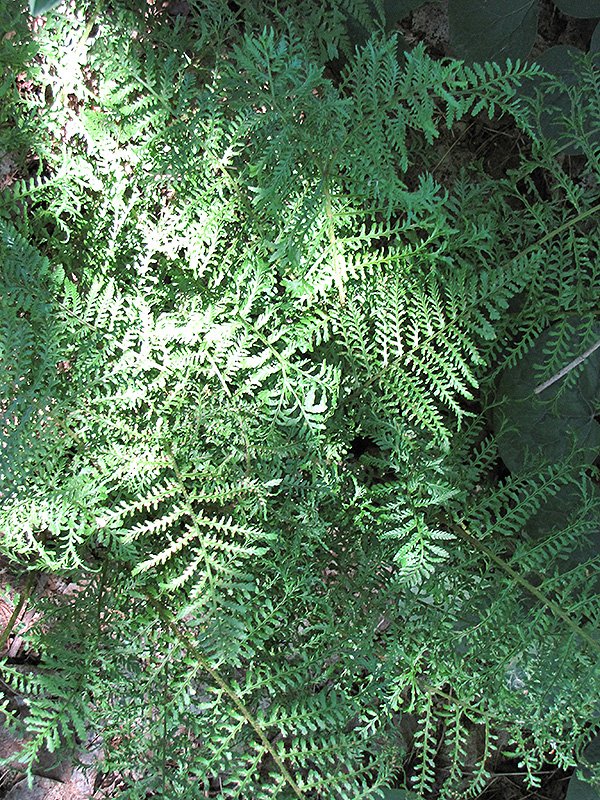
Botanical Name: Dryopteris filix-mas
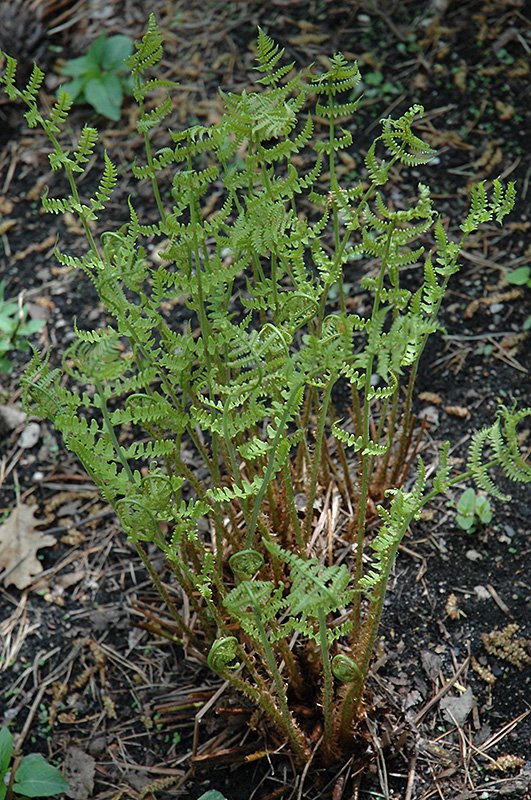
Botanical Name: Dryopteris marginalis
- Christmas fern (Polystichum acrostichoides) – Native
- Hay-scented fern (Dennstaedtia punctilobula) – Native
- Marginal wood fern (Dryopteris marginalis) – Native
- Male fern (Dryopteris filix-mas) – Native
- Rock fern (Polypodium virginianum) – Native
A Little TLC
It doesn’t take much to keep drought-tolerant plants thriving—just a little attention and some seasonal TLC. While they’re tough, even these hardy perennials appreciate an occasional deep watering during extended dry spells, especially in their first year.
For sun-loving perennials, skip the heavy fertilizers. Instead, an annual layer of compost is all they need to stay healthy and strong.
Shade-loving drought-tolerant plants, on the other hand, benefit from a layer of mulch. This helps retain moisture and reduces evaporation, especially in dry shade, which is one of the most challenging conditions for any plant to thrive in.
And don’t forget to deadhead regularly! Removing spent blooms encourages your plants to keep producing flowers instead of going to seed, meaning more colour, for longer.
With a few simple care tips, your drought-tolerant garden can remain beautiful and resilient throughout the entire season.
Other resources:
- Landscape Ontario: Eight Beautiful Drought Tolerant Plants
- Toronto Master Gardeners: Drought Tolerant Plants
- Guelph.ca: Drought Tolerant Native Plants
If flowers are the divas of the garden, foliage is the harmonious backup group that makes the whole performance shine. Colour, texture, and form don’t just come from blooms—there’s a world of interesting leaves that not only set the stage but often steal the show. Flowers may be the stars, but foliage is the picture frame, the atmosphere, and often the soul of a beautiful garden.
Start with a Standout
When choosing plants—whether for a garden bed or a container—don’t just focus on flowers. Especially in shady spots, standout foliage can create all the visual impact you need. Look for leaves that draw your eye, like the delicate structure of a cutleaf Japanese maple or the bold colour variations of Heuchera (Coral Bells), which range from deep burgundy to vibrant chartreuse.
Your standout feature doesn’t have to be a plant—it could be a sculptural shrub, an ornamental tree, or even a favourite birdbath. Try placing that birdbath atop a lush carpet of Irish moss, or line a path with the spotted leaves of Pulmonaria, silvery Artemisia, or graceful ferns. Light up a shady corner with glossy Bergenia or classic Hostas, which offer endless variety in shape, texture, and hues from bright green to cool blue-ish tones.
Build the Framework
Once you’ve chosen your focal foliage, you can build your planting scheme around it in creative ways. Think of it like building a quilt—each plant contributes a piece to the overall picture.
- Create a patchwork of leaf shapes: Group together plants with small, intricate foliage for a richly textured look.
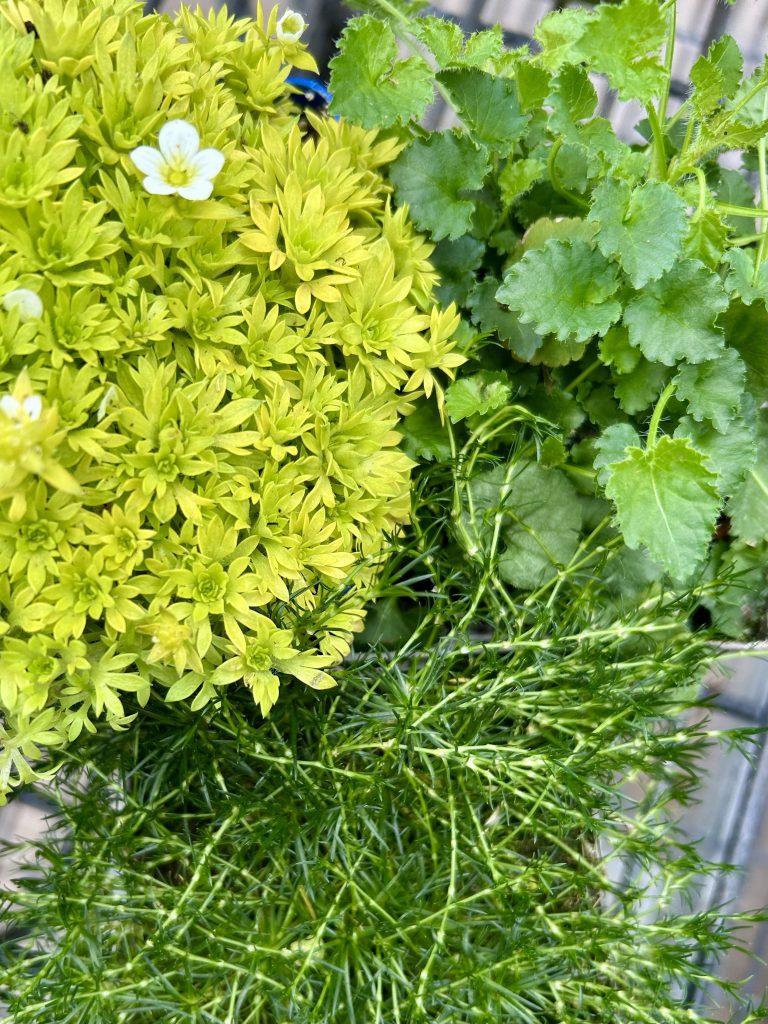
Mossy Saxifrage 'Cloth of Gold,' Sagina Subulata 'Irish Moss,' and Bellflower Campanula Carpatica 'Pearl Deep Blue'
- Echo colour tones: Pair burgundy Heuchera with other plants in similar shades, like dark-toned Euphorbia, for a cohesive palette.
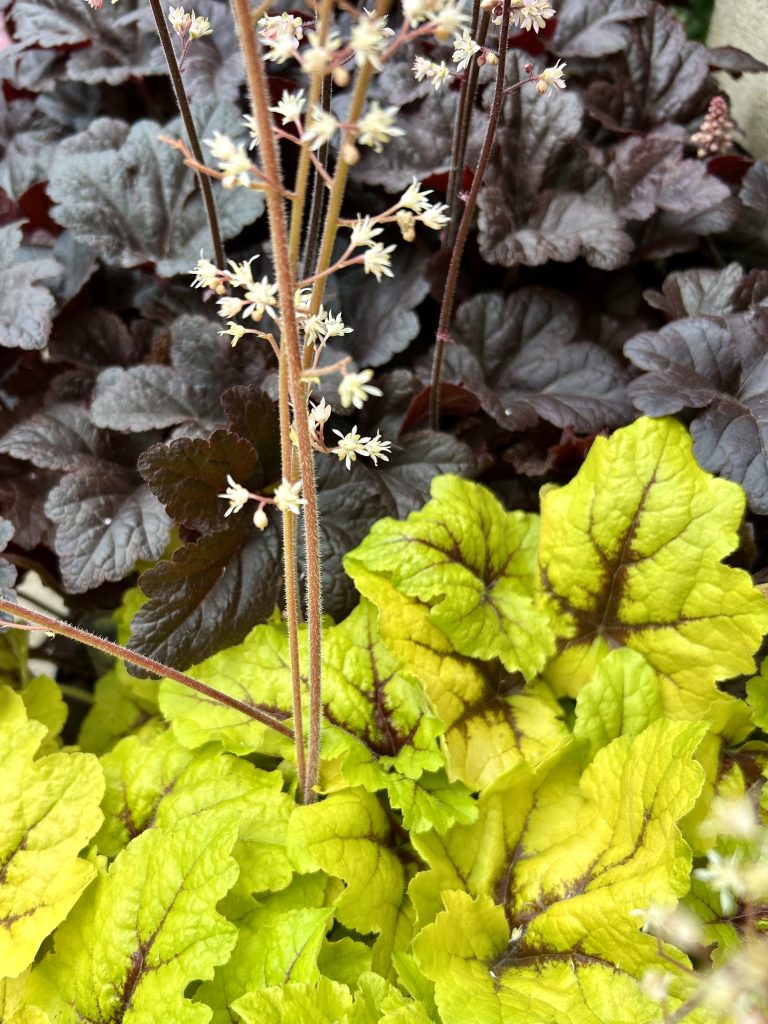
Foamy Bells 'Catching Fire,' and 'Onyx'
- Choose a colour theme: Work with warm hues like gold, rust, and copper.
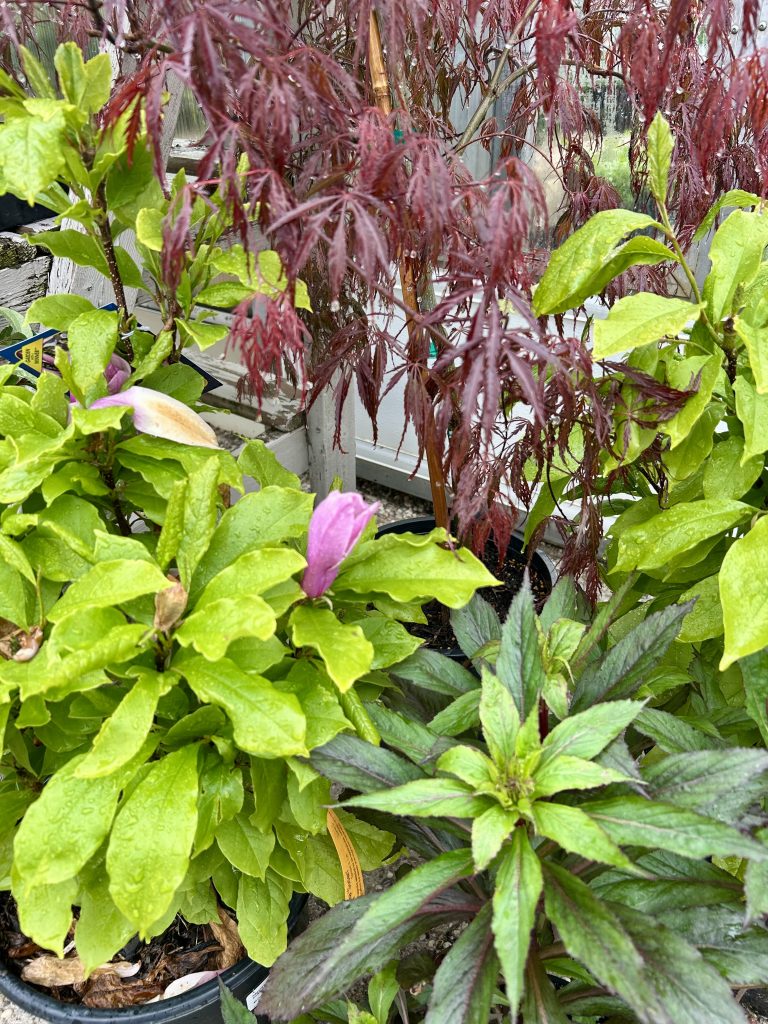
Japanese Maple 'Tamukeyama,' 'Magnolia x Soulangeana,' and Lobelia Speciosa 'Starship Scarlet'
- Mix textures, repeat colours: Choose different textures but repeat colour combinations like white and green.
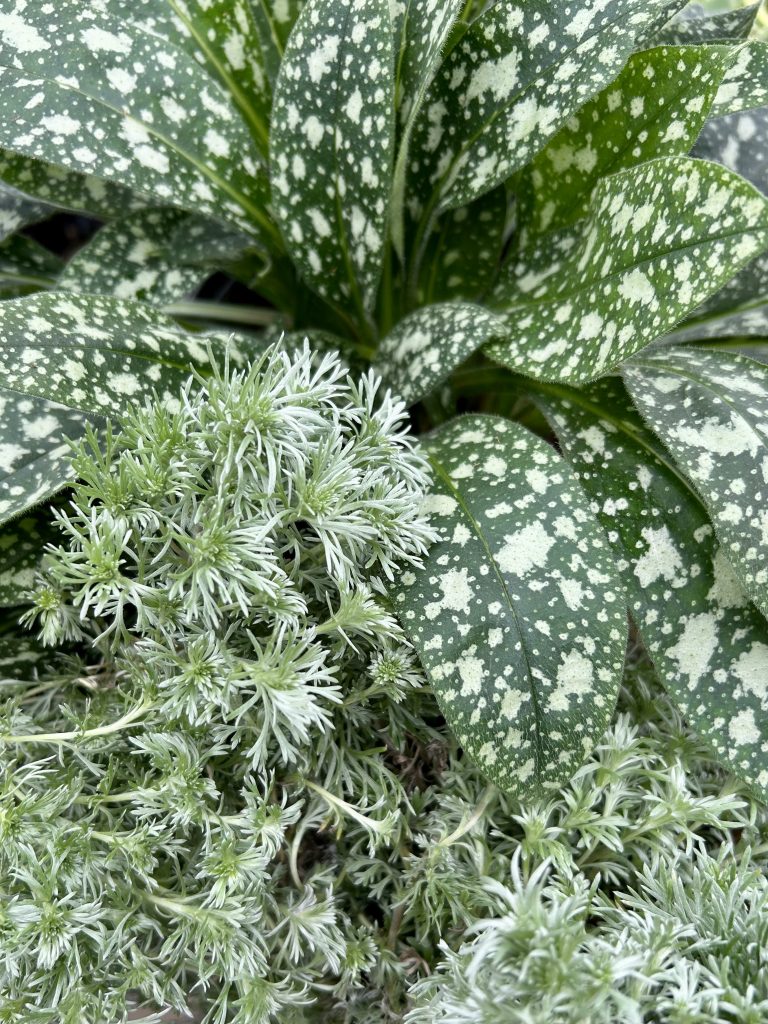
Pulmonaria 'Pink-a-Blue' and Artemesia 'Silver Mound'
Top it Off
Once your foliage framework is in place, add a statement piece to elevate it all - that favourite birdbath, a piece of artwork, an ornamental tree or shrub, or an unexpectedly showy flower. The layered, leafy backdrop with make your feature stand out even more.
Visit us at Eising Garden Centre to find all the foliage stars and supporting players you need to bring your garden vision to life!
If you think a small space and a small garden are limiting when it comes to shrub choices, think again! Colour and texture, structure and seasonal interest are all available in many small shrubs. Whether you’re looking for beautiful blooms or evergreen foliage, you’ll love what our favourite small shrubs have to offer!
Follow the 5 links for more on our 5 favourites!
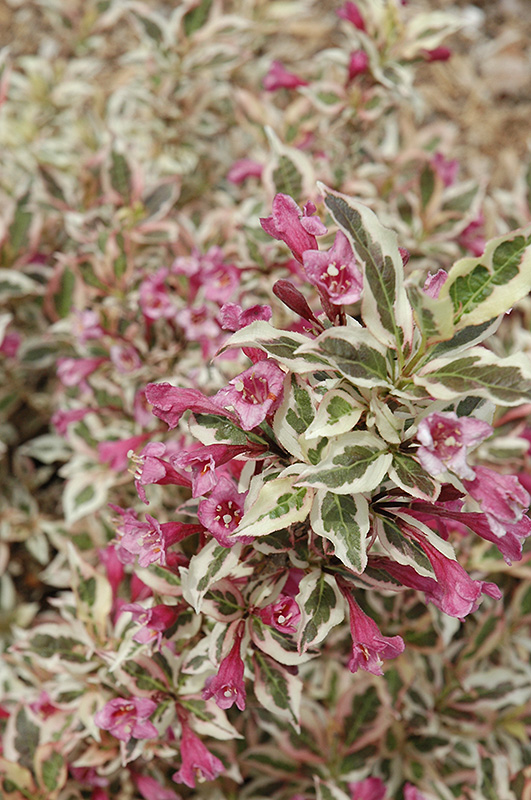
My Monet Purple Effect Weigela - Weigela florida
A deciduous shrub that’s deer resistant, colourful and low growing. This plant checks lots of boxes!! Variegated mint green and cream foliage with purple tones and pink blossoms, it makes a great companion to perennials, and as an edging plant. My Monet Purple Effect Weigela grows 18” to 2 ½ feet tall and wide in partial or full sun.
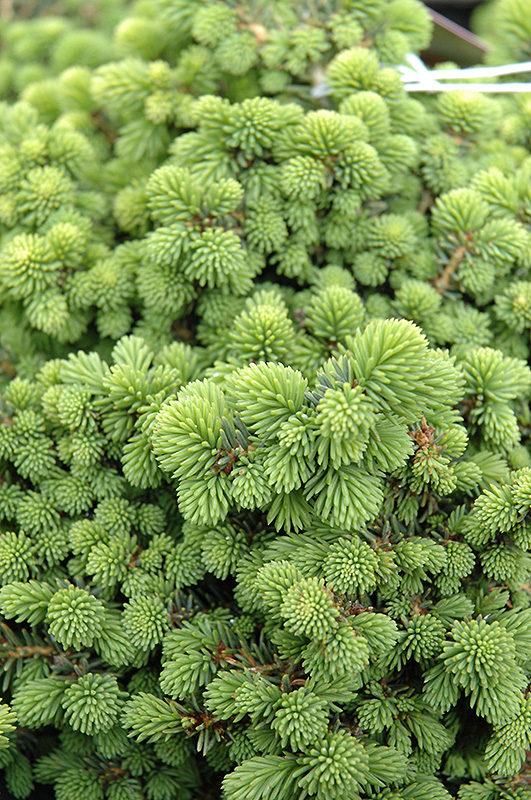
Little Gem Spruce - Picea abies ‘Little Gem’
This compact evergreen has dark green needles, making it attractive all year round. Its pyramidal shape makes it a great choice as an accent feature or in a border. It’s drought-tolerant and requires little care, making it a very appealing low-maintenance choice! Little Gem reaches a mature height of 10” to 1’ and a spread of 1’ to 2’. Plant this shrub in full sun.
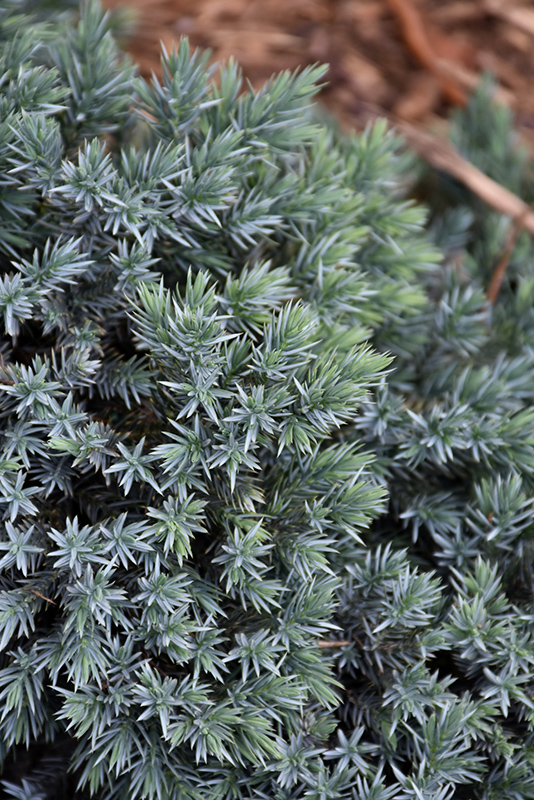
Blue Star Juniper - Juniperus squamata ‘Blue Star’
Sun-loving and slow-growing, Blue Star Juniper graces the garden with steel blue evergreen foliage that’s a beautiful contrast to many plants. It’s also drought-tolerant and requires very little pruning, making it an easy to care for naturally small shrub. Growing 1 to 3’ tall and 1 ½ to 3’ wide, its shape makes it great as ground cover or as an edging plant.
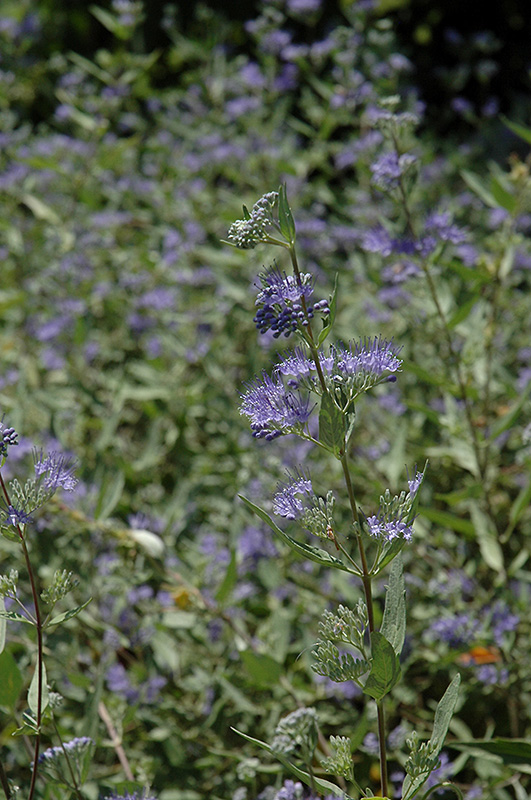
Bluebeard - Caryopteris
Classified as a shrub or as a woody perennial, either way, it deserves to be on this list. Bluebeard loves full sun and grows anywhere from 2 to 4’ in a compact mound. Sweetly scented and long blooming, it attracts all the pollinators: bees, butterflies and hummingbirds. Bluebeard foliage and blooms come in various colours depending on the variety, so it’s easy to fit into your landscape plans.
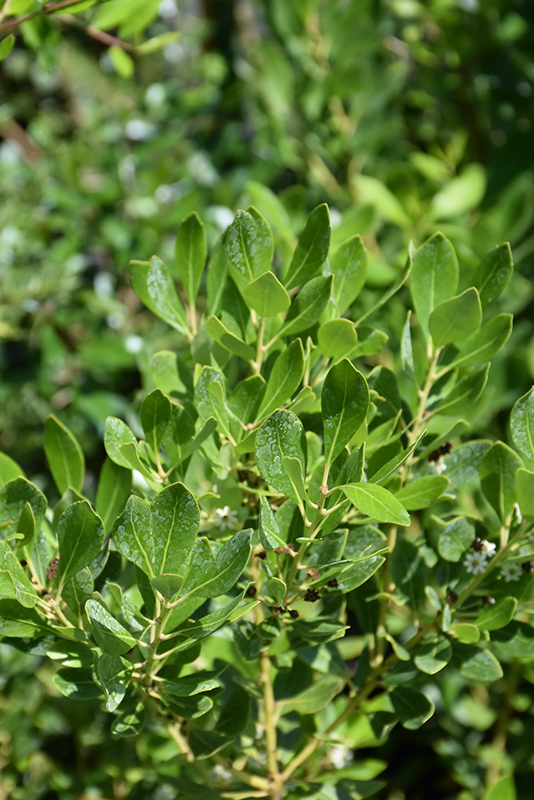
Inkberry Holly - IIlex glabra
Native to North America, Inkberry has lots to love. It looks similar to Boxwood and can be trimmed to shape, but this slow-growing evergreen also forms a tidy mound, and it blooms in the Spring! It will grow in full to part sun, and smaller varieties reach 3 to 4’ high.
While this list contains 5 of our favourites, we have lots more to offer in the garden centre. Come by and take a look! Discover how growing small shrubs in containers or small spaces adds beauty and texture, enhancing your garden bed, patio or balcony.
TIP: April and May are the best months to plant shrubs in Southern Ontario.
The much-loved boxwood hedge has been a classic for centuries and is widely used in gardens worldwide. Neatly trimmed and manicured boxwood becomes the framework for containing everything from roses to riots of perennial blooms. From extensive estate gardens to small and modest yards, boxwood is a versatile shrub that earned its place by being easy to care for and prune.
Unfortunately, this staple shrub has trouble brewing, which impacts its leafy lifespan.
Since its first appearance in Ontario in 2014, the Boxwood Blight has become a significant concern for gardeners. However, the University of Guelph is not sitting idly by. They are actively researching this issue and working hard to find solutions to protect beloved boxwood shrubs.
Sometimes, being popular isn’t all it’s cracked up to be. Because Boxwood is a widely planted favourite, a new pest attracted to it, the Boxwood Moth (from Asia), has easily spread and is infecting shrubs.
Beautiful Boxwood Alternatives
Boxwood Blight and Boxwood Moth do pose severe threats to Boxwood shrubs, but here's the good news—many shrubs make great alternatives! Using a similar shrub is one of the simplest solutions to Boxwood's issues. You have lots of options to protect and diversify your garden.
Inkberry Holly
The closest Boxwood lookalike is the Inkberry holly. It naturally grows in a rounded evergreen mound, can be trimmed like a traditional boxwood hedge, and has other enticing bonuses! Not only is it native to North America, but unlike boxwood, it blooms. In the spring, Inkberry holly is covered in showy white flowers, making it a standout alternative to boxwood. Here at Eising Greenhouses, look for Gem Box Inkberry Holly.
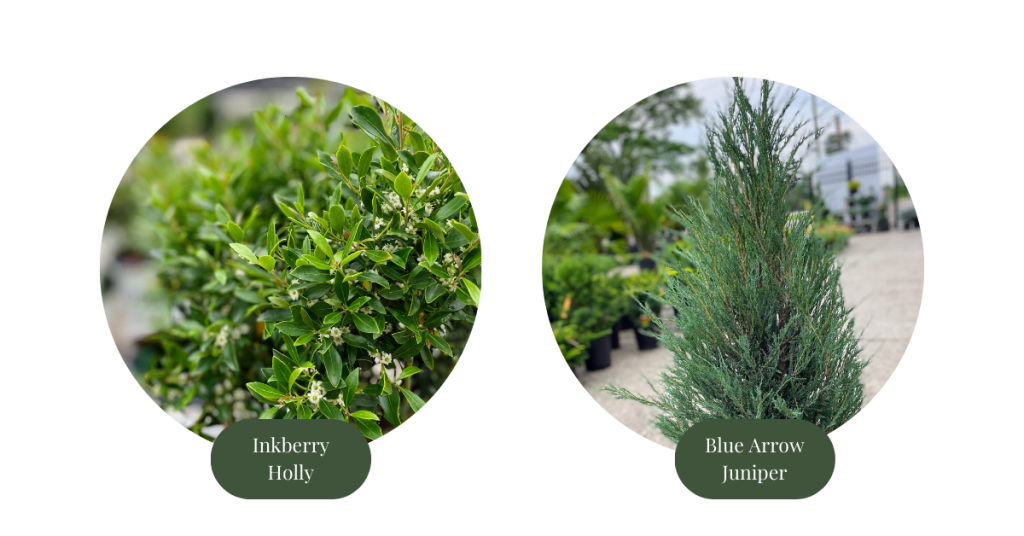
Upright Junipers
Blue Arrow and Moffat Blue Junipers make beautiful hedges and stand-alone accent trees. Both have an elegant upright form, striking blue evergreen foliage, and silvery blue berries from late spring to late fall. If that isn’t enticing enough, add drought tolerance to the list of features!
Showy Shapes and Standards
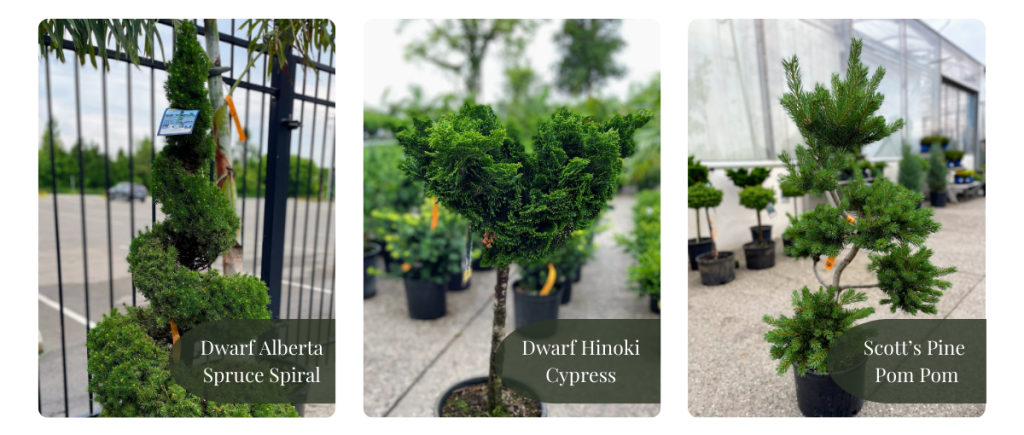
Consider a standard evergreen or a dwarf variety that has been pruned and sculpted to become a piece of art if you want to add something even more unusual. What’s a standard? It’s usually a single trunk with a plant at the top, like a compact evergreen shrub.
Standards and shaped dwarf evergreens can make a bold statement or add wonderful whimsy to your garden. We have lots to choose from, but here are a few examples to get your imagination going!
When it comes to replacing boxwood, there are many creative solutions and beautiful plants to choose from!
For more information:
Landscape Ontario - Boxwood Blight and Boxwood Moth
Toronto Master Gardeners - Rethinking Boxwood
Canada.ca - Box tree Moth
Fall is the time to plant garlic if you want to harvest them next summer. Why grow your own garlic? Like any vegetable, fresh garlic just tastes great. It’s also very satisfying to plant one little clove and get a whole head of garlic from it. Think of it as a garlic bank: put in a little effort in the Fall, and next summer you will profit from that small investment in spades!
If you’ve never planted garlic, it’s quite an easy crop to grow. Just follow these seasonal steps to help you get started. Hint: Mid-October to early November is when the majority of the work takes place.
FALL
Choose a location that is in the sunniest area of the garden. Lots of sun will produce large heads of garlic.
Prepare the soil in late summer, or as early in the Fall as possible. Or prepare the day before you plant if you can’t get to it sooner! Amending the soil is an often missed step but it will provide valuable nutrients for your garlic throughout the seasons.
Add organic compost like mushroom or sea compost, composted green waste, aged or composted manure, or a mix of any of these. Variety is best and all are great options. If you’re starting a new, raised bed, mix a ratio of 75% compost with 25% vermiculite to create a nice, light soil for your plants. This mix can also be added on top of the soil of an existing bed, making harvesting easier next summer!
Choose a garlic variety based on the flavour and size you like. There is softneck or hardneck garlic, but hardneck is recommended for growing in Canada. Also, hardneck varieties produce scapes which are a bonus crop - you can read more about that below. Red Russian, Music and Chesnock are just a few of the popular varieties grown in Ontario.
Separate the garlic cloves, or teeth, from the heads. As you’re breaking down the heads of garlic, it’s important to choose the largest cloves to plant. Starting with large cloves will increase your chances of growing large heads of garlic. Set aside any small cloves to cook with.

Planting! Sometime between early October to mid-November is a good range to get your garlic in the ground in Norfolk County. Basically, 4 to 6 weeks before the ground is frozen.
Here’s how to get your garlic in the ground!
- When it comes to spacing, there are two options.
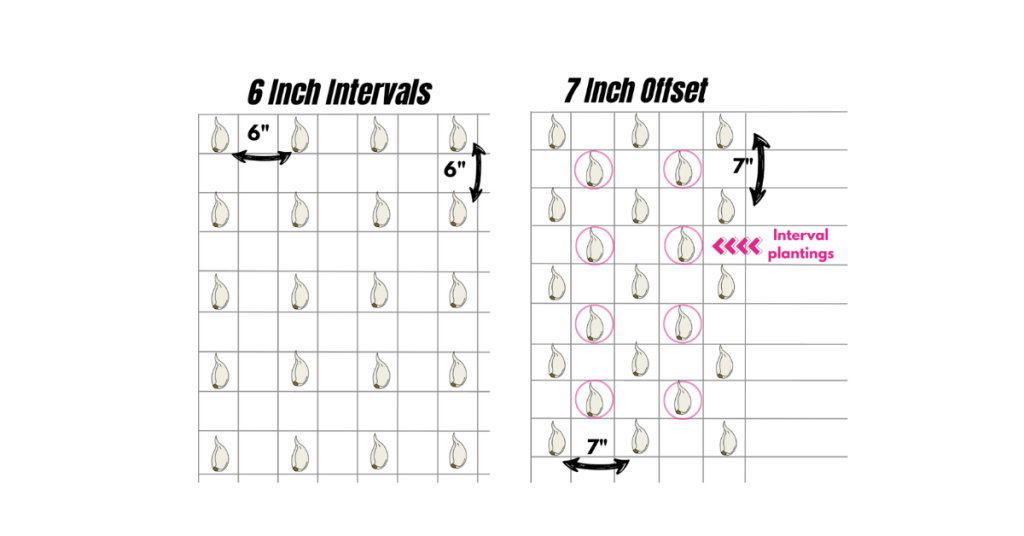
Using a dibber or a hand trowel, create 3 to 4” deep holes in one of the following patterns:
a) Make holes that are approximately 6” apart and in rows that are 6” apart.
b) Make holes that are approximately 7” apart and in rows that are 7” apart. Then, go halfway between each row and make an offset row. This method is best if you don’t have a lot of space and will not impact the growth of the garlic.
2. Place a handful of worm castings or organic 4:4:4 fertilizer in each hole and mix into the soil a bit.
3. Place ONE clove in each hole, with the pointy end facing up and the flat end down.
4. Backfill with surrounding soil so that each clove is covered 2-3”. This acts as protection during the cold winter months.
5. Top with leaf mulch, leaves, or straw, and water in your garlic if there is no rain in the forecast for several days.
SPRING
This is the time to check on your garlic and give it a little more nutrition.
Look for signs of first growth in February or March, depending on how warm the weather is. When you see 3”- 4” of growth, remove the mulch from around each plant, or from the bed, and add it to the compost pile.
Add nutrients by amending the soil with 1 tablespoon of 4:4:4 organic fertilizer per square foot of the garden, or add a 1”- 2” layer of fresh compost.
Water deeply from now on when the soil dries out. And that’s it! Your garlic is well set up to go into a BIG growth cycle.


SUMMER
Remove the scapes! Around mid-June look for the top of the stem of each plant to curl around forming what’s referred to as a “scape”. These curls, or scapes NEED to be removed so that the energy from the plant goes into growing the bulb, not into growing the seed head that is part of the curly scape. One full loop is a good time to cut or snap off the scape just above the top foliage.
All of the growth in the bulb happens once you remove the scape!
Here’s the bonus - garlic scapes are delicious! Chop them up and add them to soups, stews or anything you’re grilling. They also make excellent pesto!
Water and check your garlic for any pests throughout the growing season, just as you would with any other plants.
Harvest! Sometime in July, you will start to notice that the bottom leaves of your plant are dying. Don’t worry! The leaves on the plant correspond with the protective layers forming around the outside of your bulb, and they’re getting ready for harvest.
Around mid-July, 4 or 5 of the bottom leaves will be dead and this is your sign that it’s time to harvest your bulbs.
- Stop watering your garlic 4 to 5 days before harvesting.
- Use a pitchfork or shovel to loosen the soil, keeping well away from each plant so that you don’t slice through the garlic heads.
- Gently pull up each bulb and shake off any soil hanging on to the roots. Resist the urge to wash the bulbs as moisture at this stage will promote mould or rot!
Cure your garlic harvest by hanging it in a cool, dry place that’s out of the sun and has good airflow for 2 to 3 weeks. You may need to use a fan for this step.
Once cured, trim off the stems leaving 1-2” and the roots, and store in a dark, cool and dry spot in the house. Well-cured and stored garlic can last until sometime between December and February… unless you’re cooking, canning, and freezing with it and use most of it up! But don’t forget to save the biggest cloves to plant again in the Fall!